8 minute read
WORKING INSTRUCTIONS


Template Date: 1994_04_29Template Name: OM_1_col

TRIM THIS EDGE
STEP 3
PDH1089 Using the boom and dipper, bring the shell beam, located towards the operator’s compartment into the housing provided for it on the support.
STEP 4 With articulated boom
Extend the boom cylinders and swing the clamshell around the support by operating the boom articulation cylinders and the dipper cylinders simultaneously. The attachment will be within the approved road travel overall dimensions when the boom cylinders and boom articulation cylinders are completely extended and the clamshell beam is in position in its housing on the support.
STEP 5
Lock the boom and dipper positions using the boom and dipper locking valves. See “Boom locking valve” and “Dipper locking valve” in the “Controls/Instruments/ Accessories” Section.
STEP 6
PDH1090
With adjustable boom
Swing the clamshell around the support by operating the boom cylinders and dipper cylinders simultaneously. The attachment will be within the approved road travel overall dimensions when the marks on the boom cylinder are aligned and when the clamshell beam is in position in its housing on the support.
PDH1091 For the work position, tilt the support towards the undercarriage until it is stopped by the blade support rods.
178
TRIM THIS EDGE LEFT PAGE
JOB SITE TRAVEL
WARNING: Before driving on the job site, the stabilizers (if fitted) and the dozer blade (if fitted) must be raised completely.
NOTE: After travelling on the road, remove all the road safety devices before driving on the job site.
STEP 1 STEP 3

PH07328 Start the engine. Press down the brake pedal and select job site speed, “Position1”, on the control panel (lefthand indicator lamp comes on).
STEP 2


PH07600 Release the brakes using the parking/ work brake control switch.
STEP 4
PH07328 Press the “MAX” push button on the control panel.
PH07533 Place the front axle locking/unlocking switches in the unlocked position (the indicator lamp on the instrument panel comes on).
179
TRIM THIS EDGE RIGHT PAGE TRIM THIS EDGE
Template Name: OM_1_colTemplate Date: 1994_04_29
Template Date: 1994_04_29Template Name: OM_1_col


TRIM THIS EDGE
STEP 5
NOTE: Control the travel speed using the travel control lever. IMPORTANT: Wait for the machine to stop completely before changing the direction of travel (forward/reverse).
WARNING: The front axle must be unlocked for all travel operations. !
PH07520 Move the travel control lever to the desired position.
STEP 6
PH07532 Press down the travel control pedal.
180
TRIM THIS EDGE LEFT PAGE
WORKING INSTRUCTIONS
IMPORTANT: In work position, the wheels which control the steering are at the rear. For this reason, travel and steering controls are inverted.
Backhoe attachment


PDE0028
PDE0027 When laying a double pipeline, two parallel trenches can be dug at different depths (for example, for water and gas). It is advisable to move the excavator sideways to dig one trench and then the other, while remaining perfectly aligned. Two pipelines can be laid in the same trench, even if they are not at the same depth. The work should be carried out alternately as shown in the diagram. Move the excavator by a distance equal to the width of the bucket to prevent bucket offset and dig a perfectly straight trench. To dig trenches between 1.00 m and 1.30m in depth (beyond this depth they have to be shored), the trench must be opened in a V-section to prevent caving in. To do this, first open by following the center line, then gradually moving from the center line, trim the trench to obtain a V-section.
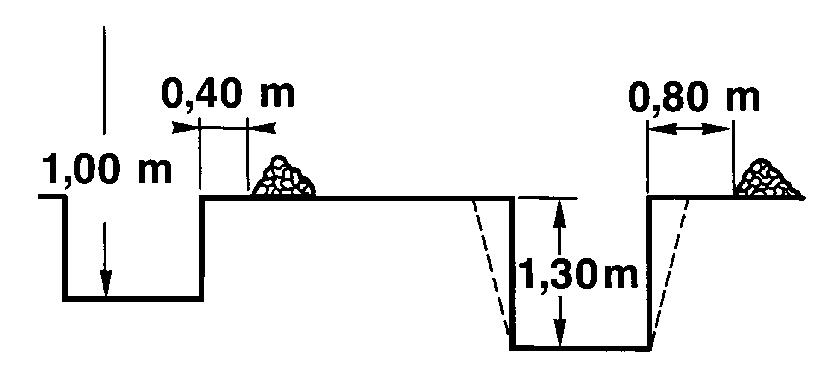
PDE0029 When opening a trench, leave one side free to store tools or material. Dump the spoil on the other side, leaving a space of 0.40 m between the spoil and the edge of the trench. If the trench depth is between 1.00 m and 1.30 m, increase this space to 0.80 m, so that the trench can be opened in a V-section.
181
TRIM THIS EDGE RIGHT PAGE TRIM THIS EDGE
Template Name: OM_1_colTemplate Date: 1994_04_29
Template Date: 1994_04_29Template Name: OM_1_col

TRIM THIS EDGE

PDG0102 A B
PDE0031
For offset backhoe work, position the machine correctly in relation to the obstacle (wall, hedge, etc.) from the start: with the boom/dipper linkage aligned with the trench. Do not extend the dipper completely, use a short dig cycle, backing up frequently to maintain the correct alignment.
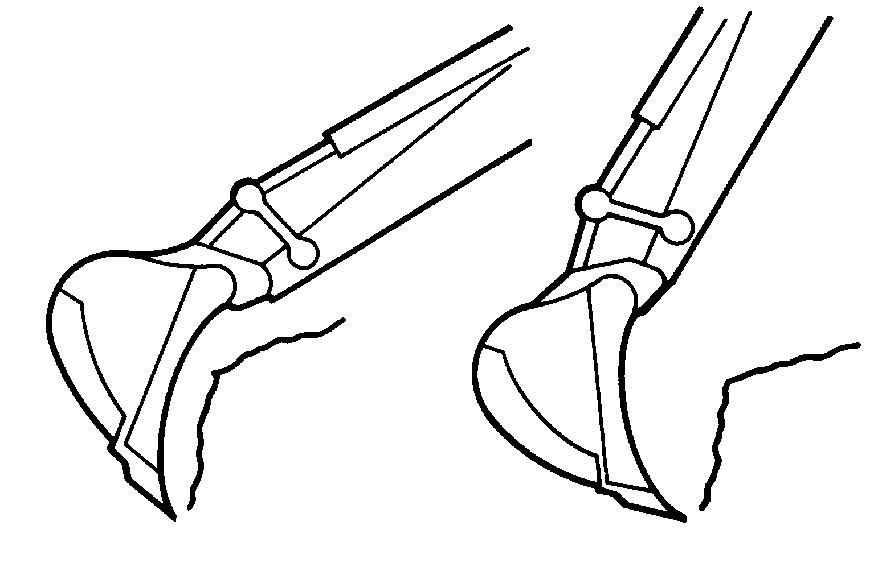
(A) WRONG (B) RIGHT
It is important to position the teeth correctly. For best performance and to prevent breaking the teeth, cut the ground without tearing it.

PDE0030 To excavate (a basement, for example), do the corners first. Follow the sequence shown in the diagram. Complete the final side and final corner last, when exiting the excavation.
PDE0032 For best backhoe performance, begin by positioning the teeth correctly. Close the bucket as soon as it begins to move so as to place the teeth in horizontal position. The teeth, not the bucket, must rest on the ground, to prevent bumping and to ensure that all the force is on the teeth.
182
TRIM THIS EDGE LEFT PAGE
PDH0101 For earthmoving, the bucket must be filled over a length of ground equal to the length of the dipper. It would be a waste of time to work over a greater or shorter distance.
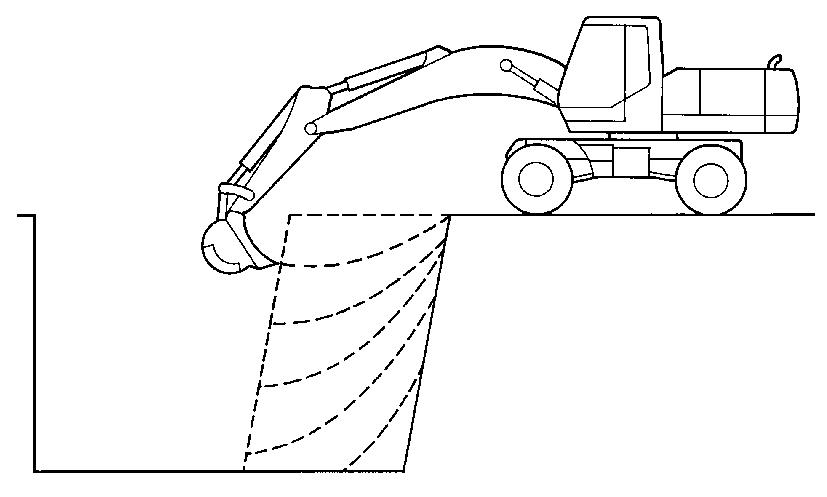
PDH0102 The results will be better if the beds are removed successively. Make sure that the teeth are in the correct position from the start. The thickness of the beds will depend on the firmness of the ground. It is important to synchronize the movements of the boom, dipper and bucket to achieve perfectly horizontal excavations and trench bottoms. As soon as they begin to move, extend the dipper and lower the boom. Close the bucket and retract the dipper, while at the same time watching the position of the teeth to prevent the bucket from scraping against the ground. Keep raising the boom until the dipper has reached the vertical position. When the dipper has passed the vertical position, the bucket should be opened progressively to keep it flat and the boom should be lowered. To facilitate earthmoving operations with the backhoe, follow these tips: Always place the cab beside the truck to be loaded or any obstacle that may be there (for better working visibility). Then, begin work beside the truck to clear the ground for the swing movements which will follow. The cycle time will be shorter since you will not have to lift the bucket over the ground which is still in place.
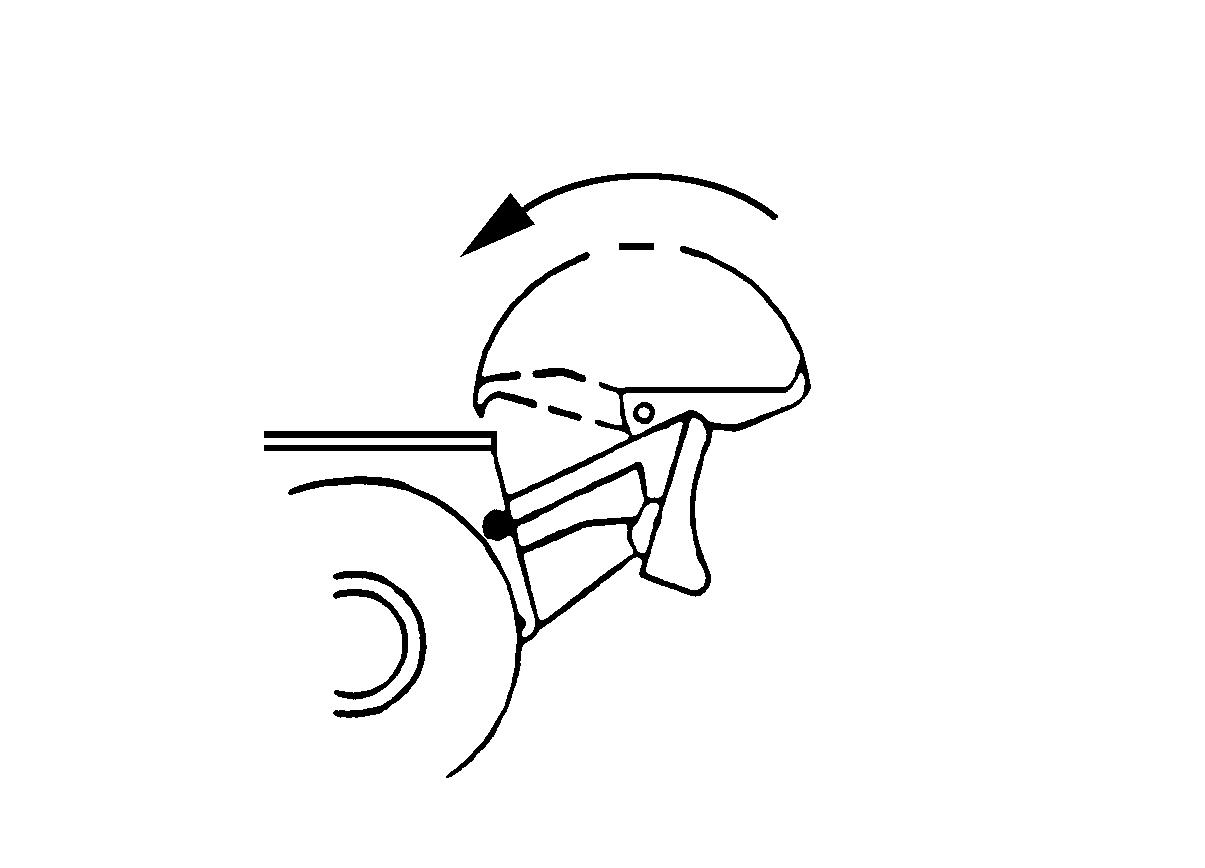
Clamshell attachment

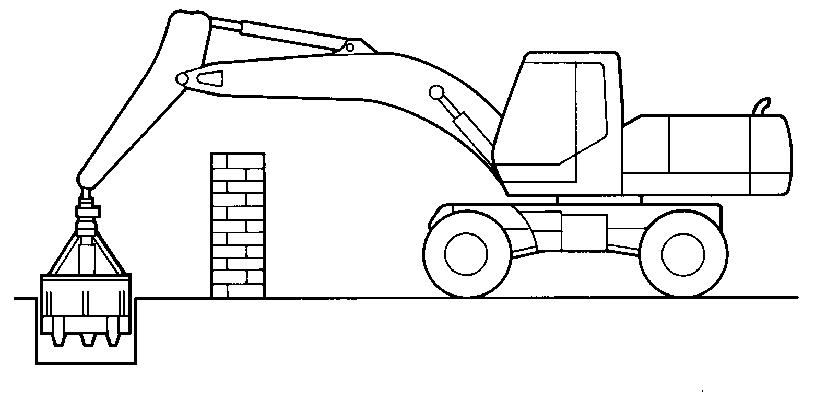
PDE0035 The clamshell has the special feature of being able to penetrate the ground while closing. The cylinder which operates the shells prevents the clamshell from rising during closure, so that the clamshell is filled quickly and completely.
183
TRIM THIS EDGE RIGHT PAGE TRIM THIS EDGE
Template Name: OM_1_colTemplate Date: 1994_04_29
Template Date: 1994_04_29Template Name: OM_1_col
TRIM THIS EDGE
PDE0036 To dig a basement (or any other type of excavation), it is important to start at the corners, but since the clamshell, unlike the backhoe, can swing, there is no need to dig the area in a set sequence. The sequence shown in the diagram should only be used as a guide. The operator may need to adopt other working methods, depending on the truck position, whether or not there is a slope leading to a garage and the size and shape of the excavation to be dug.
PDE0037
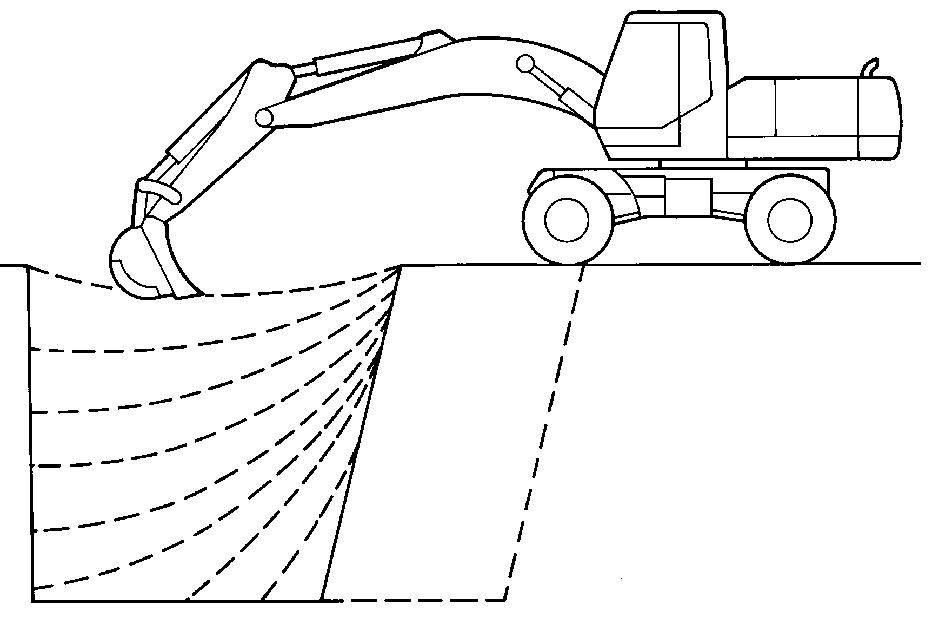
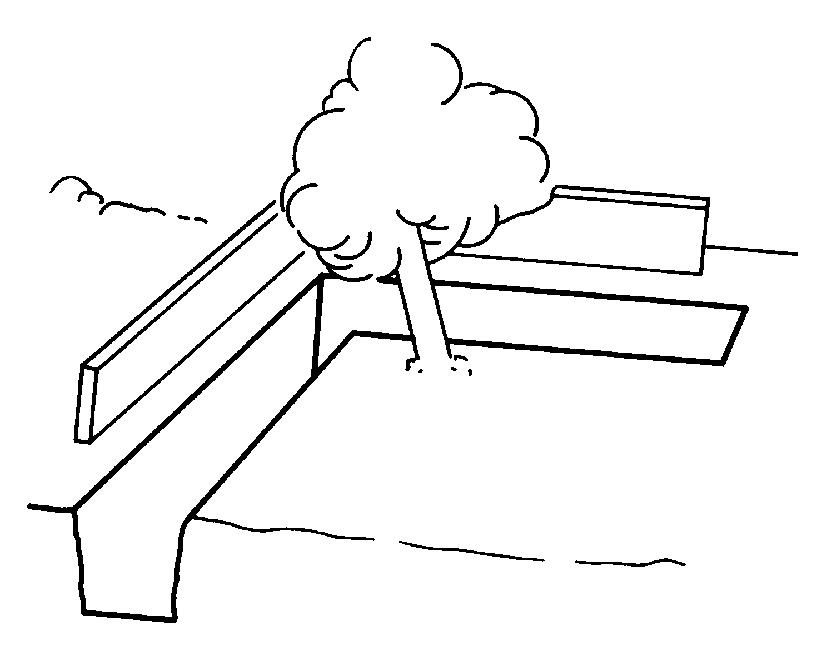
PDH0103 There are two ways to dig a trench at an angle behind a tree or a post: if the site is sufficiently clear on each side of the trench, the work will be easy. Position the excavator so that it straddles the trench and start working at the angle. If there is an obstacle near the trench (wall, hedge, etc.) place the machine as shown in the diagram and dig behind the obstacle. Clamshell swing is used in full to work behind the obstacle. The earth removed from the trench must be deposited at least 0.40 m from the edge of the trench, as when working with a backhoe attachment.
184
TRIM THIS EDGE LEFT PAGE