5 minute read
Tram secondary planetary gear ...................................5


Advertisement
To remove the tram secondary planetary gear:
1. Lower the conveyor tail section until it is level with the floor.
2. Lower the gathering head and cutter head assemblies until they touch the floor.
3. Disconnect the trailing cable to de-energize the miner. Follow all Federal and mine regulations for lockout/tagout.
WARNING! Follow all federal and mine lockout/tagout regulations. Failure to do so could result in machine damage or serious injury or death to personnel.
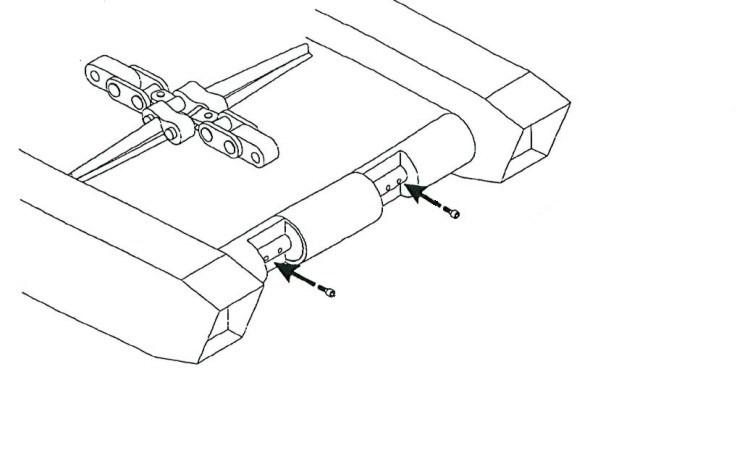
4. Remove the two rub rail pins that secure the tram rub rail to the two rub rail sections adjacent to it and remove the tram rub rail.
5. Remove the plug from the bottom of the tram secondary planetary gear cover and drain the lubricant from the gear case.
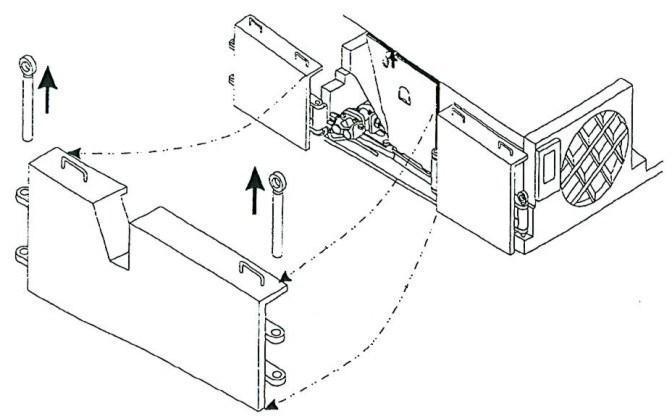
6. Replace the oil drain plug in the gear cover (Fig. 191).
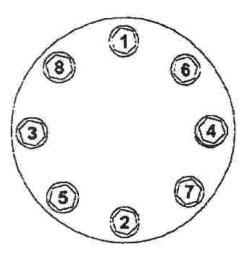
7. Remove the sixteen socket head capscrews that secure the secondary planetary gear cover to the tram case and carefully remove the secondary planetary gear cover.
Fig. 191: Tram secondary planetary gear cover and drain plug
Tram secondary planetary gear cover
Socket head capscrews
Drain plug
BI016912-04 (EN-US)
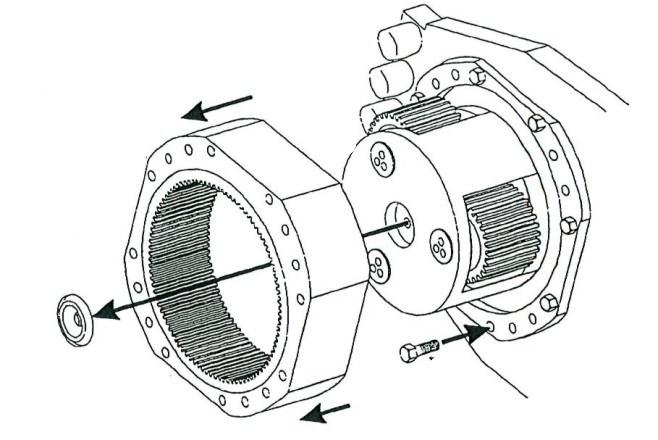
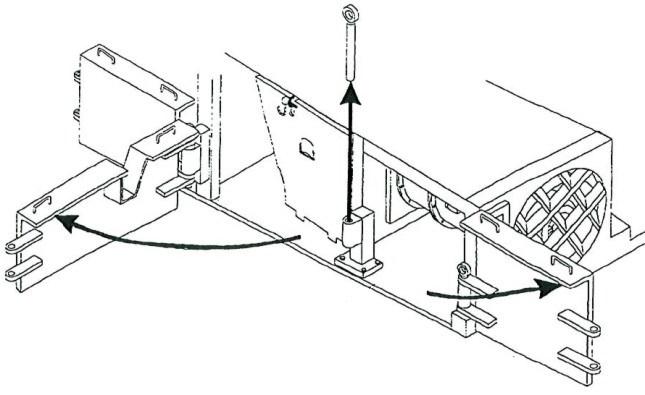
WARNING! The next step removes the secondary planetary gear ring from the secondary planetary gear assembly. The secondary planetary gear ring is extremely heavy. Be prepared to support its weight before removing it from the secondary planetary assembly.
9. Carefully slide the secondary planetary gear ring off the secondary planetary gear assembly.
10. Insert eight hex head capscrews into the sprocket bearing carrier to secure it to the tram case.
11. Carefully pull the secondary tram drive shaft from the gear and sprocket and store in a safe place.
12. Carefully slide the secondary planetary assembly out of the sprocket bearing carrier.
Fig. 192: Secondary planetary assembly removal
Thrust washer Ring gear Secondary planetary gear assembly
Secondary planetary gear assembly Hex head capscrew
Secondary tram drive shaft

Sprocket bearing carrier
Secondary planetary gear assembly

secondary planetary gear removal
To install the tram secondary planetary gear:
1. Carefully insert the secondary planetary gear assembly into the sprocket bearing carrier (Fig. 193), ensuring that the splined extension of the planetary carrier seats securely in the interior teeth of the sprocket.
Fig. 193: Planetary carrier installation
Sprocket bearing carrier
Secondary planetary gear assembly Sprocket teeth

Splined extension
2. Slide the secondary tram drive shaft through the secondary planetary gear assembly and into the tram drive sprocket and reach gear set (the drive shaft end without the threaded hole should be inserted first). The shaft may require some adjustment so that the end fits into the reach gears.
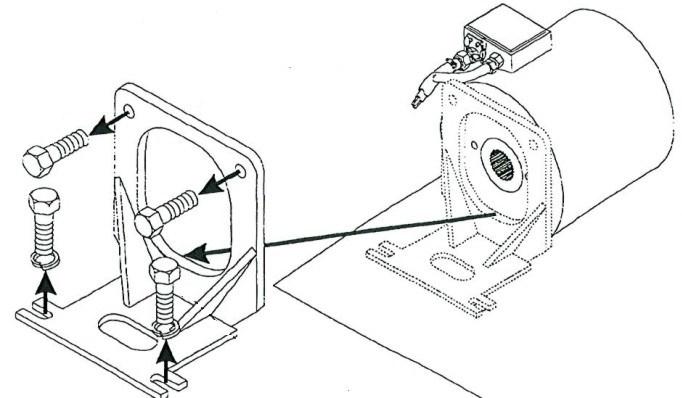
3. Insert four alignment dowels into the holes in the sprocket bearing carrier not blocked by the eight hex head capscrews (Fig. 194).
4. To facilitate gear ring insertion, mark the mounting holes of the secondary planetary gear ring that corresponds to the holes in which the dowels were placed.
5. Remove the eight hex head capscrews that secure the sprocket bearing carrier to the tram.
Fig. 194: Gear ring installation
Secondary planetary gear assembly Sprocket bearing carrier
Gear ring
Thrust washer

Alignment marks Alignment dowels Hex head capscrews
BI016912-04 (EN-US)
6. Apply silicon sealant to the ring gear.
7. Carefully slide the secondary planetary gear ring onto the four alignment dowels so that the dowels appear through the marked holes. The planetary gear teeth should slide smoothly and securely into the gear teeth should slide smoothly and securely into the gear ring teeth.
8. Place the thrust water into the secondary planetary carrier directly behind the secondary tram drive shaft. The side of the thrust washer with the inscribed circles should face away from the drive shaft.
9. Apply silicon sealant to the cover.
10. To facilitate gear cover replacement, mark the mounting holes of the secondary planetary gear cover that corresponds to the holes in which alignment dowels are placed.
11. Slide the secondary planetary gear case cover onto the alignment dowels so that the dowels appear through the marked holes.
IMPORTANT! The flat edge of the cover located adjacent to the lubrication fitting is the top of the cover. Orient the cover so that the lubricant level check plug is on the motor side of the cover and the drain plug is on the bottom.
12. Insert and tighten the twelve socket head capscrews into the holes in the gear case cover not blocked by the alignment dowels.
13. Remove the four alignment dowels.
14. Insert and tighten the remaining four socket head capscrews to secure the cover, the gear ring, and the sprocket bearing carrier to the tram case.
15. Using a torque wrench, torque all sixteen socket head capscrews to the proper torque (see Torque tables in Chapter 6 of this manual).
16. Using the lubrication fitting at the top of the gear cover (Fig. 195), fill the secondary planetary gear case to the proper level with lubricant.
17. Examine the secondary planetary gear case in various places for signs of leaking lubricant that identify improper installation or gear case damage.
Fig. 195: Gear case fill and check plugs
Fill plug
Check plug

16. Replace the tram rub rail between the two adjacent rub rails and secure it with the two rub rail pins.