1 minute read
Conveyor chain replacement .......................................5

________________________________________ Replacement of wear parts
Chain replacement
Advertisement
1. Lower the cutter head and gathering head assemblies until they touch the ground.
2. Position the conveyor tail section directly behind the miner and raise it. Insert the blocking under the tail section and lower the tail section onto the blocking.
WARNING! You could be seriously injured or killed by falling loads. Observe the safe working load limits of all blocking devices.
3. Disconnect the trailing cable to de-energize the miner. Follow all Federal and mine regulations for lockout/tagout.
WARNING! Follow all federal and mine lockout/tagout regulations. Failure to do so could result in machine damage or serious injury or death to personnel.
4. Loosen the tension of the conveyor chain as much as possible (see Conveyor chain adjustment procedure in this chapter).
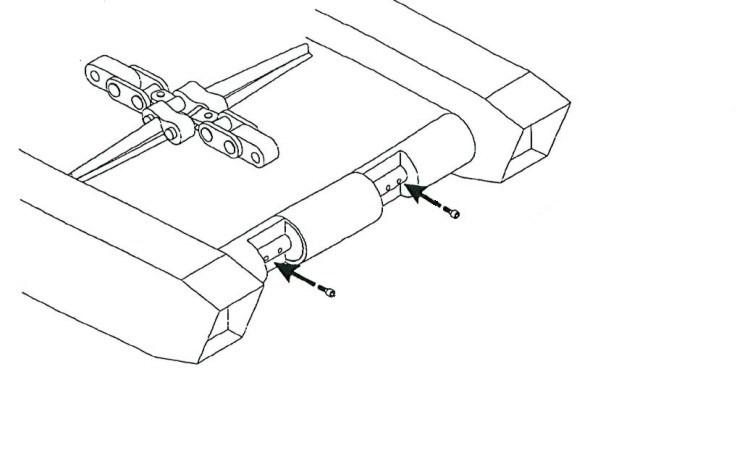
5. Remove the two retaining rings from a connecting link located near the rear of the conveyor bed.
6. Remove the connecting link. The chain is now separated.
7. Connect the come-along to the end of the chain on the conveyor bed.
8. Connect the new chain to the end of the lower chain and allow the new chain to extend behind the miner on the floor.
9. Use the come along to pull the old chain out of the miner. The new chain will follow the old through the conveyor return channel around the gathering head foot shaft and out onto the conveyor tail section.
10. When the entire length of old chain has been pulled through the miner and the replacement chain is in position, disconnect the old chain from the new and remove the come along.
11. Connect both ends of the new chain by replacing the connecting link, pins and retaining rings.
12. Tighten the conveyor chain (see Conveyor chain adjustment procedure in this chapter).