5 minute read
OPERATING PROCEDURES (Cont’d)


Operating On Slopes
Avoid Injury Or Death
• Do not travel across or up slopes which are over 15 degrees to the side, or to the back of machine or 25 degrees to the front. Keep boom centered while traveling.
• Keep attachments as low as possible when traveling on slopes or in rough conditions.
When going down a slope, control the speed with the steering levers and the speed control lever.
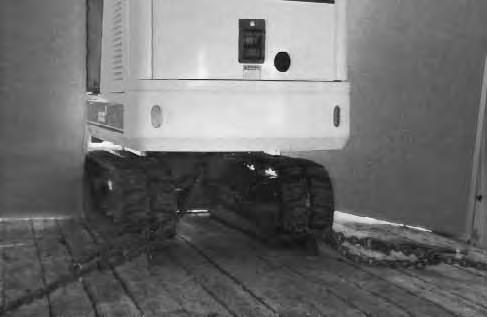
When going down grades that exceed 15 degrees, put the machine in the position shown, and run the engine slowly.
Operate as slow as possible and avoid sudden changes in lever direction.
Avoid traveling over objects (such as rocks, trees, stumps, etc.).
Stop the machine travel before moving the upper equipment controls. Never allow the blade to strike a solid object. Damage to the blade or hydraulic cylinder can result.
When working on a slope, it is recommended to level the work area [C].
If this is not possible, the following procedures should be used:
Do not work on slopes which are over 15 degrees. Slow down the work cycle.
Avoid working with the tracks across the slope as this reduces stability and increases the tendency for the machine to slide. Position the excavator with the blade down hill and lowered.
Avoid swinging or extending the bucket farther than necessary in a down hill direction. When you must swing the bucket down hill, keep the dipper arm low and skid the bucket downhill.
When working with the bucket on the uphill side, keep the bucket as close to the ground as possible. Dump the spoil far enough away from the trench or hole to prevent the possibility of a cave in.
OPERATING PROCEDURES (Cont’d) Operating in Water
Mud and water should be removed from the machine before parking. If possible, park the machine on boards or concrete to prevent the track or undercarriage from freezing to the ground and preventing machine movement.
Do not operate or immerse the Excavator in water higher than the bottom of the swing circle [A]
Properly grease the Excavator when it has been operated or immersed in water for a period of time.
Water must be removed from the cylinder rods. If water freezes to the cylinder rod, the cylinder seals can be damaged when the rod is retracted.
PARKING THE HYDRAULIC EXCAVATOR
Stop the machine on level ground. Lower the work equipment and the blade to the ground.
Run the engine at idle speed forabout 5 minutes to allow it to cool.
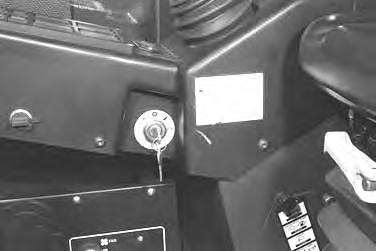
Push the speed control lever fully to the rear and hold in this position until the engine comes to a complete stop [B].
Turn the key switch to the OFF position [C]
Disconnect the seat belt. Remove the keyfrom the switch to prevent operation of machine by unauthorized personnel.
Transporting The Hydraulic Excavator
Make sure the parking brakes on the transportvehicle are engaged and wheels are blocked.
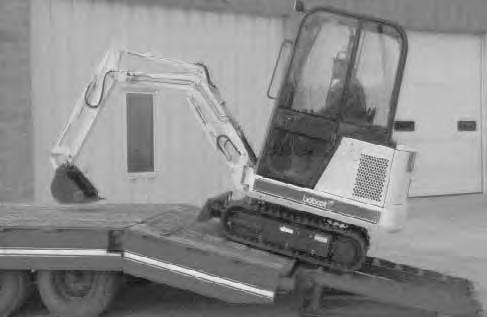
Align the ramps with the center of the transport vehicle. Secure the ramps to the truck bed and be sure ramp angle does not exceed 15 degrees.
Use metal loading ramps and slip resistant surface.
Make sure the ramps are the correct length and width, and can support the weight of the machine.
The rear of the trailer must be properly blocked or supported when loading or unloader the excavator
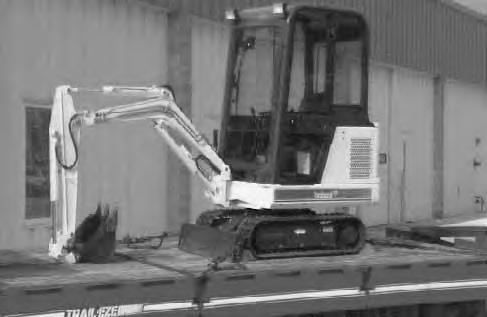
Determine the direction of the track movement before moving the machine (blade forward). Engage the swing lock pin to lock the upperstructure.
Move the machine forward onto the transport vehicle[A] Do not change direction of the machine while it is on the ramps.
After loading the machine, position the armand bucket as shown [B]
Lower the boom.
Stop the engine and remove the key.
Use the following procedure to fasten the Excavator tothe transport vehicle:
Put blocks under the front and rear of the track shoes.
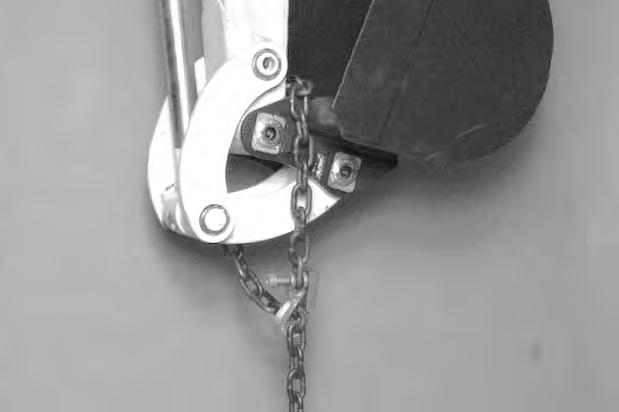
Fasten holddown chains to the front corners of the blade and to the tie down loop at the rear of the track frame to prevent it from moving when going up or down slopes,or during sudden stops [C] & [D]
Use chain binders to tighten the chains and then safety tie the chain binder levers to prevent loosening.
When transporting the machine, observe the rules, motor vehicle laws and vehicle limit ordinances. Use a transport and towing vehicle of adequate length and capacity.
Adequately designed ramps of sufficient strength are needed to support the weight of the machine when loading onto a transport vehicle. Wood ramps can break and cause personal injury.

Lifting The Excavator
Fully extend the cylinders of the bucket, arm & boom. Put the work equipment control levers in neutral and engage the swing locking lever.
Avoid Injury Or Death
• Use a lifting fixture with sufficient capacity for the weight of the excavator plus any added attachments.
• Maintain center of gravity and balance when lifting.
• Do not swing boom or upperstructure. Engage the swing locking lever.
• Never lift with operator on machine.
Secure the lifting fixture sling to the two lifting holes at the left and right side at the rear of the upperstructure and the lift eye on the boom [A] & [B]
Install a spreader bar above the cab to prevent lifting fixture from rubbing on ROPS or the rear engine cover.

Lifting A Load
Do not exceed the rated load capacity. (See Lifting Decal Page 50.)
Use the chain assembly (P/N 6665374) for lifting.
To install the chain assembly: Extend the bucket cylinder fully. Stop the engine.
Wrap the chain assembly around the arm or the bucket mounting plate [C]
Keep the safety hook to the side with a small loop in the chain [C].
Attach the secondary lift system (i.e. cables, chains or slings) to the loop of the chain assembly.
BUCKET Removal
Avoid Injury Or Death
Stop the machine on a firm flat surface. When removing or installing attachments (such as a bucket), always have a second person in the operator’s seat, give clear signals and work carefully.
W–2140–0189
Select a flat level surface. Put the bucket on the ground. Remove the quick pin from the pivot pins (Items 1 & 2) [A].
Remove the pivot pins and keep them clean. Do not damage the dust seals in the arm and the link.
Installation
Install the arm into the bucket and align the hole [A]. Install the pivot pin (Item 1) [A]
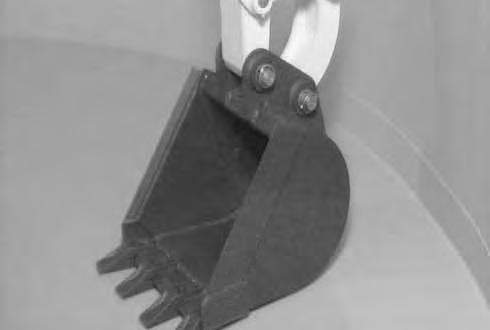
Attach the link to the other hole and install the pivot pin (Item 2) [A].
Install the quick pins. Add grease to the pivot pins before operation.
Never use attachments or buckets which are not approved by Melroe Company. Buckets and attachments for safe loads of specified densities are approved for each model. Unapproved attachments can cause injury or death.
W–2052–1285
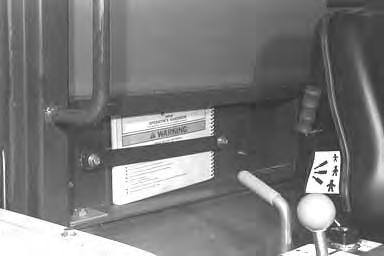
OPERATOR’S HANDBOOK (If Equipped)
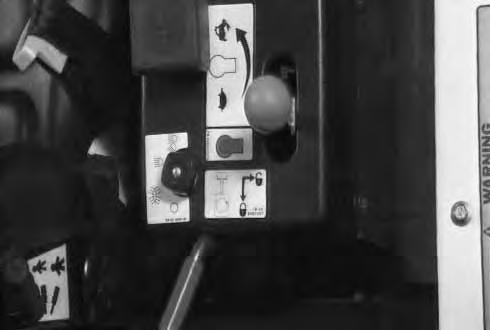
The Operator’s Handbook is a quick reference for operating the hydraulic excavator and is located behind the operator seat on the right side of the cab [A].
Read the Operation & Maintenance Manual and Operator’s Handbook before operating the hydraulic excavator.
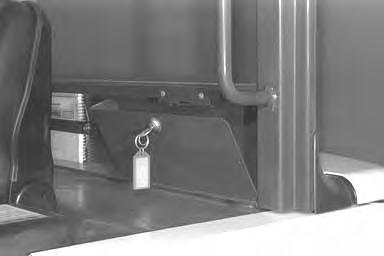
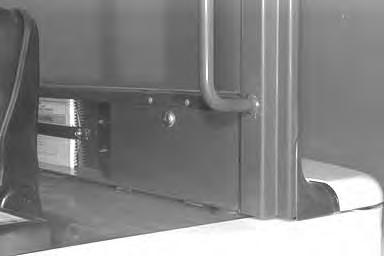
STORAGE COMPARTMENT (If Equipped)
The storage compartment, located behind the operator seat at the left side of the cab, can be used to store items (Example: Operation & Maintenance Manual) and then locked [B] & [C]. The storage compartment lock uses the same key as the key switch.
Cab Option
Opening the Front Window
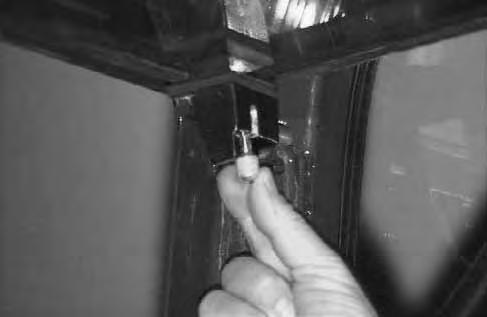
Move the four window latch pins inward and place them in the unlatched position [A].
Grab both window handles and pull the top of the window inward [B].
When the top of the window moves inward, lift up on the window handles and the window will move up and will pivot inward, over the operators head.
When the window is over the operators head, lift the bottom of the window upward. The top edgeof the window will engage the pocket at the top rear of the cab.
Hold the bottom of the window up and move the two bottom window latch pins outward. Make sure that the pins are secured to the open window latch points [C]
Closing the Front Window
Hold the bottom of the window up and move the two window latch pins inward and place them in the unlatched position [C]
Grab both window handles and pull the bottom of the window downward [B].
When the window is in the down and vertical position, push outward at each corner latch point and move the latch pins into the locked position [A]