Drive System Drive Chain and Sprockets REMOVING
1. Remove the self-tapping screws securing the front clutch shield and rear sprocket cover; then remove from the engine compartment. Note the position of the hood cable. NOTE: It will be necessary to reinstall the hood cable once the guard is removed.
IO112A
6. Secure the centrifugal clutch with a pair of channellock pliers at the outer clutch collar; then remove the cap screw securing the clutch. Account for a lock washer and a flat washer.
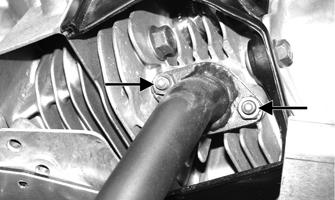
2. Remove the muffler hold-down spring from the muffler and support bracket; then remove the two nuts securing the muffler to the engine.
A020
IO111A
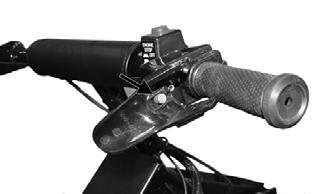
3. Press down on the muffler and pull it to the side until the muffler flange clears the engine exhaust studs; then remove the muffler from the engine compartment. Account for the exhaust gasket. 4. Compress and hold the brake lever; then remove the cap screw and washer securing the chain sprocket to the driveshaft. Release the lever.
IO113
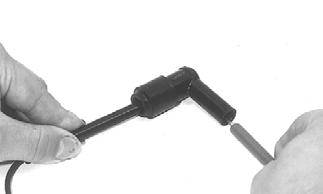
7. Slide the chain sprocket and clutch (with the drive chain) off the respective shafts and remove from the engine compartment. Account for the rear driveshaft key. CLEANING AND INSPECTING 1. Thoroughly wash all metallic components in partscleaning solvent. Dry using compressed air. 2. Wash all non-metallic components with soap and water. IO118A
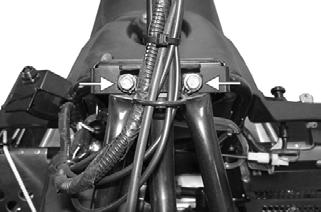
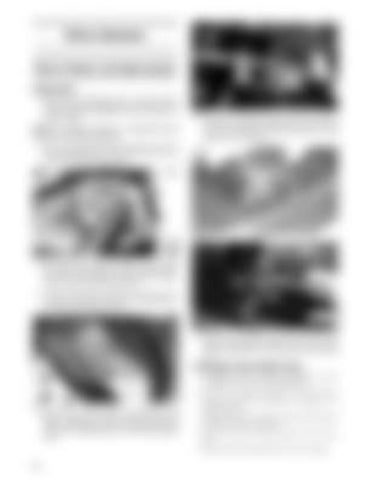
5. Remove the retaining ring (A) securing the brake band. Account for a washer; then loosen the rear brake cable adjustment jam nut (B) and slide the cable out of the brake bracket. Set the band assembly aside.
3. Inspect the sprocket driveshaft for damage or for stripped threads. 4. Inspect the keyways in the driveshaft, chain sprocket, and clutch for wear or damage. 5. Inspect the chain and chain sprocket for wear or damage. 6. Inspect the driveshaft sprockets for wear or damage.
36