

DENTAL SOLUTIONS
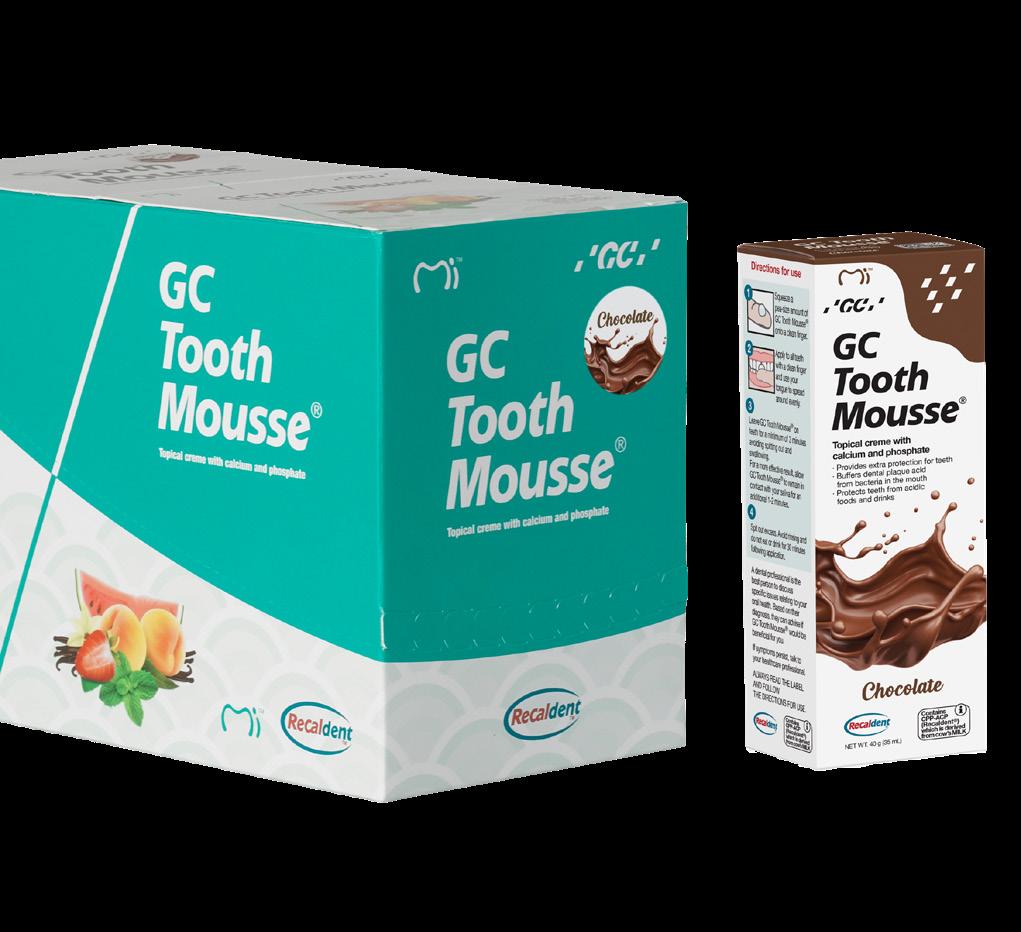
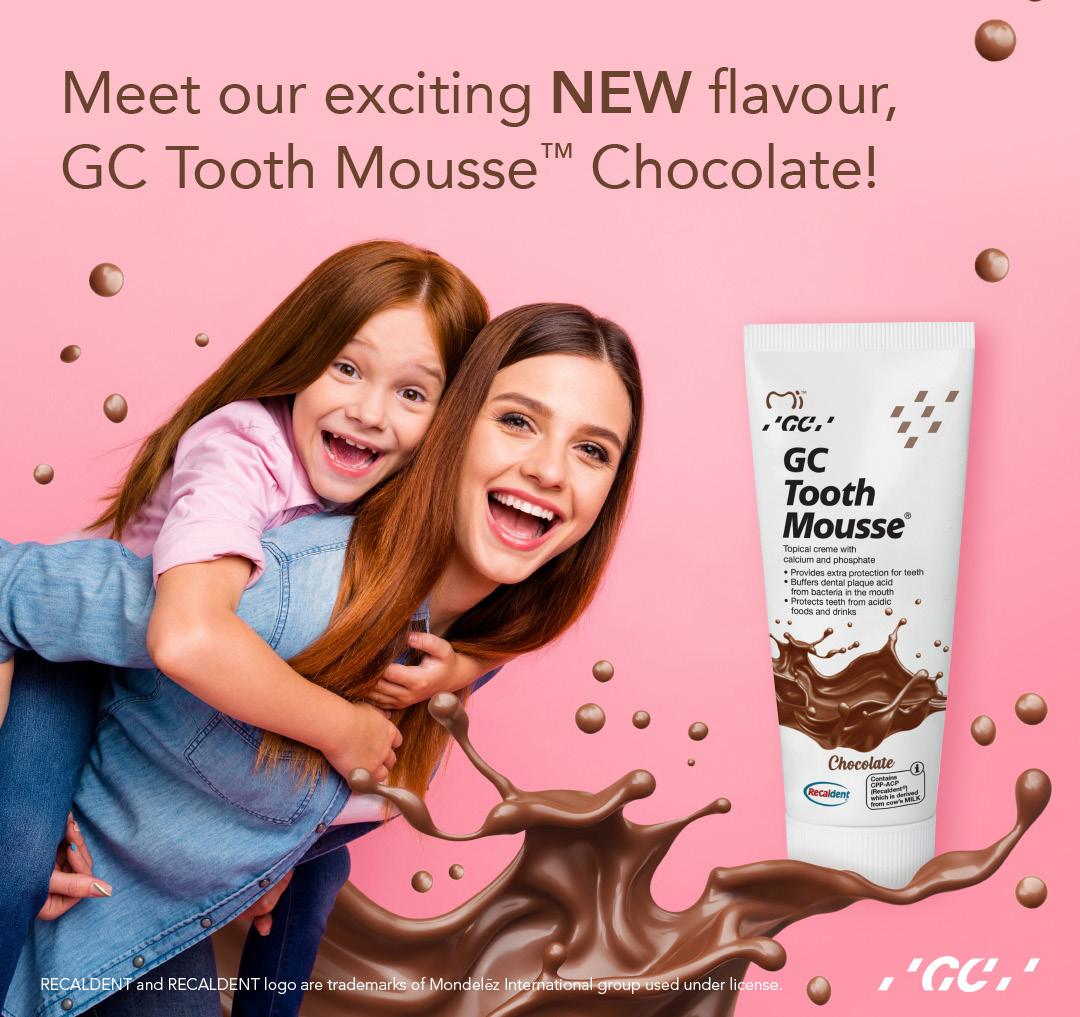
GC Chocolate Tooth Mousse
GC Tooth Mousse™ comes in a delicious BRAND-NEW Chocolate that your patients will love. Topical creme with calcium, phosphate
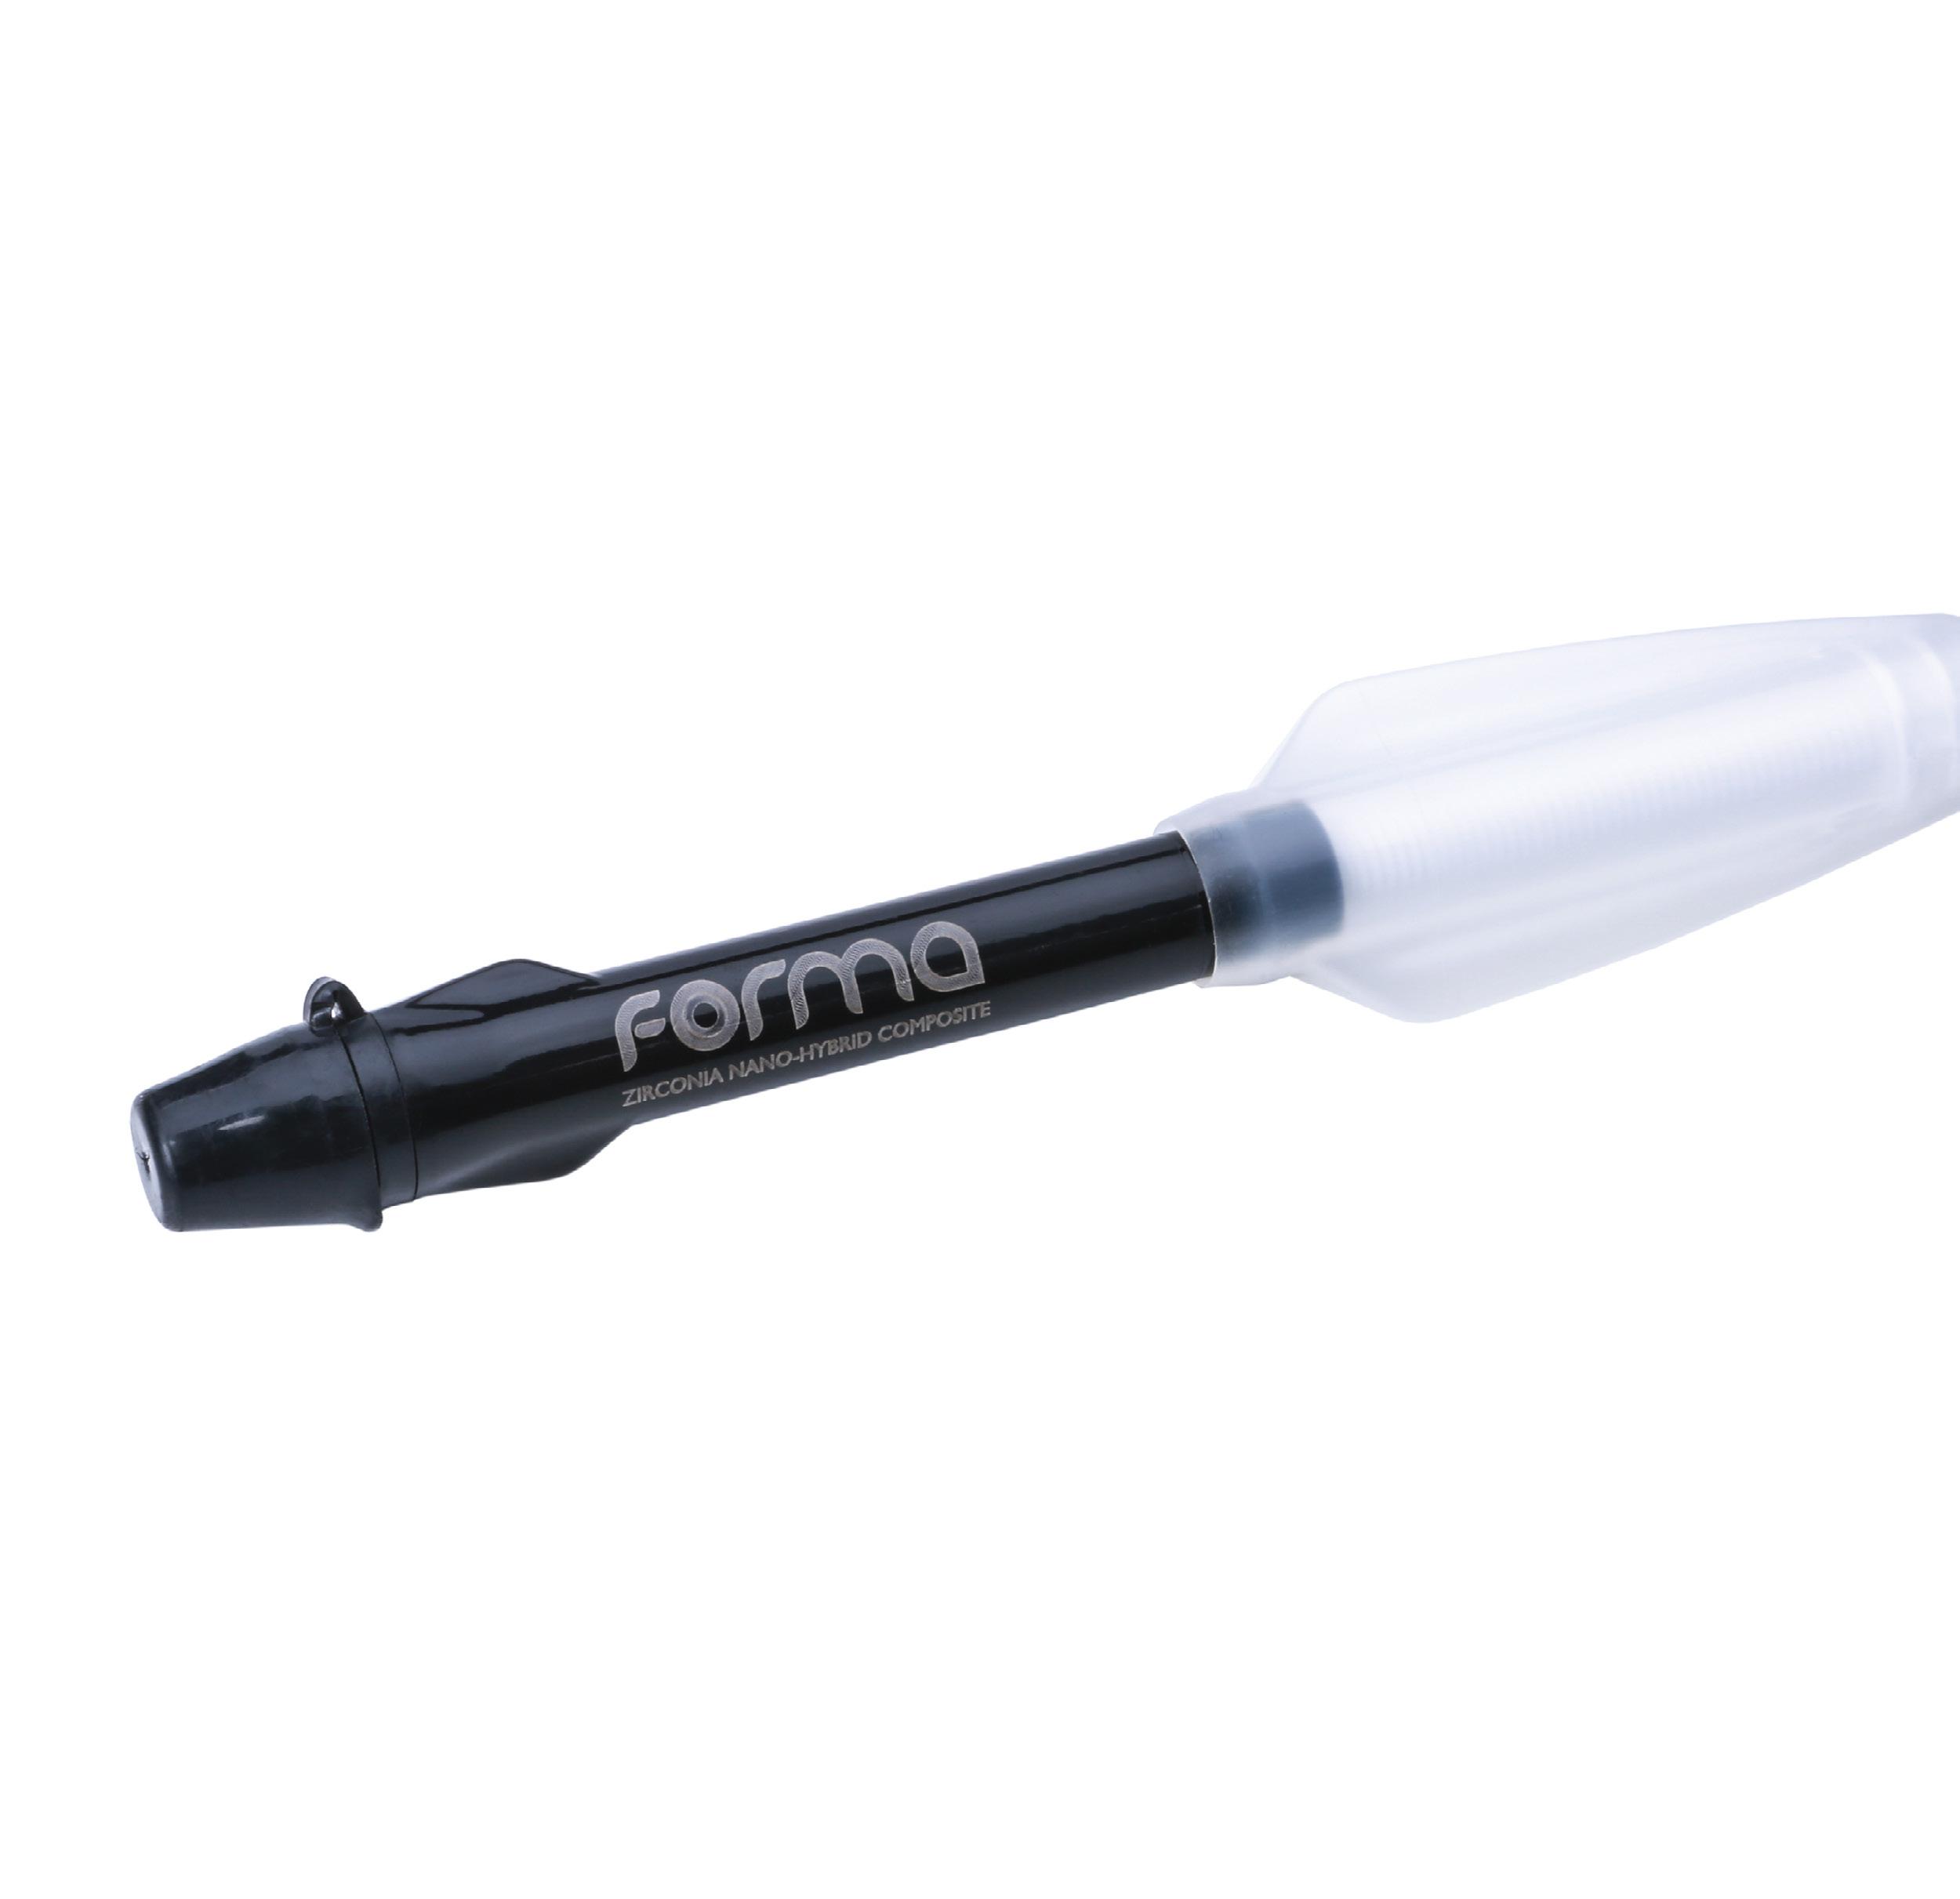
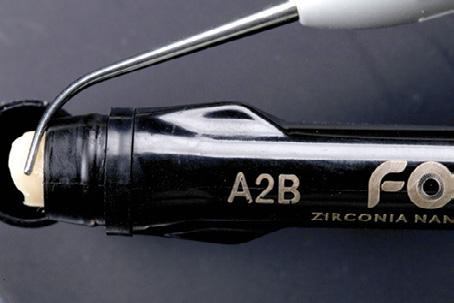
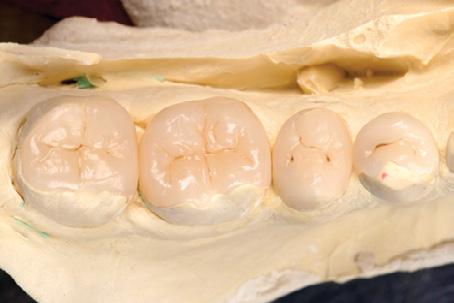
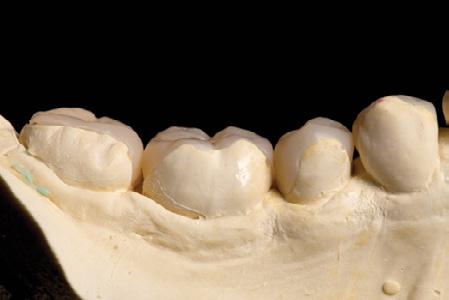
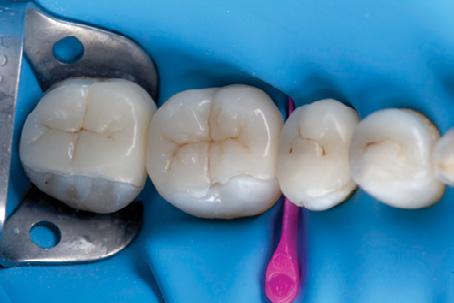
Ultradent Forma Composite
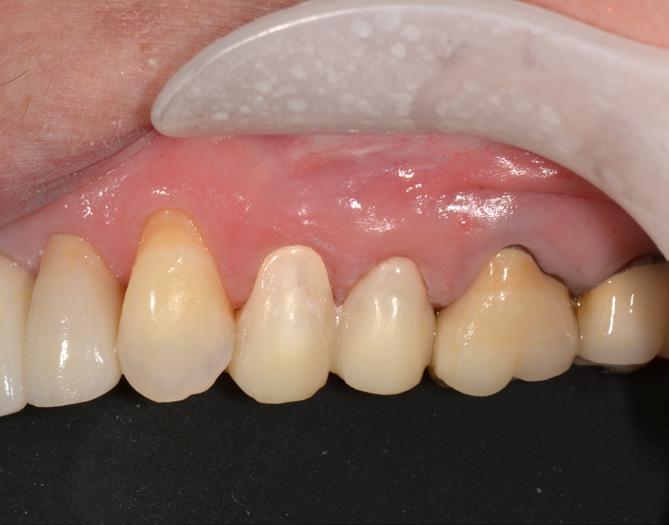
FORMA is a highly versatile aesthetic material with a zirconia nano-hybrid formula.
This unique formulation allows beautiful restorations to be made using only one Body Shade that manages to blend into the restoration thanks to its ideal combination of opalescence and translucency.
CyberTech Surgical Sutures
PGA braided absorbable surgical sutures available in both rapid and violet covering a variety of absorption times.
Sharp needles for easy penetration combined with strong needle-to-suture attachment ensures consistent quality and less tissue trauma. A superb value for money suture option.
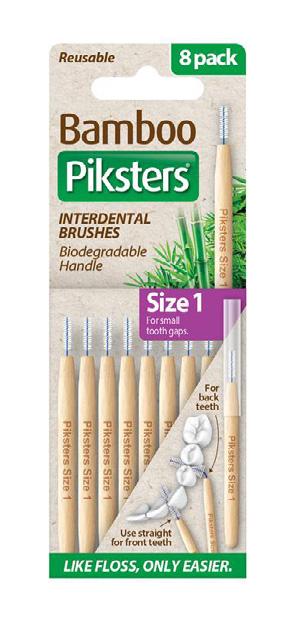
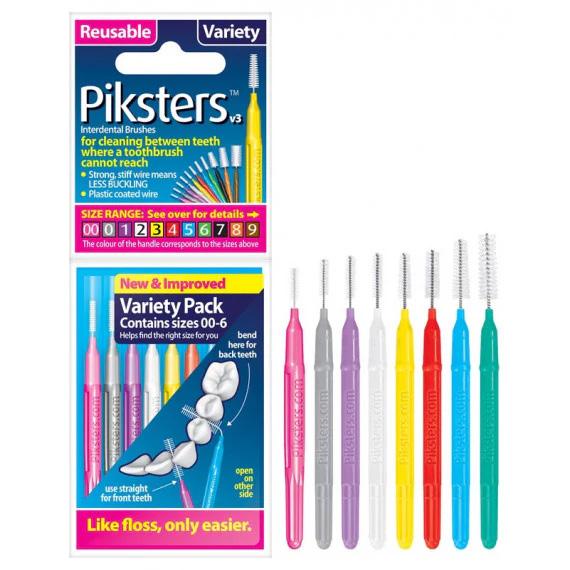
Piksters
We’re excited to announce that Piksters Interdental Brushes are now available through Henry Schein. Piksters are loved for their ease of use, single handed action, variety of sizes, low cost, convenience, the twisty handle, the stronger stiffer wire and the durability of the bristles!
This new partnership makes it easier than ever to access these popular oralcare products, helping you and your patients maintain healthy smiles.
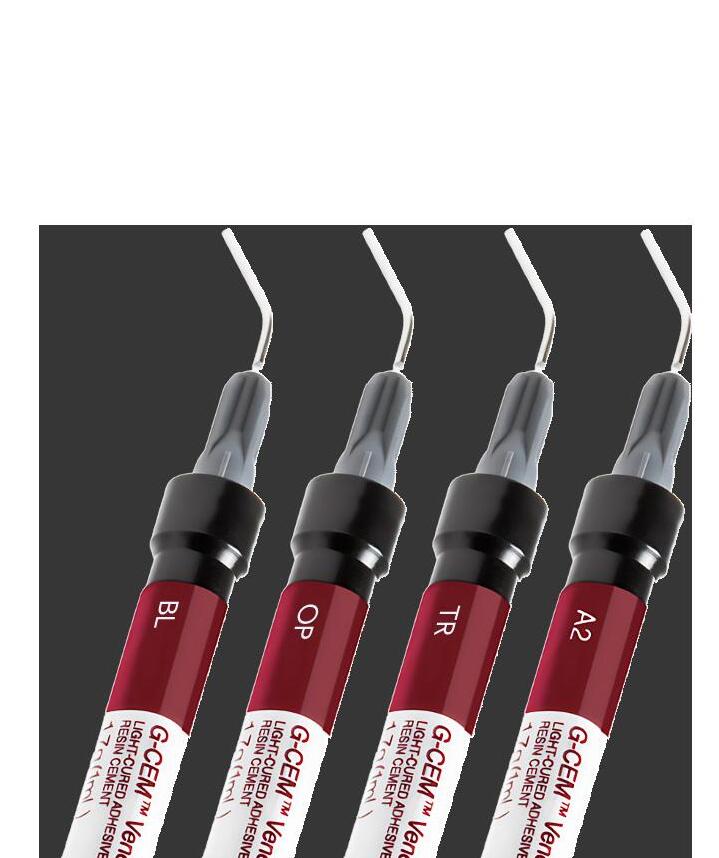
G-CEM Veneer: For the Perfect Flow
G-CEM Veneer: predictable aesthetics, high mechanical properties and unique flow.*
G-CEM Veneer has all the ingredients to deliver a stunning result for a confident smile. The secret is in its optimally balanced formula with Full-coverage Silane Coating (FSC) technology. This innovative filler treatment allows a high filler rate to be achieved with homogeneous repartition of fillers in the matrix. The result: unique handling and excellent physical properties.*
Excellent polymerisation*
G-CEM Veneer can be efficiently light-cured through restorations <2 mm with sufficient translucency. Indicated for composite and ceramic veneers, inlays and onlays.
Extremely wear-resistant*
The smooth and glossy surface is maintained over time due to high wear resistance, preventing marginal gap formation, and withstanding discolouration. The FSC technology and improved matrix prevent particle loss ensuring a homogeneous distribution of the fillers.
Low film thickness
The benefit of combining strength with the perfect flow: a high-quality fit, without the need for preheating!
Advantages of thixotropy
• G-CEM Veneer stays in place when untouched, but is fluid when put under pressure.
• G-CEM Veneer covers the entire surface of a restoration uniformly without voids, while the film thickness is kept to a minimum.
• G-CEM Veneer is not sticky; it is easy to apply with high precision and it allows easy excess removal.
• G-CEM Veneer’s unique consistency allows for an optimally balanced flow, without the need for preheating.
• G-CEM Veneer is well suited for the cementation of aesthetic restorations and offers high colour stability
View Brochure


G-CEM Veneer –simple application steps
1. Before FOUR AESTHETIC SHADES
G-CEM Veneer comes in four different shades. They were carefully selected to cover all aesthetic needs.
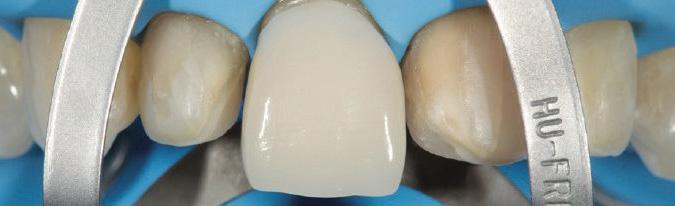
2. Restoration try-in PREDICTABLE SHADE INTEGRATION
With the use of G-CEM Try-in Paste, you can easily predict the final colour match. It helps in selecting the correct shade and opacity.
3. Preparation etching CHOOSE YOUR ETCHING MODE
Etch the enamel margins or use a total-etch approach for minimal preparations that are localised mainly in the enamel.
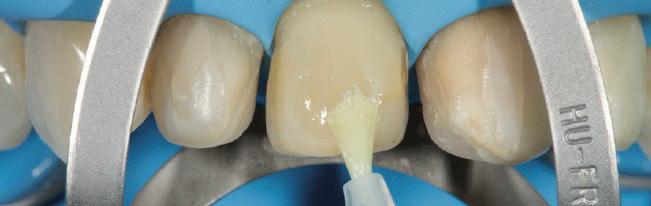
4. Apply G-Premio BOND BONDING TO ALL SUBSTRATES
G-Premio BOND is purposely designed to bond to all substrates. It is separately cured with a very low 3μm film thickness and it does not interfere with the seating of the restoration.
5. Apply G-Multi PRIMER BONDING TO ALL RESTORATIONS
After correct pre-treatment (etching or sandblasting), G-Multi PRIMER ensures stable adhesion* to all aesthetic restoratives.
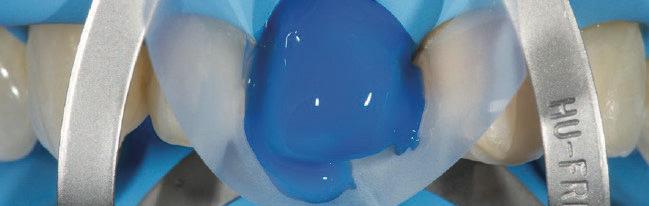
6. Cementation PRECISE APPLICATION
Thixotropy and long working time allow for precise application.
7. Excess removal EASY CLEAN-UP
Tack-curing for 1-2 seconds before removal is optional. After the final light curing, margins can be easily finished and polished to a high gloss to minimise plaque retention.
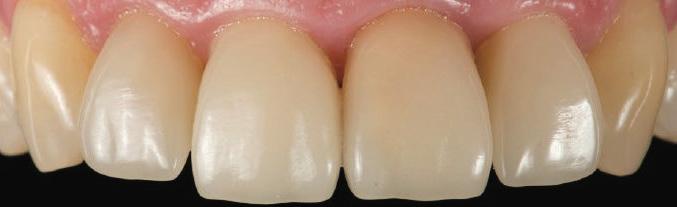
8. Final DURABLE OUTCOME
High colour stability combined with excellent mechanical properties: a high-quality, durable and aesthetic fit.*
* Data on file [ISO 4049:2000 Depth of cure, 3-body wear, Flexural strength] available from info.australasia@gc.dental.
* GC R&D. Data on file [ISO 11405: 2003 Bond strength] available from info.australasia@gc.dental.
**Source GC R&D Japan, Data on file
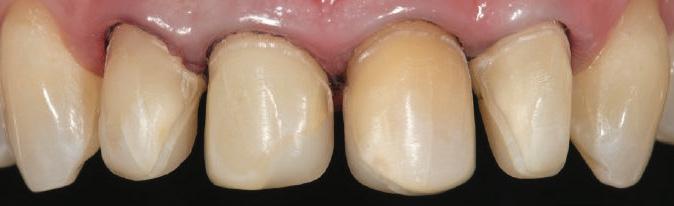
Clinical images courtesy of Dr. J Tapia Guadix, Spain
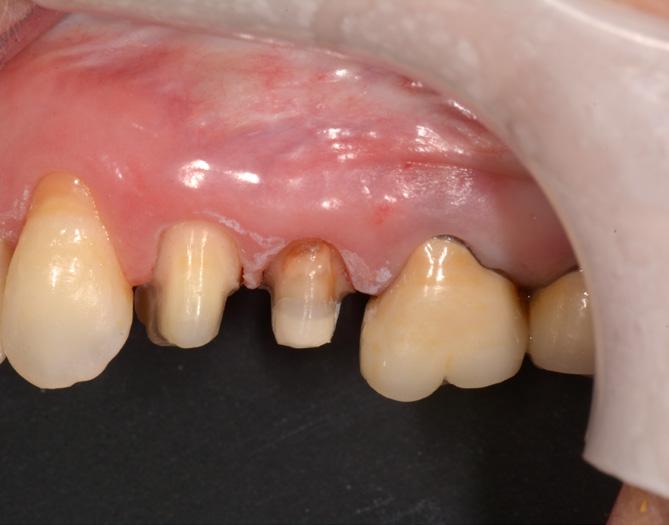
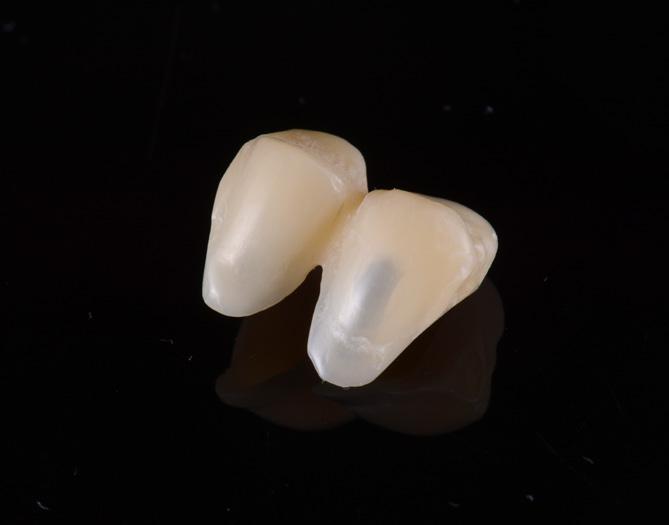
Achieving Effortlessly Beautiful Temporary
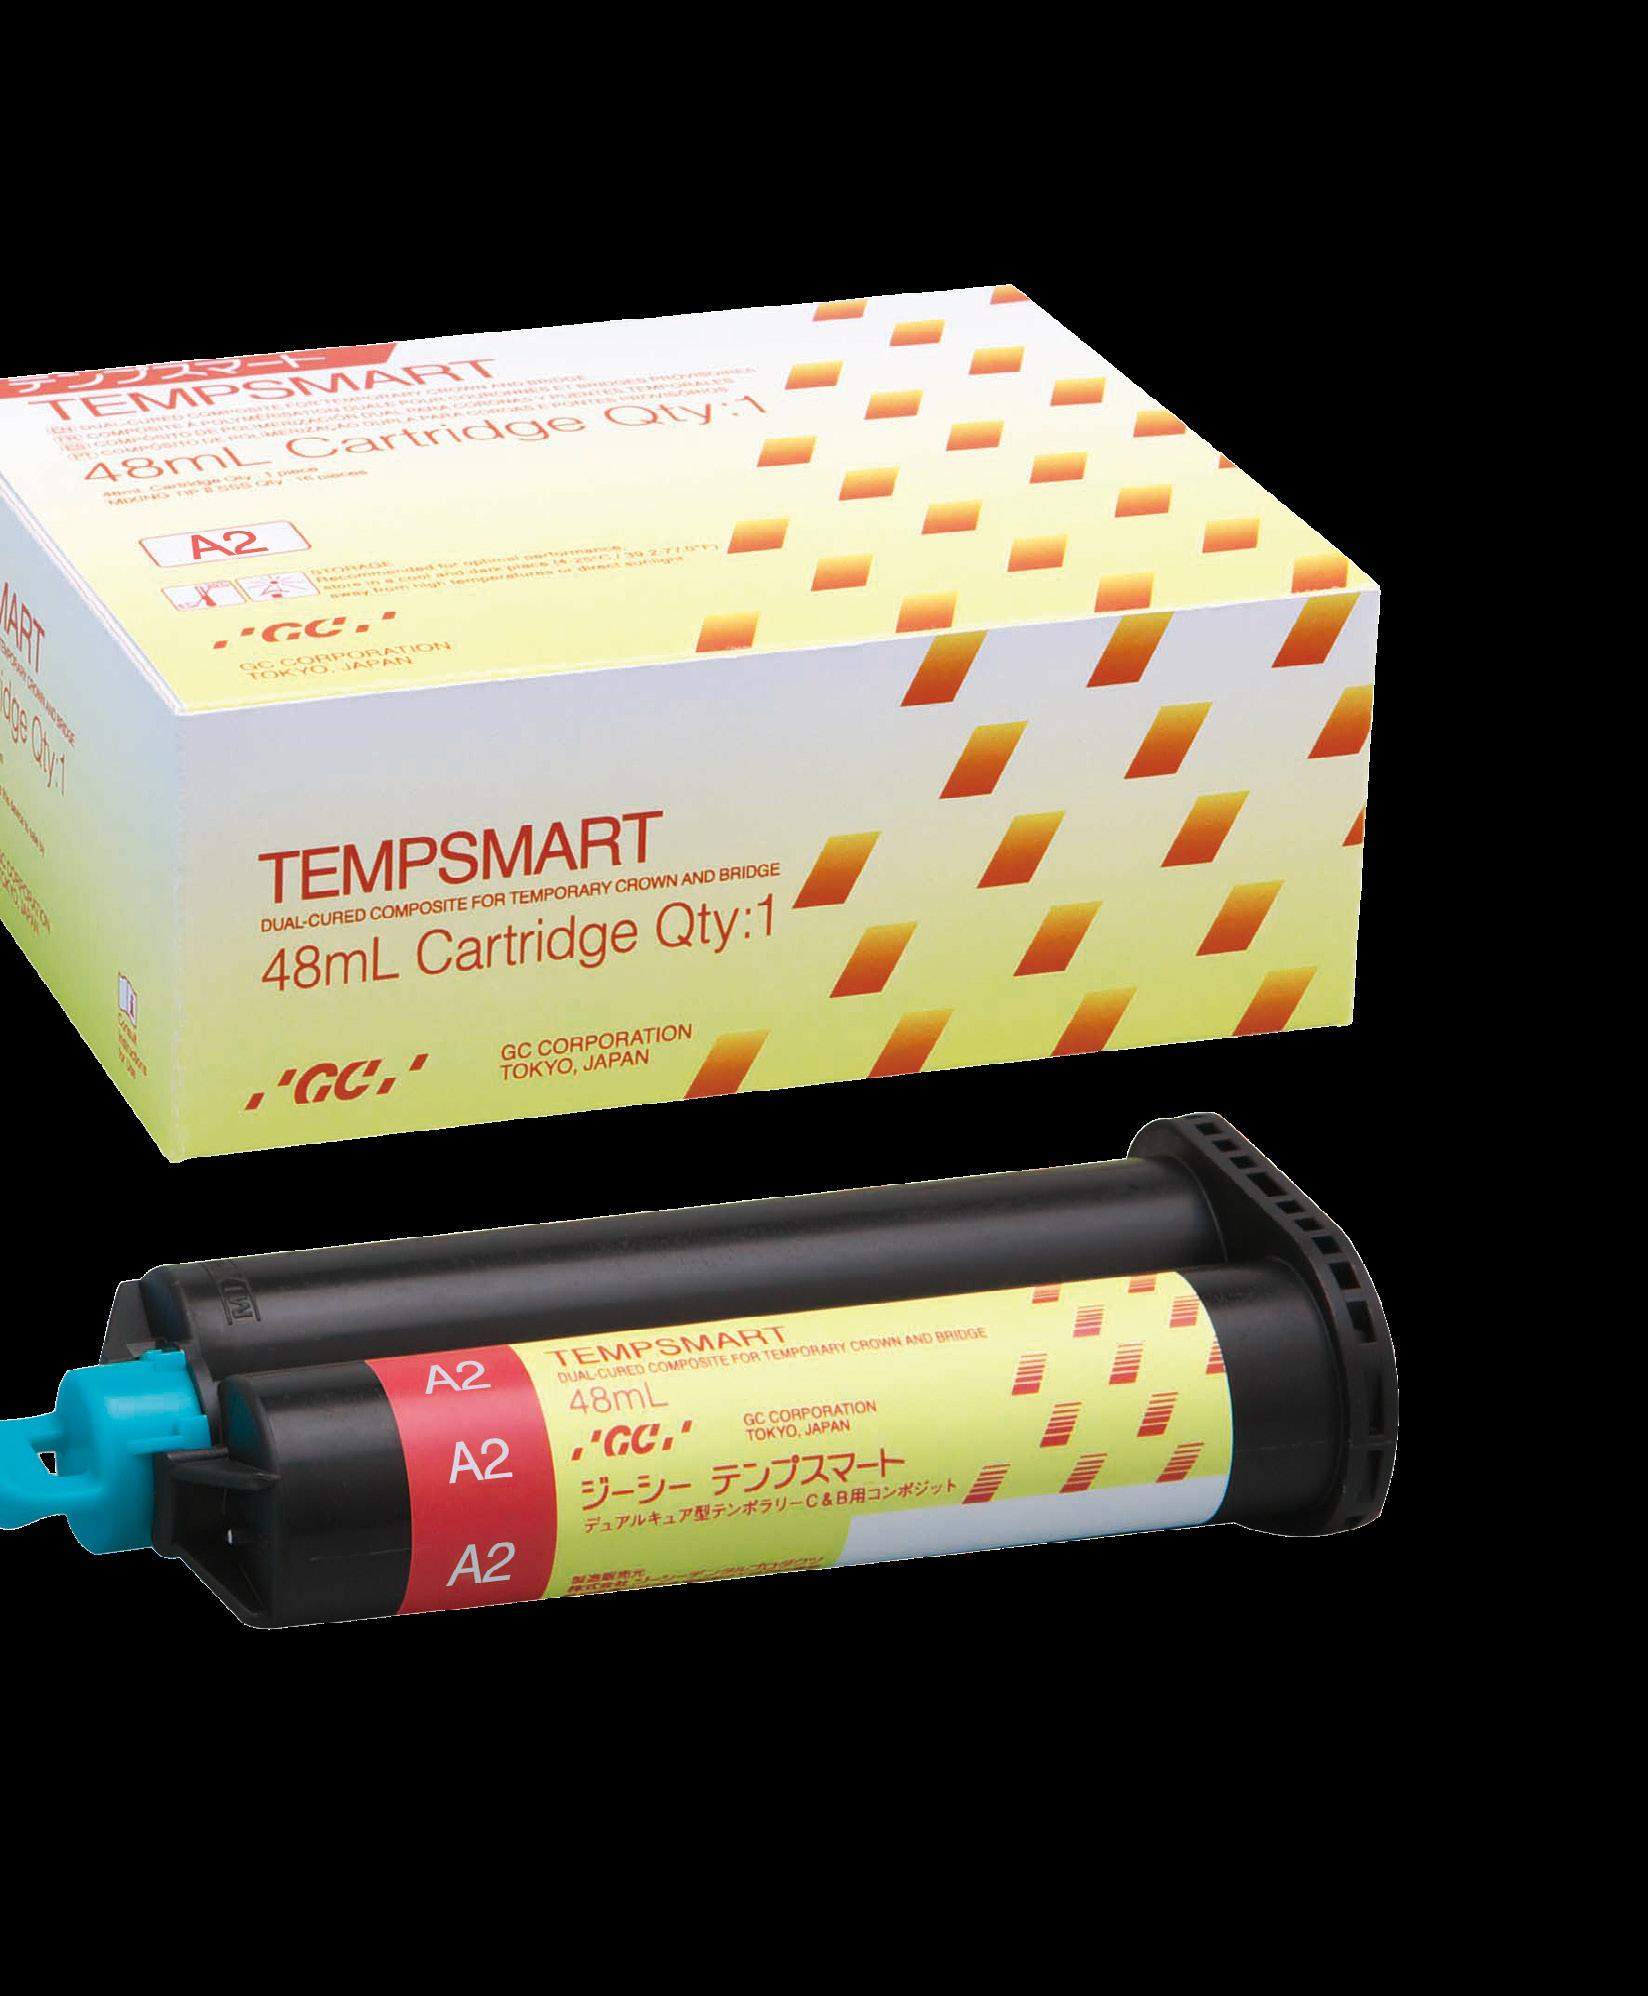
bis-acrylic composite material that sets a new benchmark in universal temporary restorations. Using a combination of nano and micro-filled resin technology provides effortless polishing to a high gloss finish, the resulting temporaries can be amazingly aesthetic, with a look and feel of natural tooth structure.
Strong and durable
will virtually eliminate the risk of broken temporaries. It’s significantly higher fracture toughness and flexural strength offer clinical longevity and make the ideal material for any single or multi-unit temporary restoration.
is dual-cured to allow adequate working time, yet rapid set, to give you the shortest overall chairside set time. A three-unit bridge can be completed in just 3 minutes.
Smart
Innovation in polymerisation initiation and filler technology provides restorations that are non-sticky for ease of handling and require minimal polishing with high gloss retention. TEMPSMART® maintains a smooth surface after polishing, reflecting natural tooth structure and fluorescence.
TEMPSMART®
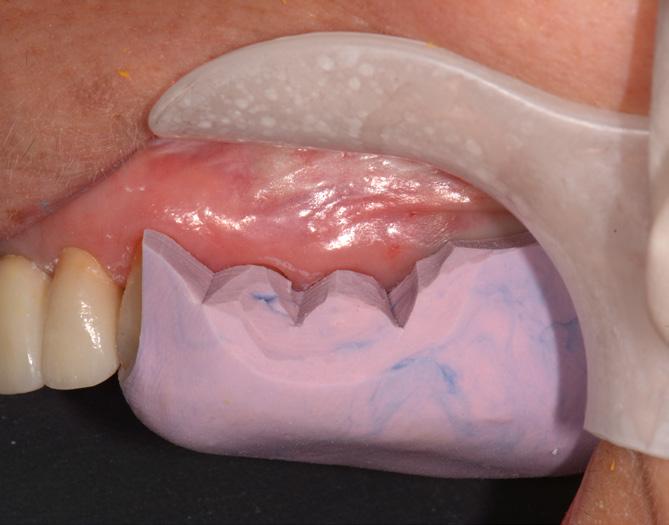
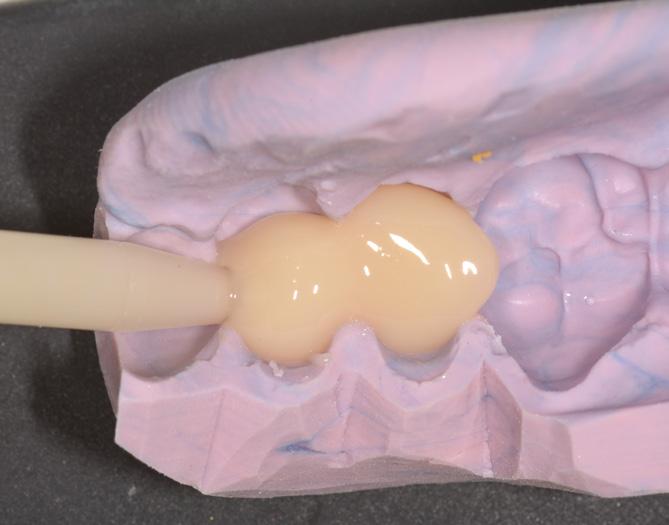
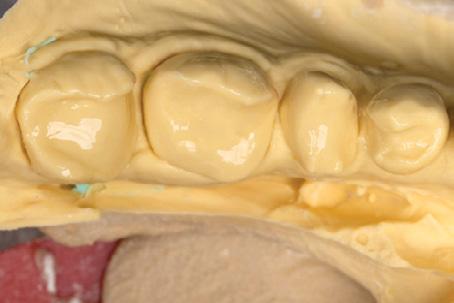
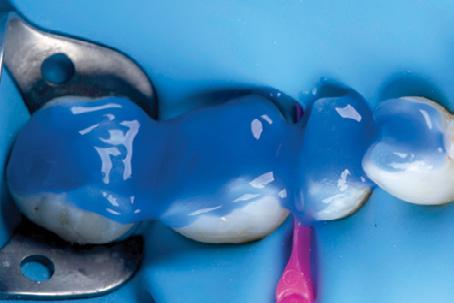
3. After bleeding the cartridge, inject TEMPSMART® into the impression.

Seat the impression within 45 secs. of start of
5. Remove impression 2’00”-2’30” after start of mix. Remove any residual material at this time.
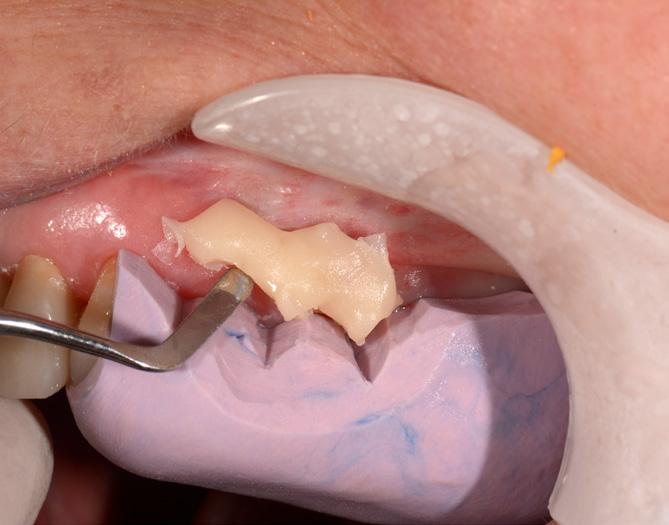
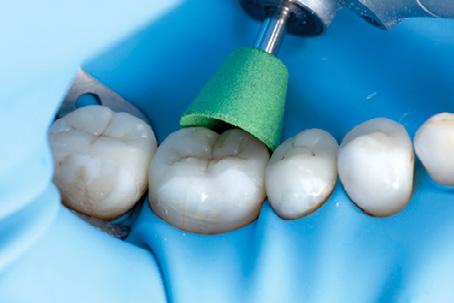
8. Finish with silicon points and polish using a goat’s hair wheel. Alternatively, apply OPTIGLAZE colour.

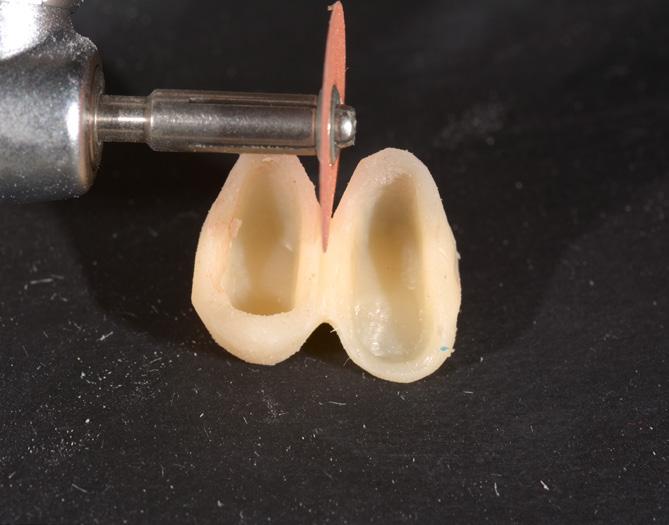
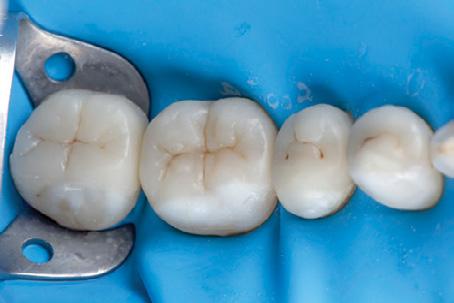
6. Once removed from the mouth, complete polymerisation by light-cure for 5 secs. per tooth
Fuji
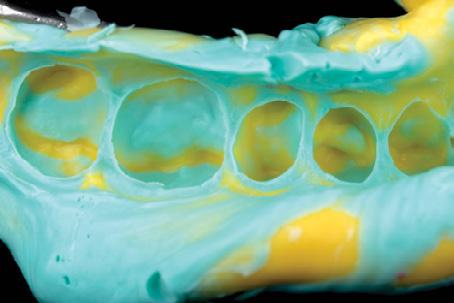
1. Take a putty impression before preparation of the abutment teeth.
4.
mix.
7. Trim excess material.
2. Preparation of abutment teeth. Apply a separating medium.
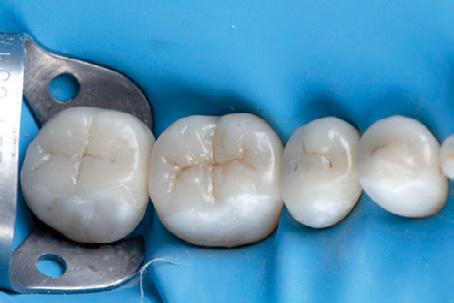
9. Cement temporary using
TEMP LT or FREEGENOL temporary cement.
View Brochure
View Product
Images courtesy of Dr Chee Chang
Clinical Guide


DR. GUSTAVO PASSARELLI PETRIS
Professor Gustavo Passarelli Petris holds a Master of Science (MSc) in Clinical Dentistry from the University of Passo Fundo in Passo Fundo, Brazil. Dr. Petris runs a private practice in Paraná, Brazil, is an international lecturer and speaker, and is a member of the Operato KOL teaching team.
Occlusal

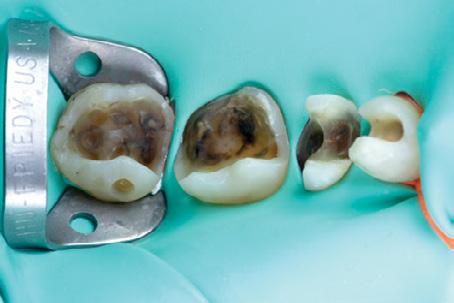
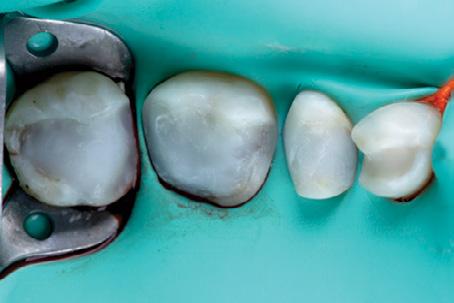
Initial situation. Removal of restorations with rubber dam isolation.
IDS (Immediate Dentin Sealing) and resin coating followed by margin management. Sandblast with aluminum oxide.
Luting with low viscosity condensable composite resin.
Ultra-Etch™ 35% phosphoric acid etchant was used with the total-etch method.
Indirect composite restorations dry fit.
Silane applied as union agent.
TRULY AN AMALGAM ALTERNATIVE
WHAT IS STELA?
AN “AMALGAM ALTERNATIVE” IS A BOLD CLAIM. IS IT TRUE?
WHAT IS STELA?
SNAPSET STRENGTH IN MINUTES
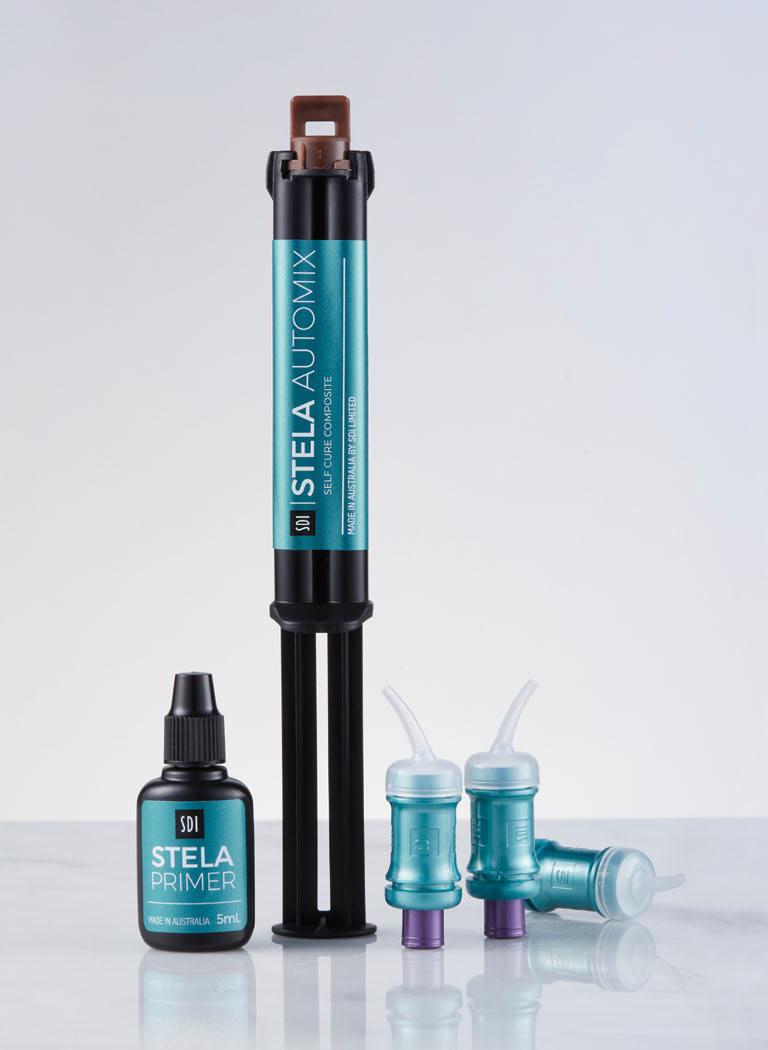
Stela – Truly an Amalgam Alternative
What is Stela?
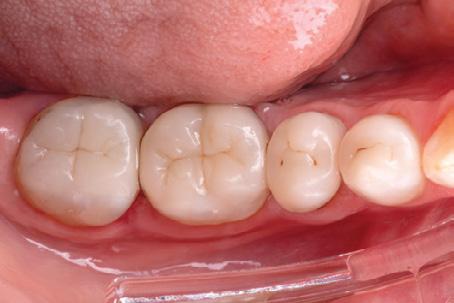
Many products claim to be an amalgam alternative, but fail comparisons based on strength, marginal sealing and depth of cure. Stela has been formulated specifically as a restorative that can be used as an amalgam alternative, with the advantage of having a lifelike aesthetic result in a cavity without mechanical retentions. Stela is available in a universal shade that blends to surrounding tooth areas with a chameleon effect
Stela is an innovative high-performance self-cure composite. Stela offers an unlimited depth of cure and low-stress polymerisation with a gap-free interface. There is no need to acid etch or light cure.
Stela achieves its ground-breaking properties through a tailored combination of BPA-free resin monomers, optimised ionglass™ fillers (SDI’s bioactive proprietary hybrid glass), and specially surface-modified amorphous silica. Stela’s outstanding mechanical properties come from a rapid curing reaction. The Stela monomers form polymeric chains and, simultaneously, these chains are rapidly and densely cross-linked to each other, forming a complex web that strongly binds the ionglass™ filler and the amorphous silica, resulting in a strong and resilient restorative material.
The Stela snap set fast cure is due to an innovative hydroperoxide-based initiation system that is free of tertiary amine. This ensures fast-setting characteristics, good colour stability and an excellent conversion rate.
Once cured, Stela’s matrix delivers consistent and reliable strength and durability for all restorations
The simple two step process minimises operator errors and patient sensitivity with no etch or curing lights required. Stela is the solution for all your clinical needs.
Restoratives harden over time until they reach their final strength. Stela is formulated to reach a high strength as quickly as possible, allowing finishing and polishing in just 4 minutes. After this initial set, Stela becomes a strong composite that easily exceeds the properties of alternatives. While amalgam achieves only 37% of its final strength in 60 minutes, Stela achieves 90% strength in the same 60 minute period.
Stela is an innovative high-performance self-cure composite. Stela offers an unlimited depth of cure and low-stress polymerisation with a gap-free interface. There is no need to acid etch or light cure.
Stela achieves its ground-breaking properties through a tailored combination of BPA-free resin monomers, optimised ionglass™ fillers (SDI’s bioactive proprietary hybrid glass), and specially surface-modified amorphous silica. Stela’s outstanding mechanical properties come from a rapid curing reaction. The Stela monomers form polymeric chains and, simultaneously, these chains are rapidly and densely cross-linked to each other, forming a complex web that strongly binds the ionglass™ filler and the amorphous silica, resulting in a strong and resilient restorative material.
INDICATIONS
The Stela snap set fast cure is due to an innovative hydroperoxide-based initiation system that is free of tertiary amine. This ensures fast-setting characteristics, good colour stability and an excellent conversion rate. Once cured, Stela’s matrix delivers consistent and reliable strength and durability for all restorations
Stela’s snapset strength reduces premature failures during the critical first 24 hour period, decreasing patient returns and re-work.
The simple two step process minimises operator errors and patient sensitivity with no etch or curing lights required. Stela is the solution for all your clinical needs.
Stela is an innovative high-performance self-cure composite. Stela offers an unlimited depth of cure and low-stress polymerisation with a gap-free interface. There is no need to acid etch or light cure. Stela achieves its ground-breaking properties through a tailored combination of BPA-free resin monomers, optimised ionglass™ fillers (SDI’s bioactive proprietary hybrid glass), and specially surfacemodified amorphous silica. Stela’s outstanding mechanical properties come from a rapid curing reaction. The Stela monomers form polymeric chains and, simultaneously, these chains are rapidly and densely cross-linked to each other, forming a complex web that strongly binds the ionglass™ filler and the amorphous silica, resulting in a strong and resilient restorative material. The Stela snap set fast cure is due to an innovative hydroperoxide-based initiation system that is free of tertiary amine. This ensures fast-setting characteristics, good colour stability and an excellent conversion rate. Once cured, Stela’s matrix delivers consistent and reliable strength and durability for all restorations. The simple two step process minimises operator errors and patient sensitivity with no etch or curing lights required. Stela is the solution for all your clinical needs. Stela is available in two delivery systems: Stela Capsule and Stela Automix syringe.
Stela is available in two delivery systems: Stela Capsule and Stela Automix syringe.
Stela also offers great value. One capsule of Stela has more volume than a 3-spill amalgam capsule, which is enough for large restorations.
Stela is available in two delivery systems: Stela Capsule and Stela Automix syringe. STEP 2 STELA CAPSULE
JEFFERY CHEETHAM, SDI CHAIRMAN AND FOUNDER
Receiver of the Medal of the Order of Australia (OAM), awarded for service worthy of particular recognition

» SDI founder Jeff Cheetham has manufactured more amalgam products than almost anyone else in the world. According to Jeff “Amalgam is so strong and easy to place. No etching, no layering, no light cure. That is the basis of Stela. The world is rapidly moving away from amalgam and that is why we mobilised our 50 years of amalgam knowledge behind developing Stela. Stela truly is the new amalgam alternative.” «

COMPARISON TO AMALGAM
Comparison to Amalgam
Mercury
Depth of cure
Aesthetics
Radiopacity
Dispensing
Working time
Snapset strength
AMALGAM

STELA
Tooth preparation Retentive cavity Cavity without mechanical retentions
Capsule or Automix syringe
Finishing and polishing
Up to 10 min 15 sec (condensing and carving)
90% strength after 24 hours
Requires a second appointment
≥ 1 min 30 sec (inserting into the cavity)
90% strength after 60 minutes
Within same appointment
Unlimited Bulk Fill With Certainty
Composite restorations fail for a variety of reasons, including uncured material in deep areas, which may cause sensitivity. Stela will self-cure at all depths, thereby eliminating any curing uncertainty.
Fewer Steps, Fewer Failures
Stela Primer revolutionises the etch, prime and bond system, while delivering a better bond strength. While other etch, prime and bond systems require up to 7 steps and 90-120 seconds to complete, the Stela Primer system is complete in only two steps and 15 seconds. Fewer steps means fewer opportunities for errors and longer lasting restorations. Reduce your in-chair time and eliminate potential technique sensitivity with the simplified Stela technique.
An “Amalgam Alternative” Is A Bold Claim. Is It True?
Many products claim to be an amalgam alternative, but fail comparisons based on strength, marginal sealing and depth of cure. Stela has been formulated specifically as
a restorative that can be used as an amalgam alternative, with the advantage of having a lifelike aesthetic result in a cavity without mechanical retentions. Stela is available in a universal shade that blends to surrounding tooth areas with a chameleon effect.
Snapset Strength In Minutes
Restoratives harden over time until they reach their final strength. Stela is formulated to reach a high strength as quickly as possible, allowing finishing and polishing in just 4 minutes. After this initial set, Stela becomes a strong composite that easily exceeds the properties of alternatives. While amalgam achieves only 37% of its final strength in 60 minutes, Stela achieves 90% strength in the same 60 minute period. Stela’s snapset strength reduces premature failures during the critical first 24 hour period, decreasing patient returns and re-work. Stela also offers great value. One capsule of Stela has more volume than a 3-spill amalgam capsule, which is enough for large restorations.
Testimonials
“I used Stela with different protocols, including directly, without pulp protection and it did not cause sensitivity. Thank you, SDI, for sharing these wonderful developments in our profession!”

Prof Dr Gonzalo Arana Gordilo
Professor in multiple Colombian universities International Lecturer in Biomaterials and Dental Aesthetics
“The application of Stela is very easy and after 4 minutes the restoration had the same shade as the tooth. Great polishability! Perfect product!”

Prof Dr Rocio Lazo
Professor of the Specialization Program in Paediatric Dentistry at the Scientific University of the South - Lima - Peru
Co-author of three books on Paediatric Dentistry and several research papers
Effective Solution For A Defective Amalgam Restoration
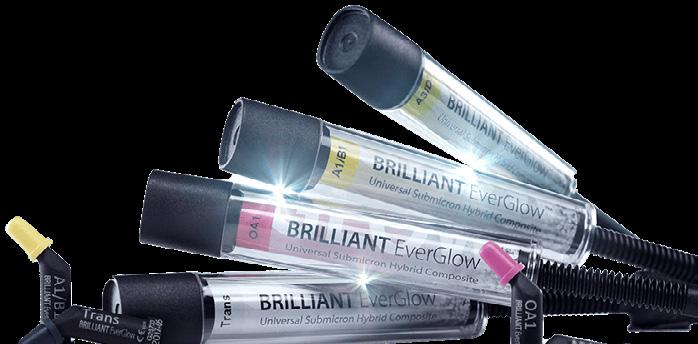
Brilliant Everglow Composite
Introduction
Dental amalgam has been used for the restoration of Class I and Class II cavities for many years. However, concerns about its lack of aesthetics, health and environmental issues have led to an increase in demand for tooth coloured restorations in the posterior region. Resin composite offers the opportunity for clinicians to provide both aesthetic and conservative restorations that are sealed to the underlying tooth. This case demonstrates the replacement of a defective amalgam restoration using BRILLIANT EverGlow (COLTENE), which is a universal submicron hybrid composite that can be used for both anterior and posterior restorations.
Patient presentation
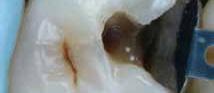
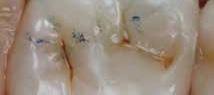
In this case, a 44-year-old male presented with persistent temperature sensitivity localised to the upper left first molar (Fig. 1). The patient had previously expressed interest in replacing the existing amalgam filling that was over 20 years old for a new tooth coloured alternative.
Examination and diagnosis
Following investigation the tooth was hypersensitive to sensibility testing particularly around the occlusal margins of the restoration. Fracture testing proved to be negative and no irreversible pulp problems were detected. Radiographs revealed some areas of cervical burnout but no significant bone loss or strong evidence of caries. A provisional diagnosis was made as marginal microleakage from the existing amalgam restoration +/- underlying secondary caries.
Treatment plan
Due to the symptoms it was agreed to remove the previous restoration to explore for cracks and remove any caries. A definitive direct composite replacement was planned to restore the tooth to full functionality and meet the patient’s aesthetic expectations. Prior to isolation, a shade selection (A2/B2) was made using the combined kit shade guide. It uses a simplified shade system with seven body shade groupings making single shade restorations very simplistic, which is ideal for posterior restorations. The inclusion of selective translucent and opaque shades allows for creative colour correction or incisal effects, which are particularly useful for anterior restorations.
Treatment protocol
Following anaesthesia, the upper left quadrant was isolated using a rubber dam. Meticulous isolation is required to facilitate contaminant free bonding and reduce the likelihood of microleakage. Once achieved it can make restoration placement less stressful by producing a very clean and tidy working field. Removal of the restoration revealed no underlying cracks and areas of secondary caries were fully removed until hard dentine was reached.
Fig 1:
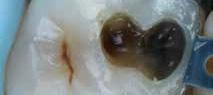
Cavity prep and sectional matrix
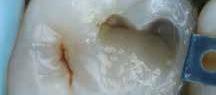
Fig 3: First incremental cuspal build up
Fig 2:
Construction of proximal wall
Fig 4:
Sculpting tip wetted with ochre tint

A sectional matrix was used to best rebuild the proximal wall (Fig. 2). Enamel was selectively etched using 37.5% phosphoric acid (Etchant Gel S, COLTENE) then fully rinsed and dried. A universal one step bonding resin (ONE COAT 7 UNIVERSAL, COLTENE) was applied to both enamel and dentine using a microbrush in a scrubbing motion for two periods of 20 seconds followed by light air dispersion using a three-in-one syringe.
The first stage of restoration involved transforming the Class II cavity to a Class I by directly building up the proximal wall (Fig. 3). This increment was adapted to the cavity floor and matrix foil using a microbrush. The firm yet pliable consistency of BRILLIANT EverGlow allows efficient packing of the material with minimal pull back. The base of the proximal box was then filled using smaller 2mm increments until it reached cavity floor level. A 20 second cure between each increment was completed using a high power LED curing light (Coltolux, COLTENE).
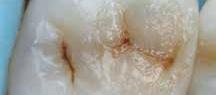
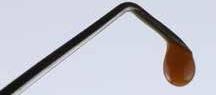
The adapted cavity was then restored using individual cuspal increments to recreate each incline (Fig. 4). The material was injected into the chosen cavity wall with firm and steady pressure to ensure full adaptation to the cavity walls. A technique called point sculpting was then employed. This involved dipping a fine tipped probe into a light brown tint (Paint on Colour, COLTENE, Fig. 5). The probe was then used to sculpt the fissures directly, the tint helping to lightly colour the fissures whilst simultaneously acting as a wetting resin when removing excess. Once the shape of the cusp was satisfactory, a microbush was then used to adapt the composite to the peripheral margins to create a more seamless junction. The cuspal increment was then cured.
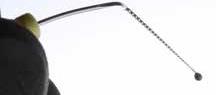
The same process was then repeated for the remaining cusps. To reproduce the more saturated and finer fissure stains, a dark brown tint was applied using an endodontic file (Fig. 6) at two points where the fissure patterns adjoin one another. This was then gently brushed using a microbrush to remove excess until a good saturation was achieved. Following the final cure, the matrix band was fully removed and the restoration cured from each side for 40 seconds. Excess resin was removed using an excavator and white Arkansas stone in a slow handpiece. Following rubber dam removal, occlusion was checked and adjusted using an Arkansas stone in a fast handpiece.
Finishing
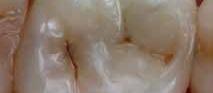
A very simple polishing protocol was employed using the DIATECH ShapeGuard Composite Polishing Kit (COLTENE). The cup was first used to broadly polish the cuspal surfaces followed by the pointed cone, which was used to more finely polish towards the fissures. The polishing wheel was then used in a light feathering motion to produce a very generous final lustre over the entire restoration (Fig. 7), and was particularly useful in reaching the proximal areas. Final occlusal checks were performed (Fig. 8) to ensure a comfortable bite for the patient that also conformed to maximum intercuspation. Shimstock holds on adjacent teeth were verified to those noted preoperatively.
ExaFinal appraisal
BRILLIANT EverGlow proved to be a very pleasant material to use and handled very well to help produce a truly anatomical restoration that not only integrated well but also fully resolved the patient’s initial symptoms. The unique shade system allows for simple and efficient restoration of posterior teeth and avoids the need to stock numerous different shades. Inclusion of glass filler particles that have been reduced to below one micron allows for excellent polishability, especially when used with the ShapeGuard Composite Polishing Kit. This feature along with the choice of additional opaque, translucent and bleach shades would also make BRILLIANT EverGlow an excellent choice for aesthetic anterior restorations.
Dr. Minesh Patel BDS Hons, MSc, MFGDP (RCS

Fig 5: K-file used to apply dark brown tint
Fig 7: Finishing and polishing completed
Fig 6: Cuspal build up and tints completed
Fig 8: Final occlusal checks performed

Choosing Composite Shades in Restorative Dentistry: A Practical Guide
Author:
Dr. Paulo Monteiro, Dr. Giuseppe Chiodera, Style Italiano.
Co-authors:
Dr. Walter Devoto, Prof. Angelo Putignano, Dr. Jordi Manauta, Dr. Marcin Krupinski, Dr. Carlos Fernadez Villares, Dr. Bianca Varvara
Composite resin materials have become indispensable in modern restorative dentistry due to their aesthetic qualities, durability, and versatility. However, selecting the appropriate shade of composite for each clinical case is crucial for achieving optimal aesthetic outcomes. While single shade composites have evolved to offer remarkable colour adaptation properties, multi/dual shade systems continue to provide versatility and precision in mimicking natural tooth colours. This article aims to provide dentists with practical guidance on when to use multi/dual composite shades versus single shade composites, along with important considerations to enhance decision-making in clinical practice.
Understanding Composite Shade Selection
Composite shades are typically classified as single shade/ opacity or multi/dual shades/opacities. Single shade composites offer simplicity in application, as they provide a uniform colour throughout the restoration. Single shade composites have undergone significant advancements in recent years, owing to innovations in material technology and formulation. Today’s single shade composites boast enhanced colour adaptation properties, allowing for seamless blending with surrounding dentition. These materials exhibit improved opacity, translucency, and fluorescence, mimicking the optical characteristics of natural teeth with remarkable precision. On the other hand, multi/dual composite shades consist of two or more components designed to mimic the natural variations in tooth colour, providing a lifelike appearance.
Harnessing the Versatility of Multi/Dual Composite Shades
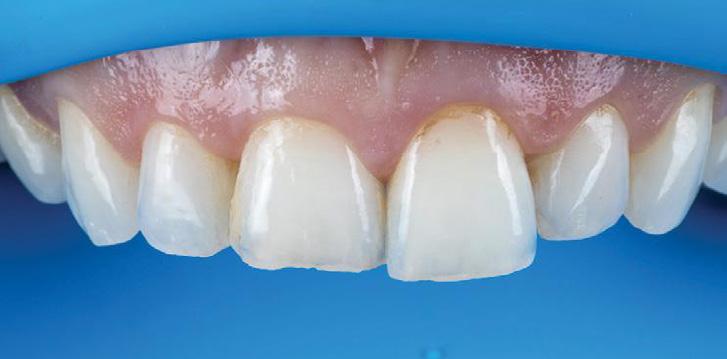
For young patients with rich details and translucence in their natural teeth, opting for multi/dual composite shades becomes more advantageous. Multi/dual composite shades excel in replicating the intricate nuances of natural tooth colour and opacities, making them indispensable in achieving precise colour matching and blending in anterior restorations and cases involving complex colour variations. Specifically, they are beneficial in cases requiring seamless transitions between different tooth structures like incisal edges, incisal translucence, dentine effects, and inter-proximal areas.
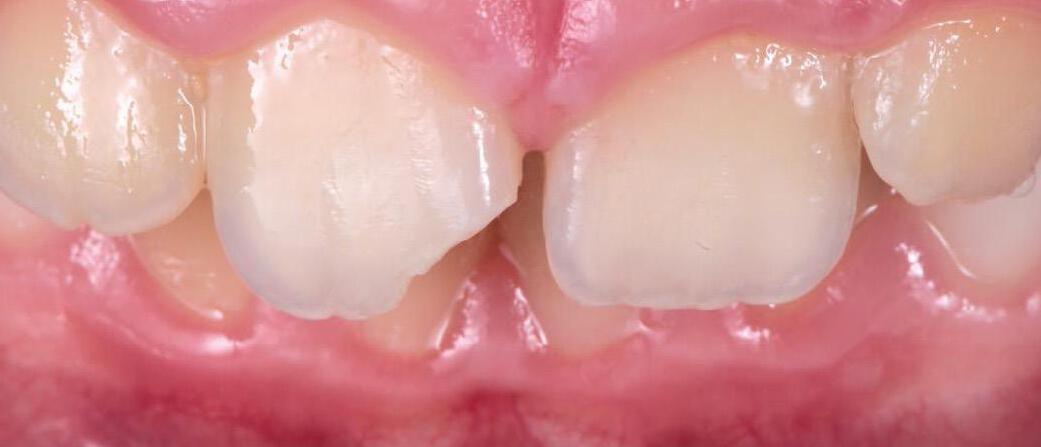
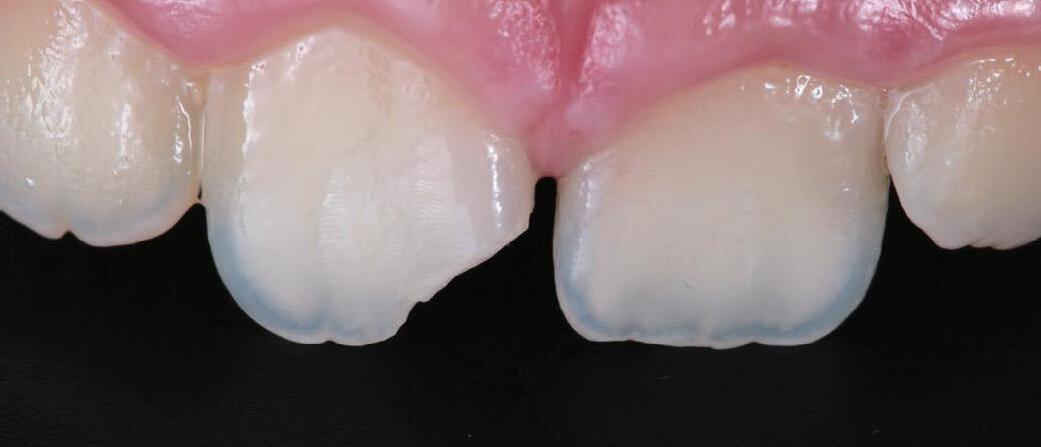
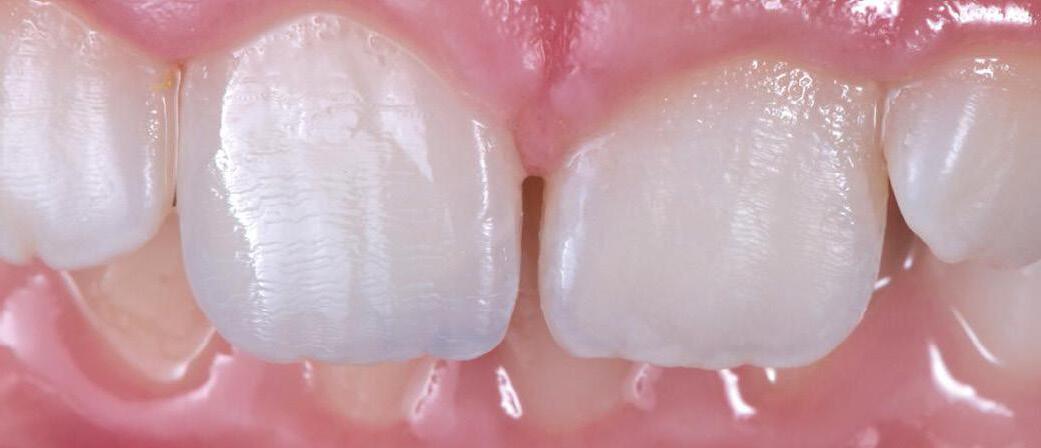
Fig. 1 & 2 - Example of a young patient with rich details and translucence in their natural teeth and need for a dual layer composite restoration.
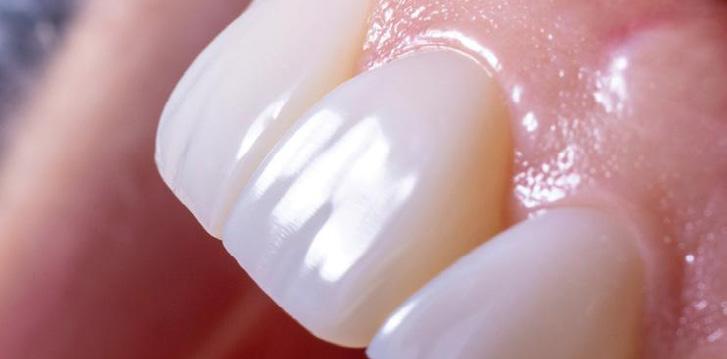
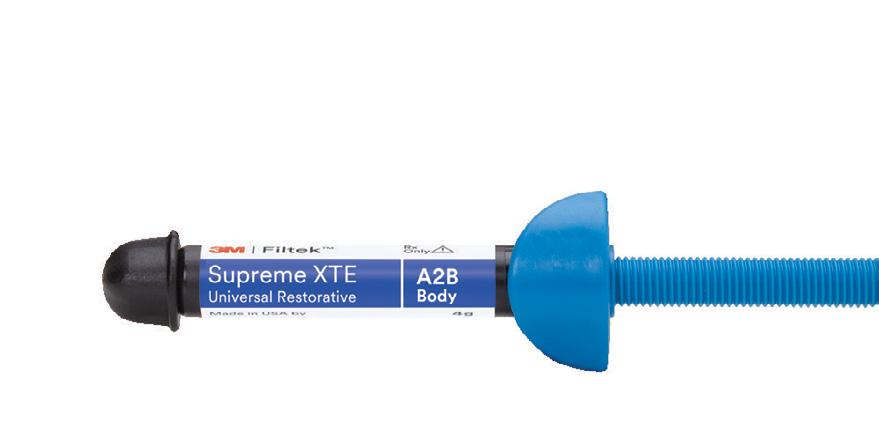
Fig. 3 - Same patient after the dual shade composite restoration with the natural translucence details done with 3M™ Filtek™ Supreme XTE Universal Restorative dentine, enamel and translucent shades.
When to Prefer Multi/Dual Composite Shades
• In anterior restorations where high aesthetics are paramount, multi/dual composite shades allow for precise colour matching and blending with adjacent natural teeth.
• Cases involving multiple shades and translucencies, such as incisal edges or incisal dentine effects, benefit from the versatility of multi/dual composite shades.
• For patients with high aesthetic expectations, particularly in visible areas of the smile, multi/ dual shades enable the dentist to achieve seamless integration with surrounding dentition.
Embracing Single Shade Composites
While advancements in single shade composites have rendered them more efficient and predictable for certain cases, it’s important to underline that adults naturally lose enamel and translucency over time. This natural process makes single shade composites preferable for cases where colour matching is less critical, such as straightforward anterior restorations or in posterior teeth. These materials now feature improved colour stability, opacity, and fluorescence, enabling seamless integration with natural dentition. These materials offer simplicity in application and good aesthetic outcomes.

When to Use Single Shade Composites
• For anterior restorations where colour matching is less critical, single shade composites offer efficiency and predictability.
• In adults that naturally lose enamel and translucency over time.
• In posterior teeth, where aesthetic demands are lower compared to anterior teeth, single shade composites can often suffice.
• When patient/clinic budget constraints are a concern, single shade composites offer a cost-effective solution without compromising durability.
Key Considerations for Dentists
Dentists should carefully evaluate the aesthetic demands and complexity of each case to determine the most appropriate composite shade approach. Simple anterior restorations and posterior teeth may benefit from single shade composites, while complex anterior restorations and cases with extensive colour variations may necessitate multi/dual shade systems. Engaging patients in the shade selection process and understanding their aesthetic preferences are critical. Dentists should communicate the advantages and limitations of both single shade and multi/dual options, empowering patients to make informed decisions aligned with their goals.
Staying abreast of the latest advancements in composite technology and mastering shade matching techniques are essential for delivering superior clinical outcomes. Dentists should invest in ongoing education and hands-on training to refine their skills and enhance their proficiency in composite shade selection.
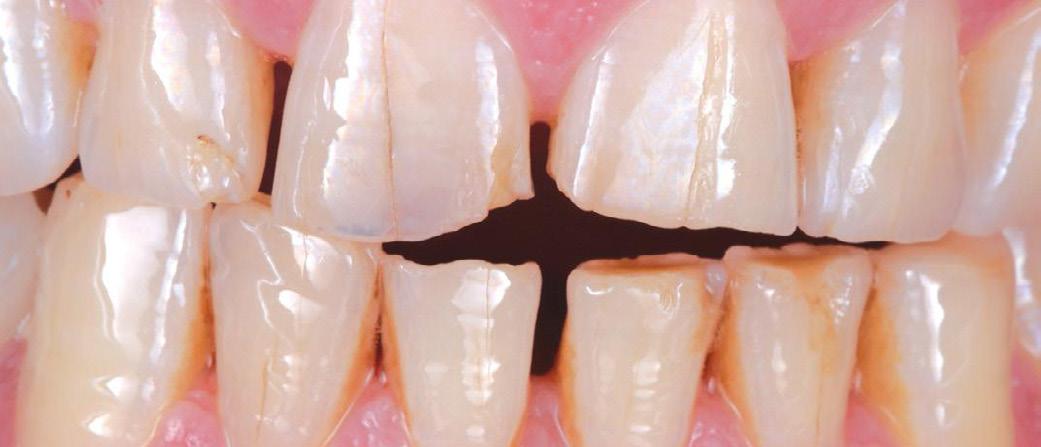
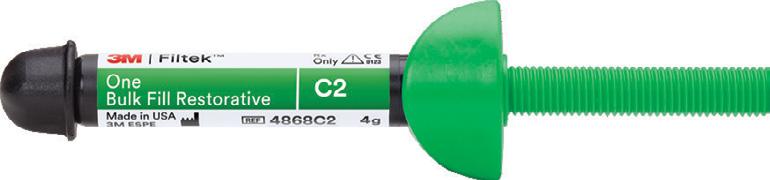
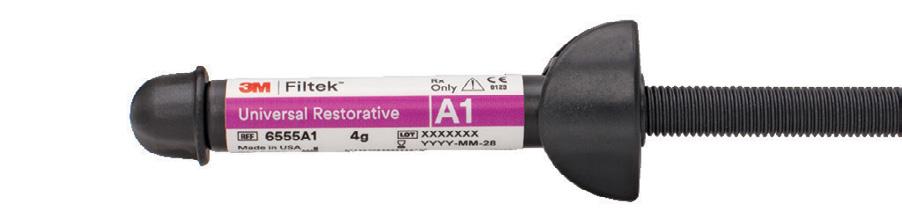
Fig. 4 & 5 - Example of an adult patient with losing of enamel and translucency over time, and after a single shade composite resin restorations done with 3M™ Filtek™ Universal Restorative.

6, 7, 8, 9, 10 &11 - Clinical case by Dr. Marcin Krupinski showing an adult patient with loss of enamel and translucency, that was restored in a fast and smart way with one single shade direct composite resin.
After the split rubber dam application, the new restoration’s shape was performed with the help of Unica matrix (Polydentia). After the adhesive system application, one single shade of 3M™ Filtek™ Universal Restorative was placed on the buccal surface in order to obtain the new shape and volume desired. After removing the Unica matrix, the shape and volume were corrected with 3M™ Sof-Lex™ Discs and Finishing Burs, smoothed with a 3M™ Sof-Lex™ Spiral Finishing and Polishing Wheel and finally a high shining polishing paste (Lucida™, DiaShine®) was used with a star felt to achieve a natural tooth like surface.
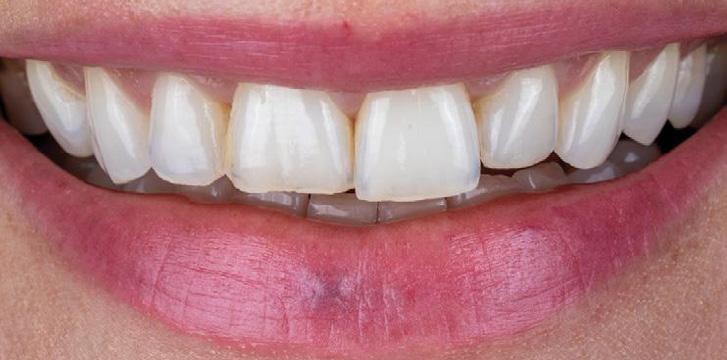
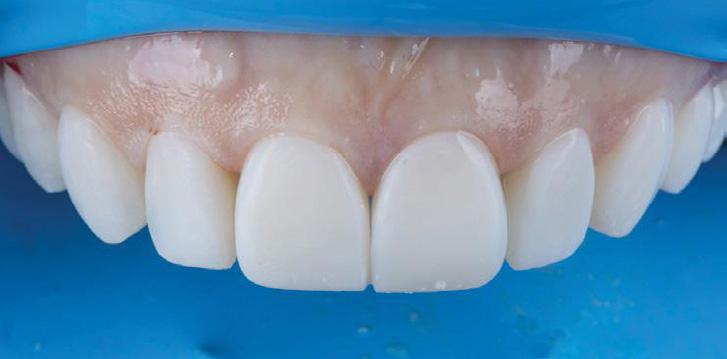
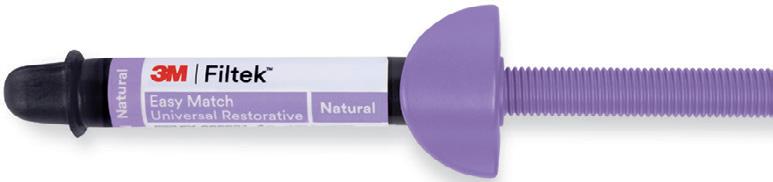
The Filtek Easy Match composite resin introduces an innovative single-shade system, designed to simplify the restorative process while maintaining exceptional aesthetic results. This system features intuitive colour selection and a remarkable chameleon effect, allowing it to blend seamlessly with multiple shades from the Vita Classical shade tab. By leveraging this shade-matching technology, the resin adapts to the natural tooth colour, covering a wide range of hues with just one material, reducing the need for multiple shades and simplifying inventory management. The ability of Filtek Easy Match to mimic surrounding tooth structures enhances both the efficiency and quality of anterior and posterior restorations, offering a user-friendly and aesthetically superior option for dental professionals.
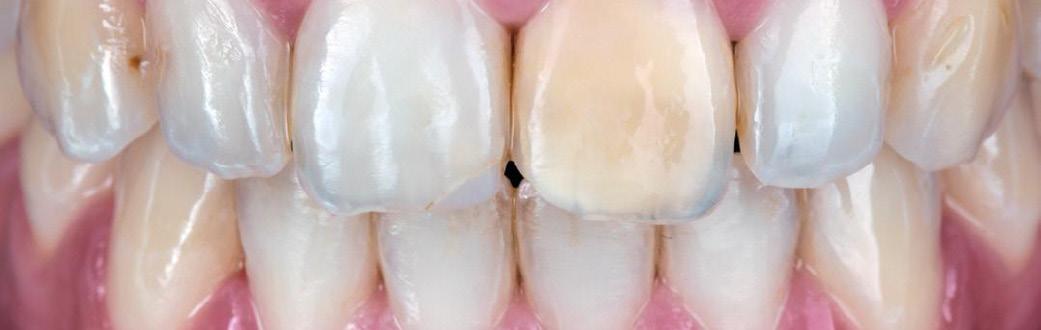
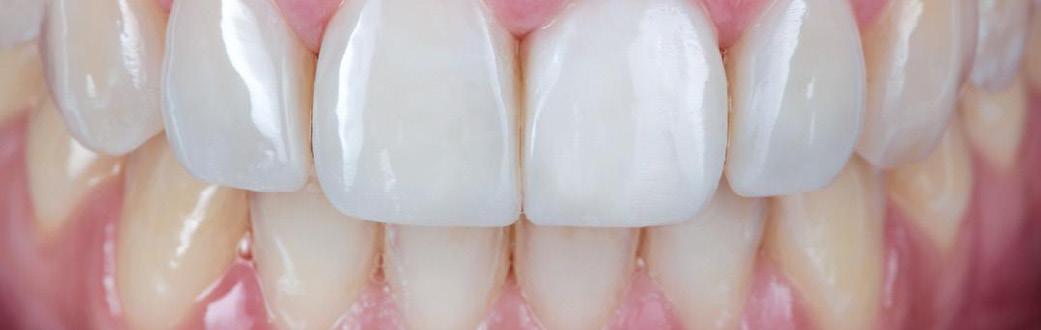
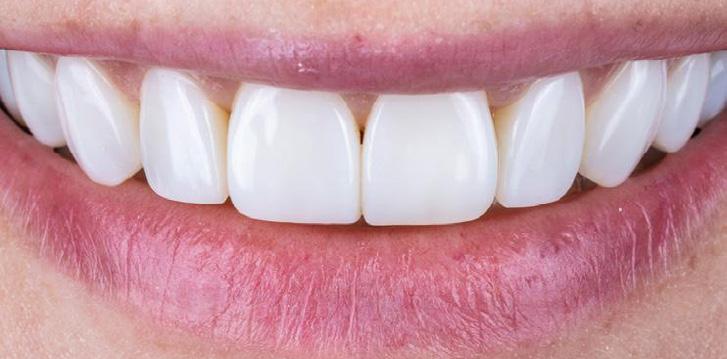
Fig 12 & 13 - Clinical case by Dr. Paulo Monteiro that exemplify the use of an innovative single shade composite system (Filtek Easy Match) in aesthetic anterior restorations. In this case six direct composite veneers were done with the Filtek Easy Match Bright shade, to increase the aesthetics and uniformise the smile. We can observe the natural integration of the restorations with the adjacent teeth and the soft tissues.
Conclusion
In the realm of restorative dentistry, the judicious selection of composite shades is a multifaceted decision influenced by various factors, including case complexity, patient preferences, and material advancements. Choosing the appropriate composite shade is a critical aspect of restorative dentistry that significantly influences the final aesthetic outcome. By understanding the indications for single shade versus multi/dual composite shades and considering important clinical considerations, dentists can consistently achieve superior aesthetic results for their patients. With careful planning and execution, composite restorations can seamlessly blend with natural dentition, restoring both function and beauty to the smile.
References
• Manauta J, Salat A. Layers: An Atlas of Composite Resin Stratification. Quintessence Publishing Co, 2012.
• Devoto W, Saracinelli M, Manauta J. Composite in everyday practice: How to choose the right material and simplify application techniques in the anterior teeth. Eur J Esthet Dent. 2010;5(1):102-124.
• Putignano A, Milledue M, Mangani F, Franceschini G, Cerutti A. Aesthetic restoration of non-carious cervical lesions: A 5-year clinical evaluation. Oper Dent. 2016;41(5):511-518.
• Drummond JL, Bapna MS, Static V, Steinberg AD. An atlas of composite restorative materials. Dent Clin North Am. 2007;51(2):359-394.
• Heintze SD, Rousson V. Clinical effectiveness of direct anterior restorationsa meta-analysis. Dent Mater. 2015;31(5):481-495.
• Ferracane JL. Resin composite--state of the art. Dent Mater. 2011;27(1):29-38.
• da Cunha LF, Pedroche LO, Gonzalez AH, Furuse AY. Resin-based composites in dentistry: the monomer systems. Eur J Dent. 2019;13(2):317-323.
• Yılmaz E, Tüfekçi E, Tuncer D, Gümüstas B, Bayrak S. Evaluation of different shade matching instruments and effect of disinfection on shade matching. Acta Odontol Scand. 2013;71(3-4):947-953.
• Hassel AJ, Johansen E, Joergensen KD, Heterogeneity in color stability and polymerization of light-cured resin composites. Acta Odontol Scand. 2015;73(7):532-538.
• Bora PA, Sharda N, Daing A, Snehil M. Aesthetic restorative materials: a review of existing and newer materials. J Dent Res Rev. 2016;3(2):52-58.
Fig.

Clinicians around the world choose 3M™ Filtek™ Dental Restoratives for their performance and handling, and for their ability to create natural-looking smiles.
Meet the new Family member, 3M™ Filtek™ Easy Match Universal Restorative: an intuitive 3-shade system featuring naturallyadaptive opacity. Built on the same TRUE nanotechnology behind the global success of Filtek Dental Restoratives, it offers brilliant polish retention, strength and wear resistance in both anterior and posterior restorations.
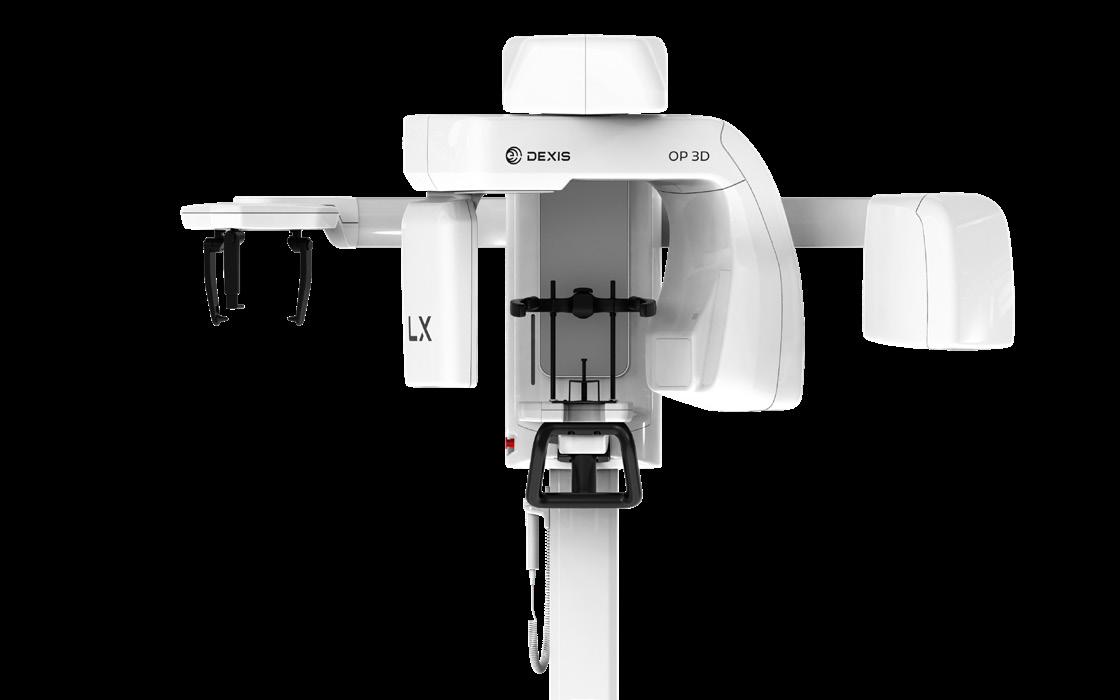
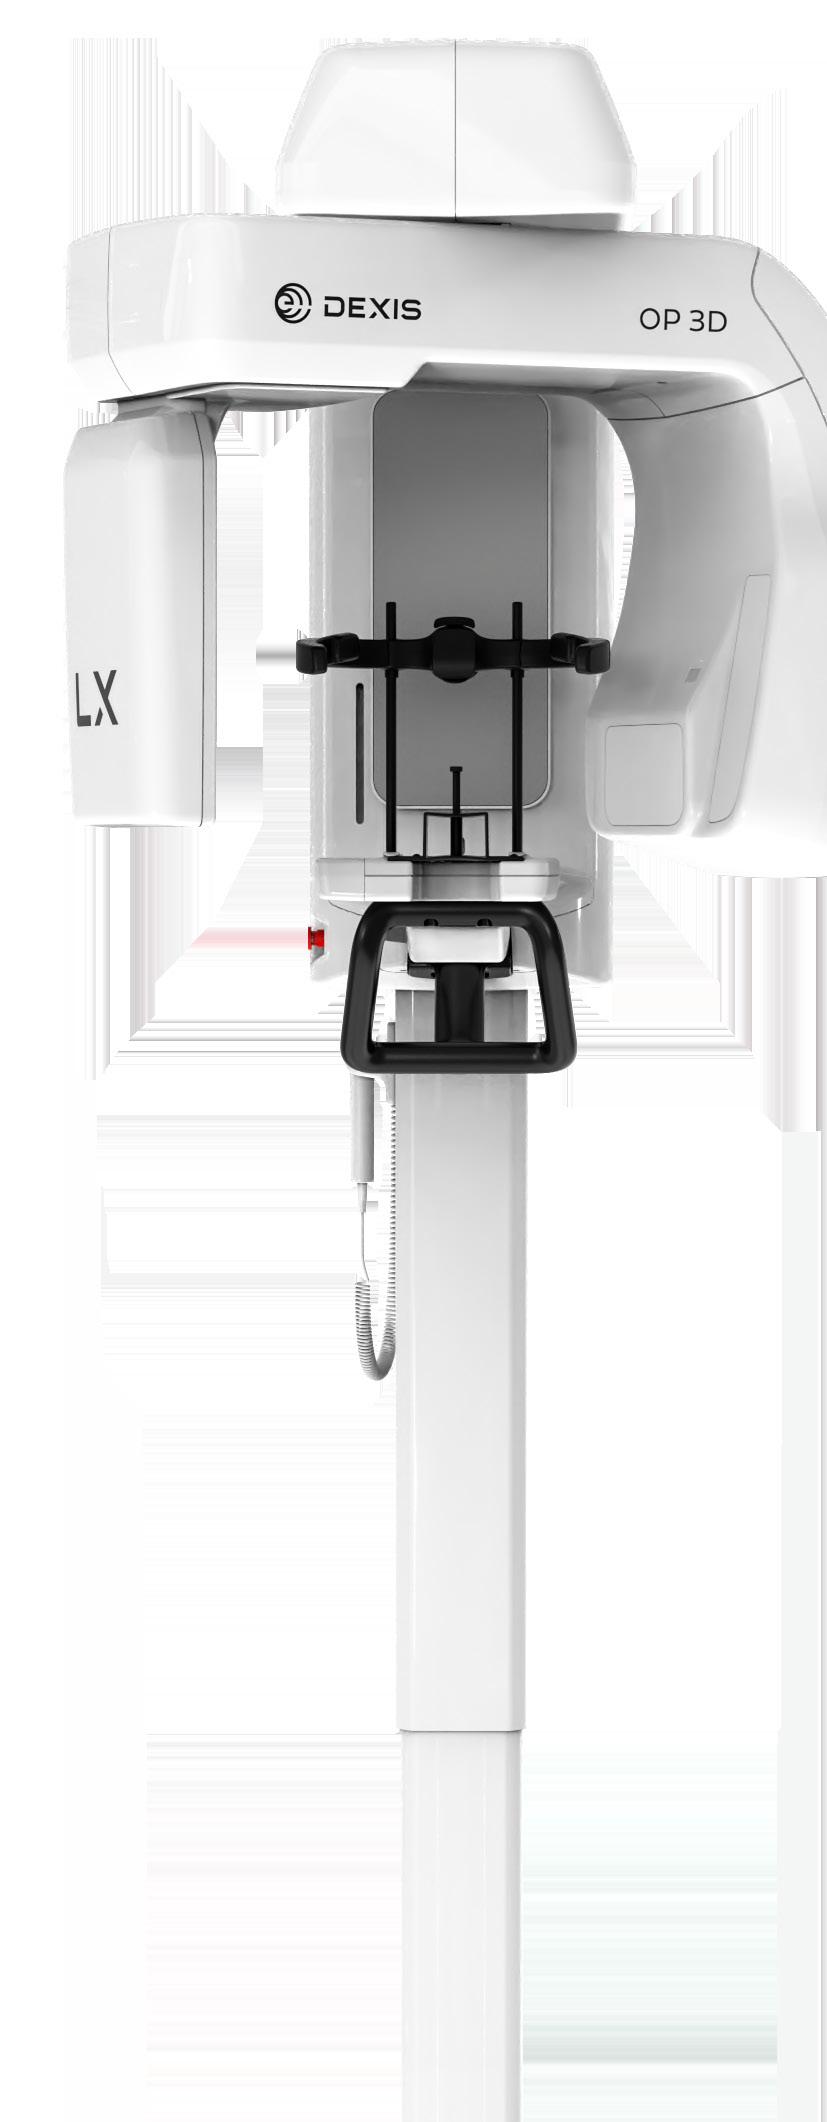
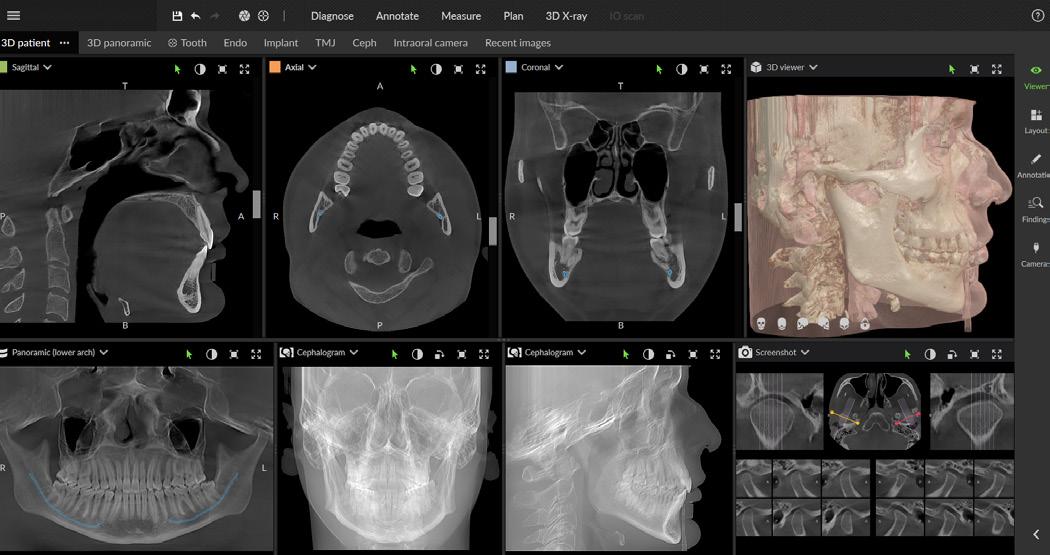
Harnessing the Power of 3D X-Ray Imaging
With an upgradable platform, the DEXIS ORTHOPANTOMOGRAPH OP 3D x-ray imaging system enables general and specialty dental practices to leverage state-of-the-art 2D and 3D images for greater diagnostics, case acceptance, and patient convenience.
3D imaging is opening up new possibilities in the quality of care delivered at dental practices nationwide. With this technology, dentists have access to clear, high-resolution scans that show a level of detail not possible with 2D systems, allowing for more accurate diagnoses and better treatment planning—ultimately elevating patient care.
3D technology is the gateway to perform in-house services such as implants, endodontics, orthodontics, airway analysis, and more, enabling the general practice to offer more procedures so that it can provide the best-possible patient experience.
The Complete X-Ray Platform
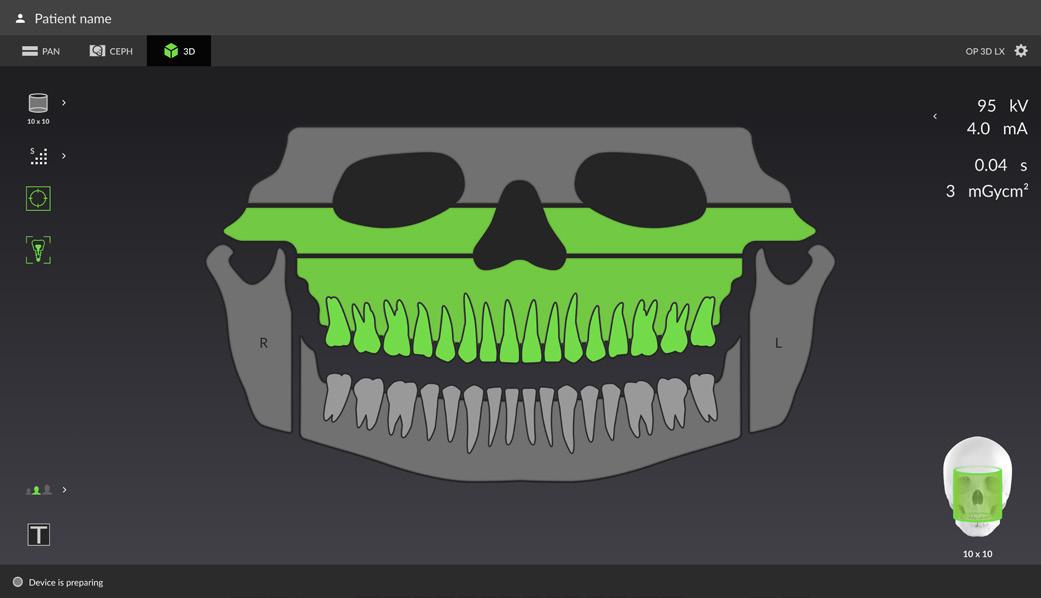
Designed for advanced imaging needs, the OP 3D features four resolutions for 3D (Low Dose Technology™, Standard, High, and Endo) and an edge-preserving noise reduction (EPNR) that softens soft-tissue noise patterns while retaining sharp edges, improved bitewing view, and a next-generation focusing technology that helps to ensure that the focal layer is aligned for each patient and their specific anatomy. These, along with the existing automated metal artifact reduction (MAR) function, work together to adapt to the ever-changing practice needs. It also comes with four predefined volumes that are freely positionable and height adjustable, for a total of 36 possible FOV sizes. The platform is designed to increase practice efficiency, with fast scan times and 3D programs for general dentists and specialists.
The Benefits of Cone Beam Imaging
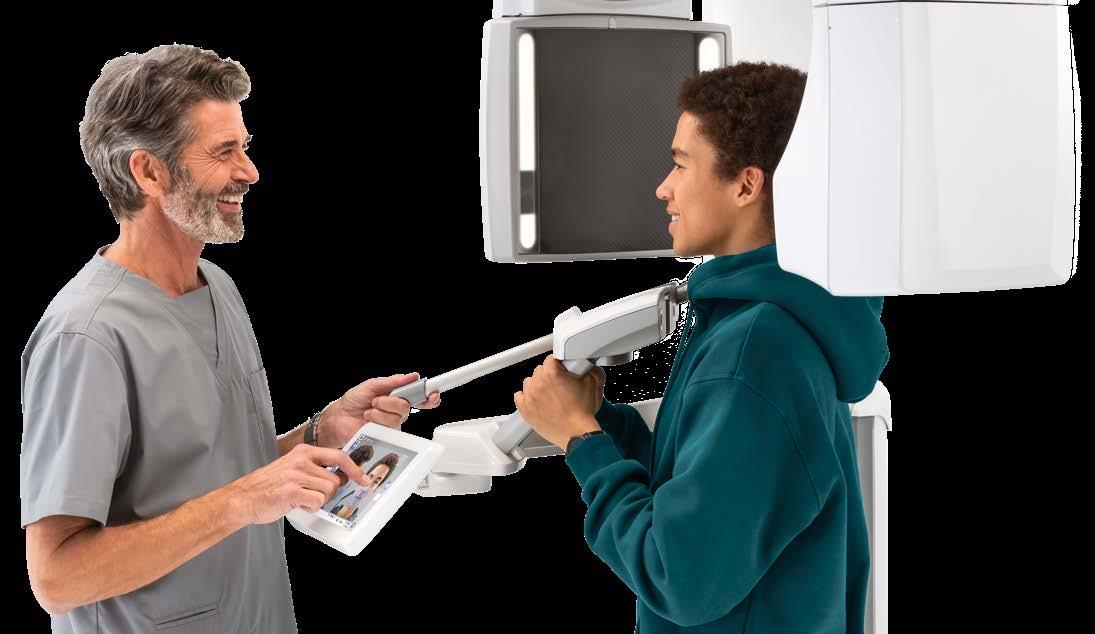
Beyond the advantages of improved diagnostics and treatment planning, adding CBCT imaging also gives your practice an edge over others that don’t use 3D imaging or that send patients to another site for image capture. Patients
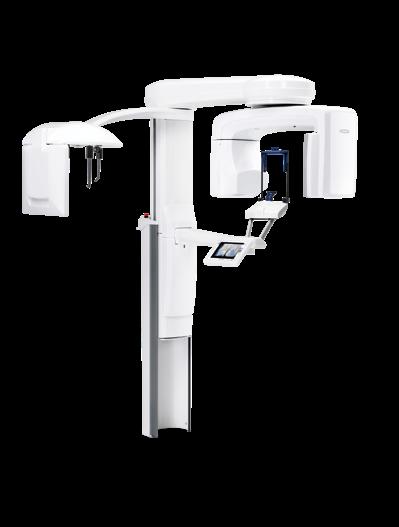
appreciate the convenience of taking the scans in your office. Many are impressed with the technology and the level of detail it provides—creating the opportunity for enhanced patient education and treatment acceptance. If you’re not ready for 3D just yet, you can take the first step by investing in the OP 3D upgradable panoramic. This system can grow with your practice, allowing you to easily add cephalometric and/or 3D capabilities when it makes the most sense. The configurable device platform has options for 2D panoramic; panoramic with cephalometric; panoramic with 3D imaging; and panoramic with cephalometric and 3D imaging.
Introducing the DEXIS OP 3D LX
Now, the next generation of DEXIS cone beam technology is here. Built on OP 3D technology, this multimodality imaging platform expands your 3D diagnostic capabilities with a wide range of clinical applications that support your evolving practice and enhance diagnostic confidence.
Flexible Fields of View
Featuring an optional 15x20 field of view—the largest view option available on a DEXIS OP 3D platform to date—and 5 other FOVs, OP 3D LX offers high-resolution scans and shorter scan times while capturing the maxillofacial complex and large diagnostic areas in one non-stitched scan. OP 3D LX features 96 additional customisable FOV options, along with 4 resolutions, including endo and low dose modes. In addition to panoramic, extraoral bitewing, and 3D imaging, OP 3D LX offers an optional cephalometric modality, as well as a host of implant planning tools and noise reduction filters embedded into the system software that minimise artifacts and noise.
What you can do with each view

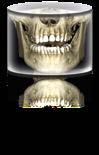
5x5 for Localised Diagnostics: endodontic evaluations, single implant sites, and pathologies.
6x9 for Single Arch/Jaw: implant planning site evaluations, surgical guide creation, and single-arch periodontal analysis.
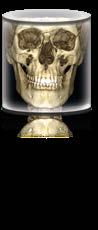
8x8 for Compact Dual-Arch: mandible and maxilla; treatment planning of dental implants with opposing arch visualisation.
10x10 for Dual-Arch: mandible and maxilla with third molar region and lower maxillary sinuses; ideal for multiple implants or periodontal evaluations.
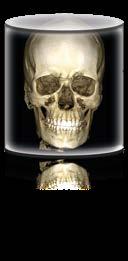
12x15 for Entire Dentition: mandible and maxilla, bilateral TMJ, and sinus and oropharyngeal airway.
15x20 for Maxillofacial Complex: bilateral TMJ, airway, tip of nose, oral/maxillofacial surgery, orthodontic analysis.

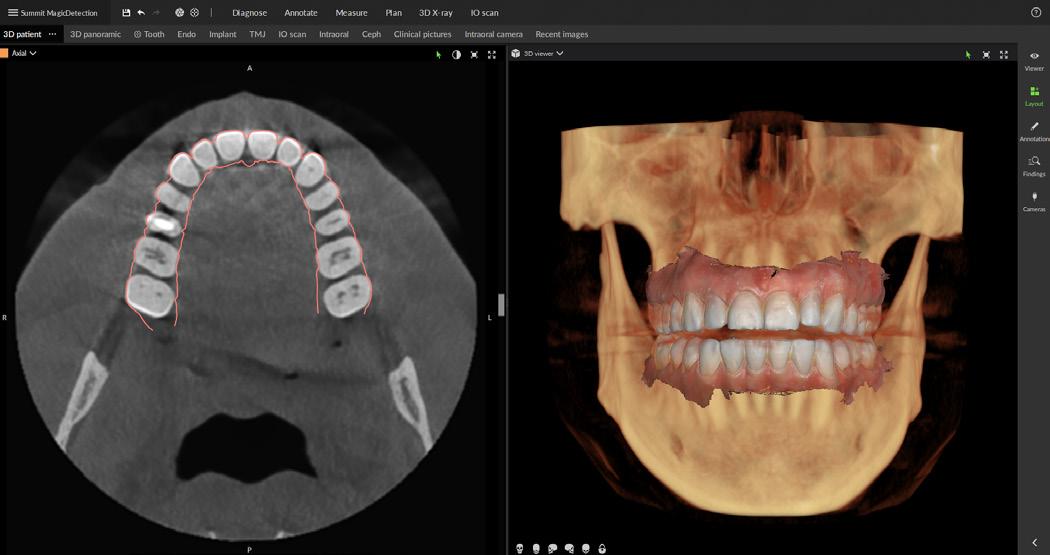
Powerhouse Imaging
DTX Studio™ Clinic software streamlines the digital diagnostic and treatment planning process while seamlessly integrating with your existing imaging hardware and fostering clinical collaboration throughout your office and beyond. From image acquisition to diagnostics and treatment planning, DTX Studio Clinic brings all your x-rays, photos, 2D and 3D, extraoral and intraoral imaging formats into one clear, comprehensive view.
Here are 5 ways DTX Studio Clinic takes 3D imaging to a new level:
• SmartFusion™ is the intelligent way of directly combining surface models from all intraoral and desktop scanners with any CBCT scan using proprietary voxel-based algorithms— for accurate information of surfaces and underlying anatomy in 3D.
• SmartFocus™ uses tooth positions as your reference. You can browse across your various patient images from different devices and sessions with just one click.
• DTX Studio Implant allows you to plan implants for major implant systems according to the patient’s anatomy and prosthetic requirements during the first visit. You can turn the plan into reality by using a surgical template or 3D-navigated implant surgery.
• DTX Studio Lab brings labs and clinicians together from treatment planning to final restoration.
• DTX Studio Go connects you to labs and other service providers in your area. For example, it’s easy to outsource implant planning with a connected clinician using the DTX Studio suite, or to order a prosthetic restoration or a TempShell at a connected lab.


Planmeca Viso®
Easy optimisation of FOV size and location for each patient
Live patient view for flexible and precise FOV positioning
solution for extraoral imaging needs
Lower patient radiation doses with proven Planmeca Ultra Low Dose™ technology
Patient movement correction with unique Planmeca CALM® algorithm

3D CBCT imaging combined with 3D face photography
Planmeca Romexis® all-in-one dental software
Introducing Automate Crown in Unite
Seamless end-to-end workflow: Scan, design, produce.

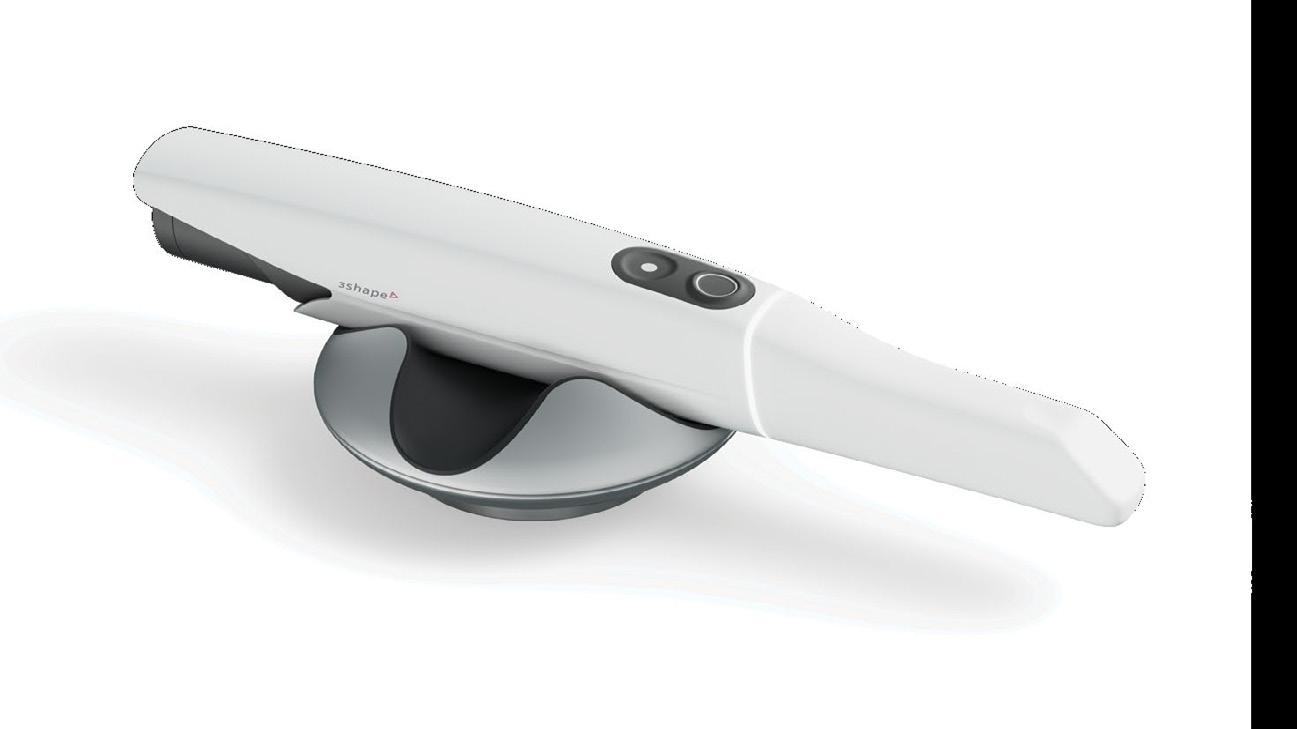
Connect to the Automate Crown app on 3Shape Unite Store to experience the new end-to-end workflow. From scanning to automated crown design, you will experience simple, smooth, and fast production all within the 3Shape ecosystem.
Learn more about 3Shape Automate
For Crowns
For Crowns
For practices with crown manufacturing capabilities, Automate Crown designs anterior* and posterior crowns for you in as little as of 90 seconds.
For practices with crown manufacturing capabilities, Automate Crown designs anterior* and posterior crowns for you in as little as of 90 seconds.
Scan your patient in 3Shape Unite
Scan your patient in 3Shape Unite
Send to Automate for design
Refine your design (optional)
Refine your design (optional)
Manufacture** crown
*Anterior crowns currently only available in Australia, China, Japan, Korea, United States.
**Optionally manufacture with 3Shape Produce or your preferred third-party manufacturing partner.
*Anterior crowns currently only available in Australia, China, Japan, Korea, United States.
**Optionally manufacture with 3Shape Produce or your preferred third-party manufacturing partner.
For Nightguards
For Nightguards
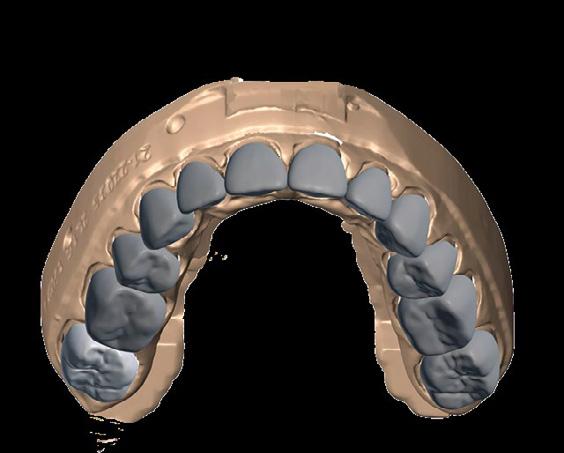
For practices offering nightguard services, Automate Nightguards designs custom nightguards for you in minutes. Simply create your order in 3Shape Unite for upper and lower nightguard designs.
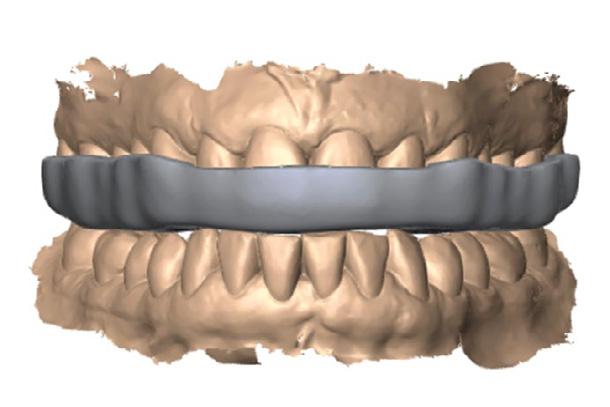
For practices offering nightguard services, Automate Nightguards designs custom nightguards for you in minutes. Simply create your order in 3Shape Unite for upper and lower nightguard designs.
Scan your patient in 3Shape Unite
Scan your patient in 3Shape Unite Send to Automate for design Send to Automate for design
Send to Automate for design
Refine your design (optional)
Refine your design (optional)
Manufacture* nightguard
Manufacture* nightguard
*Optionally manufacture with 3Shape Produce ( 3Shape Produce only available in 3Shape Unite II) or your preferred third-party manufacturing partner.
*Optionally manufacture with 3Shape Produce ( 3Shape Produce only available in 3Shape Unite II) or your preferred third-party manufacturing partner.
Questions?
Scan here to book a meeting
We‘re here for you.
Questions? We‘re here for you.
Book a meeting with us for a personalized 1:1 session to explore the new Automate Crown launch in Unite. Experience the seamless end-to-end workflow from scanning to automated crown design. Book your session now to discover how this innovative solution can enhance your practice!
Scan here to book a meeting
Book a meeting with us for a personalized 1:1 session to explore the new Automate Crown launch in Unite. Experience the seamless end-to-end workflow from scanning to automated crown design. Book your session now to discover how this innovative solution can enhance your practice! Contact us: E: automate@3shape.com
© 3Shape A/S, 2024. The 3Shape name and logo and/or other trademarks mentioned herein are trademarks of 3Shape A/S, registered in US and other countries. All rights reserved.
© 3Shape A/S, 2024. The 3Shape name and logo and/or other trademarks mentioned herein are trademarks of 3Shape A/S, registered in US and other countries. All rights reserved.
Safe Endodontics Every Step Of The Way
Modern treatment systems for perfect procedures
Endodontic procedures on the most delicate structures in confined spaces require a maximum of precision and tactility on the part of the operator. Safety will always have to come first — safety for the patient as well as safety for the dentist. Morita and its portfolio of endodontic solutions meet these requirements at the highest level, setting benchmarks for treatment perfection. The individual systems seamlessly integrate into the modern clinical workflow, from the initial clinical examination to complex chairside procedures and regular recall appointments.
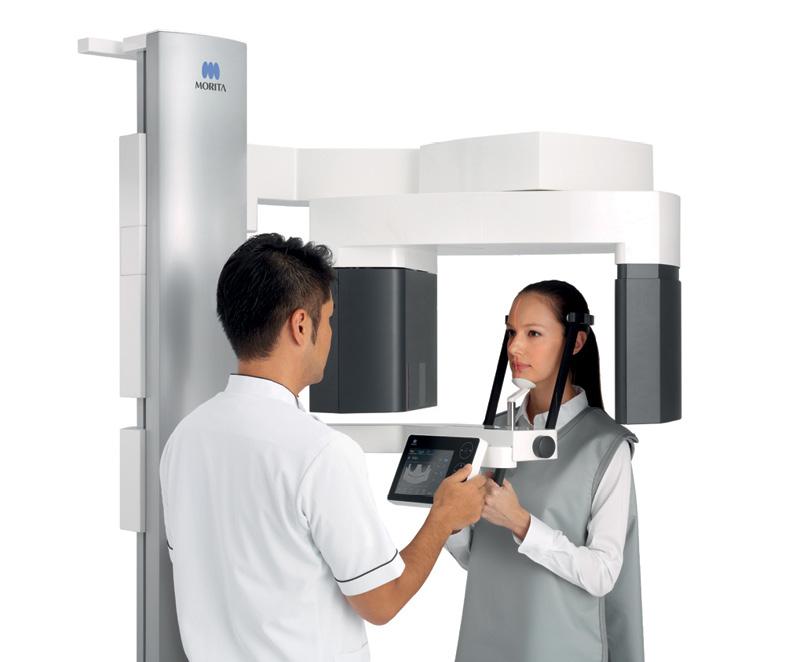
Precise diagnosis
The first step in every successful endodontic treatment is a precise diagnosis based on accurate high-resolution 3D images provided by cone-beam computed tomography (CBCT). Morita supports these diagnostic efforts with its new Veraview X800 X-ray system for 3D, panoramic, and cephalometric images, slated to supersede the previous units. It offers a level of image quality that is unprecedented in a 2D/3D imaging system (resolution: 2.5 lp/mm MTF).
Safety always comes first – this versatile system not only produces quick and accurate images but also provides maximum operator and patient safety with minimum effective doses (ALARA, “As Low As Reasonably Achievable”). The system uses the proven dose-reducing R100 field with its triangular shape. Other advantages include exposures in both 180-degree and 360-degree mode, fast cephalometric exposures in just 3.5 seconds, or a zoom reconstruction function that derives an 80-μm recording from a 125-μm voxel recording without requiring a retake.
Precision and safety for the root canal
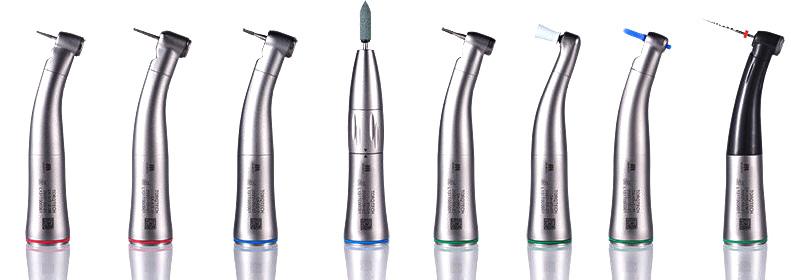
Once the endodontist proceeds with the actual intraoral procedures, several high quality instruments are available to assist his or her delicate work. For convenient preparation of the access cavity, Morita offers the powerful TwinPower turbines and the handpieces of the TorqTech series. Offering maximum torque at small instrument-head diameters, they provide a good view of the area to be instrumented as well as sufficient space when treating molars. The essential next steps of the treatment are measurement, instrumentation, filling, and polymerization.
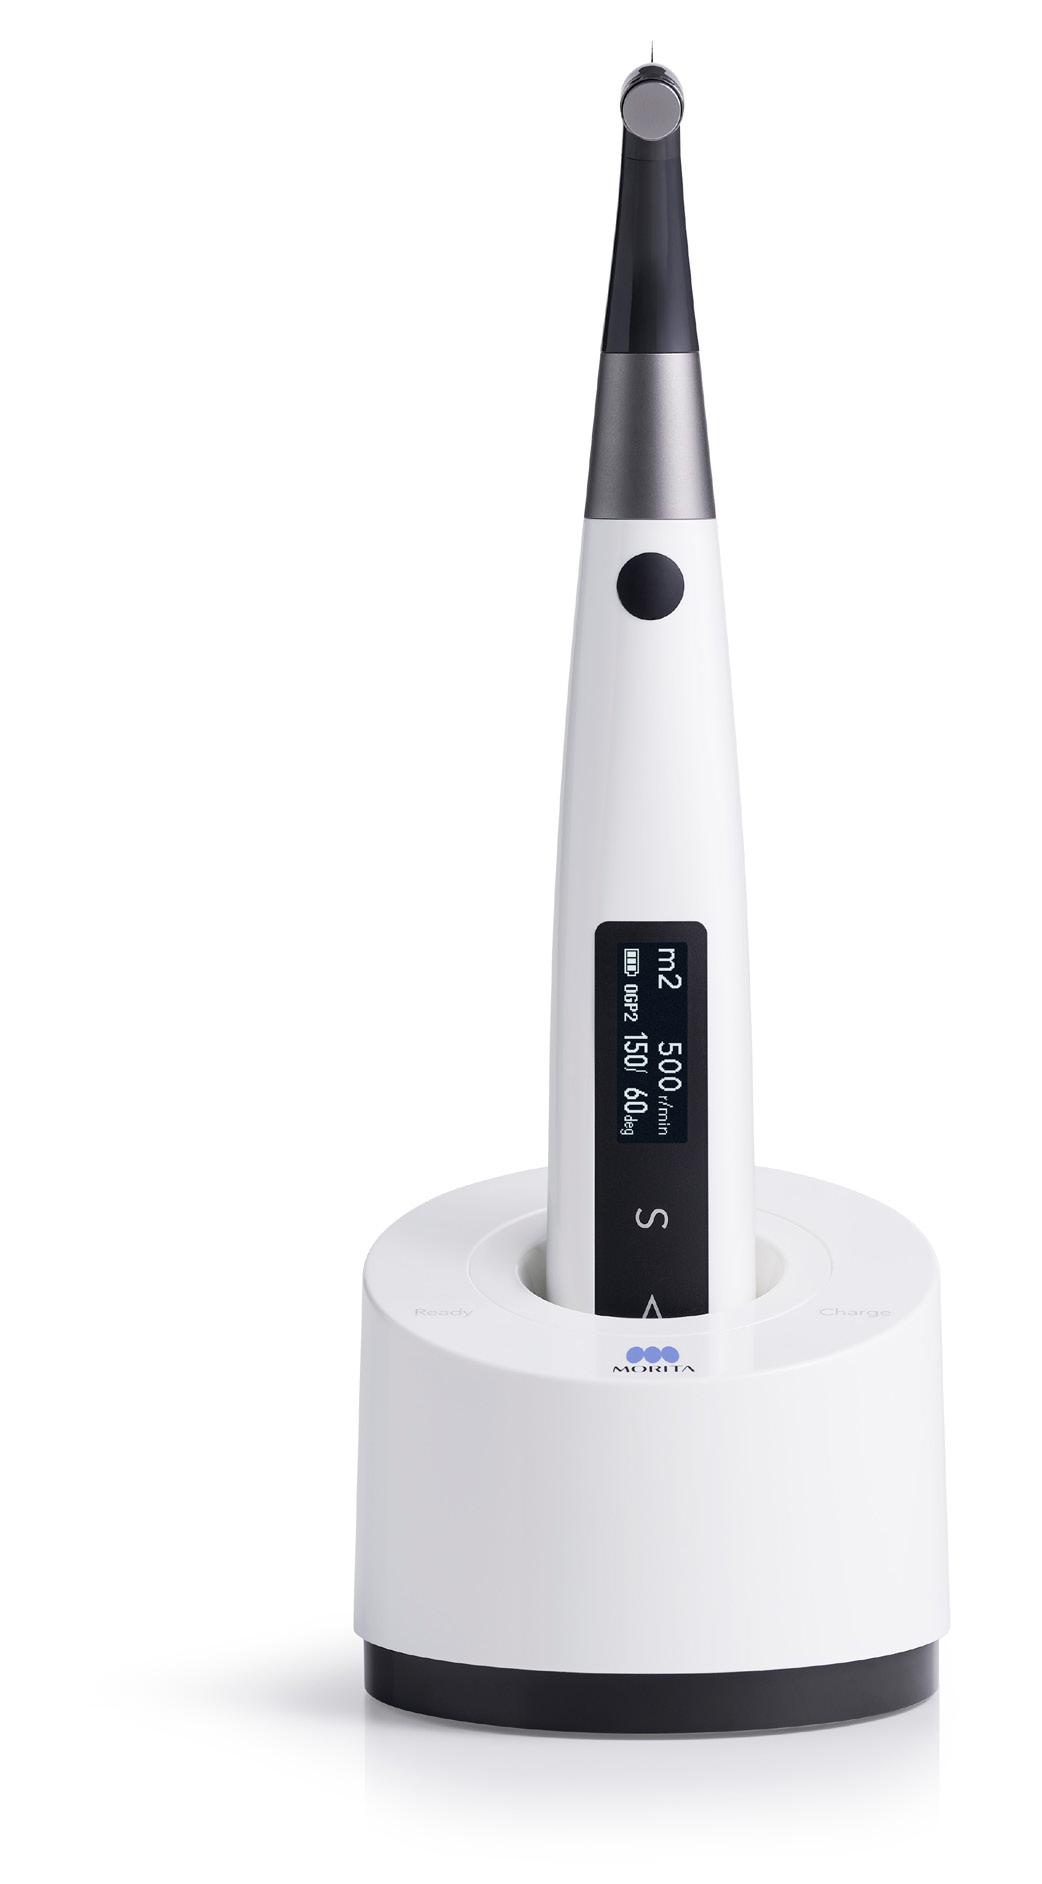
Morita has now added its new TriAuto ZX2 Plus cordless endo motor with apex locator. This system integrates the tasks of apex location and root canal preparation in a single handpiece. With its intelligent and innovative reciprocating motion, OGP2 mode was created to help you maintain the original root canal shape, regardless of whether it’s curved or narrow. OGP2 mode is all-encompassing, allowing you to perform patency, glide path, and shaping. Additionally, with no limits on file size or cutting direction, your current file system is compatible. From a #10 scout file to the widest sizes available, the Tri Auto ZX2+ handles any CW/CCW file all in one mode.
This endo motor is the best for doctors who want to focus on treatment rather than settings and allows them to finish treatments with higher efficiency and reduced possibility of file breakage. Dealing with fractured files during endodontic treatments is often not easy. OGP2 reduces file binding and, when it does occur, the chance of the file breaking in the canal is greatly reduced. This is due to the OGP2 mode’s intelligent reciprocating motion that prevents rotational deviations from accumulating.
All work steps for root canal treatment can be done with just one motor, from the establishment of patency and glide path to final shaping. OGP2 mode allows you to take advantage of the capabilities of your favorite files, both reciprocating and rotary, throughout the process.
In combination with the OGP2 function, the clinician can bring the endodontic instrument down to working length without fractures, blockage, or ledge formation. Ingeniously simple and absolutely safe. All in all, the TriAuto ZX2 Plus conserves natural tooth structure and makes the treatment even more efficient because only a limited number of files is required. Another striking feature of this endodontic system is its small head and low weight, making it very handy to use. The future-proof cordless concept significantly improves treatment flexibility for the operator and optimizes the clinical workflow.
Simple and intuitive operation and automated functions ensure reliable and safe results at all times. Increase patient comfort through shorter and smoother treatments by optimizing your workflows with Morita technology.
Morita X800 CBCT Unit TwinPower
TorqTech
How to Properly maintain and extend the lifetime of KaVo instruments
More than 50% of handpiece and contra-angle failures are caused by improper cleaning and care. With a few tips from us, you will be able to extend the service life of your KaVo instruments and avoid the most common defects.
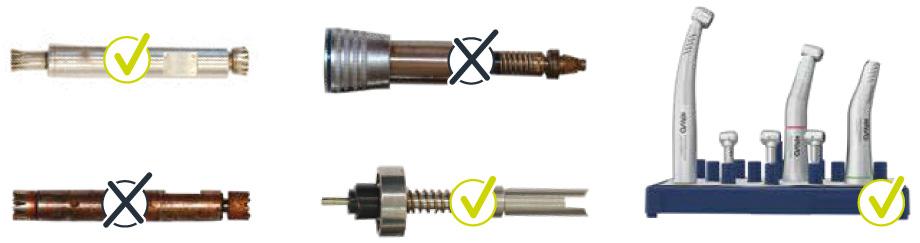
1. Chuck system
1.1 Rotating instruments with shafts intact
We always recommend that you use burs that are approved by KaVo, otherwise the instrument may suffer significant damage. Damage includes defects involving the chuck system or bur shaft.
1.2 Comply with dimensions for cutters/grinders.
For manufacturer information concerning the length, diameter, shaft shape and max. speed, please refer to the relevant instructions for use.
1.3 Removal of crowns and bridges/ separation of crowns
Bur manufacturers offer crown separators to suit different crown materials. Please comply with the speeds recommended by the bur manufacturer. In the case of straight- or cross-toothed crown separators, these are often lower than for diamondcoated crown separators.
1.4 Never leave the bur in the chuck after a treatment. The chuck should not bear any load when stored, in order to prolong its service life. Storing instruments with burs in can lead to a risk of injury or infection.
1.5 Close the tensioning ring on the handpiece.
Never start operating a straight handpiece while the chuck is open because:
• The straight handpiece blocks.
• The chuck will block.
1.6 Never press the pushbutton during operation.
Never press or wipe the pushbutton on the turbine or handpiece/contraangle while the instrument is rotating because this may cause:
• Excessive wear and tear on the drive/rotor
• Damage to the push-button/chuck Never position the push-button close to the patient’s cheek. The friction between the push-button and the chuck system generates heat, which may cause burn injuries.
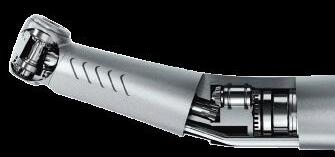
2. Ball bearings
Ball bearings must always be lubricated. Using other than original KaVo oils or applying insufficient oil to ball bearings causes excessive wear and tear and may lead to defects. To prevent any secondary damage, replace ball bearings regularly with original KaVo ball bearings.
3. Surgical instruments
Surgical instruments require special treatment. After each use, clean the instrument immediately under lukewarm running water to remove all external soiling. Wherever possible, dismantle the instrument and clean the inside under lukewarm running water as well.
4. Damage after dropping
4.1 Avoiding damage caused by dropping instruments
Visually inspect the instrument at the preparation stage for any changes in order to protect both the instrument and the patient.
4.2 Listen for the click when attaching instruments to the coupling.
The instrument must be heard to click into place on the motor/turbine coupling. Otherwise, it may not be secure and could fall and be damaged.
5. Disinfection
The instrument must never be immersed in a disinfection/ultrasonic bath because:
• The ball bearings might be destroyed
• Other technical defects involving the instrument may occur Instruments can be manually disinfected. If excessive disinfectant or a non-approved disinfectant is sprayed onto the instrument or the motor/turbine coupling, malfunctions may occur.
6. Care
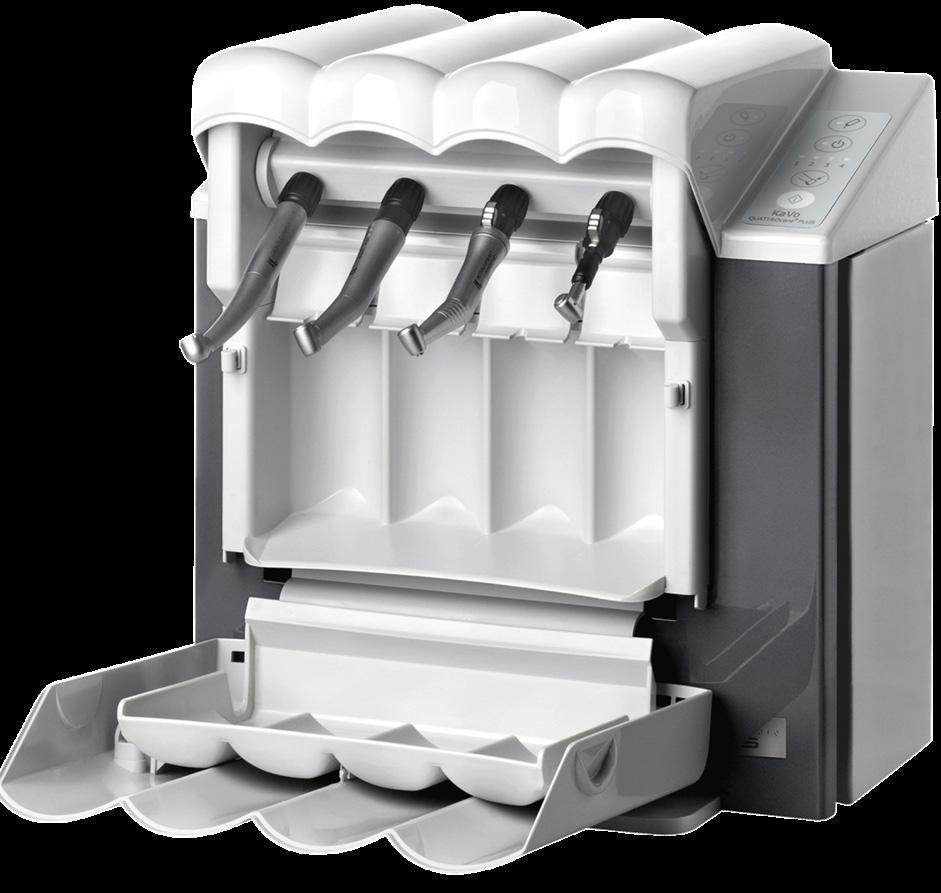
• Automated care with the QUATTROcare PLUS
• Manual care with KaVo Spray
• Chucks must be treated at least once a week with KaVo Spray or in the QUATTROcare PLUS.
7. Storage
Always use an instrument stand to store instruments after cleaning them. Any excess residual oil will be able to drain away. Otherwise, the instrument may become too hot when used again, leading to further damage to ball bearings.

Sterilisation Wrap Update | Packaging
Why Wrap?
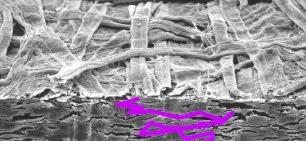
Hu-Friedy sterilisation wrap is a wet formed, nonwoven fabric compromised of natural wood pulp bonded with resin binder.
During manufacturing, the wrap components are bonded together by entangling their fibres of filaments mechanically, thermally, or chemically. This bonded web of materials creates what is called a tortuous path.
During steam sterilisation, steam is able to enter the wrap due to the extreme pressure present. Post sterilisation, the tortuous path created by the fibres prevents bacteria from entering.
Hu-Friedy wrap material is mostly composed of wood pulp, but there is an added polymer that aids in bonding the wood fibres. There is a sustainability advantage in that the main component, wood pulp, is a fully renewable resource. Many other wraps are composed of petrol/oil derived plastics, which have no sustainability.
Sterilisation Packaging Requirements
• Must be an FDA cleared medical device
• Suitable for steam sterilisation (temperature resistance up to at least 141 °C with sufficient steam permeability)
• Sufficient protection of the instruments and the sterilisation packaging against mechanical damage
• Sterilisation wrap should be used in accordance with the recommendations of the following standards:
i. ANSI/AAMI ST79: Comprehensive Guide to Steam Sterilisation and Sterility Assurance in Health Care Facilities
ii. CDC Guidelines for Infection Prevention in Dental Healthcare Settings
Tips for packaging
• Ensure all instruments and cassettes are dry before packaging for sterilisation.
• After cleaning, critical & semicritical instruments should be inspected for remaining debris.
• An internal chemical indicator should be placed inside each instrument package prior to sterilisation. If the internal indicator is not visible from outside the package, an external indicator should be affixed to the pack.
• Packages should be labeled with the date and, if multiple sterilisers are used within the facility, the steriliser used should also be labeled. (This simplifies retrieval of processed items in case of a sterilisation failure.)
• When packaging instruments and cassettes, ensure packaging does not have open gaps.
After sterilisation, wrapped items must be stored in a dedicated space free from dust and contamination. It is also important to note they must ideally be stored in ‘enclosures’ due to risks of environmental contamination. Often there are open shelves for storage in the sterilisation area or treatment room. To ensure your sterile packs are not compromised, you may want to consider doors or draws as a more suitable storage option.
Visual representation of the path that a potential bacteria would have to take.
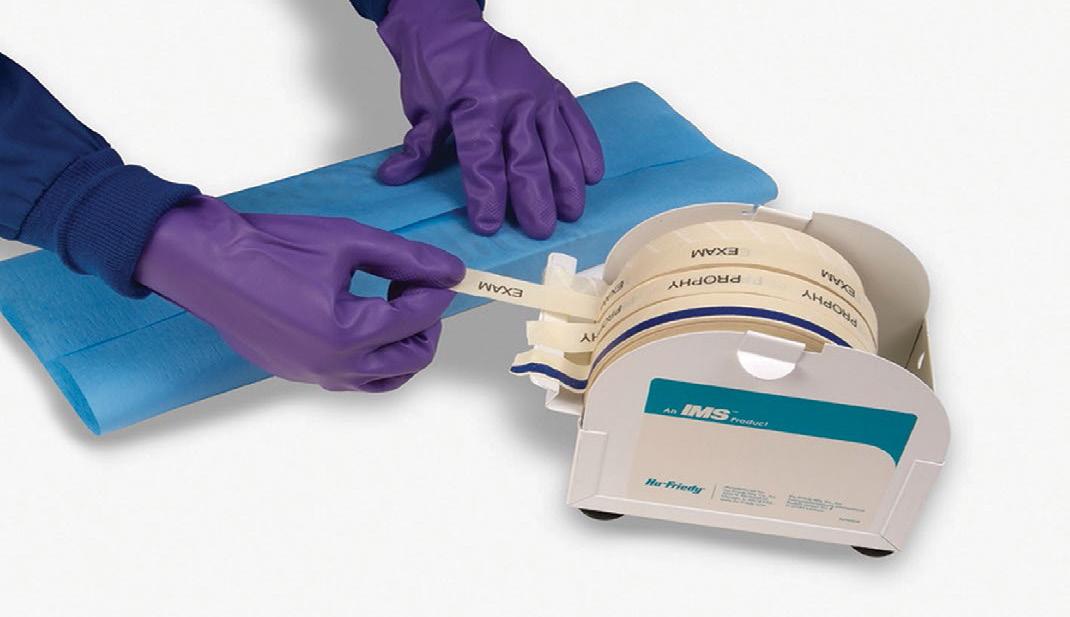
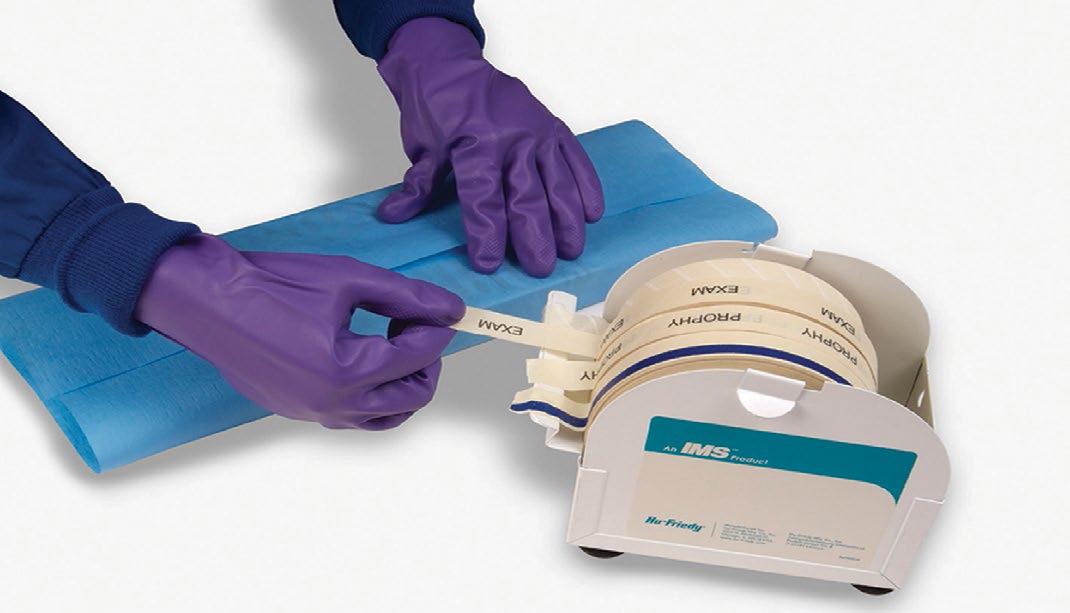
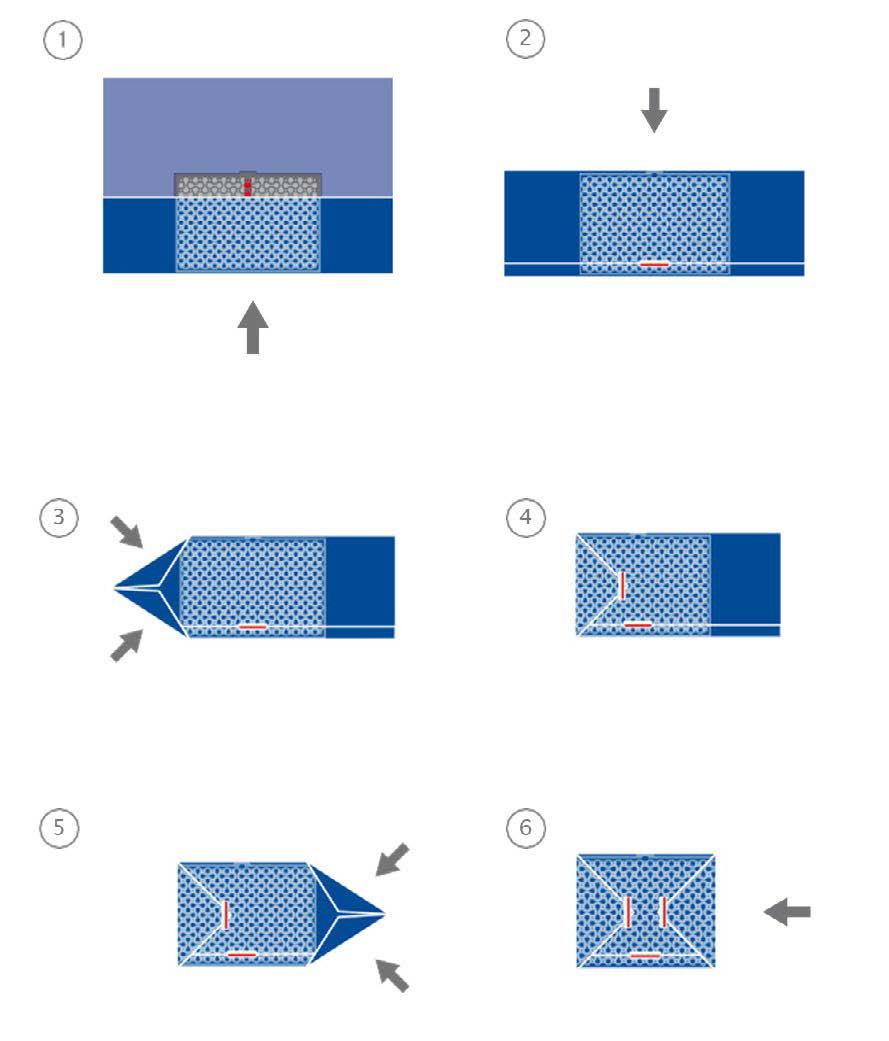
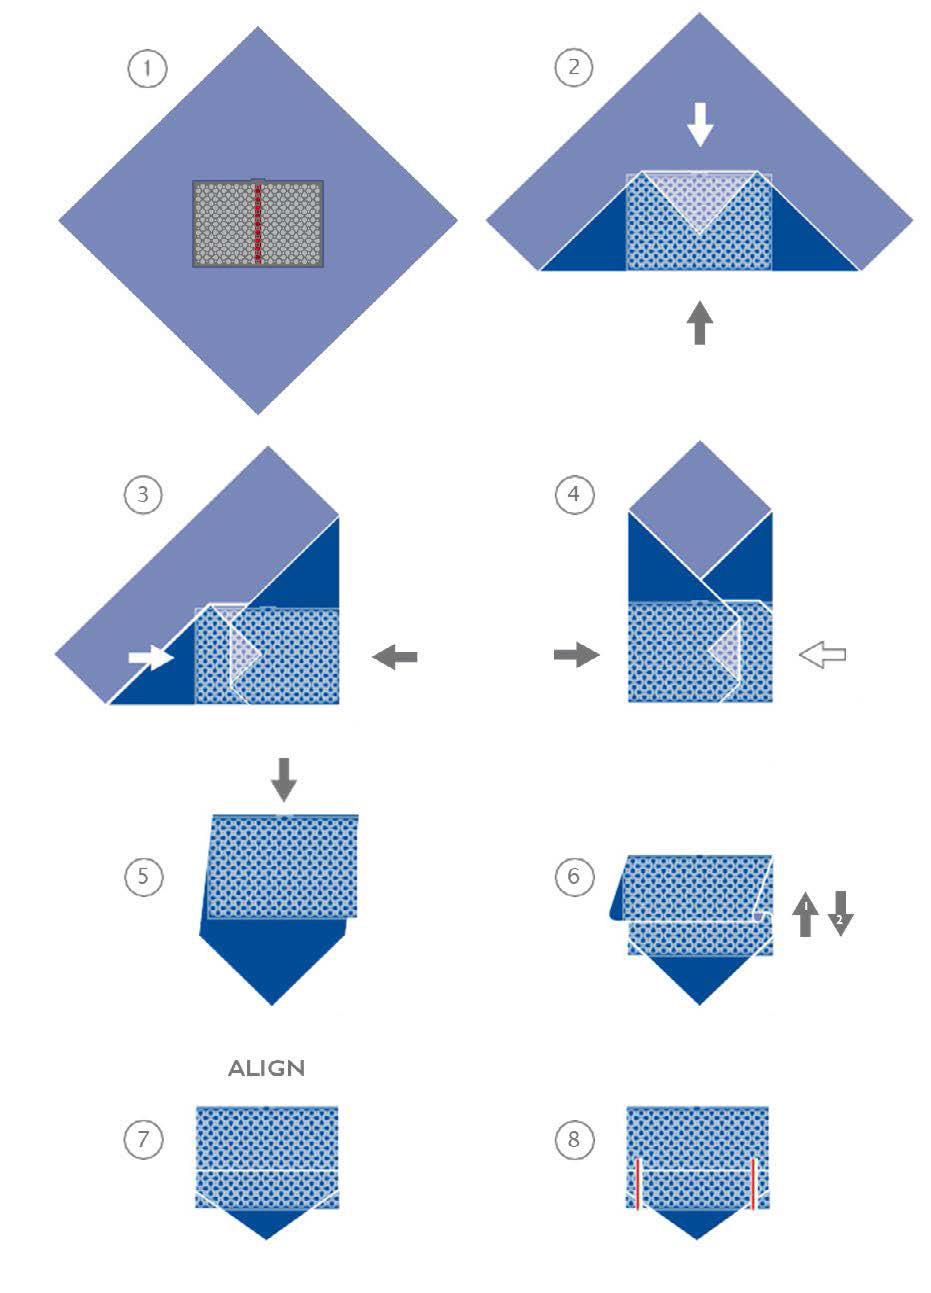
Standard Gift Technique Hospital Technique

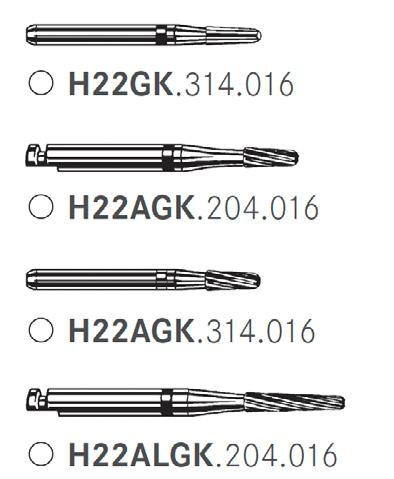
Adhesive Remover with Special Features
In cooperation with Dr. Radlanski, Freie Universität Berlin, the AGK burs have been developed as specialist instruments for removing adhesive residues. The instruments are able to remove the soft adhesive quickly and, thanks to their special toothing, without damaging the hard enamel. At low contact pressure, the instruments operate with low vibration and achieve perfectly smooth surfaces while generating merely a minimum of heat.
This is possible thanks to the innovative blade geometry. The twisted blades made of durable tungsten carbide are optimally suited for precise reduction of soft materials and assure smooth operation and high treatment comfort.
In order to avoid the risk of damaging the gingiva, all adhesive removers are provided with smooth, non-cutting tips (tip without blades). Moreover, the safety chamfer at the head end eliminates the formation of grooves.
The tapered adhesive remover is available for the contra-angle and the turbine in 2 head lengths (4.75 mm and 8.00 mm). The long version – the H22ALGK – is specifically designed for canines and longer anteriors.
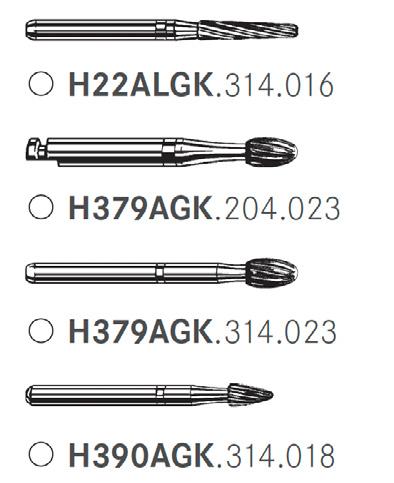
The egg-shape (H379AGK) and the grenade-shape (H390AGK) are specially suited for palatinal reduction of adhesive in the lingual technique.
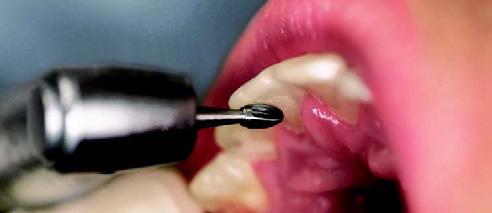
Clinical sequence
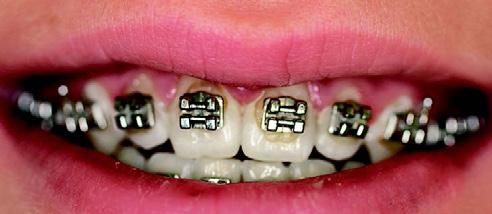
situation.
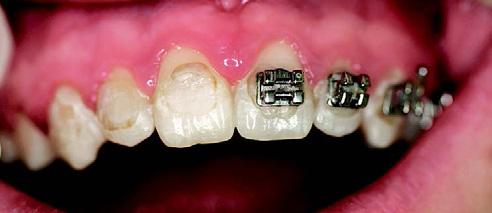
5. Palatinal removal of adhesive residues with H379AGK.204.023.
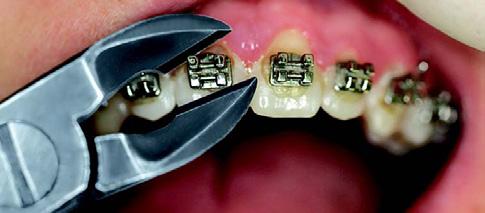
2. Removing orthodontic brackets.
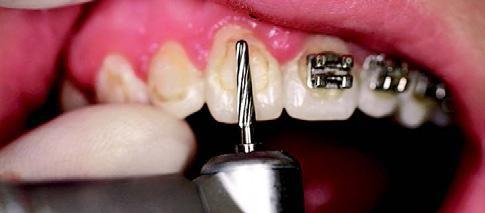
4. Removing the adhesive residues with H22ALGK.204.016.
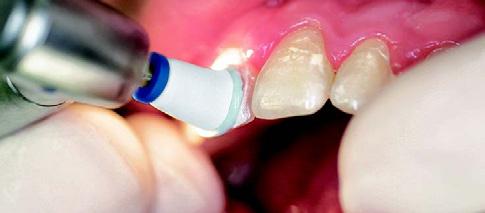
6. Polishing the labial tooth surfaces with prophylaxis polisher 9631.204.060
Recommendations for use
• The adhesive removers are used without pressure. Always supply plenty of water coolant (at least 50 ml/min.)
• Recommended speed for shank 314: / (Friction-Grip)
- Use in the red contra-angle at (120.000 rpm)
- Use in the turbine at (160.000 rpm)
• Recommended speed for shank 204: / (Latch-Grip)
- Use in the micro-motor/contra-angle at approx. (40.000 rpm)
• Apart from this general information, please observe the individual speed indicated on the packaging. The instruments must be used with utmost care to avoid damage to the dental enamel. After complete removal of the adhesive the enamel will be shiny.
1. Pre-operative
3. Brackets removed from tooth 11.

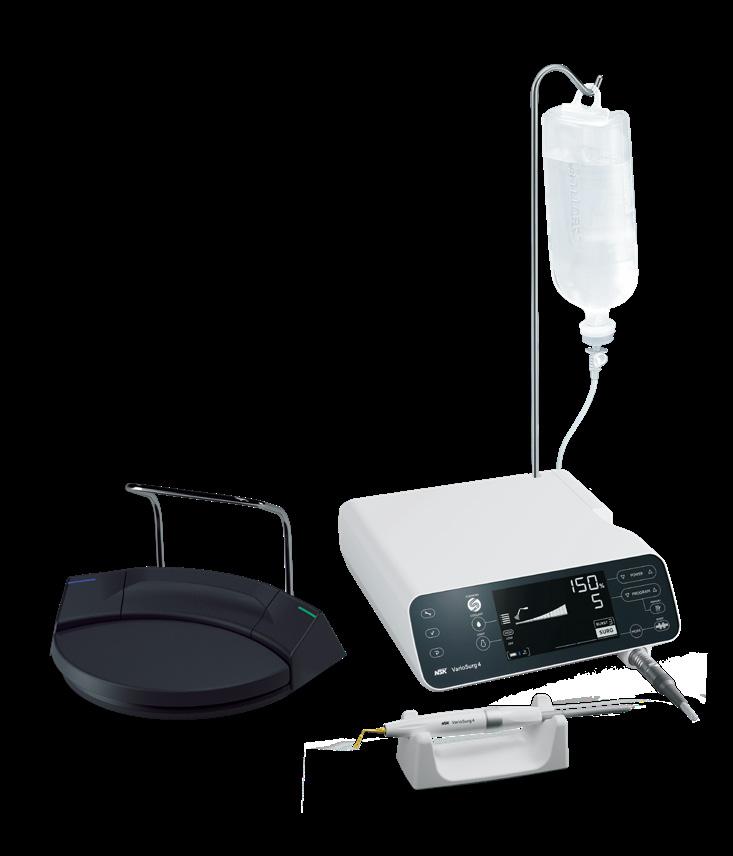
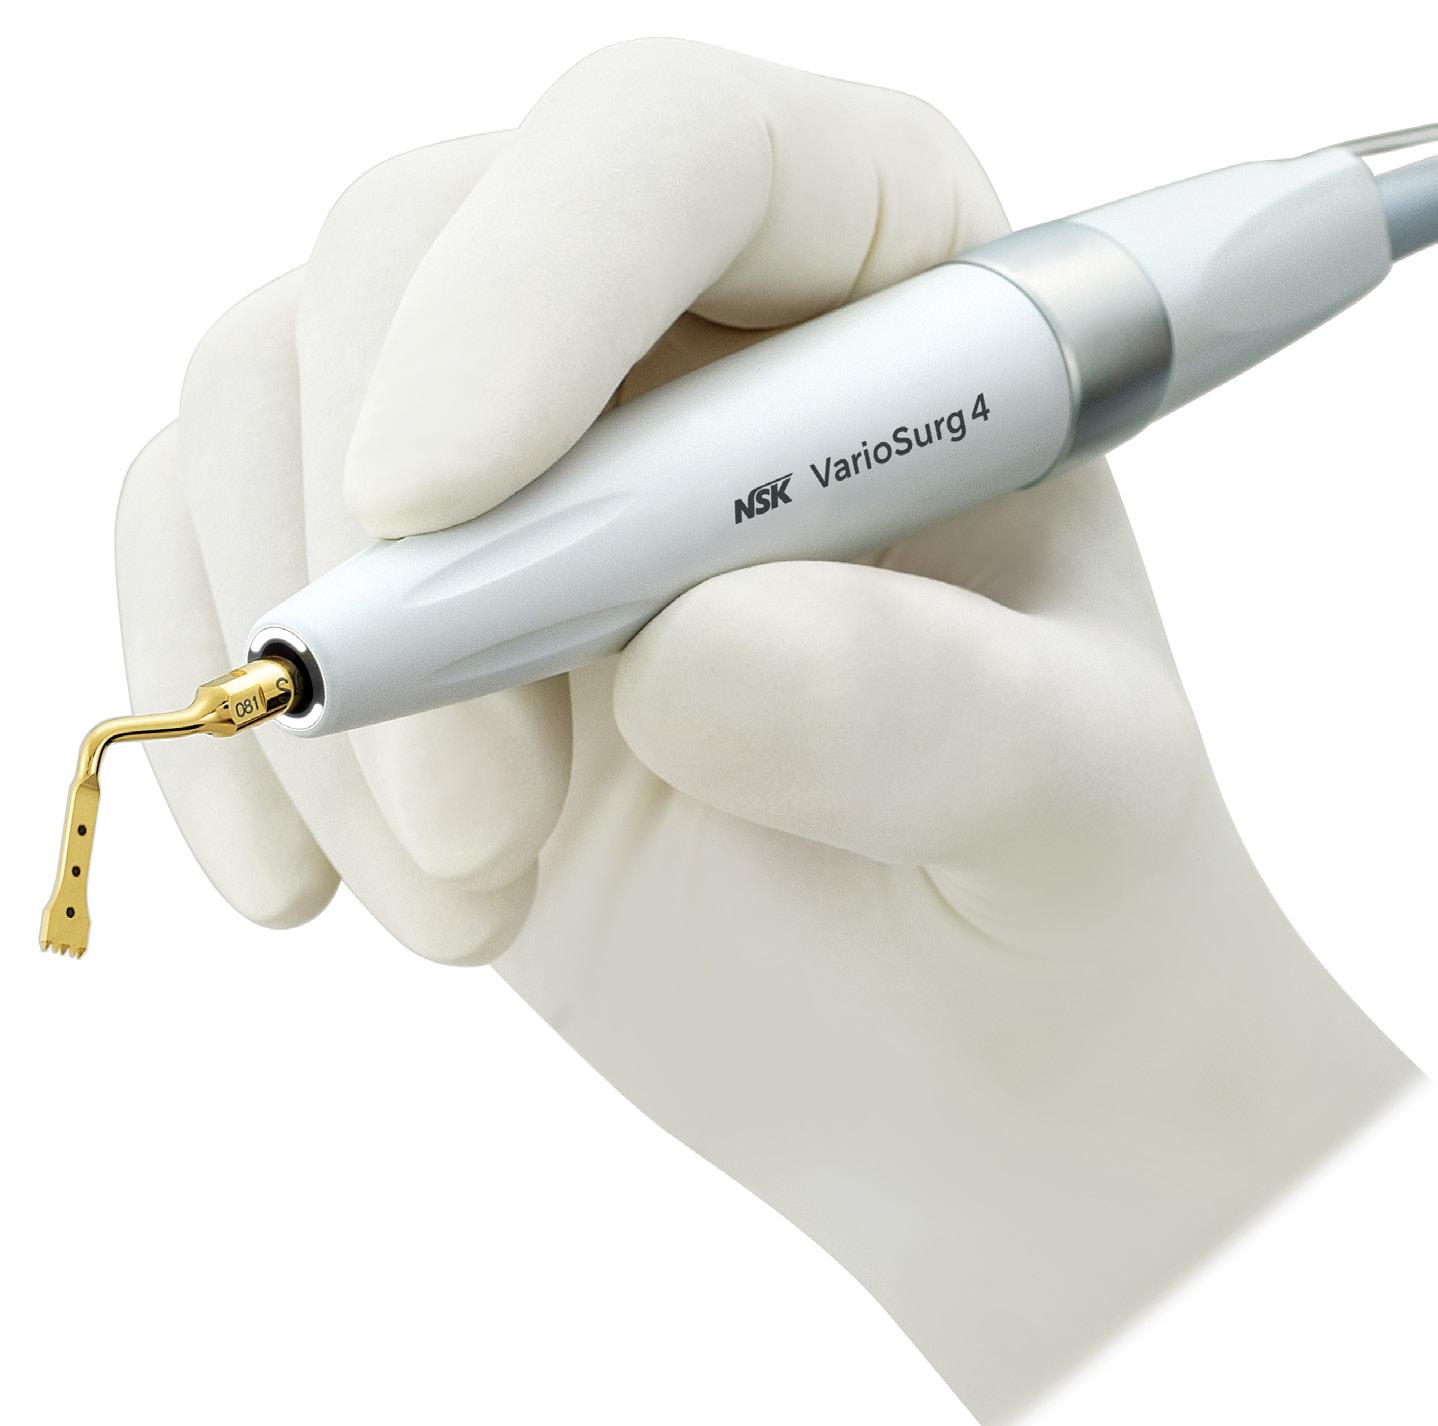
VarioSurg Ultrasonic Bone Surgery System
NSK Launches
the VarioSurg 4:
Precision, Power, and Wireless Innovation in Ultrasonic Bone Surgery
NSK is proud to introduce the VarioSurg 4 Ultrasonic Bone Surgery System, a groundbreaking advancement in implant and bone surgery that redefines surgical precision and efficiency. As the next evolution of NSK’s renowned VarioSurg series, the VarioSurg 4 combines cutting-edge technology with sleek, ergonomic design to meet the highest demands of today’s dental professionals.
At the heart of the VarioSurg 4 is NSK’s advanced feedback and control system, which automatically adjusts power output to match bone density, ensuring smooth, efficient cutting while reducing the risk of heat damage to surrounding tissues. Coupled with an optimised irrigation system and versatile tip options, clinicians can confidently perform procedures ranging from sinus lifts and bone grafting to extractions and implant site preparation.
One of the standout features of the VarioSurg 4 is its built-in Bluetooth® functionality, which enables seamless connectivity with NSK’s Surgic Pro2 surgical micromotor system. Thanks to this innovative Link Function, both devices can be operated using a single wireless foot control, allowing clinicians to effortlessly switch between ultrasonic and rotary instruments. This integration delivers a smooth, efficient workflow and creates a fully unified surgical suite—two devices, one solution, unlimited potential.
Other highlights include
• Ergonomic handpiece design for enhanced comfort and reduced fatigue during long procedures.
• Full-colour LCD touchscreen with an intuitive interface, making adjustments easy even during surgery.
• Improved peristaltic pump system for precise and consistent cooling.
The cohesive design of the VarioSurg 4 and Surgic Pro2 offers complete synergy across a wide range of surgical applications, simplifying even the most complex procedures and enhancing overall practice performance.
By prioritising minimally invasive treatment, safety, and clinician comfort, the VarioSurg 4 reflects NSK’s enduring commitment to innovation and excellence in patient care.
With the VarioSurg 4, NSK continues to shape the future of dental surgery—empowering clinicians with smarter, faster, and more connected solutions. Learn More
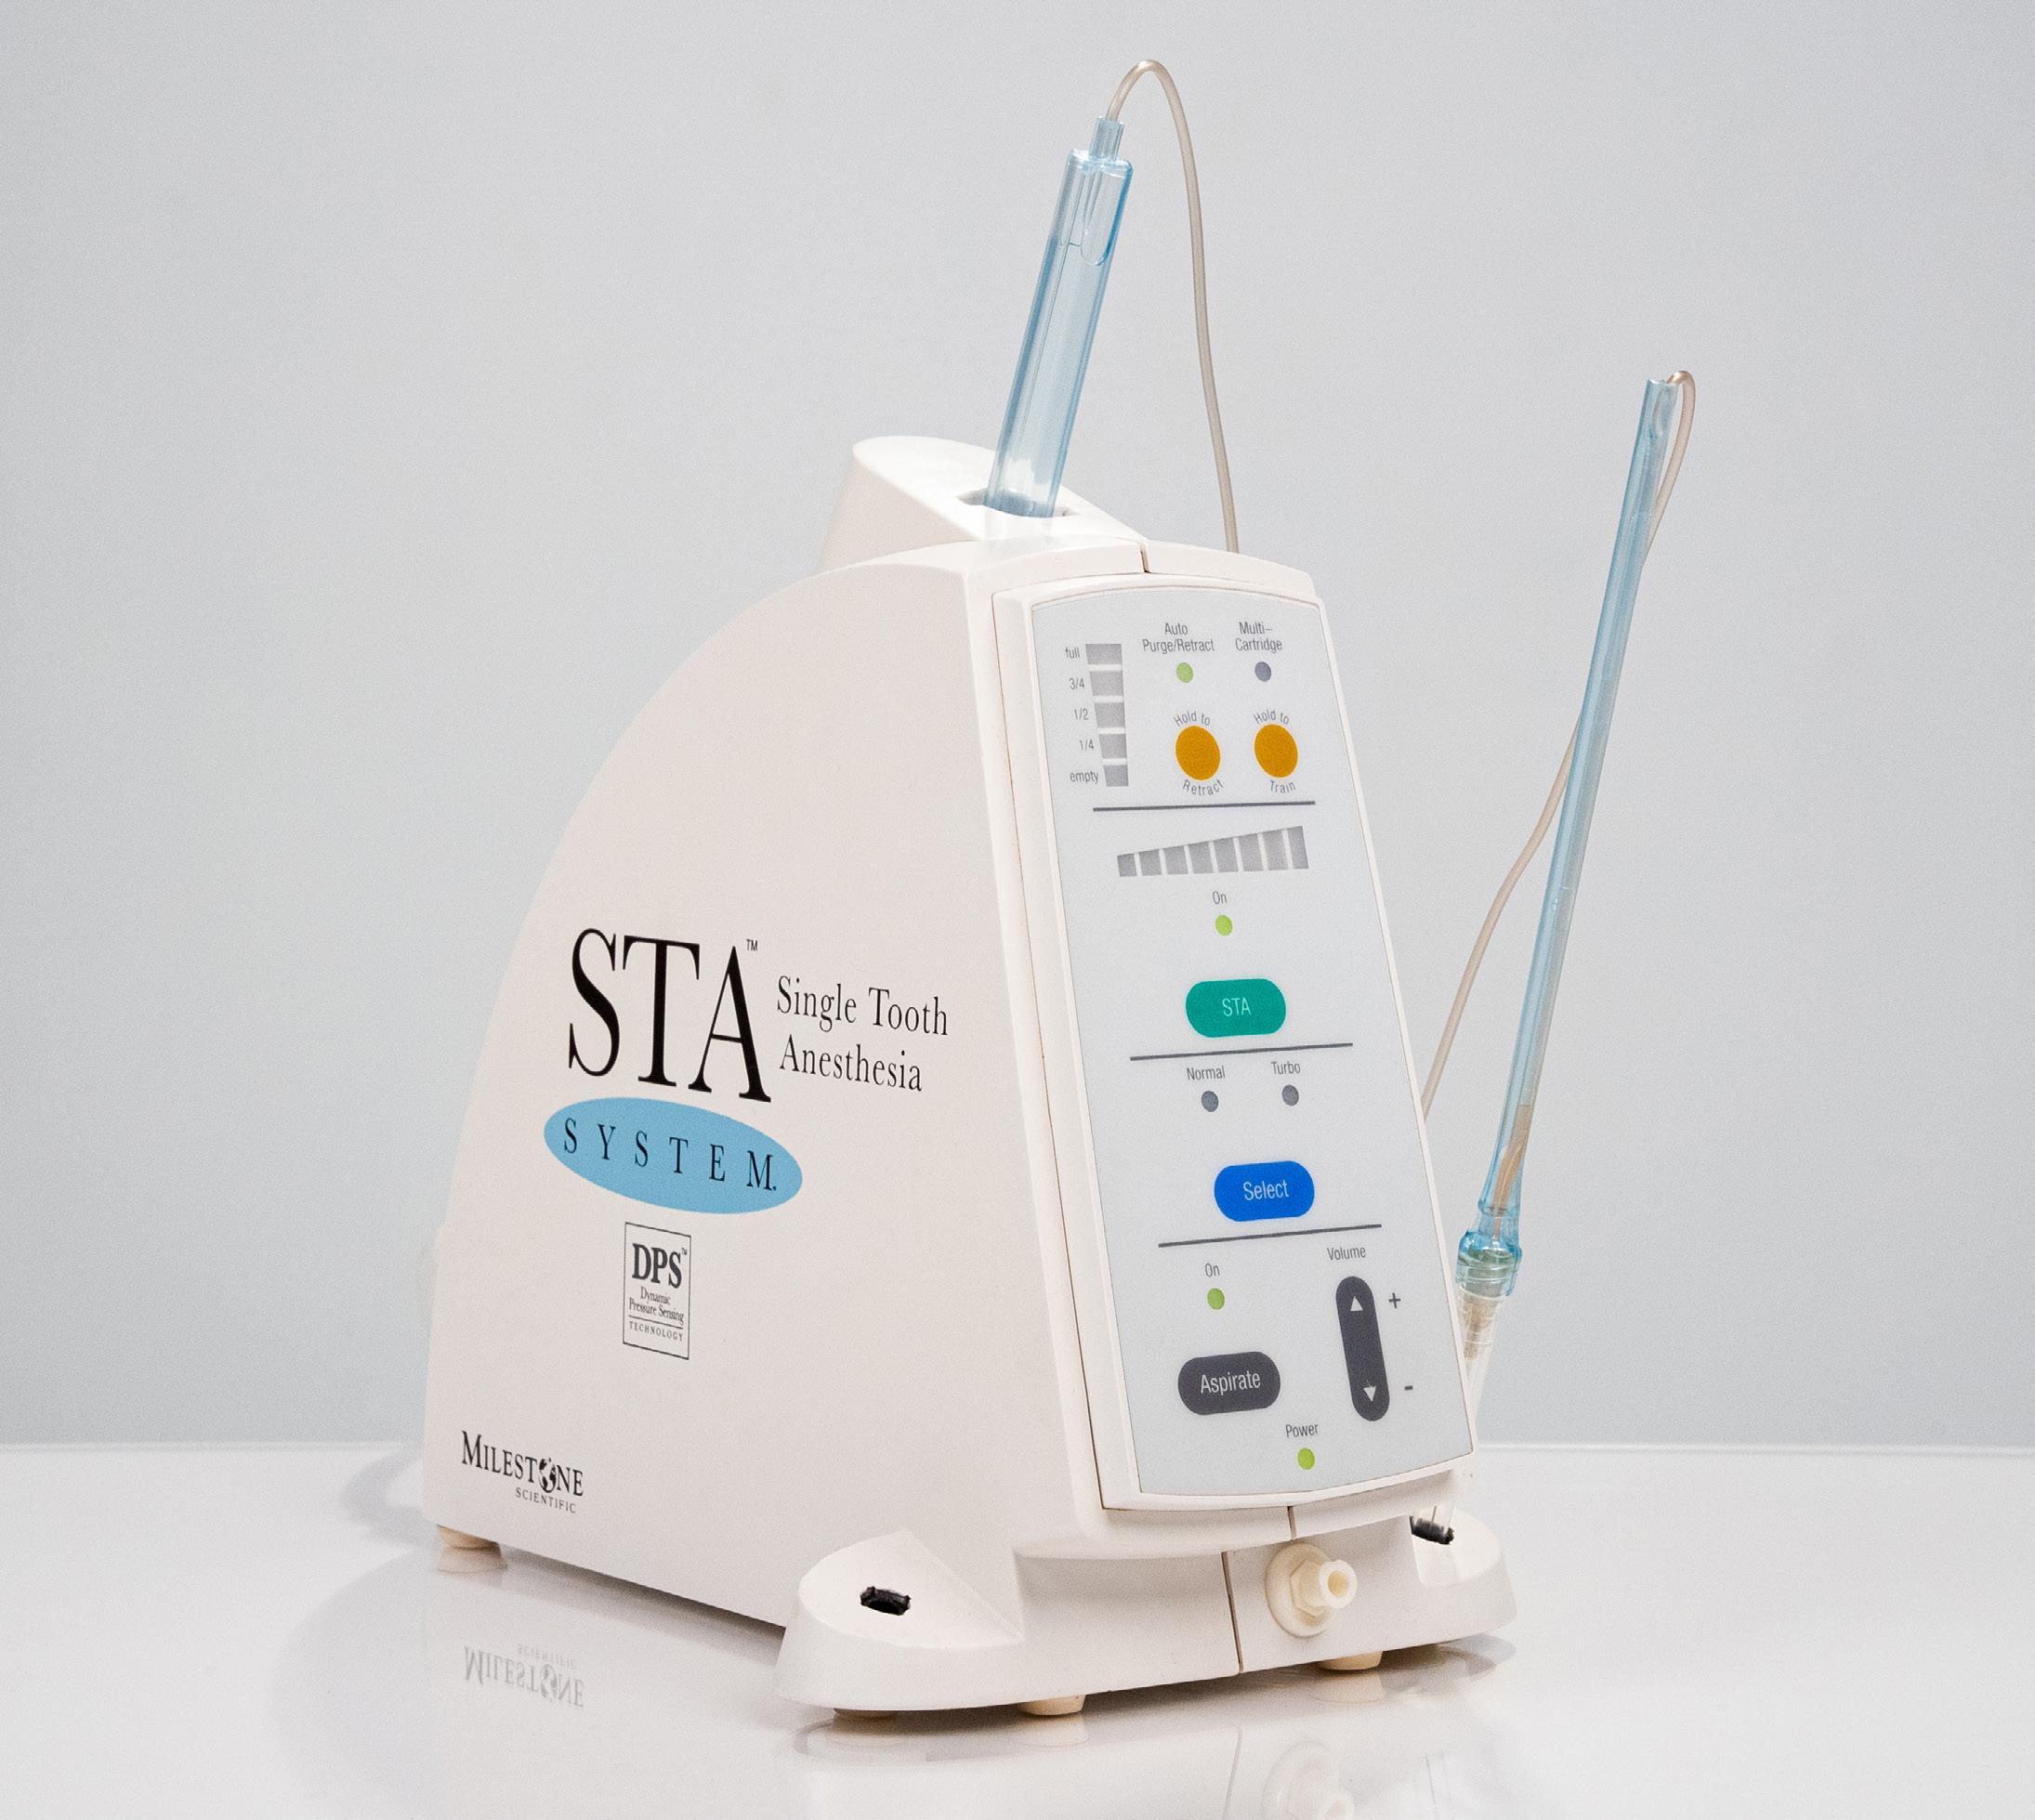
Why The Wand STA Is A Smart Investment
For Your Dental Practice
Introduction
As dental professionals, we constantly strive to offer the best care to our patients, enhancing not only their oral health but also their overall experience. One of the most significant concerns patients face during dental procedures is fear and anxiety related to pain, particularly when it comes to injections. Over the years, technology has advanced to help alleviate these concerns, and one standout innovation is the Wand STA (Single Tooth Anaesthesia) system.
A study conducted by Dr. Dino Re and associates, published in 2017 in the Journal of Investigative and Clinical Dentistry, titled “Minimally Invasive Dental Aanesthesia: Patient’s Preferences and Analysis of the Willingness-to-Pay Index”, presents compelling evidence that patients are willing to pay more for painless injection options like the Wand STA. This data suggests that incorporating the Wand STA into your dental practice is not only beneficial for patient care but can also be a financially sound decision.
The Study’s Findings
In the study by Dr. Dino Re and his team, the focus was on understanding patient preferences regarding anaesthesia and their willingness to pay for pain-free alternatives. The research demonstrated that the majority of patients would prefer minimally invasive anaesthesia techniques and, importantly, are willing to pay a premium for them. The study’s “Willingnessto-Pay (WTP) Index” was a key element, highlighting that the financial value patients place on painless injections is significant.
Patients often associate traditional injections with discomfort, leading to increased anxiety and, in some cases, avoidance of
necessary treatments. The Wand STA offers a more comfortable and precise injection experience, dramatically reducing pain, and, as this study shows, patients are keen to invest in their comfort.
Why The Wand STA is a Worthwhile Investment
The benefits of the Wand STA extend beyond patient satisfaction:
• Painless Anaesthesia Delivery: The Wand STA system is designed to provide controlled and gradual administration of anaesthetic, ensuring that patients do not feel the discomfort usually associated with injections. This painless experience reduces patient anxiety, creating a more pleasant visit and potentially increasing the frequency of their appointments.
• Increased Patient Retention: As the study indicates, patients value comfort and are willing to pay for it. By offering painless anaesthesia, you enhance the patient experience, leading to higher satisfaction, increased wordof-mouth referrals, and greater retention.
• Justifying Premium Fees: With patients willing to pay more for a painless experience, practices can charge a premium for using the Wand STA system. This positions your practice as a leader in advanced, patient-centric care while also improving your bottom line.
• Minimally Invasive Approach: The Wand STA is highly precise, allowing dentists to anesthetize a single tooth without numbing the entire area. This precision leads to faster recovery for the patient and less disruption to their daily routine, which they highly appreciate.
Incorporating the Wand STA into your practice has both clinical and financial benefits. The willingness-to-pay data provided in Dr. Dino Re’s study supports the idea that patients not only prefer this technology but are also willing to pay a premium for it. With a growing demand for painless dentistry, offering the Wand STA gives your practice a competitive edge in a market where patient comfort is paramount.
Investing in this technology could pay off quickly, considering the potential for increased patient flow, improved satisfaction, and higher revenues from the ability to charge for premium services. As the dental industry becomes more patient-centered, the practices that adopt such innovations early will be positioned for success.
Conclusion
The findings from the study by Dr. Dino Re and associates clearly indicate that patients are willing to invest in a more comfortable, pain-free dental experience. By incorporating the Wand STA system into your practice, you can meet patient demand, improve their satisfaction, and grow your practice’s profitability.
For more details on the study, view below link:
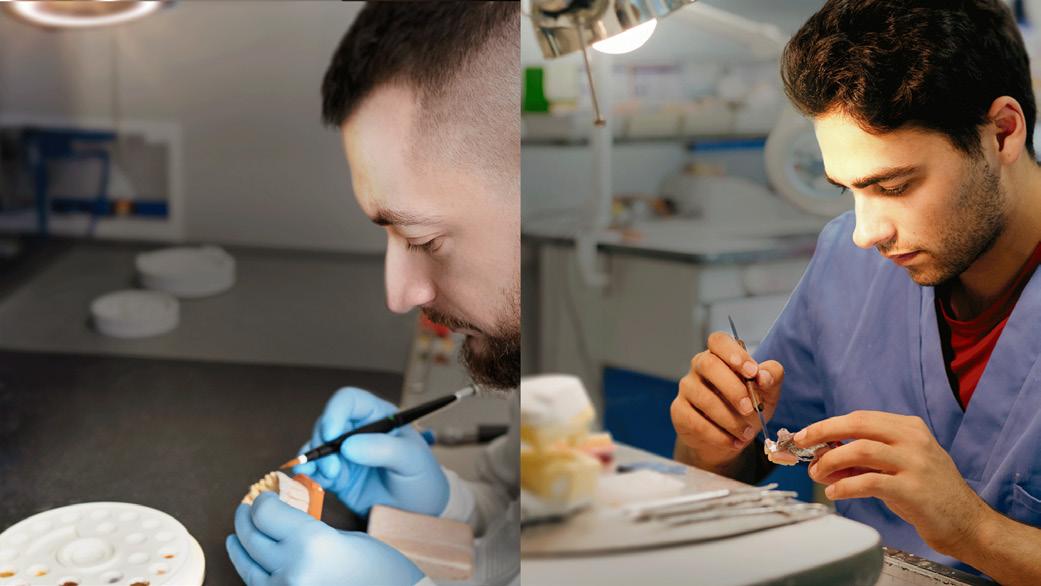
The Science of Laboratory Lighting
Basic Principles for Optimal Work
The Subject of the Article
• Precise dental work requires clever lighting concepts.
• Uniform light distribution is more important than spot brightness.
• New optical possibilities improve working conditions.
• The technical article by MDT Sascha Hein provides some well-founded analyses.
MDT Sascha Hein examines the scientific principles of good laboratory lighting in an article in “dental dialogue” magazine. His analysis shows that correct lighting is much more than just a question of brightness.
You can also read Sascha Hein’s analysis of ideal workplace lighting in the article “Color perception in dental technology: Why color arises in the brain”
The Basics of Vision in the Laboratory
“In dental technology, the constant observation of the smallest items and the assessment of shapes and colours demands maximum performance from the eyes,” explains Hein at the beginning of his article. A good light source not only aids visual function but also promotes well-being and reduces eye fatigue.
Understanding the Physics of Light
In his analysis, Sascha Hein distinguishes two central parameters:
• Lumen (lm) measures the total amount of visible light emitted by a light source in every direction. However, this value alone says little about the quality of the lighting.
• Lux (lx) describes the illuminance (intensity of illumination); in other words, the amount of light reaching a specific surface. This value is crucial in practical work.
A survey amongst dental technicians produced some interesting results: An intense concentration of brightness on the working centre was perceived as unpleasant. In contrast, uniform, high brightness over the whole working area enables more relaxed and efficient work.


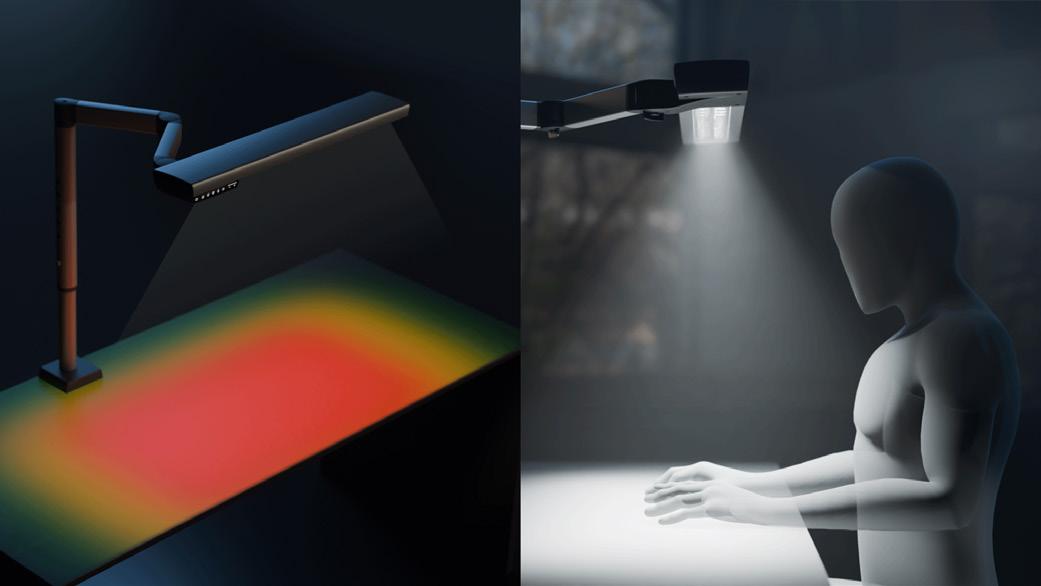
Luminaire with uniform flat illumination without hotspot formation
Luminaire with concentric hotspot formation
Did you know?
1. Dental technicians often find an intense concentration of brightness on the working area unpleasant. Uniform lighting, on the other hand, permits more relaxed working.
2. A lamp’s lumen value (the total amount of light) says little about the actual quality of the workplace lighting. The decisive factor is the lux value, which measures the amount of light reaching the working area.
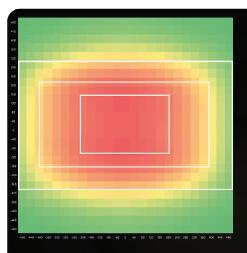
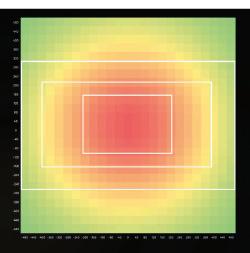
3. Two lamps may have the same lux value at the center but differ significantly in their light distribution. Conventional lamps often create annoying “hotspots”.
4. Good laboratory lighting supports the visual performance and has also been proven to promote emotional wellbeing and reduce eye fatigue.
5. The rectangular light distribution (LIGHT 1) corresponds better to the actual workplace geometry than the conventional circular illumination.
Technical Solutions
Sascha Hein’s analysis shows that conventional work lights have their highest intensity in the middle and decrease sharply towards the outside in a circular pattern. This restricts the possible illuminance, as excessive differences in brightness impair visual function. New technical developments address this challenge with special optical systems. For example, Renfert’s LIGHT 1 work light distributes the light evenly across the entire working area, avoiding any annoying differences in brightness.
Measurable Criteria for Good Illumination
In his analysis, Hein defines clear criteria for assessing laboratory lighting:
• Uniform illumination of the entire working area
• Sufficient illuminance without any glare
• Adaptation of the light distribution to the geometry of the workplace
• Avoidance of disturbing differences in brightness
Conclusion: Scientific Foundations for Better Work
Sascha Hein’s article makes it clear: Good laboratory lighting is based on sound scientific principles. Understanding these basic principles helps to optimize your own working conditions and leads to more precise, fatigue-free work.
“Making Work Easy”: The Best Light for Dental Technology
The scientific findings described find their practical application in LIGHT 1, Renfert’s new workplace lamp.
Technical details:
• Illuminance: up to 5,500 lux in the mean working area
• Illuminated area: 100 cm x 60 cm
• Uniform rectangular light distribution
Practical benefits:
• Fatigue-free work thanks to homogeneous illumination
• Precise color and shape assessment
• Efficient use of the entire working area
References
The Science of Laboratory Lighting: Basic Principles for Optimal Work From Sascha Hein Mar 31, 2025
Sascha Hein, MDT
Sascha Hein graduated from the Dental Technician College Munich in 1997. In 2001 he completed further studies in dental ceramics under Masahiro Kuwata in Tokyo, Japan.
In 2005 he graduated from Master School in Freiburg, Germany. In 2007
Sascha Hein was inducted into the international Oral Design group by founder Willi Geller. In 2012 he was inducted into the Bio-Emulation group which he served as president from 2014 - 2016. Together with Dr Panaghiotis Bazos and Dr Javier Tapia Guadix he developed the eLAB system from 2013 - 2016. From 2013 - 2017
Sascha Hein furthered his education in colour science and optical physics under the mentorship of Professor Jaap ten Bosch. Sascha Hein is currently a PhD Student at Leeds University’s School of Design.

With its specially developed optics and high-performance LEDs, Light 1 achieves extremely high lumen and lux values across the entire work surface.
Renfert LIGHT 1
Light distribution and illumination level of the Light 1 from Renfert compared to the competitor with the strongest illumination level to date.
Competitior
Give Your Patients Something to Smile About
with GC Tooth Mousse & Tooth Mousse Plus
When it comes to preventive dental care, GC Tooth Mousse and Tooth Mousse Plus are scientifically backed solutions with over 20 years of clinical research and proven results.
Developed to support acid neutralisation and remineralisation, these products help to prevent tooth decay, erosion, and reduce dentine hypersensitivity, making them an optimal choice for patients wanting to maintain strong, healthy teeth.
The
Science of Remineralisation
Both GC Tooth Mousse and Tooth Mousse Plus harness the power of Casein Phosphopeptide-Amorphous Calcium Phosphate (CPP-ACP), derived from the milk protein casein.
This unique complex delivers stabilised calcium and phosphate ions directly to the tooth surface, aiding in enamel remineralisation. Tooth Mousse Plus contains 900ppm fluoride, providing patients with extra protection.
Rapid Acid Neutralisation and Buffering
One of the standout benefits of GC Tooth Mousse is its ability to rapidly neutralise acids from plaque, food and drinks along with acid from reflux.
A reservoir of calcium and phosphate ions, along with the negatively charged peptide chains in CPP-ACP, react with positively charged hydrogen ions in acidic biofilm to neutralize acids and rapidly restore the biofilm and saliva to a neutral pH.
For patients with dry mouth conditions or frequent acid exposure, this buffering effect stabilises oral pH, reducing the overall risk of tooth decay and erosion.
Super Saturating Saliva with Essential Minerals * paper available if required
GC Tooth Mousse and Tooth Mousse Plus increases bioavailable calcium, phosphate, and fluoride (TMP) in saliva to support remineralisation at the tooth surface.
This mineral boost is especially beneficial for patients with dry mouth, often due to medication, as it keeps a steady supply of remineralising ions on the tooth surface. Fluoride in Tooth Mousse Plus goes a step further in supporting the formation of fluorapatite, a more acid-resistant mineral layer on the tooth surface.
Preventing Decay, Erosion, and Sensitivity
With a dual approach of acid buffering and increased calcium and phosphate bioavailability, plus fluoride from Tooth Mousse Plus, both Tooth Mousse and Tooth Mousse Plus strengthens and brightens enamel while preventing decay, erosion, and reducing dentine hypersensitivity. This makes them indispensable for patients seeking to maintain or enhance their dental well-being.
Effective Against White Spot Lesions
Orthodontic patients are at a higher risk of developing white spot lesions (WSLs) around brackets and bands. GC Tooth Mousse Plus with its added 900ppm fluoride is clinically proven* to prevent and reverse WSLs, offering an effective, non-invasive solution that helps patients maintain a bright, healthy smile during and after orthodontic treatment.
Patient-Friendly Flavours for Better Compliance
Patient compliance is essential for all and GC Tooth Mousse makes it easy with a variety of delicious flavours. Tooth Mousse is available in Mint, Strawberry, Vanilla, Tutti-Frutti, Melon. Milkshake and now Choclate, while Tooth Mousse Plus offers Strawberry, Mint, and Vanilla. Each tube provides up to 160 applications, giving patients an economical and delicious way to protect their oral health daily.
An Evidence Based Choice for Preventive Care Like No Other
GC Tooth Mousse and Tooth Mousse Plus are valuable additions to any dental care routine, providing patients with a trusted, research-backed method to prevent dental issues before they start. Encourage your patients to add this simple yet powerful step to their daily care regimen – they will thank you for it!
Dr Rakesh Jivan

Do it your way: 5 ways to champion sustainability in your dental practice.
You don’t have to be a practice owner to champion sustainability. And practicing in a sustainable way isn’t just about reusing, recycling and flicking light switches when you leave a room [1] [2]. Here are five ways you can champion your personal sustainable practice no matter where you work and who you work with, or for.
1. Champion prevention to reduce interventions.
Motivate patients to champion prevention to reduce their environmental footprint [2,3]. Many of our patients are aware of their environmental impact, and some may wish to leave a smaller footprint [3]. Prevention reduces the need for interventions to mitigate upstream energy consumption such as manufacturing and transport of treatments and materials, and reduced patient journeys further mitigates carbon emissions [1]
2. Promote and provide optimal long-term interventions
Include environmental costs as a consideration when you discuss treatment options with patients [2, 4]. Opt for materials that have a track record for quality and durability. Durable treatment options reduce long-term financial burden, reduce environmental costs, and increase patient satisfaction. While the initial cost of a temporary solution appears low, long term costs include additional appointments for repairs, that result in wasted materials, resources, and clinical time, and can diminish your career satisfaction [1, 4].
3. Harness the power of collaboration
Understand the benefits of integrated care [2,4] by involving suppliers, practice staff and patients. Maintain a good stock control system by advocating to order products in bulk to reduce transportation costs, and use materials before expiry [1] .
Plan and communicate your procedures in advance to help your assistant anticipate immediate clinical need to reduce their sterilising load and waste.
Consider batching appointments for families and book long appointments for multiple treatments. As long as it’s financially viable for patients, long appointments reduce surgery turnover, sterilising loads, improves your hourly rate reduces patient visits and consequently, emissions [1, 4].
4. Strive for dental excellence
Become a lifelong learner and adapt new technologies and methods [4]. Many new technologies are designed with the environmental factors in consideration. For instance, cloud based practice software reduces paper waste and scanning technologies replace impression material.
5. Be the change…
you want to see (attributed to Mahatma Ghandhi). Research shows that our behaviours, beliefs and health outcomes are often shaped by the people close to us [5]. Essentially, we are the sum of the five closest people in our circle, and our habits and behaviours are moulded and influenced by our proximal networks [6]. And in dental practice, our networks are our colleagues, and support staff. We spend more time with our workmates, than we do with our own partners and family. So if you want to influence your fellow workers, be the change you want to see. Start incorporating these practices into your workflow, and you may be surprised the ripple effect and influence in everyone’s behaviour [1]
You don’t have to be a practice owner to champion sustainability. Remember to promote the environmental benefits of prevention, deliver durable dental interventions, unite to mitigate waste, adapt evidencebased sustainable practices and champion sustainability in your practice.
References
1. Association., A.D. Sustainable Dentistry: How to Guide for Australian Dental Practices. [Online] 2025 [cited 2025 March 16]; Available from: https://ada.org.au/ resources/sustainable-dentistry.
2. Martin, N. and S. Mulligan, Environmental Sustainability Through Good-Quality Oral Healthcare. Int Dent J, 2022. 72(1): p. 26-30.
3. Byrka, K. and F.G. Kaiser, Health performance of individuals within the Campbell paradigm. International Journal of Psychology, 2013. 48(5): p. 986-999.
4. Duane, B., et al., Sustainability in Dentistry: A Multifaceted Approach Needed. Journal of Dental Research, 2020. 99(9): p. 998-1003.
5. Umberson, D. and J. Karas Montez, Social relationships and health: A flashpoint for health policy. Journal of health and social behavior, 2010. 51(1_suppl): p. S54-S66.
6. Swart, T., The Source: Open Your Mind, Change Your Life. 2019: Random House.
Author
Dr Arosha Weerakoon is senior lecturer and course coordinator at the University of Queensland’s (UQ) School of Dentistry in public health and professional practice, supervises research in dental materials, and is part of a multidisciplinary UQ team working to implement and evaluate the use of AI in higher education. She is principal dentist and owner of Tewantin Family Dental on the Sunshine Coast, serves as Deputy Chair of the Clinical Advisory Council for Country to Coast Queensland, and as an Advocate for Oral Health and Key Opinion Leader for Colgate. She collaborates with industry partners such as Kuraray Noritake Dental, contributes to national and international professional bodies, including the Australian Dental Congress organising committee. Arosha is a Fellow of the Royal Australasian College of Dental Surgeons, International College of Dentists, and the Pierre Fouchard Academy.
Her commitment to professional development was recognised with the 2022 BOQ Specialist Practice Bursary from the Australian Dental Association (QLD) and the Brisbane Lord Mayor’s Convention Trailblazer Grant in 2019. The same year, she won Universities Australia’s Vice Chancellor’s Award for science communication.
As a science communicator, Arosha communicates oral health messages to the public through various media platforms. Globally, Arosha is the top contributor on oral health-related articles for The Conversation Media Group. She is dedicated to enhancing oral and general health through community engagement, interdisciplinary collaboration, and patient empowerment. As a Colgate Advocate for Oral Health, Arosha aims to foster meaningful dialogue among health professionals to improve patient outcomes and inspire greater clinical engagement with research.

Dr Arosha Weerakoon Queensland
The Importance of Tracking Oral Health
One of the greatest challenges we face as dental professionals is helping our patients be aware of the state of their oral health as well as maintain it in the long term. In this article, I hope to share some insights into the importance of tracking oral health and tools available to help your patients maintain optimum oral health.
Peter Drucker, the renowned management consultant, once famously said that “you can’t improve what you don’t measure”.1 This statement rings true for any habit we have in life, whether consciously or unconsciously. When considering habits that maintain good oral health, we as dental professionals know all too well that brushing and flossing the teeth twice daily is the key. When establishing these habits however, a reliable tracking system is required to reinforce the habit long enough for it to become second nature.
For young children aged less than 6 years of age, it is generally advised that parents brush the teeth for their children as children this age do not yet have the manual dexterity of fine motor control to be able to effectively brush well. Establishing these routines whilst young can ensure that once they start to brush on their own from 6 years old and older, they will automatically continue this habit. Of course in childhood, children seldom keep up habits of their own volition unless supervised and monitored by parents. One great way for children who are learning to brush on their own to track their brushing progress is the use of a daily tracking tool whereby they can tick after they complete the habit. One tool that is available to parents that clinicians can recommend is the Colgate Oral Health Heroes Challenge which is part of the Bright Smiles, Bright Futures educational resources. This includes a brushing challenge that requires children to tick the morning and night boxes for 28 days (4 weeks).2
Whilst the quantity of toothbrushing daily is an important factor towards optimising a person’s oral health, it is ultimately the effectiveness of plaque removal across all tooth surfaces when brushing that is the biggest prevention factor for dental diseases. One method which can be helpful in educating the efficacy of brushing is to use plaque disclosing tablets. These chewable tablets are made with food-grade vegetable dyes that stain plaque either a red or purple colour to show plaque that is still adhered to the tooth surface.3 Whilst these are effective educational tools to help patients improve their brushing efficacy, long-term compliance can be low as one disadvantage is it can temporarily stain the soft tissues around the teeth.
A great solution to this is the use of digital connected health technologies that track brushing duration, habit and brush positioning to ensure effective brushing of all tooth surfaces. One such toothbrush that allows this tracking is the Colgate Pulse Series 2. This electric toothbrush uses bluetooth connection to the Colgate Connect App on any smartphone device. A great functionality of this application is the guided brushing tool which in real time is able to educate users on how to get the most effective brush score up to 100%.4 Other brushing markers that are tracked with this application include brushing angulation as well as brushing pressure, which is a great tool for overzealous brushes who are prone to toothbrush abrasion. In alignment with connected health integration technology platforms available with modern smart technologies, the brushing data from the Colgate Connect App can also be integrated with the Apple Health App. This allows Apple users to see their oral health progress linked in with all other health parameters being recorded summarised in one area.5
Brushing Challenge Oral Health Hero
Brush Morning and Night for 28 days!
Tick when you brush 4
Start here ➜ Week 1
Brush as a family Day 1 Day 2 Day 3 Day 4 Day 5 Day 6 Day 7
Week 2
You’re half way there Day 1 Day 2 Day 3 Day 4 Day 5 Day 6 Day 7
The Colgate Connect App can also be integrated with Amazon Alexa which allows the Alexa smart assistant to send users reminders on when they need to charge their toothbrush, as well as order new replacement brush heads three-monthly. Smart reorders can also be set up with Amazon Alexa so users can ensure they have adequate supply of replacement brush heads. This provides a convenient solution for patients to have a new brush head every three months on their electric toothbrush since brush bristles become less effective with use over time.6
For more activities visit www.colgatebsbf.com.au
Connected care technologies represent the next frontier of tools patients can use to track and optimise their dental health. It is important for dental professionals to stay updated on emerging technologies so they can best empower patients to make the best decisions for their oral health.
References
1. Young Entrepreneur Council. You are what you measure. Forbes. December 4, 2018. Accessed January 23, 2025. https://www.forbes.com/councils/ theyec/2018/12/04/you-are-what-you-measure/
2. Colgate-Palmolive. Colgate Oral Health Heroes Challenge. Colgate Palmolive. Accessed January 23, 2025. https://www.colgate.com.au/oral-health-education/ educational-resources/oral-health-heroes-challenge
3. Colgate Global Scientific Communications. What Disclosing Tablets Can Tell You About Plaque. Colgate-Palmolive. 8, 2024. Accessed January 23, 2025. https:// www.colgate.com/en-us/oral-health/plaque-and-tartar/disclosing-tablets-plaque#
4. Colgate-Palmolive. Guided Brushing. Colgate Connect Support. Accessed January 23, 2025. https://connectsupport.colgate.com/hc/en-au/articles/4418730306578Guided-Brushing
5. Colgate-Palmolive. Use Colgate Connect with Apple Health. Colgate Connect Support. Accessed January 23, 2025. https://connectsupport.colgate.com/hc/enau/articles/4418706873874-Use-Colgate-Connect-with-Apple-Health
6. Colgate-Palmolive. Use Colgate Connect With Amazon Alexa. Colgate Connect Support. Accessed January 23, 2025. https://connectsupport.colgate.com/hc/enau/articles/4418733980818-Use-Colgate-Connect-with-Amazon-Alexa
Week 3
Almost finished...
Week 4 YOU DID IT!
Author
Dr Kaejenn Tchia is a recent graduate working in a corporate private practice in Darwin, Northern Territory. He is the current President of the Australian Dental Association NT Branch Inc. He has also served leadership positions for Bupa Dental Corporation including the Clinical Advisory Panel, Clinical Procurement Committee and currently the Graduate Committee. He is passionate about helping and collaborating with fellow dental colleagues, recently embarking on a new journey to help recent graduates eliminate burnout through a 6-step B.E.L.I.E.F System through his motivational coaching platform, The Limitless Dentist. Kaejenn is a member of the Colgate Advocates for Oral Health: Content Community and hopes to use this platform to raise awareness of the importance of mental health in dentistry and provide mindset tools, which can help his colleagues unlock their next level of growth and success.

Kaejenn Tchia Northern Territory
LOW VISCOSITY SUPER ETCH LV
LOW VISCOSITY SUPER ETCH LV
LOW VISCOSITY SUPER ETCH LV
LOW VISCOSITY SUPER ETCH LV

SDI has created a specialized blue gel 37% phosphoric acid etchant for sealants, in a direct delivery system. Super Etch LV’s lower viscosity improves the acid’s surface contact for deeper etchant penetration into the pits and fissures. The deeper acid penetration strengthens the mechanical bond and the retention success of Conseal F sealants.
SDI has created a specialized blue gel 37% phosphoric acid etchant for sealants, in a direct delivery system. Super Etch LV’s lower viscosity improves the acid’s surface contact for deeper etchant penetration into the pits and fissures. The deeper acid penetration strengthens the mechanical bond and the retention success of Conseal F sealants.
SDI has created a specialized blue gel 37% phosphoric acid etchant for sealants, in a direct delivery system. Super Etch LV’s lower viscosity improves the acid’s surface contact for deeper etchant penetration into the pits and fissures. The deeper acid penetration strengthens the mechanical bond and the retention success of Conseal F sealants.
Conseal F
SDI has created a specialized blue gel 37% phosphoric acid etchant for sealants, in a direct delivery system. Super Etch LV’s lower viscosity improves the acid’s surface contact for deeper etchant penetration into the pits and fissures. The deeper acid penetration strengthens the mechanical bond and the retention success of Conseal F sealants.
ADVANTAGES
ADVANTAGES
ADVANTAGES
ADVANTAGES
No Bis-Phenol A or it’s derivatives
No Bis-Phenol A or it’s derivatives
No Bis-Phenol A or it’s derivatives
No Bis-Phenol A or it’s derivatives
Extremely low viscosity - quickly and deeply penetrate pits and fissures
Extremely low viscosity - quickly and deeply penetrate pits and fissures
Extremely low viscosity - quickly and deeply penetrate pits and fissures
Extremely low viscosity - quickly and deeply penetrate pits and fissures
Accurate and controlled delivery with 27 gauge tips
Accurate and controlled delivery with 27 gauge tips
Accurate and controlled delivery with 27 gauge tips
Accurate and controlled delivery with 27 gauge tips
7% filled – fluoride releasing
7% filled – fluoride releasing
Light Cured Fluoride Releasing Pit and Fissure Sealant
DEEPEST PENETRATION
DEEPEST PENETRATION
DEEPEST PENETRATION
DEEPEST PENETRATION
Conseal F is available in direct placement syringes. Both have pre-bent, superfine dispensing tips which facilitate controlled, direct extrusion for faster procedures and allow direct dispensing into previously difficult to reach areas.
Conseal F is available in direct placement syringes. Both have pre-bent, superfine dispensing tips which facilitate controlled, direct extrusion for faster procedures and allow direct dispensing into previously difficult to reach areas.
7% filled – fluoride releasing
7% filled – fluoride releasing
Opaque white shade
Opaque white shade
Opaque white shade
Opaque white shade
Low viscosity etchant gel provided in the intro kit
Low viscosity etchant gel provided in the intro kit
Low viscosity etchant gel provided in the intro kit
Low viscosity etchant gel provided in the intro kit
Conseal F is available in direct placement syringes. Both have pre-bent, superfine dispensing tips which facilitate controlled, direct extrusion for faster procedures and allow direct dispensing into previously difficult to reach areas.
The Conseal F nozzle, one third the size of other brands, enhances complete sealing and retention by allowing penetration into the deepest pits and fissures; crevasses that will not admit the dispensing tips of other materials.
The Conseal F nozzle, one third the size of other brands, enhances complete sealing and retention by allowing penetration into the deepest pits and fissures; crevasses that will not admit the dispensing tips of other materials.
Conseal F is the lowest viscosity resin sealant available enabling it to flow faster and deeper into the prepared pits and fissures. The Conseal F nozzle, one third of the size of other brands, enhances complete sealing and retention by allowing a deeper penetration into the smallest pits and fissures. Provided in the Conseal F kit a low viscosity etchant gel specifically designed for pit and fissure etching.
Conseal F is available in direct placement syringes. Both have pre-bent, superfine dispensing tips which facilitate controlled, direct extrusion for faster procedures and allow direct dispensing into previously difficult to reach areas.
The Conseal F nozzle, one third the size of other brands, enhances complete sealing and retention by allowing penetration into the deepest pits and fissures; crevasses that will not admit the dispensing tips of other materials.
The Conseal F nozzle, one third the size of other brands, enhances complete sealing and retention by allowing penetration into the deepest pits and fissures; crevasses that will not admit the dispensing tips of other materials.
FISSURE SEALANT
TIP SIZE COMPARISON**
TIP SIZE COMPARISON**
TIP SIZE COMPARISON**
TIP SIZE COMPARISON**
Conseal F’s syringe tip diameter opening is only 0.41mm; significantly smaller than the alternatives of 1.5mm or 1.3mm.
Conseal F’s syringe tip diameter opening is only 0.41mm; significantly smaller than the alternatives of 1.5mm or 1.3mm.
Conseal F’s syringe tip diameter opening is only 0.41mm; significantly smaller than the alternatives of 1.5mm or 1.3mm.
Conseal F’s syringe tip diameter opening is only 0.41mm; significantly smaller than the alternatives of 1.5mm or 1.3mm.
Fluoride Release
CLINICALLY PROVEN
CLINICALLY PROVEN
CLINICALLY PROVEN
CLINICALLY PROVEN
Conseal F combines the proven SDI sealant technology with an intensive initial fluoride boost in conjunction with long term fluoride treatment. The unique Conseal F filler component, with its blend of particles and high surface-to area volume ratios, enables high fluoride release. Fluoride enhances caries prevention, remineralization and the inhibition of enamel demineralization.
Lowest Viscosity
RANGE OF COLORS
RANGE OF COLORS
RANGE OF COLORS
RANGE OF COLORS
Conseal F is available in opaque white. Conseal is available in light grey.
Conseal F is available in opaque white. Conseal is available in light grey.
Conseal F is available in opaque white. Conseal is available in light grey.
Conseal F is available in opaque white. Conseal is available in light grey.
HYGIENIC PLACEMENT
Conseal F is the lowest viscosity sealant. The ideal low viscosity allows Conseal F to flow faster and deeper into the prepared pits and fissures. A recognized cause of pit and fissure sealant failure is an inability to seal. The tighter seal optimizes Conseal F’s mechanical retention and eliminates the space required for bacteria to grow. Conseal F’s tight seal is further enhanced by its unique UDMA resin system’s lower shrinkage and by being BISGMA free, avoiding the controversy of Bisphenol A.
HYGIENIC PLACEMENT
HYGIENIC PLACEMENT
HYGIENIC PLACEMENT
The Conseal F offers a direct and hygienic way of dispensing the sealant, eliminating the risk of cross contamination.
The Conseal F offers a direct and hygienic way of dispensing the sealant, eliminating the risk of cross contamination.
The Conseal F offers a direct and hygienic way of dispensing the sealant, eliminating the risk of cross contamination.
The Conseal F offers a direct and hygienic way of dispensing the sealant, eliminating the risk of cross contamination.
BIO COMPATIBLE
BIO COMPATIBLE
BIO COMPATIBLE
BIO COMPATIBLE
Deepest Penetration
Conseal F is available in direct placement syringes. Both have pre-bent, superfine dispensing tips which facilitate controlled, direct extrusion for faster procedures and allow direct dispensing into previously difficult to reach areas. The Conseal F nozzle, one third the size of other brands, enhances complete sealing and retention by allowing penetration into the deepest pits and fissures; crevasses that will not admit the dispensing tips of other materials.
Conseal F’s low water solubility minimizes breakdown of the sealant in the oral environment.
Conseal F’s low water solubility minimizes breakdown of the sealant in the oral environment.
Conseal F’s low water solubility minimizes breakdown of the sealant in the oral environment.
Conseal F’s low water solubility minimizes breakdown of the sealant in the oral environment.
» sealants contribute significantly to dental public health. 2 «
» sealants contribute significantly to dental public health. 2 «
» sealants contribute significantly to dental public health. 2 «
» sealants contribute significantly to dental public health. 2 «
Clinically Proven
5,363 Conseal sealants placed in 774 children found no failures due to the material and established that “sealants contribute significantly to dental public health.”
5,363 Conseal sealants placed in 774 children found no failures due to the material and established that “sealants contribute significantly to dental public health.”2
5,363 Conseal sealants placed in 774 children found no failures due to the material and established that “sealants contribute significantly to dental public health.”2
5,363 Conseal sealants placed in 774 children found no failures due to the material and established that “sealants contribute significantly to dental public health.”2
5,363 Conseal sealants placed in 774 children found no failures due to the material and established that “sealants contribute significantly to dental public health.”2
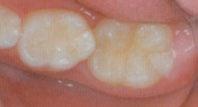
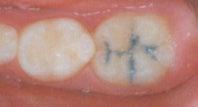

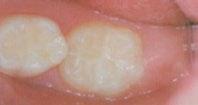
Photos courtesy of Dr Mitsuru Sonoda, D.D.S Hokkaido, Japan
Photos courtesy of Dr Mitsuru Sonoda, D.D.S Hokkaido, Japan
Photos courtesy of Dr Mitsuru Sonoda, D.D.S Hokkaido, Japan
Photos courtesy of Dr Mitsuru Sonoda, D.D.S Hokkaido, Japan
Photos courtesy of Dr Mitsuru Sonoda, D.D.S Hokkaido, Japan


KaVo amiQa – 100% KaVo. Compact and ready for every indication. Everything you need in one unit that impresses with its quality and price/ performance. The new KaVo makes the start into the future perfect.
KaVo amiQa – 100% KaVo. Kompakt und bereit für jede Indikation. Alles, was du brauchst, in einer Einheit, die durch Qualität und Preis/ Leistung überzeugt. Die neue KaVo macht den Start in die Zukunft perfekt.
KaVo amiQa. Die neue KaVo!
Erfahren Sie mehr: www.kavo.com/de/amiqa www.kavo.com
The new KaVo amiQaTM Reliably at your side. Find out more: www.kavo.com/en/amiQa