
DENTAL SOLUTIONS
Small changes, Big smiles
Minimally invasive restorations for maximum aesthetic impact
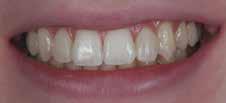
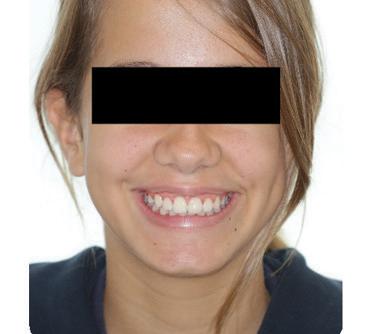
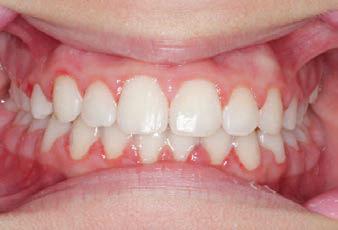
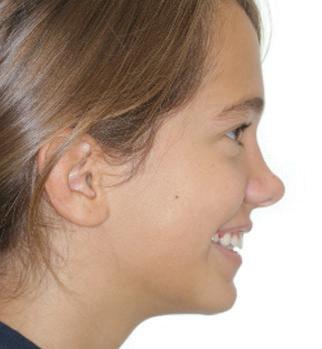
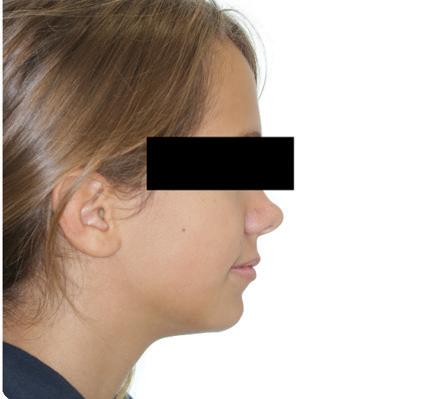
A significant number of people are unhappy with their smile, which has a considerable psychosocial impact. Although many seek cosmetic dental treatment, costs, fear and duration of total treatment are often barriers to the patients. Nevertheless, many could benefit from small and subtle changes to their teeth. With simple direct and freehand techniques, quick but significant results can be obtained that ultimately greatly improve the overall smile aesthetics.
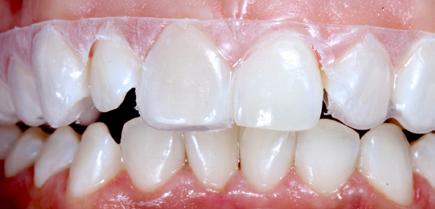
The restoration of abfractions in the anterior area is important for aesthetic appearance especially in patients with high smile lines. Moreover, restoring abfractions strengthens the cervical area of the tooth, prevents further loss of enamel and ameliorates unpleasant sensitivity.
Black triangles and diastemas can cause entrapment of the food and accumulation of bacteria, which leads to gingivitis and ultimately periodontitis. By eliminating the black triangles and diastemas with composite bonding, the dentist not only improves the aesthetics, but also protects the long-term health of the periodontal tissues.
Worn canine cusp restoration is of special functional importance. Creating functional canine guidance with a minimally invasive composite addition to the canine cusp will protect the posterior teeth during lateral movements of the jaw. Incisal wear restorations return the youthful appearance to the smile and prevent further loss of enamel and exposure of the dentinee.
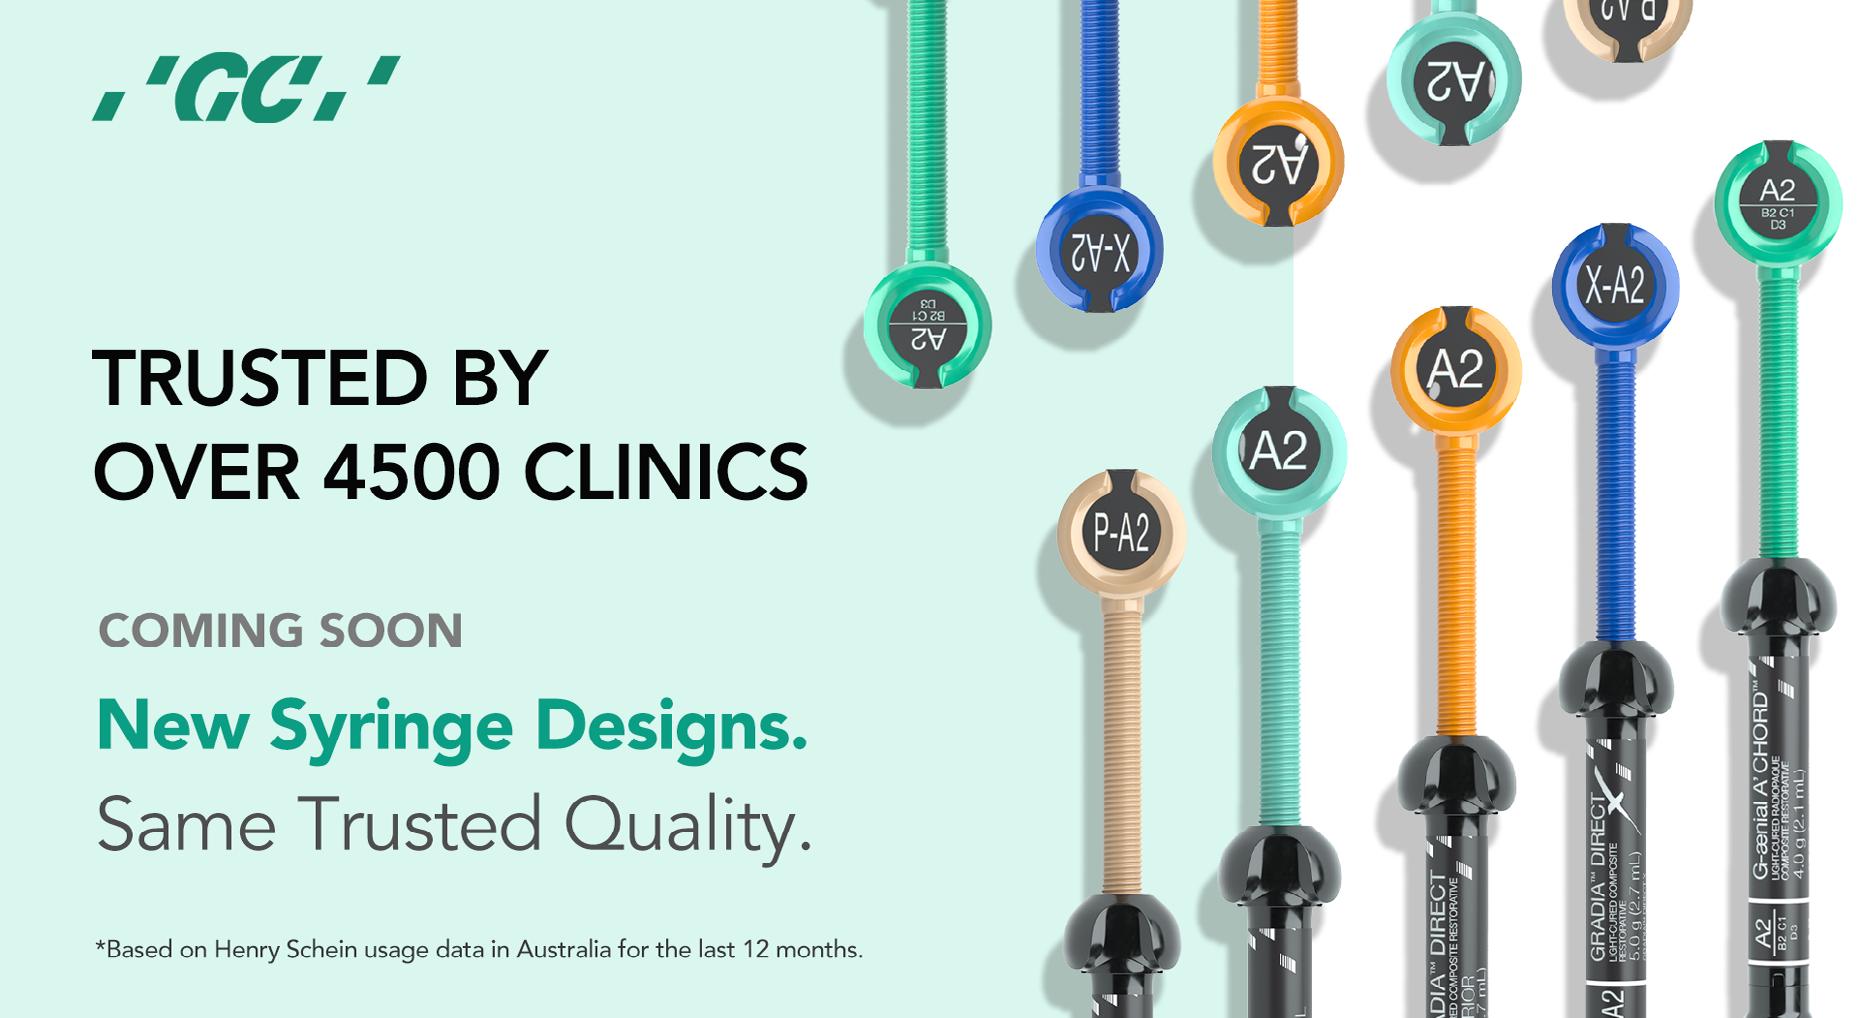
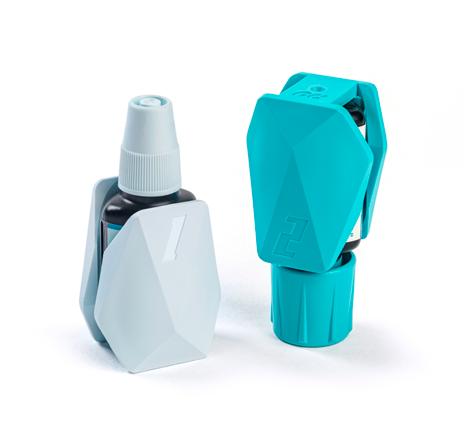
Single shade restorations
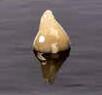
G-ænial A’CHORD®
• Pleasant consistency, adapted to the use
• Simplified shade selection due to excellent blending with the surrounding tooth
• Quickly polished to sustained brilliance
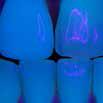
• The true-to-nature fluorescence contributes to consistent colour matching in any circumstances
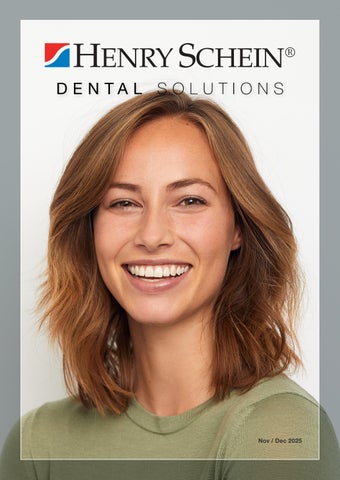
G-ænial® Universal Injectable
• Exceptional strength and wear resistance
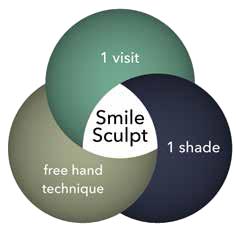
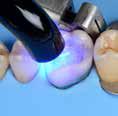
Single visit smile sculpting

“G-ænial A’CHORD composite gives me the perfect balance in handling, shade simplicity, polish ability, and physical properties for a truly universal composite system for my everyday restorative work.” Dr Anthony Mak, Australia
“I love G-ænial A’CHORD due to the simplicity of the system and the ability to create highly aesthetic and life-like restorations predictably every single time. The handling of the material is fantastic and is an essential material in my daily restorative armamentarium.” Dr. Yo-Han Choi, Australia

View products
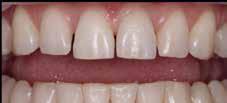
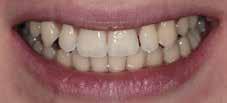
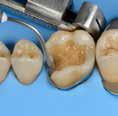
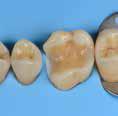
Restoring incisal wear and closing diastema with G-aenial A’CHORD. Courtesy of: Dr Aleksandra Slacan, Poland
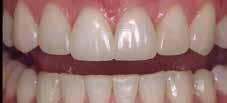
Reshaping of teeth and diastema closure with G-aenial A’CHORD. Courtesy of: Dr Andres Silva, Spain
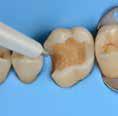
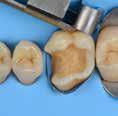
Why deep margin elevation?
Deep margin elevation will make the impression easier by moving the proximal margin of the restoration supra-gingivally, which is especially important for intra-oral scanning. It helps in avoiding periodontal surgical procedures. It makes isolation of the prepared tooth and luting of the final restoration easier.
Tips and Tricks
• Isolation with rubber dam is highly recommended.
• For a better emergence profile, use Teflon tape in the space between the matrix and the adjacent tooth instead of a wedge. Do not use the same matrix as you use for creating a contact point in direct restorations.
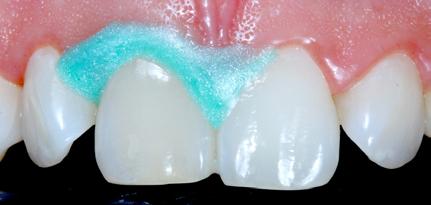
• Selective etching of the enamel is recommended.
• Use XBW shade of G-aenial® Universal Injectable for easy differentiation between the tooth, composite material and the restoration.
• The height of the new margin should be slightly above the gingival margin (1mm).
any overhangs. Expose the enamel
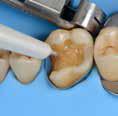
1. Clean the tooth surfaces, rinse thoroughly and dry.
2. Apply a matrix adapted to the technique. Gingival margin of the preparation should be well sealed.
3. Etch the enamel.
5. Dry and light-cure.
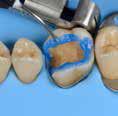
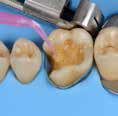
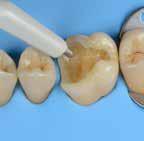
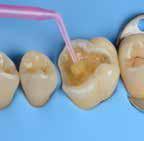
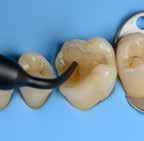
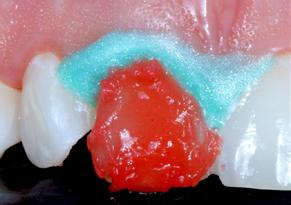
6. Apply G-ænial Universal Injectable to the gingival margin of the proximal box.
7. Light cure
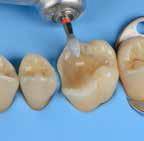
8. Remove the matrix and check for
covered with adhesive on the rest of the tooth with a fine grit diamond bur.
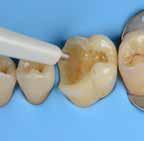
4. Apply a bonding agent (G-Premio BOND or G2-BOND Universal).
Why immediate dentine sealing?
Resin infiltration into the dentine surface is more effective on freshly cut dentine because it is uncontaminated and clean. Immedciate Dentine Sealing protects dentine against contamination with bacteria or remnants of temporary cements. It prevents post-operative sensitivity by sealing dentine tubules. It increases bond strength of the final indirect restoration to the tooth. It often eliminates the need for anaesthesia during the cementation procedure (when the restoration is delivered in the next appointment).
Tips and Tricks
• Placing a rubber dam and isolating neighbouring teeth with teflon tape are always recommended.
• Use maximum air pressure to dry 1-PRIMER of G2-Bond to remove the solvent & residues of water.
• 1-PRIMER should be kept out of light as it contains photoinitiators.
• When doing immediate dentine sealing with G-Premio BOND, it is recommended to add a thin layer of G-aenial® Universal Injectable or a flowable composite on top.
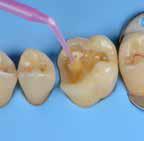

1. Clean the tooth surfaces, rinse thoroughly and dry Apply G-Premio BOND Apply 1-PRIMER of G2-BOND Universal
5. Air dry to make a uniform bonding layer
4. Light cure
5. Fill in the undercuts with everX Flow®. Perform deep margin elevation if needed.
6. Remove unpolymerized layer. Expose enamel covered with adhesive with a fine grit diamond bur.
2A. G-Premio BOND
2B. G2-BOND Universal
1 Year Clinical Performance Report: G-CEM ONE®
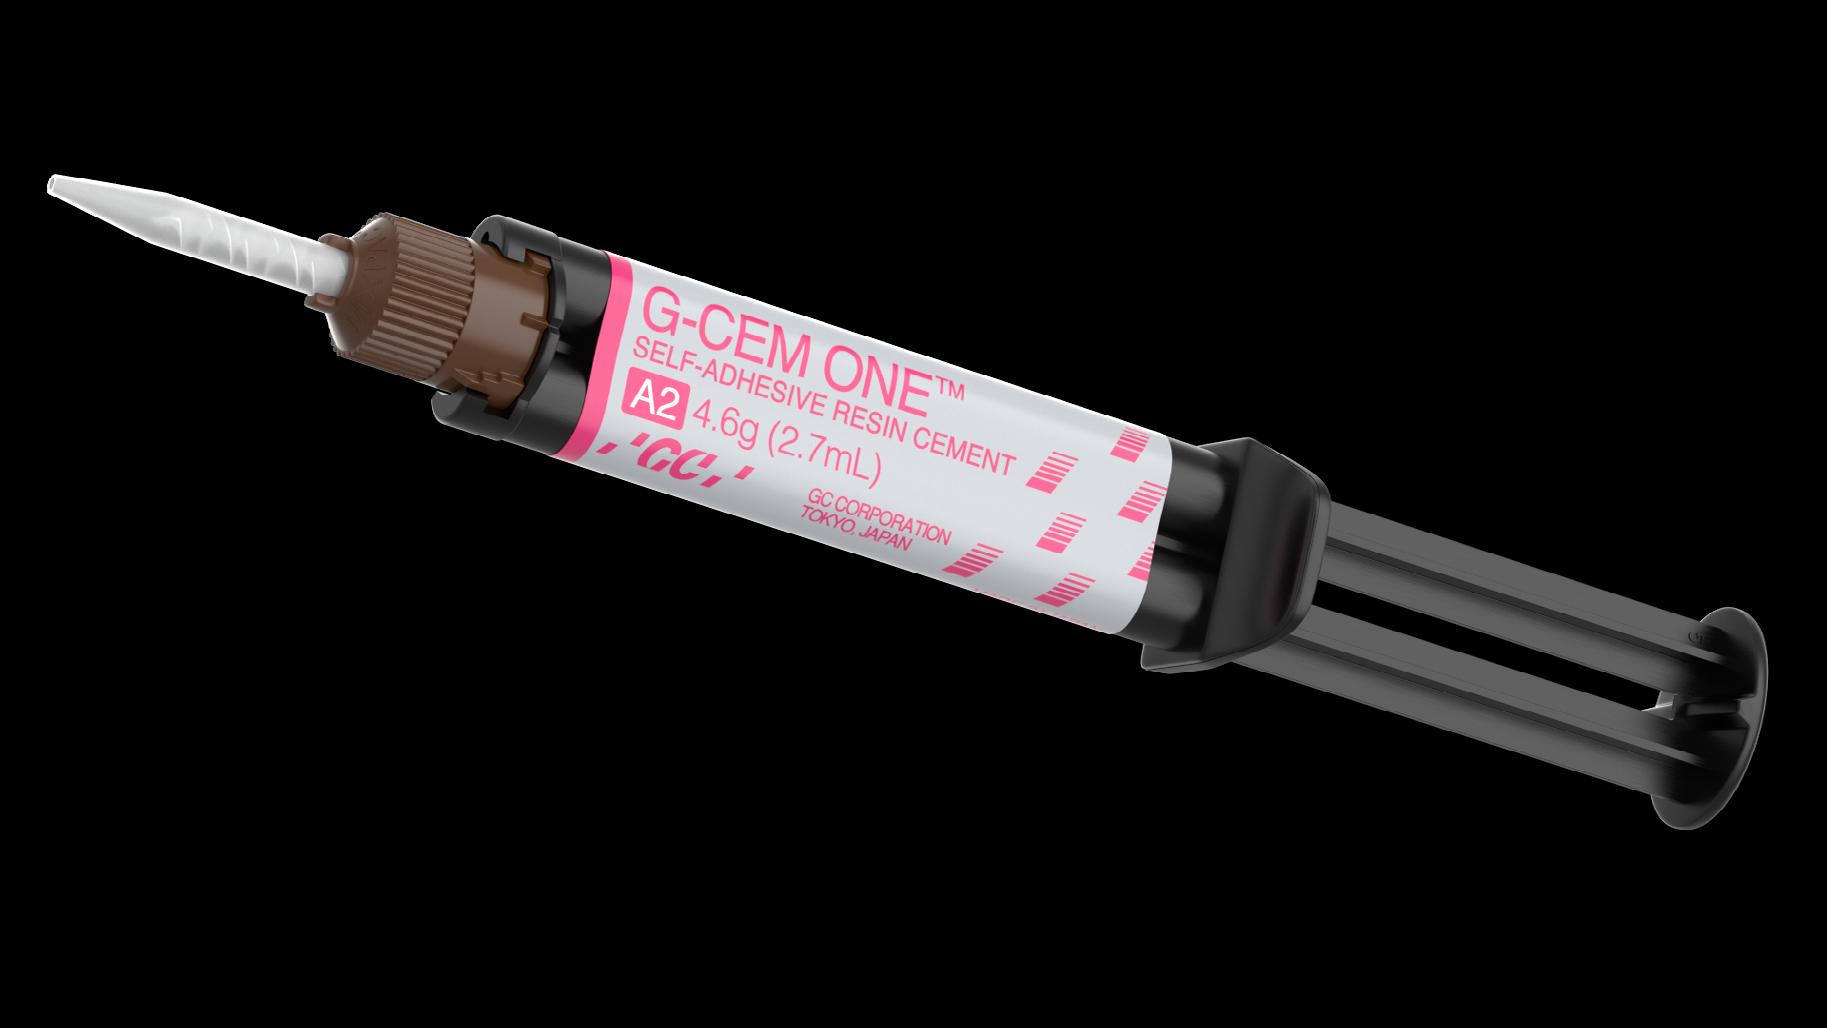
The G-CEM ONE 1-Year Retrospective Report from the Dental Advisor highlights the strong clinical performance of GC Corporation’s universal resin cement across 153 restorations over 12 months. Results show excellent bond strength to enamel, dentine, and restorative substrates such as zirconia and lithium disilicate. When used with the Adhesive Enhancing Primer (AEP), the cement achieved a 100% success rate in self-curing procedures, while overall aesthetic results remained consistently high—91% rated as excellent initially and 95% maintained after one year.
Clinicians praised G-CEM ONE for its ease of use, reliable bond strength, and predictable aesthetics, especially in challenging cases such as short clinical crown heights and thin lithium disilicate restorations. Compared to the competitor products tested, G-CEM ONE consistently demonstrated equal or superior performance in bond strength and resistance to discolouration, making it a dependable choice for a wide range of cementation procedures.
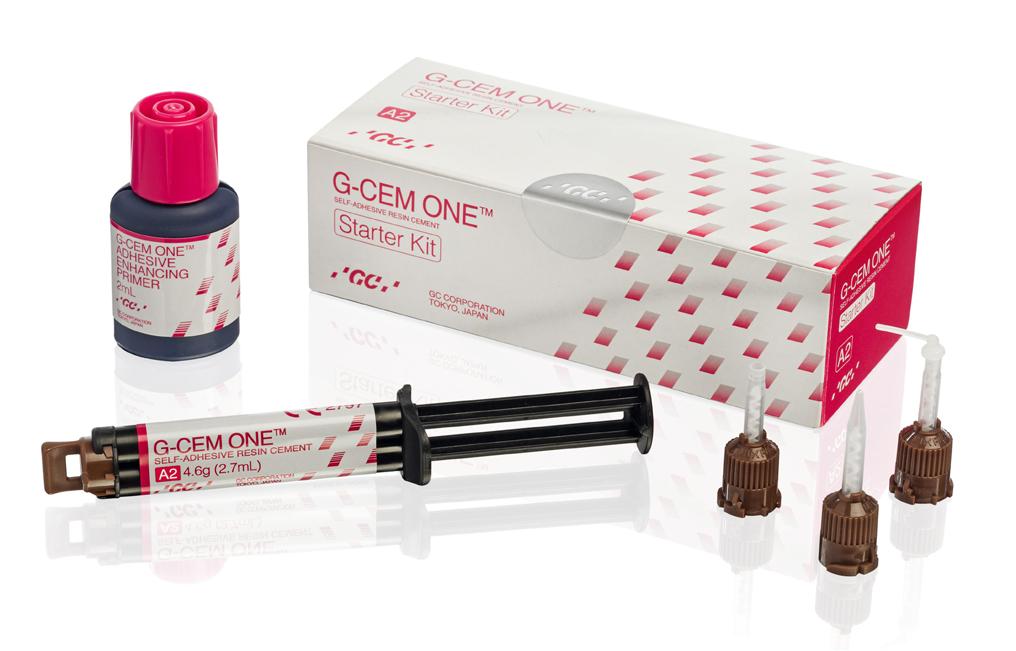
Universal self-adhesive resin cement

Answering your needs
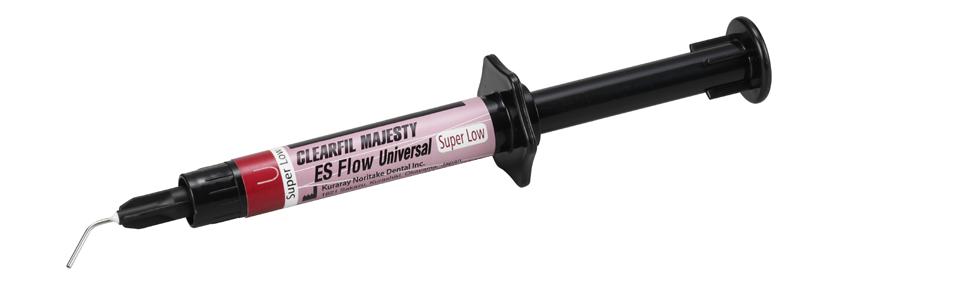
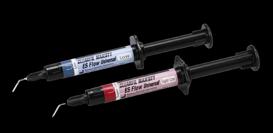
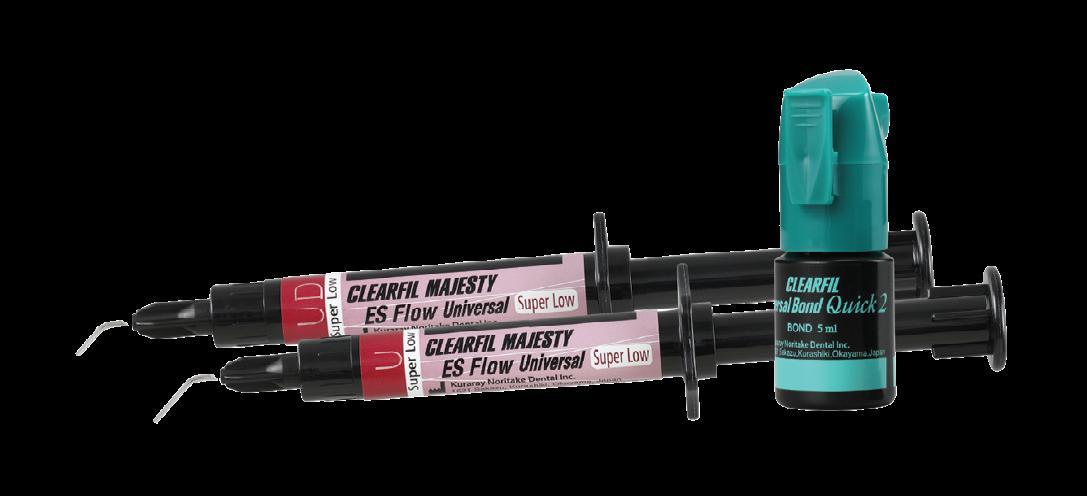
CLEARFIL™ Majesty ES Flow Universal
In modern dental practice, there is a strong need for materials that combine convenient handling and procedural efficiency with aesthetic, durable results. These materials enable dental practitioners to achieve desired outcomes more efficiently, enabling them to spend more time on personal interaction with their patients.
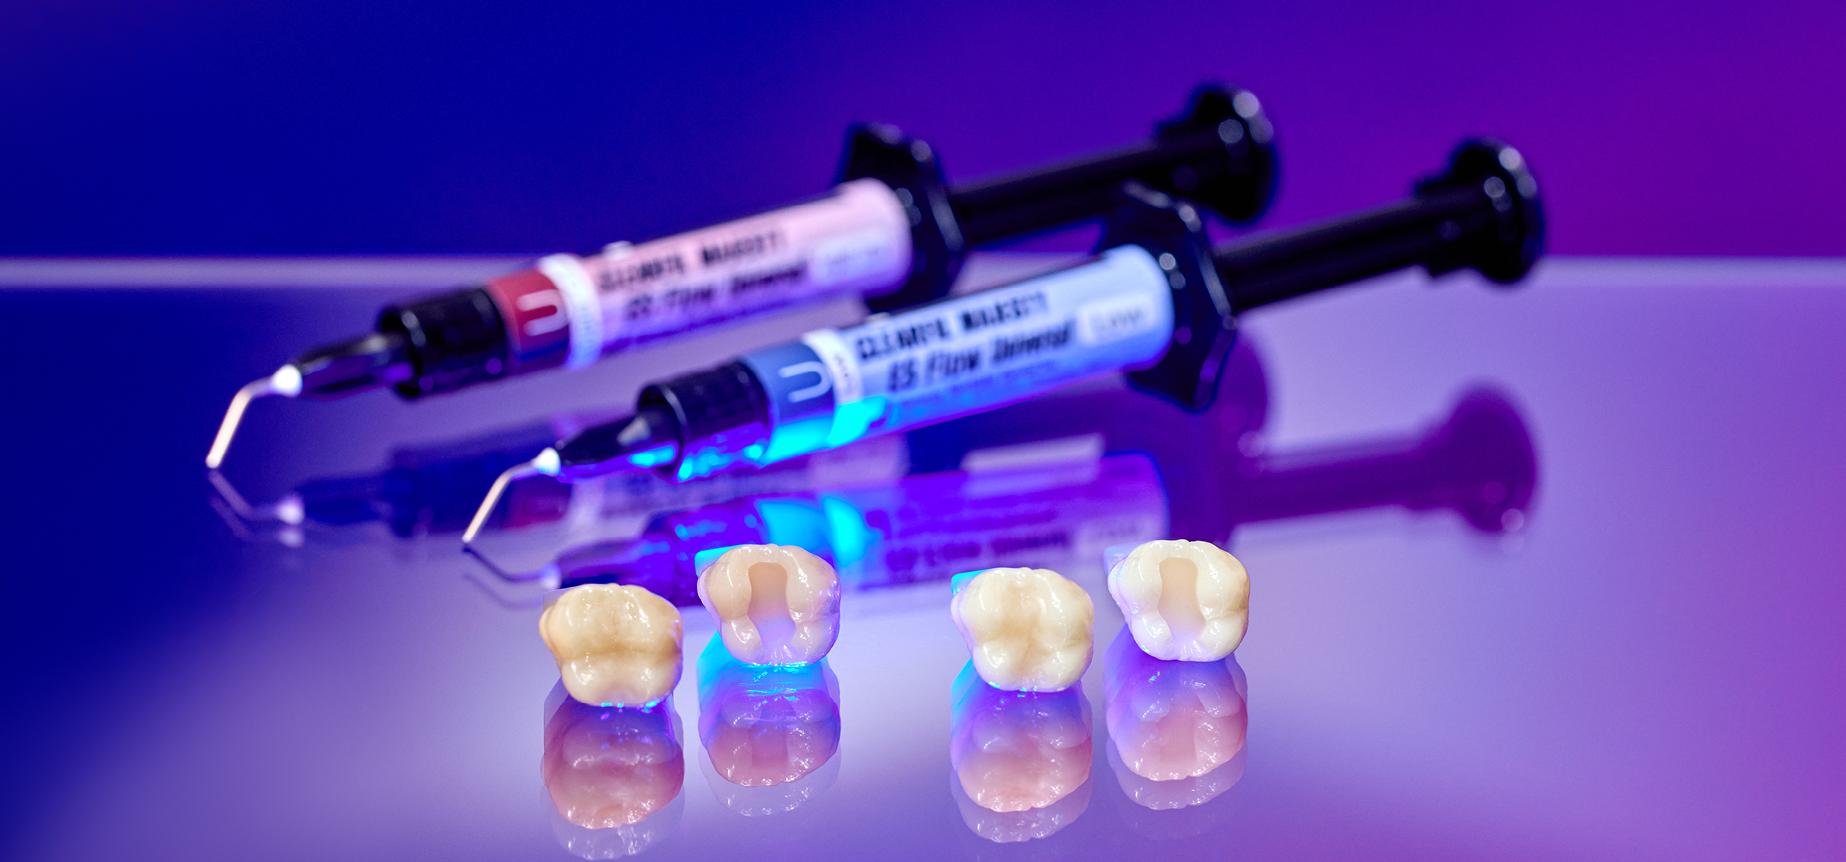
In the context of direct restorative treatments, the selected resin composite has a strong impact on the simplicity of procedures and the quality of the outcomes: This is why universal paste-type composites, such as CLEARFIL™ MAJESTY ES-2 Universal (Kuraray Noritake Dental Inc.) are becoming increasingly popular. With CLEARFIL™ MAJESTY ES Flow Universal, the same company has now introduced a flowable composite that offers similar benefits, summarized below by answering your key questions.
How can you achieve aesthetic, durable restorations with flowable ease?
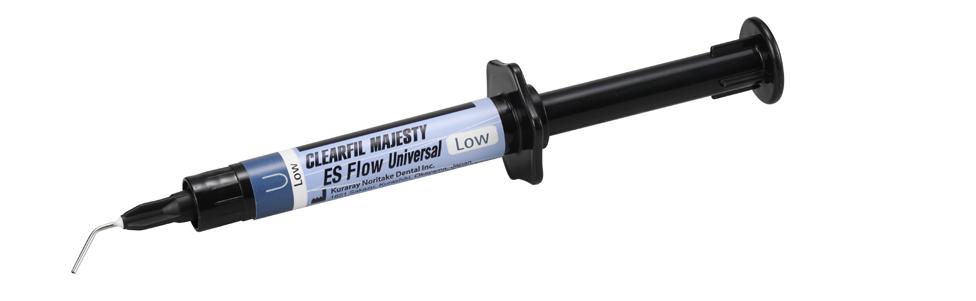
CLEARFIL™ MAJESTY ES Flow Universal is a flowable solution with two complementary shades designed for intuitive shade matching that supports a range of restorative procedures. It combines practical flow characteristics with advanced shadeblending ability and outstanding mechanical properties. Low
• Flexural strength 151 MPa.
• Compressive strength 373 MPa.
• Filler load 75 wt/% / 59 vol%.
• Radiopacity 140 % Al.
Super Low
• Flexural strength 152 MPa.
• Compressive strength 374 MPa.
• Filler load 78 wt/% / 60 vol%.
• Radiopacity 150 % Al.
What is CLEARFIL™ MAJESTY ES Flow Universal?
CLEARFIL™ MAJESTY ES Flow Universal is a light-cured, radiopaque composite resin designed for a variety of clinical situations, available in two viscosities and 2 shades. It features nano-filler technology that allows for controlled flow, polish retention, and natural-looking restorations. Seamless blending of the composite is achieved by having a smart combination of an enamel-like translucency, dentin-like chroma and LightDiffusion Technology (LDT). The enamel-like translucency allows light to transmit through the material, enhancing the color integration with surrounding tooth structure. LDT makes restorations diffuse light in a similar way as enamel and dentin. Together with the fine-tuned chroma, these characteristics contribute to a smooth optical integration of the material into the surrounding tooth structure.
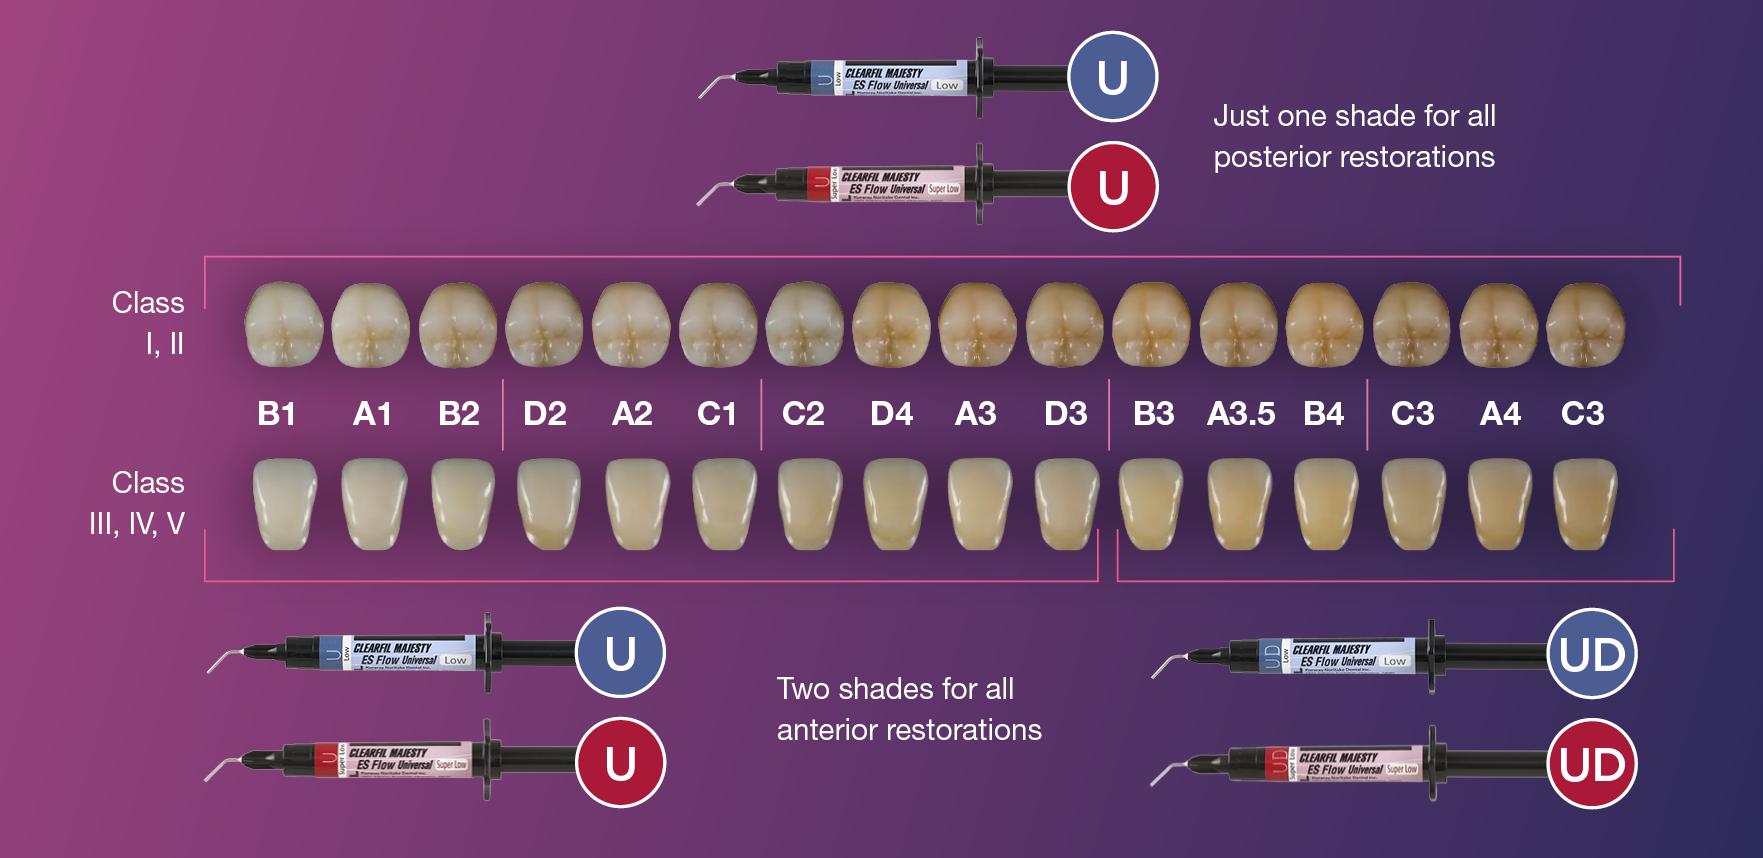
How is shade selection accomplished?
Shade selection is virtually effortless with CLEARFIL™ MAJESTY ES Flow Universal. The two complementary shades, universal (U) and universal dark (UD), are intuitively selected – no shade guide needed. Shade U is suitable for most posterior and anterior restorations.
UD performs best in darker-shade teeth (B3 and above) with a low amount of surrounding tooth structure, including Class III and IV cavities. Depending on the cavity class and age of the patient, you may pick the shade that fits best.
Where can you use CLEARFIL™ MAJESTY
ES Flow Universal?
This flowable composite is intended for a wide scope of restorative needs. From Class I-V restorations to pit and fissure sealing and repairs, it is formulated for use in both conservative and comprehensive treatment plans.
CLEARFIL™ MAJESTY ES Flow Universal may be used for:
• Direct restorations for all cavity classes, cervical lesions (e.g. root surface caries, v-shape defects), tooth wear, and tooth erosion.
• Cavity base / liner.
• Correction of tooth position and tooth shape (e.g. diastema closure, tooth malformation).
• Intraoral repair of fractured restorations.
What contributes to the performance of
CLEARFIL™ MAJESTY ES Flow Universal?
The formulation includes several features aimed at clinical effectiveness:
• Nano-filler technology: Maintains an optimal filler load for reduced shrinkage, enhanced wear resistance, and longterm polish retention.
• Universal shade adaptation: Offers good visual integration with surrounding tooth structure, supporting streamlined shade selection.
• Thixotropic handling: Flows under pressure during placement but remains stable once in position, enabling precise application.
Color matching with anterior and posterior restorations
Why consider CLEARFIL™ MAJESTY ES Flow Universal?
Clinicians may find CLEARFIL™ MAJESTY ES Flow Universal beneficial due to its:
• Predictable handling and delivery.
• Aesthetic outcomes for both anterior and posterior restorations.
• Resistance to wear and surface degradation.
• Radiopacity that supports radiographic evaluation.
• Adaptability across a variety of restorative needs.
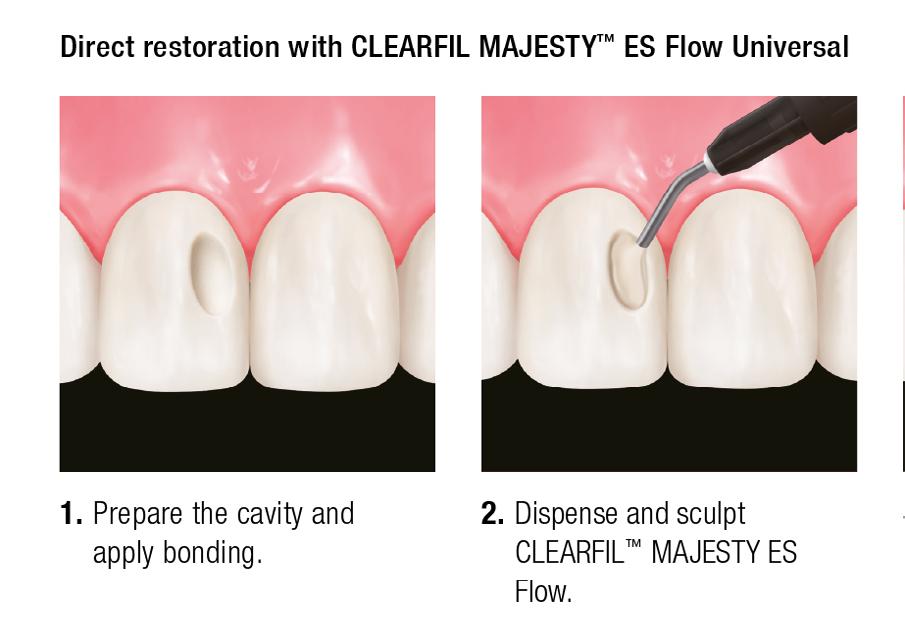
How do you apply CLEARFIL™ MAJESTY ES Flow Universal?
The application is straightforward and fits into standard clinical workflows:
1. Prepare and isolate the area as required.
2. Apply a compatible adhesive (e.g., CLEARFIL™ Universal Bond Quick 2).
3. Dispense the material using the syringe and fine-tip applicator.
4. Light-cure according to the manufacturer’s guidelines (typically 20 seconds, depending on the shade and curing light used).
5. Finish and polish to complete the restoration. Syringe-based delivery supports controlled application and convenience.

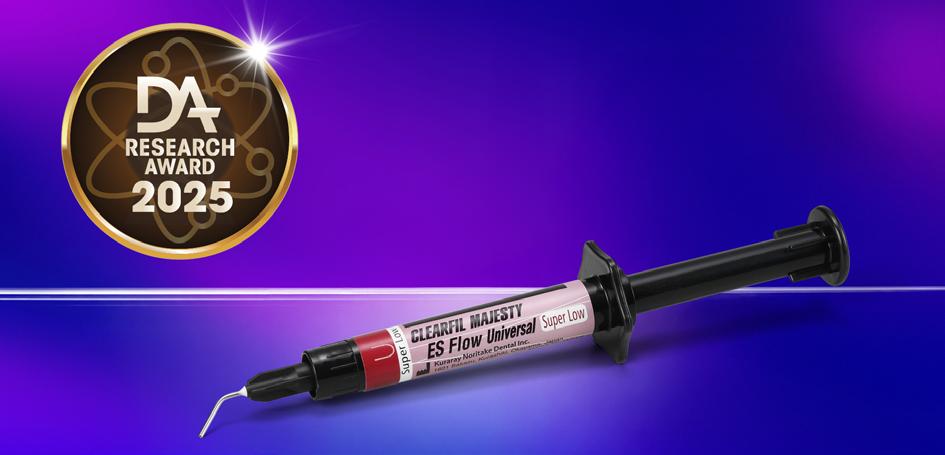
Has CLEARFIL™ MAJESTY ES Flow Universal been evaluated by independent sources?
Yes. CLEARFIL™ MAJESTY ES Flow Universal (Super Low) has been evaluated by dental professionals through third-party testing and peer-reviewed feedback. Most recently, it received Research Award 2025 from The
Dental Advisor. In their conclusion, the evaluators from the U.S.-based publication stated:
“Testing shows this composite to have among the highest physical properties for flowable composites that rivals the strongest packable composites in flexural strength, and compressive strength with an ideal radiopacity.”
A versatile flowable option: CLEARFIL™ MAJESTY ES Flow Universal
CLEARFIL™ MAJESTY ES Flow Universal is intended to support restorative procedures by combining controlled handling, aesthetic integration, and mechanical durability. It can be a practical choice for clinicians seeking a dependable flowable resin for a wide range of clinical scenarios.
Universal Excellence - Smart Streamlined Solutions
At Kuraray Noritake Dental Inc., we understand the demands of modern dental practices. Balancing complex procedures, tight schedules, and patient needs is no easy task. That is why we have been on a relentless journey to streamline, enhance, and refine every step of your work for decades. Our vision is clear: a world where your materials and tools work seamlessly in your hands, where complexity is minimized, and where you are given enough time to focus on what matters most: the individual desires and needs of every single patient. This is the future of dentistry, and together, we’re making it happen.


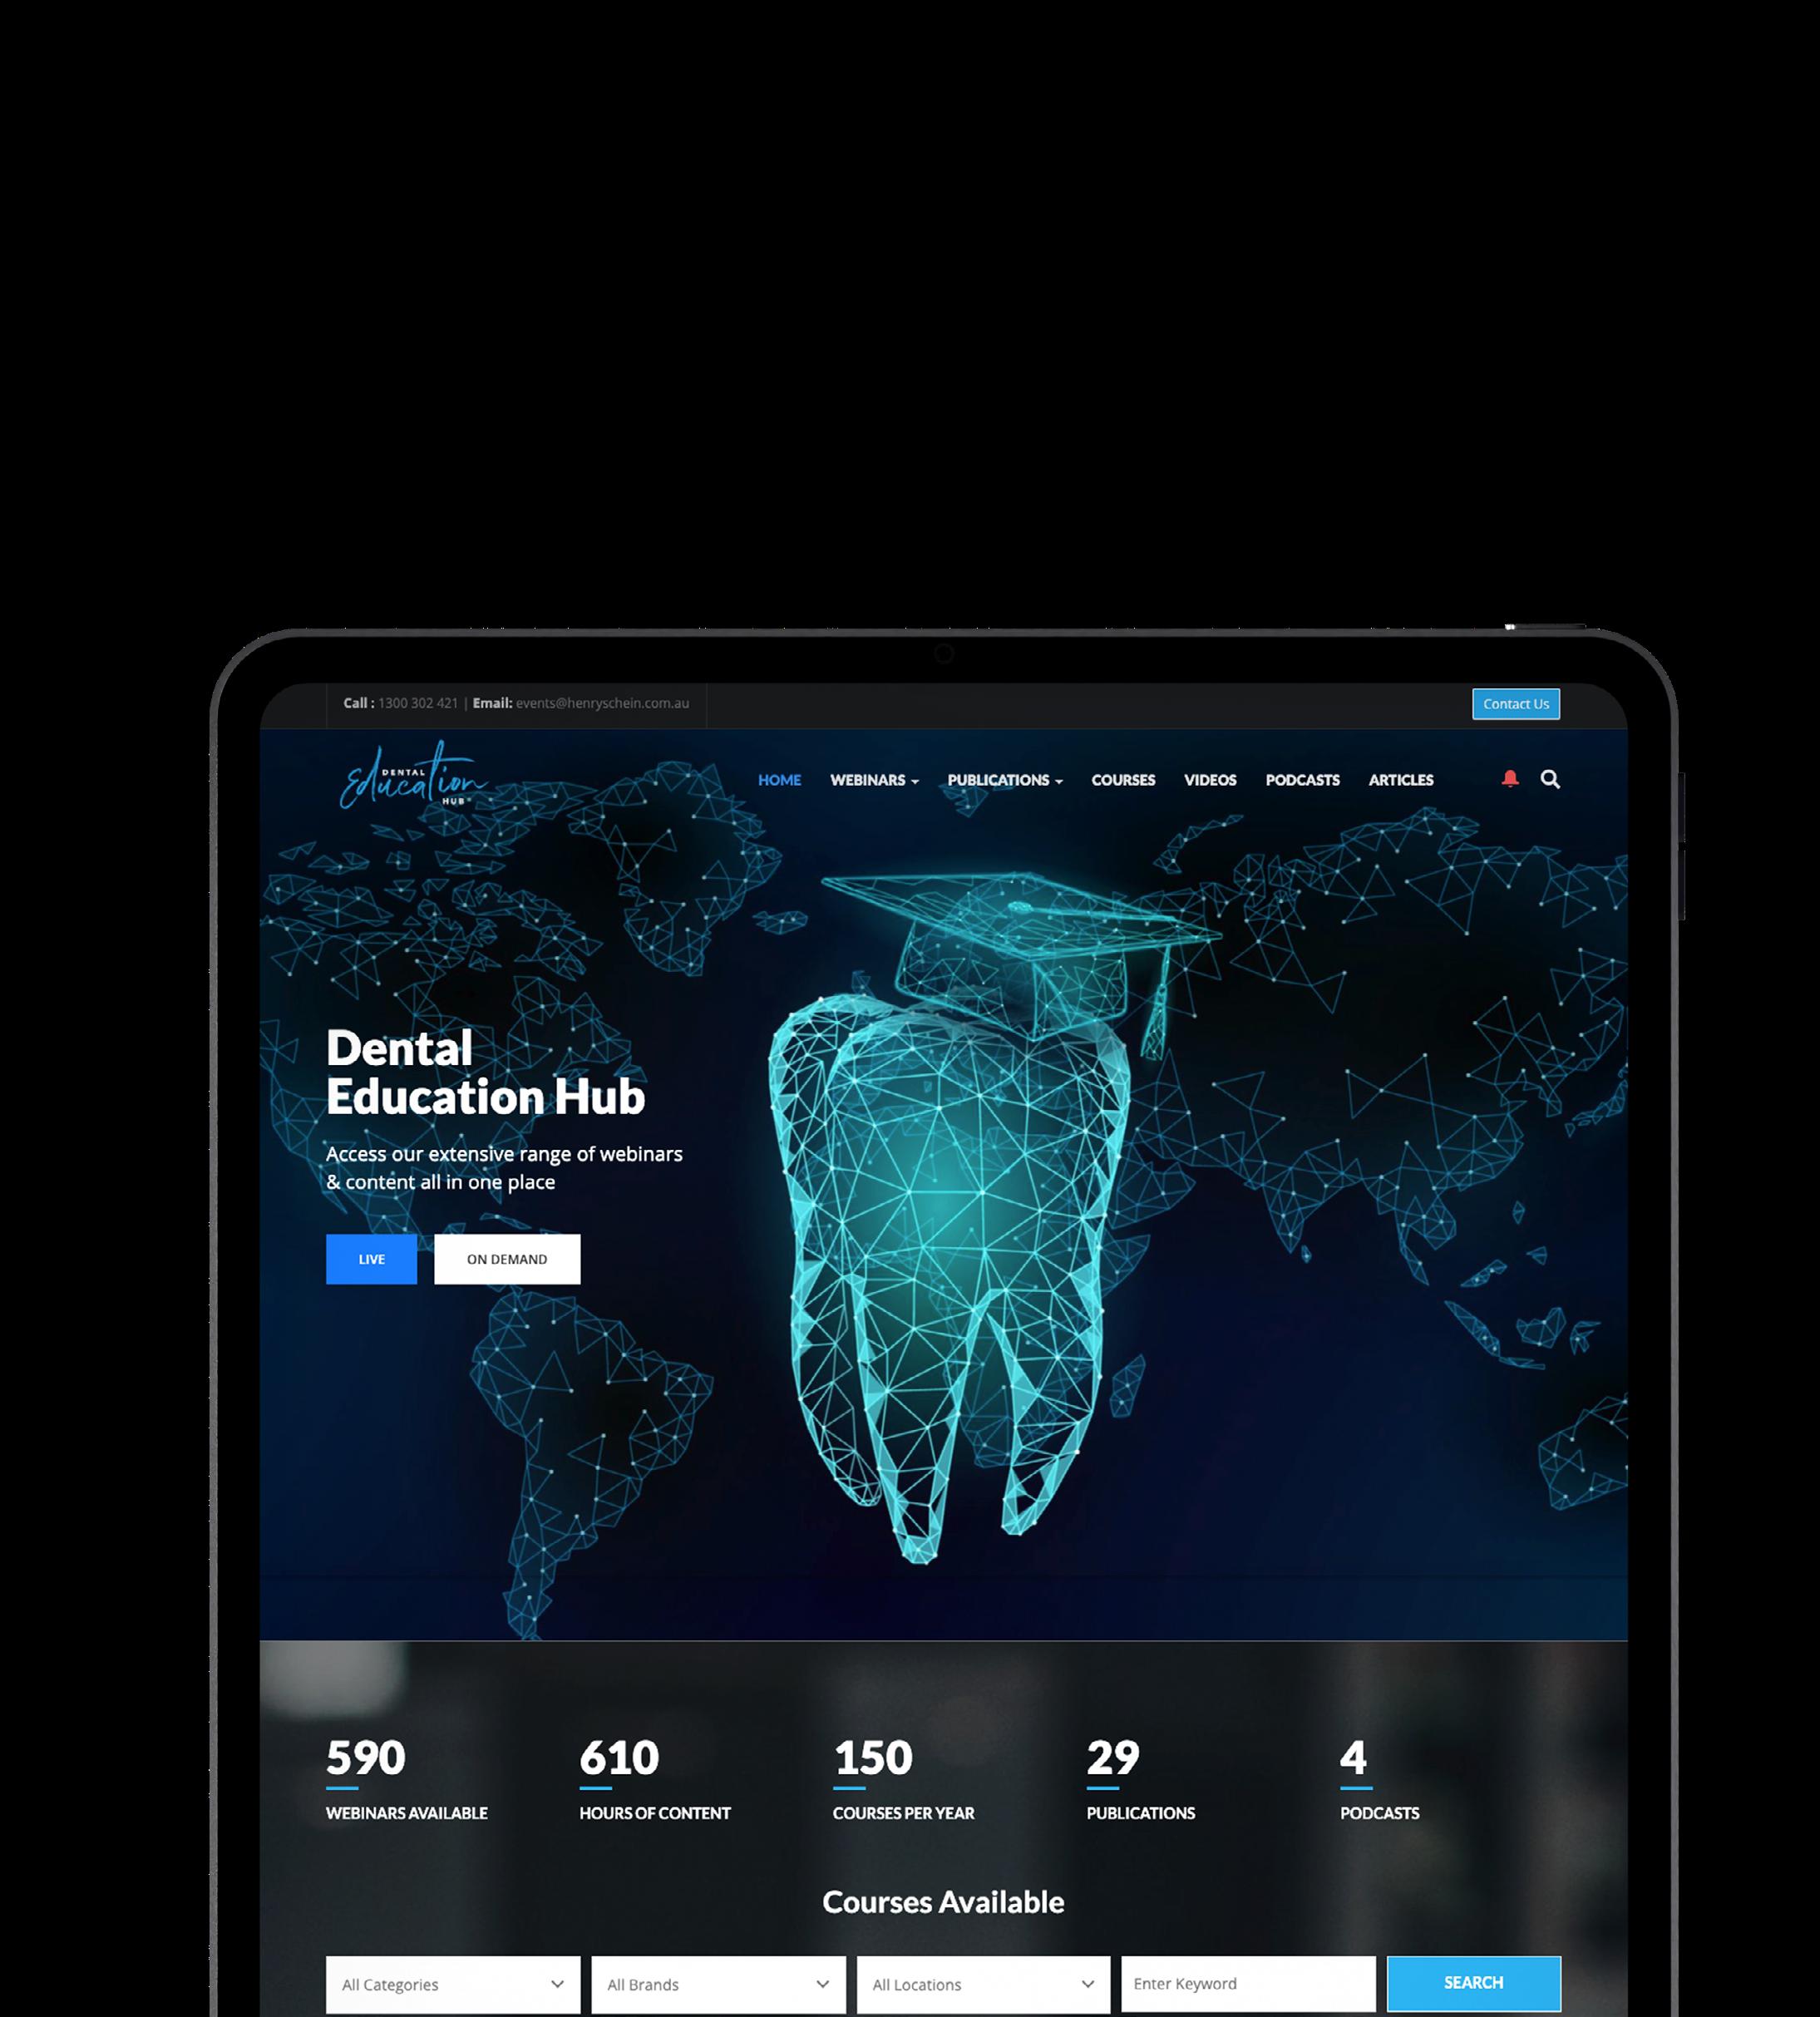
Explore over 600 hours of clinical and business related content all in one place with access to courses, webinars, podcasts and articles.
How can you Simplify your Bonding Process without compromising quality?
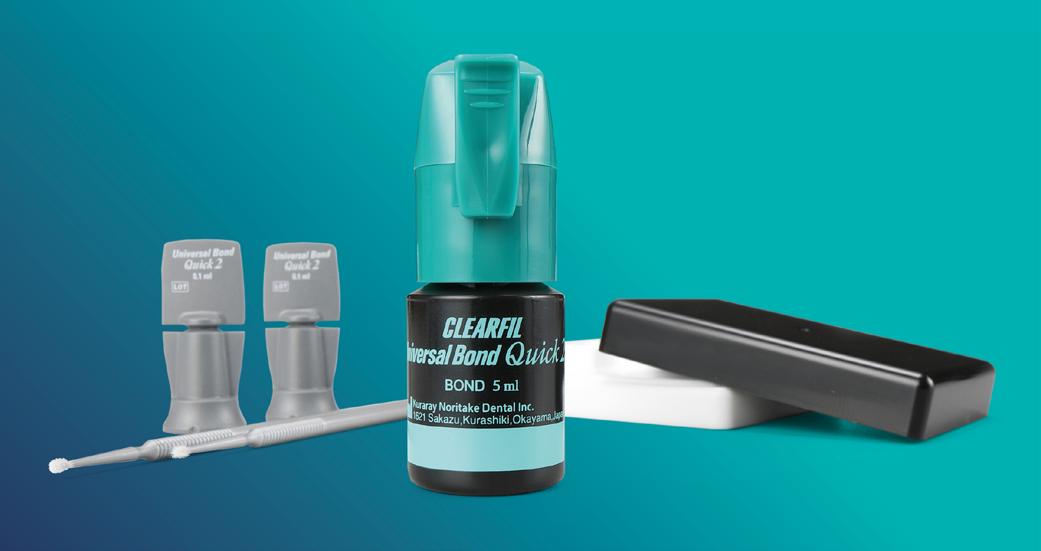
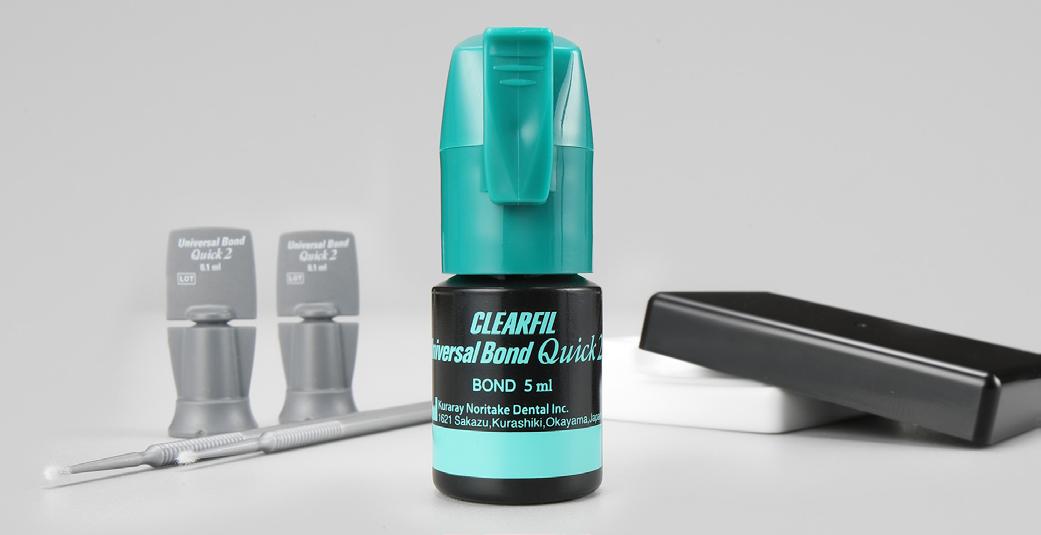
CLEARFIL™ Universal Bond Quick 2
In modern dentistry, efficiency and reliability are key elements for many practices. CLEARFIL™ Universal Bond Quick 2 offers a low effort, high-performance bonding solution providing exceptional results. With its Advanced Rapid Bond Technology, this adhesive allows for quick and easy application, eliminating unnecessary steps and reducing technical sensitivity.
What Is CLEARFIL™ Universal Bond Quick 2?
CLEARFIL™ Universal Bond Quick 2 is an advanced dental adhesive designed to streamline restorative procedures. Compatible with etching techniques of your choice, it provides strong adhesion to enamel and dentine, ensuring a strong and uniform bond layer. Its versatility makes it suitable for both direct and indirect restorations, as well as core build-ups and intraoral repairs.
Where Can This Bonding Solution Be Used?
CLEARFIL™ Universal Bond Quick 2 is ideal for any dental practice seeking a reliable and easy-to-use adhesive. Whether performing routine direct restorations or several indirect procedures, this adhesive delivers consistent performance and a simplified workflow.
What are the indications of CLEARFIL™ Universal Bond Quick 2?
This bonding agent is designed for a variety of clinical applications:
• Direct restorations using light-cured composite resin
• Sealing of a prepared cavity or abutment tooth as a pretreatment for indirect restorations
• Treatment of exposed root surfaces
• Treatment of hypersensitive teeth
• Intraoral repairs of fractured restorations
• Post cementation and core build-ups
• Cementation of indirect restorations
Why Does CLEARFIL™ Universal Bond Quick 2 Work So Well?
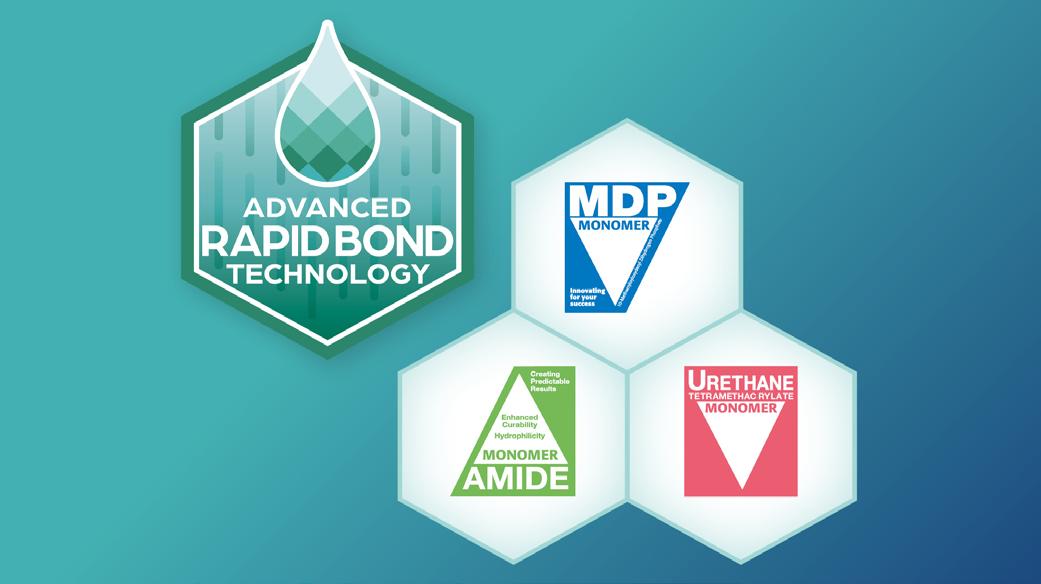
The key to its exceptional performance lies in its proprietary Advanced Rapid Bond Technology, which consists of three high performance ingredients:
• Original MDP Monomer: Invented by KURARAY CO., LTD., this monomer provides unmatched bonding strength to hydroxyapatite and a wide range of materials, including zirconium oxide. It provides for an excellent bond that remains stable over time.
• Amide Monomer: A highly hydrophilic monomer that allows for rapid penetration into the tooth structure, eliminating the need for waiting after application. During polymerisation, it forms a stable, hydrophobic crosslinked network for a strong and durable bond.
• Urethane Tetra Methacrylate (UTMA) Monomer: This multifunctional monomer enhances the strength of the bonding layer itself, increasing resistance to shrinkage forces while maintaining a thin and uniform adhesive layer.
Together, these monomers form the foundation of CLEARFIL™ Universal Bond Quick 2, providing a fast, dependable, and versatile adhesive for all your restorative needs.
Why Choose CLEARFIL™ Universal Bond Quick 2?
CLEARFIL™ Universal Bond Quick 2 enhances efficiency without sacrificing quality. Its Advanced Rapid Bond Technology integrates MDP, Amide, and Urethane Tetra Methacrylate (UTMA) monomers to create a strong, uniform bond layer. This allows for even spreading and superior bond strength to both enamel and dentine. The low-viscosity formula forms a thin, even film, reducing risk of pooling and enhancing predictability. Additional benefits include:
• Quick and straightforward application
• Consistently durable bond strength
• Versatility across different restorative techniques
• Minimized risk of pooling and contamination
• Compatibility with self-adhesive resin cements
• Convenient room temperature storage
How Do You Apply CLEARFIL™ Universal Bond Quick 2?
Application is simple and efficient, accommodating various clinical scenarios. The adhesive can be used in:
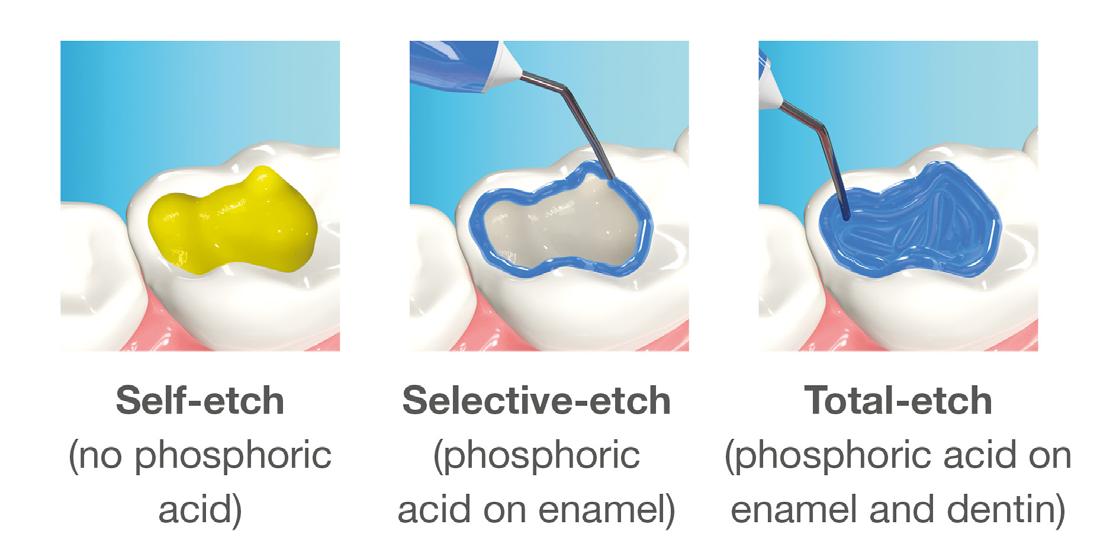
• Self-etch mode for a more modern, fast and effective approach
• Selective-etch mode for additional enamel bond strength
• Total-etch mode for a conventional approach
It is available in both bottle and unit-dose options, catering to different practice needs and ensuring easy, on-demand use.
The Ultimate Bonding Solution: CLEARFIL™ Universal Bond Quick 2
As the latest innovation in dental bonding, CLEARFIL™ Universal Bond Quick 2 delivers efficiency, reliability, and versatility. By eliminating waiting time, extensive rubbing, and the need for application of multiple layers, this adhesive simplifies procedures while creating strong, long-lasting restorations. With its exceptional performance and simplified workflow, it truly is the "everything bond" for modern dental practices.
The heart of the universal portfolio

At Kuraray Noritake Dental Inc., we understand the demands of modern dental practices. Balancing complex procedures, tight schedules, and patient care is no easy task. That is why we have spent years refining our materials—so you can focus on what matters most: your patients.
Our universal products simplify your workflow, offering you high-quality materials and tools that work seamlessly with your expertise. CLEARFIL™ Universal Bond Quick 2 forms literally the connection between several universal resin-based products of our portfolio. Plus: there is no need for a separate dual-cure activator when used with other manufacturers’ selfadhesive cements.
Case Study
Conservative Management of Class V Lesions: A Case Study Using Advanced Adhesive and High-Performance Flowable Composite
Patient Information
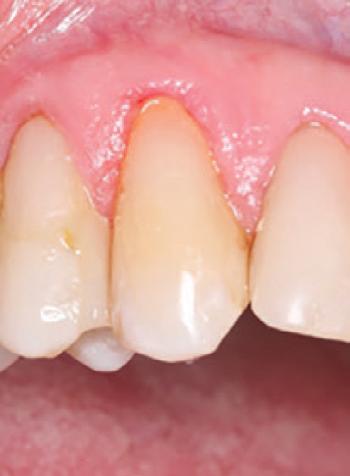
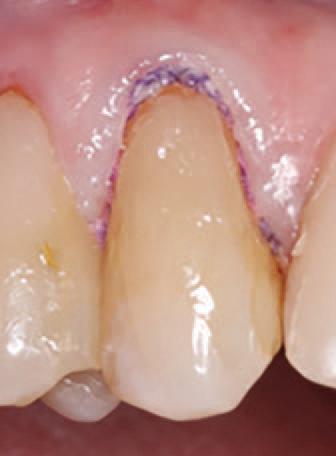
A 72-year-old male presented with a history of restoration loss and recurring sensitivity on tooth #6. The Patient reported that the previous restoration had dislodged, and he now experienced sensitivity localized to the cervical area. His medical history is non-contributory.
Diagnosis and Treatment Plan
Clinical examination confirmed the presence of a small lesion and sensitivity, likely due to exposed dentin.
Treatment Protocol: Caries Detection and Preparation
To improve isolation and soft tissue access, a retraction cord was placed before initiating the procedure (Fig. 2). The tooth was evaluated using a caries indicator dye (Kuraray Noritake Dental), helping to identify any remaining infected tissue beneath the dislodged composite (Fig. 3). Decay removal was completed with a diamond bur, and the enamel was bevelled using a starburst pattern to enhance aesthetic blending (Fig. 4). This preparation design was chosen for visual integration rather than bond strength enhancement.
Microabrasion
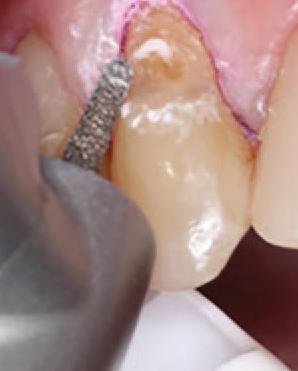
A PrepStart™ H2O Hydro Abrasion System (Danville Materials) was used to remove any residual plaque and biofilm, ensuring a clean bonding surface.
Etching and Bonding
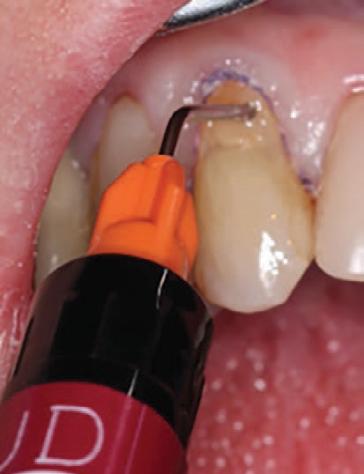
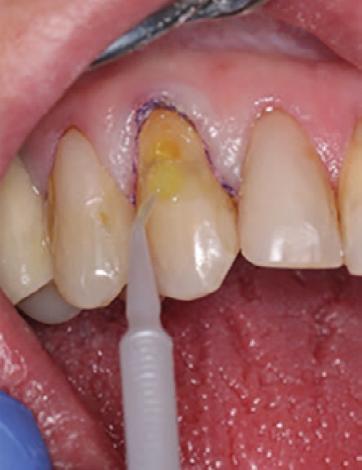
Selective etching of the enamel was performed using a phosphoric acid etchant, followed by rinsing and air drying (Fig. 5). CLEARFIL™ Universal Bond Quick 2 was then applied according to the manufacturer’s protocol: a three second application, gentle airdrying, and light-curing for 20 seconds (Fig. 6).
Restoration Placement
CLEARFIL MAJESTY™ ES Flow Universal in shade UD (Universal Dark) was paced in 0.5mm increments, with each layer light-cured prior to the next (Figure 7).
Approximately 3-4 layers were used to fully restore the lesion to its final contour. (Figure 8). The spherical fillers and light scattering properties of the flowable composite allowed for seamless shade integration with the surrounding enamel.
Finishing and Polishing
A fine-grit diamond bur was used to shape and finish the restoration (Fig. 9). Final luster was achieved using a twostep polishing system from Meisinger USA (Fig. 10). The retraction cord was removed at the end of the procedure.
Rationale for Product Selection
In selecting restorative materials, I rely on products that are not only backed by solid research but also deliver consistently high performance in clinical situations. I used CLEARFIL™ Universal Bond Quick 2 and CLEARFIL MAJESTY™ ES Flow Universal for this case. CLEARFIL™ Universal Bond Quick 2 is extremely easy to use. It has a very thin viscosity that adapts to the tooth structure, and the application with a quick three second application, gentle air dry and light cure.
CLEARFIL MAJESTY™ ES Flow Universal has outstanding physical properties and aesthetic blending capabilities. The new spherical filler formulation allows it to scatter light and blend into surrounding tooth structure. Despite being a flowable, it has the strength and durability needed. I prefer working with sculptable materials that have a flowable but give me confidence in their long-term performance.
Patient Results
The patient reported immediate relief from sensitivity and was pleased with the natural appearance of the restoration. The conservative approach restored both form and function with minimal tooth reduction, while the selected materials ensured durability and long-term success.

Figure 1. Initial presentation of tooth #6 showing the Class V lesion with dislodged previous restoration and exposed dentin.
4. Preparation of the lesion completed with diamond bur and starburst beveling pattern to enhance aesthetic blending.
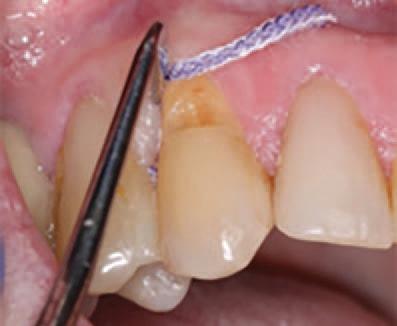
2. Placement of retraction cord to improve isolation and access to the cervical area prior to preparation.
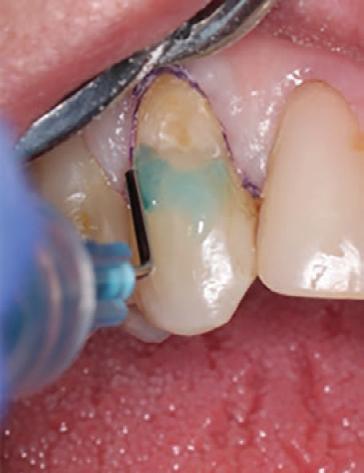
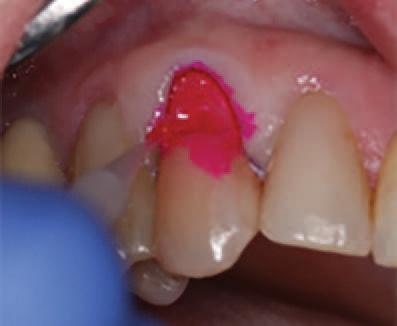
Application of caries indicator dye to identify remaining infected tissue beneath the dislodged composite.

Troy Schmedding DDS, AAACD
Dr. Troy Schmedding is a 1993 honours graduate of the Arthur A. Dugoni School of Dentistry in San Francisco, California. He maintains a private practice in Walnut Creek, CA, where he focuses on aesthetic and functional dentistry. An accredited member of the American Academy of Cosmetic Dentistry, he lectures both nationally and internationally on aesthetics and restorative materials.

Figure
Figure 3.
Figure
Figure 5. Selective etching of the enamel at the margins.
Figure 6. Application of CLEARFIL Universal Bond Quick 2 following selective etching of the enamel margins.
Figure 7. Incremental placement of CLEARFIL MAJESTY ES Flow in shade UD (Universal Dark) in 0.5 mm layers.
Figure 8. Completed restoration after full placement of CLEARFIL MAJESTY ES Flow in multiple increments.
Figure 9. Initial contouring and shaping of the restoration using a fine-grit diamond bur.
Figure 10. Completed restoration immediately after polishing, showing excellent shade integration with the surrounding tooth structure. Shop now
Tackling two complex cases with Opalescence
Whether it’s a patient presenting with one front tooth that’s several shades darker than the rest or teeth with tetracycline staining so severe that the patient refuses to smile, most dentists can agree that not all teeth whitening cases are cut and dry.
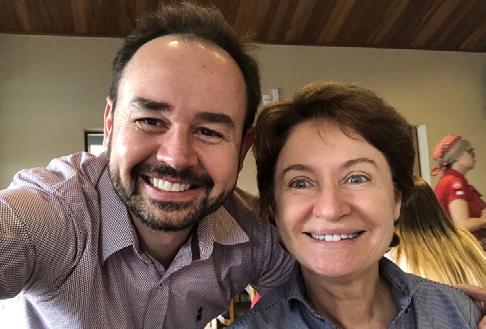
Dr. Renato Miotto Palo, a renowned dentist, uses Opalescence™ products to achieve remarkable results. He combines in-office treatments like Opalescence Boost with take-home products such as Opalescence Go™ trays and Opalescence™ PF gel.
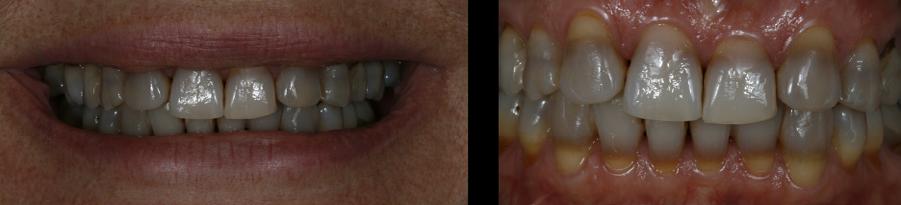
CASE 1: Tetracycline Transformation Case
1. Initial Consultation: The patient, a 60-year-old dentist with severely discoloured teeth due to tetracycline staining, approached Dr. Renato Miotto Palo after attending one of his lectures. As a long-practicing dentist herself, she’d never trusted another dentist to whiten her teeth out of fear they would end up damaged, or that she’d experience severe pain in the process.
2. Treatment Plan: Dr. Palo decided to use a combination of Opalescence Boost in-office whitening treatments and Opalescence Go whitening treatments at home.
3. In-Office Whitening: Over the next five months, Dr. Palo
administered a round of Opalescence Boost in-office whitening every three weeks.
4. At-Home Whitening: Between the in-office treatments, the patient used Opalescence Go whitening trays at home, wearing them every evening for one hour.
5. Monitoring and Adjustments: Throughout the process, Dr. Palo monitored the patient’s progress and ensured that she did not experience any sensitivity.
6. Final Results: With time and patience, the patient’s teeth gradually improved, and she ended up with teeth as brighter than Dr. Palo’s own teeth!

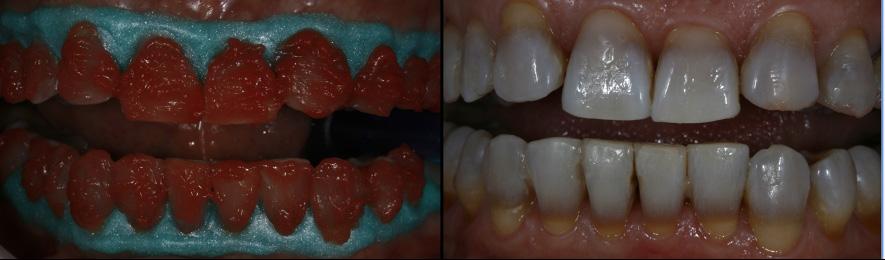
1. Patient’s initial severe tetracycline stained teeth.
3. Patient using Opalescence Go take home whitening trays between Opalescence Boost in-office treatments
2. Patient using Opalescence Go take home whitening trays between Opalescence Boost in-office treatments
4. Results after the end of the whitening treatment.
5. Dr. Palo (left) and patient, post treatment.
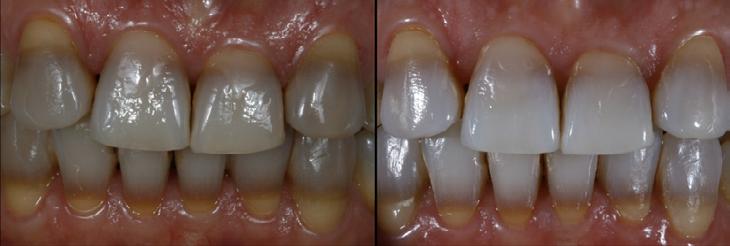
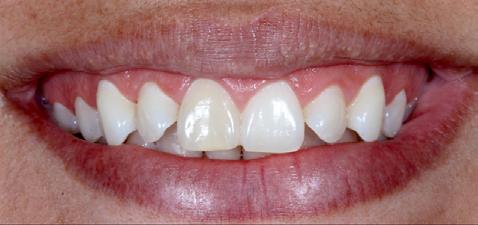
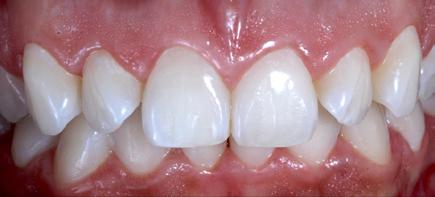
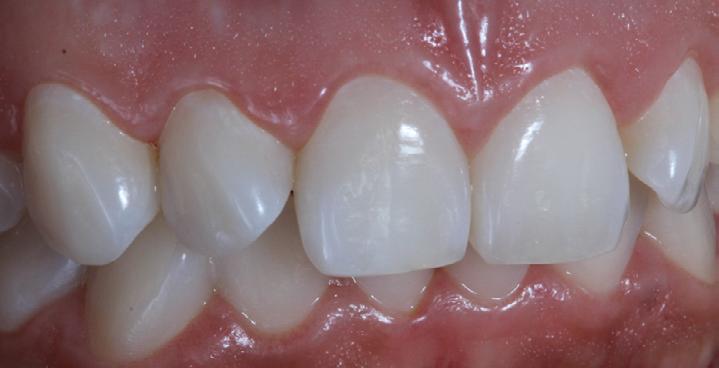
CASE 2: Internal Calcification Whitening Case
A patient presented to Dr Palo with one tooth that was several shades darker than the rest of her teeth. Upon further inspection, Dr. Palo discovered that the tooth presented more yellow than the rest due to extensive internal calcification. He said, “Instead of being filled with typical dental pulp tissues, this particular patient’s tooth was filled with calcified dentine, so I knew I needed to use a more aggressive approach to get it white enough to match the rest of her teeth.”
1. Initial Consultation: Dr. Renato Miotto Palo discovered that the patient’s front tooth was more yellow than the rest due to extensive internal calcification.
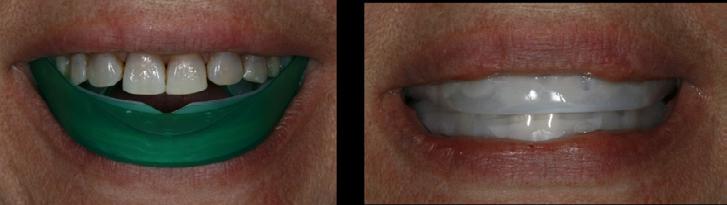
2. Customised Tray Creation: Dr. Palo created a customised tray for the patient to wear overnight, allowing her to apply Opalescence PF whitening gel to the single front tooth.
3. In-Office Whitening: Dr. Palo used Opalescence Boost inoffice whitening treatments to achieve powerful results in less time.
4. Regular Treatments: The patient visited Dr. Palo every three weeks for in-office whitening treatments
5. At-Home Whitening: The patient used Opalescence PF whitening applications in her custom tray every night.
6. Monitoring and Adjustments: Dr. Palo monitored the patient’s progress and adjusted the treatment as needed.
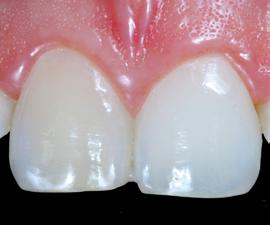
7. Final Results: The combination of in-office and at-home treatments eventually brightened the patient’s front tooth to match the rest of her smile.


Percentage of active ingredient in whitening gel varies region to region, please contact your local distributor for details

1. Patient presenting with left front tooth several shades darker than the other.
2. The darker tooth prior to treatment on the left.
4. Patient wearing Opalescence PF take-home gel in her custom tray, only applying the whitening gel to one tooth.
5. Applying Opalescence Boost in-office whitening to a single tooth.
3. The special custom tray designed by Dr. Palo to only apply bleach on one of the patient’s front teeth, to be work overnight with Opalescence PF take-home gel.
6. Opalescence Boost in-office whitening gel doing its work.
7. The patient’s final results, with both front teeth finally at the same shade.
8. Another view of the final results, where both front teeth match, in terms of shade.
Dr Renato Miotto Palo Brazil
Enamel Microbrasion:
Step-by Step-Technique
Ideal for removing superficial white and brown decalcification stains due to enamel mottling from fluorosis, Opalustre 6.6% hydrochloric acid slurry contains silicon carbide microparticles. This combination provides chemical stain removal along with gentle mechanical abrasion. Opalustre, along with OpalCups, can be used to quickly remove unsightly enamel decalcification defects that are less than 0.2mm in depth.
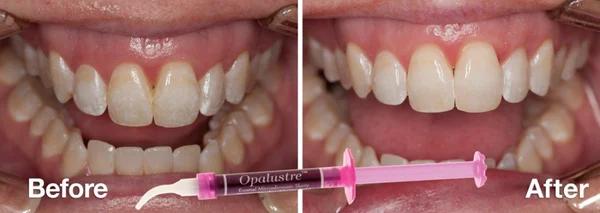
Before and After Microabrasion Treatment with Opalustre
Step-by-Step
Procedure
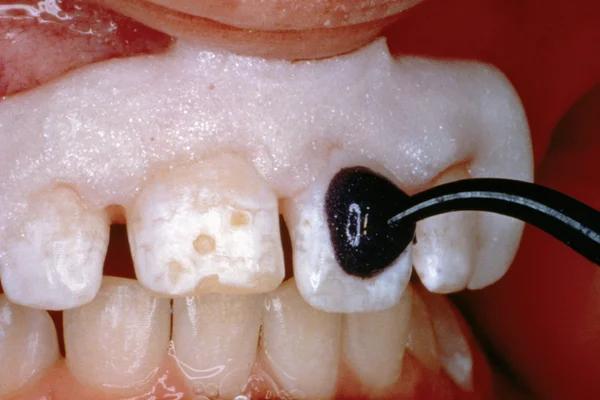
1. Determine and record the baseline of the patient. It’s best to take some pictures as well to help document the progress for the clinician and the patient.
2. It is very important to properly protect the soft tissues, using a rubber dam, and possibly use a rubber dam as well as a light-cured resin barrier at the gingival margin if desired.
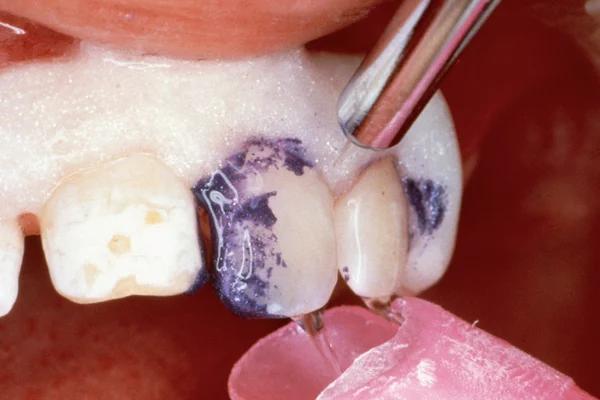
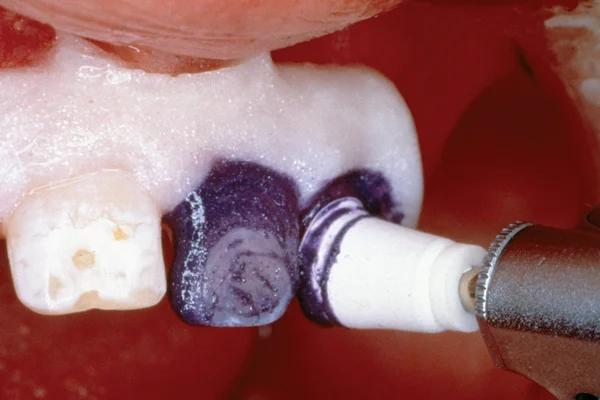
3. Starting with 2 to 3 teeth at a time, we recommend applying a 1mm thick layer of Opalustre over the discolored area and using a rubber prophy cup. Apply medium to heavy pressure at approximately 500 RPM for 60 seconds at a time.
4. Once complete, suction the paste from the teeth. Rinse.
o TIP - If the product starts to thin out, you can add some more Opalustre during the procedure which will keep the tooth moist and avoid overheating.
5. Once you have suctioned and rinsed, evaluate results and repeat as necessary.
o Note - For patients that have hypo-mineralization greater than 0.1-0.3mm, use a fine-grit water-cooled tapered diamond bur and lightly sweep over the stained area for 5-10 seconds prior to applying the Opalustre.
6. Evaluate and record the final shade using a shade guide and pictures. If additional treatment is desired, recommend the whitening regimen of your choice, such as Opalescence PF or Opalescence Go.
o Opalescence Boost can be applied, per doctor recommendation and patient comfort.

View product
Watch video

Tapered Pro Conical Anterior Teeth Replacement
Case Study
Overview
BioHorizons has introduced a new implant system that combines the advanced thread design of the Tapered Pro with the precision and stability of the Conelog conical connection. This integration delivers enhanced surgical handling, improved primary stability, and long-term biological benefits, supporting better patient outcomes in both aesthetic and functional zones.
This case was performed by Dr Homa Zadeh, DDS, PhD, a respected leader in periodontology and implant dentistry. Dr Zadeh’s approach emphasizes biologically driven protocols and evidence-based techniques, making this case a strong example of clinical excellence using the Tapered Pro Conical system. It involves the replacement of two front anterior teeth after they fractured off and the full restoration process.
Patient Presentation


Dr Homa
DDS, PhD
Zaheh
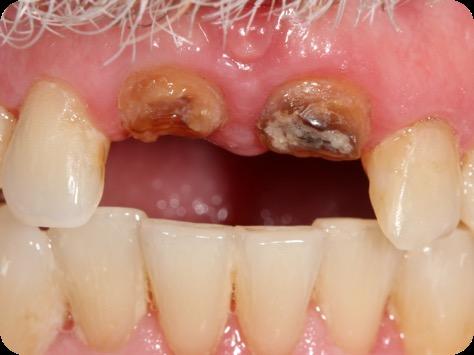
Fig 1. Patient anterior situation. Two anterior crowns fractured off.
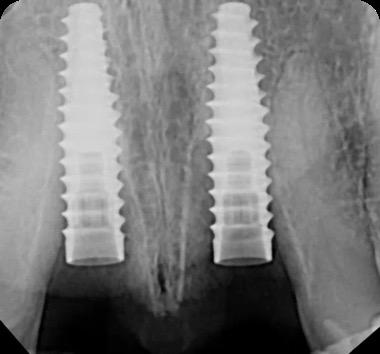
Fig 2. Intraoral radiograph indicating tooth structural loss extent.
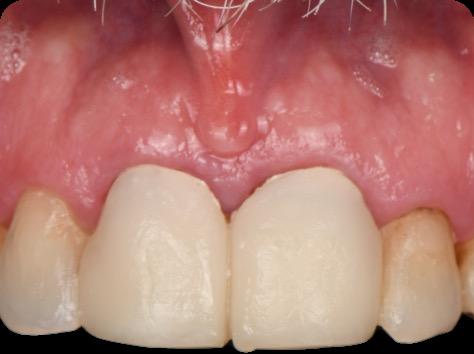
Fig 3. Provisional restorations on central incisors and gingival images. The gingival contours were optimal, and the gingival phenotype was thick.
Fig 4. Alveolar bone imaging. The alveolar bone was intact, and the alveolar crest was approximately 4mm apical to the restorative margin.
Operative Workflow


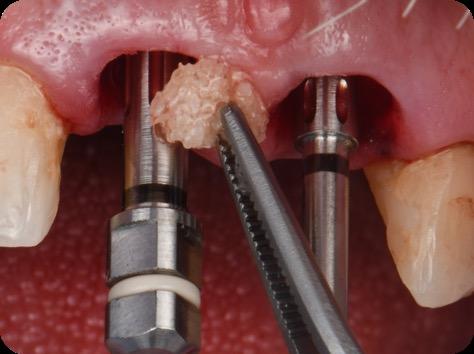
10. Titanium temporary abutments installed and composite bone graft of iPRF and MinerOss corticocancellous allograft added.

Post Operative Follow-up


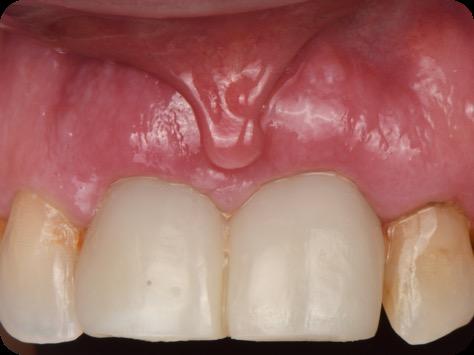
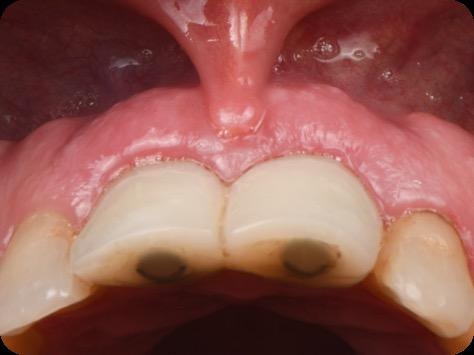
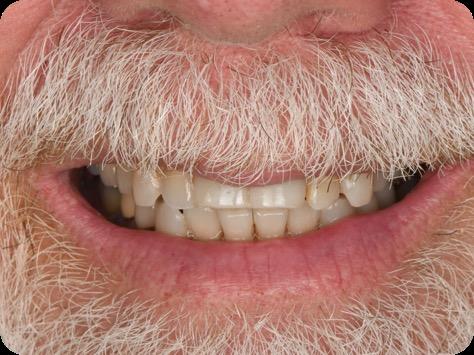
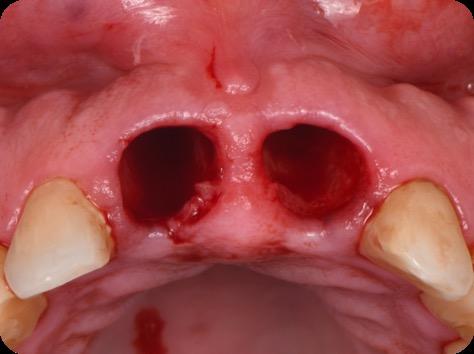
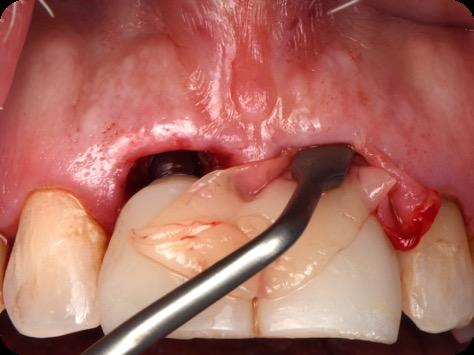
Fig 5. Central incisors extracted using minimally invasive protocol. Alveolar bone and gingival tissues were intact after extraction
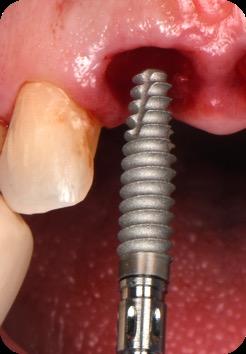
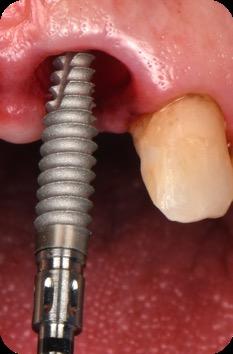
Fig 6. BioHorizons Tapered Pro Conical implants of 3.8 x 15mm placed according to the plan.
Fig 7. Implants immediately after installation.
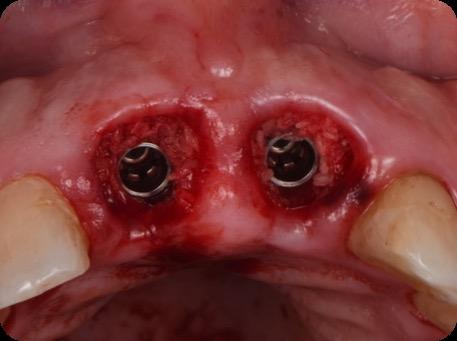
Fig 8. Scanbody installation for custom abutment and definite restoration fabrication.
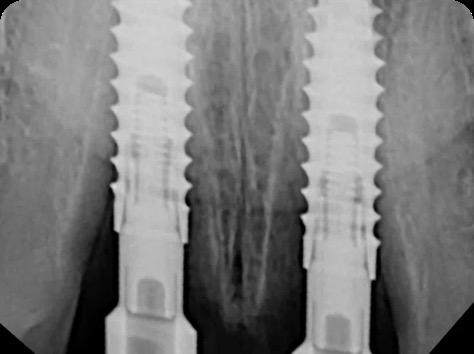
Fig 9. Periapical radiograph for verification of proper seating of the scanbodies.
Fig
Fig 11. Bone graft filling the horizontal gap between socket and implants.
Fig 12. Screw-retained provisional restoration placed into implants, with LPRF placed to protect graft material.
Fig 13. Radiograph of implants, grafts and Provisionals.
Fig 14. Clinical view at two days post-operative visit.
Fig 15. Clinical view at two days post-operative visit
Fig 16. Patient’s smile after implantation and previsualization

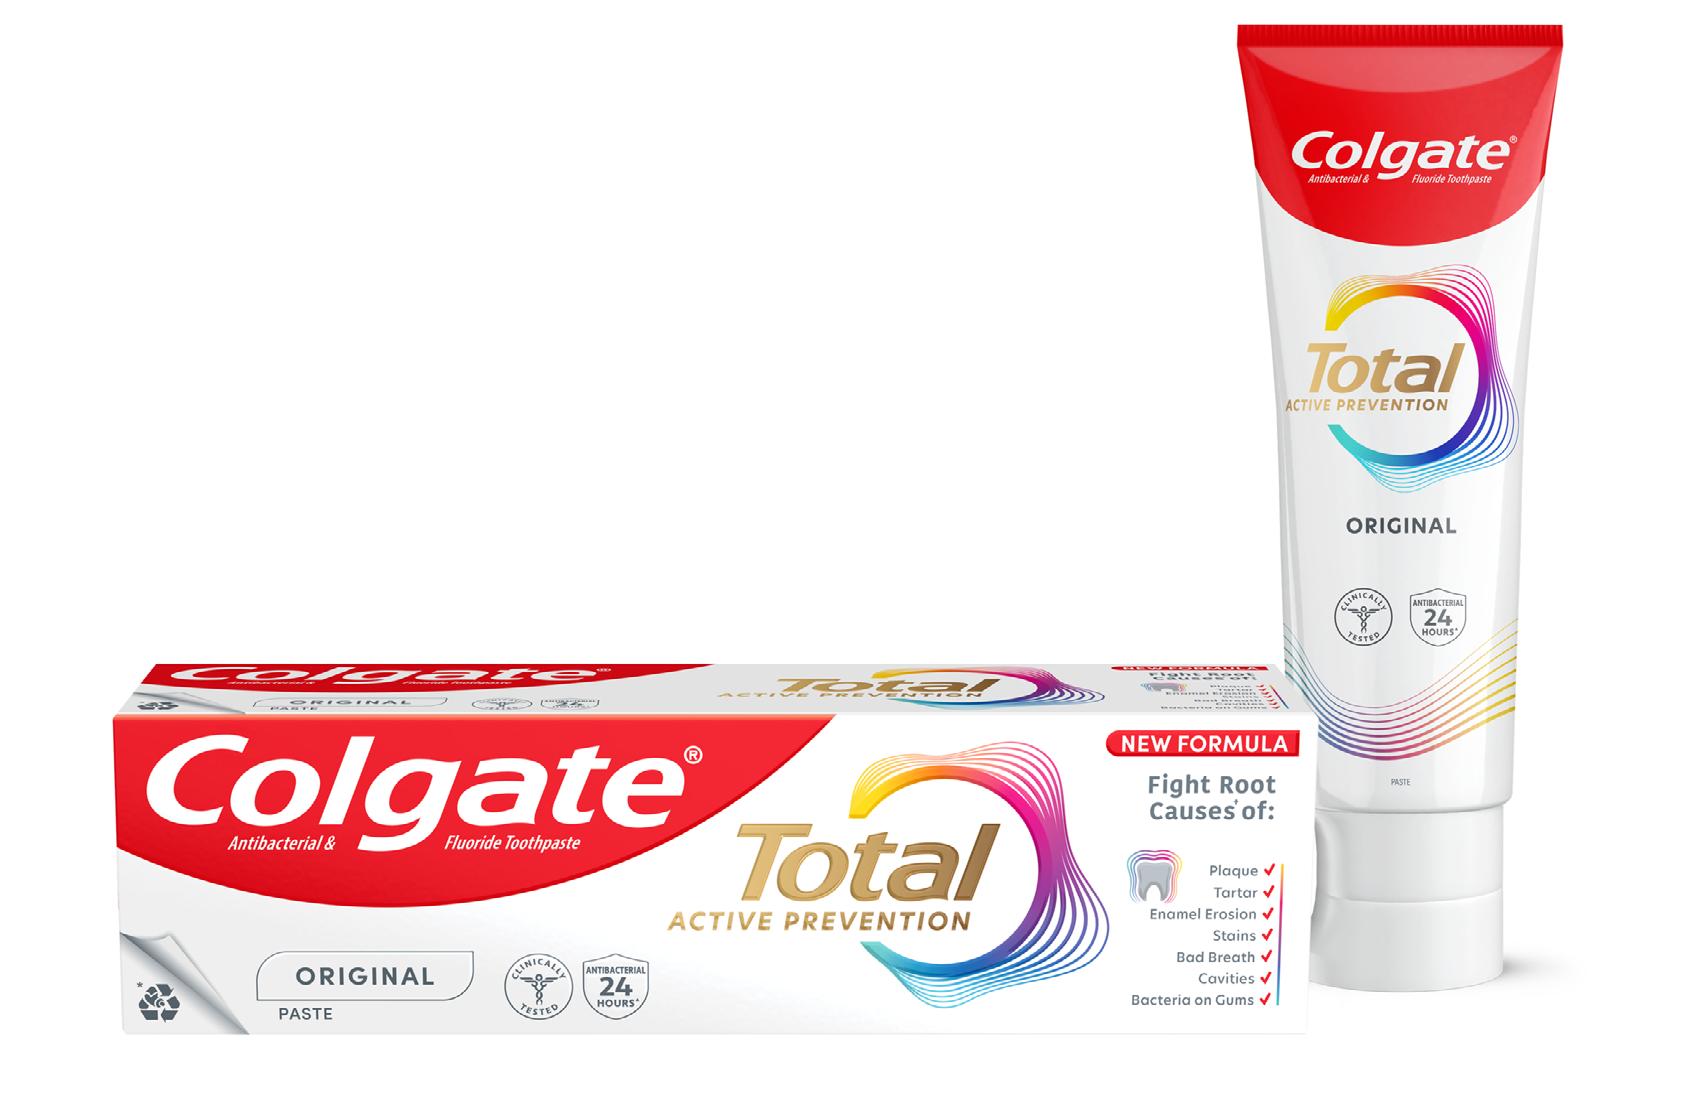
The Total Package
Active Prevention, Advancing Oral Health Protection for your Patients
As dental professionals, one of the most frequent questions we will be asked by our patients is which toothpaste should I use? As a general rule, we will recommend a toothpaste that contains fluoride. However, what I have recently gained a greater appreciation of is that not all toothpastes are made equal. When it comes to actively helping prevent oral care issues, we as dental professionals can be more proactive for our patients’ oral health by recommending a multibenefit toothpaste, as well as a more systematic approach or oral hygiene regimen.
In this article for Colgate-Palmolive, I will be sharing with you the science behind the Colgate Total Active Prevention toothpaste, which contains stannous fluoride, and the unique way in which the toothpaste is stabilized to ensure high bioavailability of the stannous ions. I will also share Colgate’s new approach to active prevention, which really aims to empower patients in their oral hygiene and improve oral health outcomes1
Active Prevention
Let’s take a deep dive into Stannous Fluoride
Stannous fluoride (SnF2) is a tin-based fluoride compound known to have multiple benefits for oral health. These include anticaries and antibacterial effects. It is also able to modulate the microbial composition of the dental biofilm3. However, stannous fluoride toothpastes are challenging to develop as SnF2 is difficult to keep stable in a toothpaste, which can limit effectiveness. Exposing stannous ions to air, water, or heat can lead to oxidation of these ions from their active form (Sn2+) to stannic ions (Sn4+); this is a form which is no longer effective against bacteria. The key to an effective antibacterial toothpaste is keeping the stannous ions in their active Sn2+ form throughout the shelf life of the toothpaste4. These bioactive ions interfere with bacterial growth and metabolism pathways, disrupting and reducing growth, and inhibiting bacterial acid production5
We know that twice daily use of a fluoride toothpaste delivers fluoride to the dental surfaces and is very much a cornerstone to caries prevention2. However, we also know that caries isn’t the only oral care issue we want to help our patients prevent. Erosion, staining and bad breath are also key issues when it comes to oral health. This is where a multibenefit toothpaste should be part of our recommendation. An antibacterial and fluoridated toothpaste can play a key role in active prevention for our patients. It is also important to understand that not all toothpastes are equally effective in preventing oral care issues, and not all toothpastes have the clinical studies and research to support their use. Therefore, we should routinely ask ourselves, what benefits does this toothpaste offer my patients? What does it actively prevent? What is the science and evidence behind this toothpaste that I am recommending?
Historically, drawbacks of toothpastes containing stannous fluoride have been grittiness, enamel staining, and a disagreeable taste. This has meant stannous fluoride toothpastes in the past have not been patient friendly and, as a result, this discourages our patients from wanting to use them. Many of these drawbacks are a result of trying to ensure the toothpaste can deliver the clinical efficacy we need and keep the Sn2+ ions in their active form. For example, low water or no water formulations can be useful to prevent hydrolysis and subsequent oxidation to the Sn4+ species, however these formulations can compromise the taste and feel of the paste. Some toothpastes may add stannous salts, such as stannous chloride, to replenish lost stannous ions, but this has proven ineffective as a high proportion of inactive stannic ions still forms.
The Science behind Colgate Total Active Prevention
The Stannous Fluoride in the new Colgate Total Active Prevention toothpaste has been stabilised by Nitrates and Phosphates. Pyrophosphate-chelated Sn2+ ions are able to maintain stability in water, and the addition of nitrates has been shown to block the oxidation of bioactive Sn2+ ions to inactive Sn4+ ions6. This maintains a high concentration of bioavailable stannous ions in the toothpaste. This unique stabilisation technology addresses many formulation challenges tooth-pastes containing stannous fluoride face, to deliver an enjoyable brushing experience. This is a really important stand-out point for me too: if I am going to recommend a toothpaste, I want it to be something my patients will want to use.
Oral Biofilm Control
The key to a healthy mouth and prevention of many oral care issues is a healthy oral biofilm. Mechanical plaque removal alone is not sufficient to disrupt the oral biofilm7,8. This is where the use of antibacterial agents comes in.
Stannous fluoride has multiple modes of action which promote its antibacterial effects. Stannous fluoride is able to alter and breakdown cell walls of bacteria, including those implicated in caries, and oral malodour9,10,11,12. A single-centre, randomised, controlled, double-blinded clinical investigation involving 98 participants demonstrated that brushing twice daily with Colgate Total Active Prevention toothpaste with SNaP
technology provided significantly greater and long-lasting antibacterial effects versus using a non-antibacterial fluoride toothpaste. Compared to baseline, the SNaP-containing toothpaste led to a significant reduction in bacterial load from the teeth (-39%), cheeks (-42%), gums (-62%), tongue (-24%) and even saliva (-30%) after 4 weeks of twice daily use13
Colgate Total Active Prevention Regime
We know that typically patients only brush for 45 seconds, rather than the recommended 2 minutes7, and that mechanical plaque removal alone only removes plaque from 42% of oral surfaces8. An additional way to improve the oral health of our patients includes the addition of a mouthrinse to their daily routine. One well-established antibacterial agent for mouthwash formulation that has been shown to reduce plaque formation is Cetylpyridinium Chloride (CPC). CPC works by cationically attracting negatively-charged bacteria and penetrating the bacterial cell membrane by the hydrophobic portion of the molecule. The subsequent solubilisation of the bacterial membrane and altered permeability for the bacteria ultimately leads to bacterial cell death14
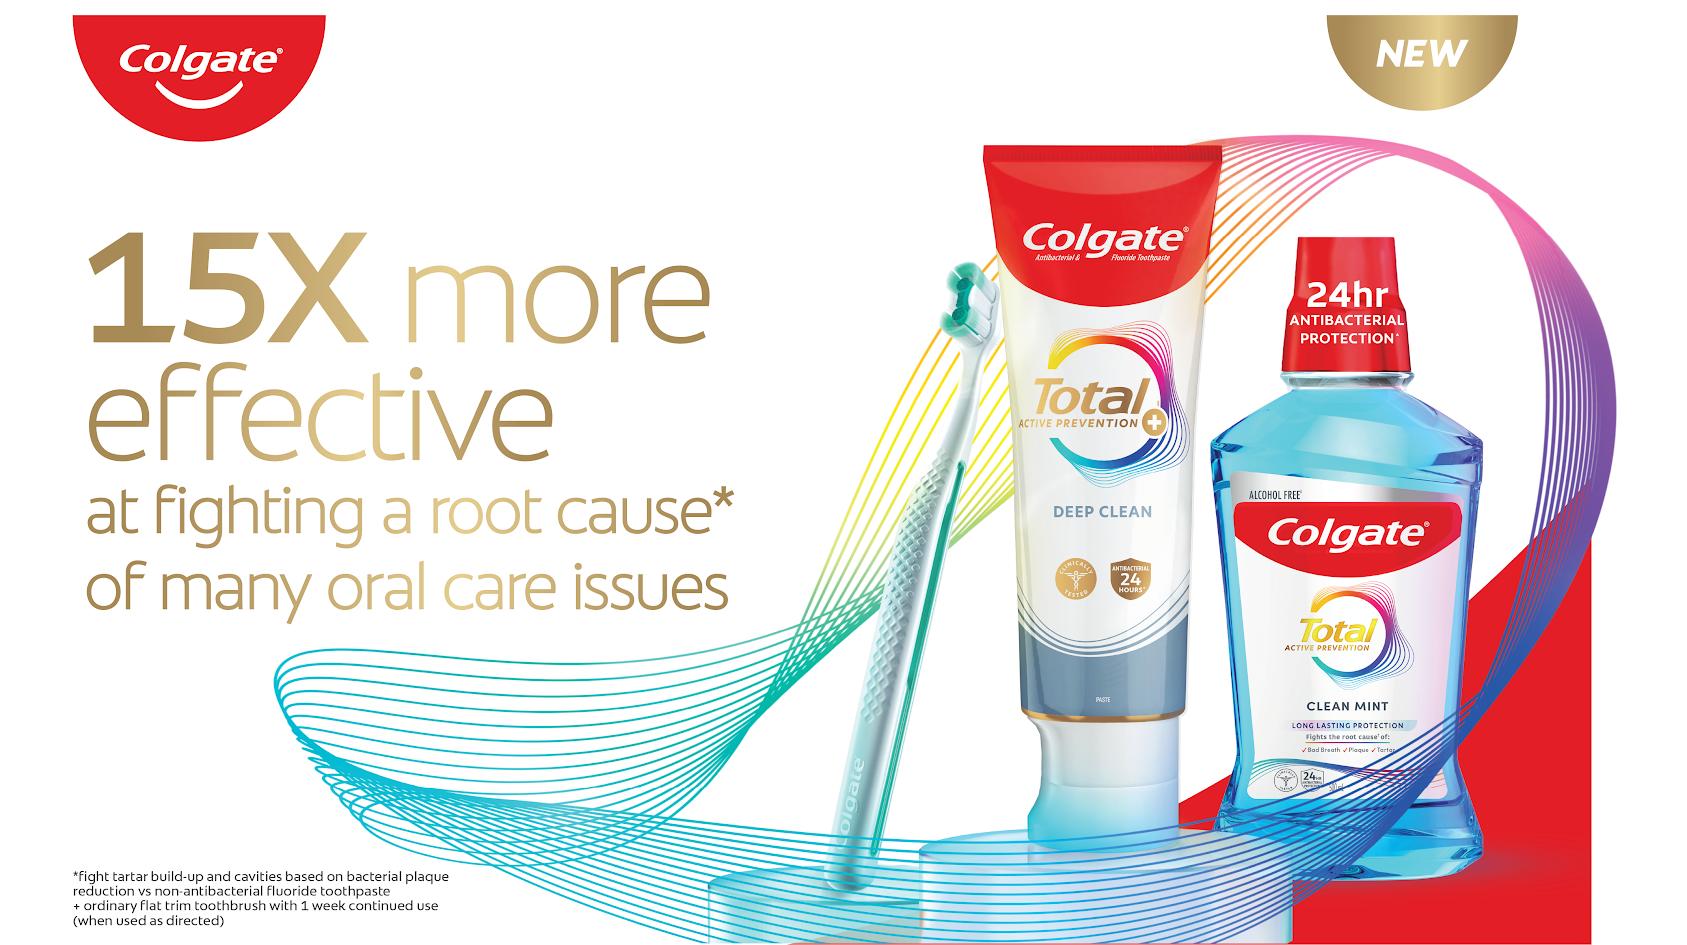
The Colgate Total Active Prevention Mouthrinse contains CPC and Zinc which, when used alongside the Colgate Total Active Prevention Toothpaste and Colgate Total Active Prevention Foaming Clean toothbrush, exhibited fifteen times more plaque reduction when compared with non-antibacterial fluoride toothpaste and regular brush with 1 week of continued use14
In an additional clinical study, the test group used a full regimen of Total Active Prevention products, including Colgate Total Active Prevention Toothpaste, Colgate Total Active Prevention Foaming Clean toothbrush and Colgate Total Active Prevention Mouthrinse, versus a non-antibacterial toothpaste and an ordinary flat trim toothbrush. 100% of people had a healthier mouth in just 3 weeks14
Dental professionals now have a clinically tested, comprehensive oral care solution for patients through the Colgate Total Active Prevention system. The combination of a toothbrush design complemented by a multibenefit toothpaste with SNaP technology, and clinically tested antibacterial, alcohol-free, CPC-containing mouthrinse, provides a complete oral care regimen system to help patients fight many common oral care issues and to help maintain optimum dental health.
References
1. Colgate. NEW Colgate Total® Active Prevention System. Colgate Professional. Accessed May 31, 2025. https://www.colgateprofessional.com/products/colgate-total 2. Walsh T, Worthington HV, Glenny AM, Marinho VC, Jeroncic A. Fluoride toothpastes of different concentrations for preventing dental caries. Cochrane Database Syst Rev. 2019;3(3):CD007868. Published 2019 Mar 4. doi:10.1002/14651858.CD007868.pub3

3. National Center for Biotechnology Information. PubChem Compound Summary for CID 24550, Stannous Fluoride. https://pubchem.ncbi.nlm.nih.gov/compound/StannousFluoride. Accessed May 31, 2025.
4. Myers CP, Pappas I, Makwana E, et al. Solving the problem with stannous fluoride: Formulation, stabilization, and antimicrobial action. J Am Dent Assoc. 2019;150:S5-S13.
5. Chakraborty B, Seriwatanachai D, Triratana T, et al. Antibacterial effects of a novel stannous fluoride toothpaste stabilized with nitrate and phosphates (snap): in vitro study and randomized controlled trial. Compend Contin Educ Dent. 2024;45(Suppl 3):12-19.
6. Manus L et al., 2024: The Evolution of Colgate Total®: A New Era Stabilized by Nitrate and Phosphates. 45(3). https://compendiumlive.com/2024/active-prevention/the-evolutionof-colgate-total-a-new-era-stabilized-by-nitrate-and-phosphates/
7. Creeth JE, Gallagher A, Sowinski J, et al. The effect of brushing time and dentifrice on dental plaque removal in vivo. J Dent Hyg. 2009;83:111-116.
8. Chapple IL, et al. Primary prevention of periodontitis: managing gingivitis. J Clin Periodontol. 2015;42 Suppl 16:S71-6.
9. Gumber HK, Louyakis AS, Sarma T, et al. Effects of a stannous fluoride dentifrice on biofilm composition, gene expression and biomechanical properties. Microorganisms. 2022;10:1691.
10. Xie S, Iberi V, Boissy Y, et al. Stannous fluoride forms aggregates between outer and inner membranes leading to membrane rupture of Porphyromonas gingivalis and Prevotella pallens. Front Oral Health. 2024;5:1427008.
11. Johannsen A, Emilson CG, Johannsen G, Konradsson K, Lingström P, Ramberg P. Effects of stabilized stannous fluoride dentifrice on dental calculus, dental plaque, gingivitis, halitosis and stain: A systematic review. Heliyon. 2019;5:e02850.
12. Fine N, Barbour A, Kaura K, et al. Effects of a stabilized stannous fluoride dentifrice on clinical, immunomodulatory, and microbial outcomes in a human experimental gingivitis model. J Periodontol. 2024;95:421-431
13. Brinta, C. et al. 2024. Antibacterial Effects of a Novel Stannous Fluoride Toothpaste Stabilized With Nitrate and Phosphates (SNaP): In Vitro Study and Randomized Controlled Trial. 45(3)
14. Ayad F, Hetata M, Ahmed R, et al. Antiplaque and antigingivitis effects of a novel oral care regimen featuring stannous fluoride toothpaste, a unique toothbrush, and cetylpyridinium chloride mouthwash: A randomized clinical trial. J Evid Based Dent Pract. 2025;25(2):102123. doi:10.1016/j.jebdp.2025.102123
Dr Kaejenn Tchia is a recent graduate working in a corporate private practice in Darwin, Northern Territory. He is the current President of the Australian Dental Association NT Branch Inc. He has also served leadership positions for Bupa Dental Corporation including the Clinical Advisory Panel, Clinical Procurement Committee and currently the Graduate Committee. He is passionate about helping and collaborating with fellow dental colleagues, recently embarking on a new journey to help recent graduates eliminate burnout through a 6-step B.E.L.I.E.F System through his motivational coaching platform, The Limitless Dentist. Kaejenn is a member of the Colgate Advocates for Oral Health: Content Community and hopes to use this platform to raise awareness of the importance of mental health in dentistry and provide mindset tools, which can help his colleagues unlock their next level of growth and success.
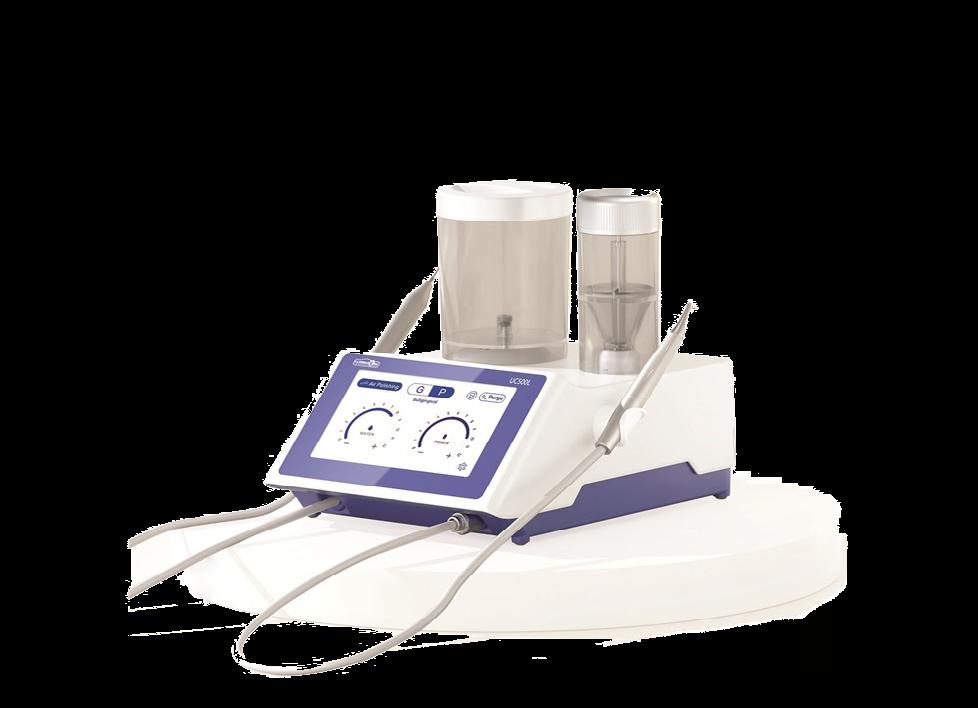
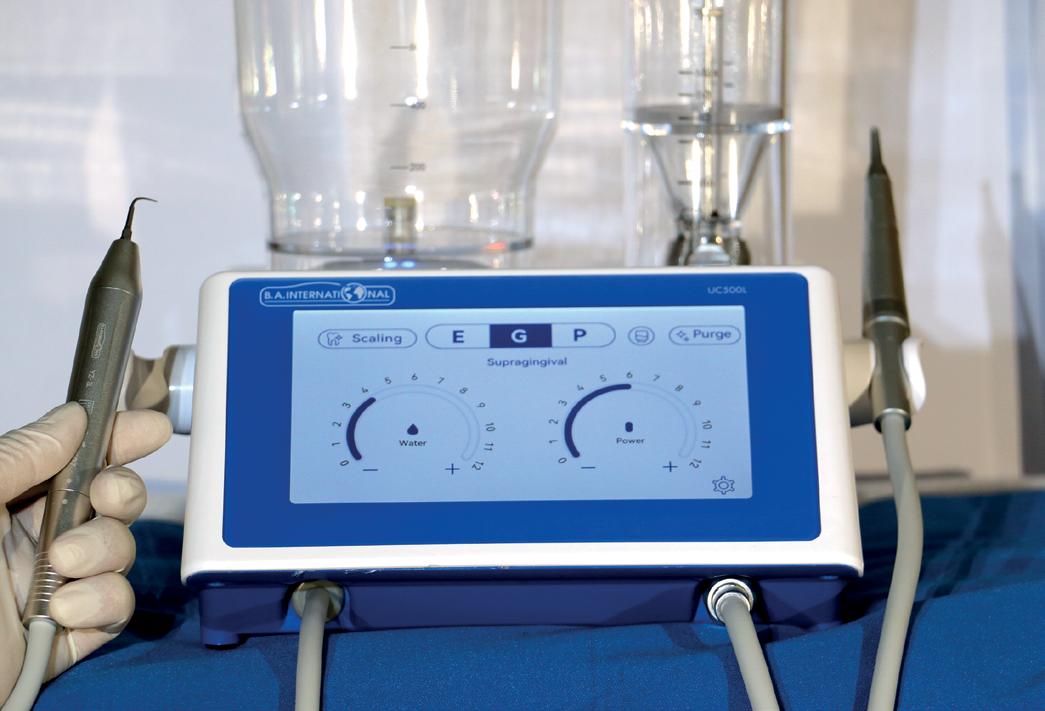
UC500L Uticlean in Action
What Dental Professionals are saying about the UC500L Scaler
The Meadows Dental Care Helpston
“The UC500L scaler was very comfortable for our patients. The unit is incredibly easy to set up and use, with a simple and intuitive interface. It comes as a complete package, offering a wide range of tips, handpieces, and accessories. Maintenance is a breeze thanks to the easy purge function.”
Dr F. G., Hamburg
“We really appreciated the simple and clear menu navigation, and the unit feels very hygienic. Patients reported better comfort—the water jet felt much softer, and the ultrasound effect was much more pleasant. Additionally, the UC500L seems to have a longer service life compared to our existing unit.”
Sanne Nijveen
Dental Hygienist, Mondzorg, Drenthe
“The scaler is very powerful, and the Prophy handpiece is well-designed and balanced, especially with the long neck. The fast water heating function adds to an excellent overall patient experience.”
Marta Velazquez Hygienist
Rodericks DP Winterbourne Bristol
“After trying different air polishers and scalers from different providers, I have to say I am very impressed with BA international Ulticlean 500L with the modern design and easy way to use, either for scaling or air polishing, to remove even hard calculus. With heated water air polishing, this makes a big difference for patients too. It’s safe to use with implants, ortho and any other dental work. I highly recommend it. As a hygienist, it makes my day at work much easier.”

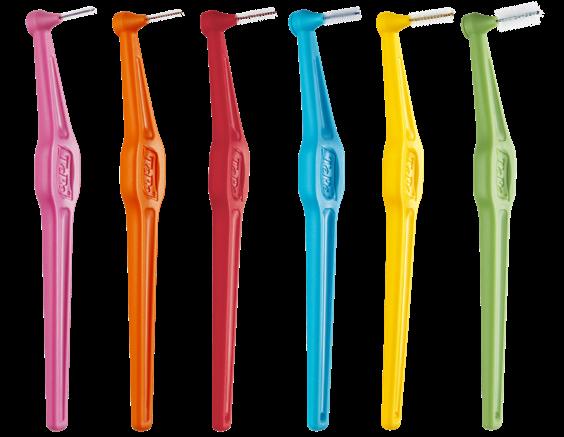
Why TePe stands out
The ultimate guide to choosing the right Interdental brush
Interdental brushes are fantastic tools for maintaining a healthy mouth. They’re perfect for cleaning those hard-to-reach areas where regular toothbrushes and floss cannot reach. In fact, studies show that interdental brushes are the most effective way to remove plaque from between your teeth. They can easily clean the concave surfaces, making them superior for interdental cleaning when there are spaces between the teeth. In this article, we’ll explore why ISO standards matter and why TePe’s interdental brushes are the best option for your dental care needs.
ISO Standards: for safety, quality and consistency
ISO (International Organization for Standardization) sets global standards to ensure that products and services are safe, reliable, and of high quality. These standards are developed by experts and cover a wide range of activities, from product manufacturing to service delivery. When it comes to dental care, ISO standards ultimately help to ensure the health and safety of patients, promote product quality, and eliminate trade barriers.1
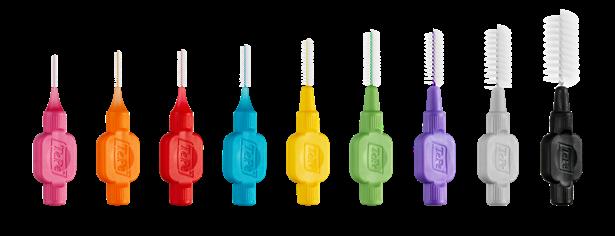
There are nine ISO sizes for interdental brushes, ranging from ISO size 0–8. The size is determined by using the passage hole diameter (PHD). PHD is the minimum diameter of a hole through which a manual interdental brush head can pass through with a clinically relevant force. Using a clinically relevant force ensures good cleaning efficiency without causing harm to the hard or soft tissue.
Rigorous testing to meet ISO compliance
Interdental brushes must pass three rigorous ISO tests to earn the ISO seal: filament retention, stem retention, and stem durability. These tests ensure that the brush’s filaments do not fall off, the wire withstands repeated bending, and the wire remains securely attached to the handle. TePe’s interdental brushes undergo regular quality checks to ensure they meet these stringent requirements.1
1. Filament retention:
This test ensures that the filaments of the brush do not come off during use. The brush is forced through a passage hole 80 times, and the filaments must remain intact.
2. Stem retention:
This test checks the durability of the wire stem. The wire must withstand a removal force of at least 15 N (1.5 kg) without detaching from the handle.
3. Stem durability:
This test ensures that the wire can endure repeated bending. The wire is bent for a minimum of 20 cycles to ensure it does not break or lose its shape
Why choose TePe’s interdental brushes?
TePe interdental brushes are approved by the Australian Dental Association (ADA), carrying the ADA seal of approval. TePe’s interdental brushes not only meet all ISO requirements but also offer additional features that make them the best choice for dental care:
• Wide range of options: TePe offers a wide range of interdental brushes to suit various needs. Whether you require a standard brush, an extra-soft version, or a pre-angled brush, TePe has you covered.
• Extra-soft versions: For those with sensitive gums, TePe offers extra-soft versions of their brushes, maintaining the same colour coding for easy identification.
• Pre-angled brushes: TePe Angle brushes are available in ISO sizes 0-5 and feature a pre-angled design for easier access to the back teeth.
• Color-coded sizes: TePe makes it easy to choose the right brush size with color-coded handles. This feature simplifies the selection process and ensures you always pick the correct brush. It is easier for patients to remember a colour than an ISO size. However, since colour coding is not an ISO standard, be cautious when switching brands.
• Environmental considerations: TePe is committed to sustainability. Their brushes, handles and cap, are made with renewable materials through the mass balance approach2, and their production facilities use only renewable energy, ensuring zero emissions.
Important features for safety and efficacy
When choosing an interdental brush, consider the following features for optimal safety and efficacy:
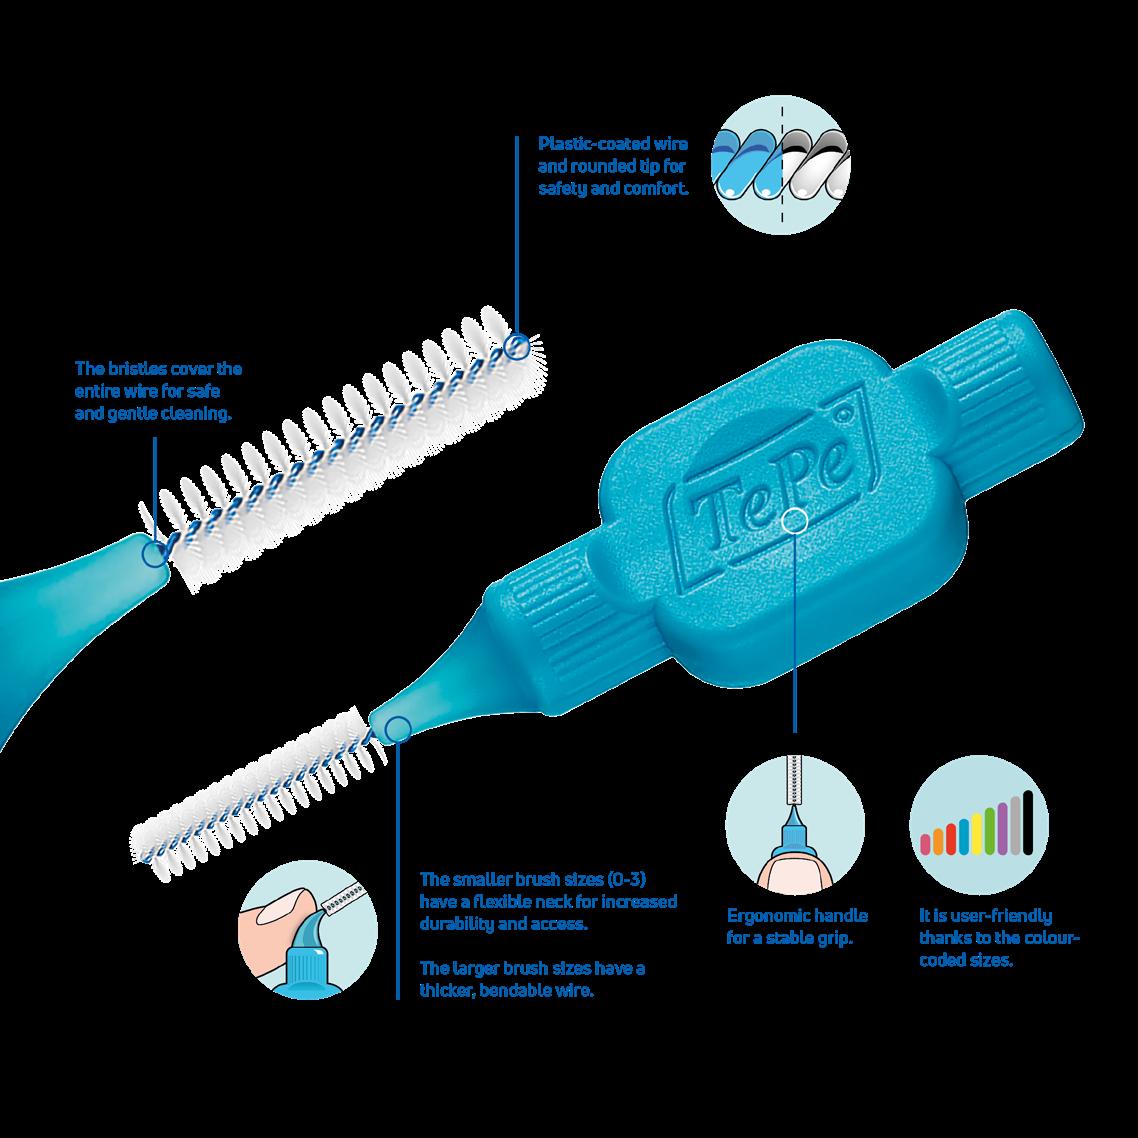
• Bristle coverage: Ensure the bristles cover the entire wire to prevent any exposed wire from causing harm to your gums. The bristles of TePe’s interdental brushes are covering the whole wire.
• Handle grip: A good grip is essential for effective back-andforth movements. TePe’s brushes are designed with ergonomic handles for a stable grip.
• Plastic-coated wire: A plastic-coated wire offers a smoother experience and prevents scratches on dental implants. The whole collection of TePe’s interdental brushes has plasticcoated wire.
• Bendable neck: A bendable neck makes it easier to reach back teeth, especially for smaller sizes. TePe’s brushes offer this feature for enhanced accessibility
Practical tips for interdental cleaning
• Practice with your patient: Always demonstrate the correct use of an interdental brush to your patients. Show them how to insert the brush gently between their teeth and use a backand-forth motion. Ask the patient to practice with you in the chair.
• Choose the right size: Ensure your patients select the correct brush size for their interdental spaces. Using the wrong size can reduce cleaning efficacy and cause discomfort.
• Regular use: Encourage your patients to use interdental brushes daily as part of their oral hygiene routine. Consistent use helps maintain healthy gums and prevents plaque buildup.
Conclusion
Choosing an interdental brush with an ISO seal ensures you are using a high-quality product that will not cause harm and will last longer. TePe’s interdental brushes not only meet all ISO standards but also offer additional features that enhance their usability and sustainability. By choosing TePe, you are making a more responsible choice – for both your oral health and the environment.
References
1. www.iso.org
2. Certified by the International Sustainability and Carbon Certificate PLUS (ISCC PLUS)
About the writer
Dr von Geijer works part-time at a private dental office in Sweden and TePe HQ in Malmö, Sweden. She has long clinical experience and is particularly interested in prevention and oral health. She has always placed a high value on working with preventive care.
Dr von Geijer has held temporary preclinical positions as amanuensis at the University of Lund, including basic research and assistance with education/training at the medical and dental schools.
She also has experience lecturing to professionals when employed by pharmaceutical companies and companies within the dental industry.
Since 2015 Dr von Geijer has been employed by TePe and a lecturer at universities worldwide.
Dr von Geijer
Doctor of Dental Surgery

Integrating Enzymatic Cleaners into Infection Control Protocols
Integrating Enzymatic Cleaners into Infection Control Protocols
Infection control is the foundation of safe dental practice. Every instrument that enters a patient’s mouth must be thoroughly cleaned and sterilised before re-use. While sterilisation is the final step, the process begins much earlier, with effective cleaning. This is where enzymatic cleaners play a powerful role in modern dental infection control protocols.
Running a dental clinic means balancing patient care, staff safety, and efficiency every single day. When it comes to infection control, every step matters, one of the most important (and often overlooked) is pre-cleaning of instruments before sterilisation.
Why Cleaning is Critical Before Sterilisation
Sterilisation can only be effective if instruments are free of organic debris. Blood, saliva, and bioburden including biofilm can shield microorganisms from contact with cleaning products, leaving sterilisation incomplete. Manual scrubbing is still widely practiced in the dental clinic; however, it produces inconsistencies and is a risk to staff, exposing them to sharps injuries and aerosols. Automated cleaning systems, paired with the right solutions, now provide a safer and more effective alternative. This is where enzymatic cleaners change the game.
What Enzymatic Cleaners Do
Enzymatic cleaners are specially formulated detergents containing enzymes that break down organic material such as blood proteins, fats, and carbohydrates. Instead of simply loosening debris, these enzymes digest it into smaller, more easily removed particles.
Key benefits include:
High cleaning efficiency
Dried-on bioburden is easier to remove.
Compatibility with ultrasonic and washer-disinfectors
Enzymatic cleaning solutions work effectively in automated cleaning equipment.
Gentle on instruments
They clean without the harsh abrasives or strong chemicals that may damage delicate dental instruments.
Reduce manual scrubbing
Minimising staff exposure to sharps and contaminated instruments.
Best Practices for Integration
To successfully integrate enzymatic cleaners into your dental infection control program:
Choose the right formulation
Select an enzymatic detergent recommended for dental instruments and compatible with your cleaning equipment.
Ensure the enzymatic cleaner has a high efficacy throughout the day
There is no point in using a product that does not deliver consistent results
Follow manufacturer’s instructions
Concentration, temperature, and soak times all impact enzyme performance.
Change solution as recommended throughout the daily
Pair with automated cleaning
For consistent results, use enzymatic cleaners in ultrasonic cleaners or washer-disinfectors rather than relying on manual scrubbing.
Train the team
Staff should understand not just how to use enzymatic cleaners, but why they are essential for patient and staff safety.
A Smarter, Safer Workflow
Pairing enzymatic solutions with ultrasonic cleaners or washerdisinfectors creates a hands-off, high-performance cleaning system. Instruments come out consistently clean, staff stay safe, and sterilisation works as it should, every time.
Why Dental Practices are making the Switch
Better results, less effort
Your team can focus on patient care, not scrubbing.
Professional image
Patients notice when a clinic invests in the latest infection control solutions.
Future-proof protocols
Stay ahead of compliance requirements with best-practice cleaning methods.
In Conclusion
In today’s dental environment, “good enough” is no longer enough. Enzymatic cleaners are not just another product, they are a practice upgrade that protects your patients, your staff, and your brand. If your infection control routine does not already include them, now is the time to make the switch.
Click on the link to read Independent 3rd party studies that support the use of enzymatic cleaning in the dental setting.
PRE-CLEANING - THE FOUNDATION FOR EFFECTIVE INSTRUMENT REPROCESSING
International Dental Journal 75 (2025) - Efficacy of Ultrasonic Cleaning Products with Various Disinfection Chemistries on Dental Instruments Contaminated with Bioburden
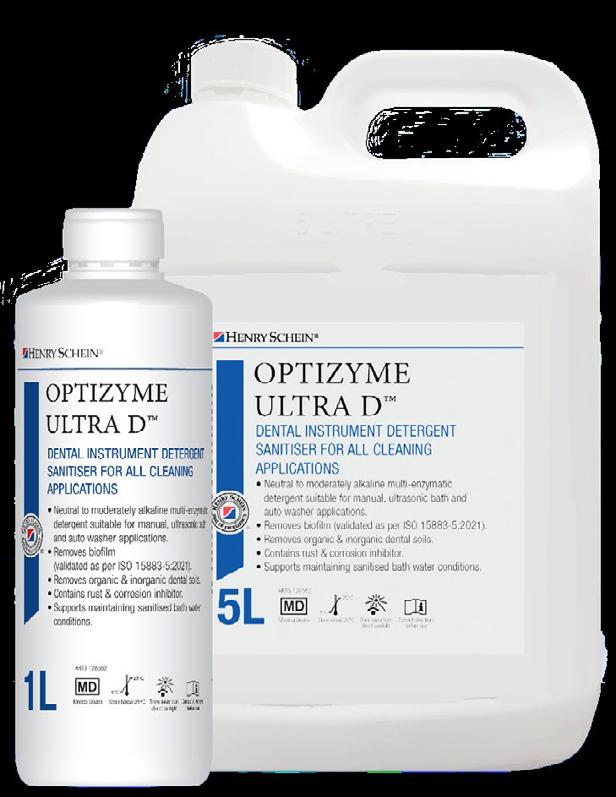
Find out more on Optizyme Ultra DTHE NEXT GENERATION OF ENZYMATIC CLEANERS Read article
Advanced Enzymatic Proven. Simple.
Emma Rolfe
Infection Prevention and Control Professional Henry Schein


Beyond the Steriliser
Why Air Removal & Steam Penetration Matter in Dental Practices
With the release of AS 5369:2023, functionality and routine testing of sterilisation processes have become highly topical for dental practices. Ensuring that steam reaches every surface of an instrument is critical for patient safety. This article briefly outlines the principles of air removal and steam penetration and explains how routine monitoring with a Process Challenge Device (PCD) helps meet the requirements of the new standard.
Getting Steam Where It Needs to Go
Steam sterilisation only works if steam reaches all instrument surfaces - including every pack and pouch, and inside hollow handpieces, turbine bodies, and other lumened instruments. Any residual air or non-condensable gases act as a barrier. Research shows, even small air pockets can block steam from penetrating hollow instruments, leaving hidden areas unsterile. This is why air removal and steam penetration are the real tests of a steriliser’s performance - not just reaching a set temperature.
Why Dentists Should Care
• Dental instruments often have narrow lumens and joints where steam struggles to enter.
• A cycle that “runs” doesn’t guarantee sterilisation if steam hasn’t penetrated properly.
• Patient safety depends on making sure every instrument is truly sterile.
Daily Monitoring with a Process Challenge Device
• To prove your steriliser is doing its job, use a Process Challenge Device (PCD) - a test piece that mimics the toughest-to-sterilise instrument.
• Daily air removal steam penetration test: After the vacuum test and before your “live loads,” place the PCD in an empty chamber in your steriliser and run the functionality test (Bowie Dick Test or Helix Test) to verify complete air removal and steam penetration and ensure the steriliser is ready to function for the day.
• Routine monitoring: Build confidence that every instrument in every load is safe.
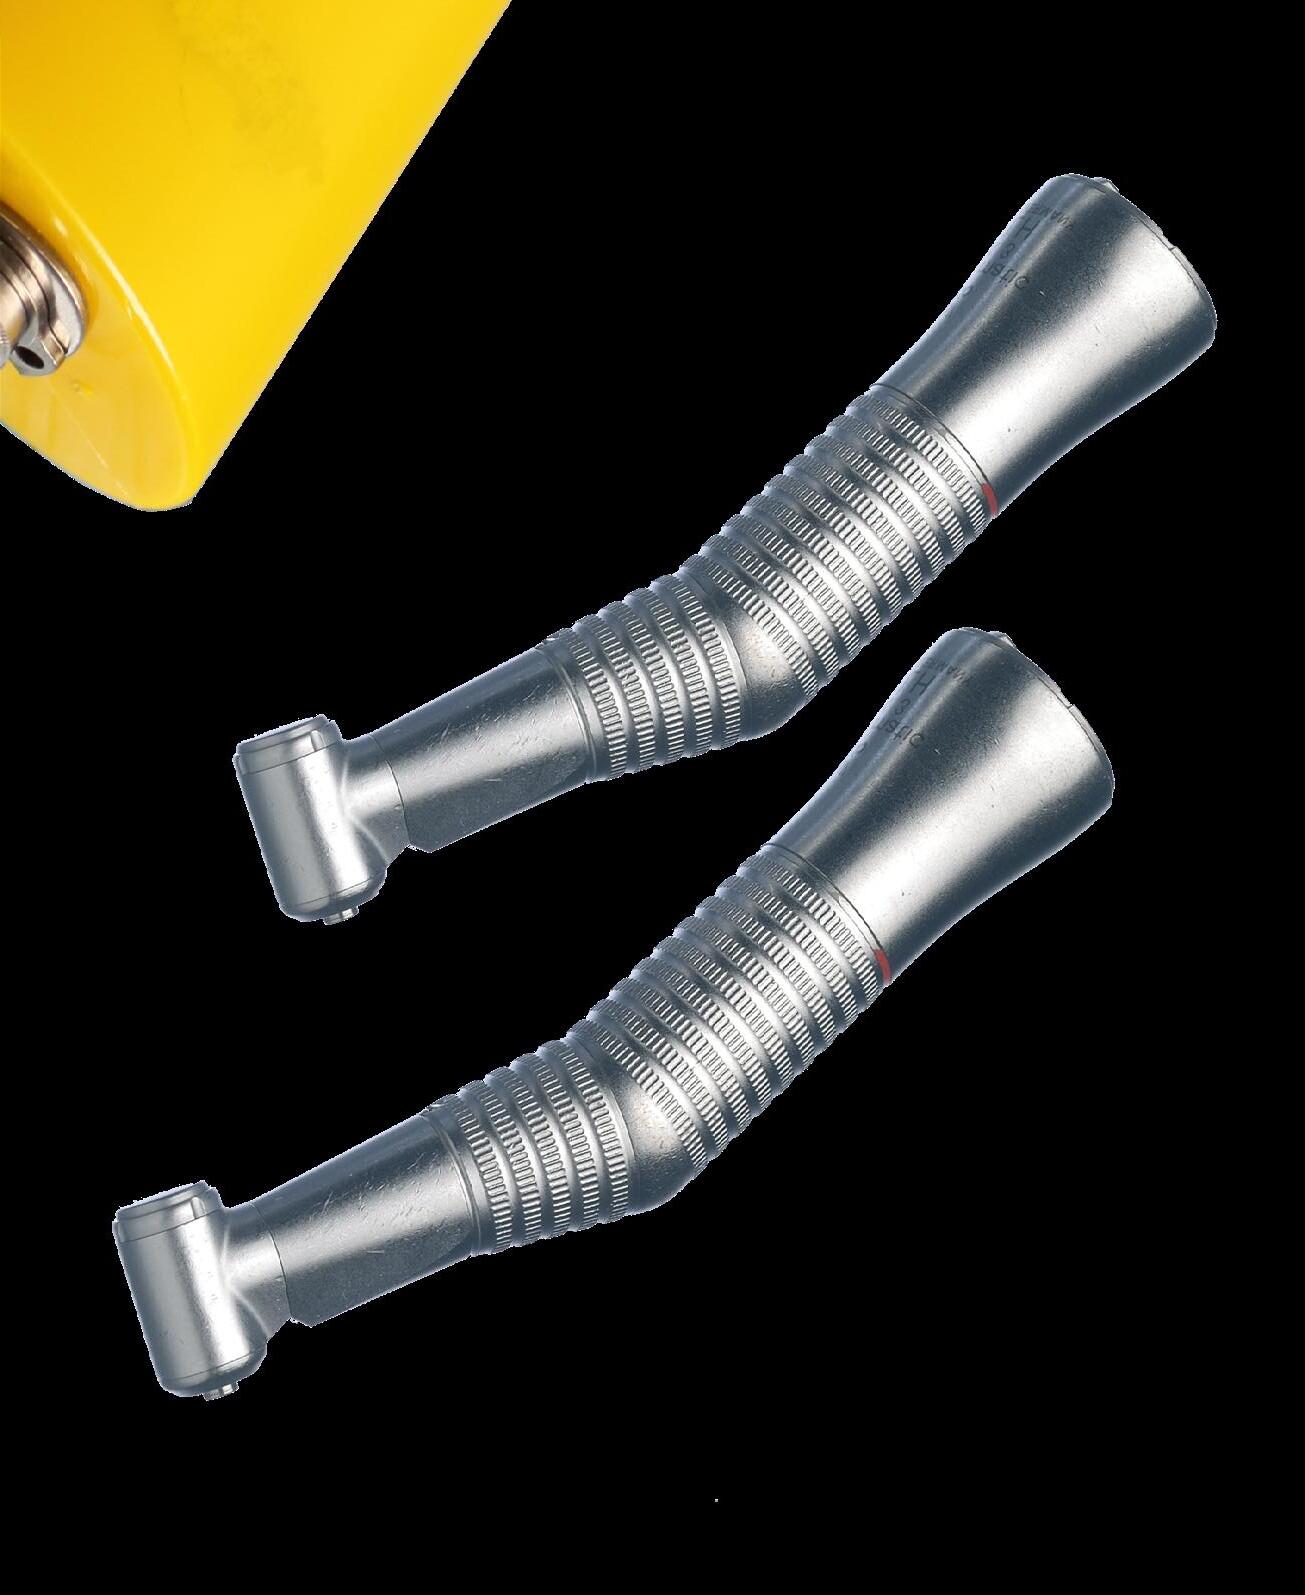
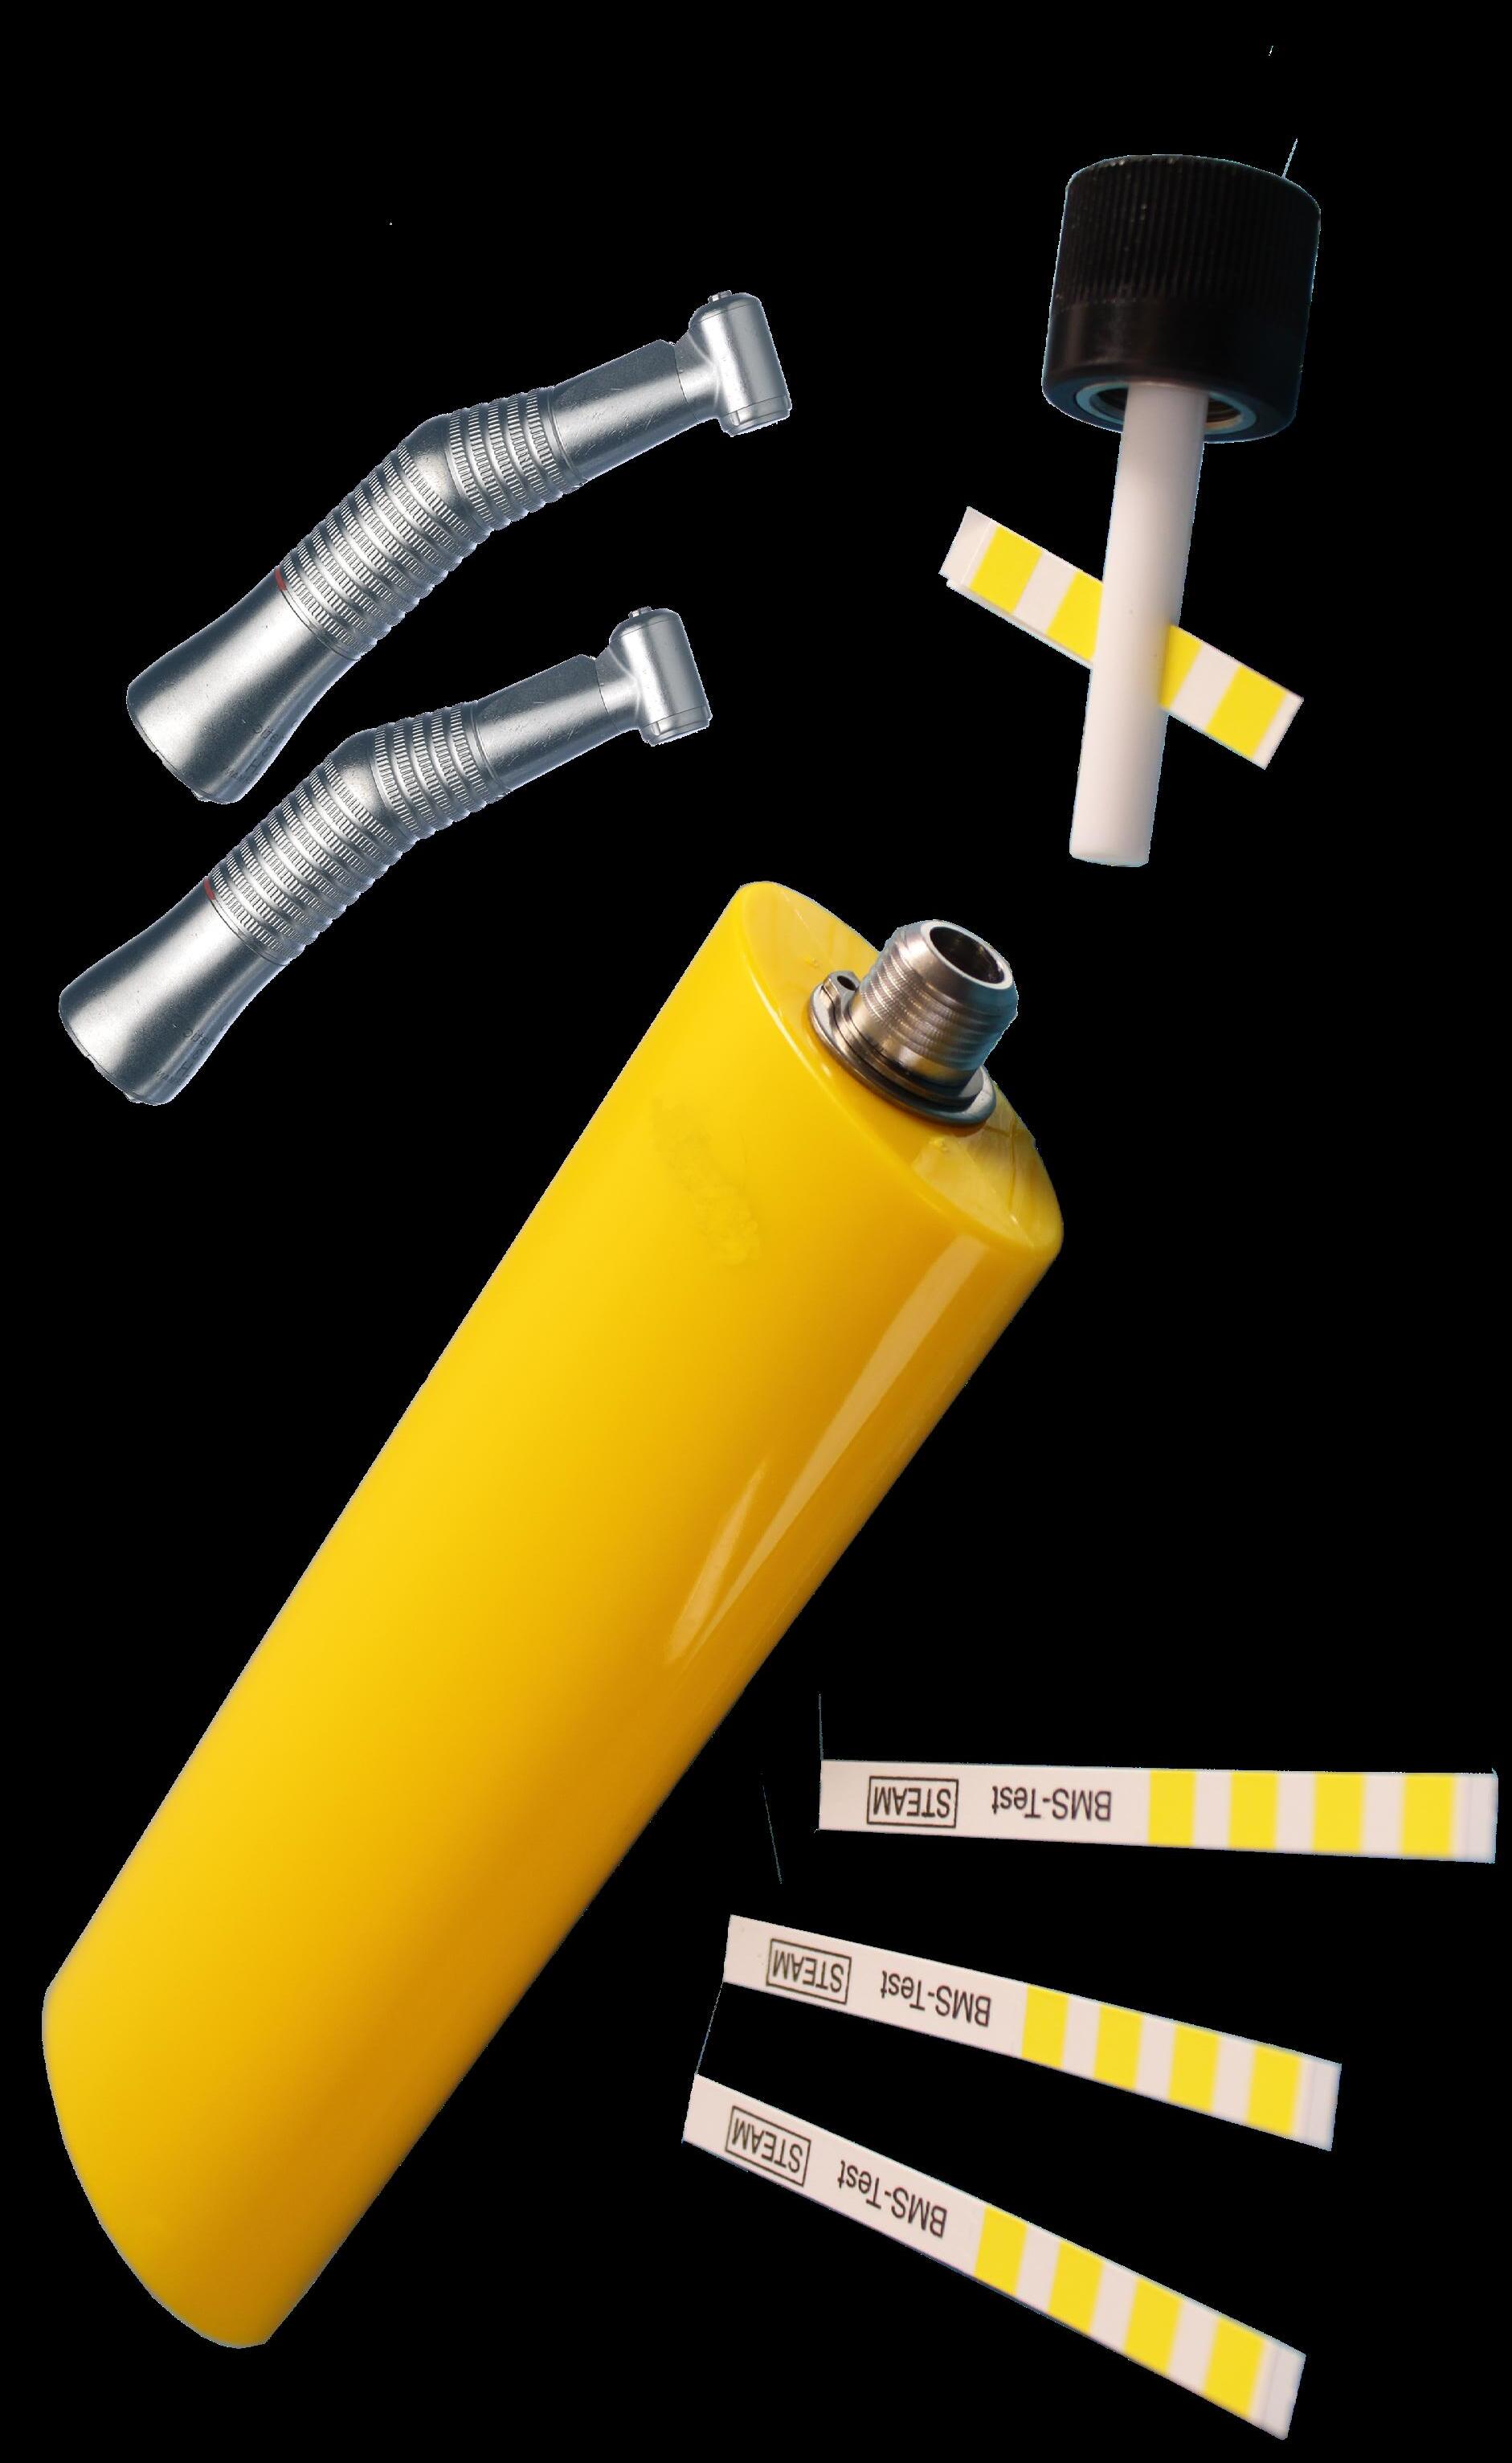
Why GKE PCDs Lead the Way
Not all PCDs are equal. Some cheaper plastic devices degrade, warp, or fail to mimic real dental instruments.
The GKE PCD is different:
• Durability – withstands repeated use without losing accuracy.
• Stainless steel design – mimics real instruments; unlike plastic, it accurately replicates heat transfer and steam condensation for reliable testing.
• Worst-case simulation – replicates hollow handpieces and lumens.
• Trusted worldwide – validated through extensive research.
• Cost-effective over time – long lifespan compared with disposable or plastic alternatives.
• Meets AS 5369:2023 requirements – a PCD for a benchtop steriliser must conform to ISO 11140-6 in accordance with AS5369:2023.
If your steriliser passes the GKE PCD, you know your instruments are safe.
Takeaway for Your Practice
Reliable sterilisation means more than pressing “start.”
✔ Air must be removed.
✔ Steam must penetrate.
✔ Every cycle must be monitored to a hollow level.
With the GKE PCD, dentists can be confident they are protecting their patients, their staff, and their practice.
Lauren Kontus Director - gke Australia

View product
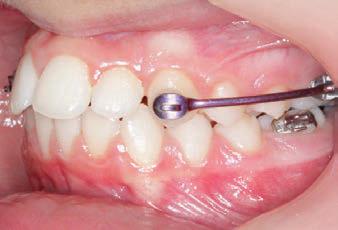
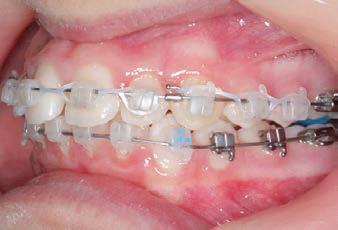
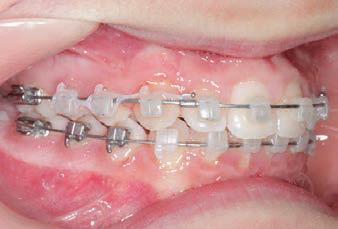
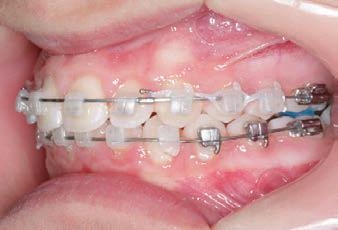
Carriere Motion 3D Appliance
Fastrack your orthodontic treatments. Save 6 months or more.
The SAGITTAL FIRST™ Philosophy is a time-tested approach that standardises, simplifies, and shortens Class II and Class III treatment times. It employs the Carriere Motion 3D Appliance to treat the AP dimension at the beginning of treatment before placing brackets or aligners. By resolving the most difficult part of treatment first, you can achieve a Class I platform in 3 to 6 months, shortening total treatment time by a minimum of 6 months1. You know how excited patients and parents become when you mention shorter treatment times.

1 “Treatment Effects of the Carriere Distalizer (Motion 3D) Using Lingual Arch and Full Fixed Appliances”, Journal of the World Federation of Orthodontists, May 2014
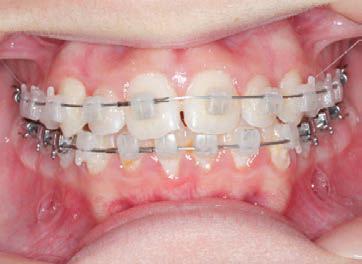
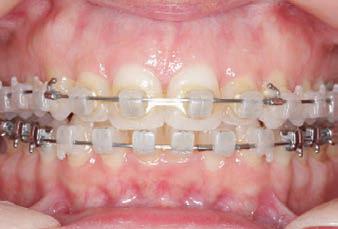
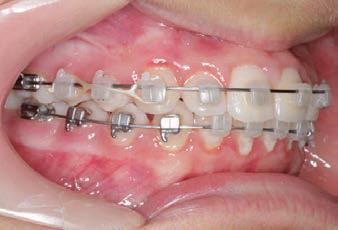
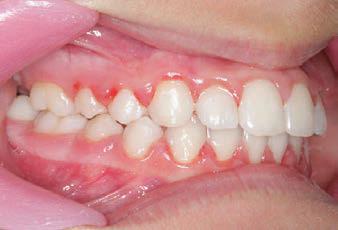
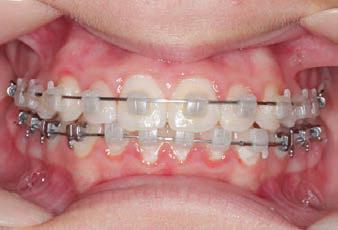
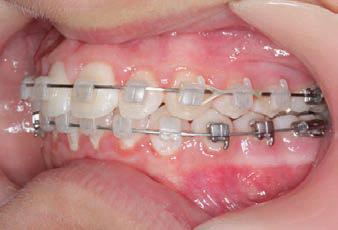
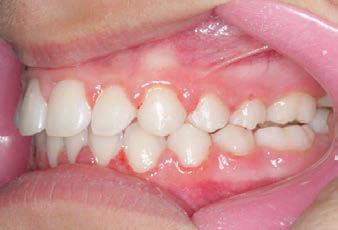
CLASS II DIV.1 - Marra
PROVIDED BY: DR. LUIS CARRIÈRE
INITIAL - 4/4/18

PROGRESS 1 - 26/9/18 - Class I platform accomplished in 5.75 months with Motion 3D COLOR Appliance

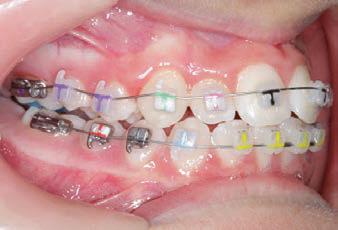
PROGRESS 2 - 26/9/18 - Placement of the SLX 3D Clear Brackets

[CONTINUED ON NEXT PAGE]
with M-ONE .015 Cu Nitanium 27°
PROVIDED BY: DR. LUIS
PROGRESS 3 - 30/10/18 - With M-TWO .020 x .020 Cu Nitanium 35° archwire
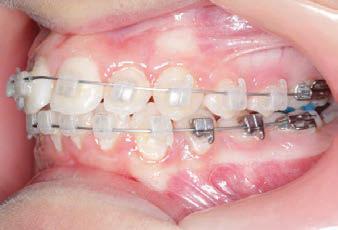
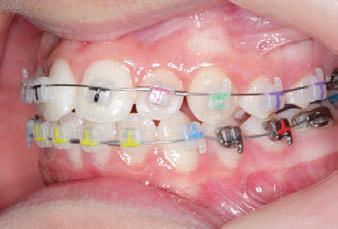
PROGRESS 4 - 27/11/18 - 3 links power chain: 5, 4, bypass 3 to crimp hooks
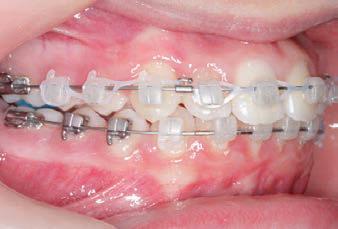
PROGRESS 5 - 13/3/19 - With M-TWO .020 x .020 Cu Nitanium 35° archwire
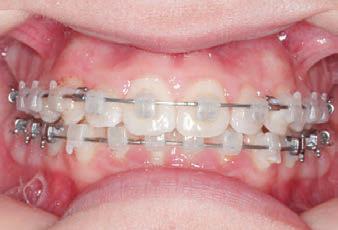
PROGRESS 6 - 1/8/19 - With M-THREE.019 x .025 Beta Titanium wire


52 HENRY SCHEIN ORTHODONTICS

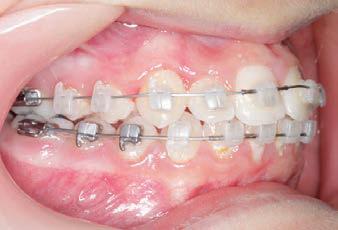
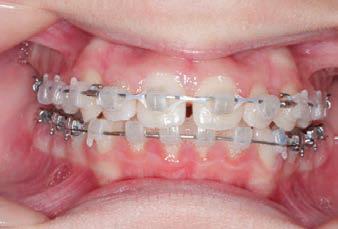
FINAL - 10/10/19 - Appliances removed AFTER
PROGRESS 7 - 10/10/19 - Final day in SLX 3D Clear Brackets BEFORE
SAGITTAL FIRST CASE BOOK
Biodentinee in Bio-Bulk
Fill Procedure
as
How long have you been using Biodentinee™ ?
I switched from MTA to Biodentinee™ five years ago.
Why do you use the Bio-Bulk Fill procedure with Biodentinee™ ? What are the main advantages for you? Firstly, if I have sufficient time at the appointment I can wait for the Biodentinee™ to fully set (12 minutes) and then complete the permanent restoration without fear of damaging the Biodentinee™. Secondly, in what is usually the case, if I have insufficient time to wait for the set and then complete the restoration, I can simply fill the cavity completely with Biodentinee™, wait for the complete set (12 minutes), discharge the patient, and then reappoint them at a later date to cut back the Biodentinee™ and cover it with the final restoration. I often use this latter technique to allow time to assess Biodentinee™’s effect on the pulp tissue, whether it be a pulpotomy, deep cavity or symptomatic crack, before committing to the final restoration, especially if an indirect restoration is planned.
Summary
Teeth with cracks that exhibit symptoms of moderate to severe pulpitis have historically been treated by pulpectomy, root canal treatment and then restoration with full-coverage indirect restoration. With the success of pulpotomies using calcium silicate cements, many of these teeth have been able to retain their vitality and arguably increase their longevity.
Methods
A full pulpotomy was performed on tooth 26 using Biodentinee™ with the Bio-Bulk Fill technique, with a permanent dentine restoration and interim enamel restoration to allow time to assess the success of the vital pulp therapy. The Biodentinee™ then acted as a core for the indirect restoration.
Discussion
Numerous studies have demonstrated that the success rate of partial and full pulpotomies ranges from 75-100%.(2,3) It has been advocated as the preferred option for treating teeth with symptoms once described as irreversible pulpitis.(4,5) While there is little published data on the use of pulpotomy in cracked teeth, my own professional experience has shown this
to be a viable treatment option for these symptomatic teeth
Conclusion
Full pulpotomy and restoration with an indirect full- coverage restoration is a viable treatment option for cracked teeth with symptoms of moderate to severe pulpitis.
Introduction
Symptomatic teeth that are found to have cracks are one of the more difficult situations for which to plan treatment. Many articles have been published regarding these teeth and unfortunately, there has been no consensus on the best course of treatment. In my experience, it is best to treat these teeth conservatively as this allows for further treatment options if the conservative treatment fails.
Case report by Dr. M. Paul Renner
Clinical signs and symptoms
In 2018, a 59-year-old patient presented with vague pain in the upper left region. He had difficulty locating which tooth was painful, but he reported that he thought it was one of the last two teeth (tooth 26 or 27).
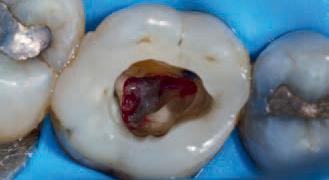
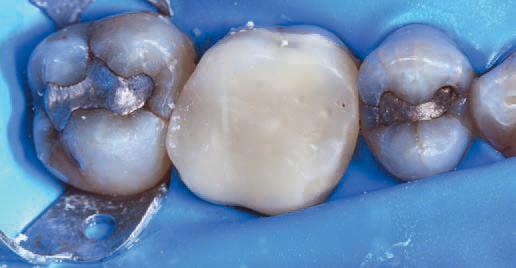
No teeth were tender to percussion. Tooth 26 reacted strongly to cold testing while the other teeth reacted normally. Tooth 26 tested positive to biting on damp gauze but the sensation did not linger. Both tooth 27 and 25 were negative to the bite test. The composite resin restoration in tooth 26 was removed under rubber dam and crack lines could be seen under the restoration (Fig. 1), with the most obvious running from the lingual to the centre of the tooth, and another from the mesiobuccal to the centre. A number of other minor cracks were visible, including one that ran under the buccal cusps (Fig. 1).
a core material for indirect restoration
Fig. 1
These crack lines were discussed with the patient and he was given the option of either restoring the tooth with direct composite resin or with a full- coverage indirect restoration. The patient chose to have the tooth restored with a direct composite resin and so this was performed at this appointment. The patient returned annually for examination and reported the tooth was asymptomatic.
In 2024, the patient presented again with pain in tooth 26. He reported the tooth was very sensitive to cold, with the pain lasting several minutes. He also reported that the tooth had ached spontaneously at times. On examination, the tooth reacted very strongly to cold, which lasted for almost one minute. The tooth was also slightly tender to percussion. The composite resin restoration appeared sound (Fig. 2). A PA radiograph (Fig. 3) revealed no PARL, but the pulp chamber was reduced in size when compared to a previous bite-wing radiograph.
Diagnosis
Given the tooth’s previous history of visible cracks running into the tooth and the current symptoms of moderate to severe pulpitis, a decision was made after discussion with the patient to enter the pulp chamber to assess the condition of the pulp and the depth of the cracks. The plan was to either perform a full pulpotomy or, if no viable pulp tissue was present, extirpate the pulp.
Procedure and treatment
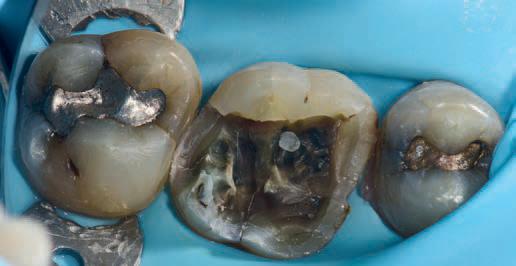
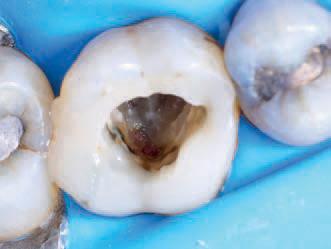
Using local anaesthetic and rubber dam isolation, access was obtained through the composite resin restoration. While the cracks were visible, they appeared similar to the image from 2018 (Fig. 4). The roof of the pulp chamber was removed and vital tissue was found, which did not appear to be heavily inflamed (Fig. 5). A pulp stone was also present (Fig. 6). Removing this revealed bleeding pulp tissue at the opening of the root canals. A cotton pellet soaked in NaOCl was placed on the pulp tissue at the opening of the root canal and after five minutes the bleeding had ceased (Figs. 7 and 8).
As the plan was to restore the tooth with a full- coverage indirect restoration, the entire pulp cavity was filled with Biodentinee™ with the Bio-Bulk Fill technique. (Fig. 9).
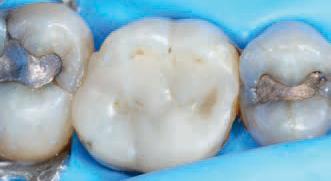
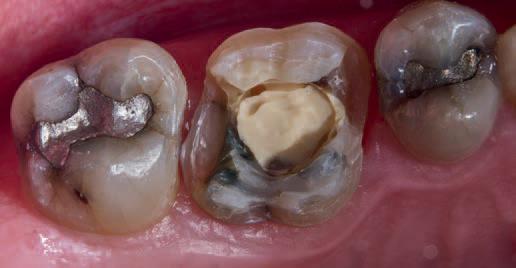
The patient returned after twelve weeks and reported that the tooth had been asymptomatic (Fig. 10). At this appointment, a preparation for a ¾ crown was performed (Fig. 11). The Biodentinee™ was left in situ, cut back and used as a core for the restoration. A PVS impression was recorded, and a BISAcrylic temporary crown cemented with provisional cement (Fig. 12).
Three weeks later, a monolithic zirconia crown (Fig. 13) was bonded onto the tooth (Fig. 14). The tooth will be monitored and a review radiograph taken after six months.
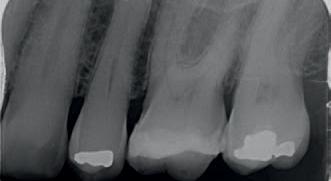
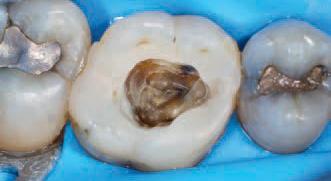

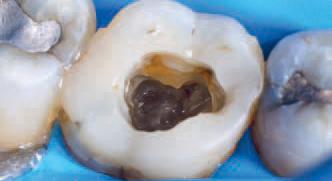
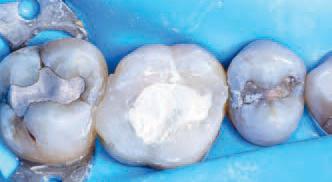
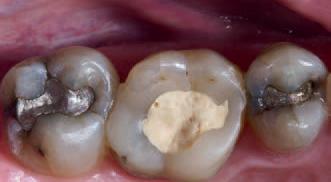
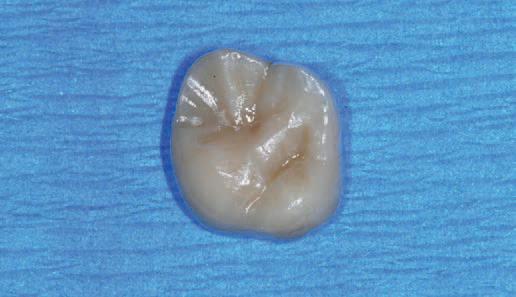
Fig. 2: Pre-op composite resin restoration, 2024.
Fig. 5: Initial exposure of the pulp chamber showing slight bleeding and pulp stone.
Fig. 3: PA radiograph.
Fig. 6: Pulp stone removed.
Fig. 8: Palatal root opening with vital tissue after bleeding has stopped.
Fig. 4: Initial access showing existing cracks.
Fig. 10: Tooth at 12-week review.
Fig. 7: Buccal root openings with vital tissue after bleeding has stopped.
Fig. 9: Cavity filled with Biodentinee™.

Discussion
This case highlights a number of elements of pulpotomies in teeth with cracks. Firstly, many teeth with deep cracks have a long-standing mild pulpitis, to which the pulp has responded by producing reparative dentinee that often appears in the form of a pulp calcification. The operator must be careful when performing vital pulp therapy on these teeth as it is often difficult to differentiate the pulp calcification from the floor of the pulp chamber.
Any pulp calcifications must be removed before assessing the condition of the radicular pulp tissue.
Secondly, in teeth with pulp symptoms resulting from cracks, it is best to perform a coronal pulpotomy. This allows the floor of the pulp chamber to be examined for any extension of the crack across the floor, which would greatly reduce the prognosis for the tooth.
Conclusion
The ability to use Biodentinee™ in the Bio-Bulk Fill technique has a number of advantages in cases like the above.
The initial vital pulp therapy appointment can be shortened by completely filling the cavity and using the Biodentinee™ as a permanent dentine replacement and an interim enamel replacement. The fact that the material can be left for up to six months allows time to assess the success of the procedure before committing to the final indirect restoration. The strength of Biodentinee™ means there is no requirement to place a separate core material.
Acknowledgements
I would like to thank my dental assistants, Ms Ellen Gordon and Ms Julie Schefe, for their assistance with the procedures and photography.
References on request
Dr. M. Paul Renner - Paul graduated from the University of Queensland with a BDSc in 1981. He has worked in general practice since, first in government service and then in his private practice in Dalby, Queensland from 1991 onwards. For the last 15 years, Paul has been employed as a part- time clinical supervisor at the University of Queensland, supervising final year students. Additionally, he currently holds the title of Associate Lecturer at the university. Paul has been active in the Australian Dental Association Queensland, where he served as president for two terms and was awarded lifetime membership.
Since starting to treat symptomatic carious teeth using vital pulp therapy eight years ago, it has become an increasingly important part of Paul’s practice. Due to the inability of many patients to afford root canal therapy and restoration with an indirect restoration, Paul has been able to save many teeth from extraction using this approach. Apart from vital pulp therapy, his other areas of interest are the diagnosis and treatment of cracked teeth and dental photography.
Fig. 14: Zirconia 3/4 crown bonded.
Fig. 11: 3/4 crown preparation.
Fig. 12: Acrylic provision crown prior to delivery of the final restoration.
Fig. 13: Monolithic zirconia 3/4 crown.
Get Inspired by our Surgery Setup Solutions
Integrated solutions to bring your vision to life
With over 90 years of experience and hundreds of successful surgical setups across Australia, we’re excited to launch our brandnew webpage — your one-stop destination for exploring the Surgery Setup Solutions portfolio like never before.
Showcasing real-world success stories of dental surgeries brought to life through tailored, integrated solutions, the webpage offers a valuable resource hub - featuring the latest articles, interviews, 360° practice tour pictures, videos, and testimonials from dentists, specialists, and key opinion leaders utilising cutting-edge technologies and advanced techniques in dentistry.
This new platform provides a unique opportunity for dentists to explore different solutions, discover fresh ideas, gain insights into key elements of modern dentistry, and how to incorporate those business solutions into a dental practice to create the perfect workflow.
Explore
• 360° Practice Tours
• Interviews with Dentists & Specialists
• Testimonials
• One Stop Shop Solution
• Latest Articles Visit Surgery Setup Solutions
Choosing Your Local Anaesthetic
Options To Manage Young Patients’ Pain
This is the first in a series of articles on local anaesthetic designed to assist the reader in local anaesthetic usage.
This first article explores the chemical properties of local anaesthetic and how these properties could determine which local anaesthetic is best suited for the patient and the procedure. From the outset, it should be recognised local anaesthetics are inherently safe with very side effects and a long history of safety. While many dentists use a particular local anaesthetic because they have always used it and it works in their hands; practitioners should not be blinded to the fact that there may be a better solution with increased efficacy and safety.
What outcomes should a local anaesthetic have?
There are 4 outcomes that the dentist requires of their local anaesthetic:
1. That it works quickly, so as to efficiently use the time available for treatment.
2. That the analgesia is profound enough to allow the procedure to be pain free.
3. That is duration of action is long enough to complete the task and,
4. That it is safe, for that patient.
What determines these outcomes for local anaesthetic? It Works quickly.
The most important factor that determines the onset of anaesthesia is the proportion of the local anaesthetic molecules that exist in a lipid-soluble rather than a water-soluble state 1 . The local anaesthetic within the cartridge is an acidic solution with a pH ~ 4 but once it is injected into the extracellular tissue it rapidly reaches the psychological pH 7.4. During this process molecule changes from the ionised form to the non-ionised form which is lipid soluble.
The equation which determines the rate at which the molecules are de-ionised and re-ionised is known as the HendersonHasselbalch Equation
pKa = pH + log [AH]/[A-]
The equation shows the relationship between the pKa and pH to the bioavailability of active ions to bind to the receptor sites and hence block the nerve channel. The pKa is the pH at which a weak acid or weak base will be 50% ionised 2.1 To summarise what this means;
The closer the pKa is to the physiological pH the quicker the onset.
Profoundness
How profound a local anaesthetic solution is largely determined by its lipid solubility. The lipid solubility of a local anaesthetic is important as the nerve membrane is a lipid environment. It is the aromatic group of the local anaesthetic which gives it lipid solubility. An increase in lipid solubility will lead to more local anaesthetic passing through the nerve walls to act on the binding site. Greater lipid solubility of a drug not only enhances potency but also enables more rapid diffusion through cell membranes. However, if it is too lipid soluble, it may impede dispersion throughout tissue fluids and foster sequestration in neighbouring adipose tissues or myelin sheaths.
A measure of a local anaesthetic is the LogP value, where the ideal local anaesthetic should have a value between 2-4. Small differences in the LogP will equate to a large difference in the actual number of ions available e.g. Articaine’s log P is 3.25 while Lignocaine is 2.84 which means that Articaine is four times more lipid soluble.
Duration
The receptor sites in the sodium channels are protein rich and local anaesthetics will vary in their duration of action due primarily to differences in their ability to bind to those protein sites and the percentage of circulating local anaesthetic that is protein bound has been found to correlate with an anaesthetic’s affinity for protein within sodium channels. Furthermore, the percentage of unbound local anaesthetic in the blood/plasma is an important consideration in toxicity. The greater the local anaesthetic protein binds, the longer the local anaesthetic duration of action 3 .
Safety
A drug’s half- life is the time needed to achieve a 50% reduction in anaesthetic in the blood levels and it takes 4 Half-Life’s for a drug to be considered cleared from the system (94% is eliminated)4. A short half-life means a shorter duration in the blood stream and important consideration with toxicity, reinjection and safety.
All amide local anesthetics are metabolized in the liver to varying degrees. Lignocaine is almost entirely metabolized by the liver by a variety of enzymes to numerous metabolites. Approximately 90% of Lignocaine administered is excreted in the form of various metabolites, and less than 10% is excreted unchanged. Prilocaine is metabolised in both the liver and the kidney and like Lignocaine is mainly metabolised by the liver 5 . Mepivacaine, while it too, is metabolised by the liver, 50% of the metabolites are excreted into the bile.
With Articaine, while it has the basic structure of an amide based local anaesthetic, it has an additional ester component. Therefore, it is 95% metabolised by the cholinesterase in the plasma producing an inert metabolite of articainic acid which is excreted via the kidneys, Therefore it is half-life is considerably shorter than other amide based local anaesthetics 6
Additional Factors
Adrenaline is often added to local anaesthetic preparations for 4 reasons which relate to its vasoconstrictive and systemic properties:
• It increases the amounts of local anesthetic that remain in and around the nerve for longer periods and hence increases duration.
• It will also decrease bleeding at the site of administration, and
• By decreasing the spread of local anaesthetic from the site of administration, it decreases the amount of systemic local anaesthetic, and therefore its toxicity.
• Used as a marker for intravascular injection. An intravascular injection of adrenaline will cause a short-lived increase in heart rate, notifying the dentist of a potential toxicity issue 7 .
It does, however, have some unwanted side effects due to adverse reactions with medications, cardiovascular disease and peripheral ischemia 8

Chu's Aesthetic Gauges
The start to a perfect finish
Instrumentation and Procedural Products
THE PROPORTION GAUGE - PROGS
Precise Color-Coded Measurements
• Provides quick, accurate diagnosis of tooth proportion
• Provides accurate results and reduces chairside adjustment time
• Easy to read—reduces visual fatigue
Common reference guide between clinicians and labs
Results in effective communication to reduce the incidence of errors and repeated adjustments
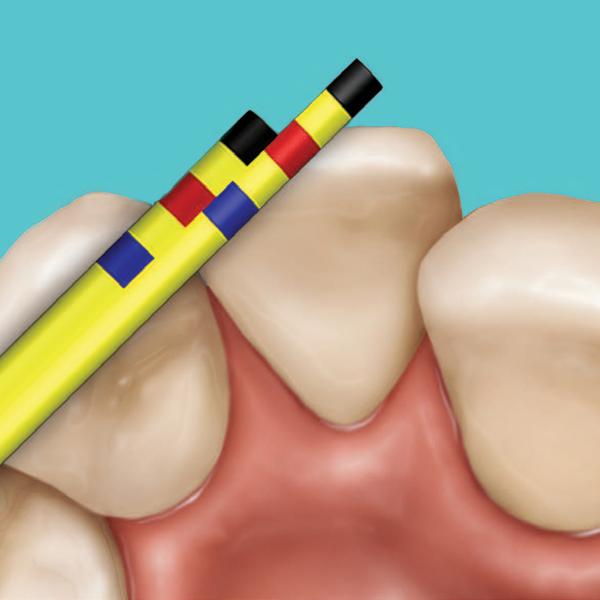
Compatible with IMS™ Cassettes and can be easily sterilized along with other instruments2
Reduces incidence of cross-infection
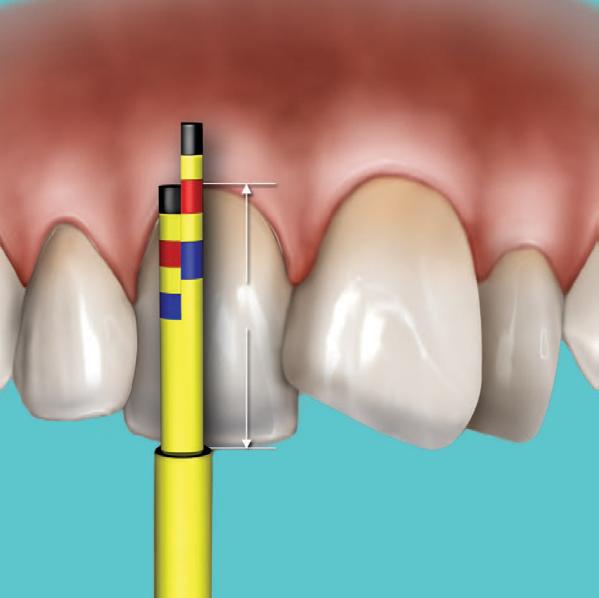
INLINE TIP
The Inline tip has a short and long vertical arm. This helps to measure the length and width, independently, in cases of crowding where the use of the T-bar tip may be difficult.
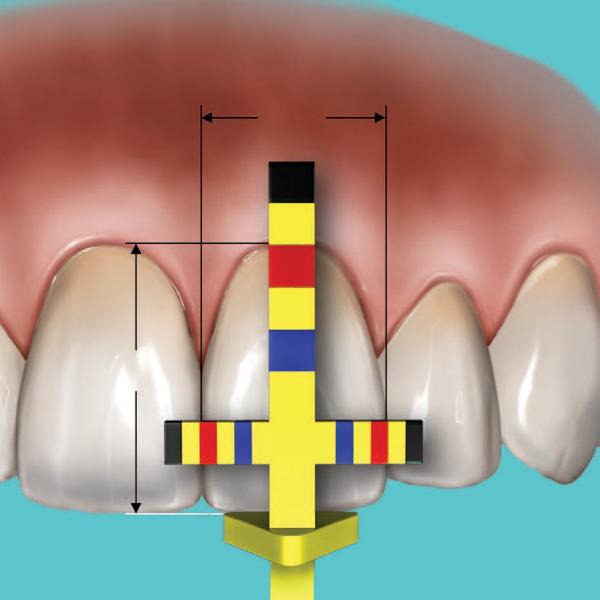
TIP
The T-bar tip has a vertical and horizontal arm. This measures length and width at the same time.
2) Color bands will wear with normal use; simply dispose of the tip. Tips last for approximately 5-10 sterilization cycles. Replacement tips are available in packs of three.
T-BAR
THE CROWN LENGTHENING GAUGE - CLGS
Precise Color-Coded Measurements
• Provides quick, accurate measurements and better results
• Easy to read—reduces visual fatigue
Compatible with IMSTM Cassettes and can be easily sterilized along with other instruments
Reduces incidence of cross-infection
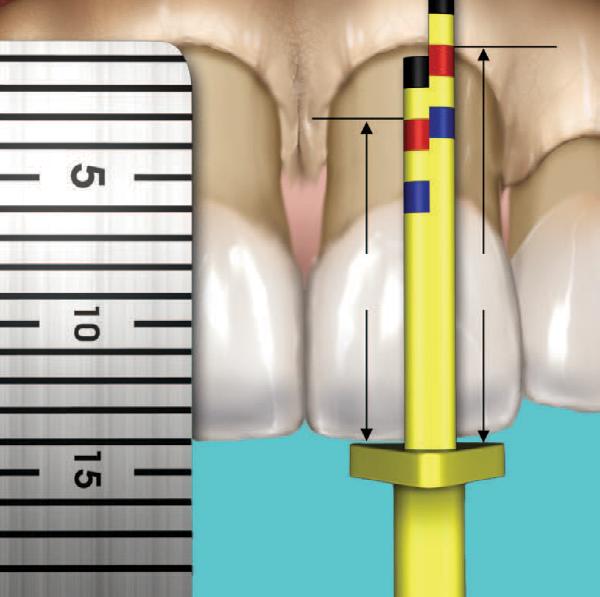
The Papilla tip has predefined measurements to help establish the correct aesthetic position of the interdental papilla from the incisal edge before the flap is closed and sutured. 11mm 14mm
The BLPG tip has predefined measurements to help achieve the proper mid-facial clinical crown and biologic crown length during a crown lengthening procedure.
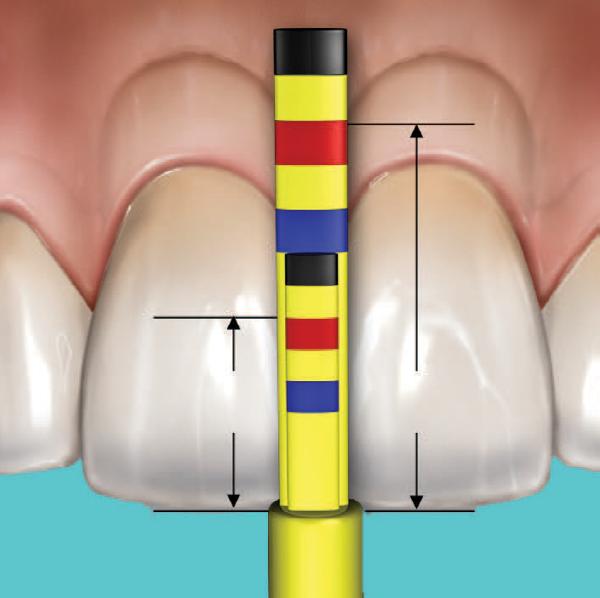
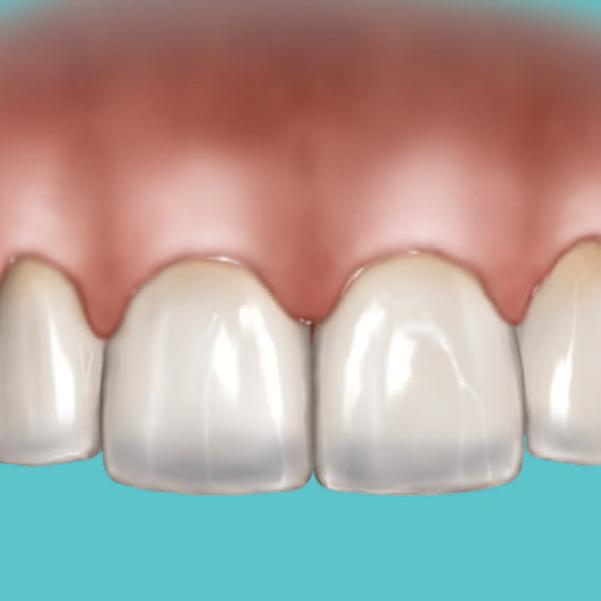
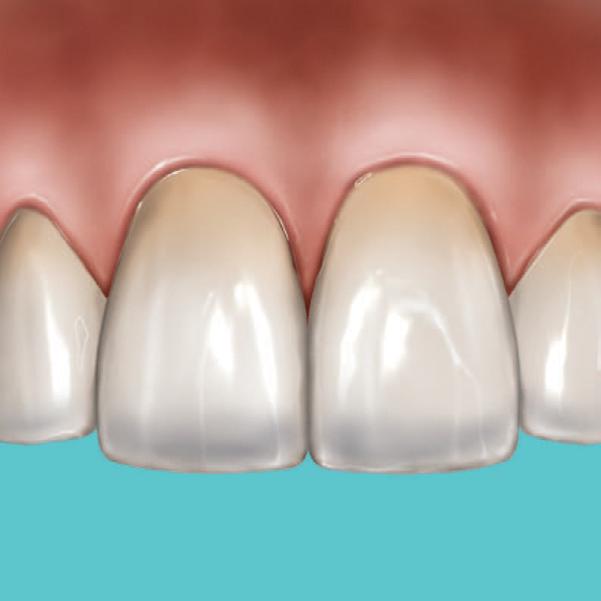
BLPG TIP
PAPILLA TIP
THE SOUNDING GAUGE - SOUNDG
• Bone sounding made simple and quick
• Sounding tip curvature and sharpness allows easy manipulation and access into deeper areas to analyze the level of the bone crest
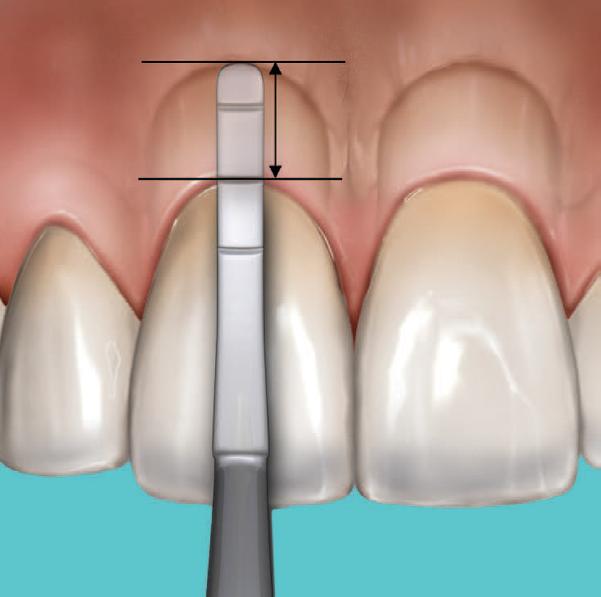
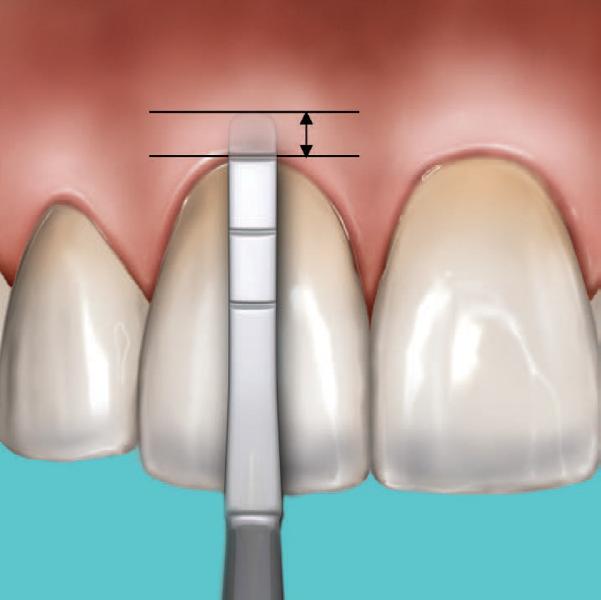
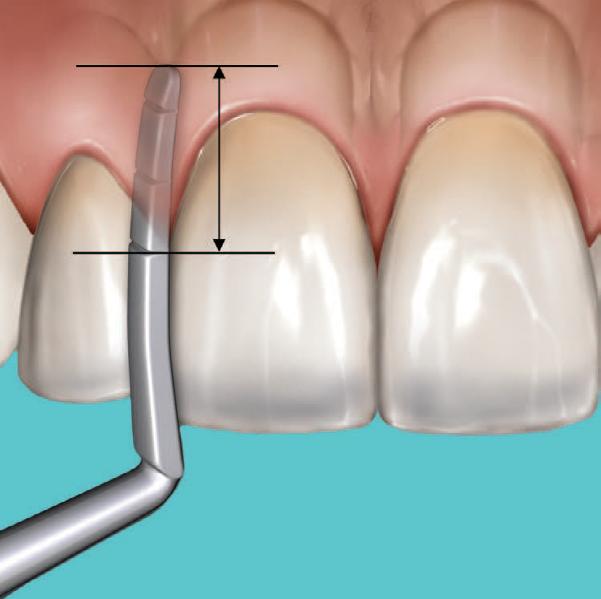
SOUNDING TIP
The Sounding tip helps determine the sulcus depth, mid-facial osseous crest location and inter-proximal osseous crest location.
CASE SYNOPSIS
A 29-year-old Caucasian female presented with congenitally missing teeth #6 and 10 with horizontal impaction of tooth #11. Consequently, her upper arch width was constricted and deficient due to the lack of the development and eruption of the permanent teeth. The patient had ‘cosmetic’ bonding in an effort to create a pleasing outcome, but failed due to the lack of objective instrumentation to help guide the dentist in treatment.
Chu’s Aesthetic Gauges, which define ranges of individual tooth size, was used to create the proper individual tooth proportion based upon width once the incisal edge position was established. The maxillary central incisors for this patient were found to be slightly deficient in length. The aesthetic restorative therapy entailed correction of tooth dimensions of all the maxillary anterior teeth through crown lengthening using the gauges as a guide for reconstruction of size and shape with ceramic laminate veneers as well as full crowns on teeth and implants. The centrals were corrected first, then the canines for occlusion, and then the lateral incisors. With Chu’s Aesthetic Gauges, predictable and swift diagnosis and correction can be accomplished with a minimum amount of1stress and a maximum amount of patient gratification1
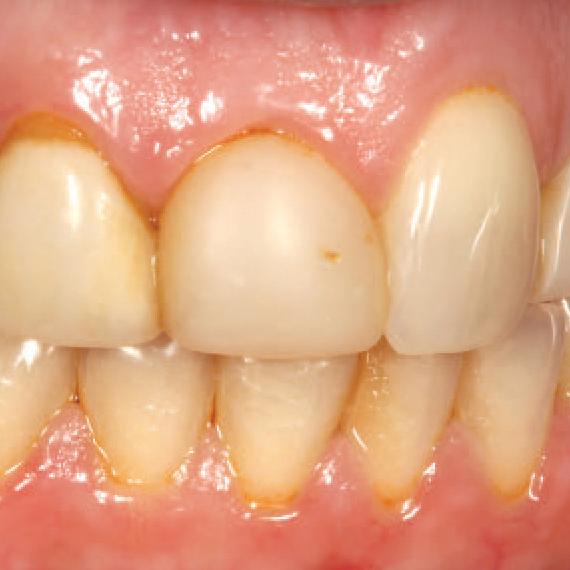
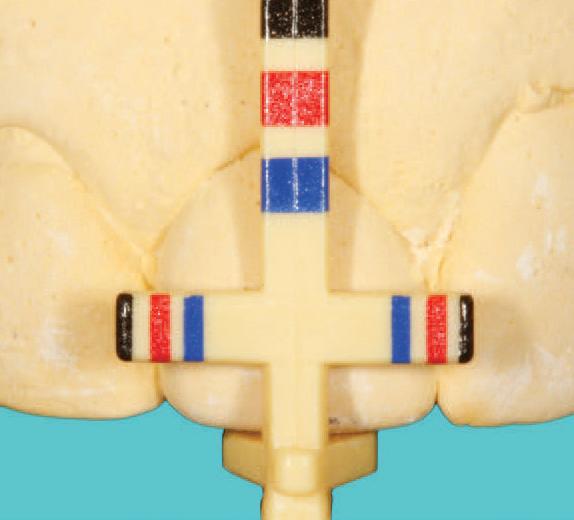
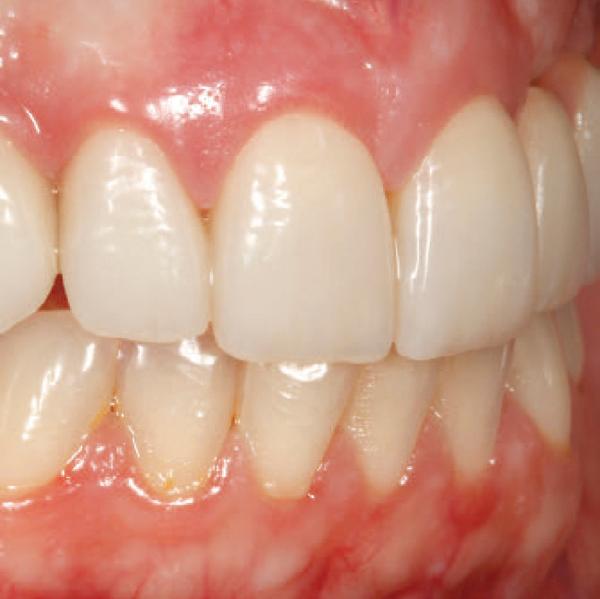
1)
Satin Steel Handle SKU Resin Handle SKU Description
PROGS PROG Proportion Gauge (1 Handle, 2 T-Bar Tips, 2 Inline Tips)
CLGS CLG Crown Lengthening Gauge (1 Handle, 2 BLPG Tips, 2 Papilla Tips)
SOUNDGS SOUNDG Sounding Gauge
SCHUSET CHUSET 1 Proportion Gauge, 1 Crown Lengthening Gauge, 1 Sounding Gauge, 1 Five-Instrument IMS™ Cassette
PROCLHDLS PROCLHDL Proportion and Crown Lengthening Gauge Handle Refill SKU Description
TBARREF T-Bar Tip Refill (3 tips)
INLINEREF In-Line Refill (3 tips)
BLPGREF Biological Periogauge (BLPG) Refill (3 tips)
PAPREF Papilla Refill (3 tips)
Products online
For more information about Chu’s Aesthetic Gauges visit HuFriedyGroup.com/ChusGauges
Hu-Friedy Mfg. Co., LLC, 1666 E. Touhy Ave., Des Plaines, IL 60018 | HuFriedyGroup.com
All company and product names are trademarks of Hu-Friedy Mfg. Co., LLC its affiliates or related companies, unless otherwise noted. Marks not registered in all jurisdictions.©2023 Hu-Friedy Mfg. Co., LLC. All rights reserved. HF-5627/1123
Dr. Stephen Chu received his undergraduate degree from Brown University and his Doctor of Dental Medicine degree from the University of Pennsylvania. He obtained his Master’s of Science degree in Restorative Dentistry and completed the Certificate Program in Fixed Prosthodontics at the University of Washington, in Seattle. Dr. Chu subsequently became a board-certified dental technician in ceramics and obtained a Master’s degree in Dental Technology from the New York University College of Dentistry (NYUCD). He is the former Director of the Continuing Education Program in Advanced Aesthetic Dentistry at NYUCD. He is also presently an Associate Clinical Professor in the Department of Periodontics and Implant Dentistry at New York University College of Dentistry. Dr. Chu has authored two textbooks on color and recently on aesthetic restorative dentistry and has contributed chapters to several others. He has published numerous articles in the dental literature and is on the editorial board of several peer-reviewed journals. He is a worldwide lecturer in aesthetic/cosmetic restorative dentistry and implant dentistry.
DR. STEPHEN CHU

View
The new KaVo MASTERmatic LUX M45 L high-speed contra-angle
The new addition to KaVo's family of reds
KaVo is expanding its family of red high-speed contra-angles with the new MASTERmatic LUX M45 L. KaVo completes the successful portfolio of its red high-speed contra-angles, and these precision instruments marked with a red ring are the power players in everyday practice: they reach the highest speeds and reliably withstand extreme loads - both during use and subsequent reprocessing.
At KaVo, we understand the importance of the red instrument series in practices and clinics, the long-established Biberachbased company is constantly expanding and improving its portfolio. Since mid-2022, the SURGmatic S15 L Pro, with a gear ratio of 1:5 and up to 200,000 rpm, has complemented the surgical contra-angles. In the restorative area, KaVo recently upgraded two high-speed contra-angles, the E25 L and E25 C.
But that’s not all: KaVo is now launching a new high-speed contra-angle to make dentists’ day-to-day work even more ergonomic and efficient in the future: The MASTERmatic LUX M45 L.
Optimum accessibility and excellent visibility during treatment have always played an important role in development, especially in the MASTER segment. The new MASTERmatic LUX M45 L now further emphasises these efforts. With its unique head-knee angle combination, it ensures improved and more ergonomic access to the molar region.
The new high-speed contra-angle handpiece is also equipped with KaVo CoolHead technology. This prevents excessive heating of the instrument head in the event of unintentional press of the push button during treatment and thus ensures additional safety for patients.
Thanks to its compatibility with drill lengths of up to 25 mm, the new instrument offers users a wide range of treatment options.
Whether head size, head angle or drill compatibility, KaVo has the perfect high-speed instrument for every dentist - for maximum flexibility and uncompromising treatment quality. This has proven itself and is what makes Dental Excellence so popular worldwide.

MASTERmatic LUX M45 L - High-speed contra-angle
• Speed increasing 1:4.2
• Sophisticated head/knee angle combination
• CoolHead Technology
• Glass rod light conductor with up to 25,000 lux
• Ceramic bearings
• Speed range up to 168,000 rpm
• Pleasant running noise thanks to 3-speed transmission
• Internally guided, separated cooling
• Optimized 3-port spray
• Exchangeable spray filter
• Compatibility with bur lengths of up to 25 mm
• For FG drills (1.6 mm)
The innovative features of the KaVo MASTERmatic LUX M45 L allow you to achieve the best possible results even in hard-to-reach areas of the patient´s mouth. The KaVo MASTERmatic LUX M45 L offers improved visibility, optimum access, maximum precision and exceptional reliability at the same time. View Online
KaVo MASTERmatic LUX high-speed contra-angle.
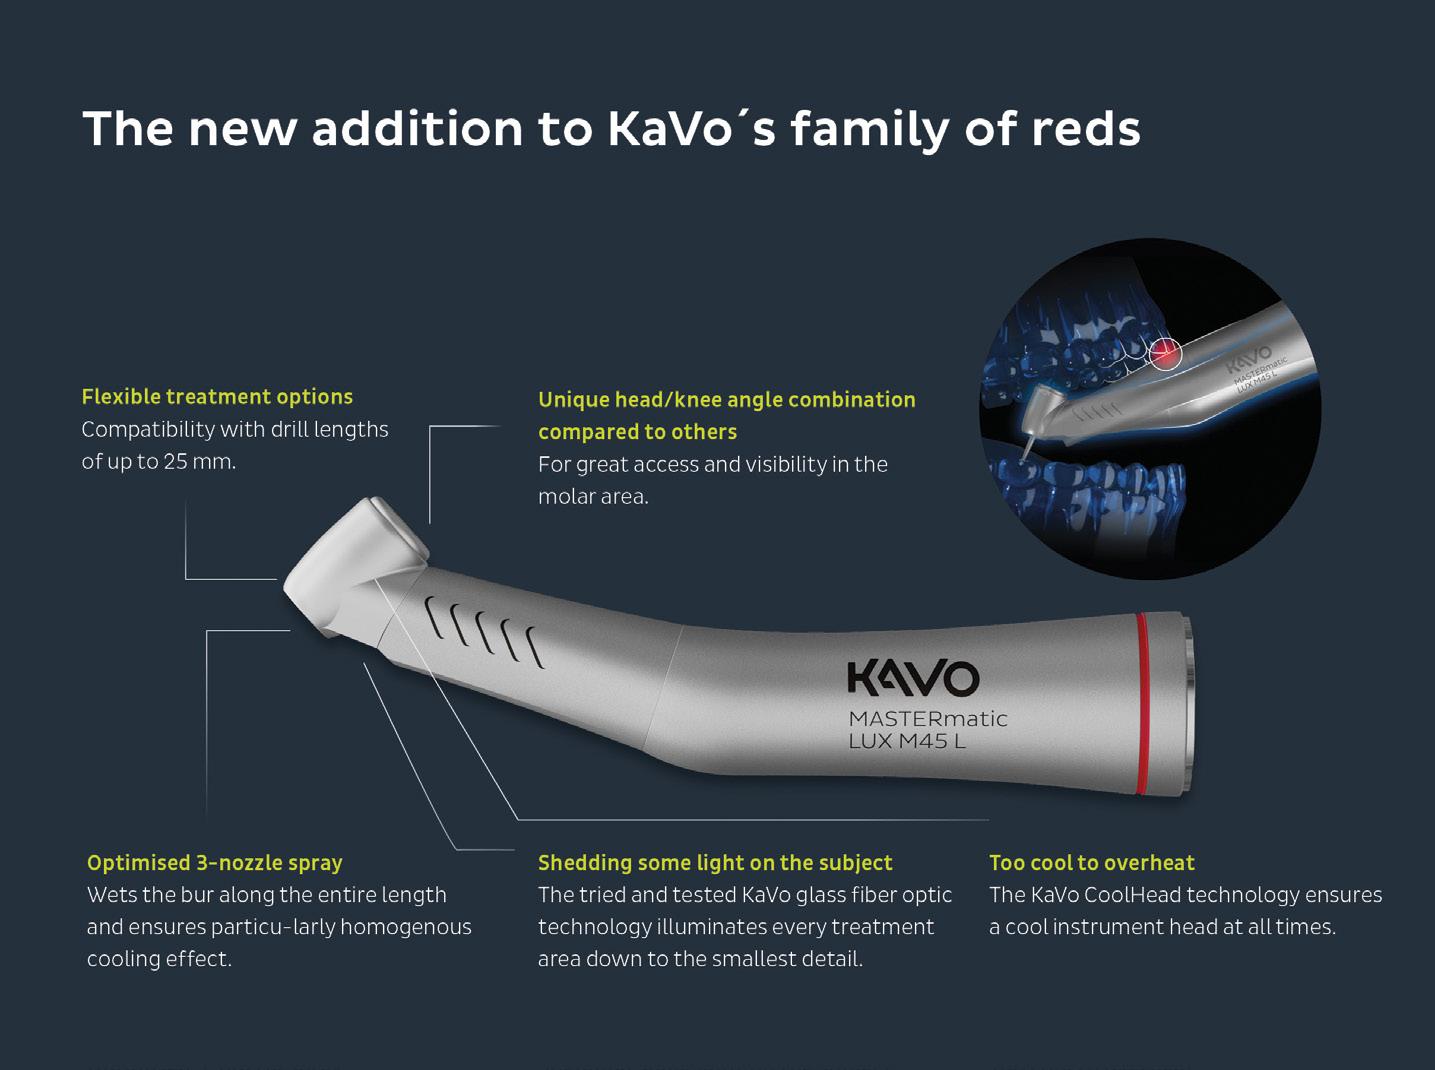
instrument offers users a wide range of treatment options.
Whether head size, head angle or drill
l Optimized 3-port spray
l Exchangeable spray filter
l Compatibility with bur lengths of up to
Elegantly solved
Clinical Assessment and Planning
Clinical examination is essential for treatment planning and execution. Figures 1–5 show the initial situation. Clinical and radiographic findings were supplemented with hingeaxis-related models, and the patient was informed about the findings. The aetiology of the pathological conditions was explained to encourage active participation.
The patient desired a high-quality, metal-free, holistic, and long-term functional solution. A collaborative planning session was held with the patient, dental technician, and clinician using photos, wax-ups, and mock-ups. In periodontally compromised cases, aesthetic compromises must be discussed and documented.
Each patient meets the dentist-technician team personally, allowing the technician to assess extraoral aesthetics like facial expressions and smile. The patient’s smile line was favourable—no gummy smile—allowing key parameters (facial proportions, lip line, midline, incisal edge position, occlusal plane, and gingival aesthetics) to be incorporated into the provisional restoration planning.
Therapy Concept
• Replacement of insufficient direct and indirect restorations
• Primary and revision endodontic treatments
• Systematic periodontal therapy
• Splint therapy
• Increase of vertical dimension of occlusion (VDO) using long-term provisionals
• Restoration of canine-guided occlusion to minimise functional disorders
• Gradual replacement of temporary restorations after at least six months without functional complaints
• Protective splint for definitive restorations
Step-by-Step Treatment
Functional screening showed no pain in muscles or joints. However, dynamic occlusion revealed posterior interferences, especially during lateral movements.
Treatment phases:
1. Oral hygiene and periodontal regeneration
2. Temporary restorations
3. Functional stabilisation and final restoration placement
A systematic periodontal therapy with quarterly recalls was initiated. Caries was removed, and inadequate restorations were replaced with precise long-term provisionals. These were placed in a newly determined centric position after splint therapy and physiotherapy.
Implants were placed in the posterior region to achieve stable occlusion, limited to the first molar. The articulator was programmed using the Arcus-Digma system (KaVo). Old photos guided the design of the anterior provisionals.
Surgical Crown Lengthening After Trauma
Just before the final phase, the patient suffered trauma, fracturing the upper anterior teeth to gingival level. Treatment options were discussed due to compromised stump stability. The decision was made to preserve the teeth using minimally invasive crown lengthening and place an implant in region 21.
Minimally Invasive Approach:
Using SonicLine ultrasonic instruments (Komet), bone contouring was performed without raising a flap. The SFS120 tip allowed precise bone remodelling to achieve biological width. The SF1LM handpiece controlled pressure and intensity. For interproximal areas, the SFS121 tip (rotated 90°) was used.
A ferrule design was created per DGZMK guidelines—2 mm of dentin above the preparation margin. Endodontic treatment followed under dry conditions. Due to reduced healing time, definitive restorations were placed soon after.
Final Restoration and Outcome
Healing time for periapical lesions was 3–6 months. Longer provisional phases improve predictability. The case was successfully managed thanks to strict adherence to the treatment concept, close collaboration with the technician, and patient compliance.
PRAXISZAHNMEDIZIN
PRAXISZAHNMEDIZIN Ästhetische PRAXISZAHNMEDIZINZahnheilkunde Ästhetische Zahnheilkunde
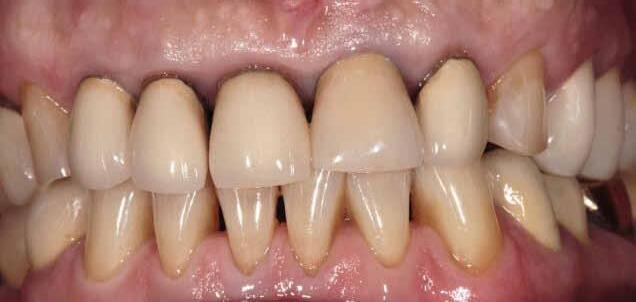
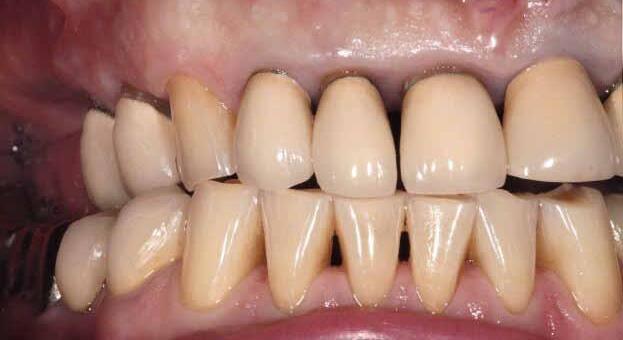
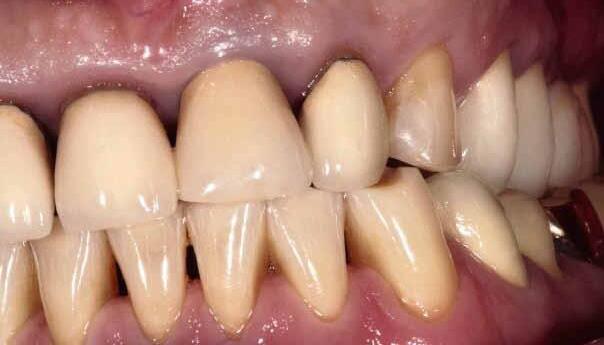
der MuskuschmerzOkklusion waren zu erken-
Behandlungsergebnis klinischer
Eingliede-
Parodontaltherapie
Gleichzeitig insuffiziente indirekte Langzeitprovisosechs Monawurden in erfolgreicher Unterstützung parodontalen VerhältImplantate
Ästhetische Zahnheilkunde ÄRZTE-VERLAG

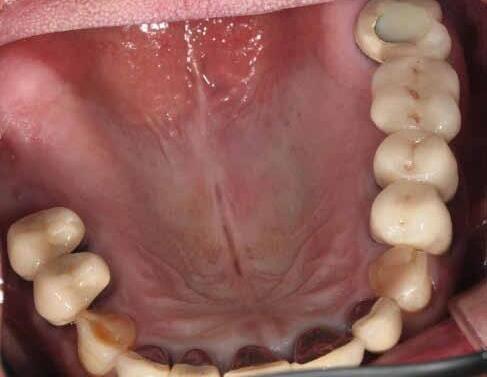
PRAXISZAHNMEDIZIN Ästhetische Zahnheilkunde
latur und den Kiefergelenken aktiv und passiv keine schmerzhaften Auffälligkeiten. In der dynamischen Okklusion waren deutliche posteriore Interferenzen/Schlifffacetten zu erkennen, besonders bei den Seitwärtsbewegungen. kann nur erreicht werden, wenn folgende Phasen klinischer Behandlung erfolgreich durchlaufen werden:
rung der definitiven Restauration Schritt für Schritt
rung der definitiven Restauration
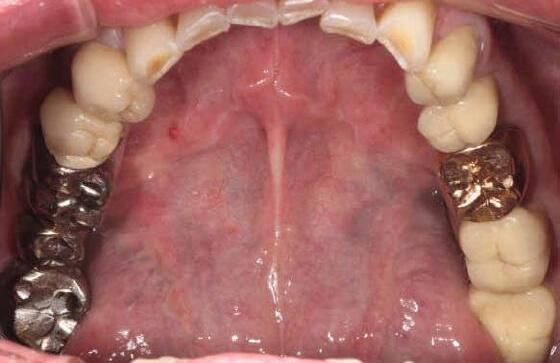
The ultrasonic technique expanded the scope of minimally invasive aesthetic dentistry. Benefits included fewer appointments, faster healing, and minimal tissue trauma. The result: harmonious gingival contours and healthy pale pink gingiva.
Glass fibre posts stabilised the endodontically treated stumps. Flat anterior guidance angles reduced shear forces. The stumps were splinted with lab-made provisionals. Final restorations were placed after six months (implant healing).
PRAXISZAHNMEDIZIN Ästhetische Zahnheilkunde
Materials used
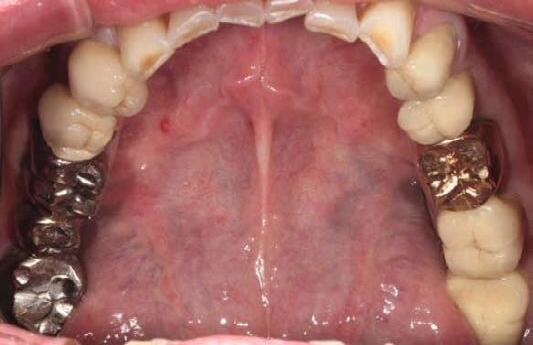
PRAXISZAHNMEDIZIN Ästhetische Zahnheilkunde
PRAXISZAHNMEDIZIN Ästhetische Zahnheilkunde
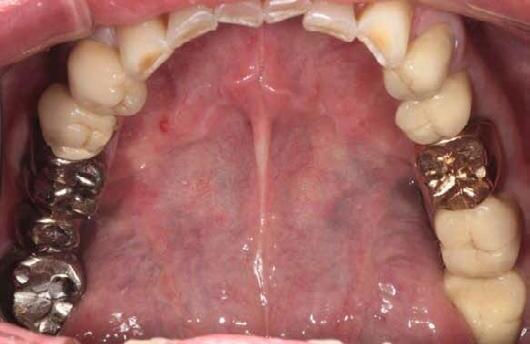
• IPS e.max Press (Ivoclar Vivadent) for veneers, partial crowns, and crowns
• CAD/CAM zirconia abutments on titanium bases with lithium disilicate crowns
• Dual-cure cement (Multilink) for crowns
• Light-cure composite (Variolink Veneer, Syntac Classic) for veneers under rubber dam
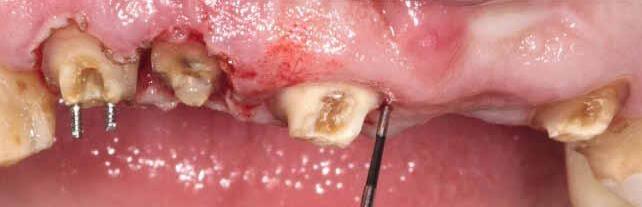
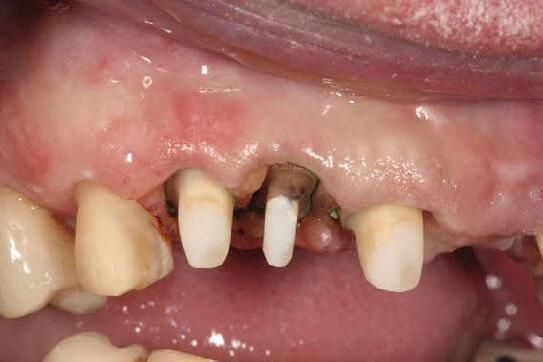

Kronenstümpfe nach Trauma (Unfall). Messung der biologischen Breite mit PAR-Sonde
Chirurgische Kronenverlängerung nach Unfall Wir programmierten den Artikulator per Registrierung mit dem Arcus-Digma-System (KaVo). Die LZP in der Front kamen dem Geschmack des Patienten sehr nahe, alte Fotos wurden als Vorlage genommen, die zentralen Frontzähne waren auch in jungen Jahren nur leicht länger als die seitlichen Schneidezähne. Ein Kuriosum war ein dritter seitlicher
DEUTSCHER ÄRZTE-VERLAG | DENTAL MAGAZIN | 2014;32(2)
Abb. 7: Unmittelbarer Zustand nach chirurgischer Kronenverlängerung und endodont./postendodont. Behandlung (Fassreifen-Effekt)
PRAXISZAHNMEDIZIN
A three-month recall was scheduled for periodontal and functional maintenance.
Outcome
After four years, the restorations showed excellent integration, especially in the upper anterior region, despite the extensive intervention. The final image reflects the satisfaction of the entire dental team.
Abb. 8: Die Schallspitze SFS120 (Komet) ist zum Zahn und zur Gingiva hin glatt poliert und weist nur am dünnen krestalen Arbeitsende eine Diamantierung auf.
Unmittelbarer Zustand nach chirurgischer Kronenverlängerung und Abb. 8: Die Schallspitze SFS120 (Komet) ist zum Zahn und zur Gingiva hin glatt poliert und weist nur am dünnen krestalen Arbeitsende eine DiamantieKomet
About Dr. Kianusch Yazdani
Ästhetische Zahnheilkunde
PRAXISZAHNMEDIZIN
PRAXISZAHNMEDIZIN
Ästhetische Zahnheilkunde
Ästhetische Zahnheilkunde
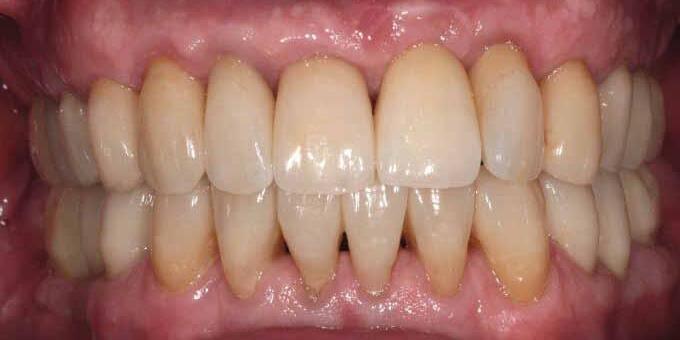
KomZeit länger die VorhersagbarKronenverlängerung.
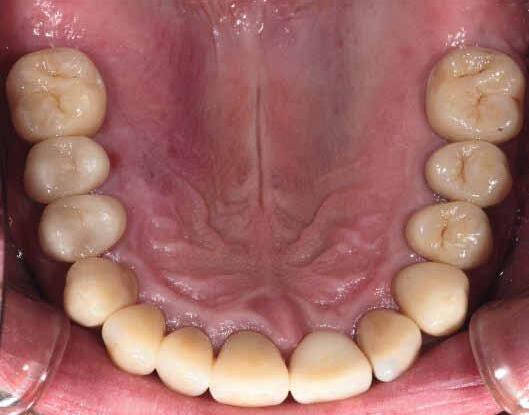
sem Fall ist für eine Stabilisierung des dento-gingivalen Komplexes und die Abheilung der periapikalen Läsion eine Zeit zwischen drei und sechs Monaten vorgesehen. Je länger die Zeit der provisorischen Phase, desto besser die Vorhersagbarkeit des Ergebnisses der chirurgischen Kronenverlängerung. Etabliertes Verfahren
ohne gradurch das Zusamauch der Durch die minimalinÄsthetik KronenverlängeVerfahren in Zeitersparnis Wundheilung wie Gewebes. Das eine Glasfaserstift, versorgt sehr Exkursionsbewepräparierten
Provisorium die
optimal steuern. Die Feinkorrektur erfolgt im Modus 1 des SF1LM. Die feine Diamantierung der Schallspitze SFS120 am krestalen Arbeitsende lässt eine sehr gute Konturierung und Ausdünnung zu. Durch die Politur des Ansatzes sind Zahn und Gingiva geschützt. Dem Behandler stehen verschiedene Ansätze zur Verfügung. Falls die Arbeit in den approximalen Bereich führt, wählt man die um 90° gedrehte Ausführung SFS 121. Beide Ansätze gibt es in zwei Größen bzw. Breiten; die feinere Größe dient eher der Konturierung und Ausdünnung des Knochens. Primär ist die Erreichung der biologischen Breite entscheidend. Ebenso ist die prothetische Rehabilitation mit einer hohen Erfolgsprognose in diesem Fall maßgebend.
Dr. Kianusch Yazdani studied dentistry in Münster and has been a practising dentist in Münster since 2006. His areas of expertise include aesthetic-restorative dentistry, particularly all-ceramic minimally invasive restorations, microscopic root canal treatments, as well as CMD (craniomandibular dysfunction) and other temporomandibular joint disorders.
Schneidezahn 12/Doppelanlage. Kurz vor der definitiven Phase kam es zum prothetischen Gau, nachdem der Patient unfallbedingt die Oberkieferfront bis auf Gingivaniveau frakturierte. In einem ausführlichen Gespräch mit dem Patienten wurden verschiedene Behandlungsoptionen diskutiert, da die Stabilität der frakturierten Stümpfe erheblich eingeschränkt war. Wir entschieden uns, die Zähne mithilfe minimalinvasiver chirurgischer Kronenverlängerungen zu erhalten und ein Implantat in Regio 21 zu inserieren. Minimalinvasives Vorgehen: Die rote Ästhetik im Rahmen einer chirurgischen Kronenverlängerung erfordert die Einhaltung bzw. die Schaffung der biologischen Breite. Die klassische Osteoplastik stellt einen relativ invasiven Vorgang dar. Wir arbeiten seit fast zehn Jahren mit den Schallinstrumenten der SonicLine (Komet). Durch die innovative Schalltechnologie lässt sich die Invasivität an der Gingiva deutlich minimieren. Nach Messung der Taschentiefe mit der Parodontalsonde erfolgt die Korrektur bzw. Reduzierung des Knochenverlaufes zirkumferär ohne Bildung eines Muko-Periostlappens. Der Knochen wird kontrolliert durch die speziellen Schallspitzen modellierend abgetragen. Diese besitzen unterschiedliche Abwinkelungen. Durch die schmale und dünne Schallspitze SFS120 von Komet mit dem feinen auslaufenden abgerundeten Arbeitsende lässt sich der Knochen perfekt remodellieren, bis die biologische Breite erreicht ist. Druck, Intensität und Einstellungen lassen sich am Schallhandstück SF1LM (Komet)
In diesem komplexen Patientenfall ist die Sanierung ohne gravierende Probleme durchgeführt worden, was nur durch das konsequente Einhalten des Konzepts und die enge Zusammenarbeit mit dem Zahntechniker möglich und auch der guten Compliance des Patienten zu verdanken war. Durch die Schallspitzen wird das zeitgemäße Konzept einer minimalinvasiven ästhetischen Zahnmedizin auch in der roten Ästhetik erweitert. Die minimalinvasive chirurgische Kronenverlängerung per Schall ist mittlerweile ein etabliertes Verfahren in meiner Praxis. Der große Vorteil liegt in der Zeitersparnis zusätzlicher Sitzungen und der schnelleren Wundheilung wie auch der viel geringeren Traumatisierung des Gewebes. Das Ergebnis zeigt einen harmonischen Gingivaverlauf und eine gesunde blassrosa Gingiva in der Front. Zur Stabilisierung der Aufbauten diente ein Glasfaserstift, da die frakturierten Stümpfe auch endodontisch versorgt werden mussten. Die Frontzahnführungswinkel wurden sehr flach gehalten, um die Scherkräfte bei den Exkursionsbewegungen so gering wie möglich zu halten. Die präparierten Zahnstümpfe wurden mit einem laborgefertigten Provisorium zur Stabilisierung verblockt. Nach sechs Monaten erfolgte die definitive Versorgung (Einheilzeit des Implantats).
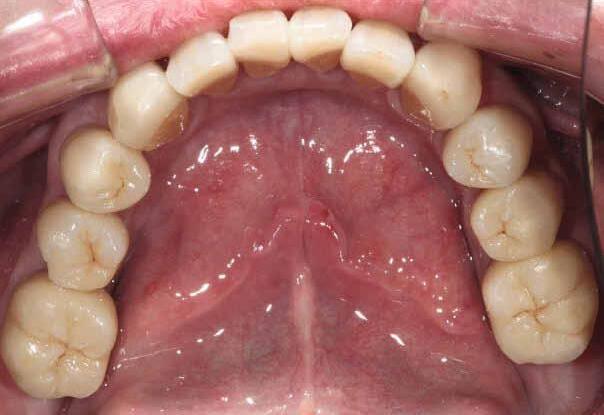
optimal steuern. Die Feinkorrektur erfolgt im Modus 1 des SF1LM. Die feine Diamantierung der Schallspitze SFS120 am krestalen Arbeitsende lässt eine sehr gute Konturierung und Ausdünnung zu. Durch die Politur des Ansatzes sind Zahn und Gingiva geschützt. Dem Behandler stehen verschiedene Ansätze zur Verfügung. Falls die Arbeit in den approximalen Bereich führt, wählt man die um 90° gedrehte Ausführung SFS 121. Beide Ansätze gibt es in zwei Größen bzw. Breiten; die feinere Größe dient eher der Konturierung und Ausdünnung des Knochens. Primär ist die Erreichung der biologischen Breite entscheidend. Ebenso ist die prothetische Rehabilitation mit einer hohen Erfolgsprognose in diesem Fall
sem Fall ist für eine Stabilisierung des dento-gingivalen Komplexes und die Abheilung der periapikalen Läsion eine Zeit zwischen drei und sechs Monaten vorgesehen. Je länger die Zeit der provisorischen Phase, desto besser die Vorhersagbarkeit des Ergebnisses der chirurgischen Kronenverlängerung. Etabliertes Verfahren
In diesem komplexen Patientenfall ist die Sanierung ohne gravierende Probleme durchgeführt worden, was nur durch das konsequente Einhalten des Konzepts und die enge Zusammenarbeit mit dem Zahntechniker möglich und auch der guten Compliance des Patienten zu verdanken war. Durch die Schallspitzen wird das zeitgemäße Konzept einer minimalinvasiven ästhetischen Zahnmedizin auch in der roten Ästhetik erweitert. Die minimalinvasive chirurgische Kronenverlängerung per Schall ist mittlerweile ein etabliertes Verfahren in meiner Praxis. Der große Vorteil liegt in der Zeitersparnis zusätzlicher Sitzungen und der schnelleren Wundheilung wie auch der viel geringeren Traumatisierung des Gewebes. Das Ergebnis zeigt einen harmonischen Gingivaverlauf und eine gesunde blassrosa Gingiva in der Front.
Ein signifikanter Faktor für eine langfristige Erfolgsprognose der prothetischen Restauration bei Zähnen mit großer Destruktion ist die Schaffung eines Ferrule-Designs (DGZMKRichtlinie). Zur Erreichung dieses sogenannten FassreifenDesigns muss zusätzlich zur biologischen Breite oberhalb der Präparationsgrenze ein ca. 2 mm breiter zirkulärer hoher Dentinsaum geschaffen werden. Nach der chirurgischen Kronenverlängerung an den Zähnen 12, 12, 11 und 22 erfolgte die endodontische Versorgung unter absoluter Trockenlegung.
der uns als Team Zahntechniker, Mitarbeiter und Zahnarzt in unserem Job glücklich macht.
Wir arbeiten seit fast zehn Jahren mit den Schallinstrumenten der SonicLine (Komet). Durch die innovative Schalltechnologie lässt sich die Invasivität an der Gingiva deutlich minimieren. Nach Messung der Taschentiefe mit der Parodontalsonde erfolgt die Korrektur bzw. Reduzierung des Knochenverlaufes Bildung eines Muko-Periostlappens. Der Knochen wird kontrolliert durch die speziellen Schallspitzen modellierend abgetragen. Diese besitzen unterschiedliche Abwinkelungen. Durch die schmale und dünne Schallspitze SFS120 von Komet mit dem feinen auslaufenden abgerundeten Arbeitsende lässt sich der Knochen perfekt remodellieren, bis die biologische Breite erreicht ist. Druck, Intensität und Einstellungen lassen sich am Schallhandstück SF1LM (Komet)
Bei kleineren Korrekturen wird direkt der definitive Zahnersatz hergestellt, denn nach dem minimalinvasiven Eingriff ist die Wundheilungszeit deutlich reduziert. Dieses Verfahren hat sich durch die Erfahrungen über die Jahre etabliert. In die-
tung bzw. die Schaffung der biologischen Breite. Die klassische Osteoplastik stellt einen relativ invasiven Vorgang dar. Wir arbeiten seit fast zehn Jahren mit den Schallinstrumenten der SonicLine (Komet). Durch die innovative Schalltechnologie lässt sich die Invasivität an der Gingiva deutlich minimieren. Nach Messung der Taschentiefe mit der Parodontalsonde erfolgt die Korrektur bzw. Reduzierung des Knochenverlaufes Bildung eines Muko-Periostlappens. Der Knochen wird kontrolliert durch die speziellen Schallspitzen modellierend abgetragen. Diese besitzen unterschiedliche Abwinkelungen. Durch die schmale und dünne Schallspitze SFS120 von Komet mit dem feinen auslaufenden abgerundeten Arbeitsende lässt sich der Knochen perfekt remodellieren, bis die biologische Breite erreicht ist. Druck, Intensität und Einstellungen lassen sich am Schallhandstück SF1LM (Komet) hat sich durch die Erfahrungen über die Jahre etabliert. In die-
der uns als Team Zahntechniker, Mitarbeiter und Zahnarzt in unserem Job glücklich macht.
Ein signifikanter Faktor für eine langfristige Erfolgsprognose der prothetischen Restauration bei Zähnen mit großer Destruktion ist die Schaffung eines Ferrule-Designs (DGZMKRichtlinie). Zur Erreichung dieses sogenannten FassreifenDesigns muss zusätzlich zur biologischen Breite oberhalb der Präparationsgrenze ein ca. 2 mm breiter zirkulärer hoher Dentinsaum geschaffen werden. Nach der chirurgischen Kronenverlängerung an den Zähnen 12, 12, 11 und 22 erfolgte die endodontische Versorgung unter absoluter Trockenlegung.
Bei kleineren Korrekturen wird direkt der definitive Zahnersatz hergestellt, denn nach dem minimalinvasiven Eingriff ist die Wundheilungszeit deutlich reduziert. Dieses Verfahren hat sich durch die Erfahrungen über die Jahre etabliert. In die-
der uns als Team Zahntechniker, Mitarbeiter und Zahnarzt in unserem Job glücklich macht.
iso- oder leicht subgingival gelegten Präparationsrand des Abutments leicht bewerkstelligen. Die Versorgung erfolgte vier Wochen nach der Freilegung der Implantate. Die adhäsive Befestigung der Kronen erfolgte mit dualhärtendem Zement (Multilink, Ivoclar Vivadent), die Veneers in der UK-Front wurden mit lichthärtendem Komposit unter Kofferdam adhäsiv befestigt (Variolink Veneer, Syntac Classic). Ein engmaschiger dreimonatiger Recall ist in diesem Fall Voraussetzung, um die parodontologischen (PZR) und funktionellen (Schienenkontrolle) Parameter stabil zu halten. Das Ergebnis spricht für sich: Das Abschlussbild nach vier Jahren macht uns als Team Zahntechniker, Mitarbeiter und Zahnarzt in unserem Job glücklich!
Zur Stabilisierung der Aufbauten diente ein Glasfaserstift, da die frakturierten Stümpfe auch endodontisch versorgt werden mussten. Die Frontzahnführungswinkel wurden sehr flach gehalten, um die Scherkräfte bei den Exkursionsbewegungen so gering wie möglich zu halten. Die präparierten Zahnstümpfe wurden mit einem laborgefertigten Provisorium
iso- oder leicht subgingival gelegten Präparationsrand des Abutments leicht bewerkstelligen. Die Versorgung erfolgte vier Wochen nach der Freilegung der Implantate. Die adhäsive Befestigung der Kronen erfolgte mit dualhärtendem Zement (Multilink, Ivoclar Vivadent), die Veneers in der UK-Front wurden mit lichthärtendem Komposit unter Kofferdam adhäsiv befestigt (Variolink Veneer, Syntac Classic). Ein engmaschiger dreimonatiger Recall ist in diesem Fall Voraussetzung, um die parodontologischen (PZR) und funktionellen (Schienenkontrolle) Parameter stabil zu halten. Das Ergebnis spricht für sich: Das Abschlussbild nach vier Jahren macht uns als Team Zahntechniker, Mitarbeiter und Zahnarzt in unserem Job glücklich!
iso- oder leicht subgingival gelegten Präparationsrand des Abutments leicht bewerkstelligen.
Die Versorgung erfolgte vier Wochen nach der Freilegung der Implantate. Die adhäsive Befestigung der Kronen erfolgte mit dualhärtendem Zement (Multilink, Ivoclar Vivadent), die Veneers in der UK-Front wurden mit lichthärtendem Komposit unter Kofferdam adhäsiv befestigt (Variolink Veneer, Syntac Classic). Ein engmaschiger dreimonatiger Recall ist in diesem Fall Voraussetzung, um die parodontologischen (PZR) und funktionellen (Schienenkontrolle) Parameter stabil zu halten. Das Ergebnis spricht für sich: Das Abschlussbild nach vier Jahren macht uns als
Explore Komet on Henry Schein
Schneidezahn 12/Doppelanlage. Kurz vor der definitiven
Frakturierte
Frakturierte Kronenstümpfe nach Trauma (Unfall). Messung der biologischen Breite mit PAR-Sonde
Figure 1-5
Figure 6
Figure 7
Figure 9-11
Figure 8
The Advantages of Monofilament EPTFE Sutures in Surgical Practice
Sutures play a critical role in wound closure and healing, but not all sutures are created equal. Among the various types available, monofilament sutures stand out for their superior performance in reducing infection risk, enhancing tissue compatibility, and improving patient outcomes. This article explores the key benefits of monofilament sutures, with a special focus on EPTFE sutures used in dental and periodontal procedures.
1. Infection Prevention: A Key Advantage (1,
2)
One of the most significant benefits of monofilament sutures is their ability to reduce the risk of post-operative infections. This is achieved through several mechanisms:
No capillary action: Unlike braided sutures, monofilaments do not wick fluids along their length, preventing the transport of bacteria into the wound site.
Reduced bacterial adhesion: The smooth surface of monofilament sutures discourages bacterial colonization, lowering the chances of infection. Their structure allows phagocytes— immune cells that engulf and destroy pathogens—to access bacteria more easily on or within the suture material. By minimizing infection risk, monofilament sutures contribute to cost savings by reducing the need for:
• Additional treatments such as antibiotics
• Re-operations due to wound complications
2. Smooth Passage Through Tissue (3)
Tissue trauma during suturing can delay healing and increase discomfort. Monofilament sutures offer a smoother passage through tissue compared to coated braided sutures, which tend to generate more friction. This reduced resistance leads to less tearing because of their smooth surfaces
3. High Tensile Strength and Tissue Holding (4)
Monofilament sutures are engineered for durability and
strength, making them ideal for maintaining wound closure under tension. Compared to braided sutures, they:
• Provide better tissue approximation
• Maintain knot security
• Resist breakage during and after surgery
This strength ensures that the sutures hold the tissue firmly throughout the healing process, reducing the risk of dehiscence
Spotlight on EPTFE Sutures: Excellence in Dental Surgery (5,6,7)
EPTFE (Expanded Polytetrafluoroethylene) sutures represent a premium class of monofilament sutures designed for specialized applications such as periodontal surgery, bone grafting, and implant procedures. These sutures are:
• Non-absorbable and undyed, ensuring long-term stability and minimal tissue reaction
• Biologically inert, making them ideal for sensitive surgical sites
• Soft and pliable, improving intraoperative handling and patient comfort
Studies have shown that EPTFE sutures exhibit lower bacterial adhesion compared to standard braided sutures, further reinforcing their role in infection prevention.
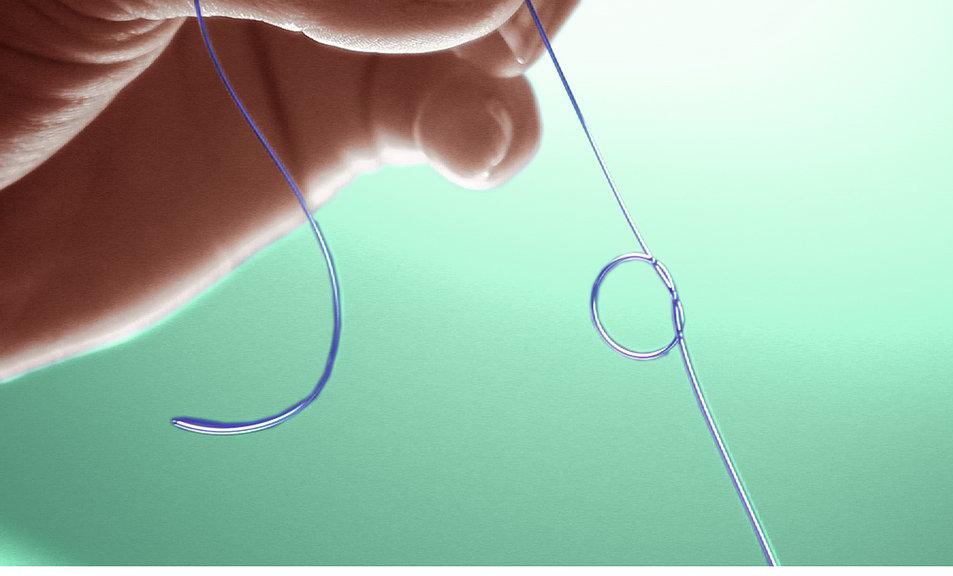
EPTFE sutures are available in various USP sizes (from 3/0 to 6/0) and stainless steel needle combinations, offering flexibility for different surgical needs.
Conclusion
Monofilament sutures, particularly those made from EPTFE, offer a compelling combination of safety, strength, and surgical efficiency. Their ability to reduce infection, ease tissue passage, and adapt to healing dynamics makes them a preferred choice across multiple disciplines—especially in dental and periodontal surgery. As surgical techniques evolve, the materials we choose must keep pace, and monofilament sutures are leading the way.
Sources
Mangram AJ, Horan TC, Pearson ML, Silver LC, Jarvis WR. Guideline for prevention of surgical site infection 1999. Hospital Infection Control Practices Advisory Committee. Infect Control Hosp Epidemiol. 1999;20(4):250-78.
Choi HJ, Chae HD. Comparison of E. Coli infiltration between new synthetic absorbable sutures. J Korean Surg Soc. 2009;77(1):1-6.
Im JN, Kim JK, Kim HK, Lee KY, Park WH. Characteristics of novel monofilament sutures prepared by conjugate spinning
Internal lab test. PTR/02/FF/0801/JLT-A; RDR/02/FF/1369/JLT-A. Issue date: 02/04/08; 13/03/14
1990 Sep 30;58(14):54-8, 61. [Sutures in dentistry. Traditional and PTFE materials]
2005 Jan;76(1):34-42. Human gingival tissue reactions to silk and expanded polytetrafluoroethylene sutures, Knut N Leknes 1, Inghild Tafjord Røynstrand, Knut A Selvig, PMID: 15830635, DOI: 10.1902/ jop.2005.76.1.34
2011 Mar;22(3):282-8. A comparative study between two different suture materials in oral implantology, Olivia Pons-Vicente 1, Lidia López-Jiménez, María Angels SánchezGarcés, Sergi Sala- Pérez, Cosme Gay-Escoda PMID: 21039893, DOI: 10.1111/j.16000501.2010.01993.x
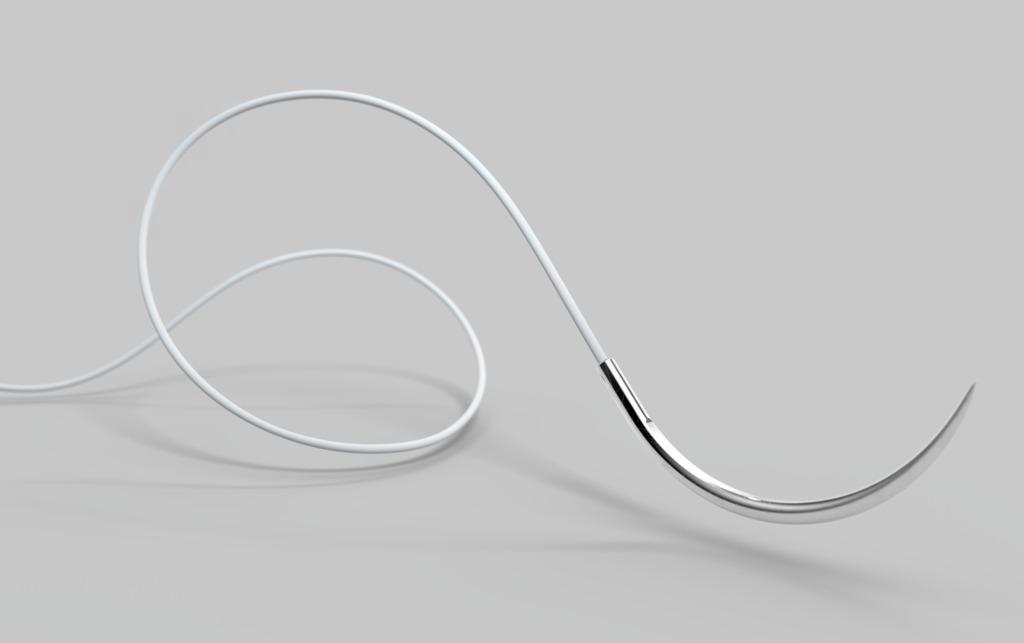
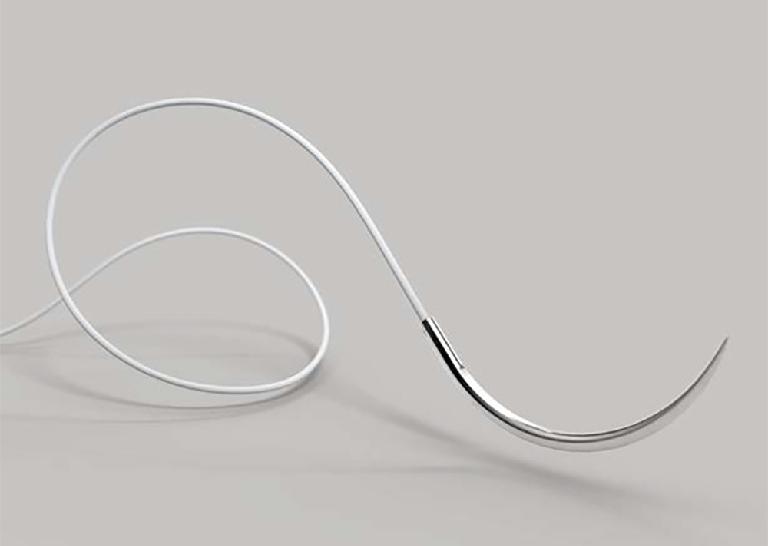
A New Era of Dental Excellence Begins
Meet the Newest Member of KaVo’s Next Generation of Dental Chairs:
KaVo Lumina with UX Light Technology. Enjoy the light side of dentistry.
Easy. Precise. Excellent. Because real values are what counts
The KaVo Lumina is setting new lighting standards in dental practices. truly stunning piece of equipment, it takes lighting technology to a whole new level, boasts a variety of smart features and sets the gold standard in terms of user experience. The innovative UX Light technology enables perfect illumination of all levels right up to the molar area without annoying reflections on the anterior teeth. Combined with the optimised light field, this is easy on the eyes and facilitates concentrated work. With its precise colour rendering, the natural light spectrum offers 'Made by KaVo' quality, enhancing the day-to-day work of technology enthusiasts and design aficionados alike.
Compact and ready for every indication, it embodies the essence of friendship: true friends never let us down, they make us feel safe and reassured. The KaVo amiQa is your steadfast companion.
amiQa distills KaVo DNA into a streamlined concept: top quality, ingenious hygiene, sophisticated ergonomics, fresh design and impressive technological features.From essential to specialist procedures, amiQa incorporates the defining attributes of the newest KaVo generation of dental chairs, delivering performance, reliability, and value.
CLEANLINESS MADE SIMPLE – HYGIENE WITH THE KAVO AMIQA
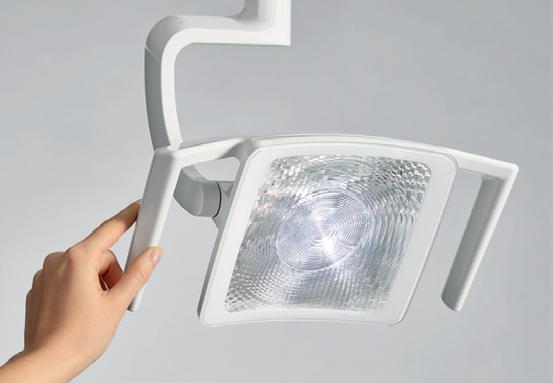
New touchscreen generation
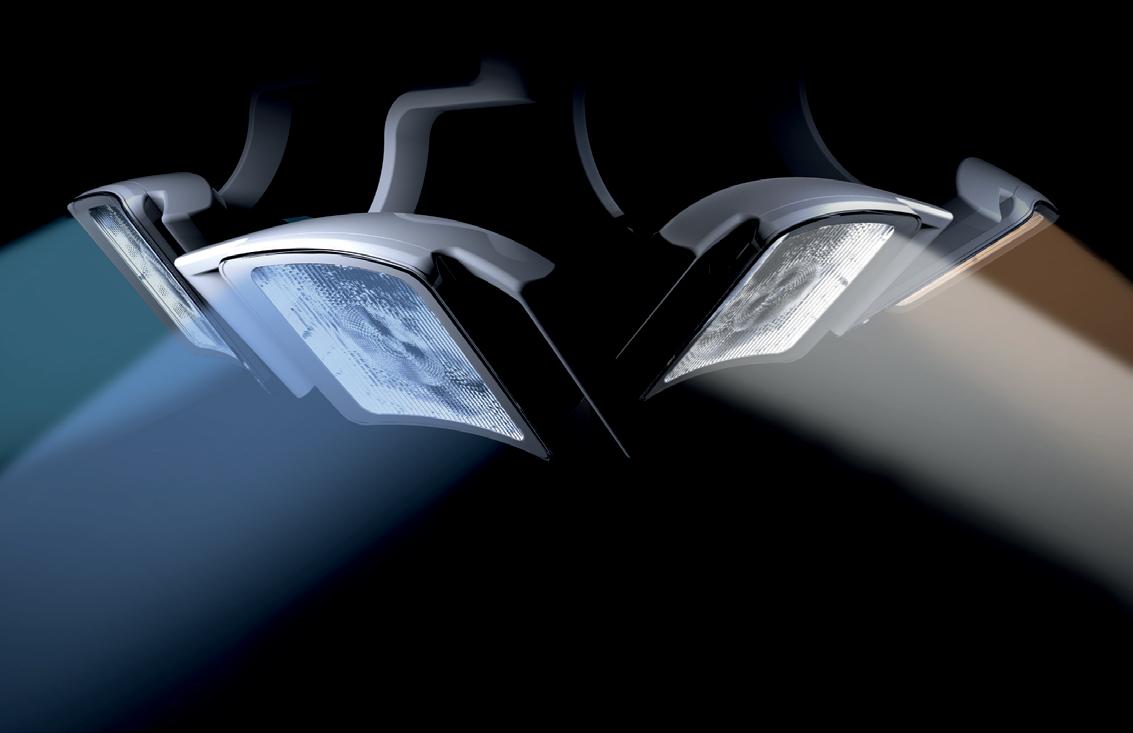

Intuitive and responsive, the high-resolution 7” glass touch display offers a self-explanatory interface for smooth, quick,
COMPOshape mode
The colour spectrum of the new COMPOshape mode with its reduced proportion of blue supports aesthetic layering. So thanks to improved colour and structure reproduction, contrasts are visible without premature hardening of the composite.
Set new lighting standards with the innovative UX Light tech, precise shade accuracy, optimized light field, and comfortable, Safe, stress-free treatment with KaVo DVGW water block, automated hygiene, step-by-step guidance, and gel suction
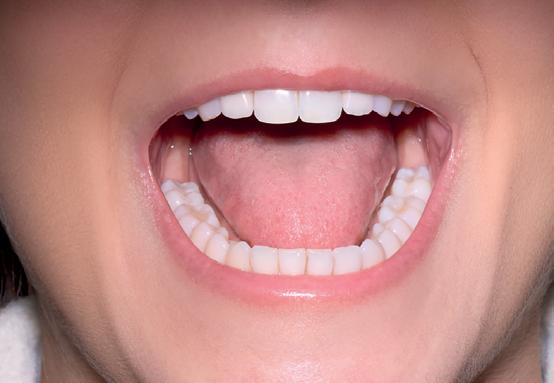
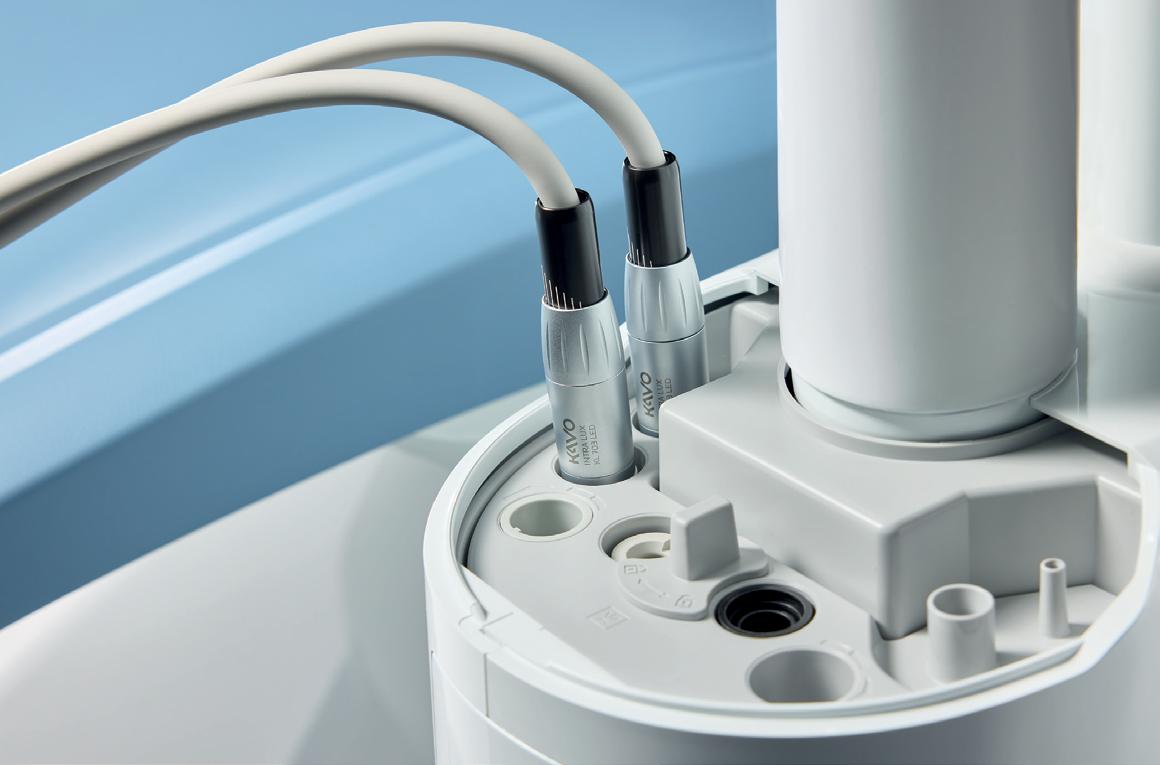
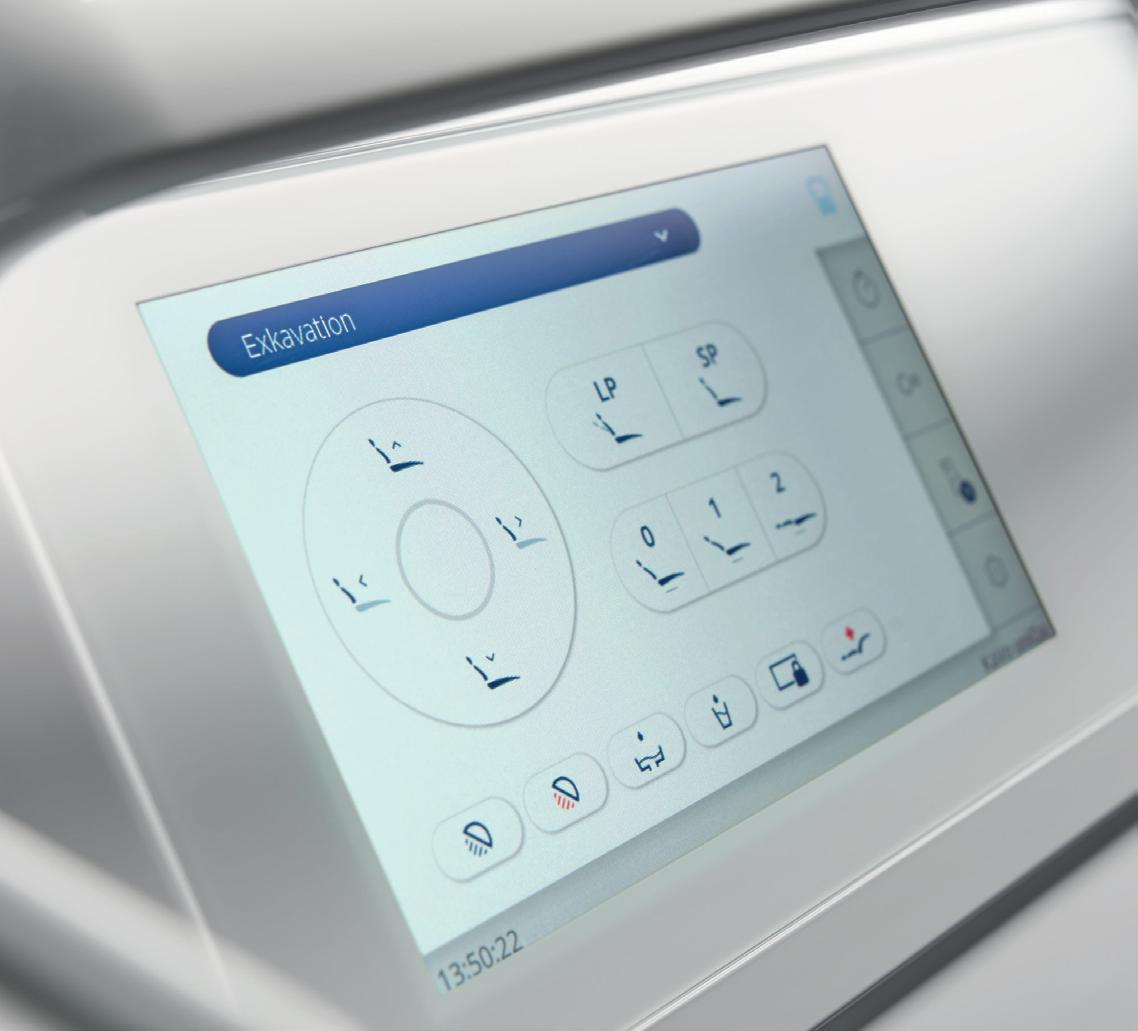
The response speed and sharpness of the new generation of KaVo touchscreens delight users from the very first touch. The self-explanatory, intuitive user interface of the dentist element with its high-quality glass panel ensures smooth, speedy and relaxed workflows.
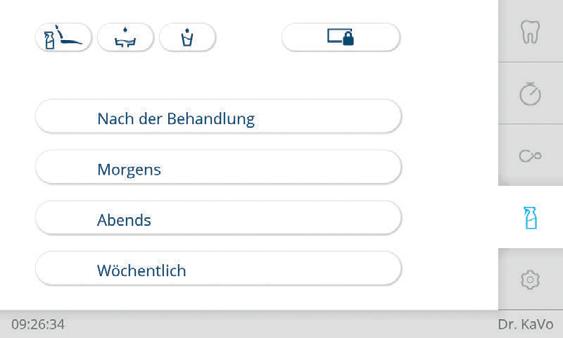
Fig. 3 Ingenious hygiene processes
Fig. 1 KaVo Lumina with UX Light Tech
Fig. 2 New Touchscreen Generation
Excellence in every position
Patient comfort and clinician ergonomics ensured with a reversible cushion and adjustable double-jointed headrest for clear visibility and easy access.
Designed and made in Germany
Made with robust metal base, premium materials, low maintenance and expert support for reliable performance.
Ultra Flexibility
Available in TM-table, Cart, and S-table - each model suits right or left-handed users and upgrades from 4 to 6 instrument holders.


The Inventor of Dental Suction: a Glimpse Into the Future
Dürr Dental has invented dental spray mist suction systems not just once, but twice. Sixty years ago, engineers at the company developed a new approach that not only paved the way for dentists to sit down while treating their patients, but also allowed the patients to lie down during the procedure. Ten years ago, it then managed to refine this invention with energy savings of up to 75 percent.
Even though it is almost impossible to imagine today, up until the mid-1960s it was normal for the patient to be seated during treatment and for the dentist to be standing up. In 1964, when engineers from Dürr Dental first delivered an effective suction system that allowed the dentist to sit down and the patient to lie down, this heralded a more comfortable era of dental treatment – and this ergonomic new approach also solved a number of other problems.
In particular, it reduced the size of the aerosol cloud coming from the patient’s mouth, which was full of germs and could be as much as two metres across. This was an effective way to safeguard against the risk of infection and has proved itself

to be highly successful – not least during the Covid pandemic, when this issue was at the forefront of dentists’ minds. In fact, during this time it would have not been possible for dental practices to stay open without this technology. In a highly acclaimed study utilising state-of-the-art analytical methods that were not previously available in similar investigations carried out in the 1970s, Dürr Dental provided impressive evidence for the need for spray mist suction with a suction volume of 300 litres per minute at the cannula (study director: Dr. Martin Koch, Dürr Dental Technical Academy).
In 1964, the water cooling required to protect high-speed turbines from overheating generated a larger volume of spray mist – but the advent of the new suction technology then made it possible to extract this. It also meant improved visibility for the dentist, making longer procedures in particular much easier. Over the course of the following decades, Dürr Dental established itself as an expert and pioneer in the field of dental suction systems, and its developments included a wide range of design variants for all manner of applications. Covering everything from small practices to large ones withmultiple
Fig. 2 1964: A revolutionary moment: DÜRR DENTAL fundamentally changed the treatment environment with the ‘Orosuc’ suction unit.
Fig. 1 Beginnings in the 20th century: Challenges in everyday practice. Until the mid-1960s, patients sat down while dentists worked standing up.
dentists and even full-scale clinics for dental treatments and surgical procedures, Dürr Dental systematically developed and widened its portfolio.
It goes without saying that these dental suction systems need energy to run, and Dürr Dental was able to step in here too with its second groundbreaking innovation in the field of suction. In order to boost savings opportunities for dental practices and clinics,ten years ago Dürr Dental made new technology available that transformed dental spray mist suction. The technology involved introducing radial compression instead of side channel compression. From the perspective of protecting the environment and saving resources, this high-performance technology now makes it possible to achieve energy savings of up to 75 percent – which can certainly felt in the bottom line
down, and the new, hugely energy-saving way of operating the technology introduced ten years ago, Dürr Dental remains a pioneer and innovator to this day. With the increased networking of its devices with the cloud-based equipment platform VistaSoft Monitor, the company is currently laying the foundations for the digital practice of tomorrow. In future, practice and laboratory teams can look forward to even more comfortable day-to-day operations combinedwith improved reliability.
Dürr Dental has taken dental spray mist suction to new levels –first in terms of ergonomics, and now, fifty years later, in terms of energy consumption. And both cases can be justifiably regarded as evolutionary leaps in their own right. Reflecting the DNA of the company, it is now already looking ahead
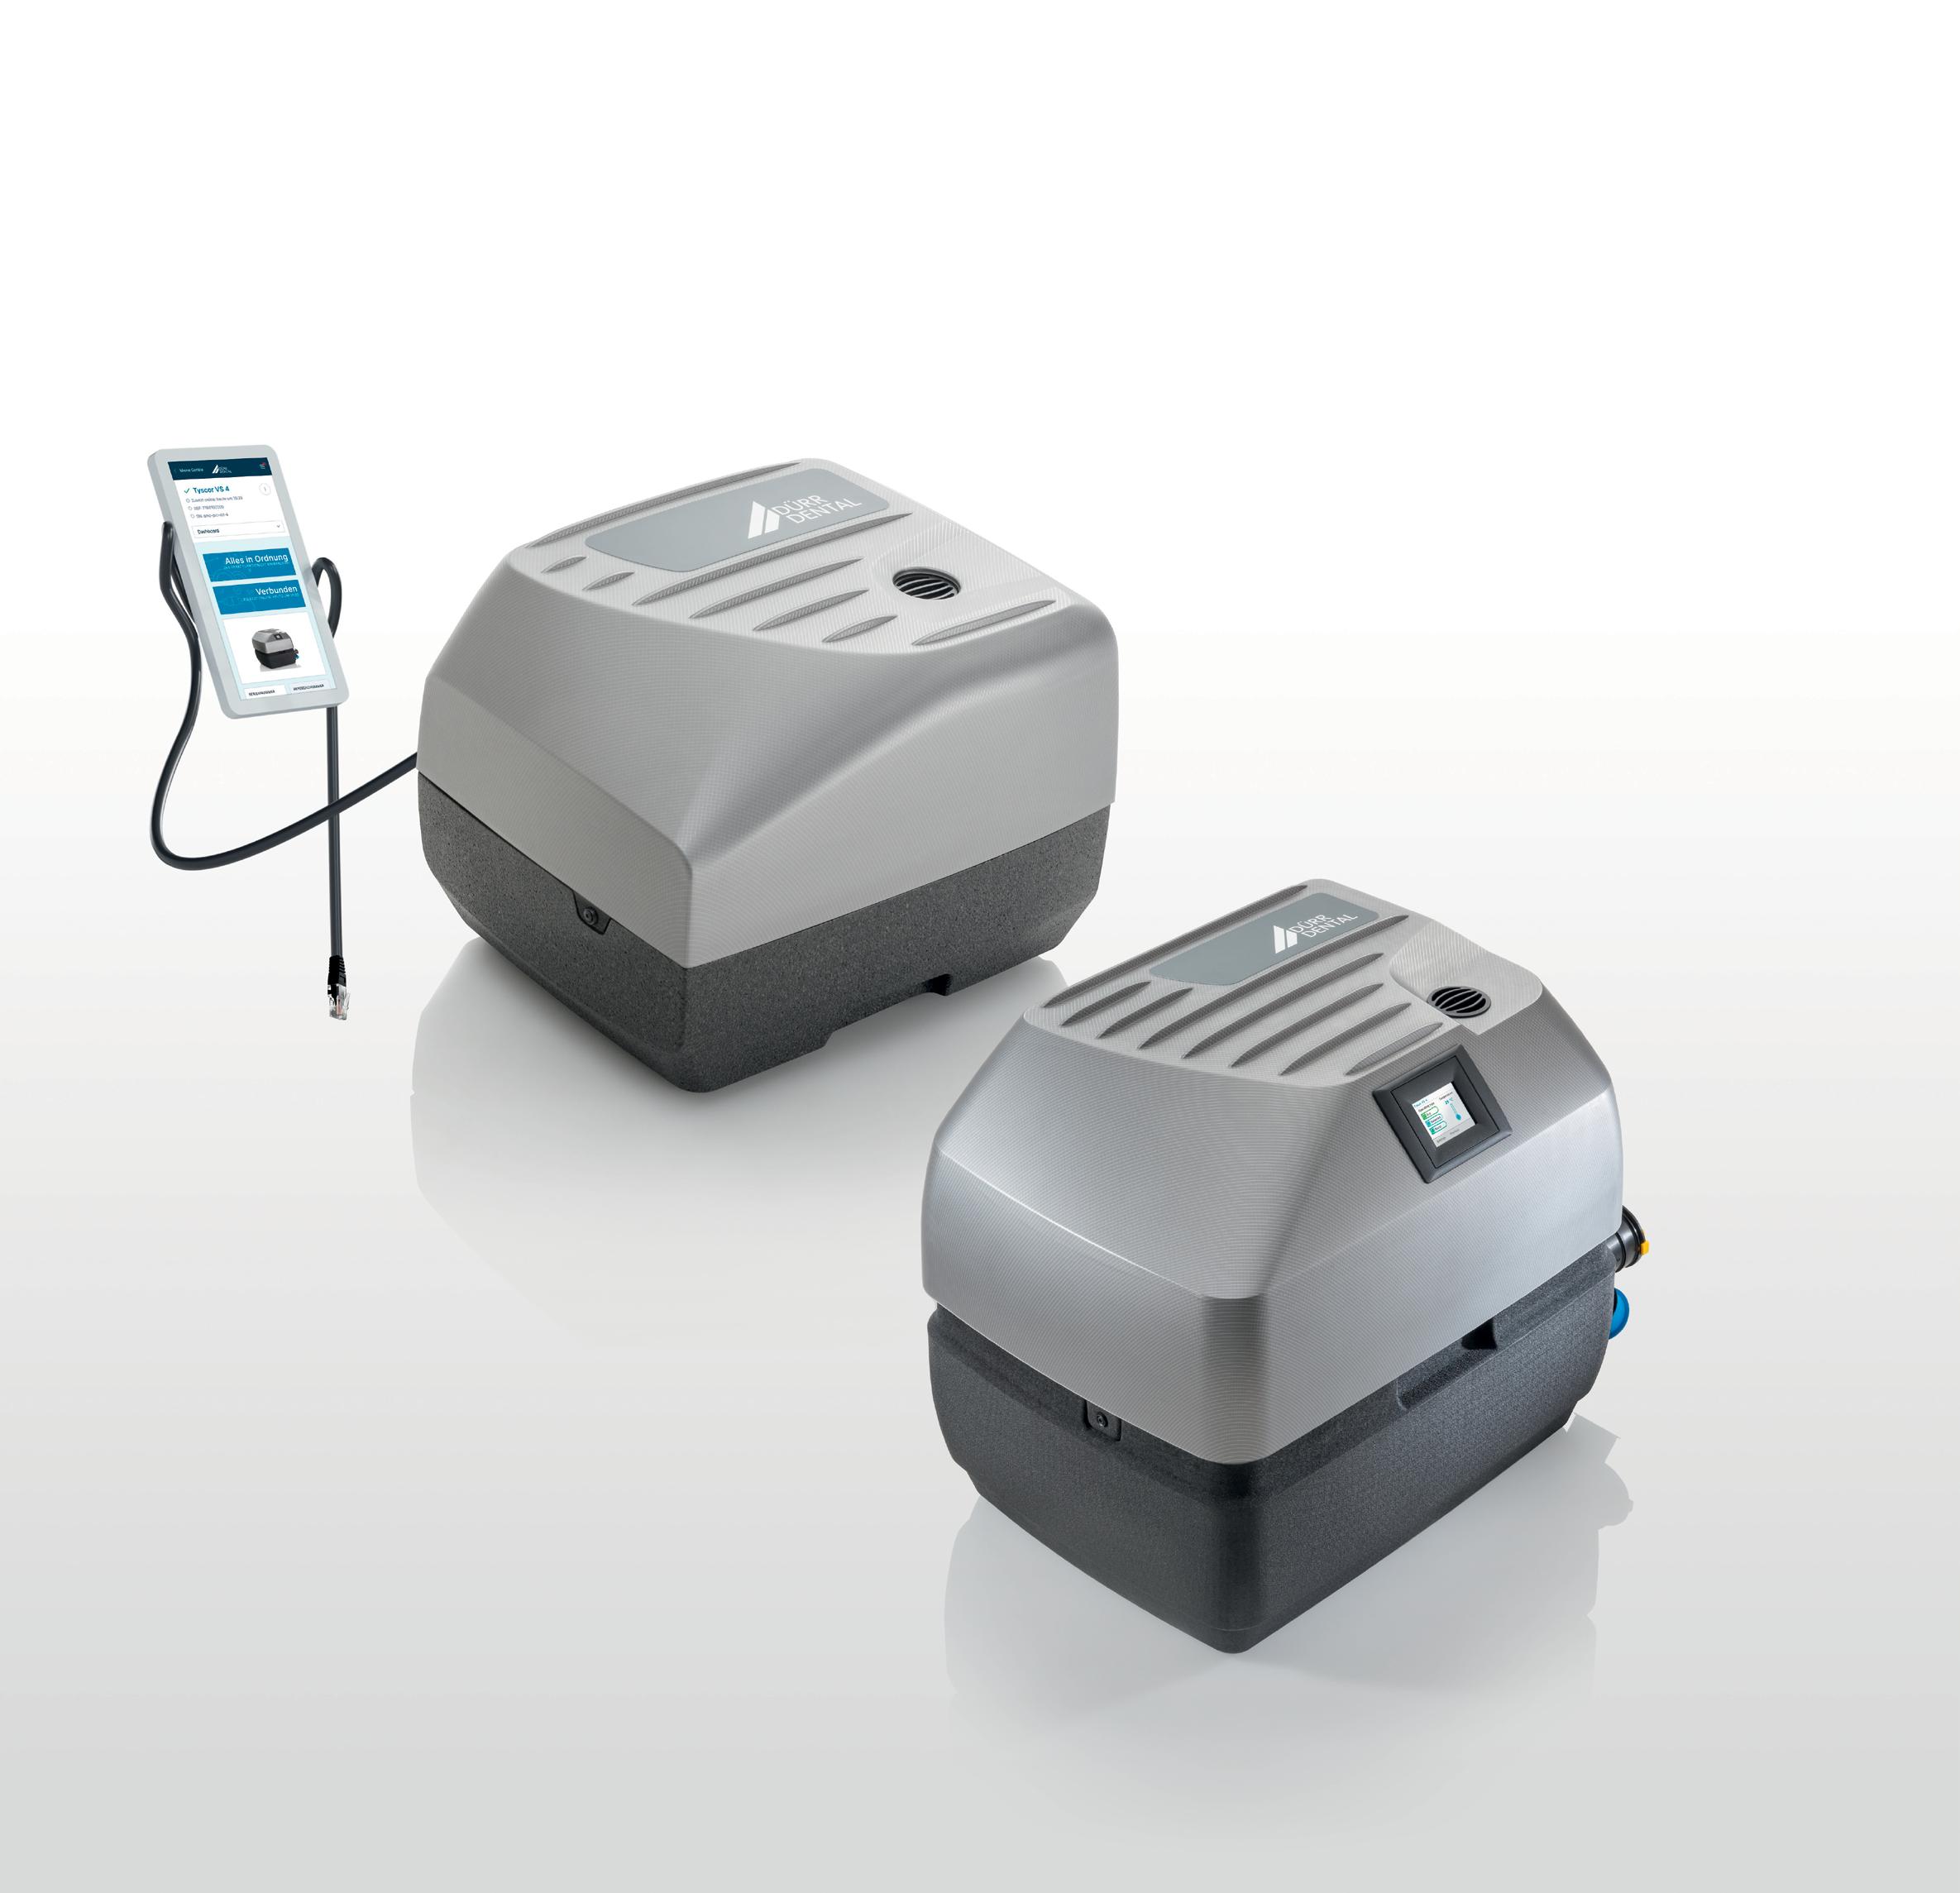
Learn More About Dürr Dental Tyscor Range