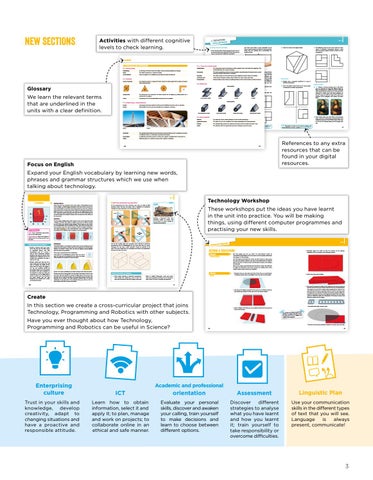
NEW SECTIONS
Activities with different cognitive levels to check learning.
resources to choose . Remember for your portfolio from this unit
Unit
ndido apreTISE ANDloPRAC ajaEWcon REVI trab Drawing materials and tools
and write them down in your notebook. Try to draw a sketch of your arm with the measurements made. Use the auxiliary lines surrounding the sketch to help.
1 What characteristics should a piece of paper have if we want to draw on it using ink? What if we want to make a drawing with millimetric precision?
2
18 The following views are of a part which we want drawn in isometric perspective. Create a grid with the correct angles in order to draw it in that perspective.
B
2 What kind of characteristics do these types of
A
paper have?
Glossary
15 Draw the views of the object below
a) Paper for pencil drawings b) Paper for ink drawings c) Sketch paper
4. STRUCTURES AND MECHANISMS
4. TYPES OF STRUCTURES d) Greaseproof paper
1. STRUCTURES
exoskeletons
biomimicry
A strategy that learns from and copies nature to solve problems in design.
loads
The forces exerted on a surface or body.
static balance
When an object is in equilibrium, and does not move or fall over.
to hardest: beams, or beams connected in triangles. each one by 100 and draw it in your notebook, HB, 6H, F, the 2H, centre B, 6B of an arch, holding the other with stones the surface to scale. Take note of the The stone which is in in position. measurements of your bed, your wardrobe and A line drawn throughbetween a shape,awhich reflects each side. 4 What is the difference dip pen and the a same shape other furniture in your room, divide them by 100, fine-point pen? Describe them and sayor other construction Using triangle shapes toeach give of a building, bridge a strong structure. draw them on card and cut them out. Place the what their common uses are. cut outs in the drawing of your room in different arrangements, then choose the design you like 5 What are the angles on the different set squares? the most and draw it. Make a list of the angles that can be defined with a Open profiles combination of both elements. 13 What is the difference between a graduated ruler and a scale ruler? 6 What is the main function of an extension bar on a Projections and views of an object compass?
keystone symmetry axis
2. FORCES
triangulation
centre of gravity
An imaginary point in a body of matter where the total weight of the body is thought to be concentrated.
5. PROFILES
Glossary We learn the relevant terms that are underlined in the units with a clear definition.
spring scale
An instrument that measures the force exerted on an object, by pulling down on a spring with its weight.
stress
In physics, this is the physical force or pressure on an object.
7 The ceramic tiles found in Andalucía are well known
Freehand drawing
Long pieces of heavy wood or metal used in building structures such as housing.
braces
Steel cables that are used to strengthen and support a structure.
Perspective 16 Explain why a reduction coefficient is used in cavalier perspective.
17 Draw the object represented by the views below in isometric or cavalier perspective:
14 Look at the views of the shape and draw the
and are embedded in the local culture. Choose a geometric tile design from the region and copy it, techniques you have learnt. I, H or double-T profile using the drawing T profile L profile
3. STRUCTURAL COMPONENTS beams
C
The hard, paper outer parts of structures which support them and hold them together. The e) Millimetre
Scales metal bodywork of a car, for example. 3 Order the following grades of pencils from softest The main supporting parts of a structure; often a combination of horizontal and vertical of your room in metres. Divide 12 Take measurements
framework
object in cavalier perspective. U profile
Digital graphics 19
Choose a famous painting such as The Mona Lisa, by Leonardo da Vinci; The Clothed Maja, by Goya, a landscape or a still life and make a freestyle copy using Inkscape. To do so, use an image of the painting in a lower layer and make polygons on top of it using the different tools. When you finish, combine all the polygons and remove the lower layer.
Closed profiles
8 Make a sketch of several objects you use in your school: the pen you normally use the pencil sharpener and scissors.
9 Make a diagram of the square and triangle you use. Remember to add the measurements and the value of the angles of each of them.
Rectangular cross-section
Square cross-section
Round cross-section
Triangular cross-section
10 Say what the differences are between an object drawn in a sketch and the same object drawn in a diagram. Which one offers more information about object? Thethe point on a lever which balances or turns or lifts something.
6. MECHANISMS fulcrum geometric centre
Braces
The gradual destruction of metal caused by external factors such as exposure to water or pollution. Rust is a well-known example of corrosion.
foundations
A solid layer of bricks, cement or stone that support a building from underneath it.
pillars
Tall posts, often in a cylinder shape, which support a building.
Make a list of the advantages, disadvantages and similarities between them. Think about how easy it is to use the drawing tools and the images you get.
(identified in the figure with the letters A, B, C) The relationship between the diameter of a gear and the number of teeth it has. 46
Beams
corrosion
20 Think about when you used Pinta and Inkscape.
11 Take following measurements body Thethe point that is in the middle of of theyour shape, according to its measurements.
module radius
The distance from the geometric centre of a circle, to any of its sides. You can find a printable isometric template to help you with your drawings at anayaeducacion.es.
230
231
Focus on English
Remember to check out the learn by playing and Study: Mind Map activities available at anayaeducacion.es.
47
References to any extra resources that can be found in your digital resources.
Expand your English vocabulary by learning new words, phrases and grammar structures which we use when talking about technology. Unit
2 TINKERCAD
ä 6.3 The isometric perspective
Aligning objects Now that you have acquired some basic skills in TinkerCAD, you can tool to align two objects with each other in any of the use the Align three dimensions. In the case of the die, where we want the numbers to be centred on its faces, we need to select the box and, pressing the Shift key, select a number. When you click on the Align tool, or press the L key, three points will appear in each of the three dimensions of the box to align the selected number with the centre or with either of the two ends.
In this perspective, the three reference axes have an angle of 120° between them. We can use paper with a template of equilateral triangles to make drawing in this perspective easier.
C REATE
2
Technology Workshop
History
These workshops put the ideas you have learnt in the unit into practice. You will be making things, using different computer programmes and practising your new skills.
Z axis X axis
Choose a monument from your favourite period in history and try to draw it in either cavalier or isometric perspective.
Symmetry The last shape editing tool, which appears next to the alignment tool, is Mirror . When you select an object and press the Mirror button, or the M key, three double arrows appear. These show the axis which the transformation can be applied to. When you hold the cursor over these arrows, they turn red. A preview of how the object will look if you apply symmetry is then superimposed* over the original shape. Just click on the double arrow to apply the transformation. Y axis
sink: move something downwards so it is at a lower level
120°
120° 120°
superimposed: when one image is placed over the other, but both can be seen
Understand, think, investigate... 2 Design a keyring with your name on it. You can use the Text shape or individual letters, and add decorations, such as a heart, a star, or other predefined designs. Decide if you want the letters to be embossed or hollowed out on the surface and remember to make a hole for the ring.
Workplanes TinkerCAD allows us to modify the plane which we are working on and transfer it onto another surface. This can be helpful if we want to place objects on another shape. Let’s see this by placing several objects over the faces of a pyramid.
DESIGN A SKATEPARK
First, drag a pyramid onto the Workplane.
PROJECT PRESENTATION
Next, click on the Workplane button. Move the cursor over the faces of the pyramid to see where the plane will be located if we click the mouse button.
4. Carefully adjust the width so that the cut-out of the cylinder coincides with the cut-out of the flattened sphere.
For this project you can use either the conventional version of TinkerCAD or Codeblocks. We have chosen the first option to illustrate the process in this example. We will build several elements which are often found in skate parks, but you can include whatever you want. You could build the inclined planes that form a funbox using a combination of boxes and wedges, for example.
3 Design a plant pot. You can use a box or cone for the body. You will have to modify the width of the bases and the height. To hollow it out you can duplicate (CTRL+D) the shape, move it up and narrow the bases a bit. Use a cylinder at the bottom to make the hole, and remember to use the Align tool to centre it. Once you have obtained the basic shape, you can add details to the surface for a more personalised design.
Unit 4
KSHOP TECHNOLOGY WOR
We do not usually apply any reduction when drawing in isometric perspective, and the proportions on the three axes stay the same. However, the rule says a 0.82 reduction should be applied to all axes. This way it looks like the real object and keeps the proportions between the axes the same.
Most of the pieces you build will have the box as a base. You will have to adjust its dimensions and make cut-outs by adding other parts, maybe another box, a sphere or a cylinder. When it has been positioned, the plane changes from blue to brown. Choose any other shape, place it on the plane and reduce it to the size you want. You can position it using the Align tool or the cursors. You can also sink* it into the surface of the pyramid using the cone that appears on the object. The cone control is aligned with the current workplane. If you go back to the original plane, you will see that the basic object controls change orientation.
PROJECT STEPS
Understand, think, investigate… 24 Think about drawing in isometric perspective. What length line would you have to draw for each side of a cube if each of its edges measured
10cm in reality? Remember what you learnt about the reduction coefficient of the isometric axes. What if it were in cavalier perspective?
108
1. To begin with, we add a box and make it flat. Then, we superimpose a flattened sphere over it, to hollow it out. You can see this below.
5. Add a few steps and a railing.
41
6. We haven’t changed the colour of the boxes yet so that it is easier to identify each one and get a better idea of what they should look like. You could use grey for the railing. Also, modifying the radius of the box will make the corners rounded. You can use the same idea with the boxes for the cut-outs. To make the cut-outs clearly visible, the height of the boxes must be two millimetres higher than the railing and one millimetre below the Workplane. This picture shows two different sections of the railing.
2. We group the objects, duplicate them, and use the Mirror button to get something similar to what you see in the picture below.
Create In this section we create a cross-curricular project that joins Technology, Programming and Robotics with other subjects.
Trust in your skills and knowledge, develop creativity, adapt to changing situations and have a proactive and responsible attitude.
rotate it 90° To position the railing, then rotate to place it upright and it follows the it again 8° so that angle of the staircase.
Have you ever thought about how Technology, Programming and Robotics can be useful in Science?
Enterprising culture
You could also build a quarter pipe. 3. Add a halfpipe. This time, we use a cylinder instead of the sphere to cut out of the box.
To create the skate park, simply put together the pieces you have built. 120
121
Academic and professional
ICT
orientation
Assessment
Linguistic Plan
Learn how to obtain information, select it and apply it; to plan, manage and work on projects; to collaborate online in an ethical and safe manner.
Evaluate your personal skills, discover and awaken your calling, train yourself to make decisions and learn to choose between different options.
Discover different strategies to analyse what you have learnt and how you learnt it; train yourself to take responsibility or overcome difficulties.
Use your communication skills in the different types of text that you will see. Language is always present, communicate!
3