w ch
g
v
a
p a c a
d
sh
x y COUNTDOWN TEACHER GUIDE BOOK 3 UNITS 17–28
m
ch z yes
c win like like sh
th
w g f l t
z p e a b ck th
f
wh
COUNTDOWN
Really Great Reading
PO Box 46 Cabin John, MD 20818 866-401-7323 www.ReallyGreatReading.com Copyright © 2017 Really Great Reading ®
Curriculum Development Team: Amy E. Vanden Boogart, Ed. D., Janeen Hergert, M. Ed., Sharon E. Stockman, M.S., CCC-SLP, Randall Klein, Scott DeSimone
Graphic Design and Interactive Media: Ingrid Shwaiko, Rachel Nadeau, Mark Snyder, Cora Jane Hay
First Edition ISBN: 978-1-942598-48-0
No portion of this book may be reproduced or transmitted in any form or by any means, electronic or mechanical, including photocopying or recording or by any information storage or retrieval system, without the express written permission of the publisher. Printed in the U.S.A.
Table of Contents
INTRODUCTION i
UNIT 17:
Lesson 1 1 Lesson 2 7 Lesson 3 11 Lesson 4 15 Lesson 5 21
UNIT 18: Lesson 1 25 Lesson 2 33 Lesson 3 40 Lesson 4 48 Lesson 5 51
UNIT 19: Lesson 1 55 Lesson 2 62 Lesson 3 71 Lesson 4 76 Lesson 5 78
UNIT 20: Lesson 1 85 Lesson 2 91 Lesson 3 99 Lesson 4 104 Lesson 5 109
UNIT 21:
Lesson 1 113 Lesson 2 118 Lesson 3 127 Lesson 4 133 Lesson 5 137
UNIT 22:
Lesson 1 141 Lesson 2 146 Lesson 3 154 Lesson 4 159 Lesson 5 163
UNIT 23:
Lesson 1 167 Lesson 2 172 Lesson 3 180 Lesson 4 186 Lesson 5 190
UNIT 24: Lesson 1 195 Lesson 2 200 Lesson 3 211 Lesson 4 217 Lesson 5 221
UNIT 25: Lesson 1 225 Lesson 2 230 Lesson 3 238 Lesson 4 243 Lesson 5 247
UNIT 26: Lesson 1 251 Lesson 2 256 Lesson 3 263 Lesson 4 270 Lesson 5 273
UNIT 27: Lesson 1 277 Lesson 2 282 Lesson 3 289 Lesson 4 297 Lesson 5 301
UNIT 28: Lesson 1 305 Lesson 2 310 Lesson 3 313 Lesson 4 318 Lesson 5 322 APPENDICES 325
Introduction
Table of Contents
What is Countdown? ii
Countdown’s Overarching Goals ii
Shift in Focus from Units 6-16 to Units 17-28 iv
Countdown Book 3’s Broad Structure: Strands v
Sight Words/High-Frequency Words v
Countdown’s Unit and Lesson Structure: How Book 3 Differs vi
Lesson Design viii
Countdown’s Components and What’s In This Book ix
How Much Time Will It Take to Complete Countdown Book 3? xi
Philosophy and Principles Underlying Book 3 Instruction xi
Items in Supplemental Resources of Countdown Online xii
Items in the Appendices xiv
Scope and Sequence xvi
© 2017 Really Great Reading Company, LLC i Introduction
Introduction
What Is Countdown?
Countdown is a set of supplemental literacy lessons, structured in units, for students who are learning to read. This book is the last of the three Teacher Guides in the Countdown series. In Book 3, each Countdown unit contains five lessons. The Book 3 lessons provide direct, explicit, multisensory, and systematic playful instruction in phonemic awareness and phonics to give students a firm foundation in the subskills that lead to strong decoding and fluent reading. Countdown instruction is used to supplement (or replace) portions of a core reading program. Countdown follows a carefully designed Scope and Sequence so your students will not miss any steps on their path to mastering key foundational literacy skills. All instruction is teacher-directed and teacher-led with student participation, and the lessons are designed to be short, yet impactful.
Countdown’s Overarching Goals
The primary goals of Countdown are:
1. To help students build robust phonemic awareness skills with an understanding that words are made of a sequence of sounds and that we can isolate individual sounds and distinguish them from one another
2. To teach students how to use phonemic awareness skills to read and spell
3. To help students understand the alphabetic principle, or the idea that letters represent sounds
4. To build students’ automaticity with letter-sound relationships
5. To help students decode simple Closed Syllable words with accuracy and automaticity
6. To help students read a set of high-frequency words (referred to in Countdown as sight words/Heart Words) with accuracy and automaticity
7. To build students’ phonics knowledge related to consonant digraphs and consonant blends, and to provide strategies for reading simple two-syllable words
Essentially, Countdown is designed to give students the skills and knowledge they need to become strong decoders and fluent readers. Countdown’s secondary goals include:
1. To provide schools with a uniform, consistent path for teaching key foundational literacy skills
2. To make delivery of instruction easy and stress free for the teacher and the student
3. To help teachers monitor the acquisition of key foundational literacy skills and use data to group their students by ability if so desired
Specific Curricular Goals
Countdown’s specific curricular goals are listed below. The goals are broken down into two major sections: Units 1-16 (Teacher Guide Books 1 and 2), which focus on pre-decoding skills and
ii © 2017 Really Great Reading Company, LLC
scaffolded decoding and encoding, and Units 17-28 (this book, Teacher Guide Book 3), which focus on increasingly independent encoding and decoding of words in isolation and in connected text.
• The first half of the year (Units 1-16) teaches pre-decoding skills (understanding the alphabetic principle, building basic phonemic awareness skills, understanding letter-sound relationships, and watching and participating in models of proficient decoding and encoding). By Unit 16, students should be able to read and understand the structure of CVC words like hug, sat, rip, and wet, independently or with the teacher’s support.
• The second half of the year (Units 17-28) focuses on using these skills to decode more complex words in isolation and in connected text. Students practice both with support and independently, and the focus is on building automaticity with letter-sound relationships, increasing scaffolded and independent phonics decoding and spelling practice, building automaticity with high-frequency words, and reading connected text. By the end of the Countdown program (Unit 28), students should be able to read and understand the structure of more complex single-syllable Closed Syllable words, like dust, hush, smash, and west, as well as two-syllable words where both syllables are closed, like sunset and picnic.
Upon completion of the second half of Countdown (Units 17-28), students should be able to:
• Blend the sounds in threeand four-phoneme words
• Segment the sounds in threeand four-phoneme words
• Encode (spell) three- and fourphoneme words with short vowels
• Decode (read) three- and four-phoneme words with short vowels
• Read 60 high-frequency words
• Read short, decodable phrases and sentences with fluency and automaticity
• Distinguish between long and short vowel phonemes
• Delete, add, and substitute phonemes in spoken words
• Identify and decode words with digraphs
• Identify and decode words with consonant blends
• Identify and decode single-syllable Closed Syllable words
• Blend the syllables in two-syllable words
• Decode two-syllable words with Closed Syllables
Countdown accomplishes these goals with direct, explicit, and multisensory teaching of the subskills that lead to strong decoding and accurate, fluent reading. For a more detailed look at the Scope and Sequence, see p. xvi.
For teachers who want to expand the scope of their Countdown instruction, some additional Countdown lessons are available through Countdown Online. These lessons focus on:
• Vowel-Consonant-e Syllables (words like hope, cape, snake, etc.)
• Open Syllables (words like hi, we, she, etc.)
• Spelling two-syllable words with Closed Syllables (words like sunset, comic, dentist, etc.)
© 2017 Really Great Reading Company, LLC iii Introduction
Introduction
Shift in Focus from Units 6-16 to Units 17-28
Units 6-16 in Countdown Teacher Guide 2 focused on letter-sound identification, encoding, and decoding as students learned to match symbols to sounds and then to use those symbols to spell and read simple CVC words. Students’ decoding and encoding was done exclusively through guided practice, with heavy teacher modeling to ensure that students were grasping the concepts. Students began to read a body of high-frequency words called Heart Words. They also began to read simple phrases containing decodable words and Heart Words chorally, led by the teacher. They continued to develop their phonemic awareness knowledge with beginning sound isolation and blending practice, as well as with phoneme segmentation and manipulation (addition and substitution) tasks. In Units 17-28, students begin to practice the skills they have been learning independently. They still work under the guidance of the teacher as they are learning new concepts, but they are also given the independence to segment words, encode, and decode on their own to demonstrate individual mastery of the concepts taught. Phonemic awareness remains a focus in Book 3. Building off of the solid base of phonemic awareness they have built through the Book 1 and Book 2 lessons, students continue to segment the sounds in spoken words, but now they deepen their knowledge as they isolate and identify the vowel sounds in words and categorize them as short or long. Book 3 ’s phonics instruction begins with simple CVC words, but quickly builds to words with more complex features such as digraphs and 2-sound blends. Students use their own manipulatives to build words and their own workbooks to practice what they have learned. By the end of Book 3, students are using manipulatives and strategies to attack twosyllable Closed Syllable words. Along the way, students continue to master a new set of Heart Words in each unit. By the end of Countdown, kindergarteners should have a firmly established base of phonemic awareness and phonics knowledge that allows them to accurately and automatically decode both familiar and unfamiliar singlesyllable and two-syllable Closed Syllable words.
The diagram to the left displays the progression of phonics concepts taught in Countdown Book 3
iv © 2017 Really Great Reading Company, LLC
CVC DIGRAPHS 2-SOUND BLENDS CLOSED Ready For Grade 1 Units 6–19 Units 20–25 Unit 26 Units 27–28 Letter-Sound Correspondences lid ship slip picnic map path clap cobweb hot duck rest sunset set chop milk pumpkin SingleSyllable TwoSyllable Progression of Phonics Concept Instruction in Countdown Book 3 (Units 17-28)
Countdown Book 3’s Broad Structure: Strands
Countdown Book 3 continues to help students assemble the “puzzle pieces,” or skills, that underlie proficient and accurate reading. In Units 17-28, the Functional Vocabulary and Rhyming strands are no longer present. Book 3 instruction focuses exclusively on the Sight Word, Phonemic Awareness, and Alphabetic Principle strands. Lesson 1 of each unit focuses on the Alphabetic Principle substrand of Letter-Sound Identification and the Sight Word strand, Lesson 2 focuses on Phonemic Awareness, and Lessons 3-5 focus on the Alphabetic Principle (phonics) substrands of Encoding and Decoding. Detailed information about the strands and sub-strands can be found in the What You Need to Know sections in the introduction to Countdown Teacher Guide 1. More information on the unit and lesson structure of Book 3 can be found on p. vi.
Sight Words/High-Frequency Words (Heart Words)
As in Countdown Books 1 and 2, the Book 3 units give students ample practice in reading high-frequency words. In Countdown, we refer to high-frequency words as “sight words,” although a student’s sight word vocabulary consists not just of high-frequency words, but any word, high-frequency or not, that is read automatically, without conscious effort by the student. When working with students in Countdown, these are called “Heart Words” because students are encouraged to memorize these words, or learn them “by heart.” These terms refer to the most commonly used words in the English language. When children are able to read high-frequency words accurately and automatically, it helps them read any text more fluently. There are several common lists of high-frequency words, including the Dolch 220 word list and the Fry Lists. The Heart Words taught and practiced in Countdown are taken from the Dolch 220 list, developed by Edward William Dolch, Ph.D., and published in his 1948 book, Problems in Reading. The Dolch 220 list contains conjunctions, prepositions, pronouns, adverbs, adjectives, and verbs that are frequently used in writing across all subject areas. In Countdown Book 3, students are explicitly taught to
© 2017 Really Great Reading Company, LLC v Introduction
Countdown’s Strands in Units 1–16 Countdown’s Strands in Units 17–28 FUNC TIONAL VOCABUL ARY AND CONCE PTS SIGHT WORDS PHONE MIC AWARE NE SS ALPHABETIC PRINCIPLE ALPHABETIC PRINCIPLE RHYMING PHONE MIC AWARE NE SS SIGHT WORDS FUNC TIONAL VOCABUL ARY AND CONCE PTS SIGHT WORDS PHONE MIC AWARE NE SS ALPHABETIC PRINCIPLE ALPHABE
TIC PRINCIPLE RHYMING PHONE MIC AWARE NE SS SIGHT WORDS
Unit
Taught Unit Heart Words Taught 8 the, in, my 17 N/A (Transitional Unit) 9 a, is, for 18 was, no, so 10 I, am, here 19 say, now, have 11 and, at, go 20 said, come, down 12 it, like, be 21 they, that, this 13 to, not, can 22 ate, our, who 14 you, are, do 23 where, what, must 15 did, too, will 24 we, he, she 16 with, all, me 25 but, want, there 26 saw, own, please 27 make, good, new 28 out, one, two
Heart Words
read three Heart Words in Lesson 1 of every unit (in Units 18–28), and they continue to practice those Heart Words throughout the unit. They are also exposed to the Heart Words they have been taught in the Phrases and Sentences to Read activity in each unit’s Lesson 5. This intentional Heart Word learning and exposure throughout the Countdown lessons helps students become more automatic and fluent readers. The specific Heart Words taught in Countdown are listed to the right; however, the expectations for kindergarten students’ highfrequency word acquisition vary greatly from school to school. Some schools seek to have kindergarten students master 150 high-frequency words during the school year, while others target far fewer words. Countdown Online has tools to help you customize the specific words you wish to teach or practice, as well as to tailor the number of words taught to your school’s expectations.
The back of the Student Workbook contains two pages titled “My Heart Words.” These pages contain all 220 words from the Dolch list. Students can track their progress in learning their Heart Words by coloring in half a heart for words they have almost mastered and coloring in the full heart for the words they have mastered. These words are listed alphabetically so they are easy for the students to find. You may want to help students choose which Heart Words they have mastered by putting a red dot in either one or two sides of the hearts. After you place a dot in a part of the heart, then the students can color in the rest.
Even though kindergarten students are not typically responsible for learning all of the words on the Dolch list, the “My Heart Words” pages contain all of the words to give teachers the flexibility to focus on the words of their choosing from the entire list. You may consider having students save these pages upon completion of the Countdown program so that they can continue tracking their Heart Word mastery in first grade and beyond.
Countdown’s Unit and Lesson Structure: How Book 3 Differs
The unit and lesson structure of Countdown’s Teacher Guide Book 3 is different from that of Books 1 and 2. Each unit is still comprised of five daily lessons. However, each of these lessons is a series of connected instructional routines rather than three individually focused activities. Each lesson keeps
vi © 2017 Really Great Reading Company, LLC Introduction
students actively engaged in the learning process with multisensory teaching and hands-on learning. Each daily lesson has a specific focus and is designed to be completed in 15-20 minutes. In one week, students are immersed in 75-100 minutes of explicit foundational skills instruction.
Countdown Book 3 focuses on three of the five Countdown instructional strands (for more info on the strands in Book 3, see p. v):
• Sight Words/High-Frequency Words (Heart Words)
• Phonemic Awareness
• Alphabetic Principle (Letter-Sound Knowledge, Encoding, and Decoding)
The daily structure of a typical unit is as follows:
Lesson 1 (Monday) – Letter Sounds/Heart Words
In the first lesson of the week, students focus on building letter-sound and high frequency word fluency. The target is automaticity. Concepts are taught and practiced in a manner that helps students build automatic recall. Since not all students need practice with the same high-frequency words and letter sounds, teachers have the flexibility to use the ones their students need to learn or practice, not the ones that they have already mastered. The teacher typically selects six letter sounds to review in each unit. Three out of six of the Heart Words for each unit are locked with default words (the new Heart Words to be taught in that unit). The remaining three Heart Words are chosen by the teacher from the Dolch 220 list.
Lesson 2 (Tuesday) – Phonemic Awareness
The phonemic awareness piece of Countdown Book 3 starts with segmenting and blending the sounds in single-syllable words and then moves to phonological awareness with blending the syllables in multisyllabic words. These core skills are taught and practiced in a high-impact, engaging, and multisensory manner. Along the way, you also have the option to incorporate some phoneme manipulation activities, such as addition, deletion, and substitution. The phonemic awareness instruction is pure; students concentrate on speech sounds without linking them to letters or spellings. There is strong focus on vowel phonemes, which helps prevent reading and spelling failure since vowel phoneme knowledge is essential to understanding word structure.
Lesson 3 (Wednesday) – Phonics Instruction
The phonics lessons of Countdown Book 3 build from simple concepts (letter-sound correspondence, CVC words), to slightly more advanced features of single-syllable words (digraphs, blends), to the progressively more complex concept of multisyllabic word structure. By the end of Countdown Book 3, students are reading multisyllabic words like cactus, pumpkin, and sandwich.
Lesson 4 (Thursday) – Student Practice
Each unit has a series of high-impact practice activities that focus on the phonics concept taught in
© 2017 Really Great Reading Company, LLC vii Introduction
that particular unit. The practice is cumulative and controlled. Students only practice concepts that have been explicitly taught. The Lesson 4 activities are Detective Work and Word Sort. Each student reads aloud several times during each lesson so the teacher can provide immediate feedback through Positive Error Correction.
Lesson 5 (Friday) – Wrap-up
Each unit wraps up with a “show-what-you-know” lesson. Letter sounds and Heart Words are practiced and informally assessed prior to students reading a series of phrases and sentences to their classmates. These activities allow teachers to see who has mastered the concepts and who needs more support and practice. Lastly, students are asked to systematically spell phonetically predictable words in Units 18-26 or to read two-syllable words in Units 27-28.
Lesson
UNIT 18 Lesson 4
3 7
with these simple concepts to get them used to the process and routine.
Word Sorts in subsequent lessons are much more challenging. 3, 2, 1…
4 10
Open Countdown Online to Unit 18, Lesson 4 (18.4).
OPTIONAL
Before teaching this lesson, you may wish to run the Letter-Sound and Heart Word Pop-Up and 3-Up activities in Countdown Online to practice the letter sounds and Heart Words taught in Lesson 1.
Launch!
❶ Word Sort – Short Vowels
Say:
with the phonics concept that the students learned in the previous lesson.
Lesson 4 contains two practice activities and the explanations of how to run them:
Detective Work (starts in Unit 20 and appears in all subsequent units)
o Word Sort (started in previous unit and appears in all subsequent units)
• These practice activities are both cumulative and controlled; they contain only the concepts that a student has been explicitly taught in previous lessons.
• These cumulative and controlled practice activities can serve as a type of formative assessment. Teachers can determine whether a student has mastered the skills recently taught or whether the student needs additional practice and reinforcement to reach mastery.
“Remember, when we are doing a Word Sort I will always model a few words to show you how to sort the words.
Sorting words will help you to pay attention to the parts of the words.
• In this lesson, words will be sorted by the sound of the vowel. We will read the word first and then decide which short vowel sound is in each word.”
Click to display the top section of the Word Sort
Students open workbooks to page 3.
Read and finger-stretch the first word aloud: mat, /m/ /ă/ /t/, mat
9. 10. 2 6
When beginning the Word Sort, you should model as many words as you deem necessary for your students to grasp the concept and proceed independently.
9 11 12 8
Ask:
• “What vowel sound did you hear in the middle?” A: /ă/
“What letter spells /ă/ in this word?” A: a
• “Is /ă/ the same as the beginning of aaaapple or iiiitch?” A: apple
“Right! So, which picture should we circle?” A: apple
Click to circle the apple
Prompt students to circle the apple
Say:
• See the What You Need to Know section in Unit 17, Lesson 2 for information about the Word Sort procedure. Remember that some sorts, including the one found in this lesson, may seem extremely simple. We start students off ©
“Now, you are going to circle the picture for the vowel sound in the rest of the words on your own.
Listen carefully for the vowel sound when you say each word.”
Excerpt from
In this sort, students are given only two short vowel sounds to choose from for each word. In later sorts, they will choose from all five short vowel sounds.
1. Unit and Lesson Markers: The Unit and Lesson are clearly labeled at the top of each page, as well as at the beginning of each activity.
2. Concept or Type of Lesson: Lessons begin by outlining the concepts that will be covered in the lesson or the type of lesson it is (e.g., Student Practice or Show What You Know).
viii © 2017 Really Great Reading Company, LLC Introduction
Design
48 © 2017 Really Great Reading Company, LLC UNIT 18 Lesson 4 Unit 18 | Lesson 4 Student Practice AP Objective Students will read real words with short vowels and will determine which short vowel sound they hear (Word Sort). Description The teacher leads students through a model word(s) for the Word Sort. Students then read the remaining words on their own, listening carefully for the vowel sound and matching it with the guideword image for the vowel sound they hear. Teacher reviews the answers with students, allowing time for students to correct their work if needed. Student Materials • Countdown Student Workbook • Pencil What Students See What You Need to Know • Lesson 4 is dedicated to systematically practicing
Teacher Guide
Reading Company,
2017 Really Great
LLC 49
18 ma ug p pa un w g 1 5
3. Strand: Each lesson is categorized under one of the strands. Descriptions of the strands can be found on p. v.
4. Objective: The objective details what students will accomplish through the lesson.
5. Materials: If required, student materials are listed on the first page of the lesson so that you know at a glance what you will need.
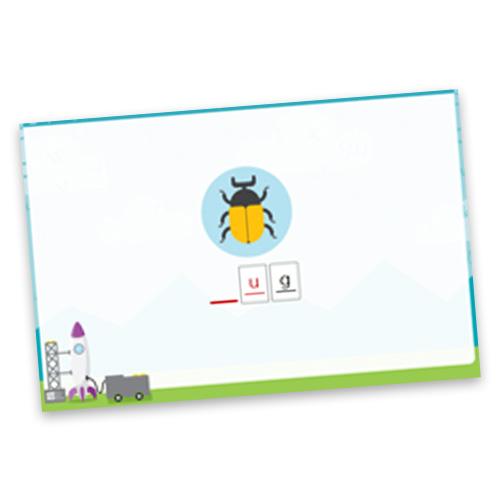
6. What Students See: Images at the beginning of each lesson show what the students see on the screen at the outset of the lesson.
7. Description: A brief description is provided for each lesson; it tells you what will happen in the lesson.
8. What You Need to Know: Each lesson begins with a section called What You Need to Know, which is designed for the teacher and contains a thorough explanation of the concepts, routines, and procedures included in that lesson.
9. 3, 2, 1: The 3, 2, 1 section indicates what you should do to prepare to launch the lesson. It alerts you to open Countdown Online, directs you to run the optional letter-sound and Heart Word fluency activities if there are any, and, if manipulatives are needed for a given lesson, the 3, 2, 1 section reminds you to have students take them out.
10. Launch: The Launch section is the beginning of the scripted lesson and provides directions for what you should do and say to lead students through the activities.
11. Teacher Notes: Sidebar notes give you additional information or tips about the materials, routines, or concepts taught in the lesson and how to differentiate instruction for your students.
12. Student Workbooks: Images of student workbook pages allow you to see exactly what the students see.
13. I Do, We Do, You Do: Countdown Book 3 lessons use an “I Do, We Do, You Do” structure to scaffold phonemic awareness and phonics concepts and skills, which leads to mastery (not pictured).
Countdown’s Components and What’s In This Book
This Teacher Guide contains Units 17-28 of Countdown and is only one of the pieces you need to deliver Countdown instruction. It, along with Books 1 and 2 of the Teacher Guide set, contains stepby-step instructions for delivering Countdown with fidelity. It also includes an appendix and other reference materials that will help you understand Countdown ’s curricular approach.
Additionally, you will need a subscription to Countdown Online, which can be purchased from Really Great Reading. Countdown Online for Units 17-28 is organized into a sequence of units and lessons, and it is strictly aligned to this Teacher Guide. You will use Countdown Online for Units 1-28. In the first half of the program (Units 1-16), the use of the manipulatives found in the Countdown Student Kit was optional. In the second half of the program (Units 17-28), the manipulatives are required, as is the Countdown Student Workbook (see below for more information on these components). A
© 2017 Really Great Reading Company, LLC ix Introduction
set of Vowels Posters is available as a resource for students as they categorize the vowel sounds in words, and optional Wall Cards allow you to display the letters and corresponding guideword images for each letter-sound taught in Countdown.
Components of Countdown
Countdown Student Workbook
• Countdown has one Student Workbook that, along with the Countdown Student Kit, contains everything a student needs to practice and build mastery with the skills taught during the second half of kindergarten. This workbook is used in conjunction with this book, Teacher Guide Book 3 (Units 17-28). The activities increase student outcomes and serve as informal, formative assessments so you can understand which students have mastered the concepts and which students may need more instruction.
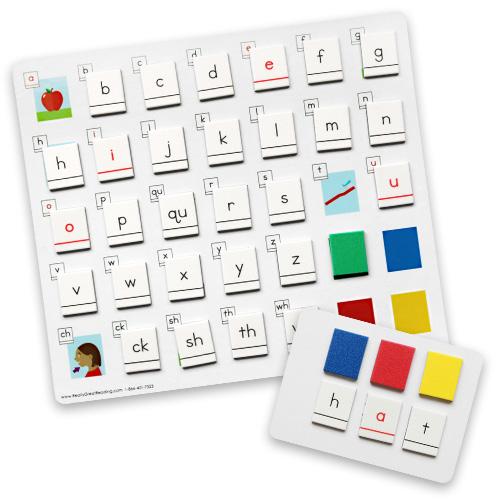
Countdown Student Kit
• The Countdown Student Kit is designed to work in conjunction with the Countdown lessons. It includes the letter tiles, color tiles, SyllaBoards™, and other components needed to complete all 28 units of Countdown. Note: if you have previously taught Really Great Reading’s Blast Foundations program or have access to the Blast Student Kits, there is a way of upgrading the Blast Kit to work with Countdown. See www.ReallyGreatReading.com for details.
• When your Countdown Student Kits first arrive, the tiles are not yet distributed on the boards. (The tiles arrive in sheets that can be easily snapped apart into individual tiles.) If you have not yet used the manipulatives as part of your Book 1 or Book 2 instruction, you will need to set the tiles up on the boards prior to beginning the Book 3 lessons.
x © 2017 Really Great Reading Company, LLC Introduction
ReallyGreatReadingCompany,LLC Oo Great Company, GreatReadingCompany, sh ReadingCompany, Ff Long Vowels a i o e Short Vowels o u i a e
Countdown
Countdown
Countdown
Countdown
Countdown
Countdown Teacher Guides
Online
Vowels Posters
Wall Cards
Student Workbook
Student Kit
How Much Time Will It Take to Complete Countdown Book 3?
For the typically developing kindergarten student who has been successful in Countdown Book 1 and Book 2 instruction, each of the units in Book 3 should take approximately one week to complete; thus, it will take approximately 12 weeks to complete Book 3 of the Countdown program. This is based on the expectation that about 15-20 minutes a day can be devoted to Countdown instruction.
Philosophy and Principles Underlying Book 3 Instruction
Multisensory Instruction
All Countdown Book 3 lessons use multisensory techniques to help students build their decoding skills. The simultaneous use of sound and movement during systematic instruction, along with the use of manipulatives such as letter tiles, color tiles, and SyllaBoards™, allow students to utilize multiple senses while learning, which deepens their understanding of the concepts taught. This is key to building the skills that emerging readers lack.
Scaffolded Instruction
In Countdown lessons, you will teach new concepts by modeling the strategies and skills you want students to master. You will gradually withdraw your support as students gain confidence and begin to achieve mastery. The goal of this scaffolded instruction is for students to use their new strategies and skills independently. Countdown lessons include an instructional routine called “I Do, We Do, You Do” that allows teachers to scaffold instruction. You will use the routine when introducing a new concept or reviewing a previously taught concept. In the “I Do” part of the routine, you demonstrate the concept to students and model how to complete a task or use a strategy. In “We Do,” students practice the new strategy with you. During this step, you should continue providing support for students and asking them questions to clarify the concept. In “You Do,” students independently and individually practice the new strategy. You may continue asking questions in this step to ensure that all students demonstrate mastery of the concept. If students do not demonstrate mastery, you may bring back a level of support and provide additional explanation and practice. The scaffolded instruction of the “I Do, We Do, You Do” routine allows you to introduce new strategies while giving your students the support they need until they can use the strategies on their own.
Cumulative and Controlled Practice as Formative Assessment
Countdown allows you to check in with your students during every lesson to make sure they are acquiring the skills and concepts taught. The last two lessons of every Countdown Book 3 unit provide practice activities and a wrap-up where students show what they know as they synthesize newly taught information with previously taught concepts. The practice is cumulative and controlled, allowing teachers to make sure that new concepts are building on and enhancing previously taught skills. Students only practice with words, phrases, and sentences that contain
© 2017 Really Great Reading Company, LLC xi Introduction
concepts within their grasp based on what they have been taught up to that point in the lessons. There are several different types of student practice activities in Countdown Book 3, and these are delivered in the Countdown Student Workbook. Each activity allows students to practice the skills and concepts taught in the current and previous units, and the activities build upon one another in complexity. Students move from simply identifying target phonics concepts in words to reading and spelling words with those concepts in isolation, in phrases, and finally in sentences. This allows students to build both their confidence and stamina in reading words with the phonics concepts they have recently learned, and it allows teachers to observe how well students can apply these new concepts in different and more complex contexts.
Positive Error Correction
Positive Error Correction is when you tell students who have provided an incorrect response what they did correctly before focusing on their errors. For instance, when asked to say the sound associated with the symbol m, some students might say the name of the letter m (“em”), rather than the sound /m/. While these students have not answered the question correctly, they did demonstrate some knowledge – knowledge of the name of the letter. Using Positive Error Correction, you might respond, “That is the name of the letter; can you tell me its sound?” rather than, “No, that is not correct. The sound is /m/, not ‘em.’” This approach encourages you to build on students’ strengths and successes and then move to positive correction of errors. Students have more confidence in participating in literacy instruction when they know the feedback they receive is going to be positive. This strategy boosts the confidence of your emerging readers and creates a positive reading environment.
Items in Supplemental Resources of Countdown Online
Countdown Online has a growing body of supplemental resources to enhance and extend your instruction. The Supplemental Resources section, which can be accessed through the home screen in Countdown Online, has several sections, each with a variety of items and tools. These include:
Interactive Resources
1. Letter Tile Free Play: online color and letter tiles that can be used for letter-sound practice, reading and spelling words, and more.
2. Letter-Sound Generator: this tool allows you to select up to six letter sounds to practice through a variety of activities (Look, Think, Say; Pop-Up; 3-Up; and Read a Row). The specific letters you select will populate in these activities, allowing you to provide targeted practice for your students with only the letter sounds of your choosing.
3. Heart Word Generator: this tool allows you to select three Heart Words to practice through a variety of activities (Look, Think, Say; Pop-Up; 3-Up; and Read a Row). Three Heart Words will be locked for each unit. The specific words you select will populate in these activities,
xii © 2017 Really Great Reading Company, LLC Introduction
allowing you to provide targeted practice for your students with only the high-frequency words of your choosing.
Videos & Animations
1. Countdown Getting Started Webinar: a webinar that provides information and tips as you get started with Countdown
2. Short Vowel Animations: a series of five animations, each focused on reviewing the articulation of and guideword and motion for one short vowel phoneme.
3. Long Vowel Animations: a series of five animations, each focused on reviewing the articulation of and guideword and motion for one long vowel phoneme.
4. Whole Body Listening Animation: a short video that uses two characters to teach students how to be good listeners.
5. Classroom Demonstration Videos: real-life classroom demonstrations of Countdown’s standard activities.
Activity Overview Snippets: short detailed video walk-throughs of each standard Countdown activity.
PDF Resources
1. Really Great Reading’s Kindergarten Foundational Skills Surveys and the “Kindergarten Foundational Skills Surveys and Countdown ” information packet: Really Great Reading’s kindergarten assessment tool that provides information on students’ knowledge in a variety of areas related to kindergarten literacy, as well as the information packet that guides you through using this assessment in conjunction with your Countdown instruction. Also available are several other assessment tools for phonological awareness, letter knowledge, and sight (high-frequency) word automaticity.
2. Optional Extension Units: three units that extend the content taught in Countdown for students who have completed all 28 standard units and need a challenge. These units teach spelling two-syllable words, Open Syllables, and Vowel-Consonant-e.
3. Alternative Introductory Activities: an alternative Scope & Sequence offers three introductory units (rather than just one, as in the standard Scope & Sequence) focused on functional vocabulary and basic concepts to prepare students to succeed with Countdown instruction. The activities to be taught in these three alternative units are available as a PDF download.
4. Additional Practice Activities: additional, downloadable activities with corresponding online components to provide more practice for students who need it. There are additional activities available for rhyming, letter-sound identification, decoding, and encoding. The download will direct you to the corresponding online components required to complete the activities.
© 2017 Really Great Reading Company, LLC xiii Introduction
5. Short and Long Vowels Posters: posters with the guideword images for all short and long vowel sounds.
6. Countdown Decodable Passages: a set of highly controlled passages that allow students to put their decoding skills to work in longer, connected text. A differentiated version of these passages with additional support is also available. Both versions contain literal and inferential comprehension questions.
7. Sound-Letter Linking Charts: color and black and white versions of charts that provide visual links between the Countdown guideword icons for the short vowel, consonant, and digraph sounds and the capital and lowercase letters that spell those sounds.
8. Uppercase-Lowercase Letter Correspondence Activities: a series of downloadable activities to help students practice uppercase-lowercase letter correspondence.
9. Additional Resources: additional resources are also available, including: ideas for how to use the Countdown Wall Cards; the User’s Guide for the Countdown Practice Cards deck; and a downloadable activity that helps students learn and practice the difference between Closed Syllables and Open Syllables (intended for use with the optional unit on Open Syllables)
We are continually adding to our body of Supplemental Resources, so check back often to see what is new.
Items in the Appendices
Appendix A: Routines and Procedures
1. Letter-Sound and Heart Word Fluency, p. 326 Look, Think, Say! Pop-Up 3-Up Read a Row 2. Phonemic and Phonological Awareness, p. 329 Important Reminders Finger-Stretching Phonemes Blending Phonemes Manipulating Phonemes (Addition, Deletion, Substitution) Syllable Stomp: Blending
xiv © 2017 Really Great Reading Company, LLC Introduction
3. Phonics Concept, p. 325
Build a Word Touch & Say
Reading Multisyllabic Words Using SyllaBoards™
4. Student Practice, p. 337
Detective Work: Mark It! and Read It!
Word Sort
Phrases and Sentences to Read Spell It!
Two-Syllable Word Reading
Appendix B
1. Components of Countdown, p. 345
2. Items in Supplemental Resources of Countdown Online, p. 346
3. Glossary of Terms, p. 348
4. Sample Read a Row Teacher Recording Form, p. 351
5. Guidewords, Movements, and Proper Articulation of Sounds, p. 353
© 2017 Really Great Reading Company, LLC xv Introduction
xvi © 2017 Really Great Reading Company, LLC BOOK 1 Lesson 1 Lesson 2 Lesson 3 Lesson 4 Lesson 5 Unit 1 (Intro) Introduction to Countdown Introduction to Category Eat vs. Wear Sort Before/After Beginning/Middle/End Describing and Comparing: Similarities Introduction to Category: Exclusion from Left to Right & One to One: Directionality & Order Whole/Part Above/Below Describing and Comparing: Differences Hear That Rhyme First/Next/Last, Before/After: Directionality & Spatial Sequence Hear That Rhyme First/Next/Last: Temporal Sequencing Unit 2 Peel That Sound Peel and Sort Peel That Sound Peel and Sort Peel and Say Sound Stories - /m/ Sound Stories - /s/ Sound Stories - /l/ Sound Stories - /n/ Sound Stories - /f/ Mystery Bag: Blending Compound Words Which Words Rhyme? Mystery Bag: Blending Compound Words Which Words Rhyme? Mystery Bag: Blending Onset-Rime Unit 3 Peel That Sound Peel and Sort Peel That Sound Peel and Match This or That? Sound Stories - /r/ Sound Stories - /v/ Sound Stories - /z/ Sound Stories - /p/ Sound Stories - /g/ What’s That Word? Creating Rhymes What’s That Word? Creating Rhymes What’s That Word? Unit 4 Peel That Sound Peel and Say This or That? Peel and Sort Peel and Match Sound Stories - /d/ Sound Stories - /t/ Sound Stories - /k/ Sound Stories - /b/ Sound Stories - /w/ Mystery Bag: Blending Sounds Mystery Bag: Blending Sounds What’s That Word? Mystery Bag: Blending Sounds Mystery Bag: Blending Sounds Unit 5 Peel That Sound Peel and Say Peel and Sort This or That? Peel and Match Sound Stories - /h/ Sound Stories - /kw/ Sound Stories - /j/ Sound Stories - /y/ Sound Stories - /ks/ What’s That Word? Mystery Bag: Blending Sounds What’s That Word? Mystery Bag: Blending Sounds What’s That Word? BOOK 2 Unit 6 (Cluster 1: m, t, p, a) Letter-Sound Intro Peel and Sort Peel and Match Letters Make Words Connect the Letter Name That Sound This Letter or That? This Letter or That? Find That Letter Touch & Say Peel and Say Stretch Those Sounds Stretch Those Sounds Stretch Those Sounds Mystery Bag: Blending Sounds Unit 7 (Cluster 2: s, h, c, i) Stretch Those Sounds This or That? What’s That Word? Peel and Sort Stretch Those Sounds Name That Sound This Letter or That? This Letter or That? Connect the Letter Touch & Say Which Letter? Guess My Word Find That Letter Which Letter? Unscramble This Unit 8 (Cluster 3: d, f, r, o) Peel and Say Stretch Those Sounds Where’s That Heart Word? (the, in, my) Stretch Those Sounds Connect the Letter Name That Sound This Letter or That? This Letter or That? Find That Letter Pop Up, 3-Up (the, in, my) Look, Think, Say; Pop Up; 3-Up (the, in, my) Guess My Word Which Letter? Unscramble This Touch & Say Countdown Scope and Sequence © 2017 Really Great Reading Company, LLC
Lesson 1 Lesson 2 Lesson 3 Lesson 4 Lesson 5 Unit 9 (Review Clusters 1-3) This Letter or That? Stretch Those Sounds Peel and Match Count the Sounds This Letter or That? Look, Think, Say; Pop Up; 3-Up (a, is, for) Find That Letter Where’s That Heart Word? (a, is, for) Connect the Letter Pop Up, 3-Up (a, is, for) Which Letter? Unscramble This Guess My Word Build a Word Touch & Say Unit 10 (Cluster 4: g, l, n, u) This or That? Touch & Say Connect the Letter Find That Letter Count the Sounds Name That Sound This Letter or That? This Letter or That? Stretch Those Sounds Pop Up, 3-Up (I, am, here) Look, Think, Say; Pop Up; 3-Up (I, am, here) Build a Word Where’s That Heart Word? (I, am, here) Unscramble This Phrase Reading Unit 11 (Cluster 5: b, k, v, e) Peel and Sort Guess My Word Stretch Those Sounds Find That Letter Count the Sounds Name That Sound This Letter or That? This Letter or That? Touch & Say Pop Up, 3-Up (and, at, go) Look, Think, Say; Pop Up; 3-Up (and, at, go) Which Letter? Where’s That Heart Word? (and, at, go) Build a Word Phrase Reading Unit 12 (Review Clusters 1-5) This Letter or That? Stretch Those Sounds Mystery Bag: Blending Sounds Count the Sounds This Letter or That? Look, Think, Say; Pop Up; 3-Up (it, like, be) Find That Letter Where’s That Heart Word? (it, like, be) Connect the Letter Pop Up, 3-Up (it, like, be) Touch & Say Unscramble This Guess My Word Build a Word Phrase Reading Unit 13 (Cluster 6: j, w, z) Peel and Match Add That Sound Find That Letter Touch & Say Add That Sound Name That Sound This Letter or That? This Letter or That? Stretch Those Sounds Pop Up, 3-Up (to, not, can) Look, Think, Say; Pop Up; 3-Up (to, not, can) Which Letter? Where’s That Heart Word? (to, not, can) Build a Word Phrase Reading Unit 14 (Cluster 7: qu, x, y) This or That? Guess My Word Add That Sound Connect the Letter Touch & Say Name That Sound This Letter or That? This Letter or That? Unscramble This Pop Up, 3-Up (you, are, do) Look, Think, Say; Pop Up; 3-Up (you, are, do) Which Letter? Where’s That Heart Word? (you, are, do) Build a Word Phrase Reading Unit 15 (Review Clusters 1-7) Mystery Bag: Blending Sounds Letter-Sound Review Which Letter? Add That Sound Touch & Say Look, Think, Say; Pop Up; 3-Up (did, too, will) Find That Letter Where’s That Heart Word? (did, too, will) Connect the Letter Pop Up, 3-Up (did, too, will) Touch & Say Unscramble This Phrase Reading Build a Word Phrase Reading Unit 16 (Review Clusters 1-7) Touch & Say Sound Swap Sound Swap Sound Swap Touch & Say Look, Think, Say; Pop Up; 3-Up (with, all, me) Connect the Letter Where’s That Heart Word? (with, all, me) Find That Letter Pop Up, 3-Up (with, all, me) Which Letter? Unscramble This Phrase Reading Build a Word Letter-Sound Review Countdown Scope and Sequence, continued KEY Functional Vocabulary Rhyming Sound Stories Sight Word Automaticity Phonemic Awareness: Beginning Sound Isolation Phonemic Awareness: Blending Phonemic Awareness: Segmenting Phonemic Awareness: Manipulation Alphabetic Principle: Letter Identification Alphabetic Principle: Encoding Alphabetic Principle: Decoding © 2017 Really Great Reading Company, LLC
xviii © 2017 Really Great Reading Company, LLC Countdown Scope and Sequence, continued KEY Alphabetic Principle: Encoding and Decoding Alphabetic Principle: Letter Identification Sight Word Automaticity Phonemic Awareness BOOK 3 Lesson 1 Lesson 2 Lessons 3, 4, 5 Letter-Sound Fluency Heart Word Fluency Phonemic Awareness Phonics Concept, Reading, and Spelling UNIT 17 • Vowels vs. Consonants • Letter Names vs. Sounds • Review what makes words • Introduce Word Sort • Review short vowel sounds and motions • Review finger-stretching phonemes UNIT 18 Letter-Sound Review • Introduce long vowel sounds • Introduce Vowel-Consonant pattern (Closed Syllables) • Introduce Build a Word • Introduce Spell It! was, no, so UNIT 19 Letter-Sound Review • Short a vs. Long a • Introduce Phrases & Sentences to Read • Reading and spelling real and nonsense words with all short vowels say, now, have UNIT 20 Letter-Sound Review • Short i vs. Long i • Digraph sh • Reading and spelling with all short vowels • Introduce Detective Work said, come, down UNIT 21 Letter-Sound Review • Short u vs. Long u • Digraph th • Reading and spelling with all short vowels they, that, this UNIT 22 Letter-Sound Review • Short o vs. Long o • Review Digraphs sh & th • Reading and spelling with all short vowels ate, our, who UNIT 23 Letter-Sound Review • Short e vs. Long e • Digraphs ch & wh • Reading and spelling with all short vowels where, what, must UNIT 24 Letter-Sound Review • Review all short and long vowels • Digraph ck • Reading and spelling with all short vowels we, he, she UNIT 25 Letter-Sound Review • Sound Buddies (2-sound blends) • Chunk all and digraph review • Reading and spelling with all short vowels but, want, there UNIT 26 Letter-Sound Review • Sound Buddies (2-sound blends) • 2-sound blends (initial and final) saw, own, please UNIT 27 Letter-Sound Review • Introduce Syllable Stomp • Introduce blending syllables • Introduce terms “syllable” and “Closed Syllable” • Reading two-syllable words with Closed Syllables make, good, new UNIT 28 Letter-Sound Review • Review Syllable Stomp • Review blending syllables • More reading two-syllable words with Closed Syllables out, one, two © 2017 Really Great Reading Company, LLC
Unit 17 | Lesson 1
Vowels vs. Consonants & Letter Sounds vs. Names AP & Sight Words
Objectives
Students will:
• understand that the alphabet is made of 26 letters;
• categorize a letter as a consonant or a vowel;
• identify the letters a, e, i, o, u as the vowel letters;
• identify the red vowel letters in the student kit;
• identify the rest of the letters as consonant letters (black letter tiles) in the student kit;
• notice that every word must have at least one vowel.
Description
The teacher reviews the idea (introduced in Countdown Book 2) that the letters students have been learning about are either vowels or consonants. Students review all letters and their most common sounds while focusing on the type of letter: vowel or consonant. The teacher demonstrates how all real words include at least one vowel.
Student Materials
Holding and working boards from Countdown Student Kit
What Students See
What You Need to Know
• In Countdown Books 1 and 2, the program consisted of weekly units with five daily lessons, each consisting of three individual lesson parts. Each lesson part contained one activity that was not related to the other parts of that lesson. In Book 3, the structure of the Countdown units shifts. Book 3 still consists of weekly units with five lessons, one lesson for each day of the week. However, the Book 3 lessons have no individual parts. Each lesson is meant to be approximately 15-20 minutes of continuous instruction.
• For students to respond well to Countdown lessons, they need to have a firm understanding of the concept of consonants and vowels.
• We teach students to identify the five common vowels – a, e, i, o, u. Earlier in Countdown, students learned the short vowel sounds for these five vowel letters. They were introduced to the names and the sounds for each, but the focus was on the letter sounds. They were introduced briefly to the concepts of consonants and vowels. Now, they will learn that these letters are called vowels, and they will learn about their importance in words.
© 2017 Really Great Reading Company, LLC 1 UNIT 17 Lesson 1
• The terms “consonant” and “vowel” can refer to either a phoneme (a sound) or a letter name.
• In Countdown, the vowel letter tiles are red, and the consonant letter tiles are black. This helps students easily find the vowel letters when reading and spelling new words, which facilitates their understanding of some of the rules they will learn. In the Countdown Student Workbook, the vowel letters are gray, and the consonant letters are black.
Important Definitions
• Consonant: a letter that spells a consonant sound. For example, the letter y is a consonant in the word yes because it spells the consonant sound /y/. The letter y is a vowel in the word by because it spells the vowel sound long i.
• Vowel: a letter that spells a vowel sound.
• Phonics: the study of the systematic relationship between sounds and the letters that spell those sounds.
• Phoneme: the smallest unit of sound in a spoken word. A phoneme is a sound, not a letter. Spoken words are made up of one or more phonemes. Phonemes are represented by letters inside two slashes, such as /k/, /m/, /ch/, /ă/, and /ou/. In Countdown, the two slashes are called a sound box. When you see a letter presented in a sound box, say the sound, not the letter name.
• Phonemic Awareness: a person’s ability to identify, segment, blend, hold in memory, and manipulate phonemes (sounds) in words.
• Grapheme: a letter or letter combination that spells a phoneme. Graphemes can have up to four letters. In Countdown, a grapheme is also referred to as a “sound spelling.”
• Digraph: two letters that spell one sound. Countdown teaches five consonant digraphs: sh spells /sh/ as in shop; th spells /th/ as in thin; ch spells /ch/ as in chat; wh spells /w/ as in whale; and ck spells /k/ as in duck
Proper Articulation of the Consonant Phonemes
• It is important to have students properly articulate the consonant phonemes as they say them. For example, the articulation of the phoneme /b/ (the sound for the letter b) should be short and quick, with no addition of the /uh/ sound to the phoneme. See Appendix B, p. 353, for a chart that details the proper articulation of all the consonant phonemes.
Extra Information About the Letter X
• The letter x spells the sounds /ks/ at the end of a syllable, as in tax and maximum. This is the most common use of the letter x. The letter x can also spell the sound /z/ at the beginning of a syllable, as in xylophone or xenophobe.
2 © 2017 Really Great Reading Company, LLC UNIT 17 Lesson 1
• The letter x always spells the sounds /ks/ in Countdown.
Extra Information About the Letter Q
•
The letter q is almost always followed by the letter u in English words, and together they spell the sounds /kw/ as in queen, quack, and question. In the letter combination qu, u is not a vowel. It represents the phoneme /w/, which is a consonant sound.
Extra Information About the Letter Y
•
The letter y can be a vowel letter or a consonant letter.
• The letter y is a consonant letter when it comes immediately before a vowel letter within the same syllable. The letter y spells the consonant sound /y/ in words such as yam, yes, yip, yodel, and yuck.
• The letter y can be a vowel spelling by itself, as in my, myth, happy, and occupy, or it can be a part of a vowel spelling when it is immediately after another vowel letter within the same syllable, as in boy, stay, key, and guy.
• The letter y is used as a consonant letter in Countdown
3, 2, 1…
Open Countdown Online to Unit 17, Lesson 1 (17.1).
Launch!
❶ Vowels vs. Consonants
Say:
• “There are 26 letters in the alphabet. All letters make sounds, and you’ve already learned a lot about them.
• When we understand letter sounds, it helps us read correctly.
• We have learned that there are two types of letters. We can sort them into two groups: vowels and consonants.
• Let’s review vowels and consonants by using our letter tiles.”
Students take out holding and working boards from Countdown Student Kit.
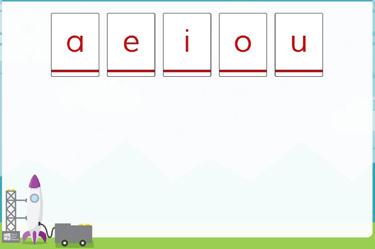
Say “In English, a letter is either a vowel or a consonant. All of the vowels on our boards are red. Find the red letter tiles, and put them on your smaller board.”
Click to display the five vowel letter tiles: a, e, i, o, u
Say:
• “These letters, the red letters, are called vowels
© 2017 Really Great Reading Company, LLC 3 UNIT 17 Lesson 1
• When I point to a letter tile on the board, I want you to find the same letter on your boards, point to it, and say its name.”
Point to one letter tile at a time, and give students time to find the correct letter tile and say its name.
Say:
• “Every word in English has a vowel in it.
• Let’s look at a few words we’ve heard before to make sure they each have a vowel.”
Click to display examples of real words, one at a time.
Point to and read each word.
h a t w i sh m e t
s o ck n u t
Say:
• “These can all be real words because each one has a red vowel letter.
• There are also black letters that are not vowels.
• These are called consonants.”
Ask “What are they called?” A: consonants Say:
• “Right, consonants are letters that are not vowels.
• So, the two kinds of letters are called vowels and consonants.
• Let’s review our vowels one more time.”
Click to display the five vowel letter tiles: a, e, i, o, u.
Say “When I say the name of a vowel letter, find it on your board, point to it, and say its name.” (Say each letter name, one at a time, in random order. After students hold up the correct letter and say its name, have them put that tile back on their holding boards.)
❷ Names vs. Sounds
Say:
• “Every letter has a name, and every letter also has a sound. It is important to know both the name of the letter and the sound.
• We are going to practice them again now.”
4 © 2017 Really Great Reading Company, LLC UNIT 17 Lesson 1
Click to display the four rows of guideword images.
Say:
• “Here are our guideword pictures.
• When I point to a picture, I will say the guideword, and it will be your job to peel off the beginning sound.
• Let’s get started!”
Point to and name the apple.
Ask “What is the beginning sound in apple?” A: /ă/ Click to reveal the letter a.
Say:
• “When we see each letter, let’s say the name of the letter together.
• If you don’t remember the name of the letter, that is okay. We will practice them together.
• This is the letter a. It spells /ă/, like /ă/, apple. It is a vowel, so it is red.”
Point to and name the bear.
Ask “What is the beginning sound in bear?” A: /b/ Click to reveal the letter b.
Say:
• “This is the letter (pause to give students time to say the name of the letter) b. It spells /b/, like /b/, bear
• It is not a vowel. It is a consonant, so it is black.”
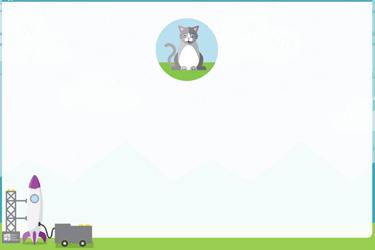
Point to and name the cat
Ask “Beginning sound?” A: /k/
Click to reveal the letter c
Ask “Letter?” (Pause to give students time to say the name of the letter.) A: c
Say “/k/, like /k/, cat.”
Ask:
• “Is c a consonant or a vowel?” A: consonant
• “How do you know?” A: it is black
Continue with the rest of the sounds and letters.
Once students understand the process, feel free to cut down on language. Rather than saying, “What is the beginning sound in cat?” simply asking “Beginning sound?” should be sufficient.
© 2017 Really Great Reading Company, LLC 5 UNIT 17 Lesson 1
Remember:
• You should articulate the letter sounds accurately.
• For the vowels, say the short vowel sounds and remind students that the vowel letters are red.
• The letters qu spell two sounds, /kw/. In English, the letters q and u always stay together to produce a sound. We do not call u a vowel when it is after q.
• The letter x spells /ks/.
Click again after you have completed the alphabet, and the alphabet in letter tiles will appear again.
Say “Now, it’s your turn to say the names of the letters and then the sounds they spell with me. Let’s go.”
Click through the alphabet, and have students say the letter names and sounds with you.
6 © 2017 Really Great Reading Company, LLC UNIT 17 Lesson 1
Unit 17 | Lesson 2
Every Word Must Have a Vowel AP
Objectives
Students will:
• differentiate consonants from vowels;
• complete a sort in the Countdown Student Workbook
Description
Students first sort letters according to whether they are consonants or vowels. They learn how to complete this sort in their Countdown Student Workbooks. Then, students review the concept from the previous lesson that every word must have at least one vowel. Lastly, they complete a second sort in their workbooks where they determine if groups of letters could be words or not.
Student Materials
• Countdown Student Workbook
• pencil
What Students See
What You Need to Know
Word Sort Overview
• Word Sort in Countdown is intended to focus students’ attention on the spelling pattern(s) presented in the lesson.
• Word Sort allows students to examine words with the new phonics concept prior to asking them to read and spell these types of words. In Word Sort, students practice reading words with the teacher and then sort some key attributes of the word depending on the focus of the lesson.
• The teacher should always lead the students in filling in the first few words of the sort to be sure the students understand how they are to sort the words. It is important for the teacher to provide a visual model for this activity using Countdown Online.
• Some Word Sorts, including the one found in this lesson, may seem extremely simple. We start students off with simple concepts to get them used to the process and routine. Word Sorts in subsequent lessons are more challenging.
© 2017 Really Great Reading Company, LLC 7 UNIT 17 Lesson 2
3, 2, 1…
Open Countdown Online to Unit 17, Lesson 2 (17.2).
Launch! ❶ Consonant vs. Vowel Sort
Say:
• “In this lesson, we will be looking at letters and sorting them into groups just like we did with our letters and sounds in some of our games.
• We will do the sorting on the screen, but you will also do it in your workbook.
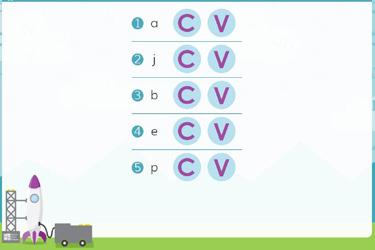
• You will be circling a C for consonant or a V for vowel in your workbooks to sort letters.”
Students open workbooks to page 1.
Say “We are going to learn how to do a Word Sort in your workbook. In most sorts, we will be sorting words, but in this sort, we will be sorting letters. We are going to look at a letter and decide if it is a consonant or a vowel. If we see a consonant, we will circle the letter C in the Consonant column (point to the Consonant column on the screen). If we see a vowel, we will circle the V in the Vowel column (point to the Vowel column on the screen).”
Click to display the Word Sort.
Point to and name the first letter aloud: a.
Ask “Is this letter a consonant or a vowel?” A: vowel
Say “Right, so we are going to circle the V in the Vowel column. Watch me.”
Click to circle the V in the Vowel column.
Say “Now, it’s your turn to circle the V in the Vowel column in your workbook with your pencil.”
Point to and name the next letter aloud: j
Ask “Is this letter a consonant or a vowel?” A: consonant
Say “Right, so we are going to circle the C in the Consonant column.”
Click to circle the C in the Consonant column.
Say “Your turn. Circle the C in the Consonant column in your workbook.”
Say “Now, you are going to sort the rest of the letters on your own. Circle the C or the V in the column that shows if each letter is a consonant (point to the Consonant column) or a vowel (point to the Vowel column).”
8 © 2017 Really Great Reading Company, LLC UNIT 17 Lesson 2
© 2017 Really Great Reading Company, LLC 1 unit 17 Word Sort Consonant Vowel
Consonant or Vowel? C V C V C V C V C V C V C V C V C V C V
1. a 2. j 3. b 4. e 5. p 6. u 7. h 8. i 9. o 10. z
Click to reveal the answers as you review them with students:
Call on individual students to read a letter and identify whether it is a consonant or a vowel.
Students check answers and correct any errors.
❷ Consonant and Vowel Review
Say:
• “For a quick review, let’s remember some important ideas:
o The alphabet has 26 letters.
o Letters can be consonants or vowels.
o The red vowel letters are a, e, i, o, u.
o The black letters are called consonants.
o All words have to have at least one vowel.”
Ask “If every word has to have at least one vowel letter, could these groups of letters be words? Let’s look at one word at a time.”
Click to display six groups of letters, one at a time.
Point to each group of letters, and have students tell you whether or not that group could be a word.
Click to display either a checkmark or an X next to each group of letters after students determine if the group could be a word or not. r a t h s t d z p h o p c a n b s f
❸ Word Sort – Could It Be a Word?
Students open workbooks to page 2.
Say “Now, we will do another Word Sort. This time we will be sorting groups of letters like we just did on the screen. We are going to look at a group of letters and decide if it could be a word or not. If we see a group of letters that could be a word, we will circle the checkmark in the Could Be a Word column. If we see a group of letters that could not be a word, we will circle the X in the Could Not Be a Word column.”
Click to display the “Could It Be a Word?” Word Sort
Read the first group of letters aloud: b d r.
© 2017 Really Great Reading Company, LLC 9 UNIT 17 Lesson 2
2 unit 17 1. bdr 2. ask 3. get 4.
5.
6.
7.
8.
9.
Could Be a Word Could Not Be a Word Word Sort Could It Be a Word?
tfd
wnm
pet
ham
dsv
zip 10. odd
Ask:
• “Could these letters be a word?” A: no
• “How do you know?” A: there is no vowel letter
Say “Right, so let’s circle the X in the Could Not Be a Word column.”
Click to circle the X in the Could Not Be a Word column.
Say “Your turn. Circle the X in the Could Not Be a Word column in your workbook.”
Read the next group of letters aloud: a s k
Ask:
• “Could these letters be a word?” A: yes
• “How do you know?” A: there is a vowel letter
• “So, should we circle the checkmark or the X for the letters a s k?”
A: checkmark
Click to circle the checkmark in the Could Be a Word column.
Say “Your turn. Circle the checkmark in the Could Be a Word column in your workbook.”
Say “Now, you are going to sort the rest of the letters on your own. Circle the checkmark if the group of letters could be a word (point to the Could Be a Word column) or the X if the group of letters could not be a word (point to the Could Not Be a Word column).”
Click to reveal the answers as you review them with students:
Call on individual students to read a group of letters and identify whether they could be a word or could not be a word.
Students check answers and correct any errors.
10 © 2017 Really Great Reading Company, LLC UNIT 17 Lesson 2
Unit 17 | Lesson 3
Short Vowel Phonemes and Motions PA
Objectives
Students will:
• label //, //, //, //, and // as short vowel sounds;
• review the sounds and motions for all short vowels.
Description
The teacher reviews all of the short vowel sounds and motions with students and explains that these sounds are called short vowels. The teacher explains that vowels can make more than one sound each and the other sounds have other names.
What Students See
What You Need to Know
• In English, there are 44 phonemes (sounds), and 18 of them are vowel phonemes. These 18 vowel phonemes are categorized into four major groups: short, long, r-controlled, and variant (or “other”) vowels.
• Countdown teaches only the short and long vowel sounds.
• Students have already learned the short vowel sounds associated with each of the five vowel letters: a, e, i, o, and u. In this lesson, they will learn the label “short” for this set of sounds.
• In Countdown, we teach short vowels by associating each sound to a guideword and a motion. Students have already learned these guidewords and motions, so this will be review for them. The practice of association gives students who struggle to identify vowel sounds and categories of vowels a functional strategy for immediate recall and categorization.
• If a student struggles to decode a word, a silent demonstration of a vowel motion, a simple visual prompt by the teacher, proves to be beneficial in helping the student recall the vowel sound.
• The goal is for students to be able to identify the vowel sound and category automatically once they have been exposed to the vowel guidewords and motions.
• Although we are exposing students to a lot of concepts and procedures in these first few lessons, we are not expecting students to demonstrate
© 2017 Really Great Reading Company, LLC 11 UNIT 17 Lesson 3
complete mastery of these skills in this lesson. This is the first exposure to some of these concepts. It should be stress-free and fun. These skills are taught explicitly and practiced further in future lessons.
3, 2, 1…
Open Countdown Online to Unit 17, Lesson 3 (17.3).
Launch!
❶ Review: Vowels Can Be Sounds or Letters
Click to display the five vowel letter tiles – a, e, i, o, and u.
Ask “Are these letters called consonants or vowels?” A: vowels
Say “Let’s practice what we’ve learned about these letters by saying the name of each vowel.”
Point to one vowel letter at a time, and have students say the name of each. Say “This time, when I point to a letter tile, say the sound of the vowel, not the name.”
Point to one vowel letter at a time, and have students say the sound of each.
Say “Guess what? Each of these vowel letters actually makes more than one sound. The sounds you just said are called short vowel sounds. We’ll learn about other sounds they make later.”
❷ Short Vowels Poster
Click to display the Short Vowels Poster.
Say:
• “This poster is something we can use to help us remember the short vowel sounds, guidewords, and motions.
• When we know these really well, it will help us read and spell a lot of words.”
Short a Point to the apple.
Say:
• “This apple (point to the apple) is here to help us remember the short a vowel sound, /ă/.
• When we see the apple, we can remember to make the short a motion.
12 © 2017 Really Great Reading Company, LLC UNIT 17 Lesson 3
Really Great Reading Company, LLC 2017 o u i a e
Short Vowels
• Remember, you pretend to have an apple in your hand (pretend an apple is in the palm of your hand, fingers curled up), and then you move it from left to right in front of your body like this (move your hand in the direction that mimics left to right for students) while you say the first sound in /ă/, apple - /ăăăă/.
• Let’s practice it now.” (Make motion with students.)
Short e
Point to the image for edge.
Say:
• “When we see the picture for edge, we can remember to make the short e motion.
• Remember, you trace your pointer finger along the edge of your desk/table (demonstrate on a surface with an edge) while you say the first sound in /ĕ/, edge - /ĕĕĕĕ/.
• Let’s practice it now.” (Make motion with students.)
Short i
Point to the image for itch
Say:
• “When we see the picture for itch, we can remember to make the short i motion.
• Remember, you pretend to scratch an itch on your arm (pretend to scratch an itch on the inside of your forearm) while you say the first sound in /ĭ/, itch - /ĭĭĭĭ/.
• Let’s practice it now.” (Make motion with students.)
Short o
Point to the octopus.
Say:
• “When we see the picture for octopus, we can remember to make the short o motion.
• Remember, you pretend your hand is an octopus and your fingers are the arms hanging down (pretend your hand is an octopus with arms hanging down, swimming back and forth in the ocean above your head) while you say the first sound in /ŏ/, octopus - /ŏŏŏŏ/.
• Let’s practice it now.” (Make motion with students.)
© 2017 Really Great Reading Company, LLC 13 UNIT 17 Lesson 3
Short u
Point to the image for up.
Say:
• “When we see the picture for up, we can remember to make the short u motion.
• Remember, you point up with your pointer finger and move it from your seat to above your head (with pointer finger pointing up, move your hand from your waist to over your head) while you say the first sound in /ŭ/, up - /ŭŭŭŭ/.
• Let’s practice it now.” (Make motion with students.)
❸ Review
Make the short a, short e, short i, short o, and short u motions randomly three times without saying the sounds, and ask all students to repeat the motion while saying the appropriate sound each time.
Say the short a, short e, short i, short o, and short u sounds randomly three times without making the motions, and ask all students to repeat the sound while making the appropriate motion each time.
14 © 2017 Really Great Reading Company, LLC UNIT 17 Lesson 3
Unit 17 | Lesson 4
Review Finger-Stretching PA
Objectives
Students will review and practice finger-stretching.
What Students See
Description
Students watch the teacher model fingerstretching and counting the sounds (phonemes) in a word. Responsibility for these tasks is gradually released to students.
Student Materials
Color tiles and working boards from Countdown Student Kit
What You Need to Know
• Beginning in this lesson, you will see the “I Do, We Do, You Do” instructional routine (also called the gradual release of responsibility). In this approach, you first model a procedure or routine for your students (I Do), then you participate together (We Do), and finally, you ask students to demonstrate the routine or procedure without your support. (Sometimes this structure is presented simply as “I Do, We Do.”) This is a way to present new concepts for students and support them as they work toward mastery.
• This lesson, and the Lesson 2s in all subsequent units, will focus on Phonemic Awareness. Phonemic awareness is a person’s ability to identify, segment, blend, hold in memory, and manipulate phonemes (sounds) in words. Here are some reminders about phonemic awareness:
o A phoneme is the smallest unit of sound in a word.
o A phoneme is a sound, not a letter.
o Phonemes are represented by letters inside two slashes: /k/, /m/, /ch/, /ă/, and /ou/ are examples.
o When a letter is between two slashes, say the sound (phoneme), not the letter name.
• In Countdown, we call the two slashes a “sound box.”
• Because most phonemes are spelled more than one way in words, when phonemes are represented with a sound box, the letters inside the slashes are often different than the letters in the word. For example, the phonemes in ledge are /l/ /ĕ/ /j/, with the letters dge spelling the /j/ phoneme. The sounds in rough are /r/ /ŭ/ /f/, with the letters ou spelling the short u phoneme, /ŭ/, and the letters gh spelling the /f/ phoneme.
We recommend that kindergarten teachers use the word “sound” instead of the word “phoneme.” The terms are interchangeable, but “sound” is more developmentally appropriate for kindergarteners. The script aimed at students uses the word “sound.”
© 2017 Really Great Reading Company, LLC 15 UNIT 17 Lesson 4
IMPORTANT
At no time during this Phonemic Awareness lesson should letters be written or talked about.
• Most emerging or struggling readers have some weakness with awareness of speech sounds. Because sound is abstract, it is helpful for these students to use manipulatives when working with speech sounds. In Countdown lessons, students will use their fingers and color tiles to represent phonemes and, eventually, SyllaBoards™ to represent syllables. These manipulatives provide multisensory learning by allowing students to “see” and “touch” the speech sounds.
Finger-Stretching Phonemes
• In Countdown, students and teachers will be asked to segment the phonemes in spoken words, or “stretch the sounds” in words. You introduced students to this skill in the game “Stretch Those Sounds.” The objective of stretching (also called finger-stretching) is for students to break a word into the separate phonemes that make up the word. You then ask students questions during the finger-stretching routine to help them identify and name the vowel sound in the word.
• The goal in finger-stretching is for students to correctly segment the phonemes in a word, to articulate the phonemes correctly, to accurately identify the vowel sound in the word, and to correctly determine what the vowel sound is called (e.g., short a vs. short u)—all on their first try. If students do not correctly complete all the steps in the finger-stretching procedure on their first try, you will provide Positive Error Correction to help students correctly stretch the word and answer the questions.
• The finger-stretching procedure is as follows:
o You say a word while extending a fist in front of your body.
o Students repeat the word while extending their fists in front of their bodies.
o Students orally segment the word into individual phonemes. They do this by extending one finger (starting with the thumb) for each phoneme as they say the phoneme.
o Students blend the phonemes back together to say the whole word, making a fist and pulling it toward their bodies while saying the word.
• After your students have stretched the word, you will ask them several questions in which they will say the vowel sound, identify whether the vowel sound is called short or long, and explain how they know what the vowel sound is called.
• Complete directions for the finger-stretching procedure are in Appendix A, p. 330.
• Example:
o Say the word mad
16 © 2017 Really Great Reading Company, LLC UNIT 17 Lesson 4
o Stretch the phonemes - /m/ (extend thumb), /ă/ (extend index finger), /d/ (extend middle finger)
o Blend the phonemes together into the word mad by pulling your fingers back into a fist while blending the sounds together to say the word mad.
More Information on Phonemes (Sounds)
• Students need to learn both the names of the letters and the phonemes (sounds) those letters spell. For example, the letter m has a name (pronounced “em”) and spells the phoneme /m/. Students learned the letter sounds, or phonemes, for each letter in Countdown Book 2. They were also exposed to the letter names although this was not the focus because learning the letter sounds is the most efficient path to proficient decoding.
• Because many students have difficulty understanding the difference between the letter name and the phoneme, it is important to be explicit in both instruction and questioning.
o Explicit instruction would include telling students both the name of the letter and the phoneme that it spells. For example: The names of the letters in cat are c, a, t while the sounds the letters spell are /k/ /ă/ /t/.
o Explicit questioning would include being specific in how you ask for information; for example, point to the letter m and ask a student, “What is the name of this letter?” or “What sound does this letter spell?” The explicit questioning reinforces students' understanding.
o The terms vowel and consonant describe both letters and phonemes.
• Countdown lessons teach the most common phonemes for the consonant letters and the short vowel phonemes for the vowel letters.
• In some of the letter sound automaticity activities, such as Look, Think, Say! and Pop Up!, students will see phonemes “written” on the screen. When written, phonemes are represented by letters inside two slashes, such as /ks/, /m/, /ch/, /ă/, and / ī/. In Countdown, the two slashes are called a sound box. When a letter is in a sound box, say the sound, not the letter name.
o Representing sounds in sound boxes is sometimes helpful for students, particularly with the sounds of the letters x (/ks/) and qu (/kw/). The sound boxes help students “see” how to pronounce those letters.
© 2017 Really Great Reading Company, LLC 17 UNIT 17 Lesson 4
Students have already learned how to fin ger-stretch, but in the past, they always saw the teacher model the stretching first. Now they will be fin ger-stretching on their own. Developmen tally, some students may have difficulty finger-stretching because they don’t yet have the required fine motor skills. You may consider allowing students to use the following alternatives to finger-stretching: touching their arm from the shoulder down to the wrist once for each pho neme; or touching their head, shoulders, knees, and toes as they say each pho neme. However, if at all possible, using their fingers is the most efficient and effective method of segment ing phonemes.
3, 2, 1…
Open Countdown Online to Unit 17, Lesson 4 (17.4).
Launch!
❶ Review Stretching Sounds in Words
Say:
• “We are going to review how to ‘stretch’ the sounds in words with our fingers so that we can hear them clearly.
• Let’s practice stretching with our fingers now.”
I DO: Finger-Stretch cat
Click to display the cat
Say:
• “We are going to separate all of the sounds in some words.
• Listen while I say the sounds in cat.”
• “cat ” (hold closed fist against chest, crossing the midline)
Click to display a color tile for each sound while saying each phoneme.
Say:
• “/k/” (extend thumb), “/ă/” (extend pointer finger), “/t/” (extend middle finger)
• “cat ” (pull fingers back to a closed fist while saying the word)
WE DO: Finger-Stretch bat
Say:
• “Now, let’s stretch out some words together.
• We will show the sounds in the words with our color tiles.”
Click to display the bat
Say:
• “Ready? Our word is bat.” (Optional: Baseball is a game played with a bat and a ball.)
• “Let’s stretch it together.”
• “bat ” (hold closed fist against chest, crossing the midline)
• “/b/” (extend thumb), “/ă/” (extend pointer finger), “/t/” (extend middle finger)
18 © 2017 Really Great Reading Company, LLC UNIT 17 Lesson 4
• “bat ” (pull fingers back to a closed fist while saying the word)
Ask “How many sounds did you hear?” A: three
Click to display a color tile for each sound while saying each phoneme/b/ /ă/ /t/, bat
Say:
• “It’s your turn to put down color tiles for these sounds.
• We will always use the red tile for the vowel, but you can use any colors you want for the consonant sounds.
• In the word bat, /b/ /ă/ /t/ (touch each tile while saying the sounds), the vowel sound is /ă/, and we use the red tile (point to the red tile) for vowels.
• Let’s say the sounds in bat again, but this time, you will take a color tile from your big board and move it to your smaller board when we say each sound.”
Students place each tile, one at a time, while saying each sound/b/ /ă/ /t/, bat.
Repeat these steps with the following words. Have students keep their color tiles on their boards until after the You Do below. Students should touch one color tile in order from left to right for each sound, making sure to use the red tile for the vowel sound.
sick - /s/ /ĭ/ /k/, sick (Optional: I stayed home from school when I was sick.) fish - /f/ /ĭ/ /sh/, fish (Optional: My pet fish hides in the castle in her bowl.)
YOU DO: Finger-Stretch words with short vowels
Click to display the image. Ask individual students to stretch the phonemes in each word below. Ask “How many sounds did you hear?” A: three
Students touch one color tile on their working boards for each phoneme they hear, using the red color tile to indicate the vowel phoneme.
Click to display the color tiles after students have touched the color tiles on their boards as a way to reinforce the concept of each tile representing a sound. mat - /m/ /ă/ /t/, mat (Optional: The dog slept on his mat by the door.) bag - /b/ /ă/ /g/, bag (Optional: Dad put the groceries into the bag.) sit - /s/ /ĭ/ /t/, sit (Optional: Let’s sit on the carpet for a story.) cut - /k/ /ŭ/ /t/, cut (Optional: Can you please cut out these circles?) pod - /p/ /ŏ/ /d/, pod (Optional: I like to pick the peas out of the pod.)
Instead of pulling your fingers back into a closed fist in the final step of the finger-stretching procedure, you may choose to keep your fingers extended as you pull your hand toward your chest. This keeps the number of phonemes in the word exposed and visible, making it easier for students to count the phonemes in the next step. You may want to use the words in a sen tence before asking students to stretch them. Students may never have heard some of these words, and hearing them in sentences ensures that they hear the word clearly and builds up their oral vocabulary.
© 2017 Really Great Reading Company, LLC 19 UNIT 17 Lesson 4
POSITIVE ERROR CORRECTION FOR FINGER-STRETCHING
If a student incorrectly stretches the sounds:
• Tell the student which sounds were correct.
• Repeat the word for the student.
• Prompt student to say the word, listen for the missed sound(s), and stretch the sounds again.
• If necessary, you or other students can stretch the sounds for the student correctly.
• Prompt student to correctly stretch the sounds independently. Always finish with student independently stretching the sounds correctly.
20 © 2017 Really Great Reading Company, LLC UNIT 17 Lesson 4
Unit 17 | Lesson 5
Wrap Up & Show What You Know
Objectives
Students will:
• identify letters as either consonants or vowels;
• articulate the correct, most common sounds of the letters;
• be able to differentiate between a letter’s name and its sound.
Description
AP & PA
Students will identify groups of letters as consonants or vowels. Then, they will peel the beginning sound off each guideword image and name the letter that makes each sound. After, they will look at the letter and then give the sound that each letter makes. Finally, students will practice connecting the vowels with their short sounds and motions.
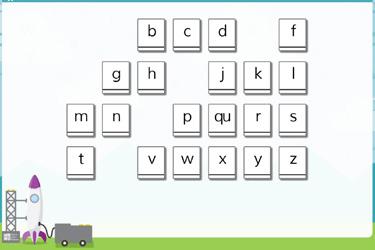
What Students See
What You Need to Know
• The fifth lesson of every Countdown Book 3 unit is called “Wrap Up & Show What You Know.” It is an opportunity to review and use the new knowledge that students have gained throughout the week. In a typical week (beginning in Unit 18), students utilize their newly gained knowledge to spell words and read phrases and sentences. It is important to have the students apply the skills they are learning as they accurately read black ink on white paper.
• In this lesson, we review key concepts to lay the foundation for success in future lessons.
3, 2, 1…
Open Countdown Online to Unit 17, Lesson 5 (17.5).
Launch! ❶ Review Alphabet Say:
•
“Let’s review the two parts of the alphabet. We learned that the alphabet has 26 letters. Some of these letters are called vowels and others are called consonants.
© 2017 Really Great Reading Company, LLC 21 UNIT 17 Lesson 5
• I am going to show you two pictures. When I show you a picture, I want you to shout out ‘vowels’ or ‘consonants.’”
Click to display all the consonant letter tiles at once. (Students shout “consonants.”)
Click to display all the vowel letter tiles at once. (Students shout “vowels.”)
❷ Review Letter Names and Sounds
Say:
• “Let’s review what we learned about letters.
• Letters have:
o a name and
o a sound.”
Click to display four rows of guideword images.
Say:
• “Here are our guideword pictures.
• When I point to a picture, I will say the guideword, and it will be your job to peel off the beginning sound, just like we did in our game ‘Peel That Sound.’
• Let’s get started!”
Point to and name the apple.
Ask “What is the beginning sound in apple?” A: /ă/ Click to reveal the letter a.
Say:
• “When we see each letter, let’s say the name of the letter together.
• If you don’t remember the name of the letter, that is okay. We will practice the names together.
• This is the letter a. It spells /ă/, like /ă/, apple. It is a vowel, so it is red.”
Point to and name the bear
Ask “What is the beginning sound in bear?” A: /b/ Click to reveal the letter b
Say:
• “This is the letter (pause to give students time to say the name of the letter) b. It spells /b/, like /b/, bear.
• It is not a vowel. It is a consonant, so it is black.”
22 © 2017 Really Great Reading Company, LLC UNIT 17 Lesson 5
Point to and name the cat.
Ask “Beginning sound?” A: /k/
Click to reveal the letter c
Ask “Letter?” (Pause to give students time to say the name of the letter.) A: c
Say “/k/, like /k/, cat.”
Ask:
• “Is c a consonant or a vowel?” A: consonant
• “How do you know?” A: it is black
Continue with the rest of the sounds and letters.
Remember:
• You should articulate the letter sounds accurately.
• For the vowels, say the short vowel sounds and remind students that the vowel letters are red.
• The letters qu spell two sounds, /kw/. In English, the letters q and u always stay together to produce a sound. We do not call u a vowel when it is after q.
• The letter x spells /ks/.
Click again after you have completed the alphabet, and the alphabet in letter tiles will appear again.
Say “Now, it’s your turn to say the names of the letters and then the sounds they spell with me. Let’s go.”
Click through the alphabet, and have students say the letter names and sounds with you.
❸ Review Short Vowel Phonemes and Motions
Say “We learned motions that go with the short vowel sounds. Let’s practice the sounds and motions for each vowel letter.”
Click to display and point to the Short Vowels Poster
Point to the appropriate section of the poster and say:
• “The short a vowel sound is /ăăăă/, like the first sound in apple. We pretend to hold an apple in our hand, and we move it across our body while we say the sound. Everybody make the motion with me as you say the sound, /ăăăă/.
Once students understand the process, feel free to cut down on language. Rather than saying, “What is the beginning sound in cat?” simply asking “Beginning sound?” should be sufficient.
© 2017 Really Great Reading Company, LLC 23 UNIT 17 Lesson 5
Really Great Reading Company, LLC 2017 o u i a e
Short Vowels
• The short e vowel sound is /ĕĕĕĕ/, like the first sound in edge. We trace our index finger along the edge of a desk or table while we say the sound. Everybody make the motion with me as you say the sound, /ĕĕĕĕ/.
• The short i vowel sound is /ĭĭĭĭ/, like the first sound in itch. We pretend to scratch the itch on the inside of our forearm while we say the sound. Everybody make the motion with me as you say the sound, /ĭĭĭ ĭ/.
• The short o vowel sound is /ŏŏŏŏ/, like the first sound in octopus
We pretend our hand is an octopus. Hold your hand up high with your fingers dangling down like octopus arms and wiggle your fingers, moving your hand from left to right, while you say the sound. Everybody make the motion with me as you say the sound, /ŏŏŏŏ/.
• The short u vowel sound is /ŭŭŭŭ/, like the first sound in up. We point our index finger up while moving our hand from below our waist to above our head while we say the sound. Everybody make the motion with me as you say the sound, /ŭŭŭŭ/.”
Make the short a, short e, short i, short o, and short u motions randomly three times without saying the sounds, and ask all students to repeat the motion while saying the appropriate sound each time.
Say the short a, short e, short i, short o, and short u sounds randomly three times without making the motions, and ask all students to repeat the sound while making the appropriate motion each time.
Click to display the five vowel letter tiles.
Point to the a, e, i, o, and u letter tiles on the board randomly three times without saying the sounds or making the motions, and ask all students to say the sound while making the appropriate motion each time.
24 © 2017 Really Great Reading Company, LLC UNIT 17 Lesson 5
Unit 18 | Lesson 1
Letter-Sound & Heart Word Fluency AP & Sight Words
Objectives
Students will:
• begin to build automatic recognition of some graphemephoneme (letter-sound) combinations;
• use the Look, Think, Say! procedure to learn new highfrequency words (Heart Words) and to practice letter sounds.
What You Need to Know
Description
Students will play Look, Think, Say!, PopUp, and 3-Up to review six letter sounds and to learn six new Heart Words.
What Students See
• In Countdown Book 3, each unit has five lessons. Lesson 1 is dedicated to helping students build automaticity with two sub-skills that are key to fluent, accurate reading:
o letter-sound relationships
o high-frequency words (Heart Words)
Letter-Sound (Grapheme-Phoneme) Relationships
• Sometimes letter-sound relationships are called grapheme-phoneme relationships, but in Countdown, the terms phoneme and grapheme are not used with students. A description of these terms was provided in the What You Need to Know section of Unit 17, Lesson 1 on p. 1, and highlights are provided again below simply for your own background knowledge.
o Phoneme: the smallest unit of sound in a spoken word. A phoneme is a sound, not a letter. Spoken words are made up of one or more phonemes. When written, phonemes are represented by letters inside two slashes, such as /k/, /m/, /ch/, /ă/, and /ou/. In Countdown, the two slashes are called a sound box. When a letter is in a sound box, say the sound, not the letter name. You will use the word “sound” with students rather than “phoneme.”
o Grapheme: a letter or letter combination that spells a phoneme. You will use the terms “letter,” “spelling,” or “sound spelling” with students, rather than “grapheme.” Graphemes can have up to four letters.
o Phonics: the study of the systematic relationship between speech sounds (phonemes) and the letters that spell the sounds (graphemes).
© 2017 Really Great Reading Company, LLC 25 UNIT 18 Lesson 1
• The words “phoneme,” “sound,” and “speech sound” can be used interchangeably. However, the term “sound” is used in Countdown to make it easier for very young students to understand the concepts.
• In decoding, letter-sound knowledge is more important than letter-name knowledge; however, Countdown instruction is dependent on a student having automatic recall of both letter names and letter sounds (e.g., a teacher might ask, “What letter spells /p/?” and students should respond with the letter “p”).
• When you see multiple letters in a sound box like this, /ăăăă/, it indicates that you should elongate the articulation by holding the phoneme (letter sound) for 2-3 seconds. This often happens with vowel phonemes (sounds), but can sometimes happen with consonant phonemes that are “continuants.” A continuant is a sound that the speaker can hold until he or she runs out of breath. Examples of continuants are the sounds /mmmm/, /nnnn/, /ssss/, or /llll/. This is in contrast to a “stop,” which is a consonant sound that cannot be held or elongated; the speaker forms the sound by constricting or “stopping” the air flow, cutting the sound off. Examples are /b/, /d/, /g/, and /p/.
Countdown Online
Countdown Online offers several ways to teach and practice letter-sound and Heart Word fluency.

Letter Sounds
• Countdown Online offers a Letter-Sound Generator, which gives you the option of choosing which letter-sound pairs you want to practice. This allows for targeted instruction. For instance, you may have data that suggests that the majority of your instructional group is confident with common consonant letter-sound (grapheme-phoneme) relationships (m, t, s, d, p) yet still needs to build up automaticity and mastery of the less common consonant sounds (y, x, c, g). The Generator allows you to choose what to practice, thus providing the review that will have the greatest impact. Countdown provides you with this flexibility because you know your students and their needs better than anyone else. There are several easy and convenient ways to gather data about your students’ strengths and weaknesses, which may inform your letter selections. Really Great Reading offers a family of free diagnostic tools to help drive targeted instruction. Visit www.reallygreatreading.com/diagnostics for more information.
• The Letter-Sound Generator allows you to choose six letters or graphemes (sound spellings) to practice with. You should choose a list of letter sounds to practice that will be most beneficial to your students. In Countdown Book 2, students were exposed to and practiced with all of the consonant and
26 © 2017 Really Great Reading Company, LLC UNIT 18 Lesson 1
short vowel letters. The goal in Countdown Book 3 is for students to develop mastery and automaticity with these letter sounds without conscious effort
• Occasionally, one or two letter sounds will be locked. This is to ensure that all students practice with graphemes that will be critical for mastery of the phonics concepts that will be introduced in that unit or in upcoming units. Students will be reading and spelling words with these new graphemes in the current unit.
• The generator uses the most common sounds of consonant letters or graphemes that produce more than one phoneme.
Heart Words
• There are several “high-frequency word” lists that are commonly used in education, including the Fry, Dolch, and Wiley lists. These lists have a great deal of overlap. The words used in Countdown are pulled from the Dolch 220 Pre-Primer and Primer lists. For more information about the Dolch highfrequency word list, see the Introduction on pg. v.
• The Heart Word Generator in Countdown Online contains the complete Dolch 220 list. Three words will be locked for each unit (these are the words to be taught in that unit per the standard Scope and Sequence), and you will select three words of your own to teach and/or practice. The Teacher Guide and Student Workbooks will include practice for the three locked words in each unit. The choice words will be displayed for practice in Countdown Online in the four standard practice activities: Look, Think, Say!, Pop-Up, 3-Up, and Read a Row.
• Use the Heart Word Generator to make your selections for the three choice words from the entire Dolch 220 list. You can sort the words alphabetically or based on frequency of use. Below is some guidance about how to choose the appropriate words.
o If your students have begun to master some of the most common Dolch words, sort the words by frequency and choose words from the middle of the list.
o If your students have already mastered many or most of the most common Dolch words, sort the list by frequency and choose words from the bottom of the list.
o If your core reading program has a prescribed list of high-frequency words, you can choose to mimic or mirror that list when supplementing instruction with Countdown.
o Letter-sound and Heart Word fluency are so important that Countdown provides opportunities for additional practice in Lessons 2, 4, and 5, beginning with this unit. These structured “warm-up” opportunities are
© 2017 Really Great Reading Company, LLC 27 UNIT 18 Lesson 1
designed to build automaticity and accuracy. Research suggests that many students can benefit from daily learning opportunities in these key skills.
• The way that Heart Words are organized (and practiced) persists into other parts of the lessons. The phrase and sentence reading activities in Lessons 4 and 5 are controlled so that students are only exposed to decodable words (based on the consonant letters, vowel phonemes, and phonics concepts taught) and Heart Words previously taught.
• The back of the Student Workbook contains two pages titled “My Heart Words.” Students can track their progress in learning Heart Words by coloring in half a heart for words they have almost mastered, and coloring in the full heart for the words they have mastered. These words are listed alphabetically so they are easy for the students to find. You may want to help students choose which Heart Words they have mastered by putting a red dot in either one or two sides of the hearts. After you place a dot in a part of the heart, then the students can color in the rest.
• In Countdown, Heart Words, or “high-frequency words,” are defined by recognition. Heart Words are those words that students recognize immediately and can read without having to break the word into constituent parts. When working with students in an intervention setting, these words are sometimes referred to as “words we know by heart” or “words in our word bank.” Some Heart Words do not follow basic phonological rules (e.g., the vowel sound in the word said is short e; ai is a very uncommon way of spelling short e) and are learned through rote memorization and practice. Others are strictly decodable, but can be practiced to build automaticity and accuracy.
Activities for Building Letter-Sound and Heart Word Fluency
• In Countdown Books 1 and 2, students played three games that facilitated the learning of and practice with high-frequency words: Look, Think, Say!, Pop-Up, and 3-Up. Students will begin using these same games to practice letter-sound fluency. In addition to these three games, students will also play a fourth game called Read a Row beginning in Unit 19.
• For a complete explanation of the Look, Think, Say!, Pop-Up, and 3-Up activities, see p. 326 in Appendix A.
28 © 2017 Really Great Reading Company, LLC UNIT 18 Lesson 1
Before Teaching:
Letter-Sound and Heart Word Fluency Set-Up
Open Countdown Online to Unit 18, Letter-Sound and Heart Word Generator.
Choose six letter sounds to review and practice. Choose three Heart Words to review and practice. (The three new Heart Words for this unit will be locked.)
Optional: Print Read a Row Teacher Recording Form.
3, 2, 1…
Open Countdown Online to Unit 18, Lesson 1 (18.1).
Launch!
❶
Letter-Sound Look, Think, Say!
Say:
• “Today, we are going to practice the sounds for six letters with the game Look, Think, Say!
• We have played this game with our Heart Words, but we can also play it with letters and their sounds.”
Click twice to display the first letter with one red dot and two empty dots below it.
Say:
• “Remember, this red dot (point to the red dot) tells us to stop what we are doing so we can listen to the letter and its sound.
• This letter is [letter name], and it spells the sound [/letter sound/].”
Click to display the yellow dot.
Say “Think about the sound of this letter.”
Click to display the green dot.
Say:
• “This green dot (point to the green dot) tells us to say the sound out loud.
• Say the sound with me, [/letter sound/].
• Let’s try another letter.
• Remember to look, think, and then say. Only say the sound out loud when the green dot shows up.”
© 2017 Really Great Reading Company, LLC 29 UNIT 18 Lesson 1
Click twice to display the next letter, and continue the above procedure for the remaining five letters.
Continue with the same six letter sounds for two additional rounds.
❷ Letter-Sound Pop-Up:
Say:
• “Now that we have reviewed the letter names and sounds, we are going to see if we can just look quickly and say the sounds that we remember.
• It is important for you to Look and Say! as quickly as possible, but remember, it is still more important to ‘Say’ the correct sound than to be fast.”
Click to display the six letters at random. Each letter will appear several times. Read each sound together with students as it pops up.
❸
Letter-Sound 3-Up:
Say:
• “Now, we are going to Look, Think, Say! with groups of letter tiles and their sounds just like we’ve done with our Heart Words.
• When you see the red dot, stop and look at the three letters. When you see the yellow dot, think about the sounds of those letters and try to remember them. When you see the green dot, say the three sounds out loud.”
Click to display the sets of three letters. Each word will appear several times. Look at, think about, and say each set of three letter sounds together with students as the sets are displayed.
❹ Heart Word Look, Think, Say!
Say “Now, we are going to learn to read some new Heart Words.”
Click twice to display the Heart Word was with one red dot and two empty dots below the word.
Say:
• “Remember, this red dot (point to the red dot) tells us to stop what we are doing so we can listen to the word.
• This word is was, as in, ‘It was hot outside yesterday.’”
Click to display the yellow dot.
Say “Think about this word.” Click to display the green dot.
30 © 2017 Really Great Reading Company, LLC UNIT 18 Lesson 1
Say:
• “Remember, this green dot (point to the green dot) tells us to say the word out loud.
• Say the word with me, was
• Let’s try another word.
• Remember to look, think, and then say. Only say the word out loud when the green dot shows up.”
Click twice to display the Heart Word no with one red dot and two empty dots below the word.
Say “Look at the word no, as in, ‘No, I don’t like strawberries.’”
Click to display the yellow dot.
Say “Think about this word.”
Click to display the green dot.
Say:
• “Say the word!
• Let’s try one more word.”
Click twice to display the Heart Word so with one red dot and two empty dots below the word.
Say “Look at the word so, as in, ‘It is cold in my house, so I will turn the heat on.’”
Click to display the yellow dot.
Say “Think about this word.”
Click to display the green dot.
Say:
• “Say the word!
• Let’s look at those words again.”
Continue with the same three Heart Words and the three Heart Words you chose in the Heart Word Generator for two additional rounds.
❺ Heart Word Pop-Up:
Say:
• “Now, we are going to practice reading the Heart Words we’ve learned.
• In our first game, when you see a word pop up onto the screen, say the word out loud.
© 2017 Really Great Reading Company, LLC 31 UNIT 18 Lesson 1
• If you need help remembering, I can help, but try your best.”
Click to display the Heart Words was, no, so, and the three Heart Words you chose in the Heart Word Generator at random. Each word will appear several times.
Read each word together with students as it pops up.
❻ Heart Word 3-Up:
Say:
• “Great job! In our next game, you will see three words on the screen.
• When you see the red dot, stop and look at the three words. When you see the yellow dot, think about the words and try to remember them. When you see the green dot, say the three words out loud.”
Click to display the sets of three Heart Words. Each set will contain the following words in a random order: was, no, so, and the three Heart Words you chose in the Heart Word Generator. Each word will appear several times.
Look at, think about, and say each set of three words together with students as the sets are displayed.
32 © 2017 Really Great Reading Company, LLC UNIT 18 Lesson 1
Unit 18 | Lesson 2
Introduction to Long Vowel Phonemes PA
Objectives
Students will:
• understand that vowel phonemes (sounds) can be short or long;
• identify the short and long vowel phonemes and make the correct motion for each of them;
• identify short and long vow el phonemes in isolation;
• identify short and long vowel phonemes in spoken words.
What You Need to Know
Description
The teacher reviews the short vowel sounds with students, having them use the Short Vowels Poster as an aid. The teacher then introduces students to the long vowel sounds using the Long Vowels Poster. Students then listen for the vowel sounds in spoken words and use the posters to help them determine whether the vowel sound is short or long.
What Students See
• Many linguists categorize vowel phonemes (sounds) into four major categories: long, short, r-controlled, and variant (or “other”) vowels (vowel phonemes that are neither long, short, nor r-controlled).
• Countdown introduces short and long vowel phonemes in the phonemic awareness lessons, but students only learn spellings for the short vowels in the phonics lessons. (There are optional extension units that introduce the spellings of the long vowels in Open Syllables and Vowel-Consonant-e syllables, but these are supplemental downloads and are not found in the Teacher Guide.)
• In the previous unit, students reviewed short vowel phonemes associated with both a guideword and a motion.
• Long vowel phonemes are taught by associating the phoneme with a motion; students will write the lowercase letters in the air. Although there are guidewords associated with the long vowel phonemes in Countdown, these are not emphasized other than in select phonemic awareness activities.
• Countdown lessons carefully teach students to be able to identify and categorize vowels in spoken words. This concentration on vowel phonemes can reduce reading difficulties caused by vowel confusion.
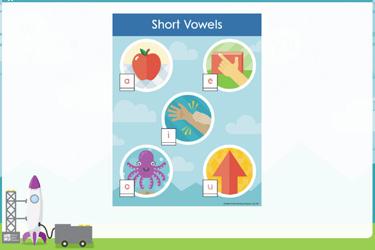
© 2017 Really Great Reading Company, LLC 33 UNIT 18 Lesson 2
• We are not expecting students to demonstrate complete mastery of these skills in this lesson. This is the first exposure to many of the concepts. It should be stress-free and fun. These skills are taught explicitly and practiced thoroughly in future lessons.
3, 2, 1…
Open Countdown Online to Unit 18, Lesson 2 (18.2).
OPTIONAL
Before teaching this lesson, you may wish to run the Letter-Sound and Heart Word Pop-Up and 3-Up activities in Countdown Online to practice the letter sounds and Heart Words taught in Lesson 1.
Launch! ❶ Review Short Vowel Phonemes and Motions
Say “Let’s practice the sounds and motions for each short vowel letter.”
Click to display and point to the Short Vowels Poster.
Point to the appropriate section of the poster and say:
• “The short a vowel sound is /ăăăă/, which is the first sound in apple. We pretend to hold an apple in our hand, and we move it across our body while we say the sound. Everybody make the motion with me as you say the sound, /ăăăă/.”
• “The short e vowel sound is /ĕĕĕĕ/, which is the first sound in edge. We trace our index finger along the edge of a desk or table while we say the sound. Everybody make the motion with me as you say the sound, /ĕĕĕĕ/.”
• “The short i vowel sound is / ĭĭĭĭ/, which is the first sound in itch. We pretend to scratch our arm while we say the sound. Everybody make the motion with me as you say the sound, / ĭĭĭĭ/.”
• “The short o vowel sound is /ŏŏŏŏ/, which is the first sound in octopus We pretend our hand is an octopus. Hold your hand up high with your fingers dangling down like octopus arms and wiggle your fingers, moving your hand from left to right, while you say the sound. Everybody make the motion with me as you say the sound, /ŏŏŏŏ/.”
• “The short u vowel sound is /ŭŭŭŭ/, which is the first sound in up. We point our index finger up while moving our hand from below our waist to above our head while we say the sound. Everybody make the motion with me as you say the sound, /ŭŭŭŭ/.”
34 © 2017 Really Great Reading Company, LLC UNIT 18 Lesson 2
Really Great Reading Company, LLC 2017 o u i a e
Short Vowels
Make the short a, short e, short i, short o, and short u motions randomly three times without saying the sounds, and ask all students to repeat the motion while saying the appropriate sound each time.
Say the short a, short e, short i, short o, and short u sounds randomly three times without making the motions, and ask all students to repeat the sound while making the appropriate motion each time.
Click to display the five vowel letter tiles.
Point to the a, e, i, o and u letter tiles on the board randomly three times without saying the sounds or making the motions, and ask all students to say the short sound while making the appropriate motion each time.
❷ Long Vowels Poster
Say:
• “Each vowel letter spells both a short vowel sound and a long vowel sound.
• We have learned the short vowel sounds, and now we are going to learn the long vowel sounds for our five vowel letters.
• The long vowel sounds are easy to remember because they are just like saying the name of the letter.”
Click to display the Long Vowels Poster.
Say “We can use this poster to help us remember the long vowel sounds and motions.”
Long a
Point to the a. Say:
• “The long a sound is just like saying the name of the letter, so the long a sound is /āāāā/.
• To help us remember this sound, we write a lowercase a in the air with our first two fingers, like this (demonstrate air writing lowercase a out in front of your face).
• Let’s practice it now.” (Make motion with students.)
Long e
Point to the e Say:
• “The long e sound is just like saying the name of the letter, so the long e sound is /ēēēē/.
© 2017 Really Great Reading Company, LLC 35 UNIT 18 Lesson 2
a i o e
Long Vowels © Really Great Reading Company, LLC 2017
• To help us remember this sound, we write a lowercase e in the air with our first two fingers, like this (demonstrate air writing lowercase e out in front of your face).
• Let’s practice it now.” (Make motion with students.)
Long i
Point to the i Say:
• “The long i sound is just like saying the name of the letter, so the long i sound is / īīīī/.
• To help us remember this sound, we write a lowercase i in the air with our first two fingers, like this (demonstrate air writing lowercase i out in front of your face)
• Let’s practice it now.” (Make motion with students.)
Long o
Point to the o. Say:
• “The long o sound is just like saying the name of the letter, so the long o sound is /ōōōō/.
• To help us remember this sound, we write a lowercase o in the air with our first two fingers, like this (demonstrate air writing lowercase o out in front of your face)
• Let’s practice it now.” (Make motion with students.)
Long u
Point to the u. Say:
• “The long u sound is just like saying the name of the letter, so the long u sound is /y�/.
• To help us remember this sound, we write a lowercase u in the air with our first two fingers, like this (demonstrate air writing lowercase u out in front of your face)
• Let’s practice it now.” (Make motion with students.)
❸ Review
Say the long a, long e, long i, long o, and long u sounds randomly three times without making the motions, and ask all students to repeat the sound while making the appropriate motion each time.
36 © 2017 Really Great Reading Company, LLC UNIT 18 Lesson 2
Click to display the five vowel letter tiles.
Point to the a, e, i, o and u letter tiles on the board randomly three times without saying the sounds or making the motions, and ask all students to say the long sound while making the appropriate motion each time.
❹ Identify Short and Long Vowel Phonemes in Spoken Words
Click to display the Short and Long Vowels Posters.
Say:
• “I am going to say a vowel sound. I want you to listen carefully.
• Then, I will ask, ‘What is our motion for that sound?’
• You will show me the motions we just learned.
• You can look at the posters to help you.
• I will show you the first few. You can just watch and listen:
o /ōōōō/, /ō/ is the name of the letter o, so I’ll write the letter o in the air.” (Demonstrate long o motion – write lowercase o in the air.)
o “/ŏŏŏŏ/, /ŏ/ is the first sound in octopus, so I’ll pretend my hand is an octopus.” (Demonstrate short o motion – pretend your fingers are the arms of an octopus hanging down, swimming through the ocean.)
o “/ăăăă/, /ă/ is the first sound in apple, so I’ll pretend to hold an apple in my hand.” (Demonstrate short a motion – pretend to hold an apple in your hand and move it from right to left across your body.)
Say “/ ĭĭĭĭ/. Show me the motion.” A: itch
Demonstrate motion with students.
Say “/ŭŭŭŭ/. Show me the motion.” A: up
Demonstrate motion with students.
Say “/ēēēē/. Show me the motion.” A: write lowercase e in the air
Demonstrate motion with students.
Say “/āāāā/. Show me the motion.” A: write lowercase a in the air
Demonstrate motion with students.
I DO: Finger-Stretch cake
Click to display the Short and Long Vowels Posters.
Say “Now, I’m going to say a whole word. Let’s see if we can hear the vowel sound in the word and make the right vowel motion. Let me show you first.”
Click to display the cake.
© 2017 Really Great Reading Company, LLC 37 UNIT 18 Lesson 2
Instead of pulling your fingers back into a closed fist in the final step of the finger-stretching procedure, you may choose to keep your fingers extended as you pull your hand towards your chest. This keeps the number of phonemes in the word exposed and visible, making it easier for students to count the phonemes in the next step.
Say:
• “My word is cake, as in, ‘I asked for a chocolate cake for my birthday.”
• “cake” (hold closed fist against chest, crossing the midline)
• “/k/” (extend thumb), “/āāāā/” (extend pointer finger), “/k/” (extend middle finger)
• “cake” (pull fingers back to a closed fist while saying the word)
Say “Cake has three sounds. I hear the name of the letter a in cake, so the vowel sound must be a long a (while tracing the lowercase letter a in the air) Long a says its name, /ā/.”
Point to the Long Vowels Poster and remind students that they can look at the letter a to remind themselves that the long a sound is the same as the name of the letter a
WE DO: Finger-Stretch bed
Click to display the Short and Long Vowels Posters
Click to display the bed.
Say:
• “Ready? Our word is bed, as in, ‘I sleep on the top bunk bed.’
• Let’s stretch it together.”
• “bed ” (hold closed fist against chest, crossing the midline)
• “/b/” (extend thumb), “/ĕĕĕĕ/” (extend pointer finger), “/d/” (extend middle finger)
• “bed ” (pull fingers back to a closed fist while saying the word)
Ask:
• “How many sounds did we hear?” A: three
• “What vowel sound did we hear in the word?” A: /ĕĕĕĕ/
• “What is the motion for /ĕĕĕĕ/?” A: run finger along the edge of a desk or table (students make motion)
• “Is that short or long?” A: short
• “How do we know?” A: /ĕ/ is the first sound in edge
If your students need more guided practice stretching the sounds in words you may wish to use some of the You Dos as We Dos.
YOU DO: Finger-Stretch words with various vowels
Say “Now, you will stretch out some words on your own.”
Click to display the Short and Long Vowels Posters.
Click to display the image.
38 © 2017 Really Great Reading Company, LLC UNIT 18 Lesson 2
Ask individual students to stretch the phonemes in each word below. After students stretch the sounds, ask:
• “How many sounds did you hear?” A: three
• “What vowel sound did we hear in the word?” A: varies
• “What is the motion for [/vowel sound/]?” A: varies
• “Is that short or long?” A: varies
•
“How do you know?” A: [/vowel sound/] is the first sound in [guideword]/is the name of the letter [letter name]
Complete the steps above with the following words: sock, /s/ /ŏ/ /k/, sock (I took off my sock and shoe.)
A: /ŏŏŏŏ/, short o teeth, /t/ /ē/ /th/, teeth (My baby brother has two teeth already!)
A: /ēēēē/, long e nap, /n/ /ă/ /p/, nap (I was tired, so I took a long nap.)
A: /ăăăă/, short a robe, /r/ /ō/ /b/, robe (My dad’s robe is red and green.)
A: /ōōōō/, long o bus, /b/ /ŭ/ /s/, bus (Did you ride on the bus to get to school today?)
A: /ŭŭŭŭ/, short u hen, /h/ /ĕ/ /n/, hen (The hen laid five eggs yesterday.)
A: /ĕĕĕĕ/, short e
© 2017 Really Great Reading Company, LLC 39 UNIT 18 Lesson 2
Unit 18 | Lesson 3
Phonics Concept: Build a Word and the Vowel-Consonant Pattern (Closed Syllables) AP
Objectives
Students will:
• identify the VowelConsonant pattern in two- and threephoneme (sound) words;
• predict the vowel phoneme as a short vowel sound in words with the VowelConsonant pattern;
• learn how to use the Countdown Student Kits for the Build a Word procedure;
• build words with short vowel phonemes.
What You Need to Know
Build a Word Procedure
Description
The teacher and students review the short vowel sounds. The teacher then introduces a new pattern, the Vowel-Consonant pattern, and explains how that pattern tells us that the vowel letter will most likely say its short sound. Students then have a chance to practice building words with this pattern, focusing on how the pattern informs the vowel sound.
Student Materials
Holding and working boards from Countdown Student Kit What
Students See
• In this lesson, students use the color and letter tiles from the Countdown Student Kits to spell and read words containing the lesson’s new concept. Some students may have been using color and letter tiles to augment the Book 2 instruction, so this may not be a new procedure for those students. For others, the use of manipulatives may be new.
• In Build a Word, the color tiles represent the phonemes (individual sounds in words), and the letter tiles are the graphemes (letters or letter combinations that spell the sounds). There will be a one-to-one correspondence of color tiles to letter tiles. For example, the phoneme /k/ can be spelled with various graphemes: c in the word cat, k in the word kid, or ck in the word lick. No matter which spelling is correct, the letters would be on one tile to show that they are spelling one sound, /k/.
• The Build a Word procedure is the same as in the “Build a Word” activity from Countdown Book 2. As a reminder, the procedure is as follows:
40 © 2017 Really Great Reading Company, LLC UNIT 18 Lesson 3
o You dictate a word and display a corresponding image.
o Students repeat the word.
o Students stretch the sounds in the word.
o Students place one color tile on their boards for each sound while saying the sound.
o Students spell the word by matching one letter tile to each color tile.
o You display the correct color and letter tiles.
o You and students use Touch & Say to read the word. To Touch & Say a word, you and students touch each letter tile while saying the sound spelled by the letter(s) on the tile. Then, blend the sounds into a word while running your index fingers from left to right under the tiles.
o Complete directions for the Build a Word procedure are in Appendix A. Vowel- Consonant Pattern (Closed Syllables)
• The term Closed Syllable refers to a syllable pattern that occurs with great regularity in English. Some researchers estimate that Closed Syllables make up around half of the syllables in English words.
• The Closed Syllable pattern can be recognized visually by examining the pattern of vowels and consonants in words and their relationship to each other. However, it is not necessary to teach your young students the term “Closed Syllable” at this point. Later in Countdown lessons, you will teach this term, but in these earlier lessons, you will use the term “Vowel-Consonant pattern” to describe the construction of a Closed Syllable. All words used at this point in the program have only one syllable, so teaching the concepts of a syllable and, specifically, a Closed Syllable, may prove confusing and unnecessary.
• The Vowel-Consonant pattern of a Closed Syllable is that the syllable has only one vowel letter followed by one or more consonants; at, cat, cash, and catch are all Closed Syllables.
• Closed Syllables occur in single-syllable and multisyllabic words; nap kin, sub tract, es tab lish, Wis con sin, and un in hab it ed are examples of words that are solely comprised of Closed Syllables.
• A Closed Syllable ends in one or more consonants but does not need to have a consonant letter before the vowel; at, Ed, it, on, and up are all Closed Syllables.
• Most of the time, the vowel letter in a Closed Syllable spells its short phoneme. Examples are: ax, cab, on, pop, Ed, met, us, sun, in, and dip.
• Understanding Closed Syllables as a visual pattern is very helpful in spelling, but it is extremely useful when decoding unfamiliar words.
© 2017 Really Great Reading Company, LLC 41 UNIT 18 Lesson 3
3, 2, 1…
Open Countdown Online to Unit 18, Lesson 3 (18.3).
Launch!
❶ Review Short Vowel Phonemes and Motions
Say:
• “In this lesson, we will learn about a word pattern. If we see this new pattern, the vowel sound will be short most of the time.
• So, before we learn the pattern, let’s review the short vowel sounds.”
Click to display and point to the Short Vowels Poster.
Say:
• “Remember, we can use this poster to help us remember our short vowel sounds.
• I’m going to make one of our short vowel motions. Your job is to copy my motion, but you will also make the sound that goes with it.”
Make the short a, short e, short i, short o, and short u motions randomly three times without saying the sounds, and make sure that all students repeat the motion while saying the appropriate sound each time.
Say “Now, I’ll say a short vowel sound. You will repeat it and make the motion that goes with it.”
Say the short a, short e, short i, short o, and short u sounds randomly three times without making the motions, and make sure all students repeat the sound while making the appropriate motion each time.
Click to display the five vowel letter tiles.
Say “Now, when I point to a vowel letter tile, you will say the sound and make the motion.”
Point to the a, e, i, o, and u letter tiles on the board randomly three times without saying the sounds or making the motions, and make sure all students say the sound while making the appropriate motion each time.
❷ Vowel-Consonant Pattern
I DO
Say:
• “Now, we are going to learn to read words that have a special pattern.
42 © 2017 Really Great Reading Company, LLC UNIT 18 Lesson 3
a
Short Vowels
o u i
e
• The pattern we are going to look for is one vowel letter, with one or more consonant letters after the vowel. It’s called a Vowel-Consonant pattern.
• Remember, our vowel letters are red and our consonant letters are black. When we see the Vowel-Consonant pattern, it will have just one red letter by itself, and that red letter will have at least one black letter after it.”
Click to display the word bat.
Ask:
• “Do you see a vowel letter in this word?” A: yes
• “What is the name of the vowel letter?” A: a
Click to display an arrow under the a letter tile.
Ask:
• “Does the a have a consonant letter after it?” A: yes
• “What is the name of the consonant letter?” A: t
Click to display a box around the t letter tile.
Ask:
• “Does this word have our pattern?” A: yes
• “What is our pattern?” A: one vowel with one or more consonants after it
Say:
• “When we see this Vowel-Consonant pattern, it means that, most of the time, the vowel will say its short vowel sound.
• So, this word is /b/ /ăăăă/ /t/ (point to each letter tile as you say its sound), bat
•
The vowel letter a spells its short sound, /ă/, because it is a part of a Vowel-Consonant pattern. Remember that /ă/ is the short a sound, like in /ă/, apple
WE DO
•
Let’s try another word.”
Click to display the word net.
Ask “Do you see just one vowel letter in this word?” A: yes, e
Click to display an arrow under the e letter tile.
Ask:
• “Does the e have a consonant letter after it?” A: yes
• “What is the name of the consonant letter?” A: t
© 2017 Really Great Reading Company, LLC 43 UNIT 18 Lesson 3
The animation available in Countdown Online introduces the concept of the Vowel-Consonant pattern in a fun and engaging way. We recommend showing it after teaching Section 2 as a review of the content or to reinforce the content for students who might need more direct instruction.
Click to display a box around the t letter tile.
Ask:
• “Does this word have our pattern?” A: yes
• “What is our pattern?” A: one vowel with one or more consonants after it
• “So, the e should say its short sound. What is the short e sound?” A: /ĕ/
Say:
• “Right! This word is /n/ /ĕĕĕĕ/ /t/ (point to each letter tile as you say its sound), net
• Let’s look at a few more words to see if they have the VowelConsonant pattern.”
Continue reviewing the following words in the same manner as above: hip cup mop
Say:
• “Sometimes we see this pattern, but the word doesn’t have a consonant letter at the beginning.
• As long as we see one vowel letter with one or more consonant letters after it, it is still our pattern, and the vowel is probably going to say its short sound, just like in this word.”
Review the following words in the same manner as above: on us
❸ Build Real Words with the Vowel-Consonant Pattern
Students place materials on desks.
Say “Now, we’re going to build words with our Vowel-Consonant pattern.”
I DO: Build nap
Click to display the image for nap.
Say “Now, let’s build the real word nap, as in, ‘I need a nap because I am so tired.’”
Stretch the sounds - nap, /n/ /ă/ /p/, nap.
Say “I heard three sounds in nap.”
Click to display one color tile at a time while again saying, “/n/ /ă/ /p/.”
44 © 2017 Really Great Reading Company, LLC UNIT 18 Lesson 3
Click to display a letter tile below each color tile to spell each sound while saying the sound.
Use Touch & Say to read nap - /n/ /ă/ /p/, nap.
Say “I see one vowel (point to the a letter tile), and then I see a consonant after it (point to the p letter tile). That is our pattern, and that’s why the a spells its short sound, /ă/.”
Say “Now let’s try one together.”
WE DO: Build hot
Click to display the image for hot
Say “Now, let’s build the real word hot together, as in, ‘It was hot out, so I went swimming.’ Repeat hot.” (Students repeat.)
Stretch the sounds with students - /h/ /ŏ/ t/, hot.
Click to display one color tile for each sound in hot while saying the sounds, /h/ /ŏ/ /t/.
Ask individual students the following questions to lead students in spelling each sound by placing letter tiles below the color tiles, one at a time. Click to display each letter tile as students respond with the correct spellings:
• “What is the first sound you hear?” A: /h/
• “What letter spells /h/?” A: h (Click to display h; students place the h tile on their boards.)
• “What is the next sound you hear?” A: /ŏ/
• “What letter spells /ŏ/?” A: o (Click to display o; students place the o tile on their boards.)
• “What is the last sound you hear?” A: /t/
• “What letter spells /t/?” A: t (Click to display t; students place the t tile on their boards.)
Use Touch & Say to read hot with students - /h/ /ŏ/ /t/, hot.
Say “I see one vowel (point to the o letter tile), and then I see a consonant after it (point to the t letter tile). That is our pattern, and that’s why the o spells its short sound, /ŏ/.”
Students clear boards.
YOU DO: Build real words with the Vowel-Consonant pattern
Say “Now, you are going to use your color and letter tiles to build three real words. Each word will follow the Vowel-Consonant pattern ”
© 2017 Really Great Reading Company, LLC 45 UNIT 18 Lesson 3
Remember to use Positive Error Correction if students make a mistake while building words. Steps for Positive Error Correction can be found on the next page.
Click to display each image and dictate the words and sentences below, one at a time, following the Build a Word steps for each word and helping students as needed.
sap – “Sap comes from a maple tree. We collected sap to make maple syrup.” bug – “There was a bug crawling on the side of the flower pot.” wig – “The clown wore a colorful wig on his head.”
Students build each word independently, one word at a time. Students should: Say the word.
Stretch the sounds in the word.
Place one color tile on boards for each sound while saying the sound. Spell the word by placing one letter tile below each color tile. a s p u b g i w g
Use Touch & Say to read the word.
Hold up their boards so you can check their spelling and provide Positive Error Correction as needed.
Click to display the correct placement of color and letter tiles for each word. Students clear boards and wait for the next word to be dictated.
❹ Optional Challenge: Build Silly Words
Say “Now, you are going to build some super silly words that have the VowelConsonant pattern. These words are very silly! They don’t mean anything because they are not real words, but we can spell them and read them because the letters will tell us what sounds to say.”
Click to display the image for silly.
Dictate the silly words below, one at a time, following the Build a Word steps for each word and helping students as needed. jat vid
Students build each word independently, one word at a time. Students should: Say the word. Stretch the sounds in the word.
46 © 2017 Really Great Reading Company, LLC UNIT 18 Lesson 3
Place one color tile on boards for each sound while saying the sound.
Spell the word by placing one letter tile below each color tile.
a j t i v d
Use Touch & Say to read the word.
Hold up their boards so you can check their spelling and provide Positive Error Correction as needed.
Click to display the correct placement of color and letter tiles for each word.
Students clear boards and wait for the next word to be dictated.
POSITIVE ERROR CORRECTION FOR BUILD A WORD
If a student misspells a word during the Build a Word procedure, provide Positive Error Correction:
• Identify the sounds the student spelled correctly.
• Repeat the word.
• Have the student repeat the word and listen for the misspelled sound. Then, have the student correct the spelling by changing one or more letter tiles.
• If necessary, you or other students identify the misspelled sound and spelling for the student.
• Have the student independently use Touch & Say to read the word correctly.
Always finish with the student independently using Touch & Say to verify that the word is spelled correctly.
© 2017 Really Great Reading Company, LLC 47 UNIT 18 Lesson 3
Unit 18 | Lesson 4
Student Practice AP
Objective
Students will read real words with short vowels and will determine which short vowel sound they hear (Word Sort).
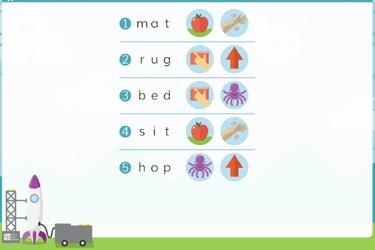
Description
The teacher leads students through a model word(s) for the Word Sort. Students then read the remaining words on their own, listening carefully for the vowel sound and matching it with the guideword image for the vowel sound they hear. Teacher reviews the answers with students, allowing time for students to correct their work if needed.
Student Materials
• Countdown Student Workbook
• Pencil
What Students See
What You Need to Know
• Lesson 4 is dedicated to systematically practicing with the phonics concept that the students learned in the previous lesson.
• Lesson 4 contains two practice activities and the explanations of how to run them:
o Detective Work (starts in Unit 20 and appears in all subsequent units)
o Word Sort (started in previous unit and appears in all subsequent units)
• These practice activities are both cumulative and controlled; they contain only the concepts that a student has been explicitly taught in previous lessons.
• These cumulative and controlled practice activities can serve as a type of formative assessment. Teachers can determine whether a student has mastered the skills recently taught or whether the student needs additional practice and reinforcement to reach mastery.
• See the What You Need to Know section in Unit 17, Lesson 2 for information about the Word Sort procedure. Remember that some sorts, including the one found in this lesson, may seem extremely simple. We start students off
48 © 2017 Really Great Reading Company, LLC UNIT 18 Lesson 4
with these simple concepts to get them used to the process and routine. Word Sorts in subsequent lessons are much more challenging.
3, 2, 1…
Open Countdown Online to Unit 18, Lesson 4 (18.4).
OPTIONAL
Before teaching this lesson, you may wish to run the Letter-Sound and Heart Word Pop-Up and 3-Up activities in Countdown Online to practice the letter sounds and Heart Words taught in Lesson 1.
Launch!
❶ Word Sort – Short Vowels
Say:
• “Remember, when we are doing a Word Sort, I will always model a few words to show you how to sort the words.
• Sorting words will help you to pay attention to the parts of the words.
• In this lesson, words will be sorted by the sound of the vowel. We will read the word first and then decide which short vowel sound is in each word.”
Click to display the top section of the Word Sort.
Students open workbooks to page 3.
Read and finger-stretch the first word aloud: mat, /m/ /ă/ /t/, mat.
Ask:
• “What vowel sound did you hear in the middle?” A: /ă/
• “What letter spells /ă/ in this word?” A: a
• “Is /ă/ the same as the beginning of aaaapple or iiiitch?” A: apple
• “Right! So, which picture should we circle?” A: apple
Click to circle the apple.
Prompt students to circle the apple.
Say:
• “Now, you are going to circle the picture for the vowel sound in the rest of the words on your own.
• Listen carefully for the vowel sound when you say each word.”
When beginning the Word Sort, you should model as many words as you deem necessary for your students to grasp the concept and proceed independently.
Short Vowels
Word
1. 2. 3. 4. 5. 6. 7. 8. 9. 10. Sort
unit 18
2017 Really Great Reading Company, LLC 3
In this sort, students are given only two short vowel sounds to choose from for each word. In later sorts, they will choose from all five short vowel sounds.
© 2017 Really Great Reading Company, LLC 49 UNIT 18 Lesson 4
mat rug bed s t hop jet cop pat sun wig
If your students are not yet able to read these words on their own, feel free to read each word aloud for them and have them independently select the correct vowel sounds.
Use Countdown Online to check answers with students.
Call on individual students to read a word and to identify the vowel sound and the correct guideword image.
Students check answers and correct any errors.
The final five words are displayed on the next screen in Countdown Online
50 © 2017 Really Great Reading Company, LLC UNIT 18 Lesson 4
Unit 18 | Lesson 5
Student Practice AP
Objectives
Students will:
• accurately segment the phonemes in spoken words;
• accurately spell words with a controlled set of concepts and phonemes.
Description
The students see an image, which the teacher names. Teacher and students finger-stretch the sounds in the word together, counting the sounds. They then fill in a circle for each sound they heard and write the corresponding letter in each box with a filled in circle, spelling the target word.
Student Materials
• Countdown Student Workbook
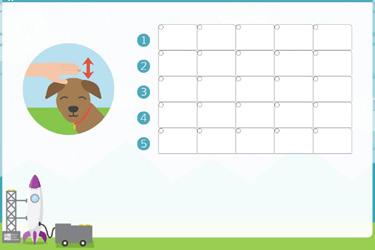
• Pencil
What Students See
What You Need to Know
• Lesson 5 is a wrap-up lesson. The wrap-up reviews and cumulatively practices the concepts taught in this unit (and in previously taught units).
• Lesson 5 contains wrap-up activities and the explanation on how to run these activities:
o Review of Phonemes (begins in this unit and appears in all subsequent units)
o Review of Heart Words (begins in this unit and appears in all subsequent units)
o Phrases & Sentences to Read (begins in Unit 19 and appears in all subsequent units)
o Spell It! (begins in this unit and appears in all subsequent units through Unit 26)
Spell It! Overview
• In this unit, we introduce the Spell It! activity. In Spell It!, students link speech sounds to alphabetic symbols. This activity reinforces the alphabetic principle, which helps students strengthen their phonemic awareness and decoding
© 2017 Really Great Reading Company, LLC 51 UNIT 18 Lesson 5
In this lesson, each phoneme is spelled with one letter, but in later lessons, students sometimes write more than one letter in each box. 4
skills and, ultimately, benefits both their word reading and spelling. Spell It! is similar to Build a Word in Lesson 3, but students represent sounds with dots and write the letters that spell those sounds in boxes. It will be completed as a large group activity with each student working directly in his or her workbook. Spell It! can be run as a game where students earn points for each correct phoneme they identify in the spoken word and for each grapheme they use to correctly spell a phoneme.
• The procedure is as follows:
1. Teacher dictates a word.
2. Students finger-stretch the word.
3. Students fill in one circle for each phoneme they hear in the word.
4. Students write the letter (or letters) that spell each sound.
3, 2, 1…
Open Countdown Online to Unit 18, Lesson 5 (18.5).
OPTIONAL
Before teaching this lesson, you may wish to run the Letter-Sound and Heart Word Pop-Up and 3-Up activities in Countdown Online to practice the letter sounds and Heart Words taught in Lesson 1.
Launch!
❶ Spell It!
Say:
• “Today, we are going to spell some words with the sounds we have been practicing.
• We are going to start by stretching out the sounds in a word so we can hear them clearly.”
Students open workbooks to Spell It! on page 4.
Say “We are going to spell words that you will hear me say aloud. Let’s start with number 1 at the top of your page.”
Click to display the image for pat.
Say “The first word is pat, as in ‘I will pat my dog on the head when he listens to me.’ Let’s stretch it together. Pat, /p/ /ă/ /t/, pat.” (Finger-stretch pat along with students.)
52 © 2017 Really Great Reading Company, LLC UNIT 18 Lesson 5
unit 18 1. 2. 3. 4. 5. 6. 7. 8. 9. 10. Challenge Spell It!
Ask “How many sounds did we hear?” A: three
Say “Since pat has three sounds, /p/ /ă/ /t/, we will fill in three dots, one for each sound, like this.”
Click three times to fill in the first three dots, and have students fill in the first three dots on their workbook pages.
1. Say:
• “Since pat has three sounds, it will also have three letters, and we will write one letter in each box that has a dot filled in.
• Let’s stretch pat again slowly so we can hear each sound and write it down.”
• “/p/” (PAUSE for students to write p in the first box) “/ă/” (PAUSE for students to write a in the second box) “/t/” (PAUSE for students to write t in the third box)
Click three times to fill in the letters p a t, and have students check their work, correcting their spelling if needed.
p a t
Continue the above process with the following words, one at a time.
2. run (Optional sentence: She likes to run around the playground.) r u n
3. pit (Optional sentence: A peach has a pit in the middle.) p i t
4. log (Optional sentence: The large toad slept quietly on the log.) l o g
5. bed (Optional sentence: Paige sleeps on the top bunk bed.) b e d
OPTIONAL CHALLENGE WORDS:
1. ax (Optional sentence: My mom used an ax to chop wood for the fire.) a x
You may wish to run Spell It! as a game where students can earn points for correctly identifying phonemes and spelling them with graphemes. Students earn one point for each phoneme they correctly identify by placing a dot in one of the boxes. They then earn one point for each phoneme they correctly spell with a grapheme by writing the correct letters in the corresponding box. See p. 342 in Appendix A for complete scoring rules and examples.
© 2017 Really Great Reading Company, LLC 53 UNIT 18 Lesson 5
If students struggle to spell the individual sounds, you may want to ask students how each sound is spelled before moving on to the next, as you do in Build a Word
2. elf (Optional sentence: An elf has pointy ears.)
e l f
3. kid (Optional sentence: That kid brought his pet snake to school.)
k i d
4. act (Optional sentence: My sister will perform a dance act in the school talent show.)
a c t
5. zap (Optional sentence: Close your umbrella so the lightning does not zap it.)
z a p
DIFFERENTIATION OPTION
If you want to have students Build a Word with letter tiles and color tiles prior to putting pencil to paper, it may increase their understanding of the spelling concept.
POSITIVE ERROR CORRECTION FOR SPELL IT!
If a student misspells a word during the Spell It! activity, provide Positive Error Correction.
• Tell the student which sounds were spelled correctly.
• Repeat the word.
• Have the student repeat the word and listen for the misspelled sound. Then, have the student correct the spelling by changing one or more graphemes.
• If necessary, you or other students may identify the misspelled sound and spelling for the student.
• Have the student independently use Touch & Say to verify that the word is spelled correctly.
54 © 2017 Really Great Reading Company, LLC UNIT 18 Lesson 5
Unit 19 | Lesson 1
Letter-Sound & Heart Word Fluency AP & Sight Words
Objectives
Students will:
• build automatic recognition of some letter-sound (graphemephoneme) combinations;
• build automatic recognition of some Heart Words.
Description
Students will play Look, Think, Say!, Pop-Up, and 3-Up to review six letter sounds, to learn three new Heart Words, and to review or learn three additional Heart Words. They will then learn the procedure for an activity called Read a Row, which acts as practice for students and also as an informal assessment.
What Students See
What You Need to Know
For a complete explanation of the Look, Think, Say!, Pop-Up, and 3-Up activities, see p. 326 in Appendix A.
Read a Row Overview
• In this lesson, students are introduced to a new activity called Read a Row Read a Row is used to measure how well students are acquiring letter-sound and Heart Word fluency.
• During this activity, Countdown Online displays rows of letter sounds or rows of Heart Words.
• Students are either Readers or Checkers. If a student is a Reader, he or she will read a row out loud to the group as the rest of the group act as Checkers.
• Six students may be selected as Readers each time this activity is run. (You can run the activity as many times as you would like to provide additional practice for students who need it.)
• The letter sounds or Heart Words that are displayed in Read a Row are dictated by the Letter-Sound and Heart Word Generator. You will choose the letter sounds you wish to review at the beginning of the unit. Occasionally, some letter sounds may be locked because they are new. Three of the Heart Words will be locked for each unit in the Generator, but you will choose three more to practice.
© 2017 Really Great Reading Company, LLC 55 UNIT 19 Lesson 1
• You can print a Read a Row Teacher Recording Form from Countdown Online.
This form can be used to record students’ accuracy and reading rate as they read from the screen. This information can be used to help students build automaticity with these key sub-skills.
• To access this form, go to the Letter-Sound and Heart Word Generator in Countdown Online, choose six letter sounds and three Heart Words to practice, and then select “Print.” A new window will generate with the Read a Row Teacher Recording Form. You can print this document like any other web-based PDF.
• Refer to Appendix A, page 328 for the full Read a Row procedure and Positive Error Correction instructions.
Before Teaching:
Letter-Sound and Heart Word Fluency Set-Up
Open Countdown Online to Unit 19, Letter-Sound and Heart Word Generator.
Choose six letter sounds to review and practice.
Choose three Heart Words to review and practice. (The three new Heart Words for this unit will be locked.)
Optional: Print Read a Row Teacher Recording Form.
3, 2, 1…
Open Countdown Online to Unit 19, Lesson 1 (19.1).
Launch!
❶ Letter-Sound Look, Think, Say!
Say “Today, we are going to practice the sounds for six letters with the game Look, Think, Say! ”
Click twice to display the first letter with one red dot and two empty dots below it.
Say:
• “Remember, this red dot (point to the red dot) tells us to stop what we are doing so we can listen to the letter and its sound.
• This letter is [letter name], and it spells the sound [/letter sound/].”
Click to display the yellow dot.
56 © 2017 Really Great Reading Company, LLC UNIT 19 Lesson 1
Say “Think about the sound of this letter.”
Click to display the green dot.
Say:
• “This green dot (point to the green dot) tells us to say the sound out loud.
• Say the sound with me, [/letter sound/].
• Let’s try another letter.
• Remember to look, think, and then say. Only say the sound out loud when the green dot shows up.”
Click twice to display the next letter, and continue the above procedure for the remaining five letters.
Continue with the same six letter sounds for two additional rounds.
❷ Letter-Sound Pop-Up
Say:
• “Now that we have reviewed the letter names and sounds, we are going to see if we can just look quickly and say the sounds that we remember.
• When you see a letter pop up onto the screen, say the sound out loud as quickly as possible, but remember that it is still more important to say the correct sound than to be fast.
• If you need help remembering, I can help, but try your best.”
Click to display the six letters at random. Each letter will appear several times. Read each sound together with students as it pops up.
❸ Letter-Sound 3-Up
Say:
• “Great job! In our next game, you will see three letters on the screen.
• When you see the red dot, stop and look at the three letters. When you see the yellow dot, think about the letters and try to remember the sounds they say. When you see the green dot, say the three sounds out loud.”
Click to display the sets of three letters. Each word will appear several times.
Look at, think about, and say each set of three letter sounds together with students as the sets are displayed.
❹ Letter-Sound Read a Row
Click to display three long green boxes, each of which is covering up a row of letter tiles.
© 2017 Really Great Reading Company, LLC 57 UNIT 19 Lesson 1
If you would like to utilize the Teacher Recording Form to record your students’ performance on Read a Row, you can print the form from the LetterSound and Heart Word Generator in Countdown Online. A sample can be found in Appendix B.
Say “Now, we are going to use Look, Think, Say! with a whole group of letter tiles. When we see a bunch of letter tiles in a line, we call that a ‘row.’ This game is called Read a Row.”
Select one student to be the first Reader.
Say:
• “When the first green box disappears, you will read the SOUNDS of the letter tiles in the row out loud for us.
• The rest of us will be Checkers, and it will be our job to Look, Think, Say! silently in our heads while we listen to you. We are going to listen very carefully without saying anything out loud.
• If you read all of the sounds correctly, we will let you know by giving you a thumbs-up.
• If you make a mistake, we will show you a sideways thumb and help you figure out which sound to try again.
Directions for Positive Error Correction for Read a Row can be found at the end of this lesson on p. 61 or in Appendix A on p. 329.
• Let’s get started!”
Click to remove one green box, revealing three groups of three letter tiles.
Call on one student to read a row of letter sounds out loud to the class.
Checkers give a thumbs-up or thumbs-to-the-side gesture to indicate if the Reader read all the letter sounds accurately or made a mistake.
Click again and the first row will be covered once again. The second green box will disappear with the next click.
Repeat with each subsequent row, clicking to reveal a row and calling on a student to say the letter sounds.
If you would like to have more than three readers read a row, Countdown Online will allow you to run through the activity twice before moving on.
❺ Heart Word Look, Think, Say!
Say “Now, we are going to learn to read some new Heart Words.”
Click twice to display the Heart Word say with one red dot and two empty dots below the word.
Say:
• “Remember, this red dot (point to the red dot) tells us to stop what we are doing so we can listen to the word.
• This word is say, as in, ‘We say the Pledge of Allegiance every morning.’”
Click to display the yellow dot.
Say “Think about this word.”
Click to display the green dot.
58 © 2017 Really Great Reading Company, LLC UNIT 19 Lesson 1
Say:
• “Say the word with me, say.
• Let’s try another word.
• Remember to look, think, and then say. Only say the word out loud when the green dot shows up.”
Click twice to display the Heart Word now with one red dot and two empty dots below the word.
Say “Look at the word now, as in, ‘We need to leave right now.’”
Click to display the yellow dot.
Say “Think about this word.”
Click to display the green dot.
Say:
• “Say the word!
• Let’s try one more word.”
Click twice to display the Heart Word have with one red dot and two empty dots below the word.
Say “Look at the word have, as in, ‘Do you have an extra pencil?’”
Click to display the yellow dot.
Say “Think about this word.”
Click to display the green dot.
Say:
• “Say the word!
• Let’s look at those words again.”
Continue with the same three Heart Words and the three Heart Words you chose in the Heart Word Generator for two additional rounds.
❻ Heart Word Pop-Up:
Say:
• “Now, we are going to practice reading the Heart Words we’ve learned.
• In our first game, when you see a word pop up onto the screen, say the word out loud.
• If you need help remembering, I can help, but try your best.”
Click to display the Heart Words say, now, have, and the three Heart Words you selected in the Heart Word Generator at random. Each word will appear several times.
Read each word together with students as it pops up.
© 2017 Really Great Reading Company, LLC 59 UNIT 19 Lesson 1
If you would like to have more than three readers read a row, Countdown Online will allow you to run through the activity twice before moving on.
❼ Heart Word 3-Up:
Say:
• “Great job! In our next game, you will see three words on the screen.
• When you see the red dot, stop and look at the three words. When you see the yellow dot, think about the words and try to remember them. When you see the green dot, say the three words out loud.”
Click to display the sets of three Heart Words. Each set will contain the following words in a random order: say, now, have, and the three words you have selected. Each word will appear several times.
Look at, think about, and say each set of three words together with students as the sets are displayed.
❽ Heart Word Read a Row
Click to display three long green boxes, each of which is covering up a row of Heart Words.
Say “Now, we are going to use Look, Think, Say! with a whole group of Heart Words.”
Remind students how to play Read a Row, if necessary:
• “In this game, I will call on one student at a time to read a row of words out loud to the group.
• When it is your turn to read, read loudly enough so everyone can hear you.
• If you are not a Reader, you are called a Checker. When you are a Checker, your job is to Look, Think, Say! quietly in your head while you listen to the Reader. Checkers will listen to make sure the Reader does not make any mistakes.
• If you are the Reader, your job is to read the entire row of words as carefully and quickly as possible.”
Click to remove one green box, revealing three groups of three Heart Words.
Call on one student to read a row of Heart Words out loud to the class.
Checkers give a thumbs-up or thumbs-to-the-side gesture to indicate if the reader read all the Heart Words accurately or made a mistake.
Click again and the first row will be covered once again. The second green box will disappear with the next click.
Repeat with each subsequent row, clicking to reveal a row and calling on a student to read the Heart Words.
60 © 2017 Really Great Reading Company, LLC UNIT 19 Lesson 1
POSITIVE ERROR CORRECTION FOR 3-UP AND READ A ROW
If students misread any of the letter sounds or Heart Words in the 3-Up or Read a Row activity, provide Positive Error Correction:
• Tell the Reader how many letter sounds or Heart Words were read correctly. Note that the maximum number read is three in one 3-Up group and nine in one Read a Row row. (“You read 7 Heart Words correctly,” or “You read the first and last letter sound correctly.”)
• Prompt the student to reread a letter sound or Heart Word. (“In the Heart Word you misread, you read the first and last sound correctly. Can you retry that middle sound? Now, can you re-try the middle Heart Word?” “Can you retry the first letter sound?” “Can you retry the third letter sound in the second group?”)
• The Reader reads the letter sound or Heart Word again.
If the Reader reads the letter sound or Heart Word accurately, the Reader then reads all three (3-Up) or all nine (Read a Row) letter sounds or Heart Words again.
• If the Reader reads all three (or nine) letter sounds or Heart Words accurately this time, you and the other students congratulate the Reader.
If the Reader misses any letter sounds or Heart Words again:
• You or other students assist by chorally reading the letter sound or Heart Word.
• The Reader independently reads the letter sound or Heart Word correctly.
• Always finish by having the Reader read all three (or nine) letter sounds or Heart Words independently and with 100% accuracy.
© 2017 Really Great Reading Company, LLC 61 UNIT 19 Lesson 1
Unit 19 | Lesson 2
Short a vs. Long a PA
Objectives
Students will:
• accurately segment (finger-stretch) phonemes in single-syllable words with short a and long a;
• accurately identify the short a and long a phonemes in spoken words;
• (OPTIONAL) accurately blend phonemes (sounds) together to produce single-syllable words with short a and long a.
Description
The teacher reviews the short a sound and movement, and students finger-stretch words with short a. The teacher then reviews the long a sound and movement, and students fingerstretch words with long a. Students sort words into two groups based on whether the vowel sound is short a or long a. Then, optionally, students finger-stretch four-sound words with short a and long a as a challenge. Students may also blend sounds in words with short a and long a as an optional extension activity.
What Students See
What You Need to Know
• Short a is the first phoneme (sound) in the word apple.
• The symbol for the short a phoneme is /ă/.
• Long a is the first phoneme in the word acorn.
• The symbol for the long a phoneme is /ā/.
• Remember, when you see letters written between slashes like this /ā/, produce the phoneme rather than saying the letter name.
• When you see multiple letters in a sound box like this /ăăăă/, remember to elongate the phoneme articulation by holding the phoneme for 2–3 seconds. This often happens with vowel phonemes, but can sometimes happen with consonant phonemes that are continuants.
Phoneme Blending Activity
• Understanding that words are made up of sequences of individual sounds, or phonemes, is a fundamental skill that students must have soundly in place to efficiently decode written text. Blending is one of many important skills that students must develop in order to become proficient readers.
62 © 2017 Really Great Reading Company, LLC UNIT 19 Lesson 2
• Students have had a lot of practice blending phonemes chorally in the activities in Countdown Books 1 and 2. Beginning in this unit, they will be able to independently practice the skill of blending phonemes by participating in the Mystery Bag: Blending Sounds game, which they also played in Countdown Books 1 and 2.
• The optional Mystery Bag phoneme blending activity in this lesson is designed to enhance students’ abilities to process individual phonemes and unify them into a word. The teacher will articulate phonemes from a real word and pause between each phoneme, like this: /g/ PAUSE /ō/ PAUSE /t/. The teacher will then ask the students to blend the phonemes together to make a real word, in this example, goat.
• One easy way to adjust this activity’s difficulty is by adjusting the length of the pause placed between the phonemes. To make it more difficult, use a longer pause between the phonemes. To make it less difficult, shorten the pause.
• During both the phoneme blending and the phoneme stretching routines, you may want to create sentences for some of the words that students will blend. This extension exercise will promote vocabulary growth. You can select which words (if any) you wish to define and to come up with simple example sentences. For example, before you ask your students to stretch a word like flip, you might say: “Flip: a flip is when something turns over in the air. Bob did a flip off the diving board,” or “If we don’t flip the pancakes, they will burn.”
3, 2, 1…
Open Countdown Online to Unit 19, Lesson 2 (19.2).
OPTIONAL
Before teaching this lesson, you may wish to run the Letter-Sound and Heart Word Pop-Up and 3-Up activities in Countdown Online to practice the letter sounds and Heart Words taught in Lesson 1.
Launch!
❶ Review Short a
Say “Let’s get started by reviewing the short a sound and movement.”
Click to display the Short Vowels Poster. Review the short a sound and movement:
• Say “The short a sound is /ăăăă/, like the first sound in aaaapple.”
Remember to elongate the vowel articulation by holding the vowel phoneme for 2–3 seconds.
© 2017 Really Great Reading Company, LLC 63 UNIT 19 Lesson 2
Remember to be a mirror image for students when making vowel movements that go from left to right. This means you must go from right to left if you are facing the students.
• Make the short a, apple movement while saying the phoneme /ăăăă/. (Pretend to hold an apple and move it across your body from left to right while saying /ăăăă/.)
• Have students make the short a, apple movement as they say /ăăăă/.
❷ Finger-Stretch Words With Short a
I DO: Finger-Stretch sap
Say “Now, let’s stretch words with the short a sound.”
Click to display the sap.
Say:
Instead of pulling your fingers back into a closed fist in the final step of the finger-stretching procedure, you may choose to keep your fingers extended as you pull your hand towards your chest. This keeps the number of phonemes in the word exposed and visible, making it easier for students to count the phonemes in the next step.
• “Listen while I say the sounds in sap, as in, ‘Sap from the maple tree is very sticky.’”
• “sap” (hold closed fist against chest, crossing the midline)
• “/s/” (extend thumb), “/ăăăă/” (extend pointer finger), “/p/” (extend middle finger)
• “sap” (pull fingers back to a closed fist while saying the word)
Say “Sap has three sounds. The vowel sound is /ăăăă/. I hear the same sound as the beginning of /ă/, apple, so the vowel sound must be short a. Short a, /ă/, is the first sound in aaaapple (while making the short a, apple motion).”
Click to display the Short Vowels Poster.
Point to the Short Vowels Poster and remind students that they can look at the picture for apple to remind themselves that short a sounds like the first sound in /ă/, apple.
WE DO: Finger-Stretch cat
Say “Now let’s stretch out some words together.”
Click to display the cat.
Say:
• “Ready? Our word is cat, as in, ‘My cat is orange with black stripes.’
• Let’s stretch it together.”
• “cat ” (hold closed fist against chest, crossing the midline)
• “/k/” (extend thumb), “/ăăăă/” (extend pointer finger), “/t/” (extend middle finger)
• “cat ” (pull fingers back to a closed fist while saying the word)
Ask:
• “How many sounds did we hear?” A: three
64 © 2017 Really Great Reading Company, LLC UNIT 19 Lesson 2
• “What vowel sound did we hear in the word?” A: /ăăăă/
Click to display the Short Vowels Poster.
Ask:
• “What is the guideword for that sound?” A: apple
• “What is the motion for apple?” A: hold an apple in hand, palm up and move from left to right (students make motion)
• “Is /ăăăă/ short or long?” A: short
• “How do we know?” A: /ă/ is the first sound in apple
YOU DO: Finger-Stretch words with short a
Say “Now, you will stretch out some words on your own.”
Click to display the image.
Click to display the Short Vowels Poster.
Ask individual students to stretch the phonemes in each word below. After students stretch the sounds, ask:
• “How many sounds did you hear?” A: three
• “What vowel sound did you hear in the word?” A: /ăăăă/
• “What is the guideword for that sound?” A: apple
• “What is the motion for apple?” A: pretend to hold an apple in hand, palm up, and move from left to right (students make motion)
• “Is /ăăăă/ short or long?” A: short cap, /k/ /ă/ /p/, cap (You can wear a cap to keep the sun out of your eyes.) bag, /b/ /ă/ /g/, bag (The bag ripped, and all my groceries fell out!) wax, /w/ /ă/ /ks/, wax (Wax from the candle dripped on the table.) fat, /f/ /ă/ /t/, fat (The fat cat just lay on a pillow all day.) mad, /m/ /ă/ /d/, mad (When I’m mad, I take a deep breath to help me calm down.)
sat, /s/ /ă/ /t/, sat (Kira sat by the pond and read her book.)
❸ Review Long a
Say “Next, we are going to review the long a sound. Remember, a long vowel sound is just like saying the name of the letter, so the long a sound is /āāāā/.”
All students repeat the phoneme, /āāāā/. Say “To help us remember this sound, we make the long a movement while saying the sound, /āāāā/.” (Write the lowercase a in the air with your index finger.)
Click to display the Short and Long Vowels Posters.
If your students are still struggling to stretch the sounds in words with short a, you may wish to use some of the You Dos as We Dos to provide more guided practice.
If your students are proficient at stretching words with short a, you may wish to do only a couple of You Dos and then move to the long a portion of the lesson. Remember to elongate the vowel articulation by holding the vowel phoneme for 2–3 seconds.
© 2017 Really Great Reading Company, LLC 65 UNIT 19 Lesson 2
Remind students they can use the posters and movements to check if a vowel phoneme is short or long:
• Point to the short a section of the Short Vowels Poster, and show students they can check the vowel phoneme by looking at the apple picture and saying: “I know /ă/ is short because /ă/ is the first sound in apple.”
• Point to the long a section of the Long Vowels Poster, and show students they can check the vowel phoneme by looking at the letter a and saying: “I know /ā/ is long because /ā/ is the name of the letter a.”
Click to display the gate.
Say:
• “I’ll use the poster to help me check the vowel sound in gate.
• First, I’ll stretch the sounds: gate, /g/ /āāāā/ /t/, gate.” (Finger-stretch the word.)
• “I hear the name of the letter a in the middle, and the Long Vowels Poster (point to the a on the Long Vowels Poster) tells me that long a says its name, so the vowel sound in gate must be a long a.”
❹ Finger-Stretch Words with Long a
I DO: Finger-Stretch tape
Click to display the tape.
Say:
• “Now, we are going to stretch out all of the sounds in some words that have long a.
• Listen while I say the sounds in tape, as in, ‘My mom uses too much tape when she wraps presents.’”
• “ tape” (hold closed fist against chest, crossing the midline)
• “/t/” (extend thumb), “/āāāā/” (extend pointer finger), “/p/” (extend middle finger)
• “ tape” (pull fingers back to a closed fist while saying the word)
Say “ Tape has three sounds. I hear the name of the letter a in tape, so the vowel sound must be a long a (while tracing the lowercase letter a in the air).
Long a says its name, /ā/.”
Click to display the Long Vowels Poster.
Point to the Long Vowels Poster and remind students that they can look at the letter a to remind themselves that the long a sound is the same as the name of the letter a
66 © 2017 Really Great Reading Company, LLC UNIT 19 Lesson 2
WE DO: Finger-Stretch wave
Say “Now let’s stretch out some words together.”
Click to display the wave.
Say:
• “Ready? Our word is wave, as in, ‘My brother surfed on a huge wave.’
• Let’s stretch it together.”
• “wave” (hold closed fist against chest, crossing the midline)
• “/w/” (extend thumb), “/āāāā/” (extend pointer finger), “/v/” (extend middle finger)
• “wave” (pull fingers back to a closed fist while saying the word)
Ask:
• “How many sounds did we hear?” A: three
• “What vowel sound did we hear in the word?” A: /āāāā/ Click to display the Long Vowels Poster.
Ask:
• “What is the motion for /āāāā/?” A: writing lowercase a in the air (students make motion)
• “Is /āāāā/ short or long?” A: long
• “How do we know?” A: /ā/ is the name of the letter a
YOU DO: Finger-Stretch words with long a
Say “Now, you will stretch out some words on your own.”
Click to display the image.
Click to display the Long Vowels Poster.
Ask individual students to stretch the phonemes in each word below. After students stretch the sounds, ask:
• “How many sounds did you hear?” A: two/three
• “What vowel sound did you hear in the word?” A: /āāāā/
• “What is the motion for /āāāā/?” A: writing lowercase a in the air (students make motion)
• “Is that short or long?” A: long
• “How do you know?” A: /ā/ is the name of the letter a Continue with the following words:
If you see a student extend the wrong number of fingers, you may want to ask your students, “How many sounds do you hear?” Offer assistance through Positive Error
Correction to make sure they are hearing the right number of phonemes. See page 20 for the Positive Error Correction procedure. If your students need more guided practice stretching the sounds in words with long a, you may wish to use some of the You Dos as We Dos.
© 2017 Really Great Reading Company, LLC 67 UNIT 19 Lesson 2
You can use the optional images as additional practice for students who may need it at a later time.
game, /g/ /ā/ /m/, game (My favorite game is hide and seek.)
ape, /ā/ /p/, ape (At the zoo, we saw an ape swinging from a vine.)
shape, /sh/ /ā/ /p/, shape (The shape of a stop sign is an octagon.)
vase, /v/ /ā/ /s/, vase (My mom got flowers in a vase for her birthday.)
whale, /w/ /ā/ /l/, whale (We spotted a whale in the ocean.)
ace, /ā/ /s/, ace (For the card trick, he picked an ace out of the pile of cards.)
❺ Sort Words with Short a and Long a
Say “Now, we are going to sort words into two groups. Some words will have a short a vowel sound, and other words will have a long a vowel sound.”
Click to display the images for the apple and the acorn as the column headings. Point to the apple and the acorn and say “/ă/, apple; /ā/, acorn.”
Say “We will hear some words. We will stretch out the sounds in each word and then decide if the vowel sound is short a, like in /ă/, apple, or long a, like in /ā/, acorn.”
Click to display and point to the image for Jane.
Say:
• “Listen while I say the sounds in Jane, as in, ‘Jane is a nurse at a hospital.’”
• “Jane” (hold closed fist against chest, crossing the midline)
• “/j/” (extend thumb), “/ā/” (extend pointer finger), “/n/” (extend middle finger)
• “Jane” (pull fingers back to a closed fist while saying the word)
Say “Jane has three sounds. The vowel sound is /āāāā/ (while writing a lowercase a in the air).”
Ask “Is /āāāā/ the first sound in /ă/, apple or /ā/, acorn?” A: /ā/, acorn
Say “Right! In /j/ /ā/ /n/, Jane, the vowel sound is /ā/ like in /ā/, acorn. I’ll move Jane to the /ā/, acorn side.”
Click to place Jane in the acorn column.
Say “Let’s try another one.”
Continue with the remaining examples, stretching the sounds in each word and comparing the vowel sound to /ă/, apple or /ā/, acorn:
2. /r/ /ă/ /p/, rap (A: apple)
3. /ch/ /ā/ /s/, chase (A: acorn)
4. /r/ /ā/ /n/, rain (A: acorn)
5. /z/ /ă/ /p/, zap (A: apple)
68 © 2017 Really Great Reading Company, LLC UNIT 19 Lesson 2
6. /h/ /ă/ /d/, had (A: apple)
7. /n/ /ā/ /t/, Nate (A: acorn)
8. /y/ /ă/ /m/, yam (A: apple)
9. /s/ /ā/ /l/, sail (A: acorn)
Optional: Additional Short a vs. Long a Sort
13. /f/ /ă/ /t/, fat (A: apple)
14. /r/ /ā/ /k/, rake (A: acorn)
15. /b/ /ă/ /t/, bat (A: apple)
16. /n/ /ă/ /p/, nap (A: apple)
17. /ā/ /t/, eight (A: acorn)
18. /p/ /ā/ /l/, pail (A: acorn)
10. /s/ /ă/ /t/, sat (A: apple)
11. /l/ /ā/ /k/, lake (A: acorn)
12. /t/ /ă/ /p/, tap (A: apple)
19. /v/ /ă/ /t/, vat (A: apple)
20. /kw/ /ā/ /l/, quail (A: acorn)
21. /z/ /ă/ /g/, zag (A: apple)
22. /h/ /ă/ /t/, hat (A: apple)
23. /h/ /ā/, hay (A: acorn)
24. /g/ /ā/ /t/, gate (A: acorn)
❻ Optional Challenge: Stretch Words with Four Phonemes
Use the following words with four phonemes to provide an additional challenge for students.
Click to display the image. snake - /s/ /n/ /ā/ /k/, snake (A snake slithered into the garden.) mask - /m/ /ă/ /s/ /k/, mask (I wore a mask for the costume party.) paint - /p/ /ā/ /n/ /t/, paint (We might paint our house blue.) brain - /b/ /r/ /ā/ /n/, brain (Always wear a helmet to protect your brain.) flag - /f/ /l/ /ă/ /g/, flag (Our classroom made its own flag for the parade.)
❼ Optional Activity: Mystery Bag: Blending Sounds
Click to display the Mystery Bag.
Say: • “Let’s see what words are in our Mystery Bag! Listen to my sounds. • /h/ /ă/ /d/.”
Ask “What word does it make when we put these sounds together, /h/ /ă/ /d/?” A: had Say “Let’s check in the bag!”
Click to display the image for had to confirm students’ answer. Say “Let’s try another one.”
Click to display the Mystery bag.
© 2017 Really Great Reading Company, LLC 69 UNIT 19 Lesson 2
Continue with the remaining examples:
1. /t/ /ā/ /p/, tape
2. /t/ /ă/ /p/, tap
3. /m/ /ă/ /d/, mad
4. /w/ /ā/ /l/, whale
5. /ch/ /ā/ /n/, chain
6. /v/ /ă/ /t/, vat
7. /ă/ /ks/, ax
8. /d/ /ā/, day
9. /p/ /ā/ /l/, pail
10. /m/ /ă/ /t/, mat
70 © 2017 Really Great Reading Company, LLC UNIT 19 Lesson 2
Unit 19 | Lesson 3
Phonics Concept: Nonsense Words AP
Objectives
Students will:
• read unfamiliar (nonsense) words with short a using their knowledge of letter sounds and short vowels;
• understand that longer, multisyllabic words are often made up of a combination of onesyllable nonsense and real words.
Description
The teacher demonstrates how reading small nonsense words can help you read longer real words. Then, students build nonsense words with color and letter tiles with the understanding that even if they haven’t heard the words before, they can read them because they follow the Vowel-Consonant pattern.
Student Materials
Holding and working boards from Countdown Student Kit What Students See
What You Need to Know
Vowel-Consonant Pattern (Closed Syllables)
• Students learned about the Vowel-Consonant pattern in the previous unit. See What You Need to Know in Unit 18, Lesson 3 on p. 41 for more information about the Vowel-Consonant pattern (Closed Syllables).
• In Countdown, students will only work with Closed Syllables (Vowel-Consonant pattern) and short vowels in the phonics concept portion of the lessons.
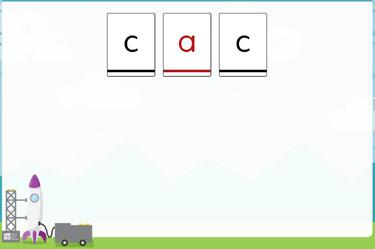
Nonsense (Silly) Words
• Nonsense words are words that have no meaning. In Countdown, nonsense words are called “silly words.”
• Understanding phonics patterns helps students to read unfamiliar or nonsense words they have never read before.
o For example, we know that when students encounter an unfamiliar word, such as faz, they should be able to decode it correctly. Faz has the Vowel-Consonant pattern and the vowel is most likely to be pronounced with its short a sound because words with this pattern most often have short vowels.
© 2017 Really Great Reading Company, LLC 71 UNIT 19 Lesson 3
o When students do not understand phonics patterns, such as that words with the Vowel-Consonant pattern most often have short vowels, they may incorrectly pronounce the unfamiliar word faz as /fāz/ (with a long vowel).
o When students do not know the short vowel sounds, they may incorrectly pronounce the unfamiliar word faz as fuzz or fizz, trying to make the word into a familiar word.
• Reading nonsense words benefits students by:
o Helping them internalize phonics patterns.
o Giving them a strategy for sounding out unfamiliar real words that are not in their vocabularies.
o Helping them to read multisyllabic words accurately in the future. Many multisyllabic words are made up of nonsense word syllables:
• es – tab – lish (the first and last syllables are nonsense words)
• ad – mon – ish (the last two syllables are nonsense words)
o Forcing them to use their decoding skills because they cannot guess at nonsense words like they can with real words.
3, 2, 1…
Open Countdown Online to Unit 19, Lesson 3 (19.3).
Launch!
❶ Explain Concept of Silly Nonsense Words
Say:
• “Today, we are going to read some silly words. These are words we can read and spell, but they don’t mean anything at all.
• Let’s start with this one.”
Click to display the nonsense word cac spelled with tiles.
Say “This doesn’t look like a word I know, but I see our Vowel-Consonant pattern. It has only one vowel letter.”
Click to display a green arrow pointing to the a letter tile.
Say “It also has a consonant letter after the vowel.”
Click to display a red box around the final c letter tile.
Say:
• “When a word follows our pattern, the vowel usually spells its short sound, so this a probably spells /ă/, like the first sound in apple.
72 © 2017 Really Great Reading Company, LLC UNIT 19 Lesson 3
• This word is /k/ /ă/ /k/ (Touch & Say each tile), cac.
• We can read and spell it, but it doesn’t mean anything at all.
• Let’s look at a few more silly words.
• You can help me read them.”
Click to display the next three nonsense words (com, tus, ic), one at a time, and ask students the following questions:
Ask:
• “Does this follow our Vowel-Consonant pattern?” A: yes
• “Should the vowel sound be short or long?” A: short
• “How do we read this word?” A: Touch & Say with students to read each nonsense word Say:
• “There are two important reasons to learn to read silly, made up words.
• First, we sometimes need to read words that we don’t know. When we see a word we don’t know, it looks like a silly made up word to us. We can use what we know to read all words correctly even if we don’t know what they mean.”
Click to move the nonsense words so they spell the real words cactus and comic Say “The second reason it is important to know how to read these silly words is because many big words are made up of small words that are silly made up words. If we can read the small, silly made up words, then we can read the big real words like cac-tus (point to each syllable and read it aloud), cactus and com-ic (point to each syllable and read it aloud), comic.
❷ Build Nonsense Words
Say “Now, we are going to build silly words They will all follow our VowelConsonant pattern, so the vowels will say their short sounds.”
I DO: Build Nonsense Word vap
Students place Countdown Student Kits on desks.
Say:
• “The first word I am going to build is the silly word vap, /v/ /ăăăă/ /p/, vap.” (Finger-stretch the word.)
• “I heard three sounds, /v/ /ă/ /p/, so I’ll put three color tiles on the board.”
Click to display one color tile at a time while again saying “/v/ /ă/ /p/.”
You may want to explain the meaning of the words cactus and comic if your students are not familiar with them. A cactus is a plant found in the desert. A comic is a very funny person who tells jokes.
© 2017 Really Great Reading Company, LLC 73 UNIT 19 Lesson 3
Click to display a letter tile below each color tile to spell each sound while saying the sound.
Use Touch & Say to read vap - /v/ /ă/ /p/, vap.
Say “Let’s try one together.”
WE DO: Build Nonsense Word faz
Say “Now, let’s build the silly word faz together. Faz, /f/ /ă/ /z/, faz.” (Finger-stretch with students.)
Click to display one color tile for each sound in faz while saying the sounds/f/ /ă/ /z/.
Ask individual students the following questions to lead students in spelling each sound by placing letter tiles below the color tiles, one at a time. Click to display each letter tile as students respond with the correct spellings:
• “What is the first sound you hear?” A: /f/
• “What letter spells /f/?” A: f (Click to display f; students place the f tile on their boards.)
• “What is the next sound you hear?” A: /ă/
• “What letter spells /ă/?” A: a (Click to display a; students place the a tile on their boards.)
• “What is the last sound you hear?” A: /z/
• “What letter spells /z/?” A: z (Click to display z; students place the z tile on their boards.)
Use Touch & Say to read faz with students - /f/ /ă/ /z/, faz.
Say “I see one vowel (point to the a letter tile), and then I see a consonant after it (point to the z letter tile). That is our pattern, and that’s why the a spells its short sound, /ă/.”
Students clear boards.
YOU DO: Build Nonsense Words nam, jav, cad
Say “Now, you are going to use your color and letter tiles to build three silly words. Each word will follow the Vowel-Consonant pattern
Dictate the words below, one at a time, following the Build a Word steps for each word and helping students as needed. nam jav
74 © 2017 Really Great Reading Company, LLC UNIT 19 Lesson 3
cad
Students build each word independently, one word at a time. Students should:
Say the word.
Stretch the sounds in the word.
Place one color tile on boards for each sound while saying the sound.
Spell the word by placing one letter tile below each color tile. a n m a j v a c d
Use Touch & Say to read the word.
Hold up their boards so you can check their spelling and provide Positive Error Correction as needed.
Click to display the correct placement of color and letter tiles for each word.
Students clear boards and wait for the next word to be dictated.
© 2017 Really Great Reading Company, LLC 75 UNIT 19 Lesson 3
When beginning the Word Sort, you should model as many words as you deem necessary for your students to grasp the concept and proceed independently. 5
Unit 19 | Lesson 4
Student Practice AP
Objectives
Students will read words and determine if they are real or nonsense (silly) (Word Sort).
What Students See
Description
Teacher leads students through a model word(s) for the Word Sort. Students then read the remaining words on their own, deciding if the words are real or nonsense. Teacher reviews the answers with students, allowing time for students to correct their work if needed.
Student Materials
• Countdown Student Workbook
• Pencil
What You Need to Know
No new concepts.
3, 2, 1…
Open Countdown Online to Unit 19, Lesson 4 (19.4).
OPTIONAL
Before teaching this lesson, you may wish to run the Letter-Sound and Heart Word Pop-Up and 3-Up activities in Countdown Online to practice the letter sounds and Heart Words taught in Lesson 1.
Launch!
❶ Word Sort: Real vs. Silly Nonsense Words
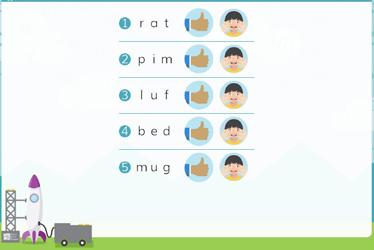
Say:
• “In this lesson, we will sort words by whether they are real words or silly made up words.
• We will be able to read all of the words on this page even if they aren’t real words.”
Click to display the Word Sort.
Students open workbooks to page 5.
76 © 2017 Really Great Reading Company, LLC UNIT 19 Lesson 4
a
p
l u
e
m
g
k e t f t z
b l e g Real vs. Silly Word Sort
unit 19 1. 2. 3. 4. 5. 6. 7. 8. 9. 10. r
t
i m
f b
d
u
d o p
o
Read and finger-stretch the first word aloud: rat, /r/ /ă/ /t/, rat.
Ask “Is rat a real word or a silly made up word?” A: real
Say:
• “Right, so we will circle the thumbs up to show that rat is a real word.
• If a word is a silly made up word, we will circle the silly face to show that it isn’t a real word.”
Click to circle the thumbs up.
Prompt students to circle the thumbs up
Say “Now, you are going to circle the thumbs up or the silly face for the rest of the words to show if they are real words or silly made up words.”
Use Countdown Online to check answers with students.
Call on individual students to read a word and to identify whether it is real or silly.
Students check answers and correct any errors.
If your students are not yet able to read these words on their own, feel free to read each word aloud for them and have them independently decide if it is real or silly. The final five words are displayed on the next screen in Countdown Online
© 2017 Really Great Reading Company, LLC 77 UNIT 19 Lesson 4
Unit 19 | Lesson 5
Wrap Up & Show What You Know AP
Objectives
Students will:
• accurately articulate the phonemes reviewed in this unit;
• accurately read phrases and sentences that contain the concepts, words, and phonemes taught in this and previous units;
• accurately spell words with a controlled set of concepts and phonemes.
What You Need to Know
Description
In Phrases and Sentences to Read, students read short phrases and sentences out loud to the class. Their goal is to read each phrase and sentence accurately the first time. In Spell It!, students see an image, which the teacher names. Teacher and students fingerstretch the sounds in the word together, counting the sounds. They then fill in a circle for each sound they heard and write the corresponding letter in each box with a filled in circle, spelling the target word.
Student Materials
• Countdown Student Workbook
• Pencil
What Students See
• Lesson 5 is a wrap-up lesson. The wrap-up reviews and cumulatively practices the concepts taught in this unit (and in previously taught units).
• Lesson 5 contains wrap-up activities and the explanation on how to run these activities:
o Review of Phonemes (began in Unit 18 and appears in all subsequent units)
o Review of Heart Words (began in Unit 18 and appears in all subsequent units)
o Phrases & Sentences to Read (begins in this unit and appears in all subsequent units)
o Spell It! (began in Unit 18 and appears in all subsequent units)
Phrases
and Sentences to Read Overview
• Phrases and Sentences to Read is introduced in this unit and appears in the next few units. Beginning in Unit 22, students will just read sentences.
• In this lesson, students are asked to read simple phrases and sentences.
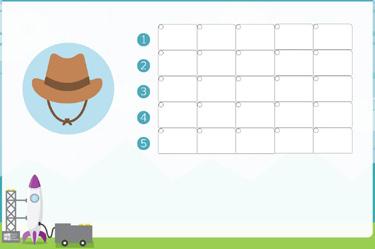
78 © 2017 Really Great Reading Company, LLC UNIT 19 Lesson 5
Students have been reading phrases chorally with the teacher since Unit 10 in Countdown Book 2. Beginning in this lesson, they now have a chance to read phrases and sentences independently out loud.
• In the Phrases and Sentences to Read activity, individual students are called on to read the phrases and sentences out loud as the rest of the class acts as Checkers.
• Countdown phrases and sentences provide an opportunity for students to read connected text with 100% accuracy. The goal is to read the phrase or sentence with 100% accuracy on the first attempt.
• Countdown phrases and sentences use decodable words and common highfrequency words, but they are written so that students have to pay attention to each word. They are not predictable, which means that students cannot guess to read accurately.
• The phrases and sentences in Countdown may have words that are unfamiliar to some students. However, all students will be able to decode these words accurately because all necessary phonics skills have been learned prior to reading the words.
• The content of the phrases and sentences is strictly controlled so that students are only exposed to:
o Decodable words that contain the consonant letters, vowel sounds, and phonics concepts previously taught and practiced. Since Countdown students have learned all of the consonant sounds and all of the short vowels in Books 1 and 2, all of these spellings are used in the phrases and sentences;
o Only the high-frequency words from the Dolch 220 list that have been taught in Countdown units up to and including this one.
• Each Heart Word in the Student Workbook is marked with a gray heart above it. During phrase and sentence reading, if a student stumbles over a Heart Word, you can remind them that they have learned this word and that they should try to remember it. If they cannot remember it, you can help, but the goal is for students to read the phrases and sentences independently with 100% accuracy.
• Some of the words in the phrases and sentences may be unfamiliar to your students. Challenging the students is encouraged, and as students start to gain confidence and skills, they often enjoy reading the difficult words even if they don’t understand their meanings.
© 2017 Really Great Reading Company, LLC 79 UNIT 19 Lesson 5
If time permits, provide each student with the opportunity to read at least one phrase or sentence. In small groups, you might consider letting each student read two phrases or sentences. Students who struggle should be given additional phrases or sentences for more practice.
3, 2, 1…
Open Countdown Online to Unit 19, Lesson 5 (19.5).
OPTIONAL
Before teaching this lesson, you may wish to run the Letter-Sound and Heart Word Pop-Up, 3-Up, and Read a Row activities in Countdown Online to practice and assess the letter sounds and Heart Words taught in Lesson 1.
Launch! ❶ Phrases and Sentences to Read
Say:
• “Today, we are going to read some phrases and some sentences in our workbooks.
• I will call on you to read a phrase or a sentence when it is your turn to be the Reader, and the rest of us will be Checkers, checking to see if the Reader is reading all of the words correctly. The Checkers will touch each word as the Reader reads it out loud.”
Students open workbooks to page 6.
Individual students read phrases and sentences. Since there are only 8 phrases and 8 sentences, it is okay to have a student reread a phrase or sentence that has been previously read.
Direct Checkers to give a thumbs-up if the Reader reads all of the words correctly or a thumbs-to-the-side if the Reader misreads a word(s). If the Reader misreads any words, teacher follows Positive Error Correction instructions below.
POSITIVE ERROR CORRECTION FOR PHRASES AND SENTENCES TO READ
1. If a Reader misreads any of the words in a phrase or sentence, provide Positive Error Correction:
• Tell students how many words were read correctly.
• Prompt a Checker to identify which word was misread by giving the posi tion of the word in the phrase or sentence without saying the word itself.
• Prompt Reader to use Touch & Say to read the word again. If the
80 © 2017 Really Great Reading Company, LLC UNIT 19 Lesson 5
6 unit 19 1. Can you hop? (3) 2. Say it to him. (4) 3. Zip up the top. (4) 4. Ken is wet now. (4) 5. You have fig jam. (4) 6. like to hug Mom. (5) 7. Sam had a big mug. (5) 8. Did you run with Tom? (5) 1. on a cot (3) 2. dug a pit (3) 3. go to bed (3) 4. be like him (3) 5. pat my pig (3) 6. will not win (3) 7. pet the hen (3) 8. hug the pup (3) Phrases Sentences Phrases and Sentences to Read
Reader reads the word accurately, the Reader then reads the entire phrase or sentence again. If the Reader reads the entire phrase or sentence accurately this time, you and all Checkers congratulate the Reader.
2. If the Reader misses the word again:
• Prompt Checkers to assist by using Touch & Say to chorally read the word.
• Prompt Reader to independently use Touch & Say to read the word correctly.
• Prompt student to read the entire phrase or sentence again. Always finish with the Reader independently reading the entire phrase or sentence accurately.
❷ Spell It!
Say:
• “Now, we are going to spell some words with the sounds we have been practicing.
• We are going to start by stretching out the sounds in a word so we can hear them clearly.”
Students open workbooks to Spell It! on page 7.
Say “We are going to spell words that you will hear me say aloud. Let’s start with number 1 at the top of your page.”
Click to display the hat.
Say “The first word is hat, as in ‘The wind blew my hat off of my head.’ Let’s stretch it together. Hat, /h/ /ă/ /t/, hat.” (Finger-stretch hat along with students.)
Ask “How many sounds did we hear?” A: three
Say “Since hat has three sounds, /h/ /ă/ /t/, we will fill in three dots, one for each sound, like this.”
Click three times to fill in the first three dots, and have students fill in the first three dots on their workbook pages.
1. Say:
• “Since hat has three sounds, it will also have three letters, and we will write one letter in each box that has a dot filled in.
Challenge
unit Spell It! 19 1. 2. 3. 4. 5. 6. 7. 8. 9. 10.
7
If you see a student incorrectly identify the number of phonemes in a word or incorrectly spell a phoneme in a box, offer assistance through Positive Error Correction to make sure they are hearing the right number of phonemes and the right phonemes. See page 54 for the Positive Error Correction procedure.
© 2017 Really Great Reading Company, LLC 81 UNIT 19 Lesson 5
You may wish to run Spell It! as a game where students can earn points for correctly identifying phonemes and spelling them with graphemes. Students earn one point for each phoneme they correctly identify by placing a dot in one of the boxes. They then earn one point for each phoneme they correctly spell with a grapheme by writing the correct letters in the corresponding box. See Appendix A on p. 342 for complete scoring rules and examples.
• Let’s stretch hat again slowly so we can hear each sound and write it down.”
• “/h/” (PAUSE for students to write h in the first box) “/ă/” (PAUSE for students to write a in the second box) “/t/” (PAUSE for students to write t in the third box)
Click three times to fill in the letters h a t, and have students check their work, correcting their spelling if needed.
h a t
Continue the above process with the following words, one at a time.
2. fin (Optional sentence: Sharks have more than one fin.) f i n
3. sip (Optional sentence: She will sip the tea because it is hot.) s i p
4. fun (Optional sentence: We had fun on our field trip.) f u n
5. net (Optional sentence: The basketball net at the park was missing.) n e t
OPTIONAL CHALLENGE WORDS:
1. box (Optional sentence: Inside of the box was a surprise!) b o x
If students struggle to spell the individual sounds, you may want to ask students how each sound is spelled before moving on to the next, as you do in Build a Word
2. quit (Optional sentence: I will not quit even if it gets hard.) qu i t
3. beg (Optional sentence: Can your dog beg for a treat?) b e g
4. kit (Optional sentence: The paint kit had brushes and paints in it.) k i t
5. rod (Optional sentence: The red fishing rod is my little brother’s.) r o d
82 © 2017 Really Great Reading Company, LLC UNIT 19 Lesson 5
DIFFERENTIATION OPTION
If you want to have students Build a Word with letter tiles and color tiles prior to putting pencil to paper, it may increase their understanding of the spelling concept.
© 2017 Really Great Reading Company, LLC 83 UNIT 19 Lesson 5
84 © 2017 Really Great Reading Company, LLC
Unit 20 | Lesson 1
Letter-Sound & Heart Word Fluency AP & Sight Words
Objectives
Students will:
• build automatic recognition of some letter-sound (grapheme-phoneme) combinations;
• build automatic recognition of some Heart Words.
What You Need to Know
Description
Students will play Look, Think, Say!, Pop-Up, 3-Up, and Read a Row to review six letter sounds, to learn three new Heart Words, and to review or learn three additional Heart Words.
What Students See
For a complete explanation of the Look, Think, Say!, Pop-Up, 3-Up, and Read a Row activities, see p. 326 in Appendix A.
Before Teaching:
Letter-Sound and Heart Word Fluency Set-Up
Open Countdown Online to Unit 20, Letter-Sound and Heart Word Generator.
Choose six letter sounds to review and practice.
Choose three Heart Words to review and practice, or you may wish to select three additional new Heart Words to teach. (The first three new Heart Words to teach in this unit will be locked.)
Optional: Print Read a Row Teacher Recording Form.
3, 2, 1…
Open Countdown Online to Unit 20, Lesson 1 (20.1).
Launch!
❶ Letter-Sound Look, Think, Say!
Say “Today, we are going to practice the sounds for six letters with the game Look, Think, Say! ”
Click twice to display the first letter with one red dot and two empty dots below it.
© 2017 Really Great Reading Company, LLC 85 UNIT 20 Lesson 1
Say:
• “Remember, this red dot (point to the red dot) tells us to stop what we are doing so we can listen to the letter and its sound.
• This letter is [letter name], and it spells the sound [/letter sound/].”
Click to display the yellow dot.
Say “Think about the sound of this letter.”
Click to display the green dot.
Say:
• “This green dot (point to the green dot) tells us to say the sound out loud.
• Say the sound with me, [/letter sound/].
• Let’s try another letter.
• Remember to look, think, and then say. Only say the sound out loud when the green dot shows up.”
Click twice to display the next letter, and continue the above procedure for the remaining five letters.
Continue with the same six letter sounds for two additional rounds.
❷ Letter-Sound Pop-Up
Say:
• “Now that we have reviewed the letter names and sounds, we are going to see if we can just look quickly and say the sounds that we remember.
• When you see a letter pop up onto the screen, say the sound out loud as quickly as possible, but remember that it is still more important to say the correct sound than to be fast.
• If you need help remembering, I can help, but try your best.”
Click to display the six letters at random. Each letter will appear several times. Read each sound together with students as it pops up.
❸ Letter-Sound 3-Up
Say:
• “Great job! In our next game, you will see three letters on the screen.
• When you see the red dot, stop and look at the three letters. When you see the yellow dot, think about the letters and try to remember the sounds they say. When you see the green dot, say the three sounds out loud.”
86 © 2017 Really Great Reading Company, LLC UNIT 20 Lesson 1
Click to display the sets of three letters. Each letter will appear several times.
Look at, think about, and say each set of three letter sounds together with students as the sets are displayed.
❹ Letter-Sound Read a Row
Click to display three long green boxes, each of which is covering up a row of letter tiles.
Say “Now, we are going to use Look, Think, Say! with a whole group of letter tiles. When we see a bunch of letter tiles in a line, we call that a ‘row.’ This game is called Read a Row.”
Select one student to be the first Reader. Say:
• “When the first green box disappears, you will read the SOUNDS of the letter tiles in the row out loud for us.
• The rest of us will be Checkers, and it will be our job to Look, Think, Say! silently in our heads while we listen to you. We are going to listen very carefully without saying anything out loud.
• If you read all of the sounds correctly, we will let you know by giving you a thumbs-up.
• If you make a mistake, we will show you a sideways thumb and help you figure out which sound to try again.
• Let’s get started!”
Click to remove one green box, revealing three groups of three letter tiles.
Call on one student to read a row of letter sounds out loud to the class. Checkers give a thumbs-up or thumbs-to-the-side gesture to indicate if the Reader read all the letter sounds accurately or made a mistake.
Click again and the first row will be covered once again. The second green box will disappear with the next click.
Repeat with each subsequent row, clicking to reveal a row and calling on a student to say the letter sounds.
❺ Heart Word Look, Think, Say!
Say “Now, we are going to learn to read some new Heart Words.”
Click twice to display the Heart Word said with one red dot and two empty dots below the word.
Directions for Positive Error Correction for Read a Row can be found on p. 61 or in Appendix A on p. 329.
If you would like to have more than three readers read a row, Countdown Online will allow you to run through the activity twice before moving on.
© 2017 Really Great Reading Company, LLC 87 UNIT 20 Lesson 1
Say:
• “Remember, this red dot (point to the red dot) tells us to stop what we are doing so we can listen to the word.
• This word is said, as in, ‘The teacher said we could line up for lunch.’”
Click to display the yellow dot. Say “Think about this word.”
Click to display the green dot.
Say:
• “Say the word with me, said.
• Let’s try another word.
• Remember to look, think, and then say. Only say the word out loud when the green dot shows up.”
Click twice to display the Heart Word come with one red dot and two empty dots below the word.
Say “Look at the word come, as in, ‘My friend will come to my house after school.’”
Click to display the yellow dot. Say “Think about this word.”
Click to display the green dot.
Say:
• “Say the word!
• Let’s try one more word.”
Click twice to display the Heart Word down with one red dot and two empty dots below the word.
Say “Look at the word down, as in, ‘I rolled the ball down the hill.’”
Click to display the yellow dot.
Say “Think about this word.”
Click to display the green dot.
Say:
• “Say the word!
• Let’s look at those words again.”
Continue with the same three Heart Words and the three Heart Words you chose in the Heart Word Generator for two additional rounds.
88 © 2017 Really Great Reading Company, LLC UNIT 20 Lesson 1
❻ Heart Word Pop-Up
Say:
• “Now, we are going to practice reading the Heart Words we’ve learned.
• In our first game, when you see a word pop up onto the screen, say the word out loud.
• If you need help remembering, I can help, but try your best.”
Click to display the Heart Words said, come, down, and the three Heart Words you have selected in the Heart Word Generator at random. Each word will appear several times.
Read each word together with students as it pops up.
❼ Heart Word 3-Up
Say:
• “Great job! In our next game, you will see three words on the screen.
• When you see the red dot, stop and look at the three words. When you see the yellow dot, think about the words and try to remember them. When you see the green dot, say the three words out loud.”
Click to display the sets of three Heart Words. Each set will contain the following words in a random order: said, come, down, and the three words you have selected. Each word will appear several times.
Look at, think about, and say each set of three words together with students as the sets are displayed.
❽ Heart Word Read a Row
Click to display three long green boxes, each of which is covering up a row of Heart Words.
Say “Now, we are going to use Look, Think, Say! with a whole group of Heart Words.”
Remind students how to play Read a Row, if necessary:
• “In this game, I will call on one student at a time to read a row of words out loud to the group.
• When it is your turn to read, read loudly enough so everyone can hear you.
• If you are not a Reader, you are called a Checker. When you are a Checker, your job is to Look, Think, Say! quietly in your head while you listen to the Reader. Checkers will listen to make sure the Reader does not make any mistakes.
© 2017 Really Great Reading Company, LLC 89 UNIT 20 Lesson 1
•
If you would like to have more than three readers read a row, Countdown Online will allow you to run through the activity twice before moving on.
If you are the Reader, your job is to read the entire row of words as carefully and quickly as possible.”
Click to remove one green box, revealing three groups of three Heart Words.
Call on one student to read a row of Heart Words out loud to the class.
Checkers give a thumbs-up or thumbs-to-the-side gesture to indicate if the Reader read all the Heart Words accurately or made a mistake.
Click again and the first row will be covered once again. The second green box will disappear with the next click.
Repeat with each subsequent row, clicking to reveal a row and calling on a student to read the Heart Words.
90 © 2017 Really Great Reading Company, LLC UNIT 20 Lesson 1
Unit 20 | Lesson 2
Short i vs. Long i PA
Objectives
Students will:
• accurately segment phonemes (sounds) in single-syllable words with short i and long i;
• accurately sort words into groups by whether their vowel sound is a short i or a long i;
• (OPTIONAL) accurately blend phonemes (sounds) together to produce single-syllable words with short i and long i
What You Need to Know
Short i and Long i
Description
The teacher reviews the short i sound and movement, and students finger-stretch words with short i. The teacher then reviews the long i sound and movement, and students finger-stretch words with long i. Students sort words into two groups based on whether their vowel sound is short i or long i. Then, optionally, students finger-stretch foursound words with short i and long i as a challenge. Additionally, students may blend the sounds in words with short i and long i as an optional extension.
What Students See
• Short i is the first phoneme in the word itch.
• The symbol for the short i phoneme is /ĭ/.
• Long i is the first phoneme in the word ice.
• The symbol for the long i phoneme is /ī/.
3, 2, 1…
Open Countdown Online to Unit 20, Lesson 2 (20.2).
OPTIONAL
Before teaching this lesson, you may wish to run the Letter-Sound and Heart Word Pop-Up and 3-Up activities in Countdown Online to practice the letter sounds and Heart Words taught in Lesson 1.
© 2017 Really Great Reading Company, LLC 91 UNIT 20 Lesson 2
Launch!
❶ Review Short i
Say “Let’s get started by reviewing the short i sound and movement.”
Click to display the Short Vowels Poster
Review the short i sound and movement:
• Say “The short i sound is /ĭĭĭĭ/, like the first sound in iiiitch.”
• Make the short i, itch movement while saying the phoneme /ĭĭĭĭ/. (Pretend to scratch your arm. Say /ĭĭĭĭ/ while scratching.)
• Have students make the short i, itch movement as they say /ĭĭĭĭ/.
❷ Finger-Stretch Words with Short i
Say “Now, let’s stretch words with the short i sound.”
I DO: Finger-Stretch kid
Click to display the kid.
Say:
• “Listen while I say the sounds in kid, as in, ‘There is a new kid in our class.’”
• “kid ” (hold closed fist against chest, crossing the midline)
• “/k/” (extend thumb), “/ ĭĭĭĭ/” (extend pointer finger), “/d/” (extend middle finger)
• “kid ” (pull fingers back to a closed fist while saying the word)
Say “Kid has three sounds. The vowel sound is /ĭĭĭĭ/. I hear the same sound as the beginning of /ĭ/, itch, so the vowel sound must be short i. Short i, /ĭ/, is the first sound in iiiitch (while making the short i, itch motion).”
Click to display the Short Vowels Poster
Point to the Short Vowels Poster and remind students that they can look at the picture for itch to remind themselves that short i sounds like the first sound in /ĭ/, itch
WE DO: Finger-Stretch fish
Say “Now let’s stretch out a word together.”
Click to display the fish.
Say:
• “Ready? Our word is fish, as in, ‘I fed my pet fish some fish food.’
• Let’s stretch it together.”
92 © 2017 Really Great Reading Company, LLC UNIT 20 Lesson 2
•
“
fish” (hold closed fist against chest, crossing the midline)
• “/f/” (extend thumb), “/ ĭĭĭĭ/” (extend pointer finger), “/sh/” (extend middle finger)
• “fish” (pull fingers back to a closed fist while saying the word)
Ask:
• “How many sounds did we hear?” A: three
• “What vowel sound did we hear in the word?” A: /ĭĭĭĭ/
Click to display the Short Vowels Poster
Ask:
• “What is the guideword for that sound?” A: itch
• “What is the motion for itch?” A: scratch the inside of your arm (students make motion)
• “Is /ĭĭĭĭ/ short or long?” A: short
• “How do we know?” A: /ĭ/ is the first sound in itch
YOU DO: Finger-Stretch words with short i
Say “Now, you will stretch out some words on your own.”
Click to display the image.
Click to display the Short Vowels Poster
Ask individual students to stretch the sounds in each word below. After students stretch the sounds, ask:
• “How many sounds did you hear?” A: three
• “What vowel sound did you hear in the word?” A: /ĭĭĭĭ/
• “What is the guideword for that sound?” A: itch
• “What is the motion for itch?” A: scratch the inside of your arm (students make motion)
• “Is /ĭĭĭĭ/ short or long?” A: short sit - /s/ / ĭ/ /t/, sit (Please sit down in your chair.)
fit - /f/ /ĭ/ /t/, fit (My pants don’t fit well anymore because I am getting taller.) zip - /z/ /ĭ/ /p/, zip (Zip up your jacket because it is cold outside.) sick - /s/ /ĭ/ /k/, sick (I went to the doctor when I was sick.) wish - /w/ /ĭ/ /sh/, wish (Make a wish when you blow out the candles.) pit - /p/ /ĭ/ /t/, pit (A pit is the hard part inside of a fruit. Throw the peach pit in the garbage.)
If your students are still struggling to stretch the sounds in words with short i, you may wish to use some of the You Dos as We Dos to provide more guided practice.
Definitions are provided for some words that may be unfamiliar to many kindergarten students.
If your students are proficient at stretching words with short i, you may wish to do only a couple of You Dos and then move to the long i portion of the lesson.
© 2017 Really Great Reading Company, LLC 93 UNIT 20 Lesson 2
Remember to elongate the vowel articulation by holding the vowel phoneme for 2–3 seconds.
❸ Review L ong i
Say “Next, we are going to review the long i sound. Remember, a long vowel sound is just like saying the name of the letter, so the long i sound is /īīīī/.”
All students repeat the sound, /īīīī/.
Say “To help us remember this sound, we make the long i movement while saying the sound, /īīīī/.” (Write the lowercase i in the air with your index finger.)
Click to display the Short and Long Vowels Posters.
Remind students they can use the posters and movements to check if a vowel sound is short or long:
• Point to the short i section of the Short Vowels Poster, and show students they can check the vowel sound by looking at the itch picture and saying: “/ĭ/ is short, like in /ĭ/, itch.”
• Point to the long i section of the Long Vowels Poster, and show students they can check the vowel sound by looking at the letter i and saying: “/ī/ is long, like the name of the letter i.”
Click to display the kite.
Say:
• “I’ll use the poster to help me check the vowel sound in kite.
• First, I’ll stretch the sounds: kite, /k/ /īīīī/ /t/, kite.” (Finger-stretch the word.)
• “I hear the name of the letter i in the middle, and the Long Vowels Poster (point to the i on the Long Vowels Poster) tells me that long i says its name, so the vowel sound in kite must be a long i.”
❹ Finger-Stretch Words with Long i
I DO: Finger-Stretch bike
Click to display the bike
Say:
• “Now, we are going to stretch out all of the sounds in some words that have long i.
• Listen while I say the sounds in bike, as in, ‘I love to ride my bike to the park.’”
• “bike” (hold closed fist against chest, crossing the midline)
• “/b/” (extend thumb), “/ īīīī/” (extend pointer finger), “/k/” (extend middle finger)
• “bike” (pull fingers back to a closed fist while saying the word)
94 © 2017 Really Great Reading Company, LLC UNIT 20 Lesson 2
Say “Bike has three sounds. I hear the name of the letter i in bike, so the vowel sound must be a long i (while tracing the lowercase letter i in the air)
Long i says its name, / ī/.”
Click to display the Long Vowels Poster.
Point to the Long Vowels Poster and remind students that they can look at the letter i to remind themselves that the long i sound is the same as the name of the letter i.
WE DO: Finger-Stretch hide
Say “Now let’s stretch out some words together.”
Click to display the image for hide.
Say:
• “Ready? Our word is hide, as in, ‘I love to play the game hide and seek.’
• Let’s stretch it together.”
• “hide” (hold closed fist against chest, crossing the midline)
• “/h/” (extend thumb), “/īīīī/” (extend pointer finger), “/d/” (extend middle finger)
•
Ask:
“hide” (pull fingers back to a closed fist while saying the word)
• “How many sounds did we hear?” A: three
• “What vowel sound did we hear in the word?” A: /īīīī/
Click to display the Long Vowels Poster.
Ask:
• “What is the motion for /īīīī/?” A: writing lowercase i in the air (students make motion)
• “Is /īīīī/ short or long?” A: long
• “How do we know?” A: /ī/ is the name of the letter i
YOU DO: Finger-Stretch words with long i
Say “Now, you will stretch out some words on your own.”
Click to display the image.
Click to display the Long Vowels Poster
Ask individual students to stretch the sounds in each word below. After students stretch the sounds, ask:
• “How many sounds did you hear?” A: three
If your students need more guided practice stretching the sounds in words with long i, you may wish to use some of the You Dos as We Dos.
© 2017 Really Great Reading Company, LLC 95 UNIT 20 Lesson 2
• “What vowel sound did you hear in the word?” A: /īīīī/
• “What is the motion for /īīīī/?” A: writing lowercase i in the air (students make motion)
• “Is that short or long?” A: long
• “How do you know?” A: /ī/ is the name of the letter i lime - /l/ / ī/ /m/, lime (We squeezed the juice out of the green lime.)
vine - /v/ /ī/ /n/, vine (A vine is a plant with long stems that can grow up the side of a building. The vine on the side of the house had pretty leaves.) knife - /n/ /ī/ /f/, knife (She used a knife to spread jam on my sandwich.)
type - /t/ /ī/ /p/, type (I am learning to type on a keyboard.) dime - /d/ /ī/ /m/, dime (I paid for the pencil with a dime and a quarter.)
light - /l/ /ī/ /t/, light (Turn on the light so you can see in the dark room.)
❺ Sort Words with Short i and Long i
Say “Now, we are going to sort words into two groups. Some words will have a short i vowel sound, and other words will have a long i vowel sound.”
Click to display the image for itch and the ice cube as the column headings. Point to the image for itch and the ice cube and say “/ ĭ/, itch; / ī/, ice.”
Say “We will hear some words. We will stretch out the sounds in each word and then decide if the vowel sound is short i, like in /ĭ/, itch, or long i, like in / ī/, ice.”
Click to display and point to the image for mix
Say:
• “Listen while I say the sounds in mix, as in, ‘I will mix the ingredients in the bowl.’”
• “mix ” (hold closed fist against chest, crossing the midline)
• “/m/” (extend thumb), “/ĭ/” (extend pointer finger), “/ks/” (extend middle finger)
• “mix ” (pull fingers back to a closed fist while saying the word)
Say “Mix has three sounds. The vowel sound is /ĭĭĭĭ/ (while making the short i, itch motion).”
Ask “Is / ĭĭĭĭ/ the first sound in / ĭ/, itch or /ī/, ice?” A: / ĭ/, itch
Say “Right! In /m/ /ĭ/ /ks/, mix, the vowel sound is /ĭ/ like in / ĭ/, itch. I’ll move mix to the / ĭ/, itch side.”
96 © 2017 Really Great Reading Company, LLC UNIT 20 Lesson 2
Click to place mix in the itch column.
Say “Let’s try another one.”
Continue with the remaining examples, stretching the sounds in each word and comparing the vowel sound to /ĭ/, itch or /ī/, ice:
2. /h/ /ī/ /d/, hide (A: ice)
3. /f/ / ĭ/ /t/, fit (A: itch)
4. /w/ /ĭ/ /n/, win (A: itch)
5. /s/ /ī/ /t/, sight (A: ice)
6. /t/ /ī/ /m/, time (A: ice)
7. /kw/ /ĭ/ /k/, quick (A: itch)
Optional: Additional Short i vs. Long i Sort
13. /l/ /ī/ /m/, lime (A: ice)
14. /v/ /ī/ /n/, vine (A: ice)
15. /s/ /ĭ/ /ks/, six (A: itch)
16. /p/ /ĭ/ /t/, pit (A: itch)
17. /m/ /ī/ /k/, Mike (A: ice)
18. /p/ /ĭ/ /g/, pig (A: itch)
8. /l/ /ī/ /t/, light (A: ice)
9. /w/ /ī/ /t/, white (A: ice)
10. /p/ /ĭ/ /ch/, pitch (A: itch)
11. /k/ /ī/ /t/, kite (A: ice)
12. /s/ /ĭ/ /t/, sit (A: itch)
19. /d/ /ī/ /m/, dime (A: ice)
20. /s/ /ī/ /n/, sign (A: ice)
21. /z/ /ĭ/ /p/, zip (A: itch)
22. /kw/ /ĭ/ /t/, quit (A: itch)
23. /p/ /ī/ /n/, pine (A: ice)
24. /h/ /ĭ/ /t/, hit (A: itch)
❼ Optional Challenge: Stretch Words with Four Phonemes
Use the following words with four phonemes to provide an additional challenge for students.
Click to display the image. quilt - /kw/ / ĭ/ /l/ /t/, quilt (A quilt is a type of blanket with special designs sewn onto it. I covered myself with the warm quilt before I went to sleep.) bride - /b/ /r/ /ī/ /d/, bride (The bride wore a beautiful white dress at her wedding.) spin - /s/ /p/ /ĭ/ /n/, spin (The wind will make the pinwheel spin.) find - /f/ /ī/ /n/ /d/, find (I was upset because I could not find my book.) pinch - /p/ /ĭ/ /n/ /ch/, pinch (It is not nice to hit or pinch others.)
❽ Optional Activity: Mystery Bag: Blending Sounds
Click to display the Mystery Bag. Say: • “Let’s see what words are in our Mystery Bag! Listen to my sounds. • /d/ / ĭ/ /p/.”
You can use the optional images as additional practice for students who may need it at a later time.
© 2017 Really Great Reading Company, LLC 97 UNIT 20 Lesson 2
Ask “What word does it make when we put these sounds together, /d/ / ĭ/ /p/?” A: dip
Say “Let’s check in the bag!”
Click to display the dip to confirm students’ answer. Say “Let’s try another one.”
Click to display the Mystery bag
Continue with the remaining examples:
1. /f/ / ĭ/ /sh/, fish
2. /t/ / ī/ /m/, time
3. /w/ / ĭ/ /n/, win
4. /w/ / ī/ /t/, white
5. /f/ / ĭ/ /n/, fin
6. /ch/ / ĭ/ /n/, chin
7. /l/ / ī/ /m/, lime
8. /n/ / ī/ /f/, knife
9. /w/ /ĭ/ /g/, wig
10. /m/ / ĭ/ /t/, mitt
98 © 2017 Really Great Reading Company, LLC UNIT 20 Lesson 2
Unit 20 | Lesson 3
Phonics Concept: Digraph sh AP
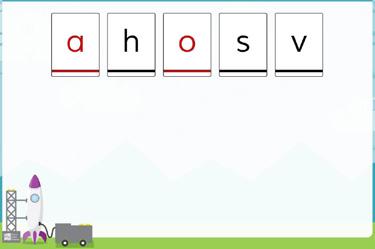
Objectives
Students will:
• explain that a digraph is two letters that spell one sound;
• identify the letters sh as a digraph that spells the phoneme (sound) /sh/;
• accurately spell and read words with the phoneme (sound) /sh/ spelled with digraph sh.
Description
The teacher, as well as an optional animation, introduces the idea that two letters can work together to spell one sound and that this is called a digraph. Students are introduced to the first digraph, digraph sh, which spells the sound /sh/, like in sheep. Students build real words with the digraph sh and then, optionally, build “silly” nonsense words as a challenge.
Student Materials
Holding and working boards from Countdown Student Kit
What Students See
What You Need to Know
• A consonant digraph is two letters that spell one sound: ch in chat, sh in shop, th in thin, wh in whale, ck in duck, ph in phone, ng in sang, gh in tough. (We teach only the digraphs ch, sh, th, wh, and ck in Countdown lessons.)
• Students have been working orally with words with digraphs in Countdown Units 1-16 in the phonemic awareness activities. They have isolated the beginning sounds of words with digraphs, like /sh/, ship and /ch/, cheese, and they have blended and segmented sounds in words with digraphs, like /w/ /ā/ /l/, whale and /th/ /ŭ/ /m/, thumb. However, this lesson is the first time students will associate letters (a grapheme) with a digraph sound.
3, 2, 1…
Open Countdown Online to Unit 20, Lesson 3 (20.3).
Students take out color and letter tiles and working board from Countdown Student Kit
© 2017 Really Great Reading Company, LLC 99 UNIT 20 Lesson 3
Launch!
❶ Teach Digraph sh
Click to display the letter tiles a, h, o, s, and v.
Say:
• “We have been working with lots of letters in our Countdown lessons.
• Each letter we have learned spells a sound.
• Let’s say the sounds of these letters together as I point to them.”
Point to each letter, one at a time, and say its sound chorally with students: “/ă/, /h/, /ŏ/, /s/, /v/.”
Say:
• “Each of these letters spells a sound by itself. One letter (point to a), one sound, /ă/, like in /ă/, apple.
• Some sounds are a little different. Some sounds are spelled with two letters instead of just one!”
Click to display the s and h tiles and the digraph sh tile.
Say:
• “This is the letter s (point), and this is the letter h (point). The letter s spells /s/, and the letter h spells /h/.”
• (Point to the digraph sh ) “Here, s and h are together on one tile.
• When we see s and h together, they have a special name. They are called a digraph, and they do something very special!”
Click to display the sheep
Ask:
• “What is this a picture of?” A: sheep
• “What is the first sound in sheep?” A: /sh/ Click to display the digraph sh tile below the sheep.
Say:
• “When we see s and h together, they work together like a team to spell one sound. They don’t spell /s/ or /h/ anymore. They say a brand new sound!
• Their new sound is /sh/, like when we are telling someone to be quiet: /shhhh/.” (Place forefinger to mouth as if asking someone to be quiet while saying /shhhh/.)
• “Say /sh/ with me while you put your finger to your lips like you are telling someone to be quiet.”
100 © 2017 Really Great Reading Company, LLC UNIT 20 Lesson 3
Students say /shhhh/ with fingers to their lips.
Say:
• “The letters sh are called a digraph. A digraph is two letters that work together to spell just one sound.
• Digraph sh (point to tile) spells the sound /sh/, like in /sh/, sheep (point to sheep)
• In your kits, you have an sh tile. You will use this tile when we build words with the digraph sh ”
❷ Build Real Words with Digraph sh
Say “Now, we are going to build real words with the digraph sh. ”
I DO: Build rash
Click to display the image for rash
Say “The first word is rash, as in, ‘I had an itchy red rash on my arm.’”
Stretch the sounds - rash, /r/ /ă/ /sh/, rash
Say “I heard three sounds in rash, /r/ /ă/ /sh/.”
Click to display one color tile at a time while again saying “/r/ /ă/ /sh/.”
Click to display a letter tile below each color tile to spell each sound while saying the sound.
Use Touch & Say to read rash - /r/ /ă/ /sh/, rash.
Point to digraph sh and say “I see digraph sh in this word. I know digraph sh has two letters working together to spell one sound, /sh/.”
Say “Now let’s try one together.”
WE DO: Build ship
Click to display the ship.
Say “Now, let’s build the real word ship together, as in, ‘I sailed the toy ship in the bathtub.’ Repeat ship.” (Students repeat.)
Stretch the sounds with students - ship, /sh/ / ĭ/ p/, ship.
Click to display one color tile for each sound in ship while saying the sounds/sh/ / ĭ/ /p/.
Ask individual students the following questions to lead students in spelling each sound by placing letter tiles below the color tiles, one at a time. Click to display each letter tile as students respond with the correct spellings:
• “What is the first sound you hear?” A: /sh/
The animation available in Countdown Online introduces the concept of digraphs and digraph sh in a fun and engaging way. We recommend showing it after teaching Section 1 as a review of the content or to reinforce the content for students who might need more direct instruction.
© 2017 Really Great Reading Company, LLC 101 UNIT 20 Lesson 3
• “What letters say /sh/?” A: sh (Click to display sh; students place the sh tile on their boards.)
• “What is the next sound you hear?” A: / ĭ/
• “What letter spells / ĭ/?” A: i (Click to display i; students place the i tile on their boards.)
• “What is the last sound you hear?” A: /p/
• “What letter spells /p/?” A: p (Click to display p; students place the p tile on their boards.)
Use Touch & Say to read ship with students - /sh/ / ĭ/ /p/, ship
Ask:
• “Which letters in ship spell the sound /sh/?” A: sh
• “What do we call the letters sh?” A: a digraph (or digraph sh)
Students clear boards.
YOU DO: Build real words with digraph sh
Say “Now, you are going to use your color and letter tiles to build four real words. Each word will have digraph sh. ”
Click to display each image and dictate the words and sentences below, one at a time, following the Build a Word steps for each word and helping students as needed. dish – “Please put the dish in the sink.” hush – “Hush means to quiet down. The librarian told us to hush.” dash – “Dash means to run quickly. I had to dash to the bus stop because I slept late.”
shed – “A shed is a small outdoor building that is used to store things. I kept my bike in the shed in our backyard.”
Students build each word independently, one word at a time. Students should: Say the word. Stretch the sounds in the word.
Place one color tile on boards for each sound while saying the sound. Spell the word by placing one letter tile below each color tile. i d sh u h sh
102 © 2017 Really Great Reading Company, LLC UNIT 20 Lesson 3
a d sh e sh d
Use Touch & Say to read the word.
Hold up their boards so you can check their spelling and provide Positive Error Correction as needed.
Click to display the correct placement of color and letter tiles for each word. Students clear boards and wait for the next word to be dictated.
❸ Optional Challenge: Build Silly Words
Say “Now, you are going to build some super silly words that have digraph sh. Remember, these words are very silly! They don’t mean anything because they are not real words, but we can spell them and read them because the letters will tell us what sounds to say.”
Click to display the silly image, and dictate the silly words below, one at a time, following the Build a Word steps for each word and helping students as needed. tash shup losh
Students build each word independently, one word at a time. Students should: Say the word.
Stretch the sounds in the word.
Place one color tile on boards for each sound while saying the sound.
Spell the word by placing one letter tile below each color tile.
a t sh u sh p o l sh
Use Touch & Say to read the word.
Hold up their boards so you can check their spelling and provide Positive Error Correction as needed.
Click to display the correct placement of color and letter tiles for each word.
Students clear boards and wait for the next word to be dictated.
Remember to use Positive Error
Correction if students make a mistake while building words. Steps for Positive Error Correction can be found on p. 47.
© 2017 Really Great Reading Company, LLC 103 UNIT 20 Lesson 3
Unit 20 | Lesson 4
Student Practice AP
Objectives
Students will:
• identify the graphemes in printed words and produce the proper phoneme for each grapheme; blend the graphemes together to produce real words (Detective Work);
• read words, identify their vowel sounds, and determine if they have digraph sh (Word Sort).
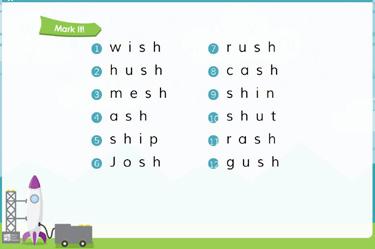
Description
Teacher leads students through the Mark It! and Read It! procedures in the Detective Work activity, and then leads students through a model word(s) for the Word Sort. Students then read the remaining words on their own, first listening carefully for the vowel sound and matching it with the guideword image for the vowel sound they hear and then listening carefully for digraph sh. Teacher reviews the answers with students, allowing time for students to correct their work if needed.
Student Materials
• Countdown Student Workbook
• Pencil
What Students See
What You Need to Know
Detective Work Overview
• Detective Work is introduced in this unit and appears in all subsequent units.
• The objective of Detective Work is to have students pay attention to the letters in words and to use the phonics concept taught in the lesson to read words accurately.
• The student work page consists of two activities, Mark It! and Read It!
• Mark It! is a scaffolded activity where students become “phonics detectives,” with the teacher leading them through underlining the graphemes (a letter or letter combination that spells a phoneme) and reading the words. Some of the words may be unknown by the students, so the teacher will model the correct underlining and reading of each word.
• In the Mark It! section, students identify and underline the target phonics concept in the words before reading them.
• During the Read It! activity, there is no underlining taking place, just reading.
104 © 2017 Really Great Reading Company, LLC UNIT 20 Lesson 4
•
In Read It!, students are either Reader or Checkers. One student will read a row of words while the rest of the group listens for accuracy. If the student reads all the words correctly, the group gives them a thumbs-up. If the student misreads a word or words, the group signals for the Reader to go back and reread the words by giving a thumbs-to-the-side.
• Both Mark It! and Read It! contain the same words in a different order. The goal is for students to read the words with 100% accuracy on their first attempt during the Read It! activity.
3, 2, 1…
Open Countdown Online to Unit 20, Lesson 4 (20.4).
OPTIONAL
Before teaching this lesson, you may wish to run the Letter-Sound and Heart Word Pop-Up and 3-Up activities in Countdown Online to practice the letter sounds and Heart Words taught in Lesson 1.
Launch!
❶ Detective Work: Mark It! Overview
Students open workbooks to page 8.
Say:
• “Every Lesson 4 from now on will have an activity called Detective Work
• The activity is called Detective Work because we are going to be ‘letter and sound detectives.’ We have talked about detectives before! Remember, a detective is a person who pays close attention to clues and then solves a problem.
• So as ‘letter and sound detectives,’ we will be using what we have learned to pay close attention to each letter in a word and then read the word.”
Click to display the Mark It! words.
Say:
• “In Mark It!, we will underline letters and say the sounds that those letters make. Then, we will blend the sounds together to make a word.
• Watch as I underline letters while saying their sounds and then read the whole word.
• When we see digraph sh, we will underline both letters with one line because, together, they spell one sound, /sh/.”
© 2017 Really Great Reading Company, LLC 105 UNIT 20 Lesson 4
2017 Really Great Reading Company, LLC Word Sort Short Vowels 8 unit 18 Mark It! Read It! 7.
10.
12. rash ship mesh shin gush ash Josh cash shut wish rush hush cash shin Josh mesh hush ash gush wish rash rush cash shin shut rash gush
Detective Work
wi sh hush mesh ash ship
8. 9.
11.
1. 2. 3. 4. 5. 6. 7.
1. 2. 3. 4. 5. 6.
Josh
Click three times to underline the spellings (graphemes) in the first word while saying the sounds:
• “/w/” while underlining the w
• “/ĭĭĭĭĭ/” while underlining the i
• “/sh/” while underlining the sh
• “wish”
Students repeat the process in their workbooks for the word wish.
Model the process above for the rest of the words one at a time. After each word, have students repeat orally and on paper. Make sure students are underlining each letter (or letters sh together with one line for digraph sh) as they are saying the proper sound.
❷ Detective Work: Read It! Overview
Say:
• “The next part of Detective Work is called Read It!
• In this section, I will be calling on one student at a time to read a row of words out loud to the group.
• In Read It!, we do not underline the letters. We just read the words.
• When it is your turn to read, read loudly enough so everyone can hear.
• When it is not your turn to read, you will be a Checker, listening carefully.
• We will give the Reader a thumbs-up if they read all of the words correctly, and we will give them a thumbs-to-the-side if there is a word they need to try again.”
Students read a row of words out loud.
POSITIVE ERROR CORRECTION FOR READ IT!
The following steps outline how you should provide Positive Error Correction when students are reading single-syllable words in Read It!
1. If the Reader misreads any of the single-syllable words in the row, provide Positive Error Correction:
• Tell the Reader how many words were read correctly. (“You read two words correctly,” or “You read the first and last word correctly.”)
• Prompt the student to reread a word. (“In the word you misread, you read the first and last sound correctly. Can you retry that middle sound?” “Now, can you retry the middle word?”)
106 © 2017 Really Great Reading Company, LLC UNIT 20 Lesson 4
• The Reader reads the word again.
• If the Reader reads the word accurately, the Reader then reads all three words again.
• If the Reader reads all three words accurately this time, you and all Checkers congratulate the Reader.
2. If the Reader misses any single-syllable word again:
• Guide the Reader to use Touch & Say to read the misread word.
• If necessary, Checkers assist by using Touch & Say to chorally read the word.
• The Reader independently uses Touch & Say to read the word correctly.
• The Reader reads all three words again.
• Always finish with the Reader independently reading all three words correctly.
• The Reader then aims to read another row of words accurately on the first attempt.
3. Responding to self-corrections:
• It is important not to praise the Reader for self-correcting.
• The goal is for the Reader to read all three words accurately the first time. Self-correcting is better than an error, but it is short of the goal.
• If the Reader reads all words accurately with a self-correction on any word, say, “You read all three words accurately after you self-corrected. Please read the words again without self-correcting.”
• After the Reader reads all three words with no errors or selfcorrections, praise the Reader by saying, “Excellent accurate reading!”
❸ Word Sort: Short Vowels and Digraph sh
Say:
• “Remember, when we are doing a Word Sort, I will always model the first one or two words to show you how to sort the words.
• Sorting words will help you to pay attention to the spelling of the words.
• In this lesson, we will sort words in two ways. First, we will decide which vowel sound we hear. We will read the word first and then decide if the vowel sounds like /ă/, apple; /ĕ/, edge; /ĭ/, itch; /ŏ/, octopus; or /ŭ/, up.
• Next, we will read the word again and listen carefully for the sound of digraph sh, /sh/. If we hear digraph sh in the word, we will circle it.
Click to display the top section of the Word Sort
Students open workbooks to page 9.
When beginning the Word Sort, you should model as many words as you deem necessary for your students to grasp the concept and proceed independently.
© 2017 Really Great Reading Company, LLC 107 UNIT 20 Lesson 4
9 unit 20
Short Vowels and Digraph
Word Sort
sh o p sh e d f u n d i sh s a p m u sh g o sh k i d b a sh sh u t 1. 2. 3. 4. 5. 6. 7. 8. 9. 10.
sh
In this sort, students are given only three short vowel sounds to choose from for each word. In later sorts, they will choose from all five short vowel sounds.
Read and finger-stretch the first word aloud: shop, /sh/ /ŏ/ /p/, shop.
Ask:
• “What vowel sound did you hear in the middle?” A: /ŏ/
• “What letter spells /ŏ/ in this word?” A: o
• “Is /ŏ/ the same as the beginning of aaaapple, ooooctopus, or uuuup?” A: octopus
• “Right! So, which picture should we circle?” A: octopus
Click to circle the octopus
Prompt students to circle the octopus.
If your students are not yet able to read these words on their own, feel free to read each word aloud for them and have them independently select the correct vowel sounds and circle the digraphs.
Say “Now, let’s stretch out the sounds in the word again: shop, /sh/ /ŏ/ /p/, shop.”
Ask:
• “Did you hear the sound /sh/ in this word?” A: yes
• “What letters spell /sh/ in this word?” A: sh
• “What do we call these letters?” A: digraph sh
Say “Right! Let’s circle the letters that spell /sh/.”
Click to circle digraph sh.
Prompt students to circle digraph sh
Say:
The final five words are displayed on the next screen in Countdown Online
• “Now, you are going to circle the picture for the vowel sound and circle digraph sh if you see it in the rest of the words on your own.
• Listen carefully for the vowel sound when you say each word.
• Then listen carefully for the digraph sh sound, /sh/.”
Use Countdown Online to check answers with students.
Call on individual students to read a word, identify the vowel sound and the correct guideword image, and identify the digraph.
Students check answers.
108 © 2017 Really Great Reading Company, LLC UNIT 20 Lesson 4
Unit 20 | Lesson 5
Wrap Up & Show What You Know
Objectives
Students will:
• accurately articulate the phonemes reviewed in this unit;
• accurately read phrases and sentences that contain the concepts, words, and phonemes taught in this and previous units;
• accurately spell words with a controlled set of concepts and phonemes.
Description
AP
In Phrases and Sentences to Read, students read short phrases and sentences out loud to the class. Their goal is to read each phrase and sentence accurately the first time. In Spell It!, students see an image, which the teacher names. Teacher and students finger-stretch the sounds in the word together, counting the sounds. They then fill in a circle for each sound they heard and write the corresponding letter(s) in each box with a filled in circle, spelling the target word.
Student Materials
• Countdown Student Workbook
• Pencil
What Students See
What You Need to Know
No new concepts.
3, 2, 1…
Open Countdown Online to Unit 20, Lesson 5 (20.5).
OPTIONAL
Before teaching this lesson, you may wish to run the Letter-Sound and Heart Word Pop-Up, 3-Up, and Read a Row activities in Countdown Online to prac tice and assess the letter sounds and Heart Words taught in Lesson 1.
© 2017 Really Great Reading Company, LLC 109 UNIT 20 Lesson 5
If time permits, provide each student with the opportunity to read at least one phrase or sentence.
In small groups, you might consider letting each student read two phrases or sentences. Students who struggle should be given additional phrases or sentences for more practice.
Launch!
❶ Phrases and Sentences to Read
Say:
• “Today, we are going to read some phrases and some sentences in our workbooks.
• I will call on you to read a phrase or a sentence when it is your turn to be the Reader, and the rest of us will be Checkers, touching each word as the Reader reads it out loud.”
Students open workbooks to page 10.
Individual students read phrases and sentences. Since there are only 8 phrases and 8 sentences, it is okay to have a student reread a phrase or sentence that has been previously read.
Direct Checkers to give a thumbs-up if the Reader reads all of the words correctly or a thumbs-to-the-side if the Reader misreads a word(s). If the Reader misreads any words, teacher follows Positive Error Correction instructions on p. 80.
❷ Spell It!
Say:
• “Now, we are going to spell some words with the sounds we have been practicing.
• We are going to start by stretching out the sounds in a word so we can hear them clearly.”
Students open workbooks to Spell It! on page 11.
Say “We are going to spell words that you will hear me say aloud. Let’s start with number 1 at the top of your page.”
Click to display the ship.
Say “The first word is ship, as in ‘The ship sailed across the ocean.’ Let’s stretch it together. Ship, /sh/ /ĭ/ /p/, ship.” (Finger-stretch ship along with students.)
Ask “How many sounds did we hear?” A: three
Say “Since ship has three sounds, /sh/ /ĭ/ /p/, we will fill in three dots, one for each sound, like this.”
Click three times to fill in the first three dots, and have students fill in the first three dots on their workbook pages.
110 © 2017 Really Great Reading Company, LLC UNIT 20 Lesson 5
1. 2017 Really Great Reading Company, LLC 10 unit 20 1. Mash it like him. (4) 2. The cash is for you. (5) 3. My shin was so red. (5) 4. The bat will bash it. (5) 5. Do you have a rash? (5) 6. Did Dan get a fish for us? (7) 7. The lad is down in the ship. (7) 8. The red cat dish had mush in it. (8) 1. a tin dish (3) 2. in the shed (3) 3. rush in here (3) 4. have a wish (3) 5. push it down (3) 6. shop for a mop (4) 7. on the lush mat (4) 8. down to the ship (4) Phrases Sentences Phrases and Sentences to Read 11 unit Spell It! 20 1. 2. 3. 4. 5. 6. 7. 8. 9. 10. Challenge
Say:
• “Since ship has three sounds, it will also have three spellings. A ‘spelling’ is a letter or a group of letters that spells one sound. We will write one letter, or two if it is a digraph sound, in each box that has a dot filled in. Let’s stretch ship again slowly so we can hear each sound and write it down.”
• “/sh/” (PAUSE for students to write sh in the first box; if necessary, remind them that /sh/ is spelled by the digraph sh) “/ĭ/” (PAUSE for students to write i in the second box) “/p/” (PAUSE for students to write p in the third box)
Click three times to fill in the letters sh i p, and have students check their work, correcting their spelling if needed. sh i p
Continue the above process with the following words, one at a time.
2. shut (Optional sentence: Please shut the door when you leave.) sh u t
3. dish (Optional sentence: My sister put some more potatoes onto her dish.) d i sh
4. rash (Optional sentence: I had an itchy, red rash on my arm.) r a sh
5. shot (Optional sentence: I was brave when the doctor gave me a shot.) sh o t
OPTIONAL CHALLENGE WORDS:
6. shed (Optional sentence: We kept the bikes in our shed in the backyard.) sh e d
7. wax (Optional sentence: The wax dripped down the side of the candle.) w a x
8. cap (Optional sentence: I wore my baseball cap at the game.) c a p
If students struggle to spell the individual sounds, you may want to ask students how each sound is spelled before moving on to the next, as you do in Build a Word.
© 2017 Really Great Reading Company, LLC 111 UNIT 20 Lesson 5
9. hush (Optional sentence: We had to hush when we were too loud.) h u sh
10. bed (Optional sentence: Mom said it was time for bed.) b e d
DIFFERENTIATION OPTION
If you want to have students Build a Word with letter tiles and color tiles prior to putting pencil to paper, it may increase their understanding of the spelling concept.
112 © 2017 Really Great Reading Company, LLC UNIT 20 Lesson 5
Unit 21 | Lesson 1
Letter-Sound & Heart Word Fluency AP & Sight Words
Objectives
Students will:
• build automatic recognition of some letter-sound (grapheme-phoneme) combinations;
• build automatic recognition of some Heart Words.
What You Need to Know
Description
Students will play Look, Think, Say!, Pop-Up, 3-Up, and Read a Row to review six letter sounds, to learn three new Heart Words, and to review or learn three additional Heart Words.
What Students See
For a complete explanation of the Look, Think, Say!, Pop-Up, 3-Up, and Read a Row activities, see p. 326 in Appendix A.
Before Teaching:
Letter-Sound and Heart Word Fluency Set-Up
Open Countdown Online to Unit 21, Letter-Sound and Heart Word Generator.
Choose six letter sounds to review and practice.
Choose three Heart Words to review and practice, or you may wish to select three additional new Heart Words to teach. (The first three new Heart Words to teach in this unit will be locked.)
Optional: Print Read a Row Teacher Recording Form.
3, 2, 1…
Open Countdown Online to Unit 21, Lesson 1 (21.1).
Launch!
❶ Letter-Sound Look, Think, Say!
Say “Today, we are going to practice the sounds for six letters with the game Look, Think, Say! ”

Click twice to display the first letter with one red dot and two empty dots below it.
Digraph sh will be locked for this unit to provide an opportunity for students to develop automaticity with its sound.
© 2017 Really Great Reading Company, LLC 113 UNIT 21 Lesson 1
Say:
• “Remember, this red dot (point to the red dot) tells us to stop what we are doing so we can listen to the letter and its sound.
• This letter is [letter name], and it spells the sound [/letter sound/].”
Click to display the yellow dot.
Say “Think about the sound of this letter.”
Click to display the green dot.
Say:
• “This green dot (point to the green dot) tells us to say the sound out loud.
• Say the sound with me, [/letter sound/].
• Let’s try another letter.
• Remember to look, think, and then say. Only say the sound out loud when the green dot shows up.”
Click twice to display the next letter, and continue the above procedure for the remaining five letters.
Continue with the same six letter sounds for two additional rounds.
❷ Letter-Sound Pop-Up
Say:
• “Now that we have reviewed the letter names and sounds, we are going to see if we can just look quickly and say the sounds that we remember.
• When you see a letter pop up onto the screen, say the sound out loud as quickly as possible, but remember that it is still more important to say the correct sound than to be fast.
• If you need help remembering, I can help, but try your best.”
Click to display the six letters at random. Each letter will appear several times. Read each sound together with students as it pops up.
❸ Letter-Sound 3-Up
Say:
• “Great job! In our next game, you will see three letters on the screen.
• When you see the red dot, stop and look at the three letters. When you see the yellow dot, think about the letters and try to remember the sounds they say. When you see the green dot, say the three sounds out loud.”
Click to display the sets of three letters. Each letter will appear several times.
114 © 2017 Really Great Reading Company, LLC UNIT 21 Lesson 1
Look at, think about, and say each set of three letter sounds together with students as the sets are displayed.
❹ Letter-Sound Read a Row
Click to display three long green boxes, each of which is covering up a row of letter tiles.
Say “Now, we are going to read a row of letter sounds.”
Call on one student to read a row of letter sounds out loud to the class.
When the student is done reading, ask the Checkers to show the thumbs-up or thumbs-to-the-side gesture.
Repeat with additional students reading the remaining rows.
❺ Heart Word Look, Think, Say!
Say “Now, we are going to learn to read some new Heart Words.”
Click twice to display the Heart Word they with one red dot and two empty dots below the word.
Say:
• “Remember, this red dot (point to the red dot) tells us to stop what we are doing so we can listen to the word.
• This word is they, as in, ‘ They both had scrambled eggs for breakfast.’”
Click to display the yellow dot.
Say “Think about this word.”
Click to display the green dot.
Say:
• “Say the word with me, they.
• Let’s try another word.
• Remember to look, think, and then say. Only say the word out loud when the green dot shows up.”
Click twice to display the Heart Word that with one red dot and two empty dots below the word.
Say “Look at the word that, as in, ‘ That is my favorite book!’”
Click to display the yellow dot.
Say “Think about this word.”
Click to display the green dot.
If you would like to have more than three readers read a row, Countdown Online will allow you to run through the activity twice before moving on.
© 2017 Really Great Reading Company, LLC 115 UNIT 21 Lesson 1
Say:
• “Say the word!
• Let’s try one more word.”
Click twice to display the Heart Word this with one red dot and two empty dots below the word.
Say “Look at the word this, as in, ‘Turn down this street to get home.’”
Click to display the yellow dot.
Say “Think about this word.”
Click to display the green dot.
Say:
• “Say the word!
• Let’s look at those words again.”
Continue with the same three Heart Words and the three Heart Words you chose in the Heart Word Generator for two additional rounds.
❻ Heart Word Pop-Up
Say:
• “Now, we are going to practice reading the Heart Words we’ve learned.
• In our first game, when you see a word pop up onto the screen, say the word out loud.
• If you need help remembering, I can help, but try your best.”
Click to display the Heart Words they, that, this and the three Heart Words you have selected in the Heart Word Generator at random. Each word will appear several times.
Read each word together with students as it pops up.
❼ Heart Word 3-Up
Say:
• “Great job! In our next game, you will see three words on the screen.
• When you see the red dot, stop and look at the three words. When you see the yellow dot, think about the words and try to remember them. When you see the green dot, say the three words out loud.”
Click to display the sets of three Heart Words. Each set will contain the following words in a random order: they, that, this, and the three words you have selected. Each word will appear several times.
116 © 2017 Really Great Reading Company, LLC UNIT 21 Lesson 1
Look at, think about, and say each set of three words together with students as the sets are displayed.
❽ Heart Word Read a Row
Click to display three long green boxes, each of which is covering up a row of Heart Words.
Say “Now, we are going to read a row of Heart Words.”
Call on one student to read a row of Heart Words out loud to the class. When the student is done reading, ask the Checkers to show the thumbs-up or thumbs-to-the-side gesture.
Repeat with additional students reading the remaining rows.
If you would like to have more than three readers read a row, Countdown Online will allow you to run through the activity twice before moving on.
© 2017 Really Great Reading Company, LLC 117 UNIT 21 Lesson 1
Unit 21 | Lesson 2
Short u vs. Long u PA
Objectives
Students will:
• accurately segment phonemes (sounds) in single-syllable words with short u and long u;
• accurately sort words into groups by whether their vowel sound is a short u or a long u;
• (OPTIONAL) accurately blend phonemes (sounds) together to produce single-syllable words with short u and long u.
Description
The teacher reviews the short u sound and movement, and students finger-stretch words with short u. The teacher then reviews the long u sound and movement, and students finger-stretch words with long u. Students sort words into two groups based on whether their vowel sound is short u or long u. Then, optionally, students fingerstretch four-sound words with short u and long u as a challenge. Additionally, students may blend the sounds in words with short u and long u as an optional extension.
What Students See
What You Need to Know
Short u and Long u
• Short u is the first phoneme in the word up.
• The symbol for the short u phoneme is /ŭ/.
• Long u is the first phoneme in the word unicorn.
• The symbol for the long u phoneme is /y�/.
• Some disagreement exists with regard to teaching the long u sound.
o Reading teachers and reading programs disagree as to whether to teach the long u phoneme as /y�/, which is the name of the letter u, or as /�/, which is the vowel phoneme in boot. Some reading programs teach both of these phonemes for long u (“two sounds of long u ”). In Countdown, long u is taught as /y�/. /�/ (which is the middle phoneme in food) is not taught in the Countdown program.
o Linguists will correctly point out that /y�/ is two phonemes: /y/ and /�/. This may be clearer when we think about the phonemes in the word you, /y/ /�/, or the phonemes in the word too, /t/ /�/, because the spellings in those words lend themselves to helping us match the /�/ phoneme to a specific spelling.
118 © 2017 Really Great Reading Company, LLC UNIT 21 Lesson 2
o It is when we try to match letters to phonemes with words such as use and unicorn that we are misled about the phonemes. In both these words, the single letter u spells the two phonemes /y/ and /�/. Technically and strictly speaking, the phonemes in the word use are /y/ /�/ /z/, with the letter u spelling both the /y/ and the /�/ phonemes. Similarly, the phonemes in the first syllable of the word unicorn are /y/ /�/, and both phonemes are spelled with the single letter u.
o In words like use, unicorn, unit, and union, the letter u spells the same phonemes that are in the name of the letter u. Therefore, many reading teachers match the letter u to the “sound” /y�/. This allows us to teach long u as being the same as the name of the letter u, which is consistent with all the other long vowel phonemes.
o Teaching the long u phoneme as /y�/ in phonics allows the spellings to match the long u letter sound in many words: mule, cube, cute, huge, hue, cue, argue, value, unit, uniform, menu, human, music, pupil, etc.
o Reading teachers have found that teaching the phoneme for long u as /y�/ makes understanding spelling patterns easier than trying to be technical and teaching /y/ /�/ as two sounds.
o In this lesson, students are encouraged to listen for the /y�/ sounds as if they are a single unit called long u.
o If a student tells you that long u sounds as if it has two phonemes, tell them that they have a good ear and that they are right. Long u has two sounds, /y/ and /�/, but we call the two sounds together long u because that is the name of the letter u.
3, 2, 1…
Open Countdown Online to Unit 21, Lesson 2 (21.2).
OPTIONAL
Before teaching this lesson, you may wish to run the Letter-Sound and Heart Word Pop-Up and 3-Up activities in Countdown Online to practice the letter sounds and Heart Words taught in Lesson 1.
Launch!
❶ Review Short u
Say “Let’s get started by reviewing the short u sound and movement.”
Click to display the Short Vowels Poster.
© 2017 Really Great Reading Company, LLC 119 UNIT 21 Lesson 2
Review the short u sound and movement:
• Say “The short u sound is /ŭŭŭŭ/, like the first sound in uuuup.”
• Make the short u, up movement while saying the phoneme /ŭŭŭŭ/.
(Point your index finger up while moving your hand from below your waist to above your head while you say the sound. Say /ŭŭŭŭ/ while pointing.)
• Have students make the short u, up movement as they say /ŭŭŭŭ/.
❷ Finger-Stretch Words with Short u
Say “Now, let’s stretch words with the short u sound.”
I DO: Finger-Stretch cut
Click to display the image for cut.
Say:
• “Listen while I say the sounds in cut, as in, ‘I cut the paper with my scissors.’”
• “cut ” (hold closed fist against chest, crossing the midline)
• “/k/” (extend thumb), “/ŭŭŭŭ/” (extend pointer finger), “/t/” (extend middle finger)
• “cut ” (pull fingers back to a closed fist while saying the word)
Say “Cut has three sounds. The vowel sound is /ŭŭŭŭ/. I hear the same sound as the beginning of /ŭ/, up, so the vowel sound must be short u. Short u, /ŭ/, is the first sound in uuuup (while making the short u, up motion).”
Click to display the Short Vowels Poster
Point to the Short Vowels Poster and remind students that they can look at the picture for up to remind themselves that short u sounds like the first sound in /ŭ/, up.
WE DO: Finger-Stretch mug
Say “Now let’s stretch out a word together.”
Click to display the mug.
Say:
• “Ready? Our word is mug, as in, ‘My mom drinks tea out of her mug.’
• Let’s stretch it together.”
• “mug ” (hold closed fist against chest, crossing the midline)
• “/m/” (extend thumb), “/ŭŭŭŭ/” (extend pointer finger), “/g/” (extend middle finger)
120 © 2017 Really Great Reading Company, LLC UNIT 21 Lesson 2
•
Ask:
“
mug ” (pull fingers back to a closed fist while saying the word)
• “How many sounds did we hear?” A: three
• “What vowel sound did we hear in the word?” A: /ŭŭŭŭ/
Click to display the Short Vowels Poster.
Ask:
• “What is the guideword for that sound?” A: up
• “What is the motion for up?” A: point up while moving hand up from waist to over head (students make motion)
• “Is /ŭŭŭŭ/ short or long?” A: short
• “How do we know?” A: /ŭ/ is the first sound in up
YOU DO: Finger-Stretch words with short u
Say “Now, you will stretch out some words on your own.”
Click to display the image.
Click to display the Short Vowels Poster.
Ask individual students to stretch the sounds in each word below. After students stretch the sounds, ask:
• “How many sounds did you hear?” A: three
• “What vowel sound did you hear in the word?” A: /ŭŭŭŭ/
• “What is the guideword for that sound?” A: up
• “What is the motion for up?” A: point up while moving hand up from waist to over head (students make motion)
• “Is /ŭŭŭŭ/ short or long?” A: short hush - /h/ /ŭ/ /sh/, hush (Dad told us to hush when we were yelling inside.) nut - /n/ /ŭ/ /t/, nut (The squirrel ate a nut.) shut - /sh/ /ŭ/ /t/, shut (Please shut the door when you come inside.) duck - /d/ /ŭ/ /k/, duck (I loved seeing the duck swimming in the pond.) cub - /k/ /ŭ/ /b/, cub (A cub is a baby bear. The bear cub slept right next to his mother.) tub - /t/ /ŭ/ /b/, tub (The little boy splashed in the bath tub.)
❸ Review Long u
Say “Next, we are going to review the long u sound. Remember, a long vowel sound is just like saying the name of the letter, so the long u sound is /y��/.”
If your students are still struggling to stretch the sounds in words with short u, you may wish to use some of the You Dos as We Dos to provide more guided practice.
Definitions are provided for words that may be unfamiliar to many kindergarten students.
If your students are proficient at stretching words with short u, you may wish to do only a couple of You Dos and then move to the long u portion of the lesson.
© 2017 Really Great Reading Company, LLC 121 UNIT 21 Lesson 2
Remember to elongate the vowel articulation by holding the vowel phoneme for 2–3 seconds.
All students repeat the sound, /y��/.
Say “To help us remember this sound, we make the long u movement while saying the sound, /y��/.” (Write the lowercase u in the air with your index finger.)
Click to display the Short and Long Vowels Poster
Remind students they can use the posters and movements to check if a vowel sound is short or long:
• Point to the short u section of the Short Vowels Poster, and show students they can check the vowel sound by looking at the up picture and saying: “/ŭ/ is short, like in /ŭ/, up.”
• Point to the long u section of the Long Vowels Poster, and show students they can check the vowel sound by looking at the letter u and saying: “/y�/ is long, like the name of the letter u.”
Click to display the cube Say:
• “I’ll use the poster to help me check the vowel sound in cube.
• First, I’ll stretch the sounds: cube, /k/ /y�/ /b/, cube. (Finger-stretch the word.)
• I hear the name of the letter u in the middle, and the Long Vowels Poster (point to the u on the Long Vowels Poster) tells me that long u says its name, so the vowel sound in cube must be a long u.”
❹ Finger-Stretch Words with Long u
I DO: Finger-Stretch few
Click to display the image for few
Say:
• “Now, we are going to stretch out all of the sounds in some words that have long u.
• Listen while I say the sounds in few, as in, ‘My friend had a lot of books, but I only had a few.’”
• “ few ” (hold closed fist against chest, crossing the midline)
• “/f/” (extend thumb), “/y�/” (extend pointer finger)
• “ few ” (pull fingers back to a closed fist while saying the word)
Say “Few has two sounds. I hear the name of the letter u in few, so the vowel sound must be a long u (while tracing the lowercase letter u in the air). Long u says its name, /y�/.”
122 © 2017 Really Great Reading Company, LLC UNIT 21 Lesson 2
Click to display the Long Vowels Poster.
Point to the Long Vowels Poster and remind students that they can look at the letter u to remind themselves that the long u sound is the same as the name of the letter u.
WE DO: Finger-Stretch huge
Say “Now, let’s stretch out some words together.”
Click to display the image for huge. Say:
• “Ready? Our word is huge, as in, ‘The huge building had 100 flights of stairs!’
• Let’s stretch it together.”
• “huge” (hold closed fist against chest, crossing the midline)
• “/h/” (extend thumb), “/y�/” (extend pointer finger), “/j/” (extend middle finger)
• “huge” (pull fingers back to a closed fist while saying the word)
Ask:
• “How many sounds did we hear?” A: three
• “What vowel sound did we hear in the word?” A: /y��/
Click to display the Long Vowels Poster.
Ask:
• “What is the motion for /y��/?” A: writing the lowercase letter u in the air (students make motion)
• “Is /y��/ short or long?” A: long
• “How do we know?” A: /y�/ is the name of the letter u
YOU DO: Finger-Stretch words with long u
Say “Now, you will stretch out some words on your own.”
Click to display the image.
Click to display the Long Vowels Poster.
Ask individual students to stretch the sounds in each word below. After students stretch the sounds, ask:
• “How many sounds did you hear?” A: two or three
• “What vowel sound did you hear in the word?” A: /y��/
• “What is the motion for /y��/?” A: writing lowercase u in the air (students make motion)
If your students need more guided practice stretching the sounds in words with long u, you may wish to use some of the You Dos as We Dos.
© 2017 Really Great Reading Company, LLC 123 UNIT 21 Lesson 2
• “Is that short or long?” A: long
• “How do we know?” A: /y�/ is the name of the letter u mute - /m/ /y�/ /t/, mute (Mute means quiet or silent. If you push the mute button on the remote control, it makes the sound go away.) pew - /p/ /y�/, pew (A pew is a bench people sit on in a church. The people in the church sat on a wooden pew.) use - /y�/ /z/, use (You can use scissors to cut the paper.) mule - /m/ /y�/ /l/, mule (A mule is an animal whose parents are a horse and a donkey. You can usually ride a mule just like a horse.) cute - /k/ /y�/ /t/, cute (The new baby was tiny and cute.) view - /v/ /y�/, view (View means to see or watch. You can view the movie for free at the library.)
❺ Sort Words with Short u and Long u
Say “Now, we are going to sort words into two groups. Some words will have a short u vowel sound, and other words will have a long u vowel sound.”
Click to display the image for up and the unicorn as the column headings. Point to up and the unicorn and say “/ŭ/, up; /y�/, unicorn.”
Say “We will hear some words. We will stretch out the sounds in each word and then decide if the vowel sound is short u, like in /ŭ/, up, or long u, like in /y�/, unicorn.”
Click to display and point to the image for hug.
Say:
• “Listen while I say the sounds in hug, as in, ‘My dad gave me a big hug before I went to bed.’”
• “hug ” (hold closed fist against chest, crossing the midline)
• “/h/” (extend thumb), “/ŭŭŭŭ/” (extend pointer finger), “/g/” (extend middle finger)
• “hug ” (pull fingers back to a closed fist while saying the word)
Say “Hug has three sounds. The vowel sound is /ŭŭŭŭ/ (while making the short u, up motion).”
Ask “Is /ŭŭŭŭ/ the first sound in /ŭ/, up or /y�/, unicorn?” A: /ŭ/, up Say “Right! In /h/ /ŭ/ /g/, hug, the vowel sound is /ŭ/ like in /ŭ/, up. I’ll move hug to the /ŭ/, up side.”
Click to place hug in the up column.
124 © 2017 Really Great Reading Company, LLC UNIT 21 Lesson 2
Say “Let’s try another one.”
Continue with the remaining examples, stretching the sounds in each word and comparing the vowel sound to /ŭ/, up or /y�/, unicorn:
2. /h/ /y�/ /j/, huge (A: unicorn)
3. /r/ /ŭ/ /sh/, rush (A: up)
6. /s/ /ŭ/ /n/, sun (A: up)
7. /h/ /y�/, Hugh (A: unicorn)
8. /v/ /y�/, view (A: unicorn)
9. /h/ /ŭ/ /sh/, hush (A: up)
Optional: Additional Short u vs. Long u Sort
13. /k/ /y�/ /t/, cute (A: unicorn)
14. /f/ /ŭ/ /n/, fun (A: up)
15. /p/ /ŭ/ /p/, pup (A: up)
16. /m/ /y�/ /l/, mule (A: unicorn)
17. /y�/ /z/, use (A: unicorn)
18. /d/ /ŭ/ /g/, dug (A: up)
4. /f/ /y�/, few (A: unicorn)
5. /r/ /ŭ/ /g/, rug (A: up)
10. /p/ /y�/, pew (A: unicorn)
11. /th/ /ŭ/ /m/, thumb (A: up)
12. /k/ /y�/ /b/, cube (A: unicorn)
19. /w/ /ŭ/ /n/, one (A: up)
20. /m/ /y�/ /t/, mute (A: unicorn)
21. /r/ /ŭ/ /sh/, rush (A: up)
22. /f/ /y�/ /m/, fume (A: unicorn)
23. /b/ /ŭ/ /s/, bus (A: up)
24. /h/ /y�/ /j/, huge (A: unicorn)
❼ Optional Challenge: Stretch Words with Four Phonemes
Use the following words with four phonemes to provide an additional challenge for students.
Click to display the image. jump - /j/ /ŭ/ /m/ /p/, jump (I can jump high enough to reach the shelf.) bump - /b/ /ŭ/ /m/ /p/, bump (The car slowed down when it went over the speed bump.) stuck - /s/ /t/ /ŭ/ /k/, stuck (I stuck the glitter to the paper with glue.) brush - /b/ /r/ /ŭ/ /sh/, brush (I dipped the brush in the red paint.) cluck - /k/ /l/ /ŭ/ /k/, cluck (The chicken said, “cluck.”)
❽ Optional Activity: Mystery Bag: Blending Sounds
Click to display the Mystery Bag. Say:
• “Let’s see what words are in our Mystery Bag! Listen to my sounds.
• /m/ /y�/ /l/.”
You can use the optional images as additional practice for students who may need it at a later time.
© 2017 Really Great Reading Company, LLC 125 UNIT 21 Lesson 2
Ask “What word does it make when we put these sounds together, /m/ /y�/ /l/?” A: mule
Say “Let’s check in the bag!”
Click to display the mule to confirm students’ answer.
Say “Let’s try another one.”
Click to display the Mystery bag
Continue with the remaining examples:
1. /b/ /ŭ/ /g/, bug
2. /k/ /y�/ /t/, cute 3. /f/ /y�/ /m/, fume 4. /r/ /ŭ/ /n/, run
5. /k/ /y�/ /b/, cube
6. /s/ /ŭ/ /n/, sun 7. /b/ /ŭ/ /s/, bus 8. /h/ /y�/ /j/, huge 9. /t/ /ŭ/ /b/, tub
10. /g/ /ŭ/ /m/, gum
126 © 2017 Really Great Reading Company, LLC UNIT 21 Lesson 2
Unit 21 | Lesson 3
Phonics Concept: Digraph th AP
Objectives
Students will:
• identify the letters th as a digraph that spells the phoneme (sound) /th/;
• accurately spell and read words with the phoneme (sound) /th/ spelled with digraph th
Description
The teacher, as well as an optional animation, introduces a new digraph, digraph th, which spells the sound /th/, like in thumb. Students build real words with the digraph th and then, optionally, build “silly” nonsense words as a challenge.
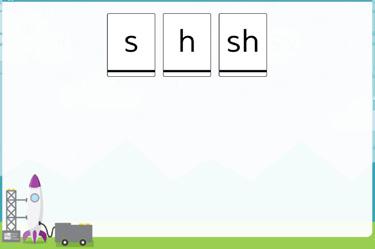
Student Materials
Holding and working boards from Countdown Student Kit What Students See
What You Need to Know
Digraph th
• The digraph th is a consonant digraph phoneme that is produced by placing the end of your tongue between your teeth and blowing air across the top of your tongue.
• Some students confuse this phoneme with the /f/ phoneme, saying “teef” instead of “teeth.”
• The digraph th has an unvoiced phoneme (the vocal chords are not used), as in thumb, and a voiced phoneme (the vocal chords are used), as in that.
• Some general observations about when the digraph th is voiced or unvoiced follow. There are, however, exceptions to these generalizations.
Voiced digraph th
• The digraph th is voiced primarily in words of Germanic (Anglo-Saxon) origin.
o The digraph th is voiced at the beginning of a word only in function words, such as that, this, them, those, thus, these.
o The digraph th can also be voiced when it is followed by the letter e at the end of a word, such as bathe, lathe, breathe, clothe, tithe, soothe, loathe
© 2017 Really Great Reading Company, LLC 127 UNIT 21 Lesson 3
o The digraph th can be voiced in the middle of words when th is preceded by a vowel and followed by er, as in mother, father, bother, gather, weather, whether, neither, together. (The digraph th is also voiced in the words farther and further, which are of Germanic origin.)
o The digraph th is voiced any time the base word worth is followed by a suffix beginning with a vowel, as in worthy, trustworthy, creditworthy, seaworthy, worthiness.
Unvoiced digraph th
• The digraph th is unvoiced in almost all other words not described above:
o The digraph th is unvoiced at the beginning of content words, such as thumb, throat, thrash, theme, thank, thing, theater, therapy, thimble, thousand, thyroid, thorax.
o The digraph th is unvoiced at the end of words, such as path, myth, cloth, birth, mouth, health, strength
o The digraph th is unvoiced in the middle of words that are not of Germanic origin, such as ether, lethal, ethics, diphthong, panther, catharsis, marathon, amethyst
o Countdown students learn several of the most common function words with the digraph th as Heart Words. We do not explicitly teach the voiced digraph th phoneme, but we do use a couple of common words with this voiced phoneme in reading and spelling activities with teacher notes offering guidance to share with students. 3, 2, 1…
Open Countdown Online to Unit 21, Lesson 3 (21.3). Students take out color and letter tiles and working board from Countdown Student
• “Remember, when we see just one letter by itself, like this s or this h (point to s and h), they spell just one sound. S spells /s/, like in /s/, soap. H spells /h/, like in /h/, hammer.
128 © 2017 Really Great Reading Company, LLC UNIT 21 Lesson 3
Launch! ❶ Review Digraph sh and Teach Digraph th
Kit.
letter tiles s
and sh Say:
Click to display the
, h,
• Some sounds are a little different because they are spelled with two letters instead of just one.”
• (Point to digraph sh tile.) “This is two letters on one tile. Two letters on one tile have a special name. They work together to spell just one sound.”
Ask “What do we call two letters that work together to spell just one sound?” A: a digraph
Say “Yes! A digraph is two letters that work together to spell just one sound.”
Point to the sh tile.
Ask “What sound does this digraph spell?” A: /sh/
Say “Yes! /sh/, like in /sh/, sheep. Now let’s learn about another digraph.”
Click to display the thumb.
Ask:
• “What is this a picture of?” A: a thumb
• “What is the first sound in thumb?” A: /th/
Click to display the digraph th tile below the thumb.
Say:
• “When we see t and h together, they work together like a team to spell one sound. They don’t spell /t/ or /h/ like they do when they are by themselves. They spell a brand new sound!
• Their new sound is /th/, like the first sound in thumb: /th/.” (Give a thumbs-up while saying /th/.)
• “Say /th/ with me while you give me a thumbs-up.”
Students say /th/ while giving a thumbs-up.
Say “The letters th are called a digraph, just like digraph sh
Ask “Who can remember what a digraph is?” A: two letters that work together to spell just one sound
Say:
• “Yes! The letters th are a digraph because the t and h work together to spell one sound, the sound /th/, like in /th/, thumb (point to thumb)
• In your kits, you have a th tile. You will use this tile when we build words with digraph th.”
The animation available in Countdown Online introduces digraph th in a fun and engaging way. We recommend showing it after teaching Section 1 as a review of the content or to reinforce the content for students who might need more direct instruction.
© 2017 Really Great Reading Company, LLC 129 UNIT 21 Lesson 3
❷ Build Real Words with Digraph th
Say “Now, we are going to build real words with digraph th ”
I DO: Build bath
Click to display the image for bath.
Say “The first word is bath, as in, ‘I took a bath to get clean.’”
Stretch the sounds - bath, /b/ /ă/ /th/, bath.
Say “I heard three sounds in bath, /b/ /ă/ /th/.”
Click to display one color tile at a time while again saying “/b/ /ă/ /th/.”
Click to display a letter tile below each color tile to spell each sound while saying the sound.
Use Touch & Say to read bath - /b/ /ă/ /th/, bath.
Point to digraph th and say “I see digraph th in this word. I know digraph th has two letters working together to spell one sound, /th/.”
Say “Now let’s try one together.”
WE DO: Build moth
Click to display the moth
Say “Now, let’s build the real word moth together. A moth is an insect that looks like a butterfly and flies in the air, mostly at night. ‘The moth flew inside the house when we opened the door.’ Repeat moth.” (Students repeat.)
Stretch the sounds with students - moth, /m/ /ŏ/ th/, moth.
Click to display one color tile for each sound in moth while saying the sounds/m/ /ŏ/ th/.
Ask individual students the following questions to lead students in spelling each sound by placing letter tiles below the color tiles, one at a time. Click to display each letter tile as students respond with the correct spellings:
• “What is the first sound you hear?” A: /m/
• “What letter spells /m/?” A: m (Click to display m; students place the m tile on their boards.)
• “What is the next sound you hear?” A: /ŏ/
• “What letter spells /ŏ/?” A: o (Click to display o; students place the o tile on their boards.)
• “What is the last sound you hear?” A: /th/
130 © 2017 Really Great Reading Company, LLC UNIT 21 Lesson 3
•
“What letters spell /th/?” A: th (Click to display th; students place the th tile on their boards.)
Use Touch & Say to read moth with students - /m/ /ŏ/ /th/, moth. Students clear boards.
YOU DO: Build real words with digraph th
Say “Now, you are going to use your color and letter tiles to build four real words. Each word will have digraph th. ”
Click to display each image and dictate the words and sentences below, one at a time, following the Build a Word steps for each word and helping students as needed.
path - “Walk down the path to the lake.” thin - “My little brother’s finger was as thin as a pencil.” thud - “A thud is a loud noise when something falls. There was a loud thud when I dropped the heavy book.” math - “I love to learn about numbers when we do math at school.”
Students build each word independently, one word at a time. Students should: Say the word. Stretch the sounds in the word. Place one color tile on boards for each sound while saying the sound. Spell the word by placing one letter tile below each color tile. a p th i th n u th d a m th
Use Touch & Say to read the word.
Hold up their boards so you can check their spelling and provide Positive Error Correction as needed.
Click to display the correct placement of color and letter tiles for each word. Students clear boards and wait for the next word to be dictated.
Remember to use Positive Error Correction if students make a mistake while building words. Steps for Positive Error Correction can be found on p. 47.
© 2017 Really Great Reading Company, LLC 131 UNIT 21 Lesson 3
❸ Optional Challenge: Build Silly Words
Say “Now, you are going to build some super silly words that have digraph th. Remember, these words are very silly! They don’t mean anything because they are not real words, but we can spell them and read them because the letters will tell us what sounds to say.”
Click to display the silly image, and dictate the silly words below, one at a time, following the Build a Word steps for each word and helping students as needed.
guth theb thox
Students build each word independently, one word at a time. Students should: Say the word.
Stretch the sounds in the word.
Place one color tile on boards for each sound while saying the sound.
Spell the word by placing one letter tile below each color tile. u g th e th b o th x
Use Touch & Say to read the word.
Hold up their boards so you can check their spelling and provide Positive Error Correction as needed.
Click to display the correct placement of color and letter tiles for each word.
Students clear boards and wait for the next word to be dictated.
132 © 2017 Really Great Reading Company, LLC UNIT 21 Lesson 3
Unit 21 | Lesson 4
Student Practice AP
Objectives
Students will:
• identify the graphemes (sound spellings) in printed words and produce the proper sound for each grapheme; blend the graphemes together to produce real words (Detective Work);
• read words, identify their vowel sounds, and determine if they have digraph th (Word Sort).
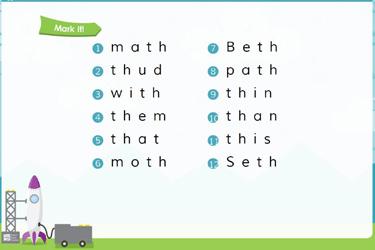
Description
Teacher leads students through the Mark It! and Read It! procedures in the Detective Work activity, and then leads students through a model word(s) for the Word Sort. Students then read the remaining words on their own, first listening carefully for the vowel sound and matching it with the guideword image for the vowel sound they hear, and then listening carefully for digraph th. Teacher reviews the answers with students, allowing time for students to correct their work if needed.
Student Materials
• Countdown Student Workbook
• Pencil
What Students See
What You Need to Know
No new concepts.
3, 2, 1…
Open Countdown Online to Unit 21, Lesson 4 (21.4).
OPTIONAL
Before teaching this lesson, you may wish to run the Letter-Sound and Heart Word Pop-Up and 3-Up activities in Countdown Online to practice the letter sounds and Heart Words taught in Lesson 1.
© 2017 Really Great Reading Company, LLC 133 UNIT 21 Lesson 4
In the words them, that, than, and this, digraph th sounds slightly different than it does in the word math because the /th/ sound is voiced (see the What You Need to Know section of Unit 21 on p. 127 for more information).
Launch!
❶ Detective Work: Mark It!
Students open workbooks to page 12.
Say “In Detective Work, we are going to be ‘letter and sound detectives.’ We will be using what we have learned to pay close attention to each letter in a word and then read the word.”
Click to display the Mark It! words. Say:
• “In Mark It!, we will underline letters and say the sounds that those letters make. Then, we will blend the sounds together to make a word.
• Watch as I underline letters while saying their sounds and then read the whole word.
• When we see digraph th, we will underline both letters with one line because, together, they spell one sound, /th/.”
Click three times to underline the spellings (graphemes) in the first word while saying the sounds:
• “/m/” while underlining the m
• “/ăăăă/” while underlining the a
• “/th/” while underlining the th
• “math”
Students repeat the process in their workbooks for the word math.
Model the process above for the rest of the words one at a time. After each word, have students repeat orally and on paper. Make sure students are underlining each letter (or letters th together with one line for digraph th) as they are saying the proper sound.
❷ Detective Work: Read It!
Say:
•
“The next part of Detective Work is called Read It!
• In this section, I will be calling on one student at a time to read a row of words out loud to the group.
• In Read It!, we do not underline the letters. We just read the words.
• When it is your turn to read, read loudly enough so everyone can hear.
• When it is not your turn to read, you will be a Checker, listening carefully.
134 © 2017 Really Great Reading Company, LLC UNIT 21 Lesson 4
Word Sort Short Vowels 12 unit 18 Mark It! Read
ma th thud with them that moth this path that thud math moth thin Beth than with them Seth that thin Beth them Seth this path than thud Beth path thin than this Seth Detective Work
2017 Really Great Reading Company, LLC
It! 1. 2. 3. 4. 5. 6. 7. 8. 9. 10. 11. 12. 1. 2. 3. 4. 5. 6. 7.
• We will give the Reader a thumbs-up if they read all of the words correctly, and we will give them a thumbs-to-the-side if there is a word they need to try again.”
Students read a row of words out loud.
❸ Word Sort: Short Vowels and Digraph th
Say:
• “Remember, when we are doing a Word Sort, I will always model the first one or two words to show you how to sort the words.
• Sorting words will help you to pay attention to the spelling of the words.
• In this lesson, we will sort words in two ways. First, we will decide which vowel sound we hear. We will read the word first and then decide if the vowel sounds like /ă/, apple; /ĕ/, edge, /ĭ/, itch; /ŏ/, octopus; or /ŭ/, up.
• Next, we will read the word again and listen carefully for the sound of digraph th, /th/. If we hear digraph th in the word, we will circle it.”
Click to display the top section of the Word Sort.
Students open workbooks to page 13.
Read and finger-stretch the first word aloud: thud, /th/ /ŭ/ /d/, thud.
Ask:
• “What vowel sound did you hear in the middle?” A: /ŭ/
• “What letter spells /ŭ/ in this word?” A: u
• “Is /ŭ/ the same as the beginning of aaaapple, eeeedge, ooooctopus, or uuuup?” A: up
•
“Right! So, which picture should we circle?” A: up
Click to circle the image for up
Prompt students to circle the image for up.
Say “Now, let’s stretch out the sounds in the word again: thud, /th/ /ŭ/ /d/, thud.”
Ask:
• “Did you hear the sound /th/ in this word?” A: yes
• “What letters spell /th/ in this word?” A: th
• “What do we call these letters?” A: digraph th
Say “Right! Let’s circle the letters that spell /th/.”
Click to circle digraph th.
Be sure to use Positive Error Correction if students misread any words in Read It! Positive Error
Correction steps can be found on p. 106. When beginning the Word Sort, you should model as many words as you deem necessary for your students to grasp the concept and proceed independently.
Short Vowels and Digraph th Word Sort
unit 21 1. 2. 3. 4. 5. 6. 7. 8. 9. 10.
th u d b a t th i n S e th m a th b o x w i th p a th s u n t e n
13
In this sort, students are given only four short vowel sounds to choose from for each word. In later sorts, they will choose from all five short vowel sounds.
© 2017 Really Great Reading Company, LLC 135 UNIT 21 Lesson 4
Prompt students to circle digraph th.
Say:
If your students are not yet able to read these words on their own, feel free to read each word aloud for them and have them independently select the correct vowel sounds and circle the digraphs.
• “Now, you are going to circle the picture for the vowel sound and circle digraph th if you see it in the rest of the words on your own.
• Listen carefully for the vowel sound when you say each word.
• Then listen carefully for digraph th sound, /th/.”
Use Countdown Online to check answers with students
Call on individual students to read a word, identify the vowel sound and thecorrect guideword image, and identify the digraph.
Students check answers.
The final five words are displayed on the next screen in Countdown Online
136 © 2017 Really Great Reading Company, LLC UNIT 21 Lesson 4
Unit 21 | Lesson 5
Wrap Up & Show What You Know
Objectives
Students will:
• accurately articulate the phonemes reviewed in this unit;
• accurately read phrases and sentences that contain the concepts, words, and phonemes taught in this unit and previous units;
• accurately spell words with a controlled set of concepts and phonemes.
Description
In Phrases and Sentences to Read, students read short phrases and sentences out loud to the class. Their goal is to read each phrase and sentence accurately the first time. In Spell It!, students see an image, which the teacher names. Teacher and students finger-stretch the sounds in the word together, counting the sounds. They then fill in a circle for each sound they heard and write the corresponding letter(s) in each box with a filled in circle, spelling the target word.
Student Materials
• Countdown Student Workbook
• Pencil
What Students See
AP
What You Need to Know
No new concepts.
3, 2, 1…
Open Countdown Online to Unit 21, Lesson 5 (21.5).
OPTIONAL
Before teaching this lesson, you may wish to run the Letter-Sound and Heart Word Pop-Up, 3-Up, and Read a Row activities in Countdown Online to practice and assess the letter sounds and Heart Words taught in Lesson 1.

© 2017 Really Great Reading Company, LLC 137 UNIT 21 Lesson 5
If time permits, provide each student with the opportunity to read at least one phrase or sentence. In small groups, you might consider letting each student read two phrases or sentences. Students who struggle should be given additional phrases or sentences for more practice.
Launch!
❶ Phrases and Sentences to Read
Say:
• “Today, we are going to read some phrases and some sentences in our workbooks.
• I will call on you to read a phrase or a sentence when it is your turn to be the Reader, and the rest of us will be Checkers, touching each word as the Reader reads it out loud.”
Students open workbooks to page 14.
Individual students read phrases and sentences. Since there are only 8 phrases and 8 sentences, it is okay to have a student reread a phrase or sentence that has been previously read.
Direct Checkers to give a thumbs-up if the Reader reads all of the words correctly or a thumbs-to-the-side if the Reader misreads a word(s). If the Reader misreads any words, teacher follows Positive Error Correction instructions.
❷ Spell It!
Say:
• “Now, we are going to spell some words with the sounds we have been practicing.
• We are going to start by stretching out the sounds in a word so we can hear them clearly.”
Students open workbooks to Spell It! on page 15.
Say “We are going to spell words that you will hear me say aloud. Let’s start with number 1 at the top of your page.”
Click to display the image for bath.
Say “The first word is bath, as in ‘I take a bath every night before I go to bed.’ Let’s stretch it together. Bath, /b/ /ă/ /th/, bath.” (Finger-stretch bath along with students.)
Ask “How many sounds did we hear?” A: three
Say “Since bath has three sounds, /b/ /ă/ /th/, we will fill in three dots, one for each sound, like this.”
138 © 2017 Really Great Reading Company, LLC UNIT 21 Lesson 5
14 unit 1. The moth was red. (4) 2. Thad is in the bath. (5) 3. They all run that lap. (5) 4. Shop for a thin mug. (5) 5. Fish with the thin rod. (5) 6. Can Beth do this math? (5) 7. Can you jot that down? (5) 8. Come to the hut with us. (6) 1. on that jet (3) 2. a big thud (3) 3. to the path (3) 4. shut that lid (3) 5. do like math (3) 6. this and that (3) 7. they had a fig (4) 8. to have a bath (4) Phrases Sentences 21 Phrases and Sentences to Read 15 unit Spell It! 21 1. 2. 3. 4. 5. 6. 7. 8. 9. 10. Challenge
Click three times to fill in the first three dots, and have students fill in the first three dots on their workbook pages.
1. Say:
• “Since bath has three sounds, it will also have three spellings, and we will write one spelling in each box that has a dot filled in.
• Let’s stretch bath again slowly so we can hear each sound and write it down.”
• “/b/” (PAUSE for students to write b in the first) “/ă/” (PAUSE for students to write a in the second box) “/th/” (PAUSE for students to write th in the third box; if necessary, remind them that /th/ is spelled by digraph th)
Click three times to fill in the letters b a th, and have students check their work, correcting their spelling if needed. b a th
Continue the above process with the following words, one at a time.
2. thud (Optional sentence: I heard a thud when the box fell.) th u d
3. with (Optional sentence: It will be faster if I clean up the toys with you.) w i th
4. gosh (Optional sentence: Oh my gosh! I cannot believe how big that dog is!) g o sh
5. path (Optional sentence: Let’s go for a walk down the path in the woods.) p a th
OPTIONAL CHALLENGE WORDS:
6. fox (Optional sentence: The fox chased the rabbit, but the rabbit got away.) f o x
7. Beth (Optional sentence: Aunt Beth will pick me up from school today.)
B e th
If students struggle to spell the individual sounds, you may want to ask students how each sound is spelled before moving on to the next, as you do in Build a Word You may need to remind students that people's names (Beth and Thad in the Spell It! list) begin with capital letters.
© 2017 Really Great Reading Company, LLC 139 UNIT 21 Lesson 5
8. lash (Optional sentence: I blinked to get the lash out of my eye.) l a sh
9. moth (Optional sentence: The moth flies near our porch light.) m o th
10. Thad (Optional sentence: The boy told me that his name was Thad.) Th a d
See p. 54 for a Differentiation Option for Spell It!
140 © 2017 Really Great Reading Company, LLC UNIT 21 Lesson 5
Unit 22 | Lesson 1
Letter-Sound & Heart Word Fluency AP & Sight Words
Objectives
Students will:
• build automatic recognition of some letter-sound (grapheme-phoneme) combinations;
• build automatic recognition of some Heart Words.
What You Need to Know
Description
Students will play Look, Think, Say!, Pop-Up, 3-Up, and Read a Row to review six letter sounds, to learn three new Heart Words, and to review or learn three additional Heart Words.
What Students See
For a complete explanation of the Look, Think, Say!, Pop-Up, 3-Up, and Read a Row activities, see p. 326 in Appendix A.
Before Teaching:
Letter-Sound and Heart Word Fluency Set-Up
Open Countdown Online to Unit 22, Letter-Sound and Heart Word Generator.
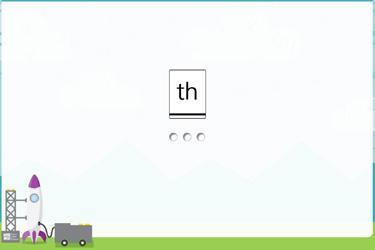
Choose six letter sounds to review and practice.
Choose three Heart Words to review and practice, or you may wish to select three additional new Heart Words to teach. (The first three new Heart Words to teach in this unit will be locked.)
Optional: Print Read a Row Teacher Recording Form.
3, 2, 1…
Open Countdown Online to Unit 22, Lesson 1 (22.1).
Launch!
❶ Letter-Sound Look, Think, Say!
Say “Today, we are going to practice the sounds for six letters with the game Look, Think, Say! ”
Click twice to display the first letter with one red dot and two empty dots below it.
Digraph th will be locked for this unit to provide an opportunity for students to develop automaticity with its sound.
© 2017 Really Great Reading Company, LLC 141 UNIT 22 Lesson 1
Say:
• “Remember, this red dot (point to the red dot) tells us to stop what we are doing so we can listen to the letter and its sound.
• This letter is [letter name], and it spells the sound [/letter sound/].”
Click to display the yellow dot.
Say “Think about the sound of this letter.”
Click to display the green dot.
Say:
• “This green dot (point to the green dot) tells us to say the sound out loud.
• Say the sound with me, [/letter sound/].
• Let’s try another letter.
• Remember to look, think, and then say. Only say the sound out loud when the green dot shows up.”
Click twice to display the next letter, and continue the above procedure for the remaining five letters.
Continue with the same six letter sounds for two additional rounds.
❷ Letter-Sound Pop-Up
Say:
• “Now that we have reviewed the letter names and sounds, we are going to see if we can just look quickly and say the sounds that we remember.
• When you see a letter pop up onto the screen, say the sound out loud as quickly as possible, but remember that it is still more important to say the correct sound than to be fast.
• If you need help remembering, I can help, but try your best.”
Click to display the six letters at random. Each letter will appear several times. Read each sound together with students as it pops up.
❸ Letter-Sound 3-Up
Say:
• “Great job! In our next game, you will see three letters on the screen.
• When you see the red dot, stop and look at the three letters. When you see the yellow dot, think about the letters and try to remember the sounds they say. When you see the green dot, say the three sounds out loud.”
142 © 2017 Really Great Reading Company, LLC UNIT 22 Lesson 1
Click to display the sets of three letters. Each letter will appear several times.
Look at, think about, and say each set of three letter sounds together with students as the sets are displayed.
❹ Letter-Sound Read A Row
Click to display three long green boxes, each of which is covering up a row of letter tiles.
Say “Now, we are going to read a row of letter sounds.”
Call on one student to read a row of letter sounds out loud to the class.
When the student is done reading, ask the Checkers to show the thumbs-up or thumbs-to-the-side gesture.
Repeat with additional students reading the remaining rows.
❺ Heart Word Look, Think, Say!
Say “Now, we are going to learn to read some new Heart Words.”
Click twice to display the Heart Word ate with one red dot and two empty dots below the word.
Say:
• “Remember, this red dot (point to the red dot) tells us to stop what we are doing so we can listen to the word.
• This word is ate, as in, ‘We ate all of the food on our plates.’”
Click to display the yellow dot.
Say “Think about this word.”
Click to display the green dot.
Say:
• “Say the word with me, ate
• Let’s try another word.
• Remember to look, think, and then say. Only say the word out loud when the green dot shows up.”
Click twice to display the Heart Word our with one red dot and two empty dots below the word.
Say “Look at the word our, as in, ‘That is our red wagon in the backyard.’”
Click to display the yellow dot.
Say “Think about this word.”
Click to display the green dot.
If you would like to have more than three readers read a row, Countdown Online will allow you to run through the activity twice before moving on. For Read a Row, you need a copy of the student tracking chart if you choose to record the students’ performance. The tracking chart can be printed from Countdown Online, and a sample can be found in Appendix B.
© 2017 Really Great Reading Company, LLC 143 UNIT 22 Lesson 1
Say:
• “Say the word!
• Let’s try one more word.”
Click twice to display the Heart Word who with one red dot and two empty dots below the word.
Say “Look at the word who, as in, ‘ Who spilled the milk on the floor?’”
Click to display the yellow dot.
Say “Think about this word.”
Click to display the green dot.
Say:
• “Say the word!
• Let’s look at those words again.”
Continue with the same three Heart Words and the three Heart Words you chose in the Heart Word Generator for two additional rounds.
❻ Heart Word Pop-Up
Say:
• “Now, we are going to practice reading the Heart Words we’ve learned.
• In our first game, when you see a word pop up onto the screen, say the word out loud.
• If you need help remembering, I can help, but try your best.”
Click to display the Heart Words ate, our, who, and the three Heart Words you have selected in the Heart Word Generator at random. Each word will appear several times.
Read each word together with students as it pops up.
❼ Heart Word 3-Up
Say:
• “Great job! In our next game, you will see three words on the screen.
• When you see the red dot, stop and look at the three words. When you see the yellow dot, think about the words and try to remember them. When you see the green dot, say the three words out loud.”
Click to display the sets of three Heart Words. Each set will contain the following words in a random order: ate, our, who, and the three words you have selected. Each word will appear several times.
144 © 2017 Really Great Reading Company, LLC UNIT 22 Lesson 1
Look at, think about, and say each set of three words together with students as the sets are displayed.
❽ Heart Word Read a Row
Click to display three long green boxes, each of which is covering up a row of Heart Words.
Say “Now, we are going to read a row of Heart Words.”
Call on one student to read a row of Heart Words out loud to the class. When the student is done reading, ask the Checkers to show the thumbs-up or thumbs-to-the-side gesture.
Repeat with additional students reading the remaining rows.
If you would like to have more than three readers read a row, Countdown Online will allow you to run through the activity twice before moving on.
© 2017 Really Great Reading Company, LLC 145 UNIT 22 Lesson 1
Unit 22 | Lesson 2
Short o vs. Long o PA
Objectives
Students will:
• accurately segment phonemes (sounds) in single-syllable words with short o and long o;
• accurately sort words into groups by whether their vowel sound is a short o or a long o;
• (OPTIONAL) accurately add a phoneme (sound) to the end of a word to form a new word.
Description
The teacher reviews the short o sound and move ment, and students finger-stretch words with short o. The teacher then reviews the long o sound and movement, and students finger-stretch words with long o. Students sort words into two groups based on whether their vowel sound is short o or long o Then, optionally, students finger-stretch four-sound words with short o and long o as a challenge. Ad ditionally, students may add a final sound to some spoken words as an optional extension.
What Students See
What You Need to Know
Short
o and Long o
• Short o is the first phoneme in the word octopus.
• The symbol for the short o phoneme is /ŏ/.
• Long o is the first phoneme in the word open.
• The symbol for the long o phoneme is /ō/.
Phoneme Addition
• This lesson includes an optional phoneme addition activity, Add That Sound
• Students participated in this activity in Countdown Book 2
• This activity involves students listening to real words and then adding a new phoneme to the end of the words. In all examples, when the new phoneme is added, a new real word is created.
• This phonemic awareness activity is designed to enhance a student’s ability to manipulate individual phonemes.
• The process is this:
o The teacher will say a real word. The teacher will then ask the students to add a new phoneme (a consonant or digraph) to the end of the word.
146 © 2017 Really Great Reading Company, LLC UNIT 22 Lesson 2
•
o When the students add a new phoneme, a new word is created, and the students will say the new word (a real word).
o Example:
• The word is tea.
• Let’s add /th/ to the end of the word to make a new word.
• What’s the new word? A: teeth
See Appendix A, p. 332, for more information on the phoneme manipulation exercises used in Countdown.
3, 2, 1…
Open Countdown Online to Unit 22, Lesson 2 (22.2).
OPTIONAL
Before teaching this lesson, you may wish to run the Letter-Sound and Heart Word Pop-Up and 3-Up activities in Countdown Online to practice the letter sounds and Heart Words taught in Lesson 1.
Launch!
❶
Review Short o
Say “Let’s get started by reviewing the short o sound and movement.”
Click to display the Short Vowels Poster
Review the short o sound and movement:
• Say “The short o sound is /ŏŏŏŏ/, like the first sound in ooooctopus.”
• Make the short o, octopus movement while saying the phoneme /ŏŏŏŏ/. (Pretend your hand is an octopus with arms hanging down, swimming back and forth in the ocean above your head. Say /ŏŏŏŏ/ while the octopus “swims.”)
• Have students make the short o, octopus movement as they say /ŏŏŏŏ/.
❷ Finger-Stretch Words With Short O
Say “Now, let’s stretch words with the short o sound.”
I DO: Finger-Stretch hop
Click to display the image for hop.
Say:
• “Listen while I say the sounds in hop, as in, ‘The bunny will hop out of his cage.’”
© 2017 Really Great Reading Company, LLC 147 UNIT 22 Lesson 2
If your students are still struggling to stretch the sounds in words with short o, you may wish to use some of the You Dos as We Dos to provide more guided practice.
• “hop” (hold closed fist against chest, crossing the midline)
• “/h/” (extend thumb), “/ŏŏŏŏ/” (extend pointer finger), “/p/” (extend middle finger)
• “hop” (pull fingers back to a closed fist while saying the word)
Say “Hop has three sounds. The vowel sound is /ŏŏŏŏ/. I hear the same sound as the beginning of /ŏ/, octopus, so the vowel sound must be short o. Short o, /ŏ/, is the first sound in ooooctopus (while making the short o, octopus motion).”
Click to display the Short Vowels Poster
Point to the Short Vowels Poster and remind students that they can look at the picture for octopus to remind themselves that short o sounds like the first sound in /ŏ/, octopus.
WE DO: Finger-Stretch log
Say “Now let’s stretch out a word together.”
Click to display the log
Say:
• “Ready? Our word is log, as in, ‘The man cut the log for a bonfire.’
• Let’s stretch it together.”
• “log ” (hold closed fist against chest, crossing the midline)
• “/l/” (extend thumb), “/ŏŏŏŏ/” (extend pointer finger), “/g/” (extend middle finger)
• “log ” (pull fingers back to a closed fist while saying the word)
Ask:
• “How many sounds did we hear?” A: three
• “What vowel sound did we hear in the word?” A: /ŏŏŏŏ/
Click to display the Short Vowels Poster
Ask:
• “What is the guideword for that sound?” A: octopus
• “What is the motion for octopus?” A: pretend hand is an octopus swimming back and forth (students make motion)
• “Is /ŏŏŏŏ/ short or long?” A: short
• “How do we know?” A: /ŏ/ is the first sound in octopus
YOU DO: Finger-Stretch words with short o
Say “Now, you will stretch out some words on your own.”
148 © 2017 Really Great Reading Company, LLC UNIT 22 Lesson 2
Click to display the image.
Click to display the Short Vowels Poster.
Ask individual students to stretch the sounds in each word below. After students stretch the sounds, ask:
• “How many sounds did you hear?” A: three
• “What vowel sound did you hear in the word?” A: /ŏŏŏŏ/
• “What is the guideword for that sound?” A: octopus
• “What is the motion for octopus?” A: pretend hand is an octopus swimming back and forth (students make motion)
• “Is /ŏŏŏŏ/ short or long?” A: short fox - /f/ /ŏ/ /ks/, fox (A fox will hunt for smaller animals to eat.) top - /t/ /ŏ/ /p/, top (We hiked to the top of the mountain.) rod - /r/ /ŏ/ /d/, rod (I got a fishing rod for my birthday.) sob - /s/ /ŏ/ /b/, sob (Sob means to cry really hard. My brother will sob if he can’t find his teddy bear.) hot - /h/ /ŏ/ /t/, hot (Be careful. The stove is very hot.) mop - /m/ /ŏ/ /p/, mop (We need a mop to clean up the spilled juice.)
❸ Review Long o
Say “Next, we are going to review the long o sound. Remember, a long vowel sound is just like saying the name of the letter, so the long o sound is /ōōōō/.”
All students repeat the sound, /ōōōō/.
Say “To help us remember this sound, we make the long o movement while saying the sound, /ōōōō/.” (Write the lowercase o in the air with your index finger.)
Click to display the Short and Long Vowels Poster.
Remind students they can use the posters and movements to check if a vowel sound is short or long:
• Point to the short o section of the Short Vowels Poster, and show students they can check the vowel sound by looking at the octopus picture and saying: “/ŏ/ is short, like in /ŏ/, octopus.”
• Point to the long o section of the Long Vowels Poster, and show students they can check the vowel sound by looking at the letter o and saying: “/ōōōō/ is long, like the name of the letter o.”
Click to display the image for hole. Say:
• “I’ll use the poster to help me check the vowel sound in hole.
Definitions are provided for words that may be unfamiliar to many kindergarten students.
If your students are proficient at stretching words with short o, you may wish to do only a couple of You Dos and then move to the long o portion of the lesson.
Remember to elongate the vowel articulation by holding the vowel phoneme for 2–3 seconds.
© 2017 Really Great Reading Company, LLC 149 UNIT 22 Lesson 2
• First, I’ll stretch the sounds: hole, /h/ /ō/ /l/, hole. (Finger-stretch the word.)
• I hear the name of the letter o in the middle, and the Long Vowels Poster (point to the o on the Long Vowels Poster) tells me that long o says its name, so the vowel sound in hole must be a long o.”
❹ Finger-Stretch Words with Long O
I DO: Finger-Stretch
Click to display the goat
Say:
• “Now, we are going to stretch out all of the sounds in some words that have long o
• Listen while I say the sounds in goat, as in, ‘A goat and a cow lived on the farm.’”
• “goat ” (hold closed fist against chest, crossing the midline)
• “/g/” (extend thumb), “/ōōōō/” (extend pointer finger), “/t/” (extend
• “goat ” (pull fingers back to a closed fist while saying the word)
Say “Goat has three sounds. I hear the name of the letter o in goat, so the vowel sound must be a long o (while tracing the lowercase letter o in the air)
Long o says its name, /ō/.”
Click to display the Long Vowels Poster
Point to the Long Vowels Poster and remind students that they can look at the letter o to remind themselves that the long o sound is the same as the name of the letter o.
WE DO: Finger-Stretch cone
Say “Now let’s stretch out a word together.”
Click to display the cone
Say:
• “Ready? Our word is cone, as in, ‘The ice cream dripped down the cone.’
• Let’s stretch it together.”
• “cone” (hold closed fist against chest, crossing the midline)
• “/k/” (extend thumb), “/ōōōō/” (extend pointer finger), “/n/” (extend middle finger)
• “cone” (pull fingers back to a closed fist while saying the word)
Ask:
• “How many sounds did we hear?” A: three
150 © 2017 Really Great Reading Company, LLC UNIT 22 Lesson 2
• “What vowel sound did we hear in the word?” A: /ōōōō/
Click to display the Long Vowels Poster.
Ask:
• “What is the motion for /ōōōō/?” A: writing lowercase o in the air (students make motion)
• “Is /ōōōō/ short or long?” A: long
• “How do we know?” A: /ō/ is the name of the letter o
YOU DO: Finger-Stretch words with long o
Say “Now, you will stretch out some words on your own.”
Click to display the image.
Click to display the Long Vowels Poster.
Ask individual students to stretch the sounds in each word below. After students stretch the sounds, ask:
• “How many sounds did you hear?” A: three
• “What vowel sound did you hear in the word?” A: /ōōōō/
• “What is the motion for /ōōōō/?” A: writing the lowercase letter o in the air (students make motion)
• “Is that short or long?” A: long
• “How do we know?” A: /ō/ is the name of the letter o rose - /r/ /ō/ /z/, rose (A rose is a type of flower. The red rose in the vase smelled so good.) loaf - /l/ /ō/ /f/, loaf (A loaf is bread that is usually in a long shape. We bought a loaf of bread so we could make sandwiches.) soap - /s/ /ō/ /p/, soap (Please wash your hands with soap and water.) toes - /t/ /ō/ /z/, toes (I like to put my toes into the ocean.) bone - /b/ /ō/ /n/, bone (The dog liked to chew on the big bone.) home - /h/ /ō/ /m/, home (I will go home after school.)
❺ Sort Words With Short o and Long o
Say “Now, we are going to sort words into two groups. Some words will have a short o vowel sound, and other words will have a long o vowel sound.” Click to display the images for octopus and open as the column headings. Point to the images for octopus and open and say “/ŏ/, octopus; /ō/, open.”
Say “We will hear some words. We will stretch out the sounds in each word and then decide if the vowel sound is short o, like in /ŏ/, octopus, or long o, like in /ō/, open.”
If your students need more guided practice stretching the sounds in words with long o, you may wish to use some of the You Dos as We Dos.
© 2017 Really Great Reading Company, LLC 151 UNIT 22 Lesson 2
You can use the optional images as additional practice for students who may need it at a later time.
Click to display and point to the image for top.
Say:
• “Listen while I say the sounds in top, as in, ‘ They hiked up to the top of the mountain.’”
• “ top” (hold closed fist against chest, crossing the midline)
• “/t/” (extend thumb), “/ŏŏŏŏ/” (extend pointer finger), “/p/” (extend middle finger)
• “ top” (pull fingers back to a closed fist while saying the word)
Say “ Top has three sounds. The vowel sound is /ŏŏŏŏ/ (while making the short o, octopus motion).”
Ask “Is /ŏŏŏŏ/ the first sound in /ŏ/, octopus or /ō/, open?” A: /ŏ/, octopus
Say “Right! In /t/ /ŏ/ /p/, top, the vowel sound is /ŏ/ like in /ŏ/, octopus. I’ll move top to the /ŏ/, octopus side.”
Click to place top in the octopus column.
Say “Let’s try another one.”
Continue with the remaining examples, stretching the sounds in each word and comparing the vowel sound to /ŏ/, octopus or /ō/, open:
2. /b/ /ŏ/ /ks/, box (A: octopus)
3. /b/ /ō/ /t/, boat (A: open)
4. /s/ /ō/ /k/, soak (A: open)
5. /l/ /ŏ/ /g/, log (A: octopus)
6. /r/ /ŏ/ /t/, rot (A: octopus)
7. /h/ /ō/ /z/, hose (A: open)
Optional: Additional Short o vs. Long o Sort 13. /t/ /ō/ /z/, toes (A: open) 14. /h/ /ŏ/ /t/, hot (A: octopus) 15. /s/ /ŏ/ /k/, sock (A: octopus) 16. /f/ /ō/ /n/, phone (A: open) 17. /r/ /ō/ /b/, robe (A: open) 18. /j/ /ŏ/ /n/, John (A: octopus)
8. /sh/ /ō/, show (A: open)
9. /p/ /ŏ/ /t/, pot (A: octopus)
10. /ō/ /t/, oat (A: open)
11. /s/ /ŏ/ /b/, sob (A: octopus)
12. /g/ /ō/, go (A: open)
19. /r/ /ŏ/ /d/, rod (A: octopus) 20. /j/ /ō/ /n/, Joan (A: open) 21. /m/ /ŏ/ /p/, mop (A: octopus) 22. /n/ /ō/ /z/, nose (A: open) 23. /h/ /ŏ/ /g/, hog (A: octopus) 24. /sh/ /ō/, show (A: open)
❼ Optional Challenge: Stretch Words with Four Phonemes
Use the following words with four phonemes to provide an additional challenge for students.
152 © 2017 Really Great Reading Company, LLC UNIT 22 Lesson 2
Click to display the image.
toast - /t/ /ō/ /s/ /t/, toast (I like to put butter on my toast in the morning.)
frog - /f/ /r/ /ŏ/ /g/, frog (The frog hopped onto the lily pad.) clock - /k/ /l/ /ŏ/ /k/, clock (I looked at the clock to see if it was time for lunch.)
groan - /g/ /r/ /ō/ /n/, groan (To groan means to make a noise that shows you are unhappy. Sarah will groan when she sees how long this line is.) smoke - /s/ /m/ /ō/ /k/, smoke (There was a lot of smoke in the air after the fire.)
❽ Optional Extension Activity: Add That Sound
Click to display the image for he.
Say:
• “Today, we are going to add a sound to the end of some words.
• Listen to my word, he.
• Let’s finger-stretch that word together. He, /h/ /ē/, he.”
Click to display a color tile for each sound while saying the sounds again: /h/ (first color tile appears), /ē/ (second color tile appears).
Say “I am going to add a new sound, /t/, to the end of he. I’ll add a new color tile since we are adding a sound.”
Click to display a third color tile. Say:
• “Let’s see what the new word is: /hē/ (sweep finger under the first two tiles), /t/ (touch the third tile), heat (sweep finger under all three tiles). The new word is heat. Did you hear the new sound /t/ at the end?
• Let’s stretch all the sounds in heat together (say the sounds while fingerstretching): /h/ (extend thumb), /ē/ (extend pointer finger), /t/ (extend middle finger), heat (pull closed fist to chest).
• Let’s try another one.”
Continue with remaining additions:
1. tea (/t/ /ē/ + /th/) → teeth
2. say (/s/ /ā/ + /m/) → same
3. sea (/s/ /ē/ + /l/) → seal
4. sigh (/s/ /ī/ + /t/) → sight
5. bee (/b/ /ē/ + /k/) → beak
6. toe (/t/ /ō/ + /d/) → toad 7. key (/k/ /ē/ + /p/) → keep 8. high (/h/ /ī/ + /k/) → hike 9. few (/f/ /y�/ + /m/) → fume 10. go (/g/ /ō/ + /l/) → goal
© 2017 Really Great Reading Company, LLC 153 UNIT 22 Lesson 2
Unit 22 | Lesson 3
Phonics Concept: Review Digraphs sh and th AP
Objectives
Students will:
• identify the letters sh as a digraph that spells the phoneme (sound) /sh/;
• identify the letters th as a digraph that spells the phoneme (sound) /th/;
• accurately spell and read words with the phonemes (sounds) /sh/ spelled with digraph sh and /th/ spelled with digraph th
Description
The teacher reviews digraph sh and digraph th, which spell the sounds /sh/, like in sheep, and /th/, like in thumb. Students build real words with digraphs sh and th and then, optionally, build “silly” nonsense words as a challenge.
Student Materials
• Holding and working boards from Countdown Student Kit What
Students See
What You Need to Know
No new concepts. 3, 2, 1…
Open Countdown Online to Unit 22, Lesson 3 (22.3).
Students take out color and letter tiles and working board from Countdown Student Kit.
Launch!
❶ Teach Digraphs sh and th
Say “Remember, some sounds are special because they are spelled with two letters instead of just one.”
Ask “What do we call two letters that work together to spell just one sound?” A: a digraph
Say “Yes! A digraph is two letters that work together to spell just one sound.”
Click to display the sheep.

Ask:
• “What is the first sound in sheep?” A: /sh/
154 © 2017 Really Great Reading Company, LLC UNIT 22 Lesson 3
•
“Yes! What letters spell the sound /sh/?” A: sh
Click to display the sh below the sheep.
Ask “Right! What do we call the letters s and h when they work together to spell the sound /sh/?” A: digraph sh
Say “That’s it! The letters s and h are called digraph sh. They work together to spell the sound /sh/, like in /sh/, sheep.”
Click to display the thumb.
Ask:
• “What is the first sound in thumb?” A: /th/
• “Yes! What letters spell the sound /th/?” A: th
Click to display the th below the thumb.
Ask “Great! What do we call the letters t and h when they work together to spell the sound /th/?” A: digraph th
Say:
• “Right! The letters t and h are called digraph th. They work together to spell the sound /th/, like in /th/, thumb.
• Whenever we hear the sounds /sh/ or /th/ in a word, we can be sure that there is a digraph in that word.”
❷ Build Real Words with Digraphs sh and th
Say “Now, we are going to build real words with digraph sh and digraph th. ”
I DO: Build cash
Click to display the image for cash.
Say:
• “Listen closely to hear which digraph is in this word.
• The word is cash, as in, ‘My dad used cash to pay for the groceries.’”
Stretch the sounds - cash, /k/ /ă/ /sh/, cash.
Say “I heard three sounds in cash, /k/ /ă/ /sh/.”
Click to display one color tile at a time while again saying “/k/ /ă/ /sh/.”
Say “The last sound I hear is /sh/. I know /sh/ is a digraph sound. It is spelled with digraph sh. ”
Click to display a letter tile below each color tile to spell each sound while saying the sound.
Use Touch & Say to read cash - /k/ /ă/ /sh/, cash.
© 2017 Really Great Reading Company, LLC 155 UNIT 22 Lesson 3
In the word them, digraph th sounds slightly different than it does in the word thumb because the /th/ sound is voiced (see the What You Need to Know section of Unit 21 on p. 127 for more information).
If students have trouble spelling the voiced sound /th/, explain that this is just a slightly different way to say the sound of digraph th.
Point to digraph sh and say “When I see digraph sh in a word, I know the s and the h work together to spell one sound, /sh/.”
Say “Now let’s try one together.”
WE DO: Build them
Click to display the image for them.
Say “Now, let’s build the real word them together. ‘When I saw my friends, I gave them high fives.’ Repeat them.” (Students repeat.)
Stretch the sounds with students - them, /th/ /ĕ/ m/, them
Click to display one color tile for each sound in them while saying the sounds/th/ /ĕ/ m/.
Ask individual students the following questions to lead students in spelling each sound by placing letter tiles below the color tiles, one at a time. Click to display each letter tile as students respond with the correct spellings:
• “What is the first sound you hear?” A: /th/
• “What letters spell /th/?” A: th (Click to display th; students place the th tile on their boards.)
• “What is the next sound you hear?” A: /ĕ/
• “What letter spells /ĕ/?” A: e (Click to display e; students place the e tile on their boards.)
• “What is the last sound you hear?” A: /m/
• “What letter spells /m/?” A: m (Click to display m; students place the m tile on their boards.)
Use Touch & Say to read them with students - /th/ /ĕ/ /m/, them.
Students clear boards.
YOU DO: Build real words with digraphs sh and th
Say “Now, you are going to use your color and letter tiles to build four real words. Each word will have either digraph sh or digraph th.
Click to display each image and dictate the words and sentences below, one at a time, following the Build a Word steps for each word and helping students as needed.
gush - “Gush means to flow very quickly and strongly. The water will gush over the waterfall into the river.” with - “I will go with my uncle to pick up my brother.”
156 © 2017 Really Great Reading Company, LLC
UNIT 22 Lesson 3
moth - “A moth is an insect that looks like a butterfly and flies in the air, mostly at night The moth flew near the light outside of our house.”
shut - “Please shut the door to keep the cold air out.”
Students build each word independently, one word at a time. Students should: Say the word.
Stretch the sounds in the word.
Place one color tile on boards for each sound while saying the sound. Spell the word by placing one letter tile below each color tile. u g sh i w th o m th u sh t
Use Touch & Say to read the word.
Hold up their boards so you can check their spelling and provide Positive Error Correction as needed.
Click to display the correct placement of color and letter tiles for each word. Students clear boards and wait for the next word to be dictated.
❸ Optional Challenge: Build Silly Words
Say “Now, you are going to build some super silly words that have digraph sh or digraph th. Remember, these words are very silly! They don’t mean anything because they are not real words, but we can spell them and read them because the letters will tell us what sounds to say.”
Click to display the silly image, and dictate the silly words below, one at a time, following the Build a Word steps for each word and helping students as needed. shep fath thed
Students build each word independently, one word at a time. Students should: Say the word.
© 2017 Really Great Reading Company, LLC 157 UNIT 22 Lesson 3
Remember to use Positive Error Correction if students make a mistake while building words. Steps for Positive Error Correction can be found on p. 47.
Stretch the sounds in the word.
Place one color tile on boards for each sound while saying the sound.
Spell the word by placing one letter tile below each color tile. e sh p a f th e th d
Use Touch & Say to read the word.
Hold up their boards so you can check their spelling and provide Positive Error Correction as needed.
Click to display the correct placement of color and letter tiles for each word. Students clear boards and wait for the next word to be dictated.
158 © 2017 Really Great Reading Company, LLC UNIT 22 Lesson 3
Unit 22 | Lesson 4
Student Practice AP
Objectives
Students will:
• identify the graphemes (sound spellings) in printed words and produce the proper sound for each grapheme; blend the graphemes together to produce real words (Detective Work);
• read words, identify their vowel sounds, and determine if they have digraph sh or digraph th (Word Sort).
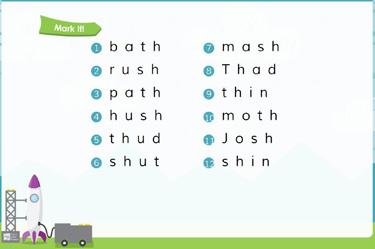
Description
Teacher leads students through the Mark It! and Read It! procedures in the Detective Work activity, and then leads students through a model word(s) for the Word Sort. Students then read the remaining words on their own, first listening carefully for the vowel sound and matching it with the guideword image for the vowel sound they hear, and then listening carefully for digraph sh or digraph th. Teacher reviews the answers with students, allowing time for students to correct their work if needed.
Student Materials
• Countdown Student Workbook
• Pencil
What Students See
What You Need to Know
No new concepts.
3, 2, 1…
Open Countdown Online to Unit 22, Lesson 4 (22.4).
OPTIONAL
Before teaching this lesson, you may wish to run the Letter-Sound and Heart Word Pop-Up and 3-Up activities in Countdown Online to practice the letter sounds and Heart Words taught in Lesson 1.
© 2017 Really Great Reading Company, LLC 159 UNIT 22 Lesson 4
Launch!
❶ Detective Work: Mark It!
Students open workbooks to page 16.
Say “In Detective Work, we are going to be ‘letter and sound detectives.’ We will be using what we have learned to pay close attention to each letter in a word and then read the word.”
Click to display the Mark It! words. Say:
• “In Mark It!, we will underline letters and say the sounds that those letters make. Then, we will blend the sounds together to make a word.
• Watch as I underline letters while saying their sounds and then read the whole word.
• When we see digraph th or digraph sh, we will underline both letters with one line because, together, they spell one sound, /th/ or /sh/.”
Click three times to underline the spellings (graphemes) while saying the sounds:
• “/b/” while underlining the b
• “/ăăăă/” while underlining the a
• “/th/” while underlining the th
• “bath”
Students repeat the process in their workbooks for the word bath
Model the process above for the rest of the words one at a time. After each word, have students repeat orally and on paper. Make sure students are underlining each letter (or letters sh or th together with one line for digraph sh or digraph th) as they are saying the proper sound.
❷ Detective Work: Read It!
Say:
• “The next part of Detective Work is called Read It!
• In this section, I will be calling on one student at a time to read a row of words out loud to the group.
• In Read It!, we do not underline the letters. We just read the words.
• When it is your turn to read, read loudly enough so everyone can hear.
• When it is not your turn to read, you will be a Checker, listening carefully.
160 © 2017 Really Great Reading Company, LLC UNIT 22 Lesson 4
Really Great Reading Company, LLC Word Sort Short Vowels 16 unit 18 Mark It! Read It! 1. 2. 3. 4. 5. 6. 7. 8. 9. 10. 11. 12. 1. 2. 3. 4. 5. 6. 7. ba th rush path hush thud shut mash Thad thin moth Josh shin 22 Detective Work
thud bath hush path shin rush Thad mash thin shut moth thud Josh path bath hush shut mash shin moth
2017
Josh
• We will give the Reader a thumbs-up if they read all of the words correctly, and we will give them a thumbs-to-the-side if there is a word they need to try again.”
Students read a row of words out loud.
❸ Word Sort: Short Vowels and Digraphs sh or th
Say:
• “Remember, when we are doing a Word Sort, I will always model the first one or two words to show you how to sort the words.
• Sorting words will help you to pay attention to the spelling of the words.
• In this lesson, we will sort words in two ways. First, we will decide which vowel sound we hear. We will read the word first and then decide if the vowel sounds like /ă/, apple; /ĕ/, edge; /ĭ/, itch; /ŏ/, octopus; or /ŭ/, up.
• Next, we will read the word again and listen carefully for the sound of digraph sh, /sh/, or digraph th, /th/. If we hear digraph sh or digraph th in the word, we will circle it.
Click to display the top section of the Word Sort
Students open workbooks to page 17.
Read and finger-stretch the first word aloud: lash, /l/ /ă/ /sh/, lash
Say “Lash, as in ‘My mom helped me get a lash out of my eye.’”
Ask:
• “What vowel sound did you hear in the middle?” A: /ă/
• “What letter spells /ă/ in this word?” A: a
• “Is /ă/ the same as the beginning of aaaapple, eeeedge, iiiitch, ooooctopus, or uuuup?” A: apple
• “Right! So, should which picture should we circle?” A: apple
Click to circle the apple.
Prompt students to circle the apple.
Say “Now, let’s stretch out the sounds in the word again: lash, /l/ /ă/ /sh/, lash.”
Ask:
• “Did you hear the sound /sh/ or /th/ in this word?” A: yes, /sh/
• “What letters spell /sh/ in this word?” A: sh
• “What do we call these letters?” A: digraph sh
Be sure to use Positive Error Correction if students misread any words in Read It! Positive Error Correction steps can be found on p. 106. When beginning the Word Sort, you should model as many words as you deem necessary for your students to grasp the concept and proceed independently.
1. 2. 3. 4. 5. 6. 7. 8. 9. 10.
unit 22 a sh sh o p w i th r u n b a th m o p sh o t th s n e t th n
17
If your students are not yet able to read these words on their own, feel free to read each word aloud for them and have them independently select the correct vowel sounds and circle the digraphs.
© 2017 Really Great Reading Company, LLC 161 UNIT 22 Lesson 4
Short Vowels and Digraphs th and sh Word Sort
The final five words are displayed on the next screen in Countdown Online.
Say “Right! Let’s circle the letters that spell /sh/.”
Click to circle digraph sh.
Prompt students to circle digraph sh Say:
• “Now, you are going to circle the picture for the vowel sound and circle digraph sh or digraph th if you see them in the rest of the words on your own.
• Listen carefully for the vowel sound when you say each word.
• Then listen carefully for the digraph sh sound, /sh/, or the digraph th sound, /th/.”
Use Countdown Online to check answers with students
Call on individual students to read a word, identify the vowel sound and the correct guideword image, and identify the digraph.
Students check answers.
162 © 2017 Really Great Reading Company, LLC UNIT 22 Lesson 4
Unit 22 | Lesson 5
Wrap Up & Show What You Know AP
Objectives
Students will:
• accurately articulate the phonemes reviewed in this unit;
• accurately read sentences that contain the concepts, words, and phonemes taught in this unit and previous units;
• accurately spell words with a controlled set of concepts and phonemes.
Description
In Sentences to Read, students read short sentences out loud to the class. Their goal is to read each sentence accurately the first time.
In Spell It!, students see an image, which the teacher names. Teacher and students fingerstretch the sounds in the word together, counting the sounds. They then fill in a circle for each sound they heard and write the corresponding letter(s) in each box with a filled in circle, spelling the target word.
Objectives
• Countdown Student Workbook
• Pencil
What Students See
What You Need to Know
Beginning in this unit, students will read only sentences and no phrases. There will be 16 sentences in the Sentences to Read activity rather than 8 phrases and 8 sentences.
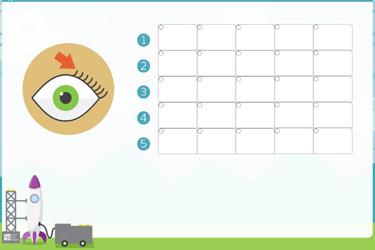
3, 2, 1…
Open Countdown Online to Unit 22, Lesson 5 (22.5).
OPTIONAL
Before teaching this lesson, you may wish to run the Letter-Sound and Heart Word Pop-Up, 3-Up, and Read a Row activities in Countdown Online to prac tice and assess the letter sounds and Heart Words taught in Lesson 1.
© 2017 Really Great Reading Company, LLC 163 UNIT 22 Lesson 5
If time permits, provide each student with the opportunity to read at least one sentence. In small groups, you might consider letting each student read two sentences. Students who struggle should be given additional sentences for more practice.
Launch!
❶ Sentences to Read
Say:
• “We are going to read some sentences in our workbooks today.
• I will call on you to read a sentence when it is your turn to be the Reader, and the rest of us will be Checkers, touching each word as the Reader reads it out loud.”
Students open workbooks to page 18.
Individual students read sentences. Since there are only 16 sentences, it is okay to have a student reread a sentence that has been previously read.
Direct Checkers to give a thumbs-up if the Reader reads all of the words correctly or a thumbs-to-the-side if the Reader misreads a word(s). If the Reader misreads any words, teacher follows Positive Error Correction instructions.
❷ Spell It!
Say:
• “Now, we are going to spell some words with the sounds we have been practicing.
• We are going to start by stretching out the sounds in a word so we can hear them clearly.”
Students open workbooks to Spell It! on page 19.
Say “We are going to spell words that you will hear me say aloud. Let’s start with number 1 at the top of your page.”
Click to display the image for lash.
Say “The first word is lash, as in ‘I blinked to get the lash out of my eye.’
Let’s stretch it together. Lash, /l/ /ă/ /sh/, lash.” (Finger-stretch lash along with students.)
Ask “How many sounds did we hear?” A: three
Say “Since lash has three sounds, /l/ /ă/ /sh/, we will fill in three dots, one for each sound, like this.”
Click three times to fill in the first three dots, and have students fill in the first three dots on their workbook pages. 1.
164 © 2017 Really Great Reading Company, LLC UNIT 22 Lesson 5
2017 Really Great Reading Company, LLC 18 unit 22 Shut the red lid. (4) They said to hush. (4) Did dad have cash? (4) Rush down here now! (4) You wish for our dish. (5) Do not rub that rash. (5) Who shut the red pot? (5) They ate our thin mush. (5) They dash down the path. (5) hit my shin in the cab. (7) Is that a pen for the hen? (7) wish to shop for that hat. (7) You ate all the hot fish dip. (7) They hum and tap at the bash. (7) get the thin rod if win. (8) Thad said the moth was not a bug. (8) 1. 2. 3. 4. 5. 6. 7. 8. 9. 10. 11. 12. 13. 14. 15. 16. Sentences to Read 19 unit Spell It! 22 1. 2. 3. 4. 5. 6. 7. 8. 9. 10. Challenge
Say:
• “Since lash has three sounds, it will also have three spellings, and we will write one letter, or two if it is a digraph sound, in each box that has a dot filled in.
• Let’s stretch lash again slowly so we can hear each sound and write it down.”
• “/l/” (PAUSE for students to write l in the first box) “/ă/” (PAUSE for students to write a in the second box) “/sh/” (PAUSE for students to write sh in the third box; if necessary, remind them that /sh/ is spelled by digraph sh) l a sh
Click three times to fill in the letters l a sh, and have students check their work, correcting their spelling if needed.
Continue the above process with the following words, one at a time.
2. thin (Optional sentence: The curtains were so thin you could see through them.) th i n
3. math (Optional sentence: I love to add numbers when we practice math.) m a th
4. gush (Optional sentence: The water will gush over the waterfall.) g u sh
5. fish (Optional sentence: I sprinkled food in the tank for my pet fish.) f i sh
OPTIONAL CHALLENGE WORDS:
6. them (Optional sentence: Please share your lunch with them.) th e m
7. cup (Optional sentence: I drank some juice out of my favorite cup.) c u p
© 2017 Really Great Reading Company, LLC 165 UNIT 22 Lesson 5
If students struggle to spell the individual sounds, you may want to ask students how each sound is spelled before moving on to the next, as you do in Build a Word
8. cash (Optional sentence: We went to the bank to get some cash.) c a sh
9. that (Optional sentence: Can I please have that eraser?) th a t
10. mush (Optional sentence: I liked the oatmeal even though it looked like mush.) m u sh
See p. 54 for a Differentiation Option for Spell It!
166 © 2017 Really Great Reading Company, LLC UNIT 22 Lesson 5
Unit 23 | Lesson 1
Letter-Sound & Heart Word Fluency AP & Sight Words
Objectives
Students will:
• build automatic recognition of some letter-sound (grapheme-phoneme) combinations;
• build automatic recognition of some Heart Words.
What You Need to Know
Description
Students will play Look, Think, Say!, Pop-Up, 3-Up, and Read a Row to review six letter sounds, to learn three new Heart Words, and to review or learn three additional Heart Words.
What Students See
For a complete explanation of the Look, Think, Say!, Pop-Up, 3-Up, and Read a Row activities, see p. 326 in Appendix A.
Before Teaching:
Letter-Sound and Heart Word Fluency Set-Up
Open Countdown Online to Unit 23, Letter-Sound and Heart Word Generator.
Choose six letter sounds to review and practice.
Choose three Heart Words to review and practice, or you may wish to select three additional new Heart Words to teach. (The first three new Heart Words to teach in this unit will be locked.)
Optional: Print Read a Row Teacher Recording Form.
3, 2, 1…
Open Countdown Online to Unit 23, Lesson 1 (23.1).
Launch!
❶ Letter-Sound Look, Think, Say!
Say “Today, we are going to practice the sounds for six letters with the game Look, Think, Say! ”
Click twice to display the first letter with one red dot and two empty dots below it.
Digraphs sh and th will be locked for this unit to provide an opportunity for students to develop automaticity with their sounds.
© 2017 Really Great Reading Company, LLC 167 UNIT 23 Lesson 1
Say:
• “Remember, this red dot (point to the red dot) tells us to stop what we are doing so we can listen to the letter and its sound.
• This letter is [letter name], and it spells the sound [/letter sound/].”
Click to display the yellow dot.
Say “Think about the sound of this letter.”
Click to display the green dot.
Say:
• “This green dot (point to the green dot) tells us to say the sound out loud.
• Say the sound with me, [/letter sound/].
• Let’s try another letter.
• Remember to look, think, and then say. Only say the sound out loud when the green dot shows up.”
Click twice to display the next letter, and continue the above procedure for the remaining five letters.
Continue with the same six letter sounds for two additional rounds.
❷ Letter-Sound Pop-Up
Say:
• “Now that we have reviewed the letter names and sounds, we are going to see if we can just look quickly and say the sounds that we remember.
• When you see a letter pop up onto the screen, say the sound out loud as quickly as possible, but remember that it is still more important to say the correct sound than to be fast.
• If you need help remembering, I can help, but try your best.”
Click to display the six letters at random. Each letter will appear several times. Read each sound together with students as it pops up.
❸ Letter-Sound 3-Up
Say:
• “Great job! In our next game, you will see three letters on the screen.
• When you see the red dot, stop and look at the three letters. When you see the yellow dot, think about the letters and try to remember the sounds they say. When you see the green dot, say the three sounds out loud.”
Click to display the sets of three letters. Each letter will appear several times.
168 © 2017 Really Great Reading Company, LLC UNIT 23 Lesson 1
Look at, think about, and say each set of three letter sounds together with students as the sets are displayed.
❹ Letter-Sound Read a Row
Click to display three long green boxes, each of which is covering up a row of letter tiles.
Say “Now, we are going to read a row of letter sounds.”
Call on one student to read a row of letter sounds out loud to the class.
When the student is done reading, ask the Checkers to show the thumbs-up or thumbs-to-the-side gesture.
Repeat with additional students reading the remaining rows.
❺ Heart Word Look, Think, Say!
Say “Now, we are going to learn to read some new Heart Words.”
Click twice to display the Heart Word where with one red dot and two empty dots below the word.
Say:
• “Remember, this red dot (point to the red dot) tells us to stop what we are doing so we can listen to the word.
• This word is where, as in, ‘ Where will we go after school today?’”
Click to display the yellow dot.
Say “Think about this word.”
Click to display the green dot.
Say:
• “Say the word with me, where.
• Let’s try another word.
• Remember to look, think, and then say. Only say the word out loud when the green dot shows up.”
Click twice to display the Heart Word what with one red dot and two empty dots below the word.
Say “Look at the word what, as in, ‘ What is your favorite color?’”
Click to display the yellow dot.
Say “Think about this word.”
Click to display the green dot.
If you would like to have more than three readers read a row, Countdown Online will allow you to run through the activity twice before moving on. For Read a Row, you need a copy of the student tracking chart if you choose to record the students’ performance. The tracking chart can be printed from Countdown Online, and a sample can be found in Appendix B.
© 2017 Really Great Reading Company, LLC 169 UNIT 23 Lesson 1
Say:
• “Say the word!
• Let’s try one more word.”
Click twice to display the Heart Word must with one red dot and two empty dots below the word.
Say “Look at the word must, as in, ‘You must line up quietly to go to the lunch room.’”
Click to display the yellow dot. Say “Think about this word.”
Click to display the green dot.
Say:
• “Say the word!
• Let’s look at those words again.”
Continue with the same three Heart Words and the three Heart Words you chose in the Heart Word Generator for two additional rounds.
❻ Heart Word Pop-Up
Say:
• “Now, we are going to practice reading the Heart Words we’ve learned.
• In our first game, when you see a word pop up onto the screen, say the word out loud.
• If you need help remembering, I can help, but try your best.”
Click to display the Heart Words where, what, must, and the three Heart Words you have selected in the Heart Word Generator at random. Each word will appear several times.
Read each word together with students as it pops up.
❼ Heart Word 3-Up
Say:
• “Great job! In our next game, you will see three words on the screen.
• When you see the red dot, stop and look at the three words. When you see the yellow dot, think about the words and try to remember them. When you see the green dot, say the three words out loud.”
Click to display the sets of three Heart Words. Each set will contain the follow ing words in a random order: where, what, must, and the three words you have selected. Each word will appear several times.
170 © 2017 Really Great Reading Company, LLC UNIT 23 Lesson 1
Look at, think about, and say each set of three words together with students as the sets are displayed.
❽ Heart Word Read a Row
Click to display three long green boxes, each of which is covering up a row of Heart Words.
Say “Now, we are going to read a row of Heart Words.”
Call on one student to read a row of Heart Words out loud to the class. When the student is done reading, ask the Checkers to show the thumbs-up or thumbs-to-the-side gesture.
Repeat with additional students reading the remaining rows.
If you would like to have more than three readers read a row, Countdown Online will allow you to run through the activity twice before moving on.
© 2017 Really Great Reading Company, LLC 171 UNIT 23 Lesson 1
Unit 23 | Lesson 2
Short e vs. Long e PA
Objectives
Students will:
• accurately segment phonemes (sounds) in single-syllable words with short e and long e;
• accurately sort words into groups by whether their vowel sound is a short e or a long e;
• (OPTIONAL) accurately add a phoneme (sound) to the beginning of a word to form a new word.
Description
The teacher reviews the short e sound and move ment, and students finger-stretch words with short e. The teacher then reviews the long e sound and movement, and students finger-stretch words with long e. Students sort words into two groups based on whether their vowel sound is short e or long e Then, optionally, students finger-stretch four-sound words with short e and long e as a challenge. Additionally, students may add an initial sound to some spoken words as an optional extension.
What Students See What You Need to Know
Short e and Long e
• Short e is the first phoneme in the word edge.
• The symbol for the short e phoneme is /ĕ/.
• Long e is the first phoneme in the word eagle.
• The symbol for the long e phoneme is /ē/.
Phoneme Addition
• This lesson provides another opportunity for students to participate in the Add That Sound activity. As in Unit 22, students will be adding a sound to a real word to make a new word, but in this lesson, students will be adding the sound to the beginning of the word rather than the end.
o Example:
• The word is each.
• Let’s add /b/ to the beginning of the word to make a new word.
• What is the new word? A: beach
• See Appendix A, p. 332, for more information on the phoneme manipulation exercises used in Countdown.
172 © 2017 Really Great Reading Company, LLC UNIT 23 Lesson 2
3, 2, 1…
Open Countdown Online to Unit 23, Lesson 2 (23.2).
OPTIONAL
Before teaching this lesson, you may wish to run the Letter-Sound and Heart Word Pop-Up and 3-Up activities in Countdown Online to practice the letter sounds and Heart Words taught in Lesson 1.
Launch!
❶ Review Short e
Say “Let’s get started by reviewing the short e sound and movement.”
Click to display the Short Vowels Poster.
Review the short e sound and movement:
• Say “The short e sound is /ĕĕĕĕ/, like the first sound in eeeedge.”
• Make the short e, eeeedge movement while saying the phoneme /ĕĕĕĕ/. (Pretend to run your finger along the edge of a table or desk from right to left – so that students see it moving from left to right – in front of you, while saying /ĕĕĕĕ/.)
• Have students make the short e, edge movement as they say /ĕĕĕĕ/.
❷ Finger-Stretch Words with Short e
Say “Now, let’s stretch words with the short e sound.”
I
DO: Finger-Stretch pet
Click to display the image for pet
Say:
• “Listen while I say the sounds in pet, as in, ‘My pet dog is a Golden Retriever named Buddy.’”
• “pet ” (hold closed fist against chest, crossing the midline)
• “/p/” (extend thumb), “/ĕĕĕĕ/” (extend pointer finger), “/t/” (extend middle finger)
• “pet ” (pull fingers back to a closed fist while saying the word)
Say “Pet has three sounds. The vowel sound is /ĕĕĕĕ/. I hear the same sound as the beginning of /ĕ/, edge, so the vowel sound must be short e. Short e, /ĕ/, is the first sound in eeeedge (while making the short e, edge motion).”
Click to display the Short Vowels Poster.
© 2017 Really Great Reading Company, LLC 173 UNIT 23 Lesson 2
If your students are still struggling to stretch the sounds in words with short e, you may wish to use some of the You Dos as We Dos to provide more guided practice.
Point to the Short Vowels Poster and remind students that they can look at the picture for edge to remind themselves that short e sounds like the first sound in /ĕ/, edge
WE DO: Finger-Stretch vet
Say “Now let’s stretch out a word together.”
Click to display the vet.
Say:
• “Ready? Our word is vet, as in, ‘We took our sick puppy to the vet to get him some medicine.’
• Let’s stretch it together.”
• “vet ” (hold closed fist against chest, crossing the midline)
• “/v/” (extend thumb), “/ĕĕĕĕ/” (extend pointer finger), “/t/” (extend middle finger)
• “vet ” (pull fingers back to a closed fist while saying the word)
Ask:
• “How many sounds did we hear?” A: three
• “What vowel sound did we hear in the word?” A: /ĕĕĕĕ/
Click to display the Short Vowels Poster.
Ask:
• “What is the guideword for that sound?” A: edge
• “What is the motion for edge?” A: run finger along edge of the table or desk (students make motion)
• “Is /ĕĕĕĕ/ short or long?” A: short
• “How do we know?” A: /ĕ/ is the first sound in edge
YOU DO: Finger-Stretch words with short e
Say “Now, you will stretch out some words on your own.”
Click to display the image.
Click to display the Short Vowels Poster.
Ask individual students to stretch the phonemes in each word below. After students stretch the sounds, ask:
• “How many sounds did you hear?” A: three
• “What vowel sound did you hear in the word?” A: /ĕĕĕĕ/
• “What is the guideword for that sound?” A: edge
174 © 2017 Really Great Reading Company, LLC UNIT 23 Lesson 2
• “What is the motion for edge?” A: run finger along edge of the table or desk (students make motion)
• “Is /ĕĕĕĕ/ short or long?” A: short Complete the steps above with the following words: pen - /p/ /ĕ/ /n/, pen (I wrote the note with my favorite purple pen.) net - /n/ /ĕ/ /t/, net (Use the net to catch the fish.) yes - /y/ /ĕ/ /s/, yes (Is the answer yes or no?) neck - /n/ /ĕ/ /k/, neck (My dad wears a tie around his neck for work.) red - /r/ /ĕ/ /d/, red (I picked out a shiny, red apple to buy at the grocery store.) ten - /t/ /ĕ/ /n/, ten (I taught my little brother how to count to ten.)
❸ Review Long e
Say “Next, we are going to review the long e sound. Remember, a long vowel sound is just like saying the name of the letter, so the long e sound is /ēēēē/.”
All students repeat the phoneme, /ēēēē/.
Say “To help us remember this sound, we make the long e movement while say ing the sound, /ēēēē/.” (Write the lowercase e in the air with your index finger.)
Click to display the Short and Long Vowels Poster.
Remind students they can use the posters and movements to check if a vowel phoneme is short or long:
• Point to the short e section of the Short Vowels Poster, and show students they can check the vowel phoneme by looking at the edge picture and saying: “/ĕ/ is short, like in /ĕ/, edge.”
• Point to the long e section of the Long Vowels Poster, and show students they can check the vowel phoneme by looking at the letter e and saying: “/ēēēē/ is long, like the name of the letter e.”
Click to display the peas.
Say:
• “I’ll use the poster to help me check the vowel sound in peas
•
First, I’ll stretch the sounds: peas, /p/ /ē/ /z/, peas. (Finger-stretch the word.)
• I hear the name of the letter e in the middle, and the Long Vowels Poster (point to the e on the Long Vowels Poster) tells me that long e says its name, so the vowel sound in peas must be a long e.”
❹ Finger-Stretch Words with Long e
I DO: Finger-Stretch leaf
Click to display the leaf.
If your students are proficient at stretching words with short e, you may wish to do only a couple of You Dos and then move to the long e portion of the lesson. Remember to elongate the vowel articulation by holding the vowel phoneme for 2–3 seconds.
© 2017 Really Great Reading Company, LLC 175 UNIT 23 Lesson 2
Say:
• “Now, we are going to stretch out all of the sounds in some words that have long e
• Listen while I say the sounds in leaf, as in, ‘I found a big orange leaf on the ground next to the tree.’”
• “leaf ” (hold closed fist against chest, crossing the midline)
• “/l/” (extend thumb), “/ēēēē/” (extend pointer finger), “/f/” (extend
• “leaf ” (pull fingers back to a closed fist while saying the word)
Say “Leaf has three sounds. I hear the name of the letter e in leaf, so the vowel sound must be a long e (while tracing the lowercase letter e in the air).
Long e says its name, /ē/.”
Click to display the Long Vowels Poster.
Point to the Long Vowels Poster and remind students that they can look at the letter e to remind themselves that the long e sound is the same as the name of the letter e.
WE DO: Finger-Stretch tea
Say “Now, let’s stretch out a word together.”
Click to display the tea.
Say:
• “Ready? Our word is tea, as in, ‘My mom likes to drink a cup of hot tea before bedtime.’
• Let’s stretch it together.”
• “ tea” (hold closed fist against chest, crossing the midline)
• “/t/” (extend thumb), “/ēēēē/” (extend pointer finger)
• “ tea” (pull fingers back to a closed fist while saying the word)
Ask:
• “How many sounds did we hear?” A: two
• “What vowel sound did we hear in the word?” A: /ēēēē/
Click to display the Long Vowels Poster.
Ask:
• “What is the motion for /ēēēē/?” A: writing lowercase e in the air (students make motion)
• “Is /ēēēē/ short or long?” A: long
• “How do we know?” A: /ē/ is the name of the letter e
176 © 2017 Really Great Reading Company, LLC UNIT 23 Lesson 2
YOU DO: Finger-Stretch words with long e
Say “Now, you will stretch out some words on your own.”
Click to display the image.
Click to display the Long Vowels Poster. Ask individual students to stretch the phonemes in each word below. After students stretch the sounds, ask:
• “How many sounds did you hear?” A: three
• “What vowel sound did you hear in the word?” A: /ēēēē/
• “What is the motion for /ēēēē/?” A: writing the lowercase letter e in the air (students make motion)
• “Is that short or long?” A: long
• “How do we know?” A: /ē/ is the name of the letter e teeth - /t/ /ē/ /th/, teeth (You should brush your teeth before you go to bed.) week - /w/ /ē/ /k/, week (My birthday is next week.) seal - /s/ /ē/ /l/, seal (I watched the seal do flips in the water at the zoo.) sheep - /sh/ /ē/ /p/, sheep (I saw a lot of fluffy sheep on our drive to the farm.) seat - /s/ /ē/ /t/, seat (Please stay in your seat until your name is called.) Pete - /p/ /ē/ /t/, Pete (Pete is coming over to play today.)
❺ Sort Words with Short e and Long e
Say “Now, we are going to sort words into two groups. Some words will have a short e vowel sound, and other words will have a long e vowel sound.”
Click to display the images for edge and eagle as the column headings. Point to the images for edge and eagle and say “/ĕ/, edge; /ē/, eagle.” Say “We will hear some words. We will stretch out the sounds in each word and then decide if the vowel sound is short e, like in /ĕ/, edge, or long e, like in /ē/, eagle.”
Click to display and point to the queen Say:
• “Listen while I say the sounds in queen, as in, ‘ The king and queen wore beautiful crowns on their heads.’”
• “queen” (hold closed fist against chest, crossing the midline)
• “/kw/” (extend thumb), “/ēēēē/” (extend pointer finger), “/n/” (extend middle finger)
• “queen” (pull fingers back to a closed fist while saying the word)
If your students need more guided practice stretching the sounds in words with long e, you may wish to use some of the You Dos as We Dos.
© 2017 Really Great Reading Company, LLC 177 UNIT 23 Lesson 2
Say “Queen has three sounds. The vowel sound is /ēēēē/ (while making the short e, edge motion).”
Ask “Is /ēēēē/ the first sound in /ĕ/, edge or /ē/, eagle?” A: /ē/, eagle
Say “Right! In /kw/ /ē/ /n/, queen, the vowel sound is /ē/ like in /ē/, eagle. I’ll move queen to the /ē/, eagle side.”
Click to place the queen in the eagle column.
Say “Let’s try another one.”
Continue with the remaining examples, stretching the sounds in each word and comparing the vowel sound to /ĕ/, edge or /ē/, eagle:
2. /w/ /ĕ/ /t/, wet (A: edge)
3. /sh/ /ĕ/ /l/, shell (A: edge)
4. /n/ /ē/, knee (A: eagle)
5. /b/ /ē/ /ch/, beach (A: eagle)
6. /j/ /ĕ/ /t/, jet (A: edge)
7. /j/ /ē/ /p/, Jeep (A: eagle)
Optional:
You can use the optional images as additional practice for students who may need it at a later time.
Additional Short e vs. Long e Sort
13. /ch/ /ē/ /z/, cheese (A: eagle)
14. /h/ /ĕ/ /n/, hen (A: edge)
15. /p/ /ē/ /l/, peel (A: eagle)
16. /n/ /ĕ/ /k/, neck (A: edge)
17. /m/ /ē/ /t/, meat (A: eagle)
18. /sh/ /ĕ/ /d/, shed (A: edge)
8. /b/ /ĕ/ /l/, bell (A: edge)
9. /l/ /ē/ /p/, leap (A: eagle)
10. /k/ /ē/, key (A: eagle)
11. /ch/ /ĕ/ /k/, check (A: edge)
12. /b/ /ĕ/ /d/, bed (A: edge)
19. /f/ /ē/ /t/, feet (A: eagle)
20. /n/ /ĕ/ /t/, net (A: edge)
21. /y/ /ĕ/ /s/, yes (A: edge)
22. /j/ /ē/ /n/, Jean (A: eagle)
23. /b/ /ē/, bee (A: eagle)
24. /t/ /ĕ/ /n/, ten (A: edge)
❼ Optional Challenge: Stretch Words with Four Phonemes
Use the following words with four phonemes to provide an additional challenge for students.
Click to display the image.
vest - /v/ /ĕ/ /s/ /t/, vest (Uncle Richard wore a vest to the wedding.) fence - /f/ /ĕ/ /n/ /s/, fence (The dog jumped over the fence.) sneeze - /s/ /n/ /ē/ /z/, sneeze (Please be sure to sneeze into a tissue.) sweet - /s/ /w/ /ē/ /t/, sweet (That candy was too sweet for me.) thread - /th/ /r/ /ĕ/ /d/, thread (Grandma fixed the hole in my pants with a needle and thread.)
178 © 2017 Really Great Reading Company, LLC UNIT 23 Lesson 2
❽ Optional Extension Activity: Add That Sound
Click to display the nail.
Say:
• “Today, we are going to add a sound to the beginning of some words.
• Listen to my word, nail.
• Let’s finger-stretch that word together. Nail, /n/ /ā/ /l/, nail.”
Ask “How many sounds did you hear?” A: three
Click to display a color tile for each sound while saying the sounds again: /n/ (first color tile appears), /ā/ (second color tile appears), /l/ (third color tile appears)
Say “I am going to add a new sound, /s/, to the beginning of nail. I’ll add a new color tile since we are adding a sound.”
Click to display a new color tile at the beginning.
Say “Let’s see what the new word is: /s/ (touch first tile), /n/ (touch second tile), /ā/ (touch third tile), /l/ (touch fourth tile), snail (sweep finger under all four tiles). The new word is snail.”
Ask “Do you hear the sound /s/ at the beginning?” A: yes
Say “Say those sounds with me.” (Students say sounds while you touch tiles.)
Say “Let’s try another one.”
Continue with the following examples. For each, click to display the image, then to display the color tiles, and finally, to add a new tile at the beginning:
1. eat (/m/ + /ē/ /t/) meat
2. each (/b/ + /ē/ /ch/) beach
3. red (/th/ + /r/ /ĕ/ /d/ thread
4. ask (/m/ + /ă/ /s/ /k/) mask
5. Kate (/s/ + /k/ /ā/ /t/) skate
6. lap (/k/ + /l/ /ă/ /p/) clap 7. win (/t/ + /w/ /ĭ/ /n/) twin 8. elf (/sh/ + /ĕ/ /l/ /f/) shelf 9. rim (/t/ + /r/ /ĭ/ /m/) trim 10. rash (/t/ + /r/ /ă/ /sh/) trash
© 2017 Really Great Reading Company, LLC 179 UNIT 23 Lesson 2
Unit 23 | Lesson 3
Phonics Concept: Digraphs ch & wh AP
Objectives
Students will:
• identify the letters ch as a digraph that spells the phoneme (sound) /ch/;
• identify the letters wh as a digraph that spells the phoneme (sound) /w/;
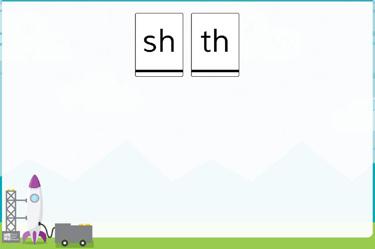
• accurately spell and read words with the phoneme (sound) /ch/ spelled with digraph ch;
• accurately spell and read words with the phoneme (sound) /w/ spelled with digraph wh
Description
The teacher, as well as an optional animation, introduces a new digraph, digraph ch, which spells the sound /ch/, like in chin. Students build real words with digraph ch. Next, the teacher, as well as an optional animation, introduces another new digraph, digraph wh, which spells the sound /w/, like in whale. Students build real words with digraph wh. Then, optionally, students build “silly” nonsense words as a challenge.
Student Materials
Countdown Student Kit
What Students See
What You Need to Know
• The letters ch spell the digraph phoneme (sound) /ch/.
• The letters wh together spell the phoneme /w/. In standard American English, there is no difference between the phoneme made by the letter w and digraph wh.
• Digraph wh is generally used only at the beginning of words or syllables in compound words.
3, 2, 1…
Open Countdown Online to Unit 23, Lesson 3 (23.3).
Students take out color and letter tiles and working board from Countdown Student Kit.
180 © 2017 Really Great Reading Company, LLC UNIT 23 Lesson 3
Launch!
❶ Review Digraphs sh and th
Click to display the letter tiles sh and th.
Remind students that sometimes when we see two letters together, they spell one sound.
Ask “What is a digraph?” A: two letters that spell one sound
Point to the letter tiles sh and th and have students say the sounds. A: /sh/, /th/
❷ Teach Digraph ch
Click to display the chin.
Ask:
• “What is this a picture of?” A: a chin
• “What is the first sound in chin?” A: /ch/
Click to display digraph ch tile below the chin.
Say:
• “When we see c and h together, they work together like a team to say one sound. They don’t say /k/ or /h/ like they do when they are by themselves. They say a brand new sound!
• Their new sound is /ch/, like the first sound in chin: /ch/.” (Tap your chin with your pointer finger repeatedly while saying “/ch/, /ch/, /ch/, /ch/.”)
• “Say /ch/ with me while you tap your chin.”
Students say /ch/ while tapping their chins.
Say “The letters ch are called a digraph, just like digraphs sh and th.”
Ask “Who can remember what a digraph is?” A: two letters that work together to spell just one sound
Say:
• “Yes! The letters ch are a digraph because the c and h work together to spell one sound, the sound /ch/, like in /ch/, chin (point to chin).
• In your kits, you have a ch tile. You will use this tile when we build words with digraph ch ”
❸ Teach Digraph wh
Click to display the whale.
The animation available in Countdown Online introduces digraph ch in a fun and engaging way. We recommend showing it after teaching Section 2 as a review of the content or to reinforce the content for students who might need more direct instruction.
© 2017 Really Great Reading Company, LLC 181 UNIT 23 Lesson 3
Ask:
• “What is this a picture of?” A: a whale
• “What is the first sound in whale?” A: /wh/
Click to display digraph wh tile below the whale.
Say “Some digraphs spell the same sound as other letters.”
Click to display the w tile next to the wh.
Say “Digraph wh spells the same sound as the letter w.”
Ask “What sound does the letter w spell?” A: /w/
Say:
• “This digraph spells the sound /w/, just like the letter w.
• Digraph wh is the first two letters in whale
• Digraph wh is usually only used to spell the sound /w/ at the beginning of words, like in /w/, whale.”
Students point to the letter tile wh on their boards and say the sound /w/.
Say “Say /w/ with me.”
Students say /w/.
Say “The letters wh are called a digraph, just like digraphs sh, th, and ch.”
Ask “What is a digraph?” A: two letters that work together to spell just one sound
Say:
The animation available in Countdown Online introduces digraph wh in a fun and engaging way. We recommend showing it after teaching Section 3 as a review of the content or to reinforce the content for students who might need more direct instruction.
• “Yes! The letters wh are a digraph because the w and h work together to spell one sound, the sound /w/, like in /w/, whale.
• In your kits, you have a wh tile. You will use this tile when we build words with digraph wh.”
❹ Build Real Words with Digraphs ch and wh
Say “Now, we are going to build real words with digraphs ch and wh ”
I DO: Build wham
Click to display the image for wham
Say “The first word is wham. Wham is a loud noise that happens very quickly. ‘I was walking down the hallway when—wham!—I bumped into Joseph!’”
Stretch the sounds wham, /w/ /ă/ /m/, wham.
Say “I heard three sounds in wham, /w/ /ă/ /m/.”
182 © 2017 Really Great Reading Company, LLC UNIT 23 Lesson 3
Click to display one color tile at a time while again saying “/w/ /ă/ /m/.”
Click to display a letter tile below each color tile to spell each sound while saying the sound.
Use Touch & Say to read wham - /w/ /ă/ /m/, wham
Point to digraph wh and say “I see digraph wh in this word. I know digraph wh has two letters working together to spell one sound, /w/.”
Say “Now let’s try one together.”
WE DO: Build chip
Click to display the chip.
Say “Now, let’s build the real word chip together. A chip is a place where something small has broken off of something bigger. ‘I got a chip in my tooth when I fell and hit my mouth on the ground.’ Repeat chip.” (Students repeat.)
Stretch the sounds with students - chip, /ch/ / ĭ/ /p/, chip
Click to display one color tile for each sound in chip while saying the sounds/ch/ / ĭ/ p/.
Ask individual students the following questions to lead students in spelling each sound by placing letter tiles below the color tiles, one at a time. Click to display each letter tile as students respond with the correct spellings:
• “What is the first sound you hear?” A: /ch/
• “What letters spell /ch/?” A: ch (Click to display ch; students place the ch tile on their boards.)
• “What is the next sound you hear?” A: / ĭ/
• “What letter spells / ĭ/?” A: i (Click to display i; students place the i tile on their boards.)
• “What is the last sound you hear?” A: /p/
• “What letter spells /p/?” A: p (Click to display p; students place the p tile on their boards.)
Use Touch & Say to read chip with students - /ch/ / ĭ/ /p/, chip.
Students clear boards.
YOU DO: Build real words with digraphs ch and wh
Say “Now, you are going to use your color and letter tiles to build four real words. Each word will have digraph ch or wh. ”
Click to display each image and dictate the words and sentences below, one at a
© 2017 Really Great Reading Company, LLC 183 UNIT 23 Lesson 3
Remember to use Positive Error Correction if students make a mistake while building words. Steps for Positive Error Correction can be found on p. 47.
time, following the Build a Word steps for each word and helping students as needed. chat - “To chat means to talk. I like to chat with my friends in the lunchroom.” whiz - “Whiz means to go very fast. The race car will whiz down the track.” chop - “Chop means to cut something into pieces. You can use an ax to chop wood.” when - “ When will we go to the library?”
Students build each word independently, one word at a time. Students should: Say the word.
Stretch the sounds in the word.
Place one color tile on boards for each sound while saying the sound. Spell the word by placing one letter tile below each color tile. a ch t i wh z o ch p e wh n
Use Touch & Say to read the word.
Hold up their boards so you can check their spelling and provide Positive Error Correction as needed.
Click to display the correct placement of color and letter tiles for each word. Students clear boards and wait for the next word to be dictated.
❸ Optional Challenge: Build Silly Words
Say “Now, you are going to build some super silly words that have digraphs ch and wh Remember, these words are very silly! They don’t mean anything because they are not real words, but we can spell them and read them because the letters will tell us what sounds to say.”
Click to display the silly image, and dictate the silly words below, one at a time, following the Build a Word steps for each word and helping students as needed. chud
184 © 2017 Really Great Reading Company, LLC UNIT 23 Lesson 3
whib chov
Students build each word independently, one word at a time. Students should: Say the word.
Stretch the sounds in the word.
Place one color tile on boards for each sound while saying the sound.
Spell the word by placing one letter tile below each color tile.
u ch d i wh b o ch v
Use Touch & Say to read the word.
Hold up their boards so you can check their spelling and provide Positive Error Correction as needed.
Click to display the correct placement of color and letter tiles for each word.
Students clear boards and wait for the next word to be dictated.
© 2017 Really Great Reading Company, LLC 185 UNIT 23 Lesson 3
Unit 23 | Lesson 4
Student Practice AP
Objectives
Students will:
• identify the graphemes (sound spellings) in printed words and produce the proper sound for each grapheme; blend the graphemes together to produce real words (Detective Work);
• read words, identify their vowel sounds, and determine if they have digraph ch or digraph wh (Word Sort).
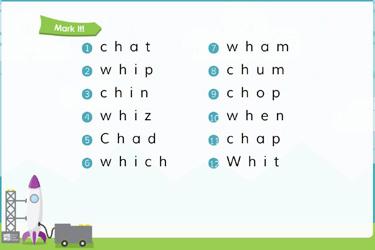
Description
Teacher leads students through the Mark It! and Read It! procedures in the Detective Work activity, and then leads students through a model word(s) for the Word Sort. Students then read the remaining words on their own, first listening carefully for the vowel sound and matching it with the guideword image for the vowel sound they hear, and then listening carefully for digraph ch or wh. Teacher reviews the answers with students, allowing time for students to correct their work if needed.
Student Materials
• Countdown Student Kit
• Pencil
What Students See
What You Need to Know
No new concepts.
3, 2, 1…
Open Countdown Online to Unit 23, Lesson 4 (23.4).
OPTIONAL
Before teaching this lesson, you may wish to run the Letter-Sound and Heart Word Pop-Up and 3-Up activities in Countdown Online to practice the letter sounds and Heart Words taught in Lesson 1.
186 © 2017 Really Great Reading Company, LLC UNIT 23 Lesson 4
Launch!
❶ Detective Work: Mark It!
Students open workbooks to page 20. Say “In Detective Work, we are going to be ‘letter and sound detectives.’ We will be using what we have learned to pay close attention to each letter in a word and then read the word.”
Click to display the Mark It! words. Say:
• “In Mark It!, we will underline letters and say the sounds that those letters make. Then, we will blend the sounds together to make a word.
• Watch as I underline letters while saying their sounds and then read the whole word.
• When we see digraph ch or wh, we will underline both letters with one line because, together, they spell one sound, /ch/ or /w/.”
Click three times to underline the spellings (graphemes) while saying the sounds:
• “/ch/” while underlining the ch
• “/ăăăă/” while underlining the a
• “/t/” while underlining the t
• “chat ”
Students repeat the process in their workbooks for the word chat.
Model the process above for the rest of the words one at a time. After each word, have students repeat orally and on paper. Make sure students are underlining each letter (or letters ch or wh together with one line for digraphs ch and wh) as they are saying the proper sound.
❷ Detective Work: Read It!
Say:
• “The next part of Detective Work is called Read It!
• In this section, I will be calling on one student at a time to read a row of words out loud to the group.
• In Read It!, we do not underline the letters. We just read the words.
• When it is your turn to read, read loudly enough so everyone can hear.
• When it is not your turn to read, you will be a Checker, listening carefully.
© 2017 Really Great Reading Company, LLC 187 UNIT 23 Lesson 4
Detective Work
2017 Really Great Reading Company, LLC 20 unit 23 Mark It! Read It! 1. 2. 3. 4. 5. 6. 7. 8. 9. 10. 11. 12. 1. 2. 3. 4. 5. 6. 7. chat Whit whiz chin whip chop Chad when wham which chum Whit chap chat whiz wham whip chin chop Chad which wham chum chop when chap Whit chat whip chin whiz Chad which
• We will give the Reader a thumbs-up if they read all of the words correctly, and we will give them a thumbs-to-the-side if there is a word they need to try again.”
Be sure to use Positive Error Correction if students misread any words in Read It! Positive Error
Correction steps can be found on p. 106.
When beginning the Word Sort, you should model as many words as you deem necessary for your students to grasp the concept and proceed independently.
Students read a row of words out loud.
❸ Word Sort: Short Vowels and Digraphs ch and wh
Say:
• “Remember, when we are doing a Word Sort, I will always model the first one or two words to show you how to sort the words.
• Sorting words will help you to pay attention to the spelling of the words.
• In this lesson, we will sort words in two ways. First, we will decide which vowel sound we hear. We will read the word first and then decide if the vowel sounds like /ă/, apple; /ĕ/, edge; /ĭ/, itch; /ŏ/, octopus; or /ŭ/, up.
• Next, we will read the word again and listen carefully for the sound of digraph ch, /ch/, or digraph wh, /w/. If we hear digraph ch or wh in the word, we will circle the digraph.”
Click to display the top section of the Word Sort
Students open workbooks to page 21.
Read and finger-stretch the first word aloud: whiz, /w/ /ĭ/ /z/, whiz.
Ask:
• “What vowel sound did you hear in the middle?” A: /ĭ/
• “What letter spells /ĭ/ in this word?” A: i
• “Is /ĭ/ the same as the beginning of aaaapple, eeeedge, iiiitch, ooooctopus, or uuuup?” A: itch
• “Right! So, should which picture should we circle?” A: itch
Click to circle the image for itch.
Prompt students to circle the image for itch
If your students are not yet able to read these words on their own, feel free to read each word aloud for them and have them independently select the correct vowel sounds and circle the digraphs.
Say “Now, let’s stretch out the sounds in the word again: whiz, /w/ /ĭ/ /z/, whiz.”
Ask:
• “Did you hear the sound /w/ in this word?” A: yes
• “What letters spell /w/ in this word?” A: wh
• “What do we call these letters?” A: digraph wh
“Right! Let’s circle the letters that spell /w/.”
188 © 2017 Really Great Reading Company, LLC UNIT 23 Lesson 4
Say
21 unit 23 wh z ch o p c u t wh ch wh e n ch a p wh a m w a x ch u m Ch e t 1. 2. 3. 4. 5. 6. 7. 8. 9. 10. Short Vowels and Digraphs ch and wh Word Sort
Click to circle digraph wh.
Prompt students to circle digraph wh.
Say:
• “Now, you are going to circle the picture for the vowel sound and circle digraph ch or wh if you see it in the rest of the words on your own.
• Listen carefully for the vowel sound when you say each word.
• Then listen carefully for the digraph ch sound, /ch/, or the digraph wh sound, /w/.”
Use Countdown Online to check answers with students.
Call on individual students to read a word, identify the vowel sound and the correct guideword image, and identify the digraph.
Students check answers.
The final five words are displayed on the next screen of Countdown Online
© 2017 Really Great Reading Company, LLC 189 UNIT 23 Lesson 4
Unit 23 | Lesson 5
Wrap Up & Show What You Know AP
Objectives
Students will:
• accurately articulate the phonemes reviewed in this unit;
• accurately read sentences that contain the concepts, words, and phonemes taught in this unit and previous units;
• accurately spell words with a controlled set of concepts and phonemes.
Description
In Sentences to Read, students read short sentences out loud to the class. Their goal is to read each sentence accurately the first time. In Spell It!, students see an image, which the teacher names. Teacher and students finger-stretch the sounds in the word together, counting the sounds. They then fill in a circle for each sound they heard and write the corresponding letter in each box with a filled in circle, spelling the target word.
Student Materials
• Countdown Student Kit
• Pencil
What Students See
What You Need to Know
No new concepts. 3, 2, 1…
Open Countdown Online to Unit 23, Lesson 5 (23.5).
OPTIONAL
Before teaching this lesson, you may wish to run the Letter-Sound and Heart Word Pop-Up, 3-Up, and Read a Row activities in Countdown Online to prac tice and assess the letter sounds and Heart Words taught in Lesson 1.
190 © 2017 Really Great Reading Company, LLC UNIT 23 Lesson 5
Launch!
❶ Sentences to Read
Say:
That
• “We are going to read some sentences in our workbooks today.
• I will call on you to read a sentence when it is your turn to be the Reader, and the rest of us will be Checkers, touching each word as the Reader reads it out loud.”
Students open workbooks to page 22.
Individual students read sentences. Since there are only 16 sentences, it is okay to have a student reread a sentence that has been previously read.
Direct Checkers to give a thumbs-up if the Reader reads all of the words correctly or a thumbs-to-the-side if the Reader misreads a word(s). If the Reader misreads any words, teacher follows Positive Error Correction instructions.
❷ Spell It!
Say:
• “Now, we are going to spell some words with the sounds we have been practicing.
• We are going to start by stretching out the sounds in a word so we can hear them clearly.”
Students open workbooks to Spell It! on page 23.
Say “We are going to spell words that you will hear me say aloud. Let’s start with number 1 at the top of your page.”
Click to display the image for chin.
Say “The first word is chin, as in ‘My grandpa has a white beard on his chin.’ Let’s stretch it together. Chin, /ch/ /ĭ/ /n/, chin.” (Finger-stretch chin along with students.)
Ask “How many sounds did we hear?” A: three Say “Since chin has three sounds, /ch/ /ĭ/ /n/, we will fill in three dots, one for each sound, like this.”
Click three times to fill in the first three dots, and have students fill in the first three dots on their workbook pages.
1.
22
unit Spell It! 23 1. 2. 3. 4. 5. 6. 7. 8. 9. 10.
23
© 2017 Really Great Reading Company, LLC 191 UNIT 23 Lesson 5
unit Chad had a wish. (4) That man was rich. (4)
tan pup will yap. (5)
you chip this rock? (5) must chop that now. (5)
down the dim path. (5)
had a big mesh top. (6)
hit you on the chin? (6) Do not chug that red pop! (6)
chip dip do you like? (6)
wax do rub on top?
is the mat for the shed?
can you shop for
tub?
will you chat with
Whit chat
up the Chex
Challenge Read
Did
Whiz
It
What
Which
Which
(7) Where
(7) Where
a
(7) When
the fox? (7) Can
and chop the log? (7) Whip
mix in the big dish. (9) 1. 2. 3. 4. 5. 6. 7. 8. 9. 10. 11. 12. 13. 14. 15. 16. 23 Sentences to
If time permits, provide each student with the opportunity to read at least one sentence. In small groups, you might consider letting each student read two sentences. Students who struggle should be given additional sentences for more practice.
If students struggle to spell the individual sounds, you may want to ask students how each sound is spelled before moving on to the next, as you do in Build a Word
Say:
• “Since chin has three sounds, it will also have three spellings, and we will write one spelling in each box that has a dot filled in.
• Let’s stretch chin again slowly so we can hear each sound and write it down. In this word, the sound /ch/ is spelled with a digraph.”
• “/ch/” (PAUSE for students to write ch in the first box; if necessary, remind them that /ch/ is spelled by the digraph ch) “/ĭ/” (PAUSE for students to write i in the second box) “/n/” (PAUSE for students to write n in the third box)
Click three times to fill in the letters ch i n, and have students check their work, correcting their spelling if needed. ch i n
Continue the above process with the following words, one at a time.
2. chip (Optional sentence: The dentist can fix a chip in your tooth.) ch i p
3. chat (Optional sentence: We cannot chat with our friends during math class.) ch a t
4. when (Optional sentence: It might snow when it gets colder.) wh e n
5. such (Optional sentence: Bradley is such a good friend.) s u ch
OPTIONAL CHALLENGE WORDS:
You should explain that we use a capital letter at the begin ning of a person's name, so Chaz begins with a capital C, but do not count a response as incorrect if the name is not capitalized.
6. chum (A chum is a friend. Optional sentence: My chum, Melissa, is tall.) ch u m
7. shin (Optional sentence: Your shin is the front part of your leg.) sh i n
8. much (Optional sentence: How much money does it cost?) m u ch
192 © 2017 Really Great Reading Company, LLC UNIT 23 Lesson 5
9. which (Optional sentence: Which color do you like the best?) wh i ch
10. Chaz (Optional sentence: My friend Chaz is coming over after school today.) Ch a z
See p. 54 for a Differentiation Option for Spell It!
© 2017 Really Great Reading Company, LLC 193 UNIT 23 Lesson 5
194 © 2017 Really Great Reading Company, LLC
Unit 24 | Lesson 1
Letter-Sound & Heart Word Fluency AP & Sight Words
Objectives
Students will:
• build automatic recognition of some letter-sound (grapheme-phoneme) combinations;
• build automatic recognition of some Heart Words.
What You Need to Know
Description
Students will play Look, Think, Say!, Pop-Up, 3-Up, and Read a Row to review six letter sounds, to learn three new Heart Words, and to review or learn three additional Heart Words.
What Students See
For a complete explanation of the Look, Think, Say!, Pop-Up, 3-Up, and Read a Row activities, see p. 326 in Appendix A.
Before Teaching:
Letter-Sound and Heart Word Fluency Set-Up
Open Countdown Online to Unit 24, Letter-Sound and Heart Word Generator.

Choose six letter sounds to review and practice.
Choose three Heart Words to review and practice, or you may wish to select three additional new Heart Words to teach. (The first three new Heart Words to teach in this unit will be locked.)
Optional: Print Read a Row Teacher Recording Form.
3, 2, 1…
Open Countdown Online to Unit 24, Lesson 1 (24.1).
Launch!
❶ Letter-Sound Look, Think, Say!
Say “Today, we are going to practice the sounds for six letters with the game Look, Think, Say! ”
Click twice to display the first letter with one red dot and two empty dots below it.
Digraphs ch and wh will be locked for this unit to provide an opportunity for students to develop automaticity with their sounds.
© 2017 Really Great Reading Company, LLC 195 UNIT 24 Lesson 1
Say:
• “Remember, this red dot (point to the red dot) tells us to stop what we are doing so we can listen to the letter and its sound.
• This letter is [letter name], and it spells the sound [/letter sound/].”
Click to display the yellow dot.
Say “Think about the sound of this letter.”
Click to display the green dot.
Say:
• “This green dot (point to the green dot) tells us to say the sound out loud.
• Say the sound with me, [/letter sound/].
• Let’s try another letter.
• Remember to look, think, and then say. Only say the sound out loud when the green dot shows up.”
Click twice to display the next letter, and continue the above procedure for the remaining five letters.
Continue with the same six letter sounds for two additional rounds.
❷ Letter-Sound Pop-Up
Say:
• “Now that we have reviewed the letter names and sounds, we are going to see if we can just look quickly and say the sounds that we remember.
• When you see a letter pop up onto the screen, say the sound out loud as quickly as possible, but remember that it is still more important to say the correct sound than to be fast.
• If you need help remembering, I can help, but try your best.”
Click to display the six letters at random. Each letter will appear several times. Read each sound together with students as it pops up.
❸ Letter-Sound 3-Up
Say:
• “Great job! In our next game, you will see three letters on the screen.
• When you see the red dot, stop and look at the three letters. When you see the yellow dot, think about the letters and try to remember the sounds they say. When you see the green dot, say the three sounds out loud.”
Click to display the sets of three letters. Each letter will appear several times.
196 © 2017 Really Great Reading Company, LLC UNIT 24 Lesson 1
Look at, think about, and say each set of three letter sounds together with students as the sets are displayed.
❹ Letter-Sound Read a Row
Click to display three long green boxes, each of which is covering up a row of letter tiles.
Say “Now, we are going to read a row of letter sounds.”
Call on one student to read a row of letter sounds out loud to the class.
When the student is done reading, ask the Checkers to show the thumbs-up or thumbs-to-the-side gesture.
Repeat with additional students reading the remaining rows.
❺ Heart Word Look, Think, Say!
Say “Now, we are going to learn to read some new Heart Words.”
Click twice to display the Heart Word we with one red dot and two empty dots below the word.
Say:
• “Remember, this red dot (point to the red dot) tells us to stop what we are doing so we can listen to the word.
• This word is we, as in, ‘ We will go to the park after school.’”
Click to display the yellow dot.
Say “Think about this word.”
Click to display the green dot.
Say:
• “Say the word with me, we.
• Let’s try another word.
• Remember to look, think, and then say. Only say the word out loud when the green dot shows up.”
Click twice to display the Heart Word he with one red dot and two empty dots below the word.
Say “Look at the word he, as in, ‘He is my teacher, and his name is Mr. Ramirez.’”
Click to display the yellow dot.
Say “Think about this word.”
Click to display the green dot.
If you would like to have more than three readers read a row, Countdown Online will allow you to run through the activity twice before moving on. For Read a Row, you need a copy of the student tracking chart if you choose to record the students’ performance. The tracking chart can be printed from Countdown Online, and a sample can be found in Appendix B.
© 2017 Really Great Reading Company, LLC 197 UNIT 24 Lesson 1
Say:
• “Say the word!
• Let’s try one more word.”
Click twice to display the Heart Word she with one red dot and two empty dots below the word.
Say “Look at the word she, as in, ‘Natasha went to the doctor when she was sick.’”
Click to display the yellow dot.
Say “Think about this word.”
Click to display the green dot.
Say:
• “Say the word!
• Let’s look at those words again.”
Continue with the same three Heart Words and the three Heart Words you chose in the Heart Word Generator for two additional rounds.
❻ Heart Word Pop-Up
Say:
• “Now, we are going to practice reading the Heart Words we’ve learned.
• In our first game, when you see a word pop up onto the screen, say the word out loud.
• If you need help remembering, I can help, but try your best.”
Click to display the Heart Words we, he, she and the three Heart Words you have selected in the Heart Word Generator at random. Each word will appear several times.
Read each word together with students as it pops up.
❼ Heart Word 3-Up
Say:
• “Great job! In our next game, you will see three words on the screen.
• When you see the red dot, stop and look at the three words. When you see the yellow dot, think about the words and try to remember them. When you see the green dot, say the three words out loud.”
Click to display the sets of three Heart Words. Each set will contain the following words in a random order: we, he, she, and the three words you have selected.
198 © 2017 Really Great Reading Company, LLC UNIT 24 Lesson 1
Each word will appear several times.
Look at, think about, and say each set of three words together with students as the sets are displayed.
❽ Heart Word Read a Row
Click to display three long green boxes, each of which is covering up a row of Heart Words.
Say “Now, we are going to read a row of Heart Words.”
Call on one student to read a row of Heart Words out loud to the class. When the student is done reading, ask the Checkers to show the thumbs-up or thumbs-to-the-side gesture.
Repeat with additional students reading the remaining rows.
If you would like to have more than three readers read a row, Countdown Online will allow you to run through the activity twice before moving on.
© 2017 Really Great Reading Company, LLC 199 UNIT 24 Lesson 1
Unit 24 | Lesson 2
Review Short and Long Vowels PA
Objectives
Students will:
• accurately segment phonemes (sounds) in single-syllable words with all short and long vowels;
• accurately sort words into groups by whether their vowel sound is short or long;
• (OPTIONAL) accurately delete a phoneme (sound) from the end of a word to form a new word.
What You Need to Know Phoneme Deletion
Description
The teacher reviews the short vowel sounds and movements, and students finger-stretch words with short vowels. The teacher then reviews the long vowel sounds and movements, and students finger-stretch words with them. Students sort words into two groups based on whether their vowel sound is short or long. Then, optionally, students finger-stretch four-sound words with short and long vowels as a challenge. Additionally, students may delete a final sound from some spoken words as an optional extension.
What Students See
This lesson introduces an optional phoneme deletion activity called Delete That Sound.
• Students will be deleting the last sound in a real word to make a new real word.
• This activity involves listening to a real word and then isolating and deleting the final phoneme. In all examples, when the final phoneme is deleted, a real word or a name remains.
• This phonemic awareness activity is designed to build students’ abilities to isolate and manipulate individual phonemes.
• The process is this:
o The teacher will say a real word. The teacher will then ask the students to delete the final phoneme (a consonant). When they delete the final sound (silently), they will say the new word (a real word).
o One way to make this activity easier for students is to help them identify the final phoneme before deleting it.
200 © 2017 Really Great Reading Company, LLC UNIT 24 Lesson 2
o Example:
• The word is beet.
• The last sound in beet is /t/.
• Get rid of the last phoneme.
• What is the new word? A: bee
3, 2, 1…
Open Countdown Online to Unit 24, Lesson 2 (24.2).
OPTIONAL
Before teaching this lesson, you may wish to run the Letter-Sound and Heart Word Pop-Up and 3-Up activities in Countdown Online to practice the letter sounds and Heart Words taught in Lesson 1.
Launch!
❶ Review Short Vowels
Say “Let’s get started by reviewing the short vowel sounds and movements.”
Click to display the Short Vowels Poster.
Review the short a sound and movement:
• Say “The short a sound is /ăăăă/, like the first sound in apple.”
• Make the short a, apple movement while saying the phoneme /ăăăă/. (Pretend to hold an apple and move it across your body from left to right while saying /ăăăă/.)
• Have students make the short a, apple movement as they say /ăăăă/.
Review the short e sound and movement:
• Say “The short e sound is /ĕĕĕĕ/, like the first sound in edge.”
• Make the short e, edge movement while saying the phoneme /ĕĕĕĕ/. (Pretend to run your finger along the edge of a table or desk from right to left – so that students see it moving from left to right – in front of you, while saying /ĕĕĕĕ/.)
• Have students make the short e, edge movement as they say /ĕĕĕĕ/.
Review the short i sound and movement:
• Say “The short i sound is /ĭĭĭĭ/, like the first sound in itch.”
• Make the short i, itch movement while saying the phoneme /ĭĭĭĭ/. (Pretend to scratch your arm. Say /ĭĭĭĭ/ while scratching.)
© 2017 Really Great Reading Company, LLC 201 UNIT 24 Lesson 2
• Have students make the short i, itch movement as they say /ĭĭĭĭ/.
Review the short o sound and movement:
• Say “The short o sound is /ŏŏŏŏ/, like the first sound in octopus.”
• Make the short o, octopus movement while saying the phoneme /ŏŏŏŏ/. (Pretend your hand is an octopus with arms hanging down, swimming back and forth in the ocean above your head. Say /ŏŏŏŏ/ while the octopus “swims.”)
Review the short u sound and movement:
• Say “The short u sound is /ŭŭŭŭ/, like the first sound in up.”
• Make the short u, up movement while saying the phoneme /ŭŭŭŭ/.
(Point your index finger up while moving your hand from below your waist to above your head while you say the sound. Say /ŭŭŭŭ/ while pointing.)
• Have students make the short u, up movement as they say /ŭŭŭŭ/.
❷ Finger-Stretch Words with Short Vowels
Say “Now, let’s stretch words with short vowel sounds.”
I DO: Finger-Stretch bag
Click to display the bag.
Say:
• “Listen while I say the sounds in bag, as in, ‘We put all of our groceries in the bag to take them home.’”
• “bag ” (hold closed fist against chest, crossing the midline)
• “/b/” (extend thumb), “/ăăăă/” (extend pointer finger), “/g/” (extend middle finger)
• “bag ” (pull fingers back to a closed fist while saying the word)
Say “Bag has three sounds. The vowel sound is /ăăăă/. I hear the same sound as the beginning of /ă/, apple, so the vowel sound must be short a. Short a, /ă/, is the first sound in aaaapple (while making the short a, apple motion).”
Click to display the Short Vowels Poster.
Point to the Short Vowels Poster and remind students that they can look at the picture of the apple to remind themselves that short a sounds like the first sound in /ă/, apple.
WE DO: Finger-Stretch hug
Say “Now let’s stretch out a word together.”
202 © 2017 Really Great Reading Company, LLC UNIT 24 Lesson 2
Click to display the image for hug.
Say:
• “Ready? Our word is hug, as in, ‘I gave my baby brother a big hug because he was upset.’
• Let’s stretch it together.”
• “hug ” (hold closed fist against chest, crossing the midline)
• “/h/” (extend thumb), “/ŭŭŭŭ/” (extend pointer finger), “/g/” (extend middle finger)
• “hug ” (pull fingers back to a closed fist while saying the word)
Ask:
• “How many sounds did we hear?” A: three
• “What vowel sound did we hear in the word?” A: /ŭŭŭŭ/
Click to display the Short Vowels Poster.
Ask:
• “What is the guideword for that sound?” A: up
• “What is the motion for up?” A: point up while moving hand up from waist to over head (students make motion)
• “Is /ŭŭŭŭ/ short or long?” A: short
• “How do we know?” A: /ŭ/ is the first sound in up
YOU DO: Finger-Stretch words with short vowels
Say “Now, you will stretch out some words on your own.”
Click to display the image.
Click to display the Short Vowels Poster.
Ask individual students to stretch the sounds in each word below. After students stretch the sounds, ask:
• “How many sounds did you hear?” A: two or three
• “What vowel sound did you hear in the word?” A: /ăăăă/, /ĕĕĕĕ/, /ĭĭĭĭ/, /ŏŏŏŏ/, or /ŭŭŭŭ/
• “What is the guideword for that sound?” A: apple, edge, itch, octopus, or up
• “What is the motion for [apple/edge/itch/octopus/up]?” A: hold apple and move across body, run finger along edge of desk, scratch arm, wiggle fingers like octopus arms, or point up (students make motion)
If your students are still struggling to stretch the sounds in words with short vowels you may wish to use some of the You Dos as We Dos to provide more guided practice.
© 2017 Really Great Reading Company, LLC 203 UNIT 24 Lesson 2
If your students are proficient at stretching words with short vowels, you may wish to do only a couple of You Dos and then move to the long vowels portion of the lesson.
• “Is [/ăăăă/, /ĕĕĕĕ/, /ĭĭĭĭ/, /ŏŏŏŏ/, or /ŭŭŭŭ/] short or long?” A: short bath - /b/ /ă/ /th/, bath (Let’s give the baby a bath to clean her up.) pet - /p/ /ĕ/ /t/, pet (My pet dog is full of energy.) with - /w/ /ĭ/ /th/, with (Please stay with me until my sister gets here.) hop - /h/ /ŏ/ /p/, hop (I like to hop in puddles.) shut - /sh/ /ŭ/ /t/, shut (Please shut the fridge door.) red - /r/ /ĕ/ /d/, red (The pencils are in the red cup.) cot - /k/ /ŏ/ /t/, cot (At camp, I sleep on a cot.)
❸ Review Long Vowels
Click to display the Long Vowels Poster
Say “Next, we are going to review the long vowel sounds. Remember, a long vowel sound is just like saying the name of the letter, so the long a sound is /āāāā/, the long e sound is /ēēēē/, the long i sound is /īīīī/, the long o sound is /ōōōō/, and the long u sound is /y��/.”
Review long a:
Say “The long a sound is /āāāā/, like the name of the letter a.”
All students repeat the sound, /āāāā/.
Say “To help us remember this sound, we make the long a movement while saying the sound, /āāāā/.” (Write the lowercase a in the air with your index finger.)
Review long e:
Say “The long e sound is /ēēēē/, like the name of the letter e.”
All students repeat the sound, /ēēēē/.
Say “To help us remember this sound, we make the long e movement while saying the sound, /ēēēē/.” (Write the lowercase e in the air with your index finger.)
Review long i:
Say “The long i sound is /īīīī/, like the name of the letter i.”
All students repeat the sound, /īīīī/.
Say “To help us remember this sound, we make the long i movement while saying the sound, /īīīī/.” (Write the lowercase i in the air with your index finger.)
Review long o:
Say “The long o sound is /ōōōō/, like the name of the letter o.”
204 © 2017 Really Great Reading Company, LLC UNIT 24 Lesson 2
All students repeat the sound, /ōōōō/.
Say “To help us remember this sound, we make the long o movement while saying the sound, /ōōōō/.” (Write the lowercase o in the air with your index finger.)
Review long u:
Say “The long u sound is /y��/, like the name of the letter u.”
All students repeat the sound, /y��/.
Say “To help us remember this sound, we make the long u movement while saying the sound, /y��/.” (Write the lowercase u in the air with your index finger.)
Click to display the Short and Long Vowels Posters.
Remind students they can use the posters and movements to check if a vowel sound is short or long.
❹ Finger-Stretch Words with Long Vowels
Say “Now, let’s stretch words with the long vowel sounds.”
I DO: Finger-Stretch kite
Click to display the kite
Say:
• “Listen while I say the sounds in kite, as in, ‘We flew our kite in the park since it was a windy day.’”
• “kite” (hold closed fist against chest, crossing the midline)
• “/k/” (extend thumb), “/ī/” (extend pointer finger), “/t/” (extend middle finger)
• “kite” (pull fingers back to a closed fist while saying the word)
Say “Kite has three sounds. I hear the name of the letter i in kite, so the vowel sound must be a long i (while tracing the lowercase letter i in the air). Long i says its name, / ī/.”
Click to display the Long Vowels Poster.
Point to the Long Vowels Poster and remind students that they can look at the letter i to remind themselves that the long i sound is the same as the name of the letter i.
WE DO: Finger-Stretch mule
Say “Now let’s stretch out some words together.”
Remember to elongate the vowel articulation by holding the vowel phoneme for 2–3 seconds.
© 2017 Really Great Reading Company, LLC 205 UNIT 24 Lesson 2
If your students need more guided practice stretching the sounds in words with long vowels you may wish to use some of the You Dos as We Dos.
Click to display the mule.
Say:
• “Ready? Our word is mule, as in, ‘We rode on the mule at the petting zoo.’
• Let’s stretch it together.”
• “mule” (hold closed fist against chest, crossing the midline)
• “/m/” (extend thumb), “/y�/” (extend pointer finger), “/l/” (extend middle finger)
• “mule” (pull fingers back to a closed fist while saying the word)
Ask:
• “How many sounds did we hear?” A: three
• “What vowel sound did we hear in the word?” A: /y��/
Click to display the Long Vowels Poster.
Ask:
• “What is the motion for /y��/?” A: writing the lowercase letter u in the air (students make motion)
• “Is /y��/ short or long?” A: long
• “How do we know?” A: /y�/ is the name of the letter u
YOU DO: Finger-Stretch words with long vowels
Say “Now, you will stretch out some words on your own.”
Click to display the image.
Click to display the Long Vowels Poster.
Ask individual students to stretch the sounds in each word below. After students stretch the sounds, ask:
• “How many sounds did you hear?” A: two or three
• “What vowel sound did you hear in the word?” A: /āāāā/, /ēēēē/, /īīīī/, /ōōōō/, or /y��/
• “What is the motion for [/āāāā/, /ēēēē/, /īīīī/, /ōōōō/, or /y��/]?”
A: writing the lowercase letter a, e, i, o, or u in the air (students make motion)
• “Is that short or long?” A: long
• “How do we know?” A: [/ā/, /ē/, /ī/, /ō/, or /y�/] is the name of the letter [a, e, i, o, or u]
hi - /h/ / ī/, hi (We said hi to our friends as we drove by.)
206 © 2017 Really Great Reading Company, LLC UNIT 24 Lesson 2
vote - /v/ /ō/ /t/, vote (Let’s vote on what to have for a snack.)
gate - /g/ /ā/ /t/, gate (Come through the gate to get into the playground.)
bee - /b/ /ē/, bee (A bee landed on my nose, but it didn’t sting me!)
nail - /n/ /ā/ /l/, nail (She hammered the nail to fix the broken table.) cute - /k/ /y�/ /t/, cute (The new baby was tiny and cute.) sign - /s/ / ī/ /n/, sign (The sign told us which way to go.)
soap - /s/ /ō/ /p/, soap (Use soap when you wash your hands.) beach - /b/ /ē/ /ch/, beach (Let’s go swimming at the beach.)
❺ Sort Words with Short and Long Vowels
Say “Now, we are going to sort words into two groups. Some words will have a short vowel sound, and other words will have a long vowel sound.”
Click to display the images for the short vowels and long vowels as the column headings.
Point to short vowels icon and say “/ă/, apple; /ĕ/, edge; /ĭ/, itch; /ŏ/, octopus; /ŭ/, up.”
Point to long vowels icon and say “/ā/, /ē/, /ī/, /ō/, /y�/.”
Say “We will hear some words. We will stretch out the sounds in each word and then decide if the vowel sound is short, like in /ă/, apple, /ĕ/, edge, /ĭ/, itch, /ŏ/, octopus, or /ŭ/, up, or long, like the names of the letters a, e, i, o, or u.”
Click to display and point to the image for dig.
Say:
• “Listen while I say the sounds in dig, as in, ‘Let’s dig a hole to plant the seeds.’”
• “dig ” (hold closed fist against chest, crossing the midline)
• “/d/” (extend thumb), “/ ĭĭĭĭ/” (extend pointer finger), “/g/” (extend middle finger)
• “dig ” (pull fingers back to a closed fist while saying the word)
Say “Dig has three sounds. The vowel sound is /ĭĭĭĭ/ (while making the short i, itch motion).”
Ask “Is /ĭĭĭĭ/ the first sound in /ă/, apple, /ĕ/, edge, /ĭ/, itch, /ŏ/, octopus, or /ŭ/, up, or does /ĭĭĭĭ/ sound like the name of the letter a, e, i, o, or u? ” A: first sound in /ĭ/, itch
Say “Right! In /d/ /ĭ/ /g/, dig, the vowel sound is /ĭ/ like in / ĭ/, itch.”
© 2017 Really Great Reading Company, LLC 207 UNIT 24 Lesson 2
You can use the optional images as additional practice for students who may need it at a later time.
Ask “So is / ĭ/ a short vowel or a long vowel?” A: short
Say “Right! I’ll move dig to the short vowels side.”
Click to place dig in the short vowels column.
Say “Let’s try another one.”
Continue with the remaining examples, stretching the sounds in each word and comparing to the vowel sounds in /ă/, apple, /ĕ/, edge, /ĭ/, itch, /ŏ/, octopus, or /ŭ/, up, or to the name of the letters a, e, i, o, or u:
2. /r/ /ŭ/ /n/, run (A: /ŭ/, short)
3. /b/ /ă/ /t/, bat (A: /ă/, short)
4. /s/ /ē/ /l/, seal (A: /ē/, long)
5. /p/ /ī/, pie (A: /ī/, long)
6. /p/ /ŭ/ /p/, pup (A: /ŭ/, short)
7. /m/ /y�/ /t/, mute (A: /y�/, long)
Optional: Additional Short vs. Long Sort
13. /sh/ /ā/ /p/, shape (A: /ā/, long)
14. /t/ / ī/, tie (A: /ī/, long)
15. /th/ /ŭ/ /m/, thumb (A: /ŭ/, short)
16. /p/ /ĭ/ /g/, pig (A: /ĭ/, short)
17. /sh/ /ē/ /p/, sheep (A: /ē/, long)
18. /w/ /ŭ/ /n/, one (A: /ŭ/, short)
8. /sh/ /ŏ/ /t/, shot (A: /ŏ/, short)
9. /g/ /ā/ /m/, game (A: /ā/, long)
10. /r/ /ō/ /d/, road (A: /ō/, long)
11. /v/ /ī/ /n/, vine (A: /ī/, long)
12. /sh/ /ĕ/ /d/, shed (A: /ĕ/, short)
19. /t/ /ā/ /p/, tape (A: /ā/, long)
20. /v/ /ĕ/ /t/, vet (A: /ĕ/, short)
21. /t/ /ă/ /p/, tap (A: /ă/, short)
22. /b/ /ō/ /t/, boat (A: /ō/, long)
23. /s/ /ĭ/ /ks/, six (A: /ĭ/, short)
24. /d/ / ī/ /m/, dime (A: /ī/, long)
❼ Optional Challenge: Stretch Words with Four Phonemes
Use the following words with four phonemes to provide an additional challenge for students.
Click to display the image.
slide - /s/ /l/ / ī/ /d/, slide (I will go down the slide at the playground.) float - /f/ /l/ /ō/ /t/, float (We watched the clouds float by.) jump - /j/ /ŭ/ /m/ /p/, jump (How high can you jump?)
crab - /k/ /r/ /ă/ /b/, crab (A crab is a sea animal with a hard shell. We saw a crab run across the beach.)
brick - /b/ /r/ /ĭ/ /k/, brick (The bench is next to the brick wall.) desk - /d/ /ĕ/ /s/ /k/, desk (Our teacher’s desk is always so clean.) paint - /p/ /ā/ /n/ /t/, paint (I love to paint pictures of my family.)
208 © 2017 Really Great Reading Company, LLC UNIT 24 Lesson 2
❽ Optional Activity: Delete That Sound
Click to display the sheep.
Say:
• “Today, we are going to take away a sound from the end of some words.
• Listen to my word, sheep.
• Let’s finger-stretch that word together. Sheep, /sh/ /ē/ /p/, sheep.”
Ask “How many sounds did you hear?” A: three
Click to display a color tile for each sound while saying the sounds again: /sh/ (first color tile appears), /ē/ (second color tile appears), /p/ (third color tile appears).
Say “I am going to take away the sound /p/ from the end of sheep. I’ll take away one of the color tiles since we are deleting, or taking away, a sound.”
Click to remove the third color tile.
Say “Let’s see what the new word is: /sh/ (touch first tile), /ē/ (touch second tile), she (sweep finger under both tiles). The new word is she.”
Ask “Do you hear the sound /p/ at the end?” A: no
Say:
• “I did not hear /p/ at the end because we took that sound away. Now the word has only two sounds!
• Let’s stretch all the sounds in she together (say the sounds while fingerstretching): /sh/ (extend thumb), /ē/ (extend pointer finger), she (pull closed fist to chest).
• Let’s try another one.”
Click to display the mask.
Say:
• “Listen to my word, mask.
• Let’s finger-stretch that word together. Mask, /m/ /ă/ /s/ /k/, mask.”
Ask “How many sounds did you hear?” A: four
Click to display a color tile for each sound while saying the sounds again: /m/ (first color tile appears), /ă/ (second color tile appears), /s/ (third color tile appears), /k/ (fourth color tile appears).
Say “I am going to take away the sound /k/ from the end of mask. I’ll take away one of the color tiles since we are deleting, or taking away, a sound.”
Click to remove the fourth color tile.
© 2017 Really Great Reading Company, LLC 209 UNIT 24 Lesson 2
Say “Let’s see what the new word is: /m/ (touch first tile), /ă/ (touch second tile), /s/ (touch third tile), mass (sweep finger under both tiles). The new word is mass.”
Ask “Do you hear the sound /k/ at the end?” A: no
Say:
• “I did not hear /k/ at the end because we took that sound away. Now the word has only three sounds!
• Let’s stretch all the sounds in mass (say the sounds while fingerstretching): /m/ (extend thumb), /ă/ (extend pointer finger), /s/ (extend middle finger), mass (pull closed fist to chest)
• Let’s try another one.”
Continue with the following examples. For each, click to display the image, then to display the color tiles, and finally, to remove the final tile.
1. nose (/n/ /ō/ /z/ - /z/) no
2. zoom (/z/ /�/ /m/ - /m/) zoo
3. bean (/b/ /ē/ /n/ - /n/) bee
4. mile (/m/ /ī/ /l/ - /l/) my
5. lamp (/l/ /ă/ /m/ /p/ - /p/) lamb
6. seed (/s/ /ē/ /d/ - /d/) see
7. tent (/t/ /ĕ/ /n/ /t/ - /t/) ten
8. time (/t/ /ī/ /m/ - /m/) tie
9. milk (/m/ /ĭ/ /l/ /k/ - /k/) mill
10. heat (/h/ /ē/ /t/ - /t/) he
210 © 2017 Really Great Reading Company, LLC UNIT 24 Lesson 2
Unit 24 | Lesson 3
Phonics Concept: Digraph ck AP
Objectives
Students will:
• identify the letters ck as a digraph that spells the phoneme (sound) /k/;
• accurately spell and read words with the phoneme (sound) /k/ spelled with digraph ck;
• To understand that when the sound /k/ occurs in singlesyllable, short vowel words immediately after the vowel, we use the letters ck together to spell the sound /k/.
Description
The teacher, as well as an optional animation, introduces a new digraph, digraph ck, which spells the sound /k/, like in duck. Students build real words with digraph ck. Then, optionally, students build “silly” nonsense words as a challenge.
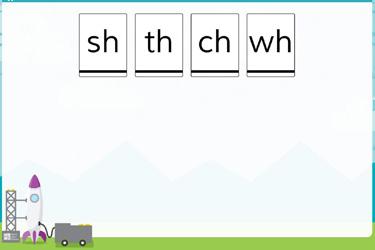
Student Materials
Holding and working boards from Countdown Student Kit What
Students See
What You Need to Know
• The letters ck together spell the sound /k/.
• We call the letters ck together a digraph because the two letters together spell one sound, /k/.
• The letters ck together are really a pseudo-digraph because each of the two letters separately spells the same sound as the two letters together, /k/.
• The ck spelling is used in single-syllable words when the sound /k/ occurs right after a short vowel and at the end of the word as in back, deck, sick, lock, and duck.
• The digraph ck is never used at the beginning of words. At the beginning of a single-syllable word, we use c to spell /k/ before a, o, or a consonant letter (as in cap, comic, crush, clasp). We use k before i, e, or y to spell /k/ (as in kit, kept, Kyle) because i, e, and y make c spell the soft c sound, /s/ (as in city, cell, cyst).
• Students do not learn about c spelling /s/ (soft c) in Countdown. In all Countdown activities, the letter c will spell /k/.
© 2017 Really Great Reading Company, LLC 211 UNIT 24 Lesson 3
3, 2, 1…
Open Countdown Online to Unit 24, Lesson 3 (24.3).
Students take out color and letter tiles and working board from Countdown Student Kit
Launch! ❶ Review Digraphs sh, th, ch, and wh
Click to display the letter tiles sh, th, ch, and wh.
Remind students that sometimes when we see two letters together, they spell one sound.
Ask “What is a digraph?” A: two letters that spell one sound
Point to the letter tiles sh, th, ch, and wh, and have students say the sounds.
A: /sh/, /th/, /ch/, /w/
Click to display the sheep, thumb, chin, and whale
Point to each image, one at a time, and have students point to the corresponding digraph letter tile on their boards while saying the sound.
A: sh, /sh/; th, /th/; ch, /ch/; wh, /w/
❷ Teach Digraph ck
Click to display the word cup spelled in letter tiles.
Say “We already know that the letter c spells the sound /k/, like in this word.
Touch & Say this word with me.”
Use Touch & Say to read the word with students - /k/ /ŭ/ /p/, cup.
Click to display the cup.
Say “Yes! This word is cup.”
Click to display the word kid spelled in letter tiles.
Say “We also know that the letter k spells the sound /k/, like in this word.
Touch & Say this word with me.”
Use Touch & Say to read the word with students - /k/ / ĭ/ /d/, kid.
Click to display the kid
Say “Yes! This word is kid.”
Say “Now, we are going to learn another way to spell the sound /k/.”
Click to display the image for sick.
212 © 2017 Really Great Reading Company, LLC UNIT 24 Lesson 3
Ask:
• “What is this a picture of?” A: a sick child
• “What is the last sound in sick?” A: /k/
Click to display the digraph ck tile below the image for sick.
Say “When we see c and k together, they work together like a team to say one sound.”
Ask “What do we call two letters that work together to spell one sound?” A: a digraph
Say:
• “Yes! The letters ck are a digraph.
• The sound of digraph ck is /k/.” (Hold the back of your hand against your forehead, as if you feel sick and feverish, while saying “/k/, /k/, /k/, /k/.”)
• “Say /k/ with me while you hold the back of your hand to your forehead.”
Students say /k/ while holding the backs of their hands against their foreheads, as if they feel sick.
Click to display the tiles c, k, and ck.
Point to each tile and say:
• “Now we know three ways to spell the sound /k/.
• The letter c by itself spells /k/.
• The letter k by itself spells /k/.
• The digraph ck spells /k/.”
Click to display the word sick.
Ask:
• “How do we spell the sound /k/ in this word?” A: ck
• “Where are the letters ck in this word?” A: at the end
Stretch the sounds in sick with students: /s/ / ĭ/ /k/, sick.
Ask:
• “What vowel sound did you hear in the word?” A: /ĭĭĭĭ/
• “What is the motion for /ĭĭĭĭ/?” A: scratching the inside of your arm
• “Is /ĭĭĭĭ/ short or long?” A: short
• “How do we know?” A: / ĭ/ is the first sound in itch
© 2017 Really Great Reading Company, LLC 213 UNIT 24 Lesson 3
The animation available in Countdown Online introduces digraph ck in a fun and engaging way. We recommend showing it after teaching Section 2 as a review of the content or to reinforce the content for students who might need more direct instruction.
Say:
• “Remember, the letters ck are called a digraph, just like digraphs sh, th, ch, and wh.
• The c and the k work together to spell the sound /k/.
• We will only see digraph ck at the end of words with a short vowel. Digraph ck never comes at the beginning of a word.
• In your kits, you have a ck tile. You will use this tile when we build words with digraph ck.”
❸ Build Real Words with Digraph ck
Say “Now, we are going to build real words with digraph ck ”
I DO: Build duck
Click to display the duck.
Say “The first word is duck. ‘I heard a duck quacking near the pond.’”
Stretch the sounds - duck, /d/ /ŭ/ /k/, duck.
Say “I heard three sounds in duck, /d/ /ŭ/ /k/.”
Click to display one color tile at a time while again saying “/d/ /ŭ/ /k/.”
Click to display a letter tile below each color tile to spell each sound while saying the sound.
Use Touch & Say to read duck - /d/ /ŭ/ /k/, duck.
Point to digraph ck and say “I see digraph ck in this word. I know digraph ck has two letters working together to spell one sound, /k/. Digraph ck always comes at the end of a word.”
Say “Now let’s try one together.”
WE DO: Build luck
Click to display the image for
luck
Say “Now, let’s build the real word luck together. ‘If you have any luck, you might win a prize!’ Repeat luck.” (Students repeat.)
Stretch the sounds with students - luck, /l/ /ŭ/ /k/, luck.
Click to display one color tile for each sound in luck while saying the sounds/l/ /ŭ/ /k/.
Ask individual students the following questions to lead students in spelling each sound by placing letter tiles below the color tiles, one at a time. Click to display each letter tile as students respond with the correct spellings:
214 © 2017 Really Great Reading Company, LLC UNIT 24 Lesson 3
• “What is the first sound you hear?” A: /l/
• “What letter spells /l/?” A: l (Click to display l; students place the l tile on their boards.)
• “What is the next sound you hear?” A: /ŭ/
• “What letter spells /ŭ/?” A: u (Click to display u; students place the u tile on their boards.)
• “What is the last sound you hear?” A: /k/
• “What letters spell /k/?” A: ck (Click to display ck; students place the ck tile on their boards.)
Use Touch & Say to read luck with students - /l/ /ŭ/ /k/, luck.
Students clear boards.
YOU DO: Build real words with digraph ck
Say “Now, you are going to use your color and letter tiles to build four real words. Each word will have digraph ck.
Click to display each image and dictate the words and sentences below, one at a time, following the Build a Word steps for each word and helping students as needed. Jack - “My cousin Jack will sleep at my house tonight.” yuck - “Theresa said ‘yuck ’ when she smelled the stinky garbage.” sock - “My baby sister will not keep that sock on her foot.” neck - “A giraffe has a very long neck.”
Students build each word independently, one word at a time. Students should: Say the word. Stretch the sounds in the word. Place one color tile on boards for each sound while saying the sound. Spell the word by placing one letter tile below each color tile. a j ck u y ck o s ck e n ck
Explain to students that the name Jack would normally be capitalized.
© 2017 Really Great Reading Company, LLC 215 UNIT 24 Lesson 3
Remember to use Positive Error Correction if students make a mistake while building words. Steps for Positive Error Correction can be found on p. 47.
Use Touch & Say to read the word.
Hold up their boards so you can check their spelling and provide Positive Error Correction as needed.
Click to display the correct placement of color and letter tiles for each word. Students clear boards and wait for the next word to be dictated.
❸ Optional Challenge: Build Silly Words
Say “Now, you are going to build some super silly words that have digraph ck Remember, these words are very silly! They don’t mean anything because they are not real words, but we can spell them and read them because the letters will tell us what sounds to say.”
Click to display the silly image, and dictate the silly words below, one at a time, following the Build a Word steps for each word and helping students as needed.
sheck nuck zick
Students build each word independently, one word at a time. Students should: Say the word.
Stretch the sounds in the word.
Place one color tile on boards for each sound while saying the sound. Spell the word by placing one letter tile below each color tile. e sh ck u n ck i z ck
Use Touch & Say to read the word.
Hold up their boards so you can check their spelling and provide Positive Error Correction as needed.
Click to display the correct placement of color and letter tiles for each word. Students clear boards and wait for the next word to be dictated.
216 © 2017 Really Great Reading Company, LLC UNIT 24 Lesson 3
Unit 24 | Lesson 4
Letter-Sound & Heart Word Fluency AP
Objectives
Students will:
• identify the graphemes (sound spellings) in printed words and produce the proper sound for each grapheme; blend the graphemes together to produce real words (Detective Work);
• read words, identify their vowel sounds, and determine if they have digraph ck (Word Sort).
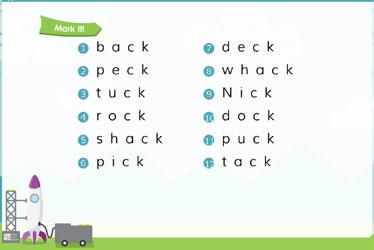
Description
Teacher leads students through the Mark It! and Read It! procedures in the Detective Work activity, and then leads students through a model word(s) for the Word Sort. Students then read the remaining words on their own, first listening carefully for the vowel sound and matching it with the guideword image for the vowel sound they hear, and then listening carefully for digraph ck. Teacher reviews the answers with students, allowing time for students to correct their work if needed.
Student Materials
• Countdown Student Workbook
• Pencil What Students See
© 2017 Really Great Reading Company, LLC 217 UNIT 24 Lesson 4
You Need to Know No new concepts. 3,
Countdown Online to Unit 24, Lesson
teaching this lesson, you may wish to run the
and
Pop-Up and 3-Up activities in Countdown Online to practice the
sounds and
Words taught in
1. Launch! ❶ Detective Work: Mark It! Students open workbooks to page 24. 2017 Really Great Reading Company, LLC 24 unit 24 Mark It! Read It! 1. 2. 3. 4. 5. 6. 7. 8. 9. 10. 11. 12. peck shack dock tuck pick rock dock Nick peck deck back tuck pick tack rock shack puck back deck Nick whack deck whack Nick dock puck tack ba ck peck tuck rock shack pick Detective Work 1. 2. 3. 4. 5. 6. 7.
What
2, 1… Open
4 (24.4). OPTIONAL Before
Letter-Sound
Heart Word
letter
Heart
Lesson
Be sure to use Positive Error Correction if students misread any words in Read It! Positive Error
Correction steps can be found on p. 106.
Say “In Detective Work, we are going to be ‘letter and sound detectives.’ We will be using what we have learned to pay close attention to each letter in a word and then read the word.”
Click to display the Mark It! words.
Say:
• “In Mark It!, we will underline letters and say the sounds that those letters make. Then, we will blend the sounds together to make a word.
• Watch as I underline letters while saying their sounds and then read the whole word.
• When we see a digraph, like digraph ck, or one of the other digraphs we have learned, we will underline both letters with one line because, together, they spell one sound.”
Click three times to underline the spellings (graphemes) while saying the sounds:
• “/b/” while underlining the b
• “/ăăăă/” while underlining the a
• “/k/” while underlining the ck
• “back ”
Students repeat the process in their workbooks for the word back
Model the process above for the rest of the words one at a time. After each word, have students repeat orally and on paper. Make sure students are underlining each letter (or letters ck for digraph ck or the other letters in a digraph together with one line) as they are saying the proper sound.
❷ Detective Work: Read It!
Say:
• “The next part of Detective Work is called Read It!
• In this section, I will be calling on one student at a time to read a row of words out loud to the group.
• In Read It!, we do not underline the letters. We just read the words.
• When it is your turn to read, read loudly enough so everyone can hear.
• When it is not your turn to read, you will be a Checker, listening carefully.
• We will give the Reader a thumbs-up if they read all of the words correctly, and we will give them a thumbs-to-the-side if there is a word they need to try again.”
Students read a row of words out loud.
218 © 2017 Really Great Reading Company, LLC UNIT 24 Lesson 4
❸ Word Sort: Short Vowels and Digraph ck
Say:
• “Remember, when we are doing a Word Sort, I will always model the first one or two words to show you how to sort the words.
• Sorting words will help you to pay attention to the spelling of the words.
• In this lesson, we will sort words in two ways. First, we will decide which vowel sound we hear. We will read the word first and then decide if the vowel sounds like /ă/, apple; /ĕ/, edge; /ĭ/, itch; /ŏ/, octopus; or /ŭ/, up.
• Next, we will read the word again and listen carefully for the sound /k/. We will look at the letters in the word and decide if the sound /k/ is being spelled by the letter c, the letter k, or the digraph ck. If we see the digraph ck, we will circle the digraph.”
Click to display the top section of the Word Sort
Students open workbooks to page 25.
Read and finger-stretch the first word aloud: pack, /p/ /ă/ /k/, pack
Ask:
• “What vowel sound did you hear in the middle?” A: /ă/
• “What letter spells /ă/ in this word?” A: a
• “Is /ă/ the same as the beginning of aaaapple, eeeedge, iiiitch, ooooctopus, or uuuup?” A: apple
• “Right! So, which picture should we circle?” A: apple
Click to circle the apple.
Prompt students to circle the apple
Say “Now, let’s stretch out the sounds in the word again: pack, /p/ /ă/ /k/, pack.”
Ask:
• “Did you hear the sound /k/ in this word?” A: yes
• “What letters spell /k/ in this word?” A: ck
• “What do we call these letters?” A: digraph ck
Say “Right! Let’s circle the letters that spell /k/.”
Click to circle digraph ck.
Prompt students to circle digraph ck
Say:
• “Now, you are going to circle the picture for the vowel sound and circle
Vowels and Digraph ck p a ck ch i ck c a p p u ck k d s a ck c o p K m l i ck p e ck
1. 2. 3. 4. 5. 6. 7. 8. 9. 10.
unit 24
2017 Really Great Reading Company, LLC 25
When beginning the Word Sort, you should model as many words as you deem necessary for your students to grasp the concept and proceed independently. If your students are not yet able to read these words on their own, feel free to read each word aloud for them and have them independently select the correct vowel sounds and circle the digraphs.
© 2017 Really Great Reading Company, LLC 219 UNIT 24 Lesson 4
Word Sort Short
The final five words are displayed on the next screen in Countdown Online. Some of the words in this sort have the sound /k/ spelled with the letters c or k rather than digraph ck. While students do not have to circle the other spellings of /k/, you can point them out and help students notice the multiple ways to spell /k/.
digraph ck if you see it in the rest of the words on your own.
• Listen carefully for the vowel sound when you say each word.
• Then listen carefully for the sound /k/. Pay close attention to figure out if the letter c or k by itself is spelling the sound /k/, or if it is the digraph ck.”
Use Countdown Online to check answers with students
Call on individual students to read a word, identify the vowel sound and the correct guideword image, and identify the digraph.
Students check answers.
220 © 2017 Really Great Reading Company, LLC UNIT 24 Lesson 4
Unit 24 | Lesson 5
Wrap Up & Show What You Know AP
Objectives
Students will:
• accurately articulate the phonemes reviewed in this unit;
• accurately read sentences that contain the concepts, words, and phonemes taught in this unit and previous units;
• accurately spell words with a controlled set of concepts and phonemes.
Description
In Sentences to Read, students read sentences out loud to the class. Their goal is to read each sentence accurately the first time. In Spell It!, students see an image, which the teacher names. Teacher and students finger-stretch the sounds in the word together, counting the sounds. They then fill in a circle for each sound they heard and write the corresponding letter in each box with a filled in circle, spelling the target word.
Description
• Countdown Student Workbook
• Pencil What
Students See
What You Need to Know
No new concepts.
3, 2, 1…
Open Countdown Online to Unit 24, Lesson 5 (24.5).
OPTIONAL
Before teaching this lesson, you may wish to run the Letter-Sound and Heart Word Pop-Up, 3-Up, and Read a Row activities in Countdown Online to prac tice and assess the letter sounds and Heart Words taught in Lesson 1.
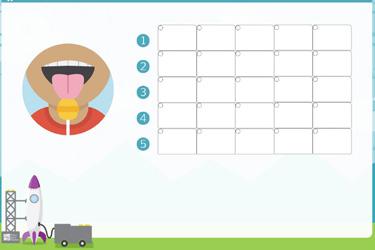
© 2017 Really Great Reading Company, LLC 221 UNIT 24 Lesson 5
If time permits, pro vide each student with the opportunity to read at least one sen tence. In small groups, you might consider letting each student read two sentences. Students who strug gle should be given additional sentences for more practice.
Launch!
❶ Sentences to Read
Say:
• “We are going to read some sentences in our workbooks today.
• I will call on you to read a sentence when it is your turn to be the Reader, and the rest of us will be Checkers, touching each word as the Reader reads it out loud.”
Students open workbooks to page 26.
Individual students read sentences. Since there are only 16 sentences, it is okay to have a student reread a sentence that has been previously read.
Direct Checkers to give a thumbs-up if the Reader reads all of the words correctly or a thumbs-to-the-side if the Reader misreads a word(s). If the Reader misreads any words, teacher follows Positive Error Correction instructions.
❷ Spell It!
Say:
• “Now, we are going to spell some words with the sounds we have been practicing.
• We are going to start by stretching out the sounds in a word so we can hear them clearly.”
Students open workbooks to Spell It! on page 27.
Say “We are going to spell words that you will hear me say aloud. Let’s start with number 1 at the top of your page.”
Click to display the neck.
Say “The first word is neck, as in ‘Uncle Jim wore a tie around his neck.’ Let’s stretch it together. Neck, /n/ /ĕ/ /k/, neck.” (Finger-stretch neck along with students.)
Ask “How many sounds did we hear?” A: three
Say “Since neck has three sounds, /n/ /ĕ/ /k/, we will fill in three dots, one for each sound, like this.”
Click three times to fill in the first three dots, and have students fill in the first three dots on their workbook pages.
1.
222 © 2017 Really Great Reading Company, LLC UNIT 24 Lesson 5
© 2017 Really Great Reading Company, LLC 27 unit Spell It! 24
5.
7. 8. 9. 10. Challenge © 2017 Really Great Reading Company, LLC 26 unit 24 She can lock it. (4) Pack the red mug. (4) Here is the wet sock. (5) With luck, we will win. (5) Did we check the map? (5) Kim will pick a thick hog. (6) Tuck the wig in the sack. (6) Where will you chat with Zack? (6) He shot the puck in the net. (7) We can jog up to the dock. (7) He was quick to pick a path. (7) Where is the lock on this van? (7) The chick will peck at the bag. (7) The pup did not kick the cup down. (8) He will pick a rack in the back shed. (9) She must check for a gap in the rock. (9)
2. 3. 4. 5. 6. 7. 8. 9. 10. 11. 12. 13. 14. 15. 16. Sentences to Read
1. 2. 3. 4.
6.
1.
Say:
• “Since neck has three sounds, it will also have three spellings, and we will write one spelling in each box that has a dot filled in.
• Let’s stretch neck again slowly so we can hear each sound and write it down. In this word, the sound /k/ is spelled with a digraph.”
• “/n/” (PAUSE for students to write n in the first box) “/ĕ/” (PAUSE for students to write e in the second box) “/k/” (PAUSE for students to write ck in the third box; if necessary, remind them that /k/ is spelled by digraph ck)
Click three times to fill in the letters n e ck, and have students check their work, correcting their spelling if needed. n e ck
Continue the above process with the following words, one at a time.
2. lick (Optional sentence: Lick the ice cream cone before it melts.) l i ck
3. back (Optional sentence: I wear my book bag on my back.) b a ck
4. sick (Optional sentence: I stayed home from school when I was sick.) s i ck
5. duck (Optional sentence: The duck quacked as it swam across the pond.) d u ck
OPTIONAL CHALLENGE WORDS:
6. shack (A shack is a small house or building. Optional sentence: The roof of the old shack was leaking.) sh a ck
7. yuck (Optional sentence: Yuck! That garbage smells terrible.) y u ck
8. check (Optional sentence: Let’s check the weather before we leave.) ch e ck
If students struggle to spell the individual sounds, you may want to ask students how each sound is spelled before moving on to the next, as you do in Build a Word
© 2017 Really Great Reading Company, LLC 223 UNIT 24 Lesson 5
You may wish to point out that we hear the sound /k/ twice in the word kick. The second /k/ is spelled with digraph ck because it comes at the end of the word after a short vowel sound.
9. shock (Optional sentence: Let's shock Mom by cleaning up all of our toys!) sh o ck
10. kick (Optional sentence: Please kick the ball to me.) k i ck
See p. 54 for a Differentiation Option for Spell It!
224 © 2017 Really Great Reading Company, LLC UNIT 24 Lesson 5
Unit 25 | Lesson 1
Letter-Sound & Heart Word Fluency AP & Sight Words
Objectives
Students will:
• build automatic recognition of some letter-sound (grapheme-phoneme) combinations;
• build automatic recognition of some Heart Words.
What You Need to Know
Description
Students will play Look, Think, Say!, Pop-Up, 3-Up, and Read a Row to review six letter sounds, to learn three new Heart Words, and to review or learn three additional Heart Words.
What Students See
For a complete explanation of the Look, Think, Say!, Pop-Up, 3-Up, and Read a Row activities, see p. 326 in Appendix A.
Before Teaching:
Letter-Sound and Heart Word Fluency Set-Up
Open Countdown Online to Unit 25, Letter-Sound and Heart Word Generator.
Choose six letter sounds to review and practice.
Choose three Heart Words to review and practice, or you may wish to select three additional new Heart Words to teach. (The first three new Heart Words to teach in this unit will be locked.)
Optional: Print Read a Row Teacher Recording Form.
3, 2, 1…
Open Countdown Online to Unit 25, Lesson 1 (25.1).
Launch!
❶ Letter-Sound Look, Think, Say!
Say “Today, we are going to practice the sounds for six letters with the game Look, Think, Say! ”
Click twice to display the first letter with one red dot and two empty dots below it.
Digraph ck will be locked for this unit to provide an opportunity for students to develop automaticity with its sound.

© 2017 Really Great Reading Company, LLC 225 UNIT 25 Lesson 1
Say:
• “Remember, this red dot (point to the red dot) tells us to stop what we are doing so we can listen to the letter and its sound.
• This letter is [letter name], and it spells the sound [/letter sound/].”
Click to display the yellow dot.
Say “Think about the sound of this letter.”
Click to display the green dot.
Say:
• “This green dot (point to the green dot) tells us to say the sound out loud.
• Say the sound with me, [/letter sound/].
• Let’s try another letter.
• Remember to look, think, and then say. Only say the sound out loud when the green dot shows up.”
Click twice to display the next letter, and continue the above procedure for the remaining five letters.
Continue with the same six letter sounds for two additional rounds.
❷ Letter-Sound Pop-Up
Say:
• “Now that we have reviewed the letter names and sounds, we are going to see if we can just look quickly and say the sounds that we remember.
• When you see a letter pop up onto the screen, say the sound out loud as quickly as possible, but remember that it is still more important to say the correct sound than to be fast.
• If you need help remembering, I can help, but try your best.”
Click to display the six letters at random. Each letter will appear several times. Read each sound together with students as it pops up.
❸ Letter-Sound 3-Up
Say:
• “Great job! In our next game, you will see three letters on the screen.
• When you see the red dot, stop and look at the three letters. When you see the yellow dot, think about the letters and try to remember the sounds they say. When you see the green dot, say the three sounds out loud.”
Click to display the sets of three letters. Each letter will appear several times.
226 © 2017 Really Great Reading Company, LLC UNIT 25 Lesson 1
Look at, think about, and say each set of three letter sounds together with stu dents as the sets are displayed.
❹ Letter-Sound Read a Row
Click to display three long green boxes, each of which is covering up a row of letter tiles.
Say “Now, we are going to read a row of letter sounds.”
Call on one student to read a row of letter sounds out loud to the class.
When the student is done reading, ask the Checkers to show the thumbs-up or thumbs-to-the-side gesture.
Repeat with additional students reading the remaining rows.
❺ Heart Word Look, Think, Say!
Say “Now, we are going to learn to read some new Heart Words.”
Click twice to display the Heart Word but with one red dot and two empty dots below the word.
Say:
• “Remember, this red dot (point to the red dot) tells us to stop what we are doing so we can listen to the word.
• This word is but, as in, ‘I like peas, but I like carrots better.’”
Click to display the yellow dot.
Say “Think about this word.”
Click to display the green dot.
Say:
• “Say the word with me, but.
• Let’s try another word.
• Remember to look, think, and then say. Only say the word out loud when the green dot shows up.”
Click twice to display the Heart Word want with one red dot and two empty dots below the word.
Say “Look at the word want, as in, ‘Do you want to watch a movie?’”
Click to display the yellow dot.
Say “Think about this word.”
Click to display the green dot.
If you would like to have more than three readers read a row, Countdown Online will allow you to run through the activity twice before moving on. For Read a Row, you need a copy of the student tracking chart if you choose to record the students’ performance. The tracking chart can be printed from Countdown Online, and a sample can be found in Appendix B.
© 2017 Really Great Reading Company, LLC 227 UNIT 25 Lesson 1
Say:
• “Say the word!
• Let’s try one more word.”
Click twice to display the Heart Word there with one red dot and two empty dots below the word.
Say “Look at the word there, as in, ‘Let’s go sit over there.’”
Click to display the yellow dot.
Say “Think about this word.”
Click to display the green dot.
Say:
• “Say the word!
• Let’s look at those words again.”
Continue with the same three Heart Words and the three Heart Words you chose in the Heart Word Generator for two additional rounds.
❻ Heart Word Pop-Up
Say:
• “Now, we are going to practice reading the Heart Words we’ve learned.
• In our first game, when you see a word pop up onto the screen, say the word out loud.
• If you need help remembering, I can help, but try your best.”
Click to display the Heart Words but, want, there, and the three Heart Words you have selected in the Heart Word Generator at random. Each word will appear several times.
Read each word together with students as it pops up.
❼ Heart Word 3-Up
Say:
• “Great job! In our next game, you will see three words on the screen.
• When you see the red dot, stop and look at the three words. When you see the yellow dot, think about the words and try to remember them. When you see the green dot, say the three words out loud.”
Click to display the sets of three Heart Words. Each set will contain the following words in a random order: but, want, there, and the three words you have select ed. Each word will appear several times.
228 © 2017 Really Great Reading Company, LLC UNIT 25 Lesson 1
Look at, think about, and say each set of three words together with students as the sets are displayed.
❽ Heart Word Read a Row
Click to display three long green boxes, each of which is covering up a row of Heart Words.
Say “Now, we are going to read a row of Heart Words.”
Call on one student to read a row of Heart Words out loud to the class. When the student is done reading, ask the Checkers to show the thumbs-up or thumbs-to-the-side gesture.
Repeat with additional students reading the remaining rows.
If you would like to have more than three readers read a row, Countdown Online will allow you to run through the activity twice before moving on.
© 2017 Really Great Reading Company, LLC 229 UNIT 25 Lesson 1
Unit 25 | Lesson 2
2-Sound Consonant Blends PA
Objectives
Students will:
• accurately segment phonemes (sounds) in single-syllable words with 2-sound consonant blends (“sound buddies”) at the end;
• accurately identify 2-sound consonant blends (“sound buddies”) at the end of spoken words;
• (OPTIONAL) accurately delete a phoneme (sound) from the beginning of a word to form a new word.
Description
The teacher introduces the idea of “sound buddies:” two consonant sounds next to each other in a word that like to be next to each other, but each spells its own sound. Students finger-stretch the sounds in four-sound words with sound buddies. Then, optionally, students finger-stretch five-sound words with sound buddies as a challenge. Additionally, students may delete an initial sound from some spoken words as an optional extension.
What Students See
What You Need to Know Consonant Blends
• As your students have learned, a digraph is two letters that spell one sound: ch, sh, ck, wh, and th.
• In this lesson, students will finger-stretch words with 2-sound consonant blends.
• A consonant blend is two or more consonants next to each other where each letter spells a separate sound.
o tr and st in the word trust are 2-sound consonant blends.
o gr and sp in the word grasp are 2-sound consonant blends.
• Many reading programs teach blends as one sound unit spelled by two consonants. Some of these programs do not distinguish between digraphs and blends, while others do. Countdown uses the “speech to print” method of teaching reading. That means that students first listen to and segment the sounds in words, then match letters to the sounds.
o Teaching the letters in blends as having separate sounds makes it clear to students that the words spot and sun both have the same first sound, even though one word has a blend and the other doesn’t.

230 © 2017 Really Great Reading Company, LLC UNIT 25 Lesson 2
o If we can build refined phonemic awareness in our students to the point where they can hear that the word mask has four sounds and ends with two separate consonant sounds or that the word frog has four sounds and starts with two separate consonant sounds, then we can use this refined phonemic awareness knowledge to develop a deep and rich understanding of how to read and spell English words. For instance, when students can accurately discern that a word like stop or snap has four sounds, and they know the relevant letter-sound relationships (s spells /s/, t spells /t/, and n spells /n/), then spelling those words correctly becomes predictable and attainable.
• There are a constrained number of common consonant blends.
o Some common initial 2-sound consonant blends in English are bl, cl, fl, gl, pl, sl, br, cr, dr, fr, gr, pr, tr, dw, sc, st, sn, sm, sw, and tw.
o Some common final 2-sound consonant blends in English are ct, ft, ld, lk, lm, lp, lt, mp, nd, nt, pt, sk, sp, st, and nk.
• In Countdown, students do not learn the term “2-sound consonant blend” right away. We introduce the sounds in a 2-sound consonant blend as “sound buddies” in this phonemic awareness lesson. In this lesson and in Unit 26, Lesson 2, students will work only with spoken words that have consonant blends. They will orally segment words with blends. It is not until Unit 26, Lesson 3 that they will learn to identify consonant blends in print. They will then learn that the concept of “sound buddies” can be labeled as “2-sound consonant blends.”
3, 2, 1…
Open Countdown Online to Unit 25, Lesson 2 (25.2).
OPTIONAL
Before teaching this lesson, you may wish to run the Letter-Sound and Heart Word Pop-Up and 3-Up activities in Countdown Online to practice the letter sounds and Heart Words taught in Lesson 1.
Launch!
❶ Finger-Stretch Words with Sound Buddies
Say:
• “In this lesson, we will stretch the sounds in some special words.
• These words will have two consonant sounds right next to each other. We will call these sounds ‘sound buddies.’”
© 2017 Really Great Reading Company, LLC 231 UNIT 25 Lesson 2
Instead of pulling your fingers back into a closed fist in the final step of the finger-stretching procedure, you may choose to keep your fingers extended as you pull your hand toward your chest. This keeps the number of phonemes in the word exposed and visible, making it easier for students to count the phonemes in the next step.
I DO: Finger-Stretch mass/mask
Click to display the image for mass.
Say:
• “Listen while I say the sounds in mass, as in, ‘My grandma goes to mass at her church on Sundays.’”
• “mass ” (hold closed fist against chest, crossing the midline)
• “/m/” (extend thumb), “/ăăăă/” (extend pointer finger), “/s/” (extend middle finger)
• “mass ” (pull fingers back to a closed fist while saying the word)
Say “Mass has three sounds. The vowel sound is /ăăăă/. I hear the same sound as the beginning of /ă/, apple, so the vowel sound must be short a. Short a, /ă/, is the first sound in aaaapple (while making the short a, apple motion).”
Click to display three color tiles.
Say “Let’s touch the tiles while we say the sounds in mass again/m/ (touch first tile), /ă/ (touch second tile), /s/ (touch third tile), mass.”
Say “Now, let’s do something special to the word mass. Let’s add a new sound to the end of the word, just like we did when we played the game Add That Sound during some of our other Countdown lessons. Our new sound will be /k/.”
Click to display four color tiles.
Say “Let’s touch the tiles while we say the sounds in mask/m/ (touch first tile), /ă/ (touch second tile), /s/ (touch third tile), /k/ (touch fourth tile), mask.”
Say:
• “The last two sounds in mask are /s/ and /k/ (touch each of the last two tiles). These are two consonant sounds next to each other. We will call them ‘sound buddies.’
• /s/ and /k/ are sound buddies because they like to be near each other, like good buddies. Even though they are great friends and like to be next to each other, they are two different sounds. They are right next to each other, but they are still two different sounds, just like you like to be near your friend, but you are still two different people.
• Sound buddies are special because we can take away one of the sounds and the other sound stays the same.
• Let’s do a little experiment with the sounds in mask.”
232 © 2017 Really Great Reading Company, LLC UNIT 25 Lesson 2
Stretch the sounds in mask - /m/ /ă/ /s/ /k/, mask.
Say “Mask has four sounds. The last two sounds are sound buddies. Let’s take away one of the sound buddies to see if we can make a new word.”
Remind students that the sound buddies in mask are /s/ /k/.
Ask students to take away the last sound in mask.
Ask “What is the new word?” A: mass
Click to remove the last color tile.
Say “Yes! If we take away the last sound, /k/, the rest of the sounds stay the same - /m/ (touch the first tile), /ă/ (touch the second tile), /s/ (touch the third tile). The sound /s/ is still there even though her buddy, the sound /k/, has gone away.”
Click to display four color tiles again.
Say the sounds in mask again - “/m/ (touch first tile), /ă/ (touch second tile), /s/ (touch third tile), /k/ (touch fourth tile), mask.”
Say:
• “Remember, the last two sounds in mask are sound buddies.
• Sound buddies are two consonant sounds next to each other, where each one makes its own separate sound. These buddies like to be very close to each other, but they are still two different sounds. It is just like you and your best friend. You can spend a lot of time right next to each other, but then you can each go away and do different things because you are two different people.
• We can take away one of the sounds who are sound buddies, and the other sound stays the same.”
Say “Let’s do another word with sound buddies.”
WE DO: Finger-Stretch den/dent
Say “Now let’s stretch out a word together.”
Click to display the image for den
Say:
• “Ready? Our word is den, as in, ‘A lion sleeps in a lion’s den.’
• Let’s stretch it together.”
• “den” (hold closed fist against chest, crossing the midline)
• “/d/” (extend thumb), “/ĕĕĕĕ/” (extend pointer finger), “/n/” (extend middle finger)
• “den” (pull fingers back to a closed fist while saying the word)
© 2017 Really Great Reading Company, LLC 233 UNIT 25 Lesson 2
If your students are still struggling to stretch the sounds in words with sound buddies, you may wish to use some of the You Dos as We Dos to provide more guided practice.
Ask:
• “How many sounds did we hear?” A: three
• “What vowel sound did we hear in the word?” A: /ĕĕĕĕ/
• “What is the guideword for that sound?” A: edge
• “What is the motion for edge?” A: run finger along edge of table or desk (students make motion)
• “Is /ĕĕĕĕ/ short or long?” A: short
• “How do we know?” A: /ĕ/ is the first sound in edge
Click to display three color tiles.
Stretch the sounds in den again with students while touching each tile/d/ /ĕ/ /n/, den.
Click to display four color tiles.
Say “Now, add the sound /t/ to the end of the word den.”
Stretch the sounds in den again with students while touching each tile, adding the sound /t/ at the end of the word while touching the fourth tile/d/ /ĕ/ /n/ /t/, dent.
Ask “What is the new word?” A: dent Say “That’s it! Dent is a small area of damage. ‘My dad’s old truck has a dent in the bumper.’”
Ask “Which two sounds are sound buddies in this word?” A: /n/ and /t/
Say “Right! /n/ and /t/ are sound buddies because they like to be near each other, like good buddies, but they are still two different sounds.”
Say “Let’s stretch the sounds in some more words with consonant sound buddies.”
YOU DO: Finger-Stretch words with sound buddies
Say “Now, you will stretch out some words on your own.”
Click to display the image.
Ask individual students to stretch the phonemes in each word below. After students stretch the sounds, ask:
Definitions are provided for some words that may be unfamiliar to many kindergarten students.
• “How many sounds did you hear?” A: four
• “What vowel sound did you hear in the word?” A: varies
• “What is the guideword for that sound?” A: varies
• “What is the motion for [guideword]?” A: varies (students make motion)
• “Is [vowel sound] short or long?” A: short
234 © 2017 Really Great Reading Company, LLC UNIT 25 Lesson 2
Complete the steps above with the following words:
tent - /t/ /ĕ/ /n/ /t/, tent (You can sleep in a tent when you go camping.)
A: four, /ĕĕĕĕ/, edge, run finger along edge of desk, short (sound buddies: /n/ and /t/) jump - /j/ /ŭ/ /m/ /p/, jump (I can’t wait to jump into the pool for a swim.)
A: four, /ŭŭŭŭ/, up, move pointer finger up, short (sound buddies: /m/ and /p/) bump - /b/ /ŭ/ /m/ /p/, bump (The car drove slowly over the bump in the road.) A: four, /ŭŭŭŭ/, up, move pointer finger up, short (sound buddies: /m/ and /p/) fast - /f/ /ă/ /s/ /t/, fast (I ran so fast that my hat flew off.) A: four, /ăăăă/, apple, hold apple and move across body, short (sound buddies: /s/ and /t/) last - /l/ /ă/ /s/ /t/, last (The last letter in the alphabet is z.) A: four, /ăăăă/, apple, hold apple and move across body, short (sound buddies: /s/ and /t/) chest - /ch/ /ĕ/ /s/ /t/, chest (The pirate had his treasure in his treasure chest.) A: four, /ĕĕĕĕ/, edge, run finger along edge of desk, short (sound buddies: /s/ and /t/) bend - /b/ /ĕ/ /n/ /d/, bend (We rode our bikes around the bend in the road.)
A: four, /ĕĕĕĕ/, edge, run finger along edge of desk, short (sound buddies: /n/ and /d/) send - /s/ /ĕ/ /n/ /d/, send (I am going to send my uncle a birthday card.)
A: four, /ĕĕĕĕ/, edge, run finger along edge of desk, short (sound buddies: /n/ and /d/) bulb - /b/ /ŭ/ /l/ /b/, bulb (It got dark when the light bulb burned out.)
A: four, /ŭŭŭŭ/, up, move pointer finger up, short (sound buddies: /l/ and /b/) milk - /m/ /ĭ/ /l/ /k/, milk (Milk comes from cows.) A: four, / ĭĭĭĭ/, itch, scratch arm, short (sound buddies: /l/ and /k/)
❷ Optional Challenge: Stretch Words with Five Sounds
Use the following words with five phonemes to provide an additional challenge for students.
Click to display the image. grasp - /g/ /r/ /ă/ /s/ /p/, grasp (Grasp means to hold something tightly. If you grasp the spoon, you can help me mix the batter.) twist - /t/ /w/ / ĭ/ /s/ /t/, twist (Help me twist the lid to get it off the jar.) crust - /k/ /r/ /ŭ/ /s/ /t/, crust (Mom cut the crust off of the bread when she made my sandwich.)
If your students seem to be getting the hang of stretching words with four sounds, you can challenge them to tell you which sounds are the sound buddies in each word.
You may wish to use the first word in Section 2, grasp, as a model. You can stretch the sounds in the four-sound word grass first, /g/ /r/ /ă/ /s/. Then, ask students to add the sound /p/ to the end of grass. The resulting five-sound word is grasp. Students can then try to stretch the five sounds in grasp Stretching five-sound words may prove too challenging for some kindergarten students, but these words are provided as an option for students who have very strong phonemic awareness.
© 2017 Really Great Reading Company, LLC 235 UNIT 25 Lesson 2
slept - /s/ /l/ /ĕ/ /p/ /t/, slept (My dog slept in my bed.)
Brent - /b/ /r/ /ĕ/ /n/ /t/, Brent (My brother’s name is Brent.)
❸ Optional Extension Activity: Delete That Sound
Click to display the image for smash
Say:
• “Today, we are going to take away a sound from the beginning of some words.
• Listen to my word, smash.
• Let’s finger-stretch that word together. Smash, /s/ /m/ /ă/ /sh/, smash.”
Ask “How many sounds did you hear?” A: four
Click to display a color tile for each sound while saying the sounds again: /s/ (first color tile appears), /m/ (second color tile appears), /ă/ (third color tile appears), /sh/ (fourth color tile appears).
Say “I am going to take away the sound /s/ from the beginning of smash. I’ll take away one of the color tiles since we are deleting, or taking away, a sound.”
Click to remove the first color tile.
Say “Let’s see what the new word is: /m/ (touch first tile), /ă/ (touch second tile), /sh/ (touch third tile), mash (sweep finger under the tiles). The new word is mash.”
Ask “Do you hear the sound /s/ at the beginning?” A: no
Say:
• “I did not hear /s/ at the beginning because we took that sound away. Now the word has only three sounds!
• Let’s stretch all the sounds in mash together (say the sounds while fingerstretching): /m/ (extend thumb), /ă/ (extend pointer finger), /sh/ (extend middle finger), mash (pull closed fist to chest).
• Let’s try another one.”
Click to display the smile.
Say:
• “Listen to my word, smile.
• Let’s finger-stretch that word together. Smile, /s/ /m/ / ī/ /l/, smile.”
Ask “How many sounds did you hear?” A: four
236 © 2017 Really Great Reading Company, LLC UNIT 25 Lesson 2
Click to display a color tile for each sound while saying the sounds again: /s/ (first color tile appears), /m/ (second color tile appears), /ī/ (third color tile appears), /l/ (fourth color tile appears).
Say “I am going to take away the sound /s/ from the beginning of smile. I’ll take away one of the color tiles since we are deleting, or taking away, a sound.”
Click to remove the first color tile.
Say “Let’s see what the new word is: /m/ (touch first tile), / ī/ (touch second tile), /l/ (touch third tile), mile (sweep finger under the tiles). The new word is mile.”
Ask:
• “What is the new word?” A: mile
• “Do you hear the sound /s/ at the beginning?” A: no Say:
• “I did not hear /s/ at the beginning because we took that sound away. Now the word has only three sounds!
• Let’s stretch all the sounds in mile (say the sounds while fingerstretching): /m/ (extend thumb), / ī/ (extend pointer finger), /l/ (extend middle finger), mile (pull closed fist to chest).
• Let’s try another one.”
Continue with the following examples. For each, click to display the image, then to display the color tiles, and finally, to remove the first tile.
1. grows (/g/ /r/ /ō/ /z/ - /g/) rose
2. twin (/t/ /w/ /ĭ/ /n/ - /t/) win
3. seat (/s/ /ē/ /t/ - /s/) eat
4. snail (/s/ /n/ /ā/ /l/ - /s/) nail
5. mitt (/m/ / ĭ/ /t/ - /m/) it
6. thread (/th/ /r/ /ĕ/ /d/ - /th/) red 7. flip (/f/ /l/ /ĭ/ /p/ - /f/) lip 8. fox (/f/ /ŏ/ /ks/ - /f/) ox 9. clock (/k/ /l/ /ŏ/ /k/ - /k/) lock 10. brain (/b/ /r/ /ā/ /n/ - /b/) rain
© 2017 Really Great Reading Company, LLC 237 UNIT 25 Lesson 2
You may wish to have students place their manipulatives on the floor next to their desks or tables until they use them later in this lesson to avoid distractions during the initial instruction. They will not use their manipulatives until Section 4.
Unit 25 | Lesson 3
Phonics Concept: Digraph Review and Chunk all AP
Objectives
Students will:
• identify the letters all as a chunk that always spells the sounds /l/;
• build real words with chunk all and digraphs sh, th, ch, wh, and ck
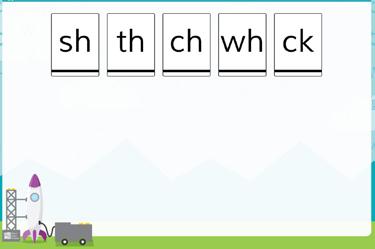
What Students See
Description
The teacher, as well as an optional animation, intro duces a new group of letters, chunk all, which spells the sounds /l/, as in the word ball. The teacher will also review digraphs sh, th, ch, wh, and ck. Students help the teacher build real words with chunk all.
Student Materials
Holding and working boards from Countdown Student Kit
What You Need to Know
Chunk all
• The letters a l l together are almost always pronounced like the word all, as in ball, call, and mall.
• The letter a in all does not spell the short a sound as in apple. It spells the short o sound. (In some dialects the vowel in all is pronounced /aw/.)
• When the letters a-l-l are split between separate syllables, as in the words bal-loon or al-li-ga-tor, they do not act as a chunk that spells the sounds /ŏl/ (or /awl/).
• The letter a followed by a single l at the end of a single-syllable word is pronounced with the short a sound, as in pal.
• We teach students to recognize the three letters a l l together as a unit or “chunk” that always spells the same sounds - /ŏl/.
3, 2, 1…
Open Countdown Online to Unit 25, Lesson 3 (25.3).
Students take out color and letter tiles and working board from Countdown Student Kit.
238 © 2017 Really Great Reading Company, LLC UNIT 25 Lesson 3
Launch!
❶ Review Digraphs
Click to display the letter tiles sh, th, ch, wh, and ck.
Remind students that sometimes when we see two letters together, they make one sound.
Ask “What is a digraph?” A: two letters that spell one sound
Point to the letter tiles sh, th, ch, wh, and ck, and have students say the sounds. A: /sh/, /th/, /ch/, /w/, /k/
❷ Teach Difference Between al and all
Click to display the image of Al.
Say “This is Al. His name is spelled with just two letters.”
Click to display the letter tiles A and l under Al
Say:
• “We spell Al with a capital a because it is a name.
• Let’s stretch the sounds in his name together, Al, /ă/ /l/, Al.”
Ask:
• “What is the vowel sound in his name?” A: /ă/
• “What do we call that vowel sound?” A: short a Say:
• “Right! The a in Al ’s name spells the short a sound because Al follows our Vowel-Consonant pattern.
• There is only one vowel, a, and then there is a consonant after it, l.”
Click to display the image for all.
Say “These are all of Al’s friends. The word all looks a lot like the name Al, but there is an extra l.”
Click to display the letter tiles a, l and l under the image for all. Say:
• “Let’s say the sounds in all together, /ŏl/.
• All is a special word. Even though it also follows our Vowel-Consonant pattern with one vowel and consonants after the vowel, the letter a makes a different sound.
• When we see a l l together, it always spells /ŏl/, so instead of using three letter tiles, we put all three letters on one tile, and we call it a ‘chunk.’”
The animation available in Countdown Online introduces the difference between al and all in a fun and engaging way. We recommend showing it after teaching Section 2 as a review of the content or to reinforce the content for students who might need more direct instruction.
© 2017 Really Great Reading Company, LLC 239 UNIT 25 Lesson 3
Remember, we consider the sounds /ŏl/ to be one sound unit, even though they are technically two separate sounds.
Click to display the letter tile all.
❸ Build Real Words with al and all
Say “Now, we are going to build a few real words with the letters a l and the chunk a l l.”
I DO: Build call
Click to display the image for call
Say “The word is call. ‘I need to call my mom.’”
Stretch the sounds. Call, /k/ /ŏl/, call
Say “I heard two sounds in call, /k/ /ŏl/.”
Click to display one color tile at a time while again saying “/k/ /ŏl/.”
Click to display a letter tile below each color tile to spell each sound while saying the sound.
Use Touch & Say to read call - /k/ /ŏl/, call.
Point to chunk all and say “I see chunk all in this word. I know chunk all has three letters working together to spell /ŏl/.”
Say “Now let’s try one together.”
WE DO: Build pal
Students do not have a tile for the chunk all in their Countdown Student Kits, so instead of building words on their own, they will assist you in building words with al and all on the screen.
Click to display the pal
Say “Now, let’s build a real word together. You won't use your color and letter tiles, but you will help me use mine. Our word is pal. ‘This is my pal, Anna.’ Repeat pal.” (Students repeat.)
Stretch the sounds with students - pal, /p/ /ă/ /l/, pal.
Click to display one color tile for each sound in pal while saying the sounds/p/ /ă/ /l/.
Ask individual students the following questions to lead students in helping you to spell each sound with letter tiles below the color tiles, one at a time. Click to display each letter tile as students respond with the correct spellings:
• “What is the first sound you hear?” A: /p/
• “What letter spells /p/?” A: p (Click to display p.)
• “What is the next sound you hear?” A: /ă/
• “What letter spells /ă/?” A: a (Click to display a.)
• “What is the last sound you hear?” A: /l/
240 © 2017 Really Great Reading Company, LLC UNIT 25 Lesson 3
•
“What letter spells /l/?” A: l (Click to display l.)
Point to the letters a l and remind students that this a spells its short sound since there is only one l, which means this is not the chunk all.
Use Touch & Say to read pal with students - /p/ /ă/ /l/, pal
WE
DO:
Build real words with al or all
Say “Now, we are going to use color and letter tiles to build four more real words. Each word will have the sounds /ăl/ or /ŏl/. You won't use your color and letter tiles, but you will help me use mine.”
Click to display each image and dictate the words and sentences below, one at a time, following the Build a Word steps for each word and prompting students as needed.
ball - “We threw a ball back and forth for a while.” tall - “Giraffes are so tall that they can eat the leaves off of trees.” gal - “Gal is another word for girl. That gal is doing a puzzle.” fall - “Fall is the season that comes after summer and before winter. Fall is my favorite season.”
Click through the steps to build each word, one word at a time. Students should tell you how many color tiles to place and which tiles to use to spell each sound, as you continue clicking. Say the word. Stretch the sounds in the word.
Click to display one color tile for each sound while saying the sound. Click to display one letter tile below each color tile to spell the word. Make sure students notice the use of the all tile to spell the sounds /ŏl/. b all t all a g l f all
Use Touch & Say to read the word.
❹ Additional Digraph Practice
YOU DO: Build real words with
digraphs
Say “Now, you are going to build some more words. This time, each word will have a digraph. Remember to use your digraph tiles when you hear a digraph in
Remember to use Positive Error Correction if students make a mistake while building words. Steps for Positive Error Correction can be found on p. 47.
© 2017 Really Great Reading Company, LLC 241 UNIT 25 Lesson 3
Have students place their manipulatives in front of them now if they have not already done so.
these words.”
Click to display each image and dictate the words and sentences below, one at a time, following the Build a Word steps for each word and helping students as needed.
math - “During math, we learn to add and subtract.” ship - “My parents went on a vacation on a ship.” luck - “What luck! You found a four-leaf clover!” when - “ When will we be at Grandma’s house?” chop - “I used an ax to chop the wood for the bonfire.”
Students build each word independently, one word at a time. Students should: Say the word. Stretch the sounds in the word. Place one color tile on boards for each sound while saying the sound. Spell the word by placing one letter tile below each color tile. Make sure students use the digraph tiles rather than individual letter tiles to spell the digraph in each word. a m th i sh p u l ck e wh n o ch p
Use Touch & Say to read the word.
Remember to use Positive Error Correction if students make a mistake while building words. Steps for Positive Error Correction can be found on p. 47.
Hold up their boards so you can check their spelling and provide Positive Error Correction as needed.
Click to display the correct placement of color and letter tiles for each word. Students clear boards and wait for the next word to be dictated.
242 © 2017 Really Great Reading Company, LLC UNIT 25 Lesson 3
Unit 25 | Lesson 4
Student Practice AP
Objectives
Students will:
• identify the graph emes (sound spellings) in printed words and produce the prop er sound for each grapheme; blend the graphemes together to produce real words (Detective Work);
• read words, identify their vowel sounds, and determine if they have a digraph or not (Word Sort).

Description
Teacher leads students through the Mark It! and Read It! procedures in the Detective Work activity, and then leads students through a model word(s) for the Word Sort. Students then read the remaining words on their own, first listening carefully for the vowel sound and matching it with the guideword image for the vowel sound they hear, and deciding if each word contains a digraph or not. Teacher reviews the answers with students, allowing time for students to correct their work if needed.
Student Materials
• Countdown Student Workbook
• Pencil
What Students See
What You Need to Know
No new concepts.
3, 2, 1…
Open Countdown Online to Unit 25, Lesson 4 (25.4).
OPTIONAL
Before teaching this lesson, you may wish to run the Letter-Sound and Heart Word Pop-Up and 3-Up activities in Countdown Online to practice the letter sounds and Heart Words taught in Lesson 1.
© 2017 Really Great Reading Company, LLC 243 UNIT 25 Lesson 4
1. 2. 3. 4. 5. 6. 7. 8. 9. 10. 11. 12. Detective Work 1. 2. 3. 4. 5. 6. 7.
Launch!
❶ Detective Work: Mark It!
Students open workbooks to page 28.
2017 Thad call pick tall chip rush
Really Great Reading Company, LLC shut fall rich sock whiz pal
Say “In Detective Work, we are going to be ‘letter and sound detectives.’ We will be using what we have learned to pay close attention to each letter in a word and then read the word.”
Click to display the Mark It! words. Say:
• “In Mark It!, we will underline letters and say the sounds that those letters make. Then, we will blend the sounds together to make a word.
• Watch as I underline letters while saying their sounds and then read the whole word.
• When we see a digraph, we will underline both letters with one line because, together, they spell one sound.
• When we see chunk all, we will underline the whole chunk, a-l-l, because those three letters work together to spell /ŏl/.”
Click three times to underline the spellings (graphemes) while saying the sounds:
• “/sh/” while underlining the sh
• “/ŭŭŭŭ/” while underlining the u
• “/t/” while underlining the t
• “shut ”
Students repeat the process in their workbooks for the word shut.
Model the process above for the rest of the words one at a time. After each word, have students repeat orally and on paper. Make sure students are underlining each letter (or letters, digraphs or chunk all, together with one line) as they are saying the proper sound.
❷
Detective Work: Read It!
Say:
• “The next part of Detective Work is called Read It!
• In this section, I will be calling on one student at a time to read a row of words out loud to the group.
244 © 2017 Really Great Reading Company, LLC UNIT 25 Lesson 4
28 unit 25 Mark It! Read It!
• In Read It!, we do not underline the letters. We just read the words. rush Thad tall shut sock pal chip pick rich whiz fall call sock rich rush call shut Thad pal tall chip
• When it is your turn to read, read loudly enough so everyone can hear.
• When it is not your turn to read, you will be a Checker, listening carefully.
• We will give the Reader a thumbs-up if they read all of the words correctly, and we will give them a thumbs-to-the-side if there is a word they need to try again.”
Students read a row of words out loud.
❸ Word Sort: Short Vowels and Digraphs
Say:
• “Remember, when we are doing a Word Sort, I will always model the first one or two words to show you how to sort the words.
• Sorting words will help you to pay attention to the spelling of the words.
• In this lesson, we will sort words in two ways. First, we will decide which vowel sound we hear. We will read the word first and then decide if the vowel sounds like /ă/, apple; /ĕ/, edge; /ĭ/, itch; /ŏ/, octopus; or /ŭ/, up.
• Next, we will read the word again and listen carefully for digraphs. When we hear a digraph in the word, we will circle it.”
Click to display the top section of the Word Sort.
Students open workbooks to page 29.
Read and finger-stretch the first word aloud: deck, /d/ /ĕ/ /k/, deck
Ask:
• “What vowel sound did you hear in the middle?” A: /ĕ/
• “What letter spells /ĕ/ in this word?” A: e
• “Is /ĕ/ the same as the beginning of aaaapple, eeeedge, iiiitch, ooooctopus, or uuuup?” A: edge
• “Right! So, which picture should we circle?” A: edge
Click to circle the image for edge.
Prompt students to circle the image for edge
Say “Now, let’s stretch out the sounds in the word again: deck, /d/ /ĕ/ /k/, deck.”
Ask:
• “Did you hear the sound /k/ in this word?” A: yes
• “What letters spell /k/ in this word?” A: ck
• “What do we call these letters?” A: digraph ck
Be sure to use Positive Error Correction if students misread any words in Read It! Positive Error
Correction steps can be found on p. 106. When beginning the Word Sort, you should model as many words as you deem necessary for your students to grasp the concept and proceed independently.
1. 2. 3. 4. 5. 6. 7. 8. 9. 10.
2017
If your students are not yet able to read these words on their own, feel free to read each word aloud for them and have them independently select the correct vowel sounds and circle the digraphs.
© 2017 Really Great Reading Company, LLC 245 UNIT 25 Lesson 4
unit 25 Short Vowels and Digraphs
Really Great Reading Company, LLC 29
d e ck wh e n ch i n p a th sh u t l o ck ch e ck th i n h u sh b a th Word Sort
The final five words are displayed on the next screen in Countdown Online
Say “Right! Let’s circle the letters that spell /k/.”
Click to circle digraph ck.
Prompt students to circle digraph ck Say:
• “Now, you are going to circle the picture for the vowel sound and circle the digraphs you see in the rest of the words on your own.
• Listen carefully for the vowel sound when you say each word.
• Then listen carefully for the digraphs.”
Use Countdown Online to check answers with students
Call on individual students to read a word, identify the vowel sound and the correct guideword image, and identify the digraph.
Students check answers.
246 © 2017 Really Great Reading Company, LLC UNIT 25 Lesson 4
Unit 25 | Lesson 5
Wrap Up & Show What You Know AP
Objectives
Students will:
• accurately articulate the phonemes reviewed in this unit;
• accurately read sentences that contain the concepts, words, and phonemes taught in this unit and previous units;
• accurately spell words with a controlled set of concepts and phonemes.
Description
In Sentences to Read, students read short sentences out loud to the class. Their goal is to read each sentence accurately the first time. In Spell It!, students see an image, which the teacher names. Teacher and students finger-stretch the sounds in the word together, counting the sounds. They then fill in a circle for each sound they heard and write the corresponding letter in each box with a filled in circle, spelling the target word.
Description
• Countdown Student Workbook
• Pencil What Students See
What You Need to Know
No new concepts.
3, 2, 1…
Open Countdown Online to Unit 25, Lesson 5 (25.5).
OPTIONAL
Before teaching this lesson, you may wish to run the Letter-Sound and Heart Word Pop-Up, 3-Up, and Read a Row activities in Countdown Online to practice and assess the letter sounds and Heart Words taught in Lesson 1.

© 2017 Really Great Reading Company, LLC 247 UNIT 25 Lesson 5
If time permits, pro vide each student with the opportunity to read at least one sen tence. In small groups, you might consider letting each student read two sentences. Students who strug gle should be given additional sentences for more practice.
Launch!
❶ Sentences to Read
Say:
• “We are going to read some sentences in our workbooks today.
• I will call on you to read a sentence when it is your turn to be the Reader, and the rest of us will act as Checkers, touching each word as the Reader reads it out loud.”
Students open workbooks to page 30.
Individual students read sentences. Since there are only 16 sentences, it is okay to have a student reread a sentence that has been previously read.
Direct Checkers to give a thumbs-up if the Reader reads all of the words correctly or a thumbs-to-the-side if the Reader misreads a word(s). If the Reader misreads any words, teacher follows Positive Error Correction instructions.
❷ Spell It!
Say:
• “Now, we are going to spell some words with the sounds we have been practicing.
• We are going to start by stretching out the sounds in a word so we can hear them clearly.”
Students open workbooks to Spell It! on page 31.
Say “We are going to spell words that you will hear me say aloud. Let’s start with number 1 at the top of your page.”
Click to display the image for rush.
Say “The first word is rush, as in ‘I need to rush home for dinner.’ Let’s stretch it together. Rush, /r/ /ŭ/ /sh/, rush.” (Finger-stretch rush along with students.)
Ask “How many sounds did we hear?” A: three Say “Since rush has three sounds, /r/ /ŭ/ /sh/, we will fill in three dots, one for each sound, like this.”
Click three times to fill in the first three dots, and have students fill in the first three dots on their workbook pages.
248 © 2017 Really Great Reading Company, LLC UNIT 25 Lesson 5
1. 30 unit Where did she fall? (4) Kim must pick the chick. (5) Our rich dad must have cash. (6) What will Chip do in the fall? (7) The shack is a thick mud hut. (7) The puck hit him in the chin. (7) Call for Jack to kick the ball. (7) Ben had ham hash in the dish. (7) Check the wall, but do not fall. (7) Will he come back to the dock? (7) The duck was quick to say quack. (7) She is tall and can hit the ball. (8) Pick a thick fish and a thin fish. (8) Can you pick us up at the mall? (8) We will check the map in the hall. (8) We want the thud to shock them all. (8) 25 1. 2. 3. 4. 5. 6. 7. 8. 9. 10. 11. 12. 13. 14. 15. 16. Sentences to Read 31 unit Spell It! 25 1. 2. 3. 4. 5. 6. 7. 8. 9. 10. Challenge
Say:
• “Since rush has three sounds, we will write one spelling in each box that has a dot filled in.
• Let’s stretch rush again slowly so we can hear each sound and write it down. In this word, the sound /sh/ is spelled with a digraph.”
• “/r/” (PAUSE for students to write r in the first box) “/ŭ/” (PAUSE for students to write u in the second box) “/sh/” (PAUSE for students to write sh in the third box; if necessary, remind them that /sh/ is spelled by the digraph sh)
Click three times to fill in the letters r u sh, and have students check their work, correcting their spelling if needed. r u sh
Continue the above process with the following words, one at a time.
2. thin (Optional sentence: Giraffes have long, thin necks.) th i n
3. chop (Optional sentence: Will you help me chop carrots for our snack?) ch o p
4. when (Optional sentence: Let me know when it is time for lunch.) wh e n
5. Rick (Optional sentence: Rick brought peanut butter and jelly for lunch.) R i ck
OPTIONAL CHALLENGE WORDS:
6. chick (Optional sentence: The chick pecked at seeds on the ground.) ch i ck
7. which (Optional sentence: Which color is your favorite?) wh i ch
If students struggle to spell the individual sounds, you may want to ask students how each sound is spelled before moving on to the next, as you do in Build a Word
You may wish to explain that we use a capital letter at the beginning of a person's name, so Rick begins with a capital R.
© 2017 Really Great Reading Company, LLC 249 UNIT 25 Lesson 5
8. shuck (Shuck means to peel off the outside of something. Optional sentence: You have to shuck corn before you can eat it.)
sh u ck
9. thick (Optional sentence: I like writing with a thick pencil.) th i ck
10. quick (Optional sentence: We will have a quick snack break.) qu i ck
See p. 54 for a Differentiation Option for Spell It!
250 © 2017 Really Great Reading Company, LLC UNIT 25 Lesson 5
Unit 26 | Lesson 1
Letter-Sound & Heart Word Fluency AP & Sight Words
Objectives
Students will:
• build automatic recognition of some letter-sound (grapheme-phoneme) combinations;
• build automatic recognition of some Heart Words.
What You Need to Know
Description
Students will play Look, Think, Say!, Pop-Up, 3-Up, and Read a Row to review six letter sounds, to learn three new Heart Words, and to review or learn three additional Heart Words.
What Students See
For a complete explanation of the Look, Think, Say!, Pop-Up, 3-Up, and Read a Row activities, see p. 326 in Appendix A.
Before Teaching:
Letter-Sound and Heart Word Fluency Set-Up
Open Countdown Online to Unit 26, Letter-Sound and Heart Word Generator.
Choose six letter sounds to review and practice.
Choose three Heart Words to review and practice, or you may wish to select three additional new Heart Words to teach. (The first three new Heart Words to teach in this unit will be locked.)
Optional: Print Read a Row Teacher Recording Form.
3, 2, 1…
Open Countdown Online to Unit 26, Lesson 1 (26.1).
Launch!
❶ Letter-Sound Look, Think, Say!
Say “Today, we are going to practice the sounds for six letters with the game Look, Think, Say! ”

Click twice to display the first letter with one red dot and two empty dots below it.
Chunk all will be locked for this unit to provide an opportunity for students to develop automaticity with its sounds.
© 2017 Really Great Reading Company, LLC 251 UNIT 26 Lesson 1
Say:
• “Remember, this red dot (point to the red dot) tells us to stop what we are doing so we can listen to the letter and its sound.
• This letter is [letter name], and it spells the sound [/letter sound/].”
Click to display the yellow dot.
Say “Think about the sound of this letter.”
Click to display the green dot.
Say:
• “This green dot (point to the green dot) tells us to say the sound out loud.
• Say the sound with me, [/letter sound/].
• Let’s try another letter.
• Remember to look, think, and then say. Only say the sound out loud when the green dot shows up.”
Click twice to display the next letter, and continue the above procedure for the remaining five letters.
Continue with the same six letter sounds for two additional rounds.
❷ Letter-Sound Pop-Up
Say:
• “Now that we have reviewed the letter names and sounds, we are going to see if we can just look quickly and say the sounds that we remember.
• When you see a letter pop up onto the screen, say the sound out loud as quickly as possible, but remember that it is still more important to say the correct sound than to be fast.
• If you need help remembering, I can help, but try your best.”
Click to display the six letters at random. Each letter will appear several times. Read each sound together with students as it pops up.
❸ Letter-Sound 3-Up
Say:
• “Great job! In our next game, you will see three letters on the screen.
• When you see the red dot, stop and look at the three letters. When you see the yellow dot, think about the letters and try to remember the sounds they say. When you see the green dot, say the three sounds out loud.”
Click to display the sets of three letters. Each letter will appear several times.
252 © 2017 Really Great Reading Company, LLC UNIT 26 Lesson 1
Look at, think about, and say each set of three letter sounds together with students as the sets are displayed.
❹ Letter-Sound Read a Row
Click to display three long green boxes, each of which is covering up a row of letter tiles.
Say “Now, we are going to read a row of letter sounds.”
Call on one student to read a row of letter sounds out loud to the class.
When the student is done reading, ask the Checkers to show the thumbs-up or thumbs-to-the-side gesture.
Repeat with additional students reading the remaining rows.
❺ Heart Word Look, Think, Say!
Say “Now, we are going to learn to read some new Heart Words.”
Click twice to display the Heart Word saw with one red dot and two empty dots below the word.
Say:
• “Remember, this red dot (point to the red dot) tells us to stop what we are doing so we can listen to the word.
• This word is saw, as in, ‘We saw elephants, chimpanzees, and wolves at the zoo.’”
Click to display the yellow dot.
Say “Think about this word.”
Click to display the green dot.
Say:
• “Say the word with me, saw.
• Let’s try another word.
• Remember to look, think, and then say. Only say the word out loud when the green dot shows up.”
Click twice to display the Heart Word own with one red dot and two empty dots below the word.
Say “Look at the word own, as in, ‘I own a bike, but I share it with my sister.’”
Click to display the yellow dot.
Say “Think about this word.”
Click to display the green dot.
If you would like to have more than three readers read a row, Countdown Online will allow you to run through the activity twice before moving on.
© 2017 Really Great Reading Company, LLC 253 UNIT 26 Lesson 1
Say:
• “Say the word!
• Let’s try one more word.”
Click twice to display the Heart Word please with one red dot and two empty dots below the word.
Say “Look at the word please, as in, ‘Please talk in a quiet voice in the library.’”
Click to display the yellow dot.
Say “Think about this word.”
Click to display the green dot.
Say:
• “Say the word!
• Let’s look at those words again.”
Continue with the same three Heart Words and the three Heart Words you chose in the Heart Word Generator for two additional rounds.
❻ Heart Word Pop-Up
Say:
• “Now, we are going to practice reading the Heart Words we’ve learned.
• In our first game, when you see a word pop up onto the screen, say the word out loud.
• If you need help remembering, I can help, but try your best.”
Click to display the Heart Words saw, own, please, and the three Heart Words you have selected in the Heart Word Generator at random. Each word will appear several times.
Read each word together with students as it pops up.
❼ Heart Word 3-Up
Say:
• “Great job! In our next game, you will see three words on the screen.
• When you see the red dot, stop and look at the three words. When you see the yellow dot, think about the words and try to remember them. When you see the green dot, say the three words out loud.”
Click to display the sets of three Heart Words. Each set will contain the following words in a random order: saw, own, please, and the three words you have selected. Each word will appear several times.
254 © 2017 Really Great Reading Company, LLC UNIT 26 Lesson 1
Look at, think about, and say each set of three words together with students as the sets are displayed.
❽ Heart Word Read a Row
Click to display three long green boxes, each of which is covering up a row of Heart Words.
Say “Now, we are going to read a row of Heart Words.”
Call on one student to read a row of Heart Words out loud to the class. When the student is done reading, ask the Checkers to show the thumbs-up or thumbs-to-the-side gesture.
Repeat with additional students reading the remaining rows.
If you would like to have more than three readers read a row, Countdown Online will allow you to run through the activity twice before moving on.
© 2017 Really Great Reading Company, LLC 255 UNIT 26 Lesson 1
Unit 26 | Lesson 2
2-Sound Consonant Blends PA
Objectives
Students will:
• accurately segment words with 2-sound consonant blends;
• accurately identify 2-sound consonant blends in spoken words;
• (OPTIONAL) swap the beginning sound of a word with a different sound to create a new real word.
Description
The teacher leads students to stretch words with 2-sound consonant blends. Students listen for and identify the blends and if they are located at the beginning or end of a word. Then, optionally, students finger-stretch five-sound words with two sets of sound buddies each as a challenge. Additionally, students may swap the beginning sound of spoken words with a new sound to create new words as an optional extension.
What Students See
What You Need to Know Consonant Blends
• In this lesson, as in Unit 25, Lesson 2, students orally segment the sounds in words with 2-sound consonant blends.
• A consonant blend is two or more consonants next to each other where each letter spells a separate sound.
o bl and nd in the word blend are 2-sound consonant blends.
• In this lesson, students continue to label the sounds in a 2-sound consonant blend as “sound buddies.” In Lesson 3 of this unit, they will learn to identify consonant blends in print. They will then learn that the concept of “sound buddies” can be labeled as “2-sound consonant blends.”
• For more information on 2-sound consonant blends, see the What You Need to Know sections of Unit 25, Lesson 2 on p. 230 and Unit 26, Lesson 3 on p. 264.
Phoneme Substitution
• This lesson includes a phoneme manipulation exercise, Sound Swap. Students participated in this activity in Countdown Book 2.
• This activity involves students listening to a real word and then substituting the initial consonant phoneme. In all examples, when the new phoneme is substituted, a new real word is created.
256 © 2017 Really Great Reading Company, LLC UNIT 26 Lesson 2
• This phonemic awareness activity is designed to enhance a student’s abilities to manipulate phonemes.
• The process is this:
o The teacher will say a real word. The teacher will then ask the students to drop the initial consonant phoneme and replace it with a new initial consonant phoneme.
o When the students add a new phoneme, a new word is created and the students will say the new word (a real word).
o Example:
• The word is light.
• Let’s change the /l/ to /r/ to make a new word.
• “What’s the new word?” A: right
3, 2, 1…
Open Countdown Online to Unit 26, Lesson 2 (26.2).
OPTIONAL
Before teaching this lesson, you may wish to run the Letter-Sound and Heart Word Pop-Up and 3-Up activities in Countdown Online to practice the letter sounds and Heart Words taught in Lesson 1.
Launch!
❶ Finger-Stretch Words with Sound Buddies
Say “In this lesson, we will stretch the sounds in some more special words.”
Ask “What do we call two consonant sounds right next to each other in a word?”
A: sound buddies
Say “Yes! We will listen carefully for the sound buddies when we stretch words today.”
I DO: Finger-Stretch lap/clap
Click to display the image for lap.
Say:
• “Listen while I say the sounds in lap, as in, ‘I sat on my dad’s lap for a story.’”
• “lap” (hold closed fist against chest, crossing the midline)
© 2017 Really Great Reading Company, LLC 257 UNIT 26 Lesson 2
Instead of pulling your fingers back into a closed fist in the final step of the finger-stretching procedure, you may choose to keep your fingers extended as you pull your hand toward your chest. This keeps the number of phonemes in the word exposed and visible, making it easier for students to count the phonemes in the next step.
• “/l/” (extend thumb), “/ăăăă/” (extend pointer finger), “/p/” (extend middle finger)
• “lap” (pull fingers back to a closed fist while saying the word)
Say “Lap has three sounds. The vowel sound is /ăăăă/. I hear the same sound as the beginning of /ă/, apple, so the vowel sound must be short a. Short a, /ă/, is the first sound in aaaapple (while making the short a, apple motion).”
Click to display three color tiles.
Say “Let’s touch the tiles while we say the sounds in lap again - /l/ (touch first tile), /ă/ (touch second tile), /p/ (touch third tile), lap.”
Say “Now, let’s do something special to the word lap. Let’s add a new sound to the beginning of the word. Our new sound will be /k/.”
Click to display four color tiles.
Say “Let’s touch the tiles while we say the sounds - /k/ (touch first tile), /l/ (touch second tile), /ă/ (touch third tile), /p/ (touch fourth tile), clap. Our new word is clap.”
Say:
• “The first two sounds in clap are /k/ and /l/ (touch each of the first two tiles). These are two consonant sounds next to each other. Remember, we call them ‘sound buddies.’
• /k/ and /l/ are sound buddies because they like to be near each other, like good buddies. Even though they are great friends and like to be next to each other, they are two different sounds. They are right next to each other, but they are still two different sounds, just like you like to be near your friend, but you are still two different people.
• Sound buddies are special because we can take away one of the sounds and the other sound stays the same.
• Let’s do a little experiment with the sounds in clap.”
Stretch the sounds in clap - /k/ /l/ /ă/ /p/, clap.
Say “Clap has four sounds. The first two sounds are sound buddies. Let’s take away one of the sound buddies to see if we can make a new word.”
Remind students that the sound buddies in clap are /k/ and /l/.
Ask students to take away the first sound in clap
Ask “What is the new word?” A: lap
Click to remove the first color tile.
Say “Yes! If we take away the first sound, /k/, the rest of the sounds stay
258 © 2017 Really Great Reading Company, LLC
UNIT 26 Lesson 2
the same - /l/ (touch the first tile), /ă/ (touch the second tile), /p/ (touch the third tile). The sound /l/ is still there even though her buddy, the sound /k/, has gone away.”
Click to display four color tiles again.
Say the sounds in clap again - “/k/ (touch first tile), /l/ (touch second tile), /ă/ (touch third tile), /p/ (touch fourth tile), clap.”
Say:
• “Remember, the first two sounds in clap are sound buddies.
• Sound buddies are two consonant sounds next to each other, where each one makes its own separate sound. These buddies like to be very close to each other, but they are still two different sounds. It is just like you and your best friend. You can spend a lot of time right next to each other, but then you can each go away and do different things because you are two different people.
• We can take away one of the sounds who are sound buddies, and the other sound stays the same.”
Say “Let’s do another word with sound buddies.”
WE DO: Finger-Stretch lash/flash
Say “Now let’s stretch out a word together.”
Click to display the image for lash
Say:
• “Ready? Our word is lash, as in, ‘I blinked to get the lash out of my eye.’
• Let’s stretch it together.”
• “lash” (hold closed fist against chest, crossing the midline)
• “/l/” (extend thumb), “/ăăăă/” (extend pointer finger), “/sh/” (extend middle finger)
• “lash” (pull fingers back to a closed fist while saying the word)
Ask:
•
“How many sounds did we hear?” A: three
• “What vowel sound did we hear in the word?” A: /ăăăă/
• “What is the guideword for that sound?” A: apple
• “What is the motion for apple?” A: hold apple and move across body (students make motion)
• “Is /ăăăă/ short or long?” A: short
© 2017 Really Great Reading Company, LLC 259 UNIT 26 Lesson 2
If your students are still struggling to stretch the sounds in words with sound buddies, you may wish to use some of the You Dos as We Dos to provide more guided practice.
• “How do we know?” A: /ă/ is the first sound in apple
Click to display three color tiles.
Stretch the sounds in lash again with students while touching each tile/l/ /ă/ /sh/, lash.
Click to display four color tiles.
Say “Now, add the sound /f/ to the beginning of the word lash.”
Stretch the sounds in lash again with students while touching each tile, adding the sound /f/ at the beginning of the word while touching the new first tile - /f/ /l/ /ă/ /sh/, flash
Ask “What is the new word?” A: flash
Say “That’s it! Flash is a quick bright light. ‘The flash from the camera was bright when we took the picture.’”
Ask “Which two sounds are sound buddies in this word?” A: /f/ and /l/
Say “Great! /f/ and /l/ are sound buddies because they like to be near each other, like good buddies, but they are still two different sounds.”
Say “Let’s stretch the sounds in some more words with consonant sound buddies.”
YOU DO: Finger-Stretch words with sound buddies
Say “Now, you will stretch out some words on your own.”
The words in this section have either short or long vowel sounds.
Click to display the image. Ask individual students to stretch the phonemes in each word below. After students stretch the sounds, ask:
• “How many sounds did you hear?” A: four
• “What vowel sound did you hear in the word?” A: varies
• (For short vowel words only) “What is the guideword for that sound?”
A: varies
If your students seem to be getting the hang of stretching words with four sounds, you can challenge them to tell you which sounds are the sound buddies in each word.
• “What is the motion for that sound?” A: varies (students make motion)
• “Is /vowel sound/ short or long?” A: varies
Complete the steps above with the following words: flight - /f/ /l/ /ī/ /t/, flight (Our flight on the airplane to grandma’s house was long.) A: four, /īīīī/, write the letter i in the air, long (sound buddies: /f/ and /l/) flip - /f/ /l/ /ĭ/ /p/, flip (The swimmer did a flip off the diving board.) A: four, /ĭĭĭĭ/, itch, scratch arm, short (sound buddies: /f/ and /l/) smash - /s/ /m/ /ă/ /sh/, smash (Do not smash it with the hammer, or it will
260 © 2017 Really Great Reading Company, LLC
UNIT 26 Lesson 2
break!) A: four, /ăăăă/, apple, hold apple and move across body, short (sound buddies: /s/ and /m/) smile - /s/ /m/ /ī/ /l/, smile (I will smile and say “cheese” for the picture.) A: four, /īīīī/, write the letter i in the air, long (sound buddies: /s/ and /m/) brush - /b/ /r/ /ŭ/ /sh/, brush (Dip your brush into the paint.) A: four, /ŭŭŭŭ/, up, move pointer finger up, short (sound buddies: /b/ and /r/) brick - /b/ /r/ /ĭ/ /k/, brick (I live in the red brick building.) A: four, /ĭĭĭĭ/, itch, scratch arm, short (sound buddies: /b/ and /r/) grass - /g/ /r/ /ă/ /s/, grass (I ran through the green grass.) A: four, /ăăăă/, apple, hold apple and move across body, short (sound buddies: /g/ and /r/) grape - /g/ /r/ /ā/ /p/, grape (My favorite pie is grape pie.) A: four, /āāāā/, acorn, write the letter a in the air, long (sound buddies: /g/ and /r/) sled - /s/ /l/ /ĕ/ /d/, sled (They rode the sled down the snowy hill.) A: four, /ĕĕĕĕ/, edge, run finger along edge of desk, short (sound buddies: /s/ and /l/) slice - /s/ /l/ /ī/ /s/, slice (I ate the last slice of pizza.) A: four, /īīīī/, write the letter i in the air, long (sound buddies: /s/ and /l/) frog - /f/ /r/ /ŏ/ /g/, frog (The frog hopped toward the pond.) A: four, /ŏŏŏŏ/, octopus, wiggle fingers like octopus arms, short (sound buddies: /f/ and /r/)
❷ Optional Challenge: Stretch Words with Five Sounds
Use the following words with five phonemes to provide an additional challenge for students.
Click to display the image. steps - /s/ /t/ /ĕ/ /p/ /s/, steps (The ball bounced down the steps.) frost - /f/ /r/ /ŏ/ /s/ /t/, frost (Let’s frost the cake with vanilla icing.) crisp - /k/ /r/ /ĭ/ /s/ /p/, crisp (Crisp means hard or crunchy. The apple was crisp and delicious.) spent - /s/ /p/ /ĕ/ /n/ /t/, spent (I spent all of my money at the zoo.) friend - /f/ /r/ /ĕ/ /n/ /d/, friend (Jack is my best friend.)
❸ Optional Extension Activity: Sound Swap
Click to display the cake. Say:
• “We are going to turn some words into new words by changing the first sound.
• Let’s start with the word cake.”
You may wish to use the first word, steps, as a model. You can stretch the sounds in the four-sound word step first, /s/ /t/ /ĕ/ /p/. Then, ask students to add the sound /s/ to the end of step The resulting fivesound word is steps. Students can then try to stretch the five sounds in steps. Stretching five-sound words may prove too challenging for some kindergarten students, but these words are provided as an option for students who have very strong phonemic awareness.
© 2017 Really Great Reading Company, LLC 261 UNIT 26 Lesson 2
Ask:
• “What is the first sound in cake?” A: /k/
• “What is the rest of the word?” A: /āk /
• “Right! /k/ /āk /, cake. Now, let’s change the first sound to /r/. What word do we get?” A: rake
Click to display the rake
Say “You got it! Let’s change another word.”
Click to display the image for check
Ask:
• “What is the first sound in check?” A: /ch/
• “What is the rest of the word?” A: /ĕk /
• “Right! /ch/ /ĕk /, check. Now, let’s change the first sound to /n/. What word do we get?” A: neck
Click to display the neck
Say “Great! Let’s keep going.”
Continue with remaining pairs:
1. fox, /f/ /ŏks/; change first sound to /b/ box
2. peas, /p/ /ēz/; change first sound to /ch/ cheese
3. bell, /b/ /ĕl/; change first sound to /sh/ shell
4. phone, /f/ /ōn/; change first sound to /b/ bone
5. meat, /m/ /ēt/; change first sound to /f/ feet
6. cut, /k/ /ŭt/; change first sound to /n/ nut
7. nose, /n/ /ōz/; change first sound to /h/ hose
8. dime, /d/ / īm/; change first sound to /l/ lime
9. wig, /w/ / ĭg /; change first sound to /p/ pig
10. cot, /k/ /ŏt/; change first sound to /r/ rot
262 © 2017 Really Great Reading Company, LLC UNIT 26 Lesson 2
Unit 26 | Lesson 3
Phonics Concept: 2-Sound Blends AP
Objectives
Students will accurately spell and read words with 2-sound consonant blends.
What Students See
Description
The teacher, as well as an optional animation, explains that a 2-sound consonant blend, when reading and spelling, is written with two separate letters and that each makes its own sound. Teacher and students build words with 2-sound consonant blends, identifying the blend in each word. Optionally, students build silly nonsense words with 2-sound consonant blends.
Student Materials
Holding and working boards from Countdown Student Kit
What You Need to Know
• Students have been introduced to the concept of a 2-sound consonant blend in spoken words in the phonemic awareness lessons of this unit and the previous unit. In those lessons, 2-sound consonant blends were labeled as “sound buddies.” In this lesson, students will learn to identify consonant blends in print and to read and spell words containing 2-sound consonant blends. They will learn that the concept of “sound buddies” can be labeled as “2-sound consonant blends.”
• A consonant blend is two or more consonants next to each other where each letter spells a separate sound.
o tr and st in the word trust are 2-sound consonant blends;
o gr and sp in the word grasp are 2-sound consonant blends.
• In this lesson, students will directly compare 2-sound consonant blends to digraphs. As students have learned previously, a digraph is two letters that spell one sound: ch, sh, ck, wh, and th
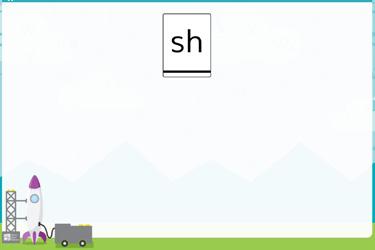
• Many reading programs teach blends as one sound unit spelled by two consonants. Some of these programs do not distinguish between digraphs and blends, while others do. Countdown uses the “speech to print” method of teaching reading. That means that students first listen to and segment the sounds in words, then match letters to the sounds.
o Students’ confusion between blends and digraphs is eliminated when blends are clearly taught as two letters representing two sounds, and
© 2017 Really Great Reading Company, LLC 263 UNIT 26 Lesson 2
then explicitly compared to digraphs, which are two letters representing one sound.
o Countdown uses an analogy to explain this distinction to students. 2-sound consonant blends are compared to a 2-scoop ice cream cone with two different flavors, where each individual flavor is visible on its own and can be tasted separately, just like each letter in a 2-sound blend spells its own sound that can be heard and manipulated individually, apart from the other letter in the blend. Digraphs are compared to a milkshake, where the ingredients are fully combined and cannot be separated from one another, just like the two letters in a digraph cannot be separated and no longer make their own individual sounds.
o Teaching the letters in blends as having separate sounds makes it clear to students that the words spot and sun both have the same first sound even though one word has a blend and the other doesn’t.
o Teaching blends as spelling two sounds, represented on two letter tiles, and digraphs as spelling one sound, represented on one letter tile, makes it obvious that spot and shot have entirely different first sounds.
o This is critical knowledge when dividing words into decodable chunks. Consonant blends are often split in the middle. Consider the word fantastic, which could be divided as “ fan - tas - tic.” In this case, we split between two consonant blends (nt and st).
• There are a constrained number of common consonant blends.
o Some common initial 2-sound consonant blends in English are bl, cl, fl, gl, pl, sl, br, cr, dr, fr, gr, pr, tr, dw, sc, st, sn, sm, sw, and tw.
o Some common final 2-sound consonant blends in English are: ct, ft, ld, lk, lm, lp, lt, mp, nd, nt, pt, sk, sp, st, and nk
For more information about 2-sound consonant blends, refer to the “What You Need to Know” section of Unit 25, Lesson 2, page 230.
3, 2, 1…
Open Countdown Online to Unit 26, Lesson 3 (26.3).
Students take out color and letter tiles and working board from Countdown Student Kit
264 © 2017 Really Great Reading Company, LLC UNIT 26 Lesson 3
Launch!
❶ Teach 2-Sound Consonant Blends
Say:
• “In our last lesson, we stretched out the sounds in words with sound buddies.
• Remember, sound buddies are two consonant sounds next to each other in a word, where each one makes its own separate sound.
• We can take away one of the sounds who are sound buddies, and the other sound stays the same.
• Today, we are going to learn how to read and spell words with sound buddies. When we read and spell a word with sound buddies, we call the sound buddies a ‘2-sound consonant blend.’
• In a 2-sound blend, each sound buddy in the blend is spelled with a separate consonant letter, and each one makes its own separate sound.”
Click to display letter tiles s and t
Point to each letter tile and say its sound “/s/ /t/. Each letter makes its own sound, but they are next to each other, just like buddies - /s/ /t/.”
Click to display letter tiles s, t, e, p
Say:
• “Let’s Touch & Say this word together - /s/ /t/ /ĕ/ /p/ (while touching each tile), step
• In the word step, we see two consonant letters next to each other.”
Ask “Which two consonants are next to each other in the word step?” A: s and t
Say “Right! S and t are consonants right next to each other, so we call them a 2-sound blend.”
Click to display the ice cream cone
Ask “What is this?” A: ice cream cone
Click to display the tiles s and t next to the ice cream cone.
Say:
• “The letters in a 2-sound blend are like an ice cream cone with two scoops of ice cream.
• Each scoop is a different flavor. We can lick the vanilla scoop and taste vanilla. We can lick the chocolate scoop and taste chocolate. The two scoops are right next to each other, but each one has its own flavor and
© 2017 Really Great Reading Company, LLC 265 UNIT 26 Lesson 3
The animation available in Countdown Online introduces 2-sound blends in a fun and engaging way. We recommend showing it after teaching Section 1 as a review of the content or to reinforce the content for students who might need more direct instruction.
we can taste it separately.
• This is like the sounds in a 2-sound blend. They are right next to each other, but we can hear each sound separately. The two letters spell two different sounds.”
Say “We learned about another time when two consonant letters are next to each other in a word.”
Click twice to display the milkshake and the digraphs sh and th
Ask:
• “What is it called when two consonant letters spell just one sound?” A: a digraph
• “What sound does this digraph spell (point to sh)?” A: /sh/
• “What sound does this digraph spell (point to th)?” A: /th/
Say “Right! A digraph is when two consonant letters (point to the sh or the th) spell one sound. The two letters in a digraph are on one tile since they make one sound.”
Point to the milkshake and say:
• “This is a milkshake. It has a few different ingredients in it – some strawberry ice cream, some vanilla ice cream, and some milk; but all of these flavors are mixed together. We can’t taste the separate flavors. We taste only one thing – the milkshake!
• The milkshake is like a digraph. Even though a digraph has two consonant letters, like the s and the h in digraph sh, we don’t hear two sounds, /s/ and /h/. Instead, we hear only one new sound, the sound /sh/.”
Click to display the digraph sh tile next to the tiles s and t.
Say:
• “Remember, a 2-sound blend has two consonant letters, but each letter makes its own sound, so each letter is on a separate letter tile, like this/s/, /t/ (while pointing to the two tiles s and t).
• A digraph also has two consonant letters, but these two letters work together to make just one sound, like this - /sh/ (while pointing to the tile sh).
• Now, let’s build words with 2-sound blends.”
❷ Build Real Words with 2-Sound Blends
I DO: Build jump
Click to display the image for jump.
266 © 2017 Really Great Reading Company, LLC
UNIT 26 Lesson 3
Say:
• “Let’s build a real word that has a 2-sound blend.
• The word is jump, as in, ‘I had to jump over the puddle.’”
Stretch the sounds - jump, /j/ /ŭ/ /m/ /p/, jump.
Say “I heard four sounds in jump, /j/ /ŭ/ /m/ /p/.”
Click to display one color tile at a time while again saying “/j/ /ŭ/ /m/ /p/.”
Click to display a letter tile below each color tile to spell each sound while saying the sound.
Use Touch & Say to read jump - /j/ /ŭ/ /m/ /p/, jump.
Point to letter tiles m and p and say “I see a 2-sound blend at the end of this word. I know each letter in the blend spells its own sound, /m/ /p/.”
Say “Now, let’s try one together.”
WE DO: Build swim
Click to display the image for swim.
Say “Now, let’s build the real word swim together, as in, ‘I want to swim in the clear lake.’ Repeat swim.” (Students repeat.)
Stretch the sounds with students - swim, /s/ /w/ / ĭ/ /m/, swim.
Click to display one color tile for each sound in swim while saying the sounds/s/ /w/ / ĭ/ /m/.
Ask individual students the following questions to lead students in spelling each sound by placing letter tiles below the color tiles, one at a time. Click to display each letter tile as students respond with the correct spellings:
• “What is the first sound you hear?” A: /s/
• “What letter spells /s/?” A: s (Click to display s; students place the s tile on their boards.)
• “What is the next sound you hear?” A: /w/
• “What letter spells /w/?” A: w (Click to display w; students place the w tile on their boards.)
• “What is the next sound you hear?” A: / ĭ/
• “What letter spells / ĭ/?” A: i (Click to display i; students place the i tile on their boards.)
• “What is the last sound you hear?” A: /m/
• “What letter spells /m/?” A: m (Click to display m; students place the m tile
© 2017 Really Great Reading Company, LLC 267 UNIT 26 Lesson 3
Remember to use Positive Error
Correction if students make a mistake while building words. Steps for Positive Error Correction can be found on p. 47.
Ask:
on their boards.)
• “Do you see a 2-sound blend in this word?” A: yes
• “Which letters are a 2-sound blend?” A: s and w
• “Does each letter in the 2-sound blend spell its own sound?” A: yes
Use Touch & Say to read swim with students - /s/ /w/ / ĭ/ /m/, swim.
Students clear boards.
YOU DO: Build real words with 2-sound blends
Say “Now, you are going to use your color and letter tiles to build four real words. Each word will have a 2-sound blend. Sometimes the blend will be at the beginning of the word, and sometimes it will be at the end of the word.”
Click to display each image and dictate the words and sentences below, one at a time, following the Build a Word steps for each word and helping students as needed.
flag - “The flag waved in the wind.” spin - “The pinwheel will only spin if you blow on it.” nest - “Three baby birds sat in the nest in our tree.” soft - “Can you bring me a soft blanket, please?”
Students build each word independently, one word at a time. Students should: Say the word.
Stretch the sounds in the word. Place one color tile on boards for each sound while saying the sound. Spell the word by placing one letter tile below each color tile. l a f g p i s n e s n t o f s t
Ask students to touch the letters that are a 2-sound blend in the word.
Use Touch & Say to read the word.
268 © 2017 Really Great Reading Company, LLC
UNIT 26 Lesson 3
Hold up their boards so you can check their spelling and provide Positive Error Correction as needed.
Click to display the correct placement of color and letter tiles for each word. Students clear boards and wait for the next word to be dictated.
❸ Optional Challenge: Build Silly Words
Say “Now, you are going to build some super silly words that have 2-sound blends. Remember, these words are very silly! They don’t mean anything because they are not real words, but we can spell them and read them because the letters will tell us what sounds to say.“
Click to display the silly image, and dictate the silly words below, one at a time, following the Build a Word steps for each word and helping students as needed. blum jaft gomp
Students build each word independently, one word at a time. Students should: Say the word. Stretch the sounds in the word. Place one color tile on boards for each sound while saying the sound. Spell the word by placing one letter tile below each color tile. l u b m a f j t o m g p
Ask students to touch the letters that are a 2-sound blend in the word.
Use Touch & Say to read the word.
Hold up their boards so you can check their spelling and provide Positive Error Correction as needed.
Click to display the correct placement of color and letter tiles for each word.
Students clear boards and wait for the next word to be dictated.
© 2017 Really Great Reading Company, LLC 269 UNIT 26 Lesson 3
Unit 26 | Lesson 4
Student Practice AP Objectives
Students will:
• identify the graphemes (sound spellings) in printed words and produce the proper sound for each grapheme; blend the graphemes together to produce real words (Detective Work);
• read words, count the sounds, and then determine if they have a digraph or a blend (Word Sort).
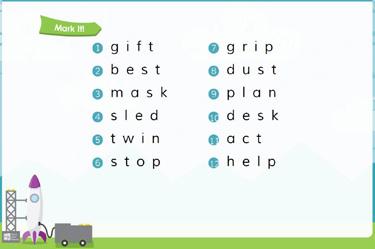
Description
Teacher leads students through the Mark It! and Read It! procedures in the Detective Work activity, and then leads students through a model word(s) for the Word Sort. Students then read the remaining words on their own, count the sounds, and then look for a digraph or a blend. Teacher reviews the answers with students, allowing time for students to correct their work if needed.
Student Materials
• Countdown Student Workbook
• Pencil
What Students See
What You Need to Know
No new concepts. 3, 2, 1…
Open Countdown Online to Unit 26, Lesson 4 (26.4).
OPTIONAL
Students open workbooks to page 32.
270 © 2017 Really Great Reading Company, LLC
❶
Before teaching this lesson, you may wish to run the Letter-Sound and Heart Word Pop-Up and 3-Up activities in Countdown Online to practice the letter sounds and Heart Words taught in Lesson 1. Launch!
Detective Work: Mark It!
2017 Really Great Reading Company, LLC 32 unit 26 Mark It! Read It! 1. 2. 3. 4. 5. 6. 7. 8. 9. 10. 11. 12. twin help mask plan gift sled grin desk stop dust best fact act gift twin mask dust plan stop grin best grip dust plan desk act help gift best mask sled twin stop Detective Work 1. 2. 3. 4. 5. 6. 7. UNIT 26 Lesson 4
Click to display the Mark It! words.
Say:
• “Today, in Mark It!, when we see a 2-sound blend, we will underline each letter separately because each letter spells one sound.
• If we see a digraph, we will underline both letters with one line because, together, they spell one sound.”
Click three times to underline the spellings (graphemes) while saying the sounds:
• “/g/” while underlining the g
• “/ ĭĭĭĭ/” while underlining the i
• “/f/” while underlining the f
• “/t/” while underlining the t
• “gift ”
Students repeat the process in their workbooks for the word gift.
Model the process above for the rest of the words one at a time. After each word, have students repeat orally and on paper. Make sure students are underlining each letter (or both letters in a digraph together) as they are saying the proper sound.
❷ Detective Work: Read It!
Say:
• “Remember, in Read It!, we do not underline the letters. We just read the words.
• When it is your turn to read, read loudly enough so everyone can hear.
• When it is not your turn to read, you will be a Checker, listening carefully.
• We will give the Reader a thumbs-up if they read all of the words correctly, and we will give them a thumbs-to-the-side if there is a word they need to try again.”
Students read a row of words out loud.
❸ Word Sort: How Many Sounds? Digraph or Blend?
Say:
• “Remember, when we are doing a Word Sort, I will always model the first one or two words to show you how to sort the words.
• Sorting words will help you to pay attention to the spelling of the words.
Be sure to use Positive Error Correction if students misread any words in Read It! Positive Error Correction steps can be found on p. 106.
© 2017 Really Great Reading Company, LLC 271 UNIT 26 Lesson 4
When beginning the Word Sort, you should model as many words as you deem necessary for your students to grasp the concept and proceed independently.
• In this lesson, we will sort words in two ways. First, we will count the sounds in the word.
• Next, we will look for digraphs and blends. If we see a digraph, we will underline both letters together because they spell one sound. If we see a 2-sound blend, we will underline each letter separately because each letter spells its own sound.”
Click to display the top section of the Word Sort.
Students open workbooks to page 33.
Read and finger-stretch the first word aloud: clam, /k/ /l/ /ă/ /m/, clam.
Ask “How many sounds did you hear?” A: four
Say “Yes, each letter spells its own sound.”
Click to circle the number 4.
Prompt students to circle the number 4.
Say “If each letter spells its own sound, then there cannot be a digraph because a digraph is two letters that spell one sound.”
Ask “Do you see a blend in the word?” A: yes, c l
The final five words are displayed on the next screen in Countdown Online. If your students are not yet able to read these words on their own, feel free to read each word aloud for them and have them independently select the correct number of sounds and identify either the digraph or blend.
Say “Let’s underline c and l separately because each letter spells its own sound.”
Click to underline the c and l with separate lines.
Prompt students to underline the c and l with separate lines.
Say:
• “Now, you are going to count the sounds in each word on your own and circle the correct number.
• Then, you will look for a digraph or a blend.
• If you see a digraph, underline both letters together.
• If you see a blend, underline each letter separately.”
Use Countdown Online to check answers with students.
Call on individual students to read a word, to count the sounds, and to underline digraphs with one line and the letters in 2-sound blends with two separate lines.
Students check answers.
272 © 2017 Really Great Reading Company, LLC
Really Great Reading Company, LLC 33 unit 26 How Many Sounds? Digraph or Blend? Word Sort
UNIT 26 Lesson 4
2017
1. 2. 3. 4. 5. 6. 7. 8. 9. 10. cl a m ch n s o ft dr u m th i s c a sh st e m p a th m lk fl o p
Unit 26 | Lesson 5
Wrap Up & Show What You Know AP
Objectives
Students will:
• accurately articulate the phonemes reviewed in this unit;
• accurately read sentences that contain the concepts, words, and phonemes taught in this unit and previous units;
• accurately spell words with a controlled set of concepts and phonemes.
Description
In Sentences to Read, students read short sentences out loud to the class. Their goal is to read each sentence accurately the first time. In Spell It!, students see an image, which the teacher names. Teacher and students finger-stretch the sounds in the word together, counting the sounds. They then fill in a circle for each sound they heard and write the corresponding letter in each box with a filled in circle, spelling the target word.
Student Materials
• Countdown Student Workbook
• Pencil What Students
See
What You Need to Know
No new concepts.
3, 2, 1…
Open Countdown Online to Unit 26, Lesson 5 (26.5).
OPTIONAL
Before teaching this lesson, you may wish to run the Letter-Sound and Heart Word Pop-Up, 3-Up, and Read a Row activities in Countdown Online to practice and assess the letter sounds and Heart Words taught in Lesson 1.
Launch!
❶ Sentences to Read Say:
• “We are going to read some sentences in our workbooks today.
© 2017 Really Great Reading Company, LLC 273 UNIT 26 Lesson 5
If time permits, pro vide each student with the opportunity to read at least one sen tence. In small groups, you might consider letting each student read two sentences. Students who strug gle should be given additional sentences for more practice.
• I will call on you to read a sentence when it is your turn to be the Reader, and the rest of us will be Checkers, touching each word as the Reader reads it out loud.”
Students open workbooks to page 34.
Individual students read sentences. Since there are only 16 sentences, it is okay to have a student reread a sentence that has been previously read.
Direct Checkers to give a thumbs-up if the Reader reads all of the words correctly or a thumbs-to-the-side if the Reader misreads a word(s). If the Reader misreads any words, teacher follows Positive Error Correction instructions.
❷ Spell It!
Say:
• “Now, we are going to spell some words with the sounds we have been practicing.
• We are going to start by stretching out the sounds in a word so we can hear them clearly.”
Students open workbooks to Spell It! on page 35.
Say “We are going to spell words that you will hear me say aloud. Let’s start with number 1 at the top of your page.”
Click to display the image for snip.
Say “The first word is snip, as in ‘My mom wanted to snip the loose threads with the scissors.’ Let’s stretch it together. Snip, /s/ /n/ /ĭ/ /p/, snip.” (Fingerstretch snip along with students.)
Ask “How many sounds did we hear?” A: four
Say “Since snip has four sounds, /s/ /n/ /ĭ/ /p/, we will fill in four dots, one for each sound, like this.”
Click four times to fill in the first four dots, and have students fill in the first four dots on their workbook pages.
1. Say:
• “Since snip has four sounds, it will also have four spellings, and we will write one spelling in each box that has a dot filled in.
• Let’s stretch snip again slowly so we can hear each sound and write it down.”
274 © 2017 Really Great Reading Company, LLC
2017 Really Great Reading Company, LLC unit 34 Please set the bug trap. (5) He sent Greg a flat gift. (6) Stan sat on the damp brick. (6) Please clap for the next skit. (6) He is glad to get the rent. (7) The fish will flop on the sand. (7) He hit the drum with the stick. (7) Gram will stand tall with a grin. (7) The rock will crush the soft plum. (7) The big frog must be in the pond. (8) She saw Fran fall on the plush cot. (8) Where can he pump gas for the truck? (8) The runt in the flock is thin and small. (9) Trish saw hens in a flock on the path. (9) Set the milk down on the deck at the end. (10) The frog did flip and flop in the fresh pond. (10) 26
16. Sentences to Read 35 unit Spell It! 26
Challenge
1. 2. 3. 4. 5. 6. 7. 8. 9. 10. 11. 12. 13. 14. 15.
1. 2. 3. 4. 5. 6. 7. 8. 9. 10.
UNIT 26 Lesson 5
• “/s/” (PAUSE for students to write s in the first box) “/n/” (PAUSE for students to write n in the second box) “/ĭ/” (PAUSE for students to write i in the third box) “/p/” (PAUSE for students to write p in the fourth box)
Click four times to fill in the letters s n i p, and have students check their work, correcting their spelling if needed. s n i p
Continue the above process with the following words, one at a time.
2. lamp (Optional sentence: Please turn the lamp off when you leave the room.) l a m p
3. nest (Optional sentence: How many birds did you see in the nest?) n e s t
4. tent (Optional sentence: We slept in a tent in the backyard last night.) t e n t
5. soft (Optional sentence: The teddy bear is so soft and cuddly.) s o f t
OPTIONAL CHALLENGE WORDS:
6. quilt (Optional sentence: Her grandma made her a red and orange quilt.) qu i l t
7. elf (Optional sentence: The elf wore a pointy hat.) e l f
8. lunch (Optional sentence: I had a sandwich for lunch.) l u n ch
9. twin (Optional sentence: One twin likes pink, and the other twin likes orange.) t w i n
10. block (Optional sentence: She only needed one more block to finish building the castle.) b l o ck
See p. 54 for a Differentiation Option for Spell It!
If students struggle to spell the individual sounds, you may want to ask students how each sound is spelled before moving on to the next, as you do in Build a Word
© 2017 Really Great Reading Company, LLC 275 UNIT 26 Lesson 5
276 © 2017 Really Great Reading Company, LLC
Unit 27 | Lesson 1
Letter-Sound & Heart Word Fluency AP & Sight Words
Objectives
Students will:
• build automatic recognition of some letter-sound (grapheme-phoneme) combinations;
• build automatic recognition of some Heart Words.
What You Need to Know
Description
Students will play Look, Think, Say!, Pop-Up, 3-Up, and Read a Row to review six letter sounds, to learn three new Heart Words, and to review or learn three additional Heart Words.
What Students See
For a complete explanation of the Look, Think, Say!, Pop-Up, 3-Up, and Read a Row activities, see p. 326 in Appendix A.
Before Teaching:
Letter-Sound and Heart Word Fluency Set-Up
Open Countdown Online to Unit 27, Letter-Sound and Heart Word Generator.
Choose six letter sounds to review and practice.
Choose three Heart Words to review and practice, or you may wish to select three additional new Heart Words to teach. (The first three new Heart Words to teach in this unit will be locked.)
Optional: Print Read a Row Teacher Recording Form.
3, 2, 1…
Open Countdown Online to Unit 27, Lesson 1 (27.1).
Launch!
❶ Letter-Sound Look, Think, Say!
Say “Today, we are going to practice the sounds for six letters with the game Look, Think, Say! ”
Click twice to display the first letter with one red dot and two empty dots below it.
© 2017 Really Great Reading Company, LLC 277 UNIT 27 Lesson 1
Say:
• “Remember, this red dot (point to the red dot) tells us to stop what we are doing so we can listen to the letter and its sound.
• This letter is [letter name], and it spells the sound [/letter sound/].”
Click to display the yellow dot.
Say “Think about the sound of this letter.”
Click to display the green dot.
Say:
• “This green dot (point to the green dot) tells us to say the sound out loud.
• Say the sound with me, [/letter sound/].
• Let’s try another letter.
• Remember to look, think, and then say. Only say the sound out loud when the green dot shows up.”
Click twice to display the next letter, and continue the above procedure for the remaining five letters.
Continue with the same six letter sounds for two additional rounds.
❷ Letter-Sound Pop-Up
Say:
• “Now that we have reviewed the letter names and sounds, we are going to see if we can just look quickly and say the sounds that we remember.
• When you see a letter pop up onto the screen, say the sound out loud as quickly as possible, but remember that it is still more important to say the correct sound than to be fast.
• If you need help remembering, I can help, but try your best.”
Click to display the six letters at random. Each letter will appear several times. Read each sound together with students as it pops up.
❸ Letter-Sound 3-Up
Say:
• “Great job! In our next game, you will see three letters on the screen.
• When you see the red dot, stop and look at the three letters. When you see the yellow dot, think about the letters and try to remember the sounds they say. When you see the green dot, say the three sounds out loud.”
Click to display the sets of three letters. Each letter will appear several times.
278 © 2017 Really Great Reading Company, LLC UNIT 27 Lesson 1
Look at, think about, and say each set of three letter sounds together with students as the sets are displayed.
❹ Letter-Sound Read a Row
Click to display three long green boxes, each of which is covering up a row of letter tiles.
Say “Now, we are going to read a row of letter sounds.”
Call on one student to read a row of letter sounds out loud to the class.
When the student is done reading, ask the Checkers to show the thumbs-up or thumbs-to-the-side gesture.
Repeat with additional students reading the remaining rows.
❺ Heart Word Look, Think, Say!
Say “Now, we are going to learn to read some new Heart Words.”
Click twice to display the Heart Word make with one red dot and two empty dots below the word.
Say:
• “Remember, this red dot (point to the red dot) tells us to stop what we are doing so we can listen to the word.
• This word is make, as in, ‘I will make a batch of cookies.’”
Click to display the yellow dot.
Say “Think about this word.”
Click to display the green dot.
Say:
• “Say the word with me, make.
• Let’s try another word.
• Remember to look, think, and then say. Only say the word out loud when the green dot shows up.”
Click twice to display the Heart Word good with one red dot and two empty dots below the word.
Say “Look at the word good, as in, ‘My mom’s pumpkin pie was so good!’”
Click to display the yellow dot.
Say “Think about this word.”
Click to display the green dot.
If you would like to have more than three readers read a row, Countdown Online will allow you to run through the activity twice before moving on.
© 2017 Really Great Reading Company, LLC 279 UNIT 27 Lesson 1
Say:
• “Say the word!
• Let’s try one more word.”
Click twice to display the Heart Word new with one red dot and two empty dots below the word.
Say “Look at the word new, as in, ‘Let’s welcome the new student to our class.’”
Click to display the yellow dot.
Say “Think about this word.”
Click to display the green dot.
Say:
• “Say the word!
• Let’s look at those words again.”
Continue with the same three Heart Words and the three Heart Words you chose in the Heart Word Generator for two additional rounds.
❻ Heart Word Pop-Up
Say:
• “Now, we are going to practice reading the Heart Words we’ve learned.
• In our first game, when you see a word pop up onto the screen, say the word out loud.
• If you need help remembering, I can help, but try your best.”
Click to display the Heart Words make, good, new, and the three Heart Words you have selected in the Heart Word Generator at random. Each word will appear several times.
Read each word together with students as it pops up.
❼ Heart Word 3-Up
Say:
• “Great job! In our next game, you will see three words on the screen.
• When you see the red dot, stop and look at the three words. When you see the yellow dot, think about the words and try to remember them. When you see the green dot, say the three words out loud.”
Click to display the sets of three Heart Words. Each set will contain the following words in a random order: make, good, new, and the three words you have selected. Each word will appear several times.
280 © 2017 Really Great Reading Company, LLC UNIT 27 Lesson 1
Look at, think about, and say each set of three words together with students as the sets are displayed.
❽ Heart Word Read a Row
Click to display three long green boxes, each of which is covering up a row of Heart Words.
Say “Now, we are going to read a row of Heart Words.”
Call on one student to read a row of Heart Words out loud to the class. When the student is done reading, ask the Checkers to show the thumbs-up or thumbs-to-the-side gesture.
Repeat with additional students reading the remaining rows.
If you would like to have more than three readers read a row, Countdown Online will allow you to run through the activity twice before moving on.
© 2017 Really Great Reading Company, LLC 281 UNIT 27 Lesson 1
Unit 27 | Lesson 2
Blending Syllables
Objectives
Students will:
• accurately blend spoken syllables into whole words;
• (OPTIONAL) swap the first syllable of a twosyllable word with a different syllable to create a new real word.
Description
PA
The teacher explains what a syllable is and how to find syllables in longer words; the teacher then teaches students the Syllable Stomp routine to break apart longer words. Additionally, students may substitute the first syllable in some spoken two-syllable words as an optional extension.
What Students See What You Need to Know

• In this lesson, the topic is syllables.
• In phonics, a syllable is a group of consonants organized around a vowel spelling. All syllables have one, and only one, vowel spelling. Most syllables contain a vowel and consonants, but some syllables are just a vowel phoneme, like oh, eye, you, I, or a.
• Phonemically, a syllable is a group of sounds organized around a vowel phoneme. All syllables have one, and only one, vowel phoneme.
• For example, these words each have only one vowel phoneme and thus are only one syllable: pie, a, Ed, not, and stump. A word with one syllable, such as top, has just one vowel sound, in this case /ŏ/.
• A word with two syllables, such as contest, has two vowel phonemes, in this case /ŏ/ and /ĕ/. Since vowel are voiced (noisy, or produced with the use of the vocal cords) and continuous (stretchy, or able to be held by the speaker until he or she runs out of breath), it is easy to emphasize these sounds in spoken words so that students can notice the “beat” or “push of air and voice” that occurs with each spoken syllable. Therefore, counting the number of syllables in a spoken word is as easy as counting the vowel phonemes.
• For example, upon hearing baaa naaa naaa (banana), children can easily use their senses to hear three emphasized sounds, see a speaker’s jaw open three times, or feel their own voices “turn on and off” three times, once for each syllable.
282 © 2017 Really Great Reading Company, LLC UNIT 27 Lesson 2
• Syllables are larger word parts than individual sounds, and in most programs, they tend to be taught before phonemes in phonological awareness instruction. However, Countdown focuses on phonemes first because it is more common for kindergarten students to struggle with phonemes than with syllables.
• Students did a bit of work with syllables in the very beginning of the Book 1 instruction, and now syllables are revisited in the phonemic awareness section of Units 27 and 28 to prepare students for reading and spelling multisyllabic words in the phonics lessons of Units 27 and 28.
Syllable Stomp
• In this lesson, students will learn to blend syllables into spoken words using Syllable Stomp
• Syllable Stomp is a routine used to demonstrate how to blend syllables in multisyllabic words.
• To Syllable Stomp a word, pound or “stomp” your fist on your desk for each syllable while saying the syllable. Then, sweep your fist from left to right while saying the whole word.
Syllable Substitution
• This lesson also includes an optional syllable manipulation exercise, Syllable Swap.
• This activity involves students listening to a real two-syllable word and then substituting the first syllable. In all examples, when the new syllable is substituted, a new real word is created.
• Although this phonological awareness activity is inherently easier than the phoneme manipulation students have done earlier in the Countdown lessons, it helps to bring students’ awareness to the syllable units in words, which prepares them for reading two-syllable words.
• The process is this:
o The teacher will say a real word. The teacher will then ask the students to drop the first syllable and replace it with a new first syllable.
o When the students add a new first syllable, a new word is created and the students will say the new word (a real word).
o Example:
• “The word is napkin.
• Let’s change nap to pump to make a new word.
• What’s the new word?” A: pumpkin
© 2017 Really Great Reading Company, LLC 283 UNIT 27 Lesson 2
This instructional sequence helps students to identify the syllables in a spoken word. It is a multisensory introduction to the concept of “syllables.” While spelling twosyllable words is not the emphasis in this unit, these strategies for hearing and “feeling” the syllables in a word are tools that you can use at a later time to help students determine the number of syllables in a spoken word and then to spell the syllables.
3, 2, 1…
Open Countdown Online to Unit 27, Lesson 2 (27.2).
OPTIONAL
Before teaching this lesson, you may wish to run the Letter-Sound and Heart Word Pop-Up and 3-Up activities in Countdown Online to practice the letter sounds and Heart Words taught in Lesson 1.
Launch! ❶ Introduction to Syllables
Say “We all know that words are made of sounds. Some words are small and have just one sound, like eye.”
Click to display the eye.
Say “Other words are bigger or longer and have many sounds, like jellybeans.”
Click to display the jellybeans.
Say:
• “When we hear bigger words, we can break off just one sound, like this: /j/, jellybeans
• We can also break long words into bigger pieces, or chunks, like this: jell-y-beans, jellybeans. Now think about what you hear and feel while you say those word chunks along with me, jell-y-beans.” (Students say the syllables with you.)
• “I could hear three beats in this word, and I could feel my mouth open three times.” (With fingers under chin, repeat jell-y-beans, enunciating each syllable).
• “Now try this. Touch your fingers to the top of your throat and say jellybeans again: jell-y-beans. I could feel my voice turn on and buzz in my throat three times! Could you?
• We have a special name for these word chunks. They are called syllables. Let’s say the word syllable and see if we feel our voices turn on as we say it in chunks: syll-a-ble.” (Students touch fingers to tops of throats with you as you and students say each syllable aloud.)
• “I could hear and feel three syllables in the word syllable!”
284 © 2017 Really Great Reading Company, LLC UNIT 27 Lesson 2
❷
Introduce Syllable Stomp
Say:
• “There is a game we can play to help us blend the syllables in longer words. It is called Syllable Stomp
• Here is how you play:
o First, I will say some syllables, or word chunks.
o Next, you use your fist to touch or ‘stomp’ the desk once for each syllable while you say it. Because we read words from left to right, we will ‘stomp’ our fists from left to right, like this.” (Demonstrate “stomping” your fist on the board from left to right.)
o “Last, you will go back to the beginning of the word and drag your fist from left to right while you blend the whole word back together again, like this.” (Demonstrate starting on the left again and dragging fist to the right while saying the whole word.)
I DO: Mystery Bag Syllable Stomp: ladybug
Click to display the Mystery Bag.
Say:
• “I have syllables in my Mystery Bag. Listen carefully.”
• “la” – (PAUSE) – “dy ” - (PAUSE) – “bug ” (“Stomp” your fist on a table or board left to right for each syllable.)
• “When I blend the syllables together, I get ladybug.” (Start back on the left, and drag your fist from left to right to blend the syllables together, saying “ladybug.”)
Click to display the ladybug.
WE DO: Mystery Bag Syllable Stomp: doughnut and newspaper
Click to display the Mystery Bag.
Say:
• “Let’s ‘stomp’ the next group of syllables in my Mystery Bag together.”
• “dough” – (PAUSE) – “nut ” (You and students repeat the syllables while “stomping” them.)
Ask “What word does it make when we blend those syllables together?”
A: doughnut (while dragging fist from left to right)
Click to display the doughnut.
© 2017 Really Great Reading Company, LLC 285 UNIT 27 Lesson 2
Say:
• “Right, dough nut, doughnut.” (Syllable stomp and blend.)
• “Let’s do another one together.”
Click to display the Mystery Bag.
Say:
• “Listen to the next group of syllables.”
• “news ” – (PAUSE) – “pa” – (PAUSE) – “per ” (You and students repeat the syllables while “stomping” them.)
Ask “What word does it make when we blend those syllables together?”
A: newspaper (while dragging fist from left to right)
Click to display the newspaper. Say “Right, news pa per, newspaper.” (Syllable stomp and blend.)
YOU DO: Mystery Bag Syllable Stomp: multisyllabic words
Say:
• “Let’s try a few more.
• After I say the syllables, repeat them while you Syllable Stomp the word.
• Then blend the syllables together and say the whole word.”
Click to display the Mystery Bag
Say the syllables for the following words aloud with a pause between each. Students “stomp” the syllables and blend them together into a whole word. Click to display the image to confirm students’ answer. 1. el-bow A: elbow 2. juice A: juice 3. sand-wich A: sandwich 4. straw-ber-ry A: strawberry 5. thun-der A: thunder 6. zu-cchi-ni A: zucchini 7. i-ci-cle A: icicle 8. cave-man A: caveman 9. rock-et A: rocket 10. o-ver-alls A: overalls
286 © 2017 Really Great Reading Company, LLC UNIT 27 Lesson 2
11. bu-tter-fly
A: butterfly
12. ham-ster A: hamster
13. chee-tah A: cheetah
14. wa-ter-fall A: waterfall
15. jell-y-fish A: jellyfish
16. toes A: toes
17. roo-ster A: rooster
18. pepp-er-mint A: peppermint
19. cheese A: cheese
20. jack-et A: jacket
POSITIVE ERROR CORRECTION FOR BLENDING SYLLABLES WITH SYLLABLE STOMP
If a student incorrectly blends the syllables, provide Positive Error Correction:
1. Tell the student which syllables were said correctly.
2. Say each individual syllable again and ask the student to listen closely for the missed syllable.
3. Prompt student to repeat the syllables, then Syllable Stomp and blend the syllables again.
4. If necessary, you or other students say and stomp the syllables to assist the student in stomping correctly.
5. Prompt student to independently Syllable Stomp and then blend the syllables correctly.
6. Always finish with the student stomping and blending the syllables independently and correctly.
❸ Optional Extension Activity: Syllable Swap
Click to display the napkin.
Say:
• “We are going to turn some words into new words by changing the first syllable.
• Let’s start with the word napkin, as in ‘Clean your face with the napkin.’”
© 2017 Really Great Reading Company, LLC 287 UNIT 27 Lesson 2
Ask:
• “What is the first syllable in napkin?” A: nap
• “What is the second syllable?” A: kin
Say “Right! Nap kin, napkin. Now, let’s change the first syllable to pump. What word do we get?” A: pumpkin
Click to display the pumpkin
Say “You got it! Let’s change another word.”
Continue with remaining pairs:
2. baseball (base ball, change first syllable to foot)→ football 3. reset (re set, change first syllable to sun) → sunset 4. comic (com ic, change first syllable to pan) → panic 5. running (runn ing, change first syllable to swing) → swinging 6. contest (con test, change first syllable to re) → retest 7. purple (pur ple, change first syllable to sta) → staple 8. backpack (back pack, change first syllable to un) → unpack 9. radish (rad ish, change first syllable to fin) → finish 10. cabin (cab in, change first syllable to rob) → robin
288 © 2017 Really Great Reading Company, LLC UNIT 27 Lesson 2
Unit 27 | Lesson 3
Phonics Concept: Reading Two-Syllable Words with Closed Syllables AP
Objectives
Students will accurately read two-syllable words in which both syllables are closed.

What Students See
Description
The teacher explains that the Vowel-Consonant pattern they learned earlier in the program has another name, a Closed Syllable. Then, teacher and students read two-syllable words with Closed Syllables by asking three key questions: “How many vowels are in the word?”; “Are the vowels next to each other ?”; and “How many syllables are there?”
Student Materials
• Two SyllaBoards™, mini eraser, and dryerase marker
• Holding and working boards from Countdown Student Kit
What You Need to Know
Closed Syllables
• The term Closed Syllable refers to a syllable pattern that occurs with great regularity in English. Some researchers estimate that Closed Syllables make up around half of the syllables in English words.
• The Closed Syllable pattern can be recognized visually by examining the pattern of vowels and consonants in words and their relationship to each other. Earlier in Countdown, students learned about the pattern of Closed Syllables (it was called the “Vowel-Consonant pattern”), but were not introduced to the term “Closed Syllable” yet.
• The Vowel-Consonant pattern of a Closed Syllable is one vowel letter followed by one or more consonants; at, cat, cash, and catch are all Closed Syllables.
• Closed Syllables occur in single-syllable and multisyllabic words; nap-kin, subtract, es-tab-lish, Wis-con-sin, and un-in-hab-it-ed are examples of words that are solely comprised of Closed Syllables.
• A Closed Syllable ends in one or more consonants but does not need to have a consonant letter before the vowel; at, Ed, it, on, and up are all Closed Syllables.
• Most of the time, the vowel letter in a Closed Syllable spells its short phoneme. Examples are: ad, cab, trap, last, bland, shack, Ed, met, step, best,
© 2017 Really Great Reading Company, LLC 289 UNIT 27 Lesson 3
trend, mesh, then, in, flip, hint, blimp, thick, on, pop, flop, pomp, stomp, shock, us, sun, glum, lump, slump, and shuck
• Many educators refer to Closed Syllables as a spelling pattern. It is very helpful in spelling, but it is extremely useful when decoding unfamiliar words.
Reading Two-Syllable Words
• Even good readers break unfamiliar long words into syllables to decode them.
• The most effective way to read an unfamiliar two-syllable word is by looking for the vowels and breaking the word into syllables around the vowel letters.
• Every syllable has a vowel sound and almost every syllable has a vowel letter.
• When one vowel letter is by itself, not next to another vowel, it is typically the only vowel in the syllable. It is a Closed Syllable the majority of the time.
• Complete directions for the procedure for reading multisyllabic words as well as Positive Error Correction can be found in Appendix A on page 337.
3, 2, 1…
Open Countdown Online to Unit 27, Lesson 3 (27.3).
Students take out two SyllaBoards™, mini eraser, and dry-erase marker from Countdown Student Kit.
Launch!
❶ Teach Closed Syllables
Say:
• “All of the words we have been reading and spelling have only been one syllable, and all of them have followed the Vowel-Consonant pattern we learned.
• Let’s look at a few words.”
Click to display the word mug spelled out in letter tiles.
Say “This word has only one vowel, u.”
Click to display an arrow under the u letter tile.
Say “This word has a consonant after the vowel.”
Click to display a box around the g letter tile.
Say:
• “That means that this word follows our Vowel-Consonant pattern, and it also means that the u (point to the u tile) probably spells its short sound, /ŭ/.
290 © 2017 Really Great Reading Company, LLC UNIT 27 Lesson 3
• This word is /m/ /ŭ/ /g/ (Touch & Say each tile while you say its sound), mug.”
Click to display the mug.
Say “Our Vowel-Consonant pattern has another name. It is also called a Closed Syllable because the consonant, or consonants, at the end of the syllable ‘close’ in the vowel and make it spell its short sound.”
Click to display the word sit spelled out in letter tiles.
Say “Let’s look at another word.”
Ask “How many vowel letters do you see in this word?” A: one
Click to display an arrow under the i tile.
Ask “Do you see any consonants after the vowel?” A: yes
Click to display a box around the t tile.
Ask:
• “Does the word follow our Vowel-Consonant pattern?” A: yes
• “What is the vowel sound in this word?” A: probably the short i sound, / ĭ/
Touch & Say the word with students - /s/ / ĭ/ /t/, sit.
Ask “What kind of syllable is this word?” A: Closed Syllable
❷ Reading Two-Syllable Words
Say:
• “Yesterday, we blended longer words by Syllable Stomping them. Today, we are going to learn how to read words that have two syllables.
• When we read and spell two-syllable words, we do not use letter tiles anymore. We use SyllaBoards™
• SyllaBoards™ are the small boards in our kits. We will use each board to represent one syllable.
• We are going to read words with more than one syllable today, and all of the syllables will be Closed Syllables.”
I DO: Read cabin
Click to display the word cabin.
Say “This word is different from all of the words we have read so far because it has two vowels, not just one. It has an a and an i.”
Click to underline each vowel letter.
Say “Since this word has two vowels and the vowel letters are not next to each other, I know that this word has two syllables.”
© 2017 Really Great Reading Company, LLC 291 UNIT 27 Lesson 3
Click to display two SyllaBoards™ under cabin.
Say:
• “I want to break this word into syllables to help me read it, so I am going to use my SyllaBoards™
• Because the word has two syllables, I need two boards.
• Next, I am going to write one vowel letter in the middle of each board.”
Click to display the letter a on the first board and the letter i on the second board.
Say “Now, I can add my consonants around the vowels so that each board ends with a consonant. We call this ‘closing the syllables’ because it makes each syllable a Closed Syllable.”
Click to add the letters c and b to the first board and the letter n to the second board.
Say:
• “These are both Closed Syllables.
• Each syllable has one vowel and each ends with a consonant.
• So, now I know how to read this word because the pattern tells me that the vowels will spell their short sounds.”
Point to and read each SyllaBoard™ with a pause between, cab in.
Sweep your hand from left to right under the syllables and read the whole word, cabin
Click to display the cabin.
Say:
• “There are three questions we will ask when we want to read a word with more than one syllable:
o How many vowels are in the word?
o Are the vowels next to each other?
o How many syllables are there?
• If the vowels are not next to each other, then each vowel will be in a different syllable and on a different SyllaBoard™.”
WE DO: Read unzip and catfish
Click to display the word unzip
Say “We are going to use those questions to help us read this new word.”
292 © 2017 Really Great Reading Company, LLC UNIT 27 Lesson 3
Ask “How many vowels do we see in this word?” A: two, u and i
Click to underline each vowel letter.
Ask “Are the vowels next to each other?” A: no
Say:
• “Since this word has two vowels and the vowel letters are not next to each other, I know that this word has two syllables.
• Because the word has two syllables, I need two SyllaBoards™.”
Click to display two SyllaBoards™ under unzip, and ask students to put two boards on their desks.
Say “Next, I am going to write one vowel letter in the middle of each board.”
Click to display the letter u on the first board and the letter i on the second board, and ask students to do the same.
Say “Now, I can add my consonants around the vowels so that each board ends with a consonant because that closes the syllable.”
Click to add the letter n to the first board and the letters z and p to the second board, and ask students to do the same.
Say:
• “These are both Closed Syllables.
• Each syllable has one vowel and each ends with a consonant.
• So, now we know how to read this word because the pattern tells us that the vowels will spell their short sounds.
• Let’s read it together.”
Point to and read each SyllaBoard™ with students, un zip.
Sweep your hand from left to right under the syllables and read the whole word, unzip
Click to display the image for unzip.
Say “Let’s do one more together.”
Click to display the word catfish.
Say “We are going to use those questions to help us read this new word.”
Ask “How many vowels do we see in this word?” A: two
Click to underline each vowel letter.
Ask “Are the vowels next to each other?” A: they are not
Ask “Since this word has two vowels and the vowel letters are not next to
© 2017 Really Great Reading Company, LLC 293 UNIT 27 Lesson 3
each other, how many syllables does it have?” A: two
Say “Yes! Because the word has two syllables, I need two SyllaBoards™.”
Click to display two SyllaBoards™ under catfish, and ask students to put two boards on their desks.
Say “Next, I am going to write one vowel letter in the middle of each board.”
Click to display the letter a on the first board and the letter i on the second board, and ask students to do the same.
Say “Now, I can add my consonants around the vowels so that each board ends with a consonant. We’ll call this ‘closing our syllables.’”
Click to add the letters c and t to the first board and the letters f and sh to the second board, and ask students to do the same.
Say:
• “These are both Closed Syllables.
• Each syllable has one vowel and each ends with a consonant.
• So, now we know how to read this word because the pattern tells us that the vowels will spell their short sounds.
• Let’s read it together.”
Point to and read each SyllaBoard™ with students, cat fish
Sweep your hand from left to right under the syllables and read the whole word, catfish.
Click to display the catfish.
YOU DO: Read two-syllable words with Closed Syllables
Say:
• “Now, it’s your turn to read some two-syllable words on your own.
• You are going to use your SyllaBoards™ to read four, two-syllable words.
• Remember, since each syllable has one vowel, put one vowel letter on each board. Then ‘close each syllable’ (make it end with a consonant) so you get two Closed Syllables.”
Ask “When we are trying to read a big word, should we first look for the vowels or the consonants?” A: vowels
Click to display each of the following words on the board. hiccup radish
294 © 2017 Really Great Reading Company, LLC UNIT 27 Lesson 3
napkin rabbit
Ask for each word:
• “How many vowels are in this word?” A: two
• “Are the vowels next to each other?” A: no
• “Since they are not next to each other, how many syllables are there?” A: two
• “And how many SyllaBoards™ will we need?” A: two
All students:
Use SyllaBoards™ to read each word.
Write vowels on the SyllaBoards™.
Write consonants around the vowels on the SyllaBoards™ (“close each syllable”) so that each board contains a Closed Syllable (ends with a consonant). hic cup rad ish
nap kin rab bit
Individual students touch each SyllaBoard™, read the syllables, then drag hand under the SyllaBoards™ to blend and read each word.
Check work and correct by clicking through the process for each word, using Positive Error Correction as needed.
Help students notice that each syllable is a Closed Syllable.
All students read each word together.
Clear boards.
Click to display the image.
Suggestions for helping students adjust their boards:
Help students move consonants so that their syllables are closed.
Help students notice that there are two Closed Syllables in the words.
❸ Optional Challenge: Read Two-Syllable Silly Words
Teach how to read nonsense words with the same two-syllable pattern.
The animation available in Countdown Online introduces reading words with two Closed Syllables in a fun and engaging way. We recommend showing it after teaching Section 2 as a review of the content or to reinforce the content for students who might need more direct instruction.
© 2017 Really Great Reading Company, LLC 295 UNIT 27 Lesson 3
Write each of the following words on the board one at a time: cadput finbap
Ask:
• “How many vowels are in this word?” A: two
• “Are the vowels next to each other?” A: no
• “How many syllables are there?” A: two
After teacher writes each word, all students use SyllaBoards™ to read the words, one at a time.
POSITIVE ERROR CORRECTION FOR READING MULTISYLLABIC WORDS
If a student misreads a multisyllabic word, provide Positive Error Correction:
1. Identify the syllables the student read correctly.
2. Prompt student to use Touch & Say to reread the incorrect syllable. Then, have the student read the whole word.
3. If necessary, guide student to ask the vowel questions for multisyllabic words. (How many vowels are in the word? Are they next to each other? How many syllables are there?)
4. Prompt student to read each syllable separately and then blend the syllables to read the whole word.
5. Have student independently reread the word correctly.
6. If a student decodes all the sounds in a word correctly but pronounces the word incorrectly:
• Identify the syllable the student pronounced correctly.
• Prompt student to read the incorrectly pronounced syllable again.
• Always finish with the student reading the whole word independently and correctly.
296 © 2017 Really Great Reading Company, LLC UNIT 27 Lesson 3
Unit 27 | Lesson 4
Student Practice AP
Objectives
Students will:
• identify the graphemes (sound spellings) in printed words and produce the proper sound for each grapheme; blend the graphemes together to produce real words (Detective Work);
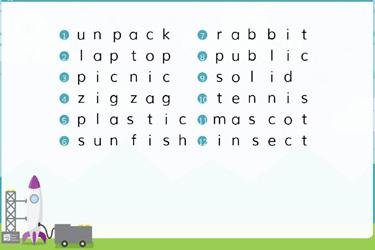
• identify the vowels in words, identify the number of syllables, and read the words, one syllable at a time if necessary (Word Sort).
Description
Teacher leads students through the Mark It! and Read It! procedures in the Detective Work activity, and then leads students through a model word(s) for the Word Sort. Students then read the remaining words on their own, first underlining the vowels, counting the number of syllables, and then dividing the syllables. Teacher reviews the answers with students, allowing time for students to correct their work if needed.
Student Materials
• Countdown Student Workbook
• Pencil
See
© 2017 Really Great Reading Company, LLC 297 UNIT 27 Lesson 4
new
Before teaching this lesson, you may wish to run the Letter-Sound and Heart Word Pop-Up and 3-Up activities in Countdown Online to practice the letter sounds and Heart Words taught in Lesson 1. Launch! ❶ Detective Work: Mark It! Students open workbooks to page 36. unit Detective Work 27 36 Mark It! Read It! 1. 2. 3. 4. 5. 6. 7. mascot zigzag sunfish insect rabbit public unpack solid laptop plastic tennis picnic zigzag laptop unpack sunfish plastic rabbit tennis mascot solid 1. 2. 3. 4. 5. 6. 7. 8. 9. 10. 11. 12. unpack laptop picnic zigzag plastic sunfish rabbit public solid tennis mascot insect
What Students
What You Need to Know No
concepts. 3, 2, 1… Open Countdown Online to Unit 27, Lesson 4 (27.4). OPTIONAL
Be sure to use Positive Error Correction if students misread any words in Read It! Positive Error Correction steps can be found on p. 106.
Say:
• “In Detective Work today, we are going to be reading big words with two syllables.
• Instead of drawing lines under each sound in the word, we will just circle the vowels, and then we will draw a rectangle around each syllable.
• I’ll show you with the first word.”
Click to display the Mark It! words.
Point to the first word, unpack.
Ask:
• “How many vowels are in this word?” A: two
• “Are they next to each other?” A: no
Click to circle the vowel letters u and a while saying their names.
Ask “How many syllables are there?” A: two
Click to display a rectangle around each syllable, un and pack
Say:
• “Un” (pointing to the first rectangle) “pack ” (pointing to the second rectangle)
• “Unpack ” (dragging finger under the word from left to right)
Students repeat the process in their workbooks for the word unpack.
Model the process above for the rest of the words one at a time. After each word, have students repeat orally and on paper. Make sure students are underlining each vowel and boxing in each syllable.
❷ Detective Work: Read It!
Say:
• “Remember, in Read It!, we do not underline or circle the letters. We just read the words.
• When it is your turn to read, read loudly enough so everyone can hear.
• When it is not your turn to read, you will be a Checker, listening carefully.
• We will give the Reader a thumbs-up if they read all of the words correctly, and we will give them a thumbs-to-the-side if there is a word they need to try again.”
Students read a row of words out loud.
298 © 2017 Really Great Reading Company, LLC
UNIT 27 Lesson 4
❸ Word Sort: How Many Syllables?
Say:
• “Remember, when we are doing a Word Sort, I will always model the first one or two words to show you how to sort the words.
• Sorting words will help you to pay attention to the spelling of the words.
• First, we will underline the vowels.
• Next, we will count the number of syllables and circle the correct number.
• Last, if there are two syllables, we will draw a line between the syllables to help us read the syllables, one at a time.”
Click to display the top section of the Word Sort.
Students open workbooks to page 37.
Ask “How many vowels are in this word?” A: two, i and i
Click to underline the vowels, and have students do the same in their workbooks.
Ask:
• “Are the vowels next to each other?” A: no
• “So, how many syllables are there?” A: two
Say “Let’s circle the number 2.”
Click to circle the number 2, and have students do the same.
Say:
• “Now, to help us read this two-syllable word, we are going to divide the syllables by drawing a line between them. That way, we can read one syllable at a time before we blend them together.
• I am going to make sure that each syllable has a consonant at the end so it is a Closed Syllable.
• I will draw my line after p i c.”
Click to display a line between the syllables pic and nic, and have students do the same.
Say “This word is pic (point to the first syllable) nic (point to the second syllable), picnic (drag finger under the word from left to right).”
Say:
• “Now, you are going to underline the vowels and circle the number of syllables.
When beginning the Word Sort, you should model as many words as you deem necessary for your students to grasp the concept and proceed independently.
unit Word Sort 27 How Many
1. 2. 3. 4. 5. 6. 7. 8. 9. 10.
picnic step radish jump insect crush glad bathtub contest trash
37
The final five words are displayed on the next screen in Countdown Online
© 2017 Really Great Reading Company, LLC 299 UNIT 27 Lesson 4
Syllables?
If your students are not yet able to read these words on their own, feel free to read each word aloud for them and have them independently underline the vowels and circle the number of syllables.
• Then, if the word has two syllables, you will draw a line between them.”
Use Countdown Online to check answers with students.
Call on individual students to identify the vowel letters, to give the number of syllables, to say each syllable separately, and to read the whole word.
Students check answers.
300 © 2017 Really Great Reading Company, LLC
UNIT 27 Lesson 4
Unit 27 | Lesson 5
Wrap Up & Show What You Know AP
Objectives
Students will:
• accurately articulate the phonemes reveiwed in this unit;
• accurately read sentences that contain the concepts, words, and phonemes taught in this unit and previous units;
• accurately break twosyllable words into two Closed Syllables, decoding each syllable and blending them together to read the word.
What You Need to Know
No new concepts.
3, 2, 1…
Description
In Sentences to Read, students read sentences out loud to the class. Their goal is to read each sentence accurately the first time. In Two-Syllable Word Reading, students look for the vowel letters in words and then break those words into syllables, decoding each syllable and then blending the syllables into a real word.
Student Materials
• Countdown Student Workbook
• Pencil
What Students See
Open Countdown Online to Unit 27, Lesson 5 (27.5).
OPTIONAL
Before teaching this lesson, you may wish to run the Letter-Sound and Heart Word Pop-Up, 3-Up, and Read a Row activities in Countdown Online to practice and assess the letter sounds and Heart Words taught in Lesson 1.
Launch!
❶ Sentences to Read
Say:
• “We are going to read some sentences in our workbooks today.
© 2017 Really Great Reading Company, LLC 301 UNIT 27 Lesson 5
• I will call on you to read a sentence when it is your turn to be the Reader, and the rest of us will be Checkers, touching each word as the Reader reads it out loud.”
Students open workbooks to page 38.
Individual students read sentences. Since there are only 16 sentences, it is okay to have a student reread a sentence that has been previously read.
Direct Checkers to give a thumbs-up if the Reader reads all of the words correctly or a thumbs-to-the-side if the Reader misreads a word(s). If the Reader misreads any words, teacher follows Positive Error Correction instructions.
❷ Two-Syllable Word Reading
Say:
• “Now, we are going to read some big words.
• You will do just what you have been doing when you read words with your SyllaBoards™, except you won’t be using real SyllaBoards™. You will be using pictures of SyllaBoards™ in your workbook instead.”
Students open workbooks to Reading Two-Syllable Words on page 39.
Say “Let’s start with the first word at the top left of your page.”
Click to display the word public
Say “We are going to use our questions to help us read this new word.”
Ask “How many vowels do we see in this word?” A: two, u and i
Click to underline each vowel letter.
Ask:
• “Are the vowels next to each other?” A: no
• “Since this word has two vowels and the vowel letters are not next to each other, how many syllables does this word have?” A: two
Say “Yes, and since the word has two syllables, you will use both of the SyllaBoards™ pictures printed in your workbook.”
Click to display two SyllaBoards™ under public, and ask students to point to the two SyllaBoards™ in their workbooks.
Say “Next, we will write one vowel letter in the middle of each board.”
Click to display the letter u on the first board and the letter i on the second board, and ask students to write each vowel letter on one of the SyllaBoards™ in their workbooks.
u i
302 © 2017 Really Great Reading Company, LLC 2017 Really Great Reading Company, LLC unit 38 Sentences to Read 27 Calvin ate a catfish. (4) The bathmat was damp. (4) The mascot was a dentist. (5) Please finish the new comic. (5) Come to the potluck picnic. (5) Where is that plastic trashcan? (5) The milkman will hiccup nonstop. (5) The upset rabbit did not panic. (6) Our wombat had a sundress on. (6) Robin will not have fresh nutmeg. (6) do not like this radish sandwich. (7) Do you like the good fabric napkin? (7) We all want a new dishpan and whisk. (8) Expect the chipmunk to be in the bathtub. (8) Devlin said we can chitchat at the contest. (8) The insect will make a web in the cabin. (9) 1. 2. 3. 4. 5. 6. 7. 8. 9. 10. 11. 12. 13. 14. 15. 16. 39 unit 27 Reading Two-Syllable Words 1. public 2. plastic 4. object 6. unzip 3. subject 5. subtract 7. infect UNIT 27 Lesson 5
Say “Now, we should add the consonants around the vowels so that each board ends with a consonant because that closes the syllable.”
Click to add the letters p and b to the first board and the letters l and c to the second board, and ask students to do the same.
pub lic Say:
• “These are both Closed Syllables.
• Each syllable has one vowel and each ends with a consonant.
• So, now we know how to read this word because the pattern tells us that the vowels will spell their short sounds.
• Let’s read it together.”
Point to and read each SyllaBoard™ with students, pub lic.
Sweep your hand from left to right under the syllables and read the whole word, public.
Say “Public means something that is open to everyone.”
Check that all students spelled the word correctly with one Closed Syllable in each box. Provide assistance as necessary.
Continue the above process with the following words, one at a time:
© 2017 Really Great Reading Company, LLC 303 UNIT 27 Lesson 5
2. plastic plas tic 3. subject sub ject 4. object ob ject 5. subtract sub tract 6. unzip un zip 7. infect in fect
304 © 2017 Really Great Reading Company, LLC
Unit 28 | Lesson 1
Letter-Sound & Heart Word Fluency AP & Sight Words
Objectives
Students will:
• build automatic recognition of some letter-sound (grapheme-phoneme) combinations;
• build automatic recognition of some Heart Words.
What You Need to Know
Description
Students will play Look, Think, Say!, Pop-Up, 3-Up, and Read a Row to review six letter sounds, to learn three new Heart Words, and to review or learn three additional Heart Words.
What Students See
For a complete explanation of the Look, Think, Say!, Pop-Up, 3-Up, and Read a Row activities, see p. 326 in Appendix A.
Before Teaching:
Letter-Sound and Heart Word Fluency Set-Up
Open Countdown Online to Unit 28, Letter-Sound and Heart Word Generator.
Choose six letter sounds to review and practice.
Choose three Heart Words to review and practice, or you may wish to select three additional new Heart Words to teach. (The first three new Heart Words to teach in this unit will be locked.)
Optional: Print Read a Row Teacher Recording Form.
3, 2, 1…
Open Countdown Online to Unit 28, Lesson 1 (28.1).
Launch!
❶ Letter-Sound Look, Think, Say!
Say “Today, we are going to practice the sounds for six letters with the game Look, Think, Say! ”
Click twice to display the first letter with one red dot and two empty dots below it.
© 2017 Really Great Reading Company, LLC 305 UNIT 28 Lesson 1
Say:
• “Remember, this red dot (point to the red dot) tells us to stop what we are doing so we can listen to the letter and its sound.
• This letter is [letter name], and it spells the sound [/letter sound/].”
Click to display the yellow dot.
Say “Think about the sound of this letter.”
Click to display the green dot.
Say:
• “This green dot (point to the green dot) tells us to say the sound out loud.
• Say the sound with me, [/letter sound/].
• Let’s try another letter.
• Remember to look, think, and then say. Only say the sound out loud when the green dot shows up.”
Click twice to display the next letter, and continue the above procedure for the remaining five letters.
Continue with the same six letter sounds for two additional rounds.
❷ Letter-Sound Pop-Up
Say:
• “Now that we have reviewed the letter names and sounds, we are going to see if we can just look quickly and say the sounds that we remember.
• When you see a letter pop up onto the screen, say the sound out loud as quickly as possible, but remember that it is still more important to say the correct sound than to be fast.
• If you need help remembering, I can help, but try your best.”
Click to display the six letters at random. Each letter will appear several times. Read each sound together with students as it pops up.
❸ Letter-Sound 3-Up
Say:
• “Great job! In our next game, you will see three letters on the screen.
• When you see the red dot, stop and look at the three letters. When you see the yellow dot, think about the letters and try to remember the sounds they say. When you see the green dot, say the three sounds out loud.”
Click to display the sets of three letters. Each letter will appear several times.
306 © 2017 Really Great Reading Company, LLC UNIT 28 Lesson 1
Look at, think about, and say each set of three letter sounds together with students as the sets are displayed.
❹ Letter-Sound Read a Row
Click to display three long green boxes, each of which is covering up a row of letter tiles.
Say “Now, we are going to read a row of letter sounds.”
Call on one student to read a row of letter sounds out loud to the class.
When the student is done reading, ask the Checkers to show the thumbs-up or thumbs-to-the-side gesture.
Repeat with additional students reading the remaining rows.
❺ Heart Word Look, Think, Say!
Say “Now, we are going to learn to read some new Heart Words.”
Click twice to display the Heart Word out with one red dot and two empty dots below the word.
Say:
• “Remember, this red dot (point to the red dot) tells us to stop what we are doing so we can listen to the word.
• This word is out, as in, ‘Can you please take the jelly out of the fridge?’”
Click to display the yellow dot.
Say “Think about this word.”
Click to display the green dot.
Say:
• “Say the word with me, out.
• Let’s try another word.
• Remember to look, think, and then say. Only say the word out loud when the green dot shows up.”
Click twice to display the Heart Word one with one red dot and two empty dots below the word.
Say “Look at the word one, as in, ‘I can only find one of my socks!’”
Click to display the yellow dot.
Say “Think about this word.”
Click to display the green dot.
If you would like to have more than three readers read a row, Countdown Online will allow you to run through the activity twice before moving on.
© 2017 Really Great Reading Company, LLC 307 UNIT 28 Lesson 1
Say:
• “Say the word!
• Let’s try one more word.”
Click twice to display the Heart Word two with one red dot and two empty dots below the word.
Say “Look at the word two, as in, ‘My mom makes me eat two vegetables for dinner.’”
Click to display the yellow dot.
Say “Think about this word.”
Click to display the green dot.
Say:
• “Say the word!
• Let’s look at those words again.”
Continue with the same three Heart Words and the three Heart Words you chose in the Heart Word Generator for two additional rounds.
❻ Heart Word Pop-Up
Say:
• “Now, we are going to practice reading the Heart Words we’ve learned.
• In our first game, when you see a word pop up onto the screen, say the word out loud.
• If you need help remembering, I can help, but try your best.”
Click to display the Heart Words out, one, two, and the three Heart Words you have selected in the Heart Word Generator at random. Each word will appear several times.
Read each word together with students as it pops up.
❼ Heart Word 3-Up
Say:
• “Great job! In our next game, you will see three words on the screen.
• When you see the red dot, stop and look at the three words. When you see the yellow dot, think about the words and try to remember them. When you see the green dot, say the three words out loud.”
Click to display the sets of three Heart Words. Each set will contain the following words in a random order: out, one, two, and the three words you have selected.
308 © 2017 Really Great Reading Company, LLC UNIT 28 Lesson 1
Each word will appear several times.
Look at, think about, and say each set of three words together with students as the sets are displayed.
❽ Heart Word Read a Row
Click to display three long green boxes, each of which is covering up a row of Heart Words.
Say “Now, we are going to read a row of Heart Words.”
Call on one student to read a row of Heart Words out loud to the class. When the student is done reading, ask the Checkers to show the thumbs-up or thumbs-to-the-side gesture.
Repeat with additional students reading the remaining rows.
If you would like to have more than three readers read a row, Countdown Online will allow you to run through the activity twice before moving on.
© 2017 Really Great Reading Company, LLC 309 UNIT 28 Lesson 1
Unit 28 | Lesson 2
Blending Syllables
Objectives
Students will accurately blend spoken syllables into whole words.
Description
PA
The teacher reviews the Syllable Stomp routine with students. Students then practice blending the syllables in spoken, multisyllabic words.
What Students See
What You Need to Know
For information on syllables, refer to the What You Need To Know section of Unit 27, Lesson 2 on p. 282.
3, 2, 1…
Open Countdown Online to Unit 28, Lesson 2 (28.2).
OPTIONAL
Before teaching this lesson, you may wish to run the Letter-Sound and Heart Word Pop-Up and 3-Up activities in Countdown Online to practice the letter sounds and Heart Words taught in Lesson 1.

Launch!
❶ Review Syllable Stomp
Say:
• “Let’s Syllable Stomp some big words.
• Remember, to Syllable Stomp:
o I will say some syllables out loud;
o we will repeat the syllables and ‘stomp’ on our desks each time we say one;
o then, we will go back to the beginning and drag our fists from left to
310 © 2017 Really Great Reading Company, LLC UNIT 28 Lesson 1
right to blend the syllables together into a word.
o I’ll show you one to help you remember.”
❷ Blending Words With Multiple Syllables
I DO: Mystery Bag Syllable Stomp: popcorn
Click to display the Mystery Bag.
Say:
• “I have syllables in my Mystery Bag. Listen carefully.”
• pop – (PAUSE) – corn (“Stomp” your fist on a table or board left to right for each syllable.)
• “When I blend the syllables together, I get popcorn.” (Start back on the left, and drag your fist from left to right to blend the syllables together.)
Click to display the popcorn.
Say “Let’s ‘stomp’ the next group of syllables in my Mystery Bag together.”
WE DO: Mystery Bag Syllable Stomp: candles
Click to display the Mystery Bag
Say “can – (PAUSE) – dles (You and students repeat the syllables while “stomping” them.)
Ask “What word does it make when we blend those syllables together?”
A: candles (while dragging fist from left to right)
Click to display the candles
Say:
• “Right, can dles, candles.” (Syllable stomp and blend.)
• “Let’s do a few more together.”
YOU DO: Mystery Bag Syllable Stomp: multisyllabic words
Say:
• “Let’s try a few more.
• After I say the syllables, repeat them while you Syllable Stomp the word.
• Then blend the syllables together and say the whole word.”
Click to display the Mystery Bag.
Say the syllables for the following words aloud with a pause between each.
© 2017 Really Great Reading Company, LLC 311 UNIT 28 Lesson 2
Students “stomp” the syllables and blend them together into a whole word. Click to display the image to confirm students’ answer.
1. vol-ca-no A: volcano 2. yo-gurt A: yogurt 3. foot-prints A: footprints 4. di-no-saur A: dinosaur 5. leaf A: leaf 6. ham-bur-ger A: hamburger 7. e-ra-ser A: eraser 8. in-side A: inside 9. moun-tain A: mountain 10. sun-glass-es A: sunglasses 11. tooth-brush A: toothbrush 12. thun-der-storm A: thunderstorm 13. up-stairs A: upstairs 14. tooth-brush A: toothbrush 15. ce-re-al A: cereal 16. itch A: itch 17. oat-meal A: oatmeal 18. hos-pi-tal A: hospital 19. blue-berr-ies A: blueberries 20. a-pron A: apron
312 © 2017 Really Great Reading Company, LLC UNIT 28 Lesson 2
Unit 28 | Lesson 3
Phonics Concept: Reading Two-Syllable Words with Closed Syllables AP
Objectives
Students will accurately read two-syllable words in which both syllables are closed.
What Students See
Description
The teacher reminds students that the VowelConsonant pattern they learned earlier in the program has another name, a Closed Syllable. Then, teacher and students read two-syllable words with Closed Syllables by asking three key questions: “How many vowels are in the word?”; “Are the vowels next to each other ?”; and “How many syllables are there?” Additionally, students may read two-syllable nonsense words or threesyllable real words as an optional challenge.
Student Materials
Two SyllaBoards™, mini eraser, and dry-erase marker from Countdown Student Kit
What You Need to Know
For information on reading two-syllable words, refer to the What You Need To Know section of Unit 27, Lesson 3 on p. 289.
3, 2, 1…
Open Countdown Online to Unit 28, Lesson 3 (28.3).
Students take out two SyllaBoards™, mini eraser, and dry-erase marker from Countdown Student Kit
Launch!
❶ Review Closed Syllables
Say “We have learned about Closed Syllables. Let’s see what we remember.”
Ask:
• “How many vowels are in a Closed Syllable?” A: one
• “Does a Closed Syllable end with a vowel or a consonant?” A: a consonant
• “Does the vowel in a Closed Syllable spell its short or long sound?” A: short
© 2017 Really Great Reading Company, LLC 313 UNIT 28 Lesson 3
❷ Reading Two-Syllable Words
I DO: Read contest
Ask “When we see a big word, like this one…”
Click to display the word contest.
Ask:
• “…should we look at the vowels or the consonants first?” A: vowels
• “What questions should we ask about the vowels?” A: “How many vowels are in this word?” and “Are the vowels next to each other?”
• “How many vowels are in this word?” (Point to the word contest.)
A: two, o and e
Click to underline each vowel letter.
Ask “Are the vowels next to each other?” A: no
Say “Since this word has two vowels and the vowel letters are not next to each other, I know that this word has two syllables.”
Click to display two SyllaBoards™ under contest
Say:
• “I want to break this word into syllables to help me read it, so I am going to use my SyllaBoards™.
• Because the word has two syllables, I need two boards.
• Next, I am going to write one vowel letter in the middle of each board.”
Click to display the letter o on the first board and the letter e on the second board.
Say “Now, I can close my syllables. I will add my consonants around the vowels so that each board ends with a consonant. That makes each syllable a Closed Syllable.”
Click to add the letters c and n to the first board and the letters t and s t to the second board.
Say:
• “These are both Closed Syllables.
• Each syllable has one vowel and each ends with a consonant.
• So, now I know how to read this word because the pattern tells me that the vowels will spell their short sounds.”
Point to and read each SyllaBoard™ with a pause between, con test.
314 © 2017 Really Great Reading Company, LLC UNIT 28 Lesson 3
Sweep your hand from left to right under the syllables and read the whole word, contest
Click to display the image for contest
Say:
• “Remember, there are three questions we will ask when we want to read a word with more than one syllable:
o How many vowels are in the word?
o Are the vowels next to each other?
o How many syllables are there?
• If the vowels are not next to each other, then each vowel will be in a different syllable and on a different SyllaBoard™.”
WE DO: Read finish
Click to display the word finish.
Say “We are going to use those questions to help us read this new word.”
Ask “How many vowels do we see in this word?” A: two, i and i
Click to underline each vowel letter.
Ask:
• “Are the vowels next to each other?” A: no
•
“Since this word has two vowels and the vowel letters are not next to each other, how many syllables does this word have?” A: two
• “Yes, and since the word has two syllables, how many SyllaBoards™ do we need?” A: two
Click to display two SyllaBoards™ under finish, and ask students to put two boards on their desks.
Say “Next, I am going to write one vowel letter in the middle of each board.”
Click to display the letter i on the first board and the letter i on the second board, and ask students to do the same.
Say “Now, I can add my consonants around the vowels so that each board ends with a consonant because that closes the syllable.”
Click to add the letters f and n to the first board and digraph sh to the second board, and ask students to do the same.
Say:
• “These are both Closed Syllables.
• Each syllable has one vowel and each ends with a consonant.
© 2017 Really Great Reading Company, LLC 315 UNIT 28 Lesson 3
• So, now we know how to read this word because the pattern tells us that the vowels will spell their short sounds.
• Let’s read it together.”
Point to and read each SyllaBoard™ with students, fin ish.
Sweep your hand from left to right under the syllables and read the whole word, finish
Click to display the image for finish.
YOU DO: Read two-syllable words with Closed Syllables
Say:
• “Now, it’s your turn to read some two-syllable words on your own.
• You are going to use your SyllaBoards™ to read four, two-syllable words.
• Remember, since each syllable has one vowel, put one vowel letter on each board. Then ‘close each syllable’ (make it end with a consonant) so you get two Closed Syllables.”
Ask “When we are trying to read a big word, should we look for the vowels or the consonants?” A: vowels
Click to display each of the following words on the board.
tennis pigpen suntan uphill
Ask for each word:
• “How many vowels are in this word?” A: two
• “Are the vowels next to each other?” A: no
• “Since they are not next to each other, how many syllables are there, and how many SyllaBoards™ will we need?” A: two
All students:
Use SyllaBoards™ to read each word.
Write vowels on the SyllaBoards™.
Write consonants around the vowels on the SyllaBoards™ so that each board contains a Closed Syllable (ends with a consonant).
ten nis pig pen
316 © 2017 Really Great Reading Company, LLC UNIT 28 Lesson 3
sun tan up hill
Individual students touch each SyllaBoard™, read the syllables, then drag hand under the SyllaBoards™ to blend and read each word.
Check work and correct by clicking through the process for each word, using Positive Error Correction as needed.
Help students notice that each syllable is a Closed Syllable.
All students read each word together.
Click to display the image.
Clear boards.
❸ Optional Challenge: Read Two-Syllable Silly Words
Teach how to read nonsense words with the same two-syllable pattern.
Click to display each of the following words on the board one at a time: chenbop spintosh
Ask:
• “How many vowels are in this word?” A: two
• “Are the vowels next to each other?” A: no
• “How many syllables are there?” A: two
All students use SyllaBoards™ to read the words, one at a time.
Click to display the correct answers.
❹ Optional Challenge: Read Three-Syllable Words
Teach how to read three-syllable real words where all three syllables are closed.
Click to display each of the following words on the board one at a time: fantastic Wisconsin magnetic
Ask:
• “How many vowels are in this word?” A: three
• “Are the vowels next to each other?” A: no
• “How many syllables are there?” A: three
All students use SyllaBoards™ to read the words, one at a time.
Click to display the correct answers.
Because each Countdown Student Kit contains only two SyllaBoards™, consider pairing students up for this three-syllable word activity so that each group of students has access to three SyllaBoards™
© 2017 Really Great Reading Company, LLC 317 UNIT 28 Lesson 3
Unit 28 | Lesson 4
Student Practice AP
Objectives
Students will:
• identify the graph emes (sound spell ings) in printed words and produce the proper sound for each grapheme; blend the graph emes together to produce real words (Detective Work);
• identify the vowels, identify the number of syllables, and read the words, one syllable at a time if necessary (Word Sort).
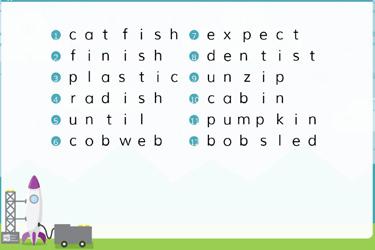
Description
Teacher leads students through the Mark It! and Read It! procedures in the Detective Work activity, and then leads students through a model word(s) for the Word Sort. Students then read the remaining words on their own, first underlining the vowels, counting the number of syllables, and then dividing the syllables. Teacher reviews the answers with students, allowing time for students to correct their work if needed.
Student Materials
• Countdown Student Workbook
• Pencil
What Students See
318 © 2017 Really Great Reading Company, LLC UNIT 28 Lesson 3
You Need
No new concepts.
2, 1…
teaching this lesson, you may wish to run the
and Heart Word Pop-Up and 3-Up activities in
to practice the letter sounds and Heart Words taught
Launch! ❶ Detective Work: Mark It! Students open workbooks to page 40. 40 unit until finish cobweb expect radish plastic dentist radish catfish unzip insect pumpkin finish dentist bobsled plastic cabin bobsled cabin until pumpkin Detective Work 28 Mark It! Read It! 1. 2. 3. 4. 5. 6. 7. 1. 2. 3. 4. 5. 6. 7. 8. 9. 10. 11. 12. catfish finish plastic radish until cobweb expect dentist unzip cabin pumpkin bobsled
What
to Know
3,
Open Countdown Online to Unit 28, Lesson 4 (28.4). OPTIONAL Before
Letter-Sound
Countdown Online
in Lesson 1.
Say:
• “In Detective Work today, we are going to read more big words with two syllables.
• Instead of drawing lines under each sound in the word, we will just circle the vowels, and then we will draw a rectangle around each syllable.
• I’ll show you with the first word.”
Click to display the Mark It! words.
Point to the first word, catfish.
Ask:
• “How many vowels are in this word?” A: two
• “Are they next to each other?” A: no
Click to circle the vowel letters a and i while saying their names.
Ask “How many syllables are there?” A: two
Click to display a rectangle around each syllable, cat and fish
Say:
• “Cat ” (pointing to the first rectangle) “fish” (pointing to the second rectangle)
• “Catfish” (dragging finger under the word from left to right)
Students repeat the process in their workbooks for the word catfish
Model the process above for the rest of the words one at a time. After each word, have students repeat orally and on paper. Make sure students are circling each vowel and boxing in each syllable.
❷ Detective Work: Read It!
Say:
• “Remember, in Read It!, we do not underline or circle the letters. We just read the words.
• When it is your turn to read, read loudly enough so everyone can hear.
• When it is not your turn to read, you will be a Checker, listening carefully.
• We will give the Reader a thumbs-up if they read all of the words correctly, and we will give them a thumbs-to-the-side if there is a word they need to try again.”
Students read a row of words out loud.
Be sure to use Positive Error Correction if students misread any words in Read It! Positive Error
Correction steps can be found on p. 106.
© 2017 Really Great Reading Company, LLC 319 UNIT 28 Lesson 4
When beginning the Word Sort, you should model as many words as you deem necessary for your students to grasp the concept and proceed independently.
❸ Word Sort: How Many Syllables?
Say:
• “Remember, when we are doing a Word Sort, I will always model the first one or two words to show you how to sort the words.
• Sorting words will help you to pay attention to the spelling of the words.
• First, we will underline the vowels.
• Next, we will count the number of syllables and circle the correct number.
• Last, if there are two syllables, we will draw a line between the syllables to help us read the syllables, one at a time.”
Click to display the top section of the Word Sort.
Students open workbooks to page 41.
Ask “How many vowels are in this first word?” A: two, a and o
Click to underline the vowels, and have students do the same in their workbooks.
Ask:
• “Are the vowels next to each other?” A: no
• “So, how many syllables are there?” A: two
Say “Let’s circle the number 2.”
Click to circle the number 2, and have students do the same.
Say:
• “Now, to help us read this two-syllable word, we are going to divide the syllables by drawing a line between them. That way, we can read one syllable at a time before we blend them together.
• I am going to make sure that each syllable has a consonant at the end so it is a Closed Syllable.
• I will draw my line after l a p.”
Click to display a line between the syllables lap and top, and have students do the same.
The final five words are displayed on the next screen in Countdown Online.
Say “This word is lap (point to the first syllable) top (point to the second syllable), laptop (drag finger under the word from left to right).”
Say:
• “Now, you are going to underline the vowels and circle the number of syllables.
320 © 2017 Really Great Reading Company, LLC
UNIT 28 Lesson 4
2017 Really Great Reading Company, LLC 41 unit laptop bend twin unzip track backpack check cobweb napkin ask 1. 2. 3. 4. 5. 6. 7. 8. 9. 10. Word Sort 28 How Many Syllables?
• Then, if the word has two syllables, you will draw a line between them.”
Use Countdown Online to check answers with students
Call on individual students to identify the vowel letters, to give the number of syllables, to say each syllable separately, and to read the whole word.
Students check answers.
If your students are not yet able to read these words on their own, feel free to read each word aloud for them and have them independently identify the vowel letters and divide the syllables.
© 2017 Really Great Reading Company, LLC 321 UNIT 28 Lesson 4
Unit 28 | Lesson 5
Wrap Up & Show What You Know AP
Objectives
Students will:
• accurately articulate the phonemes reviewed in this unit;
• accurately read sentences that contain the concepts, words, and phonemes taught in this unit and previous units;
• accurately break two-syllable words into two Closed Syllables, decoding each syllable and blending them together to read the word.
Description
In Sentences to Read, students read short sentences out loud to the class. Their goal is to read each sentence accurately the first time. In Two-Syllable Word Reading, students look for the vowel letters in words and then break those words into syllables, decoding each syllable and then blending the syllables into a real word.
Student Materials
• Countdown Student Workbook
• Pencil
What Students See
What You Need to Know
No new concepts. 3, 2, 1…
Open Countdown Online to Unit 28, Lesson 5 (28.5).
OPTIONAL
Before teaching this lesson, you may wish to run the Letter-Sound and Heart Word Pop-Up, 3-Up, and Read a Row activities in Countdown Online to practice and assess the letter sounds and Heart Words taught in Lesson 1.
322 © 2017 Really Great Reading Company, LLC UNIT 28 Lesson 4
Launch!
❶ Sentences to Read
Say:
• “We are going to read some sentences in our workbooks today.
• I will call on you to read a sentence when it is your turn to be the Reader, and the rest of us will be Checkers, touching each word as the Reader reads it out loud.”
Students open workbooks to page 42.
Individual students read sentences. Since there are only 16 sentences, it is okay to have a student reread a phrase or sentence that has been previously read.
Direct Checkers to give a thumbs-up if the Reader reads all of the words correctly or a thumbs-to-the-side if the Reader misreads a word(s). If the Reader misreads any words, teacher follows Positive Error Correction instructions.
❷ Two-Syllable Word Reading
Say:
• “Now, we are going to read some big words.
• You will do just what you have been doing when you read words with your SyllaBoards™, except you won’t be using real SyllaBoards™ You will be using pictures of SyllaBoards™ in your workbook instead.”
Students open workbooks to Reading Two-Syllable Words on page 43.
Say “Let’s start with the first word at the top left of your page.”
Click to display the word invent
Say “We are going to use our questions to help us read this new word.”
Ask “How many vowels do we see in this word?” A: two, i and e
Click to underline each vowel letter.
Ask:
• “Are the vowels next to each other?” A: no
• “Since this word has two vowels and the vowel letters are not next to each other, how many syllables does this word have?” A: two
Say “Yes, and since the word has two syllables, you will use both of the SyllaBoards™ pictures printed in your workbook.”
Click to display two SyllaBoards™ under invent, and ask students to point to the two SyllaBoards™ in their workbooks.
If time permits, provide each student with the opportunity to read at least one sentence. In small groups, you might consider letting each student read two sentences. Students who struggle should be given additional sentences for more practice.
© 2017 Really Great Reading Company, LLC 323 UNIT 28 Lesson 5
tomcat got an insect in the trashcan. (8)
are two wombats in the hot Midwest. (8) Do you like radish relish on this rabbit dish? (9)
subject that Fred and Fran like best is math. (10) They did not get the catfish with the plastic fishnet. (10) Will you inspect one catfish and two frogs with me? (10) Beth will panic and smash the insect with a dishpan. (10)
pumpkin truck did not get stuck in the fishpond.
1.
Sentences to Read 43 unit Reading Two-Syllable Words 28 1. invent 2. finish 4. insect 6. magnet 3. dentist 5. until 7. zigzag
unit 42 28 Willis was upset with one milkman. (6) Grab a bobsled, and come uphill. (6) We did not unzip the fabric tent. (7) Calvin saw a mantis on a pumpkin. (7) Can we have a picnic at the cabin? (8) She said we can chitchat in the attic. (8) Do not contact the medic for a suntan. (8) He can cram felt fabric in the backpack. (8) The
There
The
The
(10)
2. 3. 4. 5. 6. 7. 8. 9. 10. 11. 12. 13. 14. 15. 16.
Say “Next, we will write one vowel letter in the middle of each board.”
Click to display the letter i on the first board and the letter e on the second board, and ask students to write each vowel letter on one of the SyllaBoards™ in their workbooks.
i e
Say “Now, we should add the consonants around the vowels so that each board ends with a consonant because that closes the syllable.”
Click to add the letter n to the first board and the letters v, n, and t to the second board, and ask students to do the same.
in vent
Say:
• “These are both Closed Syllables.
• Each syllable has one vowel and each ends with a consonant.
• So, now we know how to read this word because the pattern tells us that the vowels will spell their short sounds.
• Let’s read it together.”
Point to and read each SyllaBoard™ with students, in vent
Sweep your hand from left to right under the syllables and read the whole word, invent.
Say “To invent means to create something brand new.”
Check that all students spelled the word correctly with one Closed Syllable in each box. Provide assistance as necessary. Continue the above process with the following words, one at a time: 2. finish fin ish 3. dentist den tist 4. insect in sect
5. until un til 6. magnet mag net 7. zigzag zig zag
324 © 2017 Really Great Reading Company, LLC UNIT 28 Lesson 5
Appendices
Table of Contents
Appendix A: Routines and Procedures
Letter-Sound and Heart Word Fluency 326
Look, Think, Say! 326
Pop-Up 327 3-Up 327 Read a Row 328 Phonemic and Phonological Awareness 329
Important Reminders 329
Finger-Stretching Phonemes 330 Blending Phonemes 331 Manipulating Phonemes (Addition, Deletion, Substitution) 332
Syllable Stomp: Blending 334 Phonics Concept 335 Build a Word 335 Touch & Say 336
Reading Multisyllabic Words Using SyllaBoards™ 336 Student Practice 337
Detective Work: Mark It! and Read It! 337 Word Sort 339 Phrases and Sentences to Read 340
Spell It! 341
Two-Syllable Word Reading 343
Appendix B
Components of Countdown 345
Items in Supplemental Resources of Countdown Online 346
Glossary of Terms 348
Sample Read a Row Teacher Recording Form 351 Guidewords, Movements, and Proper Articulation of Sounds 353
© 2017 Really Great Reading Company, LLC 325
APPENDIX A: Routines and Procedures
Letter-Sound and Heart Word Fluency
The following activities are used to teach (Look, Think, Say!), practice (Pop-Up & 3-Up), and informally assess (Read a Row) both letter-sound and Heart Word fluency. All four activities are completed in Countdown Online.
1.
Look, Think, Say!
• Objective: The objective of Look, Think, Say! in Lesson 1 of each unit (beginning in Unit 18) is for students to learn or review the correlation between letters (graphemes) and letter sounds (phonemes). This activity is also used to teach Heart Words (beginning in Unit 18). Look, Think, Say! is a group activity where all students respond chorally.
• Set-Up: You will use the Letter-Sound and Heart Word Generators to choose which letters and Heart Words will be displayed. You can choose six letter-sound combinations to review and three Heart Words to teach or review. Three Heart Words will be locked for each unit.
o In some units, you will not be able to override defaults for some of the graphemes in the Letter-Sound Generator. This is to ensure that all students practice with graphemes that will be critical for mastery of the phonics concepts that have been or will be introduced in the other lessons. For example, in Unit 21, you will not be able to override the letters sh. It is essential for students to practice with digraph sh because they just learned about this digraph in the previous unit and will continue reading words with these letters in the upcoming units.
• Routine: Open Countdown Online to the correct unit, Lesson 1, Look, Think, Say!
o This activity begins by showing letter tiles or Heart Words above a horizontal stoplight.
o On the first click, the red light appears, and students are instructed to “Look” as the teacher tells them which sound the grapheme spells or how to pronounce the Heart Word.
o On the next click, a yellow light appears, which indicates students should “Think” about the sound that the grapheme makes or about how to pronounce the Heart Word.
o On the next click, a green light appears and students are prompted to “Say” the correct phoneme or Heart Word aloud. Take care to make sure students use the correct pronunciation for both letter sounds and Heart Words.
o In Look, Think, Say! for letter sounds, a fourth click will reveal the corresponding phoneme inside a sound box. This serves to reinforce or correct the response.
• Expectations: In this activity, students are not accountable for reading every grapheme or Heart Word correctly. If a student misreads a grapheme or Heart Word, no error correction is necessary. Provide the correct phoneme or Heart Word for the students.
326 © 2017 Really Great Reading Company, LLC Appendix A Letter-Sound and Heart Word
Fluency
2. Pop-Up
• Objective: The objective of Pop-Up in Lessons 1, 2, 4, and 5 in each unit is for students to practice fluency with the letter-sound combinations and Heart Words learned in Look, Think, Say! It is a choral, group-based activity that provides randomized and fast-paced practice.
• Set-Up: No additional set-up is required once the letter-sound combinations and Heart Words are chosen at the beginning of the unit.
• Routine: Open Countdown Online to the correct unit, Lesson 1, Pop-Up
o This activity begins by showing one letter tile on the screen at a time. Students are instructed to “Look” quickly and then “Say” the phoneme when they see each letter tile or Heart Word appear.
o On the next click, for letter sounds, the letter tile will disappear to reveal the corre sponding phoneme inside a sound box. This serves to reinforce or correct the response.
• Expectations: In this practice activity, students are accountable for reading every grapheme or Heart Word correctly. If students make an error, use Positive Error Correction to guide students to the correct phoneme or Heart Word.
• Positive Error Correction for Pop-Up: If students misread a letter sound or Heart Word in the Pop-Up activity, provide Positive Error Correction:
o Tell the Reader if there was any part of the Heart Word he or she read correctly. (“You read the first letter correctly in that Heart Word.”)
o Prompt the student to reread a letter sound or Heart Word. (“You read the first sound correctly. Can you retry the whole word again?” or “That is the letter b. Can you retry that letter sound?”)
o The Reader reads the letter sound or Heart Word again.
o If the Reader reads the letter sound or Heart Word accurately, you and other students congratulate the Reader.
If the Reader misses the letter sound or Heart Word again:
o You or other students assist by chorally reading the letter sound or Heart Word.
o The Reader independently reads the letter sound or Heart Word correctly.
o Always finish by having the Reader read the letter sound or Heart Word independently and accurately.
3. 3-Up
• Objective: The objective of 3-Up in Lessons 1, 2, 4, and 5 in each unit is for students to have yet another opportunity to practice letter-sound and Heart Word fluency. Rather than focusing on one grapheme or word at a time, in 3-Up, three letter tiles or Heart Words appear together to promote automatic recognition and left to right text tracking.
© 2017 Really Great Reading Company, LLC 327 Appendix A
Letter-Sound and Heart Word Fluency
• Set-Up: No additional set-up is required once the letter-sound combinations and Heart Words are chosen at the beginning of this unit.
• Routine: Open Countdown Online to the correct unit, Lesson 1, 3-Up.
o This can either be a choral, group-based activity or an individual activity.
o This activity begins with three letter tiles or Heart Words appearing simultaneously above a horizontal stoplight. Students will follow the Look, Think, Say! procedure to read each set of three letter tiles or Heart Words.
• Expectations: In this practice activity, students are accountable for reading every grapheme or Heart Word correctly. If students misread a grapheme or Heart Word, use Positive Error Correction to guide students to the correct phoneme or word. See the instructions for 3-Up and Read a Row Positive Error Correction in the Read a Row section on p. 328.
4. Read a Row
• Objective: The objective of Read a Row in Lessons 1 and 5 in each unit (beginning in Unit 19) is to allow you to measure how well individual students grasped (in Lesson 1) and have mastered (in Lesson 5) the letter-sound relationships and Heart Words that were taught and practiced.
• Set-Up: If you would like to track student mastery of the letter-sound relationships and Heart Words taught, you may print a Read a Row Teacher Recording Form using the Print button in the Letter-Sound and Heart Word Generators in Countdown Online. This form can be used to record a student’s accuracy and reading rate as they read from the screen. This information can be used to help students build automaticity with these key sub-skills. To use the form, simply write the name of the student who will read each row, and cross out the letters or words that a student misreads. Record the number correct in the “Total Correct” line. You can also record the amount of time it takes the student to read the entire row if you would like to track the student’s fluency. A sample of this form is found in Appendix B on p. 351.
• Routine: Open Countdown Online to the correct unit, Lesson 1, Read a Row.
o Read a Row begins with a teacher calling on an individual student to read a row of letter tiles or Heart Words to the class. This screen begins with three horizontal green bars.
o On first click, the first green bar will disappear, revealing a row of three groups of three letter tiles or Heart Words. Individual students are asked to read the row accurately on the first try.
o The next click will reveal another row with the same letter tiles or Heart Words in a different order.
o If you would like more than three Readers to read a row, Countdown Online will allow you to click through the rows twice.
•
Expectations: In this assessment activity, students are accountable for reading every
328 © 2017 Really Great Reading Company, LLC
Appendix A Letter-Sound and Heart Word Fluency
grapheme or word correctly. When not reading, all other students will act as Checkers, letting the Reader know, through a hand gesture, how accurately he/she read the row. If students misread a letter tile or Heart Word, use Positive Error Correction to guide students to the correct phoneme.
• Positive Error Correction for 3-Up and Read a Row: If students misread any of the letter sounds or Heart Words in the 3-Up or Read a Row activity, provide Positive Error Correction:
o Tell the Reader how many letter sounds or Heart Words were read correctly. Note that the maximum number read is three in one 3-Up group and nine in one Read a Row row. (“You read 7 Heart Words correctly,” or “You read the first and last letter sound correctly.”)
o Prompt the student to reread a letter sound or Heart Word. (“In the Heart Word you misread, you read the first and last sound correctly. Can you retry that middle sound? Now, can you re-try the middle Heart Word?” “Can you retry the first letter sound?” “Can you retry the third letter sound in the second group?”)
o The Reader reads the letter sound or Heart Word again.
If the Reader reads the letter sound or Heart Word accurately, the Reader then reads all three (3-Up) or all nine (Read a Row) letter sounds or Heart Words again.
o If the Reader reads all three (or nine) letter sounds or Heart Words accurately this time, you and the other students congratulate the Reader.
If the Reader misses any letter sounds or Heart Words again:
o You or other students assist by chorally reading the letter sound or Heart Word.
o The Reader independently reads the letter sound or Heart Word correctly.
o Always finish by having the Reader read all three (or nine) letter sounds or Heart Words independently and with 100% accuracy.
Phonemic and Phonological Awareness
Lesson 2 of Units 18-26 focuses on phonemic awareness, which involves listening to and manipulating the individual sounds (phonemes) in words. Lesson 2 of Units 27 and 28 focuses on phonological awareness, which involves the oral blending of syllables in words.
Important Reminders for Phonemic and Phonological Awareness
Phonemic Awareness
• A phoneme is the smallest unit of sound in a word.
• A phoneme is a sound, not a letter.
© 2017 Really Great Reading Company, LLC 329
Appendix A Phonemic
Phonological Awareness
and
•
In Countdown, phonemes are represented by letters between two slashes (e.g., /k/, /m/, /ch/, /ă/, /ā/, /oi/).
• The two slashes are called a sound box.
• When letters are in a sound box, say the phoneme (sound), not the letter name. (This is only relevant for students in the letter-sound Look, Think, Say! and Pop Up activities when the letter tile disappears to reveal the sound box beneath.)
•
The letters you see inside the slashes will often be different from the letters you see in the word because most phonemes can be spelled more than one way. For example, the sounds in chef are /sh/ /ĕ/ /f/. The letters ch spell the /sh/ phoneme. Another example is the word tough. The sounds in tough are /t/ /ŭ/ /f/. The letters ou spell the short u phoneme /ŭ/ and the letters gh spell the phoneme /f/.
Phonological Awareness
•
Phonological awareness is a broader term than phonemic awareness. Phonemic awareness is a subset of phonological awareness.
• A syllable is a larger unit of spoken language than a phoneme.
• It is important for students to be comfortable orally blending syllables into words so that they are prepared to read and spell multisyllabic words.
Phonemic and Phonological Awareness Procedures
1. Finger-Stretching Phonemes
What Does It Mean to Finger-Stretch Phonemes?
When students finger-stretch phonemes (also called stretching), they use their fingers to help them segment a one-syllable word into the individual sounds that make up the word.
Reminders for Finger-Stretching Phonemes
• To ensure that students understand that phonemes can be separated, be sure they make an obvious pause between the phonemes when stretching.
• Letters should not be written or talked about while stretching phonemes. If a student mentions letters, explain that phonemic awareness is about sounds, not letters.
Finger-Stretching Phonemes Procedure
1. Say the word while extending a fist in front of your body.
2. Students repeat the word while extending their fists in front of their bodies.
3. Students orally segment (“stretch”) the phonemes by extending one finger (starting with the thumb) for each phoneme while saying the phoneme. Starting with the thumb allows up to five phonemes to be stretched with one hand.
4. Students blend the phonemes back together to say the whole word, making fists and pulling them towards their bodies while saying the word.
330 © 2017 Really Great Reading Company, LLC
Appendix A Phonemic
and Phonological Awareness
5. After your students have stretched the word, you will listen for correct segmentation and articulation of phonemes. You will usually then ask questions about the vowel sound in the word:
o How many sounds did we hear?
o What vowel sound did we hear in the word?
o What is the motion for that sound?
o Is that sound short or long?
o How do we know?
Positive Error Correction for Finger-Stretching Phonemes:
If a student incorrectly stretches the phonemes:
1. Tell the student which phonemes were correct.
2. Repeat the word for the student.
3. Prompt student to say the word, listening for the missed phoneme(s), and then to stretch the phonemes again.
4. If necessary, you or other students can stretch the phonemes for the student correctly.
5. Prompt student to correctly stretch the phonemes independently. Always finish with student independently stretching the phonemes correctly.
Positive Error Correction for Answering Vowel Questions
If a student incorrectly answers one of the vowel questions (What vowel sound did we hear in the word? What is the motion for that sound? Is that short or long?), provide Positive Error Correction:
1. Tell the student what part of the response was correct.
2. Repeat the word and stretch the phonemes, then state the question again.
3. Have the student repeat the word, stretch the phonemes, and answer the vowel question again.
4. If necessary, you or other students may stretch the phonemes again or provide the appropriate vowel movement to assist the student in answering the vowel question.
5. Have the student independently answer the vowel question correctly.
6. Always finish with the student answering the question independently and correctly.
2. Blending Phonemes
What Does It Mean to Blend Phonemes?
Blending phonemes involves listening to and pulling together isolated phonemes to create words. This process requires a student to hold the individual elements in his/her mind as
© 2017 Really Great Reading Company, LLC 331
Appendix A Phonemic and Phonological Awareness
the word is created, thus challenging a student’s active working memory. The Mystery Bag: Blending Sounds activity in Countdown is designed to enhance students’ abilities to process individual phonemes and unify them into a word. Students participated in this activity in Books 1 and 2, and it is included in some of the Book 3 lessons as an optional extension. The teacher will articulate phonemes from a real word and pause between each phoneme, like this: /g/ PAUSE /ō/ PAUSE /t/. The teacher will then ask the students to blend the phonemes together to make a real word (in this example, goat), which will be revealed from its hiding place in the Mystery Bag.
Reminders for Blending Phonemes
One easy way to make this activity more or less difficult is by adjusting the length of the pause placed between the phonemes. To make it more difficult, use a longer pause between the phonemes. To make it less difficult, shorten the pause.
Blending Phonemes Procedure
1. Say each phoneme, pausing between each.
2. Students listen to each phoneme.
3. Students blend the phonemes together into a word.
4. You can make this activity more multisensory by having students extend one finger (starting with the thumb) for each phoneme while saying the phoneme (before blending).
5. They can then blend the phonemes together to say the whole word, making a fist and pulling it towards their bodies while saying the word.
Positive Error Correction for Blending Phonemes:
If a student incorrectly blends the phonemes:
1. Tell the student which phonemes were blended correctly.
2. Repeat the phonemes for the student.
3. Prompt student to repeat the phonemes, listening for the those that were not blended correctly, and then to blend the phonemes again.
4. If necessary, you or other students can blend the phonemes for the student correctly.
5. Prompt student to correctly blend the phonemes independently. Always finish with student independently blending the phonemes correctly.
3. Manipulating Phonemes
Countdown includes several different types of phoneme manipulation activities as optional extensions in the Phonemic Awareness lessons. These include Add That Sound and Sound Swap, both of which students participated in during the Book 2 instruction, as well as a new activity called Delete That Sound. Phoneme manipulation activities are generally more challenging than segmenting and blending phonemes. These types of activities are an excellent way to continue to build students’ phonemic awareness, particularly for students
332 © 2017 Really Great Reading Company, LLC
Appendix A Phonemic and Phonological Awareness
who may have already mastered phoneme segmentation and blending. These activities involve listening to a real word and then isolating and adding, deleting, or substituting one or more of the phonemes in the word to create a different word. In all examples used in Countdown, when the phonemes are manipulated, a real word or a name remains.
Phoneme Manipulation Procedures:
1. Phoneme Addition (Add That Sound)
• Say a real word.
•
Prompt students to silently add a phoneme (a consonant). Students might be asked to add an initial or final consonant, depending on the lesson.
•
Prompt students to say the new word (a real word).
Example of phoneme addition:
o The word is each.
o Let’s add /t/ to the beginning of the word to make a new word.
o What is the new word? A: teach
2. Phoneme Deletion (Delete That Sound)
• Say a real word.
• Prompt students to silently delete one of the phonemes (a consonant). Students might be asked to delete the initial or the final consonant, depending on the lesson.
•
Prompt students to say the new word (a real word).
• One way to make this activity easier for students is to help them identify the initial or final phoneme before deleting it.
Example of phoneme deletion:
o The word is meet.
o The last sound in meet is /t/.
o Get rid of the last phoneme.
o What is the new word? A: me
3. Phoneme Substitution (Sound Swap)
• Say a real word.
•
Prompt students to silently drop the initial phoneme from the word and replace it with a different phoneme.
•
Prompt students to say the new word (a real word).
• One way to make this activity more difficult is to have students repeat the process to create a second new word. See the example below.
© 2017 Really Great Reading Company, LLC 333
Appendix A Phonemic
Phonological Awareness
and
Example of phoneme substitution:
o The word is hat
o Let’s change the /h/ to /k/ to make a new word.
o What is the new word? A: cat
o Now let’s change the /k/ to /b/ to make another new word.
o What is the new word? A: bat
4. Syllable Stomp: Blending What Does It Mean to Syllable Stomp?
Syllable Stomp is a routine used to blend syllables in spoken words. This routine allows students to listen to the individual syllables in spoken words and then blend those syllables into a word. To Syllable Stomp a word, pound or “stomp” your fist on your desk for each syllable while saying the syllable. Then, sweep your fist from left to right while saying the whole word. Students use Syllable Stomp in Lesson 2 of Units 27-28.
Syllable Stomp Procedure for Blending Syllables
1. Say the syllables. (Be sure to pause several seconds between each syllable.)
2. Prompt students to:
o Repeat the syllables.
o Use their fists to pound or “stomp” the table or desk once for each syllable while saying the syllable, moving their fists from left to right while stomping.
o Sweep their fists from left to right while blending the syllables to say the whole word.
Positive Error Correction for Blending Syllables
If a student incorrectly blends the syllables, provide Positive Error Correction:
1. Tell student which syllables were said correctly.
2. Say each individual syllable again and ask student to listen closely for the missed syllable.
3. Prompt student to repeat the syllables, then Syllable Stomp and blend the syllables again.
4. If necessary, you or other students say and stomp the syllables to assist the student.
5. Prompt student to independently Syllable Stomp and then blend the syllables correctly.
6. Always finish with the student stomping and blending the syllables independently and correctly.
334 © 2017 Really Great Reading Company, LLC
Appendix A Phonemic and Phonological Awareness
Phonics Concept
Lesson 3 of every unit includes a Phonics Concept section that explicitly introduces a new phonics concept using multisensory procedures. The multisensory procedures help students make the connection between letters and sounds. Students then practice these concepts in the following procedures:
1. Build a Word
What Is Build a Word?
Build a Word is a procedure in which students use colored and letter tiles to spell and read words containing the phonics concept taught in the lesson. In Build a Word, students use colored tiles to represent the phonemes (sounds) in a word before using letter tiles to spell the phonemes. Build a Word is not the same as simply spelling a word; when students spell words, they use letter tiles only and do not begin with colored tiles to represent sounds.
Build a Word Procedure
1. Say the word.
2. Prompt students to:
o Repeat the word.
o Stretch the phonemes in the word.
o Place one colored tile on their boards for each sound while saying the sound.
o Spell the word by placing one letter tile below each colored tile.
o Use Touch & Say (see below) to read the word.
o Hold up their boards to have their spelling checked.
3. Check students’ work and provide Positive Error Correction as needed.
4. Use Touch & Say to read the word.
Positive Error Correction for Build a Word
If a student misspells a word during the Build a Word procedure, provide Positive Error Correction:
1. Identify the sounds the student spelled correctly.
2. Repeat the word.
3. Prompt student to repeat the word and listen for the misspelled sound. Then, have the student correct the spelling by changing one or more letter tiles.
4. If necessary, you or other students identify the misspelled sound and spelling for the student.
5. Prompt student to independently use Touch & Say to read the word correctly.
© 2017 Really Great Reading Company, LLC 335
Appendix A Phonics Concept
6. Always finish with the student independently using Touch & Say to verify that the word is spelled correctly.
2. Touch & Say What Is Touch & Say?
Touch & Say is a multisensory routine used to read words. Touch & Say is one step within a procedure called Build a Word (see above). In Touch & Say, students touch colored or letter tiles while saying the phonemes represented by those tiles. Students then blend the sounds into a word by running their fingers from left to right under the tiles while saying the whole word.
Touch & Say Procedure
1. Students:
o Touch each colored or letter tile while saying each sound.
o Blend the sounds into a word while running their fingers from left to right under the tiles.
2. Provide Positive Error Correction as needed.
Positive Error Correction for Touch & Say
If a student reads a word incorrectly using Touch & Say, provide Positive Error Correction:
1. Tell student which sounds were said correctly.
2. Prompt student to:
o Touch the tile that represents the sound that was incorrect and try to say the sound again.
o Touch each tile again while saying each sound. Then, have the student blend the sounds into a word.
3. If necessary, you or other students use Touch & Say to read the word. Then, have the student repeat.
4. Prompt student to independently use Touch & Say to read the word correctly.
5. Always finish with the student independently using Touch & Say to read the word.
3. Reading Multisyllabic Words Using SyllaBoards™
What Does It Mean to Read a Multisyllabic Word with SyllaBoards™?
Students can easily and effectively read multisyllabic words by looking for the vowel letters and breaking the words into syllables around the vowels. Starting in Unit 27, students use SyllaBoards™ to break multisyllabic words into syllables, to read each syllable separately, and then to blend the syllables to read the words.
Procedure for Reading a Multisyllabic Word Using SyllaBoards™
1. Students:
o Count the number of vowel letters in the word.
336 © 2017 Really Great Reading Company, LLC
Appendix A Phonics Concept
o Determine if the vowel letters are next to each other or not.
o Determine the number of syllables in the word.
o Put out one SyllaBoard™ for each syllable.
o Write one vowel on each SyllaBoard™.
o Break the word into syllables by filling the consonants in on the SyllaBoards™
o Read each syllable while touching each SyllaBoard™.
o Blend the syllables to read the whole word while sweeping their hands from left to right under the SyllaBoard™
2. Check students’ work and provide Positive Error Correction as needed.
Positive Error Correction for Reading Multisyllabic Words
If a student misreads a multisyllabic word, provide Positive Error Correction:
1. Identify which syllables the student read correctly.
2. Prompt student to use Touch & Say to reread the incorrect syllable. Then, have the student read the whole word.
3. If necessary, guide student to ask the vowel questions for multisyllabic words. (How many vowels are in the word? Are the vowels next to each other? How many syllables are there?)
4. Prompt student to read each syllable separately and blend the syllables to read the whole word.
5. Have student independently reread the word correctly.
6. If a student decodes all the sounds in a word correctly but pronounces the word incorrectly:
o Identify which syllables the student pronounced correctly.
o Prompt student to read the incorrectly pronounced syllable again.
o Always finish with the student reading the whole word independently and correctly.
Student Practice
Lessons 4 and 5 of every unit (beginning in Unit 18) provide a series of practice activities that enable students to practice the phonics concepts they learned in the current and previous units.
1. Detective Work
What is Detective Work?
In Detective Work, students act as “phonics detectives” to find certain letter-sound relationships in words as they read. This is the first Countdown Student Workbook practice
© 2017 Really Great Reading Company, LLC 337
Appendix A Student Practice
activity that appears in Lesson 4 of each unit (beginning in Unit 20). The practice centers around the phonics concept taught in Lesson 3 of the same unit and builds on concepts from previous units. Detective Work is broken down into two sections, Mark It! and Read It!
Mark It!
In Mark It!, you will model how to underline graphemes (a letter or letter combination that spells a phoneme) and read the words. Some of the words may be unknown by the students, so the teacher will model the correct underlining and reading of the words. Students are identifying and underlining the target phonics concept in the words before reading them.
Mark It! Procedure:
1. Open Countdown Online to the correct unit, Lesson 4, Mark It! Students open their Countdown Student Workbook to the appropriate unit.
2. Each click will underline one grapheme at a time. Say each phoneme as you underline the corresponding grapheme, and then pronounce the word as a whole to demonstrate correct pronunciation.
3. Students will repeat the process exactly as you demonstrated. Make sure students are underlining each grapheme as they are saying the proper phoneme. This process reinforces grapheme-phoneme relationships.
4. Continue until all words are broken down and read correctly.
Read It!
In Read It!, students are called on one at a time to read a row of words aloud to the group. Words are read as whole words and are not divided into individual graphemes or phonemes.
Read It! Procedure:
1. You will need a copy of the Countdown Student Workbook to follow along with the student Readers.
2. Explain that Readers will need to read loudly and clearly so that the rest of the group will be able to hear them.
3. Call on one student at a time to be the Reader and read a row of words.
4. The rest of the group will act as Checkers, listening for accuracy. Checkers will give the Reader a thumbs-up if they read all of the words correctly. They will give the Reader a thumbs-to-the-side if there is a word they need to try again.
5. If a Reader makes a mistake, use Positive Error Correction to guide him/her to the correct word.
Positive Error Correction for Read It!:
If the Reader misreads any of the single-syllable words in a row during Read It!, provide Positive Error Correction:
1. Tell the Reader how many words were read correctly. (“You read two words correctly,” or “You read the first and last word correctly.”)
338 © 2017 Really Great Reading Company, LLC
Appendix A Student Practice
2. Prompt the student to reread a word. (“In the word you misread, you read the first and last sound correctly. Can you retry that middle sound?” “Now, can you re-try the middle word?”)
3. The Reader reads the word again.
4. If the Reader reads the word accurately, the Reader then reads all three words again.
5. If the Reader reads all three words accurately this time, you and all Checkers congratulate the Reader.
6. If the Reader misses any single-syllable word again:
o Guide the Reader to use Touch & Say to read the misread word.
o If necessary, Checkers assist by using Touch & Say to chorally read the word.
o The Reader independently uses Touch & Say to read the word correctly.
o The Reader reads all three words again.
7. Always finish with the Reader independently reading all three words correctly.
8. The Reader then aims to read another row of words accurately on the first attempt.
Responding to self-corrections:
1. It is important not to praise the Reader for self-correcting.
2. The goal is for the Reader to read all three words accurately the first time. Selfcorrecting is better than an error, but it is short of the goal.
3. If the Reader reads all words accurately with a self-correction on any word, say, “You read all three words accurately after you self-corrected. Please read the words again without self-correcting.”
4. After the Reader reads all three words with no errors or self-corrections, praise the Reader by saying, “Excellent accurate reading!”
2. Word Sort
What is Word Sort?
Word Sort in Countdown Foundations is intended to focus students’ attention on the spelling pattern(s) presented in the unit. It is an extension of the new concept prior to asking students to read and spell these words with less support. You will lead the students in filling in the first word(s) of the sort to be sure the students understand how they are to sort the words. Students practice reading the words and then determine which column should be checked depending on the focus of the lesson.
Word Sort Procedure:
1. Open Countdown Online to the correct unit, Lesson 4, Word Sort. Students open their Countdown Student Workbook to the appropriate unit.
2. Read the column headings so students know how they will be sorting the words.
© 2017 Really Great Reading Company, LLC 339
Appendix A Student Practice
3. Model how to complete the sort with the first two words. Work with students to circle and underline the appropriate images or letters by asking the series of questions listed in each lesson. These questions are designed to help the students sort the words by examining certain features of each word. Each click in Countdown Online will circle or underline the appropriate image or letter(s), helping to model the activity effectively.
4. Direct students to complete the rest of the sort on their own.
5. Use Countdown Online to check answers with students. Students then correct any errors.
3. Phrases and Sentences to Read
What is Phrases and Sentences to Read ?
•
This Countdown Student Workbook activity is found in Lesson 5 of each unit (beginning in Unit 19). In Unit 22, Phrases and Sentences becomes just Sentences to Read. Phrases and Sentences to Read is a list of controlled phrases and sentences that individual students are called on to read out aloud as the rest of the class acts as Checkers.
Controlled means that the students have learned all the phonics concepts, all the vowel phonemes, and all the Heart Words they need to read the text accurately. Each Heart Word is marked with a grey heart above it.
• Countdown phrases and sentences use decodable words and common high-frequency words, but they are written so that students have to pay attention to each word. They are not predictable, which means that students cannot guess in order to read accurately. The phrases may have words that are unfamiliar to some students. However, all students will be able to decode these words accurately because all necessary phonics skills have been learned prior to reading the words.
• Countdown phrases and sentences provide an opportunity for students to read connected text with 100% accuracy. During phrase reading, if a student stumbles over a Heart Word, the teacher can provide that word to the student.
Phrases and Sentences to Read Procedure:
1. Students open their Countdown Student Workbook to the appropriate unit.
2. Explain to students that the goal of this activity is to read each phrase and sentence with 100% accuracy the first time.
3. Call on one student at a time to read a phrase or sentence.
4. Students who are not the Reader will be Checkers looking for accuracy. Checkers will give the Reader a thumbs-up if they read the entire phrase correctly. They will give the Reader a thumbs-to-the-side if there is a word they need to try again.
5. If a Reader makes a mistake, use Positive Error Correction to guide him/her to the correct word.
340 © 2017 Really Great Reading Company, LLC
Appendix A Student Practice
Positive Error Correction for Phrases and Sentences to Read
If a Reader misreads any of the words in a phrase or sentence, provide Positive Error Correction:
1. Tell students how many words were read correctly.
2. Prompt a Checker to identify which word was misread by giving the position of the word in the phrase or sentence without saying the word itself.
3. Prompt Reader to use Touch & Say to read the word again. If the Reader reads the word accurately, the Reader then reads the entire phrase or sentence again. If the Reader reads the entire phrase accurately this time, you and all Checkers congratulate the Reader.
If the Reader misses a word again:
1. Prompt Checkers to assist by using Touch & Say to chorally read the word.
2. Prompt Reader to independently use Touch & Say to read the word correctly. Always finish with the student independently using Touch & Say to verify that the word is read correctly.
3. Prompt student to read the entire phrase or sentence again. Always finish with the Reader independently reading the entire phrase or sentence accurately.
Responding to self-corrections:
1. It is important not to praise the Reader for self-correcting.
2. The goal is for the Reader to read all the words accurately the first time.
3. Self-correcting is better than an error, but it is short of the goal.
4. If the Reader reads all words accurately with a self-correction on any word, say, “You read the phrase/sentence accurately after you self-corrected. Please read the phrase/sentence again without self-correcting.”
5. After the Reader reads the phrase or sentence with no errors or self-corrections, praise the Reader by saying, “Excellent accurate reading!”
4. Spell It!
What is Spell It! ?
This Countdown Student Workbook activity is found in Lesson 5 of each unit (beginning in Unit 18). In Spell It!, students link speech sounds to alphabetic symbols. This activity reinforces the alphabetic principle, which helps students strengthen their phonemic awareness and decoding skills and, ultimately, benefits both their word reading and spelling. Spell It! is similar to Build a Word in Countdown Foundations Lesson 3, but students represent sounds with dots and write the letters that spell those sounds in boxes. It will be completed as a large group activity with each student working directly in their workbook.
© 2017 Really Great Reading Company, LLC 341
Appendix A Student Practice
Spell It! Procedure:
1. Open Countdown Online to the correct unit, Lesson 5, Spell It! Students open their Countdown Student Workbook to the appropriate unit.
2. Explain that you will dictate five words, one at a time. Lead students in completing the first example with you.
3. First, students will listen for the number of phonemes in the word and will fill in a dot in one square for each phoneme they hear.
4. Next, they will spell each phoneme by writing the letter or letters (grapheme) that spells each phoneme in the box.
5. There is a second set of optional challenge words provided for students if you have extra time for more practice.
Positive Error Correction for Spell It!
If a student misspells a word during the Spell It! activity, provide Positive Error Correction.
1. Tell the student which sounds were spelled correctly.
2. Repeat the word.
3. Have the student repeat the word and listen for the misspelled sound. Then, have the student correct the spelling by changing one or more graphemes.
4. If necessary, you or other students may identify the misspelled sound and spelling for the student.
5. Have the student independently use Touch & Say to verify that the word is spelled correctly.
Spell It! Scoring Rules
You can play Spell It! as a game where students can earn points for correctly identifying the phonemes and spelling the corresponding graphemes in each word. If you choose to play Spell It! as a game where students earn points, they will earn one point for each phoneme they correctly identify by placing a dot in one of the boxes. They will then earn one additional point for each phoneme they correctly spell with a grapheme by writing the correct letters in the corresponding box. For example, the word cat would be scored in this way:
• Students can earn a maximum of 6 points for the word cat.
• They can earn 3 points for correctly placing dots in the first three boxes because there are three phonemes in cat: /k/ /ă/ /t/.
• If they segment the word into only two parts (as in, /k/ /ăt/) and place dots in two boxes, they would earn only 2 points because they only fully and correctly segmented the word into two sound segments.
• Students can then earn a maximum of 3 points for correctly spelling the word with three graphemes in three separate boxes, c a t, corresponding to the three phonemes they heard in the word.
342 © 2017 Really Great Reading Company, LLC
Appendix A Student Practice
•
If students spell the word by placing a c in the first box and an at in the second box, they would again earn only 2 points, because (even though they spelled the word correctly) they did not correctly demonstrate the 1:1 grapheme-phoneme correspondence.
• Once students begin working with digraphs, and 2-sound blends, they have opportunities to score additional points in Spell It!
•
For the word thick, students can earn a maximum of 8 points. They can earn 3 points for correctly marking dots for each of the three phonemes, /th/ /ĭ/ /k/, and then 3 more points for correctly spelling the graphemes as th i ck. They can then earn an additional 2 points if they circle digraph th and digraph ck. (If students circle one digraph but not the other, they would earn 1 additional point instead of 2 for this word.)
•
For the word jump, students can earn a maximum of 9 points. They can earn 4 points for correctly marking dots for each of the four phonemes, /j/ /ŭ/ /m/ /p/, and then 4 more points for correctly spelling the graphemes as j u m p. They can then earn an additional 1 point if they underline the letters m and p because these letters are a 2-sound consonant blend.
• Always remember that the goal of the Spell It! activity is correct 1:1 graphemephoneme correspondence, or the matching of letters to the sounds those letter spell. If students spell a word correctly, but do not match the graphemes to the correct phonemes, they have not truly mastered the goal of this activity.
5. Two-Syllable Word Reading
What is Two-Syllable Word Reading?
• This Countdown Student Workbook activity is found in Lesson 5 of Units 27 and 28. It takes the place of Spell It! in these units since students will be working with twosyllable words in the Phonics Concept lessons (Lesson 3). In Two-Syllable Word Reading, students follow the same steps as for reading two-syllable words with SyllaBoards™. The only difference is that students will be underlining the vowel letters in two-syllable words printed in their Student Workbooks, and they will then write the vowel letters and consonants on the pictures of SyllaBoards™ in their workbooks, rather than on the SyllaBoards™ manipulatives.
Procedure for Two-Syllable Word Reading:
1.
Students:
o Underline the vowel letters in the word.
o Determine if the vowel letters are next to each other or not.
o Determine the number of syllables in the word.
o Write one vowel on each SyllaBoard™ graphic in their workbooks.
o Break the word into syllables by filling the consonants in on the SyllaBoards™ graphics.
© 2017 Really Great Reading Company, LLC 343
Appendix A Student Practice
o Read each syllable while touching each SyllaBoard™ graphic.
o Blend the syllables to read the whole word while sweeping their fingers from left to right under the SyllaBoard™ graphics.
2. Check students’ work and provide Positive Error Correction as needed. Positive Error Correction for Two-Syllable Word Reading is the same as Positive Error Correction for Reading Multisyllabic Words, which can be found in Appendix A, on page 337.
344 © 2017 Really Great Reading Company, LLC
Appendix A Student Practice
Components of Countdown
© 2017 Really Great Reading Company, LLC 345
APPENDIX B
o
o
2.
o Short
o Long
3. Optional Wall Cards
Student
2. Countdown
o Holding
o SyllaBoards™
o Working
o
o
o Online
o Online
o Online
o Additional
Appendix B Components of Countdown
Teacher Materials 1. Countdown Teacher Guides: o Teacher Guide 1 (Units 1-5)
Teacher Guide 2 (Units 6-16)
Teacher Guide 3 (Units 17-28)
Vowels Posters (for Units 17-28)
Vowels Poster
Vowels Poster
Student Materials 1.
Workbook (for Units 17-28)
Student Kit, which contains:
board with letter tiles and color tiles
, dry erase marker, and eraser
board Online Resource 1. Countdown Online, which contains:
Online components correlating to each activity in the Teacher Guides (for Units 1-16)
Interactive activities for learning and practicing letter sounds, Heart Words, phonemic awareness concepts, and phonics concepts (for Units 17-28)
letter and color tiles
SyllaBoards™
Vowels Posters
Supplemental Resources (see p. 346)
Items in Supplemental Resources of Countdown Online
Countdown Online has a growing body of supplemental resources to enhance and extend your instruction. The Supplemental Resources section, which can be accessed through the home screen in Countdown Online, has several sections, each with a variety of items and tools. These include:
INTERACTIVE RESOURCES
1. Letter Tile Free Play: online color and letter tiles that can be used for letter-sound practice, reading and spelling words, and more.
2. Letter-Sound Generator: this tool allows you to select up to six letter sounds to practice through a variety of activities (Look, Think, Say; Pop-Up; 3-Up; and Read a Row). The specific letters you select will populate in these activities, allowing you to provide targeted practice for your students with only the letter sounds of your choosing.
3. Heart Word Generator: this tool allows you to select three Heart Words to practice through a variety of activities (Look, Think, Say; Pop-Up; 3-Up; and Read a Row). Three Heart Words will be locked for each unit. The specific words you select will populate in these activities, allowing you to provide targeted practice for your students with only the high-frequency words of your choosing.
VIDEOS & ANIMATIONS
1. Countdown Getting Started Webinar: a webinar that provides information and tips as you get started with Countdown
2. Short Vowel Animations: a series of five animations, each focused on reviewing the articulation of and guideword and motion for one short vowel phoneme.
3. Long Vowel Animations: a series of five animations, each focused on reviewing the articulation of and guideword and motion for one long vowel phoneme.
4. Whole Body Listening Animation: a short video that uses two characters to teach students how to be good listeners.
5. Classroom Demonstration Videos: real-life classroom demonstrations of Countdown’s standard activities.
6. Activity Overview Snippets: short detailed video walk-throughs of each standard Countdown activity.
PDF RESOURCES
1. Really Great Reading’s Kindergarten Foundational Skills Surveys and the “Kindergarten Foundational Skills Surveys and Countdown ” information packet: Really Great Reading’s kindergarten assessment tool that provides information on students’ knowledge in a variety of areas related to kindergarten literacy, as well as the information packet that guides you
346 © 2017 Really Great Reading Company, LLC
Appendix B Items in Supplemental Resources of Countdown Online
through using this assessment in conjunction with your Countdown instruction. Also available are several other assessment tools for phonological awareness, letter knowledge, and sight (high-frequency) word automaticity.
2. Optional Extension Units: three units that extend the content taught in Countdown for students who have completed all 28 standard units and need a challenge. These units teach spelling two-syllable words, Open Syllables, and Vowel-Consonant-e.
3. Alternative Introductory Activities: an alternative Scope & Sequence offers three introductory units (rather than just one, as in the standard Scope & Sequence) focused on functional vocabulary and basic concepts to prepare students to succeed with Countdown instruction. The activities to be taught in these three alternative units are available as a PDF download.
4. Additional Practice Activities: additional, downloadable activities with corresponding online components to provide more practice for students who need it. There are additional activities available for rhyming, letter-sound identification, decoding, and encoding. The download will direct you to the corresponding online components required to complete the activities.
5. Short and Long Vowels Posters: posters with the guideword images for all short and long vowel sounds.
6. Countdown Decodable Passages: a set of highly controlled passages that allow students to put their decoding skills to work in longer, connected text. A differentiated version of these passages with additional support is also available. Both versions contain literal and inferential comprehension questions.
7. Sound-Letter Linking Charts: color and black and white versions of charts that provide visual links between the Countdown guideword icons for the short vowel, consonant, and digraph sounds and the capital and lowercase letters that spell those sounds.
8. Uppercase-Lowercase Letter Correspondence Activities: a series of downloadable activities to help students practice uppercase-lowercase letter correspondence.
9. Additional Resources: additional resources are also available, including: ideas for how to use the Countdown Wall Cards; the User’s Guide for the Countdown Practice Cards deck; and a downloadable activity that helps students learn and practice the difference between Closed Syllables and Open Syllables (intended for use with the optional unit on Open Syllables)
We are continually adding to our body of Supplemental Resources, so check back often to see what is new.
© 2017 Really Great Reading Company, LLC 347
Appendix B Items in Supplemental Resources of Countdown Online
Glossary of Terms
accuracy (reading accuracy): reading without errors.
alphabetic principle: the understanding that spoken words are composed of individual sounds and that letters represent those sounds; the knowledge that there are predictable relationships between sounds and the letters that spell those sounds.
beginning sound isolation (BSI): a technique where the children are taught to pronounce the first phoneme in a word and then say the whole word (e.g., /b/, bear; /ă/, apple; /ch/, chin). The target of Beginning Sound Isolation exercises is to build up a child’s awareness that words are comprised of individual phonemes.
blend: see consonant blend.
chunk: in Countdown lessons, a group of letters in one syllable that consistently spells the same sounds. The letters in chunks can almost always be read reliably as a group. For example, chunk all almost always spells the sounds/ŏl/ when the letters are in the same syllable, as in ball or call
Closed Syllable: a syllable that has one vowel letter followed by one or more consonant letters. The vowel sound in a Closed Syllable is usually short. Examples of Closed Syllables are cat, pick, and robot.
consonant blend (blend): two or more consonant letters next to each other where each letter spells a separate sound.
consonant letter: a letter that, on its own or when combined with other letters in a grapheme, spells a consonant sound. Letters are consonants only when they spell a consonant sound. For example, the letter y is a consonant in the word yes because it spells the consonant sound /y/. The letter y is a vowel in the word by because it spells the vowel sound long i.
consonant sound: a speech sound in which some obstruction of the flow of air makes the sound. The obstruction is made with the lips, the teeth, the tongue, or a combination of these. Consonant sounds can be made with or without using the vocal chords. Most syllables have consonant sounds.
continuant: a sound that the speaker can hold until he or she runs out of breath. Examples of continuants are the sounds /m/, /n/, /s/, or /l/.
decoding: the process of accurately pronouncing a printed word using knowledge of letter-sound relationships, or the translation of print (letters) into speech (sounds).
348 © 2017 Really Great Reading Company, LLC
Appendix B Glossary of Terms
digraph: two letters that work together to spell one sound. The sound spelled by a digraph can be a vowel sound or a consonant sound. In Countdown, and in many other reading programs, the term “digraph” is used to refer only to consonant digraphs, or two consonant letters that spell one sound.
encoding: the process of translating sounds into symbols (letters); spelling. fluency: reading with enough speed, accuracy, and expression to allow for comprehension of what is being read.
grapheme: a letter or letter combination that spells a phoneme. Graphemes can have one, two, three, or four letters. For example, in the word chef, the phoneme /sh/ is spelled by the grapheme ch
long vowel: a vowel sound that is produced with tension in the vocal cords; also called “tense.” The five long vowel sounds in English are long a (/ā/), long e (/ē/), long i (/ī/), long o (/ō/), and long u (/y�/).
onset: the initial phonological unit (consonant or consonant blend) in a word. The onset consists of everything that comes before the vowel. For example, in the word cat, the onset is c. In the word split, the onset is spl. A word can be divided into its onset and rime (see rime), as in c-at or spl it.
Open Syllable: a syllable that ends with a single vowel letter. The vowel sound in an Open Syllable is usually long. Examples of Open Syllables are me, hi, table, open, and unit.
phoneme: the smallest unit of sound in a spoken word. A phoneme is a sound, not a letter.
phonemic awareness: a person’s ability to identify, segment, blend, hold in memory, and manipulate phonemes in words.
phonics: the study of the systematic relationship between sounds and the letters that spell those sounds.
phonological awareness: a person’s ability to understand all levels of the speech-sound system. Phonological awareness includes knowledge of word boundaries, syllables, onset-rime units, and phonemes. Phonemic awareness is a subset of phonological awareness.
rhyme: when two words rhyme, they have different initial sounds, or onsets (see onset), but the same vowel sound and ending, or rime (see rime). For example, pig and wig have the same rime (ig), but different onsets (p in pig and w in wig), so these words rhyme.
rime: the letter or letters that follow the onset (initial phonological unit) in a word. The rime consists of the vowel and everything after the vowel (final consonant or consonants). For example, in the
© 2017 Really Great Reading Company, LLC 349
Appendix B Glossary of Terms
word bug, the rime is ug. In the word smash, the rime is ash. A word can be divided into its onset and rime (see rime), as in b-ug or sm ash
short vowel: a vowel sound that is produced with little tension in the vocal cords; also called “lax.” The five short vowel sounds in English are short a (/ă/), short e (/ĕ/), short i (/ĭ/), short o (/ŏ/), and short u (/ŭ/).
sound box: the two slashes surrounding a phoneme’s symbol. In Countdown, phonemes are represented by letters inside sound boxes. Examples of phonemes represented inside sound boxes are /r/, /ŭ/, /ī/, /m/, and /sh/. When a letter is shown inside a sound box, say the sound (phoneme), not the letter name.
sound buddies: the two separate sounds in a 2-sound consonant blend, when referred to only in speech and not in print. See also: consonant blend.
stop: a consonant sound that cannot be held or elongated; the speaker forms the sound by constricting or “stopping” the air flow, cutting the sound off. Examples are /b/, /d/, /g/, and /p/.
syllable: a unit of spoken language that is larger than a phoneme. Every syllable contains a vowel sound, and almost every syllable contains one or more vowel letters.
Vowel-Consonant-e: a syllable type where a single vowel letter is followed by one consonant letter and the letter e. In Countdown ’s optional extension lesson on Vowel-Consonant- e, the e in VowelConsonant- e is not considered silent because it works with the single vowel letter to spell the vowel sound. In Vowel-Consonant- e, the vowel sound is usually long. Examples of Vowel-Consonant- e are make, eve, fine, note, and cute.
Vowel-Consonant pattern: see Closed Syllable.
vowel letter: a letter that, on its own or when combined with other letters in a grapheme, spells a vowel sound.
vowel sound: a speech sound made with the mouth open, produced using the vocal cords, and with no obstruction of the flow of air to make the sound. Every spoken syllable has a vowel sound.
350 © 2017 Really Great Reading Company, LLC
Appendix B Glossary of Terms
ROW 1 fms rfm rts
ROW 1 come said down say come now have now say
Student Name Total Correct /9 Time (optional)
Student Name Total Correct /9 Time (optional)
ROW 2 mfd drt sft
Student Name Total Correct /9 Time (optional)
ROW 2 say come said now down say come have now
Student Name Total Correct /9 Time (optional)
ROW 3 tdf fmr dmt
Student Name Total Correct /9 Time (optional)
ROW 3 come said say down have come said down now
Student Name Total Correct /9 Time (optional)
ROW 1
ROW 1
Student Name Total Correct /9 Time (optional) have said down say come now have now say
Student Name Total Correct /9 Time (optional) sdr rtd mfs
ROW 2
ROW 2
Student Name Total Correct /9 Time (optional) rfm dtf smt
Student Name Total Correct /9 Time (optional) say come said now down say come down have
ROW 3
ROW 3
Student Name Total Correct /9 Time (optional) come said say down now come have said say
Student Name Total Correct /9 Time (optional) rdt msf fdr
© 2017 Really Great Reading Company, LLC 351 2 © 2017 Really Great Downing Company, LLC Read
Sample
a Row Teacher Recording Form UNIT 20
© 2017 Really Great Downing 3 Sample UNIT 20 Read a Row Teacher Recording Form
ROW 1 fms rfm rts
Student Name Total Correct /9 Time (optional)
ROW 1 come said down say come now have now say
Student Name Total Correct /9 Time (optional)
ROW 2 mfd drt sft
Student Name Total Correct /9 Time (optional)
Student Name Total Correct /9 Time (optional)
ROW 2 say come said now down say come have now
ROW 3 tdf fmr dmt
Student Name Total Correct /9 Time (optional)
ROW 3 come said say down have come said down now
Student Name Total Correct /9 Time (optional)
ROW 1
ROW 1
Student Name Total Correct /9 Time (optional) have said down say come now have now say
Student Name Total Correct /9 Time (optional) sdr rtd mfs
ROW 2
ROW 2
Student Name Total Correct /9 Time (optional) say come said now down say come down have
Student Name Total Correct /9 Time (optional) rfm dtf smt
ROW 3
ROW 3
Student Name
Total Correct /9 Time (optional) come said say down now come have said say
Student Name Total Correct /9 Time (optional) rdt msf fdr
352 © 2017 Really Great Reading Company, LLC
© 2017 Really Great Downing Company, LLC 3 Sample
20 Read
Recording Form 2 © 2017 Really Great Downing Company, LLC Read a Row Teacher Recording Form
20 Sample
UNIT
a Row Teacher
UNIT
Guidewords, Movements, and Proper Articulation of Sounds
SHORT VOWEL SOUNDS
Letter Sound Guideword Movement
a /ă/
First sound in apple Pretend to hold an apple in your palm, face up, and move across the front of your body while elongating the sound “/ăăăă/.”
Teaching/Articulation Tips
Your mouth is open wide, lips pulled back. Your tongue tip is low, and your tongue body is slightly raised toward your palate, but relaxed. Your voice is continuous.
e /ĕ/
First sound in edge Pretend to run your finger along the edge of a table or desk from left to right in front of you while elongating the sound “/ĕĕĕĕ/.”
Your mouth is moderately open, lips are wide. The body of your tongue is slightly raised toward your palate, but relaxed. Tongue sides lightly contact your upper teeth. Your voice is continuous.
i /ĭ/
First sound in itch Pretend to have an itch on your inner forearm and scratch it with your other hand while elongating the sound “/ ĭĭĭĭ/.”
Your mouth is slightly open and lips are wide. Your tongue is raised toward your palate, but relaxed. Tongue sides lightly contact your upper teeth. Your voice is continuous.
o /ŏ/
First sound in octopus Pretend your hand is an octopus with tentacles (fingers) hanging down, swimming above your head while elongating the sound “/ŏŏŏŏ/.”
u /ŭ/
First sound in up With pointer finger pointing up, move your hand from your waist to over your head while elongating the sound “/ŭŭŭŭ/.”
Your mouth is moderately open, lips are somewhat rounded. Your tongue is relaxed, lying on the mouth floor. Your voice is continuous.
Your mouth is open, lips relaxed. Your tongue tip is low, the back is slightly raised toward your palate, but relaxed. Your voice is continuous.
CONSONANT SOUNDS
Letter Sound Guideword Movement
b /b/
First sound in bear Cross your arms over your chest and pretend to scratch your “fur” by moving your hands up and down while saying “/b/, /b/, /b/, /b/.”
Teaching/Articulation Tips
Close your lips to seal off your breath, turn on your voice, and let your lips pop open with a quick, noisy burst of air.
c /k/
First sound in cat Hold your thumb and pointer fingers together at the corners of your mouth, and then draw them out to the sides, away from your face (like cat whiskers) while saying “/k/, /k/, /k/, /k/.”
With your tongue tip down, press the back of your tongue up toward your throat to seal off your breath. Then, let air push past your tongue in a quick, quiet burst.
© 2017 Really Great Reading Company, LLC 353 Appendix Guidewords, Movements,
and Proper Articulation of Sounds
CONSONANT SOUNDS, continued
Letter Sound Guideword Movement Teaching/Articulation Tips
d /d/
First sound in duck Pretend your thumb and first two fingers are a duck bill in front of your mouth, opening and closing while saying “/d/, /d/, /d/, /d/.”
Press your tongue up behind your top teeth to seal off your breath, turn on your voice, and let air push over your tongue tip in a quick, noisy burst.
f /f/
First sound in fish Pretend your hand is a fish, thumb pointing up, and wave hand as if swimming through the water while elongating the sound “/ffff/.”
Rest your top teeth on your bottom lip and quietly blow air through them.
g /g/
First sound in goat Pretend your two pointer fingers are goat horns, and place them on the top of your head, while saying “/g/, /g/, /g/, /g/.”
With your tongue tip down, press the back of your tongue up toward your throat to seal off your breath. Turn on your voice, then let air push past your tongue in a quick, noisy burst.
h /h/
First sound in hammer Pretend to hold a hammer and repeatedly hit a nail while saying “/h/, /h/, /h/, /h/.”
Open your mouth, and with your tongue down, force quiet air out of your lungs.
j /j/
First sound in jump Make a small jumping motion (or small bounce if sitting) while saying the sound “/j/, /j/, /j/, /j/.”
Press the tip and sides of your tongue up against your top teeth to seal off your breath. Turn on your voice, and quickly push noisy air over your tongue tip.
k /k/
First sound in key Pretend you are holding a key and turning it to unlock a door, saying “/k/, /k/, /k/, /k/” as you turn your wrist back and forth.
With your tongue tip down, press the back of your tongue up toward your throat to seal off your breath. Then, let air push past your tongue in a quick, quiet burst.
l /l/
First sound in lion Hold hands on either side of your head with fingers curled. Pretend to comb fingers through your lion’s mane, repeatedly moving up and out from your face while elongating the sound “/llll/.”
Press the tip of your tongue to the back of your top teeth, turn on your voice, and let noisy air come over the sides of your tongue.
m /m/
First sound in monkey Hold out arms at sides, elbows out, hands cupped down, moving arms up and down like a monkey while saying “/mmmm/.”
Hold your lips together, turn on your voice, and let noisy air vibrate from your nose.
354 © 2017 Really Great Reading Company, LLC Appendix Guidewords, Movements, and Proper Articulation of Sounds
CONSONANT SOUNDS, continued
Letter Sound Guideword Movement
n /n/
First sound in nest Cup your hands into a nest, as if you are holding eggs, while elongating the sound “/nnnn/.”
Teaching/Articulation Tips
Press the tip of your tongue up behind your front teeth, turn on your voice, and let noisy air vibrate from your nose.
p /p/
First sound in popcorn Hold your hands in front of your body, pretending they are kernels of popcorn. Open and close your fingers back and forth on each hand quickly while saying “/p/, /p/, /p/, /p/.”
Close your lips to seal off your breath. Then, let your lips pop open with a quick, quiet burst of air.
qu /kw/
r /r/
First sounds in queen Make a circle with the thumbs and index fingers of both hands, and then place the small “crown” on your head while saying the sounds “/kw/, /kw/, /kw/, /kw/.”
First sound in rabbit Hold one hand with two extended fingers on top of your head (like rabbit ears). Make a small hopping motion (or small bounce if sitting) while elongating the sound “/rrrr/.”
With lips rounded, press the back of your tongue up toward your throat to seal off your breath (as in /k/). As you let air push past your tongue in a quiet stream, your lips open (as in /w/) and your voice turns on.
Crunch your tongue up and back, spreading its sides to contact your upper teeth. Turn on your voice and let noisy air come over your tongue.
s /s/
First sound in soap Rub your hands together as if washing them with soap while elongating the sound “/ssss/.”
Lift and spread your tongue so the sides touch your upper teeth. Pull your lips back into a smile, and slowly push a stream of quiet air over your tongue tip.
t /t/
First sound in toothbrush Pretend your finger is a toothbrush and use it to “brush” your teeth while saying “/t/, /t/, /t/, /t/.”
Press your tongue up behind your top teeth to seal off your breath. Then, let air push over your tongue tip in a quick, quiet burst.
v /v/
First sound in violin Pretend to hold a violin between your shoulder and chin, and use your hand to draw the bow across the strings while elongating the sound “/vvvv/.”
Rest your top teeth on your bottom lip, turn on your voice, and blow noisy air through your teeth.
w /w/
First sound in wave Wave hello with your hand, saying “/w/, /w/, /w/, /w/” as you wave it back and forth.
Round your lips into a small circle, turn on your voice, and let noisy air leak out as you open your mouth wider.
© 2017 Really Great Reading Company, LLC 355
Appendix Guidewords, Movements, and Proper Articulation of Sounds
CONSONANT SOUNDS, continued
Letter Sound Guideword Movement
x /ks/
Last sounds in mix Pretend you are holding a big spoon and mix something with your hand, moving it in a circular pattern in front of you, while saying “/ks/, /ks/, /ks/, /ks/.”
Teaching/Articulation Tips
With your tongue tip down, press the back of your tongue up toward your throat to seal off your breath (as in /k/). As air bursts out, lift your tongue tip and quickly smile as quiet air leaks out (as in /s/).
y /y/
First sound in yes Raise your fists above your head and then pull them down, saying “/y/, /y/, /y/, /y/.”
Pull your lips back into a smile, teeth slightly apart, turn on your voice, and then slowly open your mouth as noisy air streams out.
z /z/
First sound in zipper Pretend to zip and unzip a zipper on a coat, elongating the sound “/zzzz/” as you “pull the zipper” up and down.
Lift and spread your tongue so the sides touch your upper teeth. Pull your lips back into a smile, and slowly push a stream of noisy air over your tongue tip.
LONG VOWEL SOUNDS
Letter Sound Guideword Movement
a /ā/
First sound in acorn Pretend your pointer and middle fingers are a paintbrush and write the lowercase letter a in the air while saying “/ā/.”
Teaching/Articulation Tips
Your mouth is somewhat open, lips are spread. The body of your tongue is slightly raised toward your palate and tensed. Tongue sides lightly contact upper back teeth. Your voice is continuous.
e /ē/
First sound in eagle Pretend your pointer and middle fingers are a paintbrush and write the lowercase letter e in the air while saying “/ē/.”
Your mouth is slightly open, lips are wide. Your tongue is raised toward your palate and tensed. Tongue sides lightly contact your upper teeth. Your voice is continuous.
i /ī/
First sound in ice Pretend your pointer and middle fingers are a paintbrush and write the lowercase letter i in the air while saying “/ī/.”
Start with your mouth open wide, your tongue low. Your voice is continuous as your lips spread, your jaw lifts, and your tongue is tensed and raised toward your palate.
o /ō/
First sound in open Pretend your pointer and middle fingers are a paintbrush and write the lowercase letter o in the air while saying “/ō/.”
Your mouth is slightly open, lips are rounded. The back of your tongue is raised toward your palate and tensed. Your voice is continuous.
u /y�/
First sound in unicorn Pretend your pointer and middle fingers are a paintbrush and write the lowercase letter u in the air while saying “/y�/.”
Your mouth is slightly open, lips are wide. Your tongue is raised toward your palate and tensed. Your voice is continuous as your lips round and scoop forward.
356 © 2017 Really Great Reading Company, LLC
Appendix Guidewords, Movements, and Proper Articulation of Sounds
DIGRAPH SOUNDS
Letter Sound Guideword Movement
ch /ch/
First sound in chin Tap your chin with your pointer finger repeatedly while saying “/ch/, /ch/, /ch/, /ch/.”
Teaching/Articulation Tips
Press the tip and sides of your tongue up against your top teeth to seal off your breath. Then, quickly push a stream of quiet air over your tongue tip.
ck /k/
Last sound in sick Hold the back of your hand against your forehead while saying “/k/, /k/, /k/, /k/.”
With your tongue tip down, press the back of your tongue up toward your throat to seal off your breath. Then, let air push past your tongue in a quick, quiet burst.
sh /sh/
First sound in sheep Pretend one hand is a sheep and the other hand is scissors, trimming the sheep’s wool, while elongating the sound “/sh/, /sh/, /sh/, /sh/.”
First sound in thumb Give the “thumbs up” sign while elongating the sound “/th/, /th/, /th/, /th/.”
Lift and spread your tongue so the sides touch your upper teeth. Scoop your lips forward and push a stream of quiet air over the middle of your tongue.
th /th/
wh /w/
First sound in whale Make a fist with thumb and pinky finger out straight to the sides. This is the whale of the tail. Make it swim back and forth while saying the sound “/w/, /w/, /w/, /w/.”
With your lips spread and teeth slightly open, press your tongue tip against the bottom edge of your front teeth and force a stream of air through the closure. This sound can be produced with no voice (as in “thing”) or with a voice (as in “that”).
Round your lips into a small circle, turn on your voice, and let noisy air leak out as you open your mouth wider.
© 2017 Really Great Reading Company, LLC 357
Appendix Guidewords, Movements, and Proper Articulation of Sounds
358 © 2017 Really Great Reading Company, LLC
