10 minute read
How to Create Exness Real Account 2026 | Exness Account Opening

How to Create Exness Real Account - Exness Account Opening is one of the most searched queries among new forex traders today. As Exness continues to dominate the online trading space with its user-friendly interface and reliable trading conditions, setting up a real account in 2026 has become easier than ever. In this guide, you’ll learn step-by-step how to open your Exness real account, complete the verification process, and start trading confidently. Whether you're a beginner or an experienced trader, understanding the account creation process is essential to unlocking the full potential of the Exness platform.
Start Exness Trade: Open Exness Account and Visit site 👈
Why Choose Exness?
Before diving into the account creation process, it’s worth understanding why Exness is a preferred choice for millions of traders globally:
Regulated Broker: Exness is regulated by reputable authorities, ensuring a safe trading environment.
Variety of Account Types: From Standard accounts for beginners to Professional accounts for advanced traders, Exness caters to all levels.
Low Spreads and High Leverage: Trade with competitive spreads and leverage tailored to your trading needs.
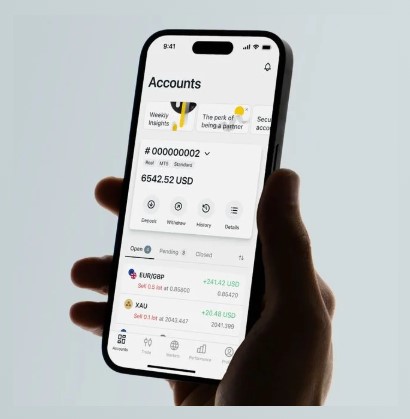
User-Friendly Platforms: Access MetaTrader 4, MetaTrader 5, and a proprietary Web Terminal.
24/7 Customer Support: Multilingual support ensures assistance is always available.
Now, let’s get started with the account opening process.
Step 1: Visit the Exness Website
Open your preferred web browser and navigate to Exness Webiste Official.
Verify that you are on the official website to avoid phishing scams. Look for the padlock icon in the address bar.

Start Exness Trade: Open Exness Account and Visit site
Step 2: Register Your Account
On the homepage, click the “Sign Up” button located in the top right corner.
Fill in the following details on the registration form:
Email Address: Use a valid email address for future communications.
Password: Create a strong password that includes uppercase and lowercase letters, numbers, and special characters.
Country/Region: Select your country of residence from the drop-down menu.
Confirm that you agree to the terms and conditions by ticking the checkbox.
Click “Continue” to proceed.
Start Exness Trade: Open Exness Account and Visit site
Step 3: Verify Your Email Address
Check your email inbox for a verification email from Exness.
Click on the verification link provided in the email to confirm your registration.
If you don’t receive the email, check your spam or junk folder or request another verification email.
Step 4: Set Up Your Personal Profile
Log in to your Exness account using your registered email and password.
Navigate to the Personal Area in your account dashboard.
Provide accurate personal information, including:
Full Name: Ensure it matches the name on your government-issued ID.
Phone Number: For two-factor authentication and account recovery.
Date of Birth: Ensure you meet the legal trading age.
Important Note: Incorrect information may result in delays or issues during verification or withdrawals.
Start Exness Trade: Open Exness Account and Visit site
Step 5: Complete Identity Verification (KYC)
Exness follows a Know Your Customer (KYC) process to ensure a secure trading environment.
Identity Verification:
Upload a clear photo or scan of a government-issued ID (passport, driver’s license, or national ID).
Ensure all details are visible and match the information provided during registration.
Address Verification:
Provide a recent utility bill, bank statement, or any official document that includes your name and residential address.
The document should not be older than three months.
Wait for confirmation from Exness, which typically takes a few hours to a day.
Pro Tip: Use high-quality images to avoid delays in the verification process.
Step 6: Select Your Preferred Account Type
Exness offers multiple account types to suit different trading needs:
Standard Account: Perfect for beginners, featuring low minimum deposits and simple trading conditions.
Raw Spread Account: For advanced traders seeking low spreads and direct market access.
Zero Account: Enjoy zero spreads on major currency pairs.
Pro Account: Designed for professionals with high trading volumes and competitive spreads.
Take time to review each account type on the Exness website to select the one that aligns with your trading strategy.
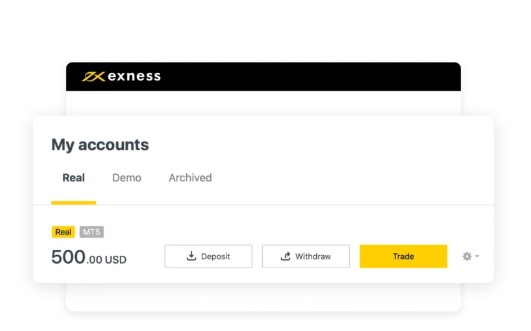
Step 7: Fund Your Trading Account
In your Personal Area, navigate to the Deposit section.
Choose a payment method:
Credit/Debit Cards
E-wallets (Skrill, Neteller, Perfect Money)
Bank Transfers
Cryptocurrencies (e.g., Bitcoin, Ethereum)
Enter the deposit amount and follow the instructions to complete the transaction.
The funds will reflect in your account within a few minutes to an hour, depending on the payment method.
Pro Tip: Start with a small deposit to get familiar with the platform.
Step 8: Download the Trading Platform
Access the Platforms section on the Exness website.
Choose a platform:
MetaTrader 4 (MT4): Ideal for traders who prefer a simple and reliable interface.
MetaTrader 5 (MT5): For advanced traders seeking more tools and features.
Exness Web Terminal: No download required; trade directly from your browser.
Install the platform on your desktop, laptop, or mobile device.
Log in to the platform using your Exness account credentials.
Step 9: Practice with a Demo Account
If you are new to trading, start with a demo account to gain experience without risking real money.
In your Personal Area, create a demo account.
Choose your virtual deposit amount and leverage.
Practice placing trades, analyzing charts, and testing strategies.
Pro Tip: Transition to a live account only when you feel confident in your trading skills.
Start Exness Trade: Open Exness Account and Visit site
Step 10: Start Live Trading
Switch to your live account in the trading platform.
Select your preferred trading instruments, such as forex, commodities, or cryptocurrencies.
Use Exness’ tools like market analysis and economic calendars to make informed decisions.
Place your first trade by setting the trade size, stop loss, and take profit levels.
Pro Tip: Always start with small trades to minimize risks while you learn the platform.
Step 11: Withdraw Your Profits
Go to the Withdrawal section in your Personal Area.
Select your preferred withdrawal method.
Enter the amount and confirm the transaction.
Withdrawals are typically processed within a few hours, depending on the payment method.
Important Note: Ensure your account is fully verified to avoid delays in withdrawals.
Step 12: Maintain Account Security
Enable Two-Factor Authentication (2FA) to add an extra layer of security.
Regularly update your password and keep it confidential.
Monitor your account activity for any unauthorized access.
Pro Tip: Contact Exness support immediately if you notice any suspicious activity.
Types of Exness Accounts in 2026
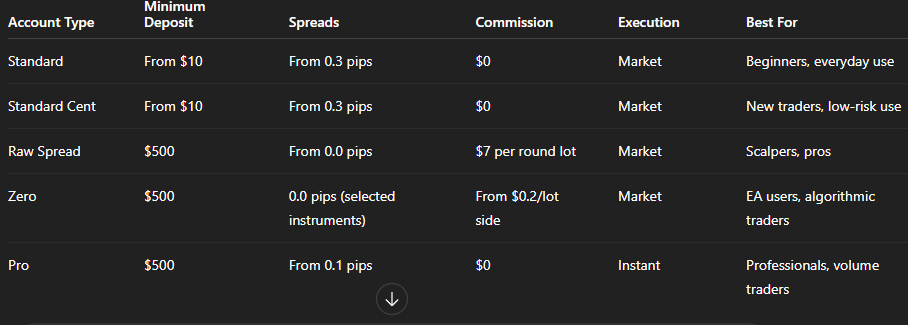
Exness offers a variety of account types to suit traders of all levels, from beginners to professionals. In 2026, traders can choose between Standard and Professional account categories, each with unique features, spreads, and minimum deposit requirements. Here’s a breakdown of the available options:
1. Standard Account
The Standard account is ideal for beginner and intermediate traders. It offers commission-free trading with competitive spreads.
Minimum Deposit: From $10 (depending on payment method)
Spreads: Starting from 0.3 pips
Commission: $0
Leverage: Up to unlimited (varies by region)
Instruments: Forex, metals, crypto, indices, energies, stocks
Start Exness Trade: Open Exness Account and Visit site
2. Standard Cent Account
Perfect for new traders who want to start small and get a feel for real-market conditions using smaller lot sizes.
Minimum Deposit: From $10
Spreads: From 0.3 pips
Commission: $0
Leverage: Up to unlimited
Lot Size: Trades in cents (1 cent lot = 0.01 standard lot)
Ideal For: Beginners and practice with real money at minimal risk
3. Raw Spread Account
The Raw Spread account is designed for experienced traders who require ultra-low spreads and high execution speed.
Minimum Deposit: $500
Spreads: Starting from 0.0 pips
Commission: Up to $3.50 per lot per side
Execution Type: Market execution
Best For: Scalping, high-frequency trading
4. Zero Account
The Zero account provides zero-spread trading on major instruments for 95% of the trading day.
Minimum Deposit: $500
Spreads: 0.0 pips on key instruments
Commission: From $0.2 to $1.0 per lot per side (variable by instrument)
Best For: Traders using expert advisors or scalping strategies
5. Pro Account
The Pro account is tailored for professional traders looking for instant order execution and zero commission.
Minimum Deposit: $500
Spreads: From 0.1 pips
Commission: $0
Execution: Instant execution with minimal slippage
Best For: Expert traders needing fast execution
Start Exness Trade: Open Exness Account and Visit site
✅ Comparison Table: Exness Account Types
Conclusion
Opening an account with Exness is a simple yet thorough process designed to ensure a secure and user-friendly trading experience. By following this detailed guide, you can successfully register, verify your account, and begin trading in the financial markets. Exness provides a robust platform, competitive trading conditions, and exceptional customer support to help you achieve your trading goals.
Start your trading journey with Exness today and unlock the potential of the global financial markets!
📌 Frequently Asked Questions (FAQs)
1. What is the first step to open a real Exness account in 2026?To begin, visit the official Exness website and click on the “Open Account” button. You’ll be asked to enter your email address, choose a secure password, and select your country of residence. Once submitted, you can proceed to personalize your account settings.
2. Is it free to create an Exness real account?Yes, opening a real account with Exness is entirely free. There are no setup or monthly maintenance fees. However, trading involves costs like spreads or commissions depending on the account type.
3. Do I need to verify my identity when opening an Exness account?Yes, identity verification is mandatory. This process ensures the safety of your funds and helps Exness comply with global regulations. Without verification, you won’t be able to deposit or trade real funds.
4. What documents are required to verify my Exness account?You will need to upload a valid government-issued ID (passport, national ID card, or driver’s license) and a proof of residence document (utility bill, bank statement, or similar) dated within the last 6 months.
5. How long does the Exness account verification process take?Once you submit the required documents, verification usually takes just a few minutes to a few hours. However, during high-traffic periods, it may take up to 24 hours.
6. Can I open multiple Exness real accounts under one profile?Yes, Exness allows users to open and manage multiple real trading accounts under a single client area. This is ideal for trying different strategies or managing funds separately.
7. Is there a minimum deposit to activate the Exness real account in 2026?Yes, the minimum deposit depends on the account type. For Standard accounts, the minimum can be as low as $10, while for Professional accounts, it can be higher (e.g., $500 or more).
8. Can I use a demo account before opening a real Exness account?Absolutely. Exness offers free demo accounts that replicate real trading conditions. You can use them to practice strategies and understand the platform before switching to a live account.
9. What are common mistakes to avoid during Exness account registration?Common mistakes include entering incorrect personal information, uploading blurry or expired documents, and using VPNs during verification. Always ensure your data matches your official ID.
10. Is Exness a safe and regulated platform for opening a real trading account?Yes, Exness is a regulated broker, licensed by authorities like the FCA, CySEC, and FSCA. The platform is well-known for transparency, fast withdrawals, and strong security measures.
See more:
How To Change USD To INR In EXNESS
Best EXNESS Strategies For Beginners
How to Trade Forex on EXNESS For Beginners