13 minute read
How to Open, Verify, and Fund Your Exness Trading Account?


Starting your trading journey with Exness is a straightforward process, but before you can dive into the world of forex and CFD trading, you need to open, verify, and fund your trading account. Exness, known for its transparency, security, and user-friendly interface, makes this process easy and efficient, ensuring that traders can focus on what matters most—executing trades and growing their portfolios.
In this guide walk you through the essential steps of opening an Exness trading account, completing the verification process to ensure your account is secure and compliant, and funding your account to start trading. Whether you’re new to trading or an experienced investor, understanding these steps will help you get started with Exness in no time. Let’s explore each stage of the process and ensure you're ready to begin trading with confidence.


What is Exness Account?
An Exness account is a personalized trading account that you open with Exness, a global online forex and CFD broker, to access the financial markets. This account allows you to trade various instruments, such as forex, commodities, indices, and cryptocurrencies, depending on the account type and features you select. By creating an Exness account, you gain access to Exness’ trading platforms (like MetaTrader 4 or MetaTrader 5), tools, and services that enable you to manage your trades, analyze market conditions, and monitor your portfolio.
Exness offers different types of accounts to suit a wide range of trading preferences and experience levels, from beginner traders to seasoned professionals. Each account type comes with its own unique features, including different spreads, leverage options, and trading conditions, allowing you to tailor your account to your trading strategy and goals.

Start Trading: Open Exness Account or Visit Website
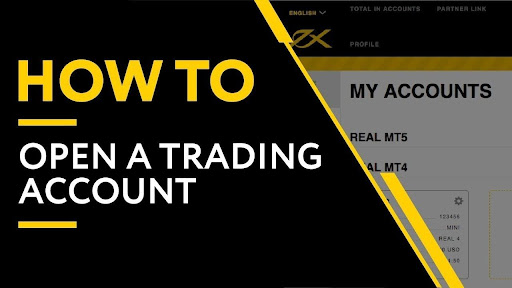
How to Open an Exness Trading Account
Opening an Exness trading account is a simple and quick process. Whether you're a beginner or an experienced trader, Exness offers a user-friendly platform to get started. Below are the steps to open an Exness trading account:
1. Visit the Exness Website
Go to the official Exness website by typing "Exness" in your browser's search bar or directly entering the URL: www.exness.com.
Once you’re on the homepage, look for the "Sign Up" or "Open Account" button, typically located at the top right corner of the page.
2. Select Your Account Type
Exness offers a variety of account types, each tailored to different types of traders. These include: Standard Accounts: Ideal for beginners or casual traders. Professional Accounts: For experienced traders seeking more advanced features.
Carefully review the account types and choose the one that best fits your trading preferences and experience level.
3. Complete the Registration Form
Click on the "Open Account" button and you will be prompted to fill out a registration form. This typically includes: Personal Information: Name, email address, phone number, country of residence, and preferred language. Account Details: Choose your account currency and other preferences.
Ensure that all the information you provide is accurate and up-to-date.
4. Create a Secure Password
You will be asked to create a strong password for your Exness account. This password will be used to log in to your account, so ensure it’s unique and secure.
Follow the password creation guidelines, which usually require a combination of upper and lower case letters, numbers, and symbols for added security.
5. Agree to the Terms and Conditions
Before proceeding, read and accept the terms and conditions of Exness. This includes the company’s policies regarding account usage, risks, and compliance with local regulations.
Make sure you understand the terms before agreeing and clicking "Submit".
6. Confirm Your Email Address
After submitting the registration form, Exness will send a confirmation link to the email address you provided.
Check your inbox (and spam folder if necessary) for the email, and click the link to confirm your email address.
7. Set Up Your Trading Platform (Optional)
After registering and confirming your email, you can set up your preferred trading platform (e.g., MetaTrader 4 or MetaTrader 5).
You’ll also have the option to download the mobile app for trading on the go.
8. Log into Your Exness Personal Area
Once your registration is complete, you can log into your Exness Personal Area using your email address and password.
This is your control center where you can manage your account, deposit funds, access trading platforms, and start trading.
How to Verify Your Exness Trading Account
Verifying your Exness trading account is an essential step in ensuring the security of your account and complying with regulatory requirements. This process helps Exness confirm your identity, protect your account from unauthorized access, and meet anti-money laundering (AML) and know your customer (KYC) regulations. Here's how to verify your Exness trading account:
1. Why Verification is Necessary
Verification is required to ensure that the person trading with Exness is legitimate and that they are operating in a secure environment. It also allows Exness to comply with legal and financial regulations. The verification process typically involves submitting identification documents to prove your identity and address.
2. Prepare Required Documents
To complete the verification process, you will need to provide the following documents:
Make sure the documents are clear, up-to-date, and readable. Exness will not accept documents that are expired or unclear.
3. Upload Your Documents to Exness
Log into your Exness Personal Area: Use your email address and password to access your Exness account.
Navigate to the "Verification" Section: Once logged in, go to the "Profile" or "Personal Area" section. You’ll find a verification tab or link that will direct you to the document upload page.
Upload your documents: Follow the prompts to upload the documents required for verification. Usually, you can upload files in PDF, JPG, or PNG format.
Ensure quality: Ensure that your documents are of high quality, with all information clearly visible. Avoid documents with shadows, reflections, or cut-off edges.
4. Wait for Verification Approval
After submitting your documents, Exness will review them. The verification process typically takes a few hours to a couple of days, depending on the volume of applications and the clarity of your submitted documents.
During this time, Exness will assess your documents to ensure they meet their requirements. You may receive an email or a notification in your personal area regarding the status of your verification.
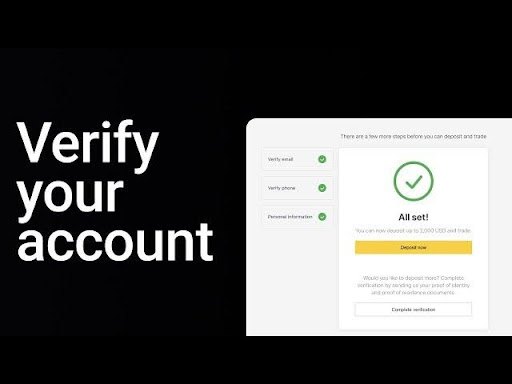
5. Account Verification Confirmation
Once your documents are approved, you will receive a confirmation email, and your account status will be updated to "Verified" in your Exness Personal Area.
At this point, you will have full access to your account, including the ability to deposit and withdraw funds, and start trading with no restrictions.
6. What to Do If Your Documents Are Rejected
If your verification documents are rejected, Exness will notify you via email or your personal area, providing the reason for the rejection.
You will be given the opportunity to re-upload corrected or updated documents. Make sure that the new documents meet the required standards to avoid further delays.
Start Trading: Open Exness Account or Visit Website
How to Fund Your Exness Trading Account
Funding your Exness trading account is a simple process that allows you to deposit money into your account and start trading. Exness offers a variety of payment methods to make this process convenient, fast, and secure. Below is a step-by-step guide to help you fund your Exness trading account.
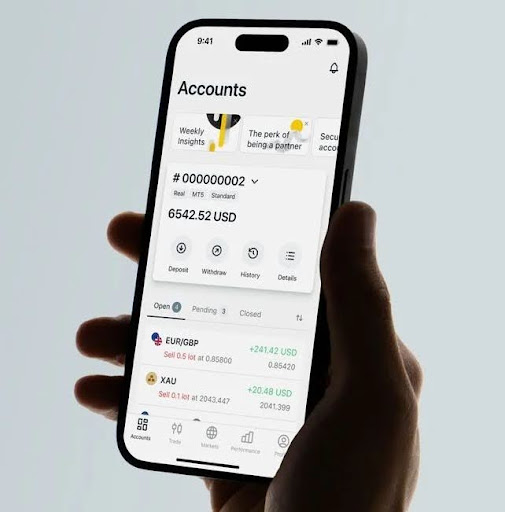
1. Log Into Your Exness Personal Area
To start the deposit process, go to the Exness website and log into your Personal Area using your registered email and password.
Your Personal Area is the hub where you can manage your trading accounts, view balances, deposit and withdraw funds, and monitor your transactions.
2. Navigate to the Deposit Section
Once logged in, find the "Deposit" section, which is usually located in the "Funds" or "Finance" tab in your Personal Area.
This section will allow you to choose your preferred payment method to fund your account.
3. Choose a Payment Method
Exness offers several deposit options, including:
Bank Transfer: Deposit funds directly from your bank account. While secure, this method may take a few business days to process.
Credit/Debit Cards: You can use Visa, MasterCard, or other major card providers for instant deposits. This method is one of the quickest and most commonly used.
E-wallets: Popular e-wallets like Skrill, Neteller, and WebMoney offer fast deposits and are widely accepted by Exness. E-wallet deposits are typically processed instantly.
Cryptocurrency: For those who prefer using digital currencies, Exness accepts Bitcoin, Ethereum, and other cryptocurrencies. This is also a fast method of funding your account.
Local Payment Providers: Depending on your location, Exness may offer region-specific deposit options, such as Fasapay, Perfect Money, or UnionPay. These methods offer secure and localized transactions.
Choose the payment method that suits you best, based on availability and your preferred transfer speed.
4. Enter Deposit Amount
After selecting your payment method, you’ll be prompted to enter the amount you want to deposit into your Exness account.
Minimum Deposit: Exness has different minimum deposit requirements depending on the account type. For example, the minimum deposit for standard accounts is usually low (around $1), while professional accounts may have higher minimum deposit limits.
Ensure you are aware of the minimum and maximum deposit limits for the chosen payment method.
5. Complete the Payment Process
After entering the deposit amount, you will be redirected to the payment processor page (e.g., your bank’s website, e-wallet platform, etc.).
Follow the on-screen instructions to complete the transaction. This may involve providing payment details like card numbers, bank account information, or logging into your e-wallet account to approve the payment.
Depending on the payment method, you may be asked to complete a security check or verification, such as entering a one-time code sent to your phone or email.
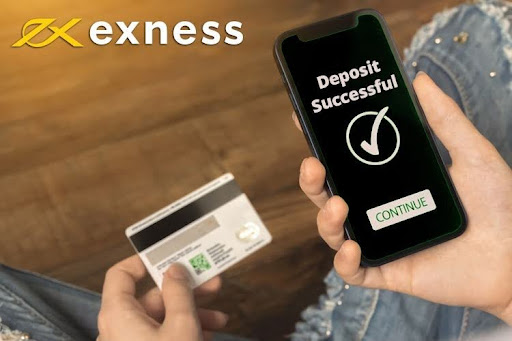
6. Verify the Transaction
After completing the payment, you will usually receive a confirmation on your screen, and Exness will notify you via email once your funds are successfully deposited into your trading account.
In some cases, the deposit may take a few minutes to appear in your Exness account. However, for certain methods like bank transfers, it may take longer (a few hours or even a few days).
7. Check Your Account Balance
Once the deposit is confirmed, log into your Exness Personal Area to check that your balance reflects the deposit.
You can also view the transaction history to confirm the deposit was successfully processed.
8. Start Trading
With your Exness trading account funded, you are now ready to start trading. You can use your funds to open positions, manage your trades, and explore the market.
Tips for Managing Your Exness Trading Account
Successfully managing your Exness trading account is key to maximizing your trading potential and minimizing unnecessary risks. One of the most important steps is regularly monitoring your account and balance. By keeping an eye on your account’s margin levels, equity, and open positions, you can ensure that your trades are well-managed and avoid unexpected margin calls. Exness provides real-time updates, so you can quickly assess your current financial situation and take action as needed. This helps ensure you have enough funds to support your positions and prevents any forced liquidations that could affect your trading goals.
Setting up alerts and notifications is another useful way to stay on top of your trades. Exness allows you to set price alerts for specific instruments, so you’ll be notified when the market reaches certain levels, helping you take advantage of trading opportunities as they arise. In addition, enabling trade notifications ensures that you are updated on key events such as order executions or changes in your open positions. These alerts are particularly valuable for traders who need to react quickly to market movements without constantly monitoring their accounts.

Conclusion
Effectively managing your Exness trading account is crucial for navigating the dynamic world of trading. By staying organized and proactive, you can enhance your trading experience, minimize risks, and maximize your chances of success. Regularly monitoring your account, setting up alerts, and using risk management tools like stop-loss and take-profit orders will help ensure that you stay on top of your trades and maintain control over your positions. Moreover, developing a solid trading strategy and learning from your past trades can give you a competitive edge in the markets.
Start Trading: Open Exness Account or Visit Website
Additionally, securing your account with two-factor authentication and making informed decisions about funding and withdrawals will safeguard both your funds and personal information. By implementing these practices and leveraging the full range of features Exness offers, you can manage your trading account with confidence and focus on achieving your trading goals. With the right approach and tools at your disposal, your Exness account will serve as a reliable platform for a successful trading journey.
FAQs
How can I monitor my account balance and margin levels on Exness?
You can easily monitor your account balance, equity, and margin levels by logging into your Exness Personal Area. The platform provides real-time updates on your financial situation, allowing you to track your open positions and manage your funds effectively.
How do I set up price alerts in Exness?
To set up price alerts, simply go to your trading platform (MetaTrader 4 or MetaTrader 5) or the Exness mobile app. Select the instrument you want to track, and then choose the option to set a price alert. You’ll receive notifications when the price reaches your specified level.
What are stop-loss and take-profit orders, and how do I use them?
A stop-loss order automatically closes a position when the market moves against you by a certain amount, helping to limit your losses. A take-profit order automatically closes a position when the market reaches your target profit level. Both can be set directly when opening or managing a trade.
How do I manage leverage on my Exness account?
Leverage can be adjusted through the Exness Personal Area when you open or modify a position. Exness offers flexible leverage, and it’s important to choose an appropriate level based on your risk tolerance and trading strategy. High leverage increases potential profits but also magnifies the risk of loss.
Can I open multiple accounts with Exness?
Yes, you can open multiple trading accounts within your Exness Personal Area. This is useful if you want to separate different strategies or trading instruments. Switching between accounts is simple and ensures that you can manage funds and track performance more easily.
How do I fund my Exness account?
To fund your Exness account, log into your Personal Area, navigate to the deposit section, and select your preferred payment method. Exness supports various methods, including credit/debit cards, e-wallets, bank transfers, and even cryptocurrencies. Follow the prompts to complete the transaction.
What should I do if I forget my Exness account password?
If you forget your password, go to the Exness login page and click on the "Forgot password" option. You will be prompted to enter your registered email address to receive instructions on how to reset your password securely.


