
User Manual
OPERATING & MAINTAINING YOUR COLUMBARIUM PRODUCT
From time to time, adjustments may be required to the niche fronts on your columbarium. You may also need to replace a niche front. This manual covers all aspects of the concealed fastening system at the heart of your columbarium.
Please instruct every person that is involved with the operation of your columbarium to thoroughly review this manual.
Eickhof Columbaria Inc.
Fabrication Facility 1200 Bruce Street Crookston, MN 56716
800.253.0457
info@eickhofcolumbaria.com
©2024 EICKHOF COLUMBARIA INC.
D052324

PATENT NOTICE
Eickhof Columbaria Inc. products are covered under one or more of the United States & Canadian patents listed on our website at www.eickhofcolumbaria.com/patents/.
Eickhof Columbaria Inc. has invested much time, effort and resources into developing technology for its columbaria and ossuaries. Eickhof Columbaria Inc. has obtained several patents and/or has filed patent applications on columbaria and related technology, including U.S. Patent 10,125,514, entitled COLUMBARIUM WITH INNER OSSUARY. Under 35 U.S.C. § 271, whoever without authority makes, uses, offers to sell, or sells any patented invention, within the United States or imports into the United States any patented invention during the term of the patent therefore, infringes the patent. Eickhof Columbaria, Inc. respects
and expects others to respect its rights.
MADE
IN MINNESOTA
intellectual property rights
Introduction Required
Hardware Detail Removing a Niche Front Overview Niche Front Operation in Detail Temporary Niche Front Adjusting a Replacement Niche Front 2 3 4 5 6 8 10 CONTENTS PLEASE NOTE
Annual Maintenance & Management Tips
REQUIRED ANNUAL MAINTENANCE
To keep your columbarium beautiful, follow these steps once a year.
Check for loose niche fronts by tapping gently near top center. If any fronts wiggle, tighten with your key wrench.
Sponge or wipe all exterior stone surfaces with warm water and a mild detergent. Rinse with clear water and wipe the stone dry.
MANAGEMENT TIPS
Our suggestions for operation and administration of your columbarium.
Adjust sprinklers to avoid your columbarium. 1 1 2 2 3 4
Utilize one vendor for inscriptions. Set and keep a standard font size, standard depth of lettering, and standard color.
Eickhof Columbaria provides extra niche fronts for future use with the purchase of your columbarium. Additional spare or replacement fronts can be purchased.
Establish Rules & Regulations for your columbarium. An outlined list of policies and procedures will set clear expectations and ensure consistent management of your columbarium and memorial space. This can include what decorations or ornaments can be placed on or around the columbarium.
Please contact us for additional cleaning options or a Rules & Regulations template. We’d be happy to assist you with any questions that may arise.
800.253.0457 • WWW.EICKHOFCOLUMBARIA.COM 3
HARDWARE
DETAIL
· Key Wrench
· Lock Clip
· Niche Adjuster
· EM Anchor
· Brass Square Lock Screw
· Shelf
· Inner Closure Panel
· Niche Front
· Brass Lock Nut
· Cement Fiber Board
· Small Swivel Sockets
· Inner Closure Tab
· Shelf
1 2 3 4 5 6 7 8 9 10 11 12 13 1 10 2 3 8 4 13 5 6 7 12 12 11 9 EXTERIOR OF NICHE INTERIOR OF NICHE BACK SIDE OF NICHE FRONT NICHE WITH INNER CLOSURE PANEL LOCK BRACKET LOCK BRACKET 4 MAINTENANCE MANUAL • ©2024 EICKHOF COLUMBARIA INC • 042324
Angle Bracket
REMOVING A NICHE FRONT OVERVIEW
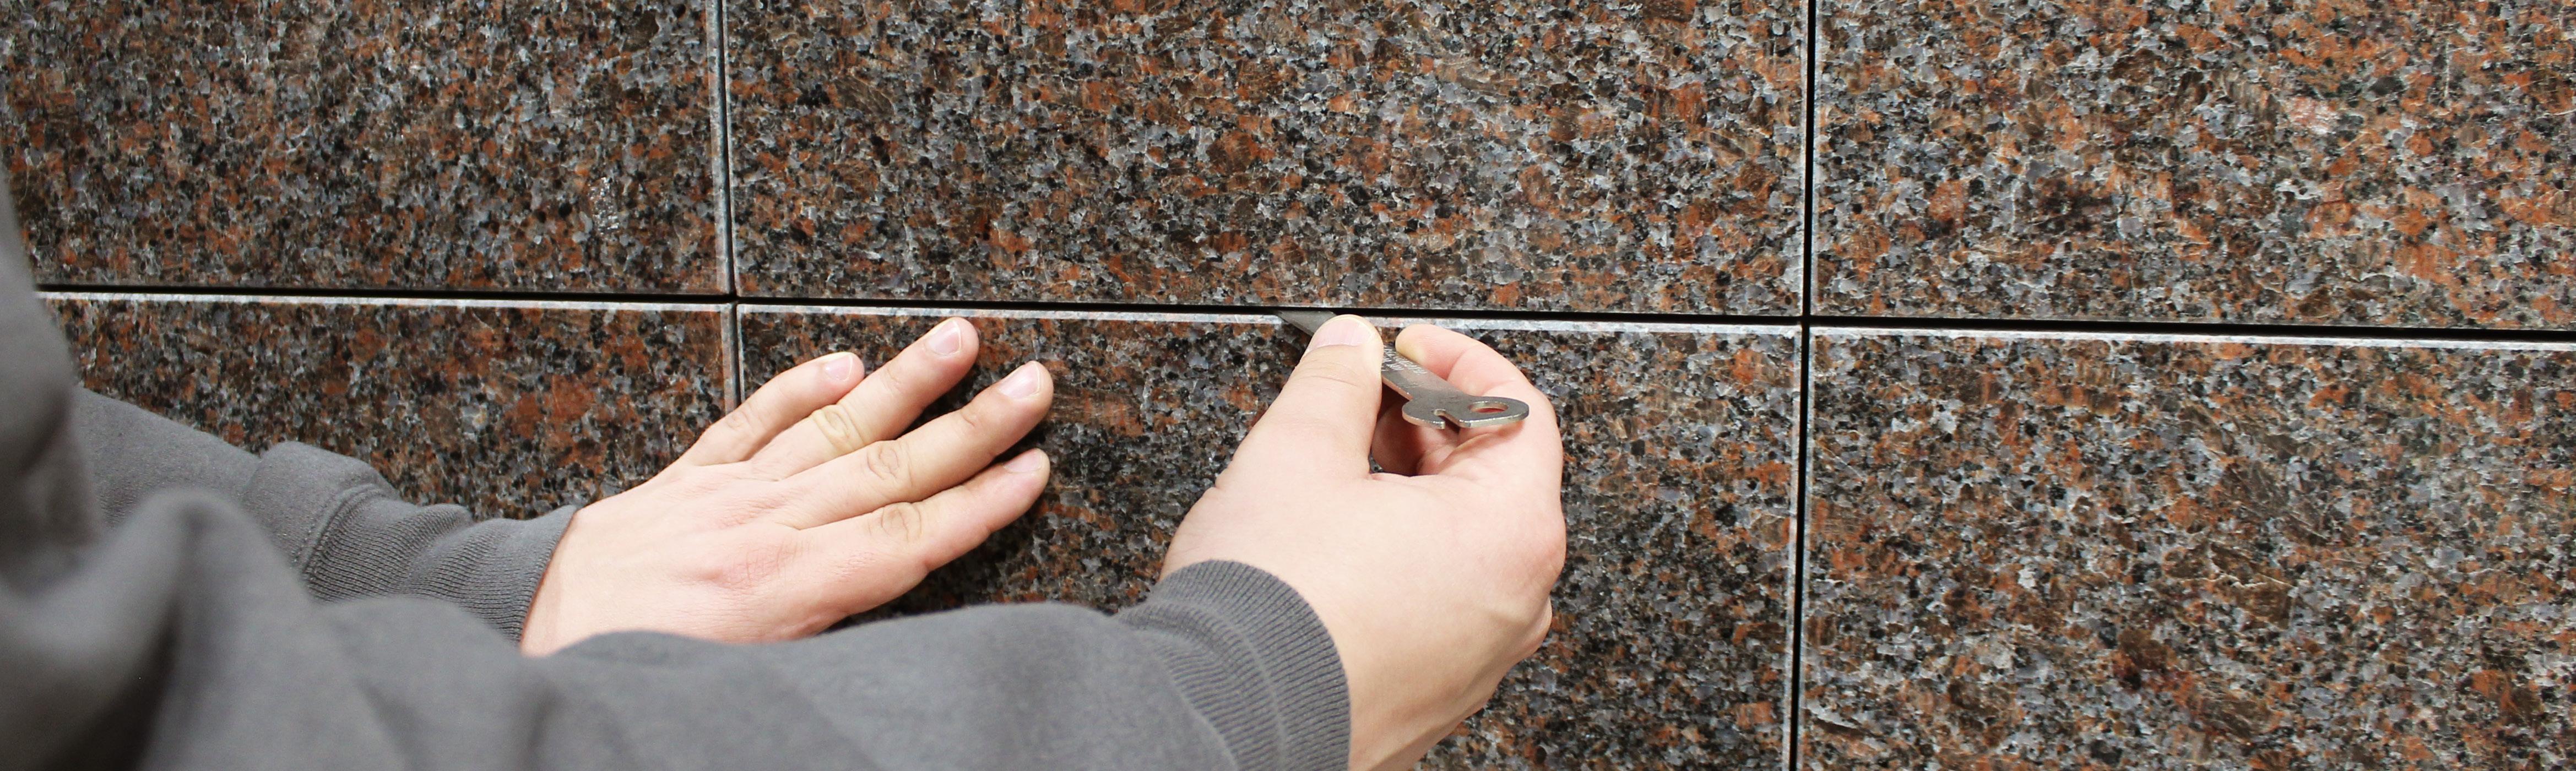
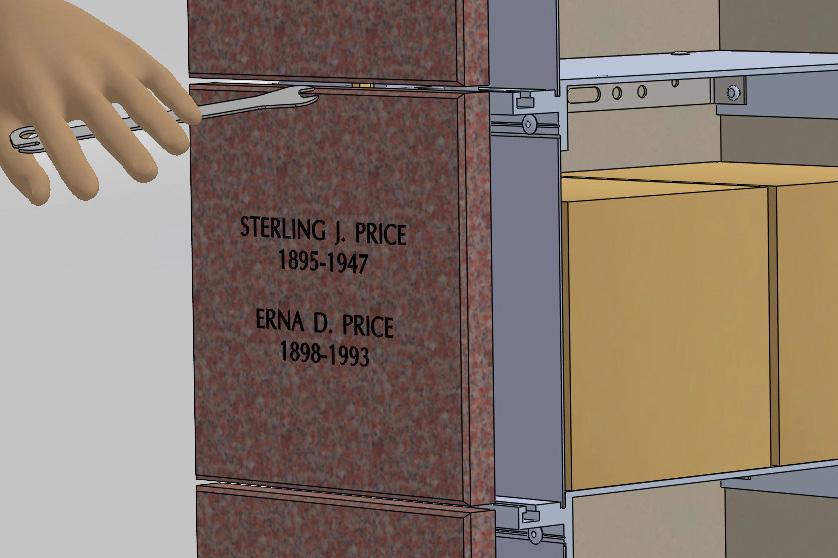
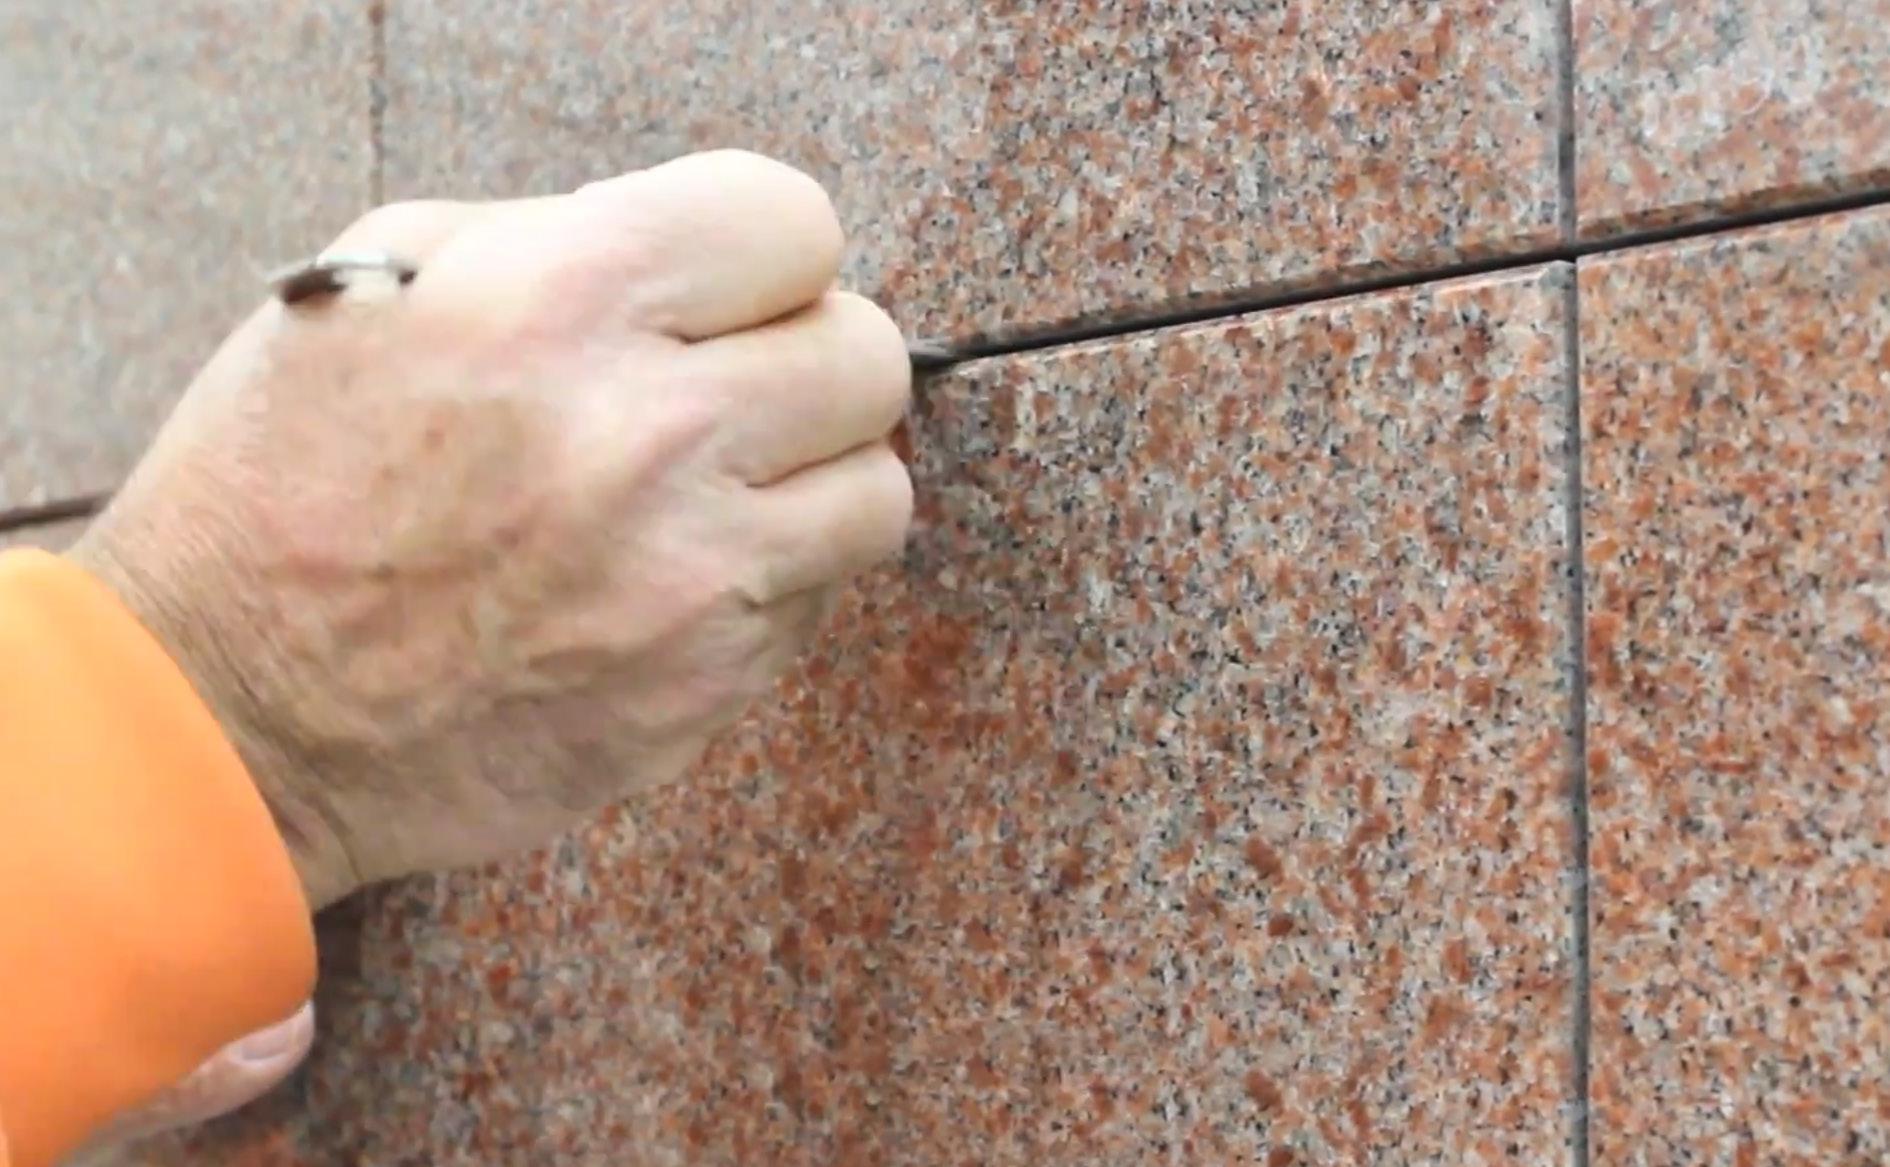
To remove the niche front, insert the key wrench into the joint on top of the niche front. Engage the brass lock nut, located in the center of the joint, and turn the wrench to loosen the nut and release the front. Review page six and page seven for the more detailed process.
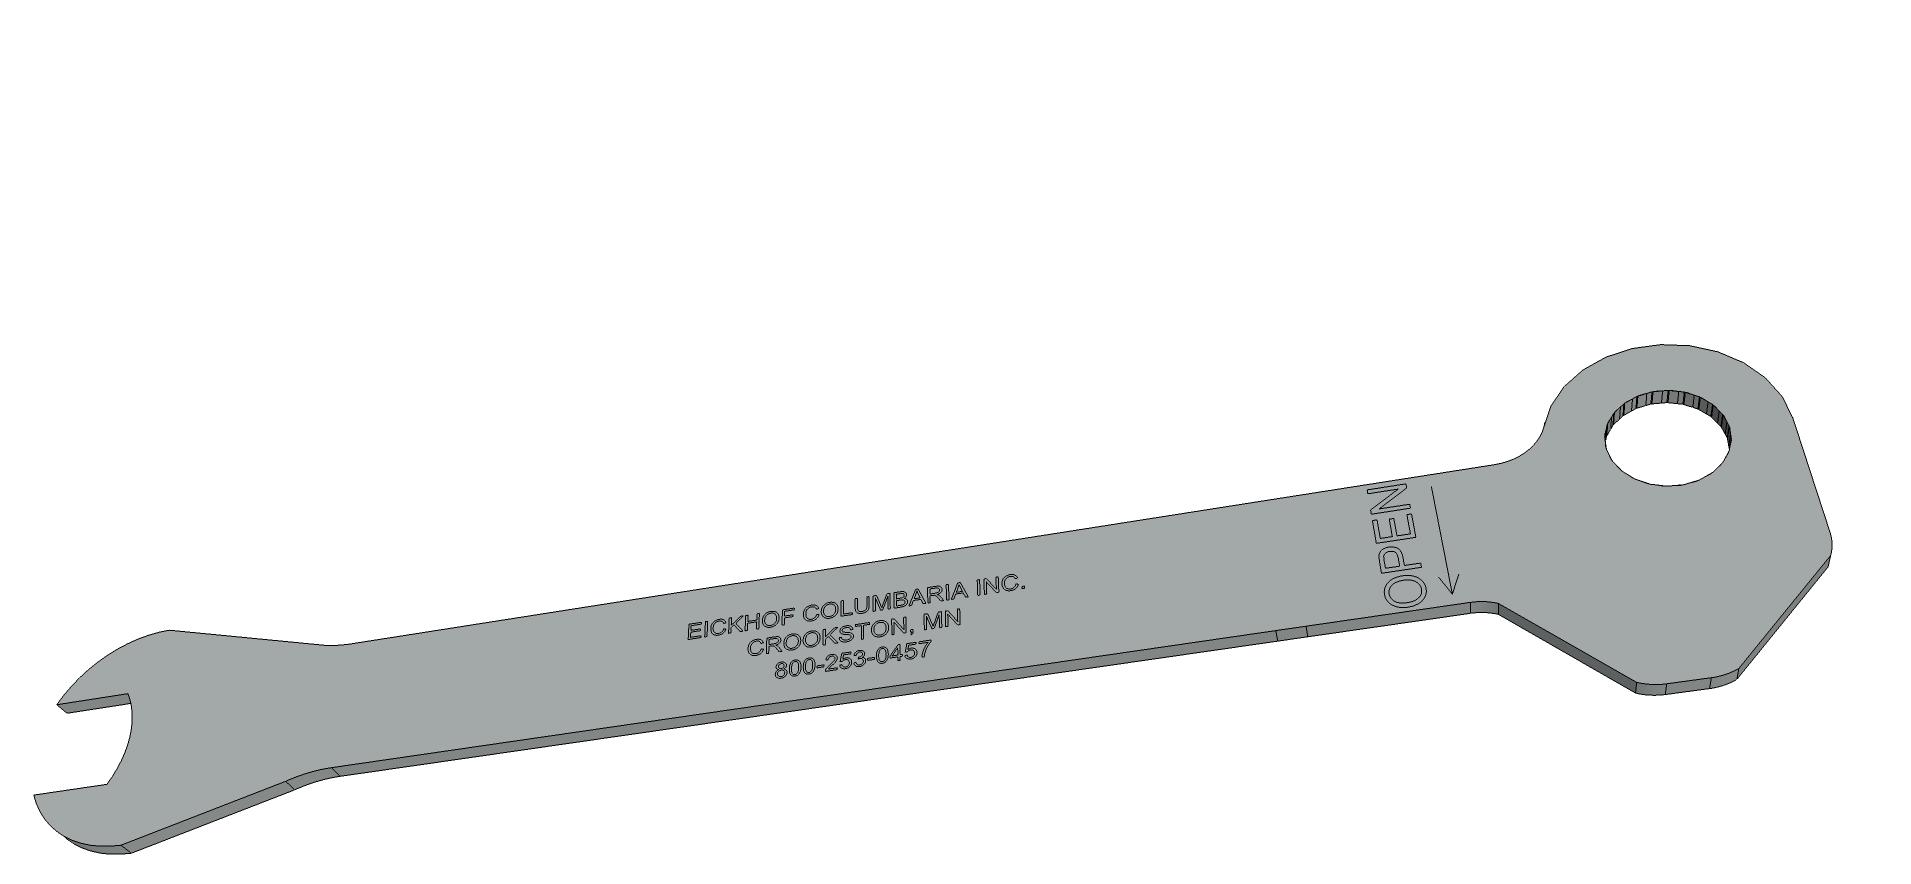
KEY WRENCH
BRASS LOCK NUT
800.253.0457 • WWW.EICKHOFCOLUMBARIA.COM 5
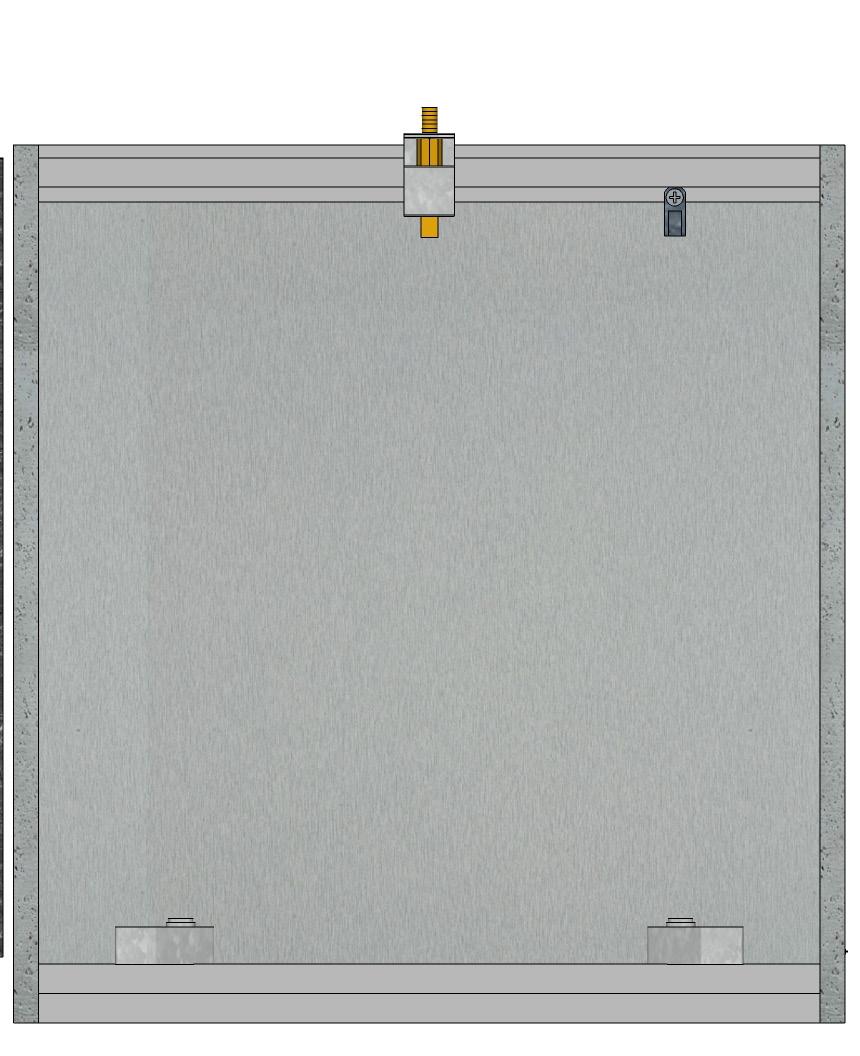
JOINT TOP OF NICHE FRONT INNER CLOSURE PANEL
NICHE FRONT OPERATION IN DETAIL
The individual niche fronts should always be placed back into the same opening they were removed from. If the front is put into a different opening, the niche hardware will need to be adjusted to accept the niche front in the new opening. 1 2 3 4 5
6 7 8
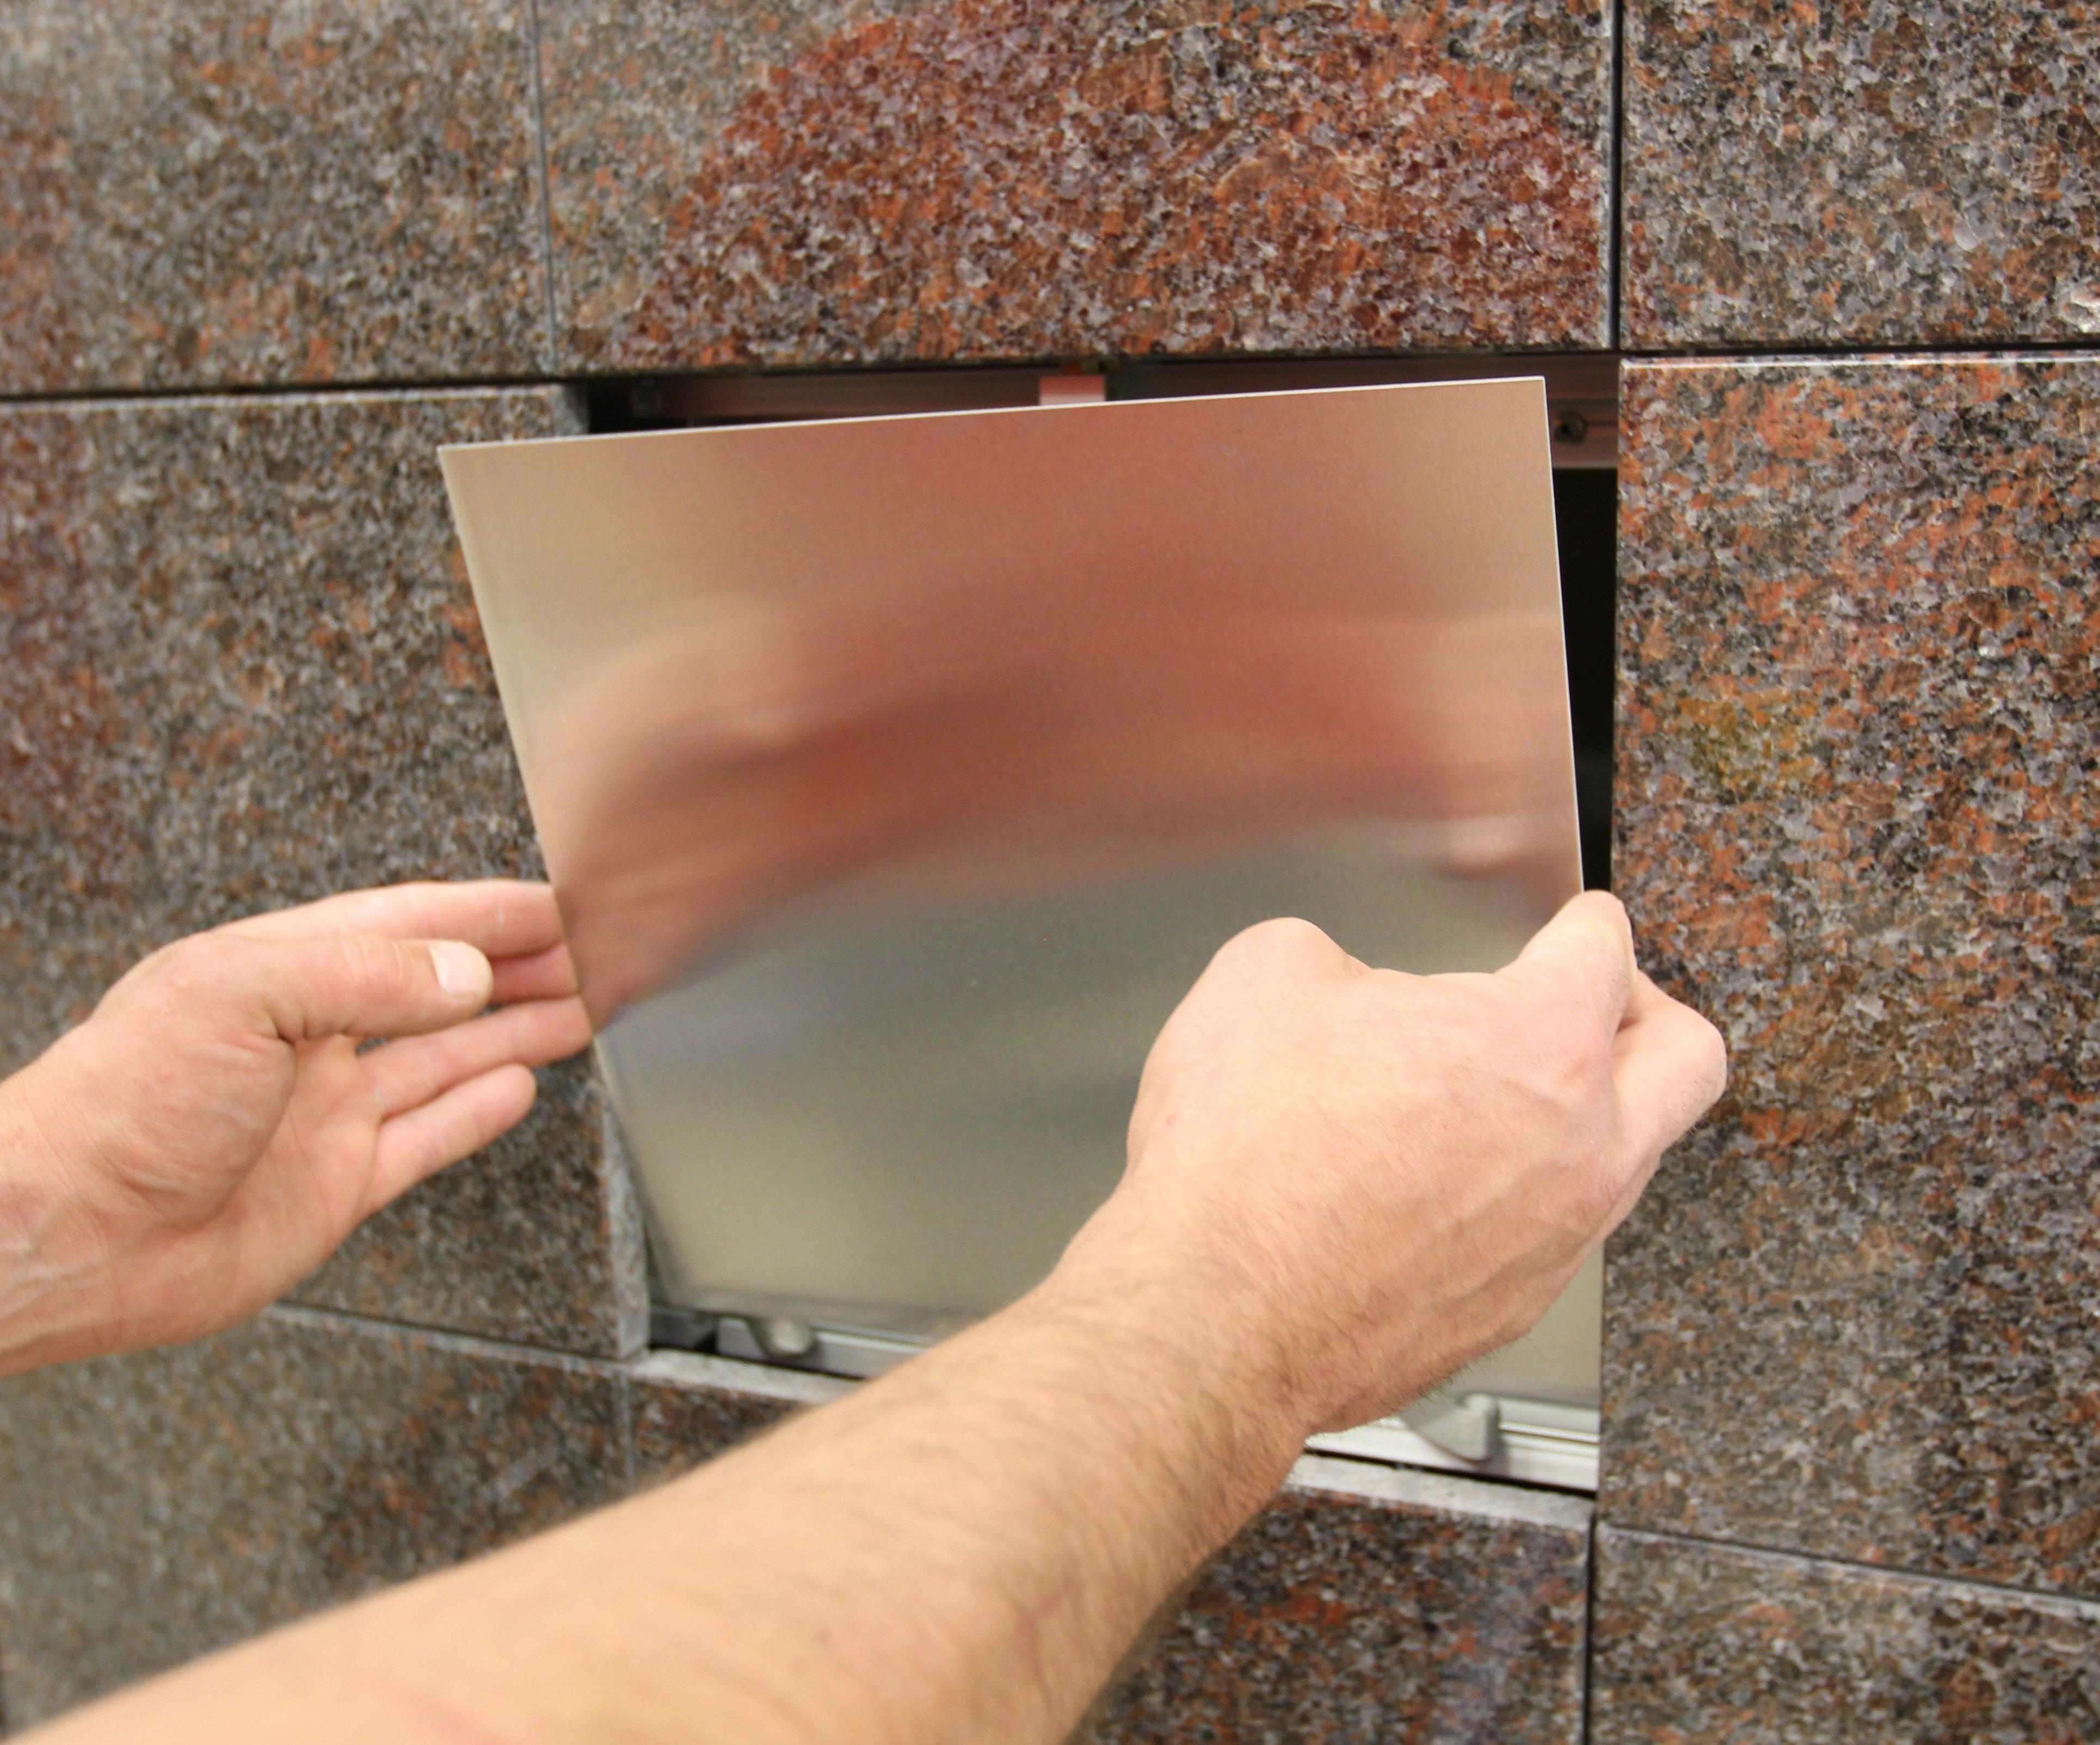
Position yourself in front of the niche. When removing a niche front, never have the top of the front any higher than your neck or chin. Preferably, the top edge of the niche front should be at waist to chest level prior to removing it.
The key wrench has text and an arrow showing which direction to turn for opening the niche. This text must be facing upward.
Locate the nut in the center of the joint, insert the wrench and turn the nut. Always keep pressure against the niche front with one hand until you have turned the nut enough to release the niche front.
Only let the niche front tip out far enough to get your fingers around the edge of the niche front. When you have a good, firm grasp, lift the niche front out of the opening.
To remove the inner closure panel, turn the inner closure tab until it releases the panel. Grasp the top of the inner closure panel and tip it towards you, then lift the panel out of the groove at the bottom.
To replace the closure panel, place the bottom edge into the groove at the bottom and tip the top edge of the closure panel inward. Turn the inner closure tab until it secures the inner closure panel.
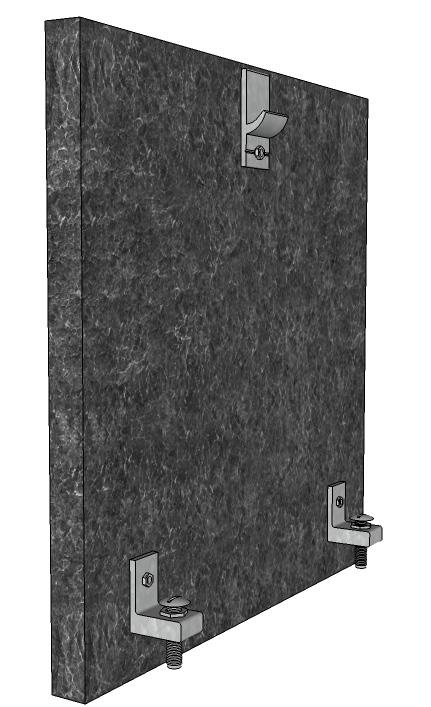
To replace the niche front, set the bottom bolts (#3 on page four) into the swivel socket divots (#11 on page four), tip niche front in and apply pressure with one hand.
Insert the key wrench and tighten the nut until snug. The niche front will not be loose or wiggle in the opening.
THE NICHE
OPEN
IS
6 MAINTENANCE MANUAL • ©2024 EICKHOF COLUMBARIA INC • 042324
Insert key wrench, text side up, into joint and remove niche front.
Turn the inner closure tab to a horizontal position to release the panel.
Grasp the edges and remove the inner closure panel.
To view this process in a video format please contact us for details by email or phone.
info@eickhofcolumbaria.com 800-253-0457
800.253.0457 • WWW.EICKHOFCOLUMBARIA.COM 7
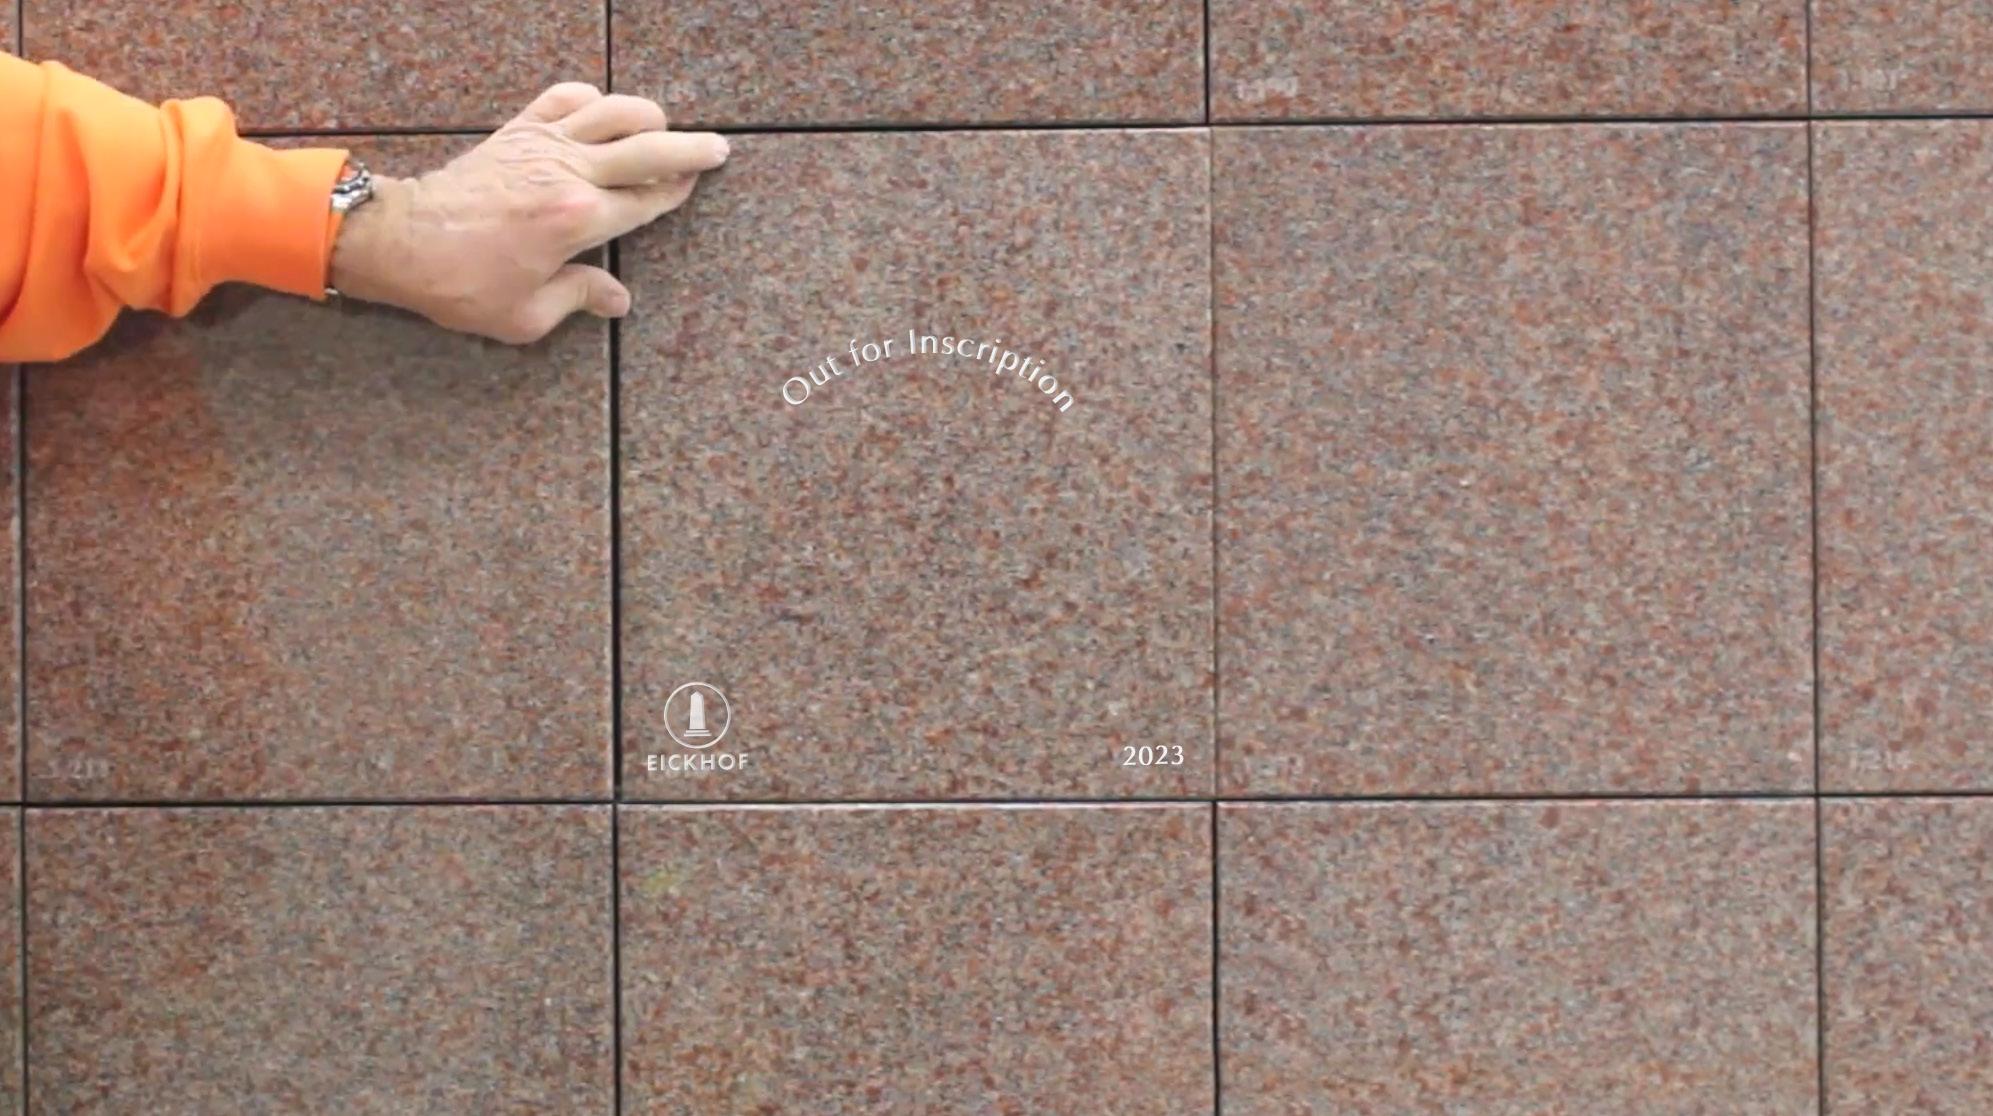
TEMPORARY NICHE FRONT
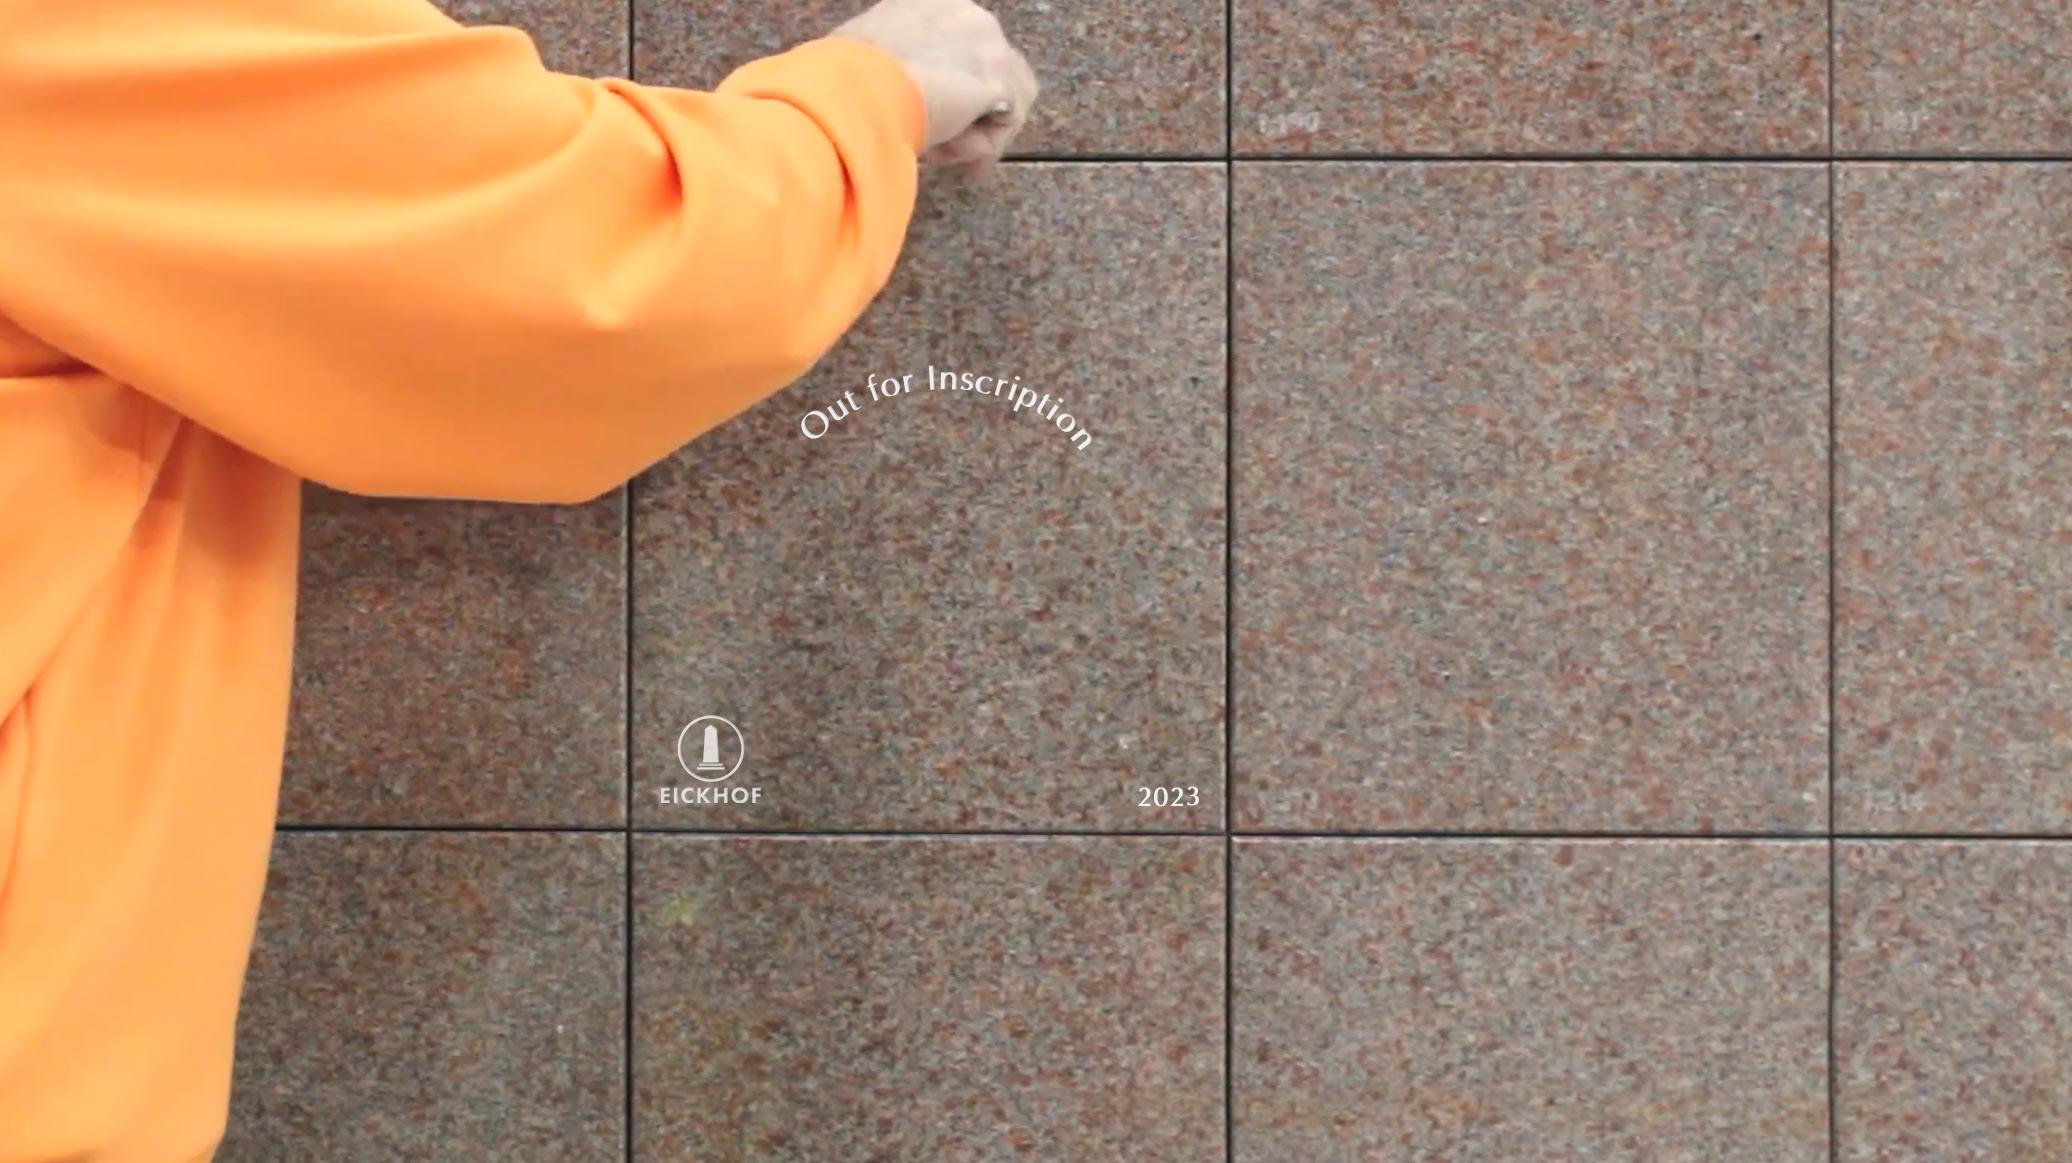
When a niche front goes out for inscription, a temporary front is needed.
Please note, each niche front is set to its specific location. For example, only A6’s niche front will fit into that location. Our temporary niche fronts are designed to fit into any location, with adjustment.
Remove niche front that needs to be inscribed.
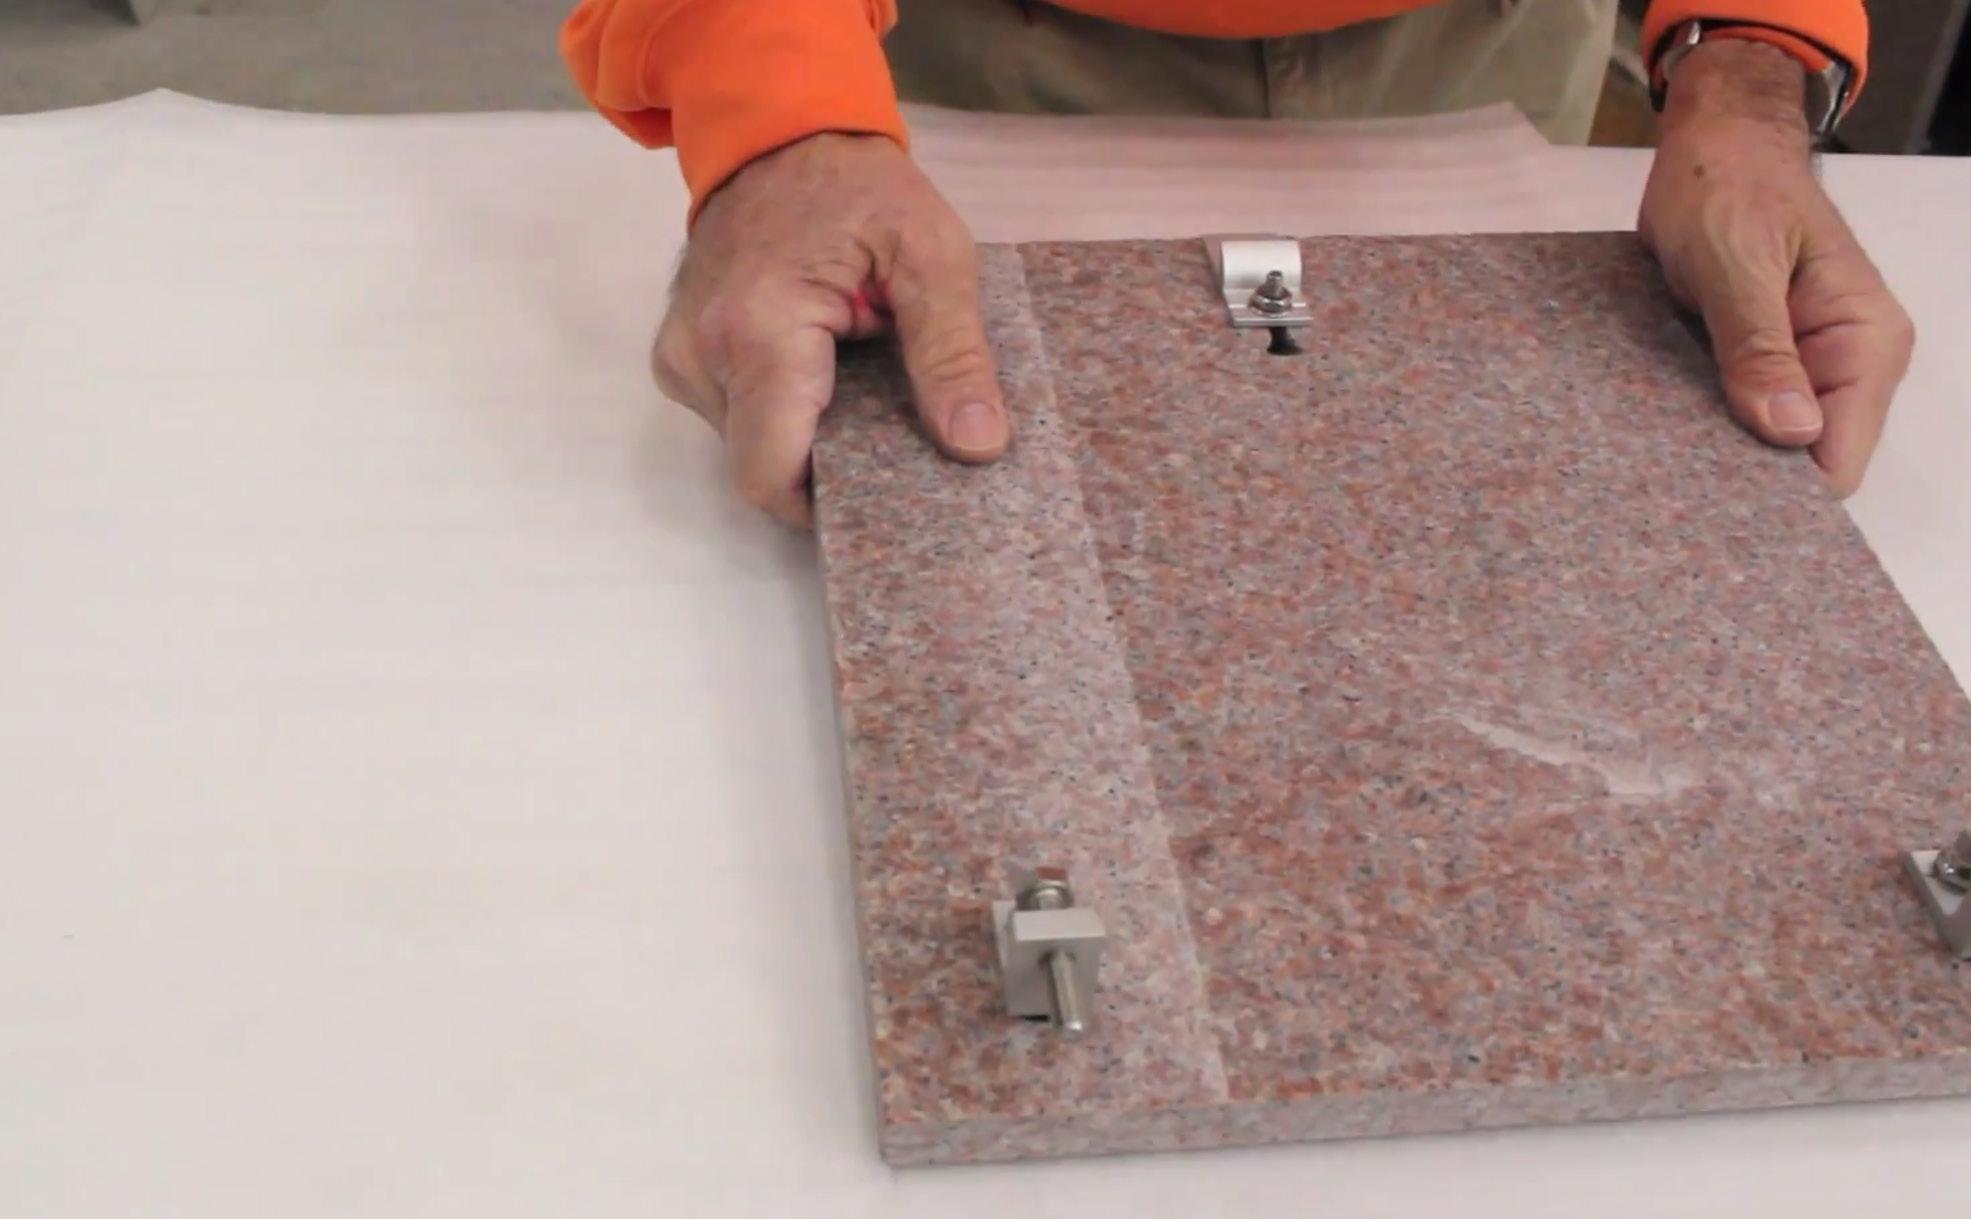
Place that niche front on a clean work surface.
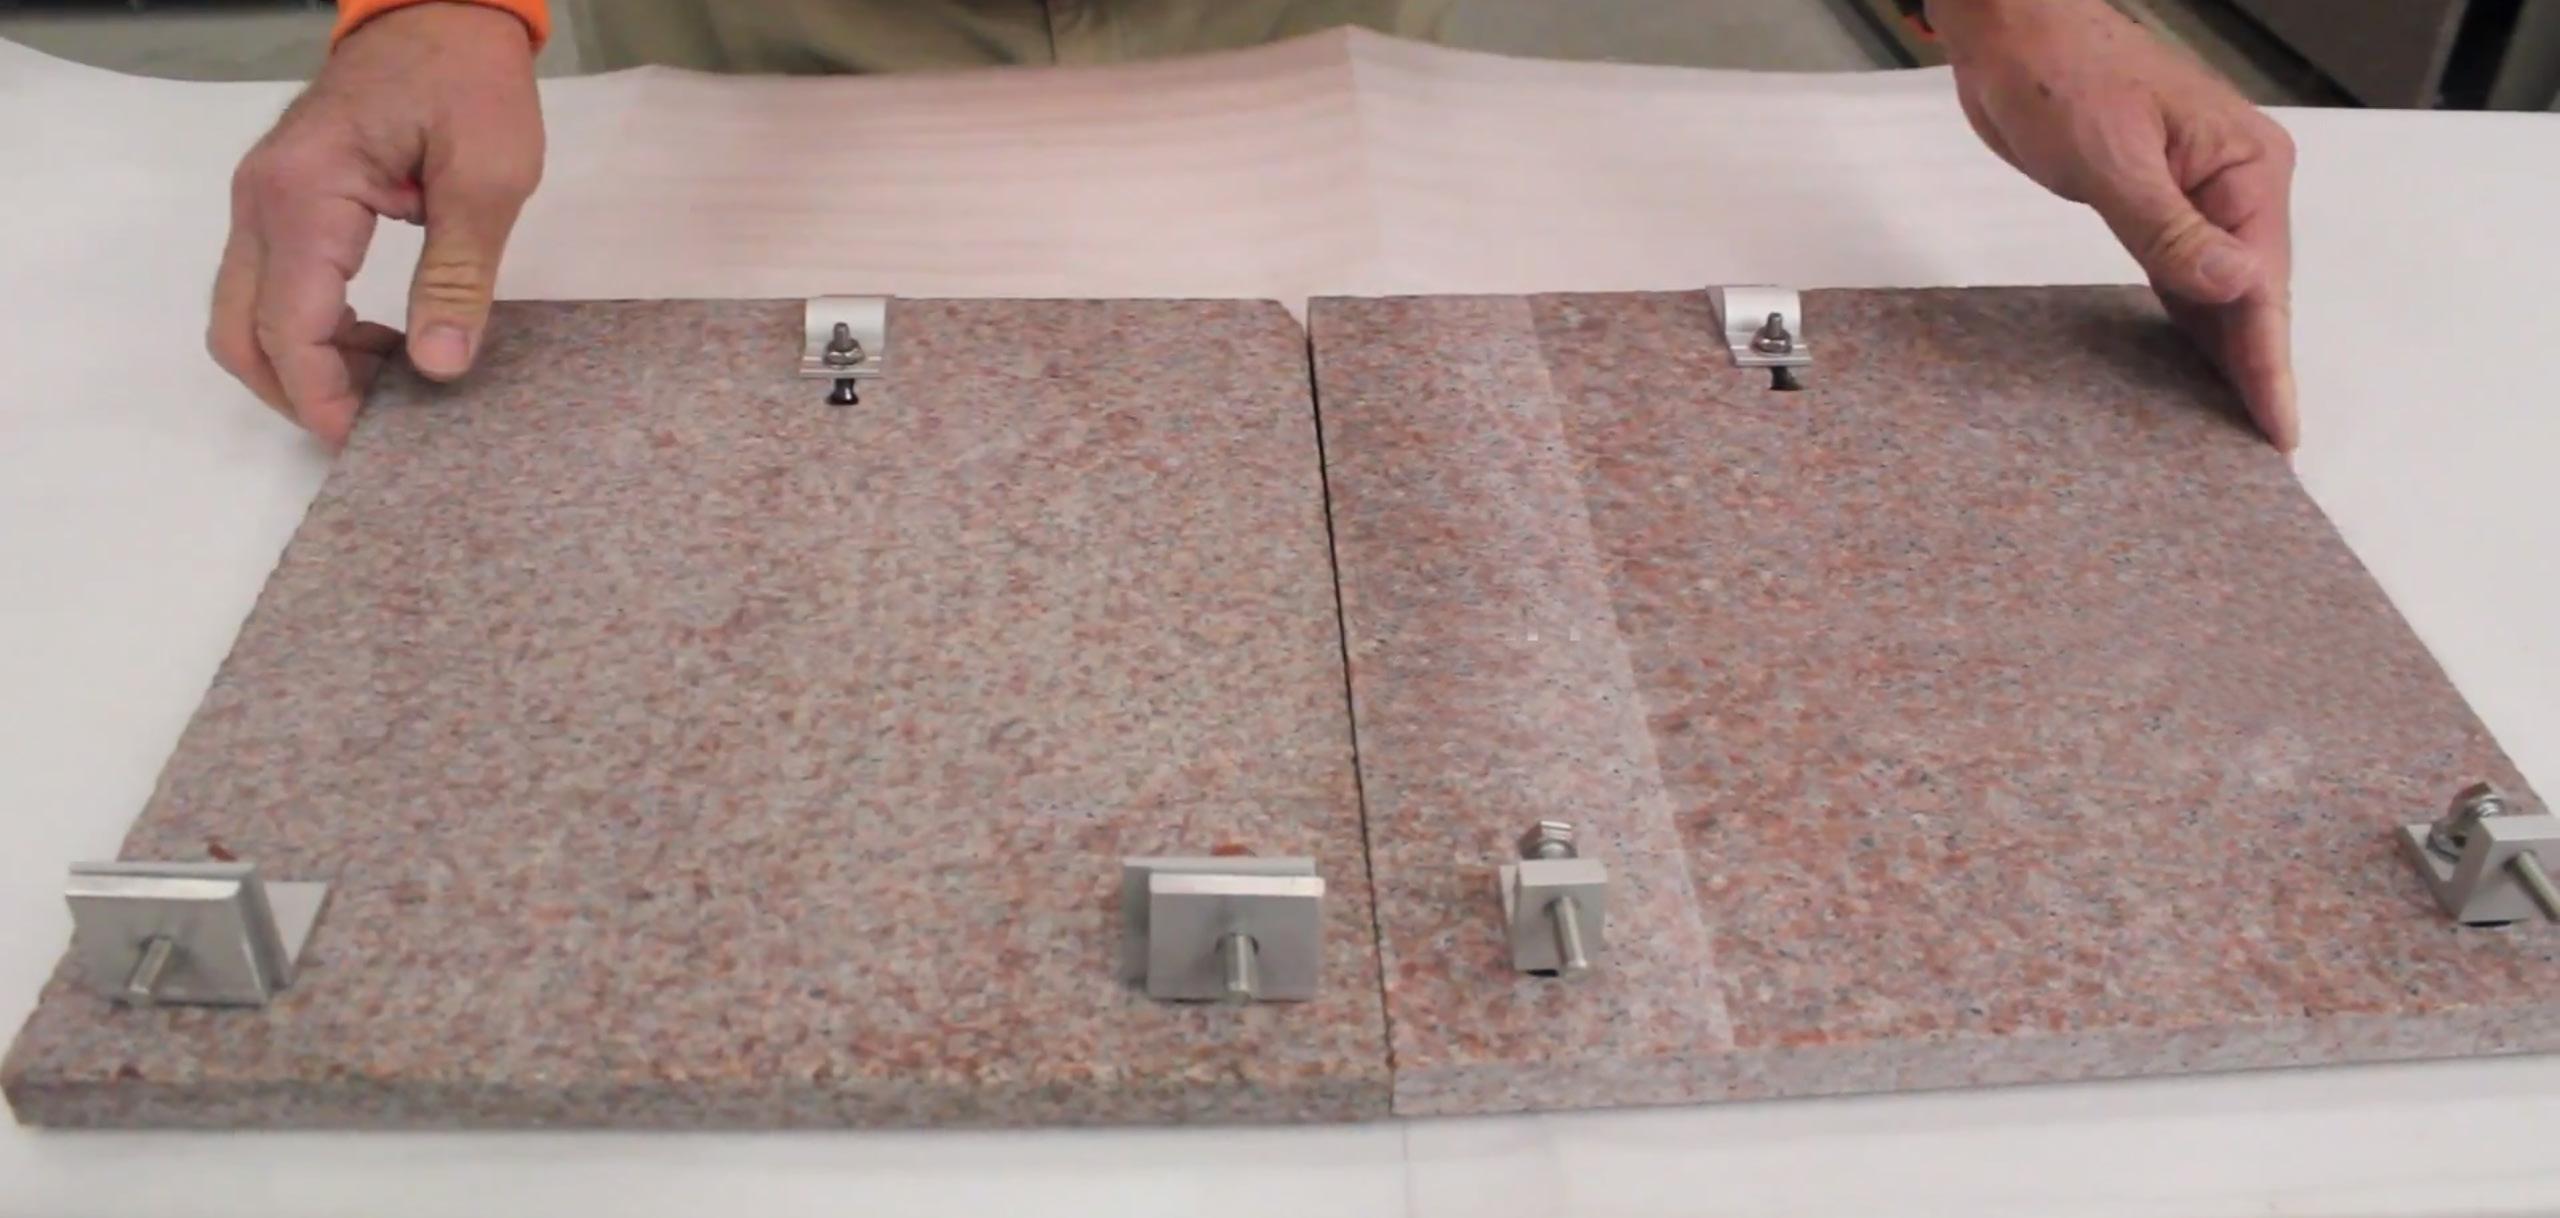
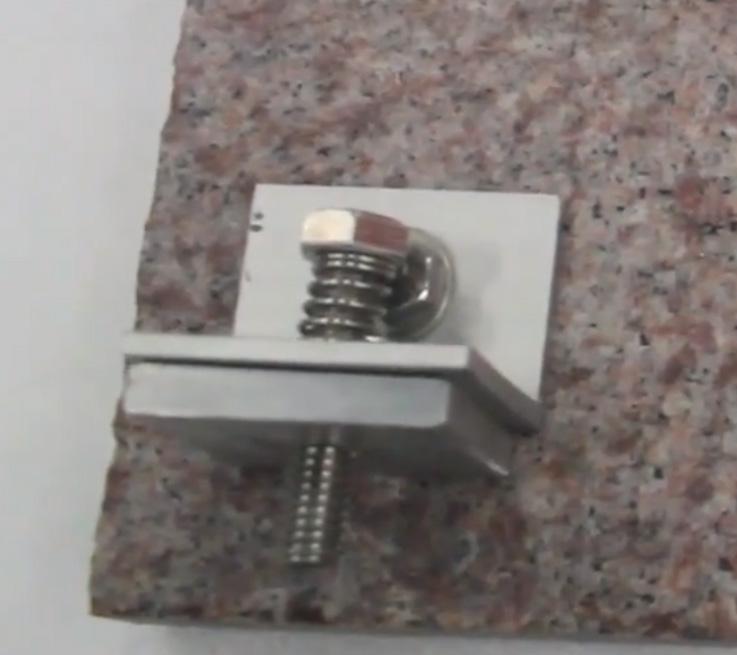
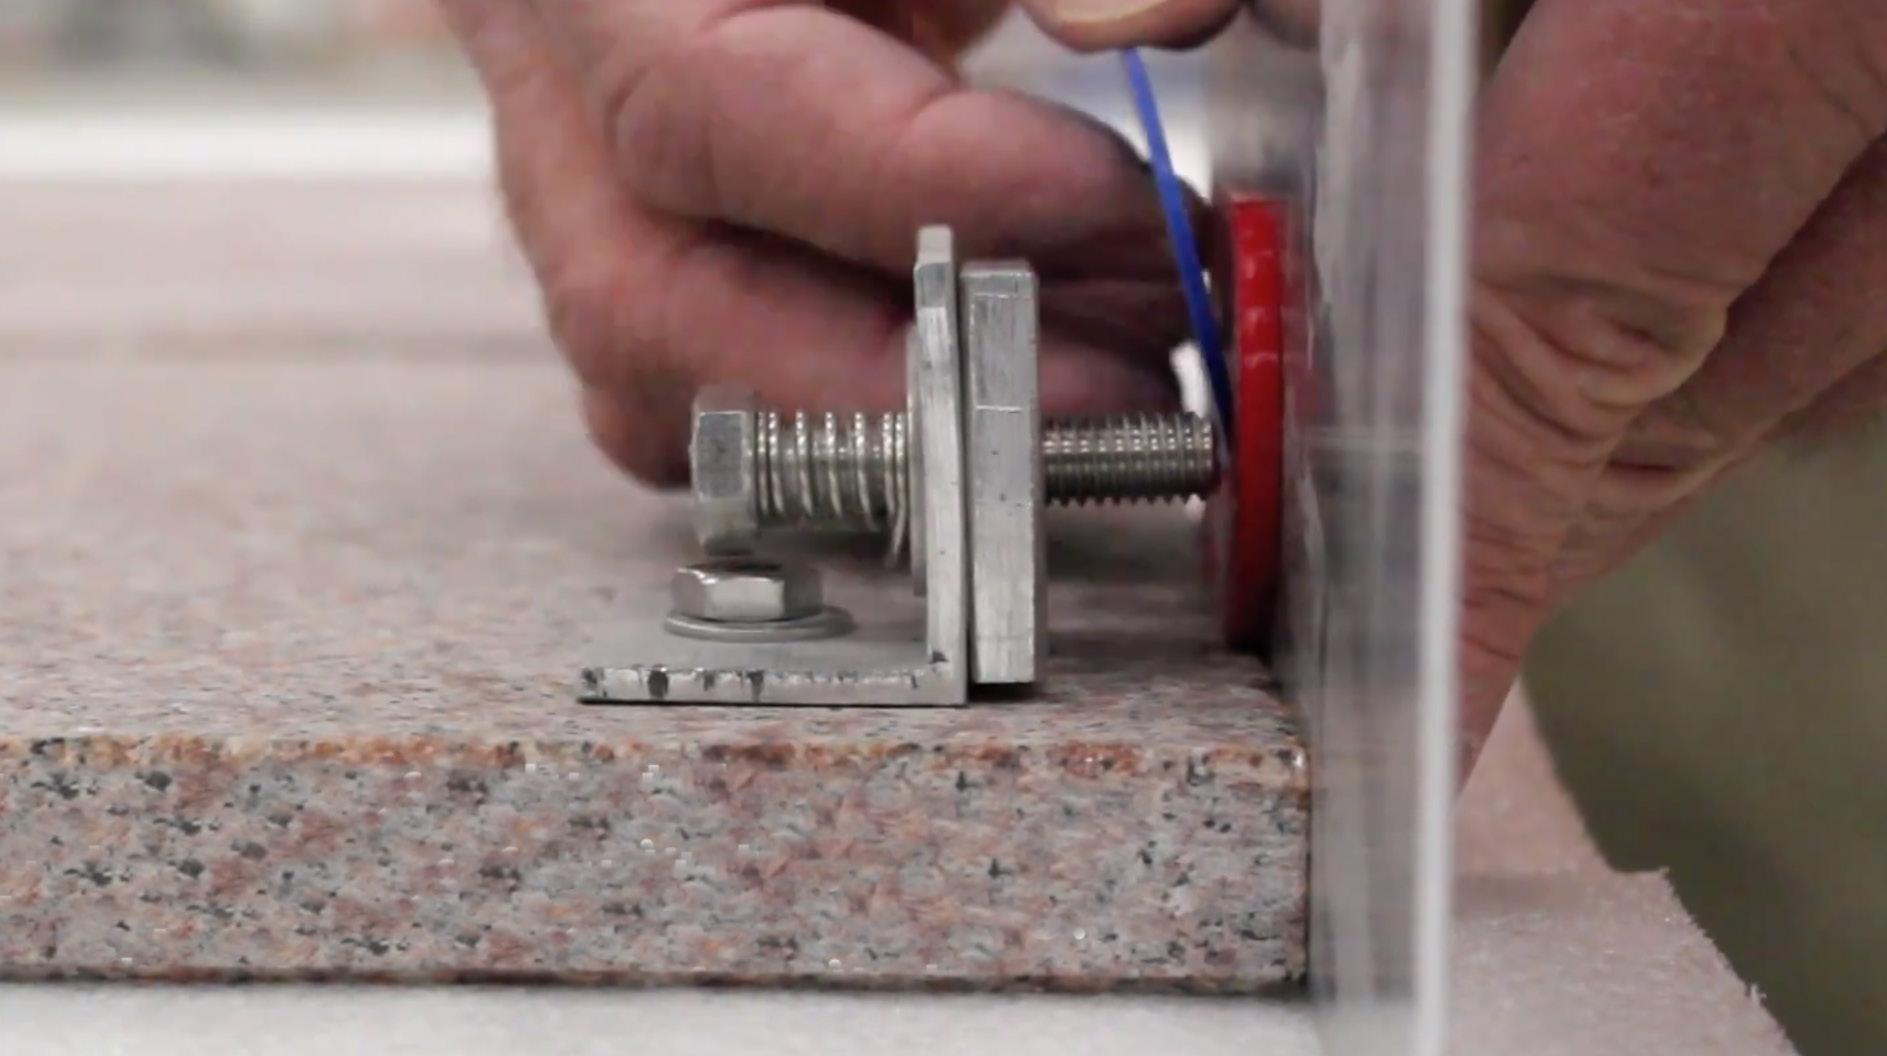
Place the temporary niche front next to that niche front. Notice the hardware difference.
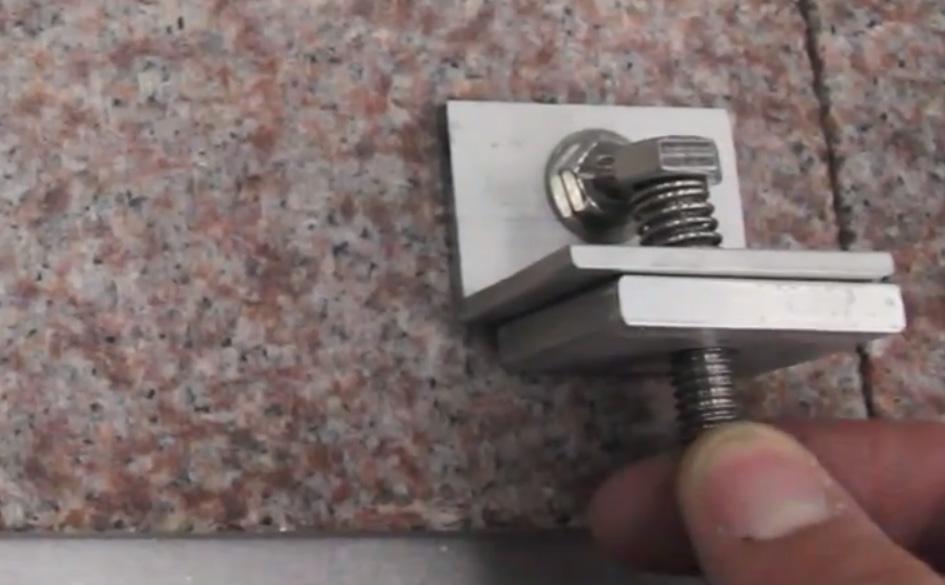
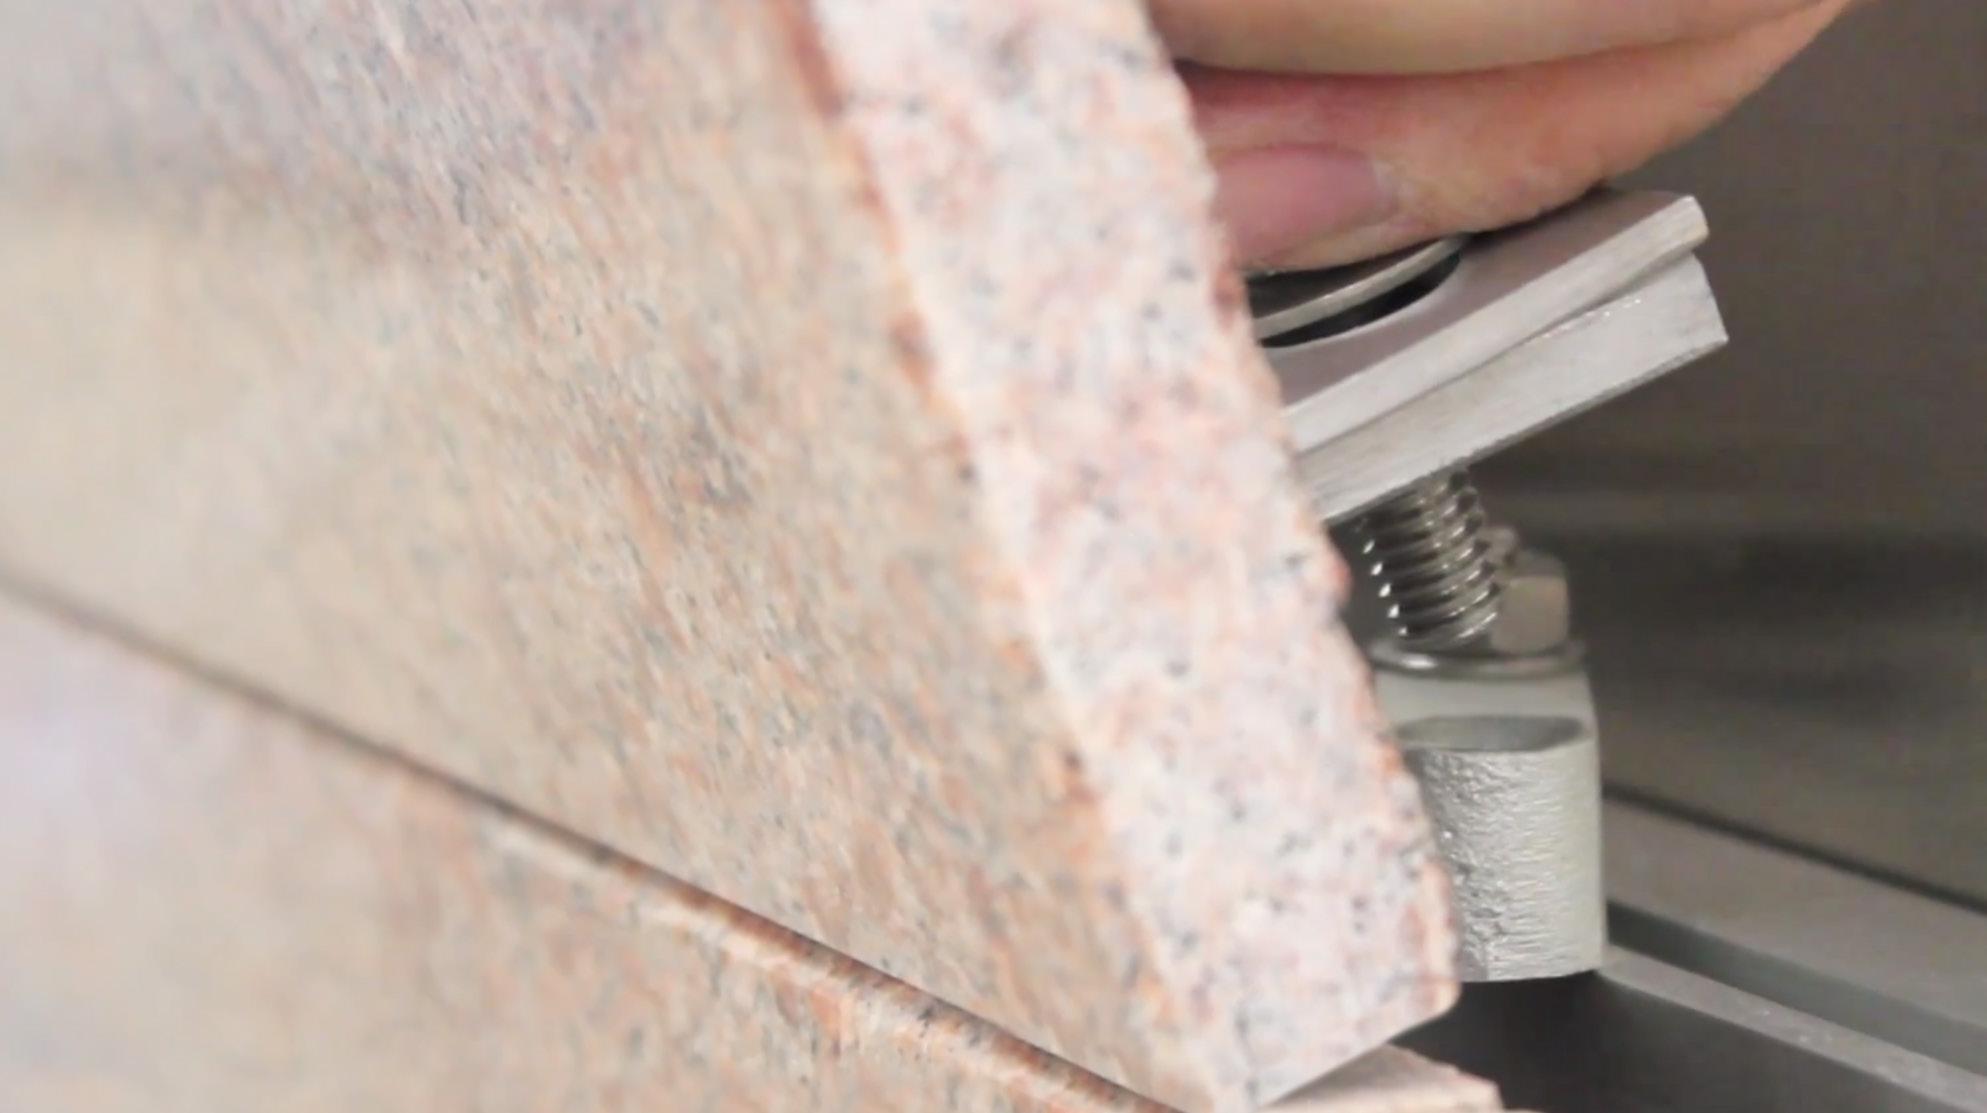
The spring gives the hardware some play.
It allows the hardware to move up and down.
8 MAINTENANCE MANUAL • ©2024 EICKHOF COLUMBARIA INC • 042324
It can also move side to side.
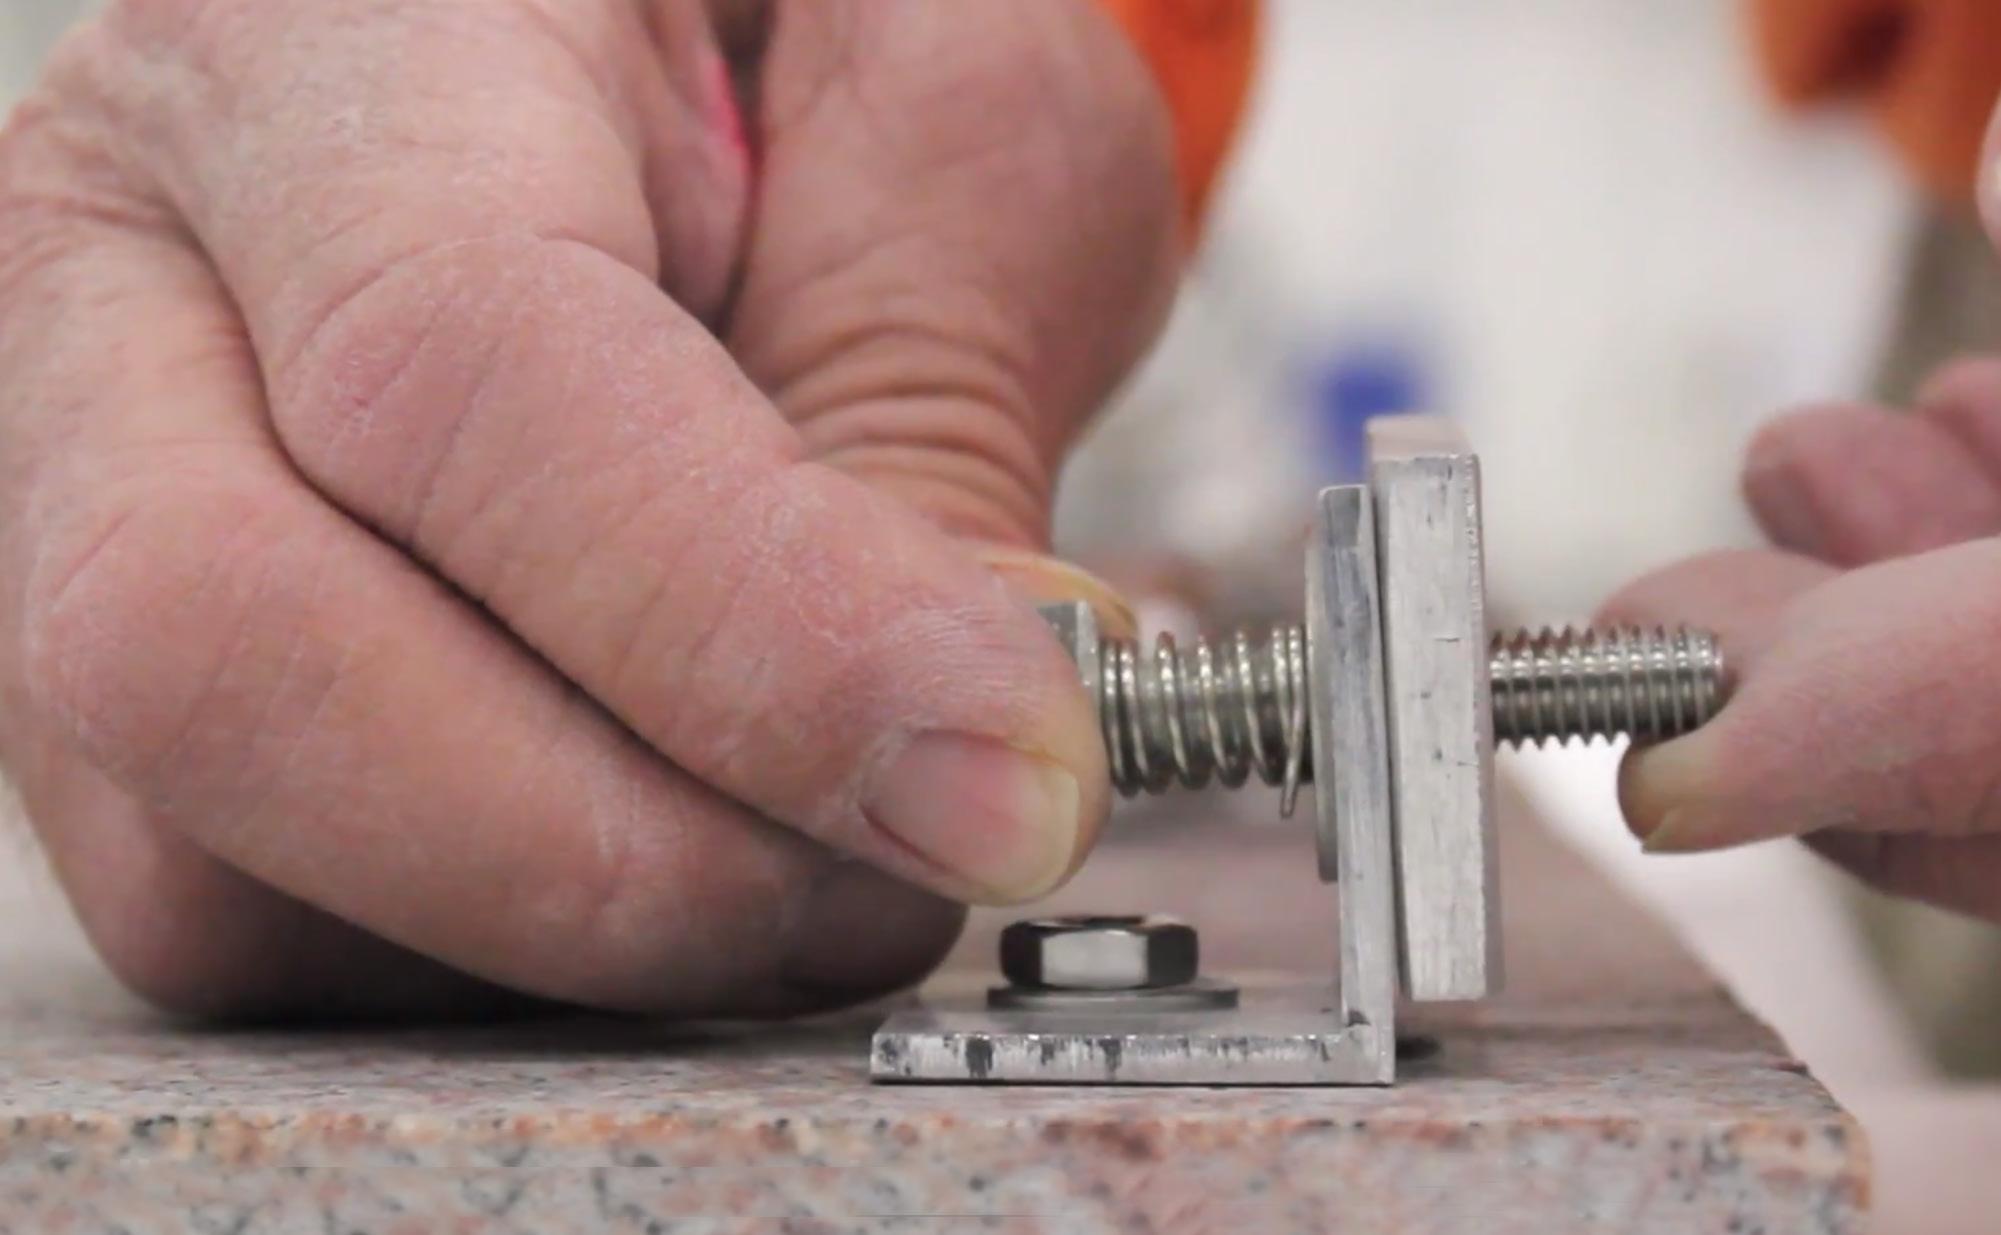
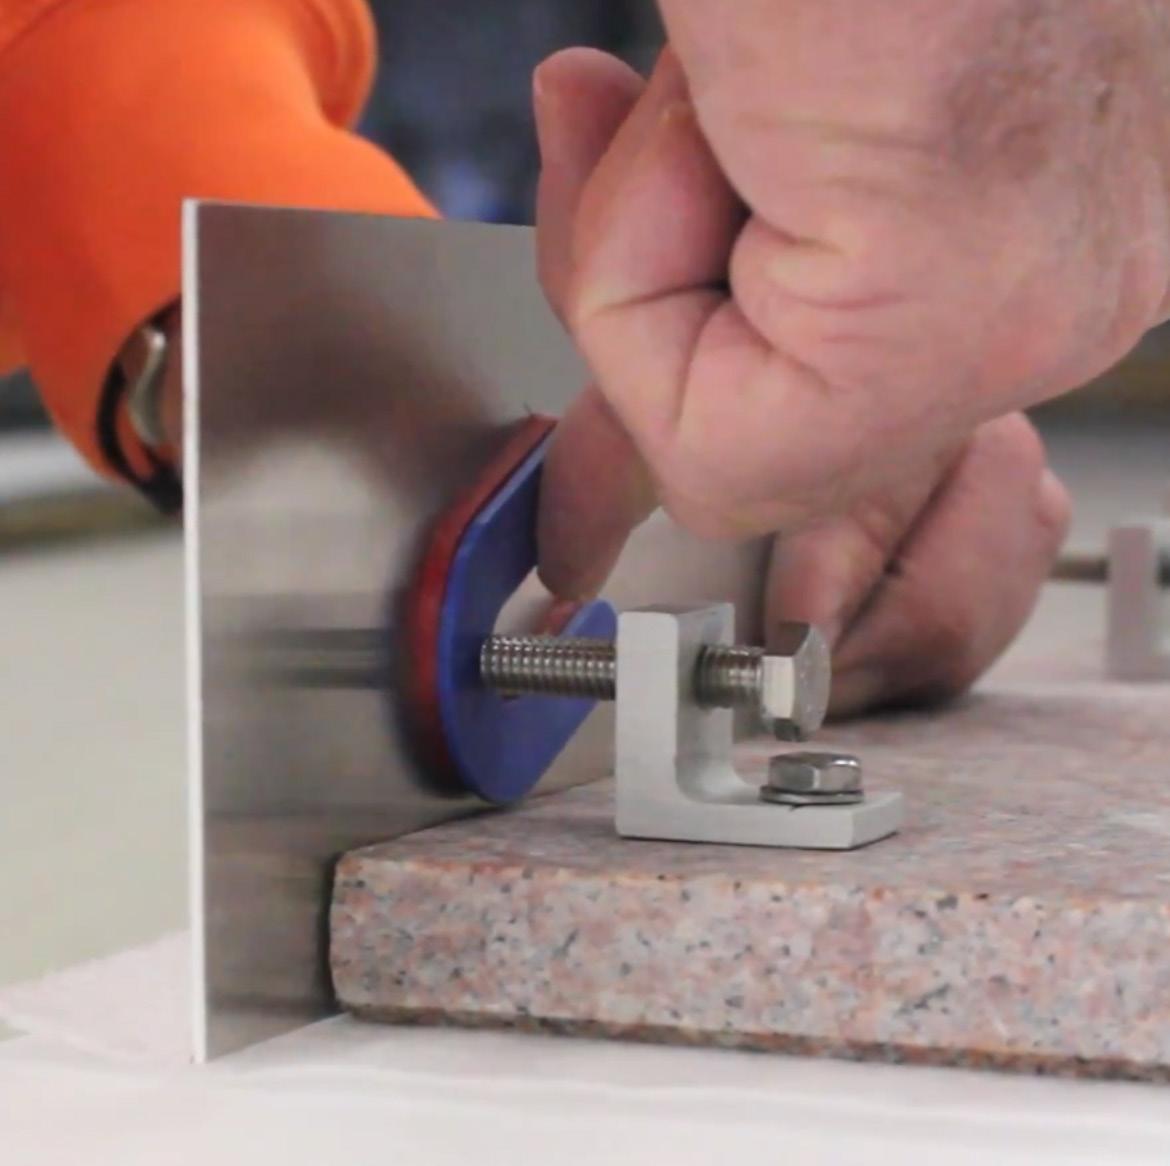
Using those measurements, adjust the corresponding temporary front’s hardware.
Move the bolts horizontally to fit into the swivel sockets.
When the temporary front is adjusted, tighten the lock nut.
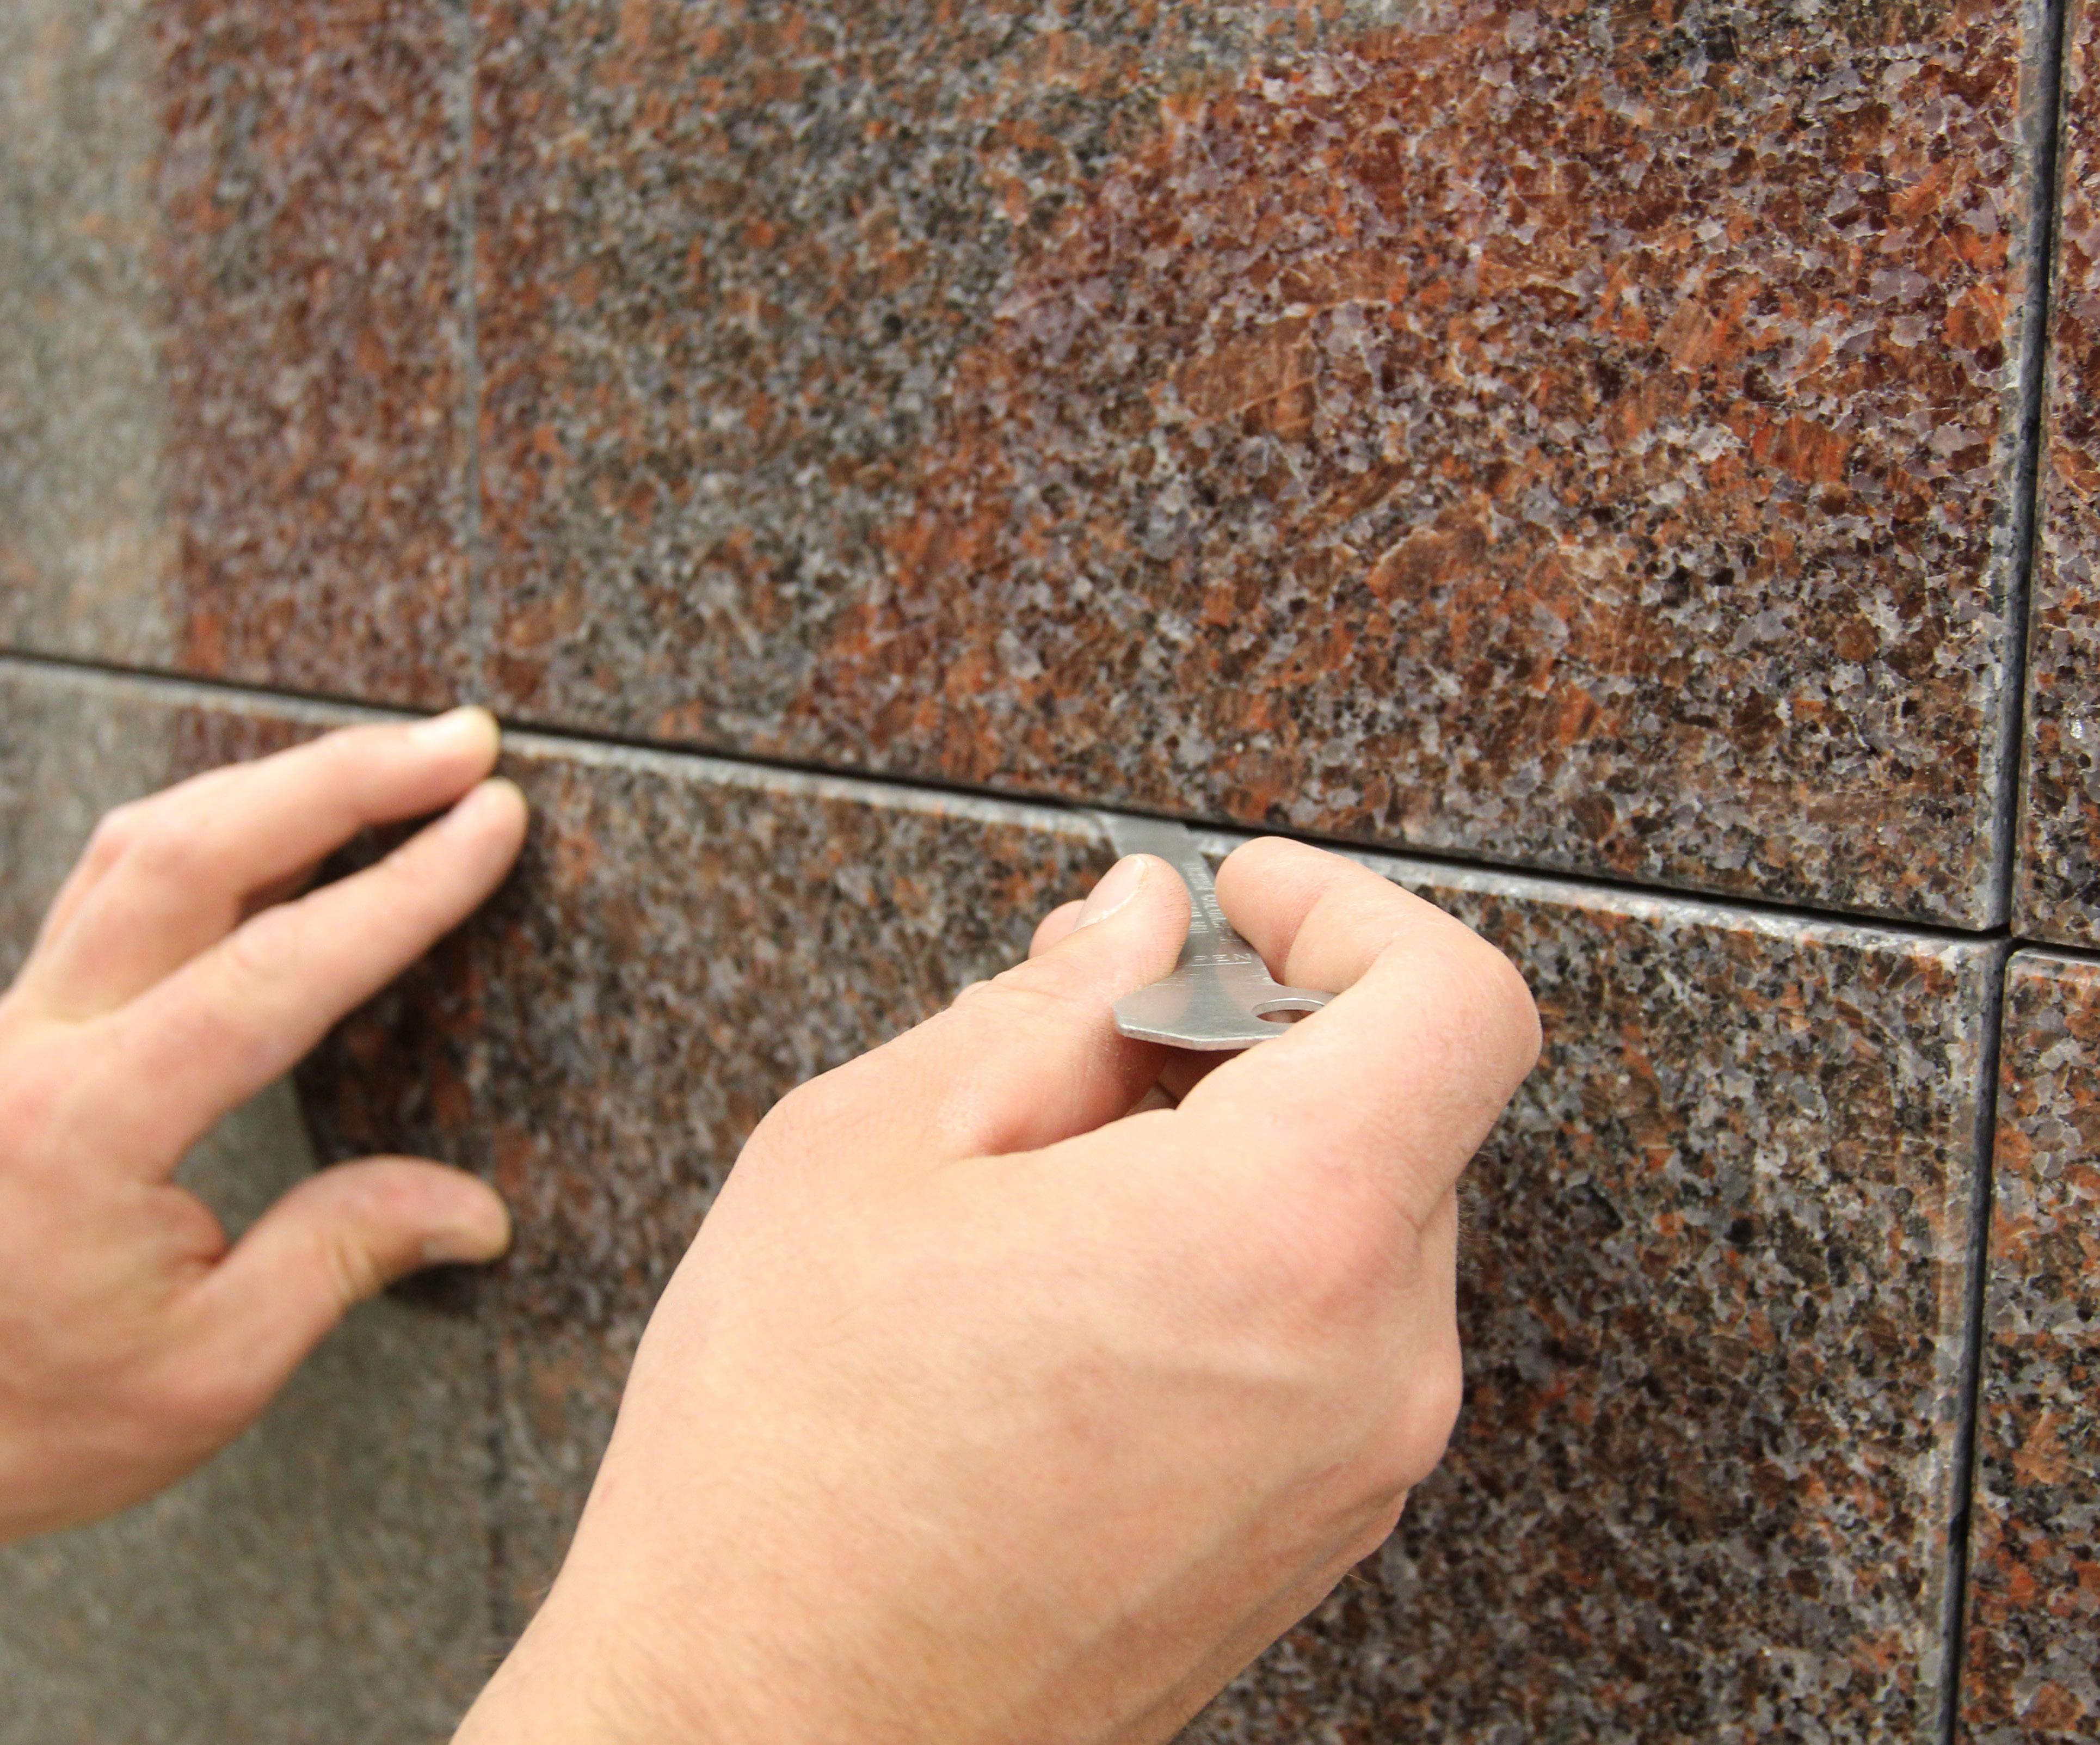
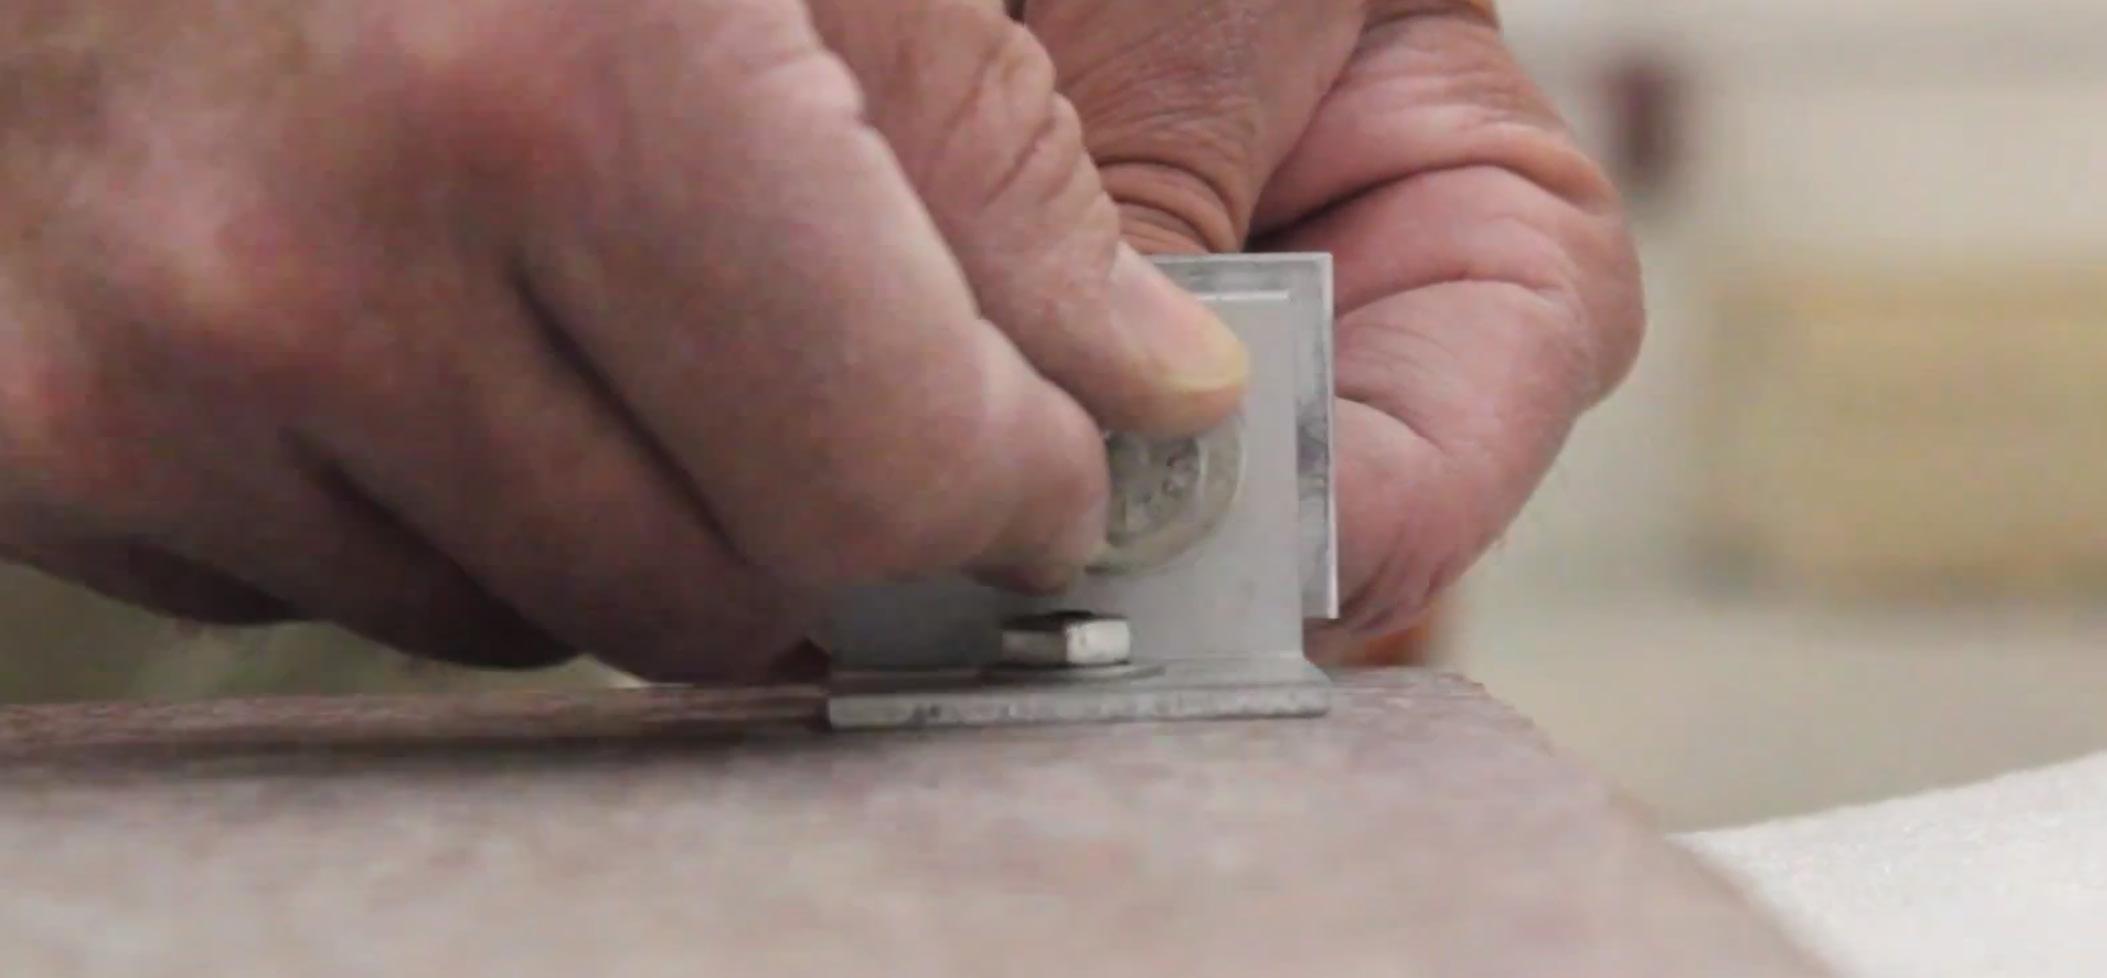
With a straight edge pressed against the bottom of the niche front, measure the distance from the base of the stone to the bottom of both bolts with shims.

After the hardware is adjusted, place the temporary front on the niche’s hardware.
Move the temporary front side to side until vertical joints are even and flush.
you require a replacement
wrench or other components, please contact us. 800-253-0457 info@eickhofcolumbaria.com
If
key
800.253.0457 • WWW.EICKHOFCOLUMBARIA.COM 9
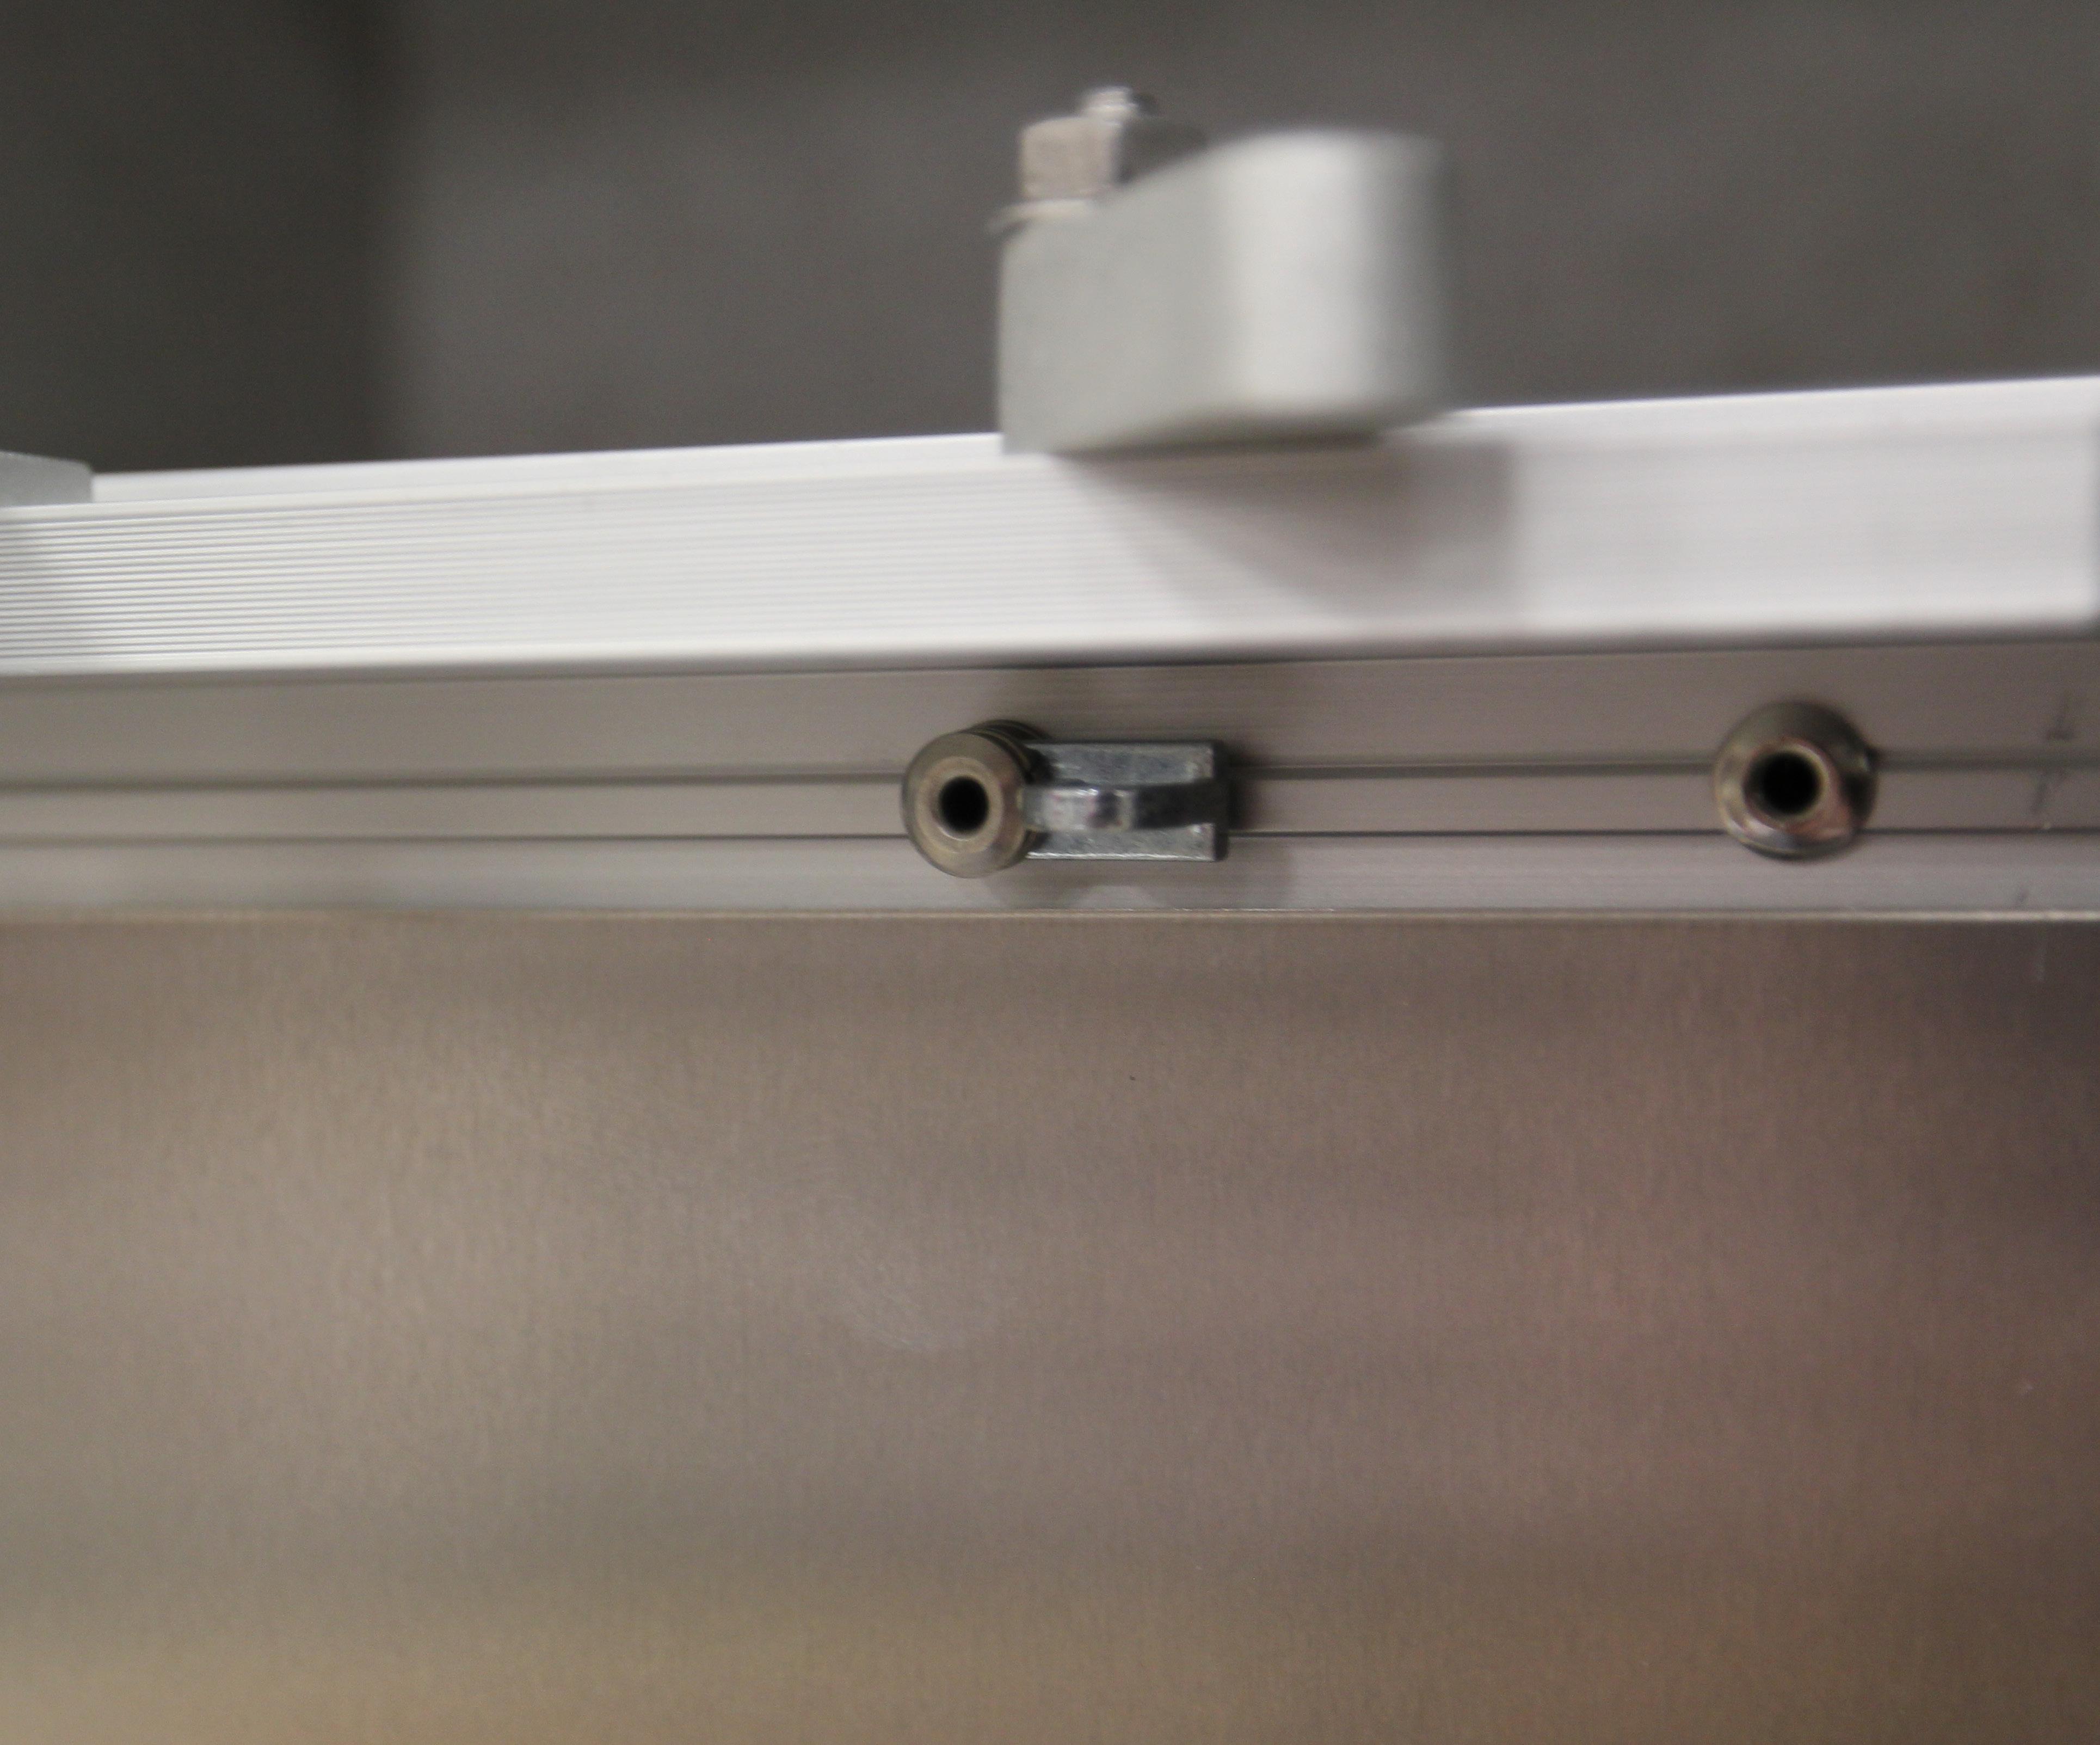
BOLT SWIVEL SOCKET
ADJUSTING A REPLACEMENT NICHE FRONT
We understand that accidents happen and sometimes a niche front must be replaced.
Replacing a niche front requires adjustments to the hardware on the columbarium cabinet and the niche front itself to achieve the ideal fit. The ideal fit creates even joints on all sides of the niche front and a flush, or plumb, niche front in comparison to the other fronts.
PLEASE REFER TO PAGE FOUR FOR HARDWARE DETAILS
Remove the niche front above the one to be replaced (or adjusted) for easier access to the hardware. DO NOT move this front’s hardware or position.
For the Top Row, you will need to remove the niche fronts on the left and/or right, too. You will also need to remove the closure panel where the front will be replaced.
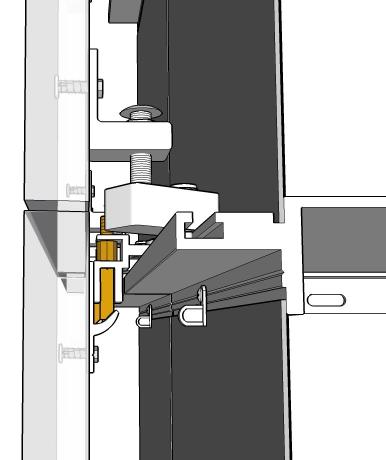
Loosen the Lock Bracket and push it back fully against the shelf extrusion. Lightly tighten in place.
Top row fronts are more challenging to adjust. There are extra steps, listed below the main steps, and the process will be slower. You may want an extra hand for top row niches or niches next to finished surrounds. 1 2 A A B 3 4 5
For the Top Row, DO NOT move at this step. Only hold the front against the lock bracket with hand pressure (also in step 7).
If the front is at the far left or right side of the columbarium, it may be possible to reach behind the front to tighten the far side Swivel Socket, or it may be necessary to take the front down and tighten the Swivel Socket without the front in place.
Loosen both Swivel Sockets and make sure they pivot freely, and their bolts move side-to-side in the track. They will tip down slightly; this will be resolved in later steps.
Thread the Niche Adjuster bolts down so the bottoms are approximately level with bolts on the prior front, or one in the same row.
Place the Niche Adjuster bolts in the Swivel Socket divots.
10 MAINTENANCE MANUAL • ©2024 EICKHOF COLUMBARIA INC • 042324
Lifting gently on the replacement by its top or edge, shift until it is aligned with the front below it (if applicable) both side-to-side and in-and-out. Do not worry about perfectly parallel side joints at this step.
Tip the front back against the lock bracket and lower the lock screw so the front is loose but will not fall. For the Top Row, see step 2A.
Gently tighten the left Swivel Socket in the track with the provided ratchet extension. For niches on the far left or right of the columbarium, see step 2B.
Pivot the replacement front’s right side so it moves in-and-out until the bottom corner is flush with the adjacent fronts.
Lightly tighten the right Swivel Socket. For niches on the far left or right of the columbarium, see step 2B.
Loosen the left Swivel Socket and pivot the front so that side becomes flush to the adjacent fronts. Re-tighten the Swivel Socket.
The front may no longer be centered in the opening. Repeat steps 6 and 8-11 until the front is centered and flush. This may take some time.
Thread each Niche Adjuster bolt so the sides of the front become parallel to adjacent fronts.
For the Top Row, you will need to place the niche fronts(s) to the left and/or right up in their original locations to confirm parallel. Remove again for step 15.
For the Top Row, the replacement front will need to be removed and placed back up multiple times to test these adjustments.
Be sure that the front is still loose against the lock screw. For Top Row, NA.
Adjust the front up-and-down by threading both Niche Adjuster bolts.
Once the joints are even, loosen the bolt holding the lock bracket while holding the front.
Pinch the lock bracket to the front and pull until flush at the top edge with adjacent fronts.
Tighten the lock bracket bolt.
Tighten the lock screw.
6 7 8 9 10 11 12 13 14 15 16 17 18 19 A B 800.253.0457 • WWW.EICKHOFCOLUMBARIA.COM 11
YOUR TOOL KIT INCLUDES
• One 3/8" Drive Ratchet
• One 12" Ratchet Extension
• One 7/16" Deep Well Socket
• One 1/2" Open End Wrench
• One 1/2" Socket
• Three Eickhof Key Wrenches
To view this user manual on your mobile device, scan the QR code to the left with your camera.
For current pricing on Inscriptions, Sheet Bronze Urns, and Soft Urns ® please visit our website or scan the QR code to the left with your camera.
800-253-0457 www.eickhofcolumbaria.com
