DURAEDGE & BEACON ATHLETICS PRESENT

ALL THE INFORMATION YOU NEED TO DESIGN, CONSTRUCT, OR RENOVATE YOUR BALLFIELD
EDITION MOREINFORMATIONTHANEVER!
FOURTH

DURAEDGE & BEACON ATHLETICS PRESENT
ALL THE INFORMATION YOU NEED TO DESIGN, CONSTRUCT, OR RENOVATE YOUR BALLFIELD

Paul Zwaska, DuraEdge. Paul has spent over 40 years in the sports turf industry. He holds a Bachelor’s degree in Soil Science with a specialty in Turf and Grounds Management from the University of Wisconsin. He went to work with the Baltimore Orioles right out of college and worked his way up to Head Groundskeeper. Paul’s Major League Baseball career spanned over 15 years before moving on to Beacon Athletics where he spent 21 years establishing their groundskeeping education programs and working with their product engineers to design new and improved tools for the ballfield industry. While at Beacon, Paul also spent 17 years on the board of a local Little League organization overseeing maintenance, renovations and crew mentoring at their facility. Through that experience he gained considerable knowledge of the inner workings of youth sports associations. During his Beacon tenure, Paul authored and published the initial “Ballfield Dimension Guide” in 2007 and has added more and more content with each periodic update of this unique, all-encompassing “ballfield Bible”. Paul also authored Beacon’s Groundskeeper University online training program in 2012, the only online training venue for grounds crews. Paul’s education in soil science and Major League Baseball experience also brought him together with DuraEdge founder Grant McKnight in 2005 as Grant set out to develop the DuraEdge product line. Together they worked on the development of products and the educational content for DuraEdge. In 2022, Paul moved over to DuraEdge full time.
Benji Brye, Beacon Athletics. Benji has spent the last 23 years at Beacon Athletics anchoring the Project Services Group that designs, supplies and manages projects involving backstop netting, barrier netting, batting cages, batter’s eyes, padding and windscreen systems.
Luke Yoder, DuraEdge. Luke has been a member of the sports turf industry for over two decades. After graduating from Clemson University with a Bachelor of Science in Turf Science, Luke established a career in Minor League and Major League Baseball. He served as head groundskeeper first with the Iowa Cubs, and then with the Pittsburgh Pirates and San Diego Padres. Luke has also consulted on ballfields in Korea, Sweden and the Dominican Republic. Upon leaving Major League Baseball, Luke served as a sports field specialist for Ewing Irrigation before joining DuraEdge in 2018.
Ross Clites, 4Most Sport Group. Ross serves as president of 4Most Sport Group, an outdoor athletic facility design consultant firm. He holds Masters of Architecture and Business Administration from Kent State. He pitched for three seasons while attending Kent State. Ross continued his work in baseball by coaching pitchers at D-III Washington University in St. Louis. He has coached high school baseball, the U17 St. Louis Gamers, and evaluated baseball talent for the USA Baseball U18 National Team Identification Series (NTIS).
Evan Mascitti, Biocore LLC. Evan has spent over 10 years in the sports field industry. He has worked as a field manager at Little League, minor league, and MLB league facilities, most recently with the Pittsburgh Pirates. In 2023 he earned a PhD in soil science from Penn State, with his dissertation titled “Performance of baseball infield soils using novel laboratory tests.” Evan currently works as a senior engineer at Biocore LLC, where he conducts research related to sports field safety.
Welcome to the definitive resource for ballfield design, construction and renovation.
Our expanded fourth edition brings you several noteworthy updates.
the experts at Beacon Athletics and DuraEdge have combined forces to deliver the most complete Ballfield Guide ever.
We know you’ll face a critical aspect in the performance of your infield right from the start. So for the first time, we go in depth with what you need to know to make sure your infield soil is properly installed.
In anticipation of a trickle down effect over the next few years, we’ve also updated our how-to for the installation of base anchors with the MLB and MiLB moving to 18" bases. And in this edition, we walk you through the pros and cons of artificial and natural pitching mounds.
We know this guide will become one of the most valuable tools in your shed. But please don’t hesitate to contact the industry leaders at DuraEdge and Beacon Athletics if you have any questions or reference the online resources at Ballfields.com/guide for an interactive experience with the information in this guide.
To ensure that you are spending your money wisely, consider these ten tips from the professionals at Beacon Athletics, DuraEdge and 4Most Sport Group.
1 Get feedback. Ask facility and field maintenance personnel, schedulers — even fans — to provide suggestions in the design stage.
2 Assess “wants” vs “needs.” There are many things you want to have, but there are critical things you need to function successfully.

3 Find a great knowledge source. Investing in a consultant’s design experience will save you money by the end of the project.
4 Get the infrastructure and structures right. They must be able to support future improvements or expansion to the facility.
5 Hire only highly qualified, experienced sports field builders. Delivering a safe, playable and properly functioning sports field is the most important priority.
6 Prioritize quality and performance. Selections made based only on price will result in under performing products. Cheap and good are not synonymous terms.
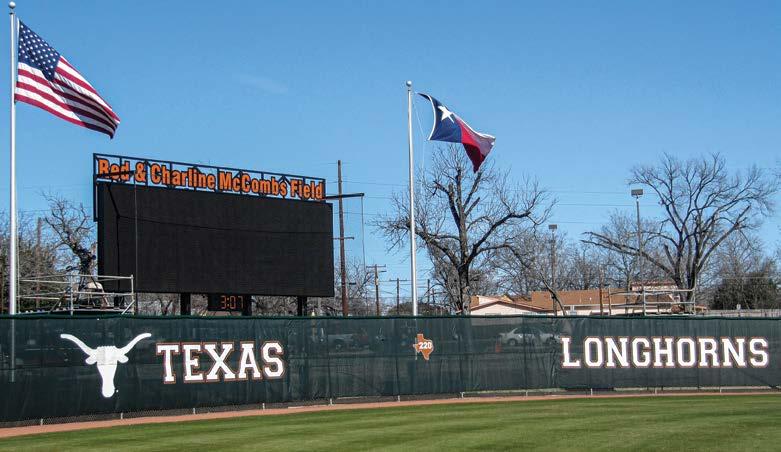
7 Budget wisely. When considering cost, the horizontals inside the fence — field grade, irrigation & drainage, turf, infield soils, etc. — are far more important than the verticals outside the fence — scoreboards, foul poles, bleachers, dugouts, press box, etc. Verticals can always be phased in later.
8 Be realistic when considering everything your fields will be used for. Besides regular season games, remember that practices, scrimmages, clinics, different seasons and age groups will all need your playing surface to perform well. Knowing this will help guide you in the right choice for products that can stand the test of time and traffic.
9 Perform your due diligence as the project advances. A consultant or project manager's advice at key milestones of your project will confirm accuracy and compliance with specs. This is especially important if the next phase involves burying or concealing parts of what has already been built.
10 Get it right the first time. Poor design choice or bad workmanship will result in years of frustration. Securing additional funding to fix your field will be difficult.

concession areas, storage facilities, bleachers, drainage swales, parking — even buffer zones — that may need to be built as well.
For the ballfield portion, these tables give you estimates for the area typically needed for the most common size ballfields. These sizes include adequate space for field amenities, such as bleachers, dugouts, fences, lights and scoreboards.
Remember, your parking lot is a piece of the puzzle, too. It can use up a lot of space in a hurry. Factor in twenty spaces as a starting point. That’s the minimum number of parking spaces for a ballfield. Twenty spaces require approximately 0.3 acre, and you’ll need another 0.015 acre for each additional parking space. ◾
■ BASEBALL FIELD Typical space needs
90' bases (400' fence) 4.5 acres
80' bases (315' fence) 3.0 acres
70' bases (275' fence) 2.0 acres
60' bases (215' fence) 1.5 acres
■ SOFTBALL FIELD Typical space needs
65' bases (275' fence) 2.5 acres
60' bases (200' fence) 1.5 acres
at the southwestern end. The centerline of the field is the imaginary line running from the back point of home plate (the apex) through the middle of 2nd base, and on out to centerfield.
Now that you know which direction your field will face, choose the location of home plate. If you have a backstop installed, make sure you center home plate within it. Check with your ruling jurisdiction for the proper distance between the backstop and home plate (see pages 12-15). The backstop-to-home-plate should be a continuation of the field centerline from home plate to centerfield. Place a pin, stake, or marking flag where you want the point of home plate (apex) to be located.
Attach one end of a 200' or longer measuring tape to the stake at home plate and measure out in the direction that you want to place 2nd base. Reference the Field Dimensions Diagrams on pages 12-15 to find the distance based on your ruling league or jurisdiction. Drive another stake at the proper distance for 2nd base. This point should be the exact center of 2nd base and should fall on the centerline of the field.
To find the location for 1st base, extend the measuring tape from 2nd base in the direction where the approximate location for 1st base will be. Be sure to measure using the required distance according to your league. Then, extend a second measuring tape from your home plate stake toward 1st base. You will place another stake at the point at which the two tapes intersect using equal distances from home-to-1st and 2nd-to-1st. This point will be the back outside corner of 1st base. Repeat this process to find the location of 3rd base.
Now that home plate and the three bases are staked, locate the pitching mound. The center of the mound is located on the centerline of the field. The distance from home plate — as dictated by the league rules — is always measured from the apex of the white portion of home plate to 2nd base. The black outside edging on the plate is not considered part of home plate and should not be included when measuring.
(continued on next page, foul poles)
When you need to make critical measurements that need to be precise and absolute on a ballfield, always use a steel measuring tape versus a fiberglass tape. A fiberglass tape is prone to stretch. The longer the fiberglass tape is, the more it can stretch resulting in inaccurate measurement. Stick with a good quality steel measuring tape for critical ballfield measurements. The Beacon Deluxe Fast Retrieve Measuring Tapes have double nylon coated steel blades so they cannot stretch, giving you the utmost confidence in your measurements. BeaconAthletics.com

6 Locate the foul poles
To determine where the foul poles should be located, use the geometric formula for a right triangle: A2 + B2 = C2
To find the left field foul line, let A equal the distance between 2nd and 3rd base. Let B equal the distance the foul line will extend past 3rd base to the foul pole.
Square each of these two numbers. Then, add them together. Next, take the square root of the sum of the two numbers to calculate the length of C — the hypotenuse (follow the sample below). Once you have values for A, B and C, you can go to work on your field to triangulate the location of your foul poles.
If you have been following Steps 1-5, you have stakes set at the back corner of 3rd base and the exact center of 2nd base. Extend a 300' measuring tape from each stake. Extend the tape from the 3rd base stake to the B distance, and you will extend the tape from 2nd base to the C distance.
Pull the two measuring tapes toward each other until they are perfectly straight and intersect at the correct measurements. Place a stake at this location to mark the left field corner. This is the location of your left field foul pole.
Repeat this process for finding the right field foul pole by having A equal the distance from 1st base to 2nd base, and B equal the distance you want the foul pole to extend past 1st base. ◾
For this example, we are setting up a high school baseball field with 90' base paths. We want our outfield wall to be 330' from home plate.
Knowing the distance from home to 3rd is 90', that leaves 240' from 3rd to the left field foul pole.
Let’s apply this to the field using the geometric formula for a right triangle: A2 + B2 = C2
Let A = 90' Let B = 240'
A2 = 90 x 90 = 8,100'
B2 = 240 x 240 = 57,600'
(A2) 8,100 + (B2) 57,600 = (C2) 65,700'
To find the value of C, calculate the square root of 65,700: C = 256.3'
You’ll want to convert that decimal into inches: 0.3' x 12" = 3.6"
Therefore, the value of C — your distance from 2nd base to the left field foul pole — is 256' 3.6".

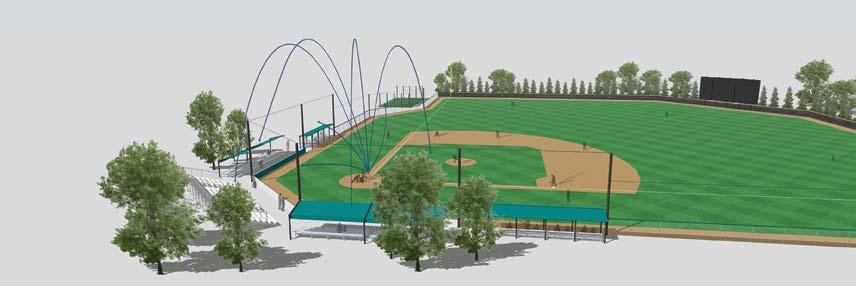
An open park-like setting is very player- and fan-centric. Fields with unique dimensions and character all point in one direction to minimize sun issues.
It’s a balancing act. Designing a multi-field sports facility involves meeting the needs and expectations of various stakeholders — athletes and coaches, tournament operators, facility owners, and families and fans. To serve everyone successfully, your facility design must strike a balance.
The primary focus for athletes and coaches is to ensure a safe and high-performance playing surface. This involves meticulous field orientation, accounting for factors like sun angles. Additionally, they require preparation facilities such as bullpens, batting cages, and practice infields. Strength and conditioning areas are crucial, along with proximity to parking for easy equipment movement.
They need a reliable playing surface, especially during and after inclement weather. Efficient flow of teams through the complex — from warm-up to post-game — is essential. Outdoor team meeting spaces and an operations center for tournament management are also key considerations. It’s also important to provide locations for tournament swag sales, which is vital for generating additional revenue.
Whether artificial or natural, facility owners need a reliable playing field surface to minimize downtime. They often focus on maximizing income during events through extensive concessions operations and on-site attractions that keep teams and fans on-site between games. Properly sized maintenance facilities and hard surfaces for efficient traffic flow and spectator positioning are also significant considerations.
Ensuring the safety of families and fans is paramount for any facility. That includes protection from balls leaving the playing field. Fan comfort is also crucial with considerations for shade, sightlines and restroom accessibility. Providing options for children, such as playgrounds, is essential, as is having a variety of concessions and minimizing the distance from parking lots to fields.
CONTINUED ON NEXT PAGE
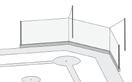
While the wagon-wheel efficiently uses available land, spectators may feel cramped and tight spaces leave little room for character to be designed into the facility.
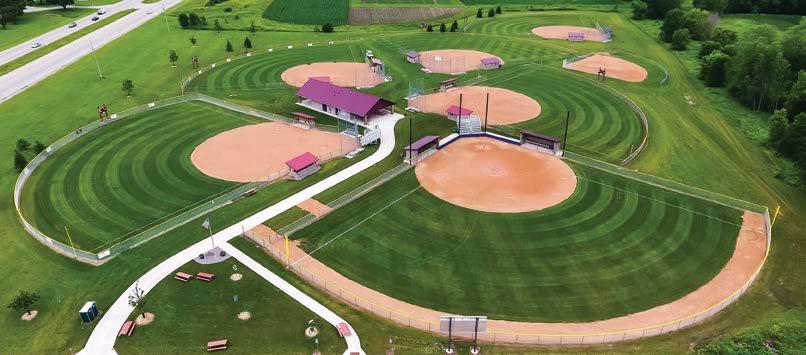
or a park-like setting.
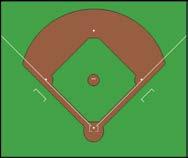
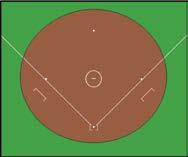
◾ The Wagon-Wheel Pattern: This design (above) is efficient in terms of land use, lighting and netting but can often feel cramped. It maximizes space and efficiency, but may lack character.
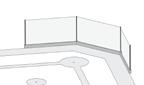
◾ A Park-Like Setting: This design (shown on previous page) provides more breathing room and allows designers to meet the diverse needs of different interest groups. Fields are more spread out, offering a comfortable and safe experience for all.
Your design choice depends on the purpose of the facility. Are you catering to the community or aiming for a profitable sports tourism destination?
Player-centric layouts optimize the playing experience, while spectator-centric layouts prioritize convenience and the fan experience. Owner-centric layouts cater to maximizing the number of games and generating revenue.
◾ Spectator-Centric: Focuses on spectator convenience, safety, and comfort, but it might compromise player experience and field orientation.
◾ Owner-Centric: A typical tournament venue layout, maximizing the number of games and revenue. It may not provide the best game experience for players and relies heavily on team fees.
Designing a multi-field facility is about finding the right balance between the needs of athletes, spectators, and owners. The choice of design approach should align with the intended user base and the facility’s purpose. Ultimately, the success of the sports complex depends on how well it addresses the unique requirements of each stakeholder group while ensuring safety, efficiency and revenue generation. ◾
A Base Distance: From home to 1st or 3rd, this measurement is taken from the back point (apex) of home plate to the farthest corner of each of 1st or 3rd base along the foul line. Between the bases, the measurement is taken from the outfield side of 1st or 3rd base at the corner by the foul line and extends to the center of 2nd base.
B 1st Base Runner’s Lane Distance: Always 3' to the foul side of the 1st base foul line. It starts exactly halfway down the 1st base line and ends at the back edge of 1st base. It’s marked on the second half of the 1st base line.
C Infield Hypotenuse: Measurement used to ensure the infield is square. May be measured from the back point (apex) of home plate to the center of 2nd base. Or, from the back corner of 1st base to the back corner of 3rd.
D Infield Arc Radius: From the center of the front edge of the pitching rubber extending toward the outfield grass to the distance recommended.
E Coach’s Box from Foul Line: The distance from the foul edge of the foul line to the line in the coach’s box running parallel to the foul line.
F Coach’s Box Length: The long side of the coach’s box.
G Coach’s Box Width: The short side of the coach’s box.
H Batter’s Box Length: From front to back of the batter’s box.
I Batter’s Box Width: The distance from the inside edge of the batter’s box to the outside edge of the batter’s box.
J Distance to Backstop: The back point of home plate (apex) to any portion of the backstop. Distance listed in the table is the minimum for that league. Distance can be greater than the minimum, but it cannot be any less.
K Minimum Fence Distance: The minimum distance from the apex of home plate, down the right and left field foul lines to the outfield fence.
L Minimum Centerfield Fence Distance: The minimum distance from the apex of home plate to the centerfield fence (following field centerline).
M Mound Radius: [ BASEBALL ] From the center of the mound outward.
M Mound Radius: [ SOFTBALL ] From the front center of the pitching rubber outward. The circle that is scribed from this radius is what is chalked to define the “Softball Pitcher’s Circle”.
N Pitching Rubber Distance: From the apex of home plate along the centerline to the front center of the pitching rubber.
O Center of Mound: Measured along the imaginary centerline running from the apex of home plate to the center of 2nd base. Measurement runs from the apex of home plate along the centerline to the distance recommended.
P Mound Height: Height of the mound at the top of the pitching rubber as prescribed by the governing body of the league. (Example: Height of mound should be X" higher than the surface of home plate.)
Q Home Plate Radius: From the back point (apex) of home plate outwards.
R Base Cutout Radius: At 1st and 3rd base, the measurement is taken from the back corner of the base inward to the infield grass. At 2nd base the measurement begins at the center of the base and extends inward to the infield grass.
S 1st and 3rd Baseline Width: Width of the skinned baseline. Typically measured from the foul edge of the foul line. Exact position of the foul line within the baseline is at the groundskeepers discretion. Since the 1980s, the foul line has been kept within 1' of the infield grass. Most base runners run on the foul side of the foul lines, resulting in very little wear on the fair side of the foul lines. Putting majority of the skinned baseline on the foul side of the line puts soil where most of the traffic occurs.
T Infield Grass Edge: Distance from string lines that are run from back of 1st or 3rd to the center of 2nd base, then out to the infield grass edge.
Reference the “Baseball Measurements Table” on the following page for your field requirements.
Red = absolute measurements
Blue = variable / discretionary measurements
■ PRO TIP: Record customizations to your field made to blue measurements in the space below.
NOTE: MLB and MiLB bases are 18". Other governing bodies may increase base size from 15" as well, so check your league rules for current base sizes.
Reference the “Softball Measurements Table” on the following page for your field requirements.
Red = absolute measurements
Blue = variable / discretionary measurements
■ PRO TIP: Record customizations to your field made to blue measurements in the space below.
Field Name:
Red = absolute measurements
Blue = variable / discretionary measurements
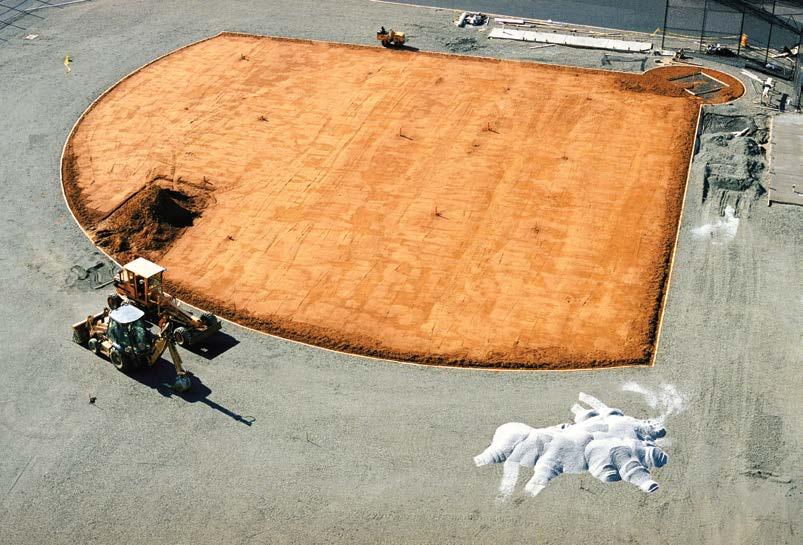
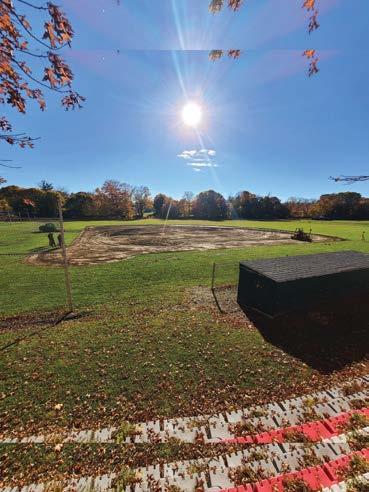
No other portion of a ballfield construction or renovation project has more impact on the success of your facility than the finish grade and the resulting surface drainage pattern. Water percolates very slowly through native soil fields and on infield skin areas. Positive surface drainage is the fastest way to drain these areas. Only a sand-based field can meet or exceed the speed of water moving off a field by surface drainage. When properly designed and graded, positive surface drainage can speed availability of fields after a rain and make field prep a breeze.
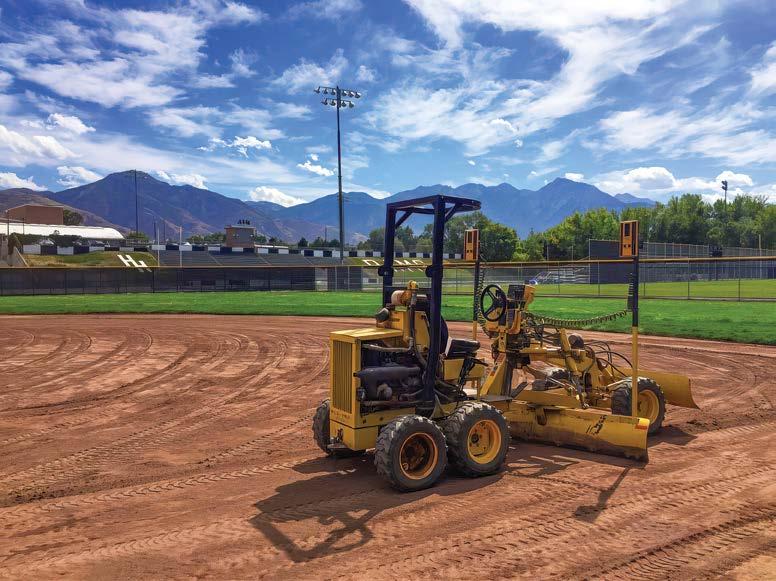
Always employ an experienced and qualified sports field contractor who will use the correct equipment to get your expected results. Make sure they:
◾ have a portfolio of installations/renovations from the last 2-3 years of natural baseball-softball surfaces, and a list of references.
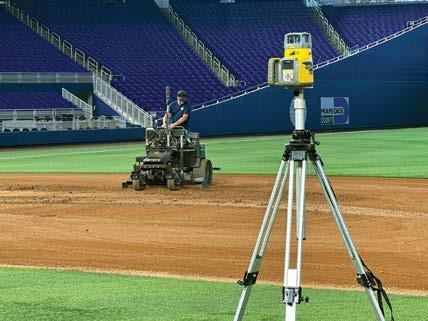
◾ work with conical and/or single/dual slope laser-guided grading equipment to achieve the appropriate grade.
◾ ensure proper and full incorporation of any material added.
◾ add or remove material as needed in order to meet specified grade.
◾ achieve finish grade tolerances of + or – ¼" or better, and allow confirmation before moving to next step.
Grading new construction ballfields are usually easier because you are starting with a clean slate over the entire field. When renovating an existing field, the challenge greatly increases. You will likely have to merge with existing grades at some point. Never grade a ballfield so that it is perfectly flat. All fields — even the best draining sand-based fields — should have some slope to move water across the surface, especially after heavy rains. The following recommendations are applicable for both fully skinned or grassed infields. Recommended slope will depend on whether a field is native soil or sand based, the level of play, and the drainage pattern chosen.
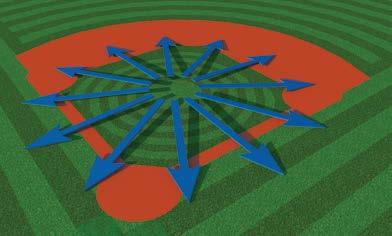
CONICAL DESIGN . This is the “Cadillac” of surface grading/drainage for infields. With this design, water moves off the infield in the shortest travel distance possible. The conical design is performed using a cone laser set up on the mound and projecting a cone shape over the field to guide the grading.
0.5% Sand-based fields — professional level and high-end college ballfields
0.5% - 1.0% Native soil fields — college, high school and recreational ballfields
With the conical design, once water has entered the outfield, it must travel the entire depth to clear the field. To expedite this movement and allow more water to move, the slope is increased to 0.5% steeper than the slope of the infield for native soil root zones. Sand-based fields may instead decrease outfield slope to 0.25%.

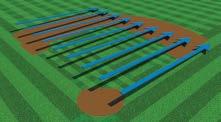
SHEET FLOW DESIGN
.
Many fields, especially in the park & rec sector, are built on gently sloping land. It is very expensive to level up these fields so a conical drainage pattern can be used. Fields like this typically slope from one side of the field to the other. In this situation, a sheet flow drainage pattern would facilitate a consistent slope across the field in order to efficiently move the water along. The volume of water requiring drainage across the entire field surface makes this the least efficient method of surface draining. Because of the large volume of water moved, a steeper slope is a must to keep water moving. A system of French Drains installed into the turf will facilitate the draining. Install them perpendicular to the flow in order to catch and remove water as it moves across the field. This will allow your builder to reduce the amount of slope needed. When sheet flow drainage is needed with your field design, be sure the field is aligned so that water does not run towards home plate. The field should be turned so that the home plate area is located on the higher side. Ideally, water flow would run outward toward the outfield. For sheet flow, the infield portion may be set at a shallower slope than the rest of the field.
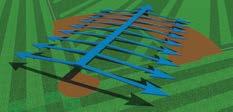
SPLIT SHEET FLOW DESIGN
. This is a more effective surface grade design than sheet flow. It involves running a crowned slope down the centerline of the field (home plate to 2nd to centerfield). The home plate area is the highest point with a slope toward 2nd base. In some cases, this centerline crown can be a flat crown from home plate to center. In addition to the centerline, the field is also sloped from out toward the right field and left field foul areas. This home-to-center and left-to-right pattern is why it’s called “split sheet flow”. This is commonly used on football and soccer fields and was frequently used in professional baseball in the days prior to sand-based fields, when multi-sport stadiums were common in the last century. This is still a reliable way to surface drain ballfields and, unlike sheet flow, does not make the water travel the entire length of the ballfield. It is graded using a dual slope laser so the operator can set an X and Y axis to create two slopes perpendicular to each other. ◾
SPLIT SHEET SLOPE RECOMMENDATIONS
0.5% — Sand based fields, all levels
1% — Native soil fields, all levels
SHEET FLOW SLOPE RECOMMENDATIONS
1% to 2% — Only native soil root zone ballfields at the recreational and sometimes high school level
Thinking about installing subsurface drainage under an infield skin? Forget it! Due to the soil makeup and compaction of an infield skin, water moves very slowly through the infield skin profile. In most cases, if not all, water will rarely ever reach the drain tile. This is why proper finish grading that promotes positive surface drainage is so important. Instead, invest in excellent finish grading with quality engineered infield soils that will give you the performance needed to get through those rainy game days. It’ll be the best decision you ever made. DuraEdge.com
Today’s fans face many distractions at the ballpark. Cell phones, ball park entertainment, and casual conversations bring increased risk for fan injury from line drive foul balls or errant balls from adjacent fields. Balancing fan safety with the ultimate ballpark experience boils down to a few key factors. Consider these important topics to help you effectively address fan and player safety.
Your needs will vary depending upon the style of facility — single field, multi-field, mixed sport complex, or wagon wheel / cloverleaf design.
Consider these areas when planning your strategy.
◾ Fan seating areas and pedestrian flow
◾ Handicapped seating, playgrounds
◾ Closely adjacent parking or buildings
◾ Concession areas
◾ Bullpens, batting cages, warmup areas
◾ Adjacent fields
While complete protection may be your goal at the outset, the reality is your budget will play a huge role in what is feasible. Determine if your facility is most in need of directional protection from line drives, or overhead protection from foul pop-ups.
Outline and prioritize your key areas to protect. Consider a multi-year approach to accomplish your goals and remain within budget. In any case, an excellent solution can still be found with a strategic combination of netting, deciduous trees and risk awareness signs.
Examine the layout of your entire facility. Look at it from the spectator’s point of view. Now, think about the flight of the ball off the bat. Considering these elements together is what makes for a smart design. From there, your options include:
◾ Placement of physical barriers (netting systems, shade structures)
◾ Landscaping (trees, hillsides)
◾ Risk awareness signs
For most types of protective netting users, nylon will be the right choice because of its overall value (low cost + good performance).
For high-end users that require a more immersive spectator experience, Dyneema® may be the better choice. When it comes to construction, knotted or knotless are both viable options and it often boils down to what the intended application will be. As with any netting project however, it is always best to consult a netting expert to help assess all aspects of the project to determine your best option.
Nylon is the tried-and-true standard in the sports netting industry and has been for many years. It is easy to produce which makes it less expensive and it can generally be sourced from almost any supplier with quick turnaround. It is also durable and provides a very good overall value over the life of a net. Its downside is it is bulkier and heavier — particularly when wet. For nylon netting to be strong enough to adequately protect spectators, twine diameters need to be larger which makes visibility through the net a bit more difficult. Nylon netting also absorbs water which adds weight and potentially more sag and slack, as well as stress on the netting support structure.
Dyneema® is a brand name for a type of netting fiber referred to as Ultra High Molecular Weight Polyethylene (UHMWPE). Other brand names that utilize UHMWPE fibers include Spectra® and UltraCross®. Due to its chemical composition, this type of fiber boasts a very high strength-to-weight ratio — even better than steel. For sports applications, this means smaller twine diameters for better visibility through the net without sacrificing break strength. Thinner twine also means lower wind loading and stress on support structures which is often a high percentage of the cost for most netting installations. UHMWPE fibers also exhibit very little stretch, do not absorb water, and resist UV rays quite well. Expect to spend 3-5 times more, however, over nylon netting materials.
Twisted knotted netting is twisted twine that is then knotted together for the desired mesh size and tends to have relatively low stretch. It is a very good choice in situations where the shape and stability is important. An obvious example of this is in baseball and softball backstops where spectators may be sitting only a few feet behind the net. Twisted knotted netting material helps avoid excessive slack due to its low stretch over a period of time and is a good candidate for providing protection to fans and property.
Braided knotless netting is braided twine that is then woven together to form the desired mesh size and can exhibit a significantly higher amount of what’s known as “construction stretch”. This stretching is a result of the woven fibers of the netting simply tightening down on themselves over time and reducing the space between individual fibers. Knotless netting is best used where the stretch that can develop over time does not pose a danger to people or property, such as with divider curtains, batting cages, and behind-the-goal net systems.

There are no hard and fast rules when it comes to netting coverage. Level of play, available space, and adjacent surroundings are some of the most important considerations. The distance and speed a ball travels and potential impact points (spectator areas, buildings, and vehicle routes) should be biggest influences when considering your coverage area.
Keep in mind, the height of your netting will be the main driver of cost. The higher the net, the larger your support structure needs to be to accommodate wind load. Your backstop should cover a minimum of 30' above field grade. Some situations may require you to go even higher. Height is the most difficult part of your netting system to change later; altering an existing system to go higher is often a challenging and costly endeavor.
In contrast, extending your netting further down the foul lines is a fairly straight-forward upgrade.
While budget is always an important consideration, getting a netting system right the first time is most important. In all likelihood, you’ll have one opportunity to fund a netting project, so getting the right coverage should be your main focus.
Both systems can provide outstanding sight lines depending upon the location of spectator seating. While the main difference is in the placement of the corner support poles, both systems do also allow the wing poles to be located at the far ends of the dugouts, thereby minimizing foundational conflicts, simplifying installation, and improving the overall fan experience.
TIE-BACK SYSTEMS . Extremely fanfriendly and most compatible with existing structures. The key is the two corner poles are offset behind seating areas, virtually eliminating any visual obstructions. While tie-back systems often have greater structural requirements, the additional material costs are typically offset by the flexibility they bring to the integration with existing structures. This flexibility minimizes the difficulty of incorporating a tie-back design with existing features such as walls, lighting poles, dugouts and seating areas. It also provides installation equipment with easier accessibility.
IN-LINE
. The most economical option for new construction. However, they can create challenges if you are integrating them with existing site features, such as dugouts and backstop walls, due to foundational conflicts. With the corner support poles in line with the netting and backstop wall, in-line systems can create visual obstructions for spectators and make them less visually appealing than tie-back systems.
and may become a safety risk if they loosen or dislodge.
Most backstop walls are covered with protective padding, so what the actual wall looks like from the field may not be an important factor. While poured concrete can look great, its higher cost may mean sacrifices elsewhere in your project making it a less practical choice. On the flip side, you may find a short chain link backstop fence can provide adequate structural integrity at a lower cost. This may allow you to add the extra netting coverage you need to truly improve fan safety.
Extending backstop netting all the way to the ground is not recommended. Maintenance equipment and animals can quickly damage your netting and create significant safety issues. A well designed backstop wall system like Beacon’s Modular Backstop Wall featuring wood-less padding can give you the best of everything — an affordable, fully-integrated, aesthetically pleasing wall and netting combination that is also maintenance friendly.
The most effective netting systems typically integrate with a durable wall structure, such as concrete, block, wood, or even chain link fence. However, it is critical that the wall be able to withstand the loading transferred to it by the netting system above. Block walls lacking filled cores and proper structural support will not be able to handle the pressure applied to mounting brackets
Experience matters. Even a perfectly designed netting system will look terrible and have safety issues if it is not properly installed. Be sure you are working with knowledgeable partners who can provide references. Experienced suppliers will ask a lot of questions to gain a full understanding of your situation. Beware of contractors who may cut corners or make decisions without consulting the netting expert and design engineers.
Working with partners who have ballpark experience will prove invaluable as decisions are made in areas such as structural specifications, pole mounting methods, netting materials, logistical timelines, and deployment methodology.
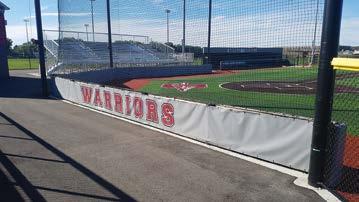
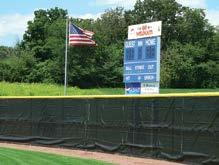
The addition of a fence windscreen provides instant aesthetic appeal as well as improved playability. Having a good understanding of materials, installation and maintenance will provide long-lasting value while avoiding costly mistakes.
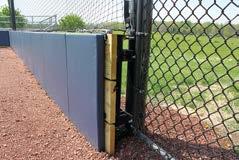
Wind load is the amount of force wind puts on your fence. This is the single most important factor to consider with windscreen. Wind load increases significantly when you add windscreen because it makes it more difficult for wind to pass through. In fact, unless the visual blockage is under 50% — well below that of typical ballpark windscreen — your potential wind load remains at nearly 100%. Using open mesh windscreen or adding vents at typical sizes and spacings will only have a marginal effect on reducing wind load. You should always assume that adding windscreen will cause complete wind blockage to a fence.
Some fences may not be designed to withstand the additional wind load from windscreen. Many lack the adequate pole sizing, spacing or bury depth to handle the load. If ignored, catastrophic failure of your fence can occur. We recommend checking with your local fencing professional — ideally the original installer — to determine if the existing fence is properly supported to handle windscreen. You may want to replace or reinforce your fence first, or consider options such as trees, shrubbery, and other natural wind and visual barriers.
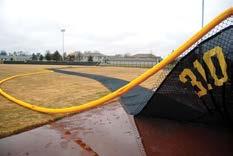
There is no single windscreen material that is a perfect fit for every site or situation. Each material comes with its own set of strengths and weaknesses, and it’s up to you to decide which factors are most important — durability, cost, color, aesthetics, etc.
For example, if your facility is located in a windy environment, a material with good abrasion resistance should be high on your list. This will come into play when a portion of a panel breaks free from the fence and flaps uncontrollably in the wind. Windscreen with good abrasion resistance are typically woven or knit polys (polypropylene or polyethylene). On the other hand, if adding color and printed graphics is high on your priorities, then a vinyl-coated material is a good choice for you.
Be sure to compare specifications and material attributes. Seek input and guidance from reputable sources that have experience with all types of windscreen materials and can help you match your needs with the best option.
▶ PROS of poly
◾ Good abrasion resistance
◾ Good UV-light resistance — fading is minimal over time
◾ Good strength to weight ratio
◾ Multiple opacity/weight options to choose from
▶ CONS of poly
◾ Limited color selection
◾ Cannot print on them reliably
◾ May unravel if damaged or cut
◾ May have a sheen or glare in sun
▶ PROS of vinyl-coated
◾ Many color options
◾ Excellent for printing
◾ Lower glare than most polys
◾ Multiple opacity and weight options to choose from
▶ CONS of vinyl-coated
◾ Poor abrasion resistance (unless using heavier extrusion-coated fabrics)
◾ Variable UV-light resistance (degree of fading over time is color-dependent)
When it comes to windscreen installation, there are a few rules to follow that will result in a beautiful windscreen and protect the most expensive part of the installation — your fence.
A. Be slightly shorter. It’s always better if your windscreen height is too short rather than too long. Windscreen that doesn’t go all the way to the ground can be installed taut. When your windscreen is too tall for the fence it will look baggy and sloppy. Proper windscreen sizing should be roughly 3" to 6" shorter than the height of the fence, and similarly short on each end.
B. Dictate your failure points. Attaching a windscreen so securely to a fence that can never break free in high winds is a recipe for disaster. We recommend using UV-treated cable ties as they can easily break if they become overloaded. Use the lightest gauge tie that will withstand your local wind conditions, and use them along the top, sides, and middle seams. For the bottom edge, we recommend using a stronger, more durable connection method such as rope, metal clips, or heavier cable ties. Allowing the windscreen to break free from the top or sides of the fence when needed will allow it to remain secured at ground level, safely out of the strongest winds.
C. Have a plan for setup, take down and maintenance. Beyond just buying the right windscreen, you should get input from those who will be in charge of caring for it. Look for answers to these important questions:
◾ Who will put it up and take it down?
◾ Does your staff have the skill set to put it up and take it down properly?
◾ Does the care and maintenance of windscreen fit within your organization’s priorities and procedures?
◾ Can you quickly replace zip ties that may break?
◾ Is seasonal removal and storage a feasible option to reduce wear & tear?
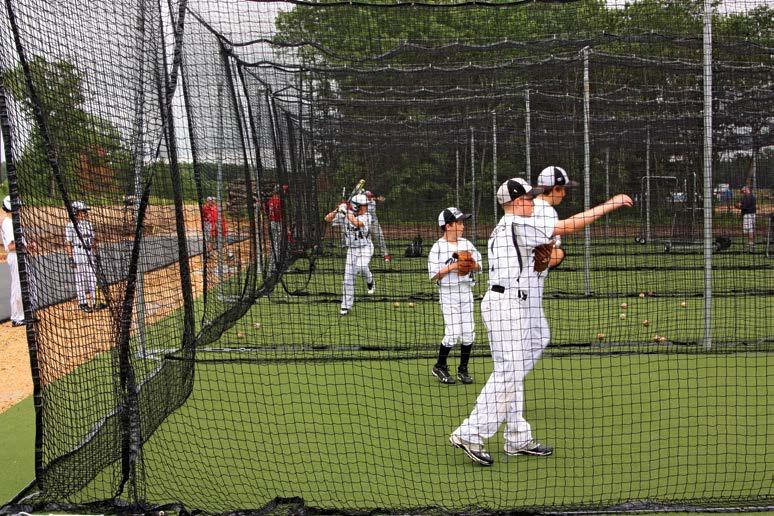
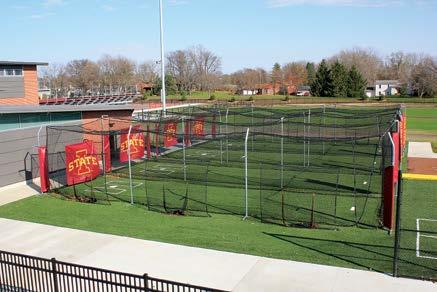
◾ Orient your batting cage north-to-south to prevent the sun from blinding hitters and pitchers during batting practice.
◾ When placing two or more batting cages in any one area, consider the safety risk of dozens of players and coaches swinging bats in a small area.
◾ Always install batting cages a minimum of 4' away from any potential snag points like chain link fences, tree limbs, etc.
◾ Consider positioning batting cages around the
Having multiple cages side-by-side can save money. However, this can cause problems for competing teams.
◾ A double cage (side-by-side) is a great setup, but adding more cages (3up, 4up or more) means that there will be a herd of players and coaches stacked on top of one another.
◾ Coaches and players appreciate not having to warm up next to opponents.
◾ Consider placing multiple 2-up cages in different parts of your complex.
There are several options for flooring and the cost of maintenance requirements vary. Below is a list of options and recommendations.
◾ Natural grass. Not recommended due to constant mowing and trimming, which increases the risk of damage to netting. Grass wears way too quickly.
◾ Infield mix/clay. Not recommended due to intense maintenance and slow recovery after rain.
◾ Crushed aggregate. A low-cost option that requires regular maintenance (raking/leveling). Use crushed stone fines (3/16" minus) for best results. Installing fortification (Jox Box, Porous Rubber BB Mats, etc.) in batters’ area is highly recommended for best footing. This surface will scuff up practice balls due to abrasiveness.
◾ Artificial turf over aggregate base. A medium-cost option. This surface requires a perimeter nailer board to be installed at ground level to anchor the turf. To prevent movement of the aggregate base, it is highly recommended that a solid fortification be installed underneath the turf in the batters' area. This will prevent low areas from developing. Always use a hitting mat on top of the permanent turf in order to extend the life of the turf around the plate.
◾ Artificial turf over concrete or asphalt. The highest-cost option with low maintenance requirements It requires professional installation of both the concrete and turf to ensure proper glue-down. Always use hitting mats at the plate to prevent the permanent turf from wearing prematurely at the batter’s boxes.
Padded backings on artificial turf are a considerable cost without providing significant benefit in terms of durability. They also absorb and hold water in outdoor applications and can negatively impact the life of the turf. Consider instead a better quality (higher density) turf product with a greater face weight to achieve the best cushioned feel. This turf will last longer and dry out more easily.
If an infilled turf is used (filled with crumb rubber, sand, or some other filler product), create a containment curb around the perimeter of your turf installation. This will reduce any migration of the infill. If the material piles along the edge, redistribute it around the floor of the cage and broom it back in to the fibers. The infill will help the fibers stand upright and will slow the fiber's wear.
Consider using ground sleeves for your poles when:
The project schedule requires quick sub-grade work or concrete to be poured before support poles can arrive.
The cage is set in a temporary location and you will be moving the cages in subsequent years.
The cage is located near parking lots or driveways where poles might be damaged by backing vehicles.
Seasonal removal of netting is not an option. Ice and snow may accumulate on the netting and places the support poles in danger of bending.
Player safety begins in the dugout. A poorly conceived dugout can leave players at risk from overthrows and lined fouls. Consider these recommendations when planning or improving your facility’s dugouts.
Using the 3rd base dugout as an example, the area where your dugout should be located can be represented by two string lines, from 2nd to 3rd and beyond, and from 1st to home. Placing dugouts in this range will help prevent injuries from overthrows should the dugout drift too far "up the line."
The corner of the dugout closest to home plate should have a minimum distance of 35' from the plate for softball and 45' from the plate for baseball. This will provide on-deck hitters and players in open dugouts with adequate protection from foul balls. The angle can deviate from parallel to the baseline to accommodate site constraints and placement of amenities. Always make your dugouts symmetrical.
Big league dugouts typically are sunken and they are designed that way to maximize seating and visibility for fans. Most other facilities find at-grade dugout elevation to be the way to go. If you do install sunken dugouts, include large drains with catch basins to filter the garbage and seeds ahead of the drain line to prevent clogging and flooding.
Dugout length is determined by the oldest age group of players using the field, and the size of team rosters. For various ages, we recommend these lengths:
◾ 6-12 yrs: minimum 20' long
◾ 13-21 yrs: minimum 30' long
◾ Over 21 yrs: 30' – 40' long
■ Determine dugout depth
Your options for depth are 8' to 12'. If the front face of the dugout is fully fenced or netted, then 8'-10' is deep enough, as players will typically hang on the fence. Dugouts with half walls and room to lean or sit in front, and a second bench along the back of the dugout, will require more depth (10'-12').
Your options for height are 8' to 12'. Our recommendation: go taller. Even youth leagues will have adults in the dugouts. Anyone standing on the lower step of the bench should have clearance without hitting their head on the roof.
■ Select back side closure
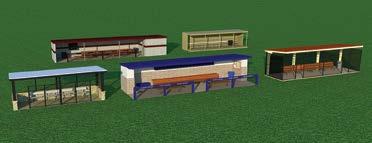
Choose from chain link fencing (with or without windscreen and roof system), poured concrete, precast concrete, concrete block, brick, decorative stone or standard wood construction. Chain link with roof kit and windscreen is the most economical option to allow player privacy. Precast concrete requires crane rental. Stylish, branded dugouts use a hybrid of materials and texture, but also have the highest cost.
Check the league governing body rules for any safety requirements with the front of your dugouts. While baseball has many options (full-height fencing; half-fencing / half-netting; bottom half padded rail and netting combo), softball fields should always have full protection due to the close proximity of home plate. Also consider extending backstop netting over the top of the dugout to protect fans, as well as extending the netting in front of the dugout. At least two, but not more than three, points of entry to the playing field should be designed into your dugouts. ◾

the ideal infield mix for any facility — no matter how big or small. Major and minor league organizations, top collegiate programs, high schools and many parks & rec departments across the country trust DuraEdge with their ballfields.
An infield skin topdressing is the true playing surface of an infield. It must help retain moisture, ensure fair bounces, create a smooth sliding surface and add resiliency.
DuraEdge ProSlide Expanded Shale and DuraEdge Calcined Clay topdressings were developed to provide a perfect playing surface for safe and reliable play. DuraEdge topdressing helps balance both firm and fast surfaces in hot, dry months as well as sticky and wet surfaces in rainy months. These are great choices for any level of play.
Even the best infields will degrade over time if not properly maintained. Both DuraEdge and Beacon Athletics offer a complete line of field maintenance products and an array of educational resources. Beacon’s Groundskeeper University offers free online training with tried & true best practices for game day preparation of ballfields. And, DuraEdge and Beacon have a vast library of blog posts related to infield maintenance at duraedge.com and ballfields.com, respectively. With DuraEdge infield materials and these tools & resources, any organization can maintain a safer and more playable infield that ballplayers will remember fondly for the rest of their lives.
DuraEdge Engineered Infield Soils have revolutionized the industry with a manufacturing process that relies on testing and computer-controlled blending. Scientifically selected soil materials are carefully metered out and mechanically combined to allow for specific infield soils.
■ New infield skin construction
When designing and building a new ballfield, the most critical decision you need to make is the infield soil you will specify and install. To answer that question, you’ll need to answer these two questions first.
◾ What are your field maintenance resources with regards to labor, equipment, maintenance practices and frequency?
◾ Do you have access to an adequate water supply?
Answers to those questions will guide you in accurately classifying your field. A four-inch profile of infield soil is recommended for all new infield skin construction. See page 30 for more info and page 33 to estimate soil amounts.
RECREATIONAL Infield Soil Specification
Infrequent, volunteer maintenance and no water access
INTERMEDIATE Infield Soil Specification
Limited maintenance with water access
PROFESSIONAL Infield Soil Specification
Frequent maintenance with water access
■ Existing infield skin renovation
The development of engineered infield soils has paved the way for many underperforming infields to be rescued while avoiding the cost of total replacement. This innovative process is based on science and math using a four-step process for renovation known as “TACS” — Test, Analyze, Compare, and Solve.
DuraEdge engineered soils come in seven different blends. All FieldSaver products contain 50% or less sand content. DuraEdge infield soils contain 60% or more sand content. A DuraEdge infield soils consultant can help you decide which soil products should be blended into your existing soil for peak performance.
1. Select the proper soil amendments based on TACS evaluation.
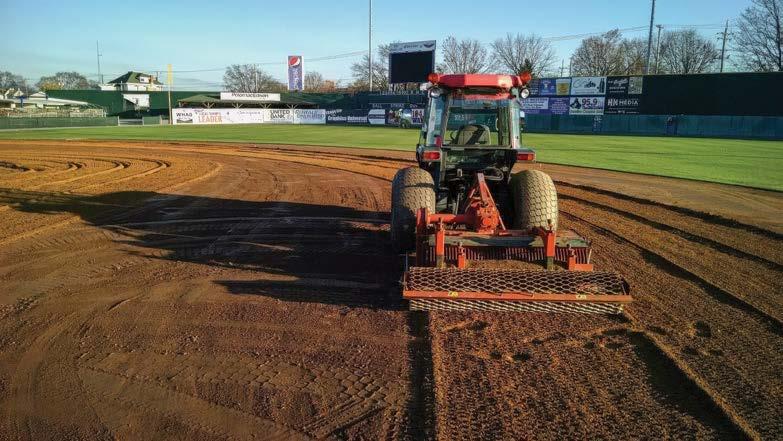
2. Remove all lips on the field and grade as close to finish grade as possible.
3. Using a topdresser, spread amendment soil evenly across infield skin surface.
4. With a reverse tine tiller, incorporate thoroughly by blending to a depth of 3".
5. Laser grade the proper crown to promote positive surface drainage (see p17).
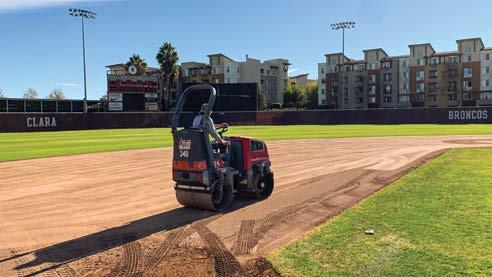
6. Roll infield skin with 1 ½ ton vibratory roller to fully compact, then flood skin area
7. Finish surface by selecting and applying a topdressing (see p34-38).
8. You have now permanently modified your infield skin profile based on soil science.
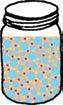
A soil is made up of three types of soil particles: sand, silt and clay. Each of these particles plays a vital role in the success of the infield skin.
In order for the soil to provide ample support for athletic play, it needs to have the proper density of particles to fully stabilize the soil surface.
■ SAND — Its function in the infield soil is to provide structural stability. When sand is present in proper amounts and sizes, it creates “pore space” or “air space” and leaves room for the smaller particles of silt and clay. Because of its large particle size, sand should take up the majority of the volume in your infield soil. Sand is usually divided into five sizes ranging from very fine to very coarse. For infield soils the majority of the sand should be in the medium to very coarse range. An infield soil with the proper volume and sizes of sand will remain stable — even in wet conditions. Infield soil with a large volume of fine and very fine sand will lack stability.
■ SILT — This is the soil particle that is sized between sand particles (larger) and clay particles (smaller). Because of this, silt helps to fill the larger voids created by the sand component to help achieve proper density. However, excess silt can cause problems ranging from a greasy surface when wet to a very dusty infield when dry.
How much silt is needed? The ideal silt content is a ratio which is equal to or half the clay content.
■ CLAY — It represents the smallest particle size in an infield soil and provides color and moisture retention. Not all clays are the same. It takes specific mineralogy of the clay in your infield for it to perform properly. In general, higher clay content in a mix requires more maintenance.
How much clay is needed? The ideal clay content is a ratio that is equal to or 1 ½ times the silt content.
Think of this jar as representing an infield soil profile. Blue and purple particles indicate variations of sand, yellow indicates silt, and the red haze indicates all kinds of tiny little clay particles. The proper amount of each sized particle creates structural stability in an infield soil.
TO FIND THE SILT-TO-CLAY RATIO divide the % silt by the % clay, as reported in your soil test. Check the SCR Scale to judge how your infield soil measures up.
The ideal SCR range for any infield soil is between 0.5 and 1.0. Fields with an Elevated SCR (between 1.0 and 2.0) can often improve performance by adding a topdressing.
Soils with a High SCR (between 2.0 and 3.0) will definitely need to be amended to get to the idea range. Overall sand content and sand size distribution will also need to be adjusted in these fields. High SCR infield soils will typically be very slippery or greasy when wet, and very dusty when dry. Both of these conditions are due to excessive silt content in the infield soil.
Excessive SCR fields (above 3.0) are very high in silt and usually high in fine or very fine sand content as well. That combination of Excessive SCR and high fine to very fine sand content results in extremely unstable infield soils when wet.
Low SCR fields (below 0.5 SCR) are common in the southeast U.S., but are rare elsewhere. These fields typically suffer from either being too loose and sandy or they have too high a clay content which will cause chunking out on the infield skin.
◾ A soil that stays in place and will not migrate
◾ A soil that is structurally stable when wet — no slipping, no sinking
◾ Little, if any, dust
While relatively new to this industry, engineered soils have had a huge impact on ballfields, much like the impact USGA spec root zones had on golf courses in the 1960s. At that time, "push up" native soil golf greens were the norm. Golf courses quickly realized the engineered root zones far outperformed the native soil greens and now native soil greens are a rarity.
An infield skin can be the source of unlimited frustration for a professional groundskeeper. Identifying the composition of the infield mix will allow you to more accurately predict how the infield skin will perform when weather is less than ideal.
■ Managing your infield soil is a science
It’s not guesswork. That’s why knowing your infield soil composition is a must before taking any action to amend it. Soil testing provides quantitative data that helps identify the shortcomings of an infield mix. After testing, you will be able to make an educated decision about which amendment material you should use.
■ Proper analysis of the data is critical
Many facilities can perform a soil test, but very few are able to interpret how the results can translate into the playability of an infield. Be sure to choose a soil testing company that understands how the composition of an infield soil affects game day performance. DuraEdge has more than two decades of experience analyzing and interpreting soil tests. Our team of soil scientists and former Major League groundskeepers partner with one of the top soil testing firms in the country to get accurate analysis.
■ Infield soil testing protocol
1 Choose eight to twelve locations around the infield skin to sample from in order to compile a good representation.
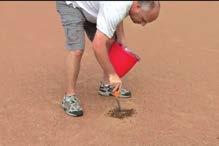
2 If your infield has a topdressing material on it, completely scrape or sweep it away from the areas you will sample to prevent contamination.
3 Using a small gardening shovel, collect a 3" x 3" sample from each location (no deeper than 3") into a box or plastic bucket.
4 Pulverize the soil as much as possible, mixing all samples together. Transfer soil to a quart size zip-lock storage bag until it is nearly full and seal it. Be sure to label the sample bag with the name of the field or complex.
5 Send your soil sample to a trusted lab for testing. Typically, you should expect to see results from your test in 7 to 10 days. If your soil lab does not analyze results, we can help. Call DuraEdge and send us your test results. We’ll help analyze your soil test results.
An infield soil test is the first step to improving the performance of an existing infield. It is a valuable tool that ballfield groundskeepers can use to expose issues a problem infield may have. You can’t fix something if you don’t know what’s wrong with it.
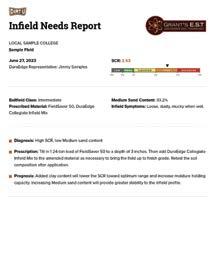
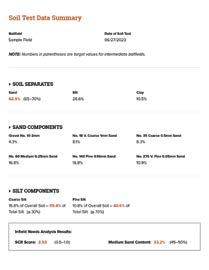
When you submit an infield soil sample to DuraEdge a two-sided report (right) will provide critical quantitative data, interpretive analysis and a recommendation of how to proceed to improve your infield skin area. These infield needs reports are based on the Engineered Soil Technology developed by DuraEdge.
The Infield Needs Report on page one provides the analysis and suggested action plan. The report includes:
A. Graphical representation of your SCR
B. Ballfield classification
C. Medium sand content
D. Likely symptoms
E. Prescription of engineered soil(s) to balance existing soil material
F. Diagnosis of where the problem exists
G. Prescribed action plan to correct the issues
H. Prognosis for anticipated results
The Soil Test Data Summary is on page two with quantitative values from the testing of your soil sample. The data includes:
A. Overall sand content
B. Overall silt content
C. Clay content
D. Sand size distribution
E. Silt size distribution
F. SCR (silt-to-clay ratio)
G. Medium sand content
If you perform the action plan outlined in the report, we recommend providing a soil sample 6 months after renovation. These follow-up soil test results will provide feedback on the effectiveness of the renovation while giving you an updated summary of the current makeup of your infield material.
To bring your infield skin up to proper grade, you’ll need to estimate how much soil you should add. With 1 cu yd of DuraEdge infield soil compacted being equal to 1.5 tons, use the 2-step formula below to help you calculate the correct amount of DuraEdge infield soil:

We did some soil calculating for you… Find your field size below for how much DuraEdge infield soil is recommended. Area
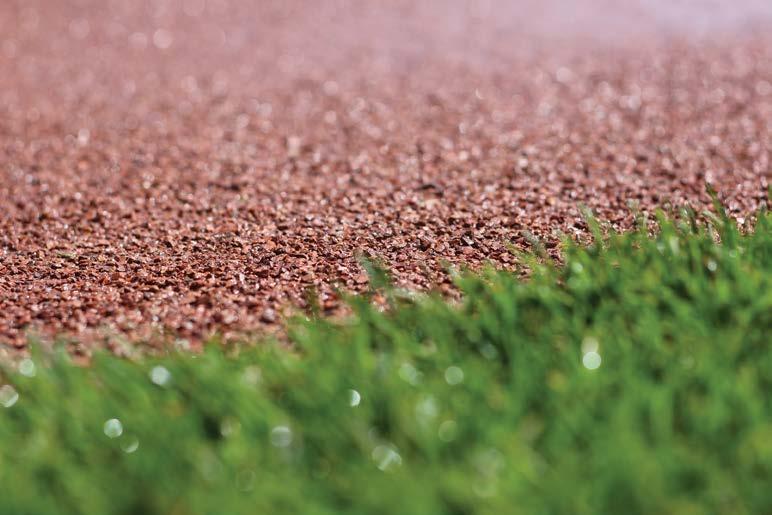
A great way to manage playability is to add topdressing to your infield skin. It will greatly improve your ability to maintain your infield, provide a consistent playing surface, and adapt to the challenges of varying moisture levels. The types of topdressing are:
▶ EXPANDED SHALE: Sheds most water. Sedimentary shale rock, crushed and fired to 2000°F. The final screened product absorbs some water, but sheds the majority of it.
DuraEdge ProSlide Brown or ProSlide Red
▶ CALCINED CLAY: Absorbs most water. A clay that is heated to 1100° – 1400°F until its physical characteristics do not change whether the clay particle is wet or dry. The final screened product has strong capillary action, thereby absorbing large amounts of water. It can then release moisture back into the soil as it dries. DuraEdge Platinum, PlayBall, or FairBall
See next page for recommended amounts of topdressing for various field sizes and layer depths.
◾ Allows you to add more water to infield skin just before a game
◾ Dries faster than infield soil to allow for quicker re-entry onto the field after rain
◾ Provides flexibility to use either type of topdressing, or a blend, to get the best overall result
When it comes to engineered infield soils, there is only one clear leader … DuraEdge. Others may say their mixes are engineered, but only DuraEdge has proven consistency through soil test results. DuraEdge soils outperform all others with proper sand sizing & distribution, as well as very unique clay mineralogy. And, unlike any other producer, DuraEdge is able to replicate production consistently across the U.S.
Reference this table for approximate amounts of DuraEdge Infield Topdressing. Expanded Shale or Calcined Clay topdressing (learn more on previous page) is a vital tool used on the surface of an infield skin to manage your field’s playability in various moisture conditions. Topdressing should be maintained between 1/8" and 1/4" thick, but no deeper.
How to apply topdressing: If distributing in bulk (dump truck or supersack), spread evenly using a topdresser. If using 40lb or 50 lb bags, place bags evenly spaced around your infield skin. Begin dumping bags and spread using a rake, level board and steel mat drag with leveling bar.
◾ APPROXIMATE VOLUME of Expanded Shale or Calcined Clay topdressing
(Blend Expanded Shale & Calcined Clay in the amounts shown below.)

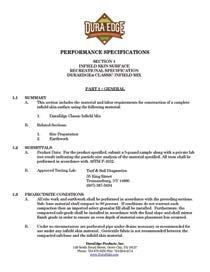
Choosing the right infield soil for your ballfield is just half the battle, making sure it is installed correctly is equally important. There have been plenty of examples where quality infield materials fail to perform only to find out the product was installed incorrectly, crippling its future success. There can be several reasons for failed infields, not the least of which is choosing the wrong infield material. The following keys should be closely monitored once a project is underway.
If your ballfield is part of a larger project, then you’ll likely have a spec book created for the project that provides all of the guidelines for contractors. There is a direct correlation between the clarity of the installation instructions and the success of your infield installation. The more vague the specifications, the more that’s left to the contractor.
Therein lies the problem. Typically, most infield specs provide little or no instruction for proper installation. An infield material is only as good as its installation. Learning that lesson early on, DuraEdge spells out precise, detailed instructions.
But, as the customer it is on you to properly vet potential installers. You should require a strict set of qualifications for anyone bidding to build or renovate your infield. DuraEdge maintains a list of “preferred installers” who have been properly vetted and can ensure the correct installation equipment and procedures are followed.
Remember, if an installation fails, it is difficult to assign responsibility for what happened if your project did not start with detailed installation instructions and specifications.
3 Surface finish grade and a consistent slope.
On pages 16 and 17 of this guide we talked about how important the surface finish grade is. No infield material — no matter how good it is — will work well if there are issues with the flow of water across it. If water has the ability to sit on an infield, it will soften that infield. The surface grade of the infield must have a consistent slope from one side to the other to keep water moving. The groundskeeper’s job is to maintain proper surface grade over time. Modern construction equipment utilizes lasers to guide or operate the grading equipment for laying down the most precise grade, which is to be within a tolerance of ± 1/8". This must be accomplished for a successful installation, so be sure you find experienced field installers with the proper equipment to do the job right. This is definitely not the part of the project where you can take a shortcut or bring in your neighbor who says he has a skid steer and will do it for free. You only get funding once, do it right the first time.
(continued on next page)
4 Compaction of both subgrade and infield material.
Compaction involves removing pore space in a soil which increases soil density and soil firmness. Compaction is important not only for the infield material, but for the subgrade layer beneath it as well. Maximum density/firmness are determined by the makeup of the soil including the percentage of sand, silt, clay, and organic matter present, as well as the mineralogy of the soil.
DuraEdge calls for their infield soil material to be optimally compacted to 85-90% as achieved on a standard “Proctor” test (see below) To accomplish this, the subgrade must be compacted to at least 90% Proctor or higher. If compaction is less than 90%, the infield material above it will struggle or even fail to achieve the required compaction which can result in a faulty installation and poor infield performance.
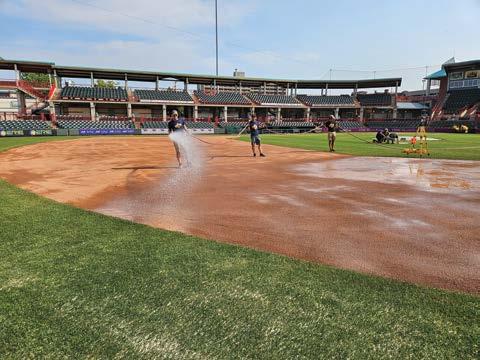
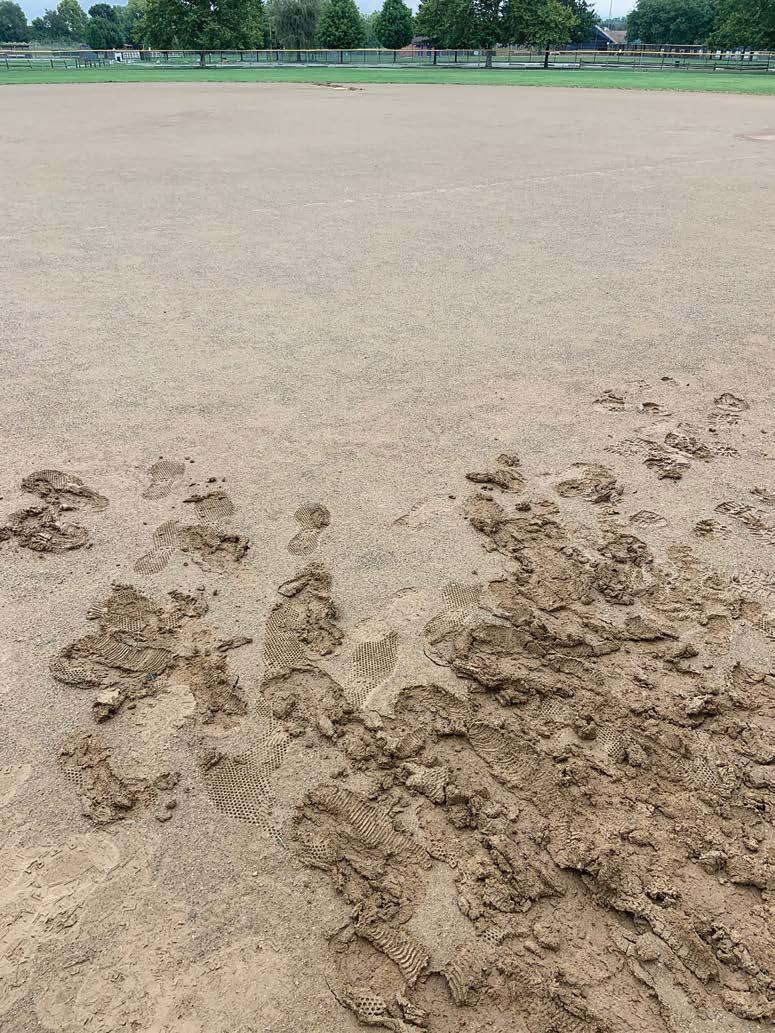
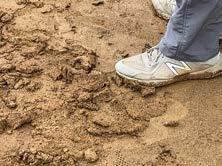
It is truly the “glue” that holds soil together. Water and scarification help the compressed soil to bind and hold, which removes pore space. If an infield soil is left too dry when the installer attempts to compact, the soil simply will not bind.
The negative consequence of unbound soil will be apparent with the first rain event on the new infield. It will quickly turn into a quagmire. Inadequate compaction during installation due to a lack of moisture allows the pore space to remain, which then fills with rainwater.
To prevent this scenario, during installation think, “Moisten. Scarify. Add. Compact.” When you’re adding a new lift of soil, be sure to moisten the soil that you are adding to, then scarify that surface before adding the next lift and compacting with a roller.
The one caveat is to not over water the soil. The goal is enough water to permeate through the entire soil layer, but not so much that it becomes saturated, fills all the pore space and pumps when attempting to compact due to too much soil moisture. ◾
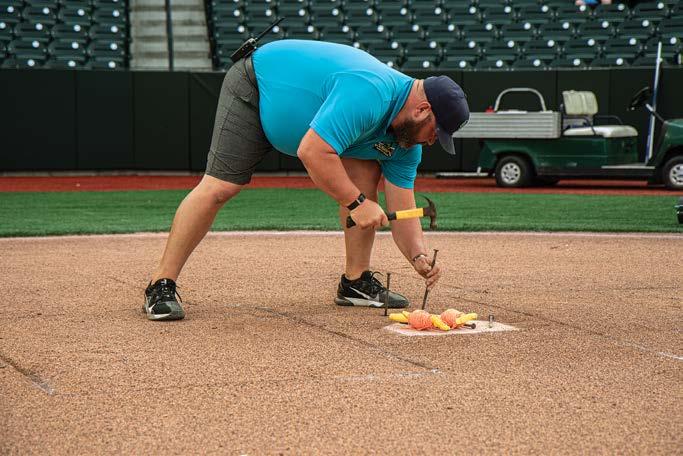
With Major League and Minor League Baseball recently moving away from 15" square bases to 18" square bases for safety purposes, it is likely this change will filter down through other governing bodies of baseball and possibly softball over time. Meanwhile, during this transitional period, there will be instances of ballfields that need to set up their fields with base anchors for both size bases. This step-by-step should help you in setting anchors for 15" bases or 18" bases, as well as situations where you may need the ability to accommodate both sizes on the same field. We always recommend making concrete anchors that are in the exact shape of the base for easy and accurate alignment during installation.
For each 15" base anchor:
◾ Two 15" long 2x4s — “shorter 2x4s”
◾ Two 18" long 2x4s — “longer 2x4s”
◾ 18" x 18" square piece of ½" plywood or OSB board for each form. (1)
◾ Concrete Form Release Agent, available most retailers where bagged concrete mix is sold.
For each 18" base anchor or combo anchor (15" + 18" combo):
◾ Two 18" long 2x4s — “shorter 2x4s”
◾ Two 21" long 2x4s — “longer 2x4s”
◾ 21" x 21" square piece of ½" plywood or OSB board for each form. (1)
◾ Concrete Form Release Agent, available most retailers where bagged concrete mix is sold.
CONTINUED FROM PREVIOUS PAGE
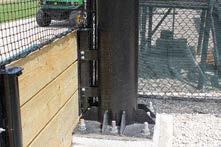
1 How to create concrete anchors. Reference materials list on previous page.
A. Build three forms. Each form will require two shorter 2x4s, two longer 2x4s, and piece of ½" plywood or OSB board. Exact lengths are based on the size of the base anchor (see materials list, previous page). Nail, screw and/or glue the pieces together as shown in Drawing 1. When finished, the inside of the box should be the same size as the base: either 15" x 15" or 18" x 18".
B. Position the base anchor on the “X”. Using a chalk line or a pencil, use a straight edge to draw diagonal lines from corner to corner on the inside bottom of the form creating an “X” (see Drawing 2). Spray the bottom and sides of the inside of your forms with a concrete form release agent to prevent the concrete from sticking to the forms once cured. Then center your anchor (1" or 1-1/2") on the “X” so that the sides of the anchor are parallel to the sides of the wooden form. Be sure that the flared end of the anchor is at the bottom of the form box. Repeat this step for all three base anchors.
▶ If you have a combo field where both the 15" and 18" bases will be used, then two of your three concrete base anchors will need a double-anchor sleeve setup embedded in the concrete. For 2nd base, a combo field will simply use a standard anchor block setup with just one centered anchor sleeve as shown in Drawing 2. For 1st and 3rd base you will need to add the second anchor. The second anchor should butt to any of the four corners of the centered anchor as shown in Diagram 3, making sure the opposite corner of the anchor aligns with the scribed diagonal.
C. Fill forms with concrete. Mix an 80lb bag of Redi-Mix concrete as directed on the package. Have someone hold the anchor or anchors in place the whole time you are pouring the concrete. Fill the form to the top with concrete and allow at least one day to cure, preferably longer.
(Assuming home plate is in place and a centerline can be established.)
A. Find the center of 2nd base. With the centerline in place, refer to letter C on the Field
Dimensions Diagrams on pages 12-15 to find the correct Infield Hypotenuse dimension. Measure with a steel measuring tape from the apex of home plate (following the centerline) to the distance indicated for the Infield Hypotenuse. Place a tarp pin or nail at that spot on the centerline. This is the center of 2nd base.
Drawing
Drawing 2
For all fields: Used for either a 15" base or an 18" base.
Also used for 2nd base when a field uses a combination of 15" and 18".
Drawing 3
For combo fields only: A double-anchor sleeve setup is needed for 1st and 3rd base anchors when a field uses a combination of 15" and 18". 18" 15"
B. Measure to 1st base. From the pin at 2nd base measure the distance where 1st base will be positioned (refer to letter A on the Field
Dimensions Diagrams on pages 12-15).
Using a second steel tape, measure the required base distance from the point of home plate to 1st base. Where the two tape measures intersect at the proper measurement, set another tarp pin or nail. This is the back foul corner of 1st base. Note: This measurement is the same, regardless of base size.
C. Measure to 3rd base. Now repeat the process to position 3rd base. From the 2nd base pin measure the proper base distance to 3rd base. Using a second tape, measure from the point of home plate to 3rd base. Where the tape measures intersect is the proper location to place your tarp pin. This is the back foul corner of 3rd base. Note: This measurement is the same, regardless of base size.
D. Make sure the base path is square. Now that you have measured and pinned all of your bases, you must ensure the base path is square. Measure from the apex of home plate to your 2nd base pin and, with a second tape, from the 1st base pin to the 3rd base pin. These measurements must be identical for your base layout to be perfectly square. Adjust as needed until all measurements are correct.
E. Position the anchor accurately. Using the string line as your guide, maneuver the anchor so one edge of the concrete is directly below the string line, the back foul corner of the concrete is where your pin was placed, and the rest of the concrete is on the “fair side” of your string (see Drawing 4). Measure from the point of home plate to the back foul corner of the concrete anchor to ensure correct base placement. You may want to temporarily place a base in the anchor for easier measuring. When you are placing a double-anchor setup for 1st or 3rd
base locations of a combo field, the off-center anchor will be positioned toward the outside corner as shown in Drawing 4. This ensures proper alignment of your 15" bases.
After adjusting your base anchor accordingly for correct placement, recheck for levelness and proper depth and adjust if needed.
A. String it up and dig a hole. Starting at the point of home plate, run a string line up the foul edge of the foul line well past the 1st or 3rd base pin. This string line should be slightly to the foul side of your 1st or 3rd base pin.
To be installed correctly, the base should cover the foul line as it runs under the base. Next, excavate an area about 2' square where the base should be located (see Drawing 5). Excavate this area knowing the pins you set indicate the back foul corner of the base.
Most metal anchors are about 8" long and your 2' x 2' hole for the anchor should be 8 ½" to 8 ¾" deep. The top of the anchor post should always be ½" to ¾" below the surface so it is never caught when nail dragging. Make sure that the bottom of the hole is level and well compacted.
Drawing 5
CONTINUED FROM PREVIOUS PAGE
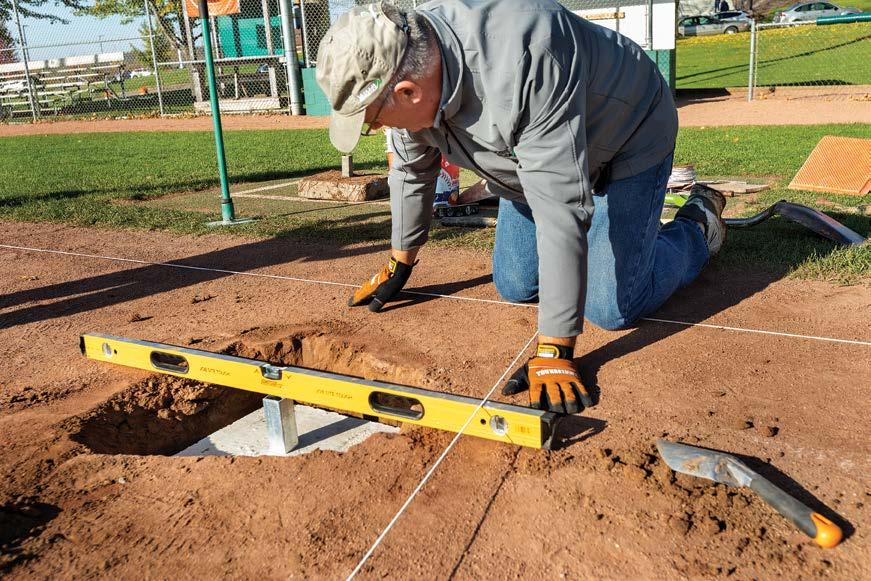
B. Place the anchor. Remove one of the concrete anchors from its form by turning it upside down and pounding the form with a rubber mallet to loosen. Make sure that there is no concrete inside the steel anchor post. To maintain proper drainage, clear any excess concrete if necessary. Using a 2x4, create a bridge across the hole and over the anchor post. Ensure that there is a gap of 1/2" to 3/4" from the top of the anchor post to the bottom of your 2x4 bridge. If not, remove the anchor, correct the sub-grade, and remeasure the depth.
C. Is it level? Once your depth is set, make sure the anchor is level. Use a torpedo level on the sides of the anchor post. If necessary, adjust the grade under the concrete anchor until it is level.
D. Position the anchor accurately. Using the string line as your guide, maneuver the anchor so one edge of the concrete is on the string line, the back foul corner of the concrete is where your pin was placed, and the rest of the concrete is on the “fair side” of your string (see Drawing 4, previous page). Measure from the point of home plate to the back foul corner of the concrete anchor to ensure correct base placement. You may place a base in the anchor to make for easier measuring. After adjusting your concrete anchor accordingly for correct placement, recheck for levelness and proper depth. Adjust if needed.
E. Bury the anchor. When all three parameters are met (distance, depth, levelness), the anchor can be buried. Add soil a few inches at a time. Compact thoroughly before adding the next few inches. Continue until the level of soil in the excavated area matches the grade of the surrounding infield skin. Compact the soil, then moisten and apply topdressing if used.
4 Install 2nd base anchor.
A. Dig a hole and level it out. The 2nd base pin you placed marks the base’s exact center. Therefore, excavating 1' out in all directions from the base pin will create a 2' square area. Follow the same process of
excavation and leveling as you did in Step 3 with the 1st and 3rd base anchors.
B. Find the exact center of 2nd base. No matter which size base you are using, or if you are on a combo field, you will only need one centered anchor for 2nd base. The centered alignment is the same for all base sizes. Place the concrete anchor in the hole. Stretch your steel measuring tapes from the back foul corners of both 1st and 3rd base toward 2nd base. The exact center of 2nd base is where the two tapes form a right angle at the proper base distance. (See letter A on the Field Dimensions Diagrams on pages 12-15) Center the anchor post at that point (see Drawing 4, previous page), making sure the sides of the concrete anchor are parallel to the foul lines.
C. Bury the anchor. When all three parameters are met (distance, depth and levelness), the anchor can be buried, just as you buried the 1st and 3rd base anchors.
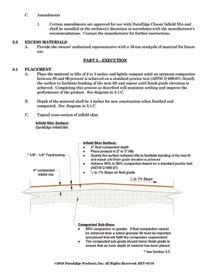
5 Test each base, troubleshoot if necessary.
With the anchors now in place, test them by installing the bases to see how they sit on the infield skin surface. The base will sit flush to the skin surface with no gaps. If you see gaps from the base sitting up too high, troubleshoot these common installation problems:
◾ The steel anchor post is not level (plumb).
◾ The infield skin is not level, and it does not match the surrounding grade causing low areas around the base.
◾ How old are your bases? It is possible the bottom edges are curled up.
All of these problems can present a risk to players. You should correct any of these conditions immediately to reduce any risk of injury.
There are 4 key parameters
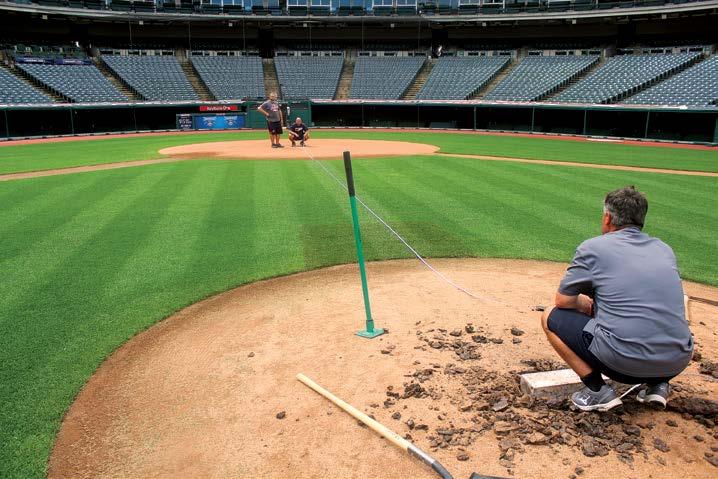
■ When a half inch becomes two feet.
Ever stood on a pitching mound and noticed the rubber was twisted? While most might think that it is not a big deal, ask a pitcher, a pitching coach, or a trainer how even a minor twist can have major effects on a pitcher’s mechanics.
A pitching rubber that is just slightly turned by ¼" on a Major League mound will move the centerline off-center from home plate by 1.15°, or 14½". A rubber that is twisted just a little more to a ½" will throw the centerline off by 2.39°, or more than 2 ½ feet! That messes with a pitcher’s mechanics and increases wear on their arm as they work to compensate for the misalignment.
The apex of home plate is the benchmark of a ballfield. Everything is laid out based on its placement. The pitching mound and its rubber are equally critical for a pitcher.
(continued on next page)
A pitching rubber twisted as little as a half inch skews the home plate centerline by more than 2½ feet.
■ Elevation, distance, levelness, and square.
CONTINUED FROM PREVIOUS PAGE
These four parameters require absolute perfection in order to successfully install a pitching rubber to specification. Elevation, distance, levelness, and square are interdependent. Adjusting any one of these four parameters will require you to check the other three to ensure they are still correct.
◾ ELEVATION . The elevation of the pitching rubber is measured in respect to the elevation of home plate. A mound that is ten inches tall has a pitching rubber surface that is exactly ten inches higher than the surface of home plate. Most infields incorporate a slope in order to facilitate drainage from the infield. This will reduce the height of your soil mound.
For example, if you have three inches of slope from the base of the mound to home plate and need to build a ten inch mound, the actual mound of soil you build should only be seven inches in height. Use a transit or builders level to measure the height of the home plate surface and pitching rubber surface. Ensure that you have the correct change in elevation between the two. Some fields have irregular surface grades and may tilt in odd directions. In these situations, it might be easier to build the mound ten inches higher than the ground immediately surrounding it.
◾ DISTANCE . When the rule book lists the pitching distance for a ballfield, it is describing the distance from the apex of home plate to the front center of the pitching rubber. By the way, that is the apex of the white portion of home plate, not the black portion. This distance should always be measured using a steel tape when possible. Fiberglass tapes can stretch considerably over distance thereby threatening the accuracy of the measurement.
◾ LEVELNESS . Now that you know precisely where the rubber will be located, it’s time to level it. Level is checked in two directions on the rubber: from side to side and front to back. A torpedo level will work best for this portion of the installation. Be sure that the pitching rubber you are working with is in pristine condition. Any bubbling of the rubber will make it impossible to achieve a level pitching rubber.
◾ SQUARE . Once the pitching distance is correct, checking to make sure the rubber is square to home plate is the next critical measurement. On the pitching rubber, find the center and mark it with a pencil or pen. Then, run a very taut string line from the apex of home plate to the center of second base. Pop the string three to five times to see where the line settles. Ideally, the string will fall on the center line of the pitching rubber.
When it comes to the best pitching rubber, there’s one clear leader: the Bulldog Field Equipment Pitching Rubber. A 3" core center surrounded by 40lbs of rubber means they last well beyond any other pitching rubber. When the cost of replacing standard pitching rubbers is factored in, using the Bulldog Field Equipment Pitching Rubber saves time and money.
■ Make sure it’s square.
To accurately determine if the pitching rubber is square, you’ll need to measure from the square portion of home plate. On the rubber, measure 8½" in both directions from the centerline and mark those points on the front of the rubber (see illustration). Using the Measurements Table (right), find the pitching distance for your ballfield and reference the squaring measurement.
Measure the distance from the front square corner of home plate to the front of the pitcher’s rubber at the 8-½" mark you made earlier. Repeat this measurement on the other side, from the opposite corner of home plate to the front of the pitcher’s rubber. These measurements should be the same when home plate is square to the pitching rubber.
If these measurements are not the same, then the pitching rubber needs to be adjusted by twisting it slightly until the measurements match. Each time you manipulate the rubber to bring it square, re-measure the pitching distance and the two squaring measurements on each side of the rubber until they all meet the specified distances shown on the Measurements Table.
When all four of the parameters have been met — elevation, distance, levelness, and square — double-check each measurement one last time before backfilling around the rubber. After compacting around the rubber, do one final check on level, distance, and square to ensure the compacting process did not throw the rubber off its mark.
■ Perfection is your goal.
Installing a pitching rubber can be tedious. It is one ballfield task that demands both accuracy and patience. It can take as little as 15 minutes to set the rubber, or it can take as much as an hour. In either case, perfection is your ultimate goal. ◾
■ The softball pitching circle is a 16' diameter circle.
The center is located along an invisible line extending from the apex of home plate through the center of 2nd base. The front, center edge of the pitching rubber is located in the center of the 8' radius pitching circle. The distance of the pitching rubber from the apex of home plate varies from 35' – 50'. Reference the Softball Field Dimensions Diagram on pages 14-15 for the distance for your governing body and league.
The Pitcher’s Lane is a chalked lane within the softball pitching circle. This lane is 3' 4" wide and 8' long. Pitchers are required to stay within this lane when delivering a pitch to the plate. To mark the chalk lines for this lane, run a stringline from the front corners of the pitching rubber to the front inside corners of the batter’s boxes. Only chalk along the stringlines within the softball pitching circle.
To help with maintenance, reduce digout and improve footing, DuraPitch or Blackstick bagged mound clay or DuraEdge ProLoc Blocks can be added to the Pitcher’s Lane. This clay layer should be a minimum of 2½" - 4" thick.
■ APPROXIMATE VOLUME of DuraEdge blocks or DuraPitch / Blackstick clay
Pitcher’s Lane chalk line 4' 3' 7' 8' radius
Pitcher’s Lane (recommended clay fortification area)
Skip the scribe and get done fast and easy. Typically, you would use a tape measure and a tarp stake to measure 8' and then scribe the pitcher’s circle before chalking the line. But, it’s much faster and more accurate to use a product like Beacon’s Streamliner Pitcher's Circle Kit. Just attach the kit to your Streamliner. Your chalker will create a perfect 8' circle — no scribe needed.
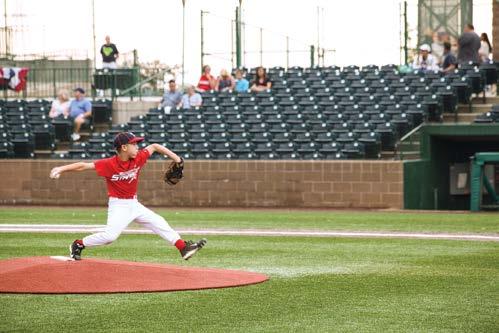
Over the past 30 years, there’s been a noteworthy shift to artificial turf fields and indoor workout facilities for baseball and softball. To go along with this migration, there has been a split with how to treat skinned areas. Some choose to stick with soil while others bring the artificial turf theme to their infield. With that, pitching mounds can become a big challenge. There is no “right way” to go for the mound, as each ballfield has a different set of circumstances to consider. That said, even on natural infields, a clear favorite can emerge. But to determine the right move for you, a look at the benefits and shortcomings is necessary before carefully deciding how this heavily trafficked area will be addressed.
◾ Perfect for fields with multiple base lengths/ pitching distances
◾ Portability provides quick and easy transformations between baseball and softball
◾ Decreased maintenance
◾ Choice of full-size “game” mounds, smaller practice mounds, or bullpen mounds
◾ Can be used indoors or outdoors
◾ Most made with a fiberglass or high-density foam core
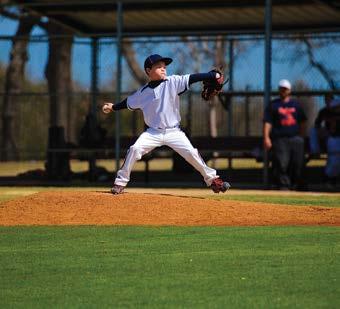
◾ Use of metal or rubber cleats is usually prohibited, and turf shoes are slippery on worn or wet turf
◾ Potential slipping hazards can cause pitchers to alter mechanics, which can result in injury or poor performance
◾ Same wear areas as natural mounds, just at a slower rate
◾ Turf must be replaced when fibers wear out
◾ At 55 lbs for small mounds and up to 1200 lbs for large, it usually requires multiple people to move them
◾ The preferred, healthiest option for a pitcher’s career
◾ Keeps play consistent with natural mounds used at higher levels of play
◾ Pitcher’s can maximize their performance due to the ground-force stability for their landing foot
◾ Provides best anchor footing for back foot drive
◾ When properly maintained, can be played on in light rain situations
◾ Not an option on multiple pitching distance fields
◾ Higher maintenance and requires tarping when not in use to maintain moisture
◾ Can become slippery when pitched off of during prolonged light rain or drizzle
◾ Very difficult to manage moisture content on indoor clay mounds
◾ On an artificial turf field, it can be very challenging to keep mound spoils from building up in the surrounding turf
There are different ways to build it. Choose the method that best fits your level of play and budget.
■ Three options for building a mound.
◾ Built entirely of mound clay. Most expensive and typically only done at professional & collegiate levels.
◾ Built with 2" overall clay cap over whole mound. Less expensive alternative to a fully clayed mound.
◾ Built with clay inserts only on the top table and front slope. Least expensive and most common way to build a mound.
■ Build your mound, step by step.
1 Dig a trench 2" deep and one shovel width wide around the inside edge of the mound. This will be filled with mound material and will prevent it from creeping past the edge of the mound circle during construction and compaction.
2 If building a fully clay mound, dump clay and spread to shape.
3 Build in 2" lifts, fully compacting with vibratory plate compactor or roller.
4 Hydrate each lift, if needed, to facilitate compaction and to help the next lift adhere to the previous lift.
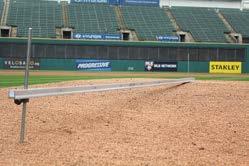
5 When building a capped or clay inlay mound, the base of the mound is constructed first. Use a clean (screened) loam or clay loam soil. For even easier construction, use DuraEdge HydroPro premoistened soil for instant compaction. Build in 2" lifts.
6 Once base soil is in place install rubber at the correct elevation and square to home plate. Use a SweetSpot Tamp to carefully compact soil against the inserted pitching rubber.
7 Cap the mound or install the clay inlay to finish grade. Compact clay areas using a hand tamp when compacting near the rubber.
8 Perform your final sculpting of the mound using a Beacon Mound Slope Gauge to ensure proper slope at the front. Use a Beacon SweetSpot Tamp to finish shaping the mound table.
9 Once mound is finished, compact entire mound in multiple directions using plate compactor or roller. Water the mound appropriately afterwards and cover with tarp. Let sit for 24 hours.
10 Finally, remove tarp. If clay is tacky, allow to bake in the sun and wind for a bit, then add DuraEdge Calcined or ProSlide Expanded Shale topdressing ⅛" to ¼” thick. Compact mound one last time.
For professional, college, high school, youth Babe Ruth, Dixie, Little League and Pony use.
■ The 10" pitching mound is an 18' diameter circle.
The center is located 59' from the apex of home plate along an invisible line from the apex through the center of 2nd base. The front, center edge of the pitching rubber is located 60'6" from the apex of home plate along this same line.
The top face of the pitching rubber should be elevated 10" above home plate to ensure the proper slope on the front landing area. The front slope of the mound is a uniform 1 inch drop for every 1 foot towards home plate, beginning 6" in front of the pitching rubber.
If desired, bagged clay or unfired clay brick can be added to the table and front slope of the mound to reduce digout and improve footing. This clay layer should be a minimum of 2½" - 4" thick.
■ APPROXIMATE VOLUME of DuraEdge blocks or DuraPitch / Blackstick clay
For Cal Ripken, Dixie, Little League and Pony use.
■ We recommend the 8" pitching mound as a 14' diameter circle due to the size of and stride of the pitchers throwing off this mound. This is different than the rule book recommendation of a 12' diameter mound.
The center is located 48'6" from the apex of home plate along an invisible line from the apex through the center of 2nd base. The front, center edge of the pitching rubber is located 50' from the apex of home plate along this same line.
The top face of the pitching rubber should be elevated 8" above home plate to ensure the proper slope on the front landing area. The front slope of the mound is a uniform 1 inch drop for every 1 foot towards home plate, beginning 6" in front of the pitching rubber.
If desired, bagged clay or unfired clay brick can be added to the table and front slope of the mound to reduce digout and improve footing. This clay layer should be a minimum of 2½" - 4" thick. ◾
For Cal Ripken, Dixie, Little League and Pony use.
■ We recommend the 6" pitching mound as a 12' diameter circle due to the size and stride of the pitchers throwing off this mound. This is different than the rule book recommendation of a 10' diameter mound.
The center is located 45' from the apex of home plate along an invisible line from the apex through the center of 2nd base. The front, center edge of the pitching rubber is located 46' from the apex of home plate along this same line.
The top face of the pitching rubber should be elevated 6" above home plate to ensure the proper slope on the front landing area. The front slope of the mound is a uniform 1 inch drop for every 1 foot towards home plate, beginning 4" in front of the pitching rubber.
If desired, bagged clay or unfired clay brick can be added to the table and front slope of the mound to reduce digout and improve footing. This clay layer should be 2½" to 3" deep since only rubber cleats are allowed at this level. ◾
■ Like mounds, there are a few layout options for batter’s and catcher’s boxes. Each governing body establishes the protocol for layout of the home plate area. Check the list of governing bodies with each batter’s box diagram to find your league.
The depth of clay needed for fortification is dependent on the type of cleats that will be used on that field. Rubber or plastic cleats can use a shallow depth of clay or brick, while metal cleats need the deeper depth.
■ Keys for clay fortification.
There are three keys to successfully using clay as fortification in your batter's and catcher's boxes. These will drastically reduce wear.
1 Repair worn areas in the clay regularly (preferably with new clay).
2 Add water to the clay areas as needed. Anytime these areas are exposed to the open air, evaporation is occurring. Whatever moisture Mother Nature has taken away, put that back into the clay.
3 During practices, use artificial turf mats over the clay areas to hold moisture in and keep wear to a minimum. Whenever the home plate area is not in use, keep it covered with a tarp. This will manage the moisture and minimize evaporation, and limit potential overwetting from rain or irrigation.
BOX A (each batter’s box 6' x 3', catcher’s box 5' x 5')
For Dixie baseball (all divisions); Dixie softball (Sweetees, Darlings, Angels & Ponytails); Little League baseball (T-ball, Minor, Major); Little League softball (T-ball, Minor, Major); Pony baseball (local option, all levels).
BOX B (each batter’s box 6' x 4', catcher’s box 5' x 6')
For WBSC; MLB / MiLB; NCAA; NFHS; Babe Ruth baseball (all levels); Cal Ripken (all levels – 4" offset from home plage and 6' x 3'); Little League baseball (Intermediate 50/70, Junior & Senior); Pony baseball (local option, all levels).
BOX C (each batter’s box 7' x 3', catcher’s box 6' x 6')
For WBSC; NCAA; NFHS; Babe Ruth softball (all divisions); Dixie softball (Belles & Debs); Little League softball (Junior & Senior); Pony (all divisions); USSSA (all divisions).
Extend warning track 6" – 12" beyond back side of fence for easy maintenance and weed control
Compacted Subgrade
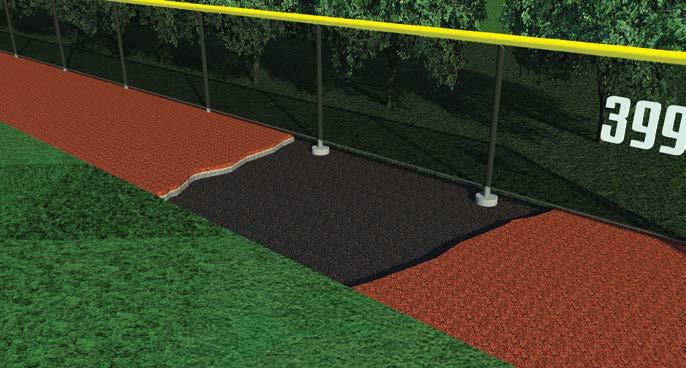
approaching a barrier. Their first step onto the track alerts them with a different texture under their feet. Their second and third steps allow players to decelerate before making contact with the barrier. The width of the warning track is determined by the oldest age group using the field.
◾ RECOMMENDED WARNING TRACK WIDTH
10
■ Depth of material.
A minimum of 3" is enough for most recreational fields if only mowers and turf utility vehicles will be using the track. If vehicles over 2 tons will be using the warning track, it is strongly advised to have a 3" to 4" stone road base installed below the 3" of warning track material — especially for collegiate and professional baseball and softball facilities.
drainage to move water off the track. A 0.5% to 1% slope will carry the water away from the field. For professional and collegiate fields, stronger tracks should be built that incorporate both subsurface and surface drainage features to quickly remove water.
■ Type of material and gradation.
This is usually a ground aggregate of some kind. Recreational field warning track material should use 3/16" minus gradation. Professional or collegiate facilities will use a slightly finer 1/8" minus gradation.
■ APPROXIMATE COVERAGE of DuraTrax Warning Track Mix
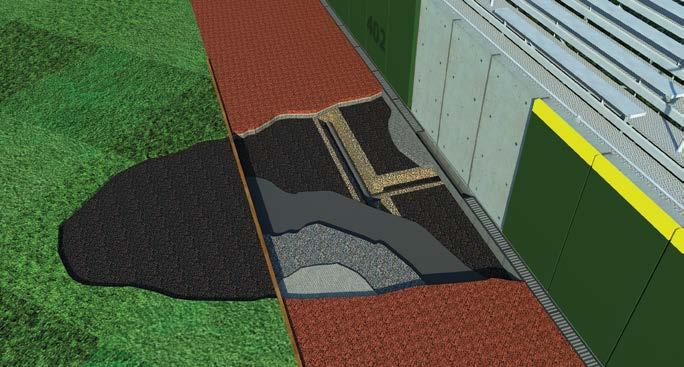
“I have looked forward to every new version of this guide. For years, this has been my go-to resource for all of our ballfield projects. There’s nothing quite like it. We look at it as our ‘ballfield Bible’. It’s indispensable.”
Pat Murphy, Tannenbaum Little League Tannenbaum, TN—

Preserving the integrity of ballfields.
BeaconAthletics.com DuraEdge.com