Technical
Tech tips From preventing warpage to replacing wheel studs CHECKING HEAD FLATNESS Whenever a cylinder head is removed, especially if overheating or head gasket failure has occurred, inspect the head deck for warpage. Clean the deck surface of any debris or gasket residue. Using only a precision machinist’s straightedge and a feeler gauge, measure for warpage from front to rear above the chambers, across the middle of the chambers and below the chambers. Also measure with the straightedge placed diagonally from the front top to rear bottom and front rear to rear bottom, as well as across the head from the intake side to the exhaust side, between each combustion chamber. Always refer to factory limit specifications. A rule of thumb for aluminum heads for maximum allowable warpage is about 0.002 – 0.003 inch along lengths and diagonally, and about 0.002 inch from intake to exhaust sides.
When measuring, the straightedge must be firmly held down to the deck. Avoid placing the feeler gauge across any oil or coolant holes, as this will provide a false reading.
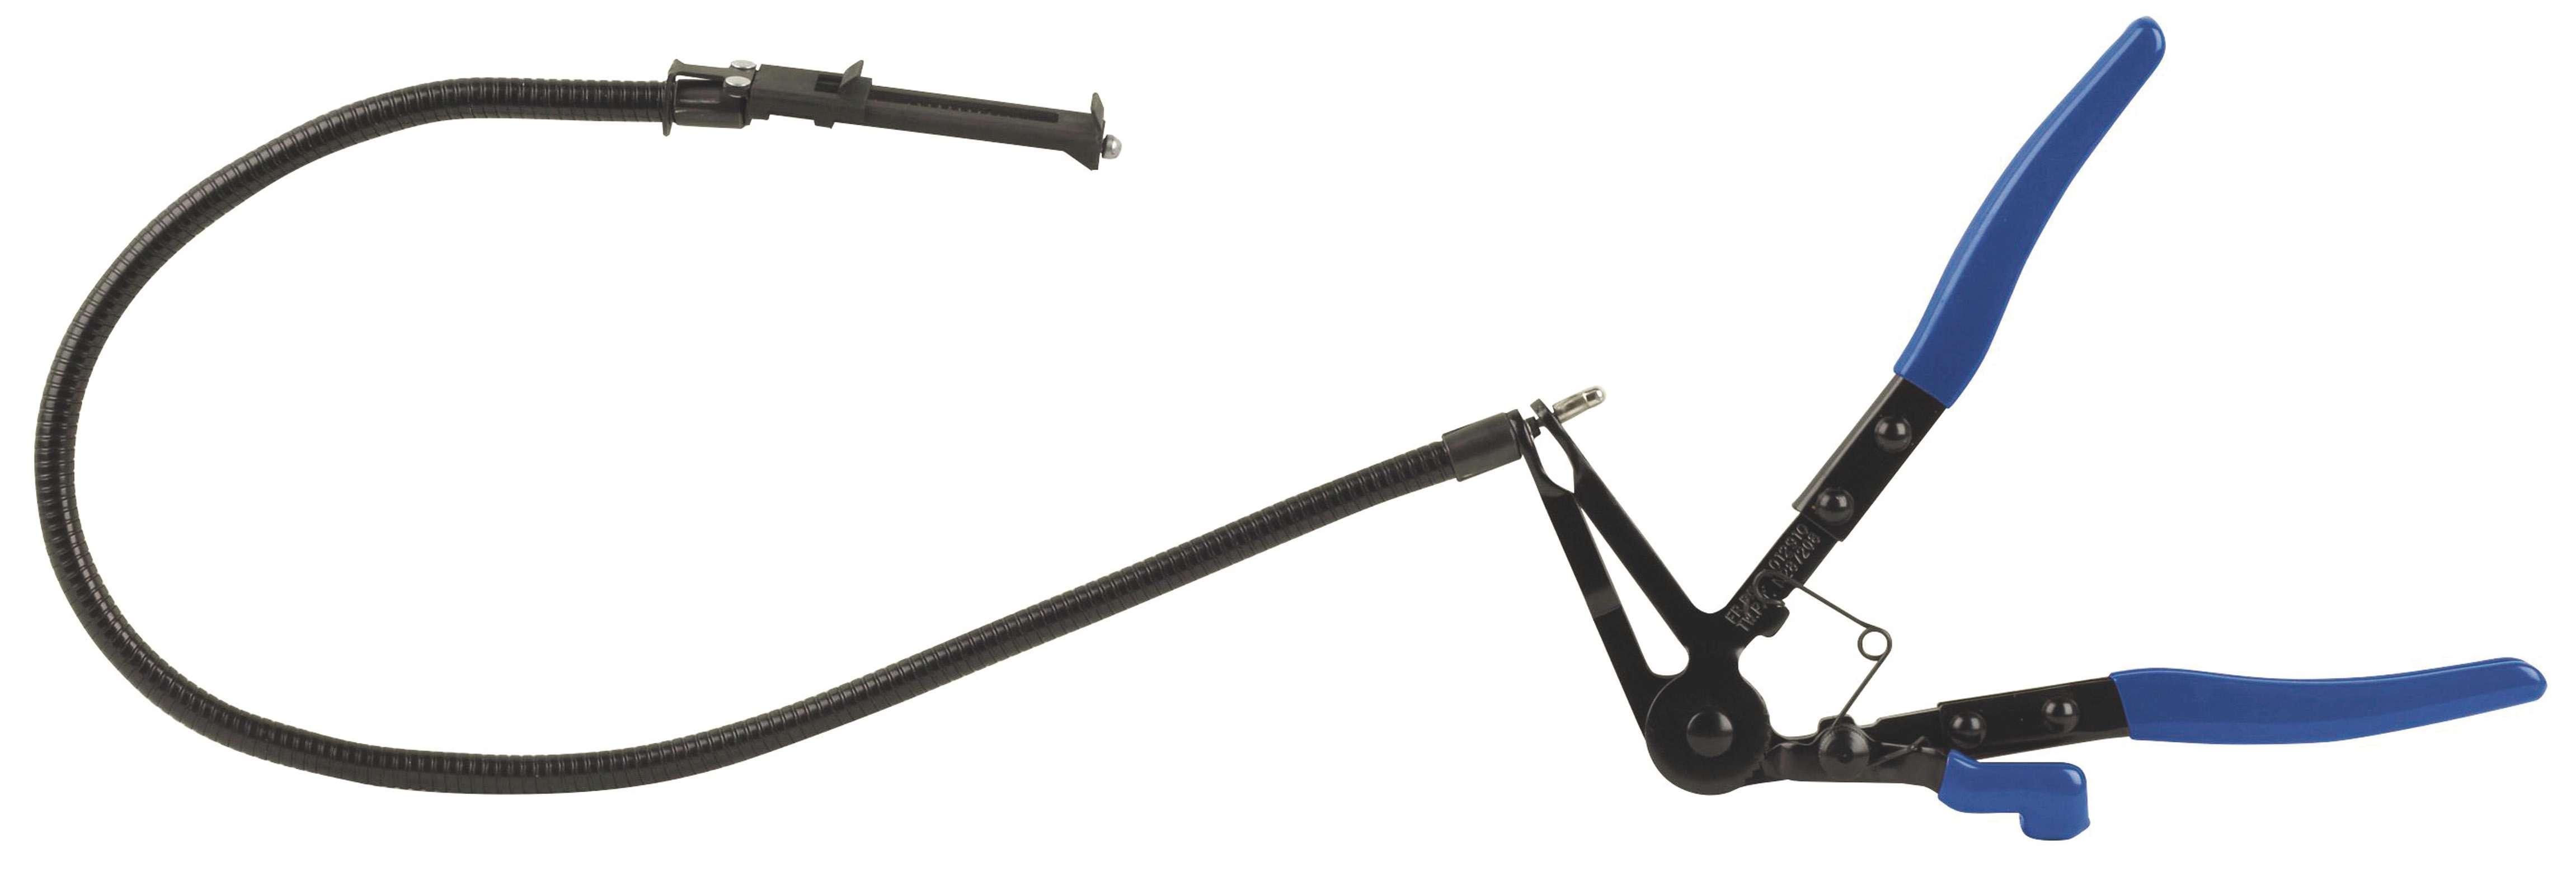
REPLACING WHEEL STUDS As with anything, there’s a right way and a wrong way. When replacing a wheel stud, use a manual press tool (Fig. A) to remove the old stud from the hub, as opposed to banging it out with a hammer, to avoid poten- Fig. A tial hub warpage. When installing the new stud, do not thread on a nut and try to pull the stud to engage the Fig. B
Measure for warpage from front to rear on each side of the combustion chambers and across the center of the chambers and below the chambers.
Measure the surface between the intake and exhaust side, between the chambers.
splines using an impact wrench, as this can stress the stud and potentially damage the splines. Insert the stud from the backside of the hub, initially engaging the splines. Install a thick washer followed by a spare wheel nut of the proper thread size, and draw the stud fully using a hand wrench, while holding the hub stationary with a brass or aluminum bar across two of the other wheel studs (Fig. B). Tighten until the stud head is fully seated flush against its seat on the rear of the hub flange. ■
8 | ASP August 2016