


 Danny S. Parker
Richard A. Hoffman
Two Waffen SS non-commissioned officers with 1st SS Panzer Reconnaissance Battalion, Kampfgruppe Knittel, in their amphibious Schwimmwagen at the Kaiserbaracke crossroads (4214). (National Archives and Records Administration)
Compass Games, © 2023
Designer Signature Edition
In December 1944, six months after the Allied invasion of France, the total defeat of Nazi Germany seemed inevitable. On both the Eastern and Western Fronts, the Allies were on German soil. It seemed only a matter of time before the final battle for the Third Reich would begin – and the victor of that battle could not be in doubt. Adolf Hitler, the Nazi dictator, saw the situation differently. He prepared to launch an all-out offensive through the heavily forested Ardennes in Belgium and Luxembourg to capture the port of Antwerp. This would smash the U.S. Twelfth Army Group and leave the British Army unsupplied. Hitler hoped that this would split the U.S. - British alliance and buy time. With the Western Allies in disarray, Germany would then turn its military attention to the East and the Soviet Union.
Carefully husbanding his panzer reserves, Hitler and his generals secretly concentrated a powerful force against the inexperienced and battle-weary U.S. forces thinly guarding the Ardennes. In these dense, misty forests, 200,000 German troops, 1,300 pieces of heavy artillery and almost 700 tanks and assault guns stealthily moved into their assault positions.
Promptly at 5AM on 16 December, a 2,000-gun barrage signaled the beginning of Hitler’s last desperate offensive. This epic battle would transform a quiet sector of the Western Front into one of the greatest battlefields of World War II: The Battle of the Bulge. For the Allies it was to be a final crisis on their eve of triumph. For the Third Reich, it was their final chance for victory in the war – The Last Gamble.
The Last Gamble, Designer Signature Edition (DSE) is a regimental/battalion-level war game of the German Ardennes Offensive of 1944-45, best known in the United States as the Battle of
the Bulge. This epic clash of arms is explored through basic and optional rules and scenarios that address many of the important factors that influenced the progress of the campaign. The game is based on a very careful analysis of the terrain, troops, weapons and leaders involved. Exhaustive research has unearthed a wealth of new, detailed information on the battle.
Game Organization. The Last Gamble has many components, all of which are important to game play.
The Map is a detailed terrain analysis of the topographic features that made up the actual battlefield. Hexagons (hereafter referred to as hexes) and their hexsides regulate the position and movement of the unit counters.
The Unit Counters represent the various combat units and headquarters that participated in the battle. Game markers regulate rule and game functions.
The Game Rules are a set of procedures that strictly govern game activities. The structure of the game rests upon the sequence of play – the order in which all game activities are conducted. Optional rules allow additional historical detail and realism for those who desire it. Five scenarios and a series of variants explore historical “what if?” situations for further play.
The Player Aid Cards contain the most frequently used charts and tables that summarize the body of the rules. Each scenario has game status, victory condition and air/ground order of appearance (OOA) charts that describe unit type, strength, movement and arrival data.
The Game Booklet presents the historical events and how the game approaches them. It includes the five game scenarios and their victory conditions, the twenty-four game variants, designer’s notes and an illustrated examination of the fifteen German attacks conducted on the morning of 16 December, 1944 using the game rules
The Historical Study presents the rationale and sources used in creating the game It includes a more detailed historical summary of the battle with an analysis of the important aspects that shaped its outcome, an annotated bibliography, a complete Order of Battle (OOB) for each side, and an evaluation of the Allied and German divisional combat strengths in the Ardennes Offensive.
Parts Inventory
Three map sheets, six counter sheets, multiple player aids, one game rules booklet, one game booklet, one historical study, two dice, one game box.
Scale of the Game. Each hex represents actual terrain that is 3.2 kilometers (2 miles) wide from hexside to hexside The time scale matches the midwinter days and nights in northwest Europe, with each day (AM) game turn representing eight hours of real time (approximately 8AM to 4PM) and each night (PM) game turn representing sixteen hours of real time (approximately 4PM to 8AM).
The die-cut counters (hereafter referred to as “units”) represent combat and non -combat
formations. The unit sizes depicted on the counters are: XXXX = Army, XXX = Corps, XX = Division, X = Brigade, III = Regiment or Group, II = Battalion, I = Company. Allied units include U.S. (black on serge brown), British (black on khaki) and French / Belgian (black on medium blue). German units include Wehrmacht (black on blue-grey), Waffen SS (white on black), Luftwaffe (black on light blue) and special forces (black on camouflage)
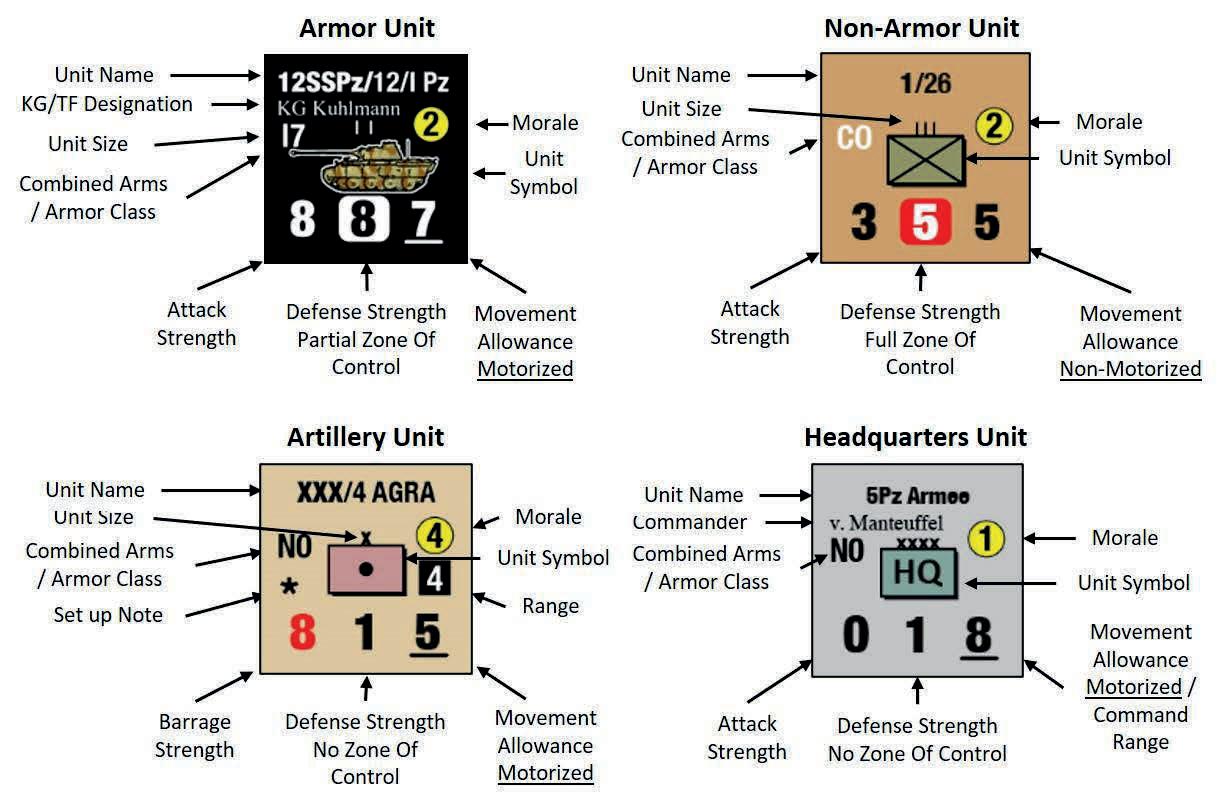
Attack Strength. This quantifies a unit’s attack capability. Barrage strength (in red) is unique to artillery and rocket units. Artillery units also have a range (white type in a black box) below the morale value, indicating the distance (in hexes) they may use th eir barrage strength for various types of fire missions.
Defense Strength. This quantifies a unit’s defense capability.
Movement Allowance. This quantifies a unit’s movement capabilities. Each unit pays movement points (MP) to enter hexes of various types. This allowance may be modified by the unit’s supply state or tactical formation.
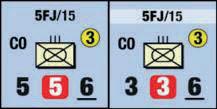
Reduced Strength. Unit counters are printed with the unit’s full-strength on the front side and a reduced-strength with a light-colored banner across the unit’s name on the back side, indicating lower effectiveness due to combat losses. Going from full-strength to reduced-strength is known as “losing a step.”
Units that have only one step at full-strength or have already been reduced are “eliminated” (removed from the map) if they lose another step. Some units either set up or arrive at reduced-strength.
Zone of Control (ZOC). The markings around a unit’s defense strength indicate what type of ZOC it exerts and its influence on the movement of adjacent units.
Combined Arms/Armor Class. This alphanumeric marking describes if a unit may claim a combined arms or armor superiority advantage by itself or in combination with another unit.
Unit Name. This identifies the unit’s organization in its respective OOB. The item on the left of the hash mark is the parent organization that the unit was historically subordinate to at the beginning of the battle or on its arrival as a reinforcement. The number on the right of the hash mark is the unit’s name or number denoting a regiment, battalion, or smaller unit. German units are written in italic font in the game documents but normal font on the unit counters for clarity. Unit examples include:
Army Group: H.Gru.B/506 s.Pz > Heeresgruppe
B / 506th Heavy Panzer Battalion
Army: 3 Army > U.S. Third Army (Patton)
Corps: V/51 Eng > U.S. V Corps / 51st Engineer Combat Battalion
Regiment: 12/48 > 12th Volksgrenadier (VG) Division / 48th Regiment
Battalion: 28/110/1 > 28th Infantry Division / 110th Regiment / 1st Battalion
Situational Units (“*”). Special conditions or optional rules govern the unit’s setup or entry.
Unit Types. Combat units are classified by type as either motorized (with an underlined movement allowance) or non-motorized (with a non-underlined movement allowance). Armor unit counters have silhouettes printed on them; non-armor units have a unit symbol.
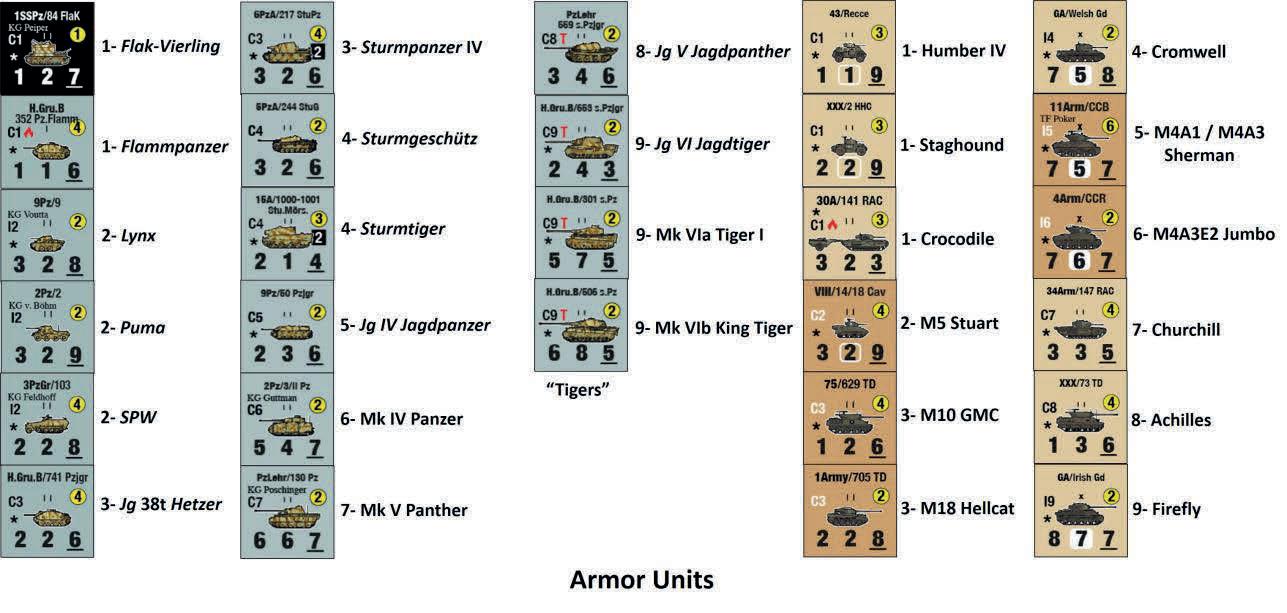
Armor Units. These represent formations of tanks, assault guns, armored cars, half-tracks and other armored fighting vehicles. German tanks were typically known as “panzers.” Fullstrength armor battalions possess 20-60 armored fighting vehicles. Full-strength armor brigades and regiments possess 50-100 armored fighting vehicles.
German Kampfgruppen (KG). The Germans organized “Kampfgruppen” that were combined armor/infantry combat groups similar to U.S. combat commands. These units were usually organized around a panzergrenadier regiment with an attached panzer battalion, or two panzer battalions of the division’s panzer regiment with an attached panzergrenadier battalion.
Allied Task Forces (TF). Besides those single unit combat commands with task force designations, the Allied player may form multiunit “Task Forces” (TF) within the U.S. 3rd Armored Division (3Arm).
“Tiger” Tanks. The Germans employed several heavy panzer and Panzerjäger battalions that were often identified as “Tigers” by Allied troops. These are identified by a red “T” adjacent to the combined arms/armor class marking (e.g., C8T or C9T).
Armored Infantry (Panzergrenadiers). These represent mechanized infantry formations primarily transported by half-tracks. Armored infantry regiments contain 3,000-4,000 men.
Artillery, Rocket Artillery (Nebelwerfer). These represent army and corps-level artillery formations of large-caliber, long-range guns and rocket launchers. The artillery that was organic to individual divisions is factored into the attack and defense strength of each combat unit. A howitzer/gun type unit has a “Deployed” frontside and a “Moved” backside on its counter.
Flak/AAA. These represent the six fullymotorized Luftwaffe field regiments with a variety of anti-aircraft (flak) guns (including 88mm) that also served in a ground support role and two flak battalions that were attached to 1st SS Panzer Division (armored) and the Führer Begleit Brigade (non-armored). One U.S. 3-inch Anti-Aircraft Artillery (AAA) regiment (nonarmored) was assigned to protect the fuel depots near Liège.
Anti-Tank (AT). These represent the three fully-motorized battalions of German Pak43 (88mm) guns and one Festung (fortress) battalion of Pak40 (75mm) guns that were
specifically trained to serve in an anti-armor role.
Infantry, Volksgrenadier and Festung (Fortress) Infantry. These represent nonmotorized, marching infantry battalions, regiments and brigades. Infantry battalions contain roughly 1,000 men. Infantry regiments and brigades contain roughly 4,000 men.
Airborne Infantry. These represent elite formations of Allied parachute and glider infantry and German Fallschirmjäger units.
KG von der Heydte. This Fallschirmjäger battalion was assigned to “Operation Stösser” and is the only airborne infantry unit that may be air-dropped during the game.
Mountain Infantry. These represent specially trained troops with enhanced movement capabilities.
Ranger Infantry. One Allied unit represents the elite 2nd Ranger Battalion (V/2 Ranger).
Engineers. These represent army and corpslevel construction and combat engineers whose primary function is to enhance the mobility of friendly units or impede the mobility of the enemy.
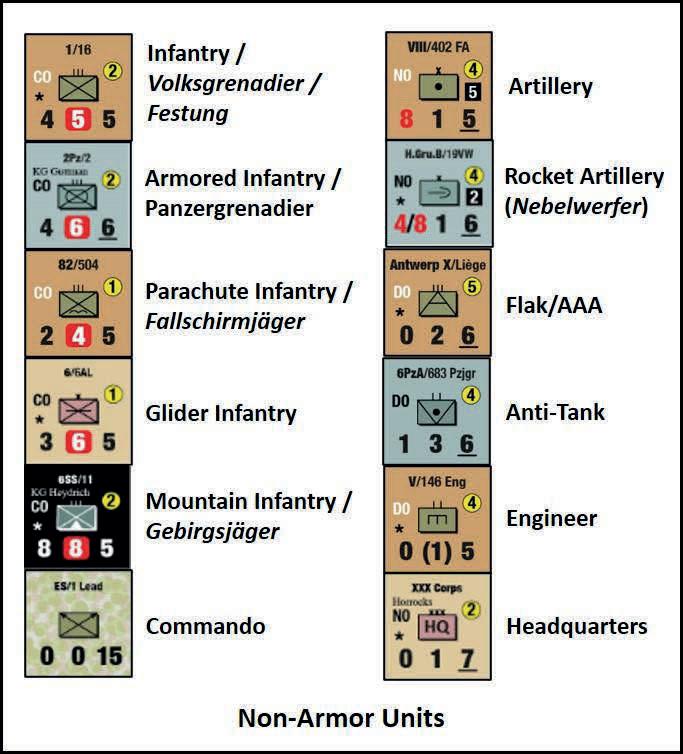
Headquarters. These represent army and corps leaders, their headquarters staffs and security elements. Headquarters are non-combat units but have the ability to influence both movement and combat.
Commandos. These represent the famous “Einheit Steilau” jeep units of Otto Skorzeny’s “Operation Greif.” Commandos are noncombat units whose purpose was to provide reconnaissance, redirect enemy traffic and disrupt Allied defenses.
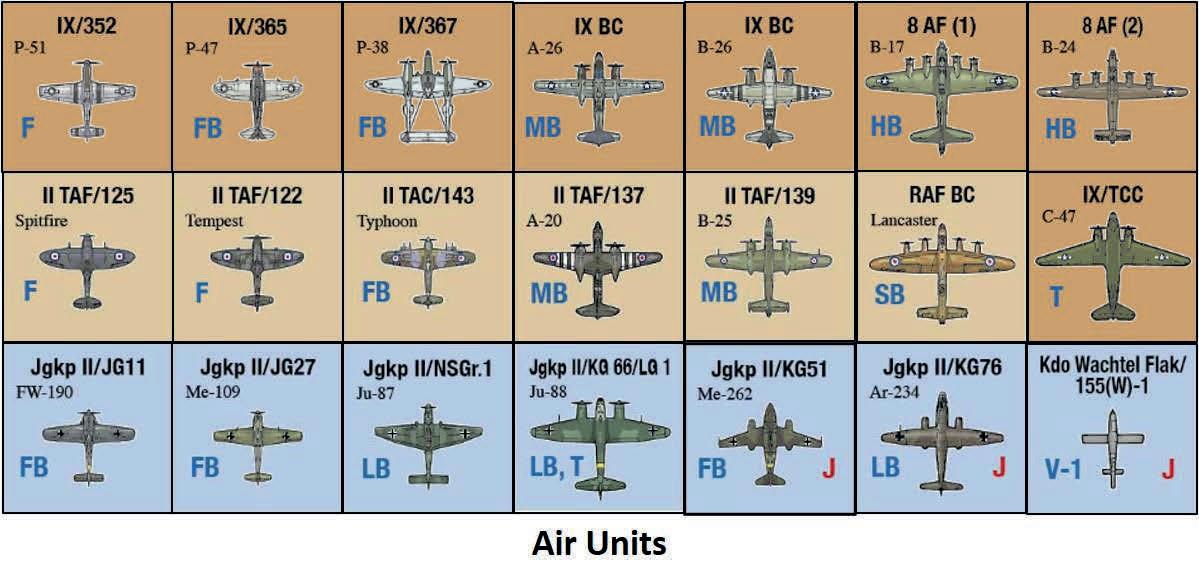
Air Units. These represent the historical air groups that participated in the battle. Each counter shows the air unit’s formation (top), aircraft type (upper-left), overhead image (center) and air-mission type (lower-left). German jet aircraft have a “J” marking (lowerright). The background color represents its nationality – U.S. (serge brown), British (khaki) and German (light blue).
Background Texture. All map hexes have a background of wavy, light-reddish lines to represent the undulating character of the Ardennes region. These have no effect on game play.
Hex Numbers. Each hex has four numbers along its bottom edge to quickly describe its position on the map from west to east (first two numbers) and north to south (second two numbers).
Orientation. North is toward the top edge of the map as indicated by the compass arrow in the legend.

Clear Hexes. Clear-terrain hexes are white representing pasture land, crop land and large areas of cleared fields. They present no obstacle to movement and provide little to no cover or concealment.

Rough Hexes. Rough hexes are mottled-yellow representing barren, rocky, hilly scrubland that is fairly devoid of trees.

Woods Hexes. Woods hexes are light-green representing scattered woodlands and lighter stands of less mature trees.


Forest Hexes. Forest hexes are darkgreen representing dense groves of large, old growth, heavy trees.
Marsh Terrain. Marsh terrain is depicted by random dark-blue grass representing damp, swamp-like areas that are unsuited for off-road vehicular movement.

Westwall Terrain. Westwall terrain is depicted by a triple-wide band of small white triangles that represent minefields, barbed wire, dragon’s teeth, tank ditches, trenches, concrete fortifications, and
other heavily engineered defenses along the German border.

Severe Terrain Hexsides. Severe terrain hexsides are depicted by curving, dark-grey, hashed lines extending across the majority of a hexside that represent steep slopes and ravines that are unsuited for off-road vehicular movement.

River Hexsides. Rivers are depicted by solid-blue meandering lines running along hexsides. Rivers were major obstacles to movement and combat.
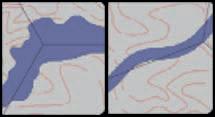
Lake, Reservoir and Waterway Hexsides. Five lakes and three reservoirs are depicted by large dark blue irregular hexsides, several times the width of rivers. The Meuse and Moselle rivers are waterways depicted by broad, dark blue hexsides, three to four times the width of rivers. Unless bridged or forded, all are impassible water obstacles that severely affect movement and combat.

Roads. The road network represents the improved roads in the Ardennes. They include “Highways” (blacksided red lines) representing paved roads sixplus meters wide, “Roads” (black-sided yellow lines) representing paved roads, three-plus meters wide, and “Trails” (dark-grey dashed lines) representing gravel secondary roads, fiveplus meters wide. Understanding and properly using the road network is critical to success.

Bridges. Road bridges are either “Heavy” (double black corseted lines) representing steel or stone bridges, or “Light” (single black corseted lines) representing lighter wooden and foot bridges that connect highways, roads or trails across a river or waterway hexside. “Rail” bridges (black-colored thatched lines) do not connect
highways, roads or trails across a river or waterway hexside.

Fords. Fords are depicted by two dark grey, dashed parallel lines across a river or waterway hexside. They represent natural river and waterway crossings with relatively shallow, slow-moving water and firm beds that enable determined infantry and light armored vehicles to cross them with limitations. 1

Cities. Four cities are depicted on the map by numerous dark-black shapes throughout the hex, annotated with the city’s name in large capitalized print. 2 These represent heavily built-up settlements of 25,000+ people and provide strong defensive advantages.

Towns. One hundred thirty-eight towns are depicted on the map by many dark grey squares within the hex, annotated with the town’s name in small capitalized print. 3 They represent sizable urban settlements of 2,000-25,000 people and provide significant defensive advantages.

Villages. Six hundred twenty-six villages are depicted on the map by two grey rectangles, annotated with the village’s name in small print. They represent smaller settlements of 500-2,000 people and provide good defensive advantages. 4

Castles. Thirteen castles are depicted on the map by grey pentagonal edifices, annotated with the castle’s name in small print. They represent medieval fortified settlements that provide a defensive advantage to infantry units.

Hamlets. Five hundred twenty-four hamlets are depicted on the map by small grey double-squares, annotated with the hamlet’s name in small italicized print. They represent small settlements of clustered farmsteads with 100-500 inhabitants. They provide an optional hold-or-retreat advantage to a defending battalion-sized unit.

Points. One hundred fifty points are depicted on the map by small greydotted triangles with the point’s name in small italicized print. They represent monuments, vista points and other features of historical interest but have no impact on movement or combat.

Army Boundaries / Assembly Areas. Thick, light-red dashed lines depict the three German army boundaries at the beginning of the battle and the assembly area of the U.S. Third Army.

International Borders. Thick, lightyellow dashed lines depict the borders between Belgium, France, Germany and Luxembourg.
The game may be played by two players or teams of players, play by mail (PBM), play by email (PBEM), or even solitaire.
Rules Sections. The introduction and rules sections 1-10 are “basic” rules that apply to all scenarios. Rules section 11 contains “optional” rules that can increase realism and uncertainty. The historical scenarios and twenty-four interesting “what if” game variants are provided in the Game Booklet. Players should agree and
1 Many fords that were available in the late summer of 1944 were no longer fordable after the heavy rain and snows of November and early December.
2 Liège, Namur, Seraing and Verviers.
3 Five towns have multiple hexes (Dinant [0818-0918], Givet [0523-0623], Sedan [0838-0938], Huy [1807-1808] and Herstal [2801-2802]).
4 These often provide the only shelter from winter weather and were bitterly contested by both sides.
record beforehand which optional rules or variants to use during the game.
Setting Up the Game. Unfold the map sheets and join them along hex column 2800. Lightly taping the map sheets down or covering them with clear Plexiglas will help maintain the stability of the playing surface. The unit counters and game markers are then placed on the map per that scenario’s OOA, paying careful attention to the details provided in the OOA notes.
Sequence Of Play. Each scenario in The Last Gamble represents activity over a number of “game days” (e.g., 16 DEC). Each game day is divided into two “game turns” that represent the daytime and nighttime periods for each date of the battle (e.g., 16AM or 16PM). Each game turn is divided into two “player turns” (German and Allied). The German player plays his/her player turn first, followed by the Allied player. The player whose player turn is in progress is called the “phasing player” (the attacker), the other is the “non-phasing player” (the defender). The length of each scenario is described in its game status card. The Sequence of Play card summarizes the game phases and activities that occur in each game turn.

Each scenario describes the starting weather and ground conditions that have a large effect on movement, combat and air support 5 Weather and ground conditions are determined on each subsequent day turn and last for both the day and night game turns. 6 The weather that occurred during the Battle of the Bulge is depicted in the Historical Weather Table
Movement effects are summarized on the Terrain Effects Chart (TEC).
Winter weather in Europe is notoriously complex with respect to geography. The weather in the game represents the composite weather over the Ardennes battlefield, which was often different from the weather over the various airfields of the Allied and German air forces. Weather, therefore, had a strong influence on air mission availability and effectiveness.
1.1.1 Clear. Sunny skies, calm winds, maximum visibility. Allows maximum air support.
1.1.2 Overcast. Low clouds and blustery winds with generally low visibility. Reduces air support availability and effectiveness.
1.1.3 Bad. Variable rain, mixed sleet and snow with poor visibility at all altitudes. Leads to muddy ground conditions and precludes air resupply and close air support.
1.1.4 Fog. High humidity, light rain and ground fog with low to minimal visibility. May reduce movement and precludes air operations.
1.1.5 Snow. Variable sleet and snow showers with low to minimal visibility. Slows movement and reduces air support availability and effectiveness.
1.1.6 Blizzard. High winds, heavy, drifting snow, near zero visibility. Slows movement and precludes air operations.
Ground conditions had a strong impact on mobility and may affect ground combat.
1.2.1 Firm. Relatively dry, stable ground conditions that have no effect on movement.
1.2.2 Mud. Wet, saturated ground conditions that prevail during 10-12 DEC and 17–19 DEC
5 Also see optional Uncertain Weather (11.1) and Weather Effects on Ground Units (11.2)
6 The current weather and ground conditions may be tracked on the game status card for each scenario.
or as determined on the Uncertain Weather Table Slows off-road armored and motorized movement.
1.2.3 Frozen. Hard, frozen ground conditions that prevail from 23-29 DEC or as determined on the Uncertain Weather Table. Facilitates offroad armored and motorized movement.
1.2.4 Snow. Significant accumulated snow conditions that prevail on and after 30 DEC or as determined on the Uncertain Weather Table Slows all movement.
Supply determination represents the flow of logistics that enables a unit to perform game activities. Each scenario’s game status card provides the starting supply level for each player. On each subsequent day turn, both players determine each on-map unit’s supply level (general supply, unsupplied or isolated) by tracing its supply line Reinforcements enter the map in general supply unless otherwise specified in that scenario’s OOA or the fuel rules. 7 Each unit’s supply level remains in effect throughout that date’s day and night game turns, regardless of movement or combat (exception: German airresupply [4.4.2]). 8 Units are never lost through lack of supply alone; they may remain unsupplied or isolated indefinitely but may be subject to surrender
Supply lines are traced along a path of continuous hexes stretching from the unit to a valid supply source. The first four hexes of the supply path may run on-road or off-road through clear, rough, woods or forest hexes but is
blocked by non-road marsh terrain, non-road Westwall terrain, non-road severe terrain hexsides, fords, lake or reservoir hexsides, unbridged river or waterway hexsides (exception: engineer assistance [5.2.5]), or hexes occupied by enemy units or controlled by enemy zones of control (ZOCs) The fifth hex of the supply path for motorized units must contain a highway or road that must then run uninterrupted by enemy units, enemy ZOCs or blown bridges back to a valid supply source. The fifth hex of the supply path for nonmotorized units must contain a highway, road or trail that must then run uninterrupted by enemy units, enemy ZOCs or blown bridges back to a valid supply source. Supply lines may be traced through friendly units that are in enemy ZOCs. Units that can trace a supply line back to a supply source are in “general supply” and may utilize their full combat potential. 9
2.3.1 Allied. All highways and roads (for all units) or trails (for non-motorized units) connecting to any Liège or Namur city hex, leading off the north map edge at any “Q” entry area and hexes 5001 and 5101, leading off the south map edge between entry areas “A” and “E” (hexes 1939-4839 inclusive), or connecting to any Allied 4, 5, 10 or 15-point fuel depot (Allied fuel dumps [11.3]).
2.3.2 German. All highways and roads (for all units) or trails (for non-motorized units) leading off the east map edge.
2.3.3 Both. Map edge hexes without highways, roads or trails are not valid supply sources.
7 Basic German Fuel Capture (2.5) or optional Allied Fuel Depots (11.3) and German Fuel Shortages (2.6).
8 Also see optional Assault Crossing (11.17).
9 Also see optional Attack Supply (11.4).

Units that cannot trace a supply line to a valid supply source are “unsupplied.” Mark unsupplied units with Unsupplied markers, removing them at the beginning of the next supply phase if their supply level changes. The movement allowance of unsupplied non-armor units is halved (fractions rounded up [FRU]). The movement allowance of unsupplied armor units is reduced to two movement points (2MP). 10 The attack strength of all unsupplied units is halved (FRU) but their defense strength is unaffected. Unsupplied units may not perform any of the activities of a unit in good order (2.7).
During the actual battle, poor logistical decisions and a lack of transport left the German armored columns desperately short of fuel. In the basic game, the German player may attempt to capture fuel using the following abstract rule: 11
2.5.1 Before supply determination on 18AM, if any German combat unit (except KG von der Heydte [5.5.3.3]) has entered or is within four hexes of Spa (3509) or Angleur-Kinkempois (2704), the German player rolls one die on the German Fuel Capture Table If a German combat unit entered or is within two hexes of Spa or Angleur-Kinkempois, subtract one (-1) from the die roll. A result of “0-3” reflects successful fuel capture with the effects indicated in the table. A result of “4-6” reflects no fuel capture up to this point. If no German combat unit is within four hexes of Spa or AngleurKinkempois, supply determination proceeds normally on 18AM and German fuel shortages (2.6) begin on 19AM
10 Also see Allied Air Supremacy (4.7).
11 Also see optional Allied Fuel Dumps (11.3).
2.5.2 Before supply determination when German fuel shortages begin and every day thereafter, the German player rolls two dice to determine whether German fuel shortages will be implemented that day. A result of “2” (snakeeyes) reflects successful fuel capture on the previous day and reduces by one (-1) the number of German fuel shortages die rolls made on the current day. A result of “3-12” reflects no fuel capture on the previous day and standard implementation of the German Fuel Shortages rule on the current day.
Unless delayed by fuel capture, the German player must make additional supply determination dice-rolls beginning on 19AM
2.6.1 Procedure. Following supply determination for on-map units, the German player makes one or more date-determined twodice rolls on the German Fuel Shortages Table. All units of the corresponding division, brigade or army-level “Tiger” battalion that are on-map or arriving as reinforcements that turn are “unsupplied” until the following AM supply phase 12 (exception: German panzer reconnaissance units arriving as reinforcements are exempt from German fuel shortages their first date on-map [e.g., 20 DEC]). 13 On-map formations or units that were already unsupplied remain so Formations and units that arrive on later turns are unaffected. Place Unsupplied markers on affected units, removing them in the next supply phase if their supply level changes
2.6.2 Frequency. On 19 DEC roll once, from 20-23 DEC roll twice, from 24-25 DEC roll three times, from 26 DEC onward roll four times. 14 Duplicate die rolls have no effect
12 The six H.Gru.B heavy panzer and Panzerjäger battalions were independently supplied (7.6.1).
13 All Puma, Lynx and SPW units as well as 2SSPz/2 StuG (KG Krag)
14 Also see optional “Operation Spätlese” (11.7)
Units that are in general supply, not disrupted or recovering from air attack (4.6.3) and/or not disorganized (7.10.8) are considered to be in “good order.” In addition to the conditions specified in each rules section, units must at a minimum be in “good order” to perform the following combat activities: Spend their full movement allowance, enter strategic movement (5.1.3), conduct a forced march (5.1.5), enter or remain in reserve status or conduct reserve movement (5.4), conduct enemy reaction movement (6.0), attack at full-strength, 15 conduct reserve combat (8.3), blow or build a bridge (5.2.6, 9.1), build an improved position (9.2), or build a roadblock (9.3).

Units are “Isolated” when they have been unsupplied for at least two consecutive days, are surrounded on all adjacent hexes by enemy units and/or their ZOCs, and are more than two hexes away from a friendly combat unit in general supply. Mark isolated units with Isolated markers, removing them in the next supply phase if their status changes. The movement allowance of isolated non-armor units is halved (FRU). Isolated armor units may not move at all. Isolated units may not attack, defend at half-strength if attacked (FRU), and may not perform any of the combat activities of a unit in good order.
Units that are surrounded and cut off from their sources of supply may eventually “surrender” depending on their training and tenacity. When
a unit (or stack of units) has been isolated for two consecutive days, the opposing player rolls one die for its surrender at the end of the supply phase: 16 If the die-roll is less than the morale rating of the “best-morale” unit in the hex (7.3), all units occupying the hex surrender. If a “1” is rolled and the “best-morale” unit has a morale rating of “1,” roll again and all units occupying the hex surrender on a “1” or “2.” Otherwise, all units occupying the hex remain isolated. All surrendered units are permanently removed from the game. This process repeats on each consecutive day that a unit (or stack of units) is isolated until its supply level improves to unsupplied or general supply – either through proximity or contact with friendly combat units, air resupply, or the withdrawal or elimination of enemy units. An improved supply level resets a unit’s “surrender clock” to zero.
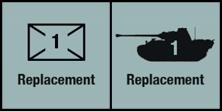
The replacement phase is conducted simultaneously for both players on day turns. Replacement points are accumulated by type: armor (units with a vehicle silhouette) or infantry (infantry units with a unit symbol) Reduced-strength U.S. and German armor and infantry units with a division, brigade, corps or army designation may be “rebuilt ” Only eliminated U.S. and German armor and infantry units with a division designation may be “replaced” (exception: The three units of the British 29th Armoured Brigade 17 may be rebuilt once but no other British unit may be rebuilt or replaced). AT, artillery, rocket artillery, engineer, Flak/AAA, commando, headquarters, Ranger, French and Belgian units, German KG
15 Also see optional Attack Supply (11.4) and Allied Time-on-Target Fire (11.20).
16 As a game aid, players should separately record when and how long units have been isolated.
17 On 16 DEC near Ypres, Belgium, the 29th Armoured Brigade began exchanging its old M4 Sherman tanks for new Comet tanks. On 21 DEC, it was urgently dispatched to protect the Meuse River bridges with its available Firefly and M5 Stuart tanks while the old “Shermans” were hastily refurbished and sent forward as quickly as possible. On 21PM, all three units arrive at entry area “J” at half-strength (3-2-7). On 24AM unless they are isolated, all three units are arbitrarily raised to full-strength (53-7) without the use of armor replacement points.
von der Heydte and Panzer Brigade 150 may never be rebuilt or replaced. Units that surrendered or were isolated when eliminated may not be replaced. Place these units in a separate, “permanently eliminated” pile.
Scheduled replacement points represent soldiers and vehicles returning to their units from a temporary absence (e.g., home leave, convalescence, training, repairs, etc.) and the “combing out” of rear area units to bolster frontline rifle strength. The Germans also had numerous “Feldersatz” replacement battalions composed of units undergoing initial combat training. Scheduled replacement points may be used by eligible units on or after the date they become available on the scenario game status card. Record scheduled replacement point availability and use on the Replacement Worksheet.18
In addition to scheduled replacements, a number of “combat” replacement points may become available during periods of heavy fighting. These represent the gradual recovery of combat effectiveness as well as fragments of units that retired from battle, the recovery and repair of damaged armored vehicles, stragglers, MIAs and the walking wounded who were subsequently folded into other units to regain their strength. Steps lost from isolated units do not count toward this increase. Combat replacement points may be used by eligible units two or more days after they are gained. Record combat
replacement point availability and use on the Replacement Worksheet.
3.2.1 Unit Reorganization. For every three steps of infantry-type units lost while attacking or defending, one infantry replacement point is gained.
3.2.2 Tank Recovery and Repair. For every three steps of armor units lost while attacking or defending, one armor replacement point is gained.
An eligible reduced-strength armor or infantry unit that is in good order (2.7) and not currently “engaged” (7.10.6) may be rebuilt to fullstrength by spending one available replacement point of the appropriate type (armor or infantry)
An eligible U.S. or German divisional armor or infantry unit that has been eliminated and has at least one other unit of its division on the map may be “replaced” (i.e., brought back onto the map) two or more days after it was eliminated by spending one available scheduled (3.1) or combat (3.2) replacement point of the appropriate type (armor or infantry).19 Replaced units must be brought onto the map at reducedstrength but may be rebuilt to full-strength in subsequent replacement phases. Replaced units are placed in a friendly-controlled city, town or village nearest to a unit of their parent division and at least three hexes away from the nearest enemy combat unit. 20
18 The Replacement Worksheet should be photocopied for repeat use.
19 E.g., a unit that was “eliminated” on 17AM or 17PM may not be “replaced” until 19AM. Place the unit counter of an “eliminated” U.S. or German divisional armor or infantry unit on game status card’s turn record track two days after its elimination.
20 Control of a city, town or village is defined by the last side to occupy it. If no unit has passed through it during the game, control is assumed to be Allied if it is west of the Westwall and German if it is east of the Westwall (exception: hexes 5001, 5101, 5201). In the Battle “Before the Meuse” and “22 December” scenarios, use cities, towns or villages within the German setup perimeter.
Activities in the air phase are conducted sequentially to enhance one’s own operational flexibility while degrading that of the enemy. 21 Non-battlefield interception, air resupply, air interdiction and air attack missions are flown in the air phase. Ground attack support and ground defense support missions are flown in the combat phase. Each air mission may only be used in the game turn it is available. Air units may “fly” to any hex on the map and do not count for stacking purposes. Each air unit may perform only one type of air mission per game turn. 22
Available air missions are allocated for each side in the air OOA for that scenario or the Uncertain Weather rule (11.1). 23
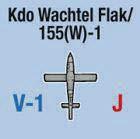
During the Battle of the Bulge, the Germans increased their V-1 "Buzz Bomb" attacks against Liège and Verviers to interdict Allied supplies and reinforcements passing through those cities. VWeapon attacks represent barrages of buzzbombs over the space of an entire day and night and cannot be intercepted or negated by Allied air units. 24 The Allies took several steps to mitigate this problem, including traffic avoidance and increased anti-aircraft artillery (AAA) protection.
4.2.1 V-Weapon Attacks. Beginning on 16
DEC in each daytime (AM) air phase following air mission allocation, the German player conducts two V-Weapon attacks until the U.S.
Antwerp X/Liège AAA Regiment occupies one of the three Liège city hexes or AngleurKinkempois (2704), and one V-Weapon attack as long as it remains there. Roll one die for each V-Weapon attack to determine which city is targeted: “1-5” = Liège, “6” = Verviers. Roll a second die for each V-Weapon attack to determine the target hex in each city: For Liège, “1-2” = 2602, “3-4” = 2702, “5-6” = 2703. All attacks against Verviers target hex 3505. Roll a third die to determine the accuracy of each VWeapon attack: “1-2” = target hex, “3-6” = scattered. If necessary, roll a fourth die for each scattered result to determine its direction: “1” = north, “2” = northeast, “3” = southeast, “4” = south, “5” = southwest, “6” = northwest. Place a V-Weapon marker in each final V-Weapon attack hex, removing it at the end of the night game turn (24 hours later).
4.2.2 German Advance Re-Targeting. If a German combat unit is within six hexes of Liège or Verviers at the beginning of a daytime air phase, that city is not subject to V-Weapon attack and any V-Weapon attack die-roll against it is ignored.
4.2.3 V-Weapon Effects. No unit may enter a V-Weapon-interdicted hex on that date. If two V-Weapon attacks occur in the same hex, the movement cost through all adjacent hexes is doubled for that date. If two V-Weapon attacks occur in Angleur-Kinkempois (2704) on the same turn, the Allied player loses five points of fuel in addition to the movement penalties above. 25 Units occupying a hex under VWeapon attack immediately lose their strategic movement or reserve status, must spend two
21 Also see optional German Jet Bombers (11.9), Allied Air Observation (11.10) and Planned Air Utilization (11.11).
22 Each side’s bomber, fighter and fighter-bomber units represent 40-80 aircraft sorties over the battlefield and perform based on unit type. The destructive potential of bombers depends on their classification. German jet units have unique abilities. Air unit formations are for historical interest and have no effect on play.
23 The “Battle Before the Meuse” scenario has a combined air-ground OOA for each side
24 V-1 overflights in the Ardennes were often described in Allied reports as occurring “about every fifteen minutes.”
25 The 5-point fuel loss is only applicable when using the optional Allied Fuel Dumps rule (11.3).
additional (+2) MP to exit the hex, and attack or defend at half-strength.

On day turns when they are available, each Allied fighter (F) and fighter bomber (FB) assigned to a non-battlefield interception mission may intercept two German non-jet air units and keep them from entering the map (exception: A P-38 may intercept only one German non-jet air unit).
26 German jet air units may not be intercepted off-map and the German player may not fly nonbattlefield interception missions.27 Up to four non-battlefield interception missions may be flown during clear weather, one during overcast and bad weather, and none during fog, snow or blizzard weather. Recycle the intercepted
German air units back to the German Air OOA.
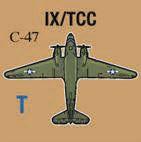
4.4.1 Allied. On day turns when it is available, the Allied C-47 Transport (T) may attempt to resupply isolated Allied ground units by placing it in a friendly-occupied clear, rough, woods, city, or town hex. The Allied player may optionally place one available U.S. fighter (F) or fighterbomber (FB) unit in the air resupply hex to escort the C-47 against German fighters. The German player may negate an unescorted air resupply mission by placing one available fighter-bomber (FB) in the air resupply hex. 28
For air resupply missions that are not negated, the Allied player rolls one die to determine success: “1-5” = success, “6” = failure. Success improves the supply level of all Allied units in and adjacent to the air resupply hex from isolated to unsupplied until the next supply
phase (24 hours) and resets their surrender determination clock to zero. Failure leaves the units in their current supply and surrender state.
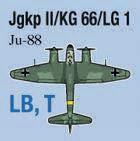
4.4.2 German. On night turns when it is available, the German Ju-88 (LB, T) may attempt to resupply a single hex of isolated German units by placing it in a friendly-occupied clear, rough, woods, city, or town hex. Roll one die to determine success: “1-2” = success, “3-6” = failure. Success improves the supply level of all German units in the air resupply hex from isolated to unsupplied and resets their surrender determination clock to zero until the following PM air phase (24 hours later). If their supply trace (2.2) in the next AM supply phase improves their supply level to either unsupplied or general supply, that supply level persists for both the AM and PM game turns on that date. If they cannot trace a supply line in the next AM supply phase, their airresupply only lasts until the following PM air phase when their supply level reverts to isolated, at which time the German player may attempt to resupply them again if the Ju-88 is available.
29 Failure leaves the units in their current supply and surrender state.
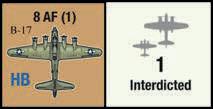
On day or night turns when they are available, the Allied player may conduct air interdiction missions with medium bombers (MB), heavy bombers (HB) and super-heavy bombers (SB) against cities, towns, castles or villages under German control (occupied or vacant) that are located at river crossings or the intersection of roads and/or highways (but not
26 At this stage of the war, P-38s were primarily armed, trained and used for air attack and close air support.
27 German jet air units are the V-1 Buzz Bomb, Me-262 (KG-51) and Arado-234 (KG-76)
28 C-47 formations had dedicated escorts for the trip to and from the drop zone and met additional escorts over the drop zone. Failure of the escort groups to meet up often led to increased transport aircraft losses and aborted drops.
29 As a game aid, leave the Ju-88 marker in the successfully air-resupplied hex until the affected unit(s) can trace a supply line, or their supply level reverts to isolated, or the beginning of the following PM air phase, whichever occurs first
trails). 30 Only one air interdiction mission may be conducted against any one hex each turn. All available air interdiction missions are placed at one time, must be a minimum safe distance from all friendly ground units (three hexes away for medium bombers or six hexes away for heavy and super-heavy bombers) and are not subject to negation by German fighters. 31 Enemy ground units (exception: commandos [11.15]) occupying a hex that is air interdicted also suffer the results of an air attack (4.6) using the same air interdiction die roll, regardless of the air interdiction result. For each air interdiction, roll one die on the right-hand column of the Air Attack / Air Interdiction Table, using the applicable cumulative die-roll modifiers below it. Successful air interdiction damages the roads and buildings in the hex with the following effects: 32
4.5.1 NE (No Effect). The air interdiction missed or had no appreciable effect.
4.5.2 Interdicted # Turns. Neither side may trace supply through an interdicted hex during subsequent supply phases. Units entering an interdicted hex may only use normal movement (5.1.1) or road movement (5.1.2), both with a +1MP penalty. Place “Interdicted 1” and/or “Interdicted 2” markers in the hex, turning them over or removing them at the end of each game turn (8-16 hours later) to reduce the number of interdicted turns by one point. Multiple air interdiction markers may accumulate in the same hex. 33
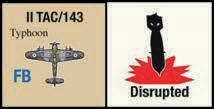
On day and night turns when they are available, both sides may use fighter bombers (FB) and light bombers (LB) to conduct air attacks against enemy combat or headquarters units occupying any clear, rough or woods hex that is not adjacent to any friendly combat or headquarters unit. Units in forest hexes may not be air attacked unless the forest hex also contains a town. 34 Only one air attack mission may be conducted against any one hex each turn. Place all German air attacks first, followed by all Allied air attacks. Either player may then use available fighter or fighter-bomber units to negate enemy air attacks on a one-for-one basis (exception: German jet aircraft cannot be negated). For those air attacks that are not negated, the owning player rolls one die on the five left-hand columns of the Air Attack / Air Interdiction Table using the cumulative die-roll modifiers below it with the following effects:
4.6.1 NE (No Effect). The air attack missed or had no appreciable effect.
4.6.2 STEP. One randomly determined unit loses a step and all units in the hex are disrupted.
4.6.3 DIS (Disrupted). All units in the hex are disrupted and may not move or attack, still exert a ZOC (if applicable), defend at half-strength if attacked (FRU) and may not perform any activity requiring a unit to be in good order (2.7). Place a Disrupted marker on all affected units, removing it at the end of the current game turn (8-16 hours later).
30 Control of a city, town, castle or village is defined by the last side to occupy it. If no unit has passed through it during the game, control is assumed to be Allied if it is west of the Westwall and German if it is east of the Westwall (exceptions: hexes 5001, 5101, 5201).
31 Allied daytime bomber missions had strong, dedicated fighter escorts that are not shown on the Air OOA
32 E.g., a motorized unit in strategic movement would have 3 subtracted from the die-roll
33 An “Interdicted 1” marker placed on top of “Interdicted 2” marker would result in 3 game turns of interdiction.
34 This differentiates “air attack” missions conducted in a free-fire zone from “close air support” missions (7.8) conducted adjacent to friendly ground units under much closer control. Acquiring targets in dense forests from the air was also nearly impossible except in the presence of large settlements.
On clear-weather day turns, the movement allowance of German motorized units is reduced by two movement points (-2MP), down to a minimum of two movement points for unsupplied units German units may not enter or use strategic movement (5.1.3), those German units in SM at the beginning of a clear-weather day turn must leave SM at the beginning of their movement phase, the movement allowance of German headquarters is halved, and the morale of all German units is worsened by one point, up to a maximum of 9 (e.g., a German morale of 2 is adjusted to 3) 35
In the movement phase, the phasing player may move as few or as many units as desired in any movement order or direction desired. The number of movement points (MP) a unit may expend may never exceed its movement allowance, cannot be transferred from one unit to another and cannot be accumulated from one turn to another. A unit or stack of units must conduct its entire movement before another unit or stack of units may move. Movement from hex to hex must be consecutive (i.e., units may not skip hexes). A unit may not enter a hex occupied by an enemy unit (exception: commandos [11.15]) but friendly units may move over and stack with one another. All movement is subject to the provisions and limitations of the current ground conditions (1.2), supply (2.0), terrain effects on movement
(5.2), zones of control (5.7) and stacking limitations (5.8). 36
5.1.1 Normal Movement. Normal movement is used when a unit enters a hex without the benefit of a highway, road or trail by paying the full movement-point cost of the hexside crossed and the terrain entered. 37
5.1.2 Road Movement. Road movement allows a unit to enter a hex at a lower movement point cost along highways, roads or trails under the following conditions: 38
5.1.2.1 Road movement must be made through connected highway, road, or trail hexes by paying the road movement cost under the current ground conditions.
5.1.2.2 A non-motorized unit may use road movement to enter a hex occupied by friendly motorized or non-motorized units.
5.1.2.3 A motorized unit may use road movement to enter a hex occupied by friendly, non-motorized units.
5.1.2.4 A motorized unit must use normal movement (5.1.1), march movement (armored infantry and panzergrenadiers only [5.1.4]) or minimal movement (5.1.6) to enter a hex occupied by another motorized unit (exceptions: “deployed” artillery, AT, or Flak/AAA [5.3.3], engineer [5.3.4] or headquarters [11.14] units)
5.1.2.5 Movement point fractions are lost when transferring from a highway to a road, trail or non-road hex.
35 The overwhelming advantage of Allied tactical air support had a strong interdicting and morale effect on German movement and combat throughout the battle area Also see optional Allied Air Observation (11.10).
36 Other situational effects on movement may include air interdiction (4.5), air attack (4.6), Allied air supremacy (4.7), specialized movement by unit type (5.3), reserve movement (5.4), restricted units (5.6), German surprise advantages (10.0) and a number of optional rules.
37 Normal movement represents primarily cross-country movement in tactical formation on a broad front. It is less economical than road movement, strategic movement or march movement but has fewer restrictions.
38 Road movement represents a formation of tactical columns moving in the same direction and utilizing the road net as much as possible to gain speed. Also see optional Road Space (11.13).
5.1.2.6 A unit using road movement (5.1.2) that wishes to switch roads in a hex containing two or more “unconnected” highways, roads or trails may enter and exit the hex using road movement but must cross the space between the highway, road or trail using normal movement (5.1.1) or march movement (infantry only [5.1.4]) 39 Unconnected roads that occur in a town hex (e.g., 1906, 1907, 4431) are assumed to be “connected” by the streets in the town and a unit using road movement may switch between them freely. If a unit ends its road movement in a hex with nonconnected roads and wishes to switch roads in its next movement opportunity, it may pay this cost either at the end of its movement or at the beginning of its next movement. 40
(5.1.5) and may not be in reserve (5.4). A combat unit in SM may not move adjacent to another friendly combat unit (or multi-unit KG/TF) that is also in SM along the same highway, road or trail, or enter the hex of a friendly combat unit (or multi-unit KG/TF) that is not in SM (exceptions: a non-motorized unit occupying a city, town or village, or a deployed artillery, AT, Flak/AAA [5.3.3] or engineer unit [5.3.4] in any hex Stacking limits apply [5.8]).
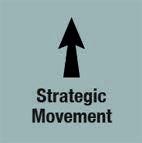
5.1.3 Strategic Movement. Strategic movement (SM) allows an eligible unit to use road movement (5.1.2) at up to five times its movement allowance during the owning player’s movement phase (only) under the following conditions: All motorized, Allied infantry or Allied engineer units may conduct SM. 41 Other non-motorized units (whose movement allowance is not underlined) may not. Units in SM must be in good order (2.7), may not be fatigued or resting
42 An armor, armored infantry or panzergrenadier unit in SM may not move closer than two hexes from an enemy combat unit (exception: KG von der Heydte [5.5.3.2]). A non-armored unit in SM may not move closer than four hexes from an enemy combat unit. The number of SM markers does not limit the number of units that may enter or remain in SM. Units in SM do not exert a ZOC, defend at halfstrength if attacked (FRU) and may not blow a bridge or modify a bridge blowing attempt (5.2.6.3) 43
5.1.3.1 On-Map Units Entering Strategic Movement. At the beginning of the owning player’s movement phase, an on-map SM eligible unit (or multi-unit KG/TF) may enter SM if it is in good order, can trace a supply line to a valid supply source, begins its movement phase in a hex with a highway, road or trail, meets the friendly and enemy proximity limits for units in SM, and pays one-half of its movement allowance. Place an arrow (SM) marker over all units entering SM. 44 The number of movement points (MP) available are
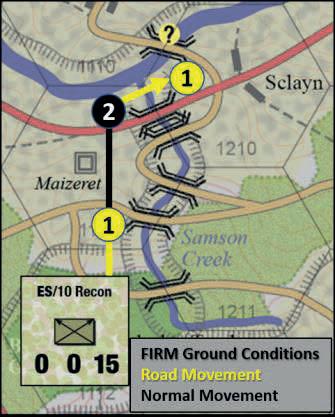
39 In the diagram, ES-10 Recon (non-motorized) pays 1MP using road movement from hex 1112 to Maizeret, 2MP using normal movement through rough terrain and 1MP using road movement across the bridge to Sclayn.
40 As a game aid, place a broad arrow (Engaged) marker beneath the unit, pointing upward for units that have paid the road change cost at the end of their current movement, or downward for units that have not paid the road-change cost at the end of their current movement.
41 Although the bulk of Allied engineer and infantry units were non-motorized, they used non-organic General Service truck battalions to conduct long-distance, strategic movement.
42 Cities, towns and villages had many parallel streets and lanes that could accommodate a high flow of traffic.
43 Strategic movement represents highly controlled, administrative movement conducted exclusively along the road net with minimum security.
44 Changing formation from tactical to road-march either on or off-map took time. As a game aid, orient SM markers upward for units entering SM and sideways for those continuing their SM movement from a previous turn.
shown on the Strategic Movement Table under the On-Map Entering SM Movement Points column. 45
5.1.3.2 On-Map Units Continuing Strategic Movement. An on-map unit that was in SM during its previous turn and remains in good order, can trace a supply line to a valid supply source and meets the friendly and enemy proximity limits for units in SM may continue moving in SM during the owning player’s movement phase. The number of movement points (MP) available are shown on the Strategic Movement Table under the On-Map Continuing SM Movement Points column.
5.1.3.3 Reinforcements Entering Strategic Movement. An SM eligible reinforcement that is in good order and meets the friendly and enemy proximity restrictions for units in SM may enter the map in SM. Place an arrow (SM) marker on all reinforcements entering the map in SM. The number of movement points (MP) available are shown on the Strategic Movement Table under the Enter Map SM Movement Points column. Also see the spacing requirements for multiple reinforcements entering the same hex (5.5).
5.1.3.4 On-Map Units Leaving Strategic Movement. A unit that becomes unsupplied or isolated is immediately removed from SM. A unit in SM may be attacked and is immediately removed from SM if it suffers disruption or steploss from air attack or any “D,” “ENG” or “FF” combat result. Finally, at the beginning of its own movement phase, an armor, armored infantry or panzergrenadier unit in SM must leave SM if an enemy combat unit is closer than two hexes from it, or a non-armored unit in SM must leave SM if an enemy combat unit is closer
than four hexes from it (exception to both: KG von der Heydte [5.5.3.2]), or any unit in SM may leave SM voluntarily. There is no movement point cost to leave SM.
5.1.4 March Movement. During the owning player’s movement phase (only), an infantry unit of any type that is using normal movement (5.1.1) under firm, mud or frozen ground conditions may reduce its MP cost by 1MP per hex, down to 1MP per hex, as long as it is not adjacent to an enemy combat unit at any time during its movement. Terrain entry and hexside crossing costs and restrictions apply. 46
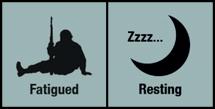
5.1.5 Forced March. On night turns during the owning player’s movement phase (only), armor or infantry units of any type may conduct a “forced march” that doubles their movement allowance under the following conditions: they must be in good order (2.7), may not be in strategic movement (5.1.3), may not be in reserve (5.4), may not be resting from fatigue and may not be adjacent to an enemy combat unit at any time during their movement (exception: KG Peiper breakout movement [10.7.2]). 47 Armor units may only use normal movement (5.1.1) and/or road movement (5.1.2) Infantry units may only use normal movement (5.1.1), road movement (5.1.2) and/or march movement (5.1.4) Place Fatigued markers on force-marching units at the end of their movement. On their following day (AM) turn, fatigued units may not enter reserve or strategic movement, their movement allowance is halved (FRU), they may attack at half-strength but defend at full-strength, they still exert a ZOC (if applicable), they may blow a bridge, and if they are not within an enemy ZOC, they may begin to
45 Also see optional Fuel Capture or Destruction Effects on U.S. Units (11.3.4).
46 The Ardennes area is laced with numerous unpaved lanes, paths and tracks that are not shown on the map that bogged heavy vehicles down but allowed unopposed, dismounted infantry to move very quickly.
47 Night turns in the game are 16 hours in length. Since all units required rest, the movement rate of all units in the game was reduced to one-half their normal (real-world) value. However, it was possible for military formations to conduct a “forced march” at night at the price of catching up on sleep later.
build an improved position (IP). Flip all Fatigued markers to Resting at the end of each day (AM) game turn. On their following night (PM) turn, resting units may not enter reserve or strategic movement, they may not move or attack but they defend at full-strength, they still exert a ZOC (if applicable) and they may blow a bridge but they may not complete an improved position until fully rested. Remove all Resting markers at the end of each night (PM) game turn unless the unit participated in ground combat, in which case the Resting marker and its restrictions remain in place until the end of the turn the unit does not participate in combat. 48
5.1.6 Minimal Movement. Regardless of movement restrictions, a unit may move one hex by spending its entire movement allowance unless it would involve moving across a hexside or into terrain prohibited for that unit type, or moving directly from one enemy zone of control to another (exception: Isolated armor units may not move at all [2.8]). Only one friendly motorized unit (or KG/TF) per game turn may cross any one bridge or ford using minimal movement.
5.1.7 Combined Movement. Several movement types may be combined by eligible units during the movement phase, enemy reaction phase and exploitation phase. See the Movement Combination Table
For the purposes of moving through the map, there are two types of units (motorized and nonmotorized) that pay differing movement point costs for different terrain types. 49 The Terrain Effects Chart (TEC) indexes the movement point cost for motorized and non-motorized units with each type of terrain and the current ground condition. The base terrain of a hex
(clear, rough, woods or forest) is often modified by the terrain features described below. Where there are mixed terrain types in a hex (e.g., 3618), use the costliest type of terrain for the purposes of movement.
5.2.1 Severe Terrain Hexsides. Only infantry units may cross a non-road severe terrain hexside Non-motorized infantry may use normal movement +1MP (5.1.1), march movement +1MP (5.1.4) or minimal movement (5.1.6). Armored infantry and panzergrenadiers may only use minimal movement (5.1.6). All units may cross a severe terrain hexside along a highway, road or trail using road movement (5.1.2) and all motorized units, Allied infantry and Allied engineer units may do so using strategic movement (5.1.3). A unit using road or strategic movement may ignore severe terrain hexside costs and any unit may move parallel to a severe terrain hexside consistent with the other features of the hex (e.g., rivers, waterways, lakes, reservoirs, marsh and Westwall terrain). The effects on movement are the same if the severe terrain symbol exists on one or both sides of the hexside.
5.2.2 Lake and Reservoir Hexsides. No unit may move across a lake or reservoir hexside. 50
5.2.3 River Hexsides. Any unit may cross a river hexside over an intact bridge of the appropriate capacity (5.2.6). A non-motorized infantry, armored infantry or panzergrenadier unit may move across an unbridged river hexside and any associated severe terrain using minimal movement (5.1.6).
5.2.4 Waterway Hexsides. Any unit may cross a waterway hexside over an intact bridge of the appropriate capacity (5.2.6). Only nonmotorized infantry, armored infantry and
48 As a game aid, orient Resting markers downward for units that were attacked while resting.
49 See the “units” section of the introduction for a breakdown of motorized and non-motorized units.
50 The Urft Reservoir dam between hexes 5005-5105 is a reservoir hexside and is impassable to all units.
panzergrenadier units may cross an unbridged waterway hexside with engineer assistance.
5.2.5 Engineer Assistance. A non-motorized infantry, armored infantry and panzergrenadier unit may cross an unbridged waterway hexside using minimal movement (5.1.6) if the hex it crosses from also contains an engineer unit (e.g., the two units begin their movement in the same hex). Non-motorized infantry, armored infantry and panzergrenadier units may trace a supply line through a friendly engineer unit across a ford, unbridged river or unbridged waterway hexside if they remain adjacent to each other. 51
5.2.6 Bridges. Bridges connect the highways, roads or trails adjacent to them and allow units to cross over river, waterway and any associated severe terrain hexsides with certain limitations. Note that all of the Our River and Sauer River bridges south of Dahnen (4324) are “blown” at the beginning of the “Wacht am Rhein,” “Last Blitzkrieg” and “Das Eisen Schmieden” scenarios. 52 The sixteen “undiscovered” bridges marked with a yellow-circled “?”are also “blown” in the basic game (exception: Ouren bridge uncertainty [10.5.2]).
53
5.2.6.1 Road Bridges. A unit crossing an intact road bridge may only use road movement (5.1.2), strategic movement (5.1.3) or minimal movement (5.1.6), consistent with its unit type (motorized or non-motorized) and bridge capacity.
54 Road bridges are of two types:
5.2.6.1.1 “Heavy” road bridges (double-lined, black-colored) were typically made of stone or steel and can support any type of unit
5.2.6.1.2 “Light” road bridges (single-lined, black-colored) were typically made of wood and
can only support light armor, 55 infantry of any type, engineer, rocket artillery, headquarters and commando units.
5.2.6.2 Rail Bridges. Rail bridges (blackcolored cross-hashed symbols) may be crossed by any unit using normal movement (5.1.1) and adding one movement point (+1MP) for the bridge, or minimal movement (5.1.6). An infantry unit may also use march movement (5.1.4). Rail bridges do not connect to any highways, roads or trails but they may be used to trace supply (2.2) across a river or waterway up to four hexes from the rail bridge hex.
5.2.6.3 Bridge Demolition. A combat unit that is in good order (2.7) and not in strategic movement (5.1.3) or reserve (5.4) may attempt to demolish (blow) an intact bridge when an enemy unit attempts to move, attack or advance across it Full-strength engineer regiments may blow up to two bridges per game turn. Non-engineer units, reducedstrength engineer regiments and engineer battalions may attempt to blow only one bridge per game turn. Each side may make only one attempt to blow any single bridge per player turn and possession of the bridge must change hands before another attempt may be made.
56 For each attempt, the non-moving player chooses a friendly unit that is in range with a clear path to the bridge hexside and rolls one die on the Bridge Demolition Table The path to the bridge hexside is blocked if it must traverse an unbridged river or waterway, non-road marsh terrain or non-road severe terrain hexside, or a hex containing enemy units or their ZOCs (friendly combat units negate enemy ZOCs for this purpose). A +1 die-roll modifier is added if
51 Engineers operated assault boats to ferry troops and supplies across rivers and waterways
52 The Germans blew these bridges in the fall of 1944 during their retreat to the Westwall
53 Also see optional Bridge Discovery (11.12).
54 The non-road bridge at Alscheid (4028-4128) is crossed like a rail bridge (terrain entry cost +1MP).
55 German Puma, Lynx, and SPW, British Humber IV and Staghound, and U.S. M-5 Stuart armor units.
56 Possession of a contested bridge is gained by occupying both hexes adjoining the bridge hexside with a friendly combat unit for at least one game turn
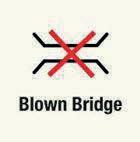
a non-crossing enemy unit exerts a ZOC into the hex that is being entered, the bridge enters a Liège city hex (2602, 2702, 2703), or a German lead commando unit occupies one of the bridge hexes (11.15.4). A -1 die-roll modifier applies to attempts by the U.S. V/291 Engineer Combat Battalion. Place a Blown Bridge marker in the defending unit’s hex pointing toward the bridge that receives a “D” result. 57 Units attempting to cross a newly blown bridge must end their movement without crossing. Attacking armor units may complete their attack but lose any combined arms or armor superiority advantage they may have claimed. Blown bridges negate the roads crossing them and unless rebuilt, remain destroyed indefinitely.
5.2.7 Fords. A non-motorized infantry unit may move across any ford by using normal movement (5.1.1) and adding two additional movement points (+2MP) for the ford (and one additional movement point [+1MP] for any severe terrain hexside if present), or it may use minimal movement (5.1.6). An armored infantry or panzergrenadier unit may move across a ford without severe terrain by using normal movement (5.1.1) and adding three additional movement points (+3MP) for the ford, or it may move across a ford with severe terrain by using road movement (5.1.2) along an “approach trail” 58 and adding three additional movement points (+3MP) for the ford, or it may use minimal movement (5.1.6) A light armor unit 59 may move across a ford without severe terrain by using normal movement (5.1.1) and adding three additional movement points (+3MP) for the ford, or it may move across a ford with severe terrain by using road movement (5.1.2) along an approach trail and adding three additional movement points (+3MP) for the
ford. A light armor unit may not cross a ford across a non-road severe terrain hexside and no other unit types may cross a ford. 60
5.2.8 Marsh Terrain. Movement in marsh terrain is severely affected by the presence or absence of highways, roads or trails and only one motorized unit may occupy marsh terrain at any one time.
5.2.8.1 Non-Road Marsh Hexside. A nonmotorized infantry unit may enter marsh terrain across a non-road hexside using normal movement (5.1.1) plus one additional movement point (+1MP) for the marsh (and +1MP for a severe terrain hexside if present), or it may use minimal movement (5.1.6) An armored infantry or panzergrenadier unit may only enter marsh terrain across a non-road hexside using minimal movement (5.1.6). No infantry unit may use march movement (5.1.4) to enter marsh terrain.
5.2.8.2 Road Marsh Hexside. All other units may only enter or exit marsh terrain along a highway, road or trail using road movement (5.1.2) and any motorized unit, Allied infantry or Allied engineer unit may do so using strategic movement (5.1.3).
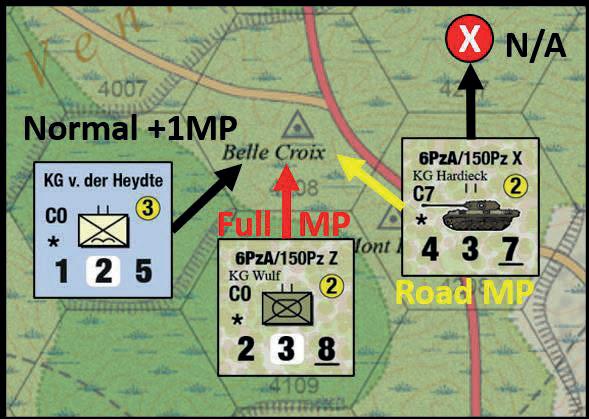
5.2.9 Westwall Terrain. Allied units may only enter Westwall terrain using normal movement (5.1.1) or minimal movement (5.1.6). German
57 As a game aid, place the Bridge marker (intact or blown) in the hex of the moving/attacking unit. If the bridge faces north/south, place the marker on the north side for Allied and the south side for German capture attempts.
58 E.g., hexsides 0731-0732, 3022-3122, 4517-4617.
59 German Puma, SPW and Lynx, British Humber IV and Staghound, and U.S. M-5 Stuart armor units.
60 See the Movement Examples player aid card.
units may enter Westwall terrain using normal movement (5.1.1), road movement (5.1.2), strategic movement (5.1.3), forced march (5.1.5) or minimal movement (5.1.6), consistent with the restrictions for those movement types. No unit may use march movement (5.1.4) to enter Westwall terrain.
5.2.10 Settlements. Movement is unaffected by the presence of cities, towns, castles, villages, hamlets or points (exception: strategic movement through non-motorized units in cities, towns and villages [5.1.3])
5.3 Specialized Movement by Unit Type
5.3.1 German Kampfgruppen (KG). A German Kampfgruppe is always composed of two motorized units, at least one of which must be an armor unit. A German KG may be formed when two eligible units occupy the same hex during movement or advance after combat. Once formed, the KG moves as a single unit at the slower unit’s movement rate, is subject to the terrain restrictions that may affect the armor portion of the unit, and counts as one regimental-sized unit for stacking purposes until the owning player separates it. 61 KGs may reform with other friendly units that occupy the same hex, subject to division affiliation, unit size and stacking limits. KGs that begin a scenario on-map or enter as reinforcements do not spend MP to form.
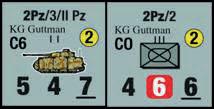
5.3.1.1 Same KG Identifier. When two or more units with the same KG identifier are on the map, they may only form a Kampfgruppe with each other. This limitation ceases if only one unit remains on the map. Two German armor units may only form a
61 As a game aid, stack the unit with the lowest MP on top of a KG
Kampfgruppe with each other if they share the same KG identifier 62
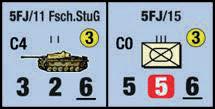
5.3.1.2 One or no KG Identifier. A German panzergrenadier regiment or battalion (only) with a unique or no KG identifier may form a Kampfgruppe with an armor unit from the same division or an army-level, brigade-level or corps-level armor unit (exception: inter-German stacking [5.8.3]).
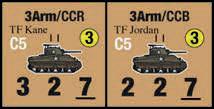
5.3.2 Allied Task Force (TF). Besides those single-unit Combat Commands that have task force identifiers, the Allied player may form a multi-unit “Task Force” (TF) by combining two armor battalions from the U.S. 3rd Armored Division. 63 The U.S. 9Arm/60(+) Armored Infantry Battalion may form a TF with any other unit of 9th Armored Division, and the 1 Army/526 Armored Infantry Battalion may form a TF with any army-level or corps-level tank or TD battalion Once formed, a TF moves like a German Kampfgruppe
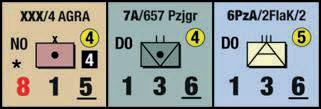
5.3.3 Artillery, Anti-Tank and Flak/AAA. Artillery, AT and Flak/AAA units with an underlined movement allowance are motorized. German artillery units with a non-underlined movement allowance are non-motorized (horse-drawn) and those with a movement allowance of “0” may not move. 64 Howitzer-type artillery, AT and Flak/AAA units may only cross rivers or waterways at intact, heavy road or rail bridges. Rocket (R-type) artillery units may cross rivers or waterways at any intact bridge. An artillery, AT or Flak/AAA unit may only cross a severe terrain hexside along a highway, road or trail or
62 KG Peiper, KG Bayer, KG Fallois, KG Telkamp, KG Kuhlmann
63 3rd Armored Division was committed during the most uncertain period of the battle and broken into numerous battalion-sized, armor/infantry task forces to plug the many holes in the Allied defense.
64 The H.Gru.B/725 rail gun battalion and the 7A/Pzjgr 501 Fest. anti-tank battalion.
over an intact bridge. Artillery, AT and Flak/AAA units that are not in SM may “deploy” for combat in any terrain. 65 If they “deploy” in a hex with a highway, road or trail, friendly units may freely move through them using road movement (5.1.2) or strategic movement (5.1.3). All artillery, AT and Flak/AAA units begin a scenario “deployed” unless otherwise stated in the game status card and OOA Rocket artillery, AT and Flak/AAA units may “deploy” at the beginning or the end of their movement at no cost. 66 Howitzer-type artillery units may “deploy” at the beginning of their movement phase at no cost or at the end of their movement by paying one additional movement point (+1MP) (exception: bridge interdiction fire [7.7.3]). Howitzer-type artillery units that either retreat or do not “deploy” at the end of their movement are flipped over to their “Moved” side and may not fire until they “deploy” again. Artillery units must be “deployed” to conduct artillery missions.
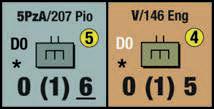
5.3.4 Engineers. German engineers (Pioniertruppen) with a movement allowance of “6” are motorized, those with a movement allowance of “5” are non-motorized. All Allied engineers are non-motorized but may use SM (5.1.3). Motorized units may move through a friendly engineer unit using normal movement (5.1.1), road movement (5.1.2) or strategic movement (5.1.3) at no additional movement point cost. 67 Engineers utilize specialized movement when building bridges (9.1) and creating roadblocks (9.3). Also see the scenario OOA notes for engineer movement restrictions.
At the beginning of the owning player’s movement phase, armor and infantry units (only) that are in good order (2.7) and not adjacent to enemy combat units may be designated as “reserves ” Armor, armored infantry and panzergrenadiers are “armored” units that may be designated as combat reserves or exploitation reserves.68 Non-motorized infantry units may only be designated as exploitation reserves. The number of reserve markers does not limit the number of units that may be in reserve. Each scenario’s OOA identifies which units start in reserve. Units arriving as reinforcements may not be placed in reserve on their turn of entry. Reserve units may not attempt to blow a bridge or build an improved position (IP). Units in reserve may only form KGs or TFs with other units that are also in reserve. Units in reserve that have an enemy combat unit move, advance or retreat adjacent to them at any time immediately lose their reserve status whether the enemy unit exerts a ZOC or not (exception: Allied reserve restrictions [10.4]).

5.4.1 Combat Reserves. A combat reserve may move up to one-half its movement allowance (FRU) using normal movement (5.1.1) and/or road movement (5.1.2) during the owning player’s movement phase and may then attack during the combat phase. If a combat reserve receives an ENG result or becomes disorganized (7.10.8), it immediately loses its reserve status. Any other result allows it to maintain its reserve status and move and attack again in the owning player’s exploitation phase (8.1, 8.3).
65 As a game aid, orient artillery unit counters upward for those units that have deployed but not fired in the current game turn and downward for units that have conducted any type of fire in the current game turn.
66 Their nearness to the front lines and extensive training enabled these units to deploy quickly.
67 Deployed engineers operated in a general support role over a wide area, concentrating only when needed.
68 “Armored” units fought directly from their vehicles and were able to “move out” quicker than non-armored units.
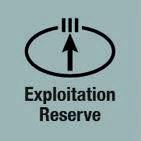
5.4.2 Exploitation Reserves. An exploitation reserve may not move in the owning player’s movement phase or attack in the owning player’s combat phase unless it is “committed” to battle (7.10.6.1). An exploitation reserve may move in the enemy reaction phase (6.0) or move and attack in the owning player’s exploitation phase (8.2, 8.3).
Reinforcements (single units or multi-unit KG/TFs) must enter the map during the owning player’s movement phase at the entry location(s) specified in that scenario’s OOA. 69
the reinforcements must wait until the owning player’s following turn and enter at the next unblocked entry hex (to the west, north or south for Allied Units, to the north or south for German units).
5.5.2 Exiting Units from the Map. The German player may exit units off the map and force the Allied player to withhold reinforcements from entering the game. German units may only exit Allied entry areas “A-C” and “F-N” using any type of movement. They may not exit off the map between entry areas “D-E,” “O-Q,” or hexes 4801, 4901, 5001, 5101, 5201, 5301, 5401 or 5501.
5.5.2.1 Movement Cost to Exit. A unit exiting the map pays movement points equal to the entry cost of the hex it is leaving during the movement phase, enemy reaction phase or exploitation phase, or it may exit the map during an advance after combat (7.12). 71
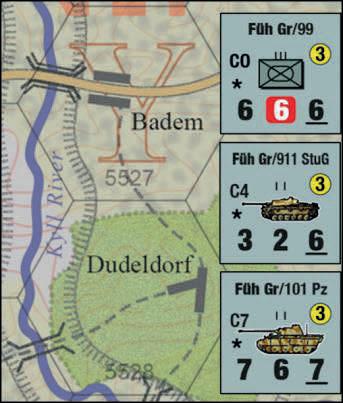
Reinforcements may enter on road hexes using road movement (5.1.2) or strategic movement (5.1.3), or non-road hexes between designated entry locations using normal movement (5.1.1), march movement (infantry only [5.1.4]) and/or minimal movement (5.1.6). Reinforcements may not enter the map using a forced march (5.1.5). Multiple reinforcements entering at the same time and location have their movement allowance reduced by the entry hex’s MP cost for each unit that enters ahead of them. 70
5.5.1 Blocked Entry. Reinforcements must enter the map on the turn and location of their scheduled entry unless those hexes are blocked by enemy units. Entry hexes are only blocked by physical occupation (not enemy ZOCs) or if German units have exited the map from those hexes. If all scheduled entry hexes are blocked,
5.5.2.2 State of Exited Units. Units must be in general supply to exit the map. Exited units are removed from play and may not return to the game. They are not considered eliminated and may not be rebuilt (3.3) or replaced (3.4).
5.5.2.3 Effects of Exited Units. Exited units may count toward German victory conditions. For every attack-strength point of German combat units that exit the map between entry areas “I-N,” the Allied player must “hold-off” at least double this number of attack strength points of reinforcements from the north and west sides of the map as soon as possible. For every attack-strength point of German combat units that exit the map between entry areas “A-C” and “F-H,” the Allied player must hold-off at least equal this number of attack-strength points of reinforcements from the south and west sides of
69 Also see optional Early Panzer Commitment (11.6), “Operation Spätlese” (11.7) and Montgomery’s Reaction (11.8).
70 In the diagram, the second and third units to enter at “Y” would have to pay +1MP for each unit that entered before them using road movement, or +2 MP using normal movement (under firm ground conditions). If two of the units were combined in a KG, only the second unit would pay +1MP or +2MP SM spacing may increase this cost.
71 E.g., the road movement cost if exiting along a highway, road or trail, or the base terrain and hexside cost if not.
the map as soon as possible. Allied reinforcement units with zero (0) attack strength may not enter until they can be accompanied by a reinforcement unit with a positive attack strength at the same entry area. German units that exit the map eliminate those entry areas for Allied reinforcements and tracing Allied supply for the remainder of the game.
5.5.2.4 Allied Units “Held-Off.” Allied reinforcements that are held off may be any type of combat unit and may not enter the map for the rest of the game. If the Allied player has no reinforcements entering the map from the side that German units exit, reinforcements from another side of the map must be held-off at the earliest opportunity. If the Allied player has no reinforcements to hold-off in the current turn, future reinforcements must be held off in the order of their scheduled appearance to satisfy the hold-off conditions.
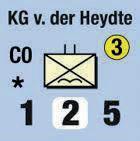
5.5.3 German Air Drop. “Operation Stösser” represents the attempt to land a German parachute battalion behind enemy lines at the beginning of the Ardennes Offensive. 72 See the German OOA notes for arrival details. If landed, KG von der Heydte is in general supply for its first two game turns on map and subject to standard supply rules thereafter. 73 Its movement is restricted as follows:
5.5.3.1 If it lands on-target at full-strength (1-25), it may not move until the turn after it lands and is not subject to German traffic jams (10.6).
5.5.3.2 If it scatters and lands at reduced strength (0-1-5), it is disorganized on the game turn it lands, regroups on the following game turn (7.10.8) and is not subject to German traffic jams (10.6) thereafter Place a Disorganized / Regrouping marker accordingly. Allied units
using strategic movement (5.1.3) may move adjacent to it without penalty Also see the Special German Artillery rules (7.7.7.3)
5.5.3.3 It may not be used to capture Allied fuel dumps, but it may search for them.
5.5.3.4 It is not eligible to earn a German victory condition through occupation of any Liège or Namur city hex.
The arrival and movement of designated Allied and German units are “restricted” until they are “released” on a specific game turn or when or certain game conditions are met. Some units are also “withdrawn” from play during the game and must move through the map and exit from a valid supply source for that side. Withdrawn units may not be replaced or returned to play and there is no penalty if they have already been eliminated (exception: German 89/1055 Infantry Regiment) All of these units are specified in the German Surprise Advantages rules (10.3 to 10.8) and each scenario’s OOA notes.
A Zone of Control (ZOC) represents the combat influence and/or limited occupation of the hexes adjacent to a unit’s location. A unit may extend a ZOC into some or none of its adjacent hexes depending on the type of ZOC the unit exerts, the time of day, the hexside crossed and the terrain in the adjacent hex. When a ZOC is exerted into an adjacent hex, it applies to any settlement, marsh terrain or Westwall terrain there as well. Supply level does not affect ZOCs (an unsupplied or isolated unit may still exert a ZOC). A ZOC may affect the movement of both friendly and enemy units. 74 Each unit exerts
72 Inadequate preparation, adverse weather and the fog-of-war hampered “Operation Stösser” from the beginning.
73 KG von der Heydte actually landed in the hours just before dawn and spent the first day assembling.
74 See optional Road Space (11.13).
either a “full ZOC,” “partial ZOC” or “no ZOC.” 75
5.7.1 Full ZOC. A single unit with a red square underlying its defense strength that is not in strategic movement (SM, [5.1.3]) exerts a full ZOC. 76 A multi-unit German Kampfgruppe (KG) composed of a panzergrenadier regiment and an armor battalion also exerts a full ZOC
5.7.1.1 Day Turns. On daytime (AM) turns, a full ZOC extends into clear, rough, woods and forest hexes, along highways, roads or trails, across fords and intact bridges, and across an unbridged river hexside without severe terrain. The term “along” means that the highway, road or trail connects the unit’s hex and the hex it exerts a ZOC into. However, a full ZOC does not extend across a lake, reservoir or unbridged waterway hexside, or across an unbridged river hexside with severe terrain
5.7.1.2 Night Turns On night turns, daytime full ZOC provisions apply but a full ZOC do not extend across river or severe terrain hexsides into forest hexes except along highways, roads or trails or across an intact bridge or ford
5.7.2 Partial ZOC. A single unit with a white square underlying its defense strength that is not in strategic movement (SM, [5.1.3]) exerts a partial ZOC. 77 A full-strength single unit with a square white line around its defense strength that is not in strategic movement (SM, [5.1.3]) exerts a partial ZOC only when it occupies an improved position (IP). 78 A multi-unit German Kampfgruppe (KG) or Allied task force (TF) composed of two armor units exerts a Partial ZOC A multi-unit KG/TF composed of an
armor unit and an armored infantry or panzergrenadier battalion exerts the current ZOC of the infantry unit
5.7.2.1 Day and Night Turns. On both day and night turns, a partial ZOC extends into clear, rough and woods (but not forest) hexes, along highways, roads and trails, across intact bridges (but not fords), and across unbridged river hexsides without severe terrain The term “along” means that the road connects the unit’s hex and the hex it exerts a ZOC into. A partial ZOC does not extend into forest hexes, across fords or across severe terrain hexsides except along highways, roads or trails, across lake, reservoir or unbridged waterway hexsides, or across unbridged river hexsides with severe terrain
5.7.3 No ZOC. A single unit with no marking underlying or around its defense strength does not exert a ZOC into any adjacent hex at any time. 79
5.7.4 ZOC Effects on Movement. Units must stop moving as soon as they enter a full or partial enemy ZOC. Units may not move directly from one enemy ZOC to another. Rather, they may withdraw from an enemy ZOC into a non-enemy controlled hex as the first part of their movement and then re-enter an enemy ZOC later if sufficient movement points are available. Units may conduct limited retreats or advance after combat directly from one enemy ZOCs to another (see 7.11.1 and 7.12.7).
5.7.4.1 Breaking Contact. On day turns (only), all non-armor units must spend one additional
75 See the Zone of Control Chart for a full summary and illustrated examples
76 Regimental or brigade-sized (III, X) infantry of any type at full or reduced-strength.
77 Battalion-sized (II) infantry of any type (exception: Belgian V Fusiliers), engineer regiments and brigades (III, X), U.S. cavalry regiments (III), British armoured Battlegroups (X), Allied Combat Commands (X), the five “Sherman” armor task groups (X) of 2nd Armored Division, the “Panther” regiment of KG Peiper (1SSPz/1 Pz), and the Mk IV and Mk V panzer battalions of KG Kuhlmann (12SSPz/12/I & II)
78 Full-strength U.S. M5 Stuart “Cav” battalions and British Humber IV and Staghound “Recce” units.
79 All artillery, rocket artillery, Flak/AAA, Anti-Tank, headquarters and commando units, battalion-sized (II) engineer units, battalion-sized armor units (except as noted), and all battalion-sized units at reduced strength.
movement point (+1MP) to exit an enemy ZOC. This does not allow units to move from one enemy ZOC directly into another.
5.7.4.2 Negation of Enemy ZOCs. Friendly units negate enemy ZOCs for the purposes of tracing supply and conducting retreats.
5.7.5. Strength Loss Effects on ZOCs.
5.7.5.1 Full ZOC Units. A unit that exerts a full ZOC retains it at both full and reducedstrength.
5.7.5.2 Partial ZOC Units. A regimental or brigade-sized armor unit retains its partial ZOC at full or reduced-strength. A battalion-sized armor unit that exerts a partial ZOC at fullstrength loses it at reduced-strength (it becomes a no-ZOC unit). A battalion-sized infantry unit that exerts a partial ZOC at full-strength loses it at reduced-strength unless it occupies an improved position (IP, 9.2), or is stacked with another reduced-strength infantry battalion.
Single-counter combat units are company (I), battalion (II), regimental/group (III) or brigade (X) in size. For the purposes of stacking, company-sized units count as one-third of a battalion-sized unit and battalion-sized units count as one-third of a regimental or brigadesized unit. Artillery corps and brigades (X) are regimental-sized units. Headquarters are battalion-sized units. Commando units are individual jeep teams and do not count toward stacking limits. A multi-unit German Kampfgruppe (KG) or Allied task forces (TF) forms a single regimental-sized unit. No more than two regimental or brigade-sized units may occupy a hex regardless of unit type, strength or number of steps. No more than one regimentalsized motorized unit may occupy marsh terrain (5.2.8) A unit (or multi-unit KG/TF) moving in the movement, enemy reaction or exploitation phase may not exceed stacking limits at any time, to include moving through hexes that are
stacked to maximum capacity. However, a unit (or multi-unit KG/TF) retreating as a result of combat or reserve combat may temporarily exceed stacking limits during its retreat (7.11.3).
5.8.1 Stack Movement. Units may only move as stacks of units using normal movement (5.1.1) or minimum movement (5.1.6) (exception: multi-unit KG/TF [5.3.1 and 5.3.2]). Units may split off from stacks and continue moving after slower units exhaust their movement allowance. Stacks may be broken up, combined and reassembled at any point during movement as long as the two regiment (or equivalent) stacking limit is not exceeded.
5.8.2 Inter-Allied Stacking. British, French and U.S. units may not stack together unless forced to do so during retreats. In such cases they must separate at the earliest opportunity (exception: British 31T/1 FFY/B flame-throwing tank squadron, see the British OOA notes).
5.8.3 Inter-German Stacking. The three units of Panzer Brigade 150 may not stack with nonWaffen SS units at any time and if forced to do so during a retreat, must continue to retreat to an unoccupied or Waffen SS-only occupied hex and become disorganized (7.10.8).
5.8.4 Game Marker Effects on Stacking. Air mission counters, bridge, disorganized, disrupted, fatigued, fuel depot, improved position, interdicted, reserve, and supply level markers have no effect on stacking. Strategic Movement (SM) markers allow only one unit (or KG/TF) to occupy a hex at a time (exceptions: non-motorized units occupying cities, towns or villages [5.1.3], deployed artillery, AT, Flak/AAA [5.3.3] and engineer units [5.3.4]).

During the enemy reaction phase, the non-phasing player may move any of his/her units that are in exploitation
reserve. A motorized unit (or multi-unit KG/TF) in exploitation reserve may move up to its full movement allowance using normal movement (5.1.1), road movement (5.1.2) or minimal movement (5.1.6). A non-motorized unit in exploitation reserve may only move up to 3MP using normal movement (5.1.1), road movement (5.1.2) or minimal movement (5.1.6). When a unit completes its reaction movement, its reserve marker is removed, it may not attack and it may not move again during the same game turn 80
During the combat phase, the phasing player’s combat units may attack enemy units that are adjacent to them (exception: lake and reservoir hexsides [7.2.8]). Non-adjacent enemy units may be attacked with artillery. The combat strength of a single unit (attack or defense) is unitary and may never be divided among separate battles. A unit (or multi-unit KG/TF) may make only one attack per combat phase and no enemy unit may be attacked more than once per combat phase (exceptions: “engaged” [7.10.6] or “unresolved battle” [7.10.7] combat results) British, French or Belgian units may not conduct joint attacks with U.S. units and may only defend together if forced to occupy the same hex after a retreat (exception: inter-Allied stacking [5.8.2]). 81 German units may attack and defend together with limitations (interGerman stacking [5.8.3]). The phasing player is the attacker, the non-phasing player is the defender. The phasing player may make as few or as many attacks as desired, resolving the battles one at a time, in any order desired.
7.1.1 Attack Frontage. One or more combat units may attack one or more enemy occupied hexes provided that: (1) every attacking unit is adjacent to (or within artillery range of) each defending unit that it attacks and (2) the defending units must occupy one continuous line and (3) when one or more combat units attack one or more enemy occupied hexes, the attack strength of all attacking combat units must be combined into a single attack strength. Multiple combat units stacked together in a single hex may attack out of that hex individually or in combination against one or more enemy occupied hexes.
7.1.2 Defense Frontage. Multiple units occupying a single hex must defend with one combined defense strength. Multiple units in multiple hexes defending against a single attack must combine the defense strength of all defending units into one defense strength. 82
Each type of base terrain has an appropriate odds column on the Combat Results Table (CRT). The terrain column used depends on the type of base terrain (clear, rough, woods or forest) the defending unit occupies. If more than one type of base terrain appears in a hex (e.g., hex 3619) or multiple enemy-occupied hexes are attacked, use the type of base terrain most advantageous to the defender.
7.2.1 Clear Hexes. Armor units attack nonarmor units in clear hexes at double-strength unless one or more of the defending units is an engineer, AT or Flak/AAA unit. 83 Armor units
80 Reaction movement is designed to counter a strong enemy move as quickly as possible. As a game aid, orient the reacting unit counter sideways to indicate that it has already moved in the current game turn.
81 The British 31T/1 FFY/B flame-throwing tank squadron was attached to the U.S. 2nd Armored Division and is the only Allied unit that may freely attack and defend with U.S. units
82 See the Complex Combat Examples player aid card.
83 Units with a D0 combined arms/armor superiority rating were trained and equipped for anti-armor defense
defend in clear hexes at double-strength unless attacked by other armor units that claim an armor superiority advantage Cities and towns located in clear hexes negate this modification.
7.2.2 Rough Hexes. These have no additional effect on combat beyond their CRT values.
7.2.3 Woods Hexes. These have no additional effect on combat beyond their CRT values.
7.2.4 Forest Hexes. Armor units attack into forest hexes along highways and roads at fullstrength. Armor units attack into forest hexes along trails and across non-road forest hexsides at half-strength (FRU). Armor units (or KG/TF) that exert a ZOC or are stacked with an infantry unit defend in forest hexes at full-strength. Otherwise, they defend in forest hexes at halfstrength (FRU) Players may claim a combined arms or armor superiority advantage in a forest hex only if one (or more) of their participating armor units attack or defend against an attack along a road or highway (but not a trail). 84
7.2.5 Marsh Terrain. Armor units attack into marsh terrain at half-strength (FRU) regardless of the presence of highways, roads or trails. Players may claim a combined arms or armor superiority advantage in non-forest hexes that contain marsh terrain.
7.2.6 Severe Terrain Hexsides. Armor units attack across severe terrain hexsides at halfstrength (FRU) regardless of the presence of highways, roads or trails. The effects on combat are the same if a severe terrain symbol exists on one or both sides of the hexside.
7.2.7 Ford, River and Waterway Hexsides. All non-artillery units attack at half-strength (FRU) across ford, river or waterway hexsides, regardless of crossings. Armor units may claim a combined arms or armor superiority advantage only when attacking along a highway or road
across an intact heavy road, heavy tank or rail bridge
7.2.8 Lake and Reservoir Hexsides. Nonartillery units may not attack across a lake or reservoir hexside
7.2.9 Points. “Point” features have no effect on combat
7.2.10 Hamlets. Battalion-sized units defending a hamlet may choose to take a step loss and hold position rather than retreat. Regimental/brigadesized units must retreat on any “D” result.
7.2.11 Castles. An infantry unit defending a castle may increase its defense strength by one point (maximum one-point per castle). Armor units (or KG/TF) that exert a ZOC and all infantry units defending a castle may choose to take a step loss and hold position rather than retreat. Artillery, AT, Flak/AAA, headquarters and no-ZOC armor units must retreat on any “D” result. When a castle hex also contains an improved position (9.2), the castle’s +1 strengthpoint benefit is ignored.
7.2.12 Villages. All units defending a village may choose to take a step loss and hold position rather than retreat.
7.2.13 Towns. All non-armor units and armor units (or KG/TF) that exert a ZOC or are stacked with an infantry unit defend a town at fullstrength. Armor units without a ZOC or are not stacked with an infantry unit defend a town at half-strength (FRU). All units defending towns receive a defensive (-1) combat odd shift and may choose to take a step loss and hold position rather than retreat 85 Artillery barrage strength is halved when conducting barrage attacks and offensive fire support into towns.
7.2.14 Cities. All non-armor units and armor units (or KG/TF) that exert a ZOC or are stacked with an infantry unit defend a city at double-
84 Gravel trails often washed out in the wintery Ardennes weather, limiting an armor unit’s ability to mass quickly. 85 This includes the towns of Simmerath (4804) and Rollesbroich (4903) that are located in Westwall terrain.
strength. Armor units without a ZOC or are not stacked with an infantry unit defend a city at half-strength (FRU) All units defending a city may choose to take a step loss and hold position rather than retreat. Artillery barrage strength is halved when conducting barrage attacks and offensive fire support into a city
7.2.15 Westwall Terrain. All units in Westwall terrain defend at double-strength and may choose to take a step loss and hold position rather than retreat. German units defending Westwall terrain receive an additional defensive (-1) combat-odds shift Armor units attack into Westwall terrain at half-strength (FRU) and may not claim a combined arms/armor superiority advantage regardless of the presence of highways, roads or trails Artillery barrage strength is halved when conducting barrage attacks and offensive fire support into Westwall terrain.
7.2.16 Improved Positions. Units occupying improved positions (IP) defend at doublestrength and may choose to take a step loss and hold position rather than retreat. Artillery barrage strength is halved when conducting barrage attacks and offensive fire support into improved positions.
All combat and headquarters units have a morale rating from 1 (best) to 8 (worst) depicted on the unit counter by a number in a yellow circle. The player with the best morale unit receives one favorable combat-odds shift during combat resolution (+1 if attacking, -1 if defending), ties offset. 86 Artillery units may not confer their morale rating unless they defend against a direct attack by non-artillery units
Combat coordination between units that extensively trained and fought together was a strong force multiplier in WWII combat. Unsupplied and fatigued units may receive defensive but not offensive combat coordination benefits. Isolated, disorganized or disrupted units cannot receive combat coordination benefits. Units from up to two divisions (e.g., 26VG and 2Pz) may participate in a single battle and receive combat coordination benefits. If units of three or more divisions participate in a single battle, they lose all combat coordination benefits. Army and corps-level units are exempt from this restriction. 87 The number of applicable combat-odds shifts are described below and summarized in the Combat Coordination Table
7.4.1 Uncoordinated Combat. When a player attacks or defends with independent (nondivisional) units, less than two units from the same divisionor a combination of the two, that player may not claim a combat coordination benefit (zero combat-odds shifts) 88
7.4.2 Coordinated Attack. When two or more units from the same division combine in an attack, the attacker receives one positive (+1) combat-odds shift. Additional friendly units may participate in such attacks but do not further increase this benefit.
7.4.3 Coordinated Defense. When two or more units from the same division are stacked together or are adjacent to one another when one or more of them is attacked, the defender receives one negative (-1) combat-odds shift. Additional friendly units may participate in such a defense but do not further increase this benefit.
86 Also see optional A Question of Morale (11.18).
87 Non-divisional units typically operated under the control of a division while in that division’s zone of operations.
88 Division units are identified by a number to the left of the unit’s name on the unit counter (E.g., 101/504). Units with an army, army group or corps designation (E.g., 1Army/, H.Gru.B/, LXVI/) are not division units.
7.4.4 Coordinated Attack vs. Coordinated Defense. A coordinated attack conducted against a coordinated defense cancel each other out (zero combat-odds shifts).
7.4.5 Coordinated Flanking Attack. When two or more units from the same division conduct a “flanking attack” (attacking a single hex from at least two non-adjacent hexes), the attacker receives one positive (+1) combat-odds shift against a coordinated defense or two positive (+2) combat-odds shifts against an uncoordinated defense (exception: Only one positive [+1] combat-odds shift may be received if the defender consists of one or more units with a morale rating of “1”). 89 The two units from the same division need not form the nonadjacent prongs of the attack, another friendly combat unit may fulfill this requirement. 90 Neither artillery offensive fire support (7.7.5) nor ground attack support (7.8.1) may provide the flanking effect.
7.4.6 Singleness of Effect. No more than one combat coordination benefit and one coordinated flanking attack benefit (+ or -) may be received by each player per battle.
7.4.7 Special Brigades. Even though they are not divisions, the Führer Begleit Brigade (Füh Bglt), Führer Grenadier Brigade (Füh Gr) and British 29th Armoured Brigade (29Arm) may use combat coordination benefits. 91
7.5.1 Combined Arms. Combined infantry/armor and supporting arms operations were a powerful force multiplier in WWII combat. To determine this, cross index the participating unit types on the Combined Arms
Table to determine whether the attacker or defender may claim an offensive (-1) or defensive (+1) modification to the combat resolution die-roll. 92 Forest (7.2.4), ford, river and waterway hexsides (7.2.7) and Westwall terrain (7.2.15) can restrict or prohibit combined arms or armor superiority advantages. The decision to claim a combined arms or armor superiority advantage is optional but must be made before the combat resolution die is rolled.
7.5.1.1 Combined Arms Unit Types.
7.5.1.1.1 Individual Units. Many singlecounter armor units in the game are “armor & infantry” combined arms teams that may individually claim a combined arms advantage (denoted by an “I#” on the unit counter). They include U.S. armored combat commands (X), British armoured battlegroups (X), U.S armored cavalry regiments (III), the German panzer regiment (III) 1SSPz/1 Pz (KG Peiper), German panzer reconnaissance battalions (II, armor class I2 and I4), and the Mk IV and Mk V panzer battalions (II) of 12SSPz (KG Kuhlmann)
7.5.1.1.2 Combined Units. Most units must combine with another unit to claim a combined arms advantage (denoted by a “C#” on the unit counter). These include infantry units of any type combined with a friendly armor unit of the same nationality, or two armor units that are formed into a German Kampfgruppe (5.3.1) or Allied task force (5.3.2).
7.5.1.1.3 Anti-Armor Defense Units. AT, Flak/AAA and engineer units may only claim a defensive (+1) combined arms advantage (denoted by an “D#” on the unit counter), either individually or when stacked with other units.
89 Elite units with a morale value of “1” were trained and expected to fight on, even in the direst circumstances.
90 E.g., the 16AM German flank attack by 62/190, 62/183 and 116Pz/60 regiments in Habscheid (4720), hex 4721 and Grosskampenberg (4621) respectively against the U.S. 106/424 regiment in Heckhuscheid (4620).
91 None of the other British armoured brigades trained and fought together enough to earn this benefit.
92 The combined arms modification allows for seven possible results on the Combat Results Table instead of six.
This benefit does not apply to German flak units on clear-weather day turns. 93
7.5.1.1.4 Non-Listed Units. Artillery, Belgian, French and headquarters units may not contribute to or claim a combined arms advantage (denoted by an “N#” on the unit counter). 94
7.5.2 Armor Superiority. Armor superiority is a continuation of the Combined Arms rule that reflects the qualitative capabilities of participating armor units and is only applicable when a battle involves armor vs. armor units or infantry & armor vs. infantry & armor units (signified by an “AST” result on the Combined Arms Table) When this occurs, cross index the highest armor class of participating armor unit for both sides on the Armor Superiority Table. 95 The result determines whether the Allied player (A) or the German player (G) may claim an offensive (-1) or defensive (+1) armor superiority advantage. In cases where the opposing armor units are equal, the advantage goes to the defender (D) Units with an armor class of “0” have no offensive armor capability.
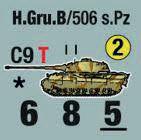
7.6.1 German “Tiger” Tanks. Several German heavy panzer and Panzerjäger units were consistently identified by the Allies as “Tigers.” Tiger tanks gain a favorable combat-odds shift (+1 if attacking, -1 if defending) when operating alone or with other units (exception: barrage attacks [7.7.4]) and may receive both the beneficial combat-odds shift for Tiger tanks and a combined arms/armor superiority advantage in a single battle. 96
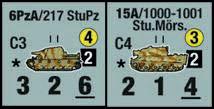
7.6.2 German “Sturm” Tanks. German Sturmtiger or Sturmpanzer IV armor units that are stacked with infantry may claim a +1 combat-odds shift when directly attacking a city, town, village, hamlet, Westwall terrain or improved positions (IP). They may also fire like artillery, do not pay MP to deploy (5.3.3), have a range of two hexes and may combine with other German artillery units for barrage attacks and offensive fire support, but may not conduct bridge interdiction fire or defensive fire support. They do not gain the +1 combat-odds shift when used as artillery.
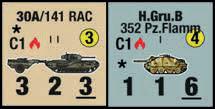
7.6.3 Flame-Throwing Tanks. Flame-throwing tanks that are stacked with infantry may claim a +1 combat-odds shift when attacking a city, town, village, hamlet, Westwall terrain or improved position (IP) during AM game turns only. Limit of one +1 combat oddsshift per attack. 97
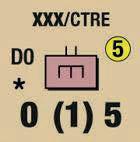
7.6.4 Engineer Vulnerability. Engineer battalions (II) were quite vulnerable when operating alone, as reflected by their defense strength in parentheses (1) 98 When they defend alone, their defense strength is “1” but the attacker gains one positive (+1) combat-odds shift. When they occupy an improved position (9.2) or are stacked with other friendly combat or headquarters units (including other engineer battalions), the “vulnerability” combat-odds shift does not apply Engineer regiments (III) are not subject to this rule.
93 German flak units were preoccupied with air defense during clear-weather daylight turns.
94 Lone artillery and headquarters units were particularly vulnerable to armored attack.
95 The “armor class” is the number following the combined arms letter on the left side of the unit counter.
96 The psychological effect of “Tiger” tanks was strongly felt by Allied troops.
97 The British Crocodile and German Flammpanzer 37(t) Hetzer flame-throwing tanks were much feared by infantry.
98 On the other hand, engineers possessed special equipment (e.g., mines, explosives, barbed wire, trench-digging equipment) which made them less vulnerable to armor.
The artillery units in the game represent army and corps-level gun, howitzer and rocket artillery battalions, regiments and corps. The artillery that was organic to infantry or armored divisions and brigades is factored into the attack and defense strength of the individual combat units. An artillery unit’s barrage strength (the left-hand number at the bottom of the unit counter) is highly dependent on organization, supply level, time-of-day and target terrain Artillery units have a defense strength of “1” and may retreat (7.11). Artillery units do not have steps and are eliminated if forced to take a step loss. Artillery units may only support units of their own nationality. Artillery units must be stacked with a friendly combat unit to conduct or continue any type of artillery fire if an enemy combat unit is adjacent to them. 99 See rule 5.3.3 for artillery movement. A deployed artillery unit (5.3.3) may conduct one bridge interdiction fire mission or barrage attack as its sole combat activity for that game turn, OR it may conduct one offensive fire support mission and one defensive fire support mission per game turn. Terrain does not affect the line of fire of artillery units. All artillery fire is voluntary and artillery units are unaffected by the combat results of their fire.
7.7.1 Artillery Range and Spotting. The range in hexes for all artillery units is printed on the right side of the unit counter beneath the morale rating. For bridge interdiction fire, barrage attacks and offensive fire support, the range is counted from the artillery unit’s hex to the enemy target hex. For defensive fire support, the range is counted from the artillery unit’s hex to the friendly supported unit’s hex. A friendly combat unit of the same nationality as the artillery unit(s) must be adjacent to or occupy
the target hex to spot artillery fire. If multiple hexes are being attacked or defended, all target hexes must be spotted and in range of all participating artillery units. 100
7.7.2 Barrage Strength Modifiers.
7.7.2.1 Supply Level. A deployed artillery unit in good order (2.7) may fire up to its full barrage strength. 101 A deployed artillery unit that is unsupplied may only fire up to half its barrage strength (FRU) Isolated artillery units may not fire at all.
7.7.2.2 Time of Day. On day turns, a deployed artillery unit in good order may fire up to its full barrage strength. On night turns, a deployed artillery unit in good order may only fire up to half its barrage strength (FRU)
7.7.2.3 Target Terrain.
7.7.2.3.1 Open Terrain. A deployed artillery unit in good order may fire up to its full barrage strength into open terrain (marsh terrain and clear, rough, woods and forest hexes that are either empty or contain castles, villages, hamlets, or points).
7.7.2.3.2 Built-Up Terrain. A deployed artillery unit in good order may only fire up to half its barrage strength (FRU) into built-up terrain (hexes with cities, towns, Westwall terrain or improved positions [IP]).
7.7.2.3.3 Terrain Hexsides. Lake, reservoir, river, waterway and severe terrain hexsides do not affect artillery fire.
7.7.3 Bridge Interdiction Fire. On day turns at the beginning of the air phase, an Allied artillery unit that is in good order (2.7) and within range of a bridge built by the German player (9.1, 9.1.1) that is spotted by a friendly unit may immediately deploy (5.3.3) and attempt to
99 The artillery doctrine of all nations valued self-preservation and displacement when threatened with direct assault.
100 Also see optional Allied Air Observation (11.10).
101 Also see optional Allied Time-on-Target Fire (11.20).
destroy the bridge by pinpoint fire as its sole activity for that game turn. 102 Roll one die for each attempt: “1-2” = bridge destroyed, “3-6” = bridge remains intact but German units must pay one-half of their movement allowance (FRU) to cross it for the rest of the game turn. Place a Bridge Interdiction marker over the Intact Bridge marker, removing it at the end of the Allied player’s AM (day) turn.
7.7.4 Barrage Attack. In the owning player’s combat phase, a deployed artillery unit may conduct an artillery-only barrage attack against enemy units that are spotted and within range. Barrage attacks and non-artillery unit ground attacks may not be made separately against the same hex(es) in the same combat phase and no more than one barrage attack may be made against any one hex per combat phase. If multiple enemy hexes are being barraged, all must be spotted and in range of all attacking artillery units. Artillery units from the same corps may combine their barrage strengths into one barrage attack. 103 The final attack strength of a barrage attack is equal to the combined barrage strength of all participating artillery units, modified for supply, time of day and target terrain. 104 Combat-odds shifts for combat coordination (H, I, J), close air support (K, L), engineer vulnerability (N), KG Peiper and Panzer Brigade 150 attacks (O, P, Q), town defense (T), Tiger tanks (U), Flame or “Sturm” tank attacks (V), commander’s personal presence (X), commando combat deception (Y) and weather effects on ground units (Z) are not applicable because they involve non-artillery units or are already factored into barrage strength modifications. Combat-odds shifts for German surprise attacks (R, S), German units
defending Westwall terrain (W) and German ammunition shortages (ZZ) are applied because of the unique nature of these attacks and fortifications. 105 The combat-odds shift for morale (M) is determined by the defender rolling one die when the barrage attack is declared If the result is greater than or equal to the best defending unit’s morale, a -1 (defensive) combat-odds shift applies. If the result is less than the best defending unit’s morale, no morale combat-shift applies and the attack occurs as calculated. Any “D” combat result is applied to the defending unit(s). An “FF” combat result inflicts a step loss only on the defending unit(s). All “A,” “BTL” and “ENG” combat results are ignored.
7.7.5 Offensive Fire Support. In the owning player’s combat phase, a deployed artillery unit may allocate (add) some or all of its barrage strength to the combined attack strength of friendly non-artillery units. If multiple enemy hexes are being attacked, all must be spotted and in range of all participating artillery units. Artillery units from the same corps may combine their barrage strengths into one offensive fire support (exception: German Special Artillery rules [7.7.7]). The attacker allocates offensive fire support in each battle before the defender allocates any defensive fire support. 106 The amount of offensive fire support is equal to either the combined barrage strength of the participating artillery units modified for supply, time-of-day or terrain, OR the combined
102 As a game aid, orient the firing unit’s counter sideways to indicate barrage or bridge interdiction fire that turn.
103 Also see optional Allied Time-On-Target Fire (11.20).
104 The Artillery Modification Table contains a summary of firing strength modifications.
105 The letter values in this paragraph correspond to the lines in the Combat Modification Table
106 Alternatively, players could hold one or more spare markers in their hands representing eligible artillery units in range and reveal them simultaneously.
unmodified attack strength of the supported nonartillery unit(s), whichever is less. 107
7.7.6 Defensive Fire Support. In the opposing player’s combat phase, a deployed artillery unit may allocate (add) some or all of its barrage strength to the combined defensive strength of friendly defending units. Artillery units may not provide defensive fire support for friendly units undergoing barrage attacks. If multiple friendly hexes are being defended, all must be in range of all participating artillery units. Allied artillery units from the same corps may combine their barrage strengths into one combined defensive fire support mission but only one German artillery unit may provide defensive fire support to any single battle. Allied artillery units conduct defensive fire support at full-strength during day turns and half-strength during night turns (FRU). German artillery units conduct defensive fire support at half-strength during the day but only quarter-strength at night (FRU) 108 The defender allocates defensive fire support in each battle after the attacker allocates any offensive fire support. The amount of defensive fire support is equal to either the combined barrage strength of the participating artillery units modified for supply or time-of-day only, 109 OR twice the combined unmodified defense strength of the supported non-artillery unit(s), whichever is less.
7.7.7 Special German Artillery Rules.
when occupying a hex west of the Scharnhorst Line and the right (typically higher) barrage strength when occupying a hex on or east of the Scharnhorst Line. 110
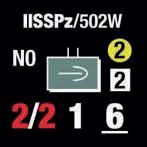
7.7.7.2 The II SSPz/502W (rocket artillery) unit was assigned to II SS-Panzerkorps but was attached to I SS-Panzerkorps at the opening of the battle and for many days afterward. It may conduct barrage attacks or offensive fire support in combination with any artillery units of I SS-Panzerkorps, II SS-Panzerkorps or H.Gru.B throughout the game.
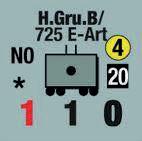
7.7.7.3 The Germans employed one battalion of long-range, 240mm and 280mm rail guns (H.Gru.B/725 E-Art) that was in direct support of KG von der Heydte (5.5.3, and the German OOA notes). This one German artillery unit may conduct barrage attacks, offensive fire support and defensive fire support on daytime (AM) turns only for a fullstrength KG von der Heydte beginning on 17AM If KG von der Heydte lands at halfstrength, roll one die to determine its radio communication status: “1-2” = good, “3-6” = lost. If KG von der Heydte does not survive its air-drop or it loses its radio communications, H.Gru.B/725 E-Art may conduct barrage attacks (only) either alone or in combination with other German artillery units beginning on 18AM 111
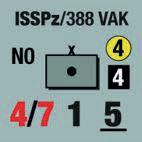
7.7.7.1 German artillery units are printed with two barrage strengths on their unit counter (e.g., 4/7). They use the left (typically lower) barrage strength
7.7.7.4 The three H.Gru.B field artillery units may conduct barrage attacks or offensive fire support in combination with any other German artillery units. 112
107 Artillery formations were composed of multiple firing batteries that were not always available at the same time due to their individual supply situation, movement, firing readiness, support priorities and enemy suppression. The greater the combined strength of the supported units, the greater the likelihood of providing more artillery support.
108 This reflects the acute ammunition shortages of the German corps and army-level artillery formations and their preference to use it offensively.
109 Defensive fire support is not modified by target terrain.
110 Because of a lack of transport, fuel and artillery ammunition, much of the German artillery was left behind the Westwall during the offensive. The Scharnhorst Line is the westernmost band of Westwall fortifications stretching from hex 4401 to 5339.
111 Historically, KG von der Heydte’s long-range FuG-10 HF radio was smashed during the airdrop.
112 H.Gru.B/19VW, H.Gru.B/20VW and H.Gru.B/410 VAK
7.7.7.5 Also see German “Sturm” Tanks (7.6.2).
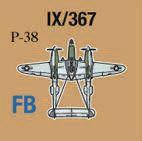
Close Air Support missions (ground attack support and ground defense support) directly aid ground units in the combat phase. Neither may be negated by enemy air units or used to support reserve combat in the exploitation phase. U.S FB units may only support U.S combat units. British FB units may only support British combat units. Luftwaffe FB units may support any German combat unit. Belgian and French units may not use close air support.
7.8.1 Ground Attack Support. The attacking player may conduct ground attack support missions in clear or overcast weather during the friendly combat phase. The Allied player may fly them against enemy combat or headquarters units occupying any clear, rough or woods hex (but not a forest hex, regardless of settlement). The German player may only fly them against enemy combat and headquarters units occupying cities, towns or castles in non-forest hexes 113 Up to two ground attack support missions may be used in a single battle but each must be rolled for separately. Ground attack support may not be used to increase the combat odds of a barrage attack. 114 Place an available FB unit in the hex that is being attacked by friendly non-artillery units and roll one die with the appropriate terrain modifiers on the Ground Attack Support Table to determine the combat-odds shift applied to that attack.
7.8.2 Ground Defense Support. The Allied player may fly ground defense support missions
in clear or overcast weather after ground attack support missions have been placed during the German player’s combat phase. The German player may not fly them at all. 115 Only one ground defense support mission may be used in a single battle. Ground defense support may not be used to decrease the combat odds of a barrage attack. Place an available FB air unit in any clear, rough or woods hex (but not a forest hex, regardless of a settlement) occupied by friendly units that are being attacked by enemy nonartillery units. Roll one die with the appropriate terrain modification on the Ground Defense Support Table to determine the combat-odds shift applied to that attack.
Use the following steps to resolve individual battles one at a time: 116
7.9.1 Calculate Total Attack and Defense Strengths. The attack, defense and barrage strengths of individual combat units are subject to supply, terrain and unit-specific conditions as summarized in lines A-G of the Combat Modification Table. When one or more of these conditions is present, the unit’s attack or defense strength is modified only once 117 If a unit’s attack, defense or barrage strength is halved and doubled in the same battle, the conditions cancel each other and the unit’s printed strength is used.
7.9.1.1 The total attack strength of a barrage attack is equal to the combined, modified barrage strengths of all participating artillery units (fractions rounded up to the nearest whole number, [7.7.4]).
113 The difficulty of identifying friend from foe in poor weather or dense forests made close air support too dangerous to friendly ground troops German pilots could only provide close air support against well-defined targets.
114 The Suppression of Enemy Air Defense (SEAD) was not widely used with close air support during WWII.
115 The German army did not have ground-to-air radios or forward air controllers to support this capability in 1944
116 The Combat Results Table, Combat Modification Chart, Artillery Modification Table, Combined Arms Table and Armor Superiority Table summarize the modifications to the combat resolution procedure. Examples are provided in the player aid cards and the “Wacht am Rhein”: The Game as History document in the Game Booklet. The Attack Log should be photo-copied for repeat use.
117 This simplification was deliberately chosen to make the game more playable.
7.9.1.2 The total attack strength of an artillerysupported attack is equal to the combined, modified attack strength of all participating nonartillery units (fractions rounded up to the nearest whole number), plus any allocated offensive fire support (7.7.5).
7.9.1.3 The total defense strength is equal to the combined, modified defense strength of all defending non-artillery units (fractions rounded up to the nearest whole number), plus any allocated defensive fire support (7.7.6).
7.9.2 Determine Initial Combat-Odds Ratio.
Divide the total attack strength (e.g., 12) by the total defense strength (e.g., 6) and simplify it to the lowest common multiple In this case, the resulting initial combat-odds ratio is 12/6, simplified to two-to-one (2-1). Fractions are rounded in favor of the defender (e.g., 4/9 becomes 1-3, 19/10 becomes 1-1, etc.).
7.9.3 Determine Final Combat-Odds Ratio.
The initial combat-odds may be modified by morale, unit capabilities, combat coordination, close air support, surprise, deception, terrain, or weather as summarized in lines H-ZZ of the Combat Modification Table. Add the appropriate combat-odds modifications together and apply them to the initial combat-odds to achieve a final combat-odds ratio (exception: A combat unit with a current attack strength of zero [0] may not gain an offensive [-X] combat odds shift). Combat-odds shifts are cumulative.
118
7.9.4 Roll Die and
7.9.4.1 On the appropriate Day (AM) or Night (PM) section of the Combat Results Table (CRT), cross-index the row showing the defending unit’s base terrain with the final combat-odds ratio to determine which CRT
column will be used. Combat odds greater than the maximum odds shown for that base terrain are resolved on the right-hand most column Combat odds less than the minimum odds shown for that base terrain are resolved on the left-hand most column.
7.9.4.2 The player with a combined arms (7.5.1) or armor superiority (7.5.2) advantage on the Combined Arms Table then decides whether to claim the +1 or -1 die-roll modification (exception: A combat unit with a current attack strength of zero [0] may not claim an offensive [-1] combined arms/armor superiority die-roll modification).
7.9.4.3 The attacker then rolls one die, modifies it for combined arms or armor superiority as necessary and reads the result to the right. 119
7.10.1 Defender’s Loss Result (D1, D2). If the defender occupies a hex with terrain that does not provide a step-loss and hold option, it must retreat all defending units the number of hexes indicated by the number of the result. If instead the defender occupies a hex with terrain that does provide a step-loss and hold option (7.2.10 – 7.2.16), the defender may retreat all defending units the number of hexes indicated, OR the defender may take the indicated number of step losses from the defending unit(s) without retreating, OR the defender may take a combination of step losses and retreats equal to the number indicated. When the loss of one or more steps is chosen, it is removed from any of the defending units, not each one of them. 120 Artillery units are immune from these effects unless they occupy a defended hex. Multiple defenders may retreat to multiple hexes
118 E.g , initial combat-odds of 2-1 with +2 positive combat-odds shifts yield final combat-odds ratio of 4-1.
119 E.g , a daytime attack into a Woods at 4-1 odds and a die-roll of 4 with no modifier yields a D1+ combat result.
120 E.g , on a D2 result, the defending unit(s) could all retreat 2 hexes, OR take two step losses from any of them without retreating (assuming they occupied terrain with a step-loss and hold option), OR take one step loss from one of them and all units retreat one hex.
consistent with allowable terrain entrance, ZOC and stacking rules.
7.10.2 Defender’s Loss Result (D1+). This is resolved like a D1 result except that the attacker must take a step loss from one of the attacking units.
7.10.3 Attacker’s Loss Result (A1). The attacker may take a step loss from one of the attacking units without retreating, OR all attacking units retreat one hex and are disorganized (7.10.8). Unlike a D1 result, the attacker may occupy any type of terrain.
7.10.4 Mandatory Loss Results (A1X, A2X, D2X). The attacker or defender must take a step loss from one of the participating units and then take any combination of step losses and / or retreats indicated by the number of the result. Attacking units that elect to retreat are also disorganized (7.10.8).
7.10.5 Fire Fight (FF). The defender must take a step loss from one of the defending units, and then the attacker must also take a step loss from one of the attacking units. No retreat or advance after combat is possible unless one player’s units are entirely eliminated as a result of the step loss.
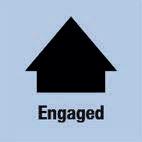
7.10.6 Engaged (ENG). No step losses or retreats are taken, both sides are “locked in combat ” Remove any Combat Reserve markers from the attacking units and place Engaged markers on all participating non-artillery units. An ENG result of a barrage attack does not affect the attacker or defender. Artillery units providing offensive fire support or defensive fire support are also not affected by an ENG result. If available, the attacker may “commit” a unit in exploitation reserve to the battle.
7.10.6.1 Committing Reserves. When an ENG result occurs in the combat phase, the attacker may immediately “commit” a unit in exploitation reserve to the battle by taking it out of reserve, moving it adjacent to the defending unit(s) and re-rolling the attack. 121 Motorized exploitation reserves may use up to their full movement allowance using normal movement (5.1.1), road movement (5.1.2) or minimal movement (5.1.6) Non-motorized exploitation reserves may only move up to 3MP using normal movement (5.1.1), road movement (5.1.2) or minimal movement (5.1.6). No more than one unit (or multi-unit KG/TF) in exploitation reserve may be committed to a single battle. In the re-rolled battle, the attack strength of the committed reserve is added to the original attacking units, including friendly artillery. The total attack strength is recalculated, combat-odds modifiers and the dieroll modification for combined arms or armor superiority are adjusted and a new combat result determined. If a second ENG result occurs, it is final for that battle and Engaged markers are placed on all participating non-artillery units, including committed reserves. 122
7.10.6.2 Engagement Continuation. In the following player turn, the original defender of the engagement (who is now the phasing [attacking] player) must make one of the following three choices, one “engagement” at a time:
7.10.6.2.1 Move all “Engaged” Units One Hex. This decision is made in the movement phase and allows the original attacker of the engagement to immediately advance after combat with one or more “engaged” units per rule 7.12. Terrain entry restrictions apply. Remove all Engaged markers from both sides
121 Movement allowances, terrain accessibility and stacking limits apply.
122 This represents a hard-fought, continuing battle that both sides believe they can win
7.10.6.2.2 Hold Position with all “Engaged”
Units. This decision is made in the movement phase and the Engaged markers on both sides remain in place. In the original attacker’s following turn, no “engaged” units may move and all must continue the original ENG attack (i.e., re-attack the same hexes as the original battle). Other, “non-engaged” units of both sides may participate in the continuation battle if they have moved into eligible positions or within artillery range before it takes place.
7.10.6.2.3 Counterattack with all “Engaged”
Units. This decision is made in the combat phase either before or after other friendly units have attacked (7.0). The “engaged” counterattackers may not move and they must attack the hexes occupied by all of the enemy units they are currently “engaged” with. Other, “nonengaged” units of both sides may participate in the counterattack if they have moved into eligible positions or within artillery range before it takes place. 123 Remove all Engaged markers from both sides if the counterattack does not result in another ENG.
7.10.7 Unresolved Battle (BTL). The battle is inconclusive and ends during the combat phase with no effect. However, if the attacker has superior morale, he/she may take a voluntary step loss from any one of the participating nonartillery units and then re-roll the attack at the same odds. No more than one BTL re-roll may be made per battle. 124

7.10.8 Disorganized Units. Place a Disorganized marker on all artillery units that retreat, all attacking units that elect to retreat (removing any reserve status) and all defending units that retreat through an over-
stacked hex of friendly units (7.11.3). Flip the Disorganized marker to Regrouping at the end of the current day or night game turn. Remove Regrouping markers at the end of the following day or night game turn. 125 Disorganized or regrouping units still exert a ZOC (if applicable) but may not move or attack, defend at halfstrength if attacked (fractions rounded up) and may not conduct any activity requiring a unit to be in good order (2.7)
Retreat is an alternative form of movement that reflects retrograde movement under little to no control. Retreating units move a number of hexes equal to the combat result (one or two hexes) regardless of movement-point costs but may only retreat across hexsides and into terrain that they could legally enter in the movement phase (5.2). Defending units must retreat on all D-type results unless they occupy a hex with a voluntary step loss and hold option (7.2.10 –7.2.16). All artillery units that retreat become disorganized (7.10.8) and howitzer type units flip to their “Moved” side. The owning player determines the path of retreat within the following priorities:
(1) Never through enemy units (exception: commandos [11.15]) and never across hexsides or into terrain that the unit could not legally enter in the movement phase (5.2); the retreating unit must lose steps instead Units that must retreat off the map are eliminated.
(2) Always to the east for German units and always to the west for Allied units. If a unit’s easterly or westerly retreat route is blocked by enemy units, unnegated enemy ZOCs or a hexside or terrain that a unit cannot legally cross
123 If more than one enemy unit occupies a hex, they defend against the counterattack together (7.1.2).
124 If an attacker with superior morale receives an ENG result in the combat phase, commits an exploitation reserve, re-rolls the attack and receives a BTL result, he/she may take a voluntary step loss and re-roll the attack again. This makes it possible to roll the combat resolution die a maximum of three times in one battle.
125 E.g., a unit disorganized on 18AM flips its Disorganized marker to Regrouping at the end of the 18AM game turn and removes the Regrouping marker at the end of the 18PM game turn.
or enter, it may retreat north or south rather than take one or more step losses. The priority for eastern or western retreat still applies at the first available hex that would not incur a step loss.
(3) If at all possible, not through an unnegated enemy ZOC.
(4) If at all possible, not across an unbridged or unforded river or waterway hexside.
(5) Lastly, failing all of the above, a unit may retreat through another friendly combat unit in any direction to avoid a step loss.
7.11.1 Zone of Control Negation. The presence of friendly combat units negates the effects of enemy ZOCs for retreat purposes. If a unit retreats into a hex occupied by a friendly combat unit and then comes under attack again in the same turn, the retreated unit does not add its defense strength to the other unit(s) in the hex. It is, however, subject to the combat results of the second (or subsequent) attack and may have to retreat further, lose steps or be eliminated In no case may a retreated unit advance after combat.
7.11.2 Zone of Control Effects on Retreat. Units may retreat through unnegated enemy ZOCs if no other retreat path is available. In so doing, each retreating unit must lose one step for each hex with an unnegated enemy ZOC that it retreats through.
7.11.3 Stacking and Retreat. Stacked units must retreat one unit (or one multi-unit KG/TF) at a time and may not end their retreat in violation of stacking limits. Multi-unit KG/TF may not be formed during a retreat but they may separate. Units may, however, temporarily exceed stacking limits when retreating through friendly combat units. If a unit ends its one or two-hex retreat in an over-stacked hex, the unit must continue retreating until it reaches a hex that is not over-stacked, where it must stop and
become disorganized (7.10.8). If a unit cannot continue to retreat due to hexsides that it cannot cross or terrain that it cannot enter, it must lose steps to achieve the stacking limit of its final retreat hex. 126
Advance after combat is an alternative form of movement that reflects pursuit under varying levels of control. When an enemy unit retreats or is eliminated as a result of combat, some of the opposing player’s participating units may be eligible to advance after combat.
7.12.1 Eligibility to Advance. Victorious armor or infantry units of any type may advance after combat regardless of whether they were the attacker or the defender in the battle. Artillery, rocket, Flak/AAA, AT, engineer and headquarters units may not advance after combat. Friendly units may not stack during an advance after combat (exception: multi-unit KG/TFs [5.3.1, 5.3.2], commandos [11.15]).
7.12.2 When to Advance. The option to advance after combat must be exercised immediately before any other combat takes place. Defeated enemy units must completely retreat the full number of hexes required before the victorious player advances any participating units. Victorious units are never forced to advance and may advance less than the maximum number of hexes allowed.
7.12.3 Direction of Advance. Advancing units may advance in any direction as long as the first hex advanced into is the defeated unit’s vacated hex
7.12.4 Length of Advance. Non-motorized infantry units may advance up to one hex after combat. Armored infantry and panzergrenadier units may advance up to two hexes after combat and only if the defeated units retreated two hexes. Armor units may advance one more hex
126 Care should be taken to retreat stacked units in an order that prioritizes their value in subsequent turns.
than the defeated units retreated or were called on to retreat, to a maximum of three hexes. Combat reserves attacking in the combat phase may advance only one hex but may not advance adjacent to enemy units in doing so (exception: commandos [11.15])
7.12.5 Length of Advance after Elimination Results. When the defending unit(s) are completely eliminated through step loss, victorious infantry units (of any type) may advance only one hex and victorious armor units may advance up to two hexes.
7.12.6 Terrain and Ground Condition Effects on Advance. Advancing units ignore terrain costs but may never advance into terrain that they could not legally enter during the movement phase and must stop upon entering a hex affected by air interdiction (4.5), bridge interdiction fire (7.7.3) or a roadblock (9.3.2). Armor units may advance along highways, roads or trails but must stop their advance in the first non-road woods or non-road forest hex they enter. During snow ground conditions, advance after combat is limited to one hex regardless of unit type or combat result.
7.12.7 Zone of Control (ZOC) Effects on Advance. A unit may advance from one enemy ZOC directly into another, but must stop in the first full or partial enemy ZOC it enters, including the ZOC of a unit that just retreated.
127
A unit that retains its reserve status (5.4) in the exploitation phase may move using normal movement (5.1.1), road movement (5.1.2) and minimal movement (5.1.6) but may not use strategic movement (5.1.3), march movement (5.1.4) or make a forced march (5.1.5)
(exception: KG Peiper breakout movement [10.7.2])

A motorized unit (or multi-unit KG/TF) in combat reserve that did not receive an ENG result or become disorganized in the combat phase may move up to one-half of its movement allowance (fractions rounded down [FRD]) in the phasing player’s exploitation phase using normal movement (5.1.1) or road movement (5.1.2) and participate in reserve combat Regardless of its activity, it is removed from reserve at the end of the exploitation phase.

8.2.1 A unit (or multi-unit KG/TF) in exploitation reserve may move in the phasing player’s exploitation phase and participate in reserve combat. Doing either or both removes it from reserve status. A motorized unit in exploitation reserve may move up to its full movement allowance using normal movement (5.1.1) or road movement (5.1.2). A non-motorized unit in exploitation reserve may only move up to 3MP using normal movement (5.1.1) or road movement (5.1.2).
8.2.2 Alternatively, a unit (or multi-unit KG/TF) in exploitation reserve may remain stationary in the exploitation phase, maintain its reserve status and be held as defensive reserve that can move in the enemy reaction phase of the opposing player’s following turn (6.0).
A unit in reserve that moves in the exploitation phase may attack adjacent enemy units in “reserve combat.” As many reserve combat attacks may be made as there are reserves available. The reserve combat sub-phase occurs
127 A unit may not attack into an empty (non-enemy occupied) hex to advance from one enemy ZOC to another.
after all exploitation movement is complete and is resolved like standard combat with the following exceptions:
8.3.1 No more than one reserve unit (or multiunit KG/TF) may conduct a reserve combat attack against a single hex occupied by enemy units.
8.3.2 Combined arms and armor superiority rules apply.
8.3.3 Artillery and air units may not be used to support either the attacker or defender.
8.3.4 It is possible in a single turn for an enemy unit to be attacked in both the combat phase and then again during reserve combat in the exploitation phase. 128 A single unit (or stack of units) may not be attacked more than once during reserve combat (exception: “unresolved battle” [BTL] combat result [7.10.7])
8.3.5 Exploitation reserves may not be “committed” to battle on ENG results during reserve combat (7.10.6.1).
8.3.6 Units participating in reserve combat may advance after combat (7.12)
In the engineer phase, each of the phasing player’s engineer units may complete a bridge (begun in the movement phase), build an improved position or build a roadblock
9.1 Bridge Construction
An engineer unit that is in good order (2.7), not in strategic movement (5.1.3) and has not moved or participated in combat during the current game turn may begin to build a bridge during its movement phase by placing a Blown Bridge marker in its hex and announcing that a bridge is being built across the desired hexside. The engineer completes the bridge in a subsequent
engineer phase by moving across the river or waterway and flipping or replacing the Blown Bridge marker with an Intact Bridge marker in the hex it came from, pointing toward the hexside that is now bridged. Bridges may not be built into a hex containing an enemy ZOC unless that hex is occupied by or within a ZOC exerted by another friendly combat unit. The Allied player may build up to fifteen Bailey heavy tank bridges and an unlimited number of light bridges during the game. The German player may build only ten Brüko-J heavy tank bridges and an unlimited number of light bridges during the game. Bridges built at an existing crossing site (e.g., 4224-4325) seamlessly connect their adjacent highways, roads or trails. Bridges built across a hexside without an existing crossing site (e.g., 4225-4325) are connected by an approach trail, requiring the unit to cross the bridge using road movement (5.1.2) at the trail movement
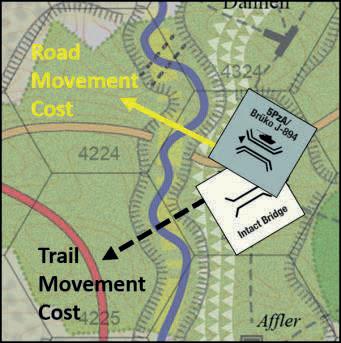
cost Engineer assistance (5.2.5) may be provided while building a bridge.
The Allied Bailey and German Brüko-J heavy tank bridges can support any type of unit. The ten German Brüko-J markers are assigned to specific engineer units (see the scenario OOA), arbitrarily “move” with their assigned engineer units and do not count for stacking purposes.
129 German engineers may swap assignment of a Brüko-J by moving within one hex of each other during their movement phase and placing the unused Brüko-J marker on the receiving engineer’s space on its OOA. If a German
128 E.g., if it retreated into a hex adjacent to another reserve unit as a result of a previous reserve combat attack.
129 Heavy bridge markers do not stack with their engineers and are only placed on the map when they are built.
engineer is eliminated by air attack or combat, roll one die: “1” = assigned Brüko-J(s) eliminated and may not be replaced, “2-6” = assigned Brüko-J(s) unaffected and may be assigned to another German engineer of the same army on the following turn Allied Bailey bridges are not assigned to individual engineer units and are available to an Allied engineer where and when needed.

Improved positions (IP) consist of field fortifications (fox holes, dugouts), camouflage, cleared fields of fire, heavy/crew-served weapons emplacement, artillery registration, telephone communications, hasty minefields, wire obstacles and other improvements designed to provide an organized defense-in-depth.
9.2.1 IP Construction. Armor, infantry (of any type), engineer, AT and Flak/AAA units that are in good order (2.7), are not in strategic movement (5.1.3) or reserve (5.4), are not in an enemy ZOC (5.8), do not occupy a city, town or Westwall terrain,and have not moved or participated in combat during the current game turn may build an IP in the owning player’s engineer phase. 130 An IP is built over two player turns, beginning in one engineer phase and completing in a subsequent engineer phase. If an enemy ZOC is exerted into the hex of a unit building an IP, the IP may not be completed until the enemy ZOC is removed. A battalion-sized unit can build and occupy a onepoint IP (IP-1). A regimental-sized unit (or multi-unit KG/TF) can build and occupy a twopoint IP (IP-2). Mark the building unit with an appropriately-sized IP marker. 131 Up to two IP
markers may be present in a hex at any one time.
9.2.2 IP Effects. Units occupying completed improved positions (IP) have their defense strength doubled and may choose to take a step loss and hold rather than retreat.
9.2.3 IP Durability. A unit may “switch places” with another unit occupying an IP if the two units are the same unit type and size and the moving unit spends 1MP at the end of its movement to occupy the IP. An IP is eliminated if the occupying unit is eliminated or leaves it unoccupied without switching places with another unit 132
Roadblocks represent hasty mine fields, felled trees, blown culverts and other engineering methods used to impede the enemy’s road mobility. Once created, a roadblock remains on the map and prevents any supply trace (2.2), road movement (5.1.2) or strategic movement (5.1.3) from occurring in the roadblocked hex until it is “removed.” See each scenario’s OOA for roadblock setup locations.
9.3.1 Roadblock Creation. An engineer unit that is in good order (2.7), is not in strategic movement (5.1.3) and has not moved or retreated in the current game turn may create a roadblock in the owning player’s engineer phase by placing a Roadblock marker in its starting hex and either remaining there or moving one hex away. An engineer may not build a bridge and a roadblock in the same game turn.
9.3.2 Roadblock Removal. An engineer battalion or regiment, infantry regiment or brigade (of any type) or armor regiment or
130 Exceptions: The V/102/38 Cav Squadron in Monschau (4606), the 99/395/3 Infantry Battalion in Höfen (4707) and the V/102/102 Cav Squadron in Lammersdorf (4803 in the DES scenario) spent weeks building extensive IP before the battle began. No other IP may be built in towns or Westwall terrain during the game.
131 As a game aid, orient the IP marker number-side down on the first building turn and number-side up when complete
132 IPs are highly directional, size-appropriate and tailored to the units that build them.
brigade 133 that is in good order (2.7), is not in strategic movement (5.1.3), is not fatigued or resting (5.1.5) and is not in reserve (5.4) may “clear” a roadblock in the owning player’s movement phase or exploitation phase by moving into the roadblocked hex using normal movement (5.1.1) or minimal movement (5.1.6), or while occupying the roadblocked hex by spending movement points equal to the base terrain cost of the hex under the current ground conditions (exception: currently “engaged” units [7.10.6]). This flips the Roadblock marker to its Cleared side and the clearing unit may continue to move using any remaining movement points However, road movement (5.1.2) and strategic movement (5.1.3) are still prohibited in the roadblocked hex until the Cleared marker is removed at the end of the current game turn. 134 Units may attack after clearing a roadblock but units advancing after combat into a roadblocked hex must stop without clearing it. An engineer unit may not build a bridge and clear a roadblock in the same turn.
The following rules describe special influences on the battle that apply primarily in the early turns of scenarios that begin on 10 DEC and 16 DEC. These rules modify the regular game rules and reflect the fact that the Germans achieved complete operational and tactical surprise over the Americans. This bolstered German attack capability while nearly paralyzing Allied forces for the first three days, with the strongest effects felt on the first day.
All German units carried sufficient supply for the first two days of the battle and are arbitrarily in general supply from 16AM through 17PM.
Neither player may use replacement points on 16AM. Scheduled replacement points may be used beginning on 17AM for the German player and 18AM by the Allied player. Combat replacement points may be used by both sides beginning on 18AM.
Allied units are restricted in their ability to move due to the surprise of the German attacks and the loss of communication from the German artillery barrages and radio jamming. In the 16AM game turn, the Allied player does not receive a reaction phase before the German attacks. In the 16AM Allied player turn, Allied units that are not in reserve (5.4) may move one hex and/or attack only if they were attacked, OR they had enemy units move adjacent to them, OR they had enemy units move while adjacent to them. In the 16PM Allied player turn, Allied units that are not reinforcements or in reserve may move up to their full movement allowance and/or attack only if they were attacked by any means in the 16AM or 16PM turns, OR they had enemy units move adjacent to them, OR they had enemy units move while adjacent to them. Beginning on 17AM, all Allied units that are not restricted (5.6) move and attack normally (see the U.S. OOA notes for exceptions to this rule)
The Allied player may not designate reserves (5.4) on the 16AM or 16PM game turns However, several Allied units begin the game in
133 These units had sufficient organic manpower and special equipment to simultaneously execute their primary mission and remove roadblocks
134 Like bridges, roadblocks took much time and effort to clear away mines and debris and repair the affected roads.
exploitation reserve (OOA note “Res”). Allied exploitation reserves may not move in the exploitation phase of the Allied 16AM game turn (exception: VIII/14/32 Cav). 135 In the 16PM game turn, Allied motorized exploitation reserves may move up to their full movement allowance and armor units that begin the game in reserve may maintain their reserve status, even if enemy units have moved adjacent to them In the 16PM game turn, Allied nonmotorized exploitation reserves may only move up to 3MP and lose their reserve status if an enemy combat unit moves, advances or retreats adjacent to them. Allied reserve restrictions end on 17AM.
The German player does not receive a movement phase on 16AM. The units that start on the map had already moved into their historical assault positions or completed their unopposed movement for the 16AM game turn
136 The German player may not designate reserves on the 16AM game turn, although a number of German units set up in exploitation reserve (OOA note “Res”). These units may move in the 16AM exploitation or enemy reaction phases.
Armee Sector. A critical creek bridge and highway overpass on the Stadtkyll–Büllingen road were not repaired in the final days before the German offensive. They are represented on the map by heavy bridge symbols with a yellow “X” in hexes 5013 (Losheim) and 4913 (Losheimergraben) No units may use eastward or westward road movement (5.1.2) or strategic
movement (5.1.3) in these two hexes or use them to trace supply until they are repaired at the beginning of the 17PM game turn (Losheim) and the 18PM game turn (Losheimergraben). 137 These repairs do not require an engineer unit or bridge to complete
10.5.2 Ouren Bridge Uncertainty. The German planners believed that the Ouren bridge (4321-4421) was strong enough to carry heavy armor, only to discover that it could not when the first Mk IV tank tried to cross it. 138 To reflect this uncertainty, the first player who attempts to cross it with an armor-class 3-9 unit must roll one die to determine its capacity: “1-2” = heavy road bridge, “3-6” = light road bridge. Place an intact Bailey Bridge marker to designate the former and a white Intact Bridge marker to designate the latter. The bridge is subject to normal bridge demolition (5.2.6.3) beginning 18AM.
Massive traffic jams strangled German movement for the first two days of the offensive in a zone running from the east map edge to three hexes west of the Scharnhorst Line 139 On 16AM and 16PM, German units that begin their turn in the traffic jam zone pay triple (X3) road movement costs (5.1.2) for the current ground conditions and may not enter strategic movement (5.1.3) or conduct a forced march (5.1.5). On 17AM and 17PM, German units that begin their turn in the traffic jam zone pay double (X2) road movement costs (5.1.2) for the current ground conditions and may not enter strategic movement (5.1.3) or conduct a forced march (5.1.5). Additionally, from 16AM to 17PM, each intact bridge in and adjoining the
135 Historically, VIII/14/32 CAV executed a pre-planned reinforcement of its sister squadron on 16AM.
136 German infantry regiments 560/1128 to Dahnen (4324), 5FJ/14 to Bivels (4428) and 212/320 to Rosport (5334).
137 As a game aid, place Blown Bridge markers in hexes 4913 and 5013 during setup and flip them to their repaired side at the times indicated.
138 U.S. M-10 tank destroyers (only 18 tons) had used it daily before the German attack
139 The Scharnhorst Line is the westernmost band of Westwall fortifications stretching from hex 4401 to 5339.
traffic jam zone may be crossed by no more than one German motorized unit (or KG) and one German non-motorized unit using road movement (5.1.2) or minimal movement (5.1.6).
Allied units and German units that begin their turn outside the traffic jam zone are unaffected and German traffic jams cease on 18AM. 140 This rule is not applicable if the optional Road Space rule is used (11.13).
10.7 Kampfgruppe Peiper (KGP)
The advance guard of 1st SS Panzer Division was imbued with special movement and combat capabilities due to its leadership, training and experience – particularly for nighttime movement and shock combat.
their movement and advance after combat (7.12.7).
16PM: All KG Peiper units must remain north of the 5th Panzer Armee / 6th Panzer Armee boundary and no KG Peiper unit may enter reserve (5.4) or conduct a forced march (5.1.5). The German player must make a "friction of war" die-roll that modifies the base movement allowance of all KG Peiper units on 16PM: “12” = +1MP, “3-4” = no change, “5” = -1MP, “6” = -2MP. One western-most unit (or multi-unit KG) of KG Peiper is exempt from German traffic jams (10.6) and may ignore enemy ZOCs during its movement (only). All other KG Peiper units are subject to German traffic jams but may ignore enemy ZOCs during their movement (only). 142
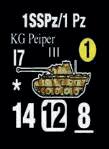
10.7.1 KG Peiper Organization. KG Peiper is composed of four armor units (1SSPz/1 Pz, 1SSPz/1/Pz Spitze, 1SSPz/s. Pz501 and 1SSPz/84
Flak). The reinforced panzer regiment (1SSPz/1 Pz [14-12-8]) is the only unit in the game with four steps and a second unit counter (7-6-8) that is substituted for it when it suffers its third step loss. Only one of these counters may be on the map at any one time. 1SSPz/84 Flak is an armor unit that may be in reserve (5.4). Any two KG Peiper units may form a multi-unit Kampfgruppe (5.3.1).
10.7.2 KG Peiper “Breakout” Movement. KG Peiper may conduct enhanced forms of movement during the first two days of the battle as follows:
16AM: All KG Peiper units must remain north of the 5th Panzer Armee / 6th Panzer Armee boundary 141 and are subject to German traffic jams and enemy zones of control (ZOCs) during
17AM: No KG Peiper unit may enter reserve (5.4). All KG Peiper units are exempt from German traffic jams but must observe enemy ZOCs during their movement and advance after combat (7.12.7).
17PM: No KG Peiper unit may enter reserve (5.4) or conduct a forced march (5.1.5). The German player must make another "friction of war" die-roll that modifies the base movement allowance of all KG Peiper units on 17PM: “12” = +1MP, “3-4” = no change, “5” = -1MP, “6” = -2MP. The German player must then make a die-roll to determine when KG Peiper units are eligible to exert a “maximum effort” to breakout: “1” = 17PM, “2-6” = 18PM. If the “maximum effort” is delayed to 18PM, all four KG Peiper units must use their 17PM “friction of war” movement allowance on this turn, are exempt from German traffic jams and may ignore enemy ZOCs during their movement (only).
140 German traffic jams represent the slow and deliberate movement of the entire German unit (not just the forward elements) through the crowded terrain and over the few available bridges in the traffic jam zone.
141 Marked by red dashes on the map from 4815 to 5516.
142 The “friction of war” die-rolls simulate the wariness, confusion and possible small-scale interactions between Allied units moving south and KG Peiper moving west across their path on the nights of 16-18 December.
KG Peiper “Maximum Effort.” Historically, SS Obersturmbannführer Peiper, after inexplicably pausing on the night of 17 December, ruthlessly drove his units throughout 18 December in a “maximum effort” to break through the U.S. lines. When exerting a “maximum effort,” a KG Peiper unit (or multiunit KG) may double (2X) its “friction of war” movement allowance without fatigue, is exempt from German traffic jams, may ignore enemy ZOCs during its movement (only) and may continue its move if a bridge is blown in its path (5.2.6.3). If one KG Peiper unit (or multi-unit KG) exerts a “maximum effort,” all must do so and each must meet all of the following conditions:
(1) It becomes eligible by a successful “maximum effort” die-roll on 17PM or the delay to 18PM.
(2) At least one KG Peiper unit must have entered Büllingen (4712) before the “maximum effort” game turn if the basic German Fuel Capture rule is in effect (2.5), or successfully captured Truck Head 55 before the “maximum effort” game turn if the optional Allied Fuel Dumps rule is in effect (11.3). 143
(3) When exerting a “maximum effort,” each KG Peiper unit (or multi-unit KG) must enter or pass through at least two of the following settlements: Ligneuville (4113), Stavelot (3812), Trois Ponts (3613), La Gleize (3512), Stoumont (3411), or Werbomont (3113). 144
(4) Failure of all four KG Peiper units to exert a “maximum effort” forfeits the “maximum effort” advantages and they move using the KG Peiper breakout provisions described for those nights.
18AM: No KG Peiper unit may enter reserve (5.4) and all four KG Peiper units use their printed movement allowance and are exempt from German traffic jams, but must observe enemy ZOCs during their movement and advance after combat (7.12.7).
18PM: No KG Peiper unit may enter reserve (5.4) or conduct a forced march (5.1.5). The German player must make one final "friction of war" die-roll that modifies the base movement allowance of all KG Peiper units on 18PM: “12” = +1MP, “3-4” = no change, “5” = -1MP, “6” = -2MP. If all four KG Peiper units did not exert a “maximum effort” on 17PM, all four must do so now. If all four KG Peiper units did exert a “maximum effort” move on 17PM, then they use their 18PM “friction of war” movement allowances and are subject to enemy ZOCs during their movement and advance after combat.
19 DEC: All KG Peiper units move regularly for the rest of the game but may not conduct a forced march (5.1.5) on 19PM if they exerted a “maximum effort” on 18PM.
10.7.3 KG Peiper Combat. The first attack by two units of KG Peiper that are formed into a Kampfgruppe receives two positive (+2) combat-odds shifts. This special combat odds modification is only available once. On all night (PM) game turns beginning on 16PM, KG Peiper units receive one additional combat-odds shift (+1 if attacking, -1 if defending)
10.8 Panzer Brigade 150
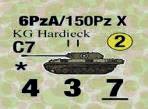
The three units of Panzer Brigade 150 145 may not move or operate south of hexrow xx18. If forced to do so, they are eliminated. On the first turn that
143 E.g., if the maximum effort occurs on 17PM, the hex entry or truck head capture must have occurred on 16PM or 17AM. If the maximum effort occurs on 18PM, the hex entry or truck head capture must have occurred from 16PM-18AM. Büllingen’s 50,000 gallons of gasoline made Peiper’s “maximum effort” to reach the Meuse in one night possible.
144 These settlements were on Panzer Rollbahn (D) that was assigned to KG Peiper
145 6PzA/150Pz X (KG Hardieck), 6PzA/150Pz Y (KG Scherf) and 6PzA/150Pz Z (KG Wulf)
any unit of Panzer Brigade 150 makes an attack, all attacks involving any unit of Panzer Brigade 150 receive one positive (+1) combat-odds shift. This special combat-odds modification is only available once.
On 16AM and 16PM, the German player may not use artillery for barrage attacks or offensive fire support against Monschau (4606). 146
10.10.1 Full-Scale Attack. On 16AM, the German player must attack all U.S. units that are adjacent to German combat units between Monschau (4606) and Echternach (5134). Attacks on adjacent U.S. units from Simmerath (4804) to Bergstein (5201) or occupying hex 5238 are optional.
10.10.2 Surprise Attack Modifications. On 16AM, all German attacks conducted in the combat phase and exploitation phase (reserve
combat) receive one positive (+1) combat-odds shift against enemy units in the Sixth Panzer Armee zone, or two positive (+2) combat-odds shifts against enemy units in the Fifth Panzer Armee and Seventh Armee zones. 147 On 16PM, all German attacks in the combat phase and exploitation phase (reserve combat) receive one positive (+1) combat-odds shift. Surprise attack modifications cease on 17AM.
On the 16AM game turn, all units of U.S. V Corps artillery may conduct defensive fire support (only) at up to full-strength but no other U.S. artillery unit may fire at all. On the 16PM game turn, all U.S. artillery units may conduct barrage attacks, offensive fire support and defensive fire support (only) at up to halfstrength. 148 On the 17AM and subsequent game turns, all Allied artillery units may conduct barrage attacks, offensive fire support, defensive fire support and bridge interdiction fire normally. 149 See Table 1.
146 During the planning for Wacht am Rhein, Field Marshal Model forbade artillery fire on the picturesque German town of Monschau. After the failure of the first day’s attack, this restriction was rescinded.
147 German Army zones are shown by red-dashed lines on the game map. Manderfeld (4915) is in the 6th PzA zone
148 The German artillery restrictions on Monschau left the Allied artillery communications in that area intact and the V Corps artillery had been supporting the U.S. 78th Infantry Division in its attack toward Kesternich for three days. The VIII Corps artillery however, was severely disrupted by the initial German artillery barrage and radio jamming.
149 Also see Allied Time-On-Target Fire (11.20)
Allied non-engineer units may not attempt to blow bridges or build improved positions (IP) until the 18AM game turn. U.S. engineer units may not build IP, blow bridges or create roadblocks until a German combat unit moves (or air lands) within seven hexes of them. See each scenario’s Allied OOA notes. German engineer operations are unrestricted from the beginning of the game.
The Allied player may not utilize morale augmentation (11.14.5.1) or commander’s personal presence (11.14.5.2) until the 17AM game turn.
The starting weather and ground conditions are stated in each game status card Beginning on the second and all subsequent day turns, the Allied player rolls one die on the Uncertain Weather Table and modifies it by the previous day’s weather to determine the weather for that date with the following effects: 150
11.1.1 Clear. Both players receive the historical 23AM, 24AM, 25AM, 26AM or 27AM air missions (they must be taken in that order, the 23AM air missions being used for the first day of clear weather, the 24AM next and repeating the sequence as necessary). The German player receives the Ju-87 and Ju-88 at night. The ground conditions are frozen and Allied air supremacy (4.7) is in force.
11.1.2 Overcast. Both players receive the historical 18AM air missions. The German
player receives the Ju-88 at night. The ground conditions are firm and Allied air supremacy (4.7) is not in force.
11.1.3 Fog. Neither player receives AM air missions. The German player receives the Ju-88 at night. The ground conditions are firm and Allied air supremacy (4.7) is not in force.
11.1.4 Bad. Neither player receives AM air missions. The German player receives the Ju-88 at night. The ground conditions on the first day of bad weather are firm. The ground conditions on the second and subsequent days of bad weather are mud. Allied air supremacy (4.7) is not in force.
11.1.5 Snow. Re-roll the die again. On a roll of “1-4,” snow allows air missions from the 30AM, and 31AM historical air mission allotment (they must be chosen in that order, the 30AM air missions being used for the first day of snow weather, the 31AM next and repeating the sequence as necessary). The German player receives the Ju-88 at night. The ground conditions are frozen and Allied air supremacy (4.7) is not in force. On a die-roll of “5-6,” ground fog cancels all air missions for that date (even the German Ju-88). The ground conditions are frozen and Allied air supremacy (4.7) is not in force.
11.1.6 Blizzard. No air missions are available to either player and ground conditions are snow for the rest of the game, regardless of future weather conditions. The Allied player continues to roll on the Uncertain Weather Table to determine air missions for future turns. Allied air supremacy (4.7) is not in force.
150 During the actual battle, weather was a decidedly uncertain element but had a major impact by restricting or bringing into play one of the Allies’ greatest advantages, their air power.
In the standard game, fog and bad weather affect the performance of air units. In reality, they also impacted ground units in several ways.
11.2.1 Ground Movement. On day and night turns in fog or bad weather, the movement allowance of ground units (including Allied infantry and engineers) using strategic movement (5.1.3) is reduced by one (e.g., from “9” to “8” for a German Puma unit or “5” to “4” for an Allied infantry unit) and the movement point cost of road movement (5.1.2) on highways is increased from 1/2MP per hex to 1MP per hex. British 29th Armoured Brigade units arriving during fog or bad weather may move two turns to reach their initial objectives (see the British OOA notes)
11.2.2 Zones of Control. Fog reduces visibility and the ability of friendly units to detect enemy units moving adjacent to them. On day turns during fog, night ZOC rules are in effect and non-armored units may break contact from enemy ZOCs without paying the -1MP movement penalty (5.7.4.1).
11.2.3 Combat. Fog added uncertainty and confusion in combat situations that often, but not always, aided the attacker. On day and night turns during fog, the attacking player makes one Uncertainty Die Roll (UDR) before the combat resolution die-roll to determine the uncertainty of the attack. A UDR of 1-3 adds one combatodds shift (+1). A UDR of 4-5 has no effect. A UDR of 6 subtracts one (-1) combat-odds shift.
11.2.4 Retreat. On day and night turns during fog, retreating units may ignore enemy ZOCs in forest hexes.
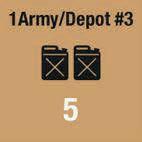
If used, this replaces German Fuel Capture (2.5). The eight Allied fuel dump markers represent more than
three million gallons of gasoline for the U.S. First Army in the Liège-Namur sector and 150,000 gallons each in the V and VIII Corps sectors. German players may try to capture fuel to improve their own (and worsen the Allied) supply situation. The Allied player may also attempt to destroy or evacuate fuel to keep it from the German player. Smaller stores of gasoline were located in the wake of Hitler’s offensive with chances for the German armored forces to capture some of this fuel to provide temporary relief.
11.3.1 Fuel Dump Locations. The fuel dumps located at Namur (0710), Angleur-Kinkempois (2704) and the Truck Head depots at Clermont (3602), Bovigny (3719), Büllingen (4712) and two miles northwest of Mersch (4136) are fixed and their markers are visibly placed on the map at the start of the game. Before the game begins, the locations 1Army/Depot # 2 (10-point) and 1 Army/Depot #3 (5-point) may be kept secret by the Allied player and their markers held off-map until they are “located” by German units. Their secret location(s) may be on any road or trail that is on or within four hexes of Cour (3610) or hex 3811. Either, but not both fuel depots may be located in the town of Spa (3509). Alternatively, the location of these two secret fuel depots may be determined randomly using
the figure above.
151 Record each location separately
11.3.2 Fuel Dump Capture or Demolition. When a German combat unit enters a secret or visible fuel depot’s or truck head’s hex (exception: KG von der Heydte [5.5.3.3]), the Allied player informs the German player of the fact, places the appropriate secret fuel depot counter in the hex and immediately rolls one die on the Fuel Dump Demolition Table to determine its fate. If the fuel dump is “blown,” the German unit ends its movement in the fuel dump hex, the result is recorded, and the counter is flipped over and placed on the turn record track of the game status card. If the fuel dump is “captured,” the counter is left in place, the result recorded and the German unit may complete its movement.
11.3.3 Captured Fuel Effects on the Germans.
11.3.3.1 Fuel Depot Capture. If the German player captures one or more Allied fuel depots before 19AM, the use of the German Fuel Shortages rule (2.6) is delayed one day for every three points of fuel captured. 152 If the German player has already begun rolling on the German Fuel Shortages Table and then captures fuel, this action has no effect on the requirement to keep rolling on the table but does delay when the German player must roll two, three or four times on the table by one day for each three points of fuel captured. Any German division that captures three or more points of fuel is not subject to the results of German fuel shortages for the rest of the game. If German units have already entered the map in an unsupplied state
before fuel was captured, they remain unsupplied 153
11.3.3.2 Truck Head Capture. If the German player captures one of the 1-point truck head fuel dumps, 154 one German panzer division, panzer brigade or Tiger unit that has one (or more) units within four hexes of the captured truck head may be designated as exempt from German fuel shortages on the following day. 155 If no German panzer division, panzer brigade or Tiger unit is within four hexes of truck head, it is blown instead.
11.3.3.3 Hidden Fuel Store Capture. Before supply determination on 19-26 DEC, if a nonisolated German combat unit (or multi-unit KG) from a panzer or panzergrenadier division or brigade is west of hex column 40xx, the German player rolls two dice to determine if a hidden fuel store has been captured 156 A “1-4” = success, “5-12” = failure. One (-1) is subtracted from the two-dice roll if the eligible unit is west of hex column 30xx. Success places the eligible unit and all non-isolated units of its parent formation (only) in general supply and exempts them from German Fuel Shortages (2.6) that day Only one panzer or panzergrenadier division or brigade may receive this benefit per day. If two or more eligible units from different formations are on the same westernmost hex column, the German player determines which one receives it with a random die-roll Hidden fuel store capture does not count toward the effects of fuel capture or destruction on the Allies.
151 This will tend to place the fuel depots near their historical locations while keeping them north of the Amblève River and avoiding the possibility of both depots occupying the same hex.
152 Q179-P3 Depot, Q179-P4 Depot, First Army Depot #2 or First Army Depot #3.
153 See each scenario’s German OOA notes for the 2nd SS Panzer Division and IISSPz/503W, the 9th SS Panzer Division and IISSPz/502-503 s. Art, the Führer Begleit Brigade, and the Führer Grenadier Brigade
154 Truck Heads 55, 83, 84 and 700.
155 As a game aid, write down the exempt unit(s) on a piece of scrap paper.
156 The Germans made unexpected captures of smaller fuel stores in the historical campaign; frequently division-level truck heads of 5,000 to 40,000 gallons located in rear areas. The danger was higher in the first days of the campaign or when German spearheads penetrated deeper into the Allied communications zone.
11.3.4 Fuel Capture or Destruction Effects on U.S. Units. The effects of fuel capture or destruction on the Allies begins on the turn following the event, but not before 19AM.
11.3.4.1 If fifteen or more points of fuel have been blown or captured, all U.S. units on the map must expend one additional movement point (+1 MP) to enter strategic movement (SM) British units are unaffected and use the basic rule Strategic Movement Table (5.1.3). U.S. reinforcements (5.5) are unaffected and may enter the map normally. 157 See Table 2
11.4.3.2 If twenty-two or more points of fuel have been blown or captured, the above effect applies and the base movement allowance of all U.S. armor units on the map are reduced by one point. British units are unaffected and use the basic rule Strategic Movement Table (5.1.3) U.S reinforcements (5.5) are unaffected and may enter the map normally. See Table 3.
11.3.5 Fuel Dump Evacuation. If the V Corps truck heads at Clermont (3602) and Büllingen (4712) have not been captured or blown before 18PM, they are evacuated off the map in the Allied turn after a German combat unit moves within four hexes of them. If the VIII Corps truck heads at Bovigny (3719) and two miles northwest of Mersch (in hex 4136) have not been captured or blown before 18PM, they are evacuated to Jemelle (1821) and Arlon (3439), respectively. If a German combat unit moves within four hexes of these new locations, they are evacuated off the map at the end of the following Allied turn. If the 1st Army fuel depots #2 (3811) and #3 (3610) have not been blown or captured by the end of the 19AM and 22AM game turns respectively, they are evacuated to Angleur-Kinkempois (2704) where
they remain for the rest of the game but are still subject to capture there. The Allied fuel depots at Namur (0710) and Angleur-Kinkempois (2704) may not be evacuated. Allied fuel dumps may not be evacuated if they are completely surrounded by enemy units or their zones of control (ZOCs) but are evacuated at the end of the first Allied turn when these conditions change. In such situations, the German player may attempt their capture until they are evacuated.
At the end of the phasing player’s movement phase, a unit that is part of a division must be within four hexes of at least two other units of the same division to be in “attack supply ” 158 If fewer than three units of a division are in play at any one time, this limitation ceases. Allied combat commands (CCA, CCB and CCR), British battle groups, German Kampfgruppen (5.3.1) and Allied task forces (5.3.2) are exempt from this limitation. Army, Army Group and corps-level units need only be within four hexes of two other friendly combat units to be in attack supply. These four hexes may traverse any type of terrain, enemy units and ZOCs. This limitation is in addition to the requirement of tracing a supply line and does not lessen the effects of German fuel shortages (2.6) or Allied fuel dumps (11.3). Effect: A unit that is not in attack supply attacks at half-strength (FRU). Its defense strength and movement capabilities are unaffected and no other abilities are restricted by lack of attack supply alone (e.g., combat coordination, combined arms/armor superiority, Tiger tank advantages). Unlike general supply
157 Large, untouched fuel depots existed in both the U.S. Ninth Army sector to the north and the U.S. Third Army sector to the south. The British had their own logistical sources.
158 A division’s organic supply trains were limited in their ability to deliver ammunition, fuel, food, water, spare parts and other supplies over a given distance and amount of time. As these two factors increased, the ability to provide adequate supplies decreased, leading to a loss of combat power, particularly for non-motorized divisions. KGs/TFs were typically task-organized with their own supply services that enabled them to operate independently.
determination, attack supply is determined when each attack is made in the combat phase
In the first edition of Hitler’s Last Gamble, as well as most conventional Battle of the Bulge wargames, the number of destroyed units often becomes quite large, with as many as 30-40 U.S. regiments and battalions destroyed by Christmas Day This was much greater than the actual campaign. 159 In the standard game, we deal with the excessive attrition rate by arbitrarily increasing the level of combat replacements. This preserves the action-heavy CRT that players have come to expect, while giving the Allied player a chance to hang on with recovering units. In this optional rule, we present an alternative that reduces the attrition rate further while potentially preserving the German advance.
D2X: Instead of suffering a mandatory step loss followed by a D2 result, the defender(s) suffer a D3 result and both players roll another die. If the defender rolls a higher value than the attacker, the defender takes a mandatory step loss. In the event of a tie, implement a D3 result with no step loss. A D3 result is similar to a D2 but requires one additional hex of retreat or one additional voluntary step loss. Advance after combat is conducted normally (7.12).
FF: Both players roll another die and only the side with the higher die-roll takes a step loss. The player with better (lower number) morale wins any ties. If both players have the
same morale and roll the same result, only the attacker takes a step loss. No retreat or advance after combat is possible unless one player’s units are entirely eliminated as a result of the step loss.
In the Sixth Panzer Armee attack plan, “Panzer Rollbahnen” 160 designated A, B, C, D and E were assigned to I SS-Panzerkorps and extended from its jump-off line to the Meuse River. The first three were for 12th SS Panzer Division and the latter two for 1st SS Panzer Division Echeloned behind them was the II SSPanzerkorps consisting of the 9th SS Panzer Division and 2nd SS Panzer Division that were to follow along these same roads as soon as they were cleared Similarly, the Fifth Panzer Armee attack plan was based on committing the 9th Panzer Division and 15th Panzergrenadier Division as the army approached the Meuse River In the actual battle, their commitment was delayed by 48 hours due to traffic conditions in the eastern Eifel and the sluggishness of the Fifth Panzer Armee spearheads. This rule allows the early commitment of these panzer reserves as soon as the German player captures certain key objectives, but not before their earliest potential arrival on 18AM See the German OOA notes for the 2nd SS Panzer Division and IISSPz/503W, the 9th SS Panzer Division and IISSPz/502-503 s.Art, for Rollbahn routes and unit appearance data. This rule does not apply
159 Historically, the 106th Infantry Division’s 422nd and 423rd Regiments surrendered, which was the largest single U.S. loss event of the war. The 28th Infantry Division's 109th and 110th Regiments and 707th Tank Battalion were effectively destroyed, with the rough equivalent of two infantry battalions remaining. The U.S. 9th Armored Division’s Combat Command “R” was wiped out defending the approaches to Bastogne, but the rest of the division was rapidly rehabilitated between 16 and 23 December, with total losses of 1,083 men (10%) and 69 of 176 armored vehicles (39%). The U.S. 99th Infantry Division survived the big battles along the Elsenborn Ridge with just under 2,000 casualties by 23 December (15% of its opening-day strength). As most of these losses were in the 27 rifle companies, the infantry regiments were strongly reduced by 23 December, but certainly not wiped out. The remaining total-unit losses were the 14th Cavalry Regiment and the 44th and 168th Engineer Combat Battalions.
160 Analogous to a Main Supply Route (MSR) in U.S. military doctrine.
to the “22 December” or “Battle Before the Meuse” scenarios.
The German Fifteenth Armee offensive was to be launched if the Sixth Panzer Armee was successful in crossing the Hohes Venn plateau and reaching the Meuse River. The attack, code named “Operation Spätlese,” was to consist of an armored thrust from the Heinsberg area by the 15th Panzergrenadier Division, 9th Panzer Division and four infantry divisions. The spearhead was to converge on Maastricht and, in conjunction with I SS-Panzerkorps, advance past Liège to encircle the U.S. First Army.
11.7.1 Offensive Launch Requirements. The German player may launch the offensive at any time in the game that he/she fulfills all of the territorial objectives listed in each scenario’s “Operation Spätlese” OOA Note. Should the decision be yes, the German player announces the launch to the Allied player and the effects begin immediately.
11.7.2 Operation Spätlese Effects.
11.7.2.1 Unless they have already arrived, units identified in each scenario’s “Operation Spätlese” OOA Note do not arrive in the game.
11.7.2.2 Once launched, the Allied player’s daily air missions are reduced by one FB air unit.
11.7.2.3 Once launched, the highest victory level the German player can earn is a German tactical victory.
11.7.2.4 Once launched, the German player rolls on the German Fuel Shortages Table one day earlier than normal (18AM) unless he/she has successfully captured fuel at least two times when the basic German Fuel Capture rule (2.5)
is in effect, or eight points of fuel are captured when the optional Allied Fuel Dumps rule (11.3) is in effect This includes the turns when he/she rolls more than once on the German Fuel Shortages Table.
11.7.2.5 Once launched, the above conditions continue for the rest of the game.
During the German Ardennes Offensive, Field Marshal Montgomery ordered the backstop deployment of British XXX Corps on his own initiative. This was based on reports from his “Phantom” reconnaissance units that conducted wide-ranging, daily fact-finding patrols throughout the battle area. Montgomery’s historical trigger was Kampfgruppe Peiper’s capture of Stavelot (3812) on 18 December. Guided by memories of Dunkirk in 1940, he believed if the Germans reached or moved west of the Salm River (hex column 37xx), they would pose a significant threat to the U.S. and British supply routes. He therefore ordered XXX Corps to guard the Meuse River bridges, which were technically in the U.S. zone at that time.
To reflect Montgomery’s reaction, set the “trigger” turn (MR0) for the British deployment as follows: If the first time a German combat unit reaches any hex on or west of hex column “37xx” and north of Halconreux (3720) is a day (AM) turn, use that day as the MR0 trigger date. If the first time a German combat unit reaches any hex on or west of hex column “37xx” and north of Halconreux (3720) is a night (PM) turn, the MR0 trigger date is the following day. The scheduled arrival and release dates of all British units are reset from the historical 18AM game turn per the figure below. 161
161 As a game aid, place a British Engaged marker on the turn record track of the game status card to mark the date that the British deployment begins
The British entry locations, movement and release restrictions (British OOA notes) still apply but their dates are also reset If the “trigger” has not occurred by 22AM, no British units will enter and the U.S. Army deals with the German offensive unassisted.
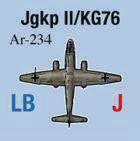
On day turns when it is available, the German Arado-234 jet bomber unit (KG-76) may attempt to destroy the Allied fuel depots in Angleur-Kinkempois (2704) by an air attack that cannot be intercepted, negated or affected by Allied AAA Roll one die for the attack: “2-6” = no effect. A “1” = success and requires another die-roll to randomly determine which dump (if more than one) is attacked and then another die-roll to determine the effect of the attack: “1-2” = destroyed, “3-6” = no effect. A successful attack may trigger fuel capture or destruction effects on U.S units (11.3.4).
During clear-weather AM turns, the barrage strength for barrage attacks, offensive fire support and defensive fire support missions is
increased by +1 for Allied artillery units with a printed barrage strength of “4” or less, or by +2 for Allied artillery units with a printed barrage strength of “5” or more. Additionally, Allied barrage attacks and bridge interdiction fire may be conducted against enemy targets without an adjacent friendly spotting unit. 162
The assignment of air missions in the basic rules provides a great deal of flexibility that likely exceeded the planning and command and control mechanisms of the German and Allied air forces of WWII, particularly in light of the simultaneous nature of the missions themselves and the game player’s knowledge of the targets available. Players who prefer a more challenging (and perhaps realistic) treatment of air power may use the following optional rule: 11.11.1 At the end of the air phase on each night (PM) game turn, both players must allocate their scheduled air missions for the following day and night turns in the mission type columns of their Pre-Planned Air Worksheet 163 Additionally, the target hex of each air resupply (4.4), air interdiction (4.5) and air attack (4.6) mission

162
163 The Pre-Planned Air Worksheets should be photocopied for repeat use.
must be pre-recorded. 164 If a designated air resupply, air interdiction or air attack is not preplanned or the target hex does not meet minimum-safe-distance requirements at the moment of execution, it is scrubbed for that day.
See the example below
11.11.2 Air missions are expended as allocated. Unused air missions are lost.
11.11.3 Each player’s Pre-Planned Air Worksheet may be inspected by the opposing player at the end of the game turn for that date’s air missions.
11.11.4 This rule is not suitable for use when the Uncertain Weather rule is in effect (11.1).

Fifteen of the sixteen bridge locations marked with a yellow-circled “?” represent bridges blown before the Battle of the Bulge whose rebuilding status was sometimes unknown to both sides at the tactical level. These bridges are “blown” in the basic game but when this optional rule is in effect, they may be either blown or intact at the start of the game and must be “discovered” before they can be used Either player may do this by moving a combat, headquarters or commando unit adjacent to the bridge or a panzer reconnaissance or cavalry unit 165 within two hexes of the bridge and rolling one die to determine its status: “1” = intact, “2-6” = blown for all “?” bridges except the bridge at Ouren (4321-4421). For the Ouren bridge, see Ouren Bridge Uncertainty (10.5.2).
This replaces the German Traffic Jams rule (10.6) and is applicable in every game phase.
Road movement (5.1.2) may not be used to enter an enemy or friendly ZOC or a friendlyoccupied hex, thereby forcing the moving unit to use another type of allowable movement to approach or move through them (exceptions: deployed artillery, AT and Flak/AAA [5.3.3], engineers [5.3.4], headquarters [11.14] and commandos [11.15]). The prohibition of moving directly from one enemy ZOC to another still applies. This optional rule, perhaps more than any other, reflects the difficulty of maneuvering large combat formations in the Ardennes. 166
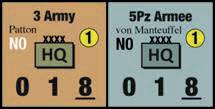
The twenty-three optional headquarters (HQ) units represent the various army and corps leaders and their headquarters staffs. Headquarters may not directly participate in an attack, have a defense strength of “1” and have no combined arms or armor superiority capability. They do not have steps and are eliminated if they suffer a step loss. Their primary function is to augment the movement and morale of combat units within their command range.
11.14.1 Headquarters Movement. Headquarters are battalion-sized, motorized, non-combat units that move with the following modifications:
11.14.1.1 Headquarters may use normal movement (5.1.1), road movement (5.1.2), strategic movement (5.1.3) and/or minimal movement (5.1.6).
11.14.1.2 Headquarters always pay motorized road movement costs (5.1.2) when moving along
164 This reflects the time it took to gather intelligence, plan air missions, assign appropriate squadrons, brief aircrews, prepare the aircraft and coordinate their use with the appropriate pathfinders and air controllers.
165 German Puma, Lynx, SPW and KG Krag, British Humber IV and Staghound, and U.S. M5 Stuart armor units.
166 Traffic jams, so commonly described as decisively influencing the Ardennes battle and impeding the German breakout, resulted from the fact that military formations took up large amounts of road space. Both sides suffered from this problem.
highways, roads or trails, even when moving adjacent to or through other friendly units.
11.14.1.3 Friendly units moving through headquarters units on highways, roads or trails do not pay any additional cost.
11.14.1.4 German headquarters movement is subject to Allied air supremacy (4.7).
11.14.2 Chain of Command Eligibility. Any U.S headquarters may augment any U.S divisional unit. The British XXX Corps headquarters may only augment British units and British units may only be augmented by XXX Corps. Any German regular army (Wehrmacht) headquarters may augment nonWaffen SS divisional units. Only a Sixth Panzer Armee headquarters (Dietrich, Priess and Bittrich) may augment Waffen SS divisional units, Panzer Brigade 150, and the three infantry divisions assigned to Sixth Panzer Armee (277VG, 12VG and 3FJ). Units with a corps designation may only be augmented by that corps headquarters. Army-level units may be augmented by any corps headquarters of their nationality. Belgian, French and commando units may not receive movement or morale augmentation.
11.14.3 Command Range. Command range is the distance in hexes from a headquarters to another headquarters or combat unit that may receive a movement or morale augmentation. It is established for each headquarters at the beginning of the owning player’s movement phase based on each headquarters’ activities during its previous turn. 167
11.14.3.1 The command range for an army headquarters is three times (X3) its current movement allowance at the beginning of a scenario or if it did not move in its previous
movement phase. Command range is two times (X2) its current movement allowance if it moved using normal movement (5.1.1), road movement (5.1.2), or minimal movement (5.1.6) in its previous movement phase. Command range is zero if it moved in strategic movement (5.1.3), was forced to retreat, or was disrupted by air attack in its previous turn.
11.14.3.2 The command range for a corps headquarters is two times (2X) its current movement allowance at the beginning of a scenario or if it did not move in its previous movement phase. Command range is one times (1X) its current movement allowance if it moved using normal movement (5.1.1), road movement (5.1.2), or minimal movement (5.1.6) in its previous movement phase. Command range is zero if it moved in strategic movement (5.1.3), was forced to retreat, or was disrupted by air attack in its previous turn.
11.14.3.3 A corps headquarters must be within the current command range of an army headquarters to provide any movement or morale augmentation benefits to combat units. Horrocks is exempt from this requirement. 168
11.14.3.4 The current command range of German headquarters is reduced by Allied air supremacy (4.7).
11.14.4 Movement Augmentation.
11.14.4.1 Entering Strategic Movement. Combat units that begin their turn on-map must be within the current command range of a friendly, chain-of-command eligible corps headquarters to enter strategic movement (SM). Units entering the map as reinforcements are not so restricted.
11.14.4.2 Divisional Movement Augmentation. The German Fifth Panzer
167 As a game aid, the command range for each headquarters should be recorded each turn in the Headquarters Utilization Worksheet and headquarters units should move last in their turn. The Headquarters Utilization Worksheets should be photocopied for repeat use
168 Horrocks was subordinate to General Sir Miles Dempsey, the commander of 2nd British Army.
Armee commander (von Manteuffel) and the U.S 3rd Army commander (Patton) may increase the movement allowance of all the units of one friendly division or brigade by one movement point (+1MP) if one or more units of that division or brigade is within the current command range of von Manteuffel’s or Patton’s headquarters. Only one division or brigade may benefit from this movement augmentation per game turn. Independent (non-divisional), corps and army-level units are not eligible (exception: German Kampfgruppen (5.3.1.2).
11.14.4.3 Prime Spearhead. A prime spearhead is a specially designated formation that is the focal point of an army-level offensive, tasked with achieving a primary objective.
11.14.4.3.1 A chain-of-command eligible armor, panzer or infantry division or brigade that is within the current command range of one of the three full-strength army headquarters at the beginning of its night movement phase may be designated as a prime spearhead. When designated, all units of that division or brigade that are in good order (2.7) and are not in strategic movement (5.1.3) or reserve (5.4) may conduct a free forced march (no Fatigue markers placed, [5.1.5]) that doubles their movement allowance for that night movement phase (5.1.5). No division or brigade may be designated as a prime spearhead two nights in a row. Both the prime spearhead forced march and divisional movement augmentation may be combined if the conditions for each are met.
11.14.4.3.2 The German Fifth Panzer Armee commander (von Manteuffel) may designate a maximum of two prime spearheads between 1620 DEC, designating both of them on one night or one on two different nights. Additionally, units of the 560VG Division may conduct one free forced march (no Fatigue markers placed) beginning on 16PM.
11.14.4.3.3 The German Seventh Armee Commander (Brandenberger) may designate only one prime spearhead between 16-20 DEC.
11.14.4.3.4 The U.S 3rd Army Commander (Patton) may designate one prime spearhead each night beginning on 22 DEC. Only 4th Armored Division may be designated as a prime spearhead on 22PM.
11.14.5 Combat Augmentation.
11.14.5.1 Morale Augmentation. Once per game date (e.g., 23 DEC), a corps headquarters may augment the morale of one friendly participating unit (or KG/TF) within its current command range by one point (e.g., morale improves from 4 to 3) for one offensive or defensive battle, down to the corps headquarters’ own morale rating. 169
11.14.5.2 Commander’s Personal Presence. Once per game date (e.g., 23 DEC), Patton and von Manteuffel may contribute one offensive or defensive combat-odds shift to one offensive or defensive battle if that battle is within the command range of their full-strength headquarters when it occurs.
11.14.6 Headquarters Elimination. If a lone headquarters unit suffers an FF or D2X combat result, it is eliminated. If a stack of units containing a headquarters suffers an FF or any type of “D” or “A” combat result, roll one more die to determine the headquarters’ fate: “1-5” = no effect, “6” = headquarters elimination. On the owning player’s following turn, the reducedstrength headquarters re-enters the map along the east edge (if German), along the north edge (if U.S. First Army or V Corps), along the south edge (U.S. VIII Corps), or along the map edge it originally entered as a reinforcement Reducedstrength corps-level headquarters may not exercise combat morale augmentation. Reduced-strength army-level headquarters may
169 Units with a better morale than the augmenting corps headquarters may not benefit from this rule.
not exercise commander’s personal presence augmentation or designate prime spearheads. The lower movement allowance of a reducedstrength headquarters affects its command range. Reduced-strength headquarters that are eliminated are permanently removed from the game.
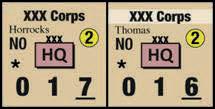
11.14.7 Horrocks Availability. The British XXX Corps commander (Lieutenant General Horrocks) went on sickleave on 27 DEC and was replaced by the 43rd Infantry Division commander (Major General "Butcher" Thomas). Flip the XXX Corps Headquarters counter over to its reducedstrength side on 27 DEC to reflect this.
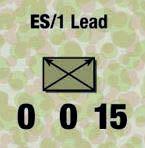
German Einheit Steilau commandos are non-combat units that are always in general supply, may not attack or defend on their own, may not spot artillery fire and may not receive close air support
11.15.1 Commando Movement. German commandos are non-motorized units that enter the map without the reinforcement spacing required by combat units (5.5), may move freely through friendly units using road movement (5.1.2) and are unhindered by enemy ZOCs, German traffic jams (10.6) or road space (11.13) restrictions. At the end of each commando unit’s movement, roll one die on the Commando Elimination Table to determine its continued operation. If the number of Allied ZOCs entered that turn is greater than the die-roll, the commando is captured and removed from the game. Subtract “1” from the die-roll for each game turn after 17PM. Beginning on the 20AM game turn, commandos are automatically captured if they enter an enemy ZOC unless they are stacked with a friendly combat unit. The German player may “attach” a commando unit
to an individual combat unit or multi-unit Kampfgruppe It is considered part of the combat unit or Kampfgruppe for all movement (including SM) and advance after combat purposes until the commando unit moves away.
11.15.2 Commando Retreat and Advance After Combat. German commandos may only retreat or advance after combat when they are attached to other German combat units. Commandos have no effect on enemy retreats and retreating Allied units have no effect on unattached commandos.
11.15.3 Commando Traffic Misdirection.
German “Recon” commando units (ES 9-12) may attempt to deceive moving Allied units through “traffic misdirection.” Commando units have no ZOC of their own and do not prevent Allied units from entering their hex. However, if an Allied unit enters a highway, road or trail hex occupied by a recon commando unit, the Allied player must pause its move and roll a die to determine if it has been misdirected. A “1” allows the German player to take control of the Allied unit and move it up to three hexes from the commando’s hex in any direction along any connecting highway, road or trail, where it ends its movement A “2-6” has no effect and the Allied player may complete the unit’s movement. From the 16PM to 18AM, a “6” eliminates the commando unit. From 18PM onward, a “5-6” eliminates the commando unit. All Allied units moving through a commando unit must roll separately until the commando is eliminated. 170
11.15.4 Commando Sabotage Operations.
German “Lead” commando units (ES 1-8) may attempt to interfere with Allied attempts to blow bridges. If a German lead commando occupies a bridge hex or moves next to a bridge that the Allied player is attempting to blow, “+1” is added to the bridge destruction die-roll (5.2.6.3)
170 The Allied player may not purposefully “see-saw” or move a unit into and out of a commando’s hex to capture it.
Only one sabotage attempt per lead commando may be made per game turn.
German “Lead” commando units (ES 1-8) that are stacked with attacking German combat units may attempt to aid German attacks through “combat deception” by announcing a combat deception attack before the combat resolution die-roll. The German player then rolls one die on the Commando Combat Deception Table to determine its effect. An “S” = a successful deception attack and a positive (+1) combatodds shift (exception: Commando combat deception may not aid a barrage attack [7.7.4]).
An “NE” = no effect. An “NE/ELIM” = no effect and the elimination of the commando unit. Only one combat deception attack may be attempted per turn.
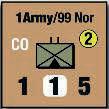
Several non-motorized infantry units were organized, trained and experienced in mountain warfare, which gave them a mobility advantage in the Ardennes. 171 Mountain infantry units may ignore the +1MP cost to move across a severe terrain hexside in all game phases and pay the frozen movement rate during snow ground conditions.
When an infantry unit (of any type) or light armor unit crosses an unbridged river, unbridged waterway or ford without the benefit of engineer assistance (5.2.5) or another supply source (e.g., a supply trace on the far side to an intact bridge [2.2] or initial German supply [10.1]), it immediately become unsupplied (2.4) on
reaching the far side and its number of unsupplied days toward possible isolation (2.8) begins on that date 172 Place an Unsupplied marker on all appropriate units.
Napoleon famously said: “The moral is to the physical as three is to one." In any combat where a player has a morale advantage (7.3) of two or more, two favorable combat-odds shifts are applied (+2 for the attacker, -2 for the defender). This benefit may not be increased by additional units with the same morale or a wider difference in morale ratings.
On the 16PM and 17PM (night) turns, NO Allied ZOC extends into a forest hex except along a highway, road, trail or over an intact bridge. 173
An Allied artillery unit that is in good order (2.7) and deployed may conduct either a “TOT Barrage Attack” or a “TOT Defensive Fire Support” mission during a daytime (AM) game turn when it is available. 174 From 17AM to the end of the game, one TOT artillery fire mission may be conducted at the Allied player's discretion. 175 A TOT artillery fire mission may only be used in the turn it is available and may not carry over from one day to the next.
11.20.1 TOT Barrage Attack. A TOT barrage attack doubles (2X) the barrage strength of the artillery unit conducting it, including the artillery
171 British 52/155, 52/156, 52/157, German 6SS/11, 6SS/12 Regiments and the U.S. 1Army/99 Norwegian Battalion.
172 This reflects the partial absence of vehicle-born or towed heavy weapons that supplemented infantry firepower.
173 Allied units were not well trained for combat in heavily forested terrain during night operations.
174 The famous WWII time-on-target (TOT) fire missions represent the artillery ammunition accumulation, coordinated employment and enhanced communications necessary to deliver massed reinforcing artillery fires under the control of a single Fire Direction Center (FDC).
175 In the “22 December” and “Battle Before the Meuse” scenarios, one TOT artillery fire mission is available each game turn.
strength increase gained through allied air observation (11.10)
11.20.2 TOT Defensive Fire Support. TOT defensive fire support adds twice (2X) the barrage strength of the firing artillery unit conducting it to the combined defense strength of the supported unit(s) regardless of their combined unmodified defense strength.

The effectiveness of the initial German artillery support varied by sector. 176 After identifying all participating units for each attack on 16AM, the German player rolls one die for each participating artillery unit to determine its accuracy. In the Sixth Panzer Armee sector, a die-roll of “1-2” = use the higher barrage strength (right-hand number), a “3-6” = use the lower barrage strength (left-hand number). In the Fifth Panzer Armee sector, a die-roll of “13” = use the higher barrage strength (right-hand number), a “4-6” = use the lower barrage strength (left-hand number). All German artillery units in the Seventh Armee sector use the higher barrage strength (right-hand number). Use these results and the Combat Modification Chart to compute the initial and final combat odds for each opening attack.
As the offensive wore on, the lack of fuel, supply trucks and harassment from the air severely limited the delivery of artillery ammunition and reduced German combat power. This problem became noticeable by 22
December and acute when Allied air supremacy was achieved. As much of the attacking firepower of WWII formations came from artillery, this had a direct effect on German army, corps and even division-level artillery.
11.22.1 Ammunition Limits. Beginning on 22 AM, the German player may only conduct barrage attacks (7.7.4) or offensive fire support (7.7.5) with four German howitzer-type artillery units and two rocket (Werfer) units each turn. Defensive fire support is unaffected. 177
11.22.2 Ammunition Shortage Effects. For each German attack (day or night) beginning on 22AM, the German player rolls one die immediately after the combat resolution die-roll to determine if ammunition shortages weakened the attack. A “1-4” indicates no effect and the attack is resolved normally. A “5-6” indicates that ammunition shortages weakened the attack by imparting a defensive (-1) combat odds shift. On days and nights with clear weather, subtract one from the German ammunition shortages dieroll.
To help dispel some of the unrealistic elements of certainty and clairvoyance found in most board wargames, the following optional rules are suggested.
11.23.1 No Peeking. Neither player may examine enemy stacks before attacking them (including air interdiction, air attack and artillery fire).
11.23.2 No Crystal Ball. Neither player may examine the OOA of the opposing player and both players must reveal their replacements by writing down their entry hexes (if an entry area has more than one hex available) before placing them on the map
176 In the Sixth Panzer Armee sector, most of the artillery fire was by map with little reconnaissance or observation and had limited effectiveness on front-line U.S. defenses. In the Fifth Panzer Armee sector, most of the artillery fire came only after contact with U.S. defenses that improved its accuracy but diminished its weight. In the Seventh Armee sector, almost all of the American target locations were identified and reported before the offensive began by German collaborators operating in Luxembourg.
177 As a game aid, orient German artillery units that have fired during ammunition shortages downward
• Three map sheets
• Six countersheets (5/8” size)
• 524 ground units
• 49 air units
• 480 game markers
• Game Rules booklet
• Game Booklet with designer notes and play examples
• Historical Study with detailed OOBs
• Twenty-one player aid cards
• Forty-five Allied and German order of appearance/setup cards
• Two six-sided dice
• One game box and lid
Abbreviation Definition
A1 Attacker’s Loss Result (1 hex)
A1X Mandatory Loss Result (attacker)
A2X Mandatory Loss Result (attacker)
AAA Anti-Aircraft Artillery
AM Daytime (turn)
AST Armor Superiority Table
BA Barrage Attack
BTL Unresolved Battle (combat result)
Cmdo Commando
Abbreviation Definition
III Regiment/Group (unit size)
IP Improved Position (1 or 2 point)
J Jet (aircraft)
KG Kampfgruppe
KGP Kampfgruppe Peiper
LB Light Bomber (aircraft)
MB Medium Bomber (aircraft)
MP Movement Point
MR0 Montgomery's Reaction (trigger)
CRT Combat Results Table OFS Offensive Fire Support
D1 Defender’s Loss Result (1 hex)
D1+ Defender’s Loss Result (1 hex +)
D2 Defender’s Loss Result (2 hexes)
D2X Mandatory Loss Result (defender)
D3 Defender’s Loss Result (3 hexes)
DEC December
DFS Defensive Fire Support
DIS Disorganized (combat result)
ENG Engaged (combat result)
Eng Engineer (unit type)
F Fighter (aircraft)
FB Fighter Bomber (aircraft)
FF Fire Fight (combat result)
FRD Fractions Rounded Down
FRU Fractions Rounded Up
H.Gru.B Heeresgruppe B (Army Group B)
HB Heavy Bomber (aircraft)
HQ Headquarters
II Battalion (unit size)
OOA Order of Appearance
OOB Order of Battle
PBM Play By Mail
PBEM Play By E-Mail
PM Nighttime (turn)
Res Reserve (status)
SB Super-Heavy Bomber (aircraft)
SM Strategic Movement
T Transport (aircraft)
TEC Terrain Effects Chart
TF Task Force
TOT Time-on-Target (artillery)
U.S United States
VG Volksgrenadier (organization)
X Brigade (unit size)
XX Division (headquarters)
XXX Corps (headquarters)
XXXX Army (headquarters)
ZOC Zone of Control
* Infantry: 3 Attack or Defense Steps = 1 Infantry RP, Armor; 3 Attack Steps or Defense Steps = 1 Armor RP. Combat replacement points may be used two days after they are gained.
Suggested Instructions:
Write in the scheduled infantry and armor replacement points per the scenario game status card. Use a pencil hash-mark (I) to record each infantry and armor step loss as they occur in those columns.
At the end of each PM game turn, strike off three accumulated hash-marks and write a C in parentheses (C) two rows (days) below them to represent one Combat Replacement Point (CRP) of that type that will be available two days later (e.g., 16 DEC step losses count toward 18 DEC replacement points). Multiples of three hashmarks can create multiple Combat Replacement RP (e.g., 6 hash marks = 2 CRP). Non-struck hash-marks carry over from day to day.
In the replacement phase, Scheduled RP are counted down when used and Combat RP (CRP) are struck off when used. The total replacement points remaining each day are updated in the balance column (Infantry / Armor).
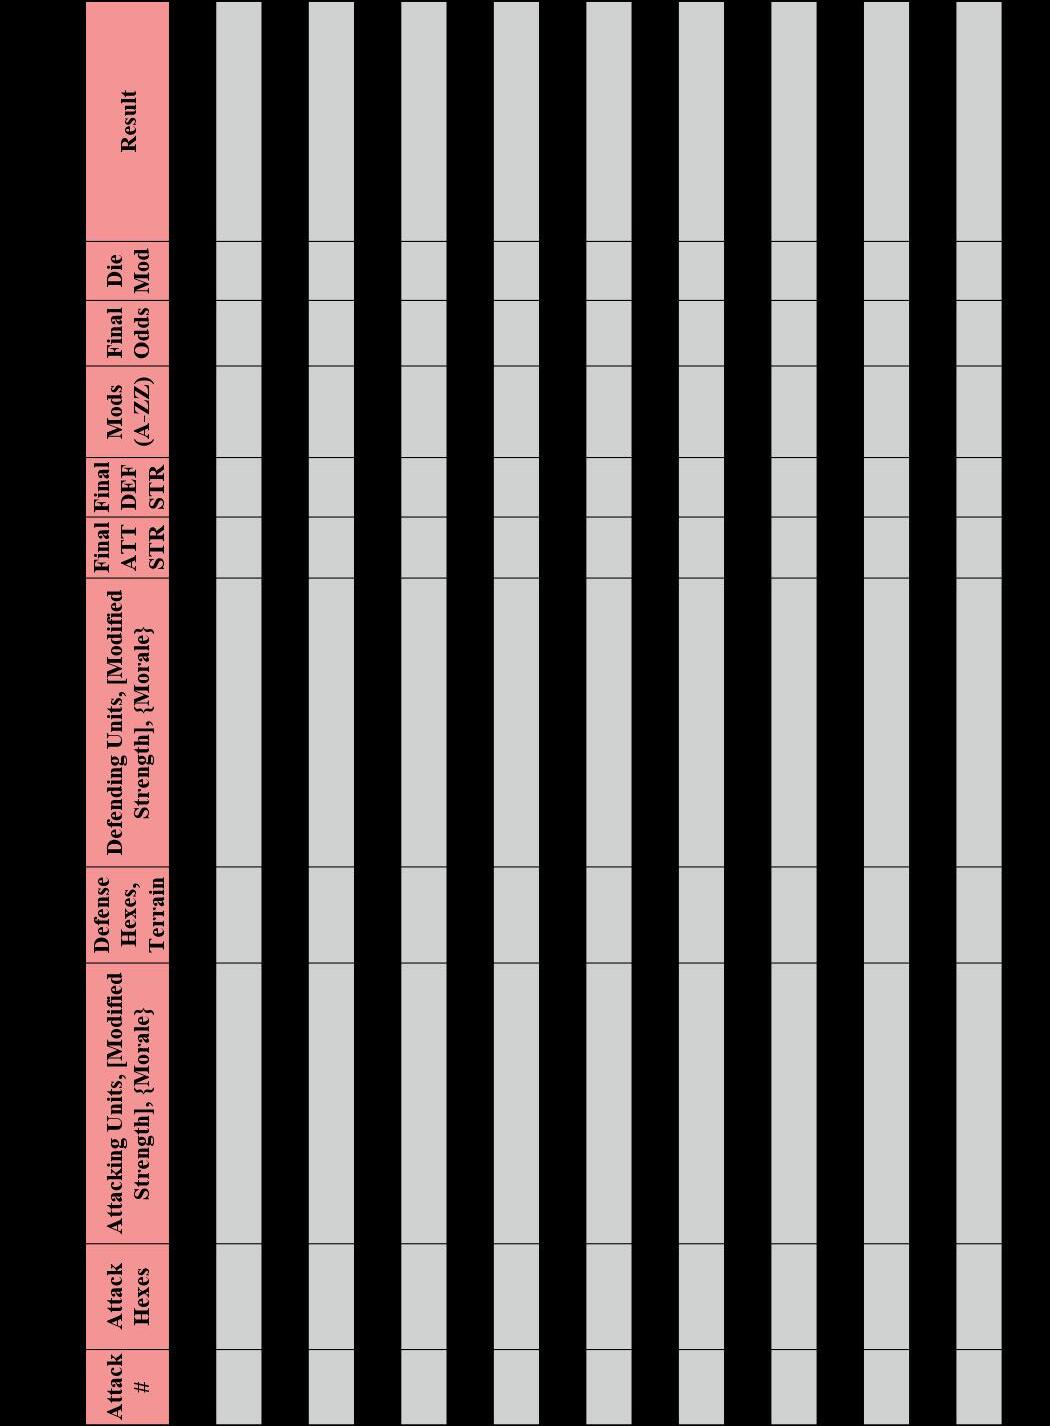
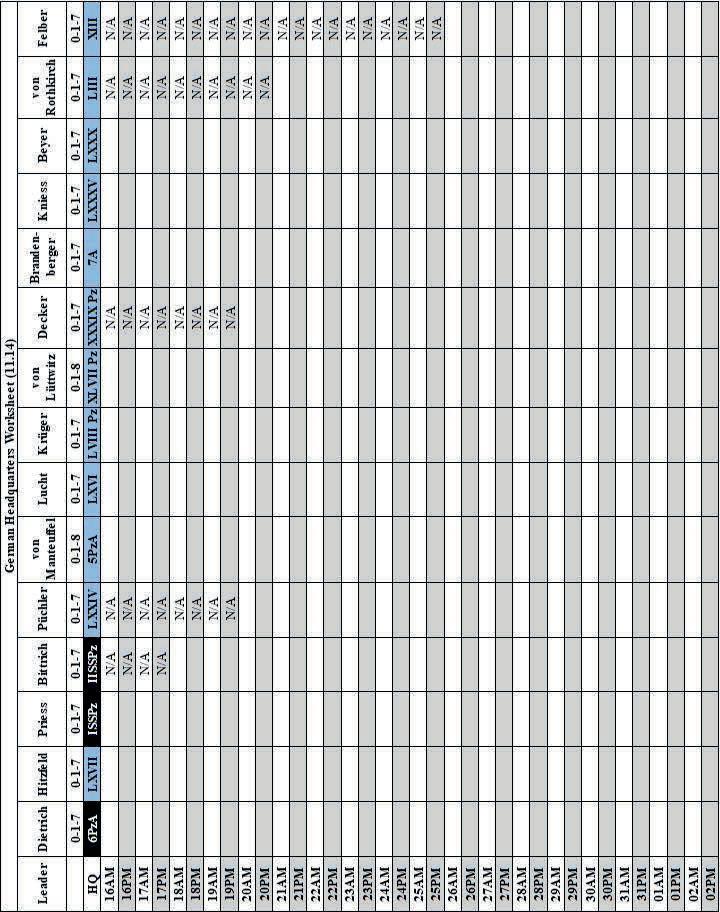
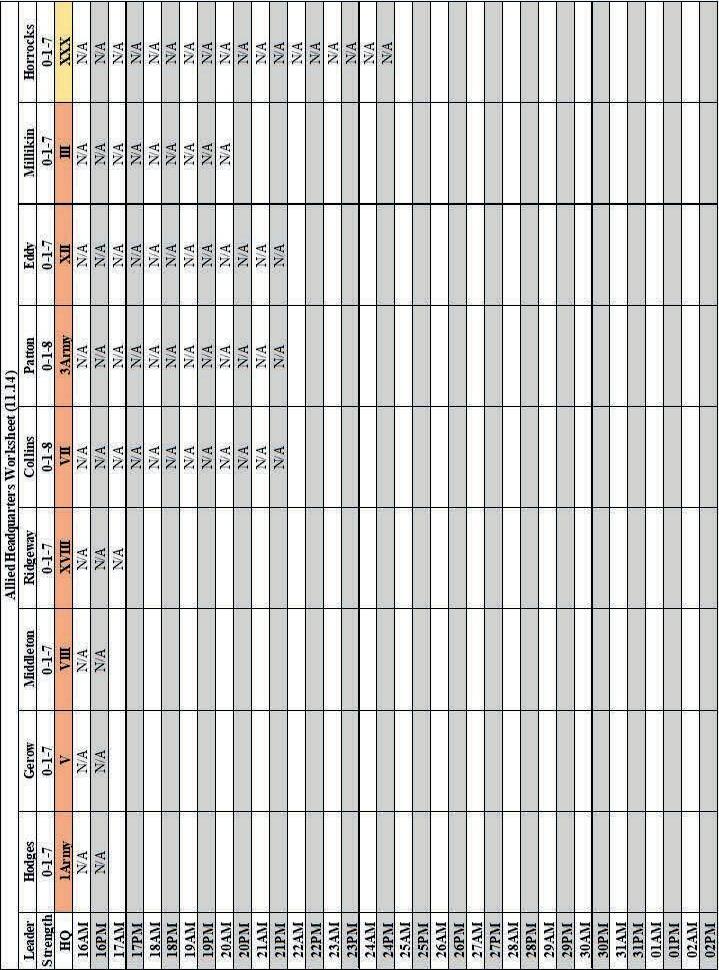

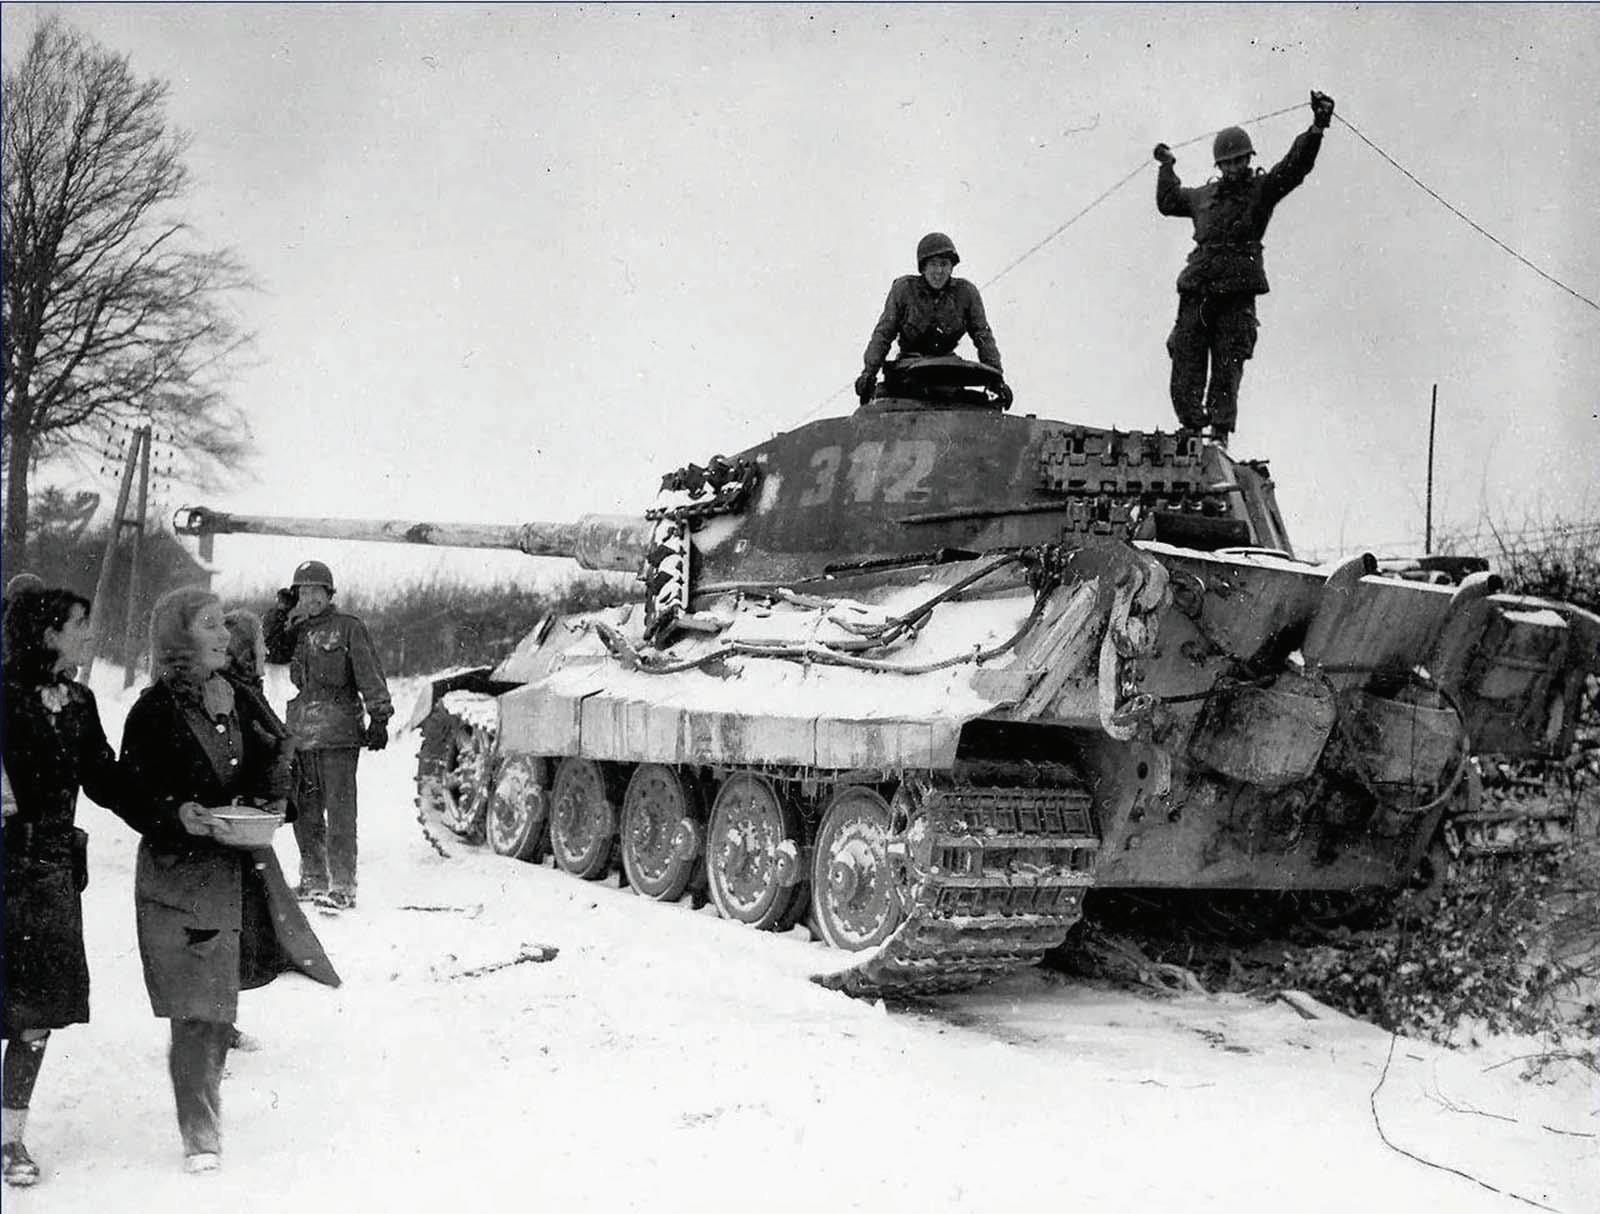 Belgian maidens walk past Königstiger 312 of s. SS Pz Battalion 501 (SS Oscha. Heinrich Ritter) that was knocked out by M-36 tank destroyers of the 628th TD Battalion near Goronne, Belgium [3616], 7 January, 1945. (NARA)