

City of Independence, Missouri
Adopted by the Independence Heritage Commission October 7, 2025
Independence Heritage Commission Members
Mark Scherer Chair
Duane Stephens Vice-Chair
Josh Guldner Secretary
Lee Argo
Robert Pruente, Jr.
Advisory Members
Sam Rushay Harry S. Truman Presidential Library
Carol Dage National Parks Service
City of Independence Historic Preservation Division
Wendy Shay Historic Preservation Manager
Consultant Team
Timothy Breihan, A.AIA
Brian Michener, AIA, LEED-AP
Principal / Project Manager; H3 Studio, Inc.
Principal; Lo Design
This publication is partially funded by a grant from the Missouri Department of Natural Resources, State Historic Preservation Office and the U.S. Department of the Interior, National Park Service. Grant awards do not imply an endorsement of contents by the grantor. Federal laws prohibit discrimination on the basis of race, religion, sex, age, handicap, or ethnicity. For more information, write to the Office of Equal Opportunity, U.S. Department of the Interior, Washington D.C. 20240.
» City of Independence Preservation Timeline
» Objective of the Historic Preservation Design Guidelines
» Frequently Asked Questions
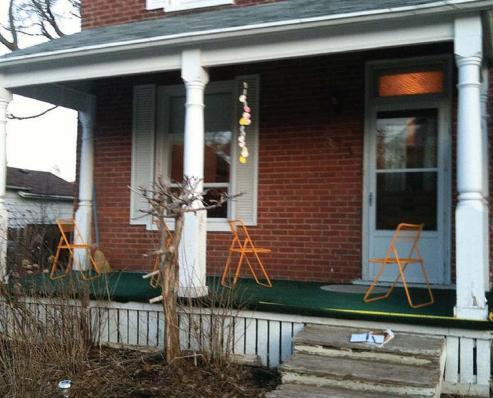
The City of Independence reflects the growth of the nation. Today, Independence is both a thriving community as well as a heritage tourism destination. Protection of its cultural resources ensures that physical evidence of its history is maintained. Local designation of those resources aids in the stabilization of neighborhood property values, rehabilitation of the historic built environment through local investment, fostering of community pride, and further economic development.
1972
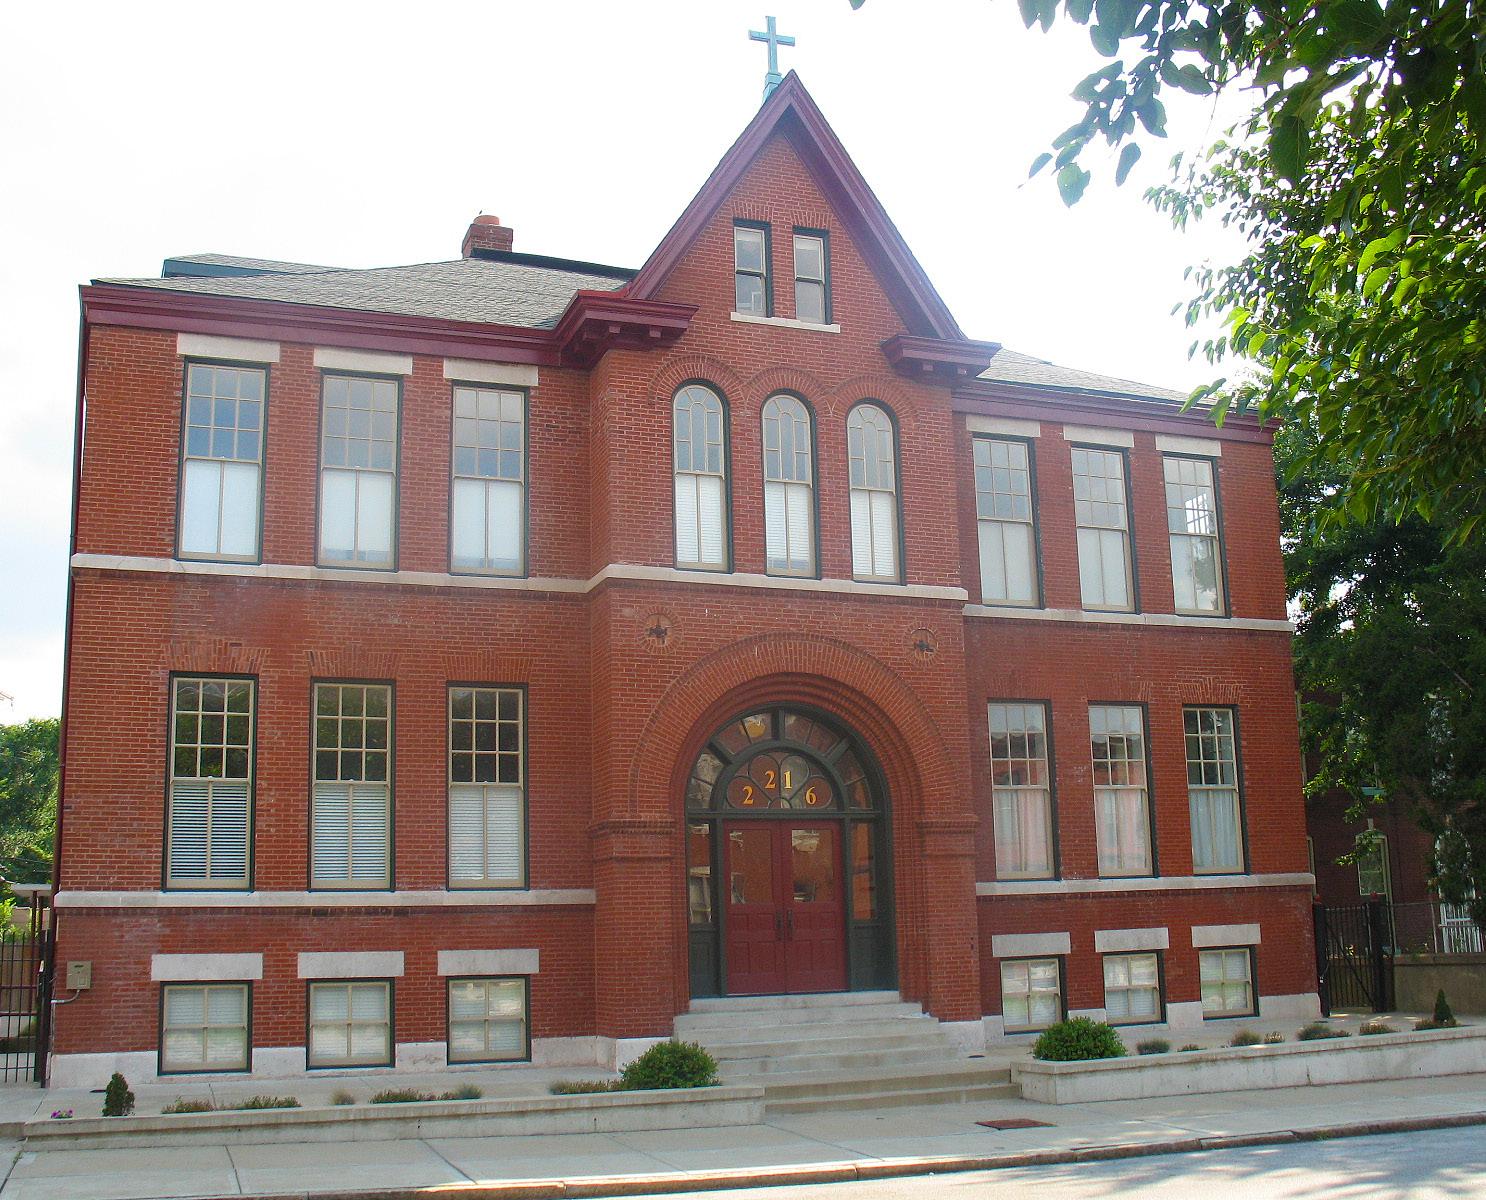
By authority of the Historic Sites Act of 1935, the federal government establishes a National Historic Landmark District, one block long, surrounding the Truman Home on Delaware.
1973 Independence City Council establishes the Harry S Truman Heritage District, the city’s first local historic district. The Independence Heritage Commission is created with the adoption of Section 30 of the City Code.
1975
The city hires Soloman and Claybaugh Architects, Inc. to conduct the first city-wide architectural survey.
1979 The Bingham-Waggoner Historical Society is formed. Partnership with the City of Independence allows for the acquisition and restoration of the Bingham-Waggoner Estate.
1983
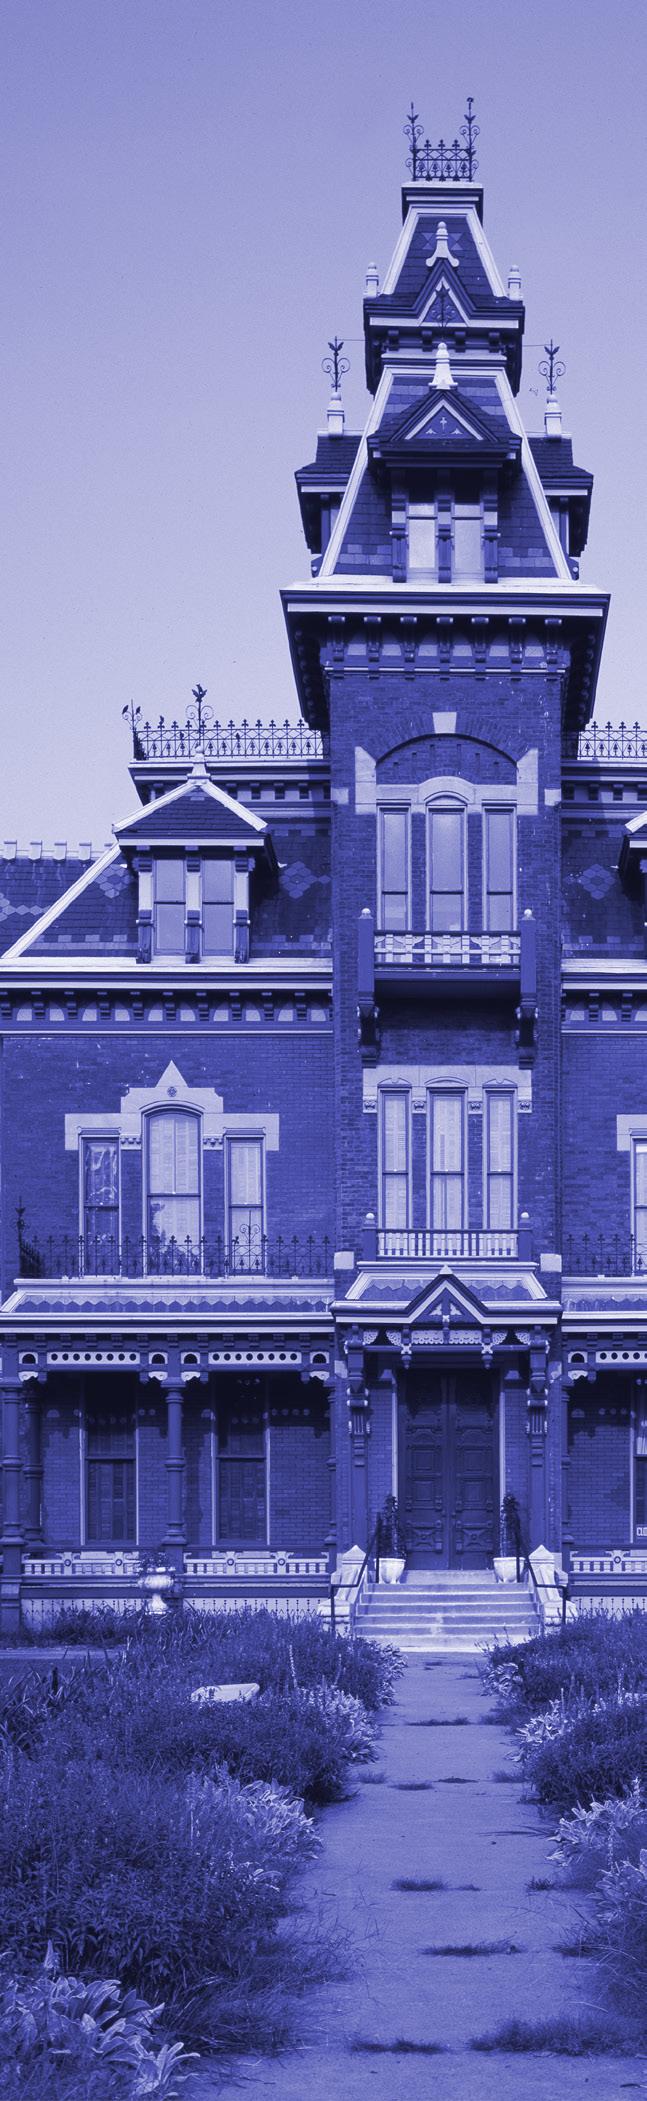
The city accepts ownership of the Vaile Mansion and begins restoration of the building for use as a house museum.
The Truman Home becomes a National Historic Site, operated by the National Park Service.
1984
1987
1992
The Independence City Council reduces the boundaries of the local historic district and redefines some of the responsibilities of the Heritage Commission.
The State of Missouri, State Historic Preservation Office (SHPO) and the U.S. Department of the Interior recognize the City of Independence as a Certified Local Government (CLG).
The city adopts a demolition moratorium and follows it up with a city-wide demolition permit review process to address the demolition of historically, culturally, and architecturally significant sites.
The Truman Depot is acquired by the city and plans for its restoration begin.
1995
1996
The 353 Midtown/Truman Road Corridor Redevelopment Plan is adopted. The plan encourages investment in the city’s historic core.
Over $175,000 of Intermodal Surface Transportation Efficiency Act (ISTEA) funds are allocated for the restoration of various cityowned historic sites including the Chicago & Alton Depot, the Truman Depot, and the design of the Truman Walking Trail.
Professional staff are hired to run the city’s Historic Preservation Division within the Community Development Department.
Relocation of the Chicago & Alton Depot is complete, preventing the structure’s demolition.
The National Trust for Historic Preservation declares the Harry S Truman National Historic Landmark District as one of the “11 Most Endangered Places.” The designation is a catalyst for citizens and city, state, and federal officials to consider the adoption of a preservation plan to stabilize the district.
1997 Revisions to the Historic Preservation Ordinance allows for the local designation of individually owned properties, known as Local Historic Landmarks.
1998 The City of Independence adopts historic preservation design guidelines.
2000 Chapter 11 is adopted as part of an overall preservation plan within the city’s larger Comprehensive Plan.
2011 The National Park Service approves expanded boundaries of the National Historic Landmark District that includes the Independence Square.
A CLG grant is utilized to update the city’s Historic Preservation Design Guidelines. This update provides comprehensive direction for property owners and makes the preservation guidelines available for the first time in both print and online.
2019 The Preservation Division receives a CLG grant to create a free-standing Historic Preservation Master Plan. The plan outlines potential future historic districts and goals and objectives to guide the Independence Heritage Commission and preservation staff through 2029.
These City of Independence Historic Preservation Design Guidelines allow property owners to comfortably and affordably live and work in a building of historic significance without compromising the conveniences of today’s newer homes and businesses.
The objective of these Guidelines is two-fold: to preserve as much integrity as possible of a historic property over time, and, in accordance with these guidelines, facilitate the upgrade of structures by incorporating modern, energy-efficient, and consumer-safe conveniences present in today’s newer homes and businesses.
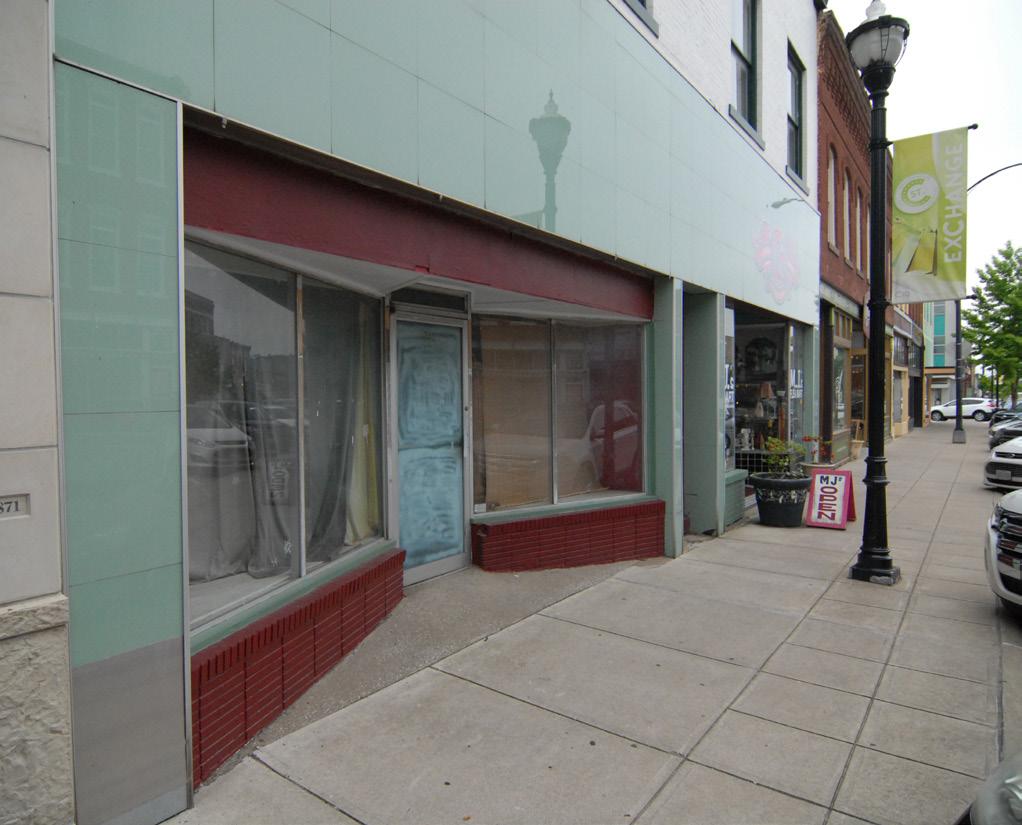
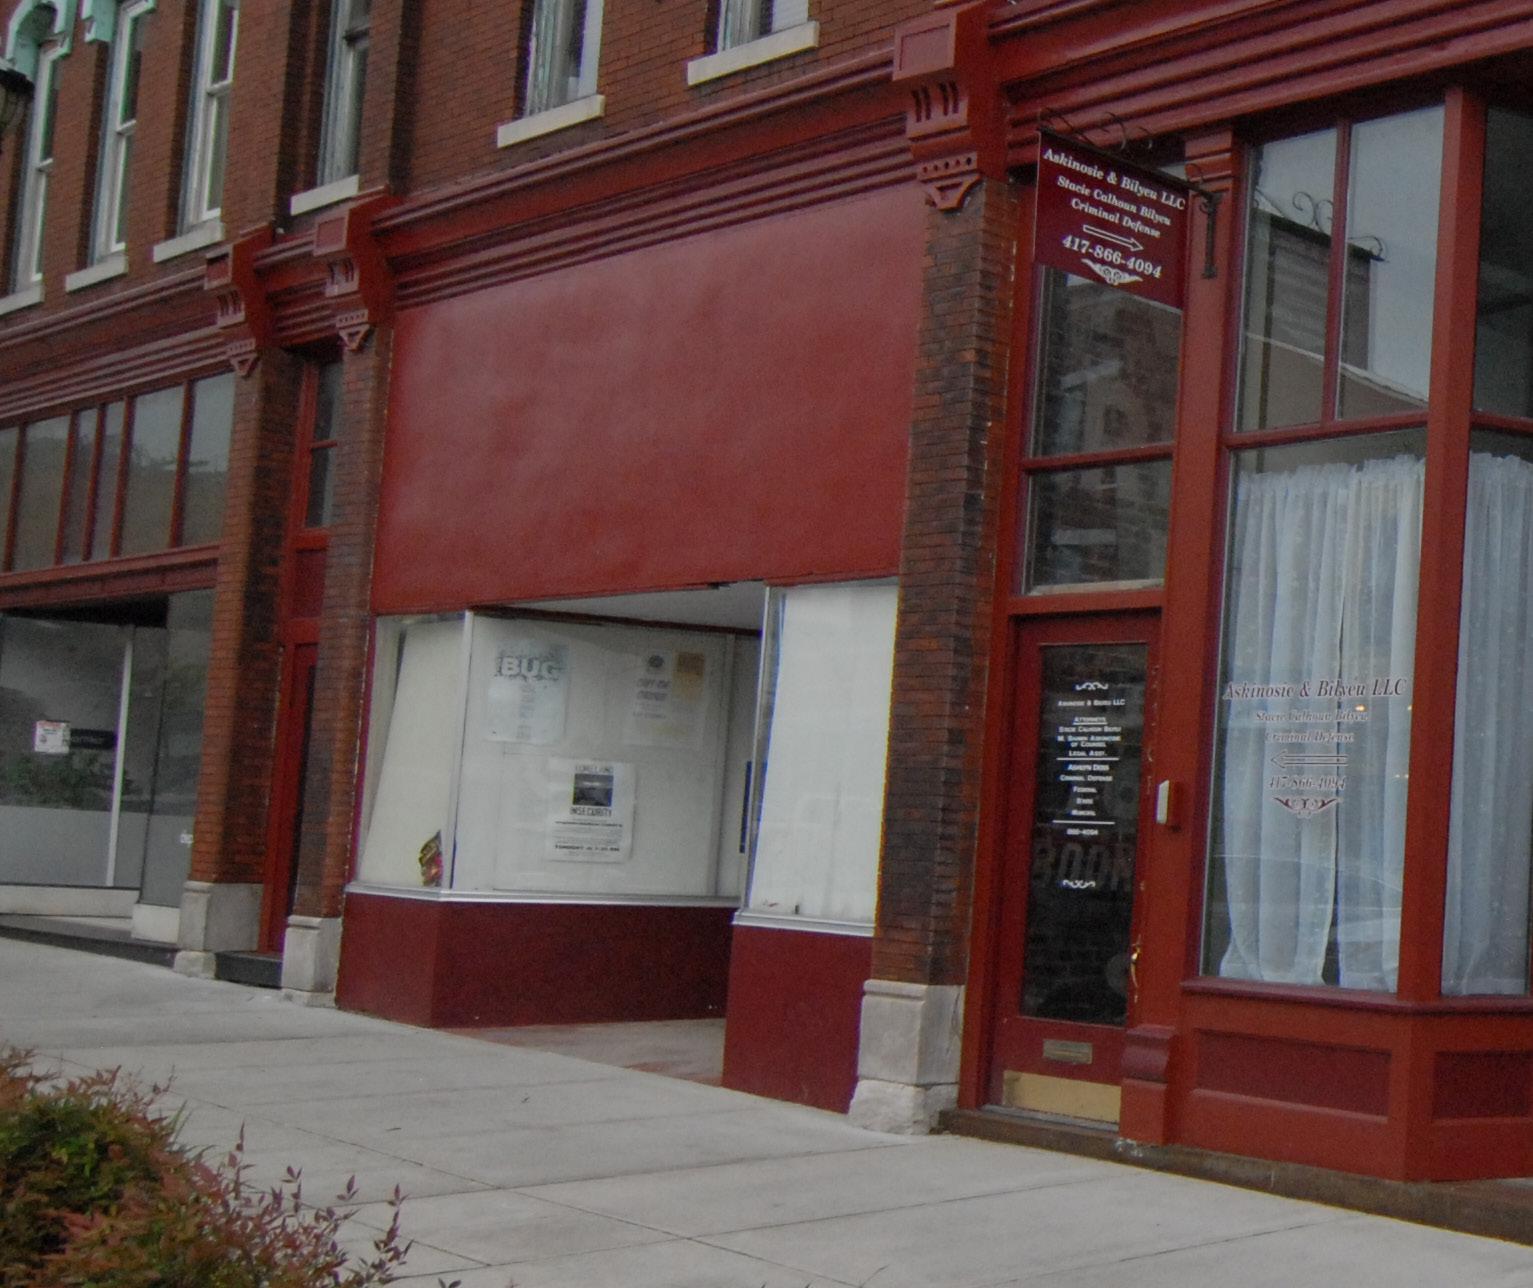
The City of Independence encourages the designation of historical, architectural, and cultural resources throughout the community as a means of stabilizing and enhancing property values, fostering civic pride, and maintaining the character that defines individual sites and neighborhoods. Independence currently has one (1) locally designated historic district and 27 individually listed local historic landmarks. According to Section 14-907 of the Unified Development Code, locally designated properties, whether within a district or individually listed, require design review for all exterior improvements.
This City of Independence Historic Preservation Design Guidelines is based upon The Secretary of the Interior’s Standards for Rehabilitation (“Standards for Rehabilitation” or “Standards”), the national model for the appropriate treatment of historic buildings. The design principles outlined by The Standards for Rehabilitation are used during the Certificate of Appropriateness (COA) application and review process by the Independence Heritage Commission. The Independence Historic Preservation Design Guidelines are intended to aid property owners on how to rehabilitate their historic property and give the owner a better understanding of how and why The Standards for Rehabilitation apply to their property. They are also designed to inform and assist property owners about how to obtain approval for proposed exterior improvements to their historic property. These guidelines apply to historic properties City wide.
These Design Guidelines outline how to best protect the unique historic features that most likely first attracted owners to the area, including features such as: mature trees, diverse architecture, quality craftsmanship, unique materials, and walkable streets. Use of these guidelines will aid property owners, City Officials, City staff, and developers to complete preservation, rehabilitations, and new construction that are sympathetic to the historic character of the property and/or district while making a lasting, long-term investment.
For more information on the history of preservation in the City of Independence and the history of the Truman Heritage District, please refer to Appendix B of the Historic Preservation Design Guidelines.
The City of Independence’s Heritage Commission was established to preserve, conserve and maintain the aesthetic and historical resources of the City and to improve the quality of the City’s built environment through preservation, conservation and maintenance of neighborhoods that reflect the City’s distinctive history.
As it relates to building and development, the Heritage Commission is responsible for reviewing plans for new construction, alteration, or relocation of designated landmarks, and any building within a designated Historic District or Conservation District 1. The Heritage Commission is also responsible for reviewing all demolition permits City-wide.
To be considered historic, a property is typically at least 50 years old and appears much as it did when originally constructed. If it would be unrecognizable on the outside to its original owners, it has lost its architectural integrity.
In order to be designated “historic,” the property must also: be affiliated with an important event, be associated with an important person, reflect a unique style of architecture or design, or be associated with an archaeological site. Examples of resources can include famous houses, battlefields, commercial buildings, and barns, to name just a few. Properties that contribute to the overall context within historic districts are considered historic.
The City of Independence recognized in the early 1970s that, without some form of protection and review, significant buildings, sites, and structures could be lost or irreversibly changed. In order to begin documenting and protecting these resources, the City adopted an ordinance that allowed for the creation of: the Independence Heritage Commission, a designation process, design review, and a demolition review process. The City was formally recognized by the State of Missouri in 1987 as a Certified Local Government (CLG) for its preservation program aimed to document, designate, preserve, and protect its historic resources.
The Independence Heritage Commission is a citizen board of nine (9) members appointed by the Independence City Council. Two (2) of the nine commissioners serve as ex-officio members representing the Harry S. Truman Presidential Library and Museum and the Harry S. Truman National Historic Site. Appointed members must either live or work in Independence and can serve no more than two consecutive three-year terms.
The Commission is responsible for reviewing proposed exterior alterations for all locally designated historic sites. They also make recommendations to the Planning Commission and City Council regarding community preservation issues and historic designations and work to promote public outreach and education.
Local designation means that the City of Independence has recognized that property as being significant at a local, regional, state, or national level. Local designation is the highest form of protection for a historic property, as all exterior modifications require design review by City staff, and/or the Heritage Commission. This review process provides a level of protection against inappropriate alterations, additions, and demolition.
In exchange for review, property owners can benefit from stabilization of their property values and tend to see an increase in values over properties that are not designated. The City does not mandate any changes or require upgrades to a property based upon its historic designation.
Listing in the National Register of Historic Places means that the federal government recognizes the property for its architectural or historical affiliations also at a local, state, or national level. The National Register holds properties to a higher standard in that they must retain a significant level of integrity in order to be honored.
National Historic Landmarks are buildings, districts, sites, and structures designated by the Secretary of the Interior because they are sites of national historical significance; places where prominent Americans lived or worked; icons of ideals that shaped the nation; outstanding examples of design or construction; places characterizing a way of life; or archaeological sites able to yield information.
Note: National designation is merely honorary and requires no design review at the local, state, or federal level. Designation in the National Register or National Historic Landmarks also provides little to no protection, from inappropriate alterations or even demolition.
Locally designated properties and districts are better protected from inappropriate change. The local review process provides an opportunity for citizens to comment on whether proposed changes may detract from the look and feel of the neighborhood. Further, property values tend to stabilize and often increase as a result of local historic designation and the added protection it brings.
Properties listed in the National Register of Historic Places may qualify for state or federal (income-producing properties only) rehabilitation tax credits. These tax credits are available for rehabilitation work on eligible historic buildings. In Independence, this would include individually listed National Register properties and many of the properties located within the Harry S. Truman National Historic Landmark District. Refer to the Missouri Department of Natural Resources (DNR) website for information about the Missouri State Historic Preservation Office (SHPO), state review requirements for National Register applications, and more in-depth information about rehabilitation tax credits.
Unique architectural features and traditional streetscapes are most likely what attracted owners to an area where they first purchased their historic property. Protection of features such as mature trees, quality craftsmanship, superior materials and design, and walkable streets is the intent of the designation and the design review process.
Studies have repeatedly shown that the higher standards designated properties are held to help to stabilize and even increase property values. Designated historic districts become more desirable neighborhoods and often see consistent investment.
Independence has one local historic district, the Harry S. Truman Heritage District (designated in 1973), and a federally recognized district, the Harry S. Truman National Historic Landmark District (designated in 1971). Additionally, there are 27 individual buildings/structures that have been listed as “local landmarks” and 23 individual properties listed on the National Register of Historic Places.
Can I make changes to my property if it is designated as historic?
Yes. Designation does not prohibit alterations or additions to historic properties. In fact, property owners are always encouraged to make improvements to their properties in historic districts. Property owners may construct free-standing garages, add an addition onto an existing house, or even install solar panels and insulation, assuming the review process is followed, and the appropriate minimal design guidelines are upheld. Some exterior changes require either administrative or Heritage Commission approval only to ensure that the alterations maintain the historic character of a property while meeting the modern-day needs of residents and owners. Design review also helps to ensure the traditional streetscape features such as mature trees, walkways, and building orientation are also maintained.
What if my property was added on to or modified a long time ago?
Many historic buildings were modified with additions or other modifications in the past, but after they were originally built. In some cases, these additions or modifications are themselves historically significant, contribute positively to the overall character of the property and the district, and should be preserved. In other cases, additions or modifications are not historically significant, do not contribute positively to the character of the property and the district, and should ideally be remediated in some way. Please refer to Chapter 3, Section “Periods of Historic Significance” for additional information on determining whether past modifications are considered contributing or non-contributing.
interior improvements and maintenance require review?
No. Interior improvements and routine indoor and outdoor maintenance such as painting, caulking, weatherstripping, rotted wood repair replaced with wood, and landscaping (except removal of mature trees) requires no review by staff or the Heritage Commission. Refer to Chapter 2, Section “Certificate of Appropriateness (COA) Approval Matrix” in order to review the most common types of property improvements and their review requirements, if any.
Who do I contact for more information?
For more information regarding historic designation and Independence’s Historic Preservation Program, contact the City of Independence Preservation Division.
» Quick Start Guide: How to Use the Historic Preservation Design Guidelines
» Overview of Heritage Commission Review
» Certificate of Appropriateness (COA) Approval Matrix
» Certificate of Appropriateness Review and Approval Process
Are you getting ready to do a project on a property in the Truman Heritage District or an individually-listed property in Independence and you’re not sure where to start? Check out this step-by-step guide for how to use these guidelines.
Determine if your project needs a Certificate of Appropriateness (COA) and what review process is required.
Refer to the COA Matrix in Chapter 2, Section “Certificate of Appropriateness (COA) Approval Matrix” for the requirements of your project or contact the City of Independence Preservation Division. Some projects will require a COA, and some will not. Some projects will require review by the Heritage Commission, and some will only require review by the Preservation Division.
Determine if your property is contributing or non-contributing to a district, its architectural style, and period of historic significance.
Refer to the Harry S. Truman National Historic Landmark District Survey and search by property address to locate your property. The description for each property in the survey includes the year built, architectural style(s), and whether the building is contributing or non-contributing. Chapter 3, Section “Periods of Historic Significance” provides additional information about buildings that have been modified in the past, and whether those modifications are contributing and should be preserved, or are non-contributing and can be altered. In the event that your property has past additions or modifications, it is recommended that you contact the City of Independence Preservation Division for additional guidance.
Go to the architectural style of your building in the Guidelines.
Go to the page describing the architectural style of your building in Chapter 3, Section “Architectural Styles”. Relevant guidelines that apply to that architectural style— based on its typical features—are listed for each style.
Determine the Historic Preservation Guidelines that are applicable to your project.
The guidelines that are applicable is determined by the features of your building and the work that you are planning. For example, window replacement may only require compliance with standards for windows. Roof replacement may require compliance with standards for both roofs and gutters. Based on your project, identify the applicable Guidelines in Chapter 3 and plan your project to conform to those Guidelines. Contact the City of Independence Preservation Division with questions.
Determine the requirements for documentation of your project.
How involved is your project? Will construction documents be needed (such as with an addition) or a simple specification (such as installation of a new door)? Are you planning to utilize Historic Preservation Tax Credits? If there are any questions about what type of documentation you need, contact the City’s Preservation Division for an informal, pre-application meeting.
If you intend to apply for Historic Preservation Tax Credits, it is strongly recommended that you also contact the Missouri State Historic Preservation Office for additional information.
Submit a completed COA application.
Refer to Chapter 2, Section “Certificate of Appropriateness (COA) Approval Matrix” for the requirements of the COA application. Staff will contact you if more information is needed. If the project can be administratively reviewed, City staff will send an approval letter to you. If the project requires Heritage Commission approval, a copy of the meeting agenda and staff report will be forwarded to you.
When used effectively, Independence’s design review process ensures that small, cumulative changes do not slowly peel away one layer of historic fabric after another; eventually removing all historic character that a property or district possesses.
For instance, changing out one original wood window may not affect the overall look of a property or of a neighborhood. However, removing all the original wood windows by one owner, removing wood siding and replacing it with stucco by the next owner, and enclosing the open front porch by the next owner, will eventually destroy the integrity of a once unique, character-defining property and negatively impact the character of the neighborhood.
A Certificate of Appropriateness (COA) is an application submitted for approval to the Preservation Division and Heritage Commission that authorizes alteration or new construction on a locally designated historic landmark, or property within a historic or conservation district, or demolition of any building City-wide, per City code.
Any project that involves exterior alterations that can be seen from a public right of- way must be reviewed by the Heritage Commission prior to issuance of a building permit, if necessary. Approval by the Heritage Commission is also needed for designations, signage, and re-zoning of all historically designated properties. Minor repairs or alterations using the same materials may be reviewed administratively by the City’s Preservation Division. Refer to Section 3 Certificate of Appropriateness (COA) Approval Matrix.
For the Certificate of Appropriateness (COA) review and approval process, refer to the flow-chart in Section 4 Certificate of Appropriateness Review and Approval Process.
A Certificate of Appropriateness application, including submittal requirement and application checklist, can be downloaded from the Preservation Division website
A contributing property is defined as a building (house) or structure (garage, barn, etc.) that adds to the historic significance of a district through its location, design, setting, materials, workmanship, feeling, and association. A contributing property is one that still reflects much of its historic appearance.
Non-contributing properties are defined as a building or structure that lacks historic significance due to its young age (typically less than 50 years old) or shows significant loss of its original design, architectural features, or is physically deteriorated to the point that it is not feasible to rehabilitate the property to its historic appearance.
The City of Independence Preservation Division determines if a property is contributing or non-contributing to a district. Properties that are classified as historic and contributing to a district are typically reviewed more stringently than those that are non-contributing as any exterior improvement could potentially impact the overall historic appearance of the building and the district. As a result, it is always recommended to consult with the City’s Preservation Staff prior to beginning the application process. To determine if a property is “contributing” or “non-contributing,” Refer to the Harry S. Truman National Historic Landmark District Survey and search by property address
1.There are no conservation districts in Independence at this time but can be implemented by the city at a later date. To find out information about their purpose and how they are organized, please refer to the City of Independence Unified Development Ordinance.
For the Certificate of Appropriateness (COA) Approval Matrix:
• “Repairs” are defined as minimal replacement of original architectural features in order to stabilize the materials. Examples include fixing cracks in concrete, replacing a portion of rotted wood on a soffit, addressing a broken window sash with wood putty or consolidator.
• “In-kind replacement” is defined as any changing out of similar materials that consist of less than 50% of the overall architectural feature.
• “New construction” consists of the replacement of 50% or more or the original architectural feature of the creation of a new feature.
A Certificate of Appropriateness (COA) is an application submitted when a property owner wishes to make exterior changes to a designated historic property. No review is necessary when making repairs or replacement with the same type of materials already on the building. Refer to the COA Approval Matrix for more information.
See the process for no review, COA staff review, and Heritage Commission required review below.
Contact the Historic Preservation Division at 816-325-7419 before you submit your COA application to ask questions, review submittal requirements, and to discuss the review process.
Examples include:
• All in-kind repairs or replacement
• Painting
• Re-pointing
Proceed to permitting (if permit is required).
• Reviews are completed within three days of submittal
• Refer to the COA Matrix for a list of projects and their review requirements
• Submit a COA application for administrative review. No fees are associated with this application
• Public meetings are held the first Tuesday of every month
• Refer to the COA Matrix for a list of projects and their review requirements
• A $25 fee is associated with this application
Projects are reviewed by staff and a letter is mailed noting the approval for your records.
• Application requests are published via a public notice 15 days prior to the meeting Call 816-325-7419 to set-up a no-cost, pre-application meeting. This meeting can be held at City Hall or on site.
Proceed to permitting (if permit is required).
A meeting date will be confirmed and Preservation Division staff will create a staff report and packet for the Commission based on your application.
Upon review and approval by the Heritage Commission, staff will remove holds from outstanding building permits that required Historic Preservation review. Denials may be appealed to City Council.
If approved, proceed to permitting (if permit is required).
Meetings are held on the first Tuesday of each month at City Hall
• Submit COA application and $25 fee to the City’s Preservation Division
• A public hearing is scheduled for Commission review of the request
• All meetings are open to the public
Commission reviews and approves the COA request during a public hearing.
Proceed to the Building Division for permitting.
Commission reviews and denies the COA request. Commission recommends applying for COA for economic hardship.
A COA for economic hardship is scheduled for a public hearing for consideration by the Heritage Commission.
If COA for economic hardship is denied by the Commission, applicant may appeal to the City Council with new evidence only.
COA is reviewed and approved for economic hardship by the Heritage Commission.
Proceed to the Building Division for permitting.
If approved by City Council, proceed to permitting. Appeals for denials must be taken to court.
Chapter 3
» Introduction to the Rehabilitation Guidelines
» The Secretary of the Interior’s Standards for Rehabilitation
» Periods of Historic Significance
» Architectural Styles
» Architectural Materials
» Architectural Features
» Site Work
The Rehabilitation Guidelines are based on the Secretary of the Interior’s Standards for Rehabilitation and are intended to help property owners choose appropriate rehabilitation treatments for individual elements of their historic building. They are not meant to prescribe the exact action for every situation, but to suggest appropriate approaches that will prevent damage to the historic fabric of the building.
As a general rule, preservation standards encourage maintenance of existing historic fabric as a priority, repair when possible, and replacement only as a last resort. However, with any project there will be other factors that play a role in the selection of treatment methods including budget, planned use, access to trades people, owner’s preference, and family priorities. These guidelines allow for the flexibility of a range of treatments that are appropriate.
In an effort to assist property owners in making sound historic preservation decisions that also meet their needs, the Secretary of the Interior and the National Park Service have developed a set of standards, or general principles, addressing each of the treatment approaches used for historic properties. There are four distinct, but interrelated approaches, for the treatment of historic properties and they are defined as follows:
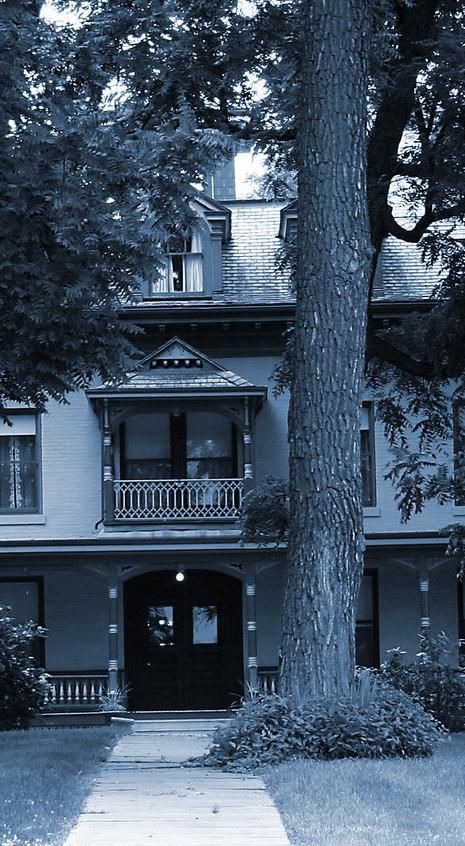
Preservation is the act of sustaining the changes to the property that have occurred over time and have become historic in their own right due to age and integrity. For example, the approach taken at the Harry S. Truman National Historic Site allows for the retention of changes to the building from its original construction date through the end of Truman’s lifetime.
Restoration is the accurate depiction of the features and character of a property as it appeared at a particular period of time by means of the removal of features from other periods in its history and reconstruction of features missing from the restoration period. For example, the approach taken at the Vaile Mansion allows only for the retention of features that were seen on the building when it was constructed in 1881.
Reconstruction is the depiction, through new construction, of the form, features, and detailing of a non-surviving site, landscape, building, structure, or object in a specific period of time and in its historic location. For example, if a historic building burned to the ground by fire, the decision to re-build the building as it previously appeared would be considered reconstruction.
Rehabilitation is the re-use of a building through repair, alterations, and additions while preserving features that reflect its historical, cultural, or architectural merits. For example, a property owner purchases a historic church and re-uses the building as a meeting hall or auditorium. Any work required to change the use while maintaining the overall architectural character would be defined as rehabilitation.
A property shall be used for its historic purpose or be placed in a new use that requires minimal change to the defining characteristics of the building and its site and environment.

The historic character of a property shall be retained and preserved. The removal of historic materials or alteration of features and spaces that characterize a property shall be avoided.
Each property shall be recognized as a physical record of its time, place, and use. Changes that create a false sense of historical development, such as adding conjectural features or architectural elements from other buildings, shall not be undertaken.
Most properties change over time; those changes that have acquired historic significance in their own right shall be retained and preserved.
Distinctive features, finishes, and construction techniques or examples of craftsmanship that characterize a property shall be preserved.

Deteriorated historic features shall be repaired rather than replaced. Where the severity of deterioration requires replacement of a distinctive feature, the new feature shall match the old in design, color, texture, and other visual qualities and, where possible, materials. Replacement of missing features shall be substantiated by documentary, physical, or pictorial evidence.
Chemical or physical treatments, such as sandblasting, that cause damage to historic materials shall not be used. The surface cleaning of structures, if appropriate, shall be undertaken using the gentlest means possible.
Significant archaeological resources affected by a project shall be protected and preserved. If such resources must be disturbed, mitigation measures shall be undertaken.

New additions, exterior alterations, or related new construction shall not destroy historic materials that characterize the property. The new work shall be differentiated from the old and shall be compatible with the massing, size, scale, and architectural features to protect the historic integrity of the property and its environment.

New additions and adjacent or related new construction shall be undertaken in such a manner that if removed in the future, the essential form and integrity of the historic property and its environment would be unimpaired.
Periods of historic significance refer to the discreet historic period or era in which a building was built. Periods of historic significance are typically associated with distinct architectural styles, design elements, and methods of construction.
Identifying and understanding a building’s period(s) of historic significance is crucial when undertaking rehabilitation work, because the period’s of historic significance will help to dictate how the preservation guidelines are applied. This is because the preservation guidelines are relational, and are intended to be applied according to the architectural materials, elements, details, and means of construction specific to the building being rehabilitated.
Following building-specific research and photographic documentation of a building’s historic condition at the time of or shortly after construction, the period of historic significance is the primary framework by which renovation and rehabilitation decisions should be made.
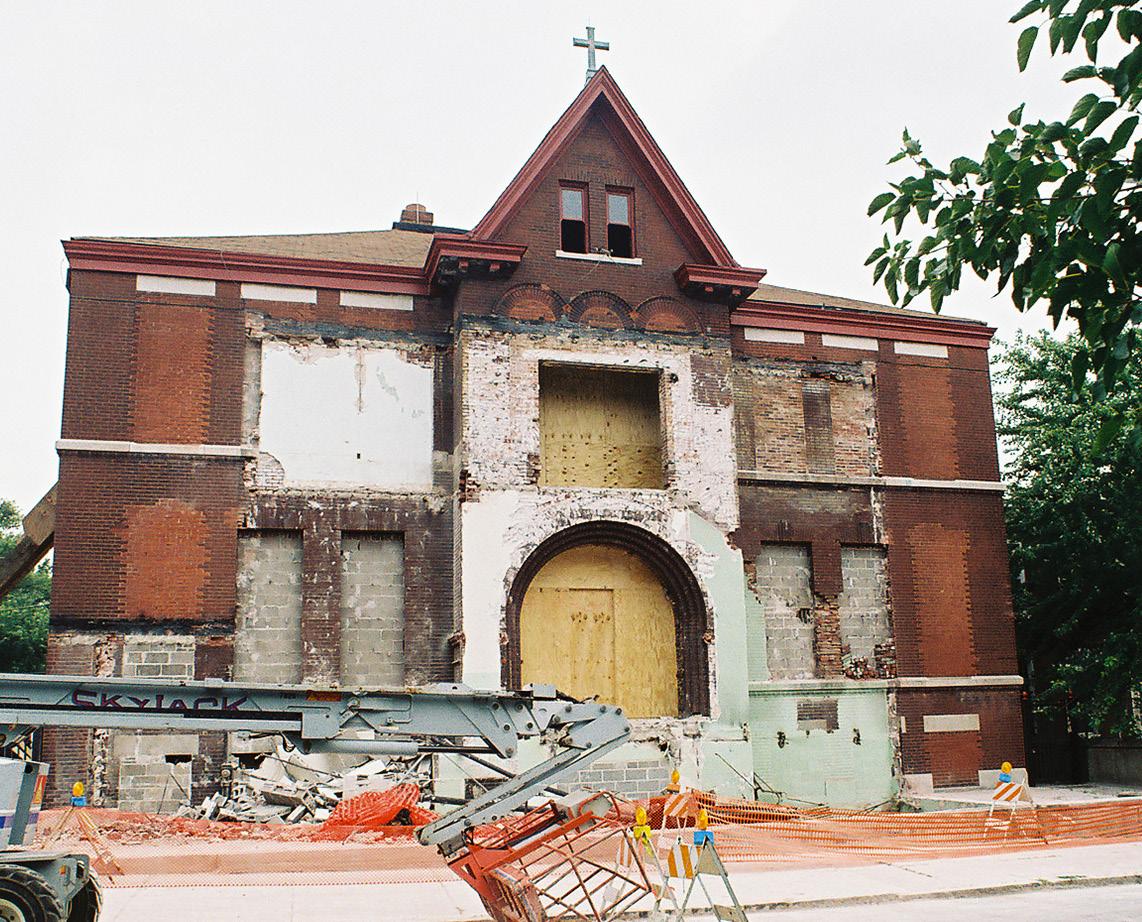
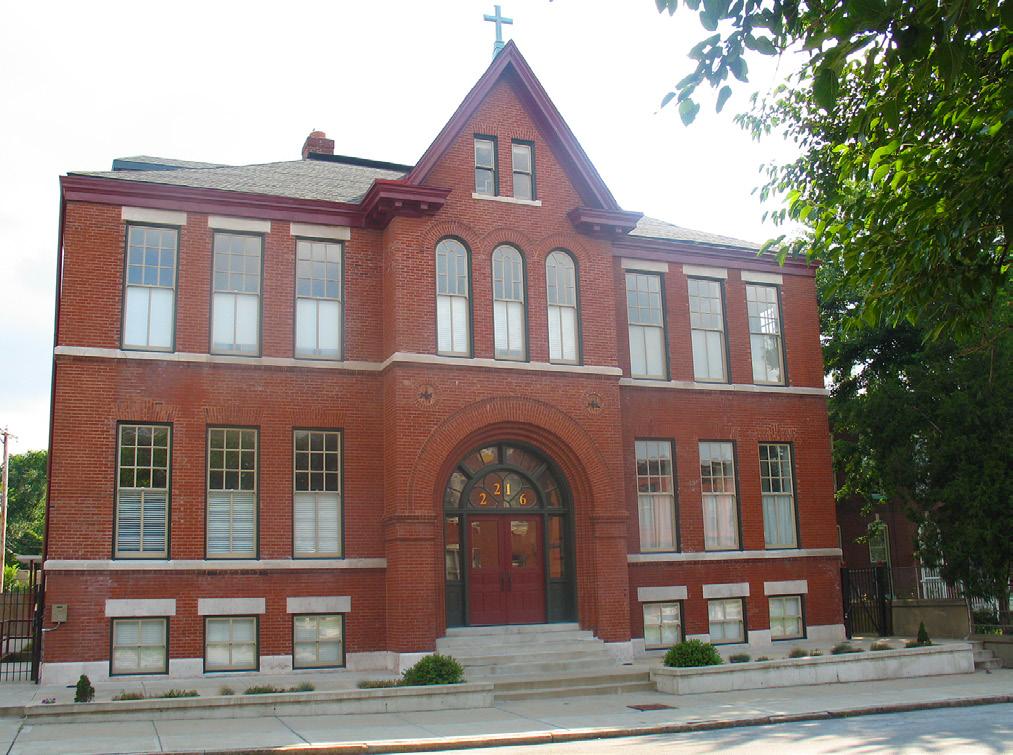
Non-contributing addition removed; non-contributing modifications to the building facade revealed.
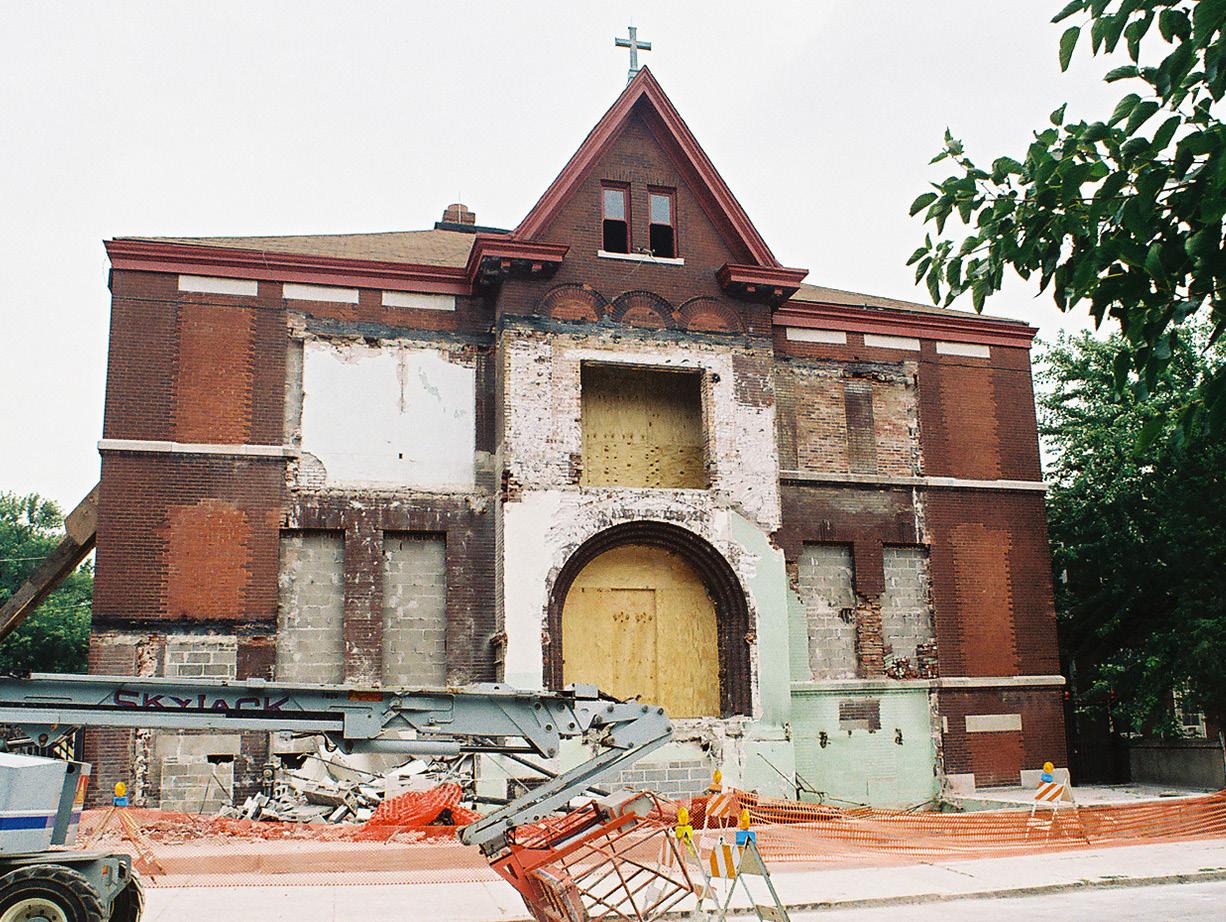
Remediation of non-contributing modifications and restoration of the facade to its historic conditions, based on photographic documentation.
The following is a list of architectural styles found among the City of Independence’s individually-listed properties and the contributing properties located within the Truman Heritage District and constructed within the District’s Period of Historic Significance (pre-1972).
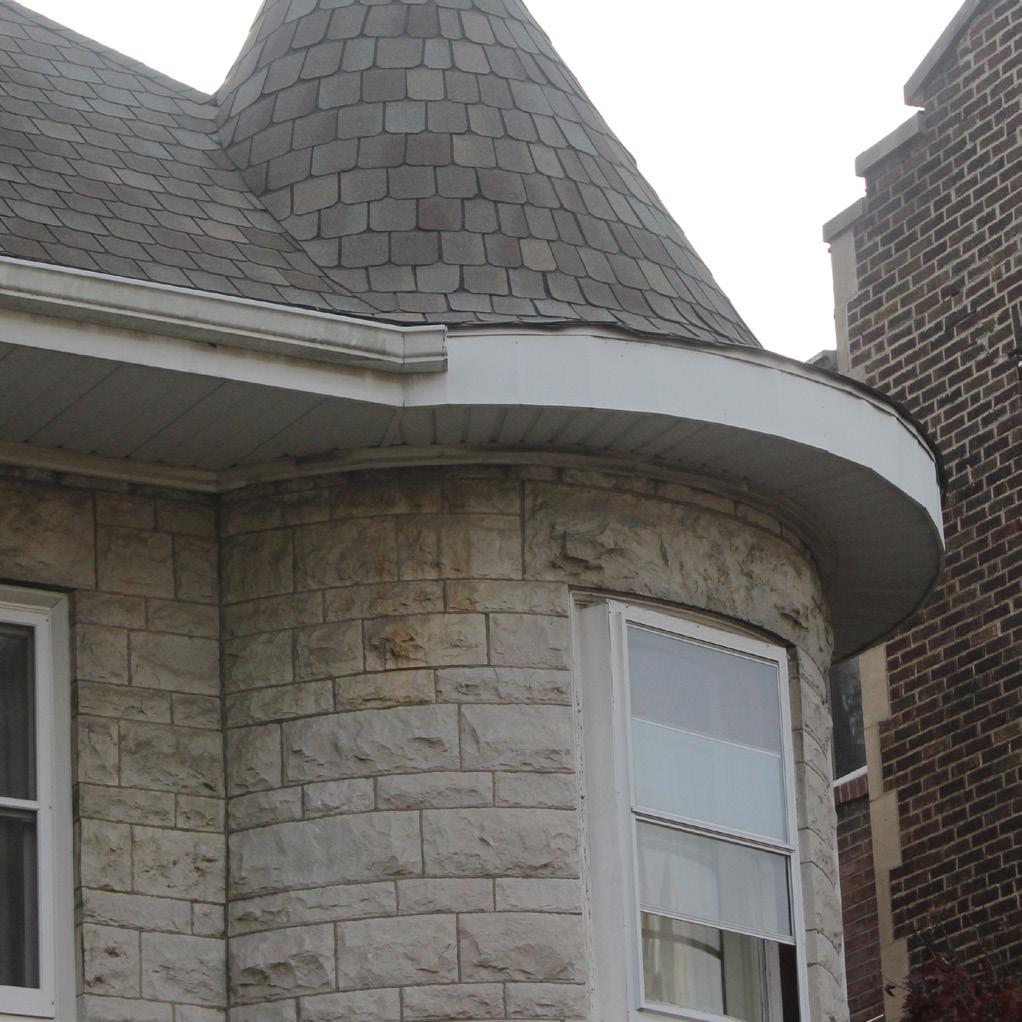
Identifying the architectural style or styles of the building being rehabilitated is the first step in effectively using the rehabilitation guidelines, because the proper application of the guidelines will be dictated by the features and period(s) of historic significance of the building’s architectural style. Furthermore, not all architectural guidelines will apply to every architectural style. For example, stucco was not used on buildings in Independence until after 1900, so stucco guidelines are generally not applicable to homes built in styles of the Victorian period (i.e. Queen Anne, Folk Victorian).
To identify a building’s architectural style, refer to the Harry S. Truman National Historic Landmark District Survey and search by property address for the architectural style of any contributing properties within the Truman Heritage District.
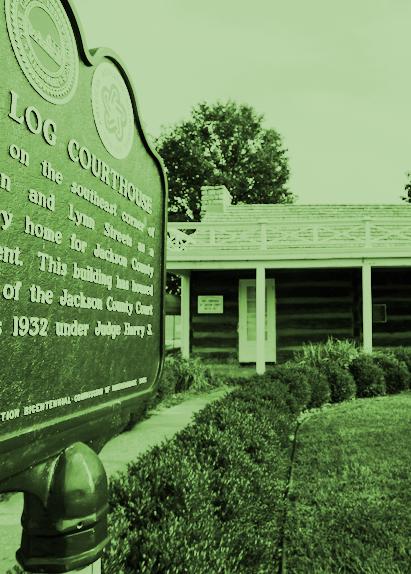
A. Log Structures
B. Italianate
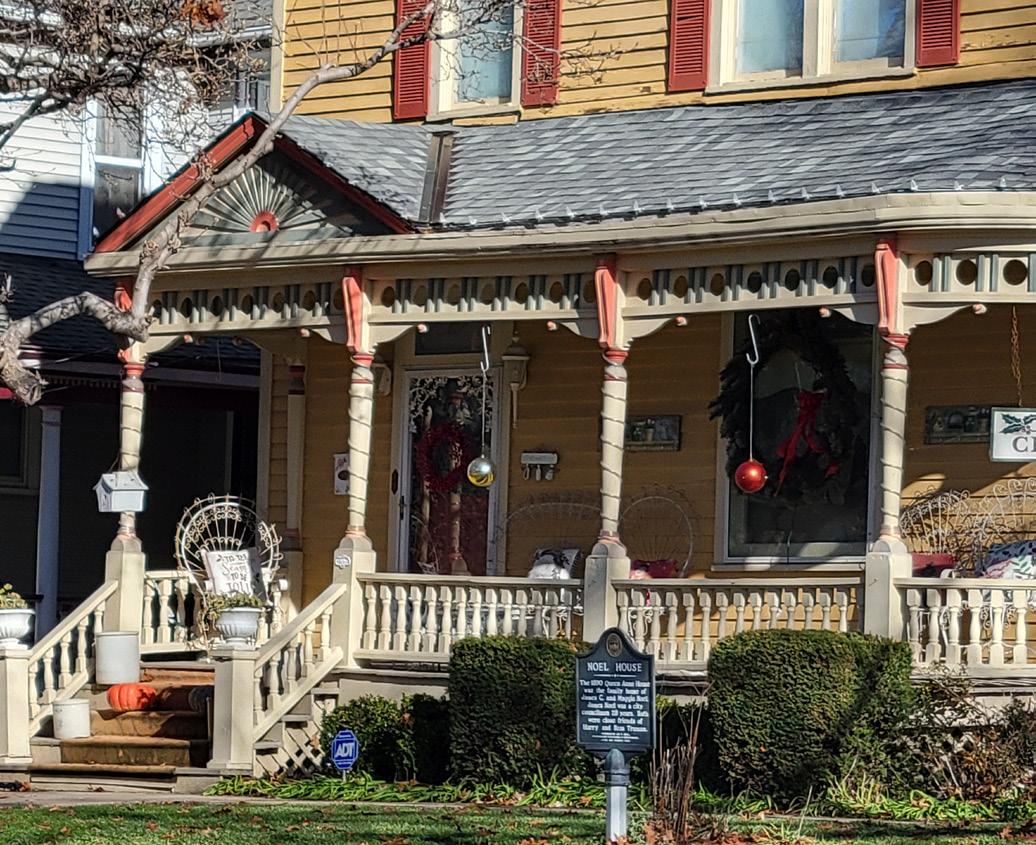
C. Queen Anne
D. Folk Victorian
E. Mission
F. Colonial Revival
G. American Foursquare
H. Tudor Revival
I. Gothic Revival
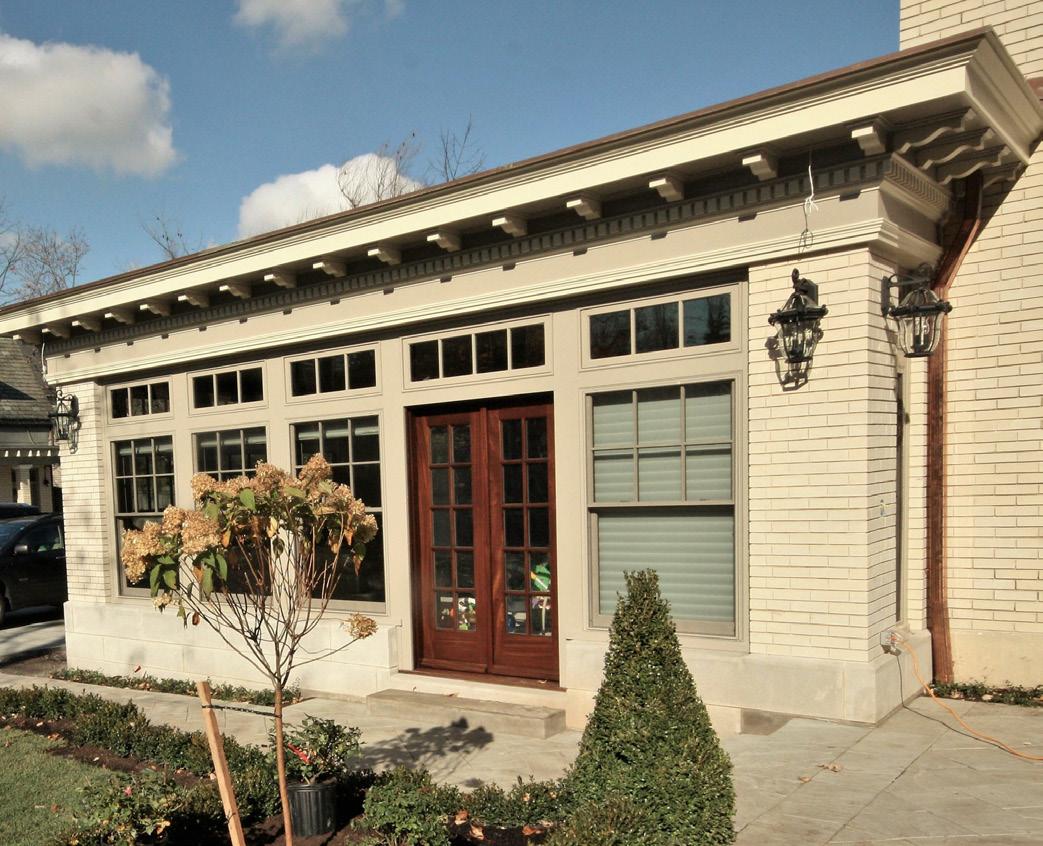
J. Craftsman Bungalow
K. Spanish Eclectic
L. Minimal Traditional
M. Ranch
N. Split-Level
O. Colonnade Apartment Buildings
A. Massive stone or brick chimneys
B. Long lengths of hewn logs ‘chinked’ with clay
C. Gabled, wood shingles with shallow overhangs
D. One to 1-1/2 stories in height
E. Minimal windows and doors
This building type is defined by construction materials and methods. Most log structures are only a single story in height because of the physical difficulty of lifting the logs; thus, most structures were only six to eight logs high. Log structures were later replaced or integrated into other types of housing. These structures can be found throughout Independence and sometimes can be located as part of a now much larger house hidden beneath cladding or concealed in barns.
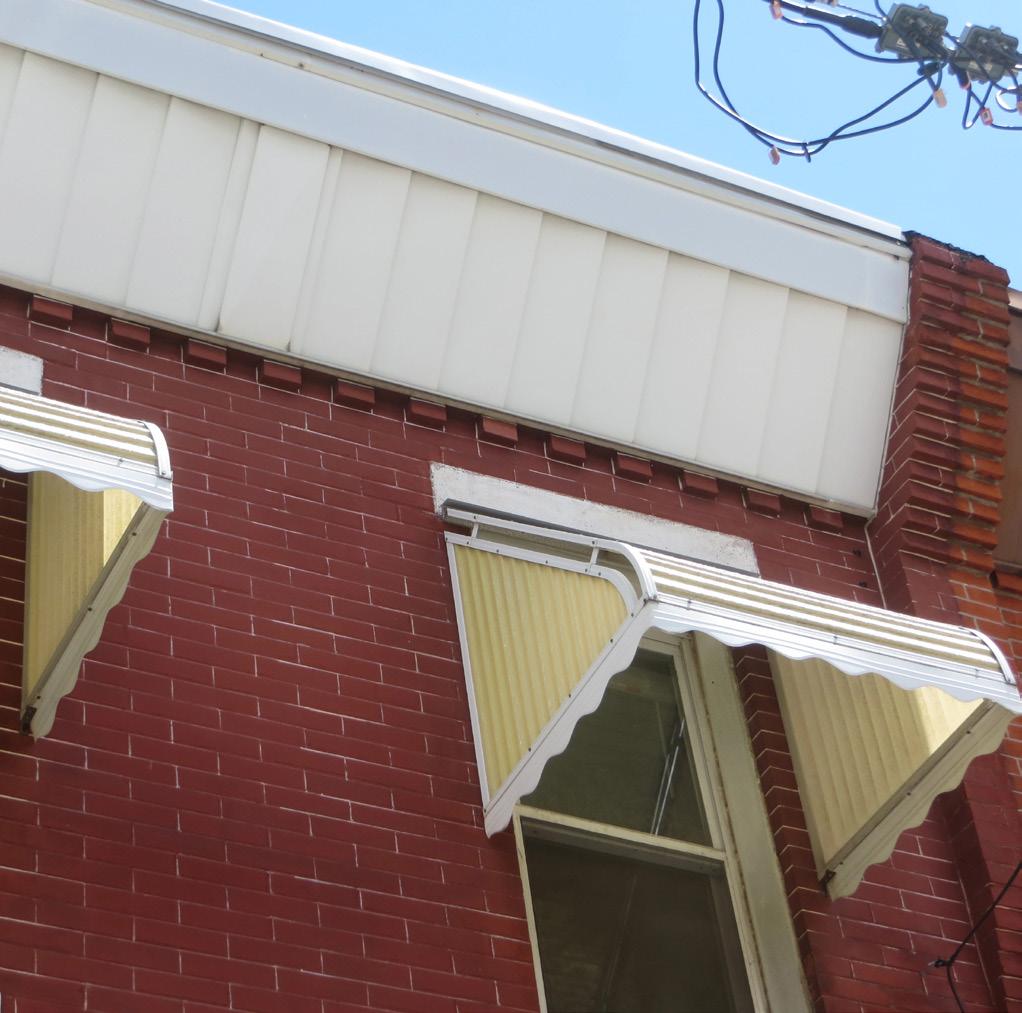
A. Low-pitched, and/or hipped roofs with wide eave overhangs
B. Ornamental cornice and eave brackets
C. Tall, narrow windows, with arched heads
D. Decorative lintels
E. One story porch
F. Square cupola or tower
G. Two to three stories in height
The Italianate style belongs to a period in architectural history known as the Picturesque Movement. In the Truman Neighborhood many property owners discovered that these stylish, Italianate designs could easily be modified and adapted to suit their own personal tastes and construction budgets.
A. Steeply pitched, complex roof configuration
B. Front-facing gable
C. Patterned shingles and masonry
D. Bay windows, towers, and wall projections
E. Stained and leaded glass windows
F. Asymmetrical facades, sometime with a tower or turret
Inspired by the late medieval manor houses of 15th, 16th and 17th century England, the Queen Anne style first reached America in the mid-1870s. Pattern books and railroad delivery of precut ornamental details were responsible for popularizing the style.
A. Front gabled or L-shaped roof
B. Eaves brackets
C. Simple window trim
D. Front porch
E. Typically symmetrical façade
F. Elaborate wood spindles, decorative brackets, and refined porch columns
The Folk Victorian Style was popular throughout the United States until about 1910 and was influenced heavily by the Queen Anne style. Pre-cut scrollwork, spindles, and other details were available to builders and homeowners and can be seen in the homes’ detailing on porch lines and eaves. Folk Victorian houses in Independence were built between 1890 and 1910.
A. Curvilinear dormer or roof parapet
B. Spanish-style details such as a cross or circular decorative window
C. Red clay tile roof
D. Arched entry door
E. Stucco wall cladding
F. Typical steel casement windows
G. Porch with massive square piers and arched openings
This style originated in California, where there are many landmark examples. The main identifying feature of this style is the dominant curved parapet (often referred to as a Mission-shaped, or bell-shaped parapet) located at the main facade roof, side elevation, and/or at the porch roof. Although not common in the Midwest, there are scattered examples throughout. Examples within the Truman neighborhood date between 1905 and 1920.
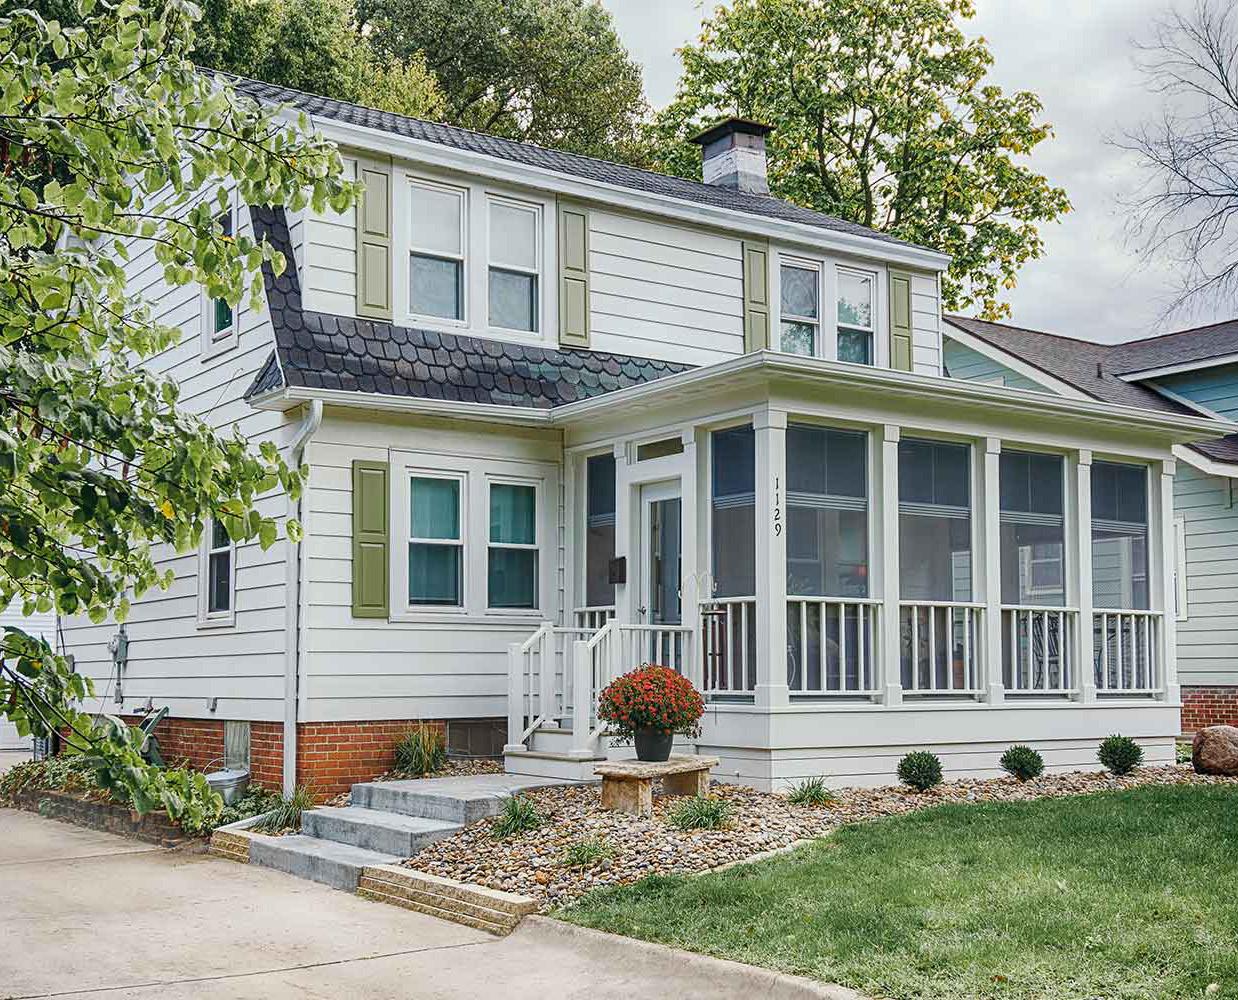
A. Side-gable or gambrel roof
B. Two stories with a typically symmetrical façade
C. Paired, double-hung windows; 6-over-1 sash lites are common
D. Simple window trim with shutters
E. Entry door sidelights fanlight or transom
F. Dominant front entrance with a decorative pediment and pilasters
Colonial style buildings exemplified America’s revived sense of patriotism and history. Early Colonial Revival architecture altered Colonial style decorative elements and design characteristics to fit the size and scale of the buildings during the Victorian era. Later styles adapted to more proportional buildings with applied Colonial details. Colonial Revival architecture was influential both after the turn-of-the-century, and during the post WWII period, and can be found throughout Independence.
A. Large central dormer
B. Two-and-a-half stories in height
C. Low-hipped roof with deep eaves
D. Symmetrical box shape with 4-room plan
E. Wood siding, stone, brick, or stucco finishes
F. Dominant, elevated front porch with large piers and stairs
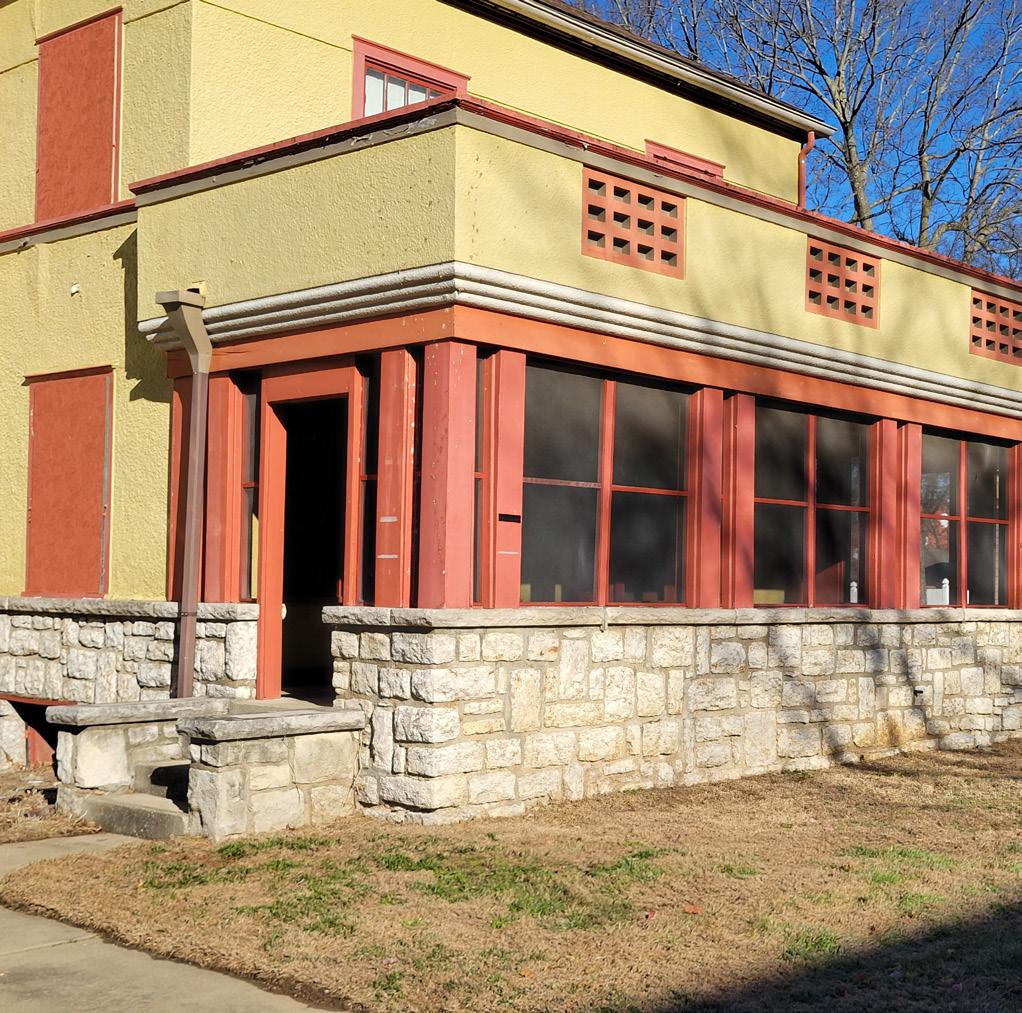
Plain in comparison to the mass-produced elements of the Victorian and other revival styles, Foursquare houses are built with a variety of materials including: brick, stone, stucco, concrete block, and wood. Known for being economical to build, the Foursquare also was ideal for downtown city lots or smaller plots of land. They were commonly used as infill houses in established, older Independence neighborhoods. The Kansas City Shirtwaist house is a sub-type of this style, with a first floor constructed of stone masonry.
A. Steeply pitched, side-gabled roof
B. Massive chimneys with decorative chimney pots
C. One or more prominent gables
D. Brick, stone and stucco wall cladding with decorative half-timbering
E. Tall narrow windows with multiple lites and/or leaded glass
F. Arched front entry door
The solid masonry construction and unique detailing of the Tudor Revival were ideal for creating the picturesque qualities and grand spaces preferred by people during the Victorian era. After the turn-of-the-century, Americans returned to a simpler life, resulting in modest interpretations of the Tudor style using details like steeply pitched gables and half-timbering with more traditional frame house forms. Examples of the Tudor Revival style in Independence were primarily constructed in the 1920s and 1930s.
A. Prominent tower with a steeply pitched roof or castellated parapet
B. Pointed-arch windows and door openings
C. Steep, gabled roof
D. Brick, stone, or wood wall cladding
E. Large round rose window with decorative tracery (common on churches)
The Gothic Revival style was used for residential, commercial, and institutional architecture. Typical Gothic elements include steep gables, arched (often pointed) windows and doors, large center (round or arched) window with decorative tracery, and towers with steeply pitched roofs or castellated parapet walls.
A. Low-pitched gabled roof
B. Wide eaves with exposed rafters and triangular brackets
C. One or 1-1/2 stories in height
D. Wood siding, stone, brick, or stucco wall-cladding
E. Full-width porch with heavy piers or tapered piers
Craftsman bungalows became the first stylized architecture in the U.S. to be designed specifically with the middle class in mind. Popular publications and mail order catalogs popularized the style, which resulted in the construction of bungalow subdivisions and infill houses in older neighborhoods.
A. Red clay tile roof
B. Low pitched or flat roof with parapet or minimal eave overhang
C. Eave projections over doors and windows
D. Arched doors and windows
E. Stone or stucco wall cladding
F. Porch with massive square piers and arched openings
The Spanish Eclectic style uses decorative details borrowed from the history of Spanish architecture. This style has either a low-pitched roof, or a flat roof with parapet walls. Wall cladding is almost always stucco, often textured, but can also be stone. Spanish Eclectic style reached its peak during the 1920’s and early 1930’s and declined after the Second World War. A few examples exist within Truman neighborhood.
A. Basic rectangular shape with little ornament
B. Gabled or hipped roofs with shallow eaves
C. Wood, brick, or stone wall cladding
D. Detached or single attached garage
E. One to 1-1/2 stories
The Minimal Traditional incorporates forms from other styles such as Colonial and Tudor, but characteristically has little ornament or great detail. The height of this style was during the Depression, but it surged in popularity post World War II. Minimal Traditional homes were designed for the growing number of families and the rising number of families with automobiles.
A. Basic rectangular shape with little ornament
B. One story in height
C. Long horizontal roof with low to medium pitch
D. Shallow to moderate eaves
E. Wood, brick, and/or stone wall cladding
F. Garage attached to primary facade or in rear
The Ranch house was the dominant housing style built post World War II as Americans bought automobiles and moved to suburbs. These single-story houses often have a large, open front yard with a driveway leading to the garage, and a sidewalk to the front door. Ranch homes are common as infill in older neighborhoods, and can be found within the Truman Heritage District.
A. Side gabled, hipped, or cross gable roof with low to medium pitch
B. Shallow to moderate eaves
C. Two stories with attached, 2-car garage
D. Visible horizontal projection of second floor
E. Wood, brick, and/or stone wall cladding
F. Front door facing street
The Split-Level became popular during the 1950s as a multi-story variation of the dominant Ranch style home. It adds a second story that can be seen from the exterior as a projection out from the main facade over the lower portion of the house. Split-Level homes often have an attached, two car garage on the lower level with the rest of the house built above and around. These homes are common throughout the country and can be found within the Truman Heritage District.
A. Flat or low-slope pitched roof
B. Three or four stories
C. Open front porches with wood or brick columns
D. Rear porches with exterior exit stair
E. Wood, stone, or brick wall cladding
F. Central entry door and hall to interior stair
This style of multi-family dwelling is recognized officially as the Kansas City Colonnade Apartment Style. It applies Beaux Arts and Neoclassical elements such as symmetry, central elevated entrance and the use of classical columns and column capitals, and often incorporates details from other architectural styles and eras. The predominant architectural feature for this building type is the colonnaded open front porch.
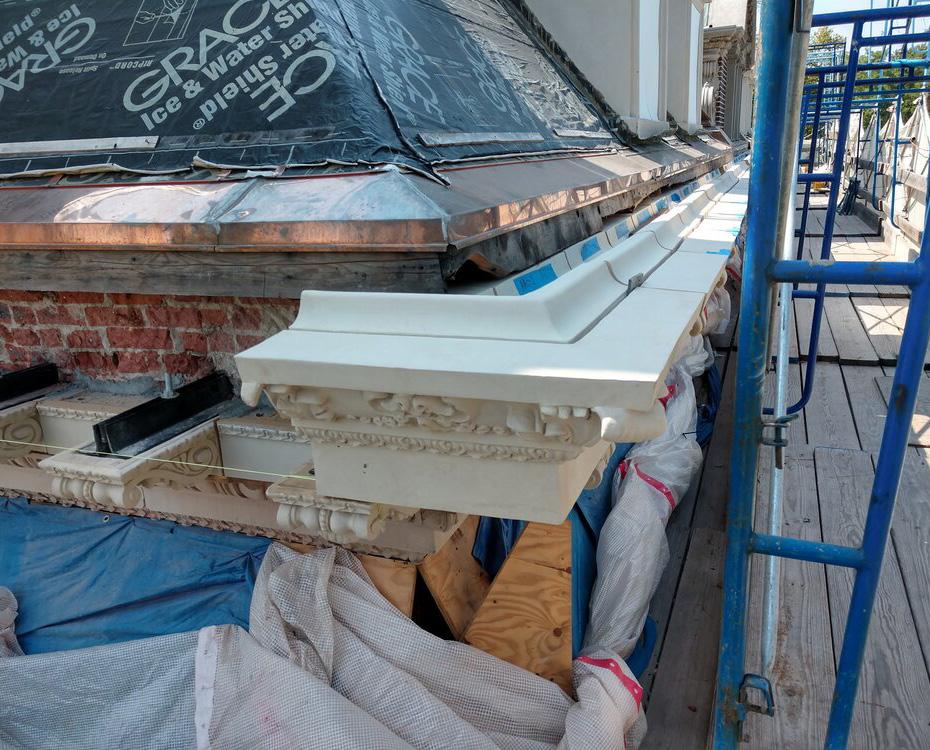
A. Architectural Metals
B. Concrete and Flat Work
C. Masonry
D. Siding and Trim
E. Stucco
Repair and Rehab
Replacement
Avoiding a False Historical Sense
Painting and Maintenance
Appropriate Treatments
Discouraged Treatments
Preservation Brief References
Certificate of Appropriateness (COA) Checklist
• Repair metal features when possible.
• Do not remove original metal features from buildings.
• Do not replace a feature that can be repaired.
• Make sure that water is not standing on or behind metal elements, causing them to rust or otherwise deteriorate. Sometimes moisture problems due to roof or gutter damage can cause irreparable damage.
• If the existing material is too deteriorated to repair, replace materials in-kind, which means that the replacement matches the original as closely as possible in all dimensions, texture, profiles and material.
• Substitute materials for architectural metals will be considered by the Heritage Commission on a caseby-case basis. Substitute materials must match the original in all dimensions, textures, and profiles.
• Avoid creating a false historical sense by adding embellishment to a building when it had none before.
• Do not add features that are not appropriate for the style of the building or are incompatible in size, scale, material, and color.
• Properly prepare metals before painting.
• Avoid leaving metal details exposed if they were originally intended to be painted. Do not use cleaning agents that will harm the finish on the metal, whether it is a natural patina, paint, or sealant. It is typically not recommended to remove patina from metal, as it may be protecting the metal from weather damage.
• Remove all corrosion and repair any damage prior to painting. Prime all surfaces with metal primer, if required, and follow paint manufacturer’s instructions.
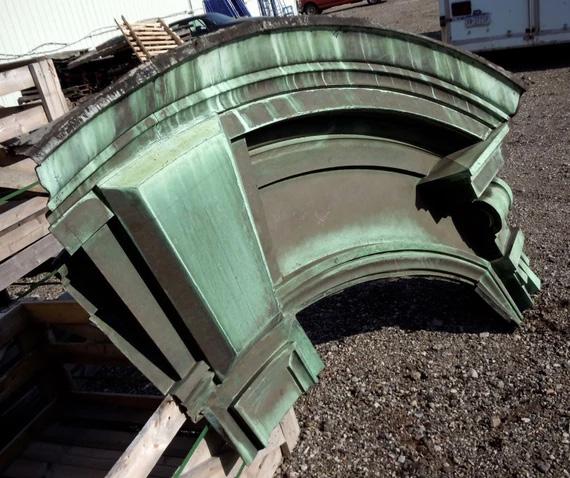
Shop-built galvanized steel, painted turret feature to exactly replicated deteriorated original metal.


Preservation Brief 11: Rehabilitating Historic Storefronts.
Preservation Brief 16: The Use of Substitute Materials on Historic Building Exteriors.
Preservation Brief 25: The Preservation of Historic Signs.
Preservation Brief 27: The Maintenance and Repair of Architectural Cast Iron.
If a property owner wishes to install new architectural metal details, either in metal or using an alternative material to metal, either as a complete replacement or as a patch or partial replacement of an element that is deteriorated beyond repair), the following should be considered before requesting approval by the Heritage Commission:
□ Is the original architectural metal detail(s) still on the building? If so, can it be repaired?
□ Has all the original architectural metal details been previously removed?
□ Does the new architectural metal detail match the original in dimensions and profile?
□ Does the texture of the new architectural metal detail match the original?
□ If architectural metal details have been removed in the past, is there photographic evidence of the removed feature or physical evidence on the building (ghost lines) of what the original trim looked like and its location?
Repair and Rehab of Concrete
Repair and Rehab of Brick and Tile Flat Work
Flat Work Drainage
Cleaning
Appropriate Treatments
Discouraged Treatments
Preservation Brief References
Certificate of Appropriateness (COA) Checklist
• Preserve concrete features of a building, such as steps, walkways, porches, foundations, chimneys, and details.
• Find and remove the source of deterioration (typically rusted rebar) prior to patching concrete or replacing damaged components.
• Avoid patching concrete with material that does not match original concrete in consistency, texture, or color.
• Make sure concrete patches will bond properly with existing concrete. It is recommended to replace entire sections of concrete to existing edges and control joints for proper bonding.
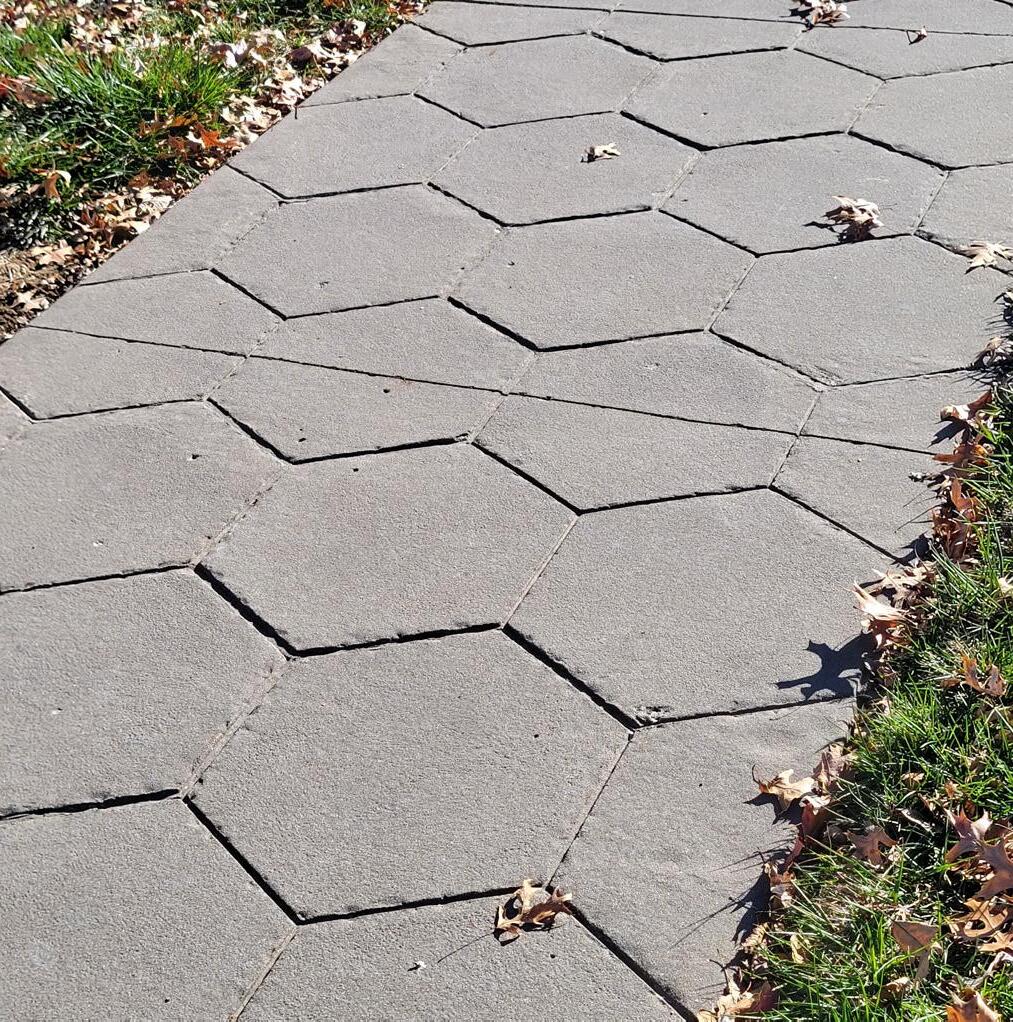
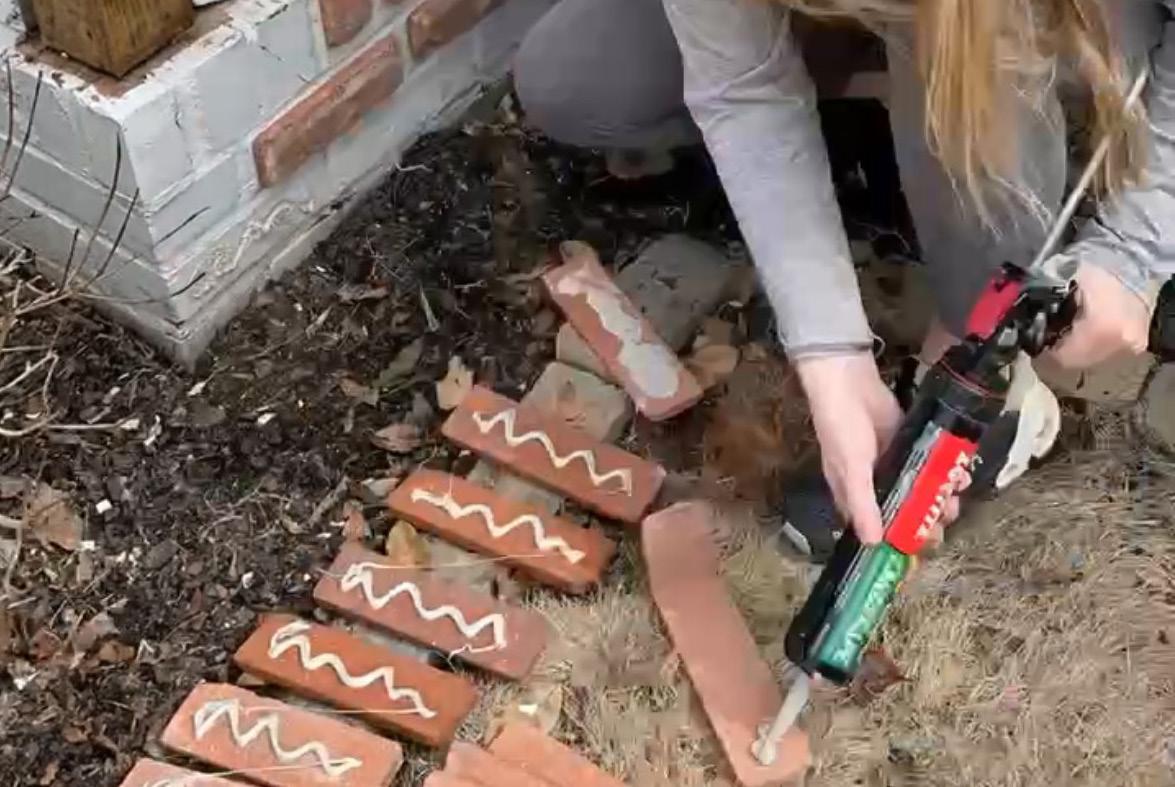
• Sidewalks using hexagonal concrete pavers are characteristic to the Truman Heritage District and should be restored and repaired in-kind. When looking to repair or replace your hexagonal paver or stamped concrete sidewalk, contact the Community Development and Municipal Services departments prior to initiation of work.
• Preserve existing historic dry-set brick pathways, patios, and site features whenever possible.
• Stabilize dry-set brick flat work in place. Generally avoid complete resetting unless the condition constitutes a tripping hazard or accessibility issue.
• If replacing portions of dry-set brick flat work, ensure that bricks are of the same color, size, texture, and profile. Use historic bricks when possible; historic bricks were typically extruded, while modern brick is typically pressed, resulting in a different edge profile and appearance.
• Preserve existing historic ceramic and porcelain tile flat work on porch floors, commercial entryways, and stoops whenever possible.
• Stabilize existing historic tile flat work in place. Generally avoid comprehensive resetting unless condition constitutes a tripping hazard or accessibility issue.
• If replacing portions of existing tile flat work, ensure that replacement tiles are of the same color, size, texture, and profile. It is usually necessary to source replacement tile from specialist tile manufacturing specializing in reproductions of historic tile. Because of the difficulty in sourcing appropriate replacements, it is recommended to stabilize tiles in place.
• Always provide a proper slope for drainage so that water does not stand on concrete and other flat work surfaces which can cause water penetration and cracking/damage, and drains away from building walls and foundations.
• Cleaning concrete is usually not necessary unless dirt, mildew, and debris are causing damage or is unsightly. Test an inconspicuous area to ensure that no permanent damage will be done. Pressure washing concrete with low pressure water (300-400 psi) using a wide fan tip will likely provide the desired results without damaging or permanently discoloring the concrete.
• Brick and tile flat work may be cleaned with methods appropriate for cleaning brick masonry. Pressure washing brick with low pressure water (300-400 psi) using a wide fan tip will likely provide the desired results without damaging or permanently discoloring the flat work. Before attempting to pressure wash tile, ensure that there are no loose tiles; mosaic tiles, in particular, can be knocked loose by pressure washing.
• Vinegar or muriatic acid-based cleaners can be used sparingly to remove stubborn stains and soiling. If using a muriatic acid-based cleaner, follow manufacturer’s instruction. Clean the entire area of flat work, as spot cleaning may result in sections of a lighter color. Gently brush muriatic acid-based cleaners onto the surface and immediately neutralize with fresh water. Do not use other stronger acid-based cleaners.
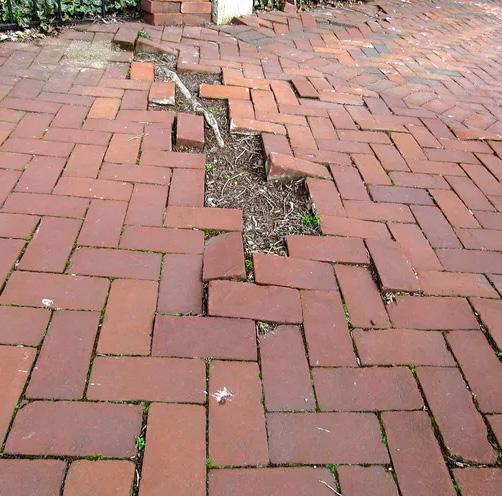
Small areas of heaved or missing bricks in dry-set brick flatwork should be reset or, when missing, replaced with matching materials. (Image © The Columbus

Preservation Brief 1: Assessing Cleaning and Water-Repellent Treatments for Historic Masonry Buildings.
Preservation Brief 6: Dangers of Abrasive Cleaning to Historic Buildings.
Preservation Brief 15: Preservation of Historic Concrete.
Preservation Brief 38: Removing Graffiti from Historic Masonry.
Preservation Brief 40: Preserving Historic Ceramic Tile Floors.
If a property owner wishes to repair existing concrete and flat work by patching or replace existing concrete and flat work, the following should be considered before requesting approval by the Heritage Commission:
□ Has the underlying source of deterioration been identified and remediated?
□ Does the replacement concrete match the existing concrete in color and surface finish?
□ Is the proposed area of concrete patch or repair large enough to ensure a proper bond with existing concrete?
□ Does repair or replacement involve historic hexagonal pavers?
□ If replacing brick or tile flat work, are the new bricks and/or tiles of the same color, size, texture, and profile?
□ Does the replacement address ADA accessibility issues, if present?
Considerations Specific to These Standards
Repair and Rehab
Mortar and Repointing
Cleaning Historic Masonry
Paints and Sealants
Appropriate Treatments
Discouraged Treatments
Preservation Brief References
Certificate of Appropriateness (COA) Checklist
Masonry refers clay, stone, or concrete block units stacked in levels (or “courses”) with mortar—comprised of sand and cement—applied in between each unit. Brick is the most common form of masonry in the Kansas City area, followed by cut or split stone and decorative concrete block.
• Only replace masonry that is deteriorated. Do not replace or cover masonry simply to eliminate evidence of past cracks, repairs, or alterations.
• When masonry is damaged, preferred treatment is to patch it in-kind with appropriate materials. If a stone or brick is too damaged or missing, utilize new materials match the existing. Consider reversing a brick to expose its good surface before replacing with a new brick.
• In-kind replacement masonry units should match the dimensions, texture, features, color, and installation of the surrounding historic materials.
• If it is necessary to replace a large amount of masonry, replacement materials should have the same visual appearance as the historic materials.
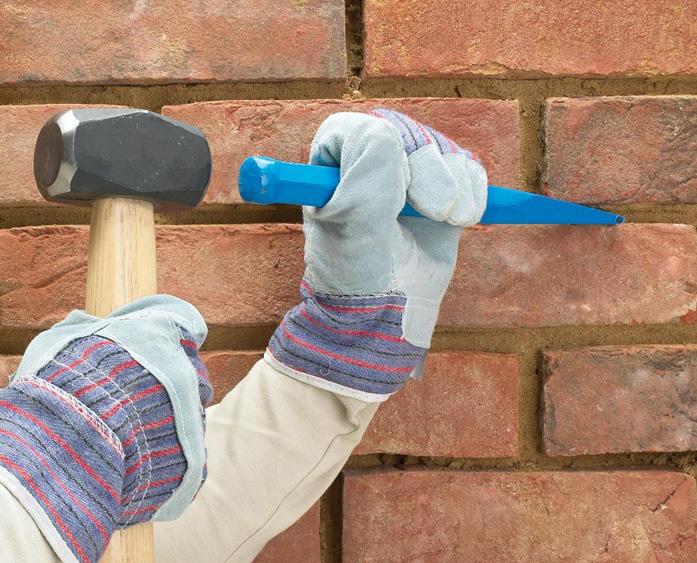
• When repointing masonry construction, old mortar should be removed with a hammer and chisel, if possible, taking care not to damage the masonry edges. Power tools can permanently damage the stone or brick.
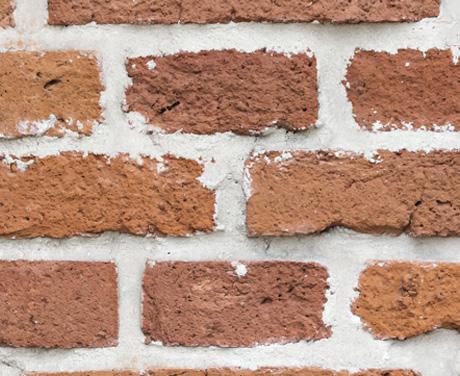
• Match original mortar in color, texture, aggregate, and joint profile. Replacement mortar that does not match original historic mortar is an obvious alteration to the building facade.
• Test existing mortar to ensure the correct recipe is applied. Many historic buildings use high lime content mortar. Modern pre-mixed mortar is too hard and should never be applied to a building constructed prior to 1920 without testing the mortar first. Mortar that is too hard will not yield properly in thermal expansion, causing the surrounding historic masonry to crack or spall, and can permanently damage the building.
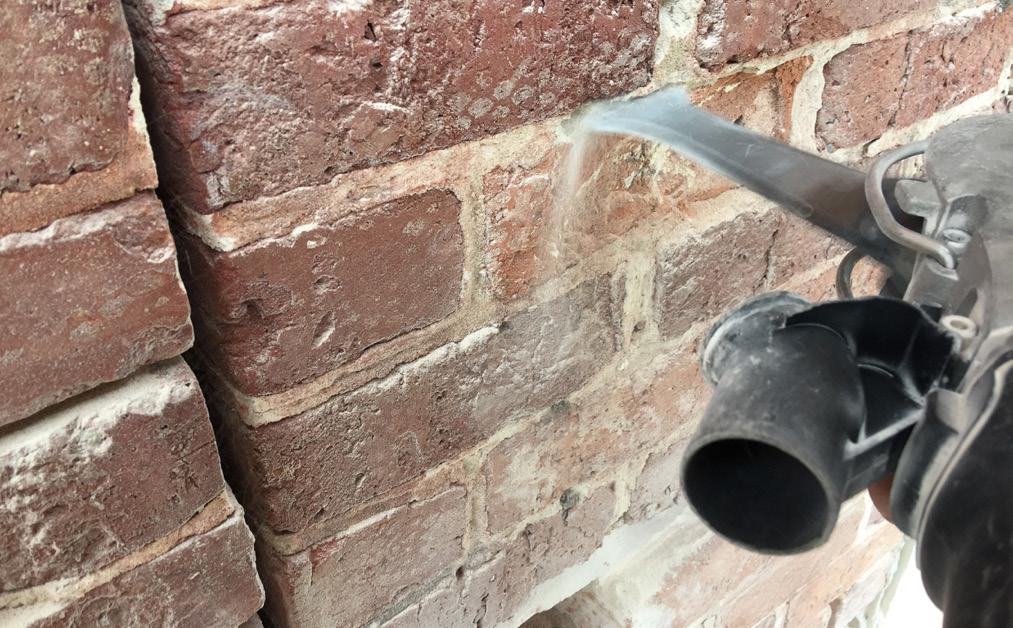
• If necessary, clean masonry using the gentlest means possible. Recommended cleaning methods include low-pressure water pressure washing and non-corrosive chemical washes. The pressure should be less than 300-400 psi to prevent damage to the masonry and mortar. Prior to cleaning, select an inconspicuous area to test to ensure that no permanent damage will be done.
• Vinegar or muriatic acid-based cleaners can be used sparingly to remove stubborn stains and soiling. If using a muriatic acid-based cleaner, follow manufacturer’s instructions. Use caution that spot cleaning does not result in sections of a lighter color. Gently brush muriatic acid-based cleaners onto the surface and immediately neutralize with fresh water. Do not use other stronger acid-based cleaners.
• Abrasive cleaning should never be used because it may destroy mortar and damage or remove the protective top layer of the brick, which keeps water from penetrating the brick.
• Do not paint masonry. If historic masonry is already painted, paint should be removed if possible using the gentlest means possible.
• Sealants are never recommended unless the stone or brick is extremely soft and severely deteriorated. Non-permeable sealants prevent the natural flow of vapors, trapping them inside the masonry, which can crack or erode with freeze-thaw cycles.
• Sealants should be used only as a last resort. Other drainage problem causes such as poor flashing, negative ground slope, and inadequate gutters should be explored first to determine if they are the cause of water infiltration. If recommended by a preservation professional, the sealant should be water permeable, allowing moisture to evaporate through, while maintaining the integrity of the stone or brick exterior.
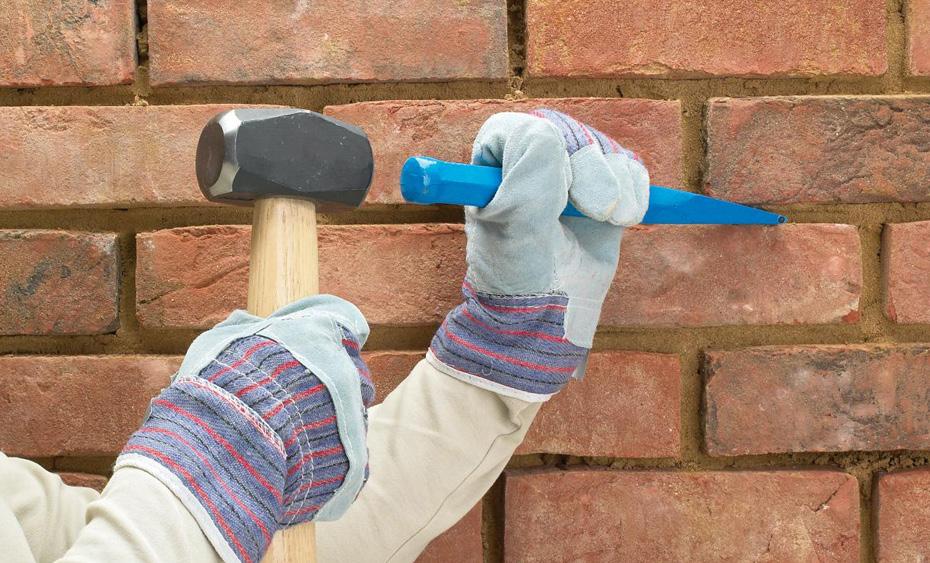
The safest and gentlest means of removing damaged mortar is a hammer and chisel (image © DIYDoctor.com).
using
to
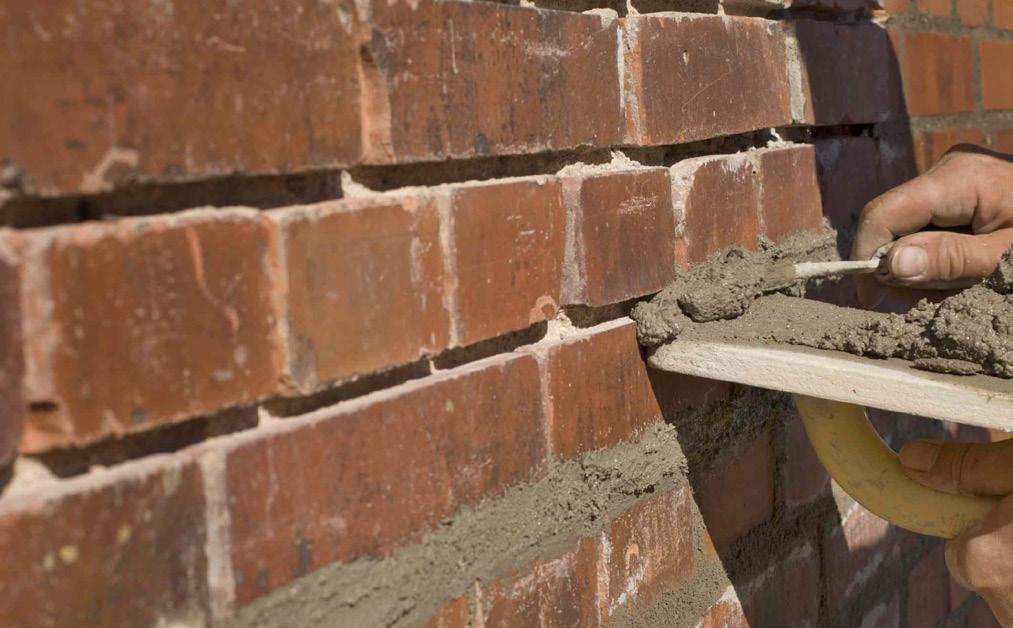
Repoint with mortar suitable for the softer composition of historic brick (image © The Spruce).
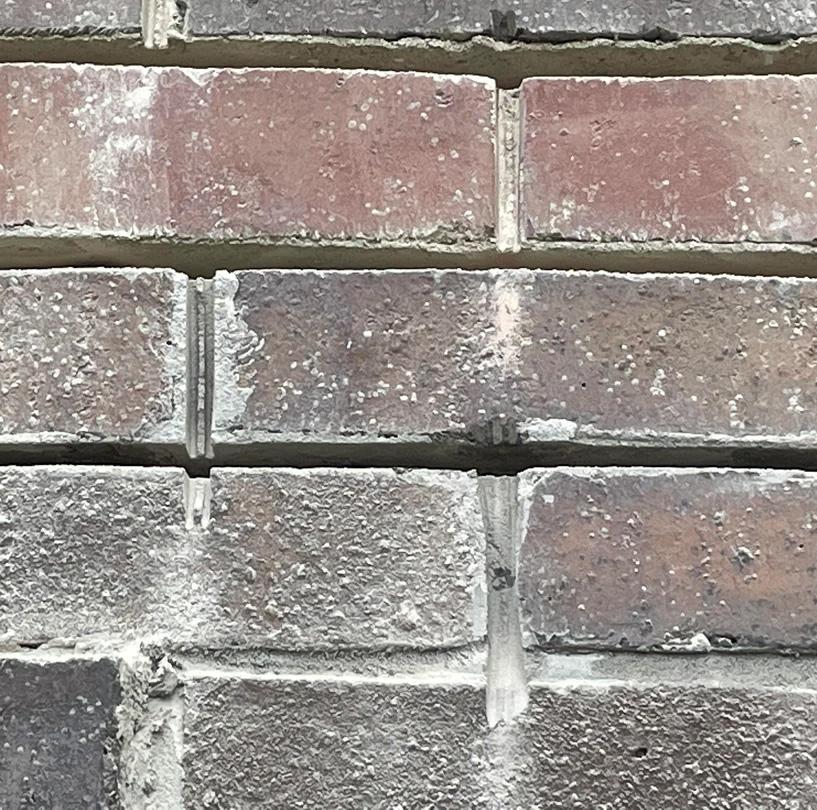
Bricks irreparably damaged by over-grinding with an angle grinder to remove damaged mortar.
Preservation Brief 1: Assessing, Cleaning and Water-Repellent Treatments for Historic Masonry Buildings.
Preservation Brief 2: Repointing Mortar Joints in Historic Masonry Buildings.
Preservation Brief 6: Dangers of Abrasive Cleaning to Historic Buildings.
Preservation Brief 7: The Preservation of Historic Glazed Architectural Terra-Cotta.
Preservation Brief 38: Removing Graffiti from Historic Masonry.
Preservation Brief 42: The Maintenance, Repair and Replacement of Historic Cast Stone.
If a property owner wishes to replace existing masonry, the following should be considered before requesting approval by the Heritage Commission:
□ If proposing replacement, is the original masonry to be replaced deteriorated beyond reasonable repair?
□ Do replacement masonry units (bricks, stones, etc.) match the original masonry in dimensions, texture, features, and color?
□ If infilling an existing window on a masonry building, is the masonry infill reversible such that it can be removed and the window restored at a later time?
□ Is masonry proposed to be painted or sealed?
While building permits are not required for the installation of new siding or trim work, approval by the Heritage Commission must be given prior to their installation. Synthetic and composite siding will be considered by the Heritage Commission on a case-by-case basis.
Considerations Specific to These Standards
Repair and Rehab Replacement
Synthetic and Composite Siding and Trim
Painting
Removal to Restore Original Siding
Appropriate Treatments
Discouraged Treatments
Preservation Brief References
Certificate of Appropriateness (COA) Checklist
Siding refers to any exterior cladding including clapboards, board and battens, shakes, brick, and stone. Wood was traditionally one of the most common forms of siding utilized for its durability, ease of use, craftsmanship, and availability. In addition to traditional materials, there are numerous factory-constructed materials that offer an alternative to historic wood, brick, and stone cladding known as synthetic siding. While some of these materials are relatively new, other have been around for a half-century or more.
Contemporary synthetic siding is often applied to update the look of “older” buildings as new trends and styles emerge. Throughout the early to mid-twentieth century, asbestos shingles were used to “upgrade” or “update” traditional wood siding. In the twenty-first century, cementitious composite products such as Hardieboard and SmartSide products serve as alternatives to traditional siding materials.
Synthetic siding should not be installed over sound wood siding, stucco, or masonry. Once new siding is applied over the original cladding, it is difficult to assess on-going maintenance and water infiltration issues. Concealing wood siding with synthetic siding materials can cause moisture to be trapped between the two and create an environment for mold growth and wood rot.
Substitute synthetic sidings, such as aluminum and vinyl siding, can also damage the integrity of a historic property and are therefore, not recommended. The color choices of synthetic siding are often limited and cannot be easily painted, which makes traditional multi-colored paint schemes difficult to achieve.
Trim refers to any ornamentation, embellishment, or individual finish pieces located around windows, doors, in gable ends, fascia, soffits, eaves, corner boards and porch details that enhance the appearance of a building’s façade. Trim can be as important to the architectural, character defining features as any other building element.
Traditionally, trim was constructed of wood. Today, replacement trim can be fabricated from cementitious composites (Hardieboard) and fiberglass. Vinyl materials are also available, but should be avoided as the sharp profiles of wood cannot be replicated in vinyl, and vinyl typically cannot be painted. Care should be taken when choosing alternate materials to make sure they will weather well over time and will match the character of the materials in-kind. For example, some early composite materials would yellow and warp in the sun over time. Technologies have improved however, and most manufacturers can create products that will withstand exposure to the elements, that will match the historic materials in-kind, and most can be painted on site.
The Heritage Commission encourages the removal of synthetic siding from a building where possible to return the building to its traditional, historic appearance. When removing synthetic siding, first remove a test area in a discreet location. If removal of the siding is not damaging the traditional siding underneath, carefully remove the remaining siding, taking care not to damage the historic wood, stone, or brick beneath.
While synthetic siding and trim are alternatives to wood, they cannot typically achieve the same detail and dimensions offered by wood. The Heritage Commission will always consider a proposal to utilize synthetic siding or trim on a historic property or building; however, the Commission prefers the use of materials that match in-kind with the original when there is no original siding or trim present. Alternative materials will be considered for new additions and for new construction.
If historic material is replaced in-kind, no review and approval by the Heritage Commission is required.
• Do not remove character defining elements from a building, including wood siding, shingles, wood trim, and decorative wood elements.
• Repair siding and trim with wood rather than with another material. Deteriorated siding or decorative elements should, when possible, be patched or consolidated in place using epoxies or other chemical fillers and painted or finished to match the original materials.
• Replace only wood that is damaged beyond repair and cannot be stabilized.
• When replacing materials, match the overall dimension, thickness, profile, scale, and finish of the original material.
• Synthetic materials are discouraged for repair where or patching or splicing of existing wood siding or trim is required, because synthetic materials expand and contract at different rates than wood.
• Where there is evidence of missing decorative detailing, replacement elements should be reconstructed to match the original. Evidence of missing detail can be found in old photographs and physical evidence left on the building. Details on another similar historic building should not be used as conclusive evidence.
• Fabrication of new trim work should be created only with photo documentation or physical evidence.
• Removing elements that were added during a historic remodeling, in an attempt to make the building look older, is not recommended. Refer to the explanation of Periods of Historic Significance on Page 32.
• Do not “dress up” a historic building by adding stylistic trim and ornamentation that would have never existed. Doing so will result in a false sense of the history and character of the building.
In general, synthetic materials with faux wood grain embossed on their surface are never permitted.
• Use of synthetic materials are acceptable on new additions and for new construction. Synthetic siding should only be used in individual board form (i.e. fiber cement, polymer composite, or cellular PVC siding boards) and not in panel form (i.e. aluminum or vinyl siding).
• Do not install aluminum, vinyl, or synthetic siding to cover original, historic siding or building elements.
• It is not appropriate to apply siding to a building that was not originally sheathed in siding or to cover traditional wood or masonry with new, contemporary siding as it can significantly change the appearance of the facade of a historic building.
Although paint selection is not subject to review by the Heritage Commission, it is encouraged to choose a paint scheme appropriate for the time period in which the house was constructed and the architectural style.
• All siding and trim installations must be painted for weather resistance.
• Properly prepare and prime wood surfaces. Utilize an oil-based primer and high quality exterior paint. Remove cracked, flaking, and excessively-thick paint the gentlest means possible and tested first in an inconspicuous area. Avoid high heat paint strippers as they may scorch and permanently damage historic wood.
• If it possible to remove synthetic that has been applied to a building inappropriately to a building without damaging the underlying siding, trim, or decorative elements, inappropriate siding should be removed.
• Remove existing inappropriate siding that covers original, historic materials. It is not always accurate to assume that historic siding will have to be replaced because it has been covered by synthetic siding in the past. In fact, where water has not been allowed to penetrate between layers, later coverings have usually served as protection for the original material.
• When removing siding from a building, first remove a test area in a discreet location. If removal of the siding is not causing harm to the original building, carefully remove the remainder of the siding, taking care not to damage the historic materials beneath.
Well-preserved and repaired wooden spindle and bracket trim typical of the Queen Anne architectural style.

Well-preserved and repaired wooden spindle and bracket trim in a Queen Anne period-appropriate color scheme.
Inappropriate application of vinyl siding in place or original slate shingles on gable and dormers.
Inappropriate aluminum fascia and soffit concealing original eave detailing.
Preservation Brief 10: Exterior Paint Problems on Historic Woodwork.
Preservation Brief 11: Rehabilitating Historic Storefronts.
Preservation Brief 16: The Use of Substitute Materials on Historic Building Exteriors.
Preservation Brief 26: The Preservation and Repair of Historic Log Buildings.
Preservation Brief 35: Understanding Old Buildings: The Process of Architectural Investigation.
If a property owner wishes to install new siding or trim work, either in wood or using an alternative material to wood, on either all of the building or on a portion of the building, the following should be considered before requesting approval by the Heritage Commission:
□ Does the new siding/trim match the original in profile (thickness and taper)?
□ Does the new siding match the original reveal (the space exposed on the front of each board)?
□ Does the texture match the original (for example: no faux wood graining on siding that was originally smooth)?
□ Can the proposed location of the new siding/trim be seen from the public right-of-way (streets and sidewalks)?
□ Is the original siding/trim still on the building? If so, can it be repaired?
□ Has all the original siding/trim been previously removed?
□ Can existing trim pieces (for example: cornerboards and window trim) be retained if new siding is installed?
□ Will the existing trim appear to be the same (retain its dimensions) after new siding is applied?
□ Is there evidence (ghost lines) of what the original trim looked like and its location?
Replacement of stucco with new materials or application of stucco where there previously was none, require Heritage Commission review and approval (this includes the installation of modern panelized stucco systems.)
Considerations Specific to These Standards
Repair and Rehab Replacement
Painting
Applying Stucco to a Building
Appropriate Treatments
Discouraged Treatments
Preservation Brief References
Certificate of Appropriateness (COA) Checklist
Stucco is an exterior building finish consisting of several layers of cement-based plaster. Stucco can be applied over structural masonry (typically brick), or it can be applied as a “siding” over wood-framed construction. When applied over wood framing, the stucco is applied to wood or expanded metal mesh lathe. Stucco can have a rustic, “rough” finish with tooling and trowel marks (typically on Spanish Revival styles), or a smooth finish similar to interior plaster (such as on Craftsman and Tudor styles).
If the stucco is reflective of the historic character of the building (as it is in many residential applications), it is important to maintain the material. Because historic stucco was applied without expansion joints or control joints, cracking of historic stucco is common. As with interior plaster, cracks, building settling, and freeze/thaw cycles can cause large section of the stucco to separate from the underlying substrate. Such deterioration should be promptly repaired to keep moisture out of the building.
Before patching or replacing stucco, ensure that the substrate to which the stucco will be applied is clean and structurally-sound. On masonry buildings:
• Remove stucco just past the area of deterioration; and
• Clean the underlying masonry of efflorescence, lime scale, and other contaminants as necessary.
On balloon-framed buildings:
• Remove the stucco past the area of deterioration;
• Remove all “ears” (the stucco that is keyed into the lathe) to ensure good structural bonding of the patch and examine lathe for damage;
• Remove damaged lathe and replace any underlying vapor barrier material; and
• Install new expanded metal mesh lathe under the area to be patched; expanded metal mesh lathe is stronger and more stable than wood lathe.
If stucco was added inappropriately and masks historic architectural features or was utilized to create architectural details that were not originally present, the Heritage Commission encourages (but never requires) the careful removal of the stucco in order to expose the historic facade.
• Do not remove stucco from a building that was installed to mask damaged masonry, unless it is intended that the underlying masonry will be restored to its original appearance.
• Existing stucco areas with signs of deterioration should be patched with historically-appropriate, lime cement-based stucco to match original stucco as closely as possible in appearance and texture.
• When patching stucco, ensure that all loose stucco, and the full extent of the area of stucco that is separating from the exterior substrate, is removed.
• If subject to significant and widespread deterioration, or if remediation or repair of the building’s underlying structure is required, it is often more cost effective to replace historic stucco with new stucco instead of attempting to repair and patch large areas.
• Install only historically-appropriate, lime cement-based stucco.
• Use of contemporary, panelized stucco systems such as Exterior Insulation and Finish Systems (EIFS) are generally prohibited.
• All stucco installations must be painted for weathertightness.
• Properly prepare and prime stucco surfaces. Utilize high quality exterior paint. Removed cracked, flaking, and excessively-thick paint the gentlest means possible and tested first in an inconspicuous area.
• Do not apply stucco to a building that did not originally have stucco.
Original, historic stucco siding, painted and in good repair, on a Prairie Style home.
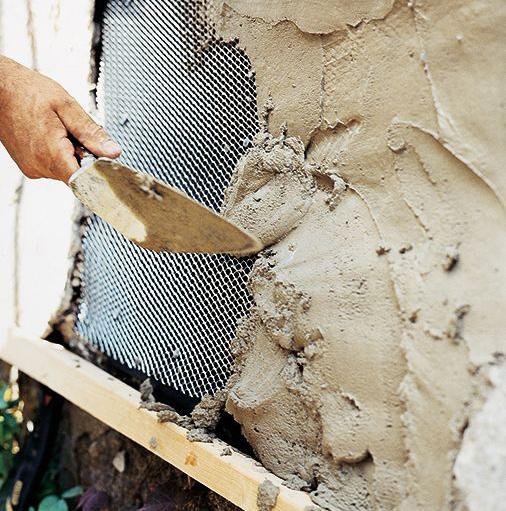
Replace damaged substrate and metal lath prior to patching damaged or deteriorated stucco (image © This Old House).
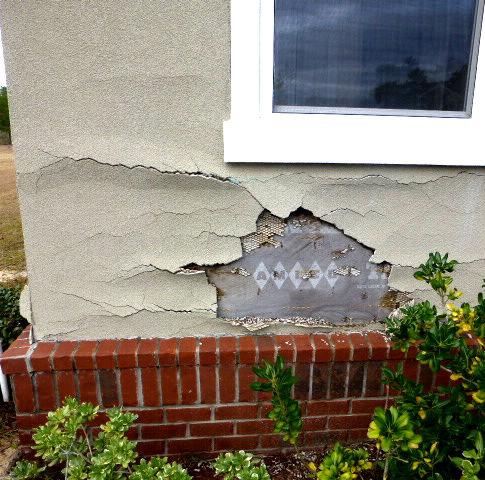
Failure to replace damaged substrate and lath with result in continued deterioration (image © Fox Valley Stucco).
Exterior insulated facade system (EIFS) siding should never be used in place of traditional stucco (image © Exterior Restoration).
Preservation Brief 22:
The Preservation and Repair of Historic Stucco.
If a property owner wishes to repair existing stucco by patching or replace existing stucco, the following should be considered before requesting approval by the Heritage Commission:
□ If proposing replacement, is the original stucco to be replaced deteriorated beyond reasonable repair?
□ Has the underlying source of deterioration been identified and remediated (including damaged lathe or damaged masonry substrate)?
□ Does the new stucco match the original stucco in texture and color?
□ Is stucco proposed to be applied to a building that was not originally finished in stucco?
□ Is stucco proposed to be replaced with a panelized stucco system (such as EIFS)?
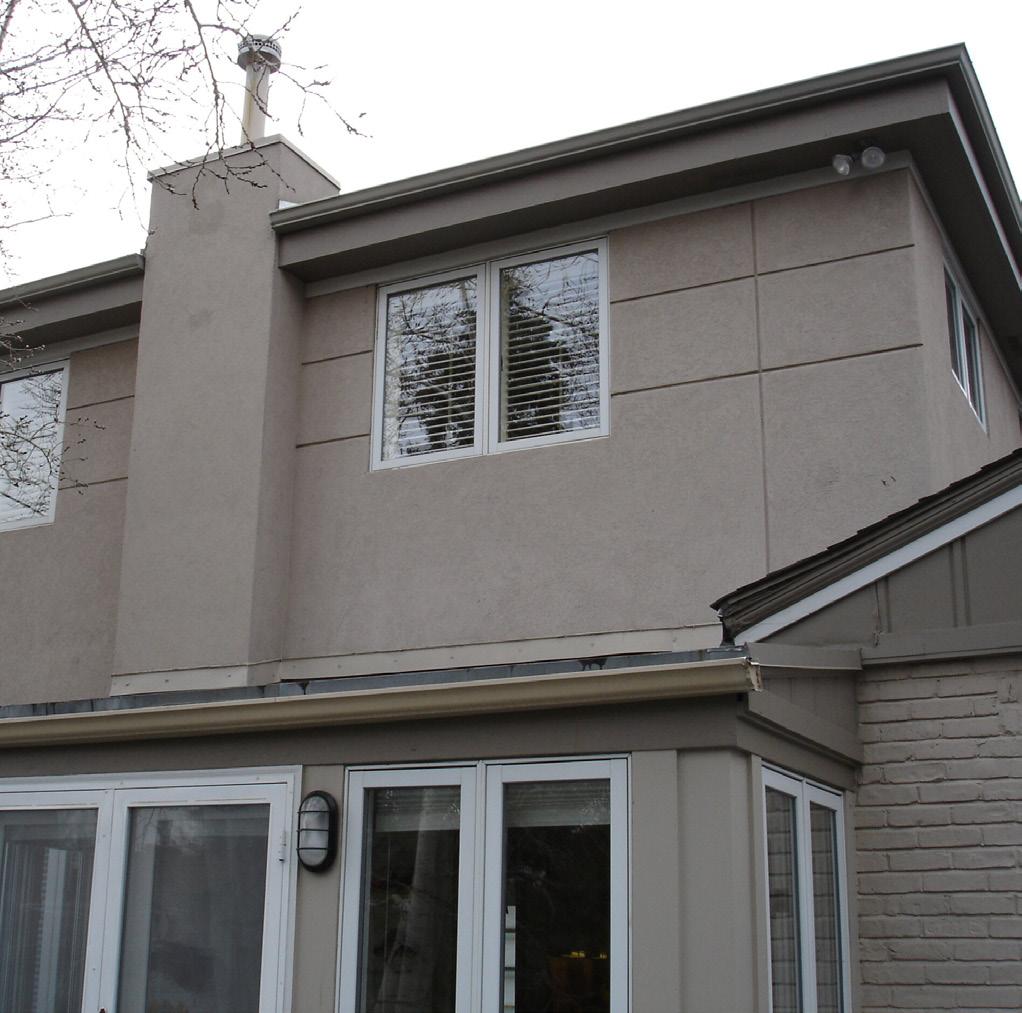
A. Roofs
B. Gutters and Downspouts
C. Doors
D. Windows
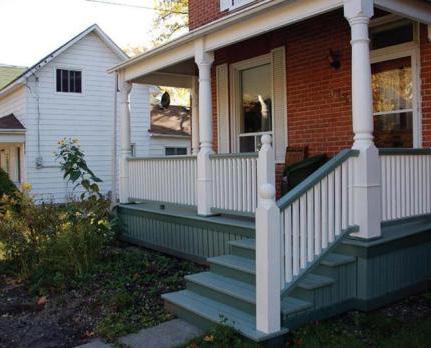
E. Porches, Decks, and Balconies
F. Carriage Houses
G. Signage and Historic Markers
H. Mechanical Equipment
I. Lighting
Approval by the Heritage Commission must be given prior to the installation of new roofing materials or the issuance of building permits for major exterior alterations such as installation of new dormers.
Considerations Specific to These Standards
Repair of Existing Historic Roofs
Replacement (Re-Roofing)
Appropriate Treatments
Discouraged Treatments
Preservation Brief References
Certificate of Appropriateness (COA) Checklist
Roofing materials are, along with building wall siding or masonry, the most significant overall character-defining features of a historic building. Unlike building wall materials, roofing materials are subject to greater deterioration and damage from weather exposure. Roofing materials will, therefore, typically be replaced multiple times throughout the life of a building, while wall materials will often never be replaced. Furthermore, damage to roofing materials will result in immediate water intrusion. Due to these considerations, particular care must be taken in the repair or replacement of roofs.
• Unless historic roofing materials are damaged or deteriorated beyond repair, it is encouraged to repair the historic roof rather that replace it.
• Repairs should be made using the same materials including the color and style.
• Annually check around chimneys, dormers, and porch roofs for missing flashing or sealants along flashing.
• Apply new sealants along flashing and stepped flashing when needed. Missing or loose sealants around flashing is a major cause of water infiltration in a historic building.
Approval for re-roofs using the same materials can be obtained administratively by City staff.
• When existing roofing materials on historic buildings require replacement, they must be replaced with materials that are visually and stylistically compatible with the building. For example, a standing-seam metal roof is incompatible with a Queen Anne-style home, as that type of roof was not historically used in Independence during the period in which Queen Annestyle homes were built. Likewise, a patterned shingle roof, appropriate to a Queen Anne home, would be incompatible with a Craftsman-style home, as Craftsman-style homes did not use patterned shingle roofs.
• Use of new materials (not already found on the building) is discouraged when they are not historically appropriate (i.e. original roof is wood shake shingles and proposed new material is asphalt shingles).
• Be sure to maintain existing roof lines when considering a new roof. The shape of the roof is also important to the design of the building.
• Replace missing or deteriorated flashing and counter-flashing, particularly around chimneys, dormers, porch roofs, etc. during all re-roofs. When installing flashing adjacent to masonry, counter-flashing should always be inserted directly into the mortar joint and affixed prior to installing the roofing materials.
• Slopes and overhangs should not be changed and original details such as soffits, fascia, and friezes should be maintained.
• Dormers and chimneys should remain intact and in their original locations. For example, combining two dormers (to enlarge an attic space) is not appropriate, as it changes the roof line of the house and can cause a loss of architectural integrity.
• The addition of one (1) or more new dormers to improve the habitability of attic space may be appropriate provided that:
a. New dormers are not located on any roof plane that faces a public street.
b. New dormers are designed with proportions and detailing that are compatible with the style of the building.
• If it is not financially feasible to re-roof using original materials such as slate, it is important to use appropriate roofing materials according to the style of the building. For example, a metal standing seam roof is not appropriate for a Craftsman Bungalow, although a patterned asphalt shingle roof may be appropriate for a Queen Anne Style house.

Synthetic slate provides a durable and more affordable alternative to natural slate (image © PJ’s Roofing).
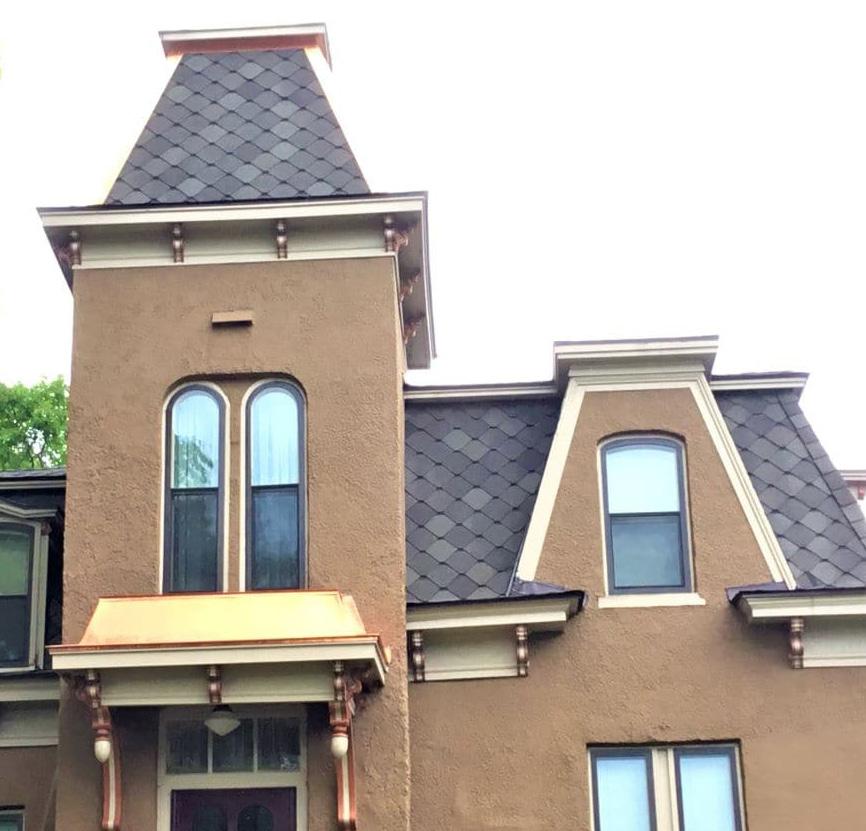
Architectural asphalt shingles are available in historic shapes, such as these fish-scale shingles (image © Lindus Construction).
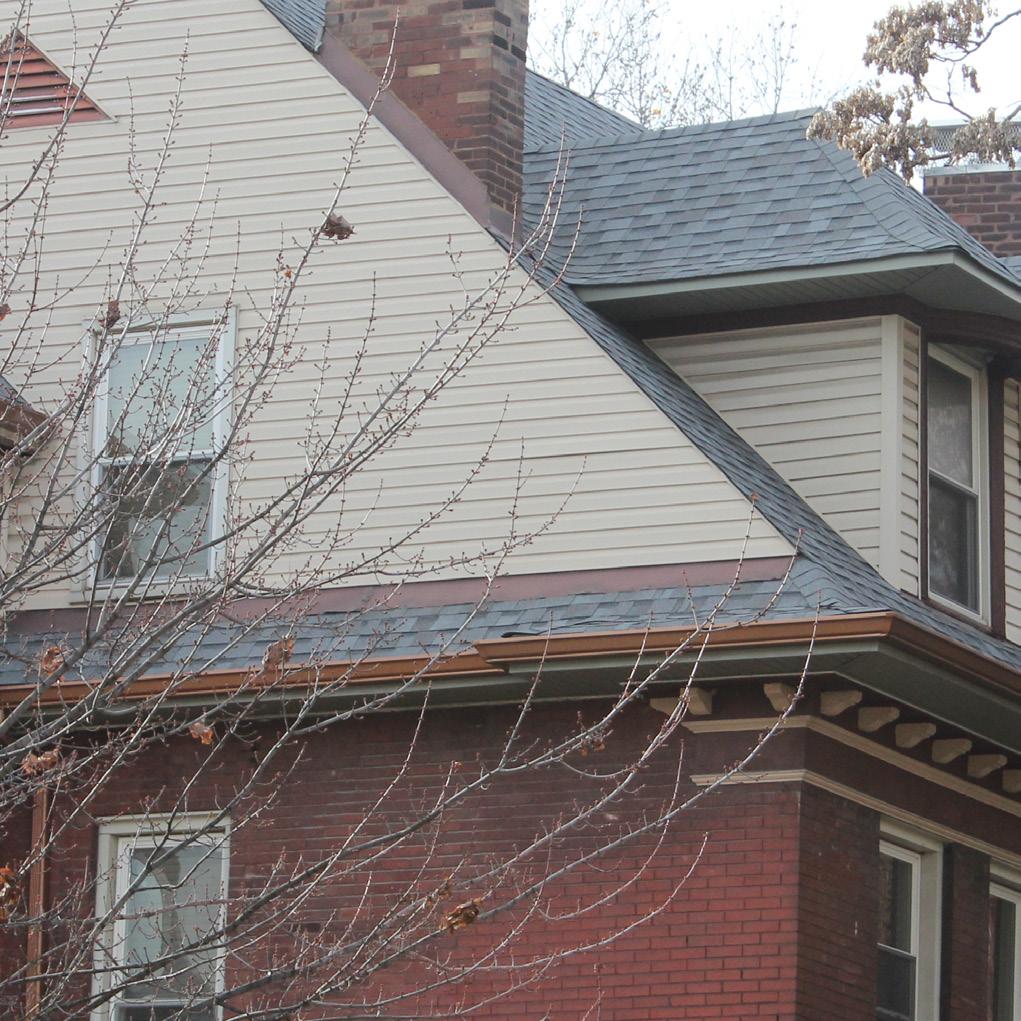
Inappropriate replacement of historic slate siding on dormers and gable faces with vinyl siding.
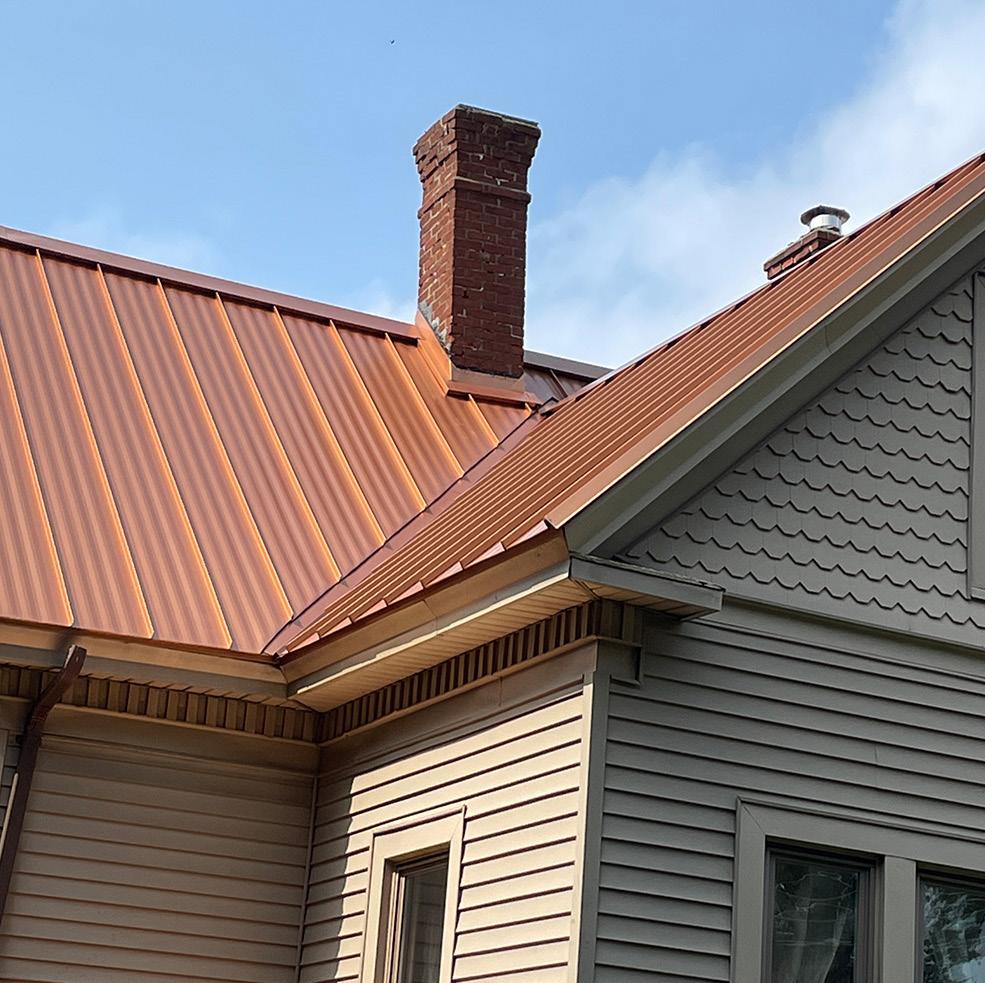
Though durable, this standing-seam metal roof is inappropriate to the architectural style of this home (image © Point Judith Peaks Roofing and Construction).
Preservation Brief 4: Roofing for Historic Buildings.
Preservation Brief 16: The Use of Substitute Materials on Historic Building Exteriors.
Preservation Brief 19: The Repair and Replacement of Historic Wooden Shingle Roofs.
Preservation Brief 29: The Repair, Replacement, and Maintenance of Historic Slate Roofs.
Preservation Brief 30: The Preservation and Repair of Historic Clay Tile Roofs.
If a property owner wishes to re-roof a building with alternative materials, the following should be considered before requesting approval by the Heritage Commission:
□ Is the original roofing material damaged or deteriorated beyond repair?
□ Is the proposed new roofing material appropriate to the architectural style and period of significance of the building?
□ Does the proposed new roofing material generally match the existing roofing material in size, shape, texture, and color?
□ Are existing chimneys, dormers, roof lines, and roof shapes being preserved?
□ If a new dormer is proposed, is it being added to a roof plane that does not face a public street?
Replacement of existing gutters and downspouts with a different type and/or style of gutter (i.e. replacing copper half-round gutters with aluminum “K” style gutters) requires Heritage Commission review and approval.
Considerations Specific to These Standards
Repair and Rehab Replacement
Painting
Appropriate Treatments
Discouraged Treatments
Preservation Brief References
Certificate of Appropriateness (COA) Checklist
Gutters and downspouts are necessary to quickly convey rainwater away from the building envelope. Damaged or otherwise non-functional gutters and downspouts can cause or exacerbate water infiltration and more damage. Maintaining gutters and downspouts is good condition is important for the appearance of the building as well as the integrity of its envelope and structure.
Historic gutters come in two basic designs: K-style gutters and box gutters. K-style gutters are rolled metal gutters with an ogee profile that are installed on the fascia board of the roof overhang. This style is commonly used in new construction. Historic K-style gutters were typically made of copper or painted galvanized steel.
Box gutters are metal-lined channels that are built into the roof overhang. Sometimes referred to as hidden gutters, box gutters are integral to the framing of the roof. Box gutters will cause severe water infiltration if the metal lining and its seams are damaged, because the gutter forms part of the roof envelope. Because of their unique character, it is discouraged to replace box gutters with K-style gutters, except under the conditions described herein.
• When repairing traditional gutters, be sure that all metal seams within the box gutters are sealed and do not allow water or ice to penetrate soffits and fascia.
• When repairing half-round gutters, be sure that the fasteners are secure and the gutters are sloped to flow towards the downspouts.
In-kind replacement of existing gutters and downspouts (replacement with a gutter of the same type, style, size, and material) can be administratively approved by the Preservation Division.
• Do not remove or demolish box gutters. Box gutters are an integral part of a historic gutter system.
• If box gutters are to be replaced with half-round or “K” style gutters, conceal box gutters with decking in order to preserve the option of restoration at a later time.
• “K” style gutters may be appropriate when replacing gutters, especially when located on facades not facing public streets.
• Be certain to size and install the correct gutters and downspouts to accommodate all the water run-off. Modern gutters may not have the capacity to catch the increased water flow from a variety of roof pitches. If necessary, have a professional inspect the roof to get an accurate measurement.
• Paint new aluminum gutters and downspouts a color to match or complement the building.
• Avoid painting contemporary gutters and downspouts colors that highlight the new system rather than blends them into the wall plane of the building.
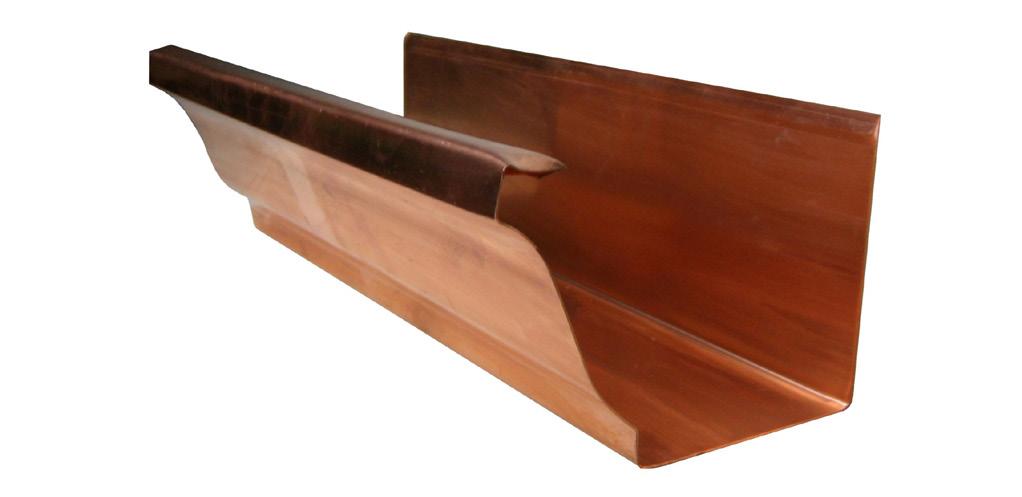
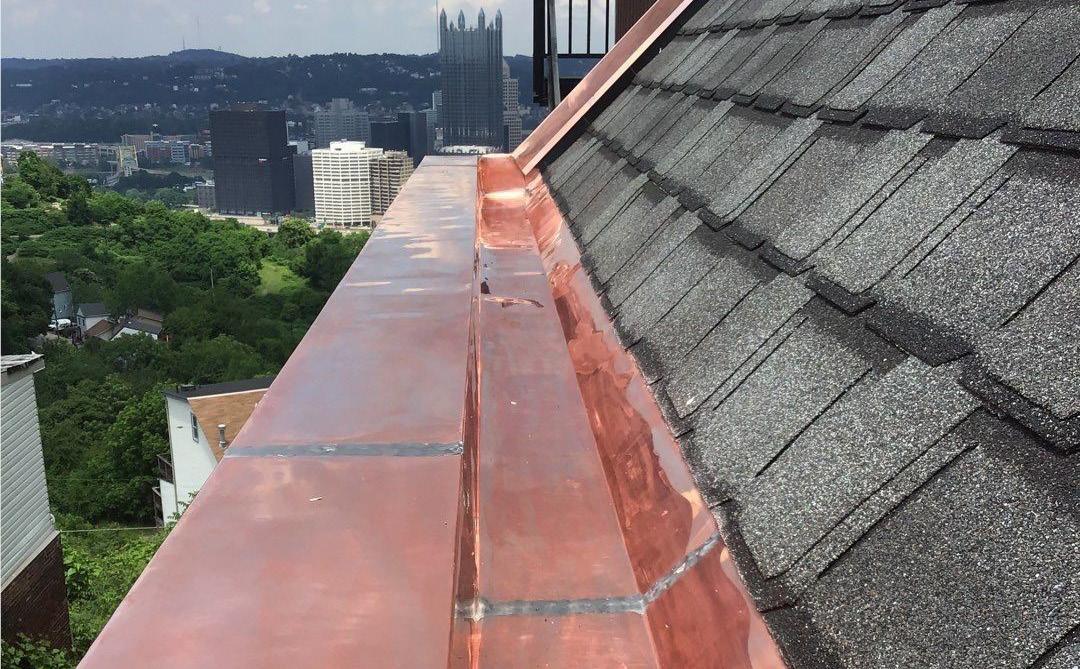
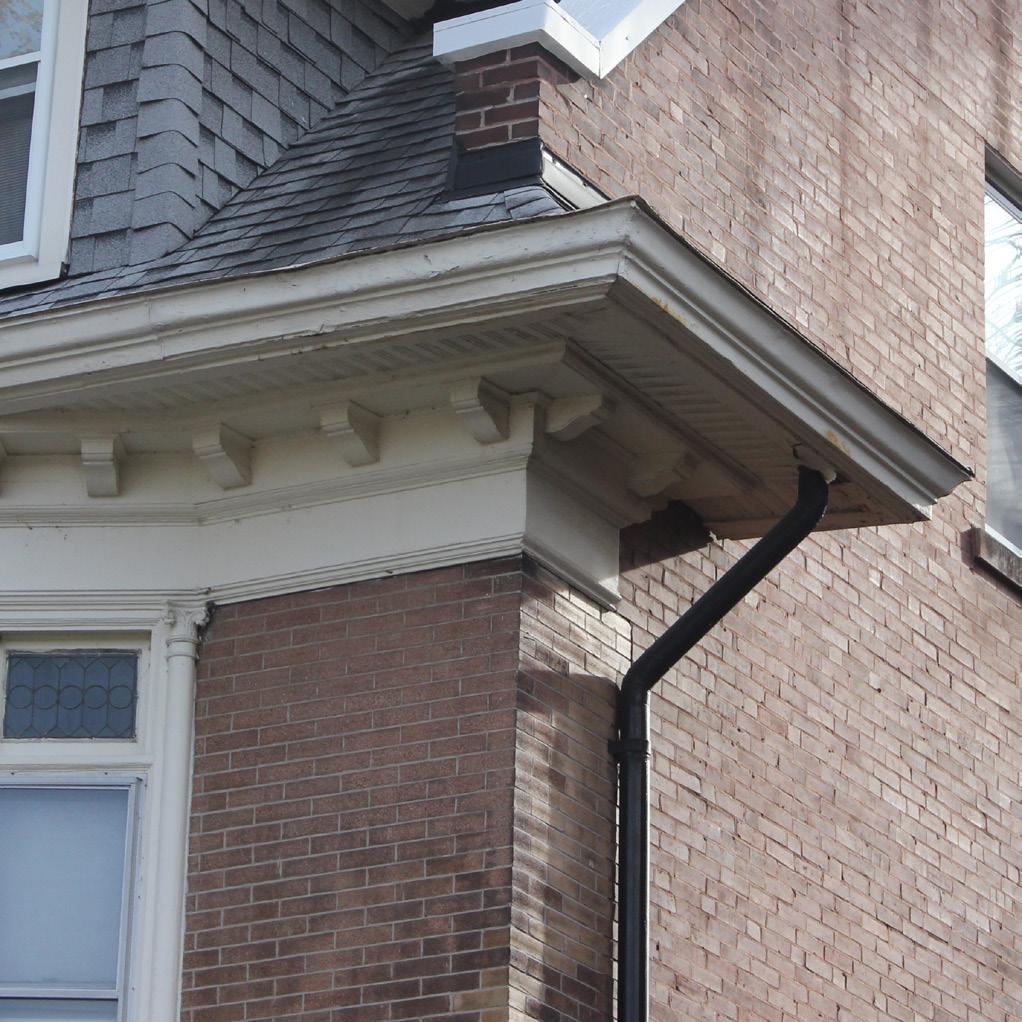
Functional, restored box gutter on the front facade eave, preserving this original feature.
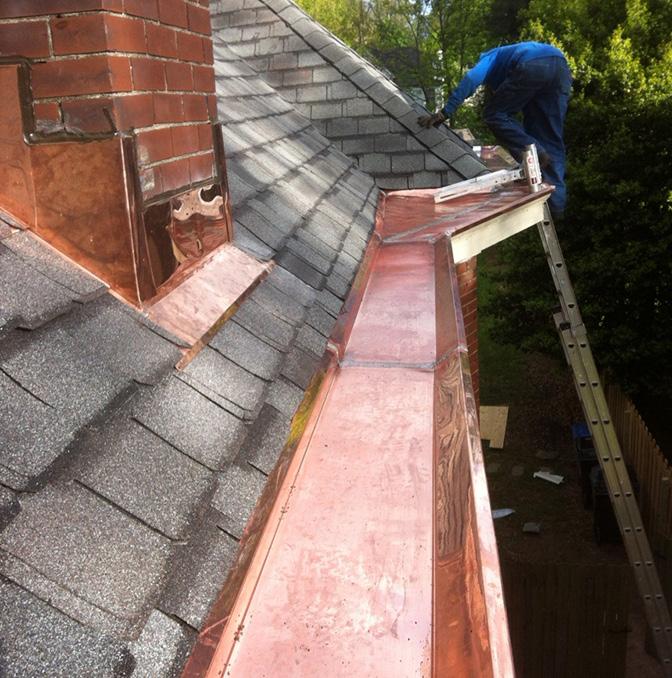
Ensure that box gutter lining in is good condition, that all joints are sealed with no perforations (image © Odessa Roofs).
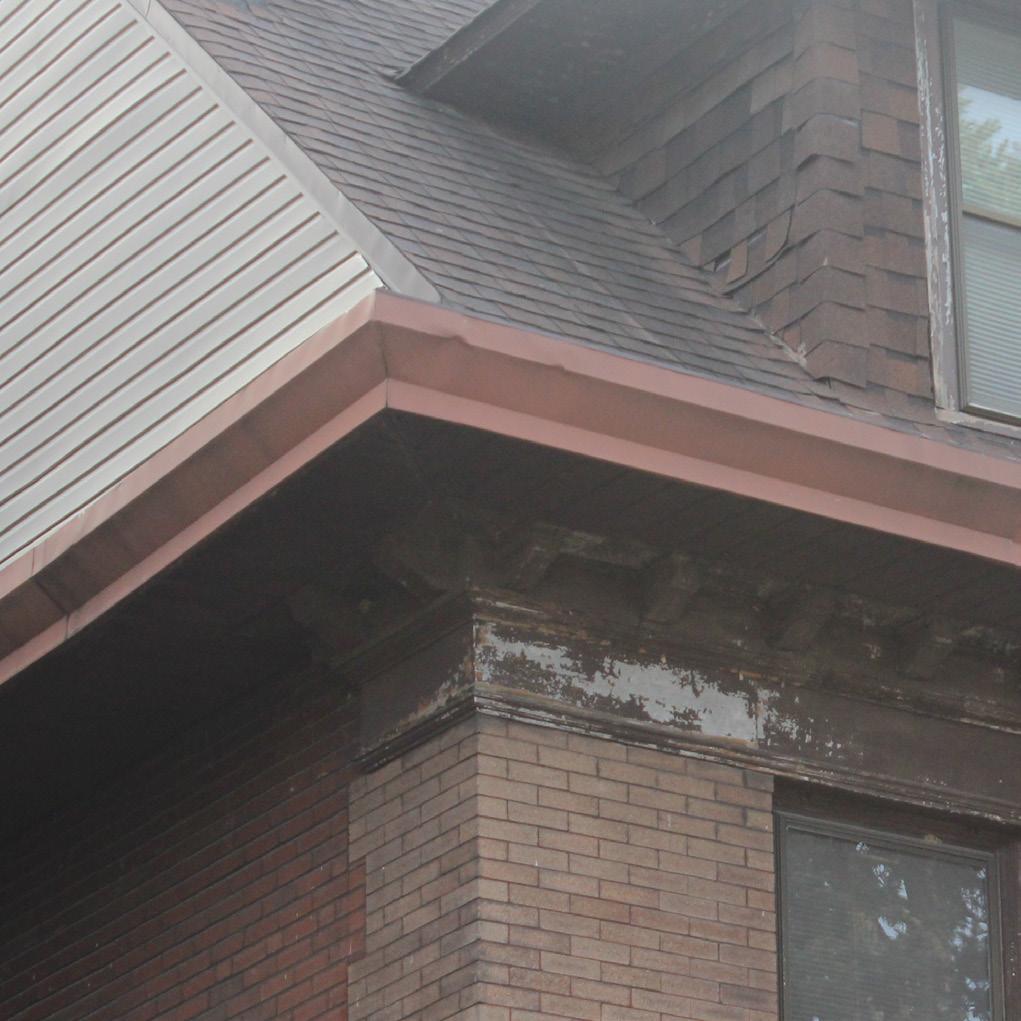
Box gutter replaces with an inappropriate, shop-fabricated, “K” style gutter with simplified profile.
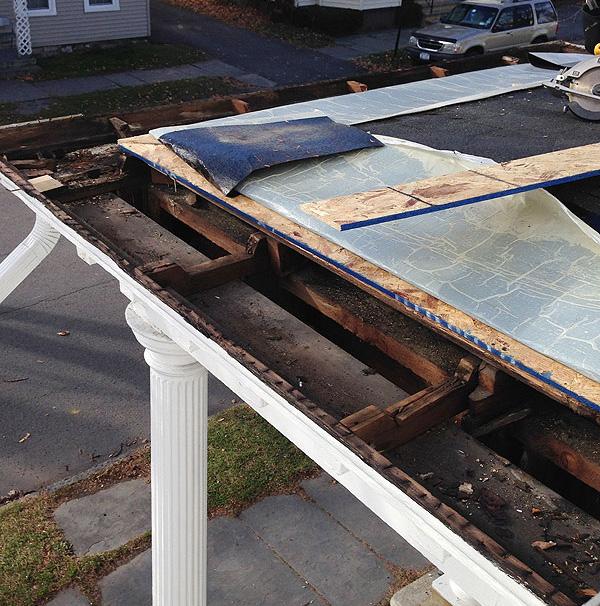
Leaking box gutter lining will result in damage to underlying roof structure and soffit materials (image © Daniel Kanter).
Preservation Brief 16: The Use of Substitute Materials on Historic Building Exteriors.
Preservation Brief 39: Holding the Line: Controlling Unwanted Moisture in Historic Buildings.
If a property owner wishes to replace existing gutters and/ or downspouts, the following should be considered before requesting approval by the Heritage Commission:
□ Are the original gutters and/or downspouts damaged or deteriorated beyond repair?
□ If the building has box gutters and it is proposed to replace these with conventional gutters, are the box gutters being abandoned in place and covered with roof decking to permit future rehabilitation?
□ If replacement with “K” style gutters is proposed, are the “K” style gutters of an appropriate size, profile, and color to blend in with the architectural style and details of the building?
□ Are replacement gutters of a sufficient size to handle run-off from the buildings roof area and slope?
While building permits are not required for installation of new doors or storm doors, approval by the Heritage Commission must be given prior to any installation. Alternative materials will be considered by the Heritage Commission on a case-by-case basis.
Considerations Specific to These Standards
Repair and Rehab Replacement
Door Hardware
Storm Doors
Garage Doors
Appropriate Treatments
Discouraged Treatments
Preservation Brief References
Certificate of Appropriateness (COA) Checklist
Building entry doors play an important role in defining the architectural style of historic homes and buildings. While generally not as impactful to the building’s style as its windows—at least when viewed from the street—doors are the architectural feature that all building occupants and visitors will interact with any time they enter or leave the building. As with windows, traditional wood doors are considered a superior product of craftsmanship and material due to their use of old-growth wood, a dense and extremely durable material. As this wood is no longer available on the market today, the retention of this quality product is invaluable to a historic property owner. Wood doors that are repaired and in good working order can last for the lifetime of the building.
Doors are often considered for replacement when thought to be less energy efficient than new. However, there are negligible differences between wood doors and steel entry doors when the wood doors are fitted with weatherstripping, missing glazing is re-applied, and storm doors are installed. It can be less expensive to repair original, wood doors than replace them, and the quality of old-growth wood used in historic doors is of higher quality and more durable that the wood used in modern doors.
Modern synthetic materials are intended to provide a “maintenance free” product for a property owner while attempting to replicate traditional historic door details. While alternative materials such as steel and fiberglass are alternatives to wood, they cannot typically achieve the same detail and dimensions offered by wood. Therefore, the Heritage Commission encourages the retention and restoration of wood doors whenever possible.
The Commission will consider, on a case-by-case basis, a proposal to utilize synthetic materials for door replacements; however, they prefer the use of similar materials when the original doors are no longer on the building, damaged beyond repair, are proposed on new additions, or for new construction.
• Original doors should be maintained and repaired whenever possible. Traditional wood should be protected from the elements through the use of storm doors, and protective paints and sealers such as polyurethane or marine-grade varnish.
• Transom windows, sidelights, and door trim are essential components of a door system and should always be retained. If necessary, custom storm sashes can be made for sidelights and transom areas.
• Sidelights and transom sash can often be retrofitted with insulated glass units. If double-pane insulated glass is to be used, it should be installed so that the exterior muntin depth dimension is preserved
• Energy-efficiency improvements for historic entry doors can be made by replacing weatherstripping, caulking and sealing around door trim, and if trim is removed for repair, sealing with low expansion foam around door frames.
• Do not replace original doors unless they are damaged or deteriorated beyond repair. Replacement due to assumed energy inefficiencies should be avoided. A properly fitted and weatherstripped door with a storm door will be just as energy efficient as new units.
• When replacement of historic doors is required, new doors should match original features, size, shape, style, placement, configuration, and materials (including hardware) of the original doors when possible. Alternative materials will be considered on a case by case basis.
• It is often less expensive to repair original doors rather than replacing them in-kind. Original doors were crafted with materials and detailing that is difficult to replicate.
• If an original door has been removed, its replacement should be a door compatible to the style of the building. Every effort should be made to match the original features as closely as possible including: the original size, shape, design, proportion, lite configuration, material, door swing, and door handedness (i.e. a lefthand opening door vs. a right-hand opening door). For example, do not replace a single-lite wood door with a new solid hollow-metal door.
• Sidelights and transoms should also be maintained when considering replacement.
• Overall, replacement doors should not change the proportion of the original openings unless necessary to accommodate the American with Disabilities (ADA) Act. (Please consult the local building code and the ANSI/ADA Accessibility Guidelines for a full listing of code requirements.)
• Generally, it is not necessary to replace historic hardware knobs, hinges, handles, knockers, locks, etc. Hardware can be refinished and repaired when in less than perfect condition. Replacement parts such as door knobs, locks, and hinges are readily available through salvage or through companies that specialize in hardware reproductions.
• If existing hardware cannot be repaired, or does not provide the security required, replacement hardware should be compatible with the building’s style. Replacement hardware that is unobtrusive and appropriate to the architectural design of the building is preferred.
• New dead bolts and security locks can be added to the existing door system. Care should be taken to minimize damage to the historic fabric when retrofitting security locks to an existing door.
• Storm doors are intended to protect historic doors and are encouraged by the Heritage Commission. Storm door installations should be reversible, meaning that the historic material behind the storm door is not damaged by installation when removed.
• Wood storm and screen doors are most compatible with historic buildings.
• Aluminum or other material storm doors may be considered if the finish is in a color to match the existing door or trim. Full view type storm doors are ideal because they allow the original door to be readily seen from the street.
• Storm doors should fit the door opening exactly, without the use of spacers.
• Do not use highly-reflective or otherwise contemporary-styled storm door units.
• It is not appropriate to install storm doors in a way that will obscure or damage a historic door and/or door opening.
• Original garage or carriage house doors that add to the character of a garage or carriage house should be repaired and retained.
• If beyond repair, the original door should serve as a model for design of a replacement.
• Overhead garage doors of a compatible design will be considered in the interest of security and safety.
• When possible, avoid altering the size of a historic door opening in a garage, carriage house, or other ancillary building, or replacing the existing doors, unless access into the building is an issue.
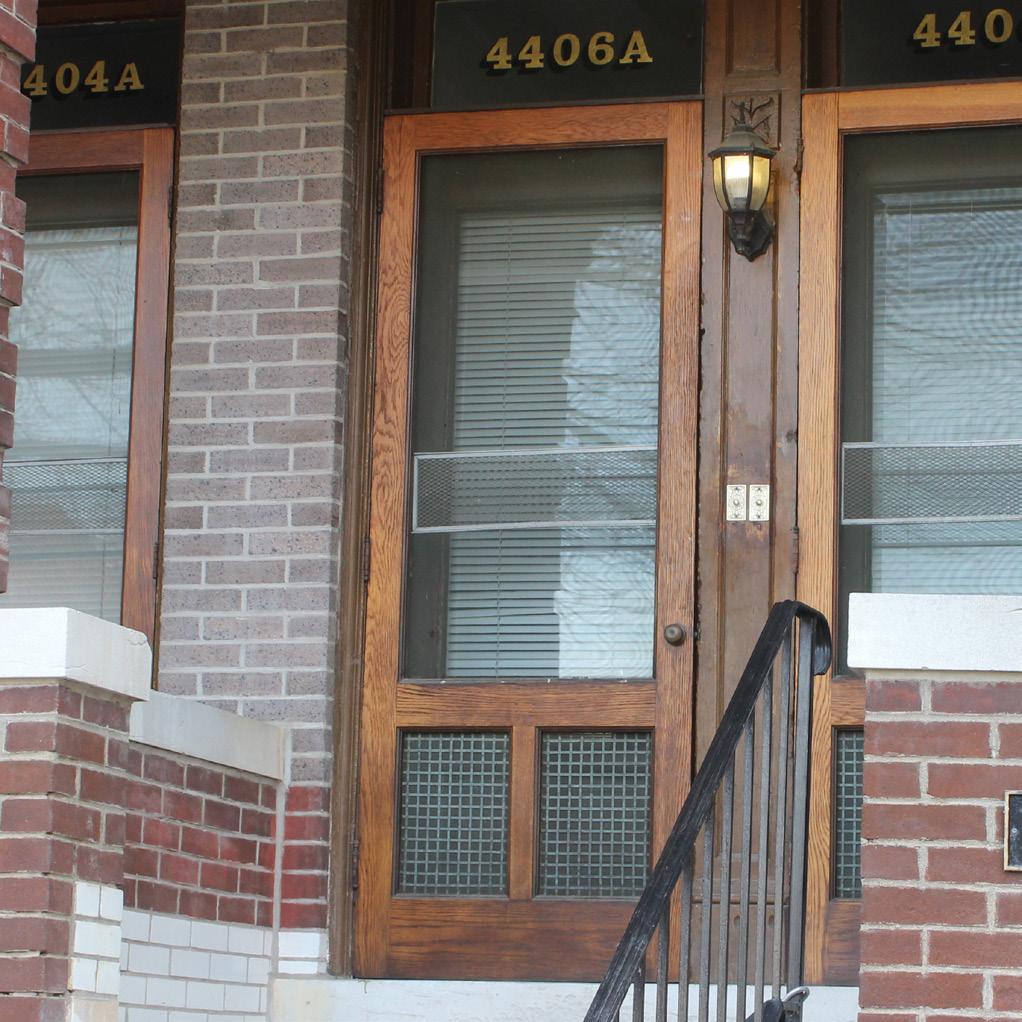
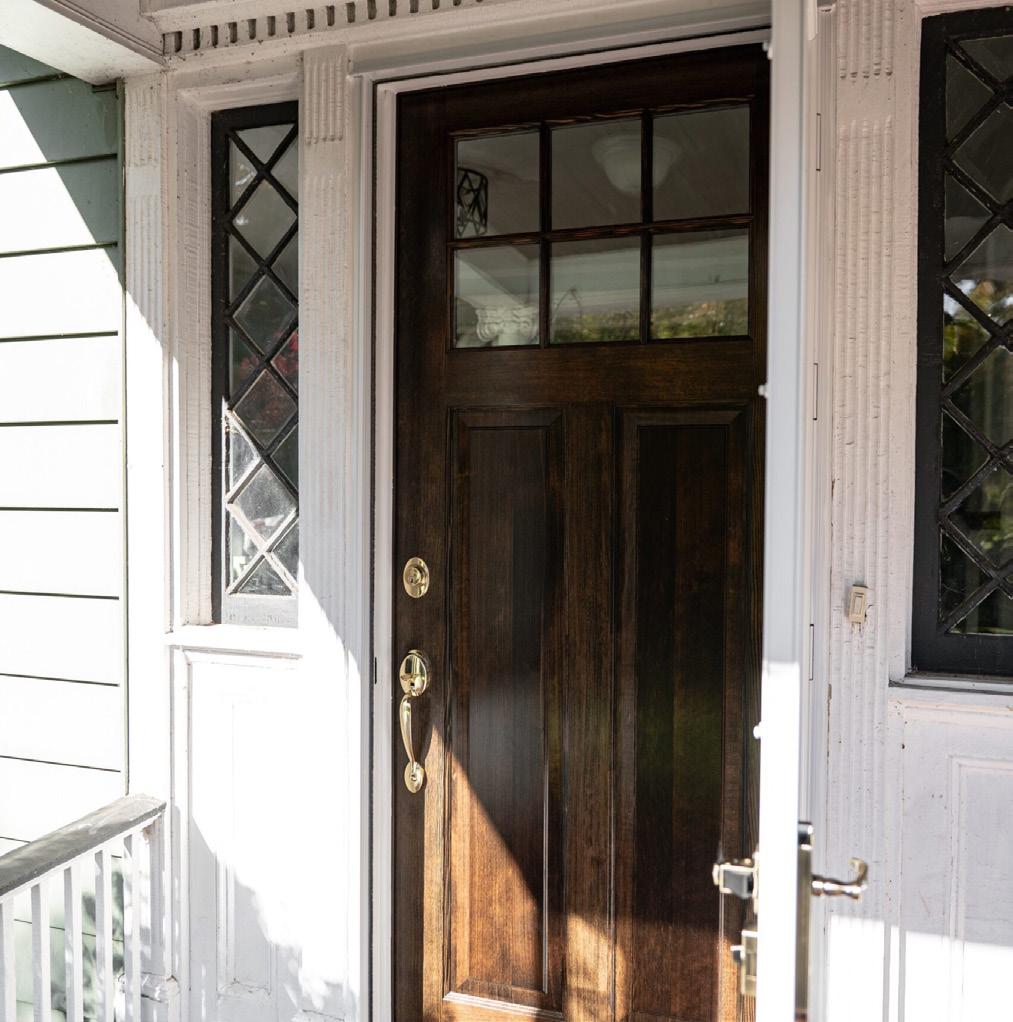
New replacement front door matching the style and period of significance of the historic home. (image © Carolen Contractors).
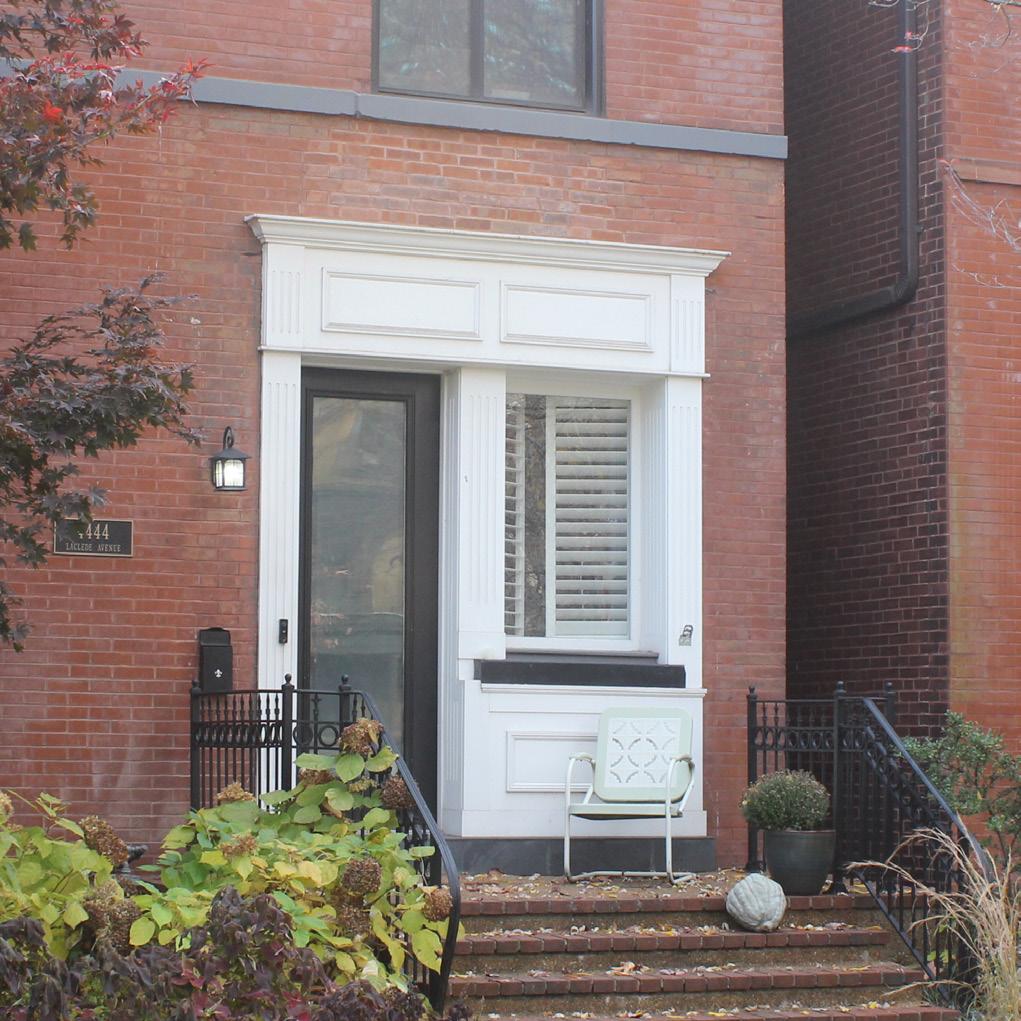
While the door and window size and orientation is original, the door, window, and surrounding trim is historically inappropriate.
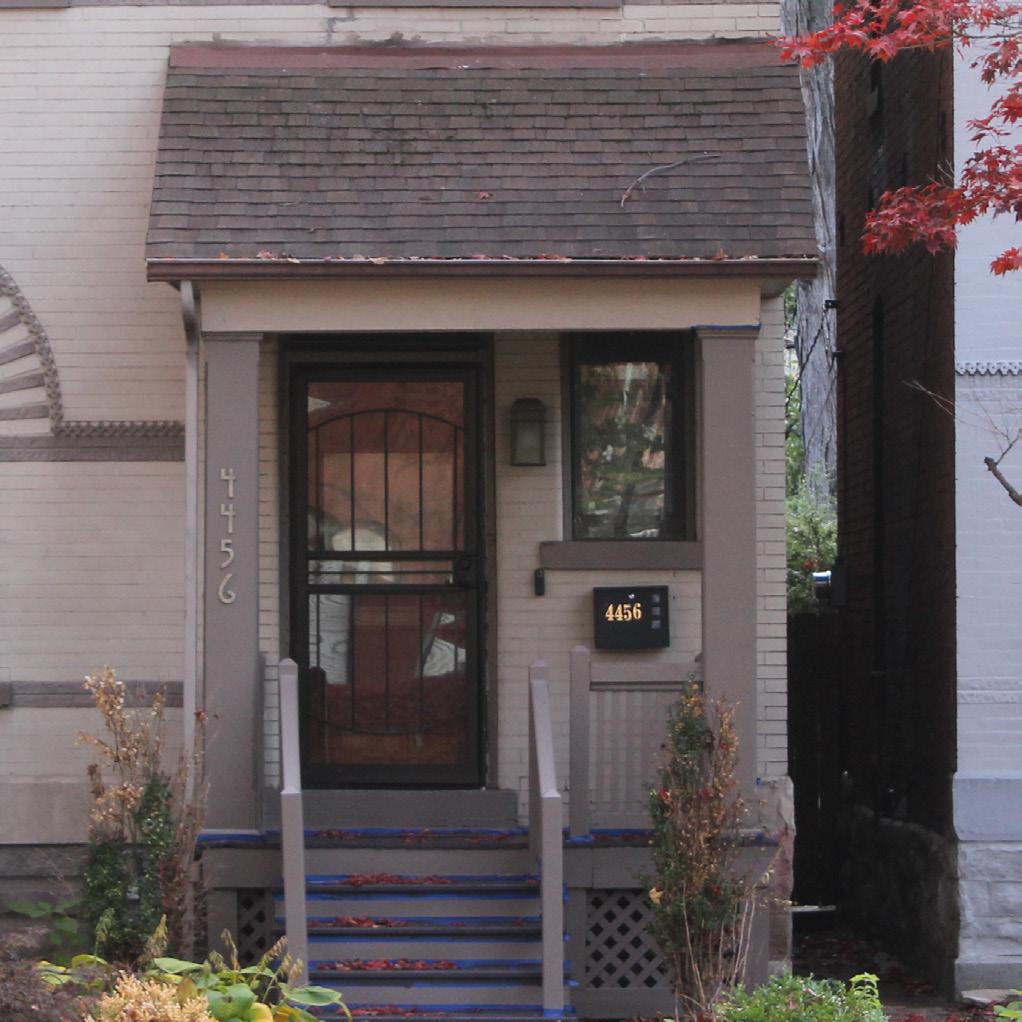
Non-historic front door, storm door, and side window, inappropriate to the style and period of significance of the home.
Preservation Brief 10: Exterior Paint Problems on Historic Woodwork.
Preservation Brief 16: The Use of Substitute Materials on Historic Building Exteriors.
If a property owner wishes to install new doors or storm doors, the following should be considered before requesting approval by the Heritage Commission:
□ Does the new door complement the style of the building? For example, is a Mission style door being considered to be installed on a Queen Anne home?
□ Does the new door match the original style (panels, glass, dimensions, etc.)?
□ If a new door is to be installed, can the proposed location of the new door be seen from the public right-of-way (streets and sidewalks)?
□ Is the original door able to be restored?
□ If the original door is being removed as part of the project, can it be salvaged?
□ Can trim pieces around the door be retained?
□ Is a storm door necessary with the installation of a new door?
□ Does the new storm door match the style and color of the main door?
□ Does the new storm door blend in to the overall appearance of the main door assembly, so as to not mask or visually overwhelm the main door?
While building permits are not required for installation of windows or installation of window shutters, approval by the Heritage Commission must be given prior to any installation. Alternative materials will be considered by the Heritage Commission on a case-by-case basis.
Considerations Specific to These Standards
Repair and Rehab
Solid Wood Replacement Windows
Wood Replacement Windows with Non-Wood Exterior Cladding
Metal Replacement Windows
Window Trims
Storm Windows
Window Shutters
Painting
Appropriate Treatments
Discouraged Treatments
Preservation Brief References
Certificate of Appropriateness (COA) Checklist
Windows, and the pattern of window openings, play an important role in defining the architectural style of historic homes and buildings. Traditional wood windows are considered a superior product of craftsmanship and material due to their use of old-growth wood, a dense and extremely durable material. As this wood is no longer available on the market today, the retention of this quality product is invaluable to a historic property owner. Wood windows that are repaired and in good working order can last for decades.
Windows are often considered for replacement when thought to be less energy efficient than new. In fact, studies have shown that windows can achieve the same energy efficiency as double-paned windows when fitted with weatherstripping, sashes are tightened, missing glazing is re-applied, and storm windows are installed. It can be less expensive to repair original, wood windows than replace them with high quality, replacement windows of any material, including solid wood, and the quality of old-growth wood used in historic windows is of higher quality and more durable that the wood used in modern replacement windows.
Modern synthetic materials, including synthetic exterior cladding on wood replacement windows, are intended to provide a “maintenance free” product for a property owner while attempting to replicate traditional historic window patterns. While alternative materials such as vinyl, aluminum, and fiberglass are alternatives to wood, they cannot typically achieve the same detail and dimensions offered by wood. For example, replicated muntins between glass panes or snap-in muntins do not have the same dimensional quality or profile as they do with traditional wood windows. Therefore, the Heritage Commission encourages the retention and restoration of wood windows whenever possible.
The Commission will consider, on a case-by-case basis, a proposal to utilize synthetic materials for window replacements; however, they prefer the use of similar materials when the original windows are no longer on the building, are proposed on new additions, or for new construction. Windows that are painted shut, have sash cords that are cut, or do not slide easily are not considered viable candidates for replacement.
• Whenever possible, existing historic windows should be repaired and restored.
• Where feasible, repair existing window components, including sashes; sash components (muntins, lift rails, meeting rails, stiles, etc.); sills; frames; and brick moulds. Epoxy wood consolidants and chemical fillers can be used to cost-effectively repair even severely-deteriorated wood. Paint and caulk to a state of renewal and proper operation.
• If repair of window sashes is not feasible, window sashes may be replaced and existing frames, sills, and brick mould should be reused. Replacement sashes should match the dimensions, profiles, and muntin configurations of existing sashes.
• If double-pane insulated glass is to be used, it should be installed such that the exterior muntin depth dimension is preserved. Replacement sashes should utilize true divided light construction with functional muntins, not exterior and interior decorative grilles.
• Window exteriors should be painted with opaque, pigment-based coatings rated for exterior application. Color should compliment the overall color scheme of the building and be appropriate to the building’s Period(s) or Significance.
• Owners who wish to replace historic windows should provide photographic documentation illustrating why repair is not possible.
• Where repair is not possible, replace existing windows with new wood windows that match the existing configuration, profiles, dimensions, muntin configuration, and sash heights. On masonry buildings, install windows with brick mould that matches the original brick mould.
• If the building’s original windows were replaced with non-contributing replacement windows in the past, replace existing windows with new windows that match the profiles, dimensions, muntin configuration, and sash heights of the original windows, providing that photographic evidence of the building’s historic condition may be found.
• Avoid creating new window openings or eliminating original windows on all street-facing elevations, or on areas of a historic building that can be seen from a public right-of-way.
Wood replacement windows with non-wood exterior cladding will be considered by the Heritage Commission on a case-by-case basis.
Because non-wood exterior cladding cannot be painted, the factory-applied color of this window type will be considered by the Heritage Commission for approval.
• Many window manufacturers offer wood replacement windows with weatherproof non-wood exterior cladding. Cladding is typically extruded aluminum (brands include Marvin, Pella, Kolbe, and Loewen), or glass-reinforced polymer (GRP) (brands include Marvin, Pella, and Kolbe). Aluminum cladding usually has a factory-applied color finish, while GRP is usually colored. This cladding cannot be painted and does not require painting.
• Wood replacement windows with aluminum exterior cladding may be permitted on building façades that do not face a public street on a case-by-case basis.
• Factory-applied color should compliment the overall color scheme of the building and be appropriate to the building’s Period(s) or Significance.
Historic double-hung window showing typical components and details: (A) narrow wood meeting rail; (B) wide wood lift rail; (C) wood muntins separating individual panes of glass, called (D) “lites”, sealed with glazing putty; (E) thick wood window sill; and (F) wood brick mould (for masonry structures) or wood trim (for framed structures with siding or stucco). The weight box (G), which houses the sash counterweights and sash cords, is integral to the window frame and concealed within the wall.
Double-hung windows are often referred to by the lite count of each sash. The illustrated window has six (6) lites on the upper sash and one (1) lite on the lower sash; this is referred to as a “6-over-1 window”.
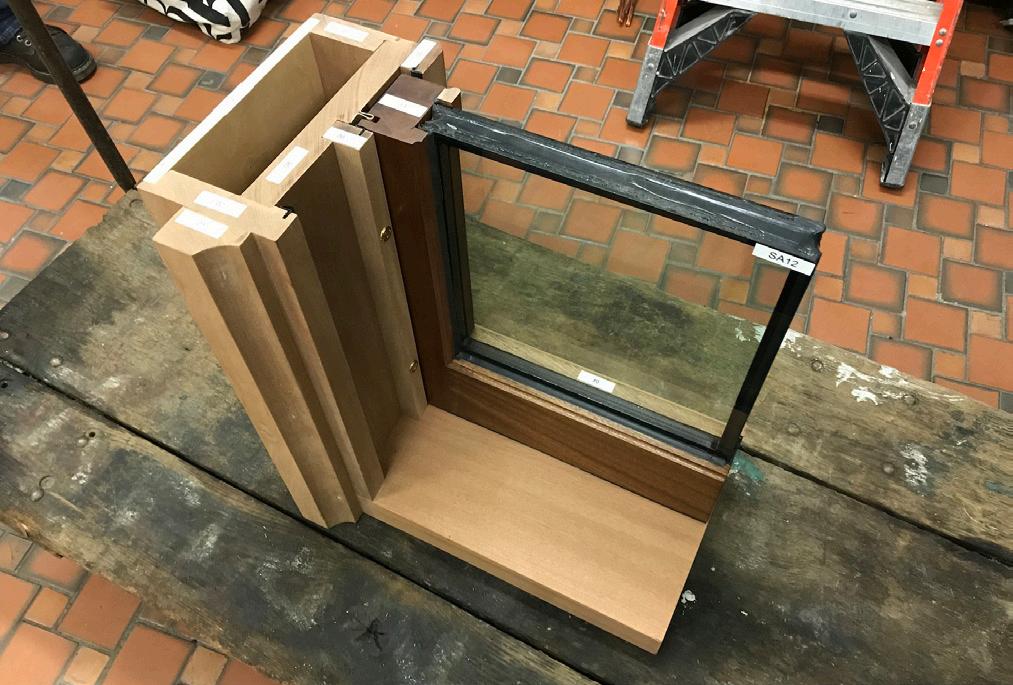
Example of a wood replacement window with dimensions, proportions, and details that are generally correct for late-19th and early-20th century double-hung windows. When specifying replacement windows, dimensions of components should generally match the dimensions of the original window.
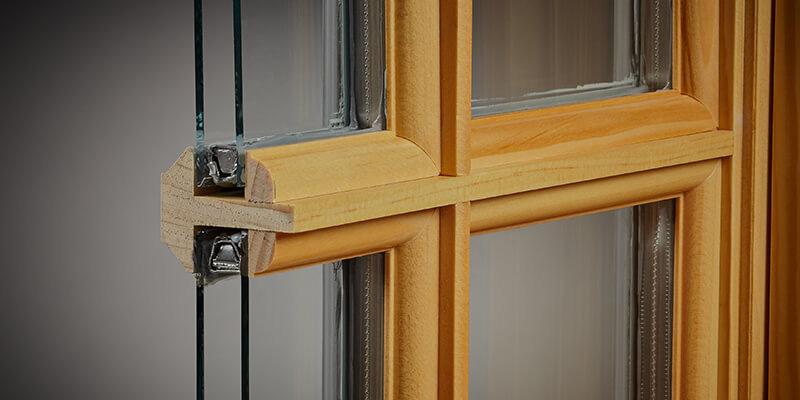
True divided lite (TDL) window, with structural wood muntins and individual pieces of glass (image © Kolbe Windows and Doors).
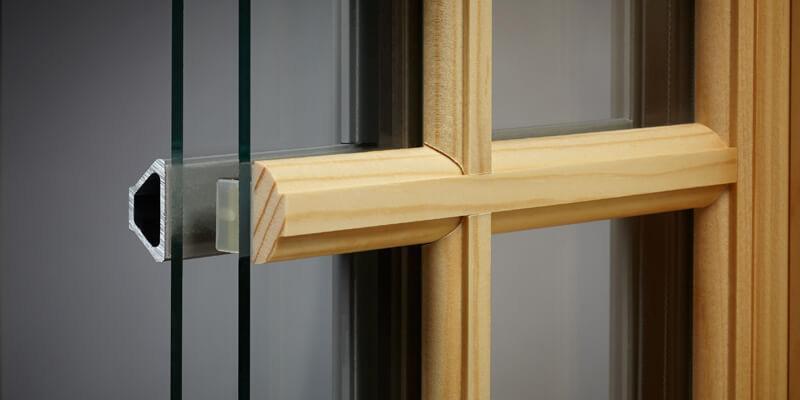
Simulated divided lite (SDL) window, with interior and exterior grilles and solid spacer bars between the panes of the double-pane glass. (image © Kolbe Windows and Doors).
If metal replacement windows are specified with factory-applied color, the color of this window type will be considered by the Heritage Commission for approval.
• Metal windows are prevalent on certain architectural styles from ca. 1930 until the 1970s, including Mission, Spanish Eclectic, Ranch and Split-Level homes, and Art Moderne commercial buildings. If damaged or deteriorated beyond the point of repair, historic metal windows should be replaced with metal windows of the same dimensions and configuration.
• Metal replacement windows may only be used as a replacement for existing historic metal windows.
• If available with factory-applied (baked on or anodized) finishes, color should compliment the overall color scheme of the building and be appropriate to the building’s Period(s) or Significance.
• Original window trim should be preserved and retained. Only badly deteriorated sections should be replaced. The replacement trim should match the original in material and appearance. Decorative window lintels or other details should be added only if there is evidence that they existed originally.
The Heritage Commission encourages the installation of appropriate storm windows to improve the energy efficiency of historic windows.
• Install storm windows where appropriate. Anodized or baked finishes, not plain mill, may be selected for new construction. Wood storm windows are always preferred for rehabilitation work, but metal storm windows may be allowed so long as the color matches the existing windows. Storm windows should fit the window opening exactly, without the use of spacers. Follow the basic lines, proportions, and numbers of glazing elements in selecting storm windows.
• Where practicable, install interior storm windows on the instead of exterior storm windows. Wood storm windows are highly recommended as they are the least likely to transfer heat and cold. Pay careful respect to installation requirements to ensure a reversible installation.
• Window shutters may be installed if there is evidence that they existed on a building historically. Evidence of shutters can include old photographs, remaining hardware, or evidence of where hardware has been removed.
• Wood and steel windows, window frames, and trim exteriors must be painted for weather-resistance.
• Window exteriors should be painted with oil-based primer and opaque, pigment-based coatings rated for exterior application. Color should compliment the overall color scheme of the building and be appropriate to the building’s Period(s) or Significance. Trendy or fashionable color schemes for windows that are not appropriate to the building’s Period of Significance are discouraged.
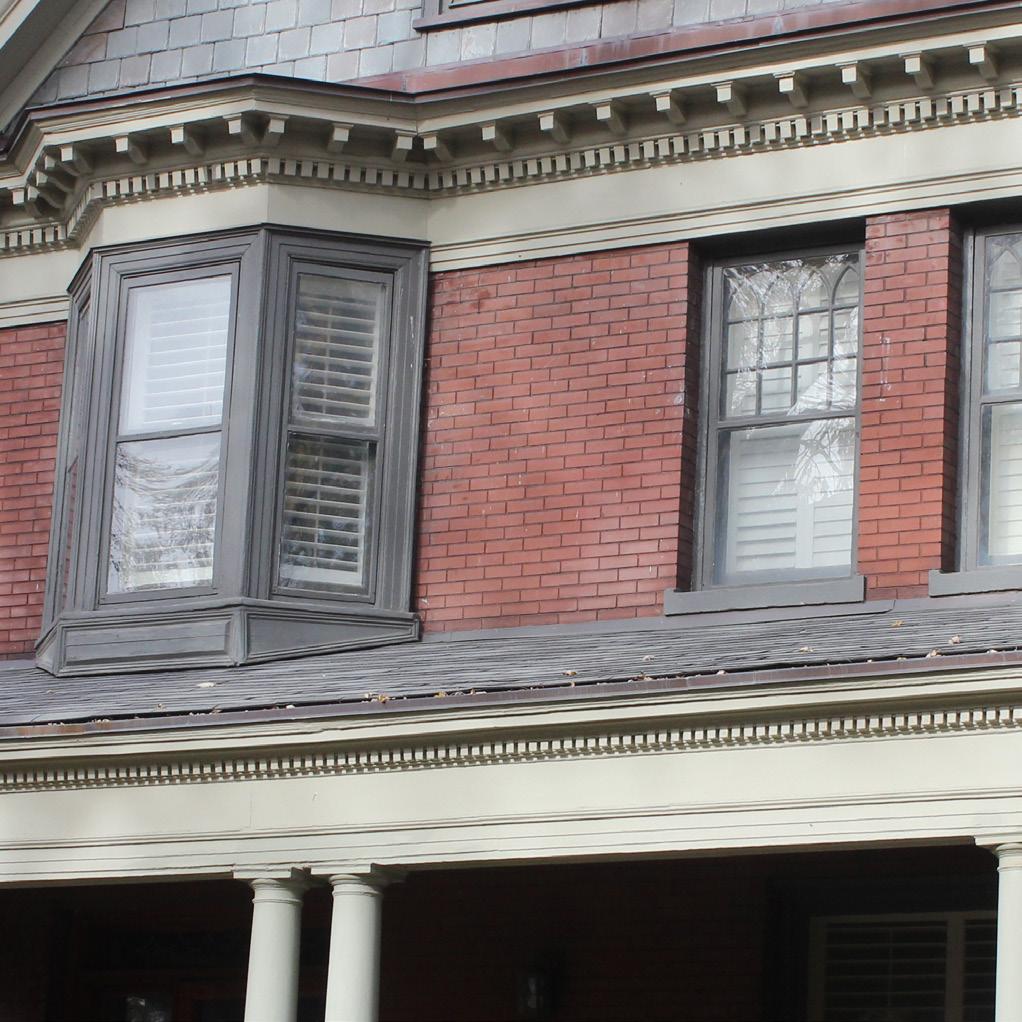
Properly-fitted and proportioned storm windows installed over restored original historic windows.
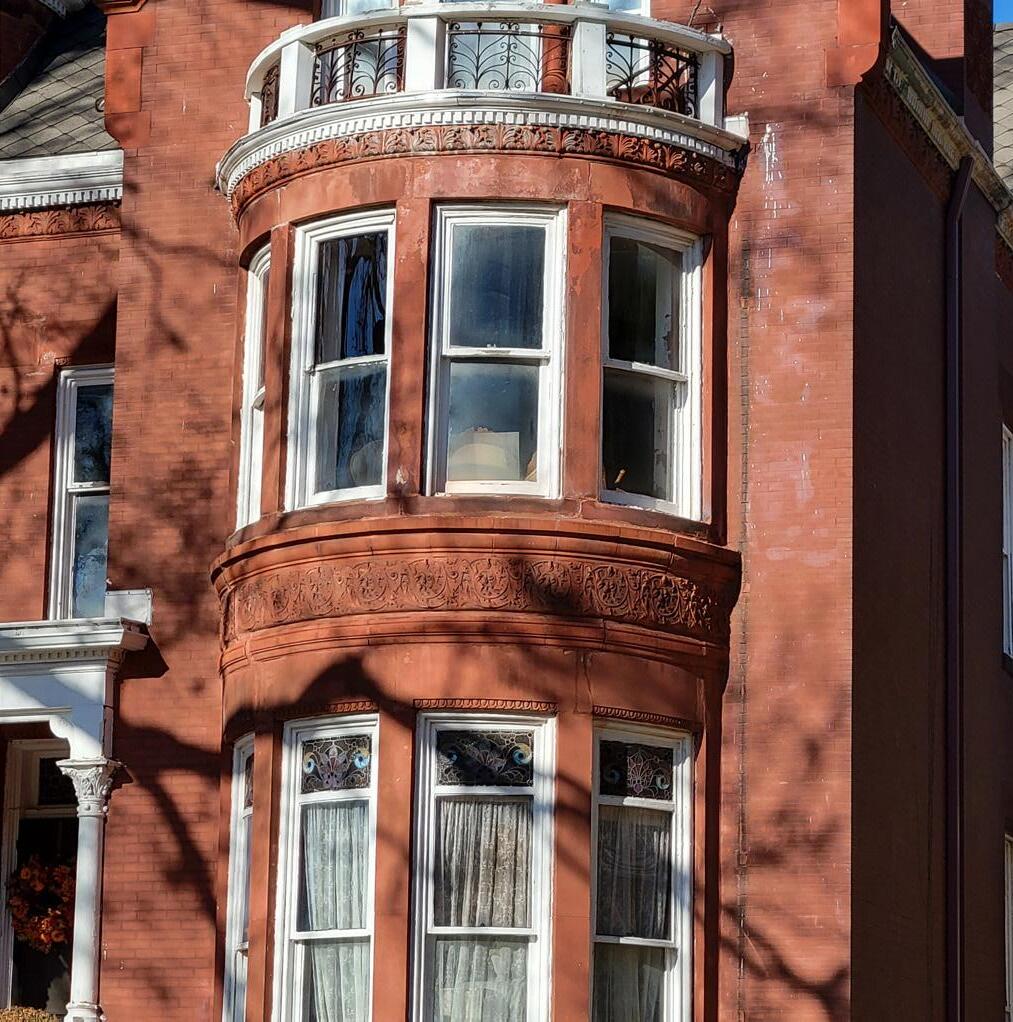
Original windows with radiused sashes matching the radius of the protruding bay.
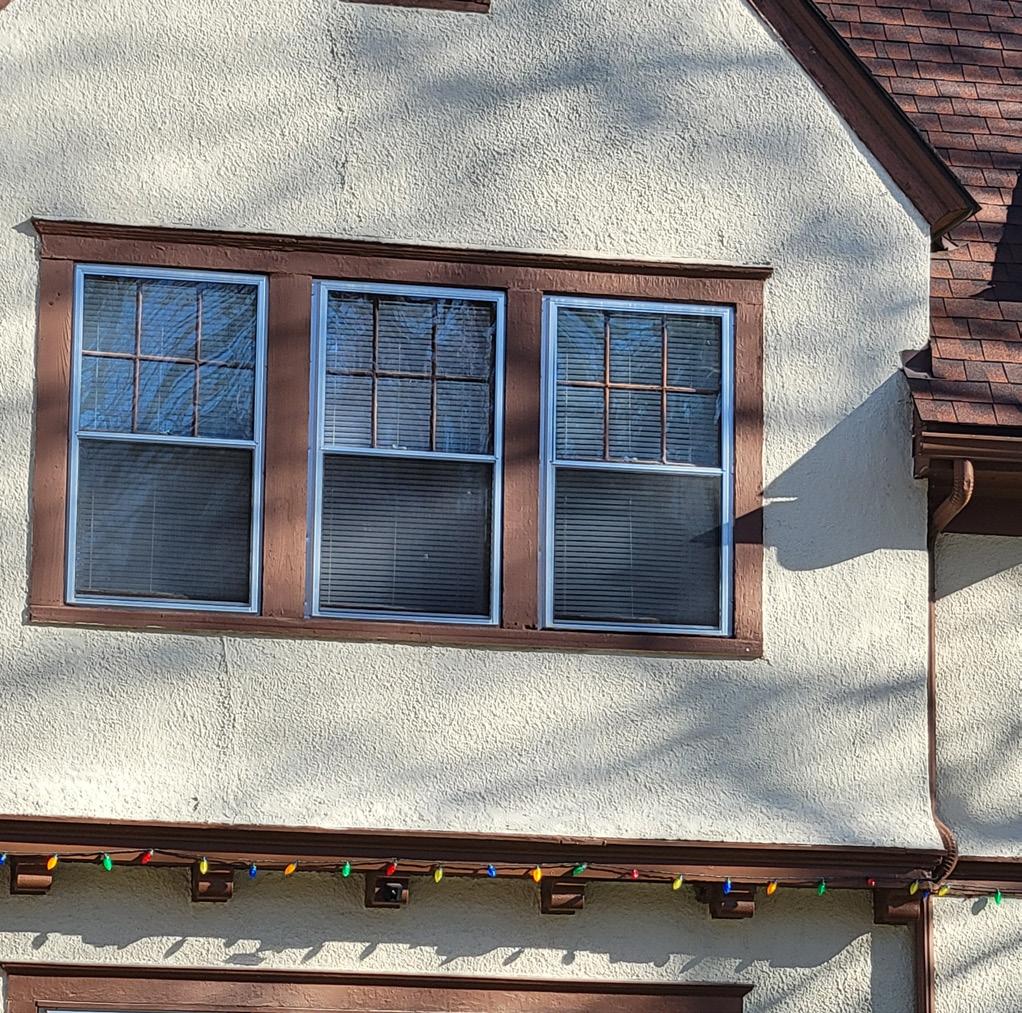
Historic wood windows with two-piece storm windows matching the proportions of the wood windows.
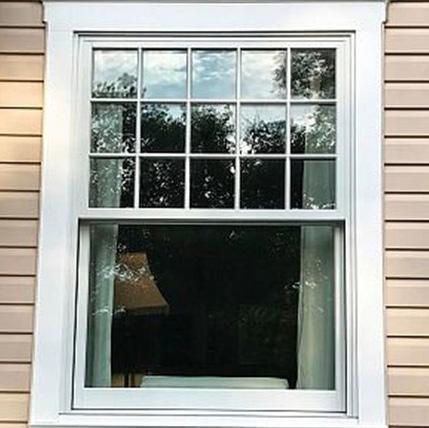
A new wood replacement window demonstrating historically-compatible rail and style dimensions and simulated divided lite (SDL) construction (image © Pella Windows).
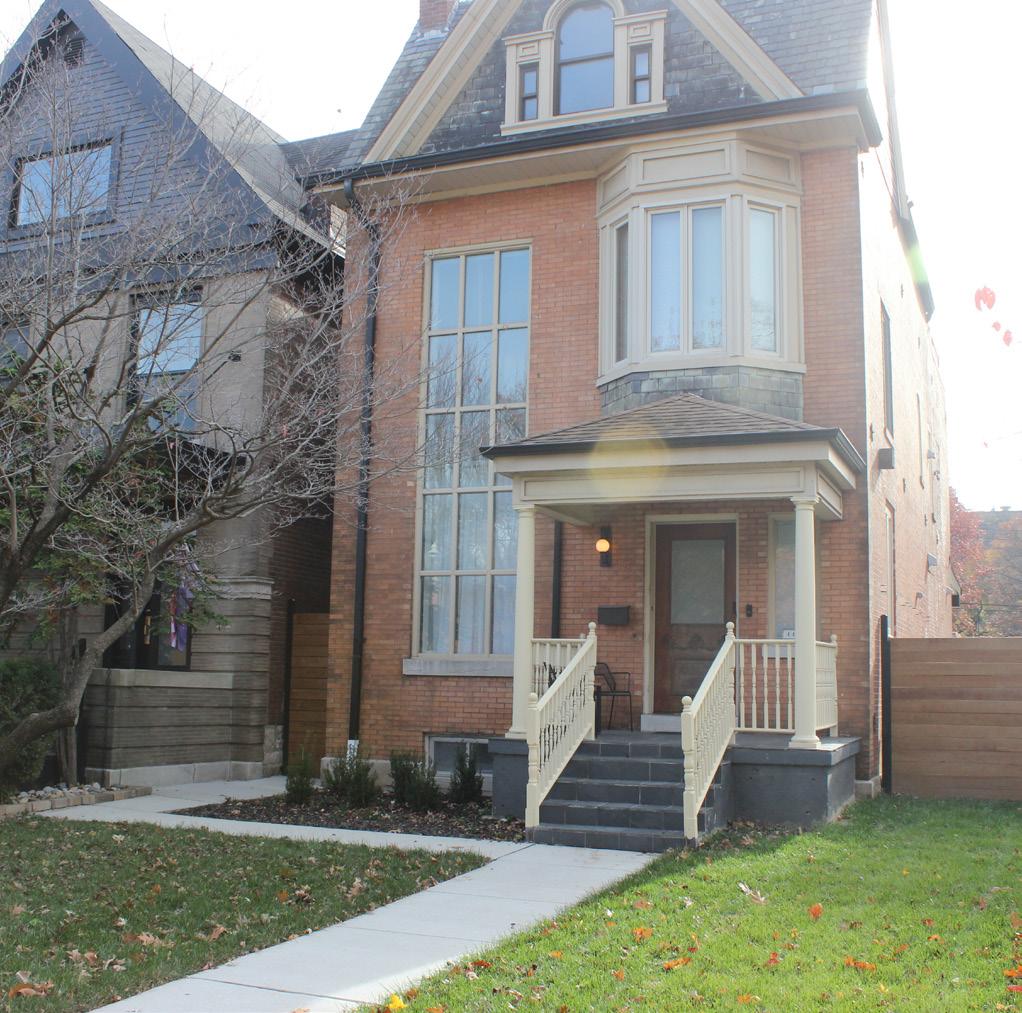
Inappropriate conversion of multiple historic window openings into a single, multi-story opening.
Inappropriate replacement of a historic double-hung window with an inoperable plate glass picture window.
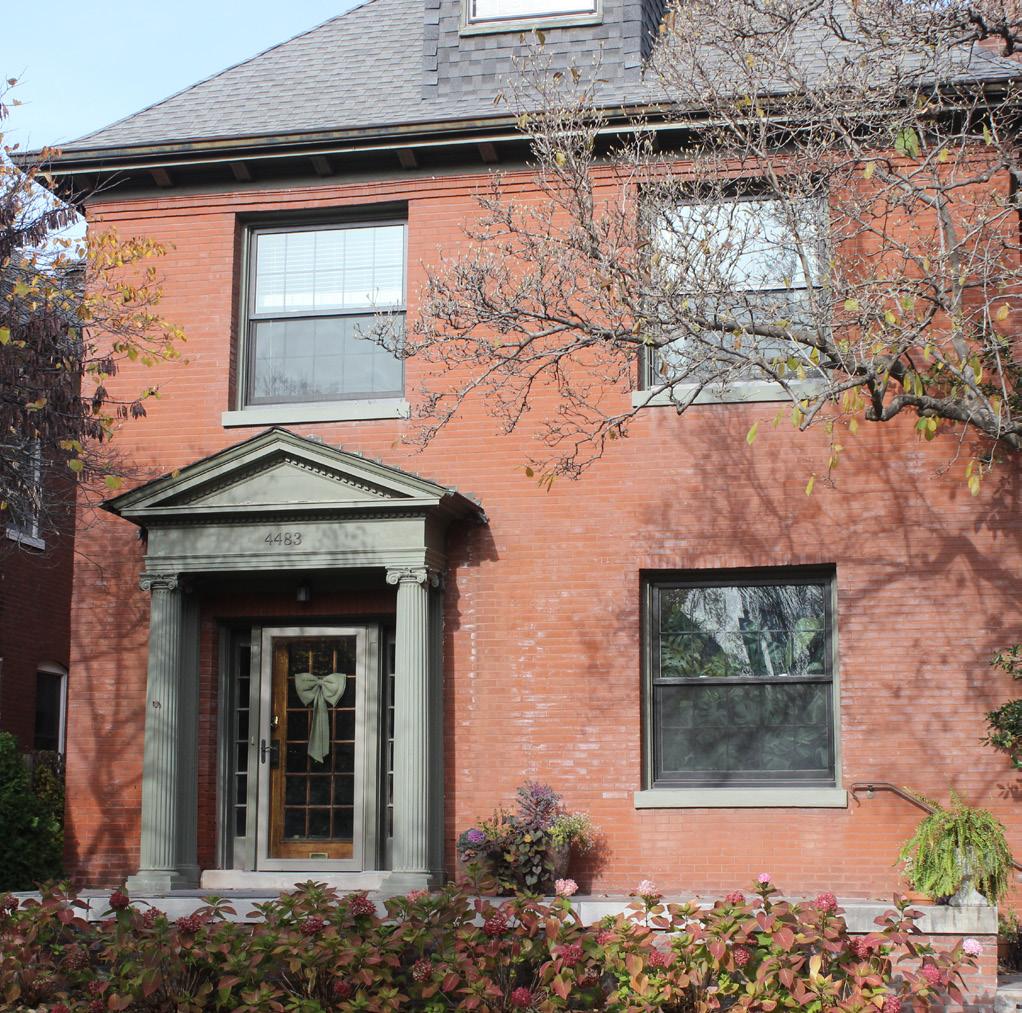
Inappropriate vinyl, double-hung replacement windows with decorative grilles between double-pane glazing.
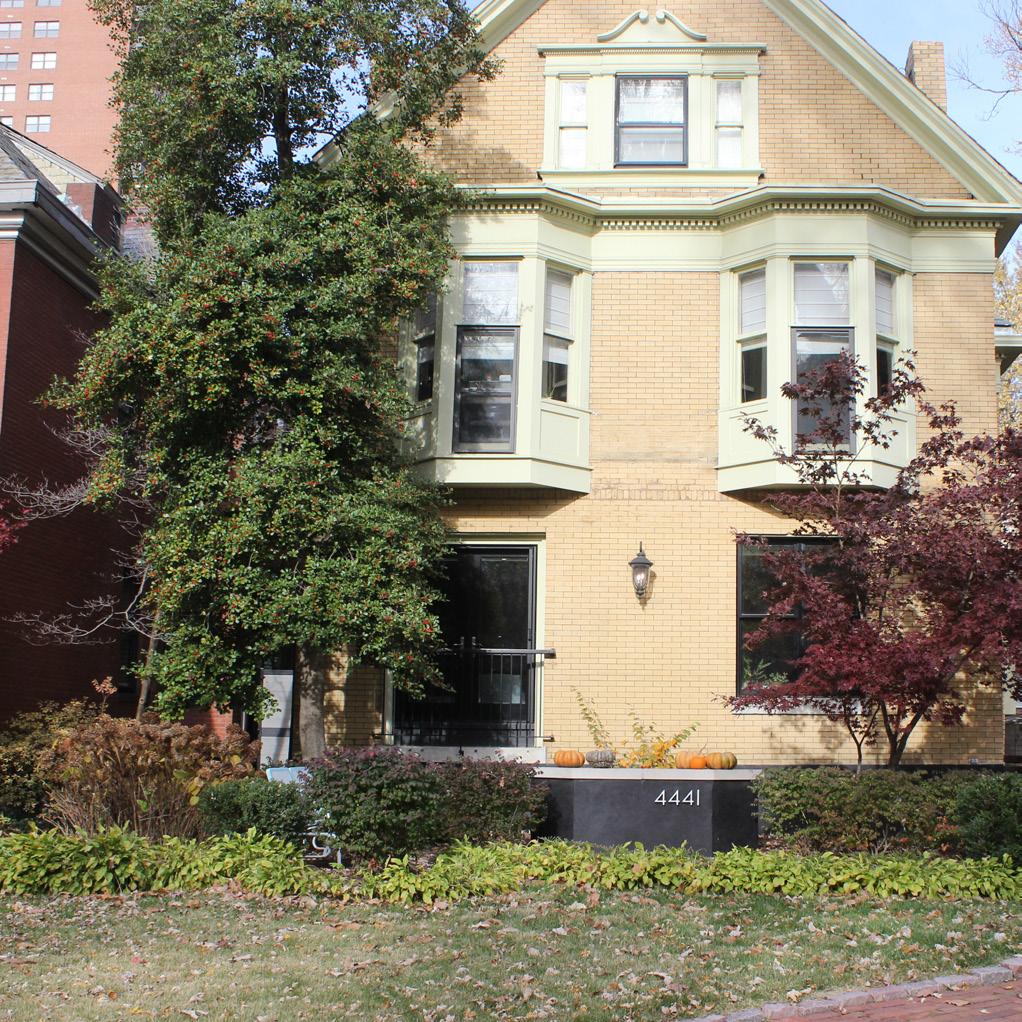
Inappropriate conversion of the primary entry door into a window, altering the character of the front facade.
Preservation Brief 9: The Repair of Historic Wooden Windows.
Preservation Brief 10: Exterior Paint Problems on Historic Woodwork.
Preservation Brief 13: The Repair and Thermal Upgrading of Historic Steel Windows.
Preservation Brief 16: The Use of Substitute Materials on Historic Building Exteriors.
If a property owner wishes to install new windows, the following should be considered before requesting approval by the Heritage Commission:
□ Are replacement windows being proposed due to lack of maintenance of historic wood windows?
□ Are the original windows still present? If so, can they be repaired or restored?
□ Does the new window complement the style of the building? For example, is a casement replacement window appropriate for a bungalow that had 3 over 1 double-hung sash windows?
□ Would the new window match the original style (glass, dimensions, locations, etc.)?
□ Are original windows being removed as a part of the project?
□ Can trim pieces around the windows be retained or repaired?
□ Are storm windows currently installed?
□ Are storm windows going to be installed as a part of the project?
□ Which is most cost-effective, repair or replacement of wood windows?
While building permits are generally not required for the installation of new features on existing porches, approval by the Heritage Commission or administration approval by the Preservation Division must be given prior to the installation of any new features.
Considerations Specific to These Standards
Repair and Rehab
Newly-Installed Features on Existing Porches
Replacement
New Construction
Decks and Exterior Staircases
Appropriate Treatments
Discouraged Treatments
Preservation Brief References
Certificate of Appropriateness (COA) Checklist
Most late nineteenth and early twentieth century houses had open, front porches, and often times a combination of side and back porches. Porches, whether open or screened, were historically used to shade interior spaces, add open living space when temperatures were warmer (such as sleeping porches), provide space for neighborhood interaction, and add architectural definition to a building. When a porch or balcony is removed or altered, not only is the character of the building changed, but the loss can greatly affect the visual rhythm and alignment of the streetscape.
Porches are distinctive from decks in their design, use, features, and Period(s) of Significance. Decks are generally uncommon on historic buildings, and should never be added to historic buildings on facades facing public streets, or other character-defining facades. Below is a partial list of some of the characteristic differences between a porch and a deck:
1. Porches always have a fixed-roof of some type, whereas decks may be covered or uncovered.
2. Porches may be constructed of masonry or of wood, and both types may feature either wood or masonry columns or pillars, wood roofs, and may or may not feature decorative balustrades of masonry or wood, or short walls of masonry. Decks are constructed of wood with wood balustrades, typically utilitarian in design.
3. When constructed of wood, porches utilize typically narrow tongue-and-groove plank flooring (where boards interlock), since porch floors are protected from weather by the porch roof, and flooring is typically oriented perpendicular to the building wall. Decks utilize basic wide plank open decking, with spaces between boards to allow rainfall to drain, and decking oriented parallel to the building wall.
4. Wood porches utilize decorative skirting between the fascia of the porch floor and ground.
5. Porches are typically finished in opaque, pigmented, outdoor-rated paint; decks are typically unfinished or are finished in a transparent or semi-transparent penetrating stain or semi-transparent paint.
Inappropriate addition of screen panels to a historic porch. Screen panels are located to the exterior of railings and balustrades and obscure historic details and design elements.
• Whenever reasonably possible, existing porches should be repaired rather than replaced.
• If deterioration has occurred, repair wood elements first with wood consolidants, epoxy, or chemical fillers before painting or staining. If the deterioration is too extensive to repair, replace heavily deteriorated wood elements in-kind and paint or stain to match the historic materials.
• Do not alter character-defining elements such as replacing turned spindles with straight spindles or replacing wood railings with decorative metal railings. Not only do these alterations drastically change the appearance of the building and result in the loss of architectural integrity, but they create a false sense of the building’s historic appearance.
• Ensure that all repaired and restored elements are properly drained, vented, sealed, and waterproofed to mitigate future damage.
• Regular maintenance of porches and balconies is necessary, because they are exposed to weather and thus, are extremely vulnerable to the elements.
• Avoid removal and replacement of original stone or concrete steps; and avoid replacing original wood floors with concrete. When possible, traditional methods of repair should be used to restore these elements for use.
• Unless photographic and/or physical evidence exists to the contrary, front and side porches may not be enclosed with glass, glazed windows, or any other solid element. Rear porch enclosures are approved on a case-by-case basis.
• Porches may be enclosed on a case-by-case basis with fixed screen panels, provided that the panels are mounted to the inside of porch columns, pillars, balustrades, railings, and/or handrails. Fixed screen panels may not obscure or otherwise alter extant historic details of the porch.
• Porches may have movable curtains or screen curtains, provided that such additions do not obscure or otherwise alter existing historic details of the porch.
• The enclosure of a front porch, or a second-story sleeping porch located on a primary elevation, is not considered appropriate. Enclosing side and rear porches in a way that will damage existing historic fabric should be avoided.
• Light fixtures and/or ceiling fans may be installed on the porch ceiling, provided that such additions do not obscure or otherwise alter extant historic details of the porch.
• If required by building code, safety elements such as handrails, railings, and/or balustrades may be added in a manner harmonious with the existing design, architectural style, and period of significance of the porch. Additionally:
a. Wood porches may use only wood handrails, railings, and/or balustrades.
b. Masonr y (brick and/or stone) porches may use either wood or metal handrails, railings, and/or balustrades.
c. The design of safety elements conforms with examples from similar buildings of the same architectural style and period of significance.
d. Handrails and guardrails of threaded pipe or other utility materials are not permitted, unless installed during a period of significance.
• Decorative and/or ornamental elements (not including lighting and ceiling fans) should not be added if they did not originally exist.
• If an existing porch is original or is a contributing modification and has deteriorated beyond feasible repair, the porch should be replaced according to a design that matches the existing porch.
• The replacement of missing original porches and balconies is highly encouraged. Photographic documentation and physical evidence should be used in the design and reconstruction of missing elements.
• When replacing wood porch flooring, use narrow-plank tongue-and-groove flooring matching the dimensions of the original flooring and directional orientation of the flooring (typically perpendicular to the building wall).
• The use of alternative and composite materials (such as Trex or Azek) for porch flooring, trim, and details is generally discouraged, and will be evaluated by the Heritage Commission on a case-by-case basis. When using alternative and composite materials they should match the original porch details in texture and all dimensions.
• A front porch and/or side porch may not be installed on a building that did not originally feature a front and/or side porch. Caution should be taken to locate new porches on non-character defining elevations and to minimize damage to the historic building.
• If a building was originally built with a front, side, and/or rear porch, and the porch was subsequently removed, the porch should be reconstructed according to the following standards:
a. If photographic documentation of the original porch exists, the new porch should be designed to match the original porch according to the photographic documentation.
b. If no photographic documentation exists, the overall dimensions and configuration of the porch (i.e. roof profile, attachment to façade, etc.) should be determined through physical inspection of the façade and the design of the porch should con-
form to extant examples from similar buildings on the block or in the area of the same architectural style and period of significance.
• Newly installed rear porches should be designed to compliment the scale of the existing building and to conform with examples from similar buildings of the same architectural style and period of significance.
• When constructing a new wood porch, use narrow-plank tongue-and-groove flooring and orient the flooring perpendicular to the building wall.
• Side and rear porches should not dominate the size, scale, and design of the front porch.
• Decks (porches without roofs) and exterior staircases are generally not used on historic buildings and are never appropriate additions on the primary façades.
• Some historic buildings utilized exterior staircases for fire egress (fire escapes). While these egress methods no longer comply with the building code, historic fire escapes should be preserved when possible.
• Locate decks and exterior staircases on the rear façade of building, or on a non-primary side façades. Decks and exterior staircases should be unobtrusive and generally not-visible from the primary façade.
• Do not allow decks and exterior staircases to dominate the facade. Keep decks and exterior staircases simple in design and in proportion to the building and neighboring decks and staircases.
• Decks may be constructed of a wood superstructure with wood decking and railings, or of structural metal with wood decking and metal railings. Decks should be of simple and functional form and design appropriate to the building to which they are attached.
• Wood elements should be stained with an opaque stain or painted to blend with the colors of the building.
• Metal elements should be painted in dark neutral colors to blend with the colors of the building.
Above: Appropriate new rear porch, utilizing details and materials that are appropriate to the Period of Significance of the structure (image
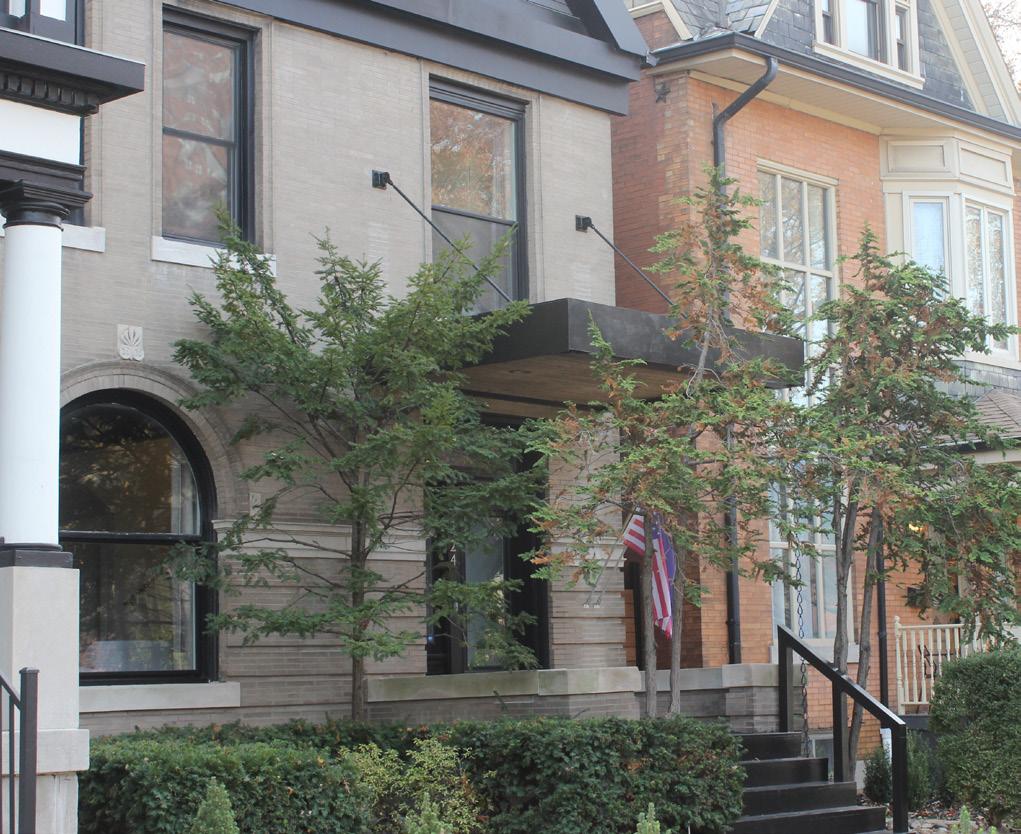
Repaired porch preserving existing historical elements with added code-compliant balustrade utilizing details appropriate to the Period of Significance.
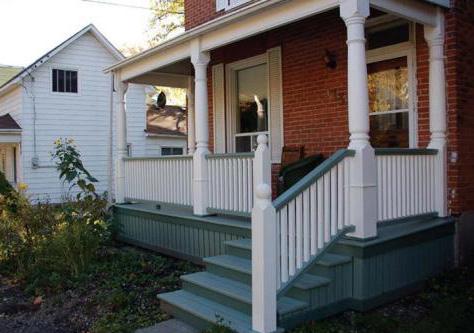
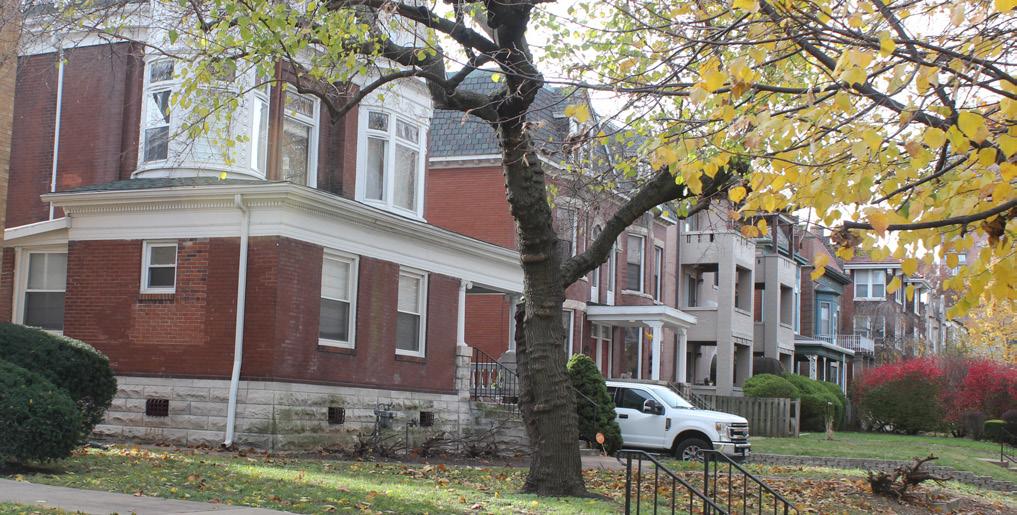
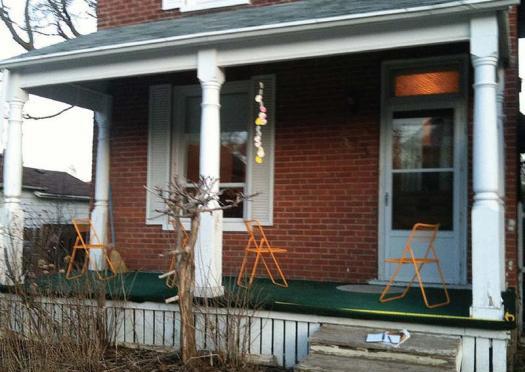
Preservation Brief 10: Exterior Paint Problems on Historic Woodwork.
Preservation Brief 16: The Use of Substitute Materials on Historic Building Exteriors.
Preservation Brief 35: Understanding Old Buildings: The Process of Architectural Investigation.
Preservation Brief 45: Preserving Historic Wooden Porches.
If a property owner wishes to replace or modify an existing porch, or install a new porch on a historic building, the following should be considered before requesting approval by the Heritage Commission:
□ Is the original porch deteriorated beyond repair, or can elements and details of the porch be repaired or replaced in-kind?
□ If alternative materials are proposed to replaced deteriorated elements (flooring/decking, fascia, details, etc.), do they match the original materials in size, profile, and texture?
□ If new elements are proposed to be added or retrofitted to an existing porch (screen panels, railings, etc.), does installation of these preserve historic features and details?
□ If a new porch is to be added to replace a porch that was removed, does the new porch match the design of original porch, as determined by photographic or physical evidence?
□ If photographic or physical evidence of a removed porch does not exist, does the design of the new porch match the architectural style and period of significance of the building?
□ If a new porch is to be added to a building, will it be added on a rear facade or facade that does not face a public street?
□ If a deck is to be added to a building, will it be added on a rear facade or facade that does not face a public street?
□ If a historic fire escape or other exterior staircase exists, has the Preservation Division been consulted to determine whether it is historically significant and should be retained and restored?
Considerations Specific to These Standards
Repair and Rehab Replacement
Appropriate Treatments
Discouraged Treatments
Preservation Brief References
Certificate of Appropriateness (COA) Checklist
A carriage house is an outbuilding that was originally built to house a horse-drawn carriage and tack. After the popular availability of automobiles, the term “carriage house” has been used interchangeably with “garage” to describe a fully-enclosed, detached garage. The detached carriage house is typical of homes that were built in the Truman Heritage District prior to ca. 1930. Unfortunately, many of these original carriage houses have been demolished due to deterioration or because they were deemed functionally obsolete due to their size. The loss of these carriage houses represents a significant loss of historic fabric.
The Heritage Commission encourages the repair and restoration of historic carriage houses. In cases where the property owner requires additional storage or other function beyond that which the historic carriage house provides, the property owner should work with the Heritage Commission and Preservation Division on a creative solution that does not require the replacement of the historic carriage house.
• Unless a carriage house is damaged or deteriorated beyond reasonable structural repair, it should be retained and preserved. Damage to carriage house sheathing, siding, or roofing material that can be repaired or replaced is not considered sufficient grounds for demolition.
• When repairing a carriage house, siding, roofing materials, trim, windows, and doors should be repaired or replaced with in-kind materials.
• Alternative materials will be considered by the Heritage Commission on a case-by-case basis. Alternative materials should match the existing materials in size, dimension, profile, texture, and surface finish, according to the guidelines for each material and/or finish in this chapter.
• If the owner requires more covered and/or enclosed storage than the existing carriage house provides, the Heritage Commission will work with the owner on creative solutions to provide additional storage while retaining the historic carriage house.
• Alternative materials will be considered by the Heritage Commission on a case-by-case basis. Alternative materials should match the existing materials in size, dimension, profile, texture, and surface finish, according to the guidelines for each material and/or finish in this chapter.
• The Heritage Commission will consider replacement of historic carriage houses on a case-by-case basis.
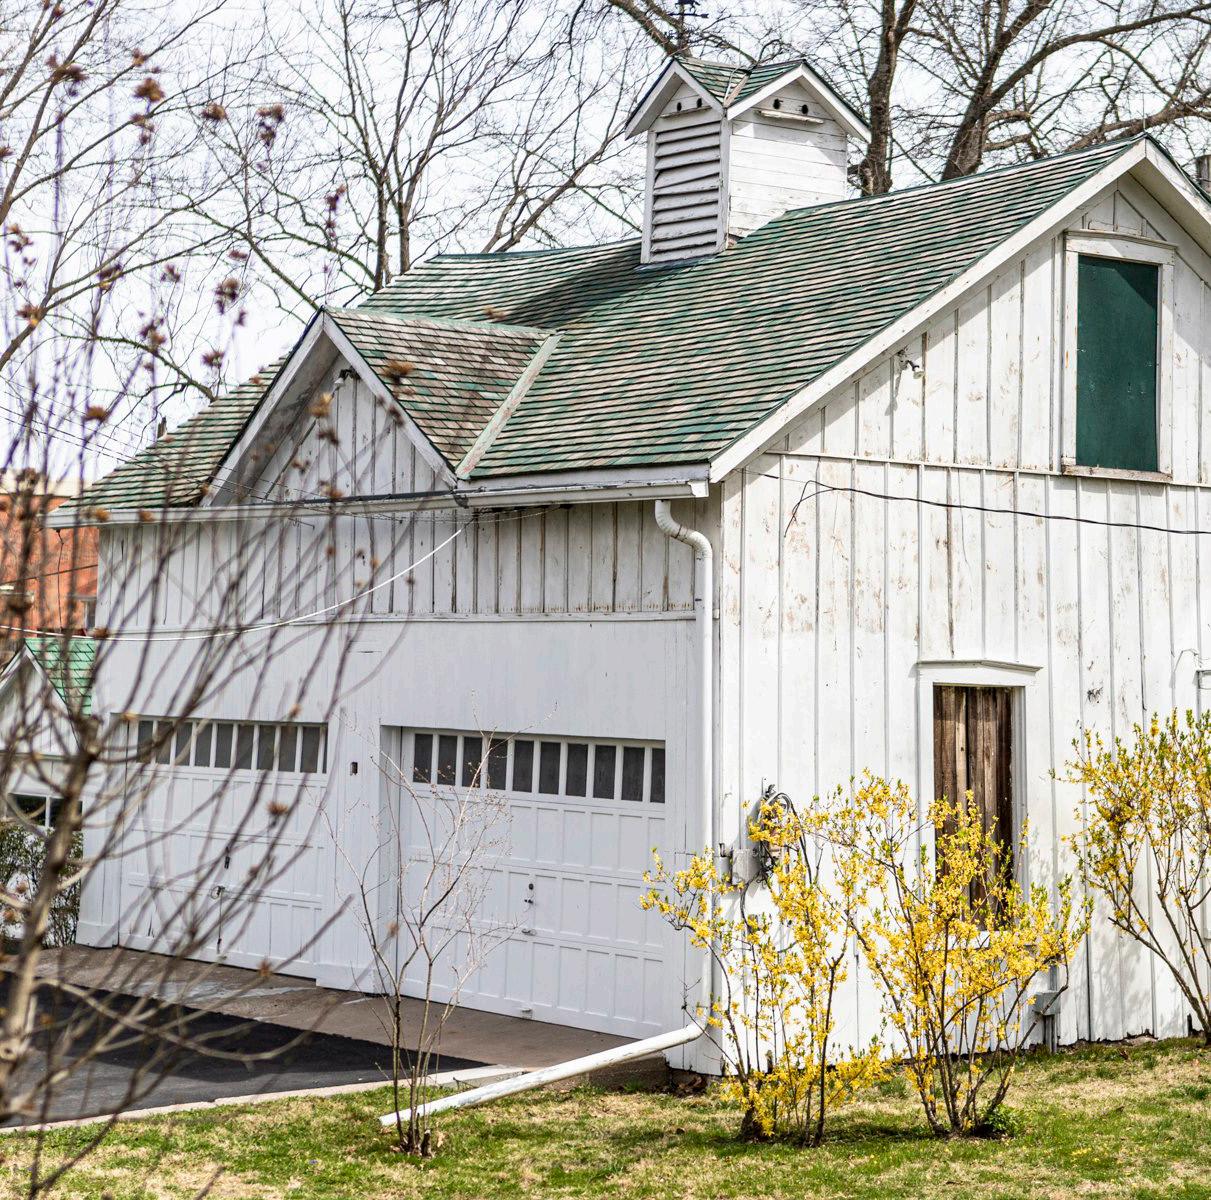
preserved
A historic carriage house in Independence, renovated for use as a short-term rental (image © Arley’s Place).
A carriage house converted into a residence; infill of historic carriage doors in inappropriate and undesirable.
An undesirable replacement of a former carriage house with a non-historic, modern “garage-port”.
Preservation Brief 2: Repointing Mortar Joints in Historic Masonry Buildings.
Preservation Brief 4: Roofing for Historic Buildings.
Preservation Brief 15: Preservation of Historic Concrete.
Preservation Brief 43: The Preparation and Use of Historic Structure Reports.
Preservation Brief 47: Maintaining the Exterior of Small and Medium Size Historic Buildings.
If a property owner wishes to replace or modify an existing carriage house, the following should be considered before requesting approval by the Heritage Commission:
□ Is the original carriage house deteriorated beyond repair, or can elements and details of the carriage house be repaired or replaced in-kind?
□ If alternative materials are proposed to replace deteriorated elements (siding, roofing, doors, details, etc.), do they match the original materials in size, profile, and surface texture?
□ If you wish to demolish and replace an existing carriage house with a larger garage, have you met with the Heritage Commission and discussed other options for gaining additional covered and/ or enclosed storage space?
Repair and Rehab
Replacement
Lighting
Appropriate Treatments
Discouraged Treatments
Preservation Brief References
Certificate of Appropriateness (COA) Checklist
All privately owned signage or markers being placed on a historically designated property must comply with Section 14-504 of the City’s Unified Development Ordinance (UDO), and be approved by the Heritage Commission prior to installation.
• Retention of historic signage that conveys the current use of the building is always encouraged.
• Historic signs should be repaired in such a way that they utilize traditional materials.
• Signage which has been painted on the side of the building may be considered historic; consult with the City of Independence prior to its removal.
• Existing historical markers and plaques should be kept clean and in good repair.
• Use signs that are appropriate in size, scale, and color to historic buildings. Signs should be made to a pedestrian scale.
• Sign materials should complement those found on the related building, or that are common within the neighborhood. Metal, stone, or painted wood signs are generally most appropriate.
• Freestanding signs should be mounted fairly low to the ground, including on landscaped bases, to avoid blocking the pedestrian’s view.
• Avoid signs that are too large in relationship to the building or that obscure character-defining elements.
• Avoid roof-mounted signs.
• Historical markers or plaques provided by the National Park Service (NPS) for National Historic Landmarks may be placed on any property so designated.
• Historical markers or plaques provided by the City of Independence for locally-designated landmarks may be placed on any property so designated.
• Other historic markers or plaques (such as a plaque indicating the date that a structure was built) for non-designated landmarks will be reviewed on a case-by-case basis by the Heritage Commission.
• Internally illuminated signs and modern materials such as plastic are generally not appropriate.
• Accent lighting used to illuminate signs should be installed in a manner that minimizes visibility of the light fixture and does not result in glare.
• Up-lighting of monument signage should not spill onto neighboring properties.
Appropriate Discouraged
Appropriate vintage style street signs with Truman Heritage District branding.
Appropriate historical marker sign.
Ensure that signs remain in good condition and legible (image © Wikimedia Commons).
Remove graffiti and other damage if incurred (image © The Burg Magazine).
Preservation Brief 25: The Preservation of Historic Signs.
Preservation Brief 35: Understanding Old Buildings: The Process of Architectural Investigation.
If a property owner wishes to replace or modify an existing sign or historic marker, or install a new sign or historic marker on a historic building, the following should be considered before requesting approval by the Heritage Commission:
□ Is the sign original to the building?
□ Does the sign convey the use of the building in a way that is subordinate to the buildings historic design and character?
□ Is the sign made of materials that are common in the district and match the architectural style and period of significance of the building.
□ Is the sign located on a portion of the building in which signage is typically located?
□ If the sign is painted on a masonry wall, has the owner met with the Preservation Division to determine in the sign is historically-significant?
□ Does a historic marker convey relevant information about the building, and is its design and placement complimentary to the design of the historic building?
□ Does the sign conform with the City of Independence’s Unified Development Ordinance (UDO)?
Location and Visual Impact
Appropriate Treatments
Discouraged Treatments
Preservation Brief References
Certificate of Appropriateness (COA) Checklist
• Minimize the visual impact of mechanical and electrical equipment. Utilize lattice panels, historically-appropriate fencing, and plantings to screen utilities, as appropriate for the building type and period of construction.
• Screen utility connections and boxes such as telephone, gas meters, and cable.
• Locate service and mechanical equipment and standpipes on non-primary facades so that they will not impact the historic primary facade materials.
• Do not install through-wall air-conditioning units on the primary facade of the building or in locations visible from the public right-of-way.
• Avoid cutting channels into or removing historic facade materials to install utility lines or mechanical equipment including exhaust hood fans or dryer vents.
• Do not locate utility lines or utility boxes on the front facade of a building or in the front yard of a residence.
Appropriate Discouraged
Example air conditioning condenser screen.
Example air conditioning condenser screen.
Avoid locating utility connections on or near the front facade of the building (image © The Spruce).

Do not bracket equipment, including air conditioner condensers, off of building walls.
Preservation Brief 3: Conserving Energy in Historic Buildings.
Preservation Brief 24: Heating, Ventilating, and Cooling Historic Buildings: Problems and Recommended Approaches.
If a property owner wishes to install, replace, or modify mechanical equipment or utility service connections on a historic building, the following should be considered before requesting approval by the Heritage Commission:
□ Is the mechanical equipment and/or utility service connection located on a facade that does not face a public street?
□ Is the mechanical equipment and/or utility service equipment screened from view and sensitive to the design of the building and appropriate to its style?
□ Is the mechanical equipment and/or utility service located or mounted in a way that preserves historic details or features and makes minimal modifications to the building?
While building permits are not required for installation of new light fixtures, approval by the Heritage Commission must be given prior to their installation.
Repair, Restoration, and Retrofitting
Replacement
New Light Fixtures
Appropriate Treatments
Discouraged Treatments
Preservation Brief References
Certificate of Appropriateness (COA) Checklist
• Whenever present, historic lighting fixtures should be retained and repaired.
• Do not permanently remove or alter original lighting fixtures. Do not replace historic fixtures with new fixtures unless historic fixtures are no longer repairable.
• Repair and maintain historic exterior fixtures whenever possible. When required, replacement in-kind, or with fixtures that maintain a similar material appearance, design, and scale is always recommended.
• Finishes of original fixtures should be maintained. Retention of traditional gas lights is encouraged, and often can be successfully converted to electric.
• When missing or damaged beyond repair, historic lighting should be replaced with historically-appropriate lighting.
• Choose a fixture that is appropriate for the building age. A Colonial-style carriage lamp, for example, on a 1930’s bungalow is inappropriate. Without documentation, it is not appropriate to install period light fixtures that will create a false sense of history.
• Make sure the fixture is an appropriate size for the building. Do not place a very large fixture next to a secondary entrance or a very small, residential type fixture next to a storefront.
• The most appropriate place for entry lighting is on the ceiling of the entry vestibule. A simple ceiling mounted or pendant fixture is most appropriate.
• Building and site lighting can enhance both building appearance and environmental safety, so long as lighting is contextually- and historically-sensitive.
• When considering introducing lighting to a property, consider minimal fixtures on the front of the property. Lighting should be introduced to ensure that pathways and driveway are safe to pedestrians.
• New yard and street light fixtures should be oriented toward the pedestrian in terms of scale, location, and intensity of illumination.
• All exterior lighting should be directed to prevent light spillover onto adjacent properties or onto the street or alley. Whenever possible, consider low-level lighting sources.
Historic reproduction porch lights, which are stylistically- and size-appropriate to the home (image © Terra Lumi).
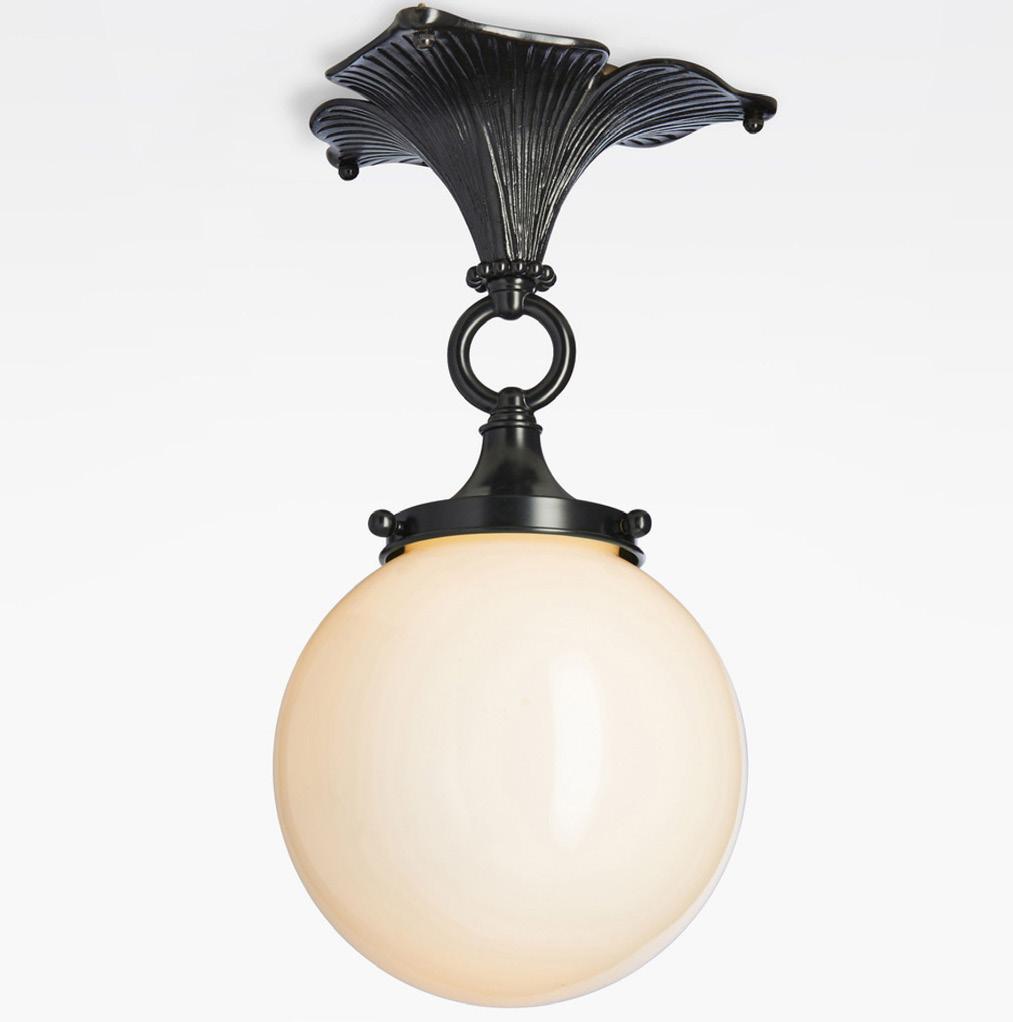
Historic reproduction porch light, which would be appropriate for a variety of Victorian-era homes (image © Rejuvenation).
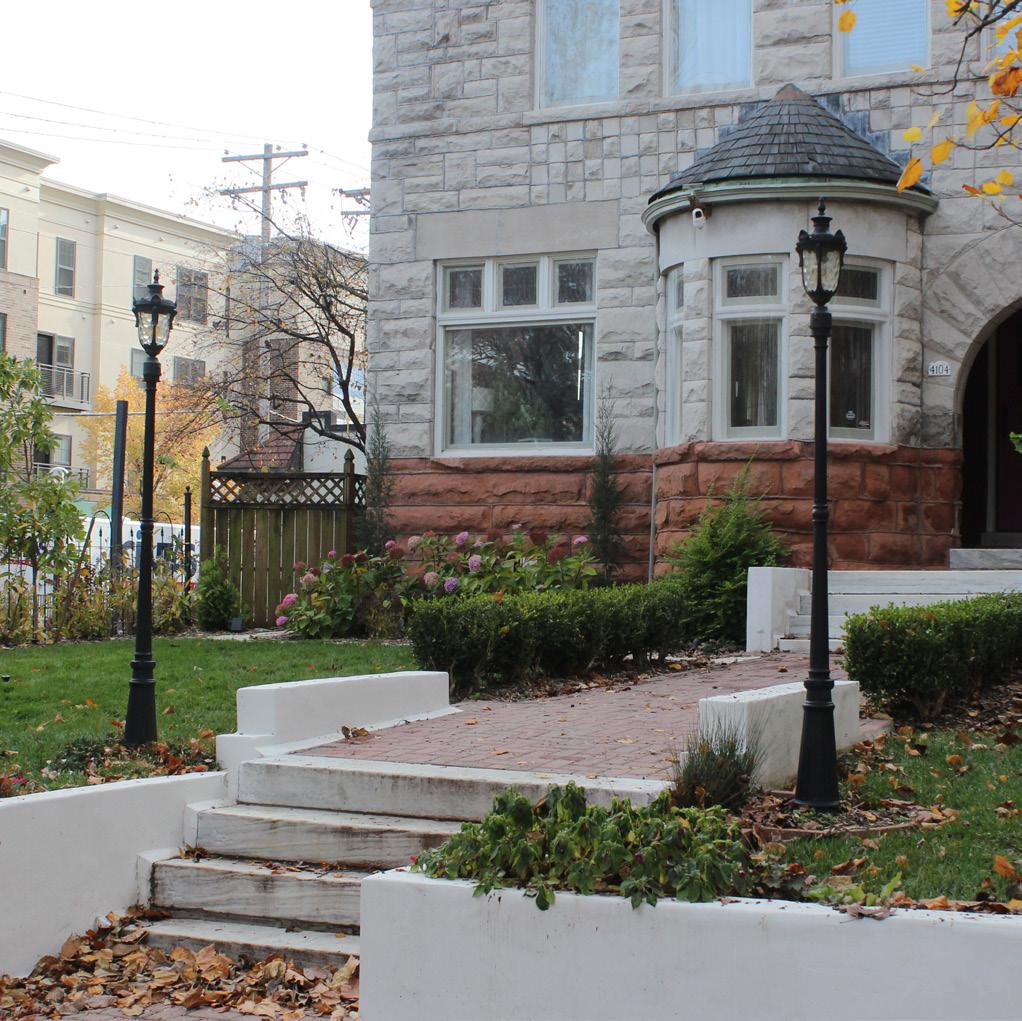
Inappropriate entryway lighting, consisting of miniaturized streetlight-style fixtures.
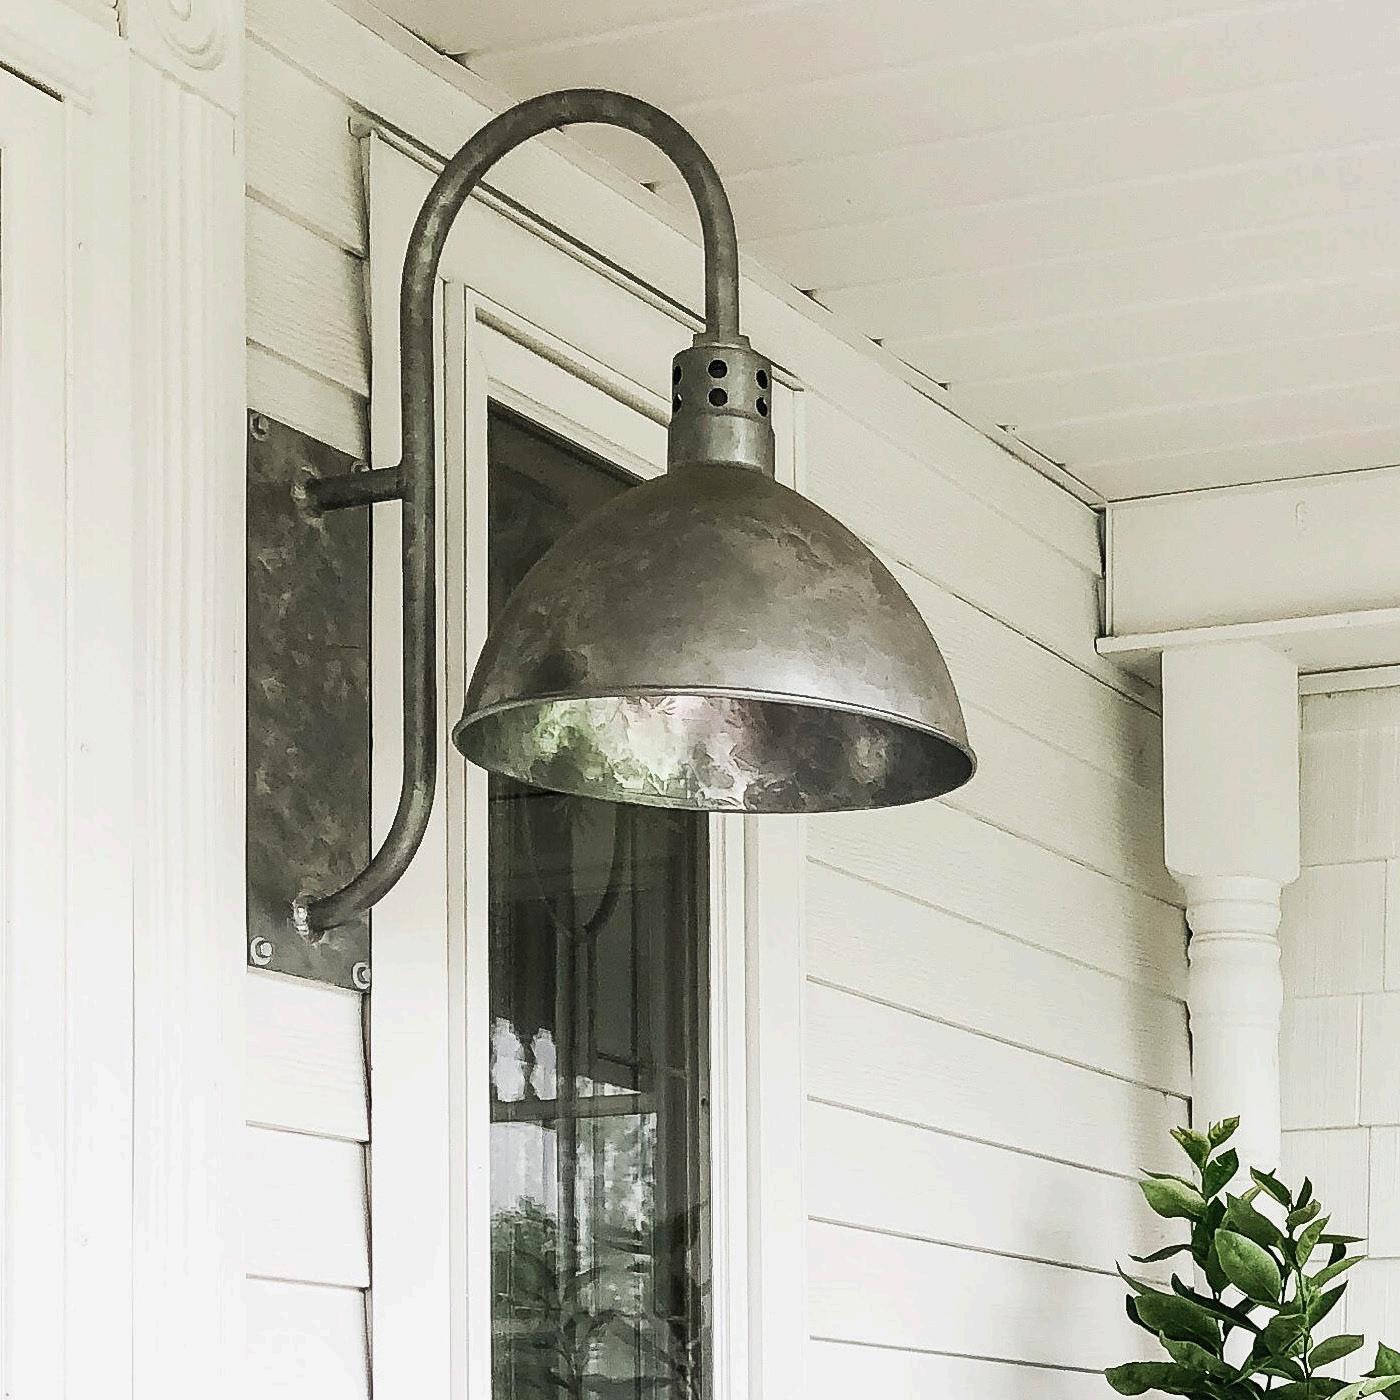
Inappropriate industrial-style porch light that is the wrong style and wrong size for the building (image © Barn Light Electric).
Preservation Brief 35: Understanding Old Buildings: The Process of Architectural Investigation.
If a property owner wishes to install, replace, or modify lighting fixtures on a historic building, the following should be considered before requesting approval by the Heritage Commission:
□ Have efforts been made to repair and/or retrofit historic lighting fixtures, if present?
□ Is the new lighting fixture of a design and size that is appropriate to the design of the building and appropriate to its style?
□ Is the new lighting fixture located or mounted in a way that preserves historic details or features and makes minimal modifications to the building?
□ Does the design of the fixture and its placement minimize light spillover onto adjacent properties?
A. Accessibility
B. Retaining Walls
C. Fences
Accessibility Considerations
Preservation Brief References
With the 1990 Americans with Disabilities Act (ADA), it became necessary to address the needs of the physically disabled for all commercial and publicly accessed properties. While some limited exceptions for historic buildings can be made by the City’s Building Official, all publicly accessed buildings must comply with ADA regulations.
It is highly recommended that a property owner contact the Building Department prior to the initiation of any change of use or historic building restoration to ensure compliance.
Review by the Heritage Commission does not connote compliance with ADA regulations.
For a complete list of requirements, consult the most current ADA Standards for Accessible Design and the current building code of the City of Independence.
Note: These are guidelines and are not intended to be complete descriptions of the code requirements. Please consult the local building code and the ANSI/ ADA Accessibility Guidelines for a full listing of code requirements.
Preservation Brief 32: Making Historic Properties Accessible.
While building permits are not required for the installation of retaining walls (under 48” in height), approval by the Heritage Commission must be sought prior to their installation.
Considerations Specific to These Standards
Repair Replacement
New Retaining Walls
Appropriate Treatments
Discouraged Treatments
Preservation Brief References
Certificate of Appropriateness (COA) Checklist
Retaining walls are often dominant visual elements of the streetscape. Retaining walls help to define the public realm and offer visual alignment along a street. In the Truman Heritage District and at locally-designated properties in Independence, traditional masonry retaining walls are very common. Rough-cut or fractured-face limestone block is the most common masonry material.
• Provide for periodic inspection and repair as needed. Winters and wet weather are extremely hard on all retaining walls.
• Ensure proper runoff for rainwater, especially from gutter downspouts. Prevent damaging plants from penetrating retaining walls with their root systems.
• Make repairs so the pattern of material and the masonry joints match the existing. Inappropriate methods of repair can sometimes do more harm than good.
• When patching or parging stone walls, it is critical that a straight Portland cement mix not be used as the patching material. A cement mix containing more than 20% Portland will not provide the elasticity needed during freeze/thaw cycles, and the resulting penetration of moisture will accelerate deterioration of the wall structure.
• Using excessive force during repair efforts can result in additional damage to historic stone materials. If concrete was previously used to parge a masonry wall, it is best to let weathering loosen the parging rather than use a jack hammer or hammer and chisel to remove it.
• The use of modern materials in replacement of existing retaining walls is strongly discouraged. Railroad ties, landscape timbers, and new cast stone units are not appropriate for street-front use on historic properties or within historic districts.
• If replacement is necessary due to the condition of the wall, first consideration should be given to dismantling and rebuilding the wall using the original material and method of construction.
• New retaining walls are discouraged, but will be considered by the Heritage Commission on a case-bybase basis.
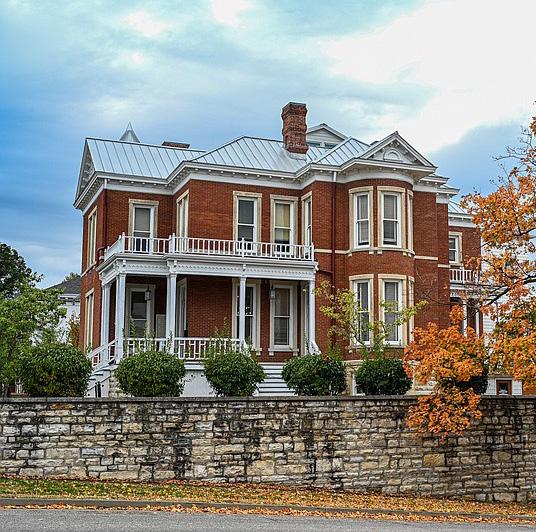
Retaining walls should be preserved and repaired whenever possible, and they are often defining features of the building and lot.
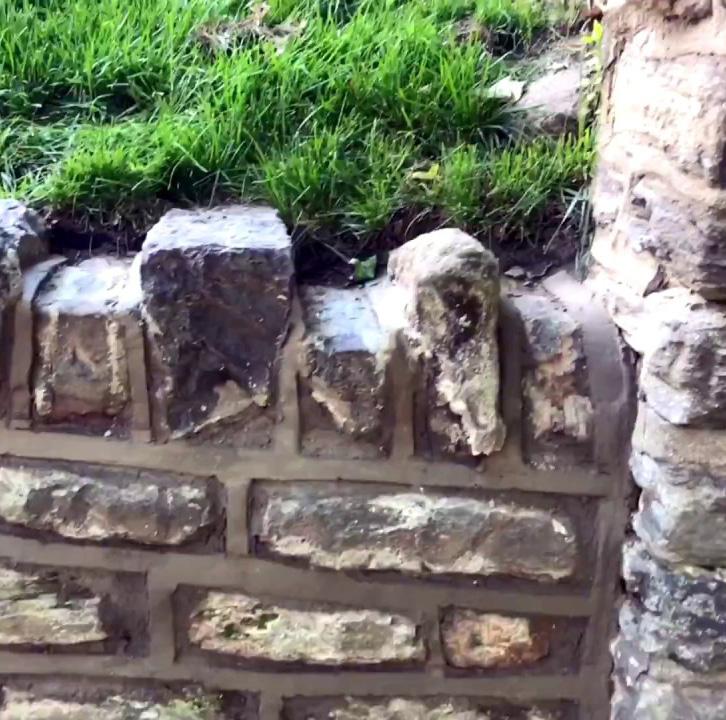
Repair and repoint stone or brick masonry retaining wall in place, the same as building masonry repair and repointing (image © Dependable Concrete).
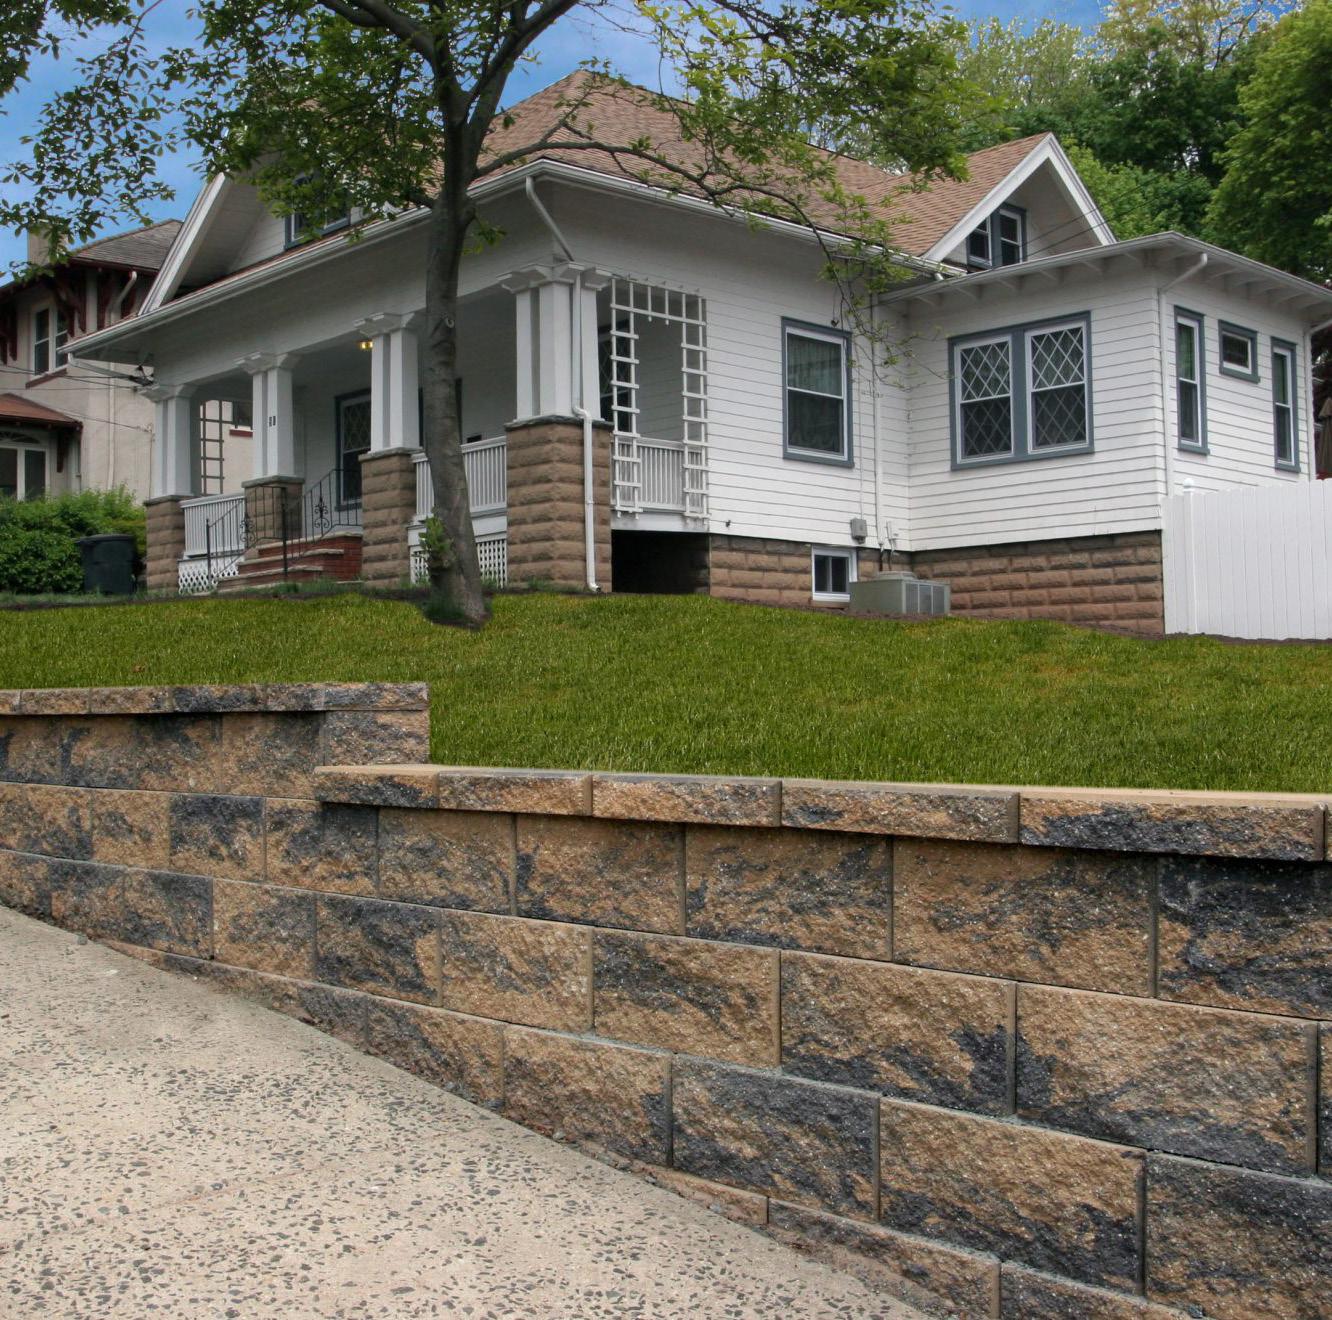
Avoid common split-face concrete block retaining walls; while not as inappropriate as railroad ties, they lack the historic character of stone walls (image © Corner Stone Wall Solutions).
Preservation Brief 1: Assessing Cleaning and Water-Repellent Treatments for Historic Masonry Buildings.
Preservation Brief 2: Repointing Mortar Joints in Historic Masonry Buildings.
Preservation Brief 15: Preservation of Historic Concrete
Preservation Brief 38: Removing Graffiti from Historic Masonry
If a property owner wishes to repair, replace, or install a retaining wall, the following should be considered before requesting approval by the Heritage Commission:
□ If the retaining wall is existing, have all reasonable efforts to repair the retaining wall been made?
□ If the existing retaining wall is deteriorated beyond repair, has consideration been given to dismantling and rebuilding the wall using the original materials?
□ If an existing retaining wall is being rebuilt with new materials, do the new materials closely match the original materials is type, size, dimensions, color, and texture?
Repair
Replacement or Reconstruction
New Fencing
Appropriate Treatments
Discouraged Treatments
Preservation Brief References
Certificate of Appropriateness (COA) Checklist
• Retain and preserve existing fences that contribute to the historic character of a property.
• Maintain and repair, through appropriate methods, the defining features of historic fencing including: material, height, configuration, ornamentation, and functional design.
• When the original protective coating has worn, wroughtiron fences should be carefully sanded, primed with a rust inhibitive primer, and painted. It is important to follow all preparation procedures prior to applying the finish coating, for rusty or improperly primed material will reduce the longevity of the paint finish.
All fencing that is replaced or reconstructed on a historically designated property must comply with Section 14-400-02 of the City’s Unified Development Ordinance (UDO), and be approved by the Heritage Commission prior to replacement or reconstruction.
• If replacement is required due to deterioration, remove only those portions that are damaged beyond repair and replace in-kind, matching the original in material, design, placement, and appearance.
• When reconstructing a historic fence, the new construction should be based on existing and historic documentation of the original that identifies the defining features including: material, height, scale, configuration, ornament and detail.
All new fencing installed on a historically designated property must comply with Section 14-400-02 of the City’s Unified Development Ordinance (UDO), and be approved by the Heritage Commission prior to installation.
• The introduction of new fences should be limited to those areas of the property that are not readily visible from the public right-of-way. Modern fences should be located in a way that complements the historic boundaries of the property without concealing its character defining features. Modern fences should also not attempt to look historic. Instead, these features should strive to enhance the character of the property and be constructed of an appropriate material, scale, height, and configuration.
• Privacy fences should never be installed along the primary facade of the building in front of the property, or along the secondary property line of a corner lot. Metal chain link and wire fences should be avoided.
• Placement of new fencing should be guided by the use of a current survey.
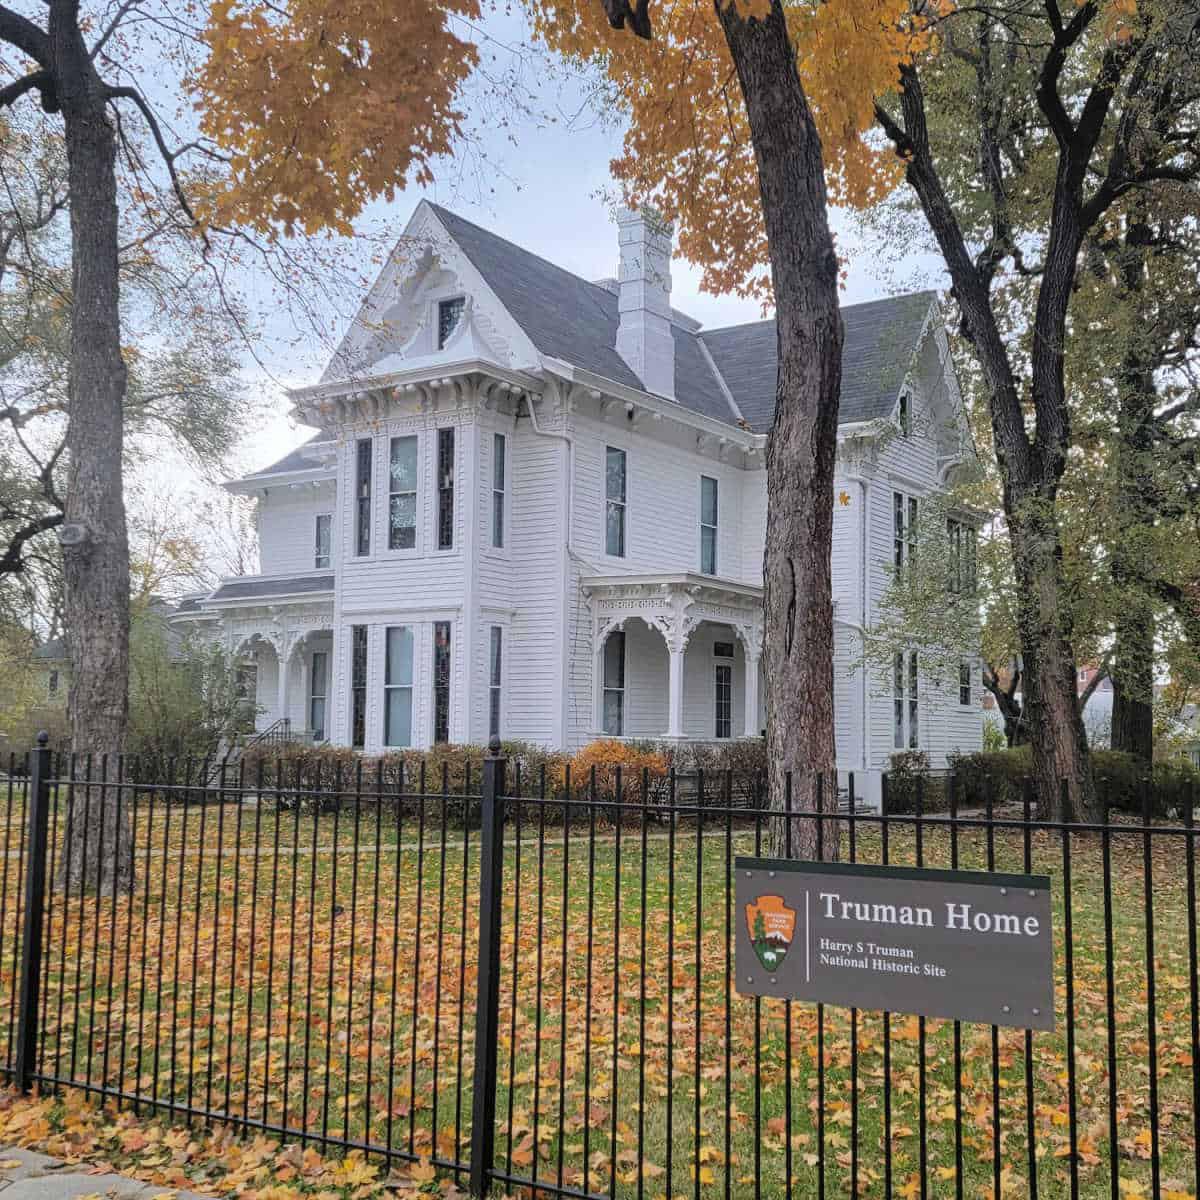
Preserved and historically-correct fence at the Harry S. Truman House (image © National Parks Service).
A variety of historically-correct, reproduction iron fencing is available from local suppliers (image © Independence Fence).
Avoid using chain link fences in the fronts yards of homes (image © Fence Me In).
Ensure that picket fences are in good repair and painted. Replace missing or damaged pickets with new pickets of matching design and material (image © Rediscover).
Preservation Brief 27:
The Maintenance and Repair of Architectural Cast Iron. If a property owner wishes to repair, replace, or install a fence or railing, the following should be considered before requesting approval by the Heritage Commission:
□ If the fence is existing, have all reasonable efforts to repair the fence or railing been made?
□ If the fence requires partial replacement due to sections that are damaged or deteriorated beyond repair, do the replacement elements match the existing fence in material, size, dimension, profile, and details?
□ If the fence requires complete replacement due to damage or deterioration beyond repair, is the design of the replacement fence based on the design of the original fence?
□ If a new fence is being installed, is it being installed only at the rear or side of a lot not facing a public street?
□ Does the fence conform with the City of Independence’s Unified Development Ordinance (UDO)?
Chapter 4
» Introduction to the New Construction Guidelines
» Elements of Design
» Outbuildings
The following standards from Secretary of the Interior’s Standards for Rehabilitation shall be followed when designing new construction within a historic district:
□ New additions, exterior alterations, or related new construction shall not destroy historic materials that characterize the property. The new work shall be differentiated from the old and shall be compatible with the massing, size, scale, and architectural features to protect the historic integrity of the property and its environment.
□ New additions and adjacent or related new construction shall be undertaken in such a manner that if removed in the future, the essential form and integrity of the historic property and its environment would be unimpaired.
The purpose of this chapter is to aid in the effort of designing new construction on a historic property or within a historic district that blends in with the surrounding architecture and the existing development pattern.
New construction includes:
• new infill buildings;
• additions to existing buildings; and
• exterior alterations to existing buildings beyond the repair and/or replacement of existing features and elements.
Creative and sensitively designed new construction that relates to its historic context will benefit the community as a whole and encourage new development within the existing historic neighborhoods or on individual, historically-designated properties without detracting from the surrounding traditional architecture.
When considering constructing a new building within a historic district, you should:
Incorporate elements of one of the predominant architectural styles in the surrounding area.
Build to the average front setback and orientation of other buildings on the block (the distance from the front plane of the building to the front property line), subject to zoning regulations.
If the zoning regulation’s setback requirements are very different from those of the existing buildings on the block, it is encouraged to apply for a variance.
Build to the average height of other buildings on the block.
If the zoning regulation’s height requirements are very different from those of the existing buildings on the block, it is encouraged to apply for a variance.
Match the proportions of the building’s windows and doors to other buildings on the block.
Match the proportions of the building’s floor heights, window sill heights, and eave lines to the neighboring buildings.
Utilize building features like bay windows, porches, dormers and chimneys that are appropriate to the building’s architectural style and harmonious with other surrounding buildings.
Use materials that complement the building’s architectural style.
When considering constructing a new building within a historic district, you should NOT:
Create a false sense of history by designing a building as a historic replica that is designed to look old.
Create an addition to an individually-listed building that is designed to look old or inappropriately blends in to the historic building, creating a false sense of history.
Mix and match historic elements from multiple architectural styles or periods of significance on the same building.
Build at a setback that significantly differs from neighboring buildings.
Orient the front of the building in a way that significantly differs from neighboring buildings, even if permitted by zoning regulations.
Build a building that is either much taller or much shorter than surrounding buildings, even if permitted by zoning regulations.
Use windows and doors that are either much smaller, much larger, or oriented differently (i.e. horizontal windows instead of vertical windows) from those in the area.
Ignore or disregard the proportions of the floor heights, window sill heights, and eave lines of neighboring buildings.
Utilize building features like bay windows, porches, dormers and chimneys that are not appropriate to the building’s architectural style or do not compliment neighboring buildings.
Use materials that significantly different from the materials that are common on other buildings in the area.
Mass, proportion, pattern, alignment, and materials are all important elements of design to take into consideration when constructing in a historic neighborhood.
Mass refers to the overall dimensions of a building (height, width, and depth create volume and form). The overall volume and form of a new building or addition should resemble that of the surrounding buildings. Mass plays an important role in the streetscape of a historic neighborhood. Historic neighborhoods typically have buildings which relate to one another through their similar masses. An incompatible building in volume and form which does not relate to its surroundings distracts from the streetscape.
Overall width, height, depth, volume, and form of new or infill construction should be similar to and compatible with the other existing buildings on the block.
Proportion is a harmonious relationship between the dimensions of one object to another. If the elements of the building are too large or too small in relation to the whole building or to another object, it is said to be “out of proportion.”
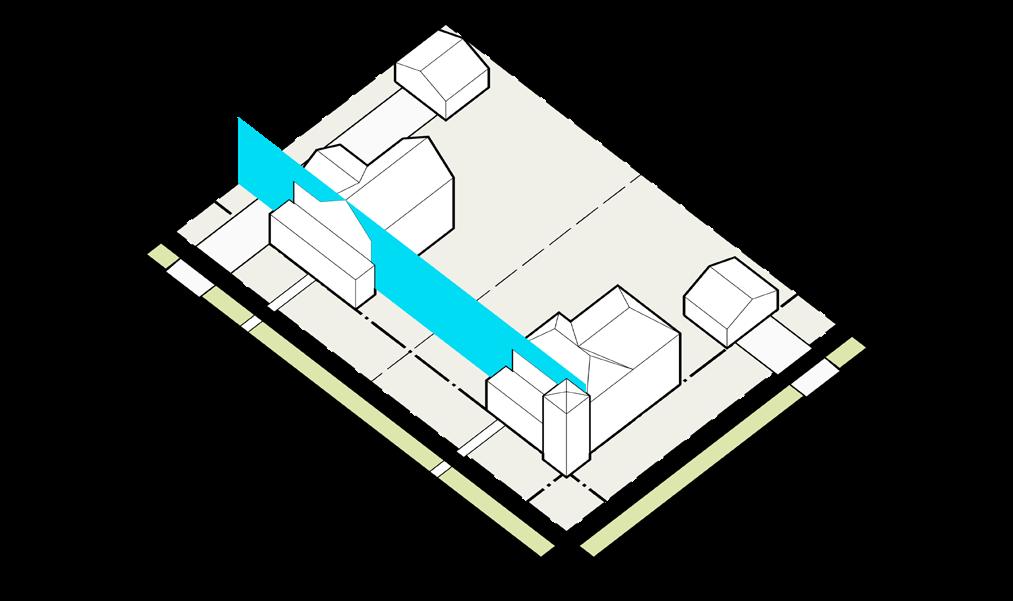
The height of newly-construction buildings should be similar to that of other buildings on the block.
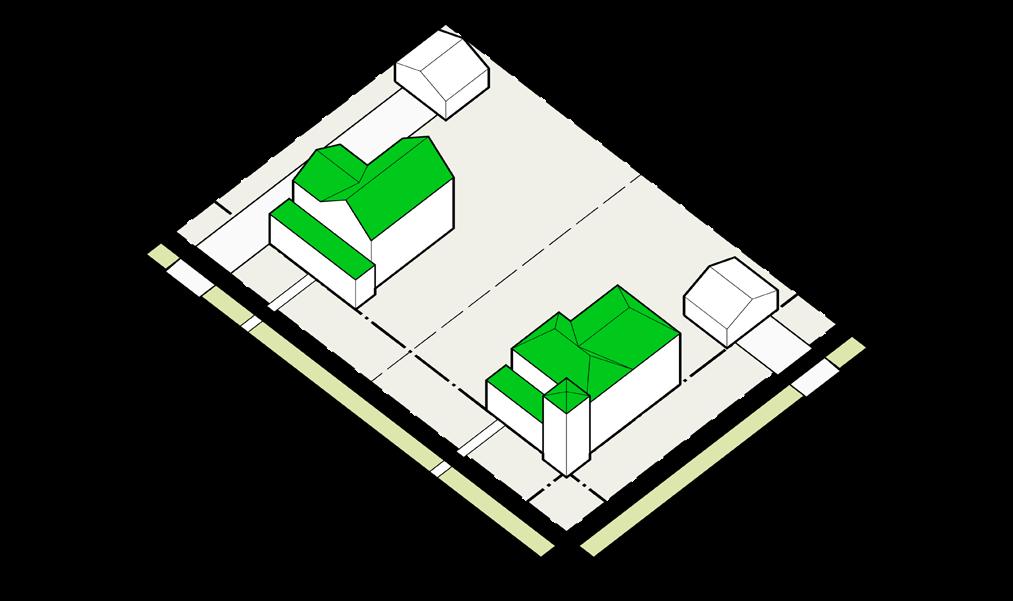
Roof forms, eave and soffit height, and overall roof height should be similar to that of other buildings on the block.
Alignment is the way buildings line up together along a street. It is usually created by the required zoning set back. Alignment can also occur vertically by lining up the rooflines or heights of adjacent buildings.
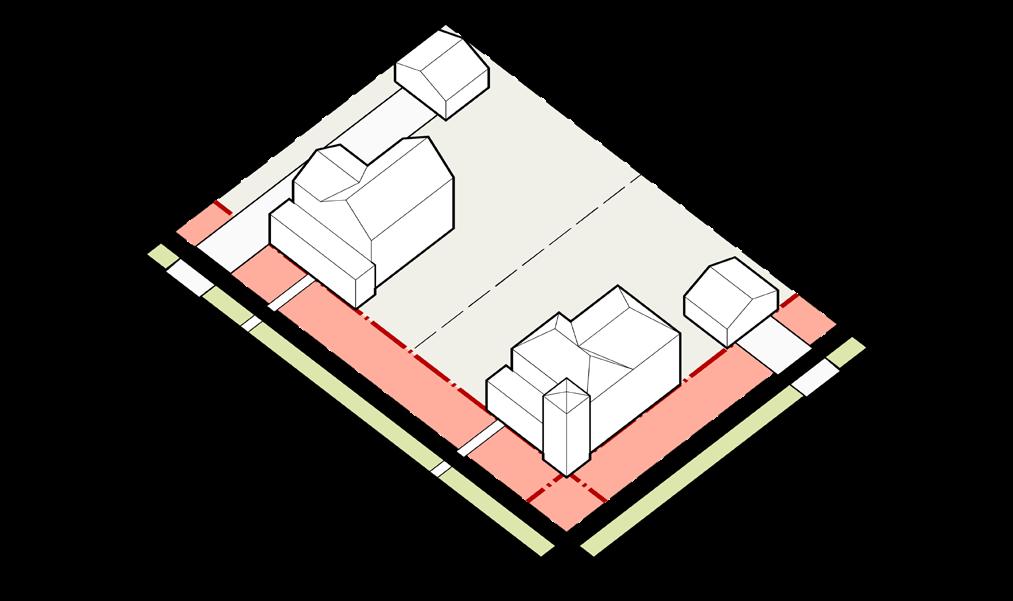
Setback, or the distance of the front facade of the building to the street, should generally match that of other buildings on the block.
Pattern is a repetition of elements or form. Patterns can be found in individual buildings in elements such as windows or in groupings of buildings with similar elements situated along a street. A building that breaks the pattern of a streetscape tends to look out of place.
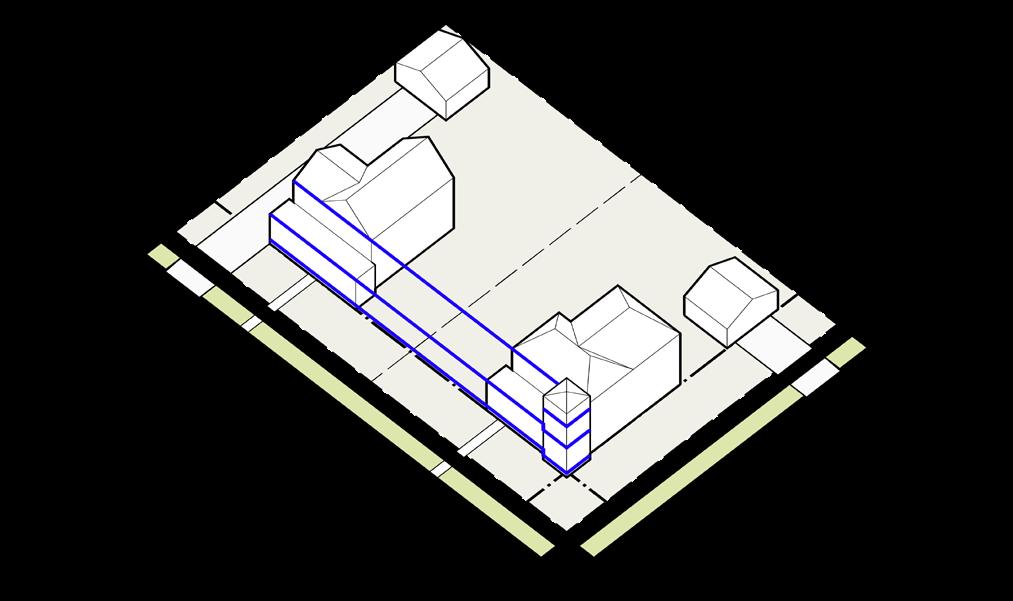
Horizontal elements like window sill lines, water tables, pediments, cornices, eaves, and porch roofs should generally align with those of other buildings on the block.
The width of the building and the spaces between the building and its neighbors should generally match those of other buildings on the block.
Materials differ between commercial and residential historic neighborhoods. Commercial buildings are typically brick or stone with metal, wood, or masonry trim. Materials found within residential neighborhoods are typically wood frame with wood siding, brick, or stone, with wood windows and shingle roofs. The consistency and repetition of building materials of the neighborhood form a cohesive environment.
The new building’s materials should be similar to those found on other historic buildings on the block. The materials of detached garages or other accessory structures should match the materials of the main building.
A grouping of new infill duplexes, which feature proportions and details similar to those of historic neighboring structures.
An new infill multi-family building, featuring proportions and details that are compatible with neighboring multi-family buildings.
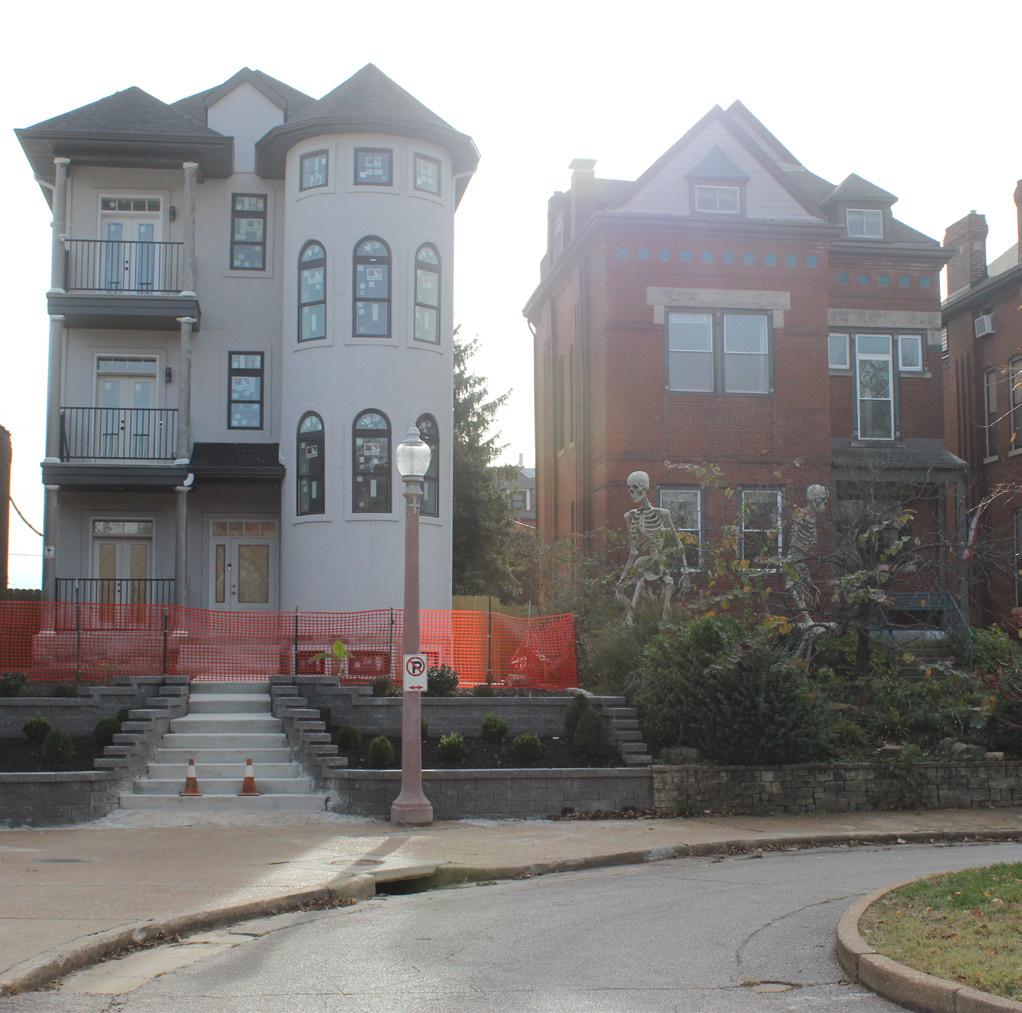
Overall mass, sill, and eave lines of the new building do not generally match those of the neighboring building.
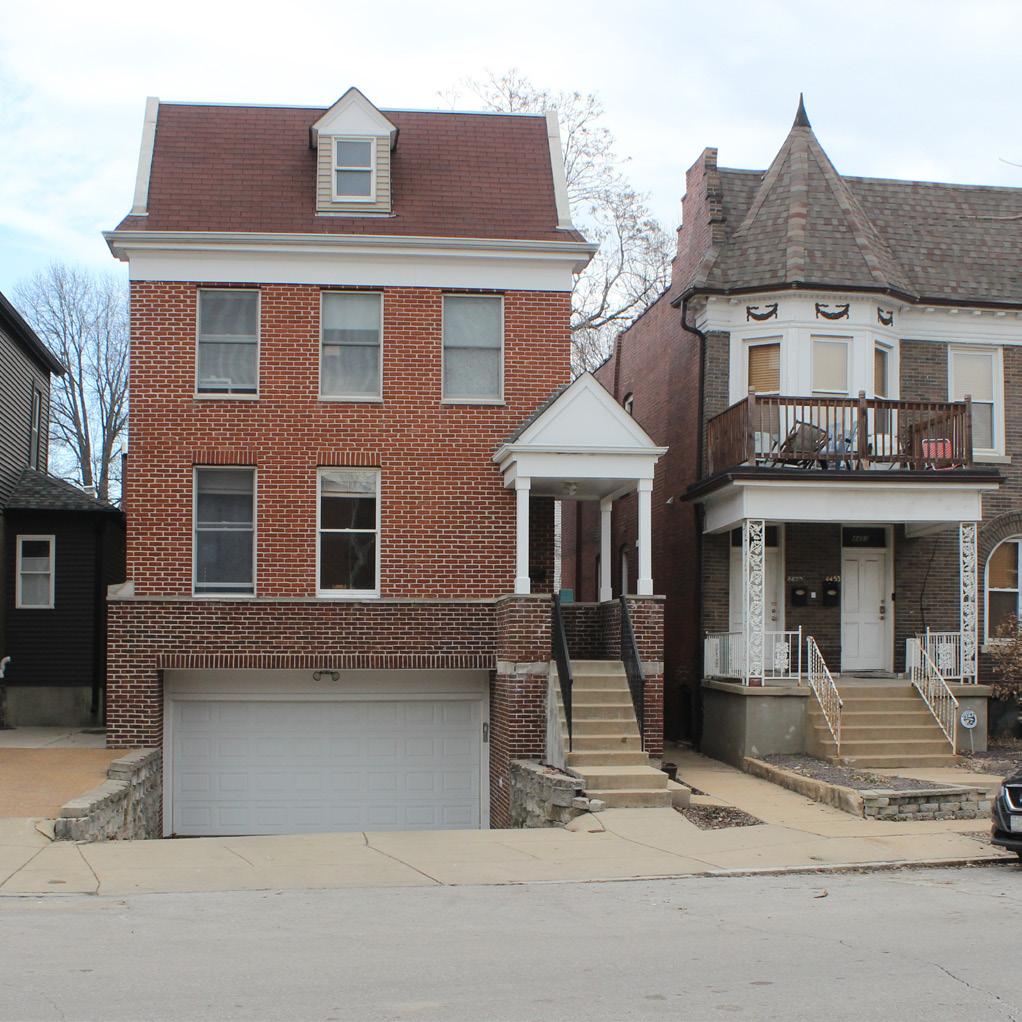
While the massing of this infill building is similar to its neighbors, the proportions of the porch, dormer, and the tuck-under garage are incompatible with neighboring historic buildings.
Outbuildings, such as garages, sheds, and barns were historically constructed as structures (non-habitable spaces) separate from the main house. They can be found both throughout the urban core and into eastern Independence on large agricultural parcels.
When in an urban/suburban setting, outbuildings are often located at the rear of the property, accessed from a driveway leading from the street or from a rear alley.
The renovation of existing historic outbuildings is encouraged whenever possible. However, it is acknowledged that outbuildings often exhibit more severe deterioration than the primary home. The Heritage Commission will consider COAs for the demolition of outbuildings on a case by case basis. The construction of new outbuildings is always supported on a vacant portion of a lot, subject to zoning regulations.. New outbuildings should complement the adjacent home, utilizing similar proportion, style, color, and materials found on the existing building, as well as reflect a similar design to other outbuildings in the neighborhood.
The Heritage Commission will consider the following when reviewing new construction Certificate of Appropriateness (COA) applications:
□ Height - Does the height of the proposed building match that of the surrounding buildings?
□ Materials - Do the proposed, contemporary materials complement that of the buildings in the district? For outbuildings, do they complement that of the main house?
□ Orientation - Does the building face the same direction as surrounding buildings? For outbuildings, does the building face the same direction as the main building?
□ Setbacks - Does the building set back from the street the same distance as its neighbors? For outbuildings, does the structure meet the current building setback requirements? (Setbacks are often grandfathered in for existing structures but may be more restrictive for new construction.)
□ Architectural Style - Does the new construction blend well with the district while looking new? For outbuildings, does the new structure complement the other structures in the area?
□ Demolition - Refer to Chapter 6 for information about Heritage Commission review of demolition.
» Building Envelope
» Solar Panels
» Skylights
» Certificate of Appropriateness (COA) Sustainability Matrix
Consider introducing or adding insulation when:
□ There is little or no insulation in unconditioned, easily accessible areas such as attics, basement ceilings, and garage walls;
□ It is noticeably and consistently cold in the winter or hot in the summer;
□ A new addition is added; and,
□ Energy bills are consistently high in the summer and winter.
The following are some of the most common improvements that assist in making a historic building more energy efficient and weather tight.
The application of weatherstripping, caulking, and insulation are considered basic maintenance and requires no administrative or Heritage Commission approval prior to installation.
Weatherstripping helps seal air leaks around movable joints, such as windows or doors. Foam or rubber weatherstripping should be applied to all doors and windows in a historic home. Weatherstripping should withstand the friction, weather, temperature changes, and wear and tear associated with its location. It should seal well when the door or window is closed while allowing it to open freely.
Caulking should be applied to any gap seen between window and door trim and the exterior of a house, the tops of doors and windows, and at other small cracks around the building’s foundation at the sill. A siliconized caulk will allow for some movement while retaining its integrity for many years. Gaps larger than 1/4” should first be filled with foam backer rod in order to provide a base for the caulk to adhere.
Inadequate insulation and air infiltration are the top causes of energy inefficiency in homes. Many older homes have inadequate insulation in attics, crawl spaces, ceilings, garages, and basements. Proper insulation can help lower heating and cooling bills and provide a sound barrier between interior spaces. There are numerous types of insulation. These include mineral wood or fiberglass batts, blown-in cellulose, foam board, and spray-on open and closed cell expanding foam.
It is highly discouraged to pump or blow in insulation into closed wall cavities in historic buildings. Packing the cavities and limiting air flow can encourage moisture retention in the walls and ceilings and breed ground mold and mildew. Moisture retention in exterior walls can also cause exterior peeling of paint and the de-lamination of stone and brick.
Historic wood and metal windows and doors typically have a good thermal rating (or U-value) to begin with and are not the main cause of energy loss. Inadequate insulation and not sealing up gaps where air infiltration occurs are the leading causes for energy loss. Existing historic windows and doors are simple to retrofit for greater energy efficiency. Improvements may include the installation of an additional layer of glass, increasing single pane windows to double pane, and re-glazing. A larger investment may include the installation of storm windows or doors. Retrofitting windows with additional panes of glass and re-glazing both require no review or approval and are encouraged by the Commission.
Installation of new storm windows and doors, while appropriate, may affect the exterior appearance of the building from the public right-of-way. As a result, installation of new storm windows and doors requires administrative review and approval.
□ Install tight-fitting, insulating interior window shades on windows that feel drafty after weatherizing.
□ Hang lined curtains. Close curtains and shades at night; open them during the day.
□ Keep windows on the south side of the house clean to let in the winter sun.
□ Install exterior storm windows. Storm windows can reduce heat loss through the windows by 25% to 50%. Storm windows should have weatherstripping at all movable joints; be made of strong, durable materials; and have interlocking or overlapping joints. Storm windows incorporating low-e glazing save even more energy.
□ Repair and weatherize your current storm windows and doors.
□ Install white window shades, drapes, or blinds to reflect heat away from the house.
□ Close curtains on south and west-facing windows during the day.
□ Install awnings on south and west-facing windows.
□ Apply sun-control or other reflective films on south facing windows to reduce solar gain.
(Source: U.S. Department of Energy)
Installation of solar panels on historic buildings will be considered on a caseby-case basis.
The following standards must be met in order for the Heritage Commission to issue a Certificate of Appropriateness (COA) for solar panel installation.
• All solar panel installations on any site, building, or structure in the historic district, whether ground-mounted or installed on a building, must be reversible. This means that they must be able to be removed with no permanent alteration of the site, building, or structure.
• The use of solar roof tiles, laminates, glazing, and other technologies that require the removal of intact historic fabric or that permanently alter or damage such fabric, are discouraged.
• Minimizing the number of points of attachment, including the use of brackets, will avoid damaging the historic fabric.
• If possible, use a ground-mounted solar panel array, located in an inconspicuous location, such as a rear or side yard, low to the ground, and sensitively screened to further limit visibility.
• In no case shall a ground-mounted solar array be located in front of a building, either in the front yard or otherwise.
• When located in a side yard, a ground mounted solar array shall be set back from the front plane of building by at least one-third (1/3) of the building’s total depth. Care should be taken to respect the historic landscape, including both its natural (i.e. topography) and designed (i.e. materials) features.
• In cases where new buildings or new additions to historic buildings are proposed and approved, placement of solar panels on the new construction is encouraged.
• To achieve overall compatibility with the historic building and its setting, consider solutions that integrate the solar panel system in less visible areas of the new design.
• When located on a front façade or street-facing roof plane, solar panels must be set back in order to reduce their visibility.
• In no case shall solar panels be located on porch roofs and dormers.
• If the site cannot accommodate solar panels and the project does not include new construction, consider placing solar panels on an existing, non-historic addition, or on an accessory structure.
• Installations below and behind parapet walls and on rear-facing roofs are recommended.
• Solar panels may be located on side-facing roofs provided that they are set back from the front plane of the building and generally not visible from any public street. Visibility of solar panels from alleys is acceptable.
Avoid permanent loss of significant, character-defining features of historic resources.
• Solar panels must not require alterations to significant or character-defining features of a historic resource, such as altering existing roof lines or dormers.
• Avoid installations that obstruct views of significant architectural features (such as overlaying windows or decorative detailing) or intrude on views of neighboring historic properties in a historic district.
Low profiles and colors that blend into surrounding features are required.
• Solar panels should be mounted no higher than a few inches above the existing roof surface. They should not be visible above the roofline of a front façade.
• To ensure that a solar installation is minimally visible, set the solar panels back from the roof’s edge and adjust the angle and height of the panels as necessary.
• The color and finish of all elements of the solar panel installation, including the solar panels themselves, mounting systems, electrical conduits, and other accessories, shall blend into the color, texture and reflectivity of the surrounding roof material or other building fabric.
Avoid disjointed multi-roof solutions.
• Solar panels should be set at angles consistent with the slope or pitch of the supporting roof.
• Solar panels should be located on one roof plane (as opposed to among several roofs) and arranged in a pattern that matches the general shape and configuration of the roof upon which they are mounted.
Appropriate low-profile solar panel installation, set back and colored to blend into the roof material.
Appropriate low-profile solar panel installation, colored to blend into the roof material with limited visibility from the street
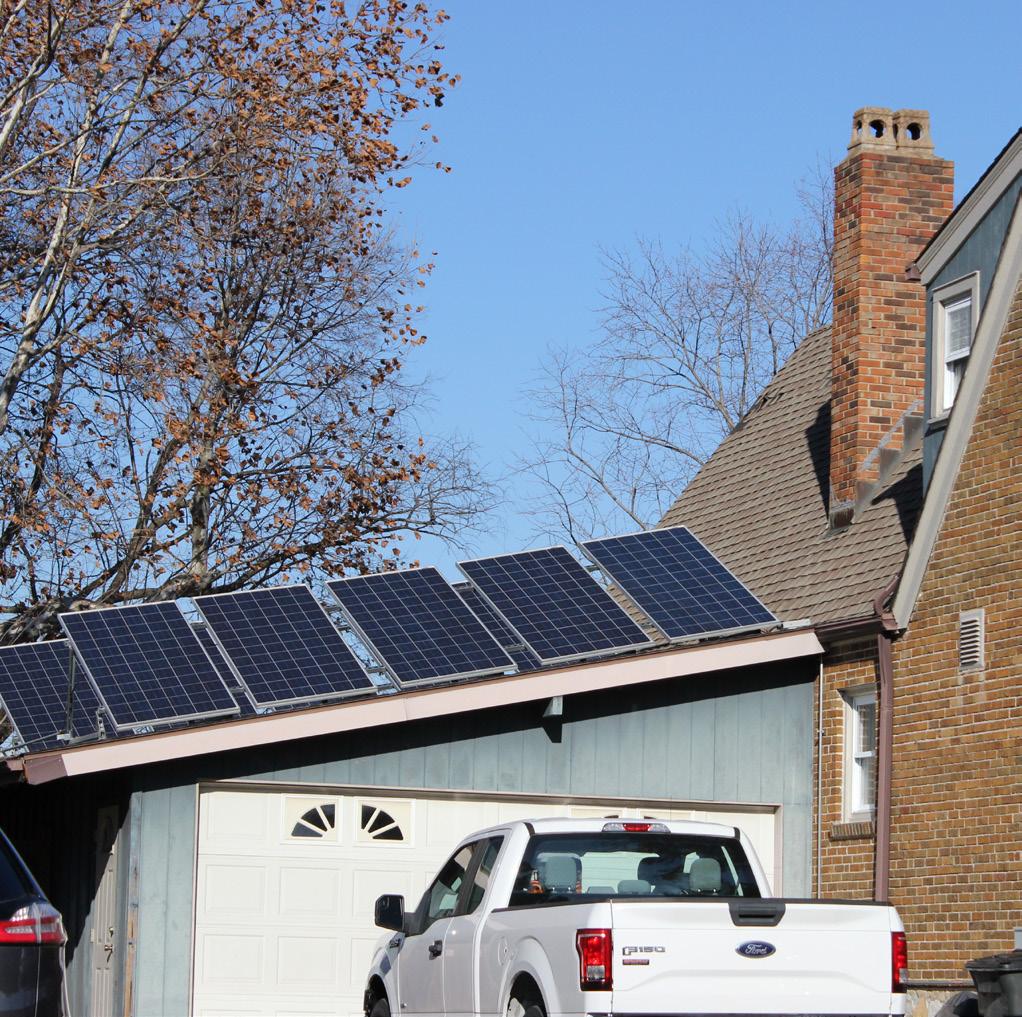
Inappropriate solar panel installation, with street-facing panels mounted in an elevated position above the roof.
Skylights are usually installed on the roof of a building and are used for day lighting the interior of a building.
There are several types of skylights including: do-it-yourself skylight kits, sky tubes (which are smaller in surface area and reflect light from the sky down into the building through a highly reflective tube), acrylic ‘bubble’ type skylights, and of course, glass skylights.
Skylights help to illuminate the interior of a building using natural day lighting by reducing the need for electric light. However, skylights that are poorly constructed and/or installed may cause leaking problems and single-paned skylights may weep with condensation. Care should be taken when choosing a skylight and locating it on the roof of the building.
Skylights/sky tubes require the Heritage Commission’s review and approval. Applications will be evaluated on a case-by-case / property-by-property basis by the City’s Preservation staff and the Heritage Commission.
» Demolition
» Demolition by Neglect
The Heritage Commission and the Preservation Division can never override a decision by the Building Official if a building or structure poses a life or safety issue. If a building/ structure is tagged for an “emergency demolition”, meaning an immediate threat to the public’s safety and in imminent danger of collapse, no Commission or Preservation staff review is required. The demolition process, including permitting for demolition, is governed by City code.
Historic designation, either local or national, does not necessarily protect historic resources from demolition. However, demolition requests for buildings or structures within a locally designated historic district or demolition of a historic landmark always requires Heritage Commission review prior to issuance of a permit.
In addition, according to City Code, Article 1.30.009, the Heritage Commission must also review all city-wide demolition permits for buildings or structures, whether they are historically-designated or not. In order to expedite this process, the Preservation Division staff reviews each demolition permit that is applied for.
Demolition of a historic building, outbuilding, or accessory structure should only be considered when the building is so deteriorated that it is no longer safe to occupy and cannot be rehabilitated. It is up to the property owner to show proof of structural stability or evidence of severe deterioration and evidence that maintenance was not deferred by the current property owner. A structural report prepared by a professional may be used to substantiate the owner’s request for demolition.
Each demolition request is evaluated on a case-by-case / property by- property basis by the City’s Preservation staff and the Heritage Commission.
If a property owner is denied approval of the demolition of a building, the property owner may elect to do nothing but secure the building, a treatment also known as “mothballing.” This course of action is acceptable only when the building is not declared as “dangerous” by the Building Department, and the lack of attention does not result in the further deterioration of the building or its unique architectural features. All mothballed buildings should be, at minimum, made resistant to pest and water infiltration. If the building is vacant, it should be boarded and secured from public access.
When considering demolition of a building or structure, the Heritage Commission will consider the following criteria:
• Is the building, garage, carriage house, barn, etc. considered historic or is deemed a contributing building to a historic district?
• Has maintenance on the building or structure been deferred for a prolonged period of time?
• How long has the current owner had possession of the building/structure?
• Has the building or structure been out of use or vacant for over 12 months?
• Is the building or structure structurally-sound?
• Could the building or structure be mothballed (boarded and secured) effectively?
• Has the building been on the market for sale within the last 12 months?
• Can the building be rehabilitated?
• Does the building or structure display a unique style of architecture or method of construction?
When applying for a Certificate of Appropriateness (COA) for demolition, the following documentation must be provided:
□ A pre-application meeting with City staff is recommended, but is not required.
□ A completed Certificate of Appropriateness (COA) with the signature of the property owner(s).
□ Photographs of the building(s) or structure(s) to be demolished.
□ Report of licensed structural engineer for the building(s) or structure(s) to be demolished.
“Demolition by neglect” is one of the most serious threats to the preservation of the City’s historic resources. According to the National Trust for Historic Preservation, “demolition by neglect” is defined as, “a situation in which a property owner intentionally allows a historic property to suffer severe deterioration, potentially beyond the point of repair.”
This not only applies to the demolition of houses and commercial buildings, but also, barns, carriage houses, garages, retaining walls, etc. While there can be numerous reasons not to address maintenance issues on a building, the intentional withholding of basic maintenance and repair to a historically designated building is prohibited by the City’s Unified Development Code, Section 14-907-23(C).
City staff are authorized to survey historic properties and request a code violation citation and serve fines if serious maintenance issues are not immediately addressed.
There are any number of problems that can lead to the deterioration of a building. These include:
• Missing or damaged gutters, downspouts, and flashing;
• Broken and missing glazing, and open or missing windows and doors;
• Missing exterior trim and finish materials; and
• Damage to or missing sections of roofing and building envelope.
While these issues may start as minor problems, they will—if not addressed completely and in a timely matter— result in more serious problems and damage. This can include deterioration due to water infiltration, pest infestation, vandalism, fire, and eventual structural damage.
It is difficult to list every possible problem and appropriate remediation, as specific situations may require different or alternative solutions. Preservation Division staff and the Heritage Commission are willing to consider any suggestions as long as they adequately address the problems that have created the deteriorated condition.
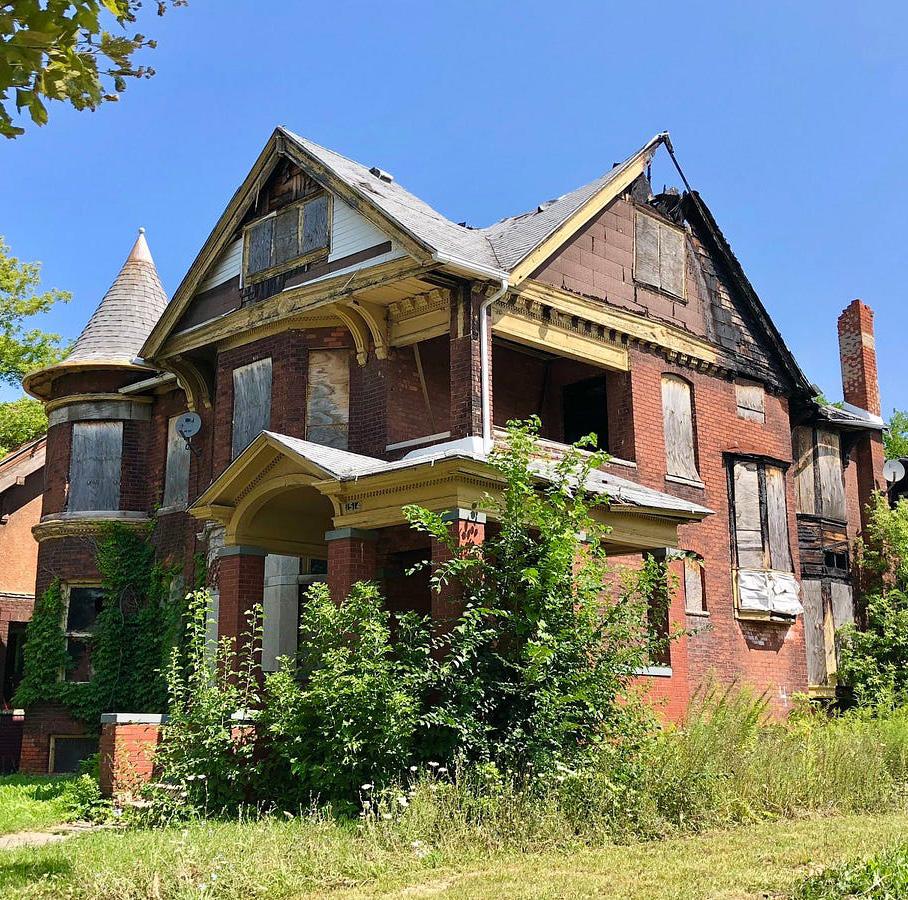
Unsecured, derelict home with a open roof, which will quickly deteriorate due to weather intrusion (image © Anney Grish).
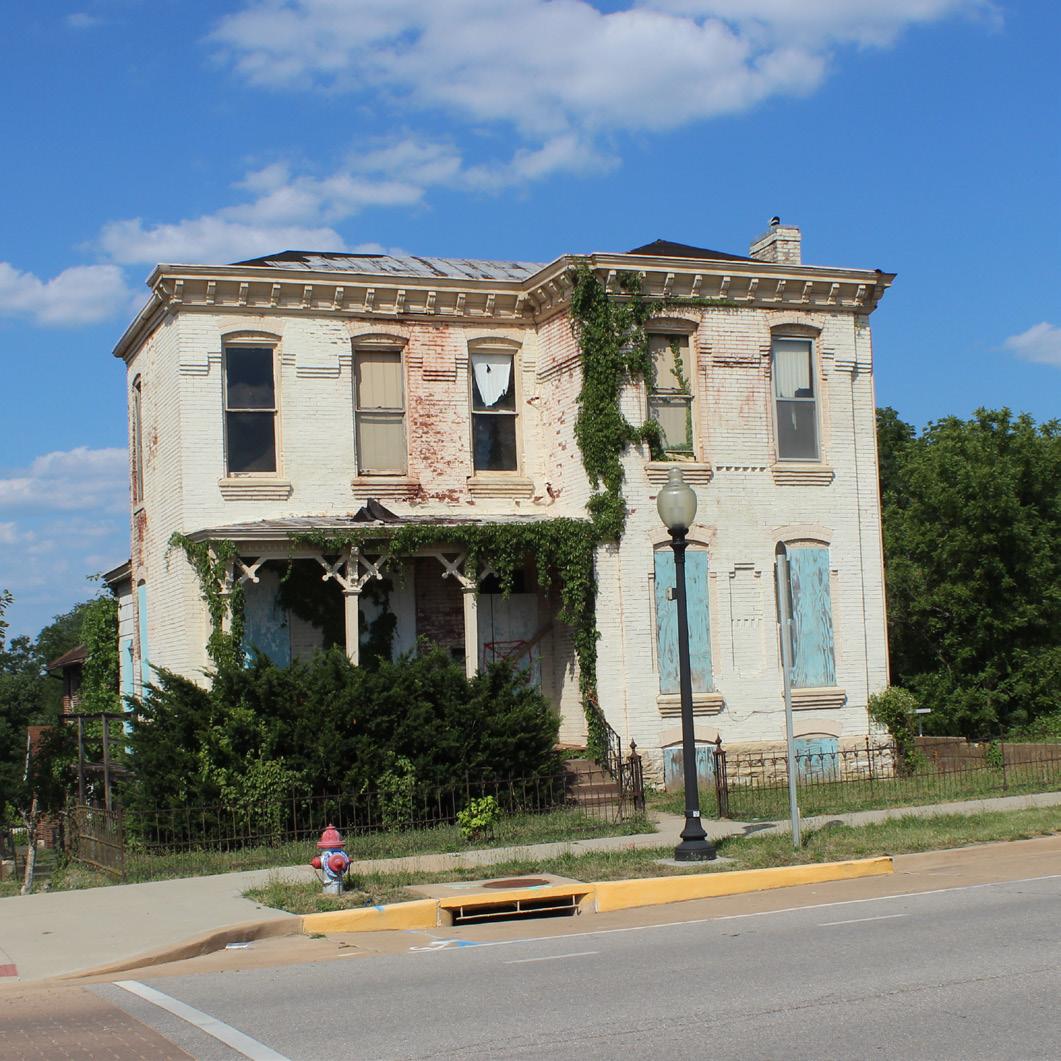
Unsecured, tornado-damaged derelict home with a open roof, which will quickly deteriorate due to weather intrusion.
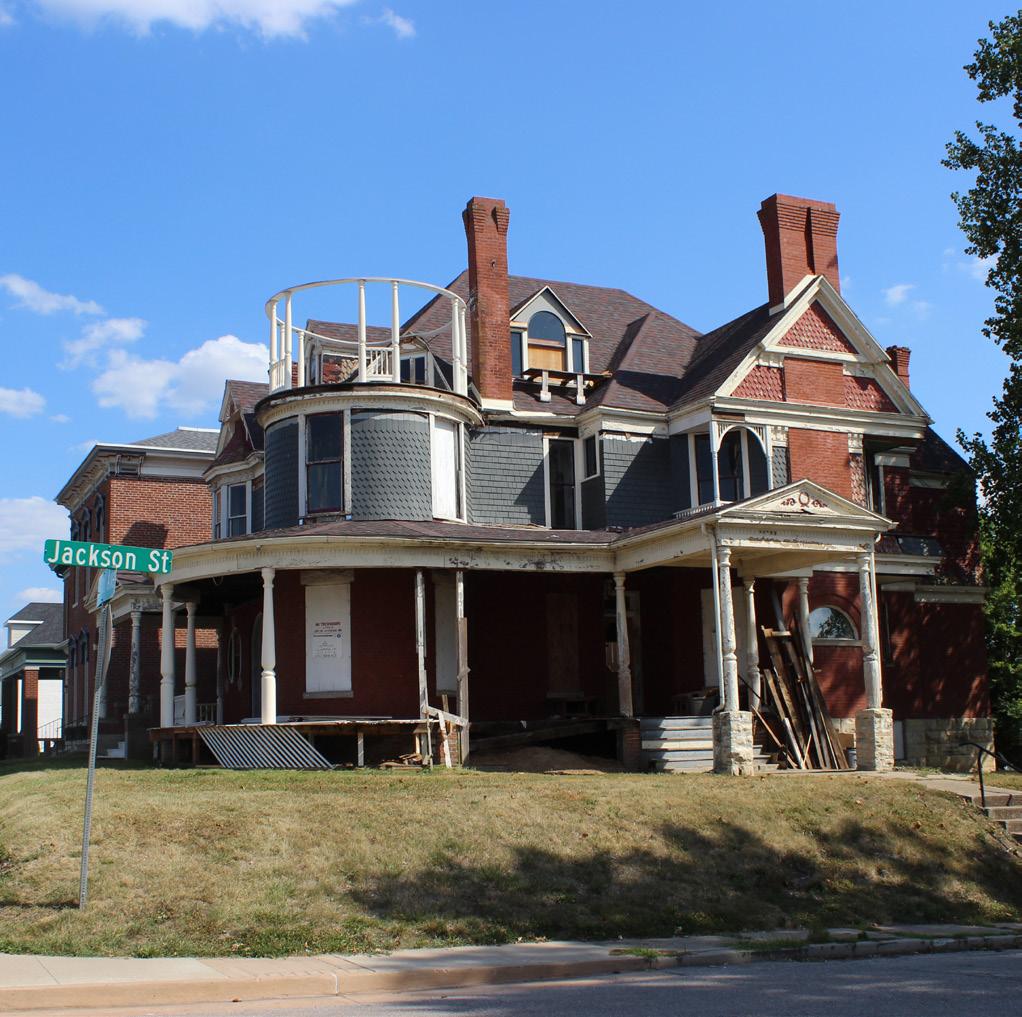
Unsecured, tornado-damaged derelict home with a open roof, which will quickly deteriorate due to weather intrusion.
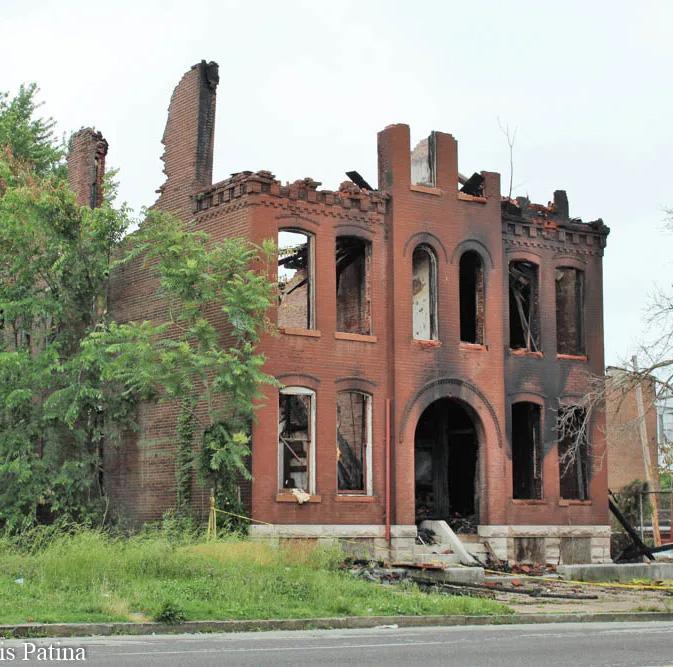
Unsecured buildings are at risk of vandalism, arson, and accidental fires (image © Chris Naffziger).
If a property owner is denied approval of the demolition of a building, the property owner may elect to do nothing but secure the building, also known as “mothballing.” All mothballed buildings should be, at minimum, made resistant to pest and water infiltration. An open roof, for example, can result in water damage to the interior and risk structural instability and loss of significant features. If the building is vacant, it should be boarded and secured from public access.
Mothballing is a temporary practice to secure and weatherproof a building to prevent decay and structural damage until the building can be properly rehabilitated.
Appropriate
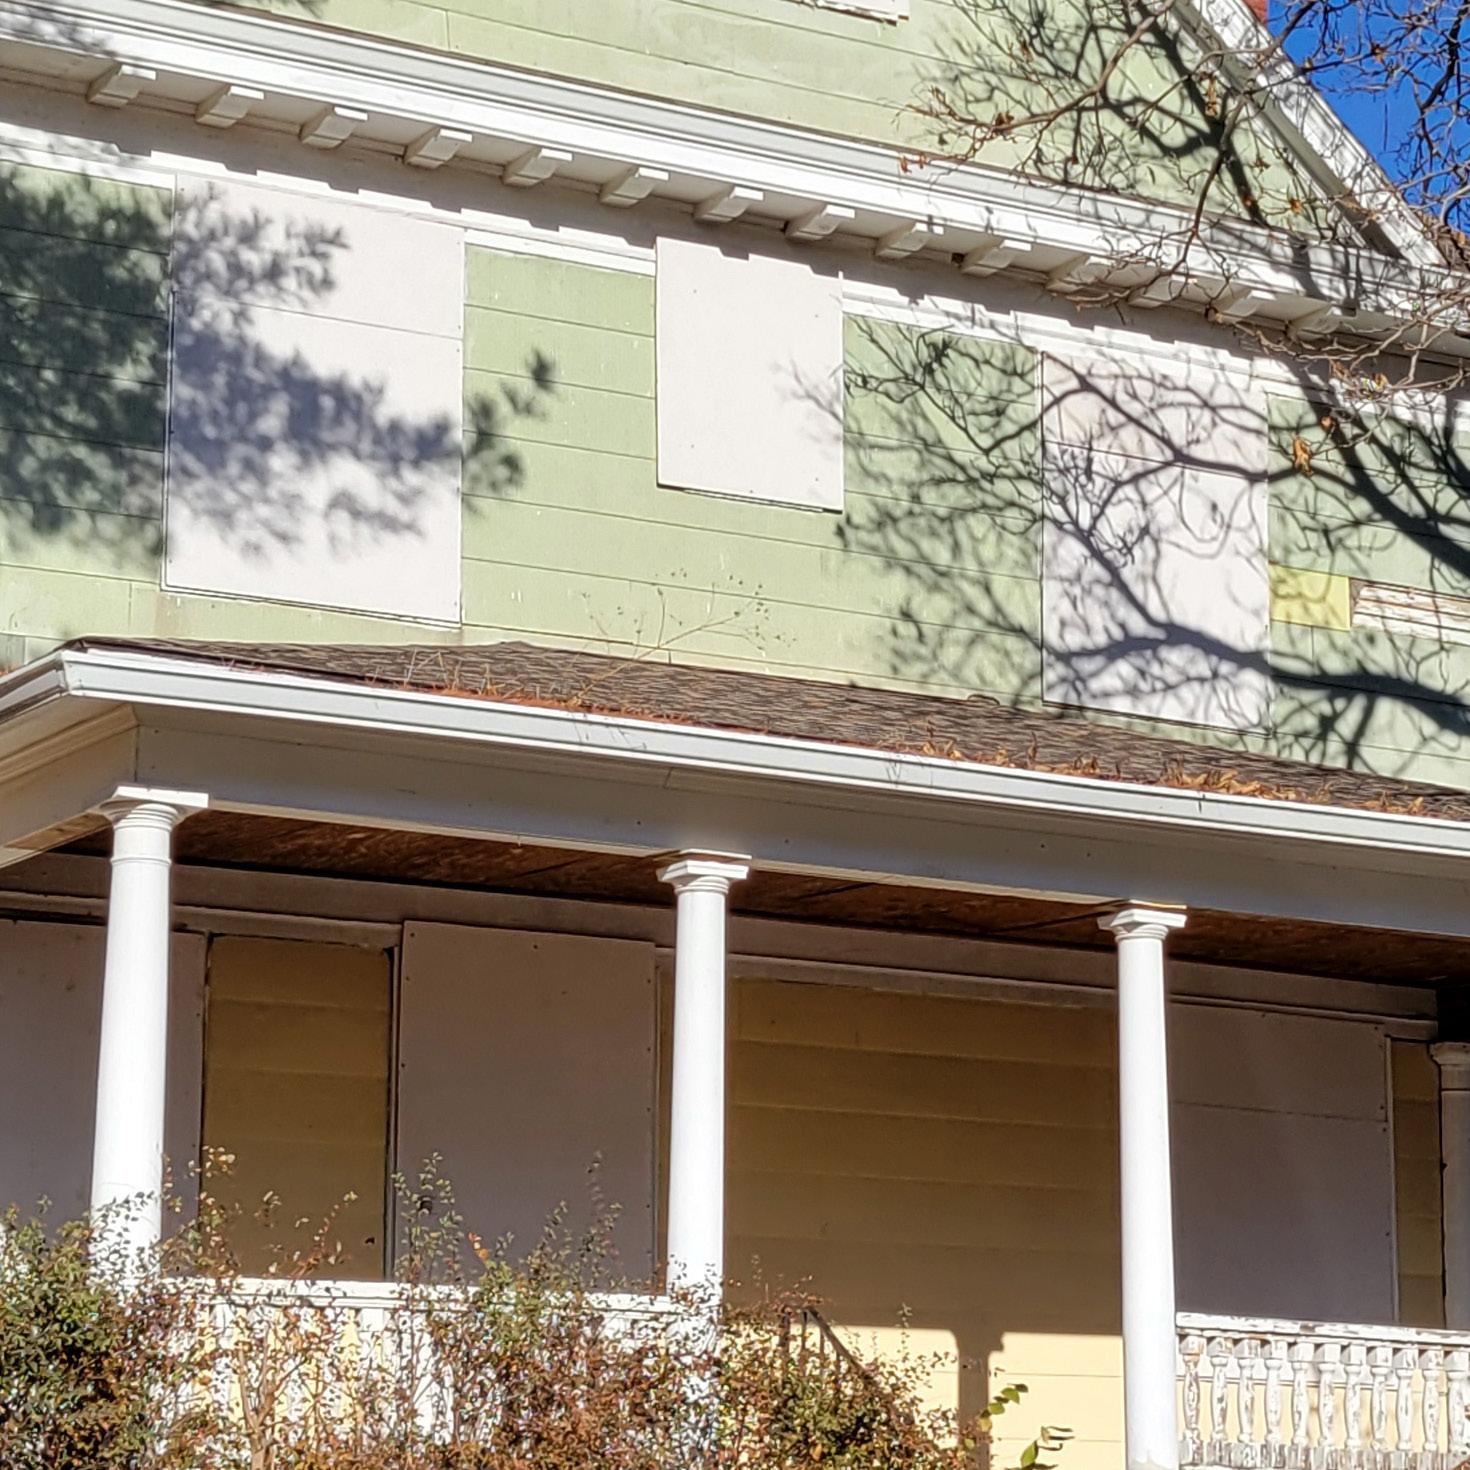
A mothballed home in Independence, properly weatherproofed and secured against trespassing.
A mothballed commercial building with decoratively-painted boarding (image © Anney Grish).
Detail of proper boarding of a building for mothballing. A mothballed commercial building with decoratively-painted boarding (image © Anney Grish).
The following terms and their definitions are adapted from the Commercial Street Historic Preservation Design Guidelines of Springfield, Missouri; information from “A Field Guide to American Houses” by Virginia & Lee McAlester (Knopf, 1984); and additions by H3 Studio.
AAccessible Route: A continuous unobstructed path.
Accessory Structure: A secondary building, the use of which is incidental to that of the primary structure on a site, including a garage, carriage house, greenhouse, playhouse, etc.
Awning: A light weight exterior roof-like shade that projects over a window or door.
BBalustrade: A series of short posts, or balusters, and the handrail they support.
Brick Mould: A trim piece covering the joint between a masonry wall and a window frame.
Building Addition: An auxiliary structure to the original building—built at a date later than the original building’s construction—either roofed with open sides (a “shed”) or fully enclosed, which has the purpose and function of increasing either the building’s program area, enclosed square footage, or both.
CCarriage House: A building originally used to protect carriages and horses, and often containing living quarters. Typically it is a two-story structure located at the rear of the building lot adjacent to an alley.
Cast Iron: A historic building material. A method of manufacturing certain historic iron building elements where molten iron alloy is poured into molds and then machined.
Caulking: A flexible sealant material used to close joints between materials; includes tar and oakum, lead, putty, and modern elastomeric compounds such as silicone and polyurethane.
Certificate of Appropriateness (COA): A certification issued by the Heritage Commission either approving or denying a building permit or demolition permit for structures either (1) within a historic district; (2) that are individually listed as locally-designated landmark; or (3) any structure to be demolished in the City of Independence, as provided for in the City code. The COA is based upon (a) the Secretary of the Interior’s Standards for Rehabilitation; (b) the City of Independence Historic Preservation Design Guidelines; and (c) In the case of either new construction or demolition, the degree to which the addition or removal is harmonious or incongruous with to the old and historic aspects of the surroundings.
Column: A vertical element that supports part of a building or structure.
Contributing Buildings: Buildings from a specific Period of Historic Significance that contribute to the overall character and qualities of Independence’s historic district. Contributing buildings are customarily listed in the historic district’s nomination statement.
Corner Lot: A lot abutting on two streets at their intersection. Corner lots feature two (2) primary façades.
Cornice: The decorative portion of a building where an exterior wall meets the roof. In addition to being decorative, the cornice often camouflages the gutter and visually supports the roof overhang. In Independence’s historic district, cornices are made of a variety of materials and designs, incorporating brackets, dentil mouldings, and ogee mouldings. Cornices are typically constructed of brick, built-up pieces of wood, sheet metal, or combinations of all three materials. As used herein, cornices include crown mouldings.
Crown Moulding: A horizontal moulding at the top of any feature that angles away from the vertical surface.
Deck: A floor that is exposed to the elements.
Dentil: A small square tooth-like block, used in a series or row as decoration on a Classical cornice.
Dormer: A structure projecting from a sloping roof or mansard, usually containing a window.
Eave: The projection of a roof beyond the wall below.
Façade: An exterior wall of a building. The street, front, or primary façade is the building wall that faces the street.
Fascia: A flat, horizontal band or member between mouldings, especially in a cornice.
Fenestration: The design, placement, and pattern of openings for windows and doors in a building.
Flat Roof: Roofs that are essentially flat, typically having a slope of ¼ inch per foot to ½ inch per foot and usually waterproofed with a built-up roof.
Gable End: The triangular upper portion of a wall at the end of a pitched roof.
Glazing Compound: Any type of sealant, such as putty, used at the edges of a pane of glass to prevent leakage of air or water. Historically, glazing compound was made of a mixture of gypsum powder and boiled (drying) linseed oil.
Individually-listed Properties: Any building that is designated as a historical landmark by either the National Parks Service, the State Historic Preservation Office, or the Independence Heritage Commission. Individually-listed properties may either be in the Truman Heritage District (i.e. the Harry S. Truman House) or outside of the District (i.e. the Vaile Mansion). In order to be individually-listed, a building typically has to either have been the site of a historically-significant event; designed, owned, or occupied by a historically-significant individual or family; or be an exemplary specimen of a particular architectural style.
LLot: A contiguous land area which is considered as a unit, is subject to a single ownership, and is legally recorded as a single piece.
MMasonry: A family of building techniques that uses stone, brick, or concrete block units, usually joined by mortar, to form walls and other parts of a building.
Mechanical Equipment: HVAC units, solar panels, satellite dishes, antennae, electrical or gas meters, conduit, cell towers, etc.
Mortar: A mixture of sand, lime, and optionally Portland cement that is used between courses of brick, stone, or block in masonry construction.
Mullion: A vertical post or other upright member that separates two or more window or door units placed in a single opening.
Muntin: A strip of wood or metal that separates and holds in place the glass panes of a window sash or door.
NNon-Contributing Buildings: Buildings not from a specific Period of Historic Significance, or buildings that have been modified in a way that the qualities of the original Period of Historic Significance have been substantially obscured or destroyed. These buildings either do not contribute to the overall character and qualities of Independence’s historic district, or fundamentally detract from its overall character and qualities.
PParapet: Those portions of the walls of a building that project above the roof, other than the chimney.
Pediment: A decorative gable placed above a facade, porch, window or door, often used in Classic Revival architecture.
Period of Significance: A discreet historic period or era from which a building dates, was built, or was modified. Periods of significance are often associated with one or more distinct architectural styles. For the Truman Heritage District, the period of significance is defined as Harry S. Truman’s lifetime.
Pilaster: A shallow pier or rectangular column that projects slightly from a wall.
Porch: A covered and floored area of a building, especially a house, that is open at the front and, usually, the sides; typically partially enclosed with columns and railings.
Primary Structure: A structure considered to be the main building on the property.
Rail: For windows and doors, the horizontal wood components of the window sash or door.
Repointing: The process of repairing mortar joints in a masonry wall, wherein existing mortar is removed to a prescribed depth back from the face of the masonry, after which new mortar is pressed into the joints and properly tooled.
Retaining Wall: A wall that holds back the earth behind it and used to make changes in grade.
SSash: The portion of a window that holds the glass; its character is derived from its material; the dimensions of all its components; its operation (as in being double-hung, casement, awning or other type); and its configuration (as in divided by muntins into lights).
Siding: The finish covering of an exterior wall of a building.
Site: A parcel or parcels of land bounded by a property line or a designated portion of a public right-of-way on which a building or other feature is located.
Stile: For windows and doors, the vertical wood components of the window sash or door.
Stoop: A small porch, platform, or staircase leading to the entrance of a house or building.
Storm Door: An outer door, historically made of wood, which protect the vestibule or the primary door.
Storm Window: An outer window, typically made of either wood or aluminum, which is affixed over the outside window trim to protect the window and offer increased weathertightness. Storm windows typically feature movable glass panes and screen panels.
Streetscape: The assemblage of components that establish the character of the public circulation area, including the street, sidewalks, building line (setback), street furnishings and lighting, landscaping in front of buildings, and block faces.
Stucco: Plaster or plaster-like material used for surfacing the exterior walls of a building.
TTooth-In: A masonry technique used to form a new opening or to close up an existing opening in a masonry wall. In the case of a new opening in a brick wall, the edges of the new opening are first notched beyond the actual width dimensions of the opening. This notching allows for the insertion of half bricks aligning with the ends of the full bricks. The result is an opening jamb that is smooth, neatly aligned, and has the hard surface of the bricks properly exposed at the jamb edges. The reverse process is used to brick in an opening in an attempt to blend the new bricks with those already existing.
Transom: The window over the top of a door, either fixed or operable.
Top Rail: On single-hung and double-hung sash windows, the top rail of the upper sash.
True Divided Light Window: A window sash in a window or door that is composed of several small panes held in place by muntins.
VVisible: For the purposes of these standards, can be seen when viewed from six feet or less above street grade from the street or sidewalk. Landscaping is not permanent and shall not be considered when determining visibility. Fences and free-standing walls are considered permanent, and objects hidden by them shall not be considered visible.
WWrought Iron: A historic building material. A method of manufacturing iron building elements in which iron is heated in a forge and shaped while soft, either by bending or hammering. Fences and gates often incorporate wrought iron elements.
Weatherstripping: A narrow, compressible band of material used between the edge of a door or window and the jambs, sill, and head to seal against air and water infiltration. Materials include felt, spring metal, plastic foam, and wood edged with rubber; types include interlocking and friction.
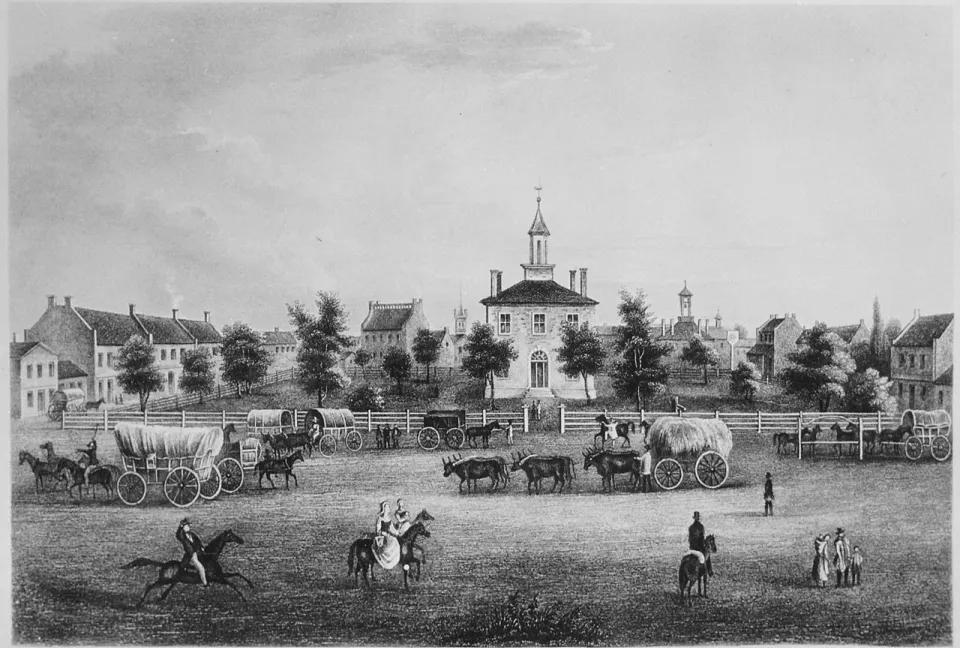
Established in 1827, the City of Independence holds a rich heritage that includes a connection to the Santa Fe, Oregon, and California Trails, the Civil War, the Mormon Church, and, of course, President Harry S. Truman. Today, the City highlights its history within a locally designated historic district, a National Historic Landmark District, as well as through individually designated properties, known as local historic landmarks. The focus of much of that history lies within central and western Independence.
Settlement of Independence by non-indigenous people began prior to the 1820s, and the City was established in 1827. The new town’s proximity to the Missouri River was an obvious choice as the starting point for westward expansion along the trails. Throughout the middle five decades of the 19th Century, Independence experienced both booming growth and prosperity along with turmoil. An influx of Mormon settlers and feuds between pro-slavery and abolitionist factions in the years preceding the Civil War resulted in decades of unrest and outright conflict. During the Civil War itself, Independence was the site of two battles. The impact of the war on Jackson County as a whole stunted Independence’s future growth potential and—although the City would partially recover in the postbellum period--it would never regain its pre-Civil War prosperity.
The City prospered from the late 19th century into the 20th century with the growth and annexation of surrounding land. Stately homes near the Square were built and torn down well into the first quarter of the 20th century to make room for more modest, working- and middle-class dwellings. It was during this time that Harry S. Truman began his life-long residency in Independence. Truman’s influence on Independence can be seen throughout the community to this day with his Presidential Library and home as the centerpieces of historic Independence. Like many historic communities, however, urban renewal projects in the late-1950s and 1960s threatened to destroy Independence’s historic assets.
The 1971 designation of the Harry S. Truman National Historic Landmark District was the first recognition to honor the national significance of Truman’s neighborhood. It was the goal of the protection of this legacy that led to the local designation of the Truman Heritage District in 1973. Although the integrity of the Heritage District has fluctuated due to political and economic pressures and inconsistent public policy, the intent of the district remains the same: to preserve the historic character of the neighborhood and its landscape.
The Truman Heritage District was locally designated by the City of Independence in 1973. The district is architecturally significant due to its establishment in the mid-nineteenth century as a neighborhood of stately homes and for its historical affiliation with the Truman family and their influence on the area. Unlike many historic districts throughout the country, properties achieve their historic significance in the Truman Heritage District based upon their date of construction, culminating at the death of Harry S Truman in 1972. As a result, buildings and structures constructed up to, and including, 1972 are considered contributing to the local district. The neighborhood’s features, including houses, garages/ carriage houses, streets, sidewalks, retaining walls, and mature trees, as well as Truman’s legacy, all illustrate the story of the district.
The evolution of the Truman neighborhood began in 1847 with the platting of the first subdivision; J.F. Moore’s Addition to Independence west of Independence Square. In 1852 J.F. McCauley’s Addition was platted north of Tanyard between Waldo Avenue on the west and Farmer Street on the east, and Delaware Street developed as the foundation of the Truman Neighborhood. During the Reconstruction Era (c. 1865-1880), the Truman neighborhood experienced prosperity and growth and notable residences, including the Gates-Wallace house (now the Truman Home), were constructed.
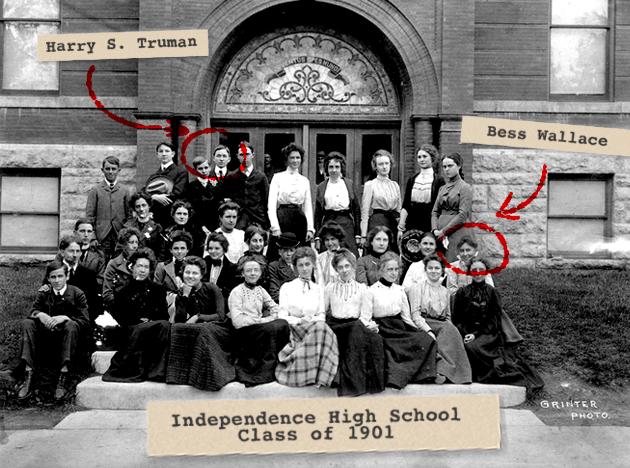
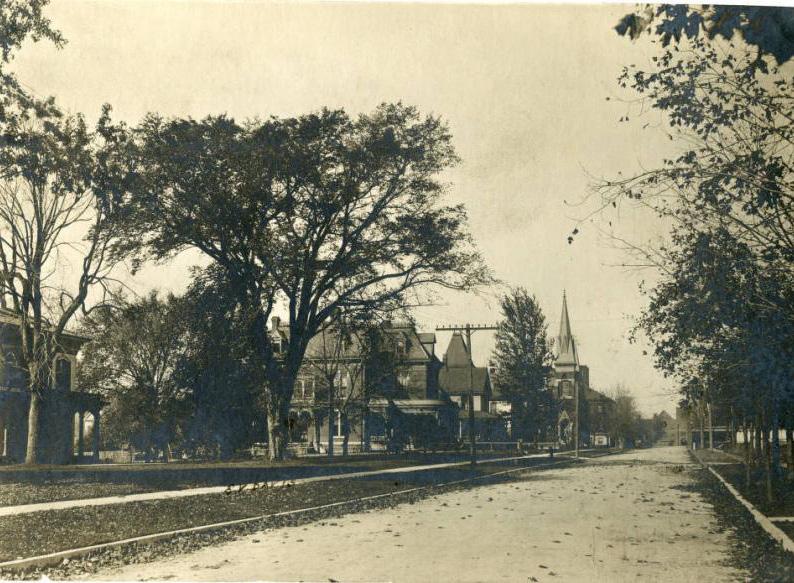
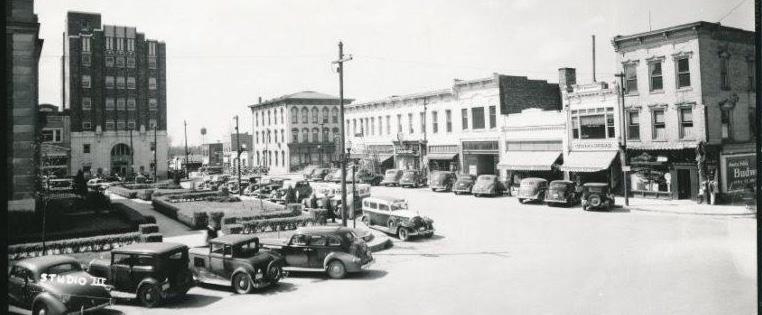
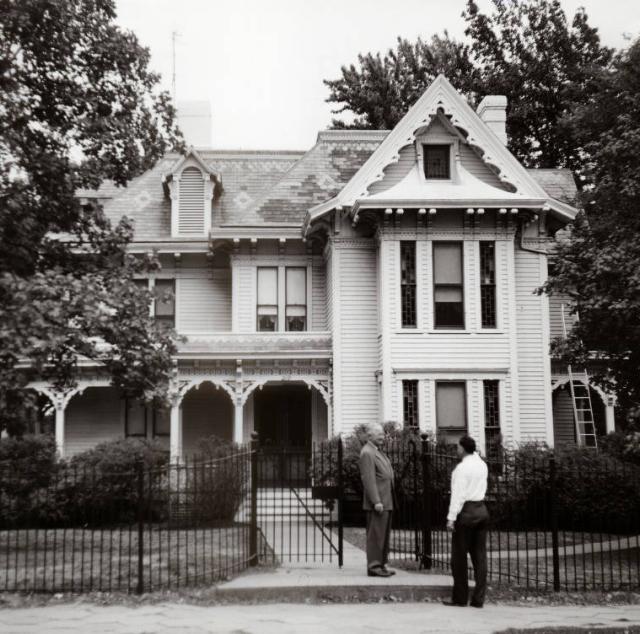
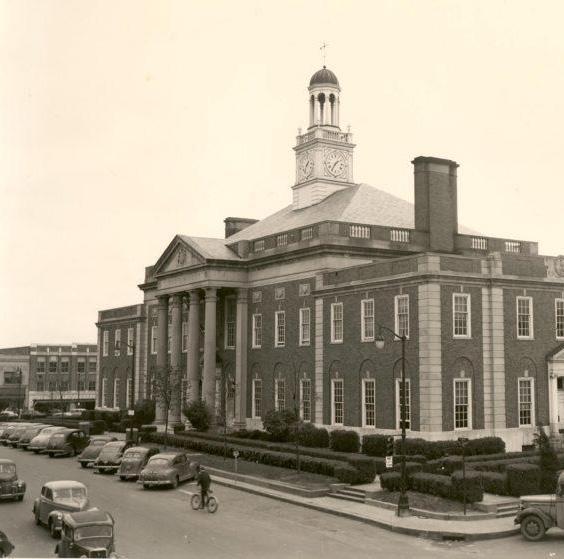
Between 1880 and 1890, Independence experienced a building boom, and eleven major subdivisions were platted within the Truman neighborhood. The finest Victorian mansions were constructed for some of the wealthiest families in Independence. Earlier estates like the Truman Home were remodeled to stay current with the latest architectural styles, including Queen Anne, Italianate, and Second Empire.
Following the turn of the twentieth century, Independence’s prosperity spread to larger segments of the population, resulting in the construction of more practical, less architecturally detailed houses. Within the Truman neighborhood, previously undeveloped additions boasted new American Foursquares and Colonial Revival homes, larger lots were subdivided, and stately homes were demolished to make way for the construction of smaller houses. The Craftsman Style Bungalow became popular, and the City’s increasing population brought new demands for multiple-unit housing that offered “modern” amenities, convenient location, and easy access to transportation.
Post World War II through the final years of the Truman legacy in the early 1970s saw the most visually impactful development of the Truman neighborhood, including the construction of Truman’s Presidential Library. It also saw urban renewal projects, including the demolition of over 200 city lots of predominantly African American housing known as the Neck, to accommodate the creation of McCoy Park and Bess Truman Parkway. All dramatically altered the historic character of the area and provided a significant impetus toward the establishment of the locally designated Truman Heritage District to preserve and enhance the neighborhood’s remaining historic assets.
Preserving Truman’s heritage by protecting the character of his historic neighborhood begins with understanding the story told by the district and the significance of its historic architecture. The quality and diversity of the buildings and the overall streetscape amenities concentrated within this historic district are defining elements of the Truman era. Maintaining the integrity of these features, both individually and as a whole, is key to maintaining the integrity of the entire neighborhood.
Regular maintenance is critical for the upkeep of every building, regardless of age. Therefore, it is especially important to develop a regular maintenance plan for a historic building.
A best practice is to plan for bi-annual inspections of your building in the spring and fall. These inspections should focus on the building envelope and its components. This includes the roof, siding and outer walls, foundation, and window and door openings.
While property owners cannot be expected to know all of the intricacies of building construction, it is vital for owners of historic properties to understand the nature of weathering. Locations where water can enter the building are of particular concern. Property owners should note all locations where wood rot, water, and air infiltration are evident and address those areas immediately. Almost all deterioration is the result of the damaging effects of moisture.
The following are notes and recommendations on basic maintenance that offer important advice on keeping your historic building weather tight and in good repair:
• Any location where two roof lines intersect, and where the roof meets a chimney or dormer should be inspected on a regular basis. Check the condition of roofing material and flashing, including sealants on stepped flashing. This should be done in the Spring after the freeze thaw cycles of winter, and in the Fall after summer heat and storms.
• Keep metal roofs painted with proper paint. Do not use asphalt patch or asphalt-based paint on metal roofs.
• Gutters and downspouts should be checked once every season to see that they are clean and free of debris. Be sure to check for deterioration of the covering, mechanical attachments, and flashing. Make sure that the correct type of fastener is used with metal flashing or roofing to prevent galvanic reaction which accelerates corrosion.
• Foundations should be checked annually for signs of cracking, water penetration, or mortar damage. Make sure that all water is draining away from the building. Keep all vegetation far enough away from the foundation (at least 24”) to prevent damage from moisture or from the roots. Make repairs in accordance with guidelines for masonry repair.
• Windows and doors should be inspected seasonally. Any cracked or broken glass should be repaired. Check for missing or cracked glazing compound as well, and repair if needed. Glass should be cleaned on a regular basis. Inspect painted surfaces of sash, sills, frame, and lintels for signs of paint problems. Sand, prime and touch up areas once a year. Check the condition of weather-stripping and replace if needed.
• Trims around doors and windows should be sound when inspected. If gaps are apparent, apply caulk to any gap less than 1/8” and re-inspect seasonally. If a gap of more than 1/8” is present, insert foam backer rod into the gap and seal over the backer rod. The use of spray foam should be avoided. This prevents both water and air from entering the house at those points. If trim shows signs of wood rot, repair or replace rotted wood immediately with in-kind materials (wood for wood).
• Brick and stone are enduring materials and are associated with buildings of a permanent nature. But masonry buildings require cyclical maintenance. The mortar used should be softer than the brick or stone used. Mortar is meant to take the brunt of damage from the elements before the brick or stone is damaged. Mortar should be inspected and repaired with material matching the original where it has cracked or washed out. Mortar testing is highly recommended.
• Never sandblast a masonry building. Abrasive cleaning of any kind damages and erodes the weathering surface of all masonry. Dirty masonry should be cleaned in the softest possible manner, starting with water and a soft bristle brush. When cleaning with a new chemical or treatment, find an inconspicuous location as a test location (on the back of a building is preferred). If there is no evidence of damage after a few days, proceed with the process.
• Masonry should always be able to breathe; allowing moisture to pass from the inside of the building to the outside. Sealants should only be considered on severely deteriorated brick or stone. Sealants should be breathable in order to ensure that moisture is not trapped on the inside of a building. Sealing of masonry walls may do more damage than good if moisture is trapped, accelerating damage. It is recommended that a property owner contact a qualified professional
prior to the application of any sealants.
• All painted surfaces can be cleaned with appropriate chemical products, but care must be taken in the selection and the use of chemicals. Always test any material prior to performing large-scale cleaning efforts. Some chemicals will require a neutralizing wash after their use. Avoid high-pressure scrubbing, even on wood surfaces.
• Keeping a good paint surface is necessary to prevent deterioration of wood. The surface must be clean and dry. All flaking or peeling paint must be removed. Tightly bonded paint can be left in place, and light sanding will help prepare for additional layers. With older buildings, an oil-based primer is recommended. However, new latex paints have been much improved, so a good quality bonding primer can often be used successfully. Plastic coatings and elastomeric paints should be avoided as they do not allow the substrate to breathe.
Remember, if the building was built prior to 1973, at least some of the existing paint probably contains lead and must be properly handled in scraping, sanding, removal, and clean up. Refer to State and Federal regulations regarding the safe removal of lead paint.
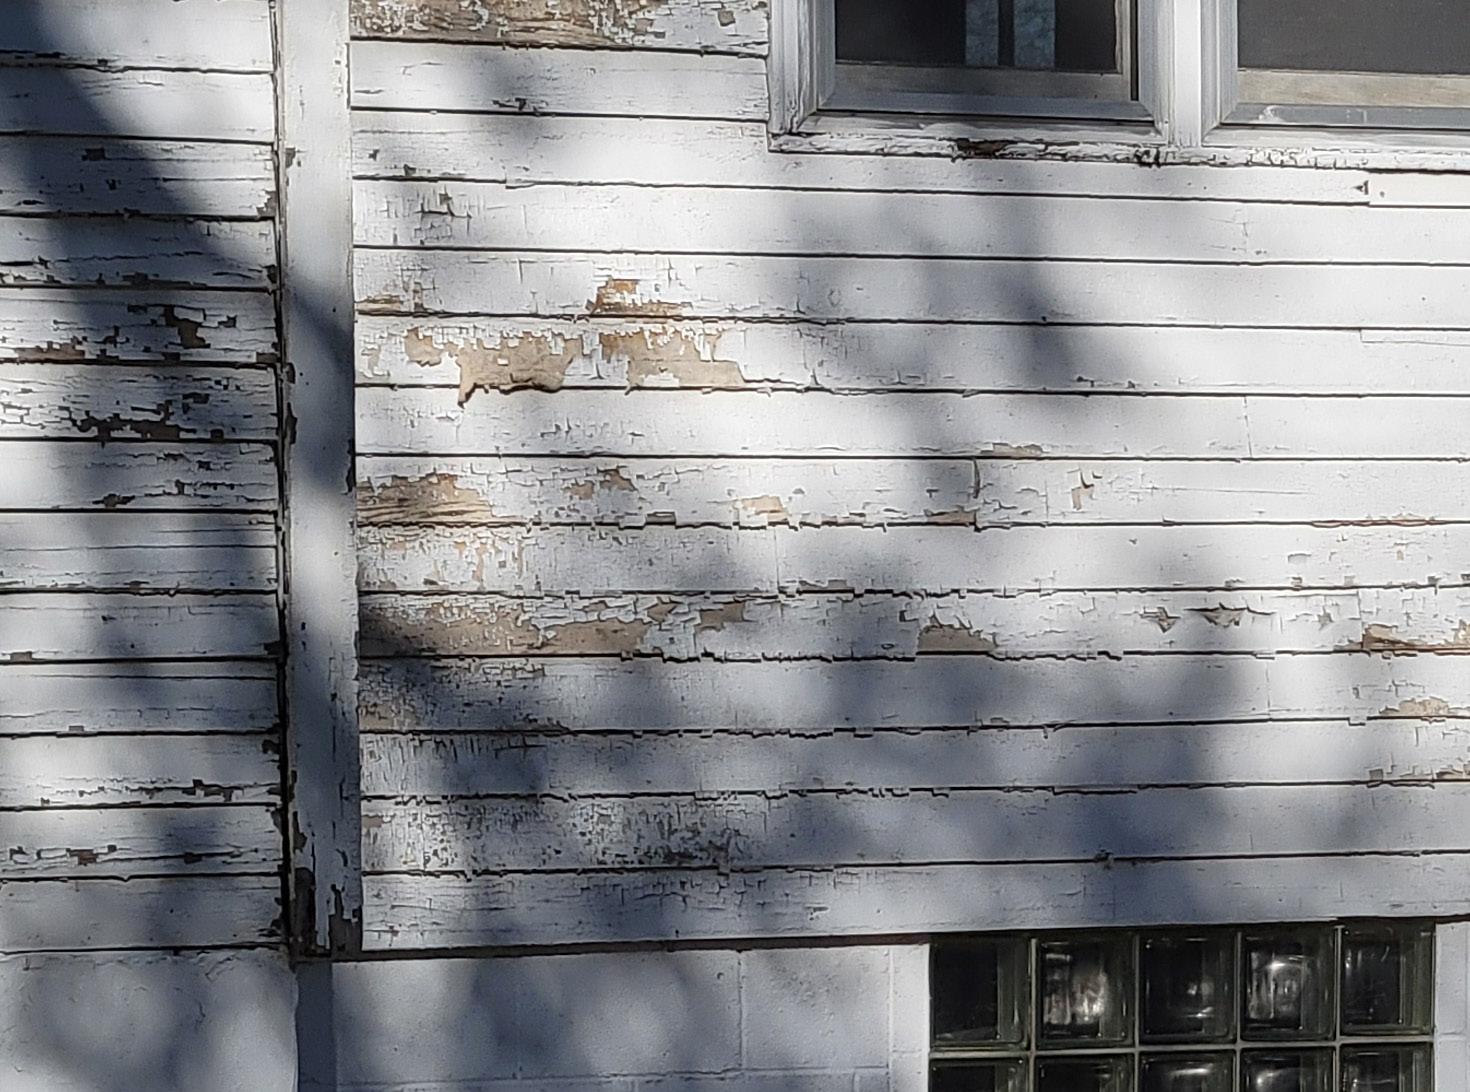
Peeling and missing paint on wood siding, stucco siding, and wood trim should be removed and re-painted to ensure weathertightness.
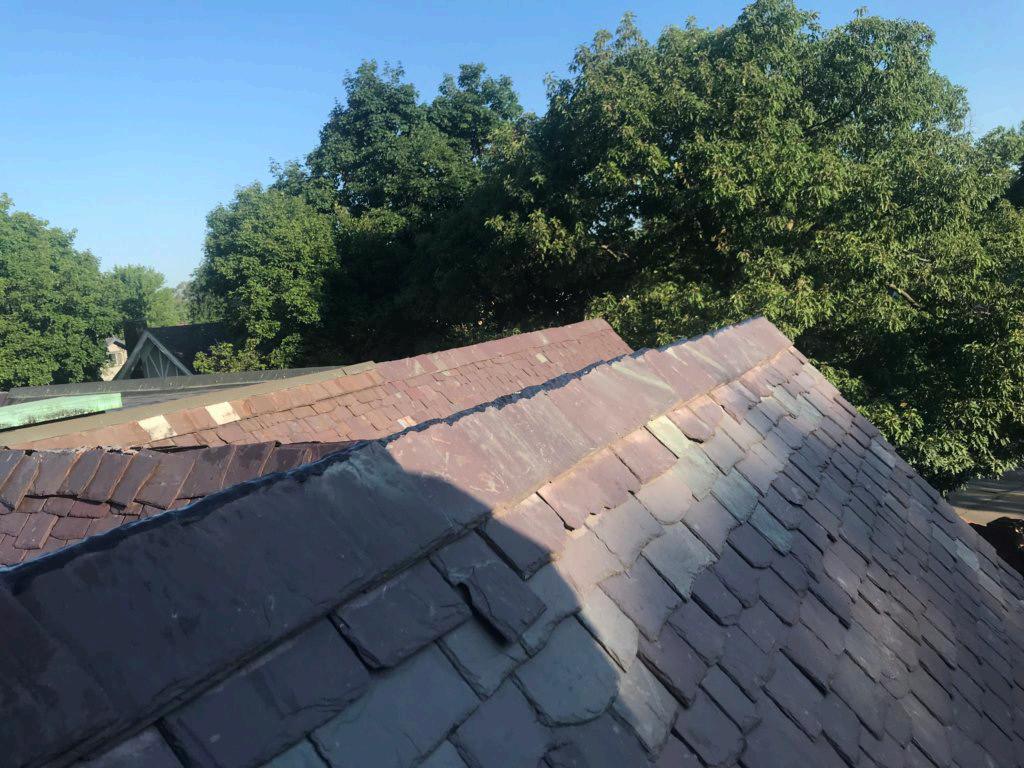
Early signs of a slate roof in need of replacement include individual slates that have broken loose or are sagging. A roof in such condition will soon begin to leak water (image © Ryan Restorations).
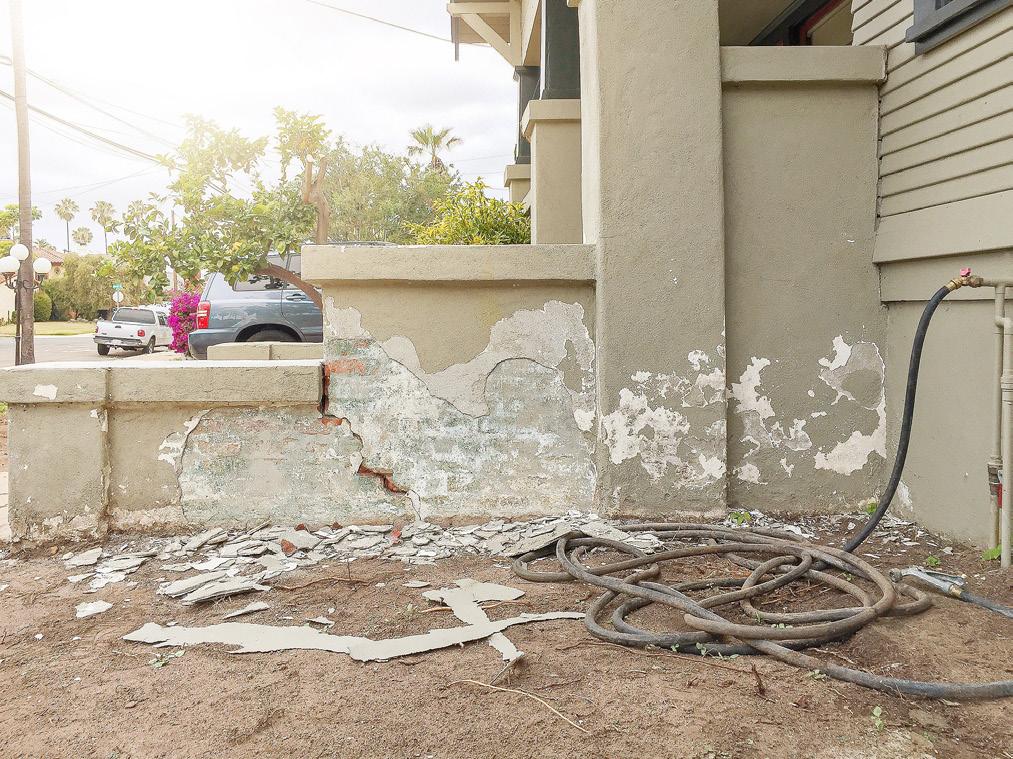
Repair damaged stucco; stucco is siding and damaged stucco can cause further damage to building sheathing and building structure (image ©
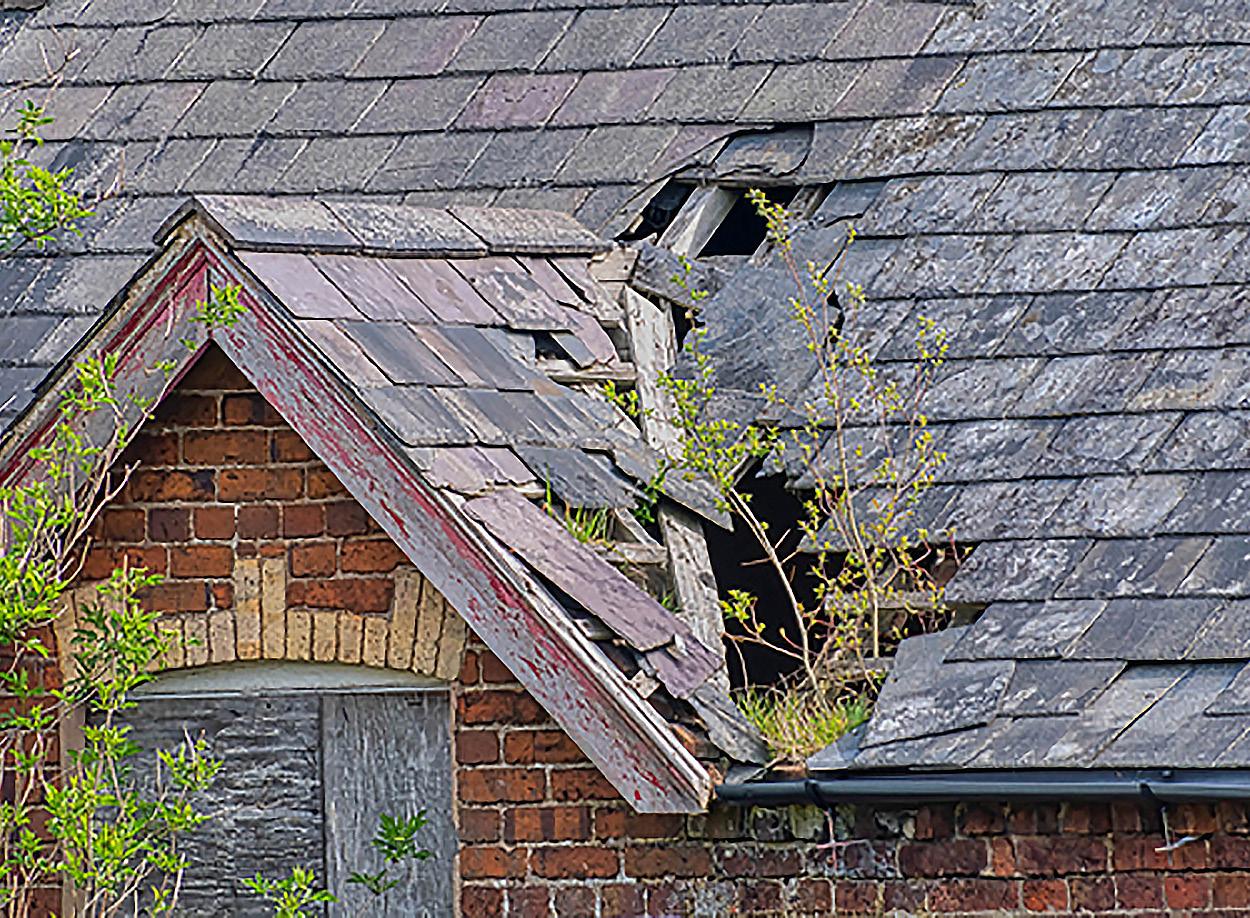
roofs will quickly result in damage and deterioration of roof sheathing and structural members. If left unaddressed, this will result in structural failure of the
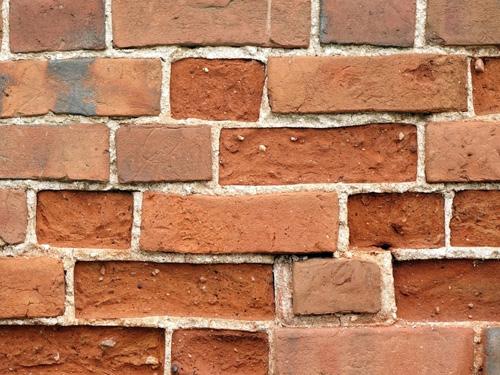
The Preservation Briefs, published by the National Parks Service Technical Preservation Services, provide a wide range of valuable information to assist homeowners and building owners with general maintenance of their historic building.
Please refer to the National Parks Service Preservation Brief website to search for best practices on historic building maintenance relevant to your building and specific circumstances.
National Parks Service Preservation Brief Website
When developing a regular maintenance plan, a property owner should include the following activities:
□ Check roofing and flashing for areas where water may penetrate.
□ Check seals around windows and doors.
□ Look at all caulked areas and replace caulking as necessary.
□ Look for cracking and peeling paint and apply a fresh coat if needed.
□ Check all wood trim and siding. Repair rotted wood where evident.
□ Clean all gutters and downspouts of debris.
□ Inspect flashing around chimneys.
□ Clear foundation of any overgrown landscaping or ground cover. Be certain that all grading around the building slopes away from the building’s foundation to help keep it dry.