CREATE YOUR OWN SCHOOL OF FOOD
A TOOLKIT FOR SCHOOLS
Getting Started. Who is it for? Who we are. What is the Hackney School of Food? A working prototype. Why should I get one? The shocking truth. Benefit & positive impact. How does it work? How to use the toolkit.
B C
CREATING A SCHOOL OF FOOD
GETTING STARTED RUNNING A SCHOOL OF FOOD
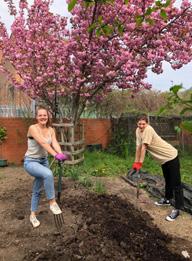
Initial planning. Change the culture. Start small. Planning something bigger? Fundraising tips. Choosing a space. Bringing in the professionals. Finding a suitable architect. The Nitty gritty. Stages of a building project. Requirements & permissions. Building contracts. Designing a School of Food. Site analysis. Brief development. Key design principles. Space planning. Capacity & circulation. Zoning, appliances & equipment. Height-adjustable work stations.
Robust materials & finishes. Simple details & exposed finishes. Building performance upgrades. Minimising structural alterations. External improvements. An identity. Privacy & visibility. Designing the gardens. Kitchen garden plan. Raised masonry planters. Outdoor cooking. Outdoor teaching & dining.
to watering can.
principles.
76
77
79
81
83
85
87
89
91
Operations. Curriculum. Key Stage 1 example curriculum. Example day in the life. Example weekly diary. Volunteers & community. External hire potential. Managing external hire. Marketing tips.
3 4 1.0 1.1 1.2 1.3 1.4 2.0 2.1 2.2 3.0 3.1 p. 06 p. 07 p. 08 p. 09 p. 10 p.11 p. 12 p. 13 p. 15 p. 16
4.0 4.1 4.2 4.3 4.4 4.5 4.6 4.7 5.0 5.1 5.2 5.3 6.0 6.1 6.2 6.3 6.4 6.5 6.6 6.7 p. 18 p. 19 p. 20 p. 21 p. 22 p. 25 p. 27 p.28 p. 29 p. 30 p. 31 p. 32 p. 33 p. 34 p. 35 p. 37 p. 39 p. 41 p.
p.
43
45
p. 47 p. 49 p. 51 p. 53 p. 55 p. 57 p. 58 p. 59 p. 61 p. 62 p. 64 p. 65 p. 66 p. 67 p. 69 p. 71 p. 73 6.8 6.9 6.10 6.11 6.12 6.13 6.14 7.0 7.1 7.2 7.3 7.4 7.5 7.6 7.7 7.8 7.9
Rainwater
Room for more? Our animals.
8.0 8.1 8.2 8.3 8.4 8.5 8.6 8.7 8.8
Planting
A problem to think about.
A
p.
p.
p.
p.
p.
p.
p.
p.
p.
1.0

GETTING STARTED
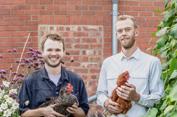
“Early on Nicole and I used to talk about how we could get better cooking lessons for children. We wanted them to touch, feel and smell vegetables and fruit and really sense what it was. I love seeing everyone smile as they come on to what used to be a derelict site and see the chefs celebrating our produce.”
 LOUISE NICHOLS Executive Head, LEAP Federation

6 5
A GETTING STARTED
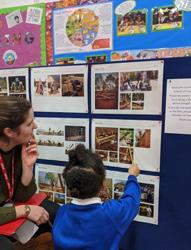
Take a look behind the scenes at the Hackney School of Food
This toolkit is for anyone who wants to teach children and their community about growing and cooking good food.
Whether you want to create a whole new cookery school or simply create a few planters on your school grounds, we can help you to get started. We recognize that every school community is unique and so this toolkit is intended for you to adapt it to meet the needs of your pupils, staff and families.
We hope that it will provide some inspiration and handy tips as you develop on your food journey, whatever stage you may be at!
WHO WE ARE
LEAP Federation is made up of three schools in London, formed with the specific aim of equipping children with the skills they need for their future and fostering a love of learning for life. LEAP has put food at the heart of their culture, ensuring children experience and learn to enjoy growing and eating good food.
Chefs in Schools is a school food charity on a mission to transform child health plate by plate, class by class, school by school. We work hands-on in schools in London, Sheffield and the South West – reaching tens of thousands of pupils each day. We train school kitchen teams to make tasty, healthy, generation-powering school food from scratch, using fresh ingredients.
Surman Weston is a multi-award winning architecture practice based in London. We’ve delivered acclaimed projects across a range of sectors including education, community and housing.

Working in collaboration with LEAP Federation and Chefs in Schools, we’ve created the Hackney School of Food –an urban oasis and food education hub with kitchen gardens, beehives, chickens and an orchard.

In 2020, we won the Clarion Housing Group 2020 William Sutton Prize for Social Innovation, which enabled us to produce this toolkit to assist others with ambitions to create their own food schools.

PLANT PICK COOK EAT 7 8
WHO IS IT FOR? 1.1 1.2
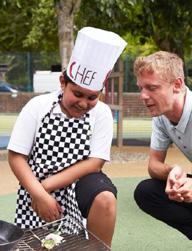
“It was a really fun experience to make something from scratch and then eat it afterwards. I loved it!”
E DITH, age 8
WHAT IS THE HACKNEY SCHOOL OF FOOD? 1.3 1.4

A short history of the Hackney School of Food...

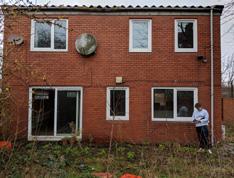
It was on a grey, rainy day sitting in a car outside Mandeville School, that Chefs in Schools’ co-founders, Nicole Pisani, Exec. Chef, and Louise Nichols, Exec. Head at LEAP, had an idea. Looking at an old school building and rundown area of grounds, they asked - could it be turned into something incredible that would benefit pupils?
Henry Dimbleby, co-founder at Chefs in Schools, became a driving force to take the project forwards. The architects, Surman Weston, then brought the vision to life, while many generous donations made it a reality. Over a year, the old building became a cookery classroom, a walled garden and orchards were created, a wood-fired oven was built and the Hackney School of Food was born.
BEFORE
Since the food education hub opened, many eager growers and young chefs have been welcomed in.

We’ve watched and listened as this pilot project has bedded in. Armed with this school-tested knowledge, we’ve refined the key principles and produced this toolkit to assist others wishing to create their own food education hub.
The Hackney School of Food was designed as a test case to see what could be possible in a school environment.
The design was driven by a number of guiding principles, these were put in place with a view to others replicating the project in the future.

9 10 A WORKING PROTOTYPE
AFTER
THE SHOCKING TRUTH WHY SHOULD I GET ONE? 2.0 2.1
A School of Food has so much to offer your pupils, staff and our wider society. It creates a learning environment where everyone can shine. Jobs from weeding vegetable beds to grating carrots are met with incredible enthusiasm, but so are projects to sell and market baked goods or to create recipes. And children will happily try vegetables they’ve helped to grow. All of which improves their food culture, which is vitally important in terms of health, attainment and wellbeing.
Research shows that cognition and attainment were found to be higher in primary school children from low-income families with better diets 1. While children with high scores on a ‘snacking’ eating pattern were more likely to have indications of conduct or oppositional disorders than those with low scores 2. And when steps are taken to improve school food standards, child obesity rates fall 3 .
The nation’s diet is a key public health issue. Obesity is becoming a leading cause of preventable illness. And yet the number of children who are overweight or obese continues to rise –as of 20 21 around 25% of children were obese by the time they reached Year 6 4. Obesity costs the NHS over £6bn per year and is said to cost society £27bn per year.
The prevalence of so-called “food swamps”, particularly in deprived areas, is making it increasingly difficult for children to access healthy food 5. But with a positive, innovative approach to food education, we can help children learn to love food that’s good for them and good to eat. Your School of Food can be the place where that life-long love of good food begins. And it can become a revenue earner, a showcase for food education and an asset for your wider community.

Associations between Food Group Intake, Cognition, and Academic Achievement in Elementary Schoolchildren. Nutrients. 2019
Eating patterns and mental health problems in early adolescence –a cross-sectional study of 12-13-year-old Norwegian schoolchildren. 2014
National
The State of the World’s Children 2019: Children, food and nutrition (UNICEF)
11 12
Hennessy E, Oh A, Agurs-Collins T, Chriqui JF, Mâsse LC, Moser RP, Perna F. State-level school competitive food and beverage laws are associated with children’s weight status.
Child Measurement Programme, England – 2020 — 2021
1 2 3 4 5
You can hold private sessions for other schools and team building days for corporate groups to generate income.

HEALTH

Food can nourish, nurture and sustain a new generation. Eating well at school helps both behaviour and attainment, which in turn aids social mobility and helps children fulfil their potential. We believe getting kids to eat well requires one key ingredient: food education.
CONFIDENCE
A pupil who refused to eat beetroots ate one like an apple after making a beetroot chocolate brownie in a food education class. Kids who have refused pasta at lunch, will line up to try it after rolling out dough and making shapes.
COMMUNITY
A hub that puts food at the centre of your school will never just be about eating, it will be about learning, confidence building, creativity and a place where all kids can shine. A School of Food puts your school at the heart of the community – holding classes for all.
We’ve seen pupils reluctant to try raw veg, plucking carrots from the soil and eating them fresh from the ground.


13 14 BENEFIT & POSITIVE
IMPACT 2.2
Whether you’re hoping to realise a full blown School of Food, or a simple outdoor growing space, we’ve tried to include as many tips and lessons learned as possible. The toolkit is split into two primary sections:

Delivering a food education hub.
Operating a food education hub.

These primary sections are then divided into smaller chapters that focus in on the specifics of certain planning, design, construction and operational phases.
Throughout this toolkit there are links to resources, you can find them all by scanning here.

15 16
"The School of Food has fast become a wonderful resource for local schools and the neighbouring community. We hope this toolkit will be the spark that creates a network of gold standard food education hubs in this country and beyond."
THIS
HENRY DIMBLEBY, Chefs in Schools Co-founder.
HOW TO USE
TOOLKIT 3.0
B


CREATING A SCHOOL OF FOOD
4.0 INITIAL PLANNING
Creating your own School of Food is an exciting and rewarding project. However you’d like your School of Food to look, there’s a scale that will work for you and benefit your school.
The first step is to bring food and food education into focus within day-to-day school life. Before embarking on the School of Food, LEAP Federation and Chefs in Schools worked together to radically improve the food culture in LEAP schools.

18 17
4.2 4.1 START SMALL CHANGE THE CULTURE


Tips for changing a school’s food culture:
Ensure your school kitchen team are confident to talk with children about their food – every visit to the dining hall is an education. Create or sign up to a school food charter, include pupils and the kitchen team in the project.
Grow a few herbs or vegetables that children can nurture and then deliver to the kitchen.

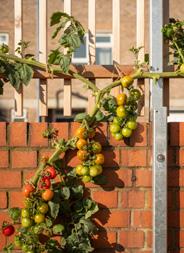
Growing your own school produce is a great way to start getting kids involved in a hands-on way. A few containers can be used to grow tomatoes or lettuce. If you have space, create a vegetable patch in the playground. Try to involve the kitchen team in any project linked to food.
You can find more advice on vegetable patches and gardening from p.59.
Put edible flowers on the table at lunch. Serve vegetables, like cauliflower, whole. Put pea shoots on the table for kids to pick themselves. Decorate the dining hall with pictures or a mural of vegetables and fruit.
Are you ready to take the first step and change the food culture in your school?

19 20
FUNDRAISING TIPS PLANNING SOMETHING BIGGER?
As the food culture in the school is transforming, it’s a good time to start planning for the next step. You’ll need three things to deliver a School of Food.
SPACE
Is there a space in your school which is rarely or never used?
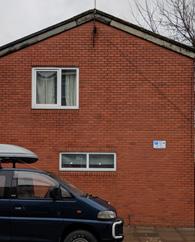
The Hackney School of Food was a near derelict building. Other options include disused classrooms waiting to be made useful – or space to build a new classroom.
VISION
Who within the school or local community has a passion for food?
Identify those who you can involve to drive the project forward and make your vision a reality. Run focus groups with your pupils, staff and parents to get their input and gather ideas. Compile these ideas into a written brief of what you’re aiming to achieve.
FUNDING
If you’re planning a large scale project, start by speaking to your local council about local funding opportunities and how they might be able to support you. There will be various pots of funds you can access from local and national grant makers.
Each funder is different and will have specific application requirements but it’s often possible to reuse information from previous bids, which means the application process gets less onerous after a few bids.
Raise awareness – send press releases to local media and keep shouting about the project on social media, this can boost fundraising and attract volunteers with expertise.
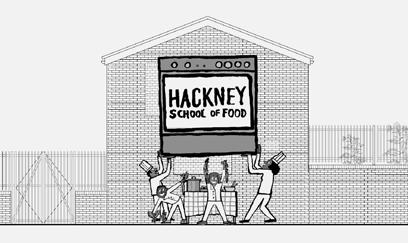
Bring your vision to life! We found that funders responded positively when presented with design work, including visualisations of the intended designs. Share the designs on social media and with local papers. The below image is a good example from the Hackney School of Food.

21 22
4.4 4.3
4.4 FUNDRAISING TIPS


INVOLVE CROWDFUNDING
Involve your school community in fundraising activities; from bake sales to fun runs, there is something for everyone.


Set up a crowdfunding page where you can tell people about your project and encourage them to donate.
REACH OUT WRITE
Reach out to parents and Governors to support your fundraising campaign – you never know who someone might know!
Write to local companies who may be able to donate equipment as well as funds.
STAY UP TO DATE WITH RELEVANT FUNDING OPPORTUNITIES.
The Grants4Schools database is a brilliant free resource to help you find grants specific to educational projects and schools.
23 24
4.5 CHOOSING A SPACE
Having refined your vision and lined up funding streams the next challenge is to find a suitable space for a School of Food. Look for spaces that are / have:
Outdoor Access: Bordering or close to an outdoor space is ideal.
Air and Light: Natural ventilation and daylight, or the opportunity to achieve both, are vital.

Supplies: Bringing in new services can be done but is costly. Ideally you’ll have existing water and electricity supplies.


Accessibility: Is the space accessible to everyone? If not, can it be adapted?

Street frontage: Improve ease of access for visiting schools, after school clubs and the local community.
Structural work: Look for spaces that don’t require extensive structural alterations.


6 2 1 3 4 5 1 6 2 3 4 5 25 26
4.6


4.7 BRINGING IN THE PROFESSIONALS
FINDING A SUITABLE ARCHITECT
With a written brief of what you’d like to create and a space identified in which to do it, now is the time to establish how best to deliver the project. Do I need an architect? Well, that depends...
I NEED AN ARCHITECT:
My project is ambitious, the quality of the end product is very important.

My project will require Planning Permission or Listed Building Consent (see p.31). My project will affect the structure of the building, or its windows, doors or roof.
I want someone to keep an eye on the project and make sure they it's on track.
If you decide your project would benefit from having an architect on board, the following tips will help you find a suitable architectural practice.
MAYBE NOT FOR NOW:
My project is simple, for example interior refurbishment only.
I have experience of managing building projects.
I’m comfortable dealing with a builder.
I’m familiar with the Building Regulations (see p. 31), and may employ an architectural technician to produce drawings.
A local practice is often a good bet, as they should have knowledge of the local planning and construction context.
Architects must be registered with the Architects Registration Board, which has a publicly accessible database.
The Royal Institute of British Architects (RIBA) has a Find an Architect service to help you find local architects with the right experience.
A ‘RIBA Chartership’ is an optional professional accreditation.
We recommend meeting with a few different practices to find those you feel most comfortable with. A friendly and productive working relationship with your architect is key to delivering a successful project.

27 28
5.0 5.1 THE NITTY GRITTY STAGES OF A BUILDING PROJECT
If you’ve opted to work with an architect, they’ll be able to guide you through the delivery of the project and ensure the required permissions are attained and all regulations are complied with. If you’re going it alone, the next few pages will help you structure
the project and point you in the direction of permissions and regulations that may be relevant to your project. If you’re unsure about any of the regulations or permissions speak to a professional before proceeding.
RIBA has devised a Plan of Work for building projects, which organises the process in ‘work stages’ and explains what you can expect at each point.

Whether or not you’re working with an architect, plan your project around the following stages:
Kick start! What would you like to achieve?
How will it actually get built?
A contractor will deliver your vision.
How big? What's the layout? Any tricky bits?
How does it look and feel?


Sign-offs & teething troubles.
Get cooking!
29 30
5.2 5.3 REQUIREMENTS & PERMISSIONS
BUILDING CONTRACTS


Depending on the works you plan to complete there are a range of permissions, rules and regulations that may apply to your project. Even if the project is small, some of the following may apply:
Planning Permission
A wide range of factors determine if planning permission is required. Always check before getting too far with you plans.
Building Regulations
These are distinct from planning permission and focus on ensuring that building work is completed to required standards. You must check if you need approval before you construct or change buildings in certain ways.

Health and Safety
Building projects are subject to specific Health and Safety Regulations. You must ensure these are complied with.

Listed Building Consent
Certain buildings of significant architectural or historic interest are listed by Historic England. Alterations to Listed Buildings require Listed Building Consent. You can check if your building is listed by searching Historic England’s List.
When working with a building contractor, with or without an architect, it’s essential to have a construction contract in place.
The right contract will protect all parties from unprofessional and unreasonable conduct and also give the building phase of the project a structure against which progress can be measured.
1 2 4 31 32 Learn more Learn more
more Learn more
Learn
6.0 6.1 DESIGNING A SCHOOL OF FOOD SITE ANALYSIS
The first step of designing a School of Food is to carefully assess the condition of your chosen site. The following are key steps and considerations:
Understand the orientation of your building / space and take note of the sun path to identify how the natural light changes throughout the day. These mobile apps help you see where the sun will in the sky be at any time throughout the whole year.
Accurately measure the size of your space, including windows, doors and any fixtures. Understanding exactly how much room you have to play with is crucial when thinking about how you might convert the space into a school of food.
Are the existing walls, doors and windows in good condition? Do they need replacing or repairing? Or will a lick of paint do?
If relevant, are the existing roof, gutters and rainwater pipes in good condition?
Will structural work be required to create a bigger or open plan space? If so it’s time to call in the professionals, you’ll need a structural engineer and an architect.
Is the space or building insulated? Are the windows double glazed? It’s a good idea to improve the environmental performance of the building where possible.
Always watch out for asbestos-containing materials. If in any doubt, do not disturb building fabric and obtain a professional asbestos survey.
Existing services – are there gas, heating, electricity, water, foul and surface drainage, an internet connection?


A thorough analysis of the existing condition will make the next (much more exciting) step of putting pen to paper and designing your space more enjoyable and efficient.
Android App!

33 34
Apple App!
6.2 BRIEF DEVELOPMENT

Before diving straight into the design work, it’s important to spend time compiling a thorough brief. This should set out what you’d like to achieve generally, as well as any specific requirements of your project.
Tips for developing a brief:
Ask the experts. When developing the brief assemble a dedicated project team. Suggested team members include a project lead, curriculum lead, gardening lead, facilities lead, cooking lead, PR / fundraising / community lead and a student rep. Each will be able to feed into discussions with specific expertise to refine your brief.
Ask the kids. We held workshops and asked the kids what they’d like to see in their new kitchen and gardens. Ask the community. It’s great to engage those who live nearby during the brief building stage. They’ll come with fresh ideas (and often strong opinions!) on what they’d like to see. Community involvement at this stage fosters a sense of ownership and pride in the project.
Be specific where you can. The more you can refine your brief and separate the ‘musthaves’ from the ‘nice-to-haves’, the easier it’ll be to arrive at a design that meets your requirements. For example, for our team in Hackney it was a ‘must-have’ that 30 children could use the space, this had a big impact on our design.
Set your budget.
There are unknowns in all projects and this is especially true when converting existing buildings. Based on our experience, we recommend that your target budget is 15% below your maximum spend, this allows a little wiggle room for unknowns that crop up throughout the project.
To ensure your budget is realistic, it’s advisable to obtain some informed costings at this stage, a quantity surveyor or local building contractor should be able advise on whether your brief is in line with the available budget.
35 36
Learning by doing. This guiding principal of how the kids would learn about food is also applied to the design of the building. Rather than try to cover up architectural alterations and additions, everything is left exposed. Children can see all the different ingredients of the building and ask questions about their space and what each bit does.
Having refined our brief we established a set of key design principles. These underpinned all design decisions and were established to help us meet the requirements of the brief in a logical and coherent fashion. Target spending on educational experience. Our budget for the project was relatively low. To ensure we achieved the maximum bang for our buck, we focused design time and construction spending on the elements that would most improve the educational experience. Of course, lots of adjustments were required to elements that wouldn’t have a direct educational impact, we completely these as simply and cost effectively as possible.
Solid materials and simple replicable details. We selected hard wearing materials that will stand-up to heavy use and be easy to maintain. The architectural detailing is unfussy to allow others to copy.
The below image shows some examples of how these key principles were employed. We established a functional datum line at 1.25m above floor level. Everything below this line is used day-to-day so design time and construction spending is focused on this area.
Above the functional datum, interventions are less critical and therefore a more loose
fit approach is adopted. Roof insulation and trusses are left exposed, walls are left rough and simply painted over and services are surface mounted – the bones of the space are crudely on show for everyone to see. Throughout the space, materials are solid and we avoided thin surface finishes that would easily damage. See section 6.7 for more information.
37 38 6.3
KEY DESIGN PRINCIPLES
1 1 2 2 3 3
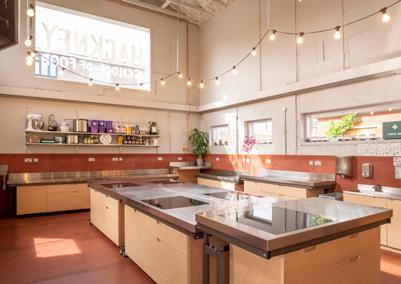
6.4 SPACE PLANNING

The following were key considerations when laying out the space:

Kids learning in a hands on way. There is enough worktop space for 30 children to all cook together. Children work in groups of 3 at 10 specially designed work stations.
Ease of demonstration. A cluster of 5 work stations are arranged to form a large central island. When the chef is demonstrating a technique, children gather round the island to watch.
Ease of supervision. From a central position at the front of the space the educator can see all pupils, this is crucial with children handling knives and cooking utensils. At least one teaching assistant is always on hand to circulate and provide additional supervision.


Good sight lines for supervision


Central island where the chef can brief the group
39 40
6.5 CAPACITY AND CIRCULATION
To give an idea of the floor area required, the Hackney School of Food had a gross internal area (GIA) of 47sqm (506sqft).

We’d recommend that this is considered the absolute minimum to accommodate 30 primary school children (this substantially below a typical classroom size but we had to work with the space we had available).
The kitchen is planned to make circulation around and through the space as simple as possible. There is a ring of circulation space around the central island and a through route between the educator station and the service zone on the rear wall.

= Student cooking station
= Educator cooking station
= Washing station
= Circulation route
dw = Dishwasher
ov = Oven
fr = Fridge
hw = Handwash station
st = Store cupboard
1.55m 1.55m 1.4m 1.1m 5.79m 8.08m To garden ov dw fr hw st To WCs To garden 41 42
Having refined our brief we established a set of key design principles. These underpinned all design decisions and were established to help us meet the requirements of the brief in a logical and coherent fashion.
When planning the kitchen, we aimed to keep the space where the kids do most of their prep and cooking separate from the areas they’d engage with less. This broadly results in two zones, an educator zone and a kids’ zone. There is of course some cross-over but minimising how much kids

need to circulate during a lesson makes supervision easier and helps them maintain focus on the task at hand.
The diagram below shows the different zones and the adjacent image shows how we positioned key appliances and equipment.

Our appliances and equipment: Educator zone


Kids' zone
10 height-adjustable work stations, each with undercounter pot, pan and utensil storage.
1 height-adjustable / demonstrator station. Tall catering fridge.
2 height-adjustable sink stations with hose taps. Meiko Dishwasher. Hand washing station (2 taps).
Tall store cupboard for cleaning equipment. Rational Combi oven (10 grid).
1 2 3 4 4 5 5 6 7 7 8 8 1 2 6 3 43 44 6.6 ZONING, APPLIANCES & EQUIPMENT
6.7 HEIGHT-ADJUSTABLE WORK STATIONS
When designing the kitchen it was very important to us that the kitchen was accessible for all ages and abilities. We developed our own height-adjustable cooking and washing stations, to allow reception aged kids and fully grown adults to cook in equal comfort.
Each cooking station is designed to be used by 3 kids or 2 two adults. Some design tips:
The working height is adjustable from about 64cm up to 94cm. Find heightadjustable frames here.
Each cooking station is 180cm wide x 60cm deep.
Cooking stations contain 1 x 4 ring induction hob, mounted completely flush with the worktop, so kids can slide heavy pans across the entire surface.

Induction hobs are a good choice as they’re only on and hot when in contact with a pot or pan.


Worktops are made from stainless steel just as you’d find in a professional kitchen. Super durable!
Each cooking station includes an undermounted storage unit made from birch plywood. The storage includes a utensil drawer, a pots and pans drawer and a small cupboard.
Lesson learned!
The cooking stations were designed as prototypes and, while largely successful, improvements could be made.
When fully loaded the cupboards get a little too heavy for the height-adjustable frames. A better solution would be to detach the cupboards from the worktops. Mounting the detached units on castors would provide greater flexibility and make cleaning around them easy.

45 46
Storage unit
Flush induction hob
Stainless worktops
6.8 ROBUST MATERIALS & FINISHES
“With hundreds of kids in and out each week, the teaching kitchen takes a real beating, but it’s been designed to be durable and easy to maintain, so far it’s holding up really well.”
TOM WALKER Head Food Educator
It’s essential to select hard wearing materials that can withstand the heavy use, however it’s also important to remember the space is primarily for children and therefore it shouldn’t be too clinical or austere.

By carefully combining materials and finishes, it’s possible to achieve the required functionality while also creating a warm, welcoming and child-friendly environment. The adjacent image shows the primary construction materials used in the teaching kitchen.
Festoon lighting is an inexpensive way to add light and has a more fun and playful look than lots of typical institutional light fittings.
Electrical services are surface mounted in ultra-tough galvanised steel cable trunking – cheaper than concealing cables in the walls and easier to adjust in the future as required.
Hard wearing wipeable paint is used on the walls above splashback to ensure stains can be cleaned.
Viroc timber-cement board is used to clad the walls up to 1.25m and for the floor finish. This superrobust waterproof material adds colour and warmth to the material palette. As it’s coloured-through, it’s very forgiving – scuffs, chips and dents are not problem.
Birch plywood cupboards are tough and this naturally warm material helps ensure the kitchen isn’t too clinical.
Stainless steel worktops on all workstations. These are tough and used in professional kitchens.

47 48
In order to maximise spending on the elements that add educational value, elsewhere, architectural detailing can be kept as straightforward and unfussy as possible.

The rough-and-ready aesthetic that results from this approach adds texture and visual interest to the space. The ingredients of the building are exposed and kids can question what each bit is and does. Much like with their cooking, they can learn through experience.


The above images are good examples of simple details and exposed finishes.
Structural ring beam treated with fire retardant paint and left exposed rather than boxing in.
The traces of removed internal walls are left exposed rather than concealing with render and plaster.
Infilled windows are clearly recognisable as the blockwork finish is simply painted over.
Window reveals are crudely rendered and painted in to match the wall colour.
1 1 2 2 2 3 3 4 4 49 50 6.9 SIMPLE DETAILS & EXPOSED FINISHES
6.10 BUILDING PERFORMANCE UPGRADES
When converting an existing building, it’s likely that general improvements will be required to ensure the new space complies with current Building Regulations. Creating a teaching kitchen may also require a few more specific upgrades.

Often these upgrades are related to incoming services, such as water, gas and electricity. Improvements to insulation, space heating and ventilation may also be required.

Improved roof insulation. In Hackney we were required to re-insulate the roof to ensure it met Building Regulations for heat retention. We used a spray foam insulation to ensure a good seal around the existing roof trusses. This method also results in zero waste material.
Space heating and ventilation upgrades. These upgrades will be dictated by your existing condition. To free up wall space for cooking stations, we used an overhead radiant heater. Ventilation was improved with two heat recovery fan units at high level.
Electrical supply upgrade. Induction hobs and professional catering ovens use a lot of power. If you’re converting a residential building into a teaching kitchen, you’ll more than likely have to upgrade the power supply from single-phase to three-phase. There is a long lead time for this specialist work and costs are considerable – check what power supply you have early on!
Water and gas.
It may be beneficial to increase the diameter of the incoming water pipe, improving water pressure, avoiding new gas installation. Air source heat pumps or electrical boilers are good alternatives.
1 2 3 4 51 52
4 2 3 1
6.11 MINIMISING STRUCTURAL ALTERATIONS
For the internal layout to work as efficiently as possible, it’s likely that external windows and doors may need to be moved. Creating completely new openings can be costly as it involves resupporting the structure above with a lintel. However adjusting existing openings, for example turning a window into a door or vice versa, is much simpler and cheaper as no structural work is required.


AFTER 1 1
BEFORE
= Lintel = Adjusted opening
= Adjustment numbers


Existing UPVC back door removed and infilled with brick to match masonry paving and planters in the kitchen garden.

2 3
Existing UPVC window removed, opening enlarged downwards below lintel and new entrance door inserted.
Existing door partially infilled with masonry and a strip window inserted below the existing lintel.

1 1 2 2 3 3 53 54
6.12 EXTERNAL IMPROVEMENT

When converting an existing building certain external improvements may be required.
We made the required external alterations, that wouldn’t greatly impact the educational experience, as simply and cost effectively as possible –good examples being the new corrugated roof and the upgraded doors and windows.
More money was spent where external improvements would directly impact the educational experience, such as the raised planters, retractable awning and external cooking facilities. See chapter 7 for more detailed information on the design of the gardens.


Modern timber-aluminium composite windows. External lighting installed all around building. External power and water outlets installed. Level thresholds to ensure accessibility for all.
Fibre cement board corrugated roofing sheets. New galvanised steel guttering and downpipes. Slatted timber fencing and gates.
Retractable cafe style awning.
9 10 11 12
Self compacting gravel walkways.
Raised masonry planters. Masonry paving. between planters. External cooking facilities.
5 8 2 9 10 12 7 6 11 3 4 55 56
1 5
6 7 8 2 3 4
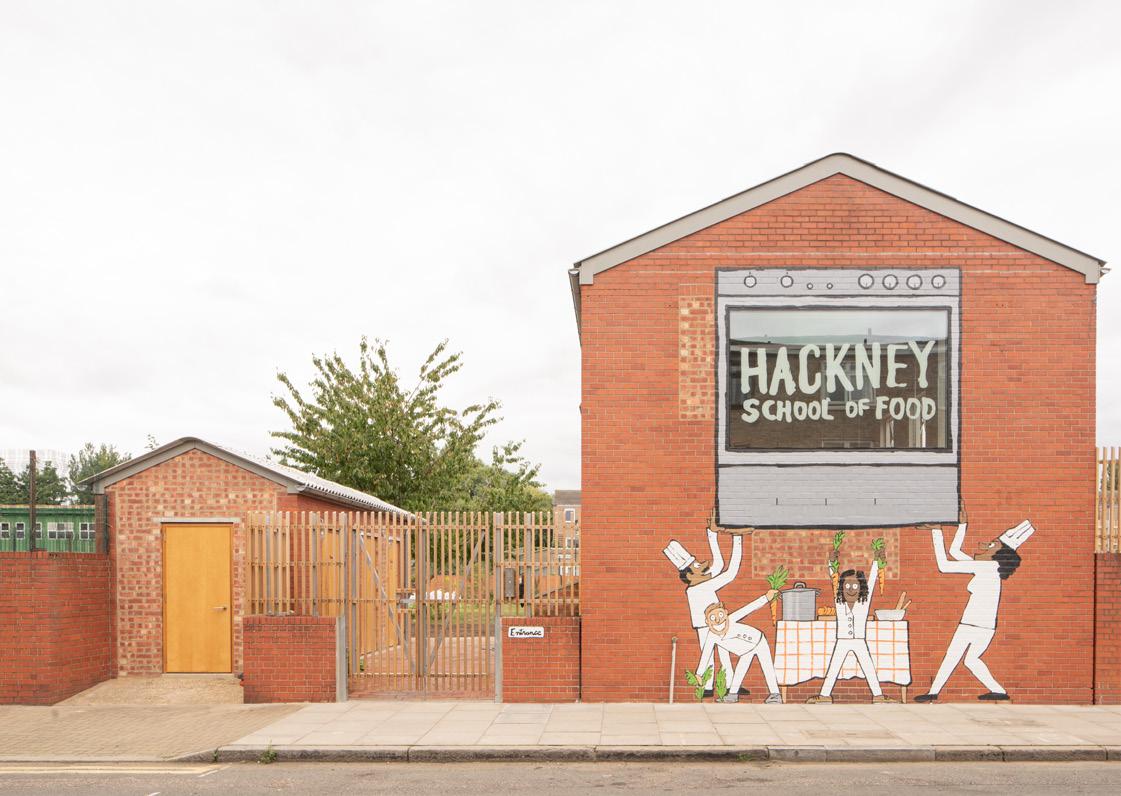
A distinctive graphic identity is a great way to capture the attention of the public, whether it be a visit to the website or the School of Food itself, a strong brand and promoting it via social media helps to reach a wider audience.


Our existing building and garden in Hackney benefited from a good amount of street frontage. We created new gated openings into the gardens from the street to improve access for visiting pupils, staff and members of the local community.


The new gates and fencing are made from slatted timber, this allows views into the gardens while maintaining a degree of privacy. Timber fencing is a great natural and sustainable alternative to more typical metal mesh school fencing. New public entrance
We worked with renowned artist Jean Jullien to develop a joyful identity for the School of Food that would appeal to adults and kids in equal measure.
A mural is a great way to enliven a tired looking building. We combined Jean’s illustrations with a new window opening to create engaging signage on the street facing elevation. The School of Food is now a beacon of joy in the community.
BEFORE 57 58 6.13
AN
PRIVACY
6.14
IDENTITY
& VISIBILITY
New staff and pupil entrance
"Assessing a site should always be the starting point for me: for example, different plants often need different conditions (light /soil type / access to water), and relative to how much sun your garden gets you can grow so many different varieties of plants. You should never be put off by a limited space. So If your outdoor space is super small you could for example think about creating a vertical garden."
“Many schools especially in built up urban areas may not have a big enough space to grow enough of anything to supply the school kitchen, but the most important thing is always the experience of growing with children and educating them about where their food comes from.”

59 60 7.0
DESIGNING THE GARDEN
LIDKA , Head Gardener at the Hackney School of Food.
7.1 KITCHEN GARDEN PLAN
The kitchen garden at the Hackney School of Food is carefully planned to pack in learning opportunities.
The adjacent plan drawing summarises the key features of the garden. We’ll look at the design of some of these features in more detail over the next few pages, but before doing so, here are the key design principles that informed our Hackney kitchen garden.

LIGHT
South-facing garden to maximise growing potential.
Public entrance.
Perimeter planted beds.
Raised masonry planting beds.
Outdoor teaching / dining area.
In a one hour lesson, kids can move easily between kitchen and garden to harvest produce, prepare it and then cook a meal.
EDIBLE PLANTS
Almost all the plants in the kitchen garden are edible – children can complete the field to fork cycle by eating what they’ve sewn and grown.
PROXIMITY TO KITCHEN HANDS-ON LEARNING AND COOKING
Kids do everything themselves, including cooking at the firepit and pizza oven (with some careful supervision!).
Firepit for cooking. Pizza oven.
Rainwater collection tank.
Wellington boot rack. Pupil and staff entrance. Food store. WCs. Teaching kitchen.
1 5 9 10 11 12 6 7 8 2 3 4 N 7 1 2 4 3 5 8 10 9 12 11 6 Through route 61 62
7.2 RAISED MASONRY PLANTERS 7.3 OUTDOOR COOKING
The raised planters are formed in masonry ensuring they’ll be low maintenance and long lasting.
The beds gradually step up in height, from around 15cm up to 75cm. Whether you’re a Year 1 child, a wheelchair user, or a 6’2” chef like Tom, the range of heights means you’ll find one which is comfortable to work at.
Around the firepit the beds form places to perch. The tallest bed transforms into a food preparation area for the adjacent pizza oven.
Key to the kitchen garden are the outdoor cooking areas. Our pizza oven is designed to be a feature of the garden.


Housed within a brick chimney, the wood-fired Gozney pizza oven and flue can cook up to four pizzas at a time – perfect for a classful of 30 hungry kids.
Kids can assist the chef in an unusual, fun and sociable way. BBQs or firepits allows for alfresco cooking on a budget.
15cm 30cm 45cm 60cm 75cm 63 64
7.4 7.5 OUTDOOR TEACHING AND DINING
RAINWATER TO WATERING CAN
A simple café-style awning is installed on the south-face of the teaching kitchen. This simple to install, cost-effective addition, provides solar shading within the kitchen to reduce overheating in summer.
When opened up the awning creates a sheltered outdoor space for outdoor lessons. It is also a place for children to sit and eat their freshly prepared meals.

To teach children about water conservation, and improve the sustainable credentials of the existing building, gutters and downpipes were replaced and re-routed into a large agricultural water storage container.


Water Tank Gutters&pipes
Tables & benches


Collapsible benches and tables can be quickly folded up and stowed away when not in use.
A slatted timber lid was added to the storage tank to ensure it’s only accessible with assistance from a supervising member of staff.
When tending to their plants, children fill up their watering cans with the collected rainwater –more nutritious for the plants and better for the planet!
65 66
7.6 PLANTING PRINCIPLES
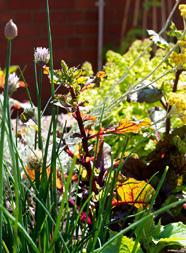
How to make your school-grown produce thrive: What we are growing:

Use your patch all year round (summer and winter planting).

Be clever with your planning, e.g. planting potatoes early which can be harvested in June and planting beans in the same space straight after that.
If there is a space for fruit trees, plant at least a couple.
Children absolutely love picking herbs to use in the kitchen for cookery lessons, and herbs are fairly easy to plant, so this is a great use of space but keep in mind that rosemary, sage, oregano and thyme prefer sun, and mint, parsley and coriander can more tolerate shade.
Plant your harvests with the term times in mind.

Ask yourself: When are there going to be people around to help keep on top of the harvests, and when is the garden going to be left relatively unattended? Plant with the answers to these questions in mind.
In the orchard, there are fruit trees – apples, pears, damsons, apricots, peaches and figs. Plenty of berries including, raspberries, jostaberries, gooseberries and strawberries.
We have climbers –grapevines, broad beans, runner beans, tomatoes, cucumbers, courgettes, pumpkins. Root vegetables including potatoes, onions, spring onions, leeks, garlic and artichokes.
Wildflowers, nigella, poppies and iris grow to attract pollinators.
“Lidka showed us a huge pumpkin, and we got to taste its seeds! Then we ate sorrel leaf, it was nice.”

67 68
KAMALI, age 7
7.7
A PROBLEM TO THINK ABOUT
A key difficulty
Lidka experienced when creating the garden was the summer holidays.

“When growing in the school setting one of the biggest difficulties I found was the six week summer break, when there’s no one to look after the garden. Often, after the summer holidays there is little to come back to due to the neglect of a garden in its infancy which needs a lot of care to be sustained over our increasingly hot summers.”
This can be heartbreaking because a whole team of people’s hard work, effort and love which has now gone into creating the garden in the spring, is then lost. But we’ve found some solutions to this problem...
Recruit help from the local community and parents living close by. We’ve found it can be a lovely experience for some families with no outdoor space at home or who cannot go away during the summer holidays. Set up irrigation – most of the garden will survive the summer if watered – so automating / simplifying the system using irrigation will help keep the garden alive.
Plant vegetables which will be harvested before the summer holidays (herbs, salads, potatoes, onions, garlic etc), that way the harvest has already been collected before the end of term, so nothing is left to rot for six weeks.
69 70
7.8 ROOM FOR MORE?
At the School of Food, the original kitchen garden proved so succesful we decided to radically increase the size of the garden.
In a second phase of works, which is gradually and organically being implemented as funds and time permit, an area of playground is slowly coming back to life and is teaming with wildlife.
The adjacent masterplan drawing sets out our ambitions for Phase 2.
We’ve packed in interactive educational features and have planned the space so that play and productivity aren’t exclusive to one another.
Additional features include:
An orchard of fruit trees.
Additional productive vegetable beds, space for composting.
A potting shed and propagation house.
Beehives. A chicken coop (the kids' favourite!).
Play spaces.
Natural amphitheatre.
Multipurpose teaching and dining space.
Vegetable beds.
Multi use teaching space. Natural amphitheatre. Natural play area. Perimeter beds. Orchard.

Smoker.
Chickens coops & beehives. Composting area. Propagation house. Outdoor classroom.
Potting shed.
1 2 3 4 5 6 7 8 10 11 12 9 5 1 5 9 10 11 12 6 7 8 2 3 4 71 72
7.9 OUR ANIMALS

The introduction of bees and chickens to the enlarged gardens has proved particularly successful, the kids love them and there are benefits for the gardens too.

Bees increase biodiversity on the site, allow you to make honey and support pollination around your garden – win-win-win! Speak to a local beekeeping group about a hive-share or beekeeping assistance.
Helping bee populations is also great for the environment!

Whether it’s collecting eggs or cuddling their favourite, our School of Food chickens are much loved by the children.

Children learn how to care for the chickens, where their eggs come from and then have the chance to cook with the freshly laid eggs. We’ve learned that in London, protecting our precious chickens
from foxes is a challenge, but with a sturdy coop and a carefully fox-proofed run we now have a robust setup and a healthy brood of hens.
73 74
C RUNNING A SCHOOL OF FOOD
8.0 OPERATIONS
At the Hackney School of Food, we have employed a Head Food Educator, Tom Walker, who is responsible for its dayto-day running, including the following:
• Delivering the term time cooking curriculum sessions and other lessons.

•
• Managing the rota for Kitchen Assistants and Chef Volunteers.

•
• Arranging bookings from schools, private hires, lessons.
•
• Budget management.
•

• Ordering ingredients for lessons and other supplies.
• Lesson and recipe
• development.
Tom being mind blowing
76 75
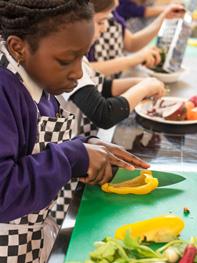
• Our cookery curriculum is divided by the Key Stage groups and covers a full range of basic cookery skills.

• Children carefully build on their cooking techniques from measuring, peeling and grating, through to chopping, slicing, dicing, preparing meat and finally cooking with fire.

• Underpinning these skills are the core ideas of a healthy and varied diet with each day focusing on different dishes or recipes that balance an Eatwell Plate.
• The field to fork approach underpins the vision of all our courses and training, using the gardens to teach children about where their food comes from.
Read on for Key Stage 1 course descriptions and learning objectives. For further curriculum information for other Key Stage groups, click here.
77 78
Our Food Educator works closely with the school team to develop lessons in line with the Primary National Curriculum.
8.1 CURRICULUM Click here
•
8.2 KEY STAGE 1 EXAMPLE CURRICULUM
YEARS 1 & 2 LEARNING OBJECTIVES
• Simple, small knife skills –cutting, peeling, grating.
• Following simple recipes.
•
EXAMPLE OF LESSONS
• Lesson A – 2 hours
1. 1. Cheese & Spinach
2. Wholemeal Scones.
3. 2. Apple & Carrot Coleslaw.
•
• Simple preparation techniques – measuring, mixing.
• Identifying fruits & vegetables.
• Nutrition – portion size, ‘5-a-Day’, ‘Eat the Rainbow’.
•
4. 3. Fruit Salad.
• Lesson B – 2 hours
1. 1. Sweet Potato Muffins.
2. 2. Crunchy Garden Salad.
3. 3. Baked Fruit.
• What happens to ingredients when they are cooked?
KEY STAGE 1 COURSE DESCRIPTION
• Key Stage 1 lessons introduce crucial kitchen tools in food preparation, learning how to safely handle small knives, peelers and graters correctly to transform raw ingredients into fresh salads.
• We cover how to follow simple recipes by breaking down the stages in easy-to-follow segments. Using techniques such as simple measuring and mixing, we create nutritious savoury bites, such as wholemeal cheese scones or sweet potato savoury muffins.
We identify different fruits and vegetables, begin to understand portion sizes and the importance of the ‘5 a Day’ and ‘Eat the Rainbow’ nutritional messages. This opportunity is used to explore different tastes of similar ingredients. It also acts as an introduction into what happens when we bake.

79 80
A.M. P.M.
07.00 — Tom, our Head Food Educator, arrives and checks booking information for the day.
Tom checks if the kitchen is ready for use, fills in the food diary and deals with deliveries. Tom then sets up the class, measures out ingredients and lays out equipment.
09.45 — The class arrives and gets ready, washing their hands, aprons on and name tags.
10.00 — The cookery session begins, 2 to 3 recipes will be covered.
12.00 — The morning session ends. If it was a half-day session, the food is boxed up and the class takes it home.
If it’s a four hour (full day) session, the class eats lunch and takes a break. Tom and any helpers clean away and lay out the equipment for the afternoon.
13.00 — The afternoon session begins – either the same students or a new group for another halfday booking. Cooking begins –another 1 or 2 recipes – or the class goes outside and learns about the gardens, plants seeds, checks on chickens and the bees or harvests produce.

14.30 — Full Day Session ends / 15.00 half day booking ends. Aprons are handed back, hands washed and the food is boxed up and taken away. Tom then cleans down the worktops, sweeps and mops the floor. All equipment is put away.
16.00 — This is Tom’s admin time, he checks bookings for the next day, responds to any emails that have come in, processes invoices and places any orders.

Tom completes the food diary for the day and goes home.

81 82 8.3 EXAMPLE DAY IN THE LIFE
8.4 EXAMPLE WEEKLY DIARY
Monday Tuesday Wednesday Thursday Friday Saturday Sunday
10-12am Boxing Academy
Learn to Cook
Programme
Week 1 of 4
1-3pm Office admin time
999 Club Community outreach: cookery skills lesson
Attendees to test and develop their own recipes
Schools booking: Curriculum Linked
Lesson
Year 4
Spanish Topic
Schools Booking: Curriculum Linked Lesson Year 2
Fire of London Topic
School Booking: Curriculum Linked
Lesson
Year 1
Explorers Topic
Schools Booking: Year 9
Intro to cooking Knife Skills and Baking
Film shoot hire: Local paper filming in kitchen and gardens
External Hire: Fermentation Class
Schools Booking: Year 4 Cookery Curriculum
After School
Evening Men's diabetes cookery class
After School Cookery Club: Mandeville Primary School
Social prescribing cooking class
After School Cookery Club: Millfields
Primary School
Exercise sessions and gardening class Migrateful Cooking School Fundraising cooking class with guest chefs
External Hire: Corporate event
External Hire: Birthday party
83 84
The Hackney School of Food is supported by a team of volunteers. Some help our school gardener care for the grounds, we also have volunteer chefs who support the cooking classes. Here are some tips on getting volunteers involved and managing their participation: Hold Volunteer Open Days to raise awareness / bring in volunteers.
Hold a ‘coffee morning’ for parents / families in the school.
Establish a core team that can then assist other newer / less confident gardeners.
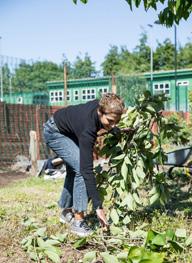
A lot of our garden volunteers are locals who have seen what’s happening in local press stories, social media and from walking past the grounds.
Establish key working days and routine / sign up sheets for volunteers to manage who will be on site, when. The number of volunteers needed / available will vary during the seasons.
We also offer a range of paid for courses for members of the local community, these include:
Bread baking for families, where family groups learn how to make focaccia, soda bread, flatbreads and naans.
Children’s Pizza Party, where kids learn how to make their pizzas from scratch including how to make a starter and the process of fermenting dough in the fridge.
Public Health Groups
.
We plan to offer a variety of cookery classes, in partnership with Public Health England and East London Foundation Trust and Homerton Hospital, to improve mental health and physical wellbeing, examples of sessions would be – Cooking for the Elderly, Cooking for Healthy Pregnancy and Cooking for Diabetes.
85 86
“Central to our mission is the belief that sharing great food unites families, communities, and society as a whole.”
LOUISE NICHOLS, Executive Headteacher
8.5 VOLUNTEERS & COMMUNITY
8.6 EXTERNAL HIRE POTENTIAL
The School of Food takes a pragmatic approach to generating revenue by offering external hire during weekends and school holidays. People and groups can hire the teaching kitchen and outdoor space, either separately or together, for events such as kids’ birthday parties, fairs and celebrations. It’s a truly fun and inspiring setting for any sort of gathering! Here are some ideas to maximise your external hire potential:

Covered outdoor space: Crucial with the British weather! An awning or canopy works well, as do marquees.
Seating and tables: Collapsible benches and tables can offer flexible banquet seating and can be stored away when not in use.
Toilets: Accessible to visitors, even just one accessible toilet will do the trick.
Pizza oven: Who doesn’t like a freshly baked slice? Outdoor pizza making is becoming increasingly popular and for good reason: it’s quick, simple, engaging, and fun –an event in itself!

Fire pit: One of the best ways of cooking vegetables is over coals or flame. It can be very cost effective but will require supervision.
Bike / scooter racks: Promote sustainable travel and allow your guests to park safely and securely.
87 88
8.7 MANAGING EXTERNAL HIRE
When producing information on the external hire options of your space, it’s important to clearly explain the general capability of the space on the website, in detail and with photos.
What is included:
Our rates include use of our bespoke built, fully equipped teaching kitchen.

10 grid rational combi oven.


4 Ring Induction hobs on each section.
For example, the Hackney School of Food website clearly outlines what is included in the space:
10 height-adjustable workstations (5 are on wheels for flexibility).
1 height-adjustable teaching station (on wheels for flexibility).
Handwashing station. Pot wash area includes 4 sinks with 2 spray hose taps and a Meiko industrial dishwasher. Tall catering fridge. A range of cookery utensils.
Cutlery, crockery, glasses and mugs.
Use of a digital projector and Bluetooth speaker on request.
Free Wi-Fi.
In addition, our walled garden includes:
Our talented team of chefs are available to cater for your events or meetings, designing bespoke menus to accommodate your needs.
100m2 wood oven (HSF induction required to use).
Garden work station.
Large fire pit. Awning and patio heaters. Outdoor tables and benches.
89 90
8.8 MARKETING TIPS
SOME TIPS:
Make sure you have good quality photos on the website that illustrate the feel of the space as well as its capabilities.
It’s a good idea to distil the website information into one-page PDF brochures. This makes it easy to explain the space. These can be emailed over to potential clients, or printed off and given at in-person viewings for them to take away.
Work out what way is best for external hire enquiries to get in touch with you – is it via a phone number or an email address? Consider the option that reduces the chance of enquiries being missed or slipping through the net.
Following up on enquiries is a key part of securing your bookings. It can remind potential external hire customers to book in their session before it’s too late. Being firm but not pushy is vital.
To sell the space, why not invite the potential hirer to visit. Photos go a long way, but do not compare to being in the room itself. Consider whether virtual tours can be facilitated.
You must properly price your hire based on a scale of what it includes, below is a breakdown of what you might need to bear in mind:
• For how long will the space be booked?
• Chef and Assistant hire.

• Booking a cookery lesson.
• Covering your building overheads.
• Will you need a key guardian, or will there always be a manager / representative on site?
Always provide clear T&Cs of the hire, including a deposit amount and consequences of late cancellations or damage to the space / equipment. Clearly outline when the deposit and hire fees need to be paid.
91 92
Thanks for reading!
We hope you feel inspired to go away and create your own School of Food. Please follow us on Instagram and tag us so we can follow your project. Most importantly – good luck!
@chefsinschools_uk
@hackneyschooloffood
@surmanweston
@leapfederation

This toolkit was developed with funding from Clarion Housing Group's William Sutton Prize for Social Innovation.
Thank you Clarion Housing Group for making this possible!
94 93
