SKETCH
A Project Guide to Drawing with Confidence
Sam Marshall

Introduction
‘To make art is to sing with the human voice. To do this you must first learn that the only voice you need is the voice you already have’
Art & Fear, David Bayles and Ted Orland
Have you ever picked up a ‘how to draw’ book and felt inadequate and out of your depth? Did you get the impression that to draw well you needed to draw like the author of the book? If you’ve ever felt disillusioned by an art book, you’ve come to the right place. This is not a ‘how to draw’ book; there are plenty of those already. I’m not going to show you how to draw accurately or teach you to draw like me. I want to give you the confidence to draw like you; to help, guide and support you to draw in a sketchbook, however that might look. I hope that you find Sketch to be an inspiring and helpful guide to encourage you to start and maintain a regular drawing practice.
Over my many years of teaching art, the most common phrase I’ve heard is ‘I can’t draw’. Many of us feel we can’t draw, even though as children we loved drawing and did it unselfconsciously. For many reasons, we develop the belief that the basic, innate quality of making marks on a surface is beyond us. I believe that we can all draw and it’s a myth that a special talent is needed. The most common barrier to people having a go at drawing and keeping at it is a conviction that the purpose of drawing is to make the artwork as realistic as possible, to make it look like what we are drawing – for example, if we can’t make an orange look like an orange, we might as well give up. This book will change the way you think and feel about drawing.
Six warm-up drawing exercises
For these exercises, you are going to draw one object in six different ways.
First, choose an object that fits in your hand. Find something that you see or use every day, something you are familiar with. Don’t overthink this; it doesn’t really matter what you draw. Remember, we aren’t here to create a ‘good drawing’, we are just having fun and making some marks.
Aim for each drawing to fill at least half the page. The timings (apart from the one-minute quick drawing) are rough guidelines – you don’t have to stick to them exactly.
I will include prompts to get you to consider how you feel about your drawings. Include these notes in your sketchbook. It might be helpful to create a list of the exercises on a separate page and record your thoughts and feelings there.
Make a note of each exercise underneath each drawing, just to remind you of the task.
What
you need
0 A simple object of your choice
0 A range of pencils: HB to 9B
0 Your larger sketchbook
0 Eraser
0 Pencil sharpener
0 Something to time yourself with
Exercise 1: Quick drawing
(1 minute)
Let all your other thoughts fall away and focus on looking at your object. Draw quickly, trying to capture the whole object in one minute. Use different pressures and marks to describe what you see. Do at least five of these drawings.
How did you find this exercise? Some people really enjoy having a time limit as it prevents them from thinking too much.
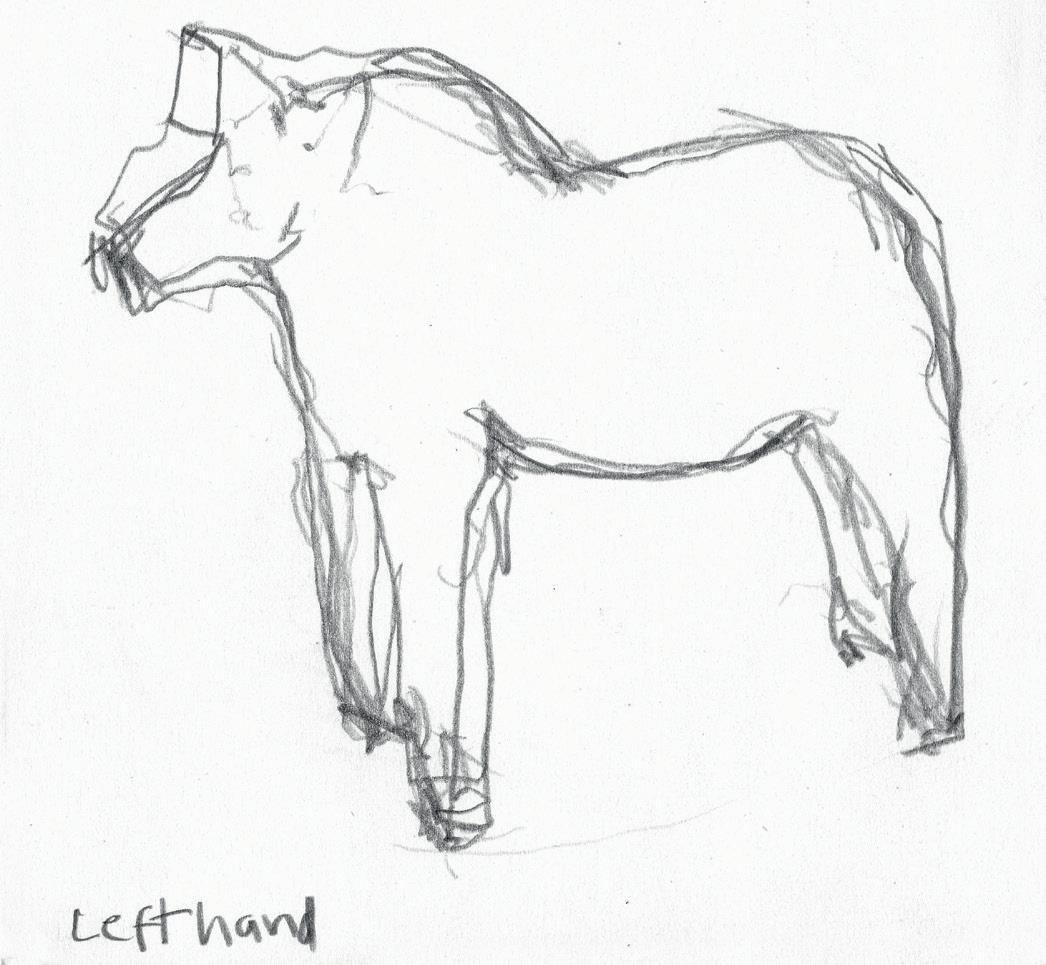
Exercise 2: Nondominant-hand drawing
(5 minutes)
Draw your object with the opposite hand to the one you normally draw with. Just let the lines flow and enjoy not being in control.
How did you find drawing in this way? Maybe you made marks that surprised you, marks that you wouldn’t normally make. Take note of this.
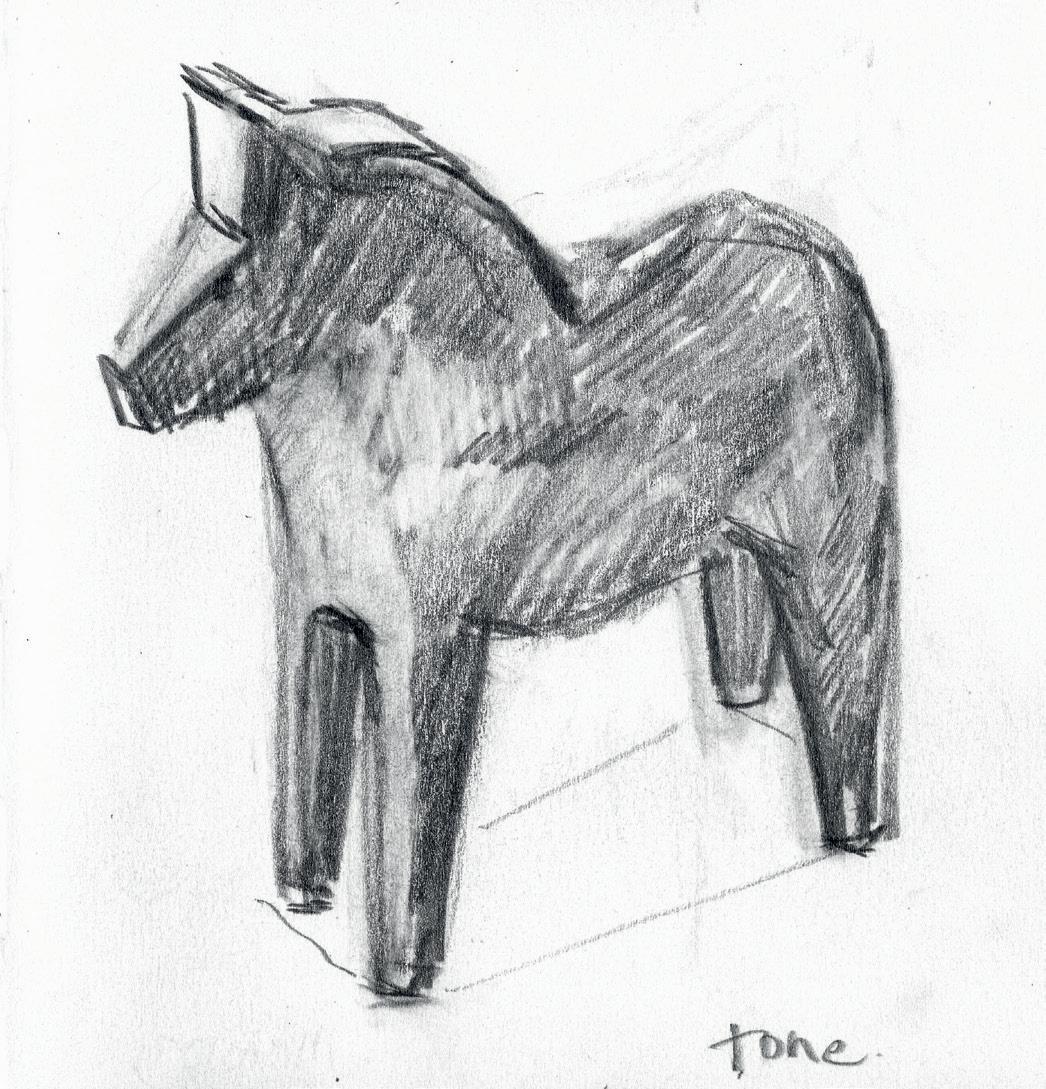
Exercise 3: Tone-only drawing (10
minutes)
For this exercise, you are not going to create an outline but just to use tone to describe your object. Put simply, tone refers to how light or dark something is.
Look carefully at your object and ask yourself what the lightest and darkest parts are. It might help you to squint while doing this, as it helps you to see tonal value areas more easily.
Turn your softest pencil on its side and use the lead to create broad marks. Build up the drawing, holding your pencil in this way.
How did you find this? Many people rely on using only lines to create their drawings. There’s nothing wrong with this, however it’s good practice to use tone in your drawings as it adds another dimension.
Exercise 4: Angry drawing
(10 minutes)
Think back to a time when you were angry. Let that emotion build up in your body and then use your pencil to channel that energy into a drawing of your object.
What does an angry mark look like to you? Remember, there is no right or wrong way to do these drawings –your anger will feel different to my anger – and this is what makes comparing these drawings exciting.
Exercise 5: Sad drawing
(10 minutes)
Now let’s do the opposite. I want you to create a sad drawing of your object. What marks can you use to convey sadness? It might help to put some sad music on to help you get in the mood.
How did you find doing these emotional drawings?
Exercise 6: Final drawing
(15 minutes)
To wrap up these exercises, you are going to do a fifteenminute drawing considering all the exercises you’ve done so far. Look carefully at your previous warm-up exercises and consider what you might want to bring into this final drawing. Perhaps you liked your use of tone in the tonal drawing or maybe you liked the scribbly lines of your mark-making exercise. It’s entirely up to you – just enjoy these final minutes with your object.
After you have finished, you can place the object back where it came from. I guarantee you will never look at it in the same way again!
My warm-up drawings
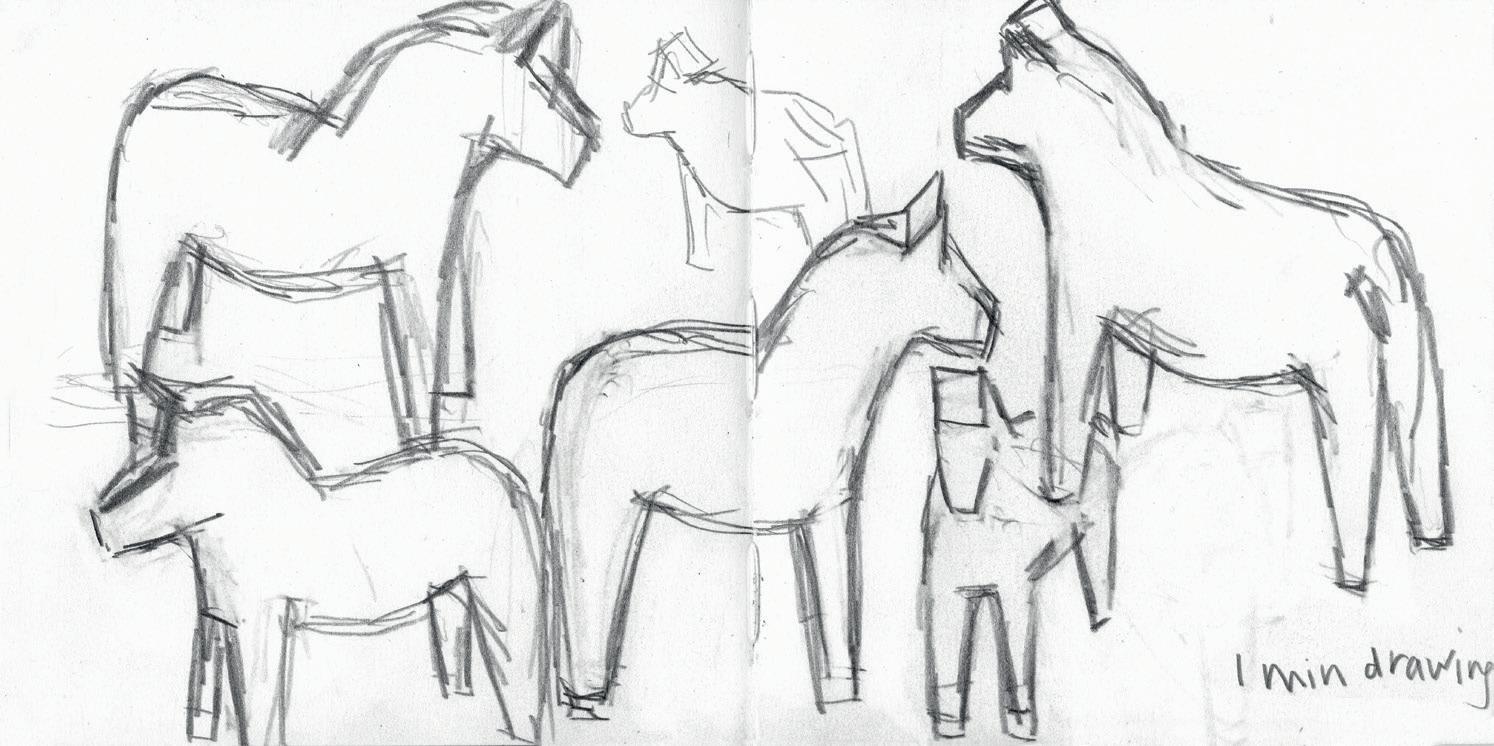
Exercise 1:
Quick drawing
I chose a small Swedish Dala horse as my object. It’s an object I’m very familiar with and one I thought I knew quite well but, when I started these one-minute drawings, I was surprised by the complexity of the shape. I assumed it would be an easy form to draw but quickly discovered that this wasn’t the case. However, by the end of the exercise, I felt that drawing at such speed had enabled me to get a grasp of the basic shape.
Exercise 3:
Tone-only drawing
Exercise 2: Non-dominant-hand drawing
I enjoy non-dominant-hand drawings. I find the lack of control really liberating and I make marks that I wouldn’t normally, which surprise me. I like the uncertain, hesitant lines that appear in this drawing.
My drawings are normally very tonal, so this was an exercise that I found straightforward. With tone-only drawings, I tend to squint so that I can see the tonal variations more clearly.
My drawings: In the home
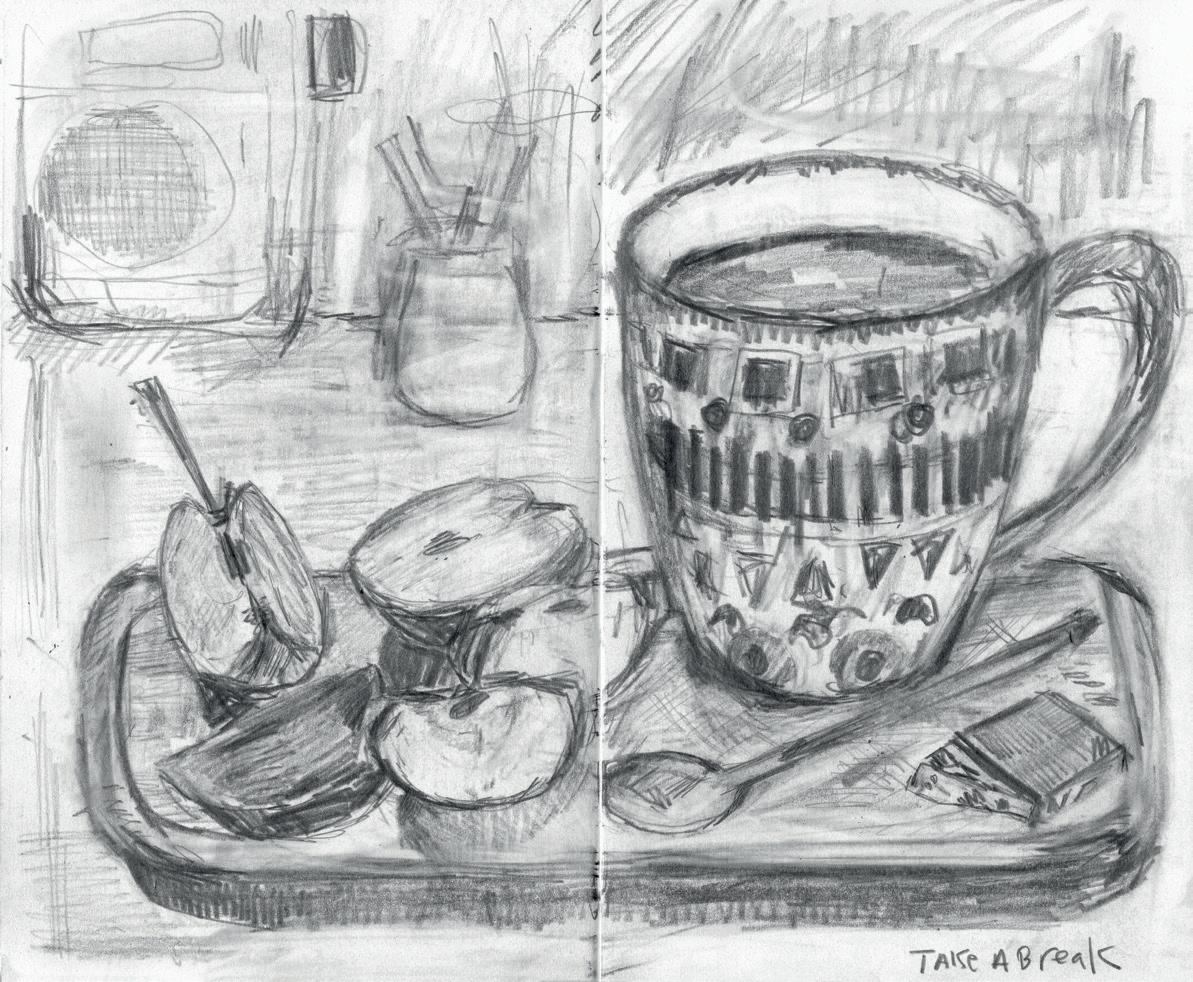
Exercise 1: Take a break
A cup of tea, a sliced apple and some chocolate is my go-to drink and snack. I used a heavy 6B pencil, as I wanted my drawing to be bold and strong. The drawing took me just under an hour and it was interesting to observe the colour change in the apple during that time. This is one of the things that I love about drawing from observation – especially drawing organic materials – the scene can change so quickly.
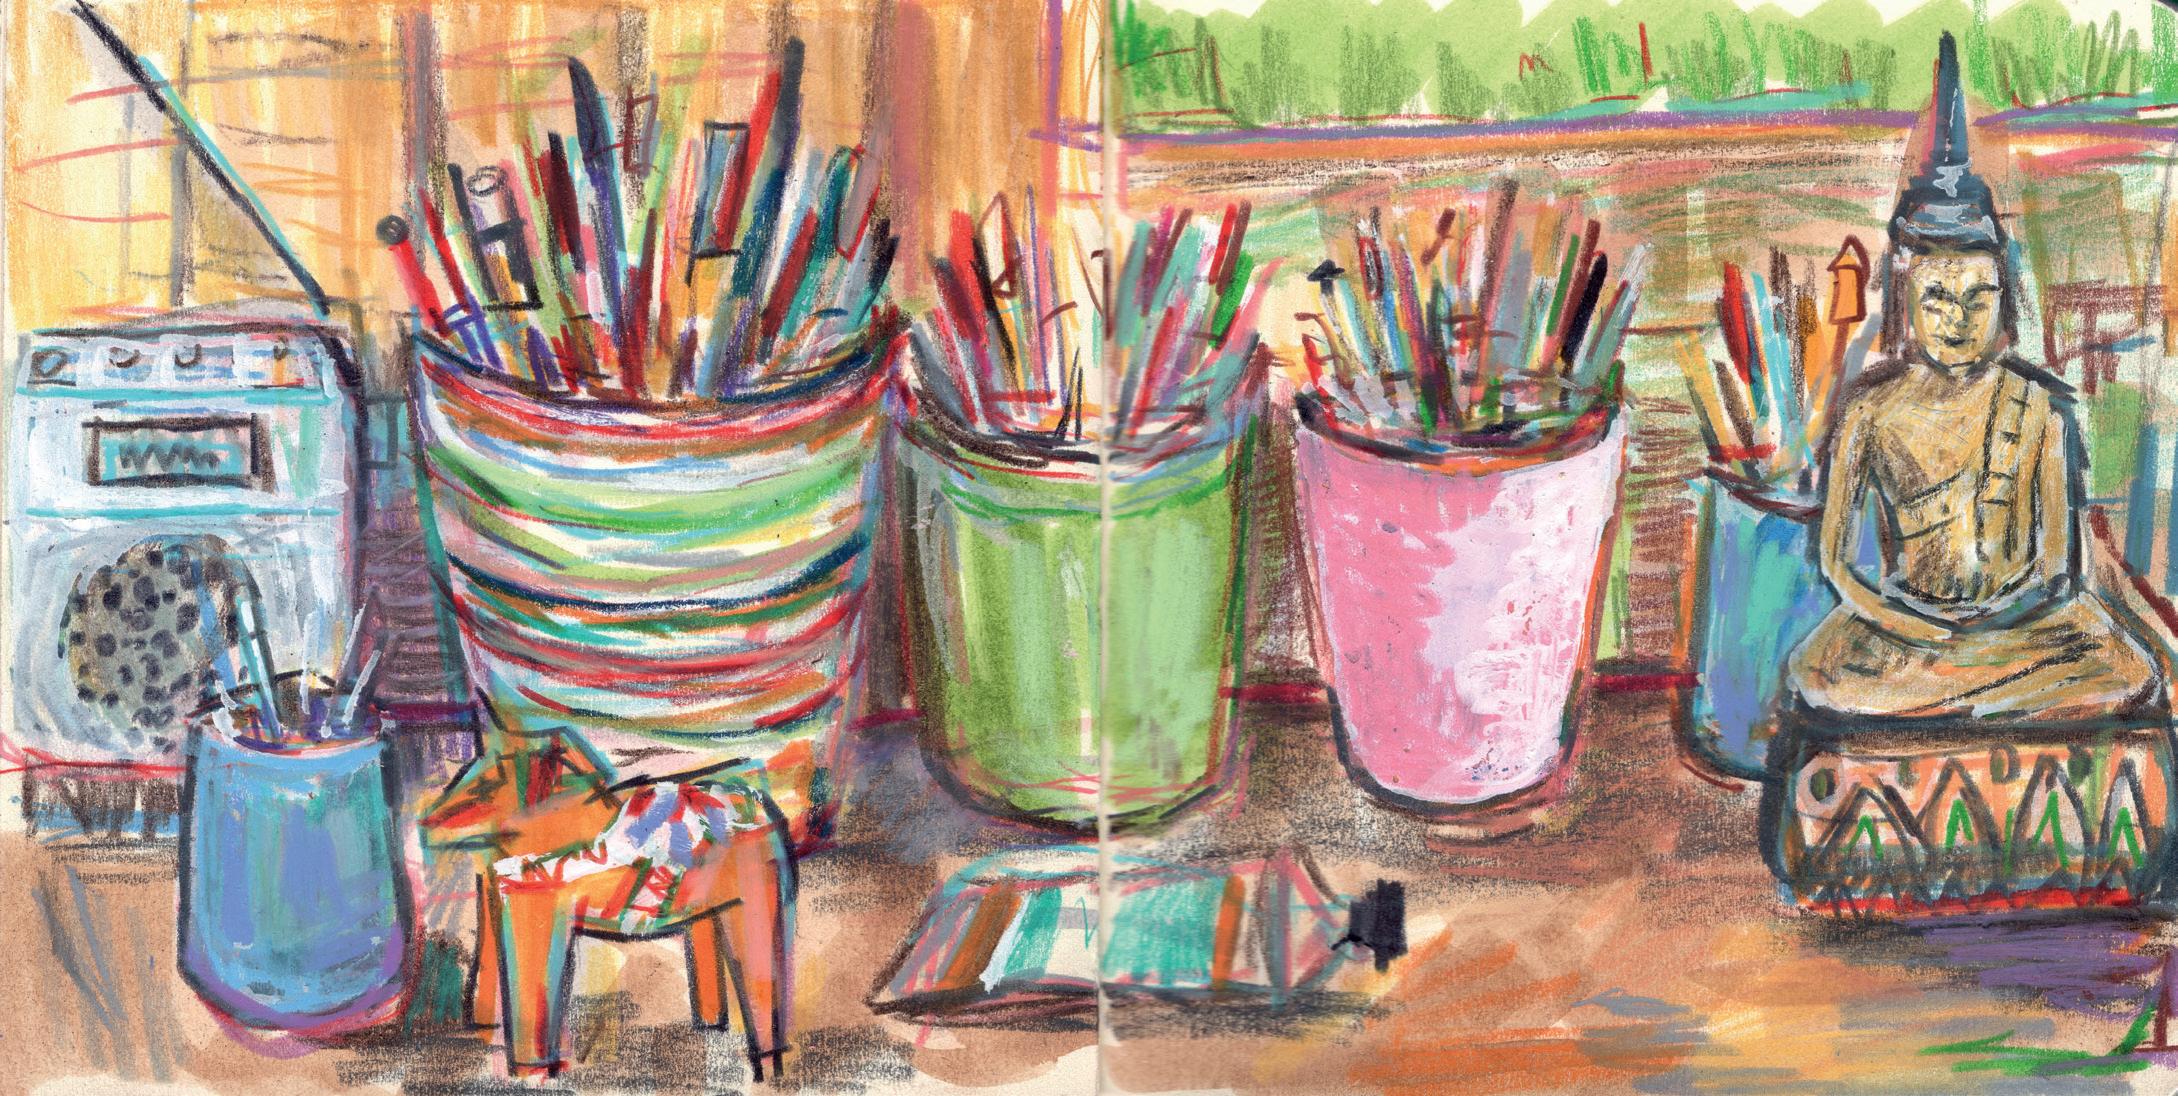
Exercise 2: What’s on your desk?
The desk in my studio is always crammed full of stuff, so it was the perfect subject for this exercise. It’s a place where things gather and accumulate. I started the drawing with a loose sketch using a light-brown marker pen to get in the main structure. I then built up the drawing using my coloured pencils and used white gouache to lighten areas so I could then draw over them again. To see how I build up my coloured drawings in this way, go to pages 78–9.
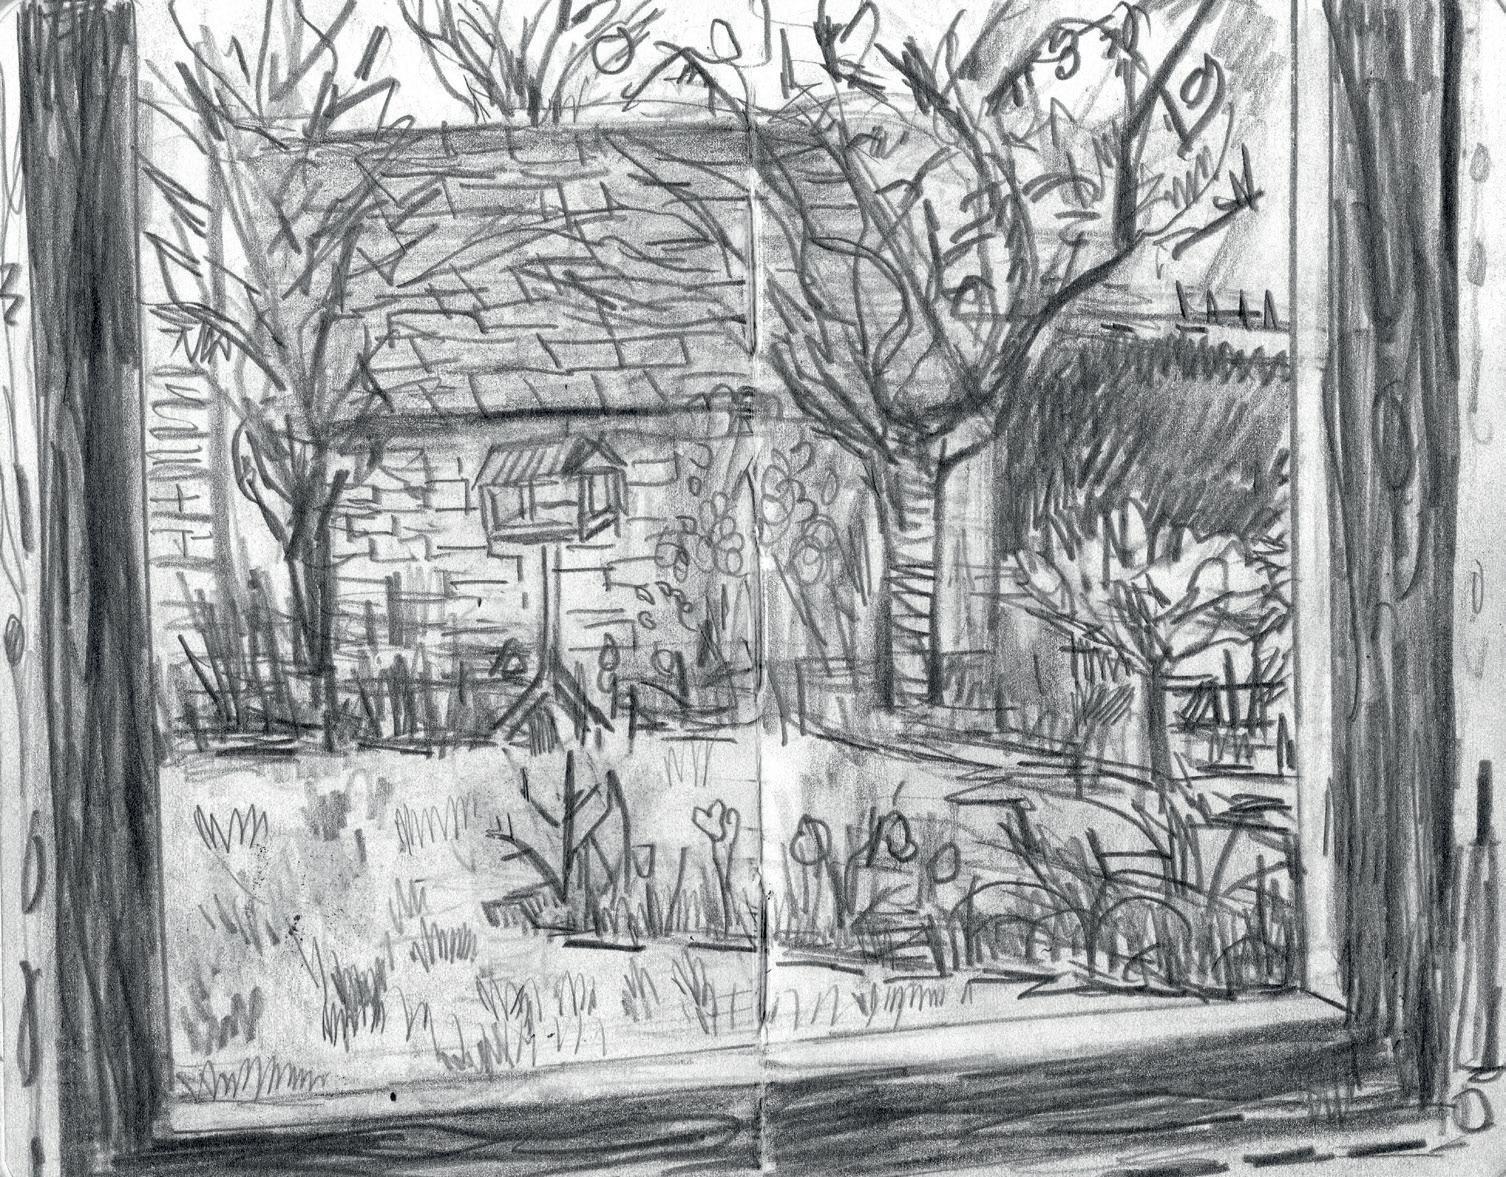
Exercise 3: Out of the window
This is the view from my studio. It’s a scene I’m familiar with and I enjoy watching how it changes with the seasons. This drawing was done in March. The trees are still bare, so you can see their structure – you see the trees as they really are. I used a small sketchbook for this and limited myself to one hour.
Exercise 4: A corner of the room
I drew a corner of my studio on one of the first sunny days of the year. I love how the sun makes everything warm and inviting. I used my Caran d’Ache Luminance coloured pencils for this drawing, which took me just over one hour.
7 Drawing portraits
By now, you have completed a series of drawings both inside and outside of the home that have challenged, enabled and encouraged you to build a regular sketchbook practice. Your sketchbook is filling up. Before we start this series of portrait exercises, take a moment to reflect on the work you have done and congratulate yourself on your commitment to building up your new skills.
If you haven’t already done so, show your drawings to someone you trust. This is an important step in building confidence and solidifying the idea of you as a creative person, not only to them but also to yourself. Many of us feel awkward about sharing our work due to a fear of being judged, of being told it’s not good enough. But the more you do it, the easier it will become. Hopefully, they will be encouraging and positive, however, if they say something critical, try and let it wash over you. Remember why you are doing this and how it makes you feel. Tune into how much you have enjoyed the drawings so far, and how much you have got from them. This is way more important than if someone thinks you haven’t got the perspective of the house quite right.
In this chapter, you will be drawing selfportraits and portraits of others. A portrait is a representation of a person, often focused on the face, head and shoulders but can include the whole body. I can picture some of your faces filling with horror as you read this – if there is one thing that people will insist they can’t do, it’s drawing faces or the figure. However, most people would like to do this, so together – without any pressure and in the spirit of fun and adventure – we are going to give it a go.
A human being is, of course, a complicated object. You are very familiar with your appearance, having seen it in the mirror for many years. You will know the way your hair falls, the way it won’t go in a certain direction. You will think you know how your nose looks, and what your eyes look like. You will have first-hand knowledge of the structure of your face. It’s for this reason we’re starting here, with you.
My drawings: On holiday
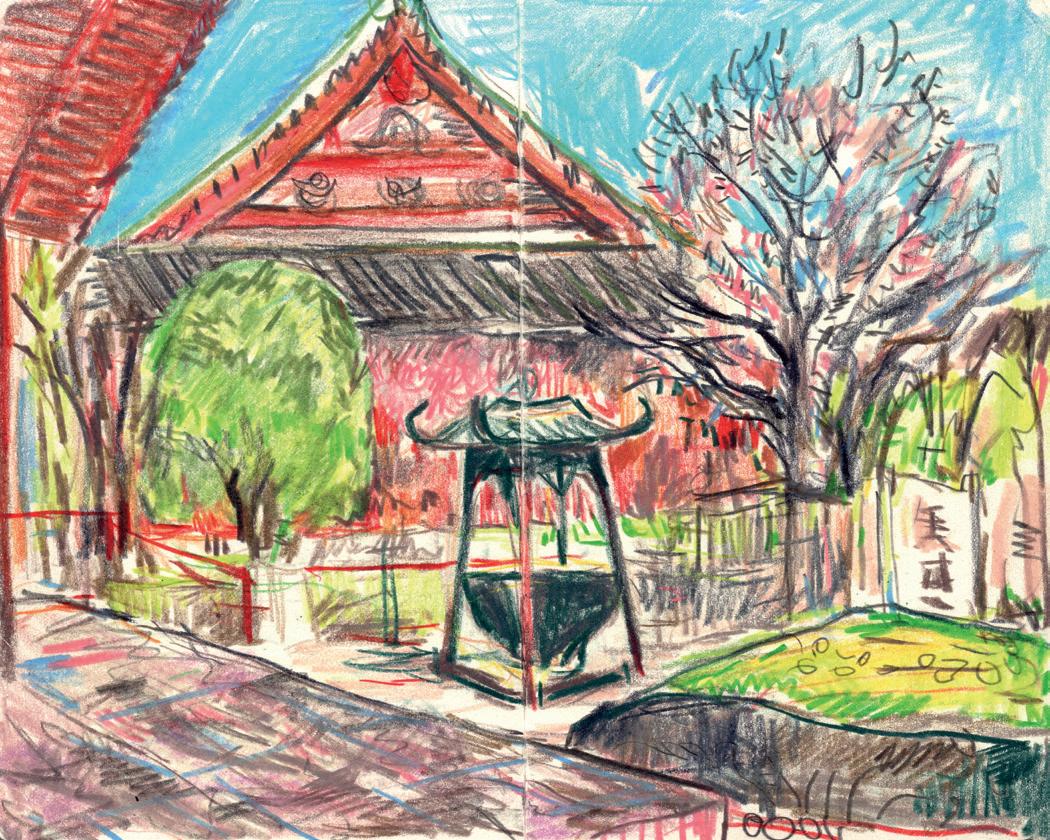
Exercise 1: First-day drawing
Sensō-ji Temple, Tokyo
This drawing was done the first afternoon I arrived in Tokyo on my trip last year. After a fourteen-hour flight, I arrived at midday at my hotel in Asakusa. I couldn’t check in until 3pm so I took my sketchpad out and headed to Sensō-ji Temple to draw. It was a beautiful day in April and the cherry blossom was out. I was terribly jet-lagged and felt all out of sorts, but I knew that drawing would help centre and ground me, and it worked its magic. This drawing took me around one hour.
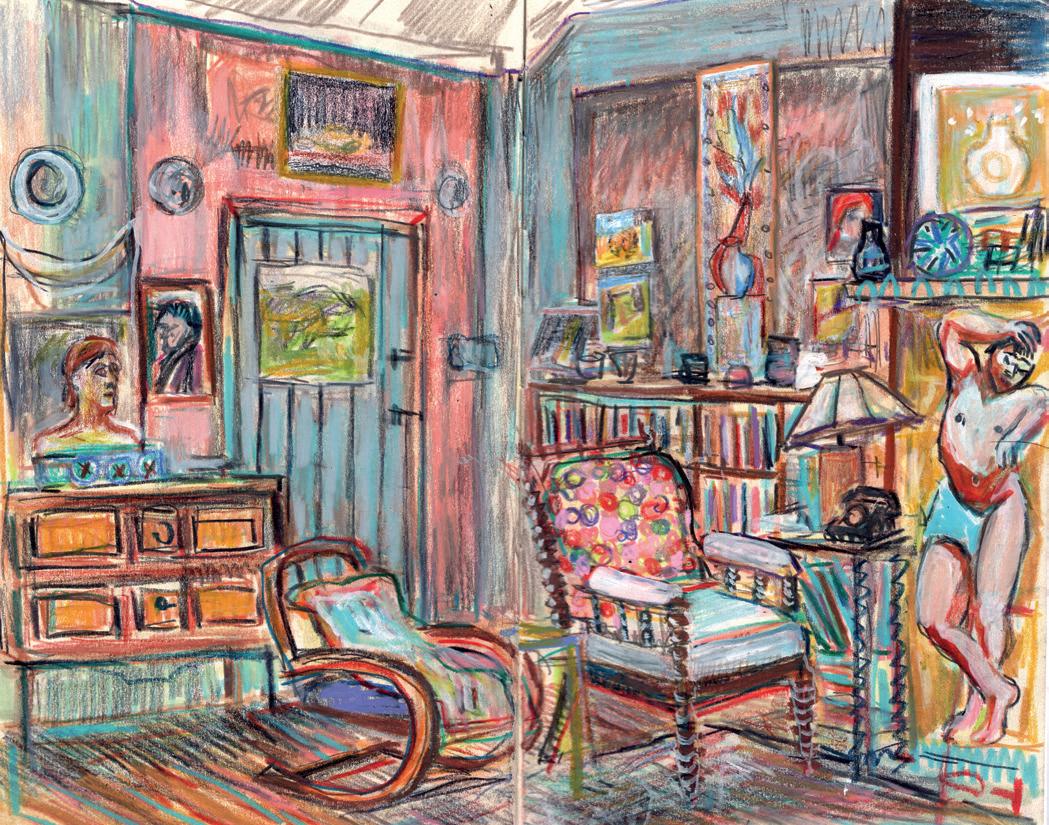
Exercise 3: When the weather defeats you
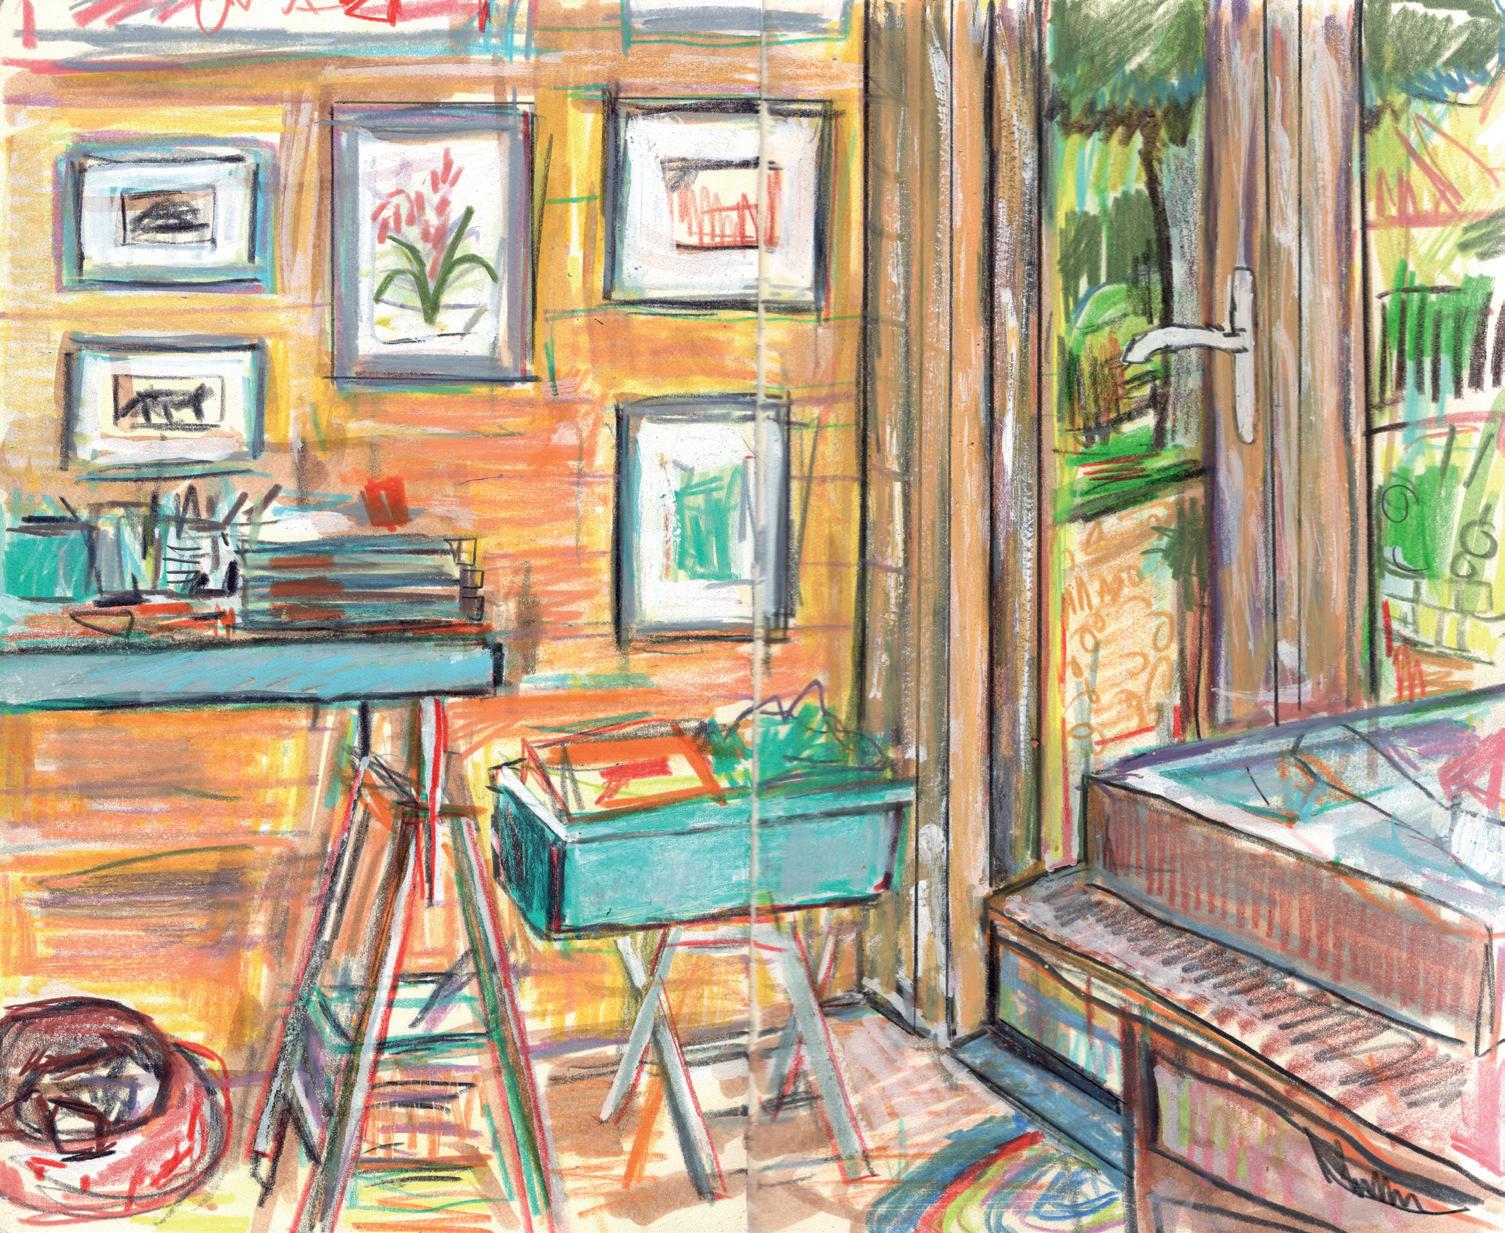
Charleston Farmhouse, Lewes, Sussex
Charleston Farmhouse in Sussex was the home of the artists Vanessa Bell and Duncan Grant, and it’s one of my favourite places in the UK. Last August, during an exceptionally hot period, I spent three days drawing in the delightfully cool rooms. This drawing is of Vanessa and Duncan’s studio. It took me around two hours to complete.
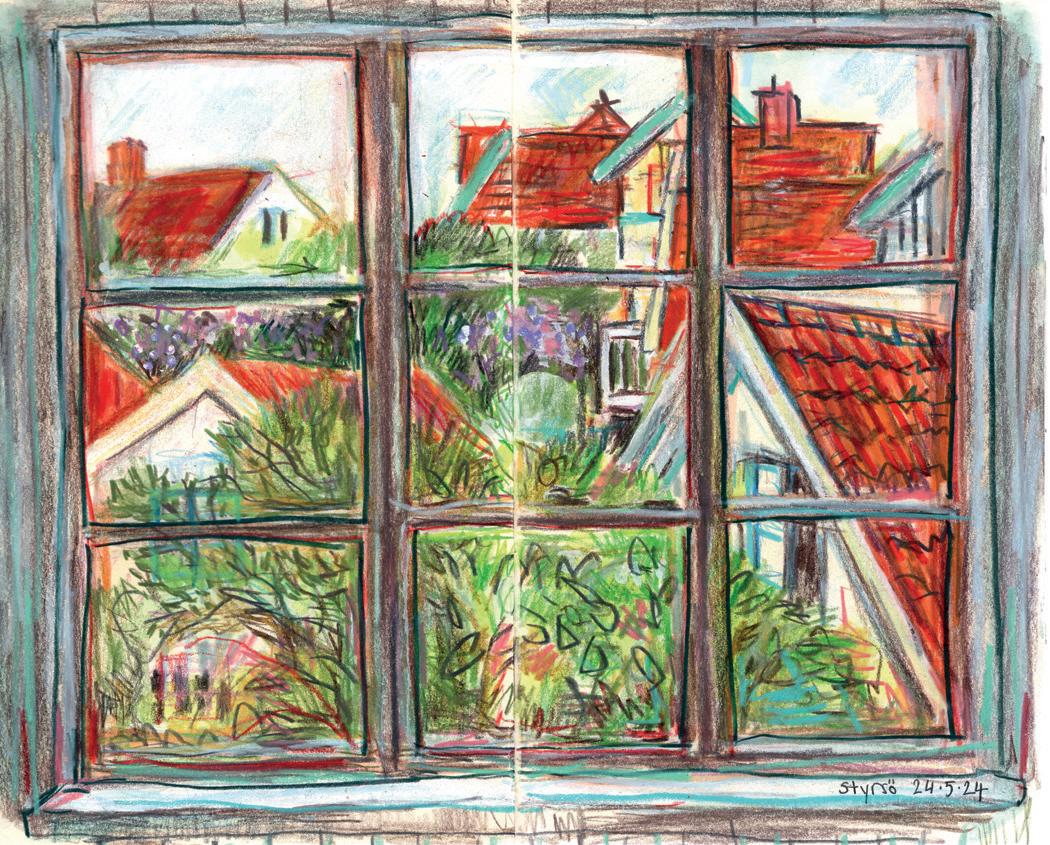
Exercise 2: Draw your view
Styrso, Gothenburg
My Swedish friend, Susanne, is a photographer and took many of the photographs for this book. To take the photos, we stayed on Strysö island in the Gothenburg Archipelago for a few days this year, and this was the view from one of the windows in our accommodation. I used my Ecoline marker pens, Caran d’Ache pencils and Neocolor® crayons.
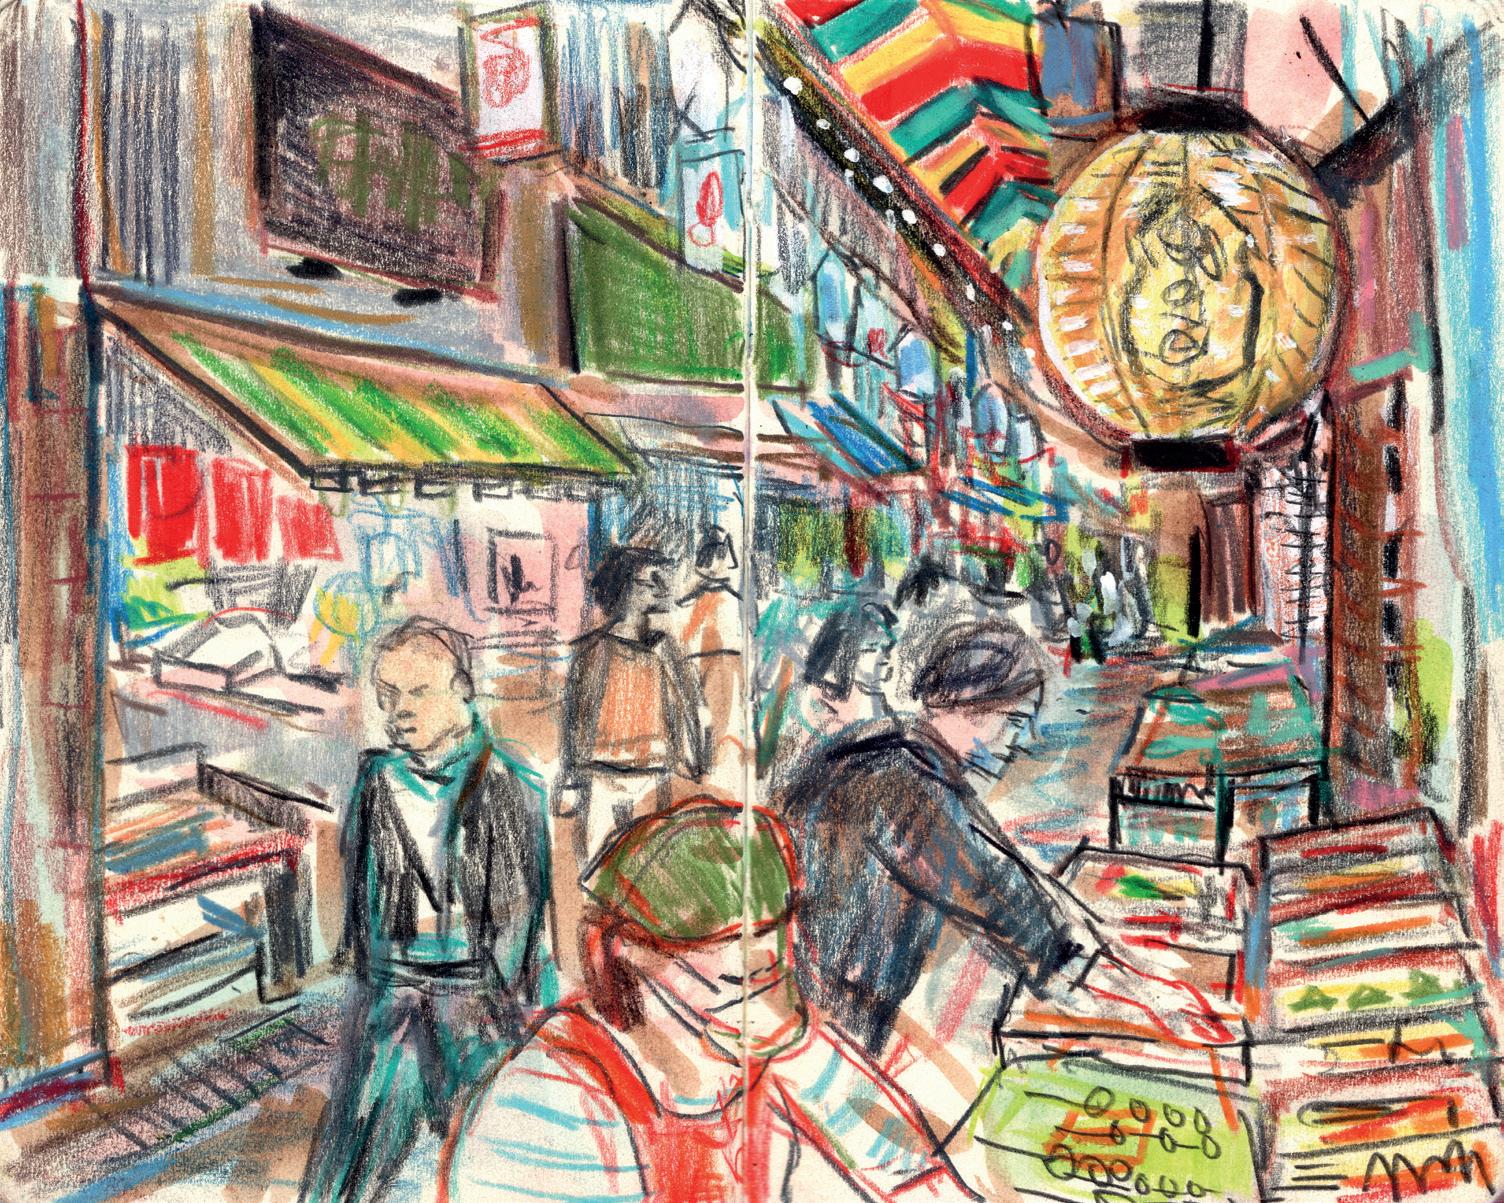
Exercise 4: Drawing on location
Here are a few of my drawings in different locations.
Nishiki Market, Kyoto, Japan
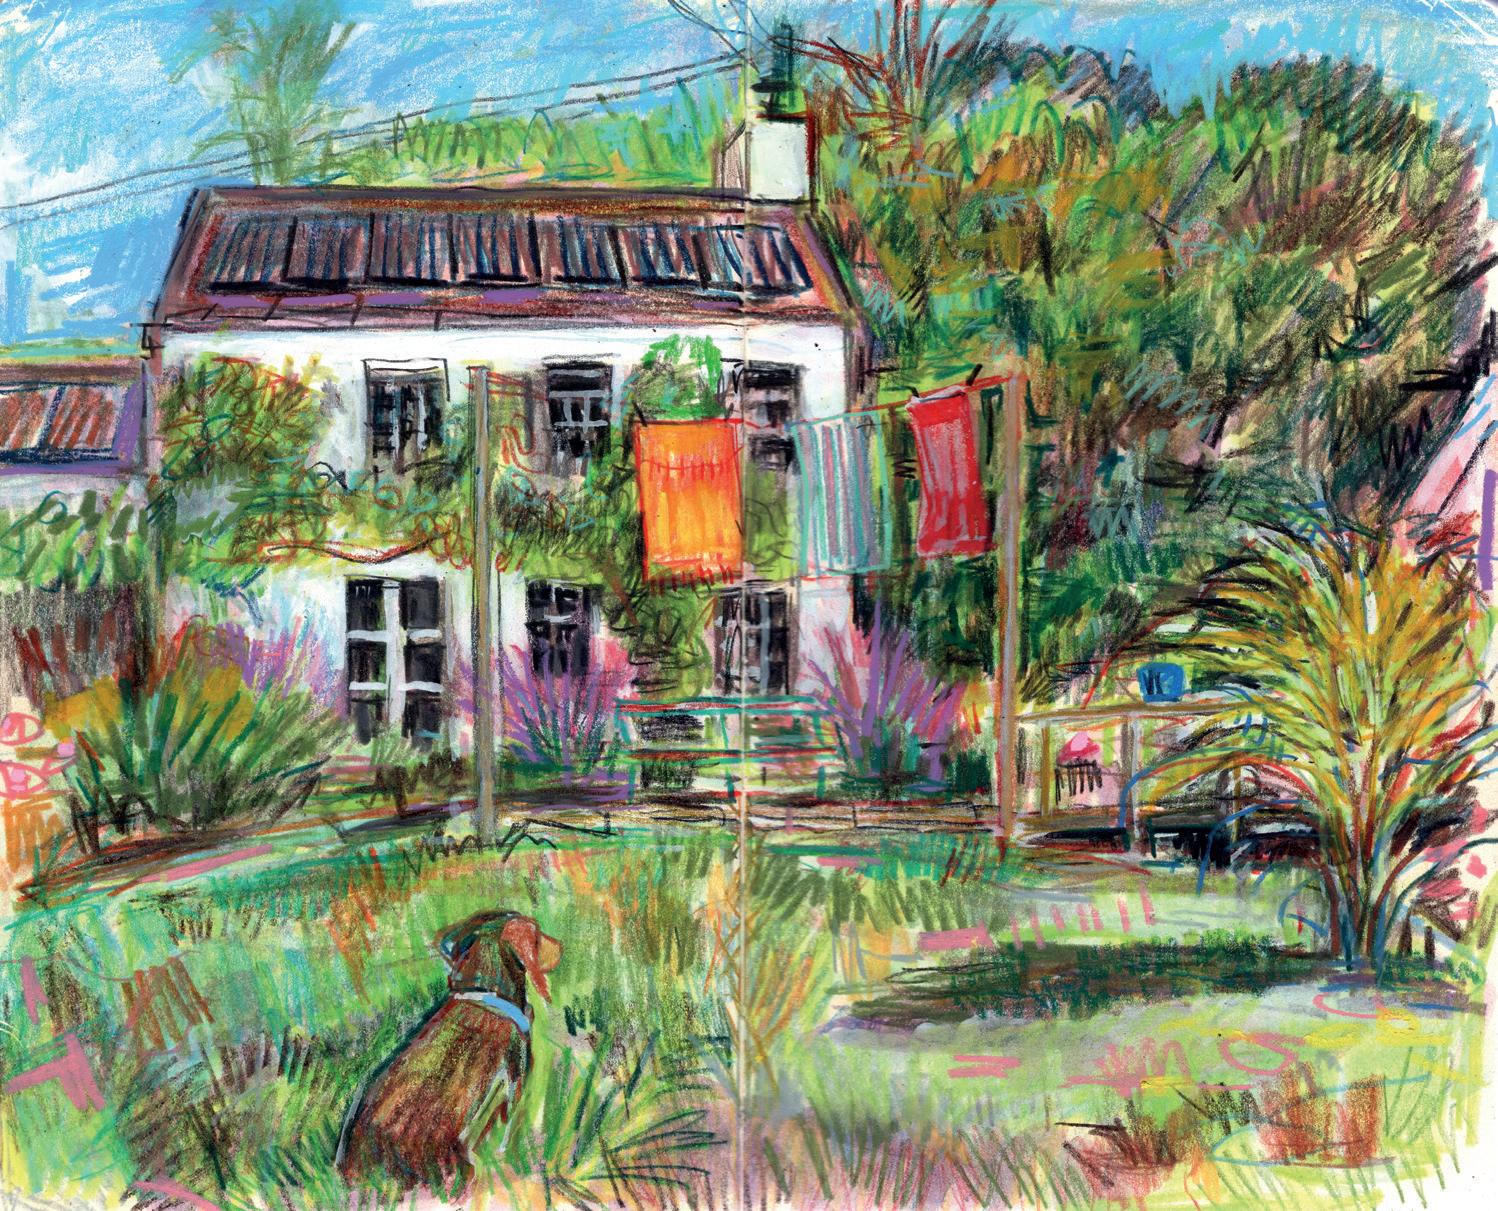
My friend Micki’s garden in Wales