

REVIEWCOPYPLEASEDONOTSHARE


Project-based Tips and Techniques for all Abilities
REVIEWCOPYPLEASEDONOTSHARE
Photographs by Ian Roxburgh
INTRODUCTION 6
A brief history 8
Part One
Getting started 10
Finding inspiration 12
Designing your mosaic 14
Work environment 16
Tools 20
Tiles 23
Cutting techniques 26
Mosaic bases 30
Adhesives and glues 31
Grout 33

Part Two


The projects 42
PROJECTS WITH GROUT 44
Terracotta dish (easy) 44
REVIEWCOPYPLEASEDONOTSHARE
Personalised present tag (easy) 48
Pride love heart (easy) 52
Cheese plant smorgasboard (easy) 58
Mosaic mirror (intermediate) 62
Moorish-inspired coasters (intermediate) 68
Mini robin (intermediate) 74
Iridescent beetle (intermediate/advanced) 80
House nameplate (advanced) 88
PROJECTS WITH CONCRETE AND RESIN 94
Concrete garden accent (intermediate) 94
Garden flower (easy) 102
Christmas star decoration (easy) 108
Garden dragonflies (intermediate) 114
Mirror ball (intermediate) 120
Rosebud brooch (intermediate) 124
Ivy leaf (intermediate) 130
Mosaic wreath (advanced) 136
Part Three
Going a little further 142
COMMUNITY AND PUBLIC ART 144
PERFECT PORTRAITURE 156
Acknowledgements & image credits 176
Mosaic stockists and handy suppliers 176
A brief history
The rst known mosaics were created in ancient
Mesopotamia over 5,000 years ago and consisted of small stones pieced together. e Greeks took the art form one step further and added more structure to the designs; geometric patterns began to make an appearance plus depictions of everyday life … and then the Romans decided to join in and changed the face of mosaic forever. As well as expanding on the decorative nature of this art form, they realised its great durability and started using it expansively in homes and gardens. Intact Roman mosaic oors are still being discovered to this day, and you can still walk on many of them. Originally, mosaics were


REVIEWCOPYPLEASEDONOTSHARE
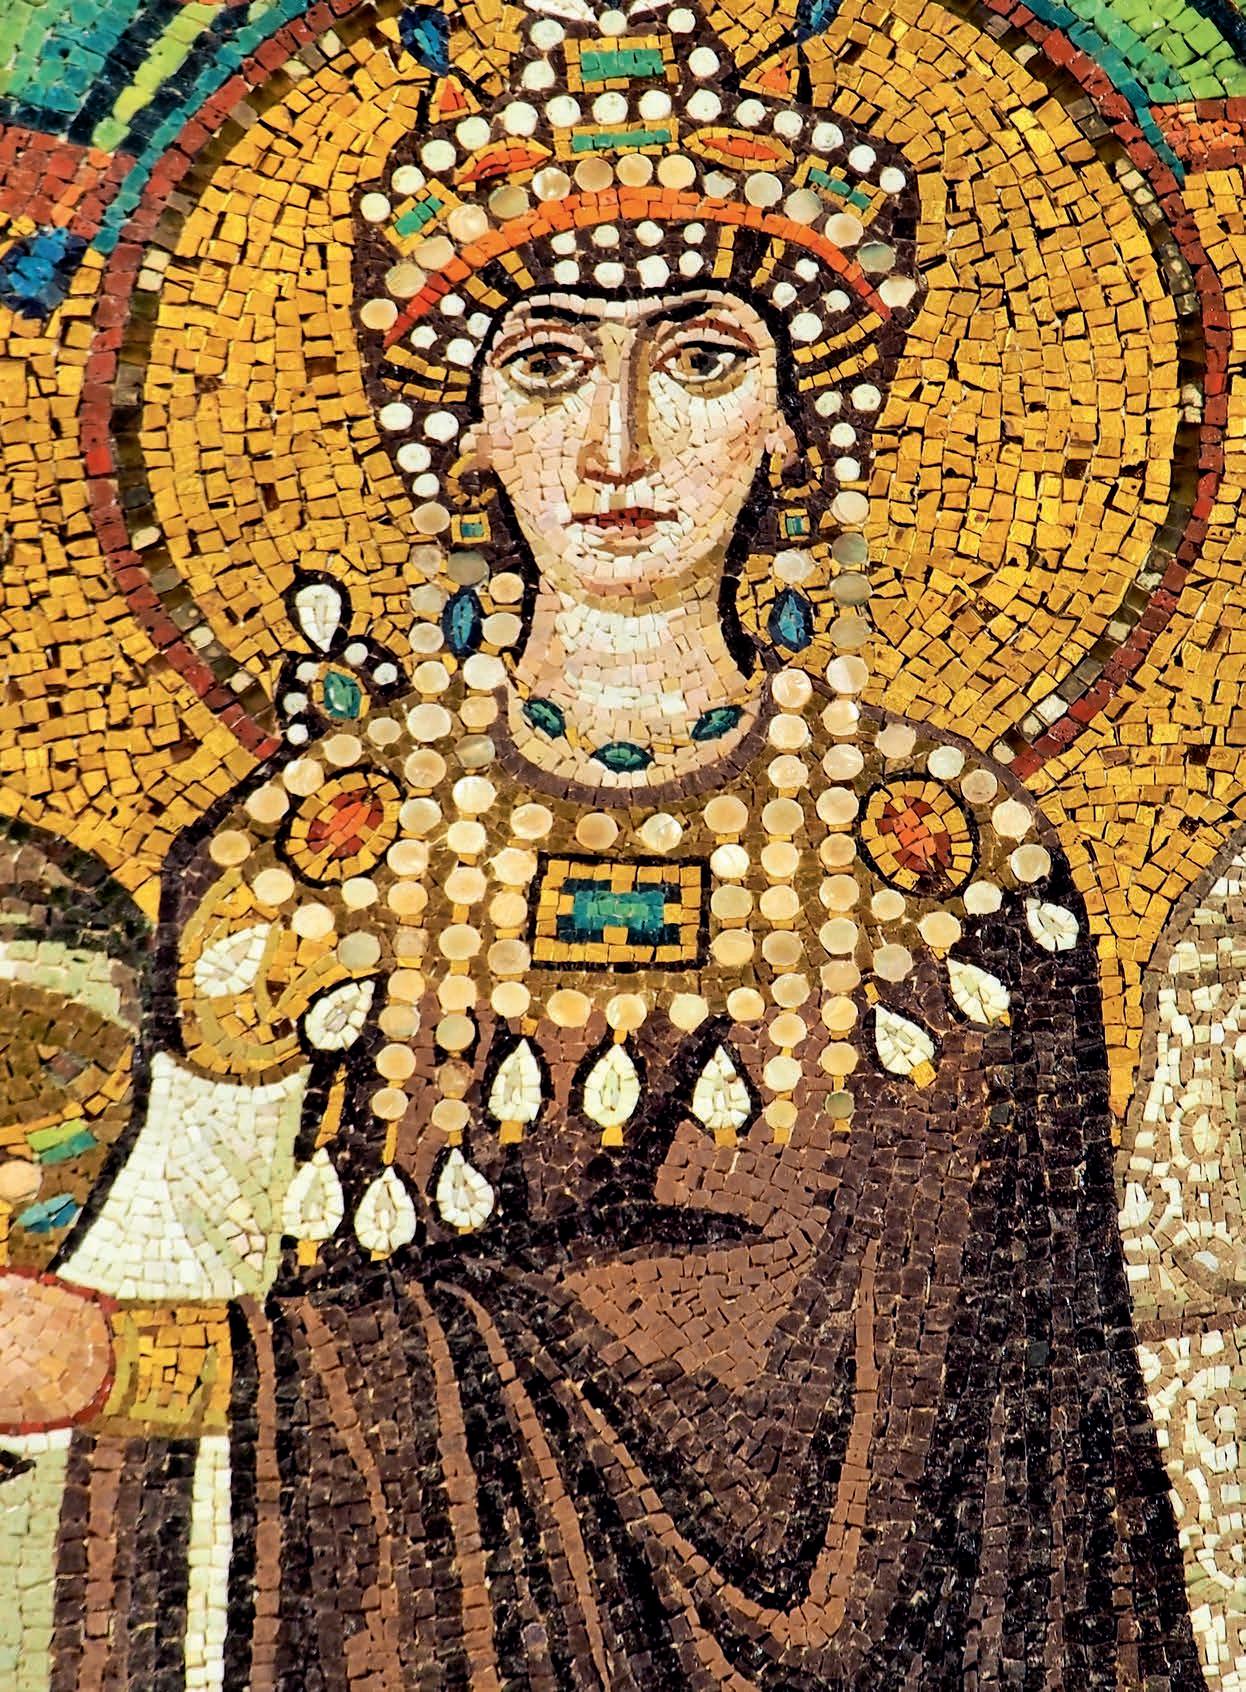
made using di erent-coloured stone, but during the Byzantine era (a continuation of the Roman Empire), they started to incorporate glass into their work and install mosaics on walls and ceilings rather than just oors. Many churches in Italy are adorned with luminescent, detailed biblical depictions made in mosaic, with Ravenna being the absolute top spot to view exquisite examples of Byzantine mosaics.
Modern-day mosaics have drawn on all of the technical know-how of our ancestors while still having the ability to evolve. From ancient oors and walls, we are now using it as a ne art as well as a craft, putting our work into frames, making it into jewellery, sculpture and more. Tesserae still includes glass and ceramic but now also found objects such as fossils and sea glass, shattered safety glass, old china cups, personal items and much more.
e projects and ideas o ered in this book are predominately contemporary mosaic designs rather than traditional ways of working, but each and every one is a direct result of these ancient techniques.
Above: A simple mosaic oor preserved in the ruined Roman town of Herculaneum, near Naples.
Right: A famous 6th-century mosaic in the Basilica of San Vitale in Ravenna, depicting the Byzantine empress Theodora.
Combined Byzantine and Moorish in uences in the 11thcentury Palatine Chapel at Palermo, Sicily.
REVIEWCOPYPLEASEDONOTSHARE
Cutting techniques
Let’s start with our wheeled nipper and glass tiles. To cut a mosaic tile into quarters, simply place the wheels into the centre of the tile, keep your hand at the base of the tool and apply pressure; the tile should snap in half. With one of the halves, place the nippers in the middle of the halfway point, apply pressure, and you should end up with two quarters (a). Try to keep your cuts contained and not pinging o in all directions. I tend to hold the corners of the tile being cut, or you could angle one side into a container. Repeat this process until you have the amount you require. Safety is paramount – yours and anyone else’s around you. It’s very common for your hand to creep up the handles when cutting. is will result in loss of power, making the cuts more di cult to achieve. Always check where you are holding this tool and adjust when necessary. Intricate cuts can also be made with a wheeled cutter. Draw exactly where you would like to make your cut on the glass tile using a Sharpie pen (all pen comes o during the grouting and cleaning process) (b). Place your nipper directly on the line and snip millimetre by millimetre, systematically on your drawn line. is should result in a smooth, clean shaped cut (c). Do make sure
REVIEWCOPYPLEASEDONOTSHARE


you have a container underneath to catch and contain the shards.
REVIEWCOPYPLEASEDONOTSHARE
To cut random-sized pieces, known as crazy paving, hold your tile rmly in one hand, angling it towards a container. Place your wheeled nipper over a corner and snip, allowing your cuts to fall into the container (d). Turn the tile and cut another random piece, and continue in this manner until you have accumulated the amount you require.

Project 1 | difficulty: easy
Terracotta dish
Bases (substrates) for mosaics come in all shapes and sizes with varying levels of technical di culty required for each. Unglazed terracotta is a perfect base for mosaic, and little dishes can be easily bought in garden centres and DIY shops. is is a fabulous project to do with children and adults alike, as they require no cutting and take up little time. e whole project can be assembled and grouted within a couple of hours.
When nished, these little mosaic beauties can be used in the home for decorative purposes, such as ring, key or candle holders. If using them for food they will require sealing.
Our rst job is to locate the centre of the dish. On some of these dishes a small central point can be seen; if so, mark it with a dot. If not, measure the width of the base, draw out a circle on scrap paper to that exact size, then fold the paper in half and then into quarters: this will give you the central point. Make a small hole in the paper at this point, lay it into your dish, and mark out the centre.
Using wood glue (stronger than PVA but feel free to use that if that’s what you have to hand), apply a little around the central point (a) and lay down six of your triangle tiles into a hexagon shape (b), making sure to leave little gaps between each tile.


You will need:

❏ Wood glue


❏ 1 terracotta unglazed dish (I’ve used a 14cm dish with a surface area of 12cm)

❏ 12 glazed ceramic 25mm petals in gold and silver
❏ 12 glazed ceramic 10mm triangles in assorted oranges and yellows


❏ 6 glazed ceramic 15mm orange circles
❏ 12 glazed ceramic 15mm white teardrops
❏ 32 glazed ceramic 10mm squares in various oranges and yellows
❏ Grout


❏ Mixing bowl and utensil
❏ Rubber gloves
❏ Newspaper
❏ Cloths


REVIEWCOPYPLEASEDONOTSHARE


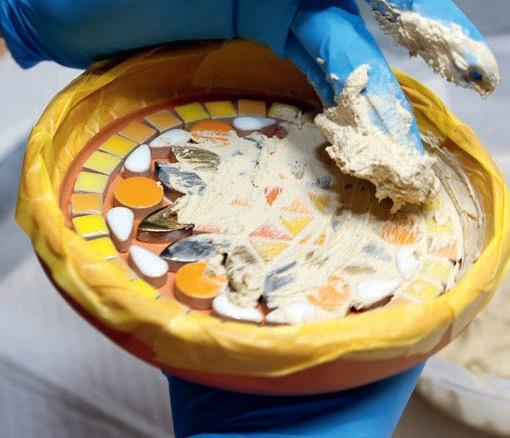
I’ve used a jasmine o -white grout for this design. Mix the grout (full instructions on pages 33–40) and apply to the dish ( h), pushing it into all the spaces and removing a top layer of excess. As it’s a terracotta dish with ceramic tiles, the grout will start to cure quite quickly. When you can feel it start to harden, start removing the excess with a dry cloth and then tidy up with a damp cloth (i), ensuring all the tiles are exposed in full and being careful not to remove too much grout from the gaps. Carefully remove the tape, clean any untidy edges that may have been created, and leave to dry fully.
After a couple of hours your mosaic should be completely dry. With a damp cloth, remove any residue grout, dust and bu up to its full shining glory. Your dish is now ready to be used.


REVIEWCOPYPLEASEDONOTSHARE


REVIEWCOPYPLEASEDONOTSHARE
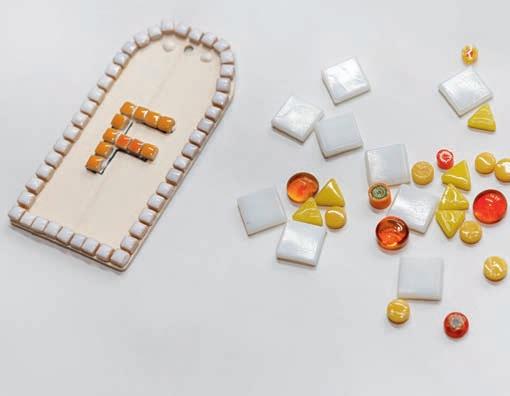
Starting with the outside, lay a small glue line around the edge and carefully place your mini tiles down (b), making sure to leave a small gap between each tile of around 1mm to 2mm. Fill in your letter with your chosen colour tile, laying down a line of glue and placing the tiles rmly into the adhesive (c). If you nd this job really ddly, a pair of tweezers will help enormously.
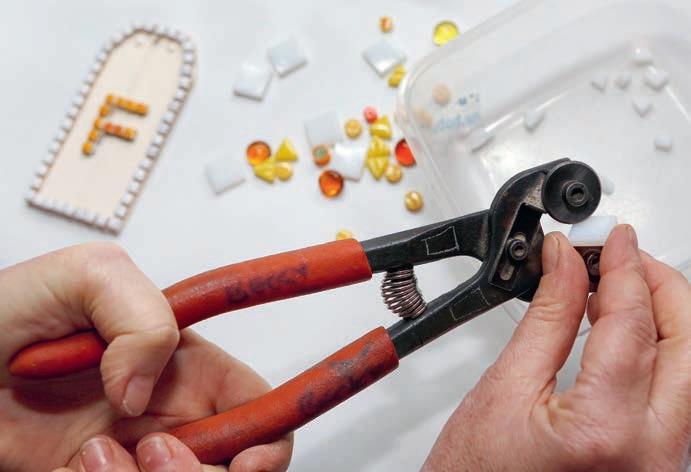
en you can select your chosen colours of background tile, and with your wheeled nipper cut them into small random pieces (d). e smaller you go, the easier they will t together.
REVIEWCOPYPLEASEDONOTSHARE
Project 3 | difficulty: easy
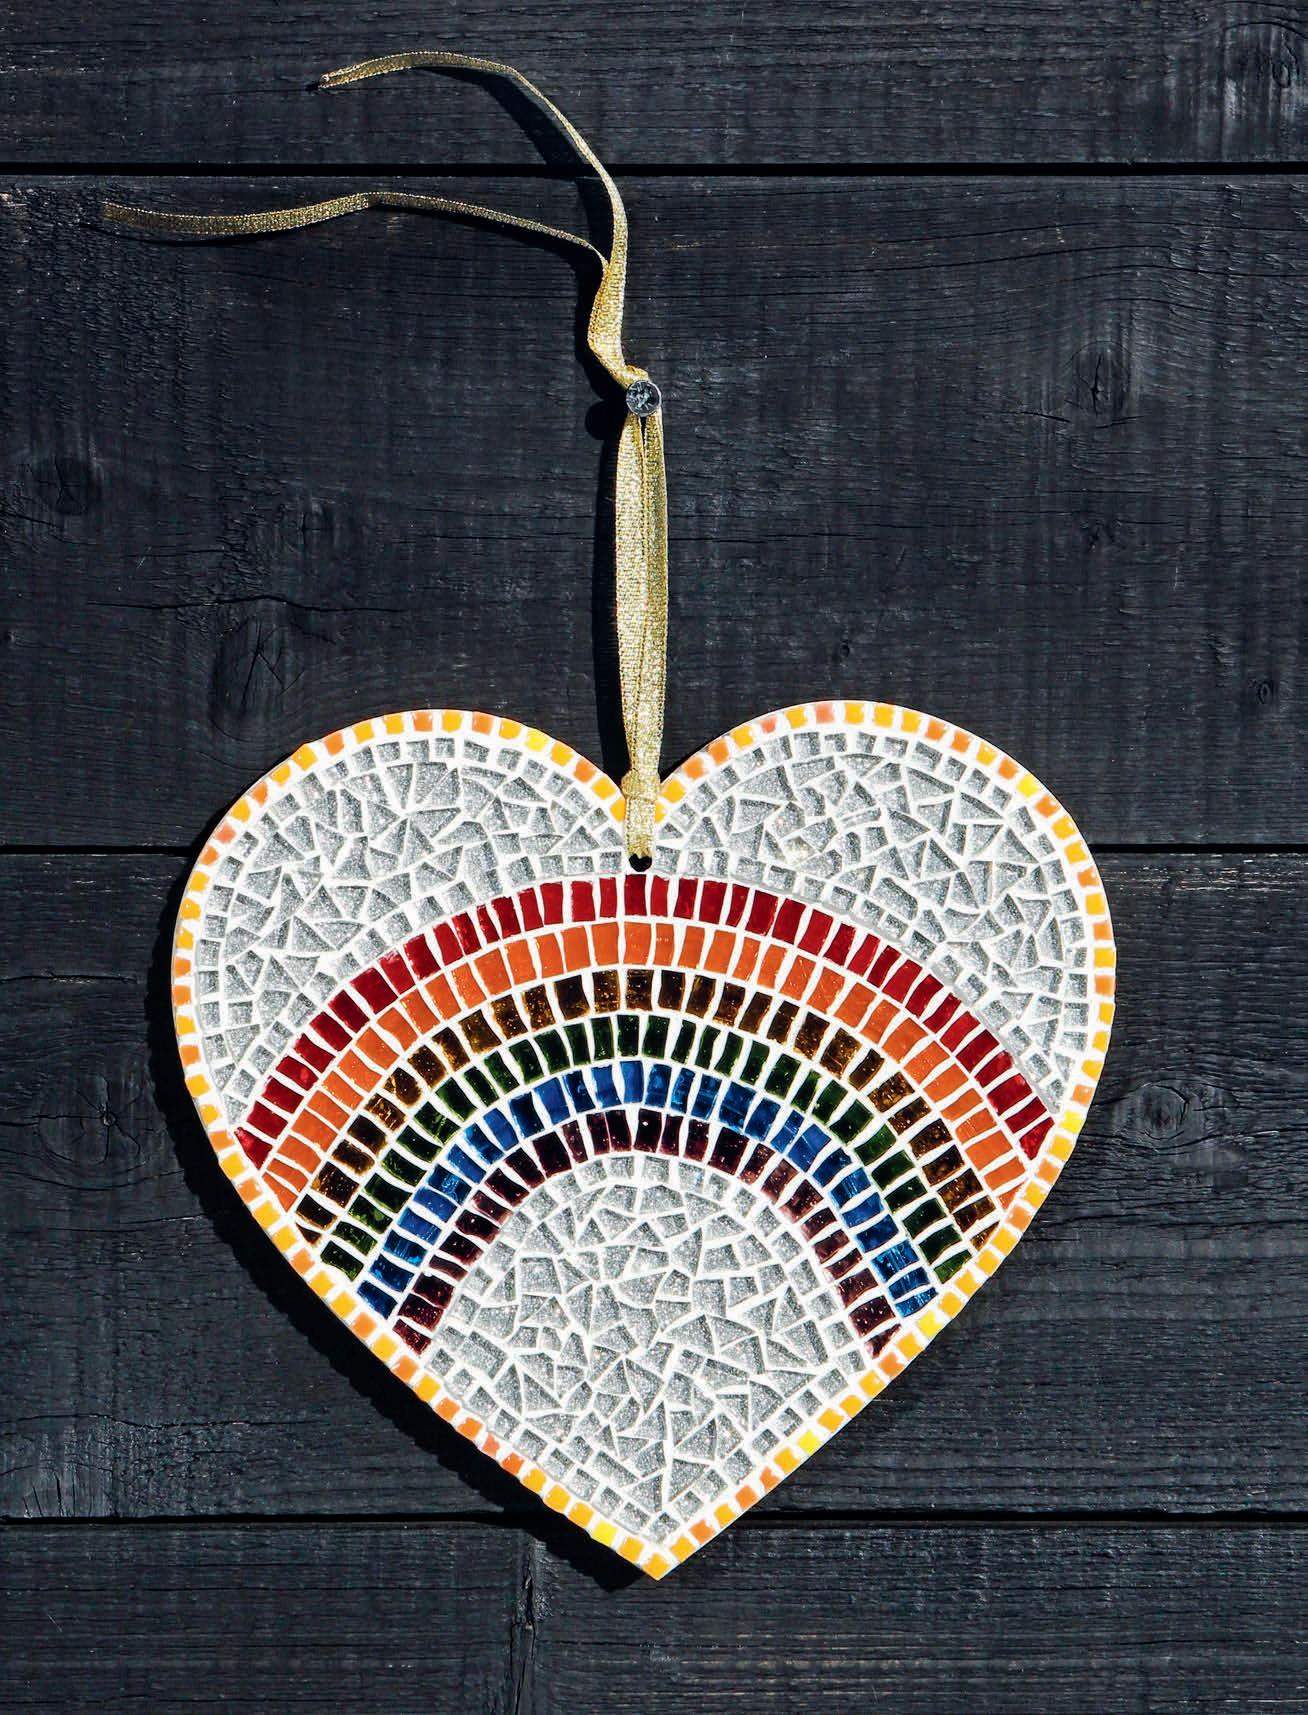
Pride love heart
With Gay Pride being a rm and joyous xture in so many national calendars, I thought it might be lovely to create and make a simple, yet beautiful heart, celebrating the LGBTQ rainbow in all its glory. is design can also be turned into a regular rainbow with the inclusion of just one more row of violet. e choice is yours; both will look amazing.
You will need:

❏ 1 love heart base (mine was 20cm in height)
❏ Wood glue


❏ Pen
❏ Tweezers (optional)
❏ Plate or similar circular object or compass


❏ Wheeled nippers
❏ Around 100 micro 5mm glazed ceramic tiles in colour of your choice
❏ 4 to 5 mirrored glass slivers (shopbought pre-cut glass, comes in 1cm x 6.5cm slivers), each in LGBTQ or regular rainbow colours


❏ 25mm x 20mm silver glitter tiles
❏ Grout


❏ Mixing bowl and utensil
❏ Newspaper
❏ Rubber grout spreader (optional)
❏ Cloths


In small sections, squeeze a small line of glue around the outside of the heart and stick down your micro tiles (a). I’ve chosen orange, leaving little gaps between each tile. You may nd it easier to use tweezers for this job.


REVIEWCOPYPLEASEDONOTSHARE
Project 5 | difficulty: intermediate
Mosaic mirror
Quite possibly, the biggest cliché in modern mosaics is the mosaic mirror. Years ago, when I was a student, thousands of mosaic mirrors were imported into the United Kingdom and seemed to ll all of the gift shops. As mosaics were vaguely out of fashion back then, these mirrors became THE mosaic item and rmly embedded themselves into our psyche. For years, I resisted making them, wanting people to acknowledge there was more to mosaics than just mirrors, and I think we are nally there. So, let’s make a mirror! As the visionary designer and activist William Morris once said, ‘have nothing in your houses that you do not know to be beautiful or believe to be useful’. A mosaic mirror ts that bill perfectly. You will need:

e rst job is to nd the centre of your base. e way I do it is to draw the base out onto paper – could be old wrapping paper or newspaper, anything would work –then cut out the circle. Carefully fold the circle in half and then into quarters and this will give you a central point. Carefully pierce this point with the tip of a pen and make a mark on your base (a). a


❏ 1 circular 30cm MDF base
❏ Paper
❏ Scissors
❏ Pen
❏ Compass
❏ Masking tape

❏ Around 15 foilbacked green 15mm tiles

❏ Sellotape
❏ Wheeled nipper

❏ Wood glue
❏ 15cm mirror

❏ 7 white darling dots
❏ Around 20 purple darling dots


❏ Around 40 foilbacked gold 15mm tiles

❏ Around 42 iridescent red 15mm tiles
❏ Around 30 purple 15mm tiles


❏ Around 50 glazed ceramic 5mm micro mosaics in greens

❏ 7 10mm circular mirrors
❏ Around 50 silver/ grey 25mm tiles
❏ Grout

❏ Mixing bowl and utensil
❏ Rubber gloves
❏ Grout spreader
❏ Cloths


