


teacher toolkit & lesson plans
Welcome to the NAARCA teacher toolkit! The Nordic Alliance of Artists’ Residencies on Climate Action (NAARCA) brings together Cove Park (Scotland) and Saari Residence (Finland), Artica Svalbard (Norway), Art Hub Copenhagen (Denmark), Baltic Art Center (Sweden), Narsaq International Research Station (Greenland), and Skaftfell Art Center (Iceland) to collaborate on research, institutional change and public education around climate action. This toolkit focuses on the pedagogy side of the programme, aiming to help young people, students, teachers and families to disseminate information and influence action around climate change. This toolkit is to be used by teachers, or anyone taking the role of the learning practitioner in an educational setting, to help guide you through the teaching of the following activities.
At the core of the pedagogy toolkit are the Creative Climate Champion Skills. These skills have been designed as learning opportunities for students to understand how they can better their knowledge and practices for climate action in creative settings. Each lesson plan has been designed to fit within a CCC skill; Exploring, Questioning, Connecting, Reimagining and Respecting. Use these as ways to anchor creative activities within the theme of climate action, alongside acting as encouragement for students to become the best Creative Climate Champion they can be!
Each lesson has been designed and tested by an artist in a workshop setting at one of NAARCA’s institutions, with a range of 10-20 students from age 5-11. The following lesson plans allow for around 2 hours for each lesson, with some indicating added prep time for materials. Each lesson indicates a full material list and alternatives for different settings. We encourage anyone who wants to try these lessons to give them a go, whether in a school setting or at home, they have been designed to be easily adapted to any place and group size.

Lesson 1: Reimagining 1-2
Lesson 2: Connecting 3-4
Lesson 3: Expressing 5-6
Lesson 4: Exploring 7-8
Lesson 5: Questioning 9-10
In this session students will be introduced to the CCC skill of Reimagining. They will learn how to situate themselves within the context of a new place: Svalbard, and reimagine what the place may look like through printmaking techniques, culminating in a final display for their community. They will find out more about artist Floortje Zonneveld, teaching us to reimagine hope into action.
At the end of this session students will:
• Understand the CCC skill of Reimagining: why it is useful, and its applications for their own futures in creativity.
• Have made their own prints, and printed display.
• Reflected on what it means to reimagine themselves in a new context, and understand the importance of what it means to change and reimagine our perspectives.
Materials Needed:
• Lino/Styrofoam/Cardboard (or any material you can carve into- you could use cardboard and string, styrofoam and pencils or lino and lino carving tools).
• Scissors
• Coloured block printing inks
• Ink pallet
• Ink roller
• Scrap paper
• Cutting mats
Start this creative session by describing what a print is, and how it has been used creatively through history and today. Introduce the spotlighted artist Floortje Zonneveld and her practice (details found on next page) and engage the students in a presentation on her work. Mention Floortje’s dedication to reimagining how we view the world we live in, and being sustainable in all of her work.
Set up each table with lino, scalpels, inks, pallets, rollers, paper and mats.
Once you have introduced the artist and activity, take 5/10 minutes to focus on the CCC skill of Reimagining; Thinking Forward. Ask the students to think about the word reimagine, what does it mean to them? Ask them to discuss this in groups and feed back to the class. After this, explain that reimagining is about thinking in new ways, and seeing things from a different perspective.
With this in mind you can carry out a 1 minute task: Reimagining the teapot. Ask students to draw a teapot, but with a new reimagined use. They must draw this new teapot, with its new use (examples of a teapot hat, 3 spouts for a teapot tea party etc). This is to emphasise the reimagination of anything, even something as simple as a teapot!
Difficulty Degree: 1/5.
Prep Time: 15 minutes.
Duration: 1-2 hours.
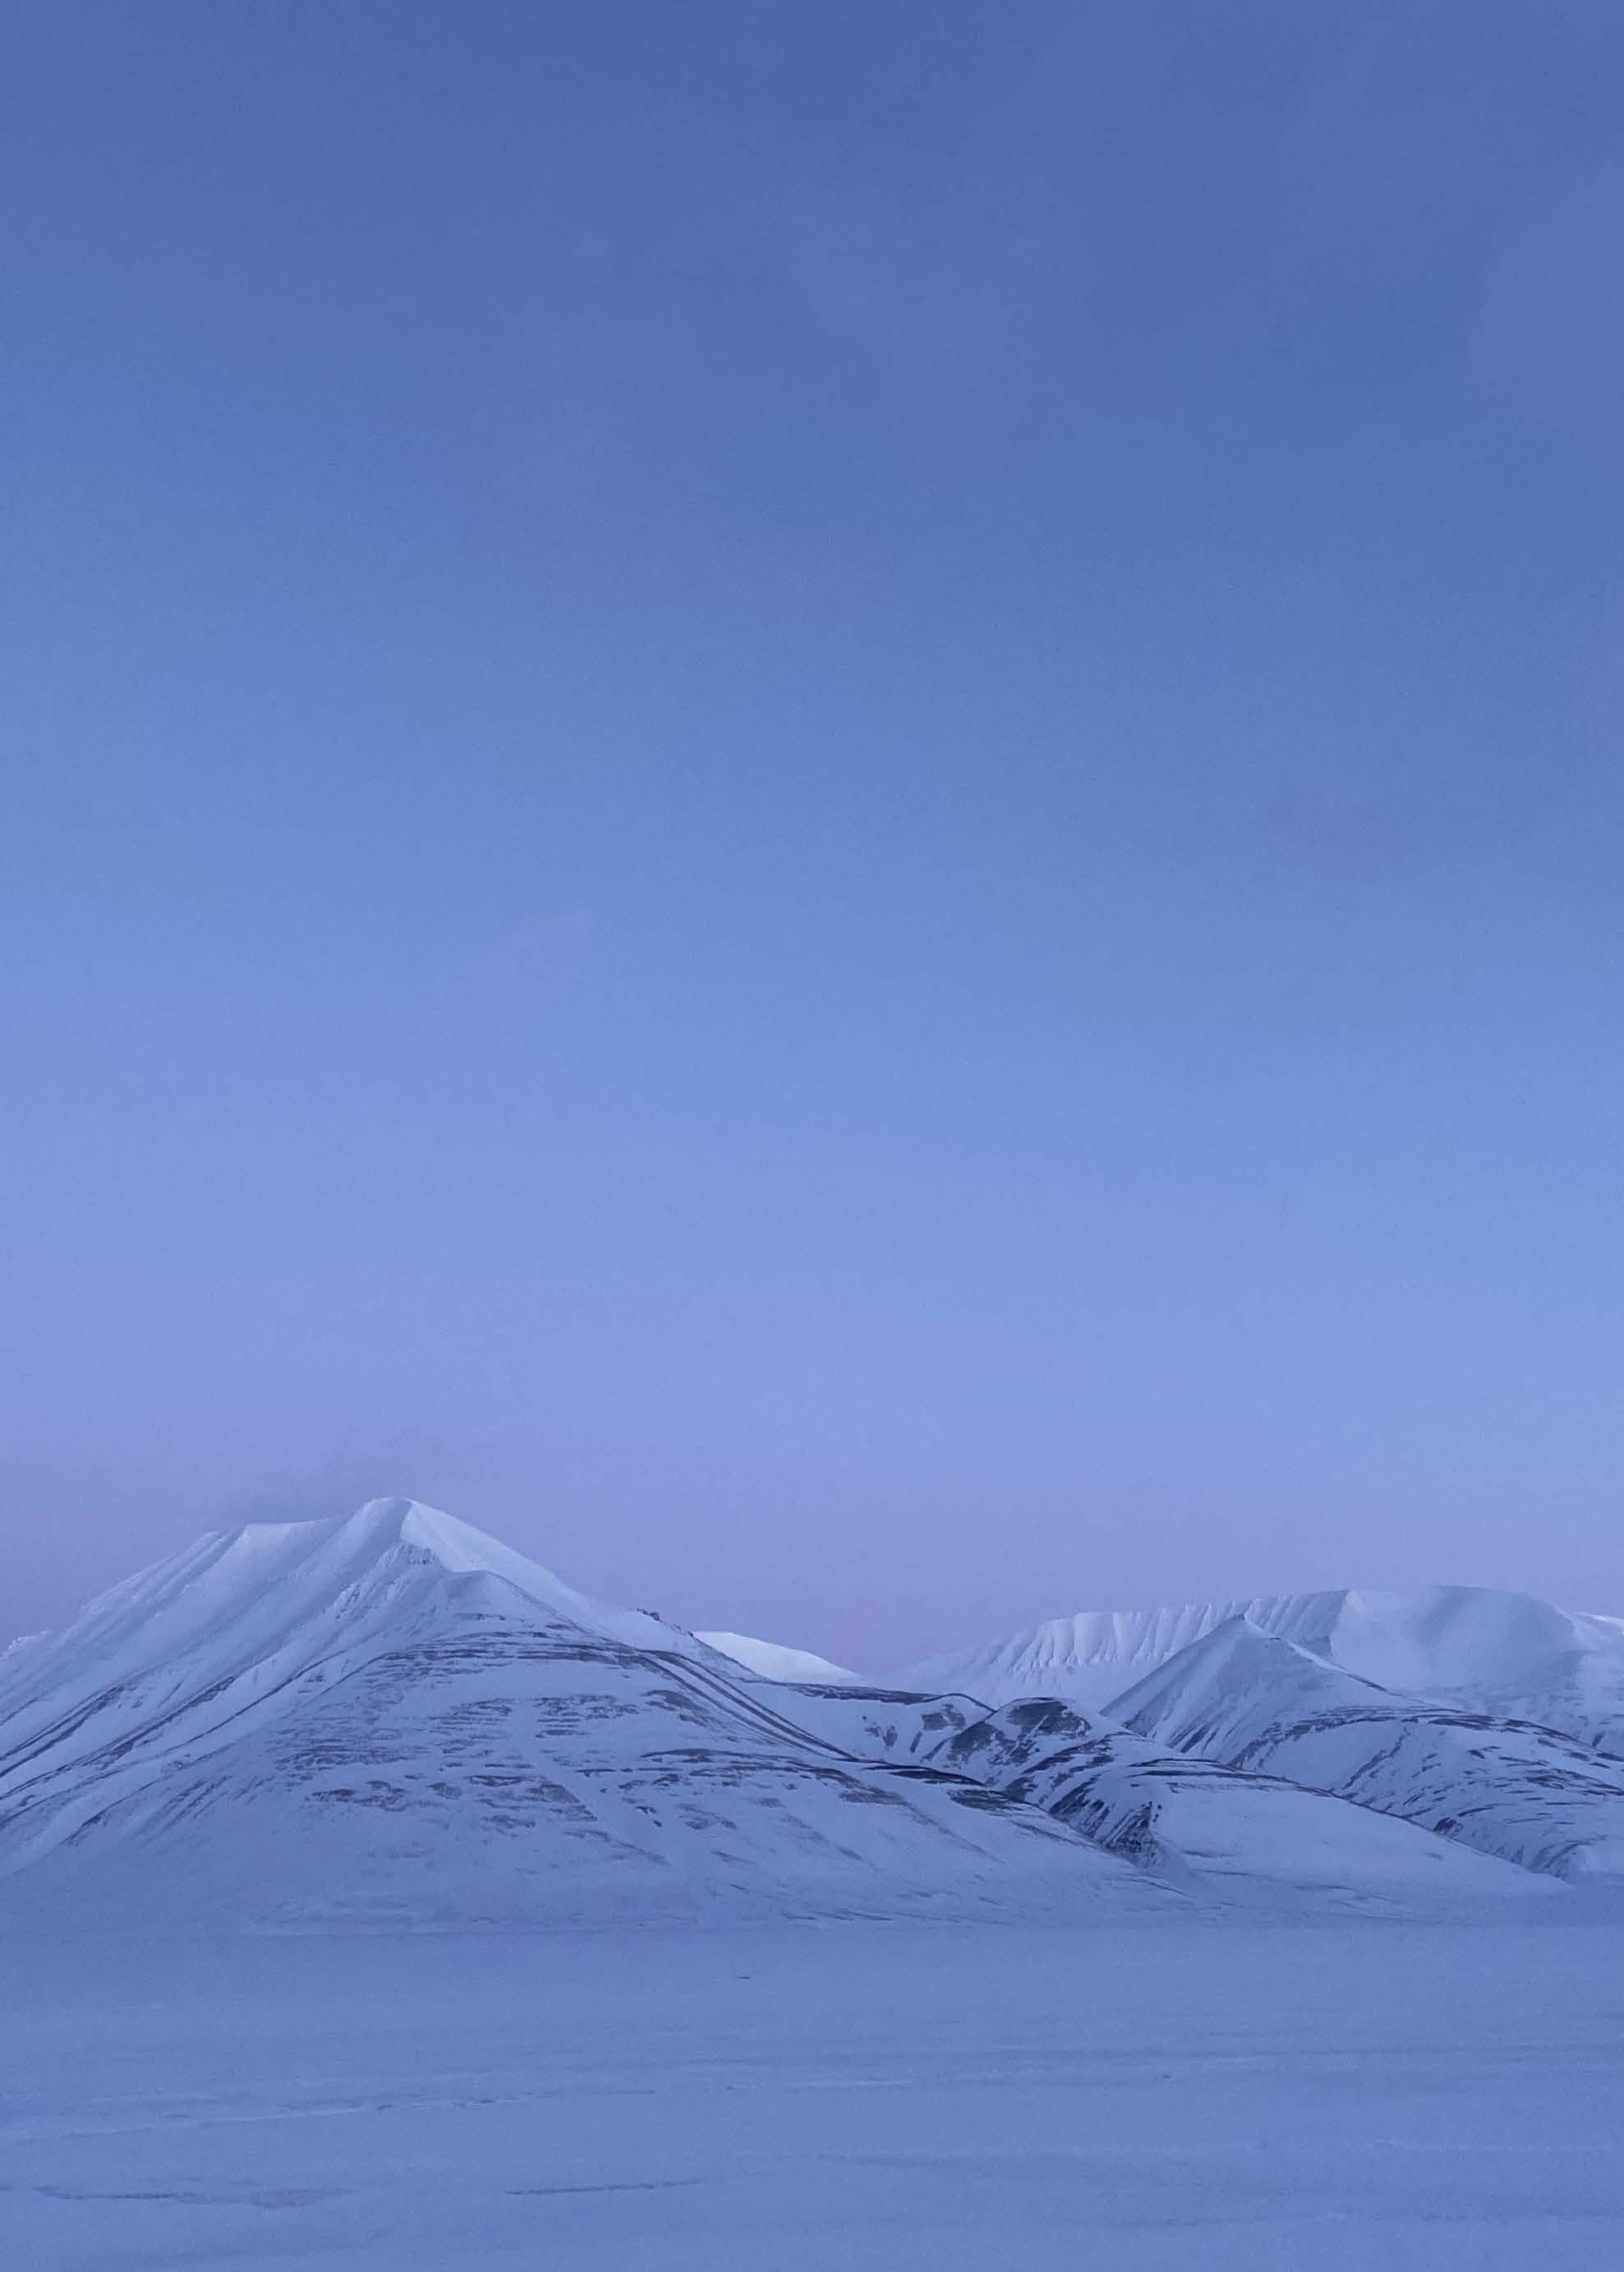
1. Start the session by introducing the students to the place of Svalbard (extra info found on next page). Try to really immerse them in the landscape, through the sounds provided. From this, get students to understand the challenges that the community face here, and the difficulties in growing crops.
2. On scrap paper ask the students to “Reimagine crops” in a mindmap activity for Svalbard, asking what crops they might be missing and annotate their answers. From this mind map, outline to the students that they will be creating an imaginary garden for the children of Svalbard.
3. Get them to choose their favourite crops and draw as many as possible. Their best designs should be copied and drawn onto their lino.
4. Next, get students to cut out their design on the lino (or whatever material you are using), focusing on themes of negative/positive space (detailed on next page).
5. Use the ink and rollers to cover the lino in ink, and then start printing onto the paper or canvas.
6. Finally, once happy with the designs, get all the students to come together to print onto one stretch of canvas or paper, creating a community Imaginary garden panel for the future.
If possible use this time to display the community printed panel somewhere of significance in the community for the students. Use it as a way to ask the public questions about reimagining the foods they eat and what places will look like in the future. Come back to the classroom and discuss what the public’s reaction
was, noting highlights and learnings for the future.
Send a postcard to Svalbard. “Carry out the same activity, but now in the context of the place you live in”. This activity is designed to get students thinking about how the place they live in might change in the future. Utilise the same activity of printmaking, but situate it within the context of the local area. Students can create a print for a postcard (found in student toolkit) and combine this with their hopes for the future. You can even get the class to send the postcards to Svalbard.
Overall this session allows young people to situate themselves in a place that is unfamiliar to them and reimagine what its future may look like, without some of the things we are used to in our everyday lives. It is important to always be thinking forward, but to do so in a positive way can sometimes be difficult. Hopefully this activity will allow students the discussion points to understand what it means to imagine places of the future in a positive light.
To reimagine something symbolises new thinking, rebirth and a brighter future. This is the skill we want to teach young people here, understanding how to think speculatively about their future and imagining multiple new worlds at once where any could be possible. Often when it comes to climate action, we can be faced with many negative statistics, and so this CCC skill allows students the space to get creative in their thinking of new possibilities. It is important now more than ever to learn the skills of hope, which is so closely linked to reimagining as from hope we can reimagine action.
Svalbard address:
Vei 608-3 Longyearbyen SJ, 9170, Svalbard & Jan Mayen
In the student toolkit you can find a cut out for a postcard to Svalbard. Get the students to cut these out and make some new prints that represent the place they live in. Send these alongside a message of hope to the people in Svalbard.
The History of Printmaking & Community Art
Printmaking has been around for thousands of years, and can be traced all the way back to the Han Dynasty in China; with wood block printing onto fabric. By the 1500s, printmaking had been developed for the masses, allowing crafts people to reproduce their work on bigger scales for the public. There are many different kinds of printmaking; but they all derive from the same principle that transfers an image from one surface onto another. Traditional methods are woodcut, etching and engraving. William Morris is a great example of a historical printmaker, who loved to use nature as inspiration for his prints, just like the prints used in this activity.
Community Art can be described as artwork that is presented in a community and public setting. It involves the community in both its creation and legacy, and often gets people involved in art that may not have been involved otherwise! Some great examples of community art can be seen all around us; Olafur Eliasson’s work is a great example of artworks
that engage the community.
Floortje is a multi-media based artist, with a focus on community and working with peoples experiences. Her work is influenced by the landscapes around her, and she finds the wilderness of the Nordic region particularly inspiring as she can feel “overwhelmed by nature here making her more connected to the land”.
Floortje has been working in Svalbard Norway for the last few years where she describes the climate “being very present around you and your thoughts as it is changing all the time, more than anywhere else in the world!” She describes the effect it has on her way of working, asking herself to question the world around her. The landscape in Svalbard is mostly rocks, ice and moss which Floortje describes as being difficult to connect to, but insists that we must rethink how we “collectively take care of something, even when it may be difficult”.
Overall, Floortje’s practice teaches us to always have faith and hope in reimagining the world we want to see. She is always trying to think in different ways, seeing problems from new angles and being an investigator in her own surroundings. Maybe, by reimagining our future through creativity, we can make better choices in our present.
Svalbard is a Norwegian Archipelago in the Arctic Ocean; and its largest settlement Longyearbyen is the most northern settlement in the world! It has a population of around 2,700 people, and has an airport, a school, university and cinema.
In this session students will be introduced to the CCC skill of Connecting. They will learn how to make their own mini film/moving image piece alongside a deep dive into artist Juliana Capes’ practice. A further learning activity with a card deck is also included in this session.
At the end of this session students will:
• Understand the CCC skill of Connecting: why it is useful, and its applications for their own futures in creativity.
• Have made a Moving Image/Film
• Reflected on the emotions they have felt during the process and understood what it means to think of the planet/nature as a non-human entity, one that may feel emotions too.
Materials Needed:
• Student Toolkit print out.
• Phone/Recording device that can create time lapse videos
• Scissors
• A4 scrap paper
• Sellotape
• Multicoloured clear sheets/tissue paper/polythene
Start this activity with a discussion with the students about what they think moving image and time lapse is. Encourage the students to do this in groups. Make sure that each group has at least one device to use. (More info on this on next page). Introduce the artist Juliana Capes and her practice, and talk about the importance of connecting to our emotions when being creative.
Set up each table with scissors, scrap paper, tape and multi coloured sheets. If taking part in the extra activity, have both these and the student toolkit printed out.
Once you have introduced the activity and Juliana Capes, take some time to introduce the next CCC Skill of Connecting: Empathy and Emotions. Ask the students in groups to quickly write as many emotions they can think of one piece of paper in 1 minute! After this, ask the students if anyone wrote Empathy? If not, talk to them about this emotion, and explain how it can be applied to the climate crisis. Talk about the complexity of all the emotions they have written down, and explain that we will be encouraging talking about feelings in this session.
1. Start the activity by making a tripod, using the step by step diagram found in the student toolkit.
2. After this, ask the students what it is they want to film, this can be through a
Difficulty Degree: 1/5.
Prep Time: 5/10 minutes.
Duration: 1-2 hours.
window, the sky, something in the garden. Just make sure it is moving. (e.g clouds)
3. Allow the students to set up their devices and record a time lapse for at least 5/10 minutes.
Whilst the devices are filming, ask students to describe what it is they are filming, ask them to talk about how the scene makes them feel, and what it feels for the scenes to change. Then ask them to flip these questions, and think about how the weather or landscape might feel. “How do you think the weather would feel if you asked it how it was?”. Ask all the students to write down the answers on scrap paper.
4. Then, ask students to stop their recording and watch it back. This is a great time to see if they like what they have filmed, encourage them to talk about how it makes them feel, seeing what worked and what didn’t.
5. If they are happy with the film, ask them to take the emotions they wrote down earlier and link them to colours of paper found on the table. Matching emotions to colour.
6. Use these new colour connections to add into a new time lapse, placing the sheets in front of the camera and building on the one they have just made. They can even add their words too.
7. Lastly, get the students to watch the films back together in a presentation movie theatre style!
Bring the group back into their smaller groups, and ask them to reflect on all the films they have seen that represent the emotions of the landscapes around them. How different or similar are they? Encourage discussion about this and
promote the importance of different emotions present at the same time.
Connect Card Deck: “Putting yourself in the weather’s shoes” found in student toolkit.
Imagining the emotions of the weather in other places. Find the card deck and print it out. Get the students to cut out the cards and think of another form of weather, different to the one they have filmed. One person plays the asker and the other is the weather. The person who is playing the weather should pick what kind of weather they are/where it is/and who it affects. The person asking the questions should ask the weather using the cards, and together write down the answers.
Overall, this session has been designed to be a creatively safe space for students to express any emotions they may be experiencing about the world around them. It is important to teach young people the skill of connecting to others through their shared emotions, and so we recommend this session to have an emphasis on group collaboration and connection.
Connection is one of the most important priorities to us as humans. In the past few years we have experienced a global pandemic, alongside the rise of digital worlds which has led to a feeling of disconnect for many. To teach young people the skill of connecting when practicing creativity is so important, it encourages personal introspection in order to connect better with the communities around us. If we do this and harness our emotions better in these ways, we may see the development of more accurate solutions to the climate crisis, as they are really coming from the heart, and from human connection itself.
As mentioned in the Extensions section, use the Connect Cards as an Extra Learning Activity. You will need to get the students to cut out the cards, and also add some of their own prompts to play the game. You can also use this connect card game in other scenarios; when questioning processes, materials and people.

A time lapse is a technique film makers use that slows down the amount of frames captured to be slower than those that we see, resulting in the moving image you view to be faster… or lapsing! Processes that are very subtle to our human eyes are great to capture on a time lapse (such as stars moving in the night sky) as we can track them better. The technique was discovered in the late 1800s, by two men trying to prove a theory about race horses movement.
Time lapse is just one technique used by artists practicing moving images as their chosen medium. Now that we consume so much video content, many contemporary artists are choosing to rediscover film from their own artistic angle, often referred to as “Video Art”, it is a great way to capture experiences and emotions, due to its real life qualities. Some great examples of famous moving image artists are William Kentridge, Nam June Paik and Steve McQueen.
Juliana is a multi-disciplinary artist, working across media, sculpture, film and installation. She works with people, and often with people with disabilities. She describes sustainability and climate action as always being part of her practice, it’s part of everything she makes. Juliana has always lived in cities, so has an interesting view on what it means for her to be immersed in nature. She finds the hidden gems of nature within a city, and is focused on the feeling of nature, not just what it looks like.
When thinking about our emotions, Juliana expresses how important it is to humanise everything around us. In this activity, we will be learning how to connect better to the weather; by asking the weather how it feels? Imagine the emotions of the weather. By doing this, we can reclaim our collective control on the world around us- and listen to what it has to say! Overall, Juliana lets us know that it’s ok to feel confused about climate change. However, it can start to feel alot less confusing when we connect with both the people and places around us: “It’s only by talking about difficult feelings that we give ourselves the chance to feel and think”.
Communicating our stories with the Arctic Creatures and Jessica Auer Activity:
In this session students will be introduced to the CCC skill of Expressing. Students will learn how to express themselves and personal climate stories important to them through the medium of performance, waste sculptures and documented by photographs. Storytelling is a powerful tool that can be expressed in many mediums, and students will learn this through the work of the Arctic Creatures and Jessica Auer.
At the end of the session students will:
• Understand the CCC skill of expressing: why it is important for them as creatives, and others who will be receiving their work.
• Have created and documented a story relating to the climate crisis through their chosen medium.
• Interact with waste from their local community and reimagine its future through a creative story.
Materials/Resources Needed:
• A Camera (We suggest an instant polaroid camera- but a phone/digital camera will also be fine)
• Waste material (Found outside)
• Paper
Difficulty Degree: 2/5
Prep Time: 15 minutes
Duration: 1.5/2 hours
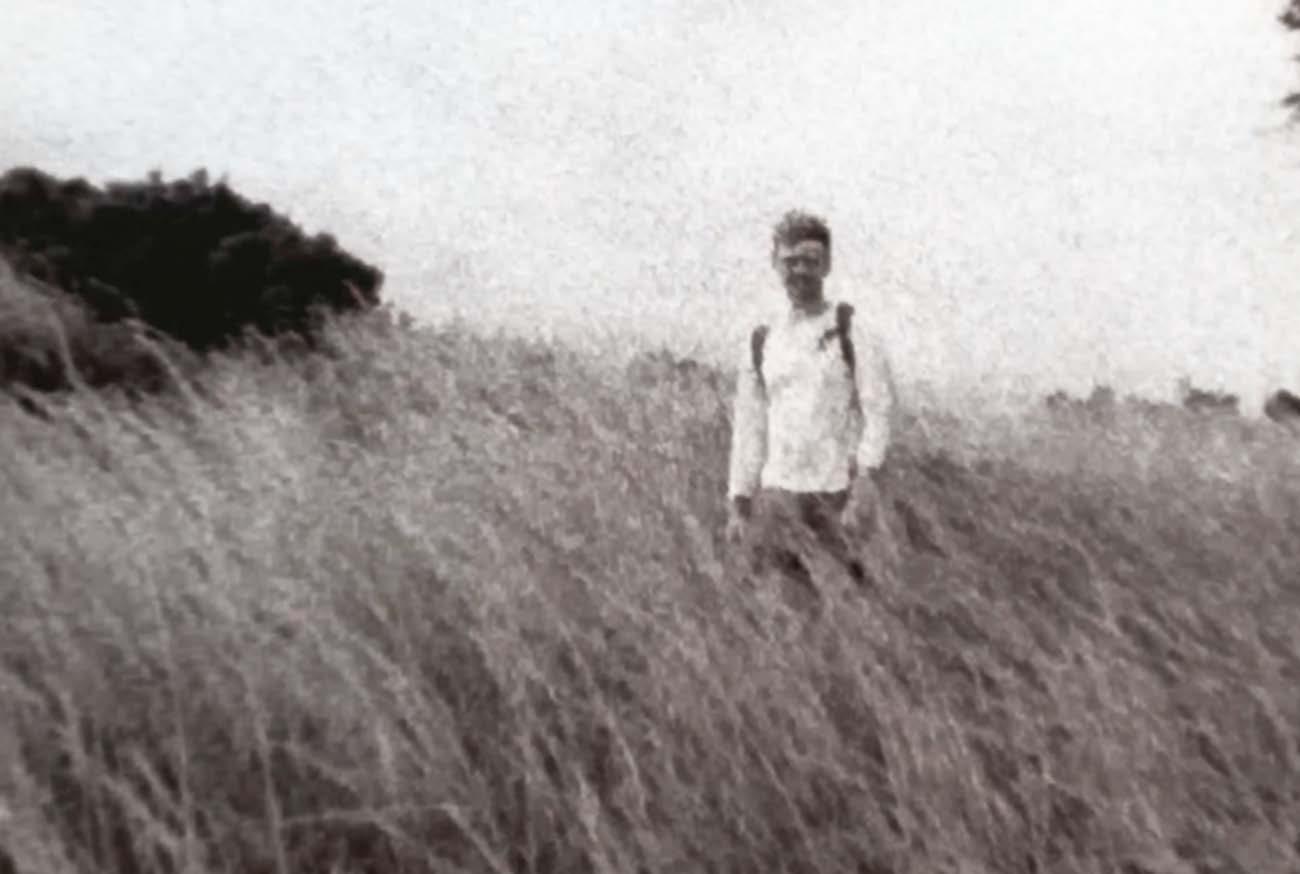
Start this session with a look at the Arctic Creatures work (pictures found in the student toolkit). Ask the students to think of all the themes relating to the climate crisis that it makes them think of, and write these down on sheets in groups. Introduce the Arctic Creatures, and explain how they situate themselves and their bodies within their photographs to communicate their stories. Also show the work of Jessica Auer: “Park Rangers”, and do the same for this work.
Once you have introduced the artists, and explored their works, take 5 minutes to focus on the CCC skill of Expressing: ‘Communicating our stories’. Ask the students what they think self expression means, and why it is important. This is a good opportunity to encourage dialogue between students on how they express themselves, get them to try and list as many creative ways to do this as possible!
1. Look at the arctic creatures’ photographs found in the toolkit and get them to list 3-5 environmental causes that it makes them think of.
2. Go outdoors, and go to a coastline. This could be anywhere from a river, to a canal, stream, the sea, ocean or your local pond. Here you will most likely find plastic waste.
3. Ask the students to collect some form of waste- one piece or multiple and bring it back to the classroom.
4. Ask them to engage with the waste and think of these questions: where
did it come from? What can we do to prevent this? What is its story? Can it be turned into something new?
5. Time to give the waste its story! Think back to the inspiration and situate your waste sculpture in this setting of your new story- what is the unique story you want to express and why is it important?
6. How can you tell this story with your hand, and your bodies? Really feel the objects and the place/setting around you.
7. Perform the outcome/build the outcome/photograph it- decide which unique way to tell this story. What would be most appropriate for you to express this? How can you use your voice, body, knowledge to get people to better connect to your story?
8. Photograph it and display to your class.
Get the students to display their photographs all together, and compare the different stories they have all told.
Extension
A great skill of storytelling is adaptability. Being able to adapt and adjust a story for diverse audiences is incredibly important when talking about our relationship to the climate crisis, as we all have different experiences. As an extended activity, get each group to swap stories and see how they interpret the narrative differently. Ask them to compare and contrast and understand the value of diversity.
Conclusion:
Overall, this session should allow students to feel free to express themselves creatively and situate themselves within
their work. Through interpreting multiple mediums and outputs, students learn the value of diversity and uniqueness in storytelling, and how we should always seek new and exciting stories when addressing the climate crisis.
To express ourselves means to show who we really are, and what is important to us, through whatever feels truly authentic to us. This is done through creative storytelling; allowing us to highlight the unique stories that make us who we are. This CCC skill aims to allow for mistake and freedom, trying new things and being playful in our approach to creativity. This playfulness is often dismissed when addressing climate action, as the topic can be negative, so this skill aims to do the opposite and encourage joy!
Performance Art
Performance art is often described as art that includes movement, the self, “live-ness” (real time), and work that is impermanent, often documented by video or photographs. It is often “interdisciplinary”: meaning to cover many disciplines and outputs, appealing to the diversity of self expression. Some say that it encompasses 5 main elements: Time, Space, Body, Presence of the artist, Relation to the public. Marina Abramovic, Ana Mendieta and Yves Klein are some great examples of performance artists.
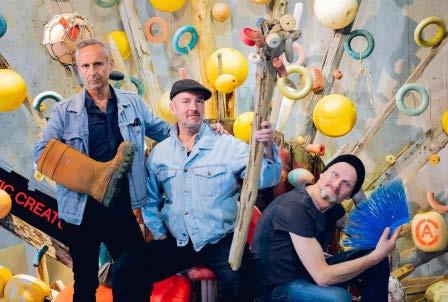
The Arctic Creatures are a group of 3 friends: Stefán Jónsson a director, Óskar Jónsson a film maker and Hrafnkell Siguðsson an artist. They come together as friends to hike and explore the Icelandic landscapes; venturing into the wilderness together. During these hikes the trio noticed waste and junk littering the beaches of Iceland; from fishing nets, to plastic bottles and barrels. They started to take pictures of themselves with the waste objects, often referencing famous scenes from history or films and creating strange, comical and fantastic images.
They mention that their work is art, but is as much about raising awareness of the waste problem as making a beautiful image. Essentially they are recycling the pollution; creatively. They let the object dictate the story; for example an old barrel becomes a scene from Ancient Rome. Their work draws in the public to understand the issues of overconsumption, pollution and waste through comical and beautiful imagery.
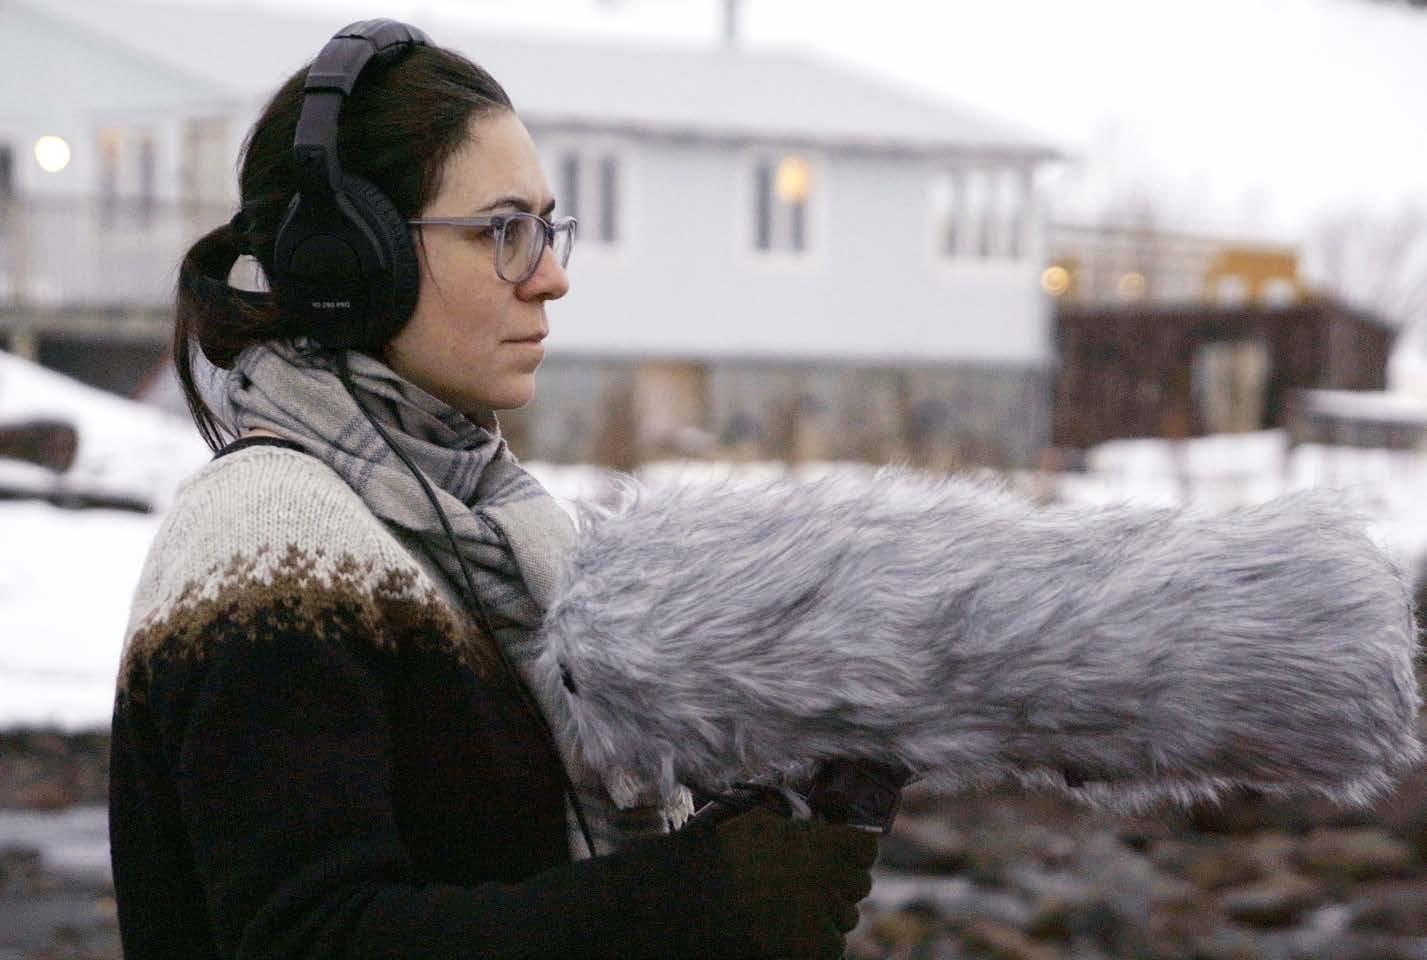
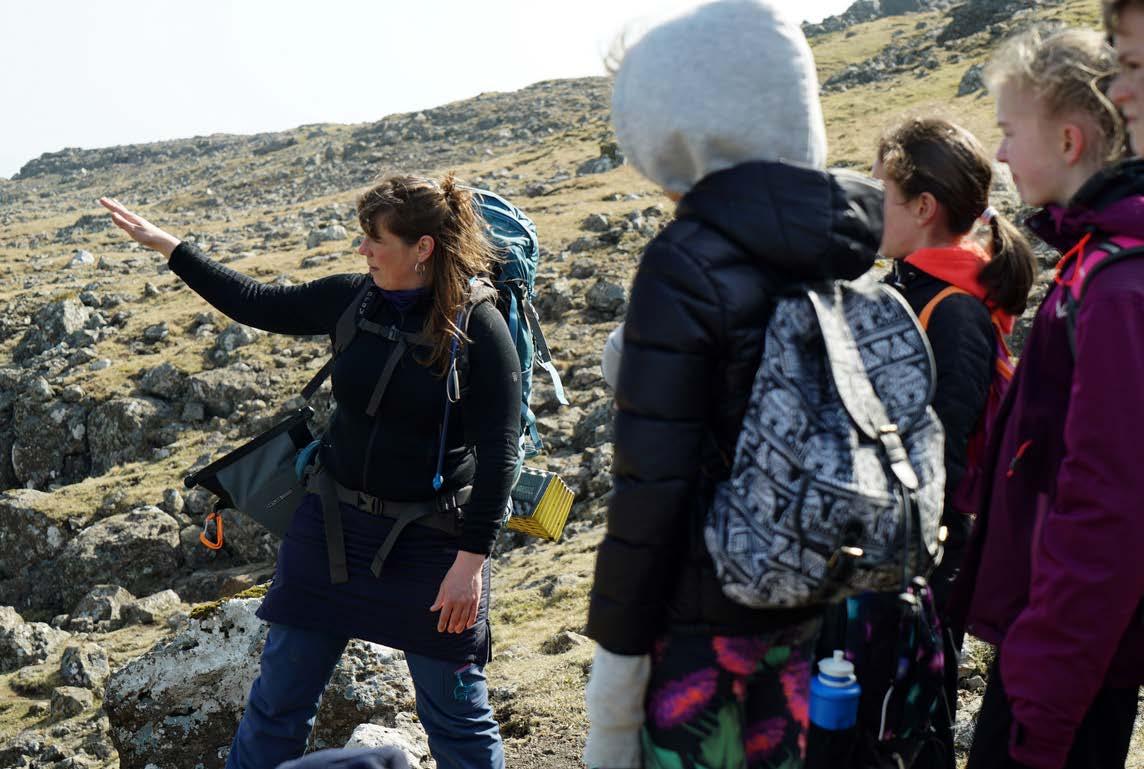
Jessica Auer is a Canadian born photographer who now resides in Iceland. Her work is place based and explores environments such as the Nordic regions due to their fragility. She is interested in places that undergo a lot of transformation; such as Iceland, mainly with communities and tourist destinations. Her work may look predominantly landscape based but it is the people and their feelings of those places that she tries to capture, alongside the impact we as humans have on the planet.
One of Jessica’s works: “Landvöður” (2019-2022) is a project about the park rangers in Iceland. Jessica photographed many park rangers and situates them as the subject within the landscapes of her photographs. She mentions: “it is about seeing yourself represented in the piece of art… we are all responsible for taking care of the environment”. This mirror of seeing ourselves/those in our communities in the work we encounter, is a great point when teaching the value of self expression in our creative work.
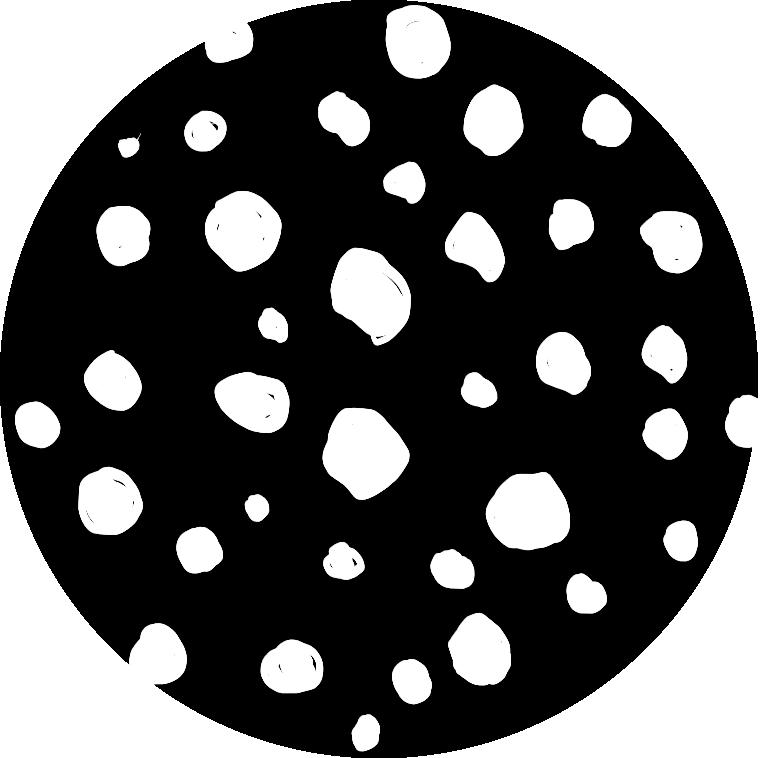
Activity: Chemigrams.
In this session students will be introduced to the CCC skill of exploring. They will learn how to make their own chemigrams, detailed with an artist’s deep dive of Ed Carr’s practice.
At the end of this session students will:
• Understand the CCC skill of Exploringwhy it is useful, and its applications for their own futures in creativity.
• Have made a chemigram
• Reflected on the processes and materials they have used.
Materials Needed (General):
• Black and white or colour darkroom paper (old, expired or fogged works just as well)
• Weighing scales
• Photographic fixer (or use a solution of 350g salt to 100ml water)
• Minimum of 3 watertight shallow trays
– Tupper wear or food packing will work.
• Gloves
• Spoons / or mixing utensils
• Tap water
• Measuring jugs
• Sieve and cloth for straining
Resist Examples:
Tapes, glues, varnish, syrups, oils, vinegars, soil, wax, clay, jam, flour and water (wheat paste).
• 40 grams of soft plant matter (weeds or herbs are a good choice e.g. nettles, wild garlic, rosemary).
• Vitamin c powder
• Washing soda (sodium carbonate / washing soda crystals)
• Boiling water or saucepan and stove
Developer Recipe
This can be made ahead of time or during the workshop. Steeped or simmered plant material will keep in the fridge for 48 hours.
1. Chop up your plant materials and place in a pan with half a litre water of boiling water. Simmer for 10 minutes or steep overnight.
2. Strain into measuring jug or bowl
3. Add 50g washing soda crystals and stir until dissolved
4. Add 10g Vitamin C powder and stir.
5. Pour into one of the water tight trays.
Start this activity by describing what a Chemigram is, and give some information on the history of photography (found on next page). Introduce the artist Edd Carr, and engage the students in his work (found in their toolkit).
Set up: Lay out your dark room paperkeep in its light proof packaging until you are ready to use it. Alongside a selection of resists; one tray of developer; one tray of fixer (or the salt water); one tray of tap water for rinsing.
Once you have introduced the artist and activity, take 5/10 minutes to focus on the CCC skill of Exploring; Materials and Processes. Ask your students to hold a
Difficulty Degree: 5/5.
Prep Time: 1 hour.
Duration: 1-2 hours.
discussion about objects and materials they see around them, could these be made in different ways that might reduce their impact on the climate? For example could a plastic chair be made from wood or recycled materials?
1.Individually or in groups, have the participants discuss and then write down their ideas for alternative materials for everyday objects, let their imagination run wild and ask them how they might feel about theses new objects. They can write these down in the form of a mind map or on post it notes
2. Discuss some of the results of this exercise with the class by encouraging participants to share.
3. Optional: ask participants to draw or sketch an image based on the feelings they have discussed. This can be representational (e.g. a sketch of their favourite tree), or entirely abstract (e.g. a hasty scribble representing feelings of confusion). These can helpful as a visual reference for the chemigram process, as it is experimental and abstract.
4.. Then if available to you take a walk outside to forage for plant materials to use in the chemigram process.
5. Once back you can start to get creative.
6. Hand out the dark room paper giving one per student. It will start reacting to the light immediately so keep any extra in its light proof packaging.
7. Start to apply your resists, there are a variety of ways to do this; they can be placed directly on the dark room paper with brushes, gloved hands or applied to foraged plant materials and pressed onto the paper to make prints.
8. Encourage students to think about the emotions they discussed earlier when applying the resists and base their
application on this.
9. Apply the developer. This can be done by submerging the whole paper or only applying it in certain places with a brush. (gloves should be used)
10. Do the same with the fixer, either submerging entirely or applying it with a brush.
11. Once you are satisfied with the results submerge in the fixer solution for up to 5 minutes (or 24 hours if using salt water) to preserve them to natural light.
12. Wash the prints in clean water submerging for about 10 minutes and making sure any resists residue are washed away.
13. Let your print dry and enjoy!
Ask students to present their work (if dry) and talk about its meaning, you can refer to the emotions we discussed earlier in the process.
Animate! If you have extra time students could use their work to create animations just like Edd does, free software like ezgif.com will help you to create short animations from your work.
Ultimately use this session to let students be as exploratory as possible with a new process, and make as much room for mistakes as possible. The key is to teach the creative act of exploring and translating our emotions and the way we think about the climate.
To explore a creative process, means to enquire about something in order to learn more about it. This is fundamentally important when teaching young people to become Creative Climate Champions, as it puts an emphasis on investigation. Giving young people more agency to investigate and explore the world around them, most importantly the processes they live in between, allows them to understand what needs to and can be changed in the future. Freedom, Mistake and Examination are great links to this skill. If you can convey that exploring encompasses all of these things, students will hopefully learn to better understand what it means to explore the planet and its current state.
As indicated in the Extensions section, this activity allows for students to test their new “Exploring” skill and to explore another creative process. This could be screen printing, woodwork, painting etc. Get them to divide each stage of the process and explore how each stage could be made more sustainable.
The NAARCA podcast “Testing Grounds” is a fantastic resource for extra learning on the Explore skill. It’s an 8 part series that investigates how artists’ residencies can better explore the climate crisis. Take a listen on the QR code below.
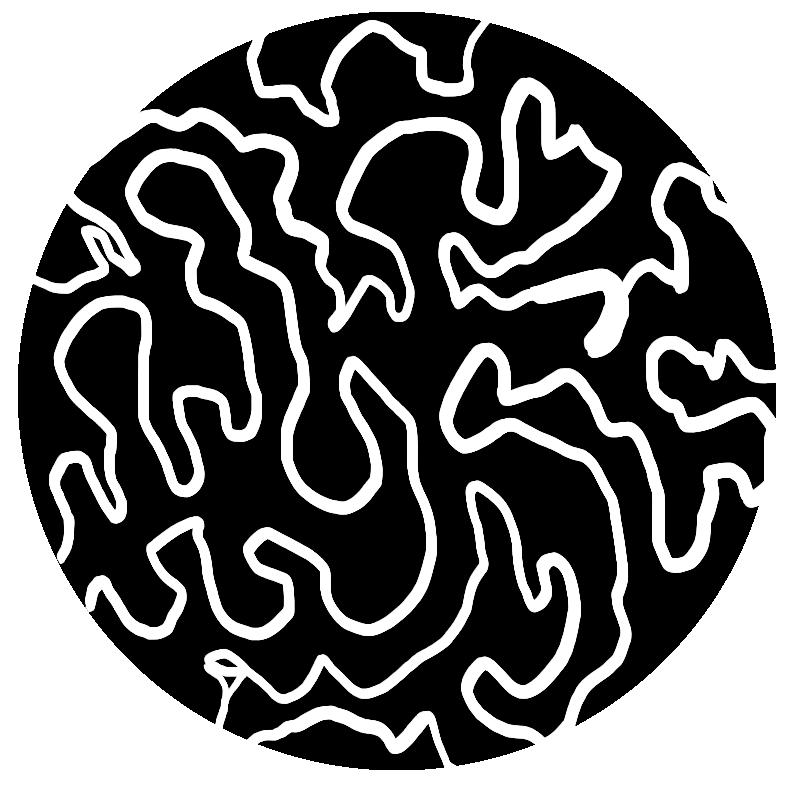
A chemigram is a form of photography that uses resists on photographic paper, to hold back the developer in the dark room process and produce more experimental and abstract outcomes. It was discovered by Pierre Cordier in 1956 and has been used by many artists as a more experimental photography medium. Further reading: https://www.alternativephotography. com/the-chemigram/
The Camera Obscura, tracked back to the Chinese and Ancient Greeks was first developed more than 2000 years ago. It comprised of a small dark room with a hole in one wall, through which images were projected. After this in the 1700s, many were testing with the development of exposing salt to sunlight, but it was not until 1826 when Joseph Nicéphore Niépce created the first permanent photograph in a sliding wooden box. In the following years, the medium exploded and quickly became one of the most influential
and exciting techniques of its time.
Edd Carr is an artist who works with photography and moving images. His work often looks at climate issues and is influenced by growing up in the countryside. He works using “natural materials and photographic processes combined”, and enjoys “shooting analogue film and developing film using natural developers that are taken from the landscape where the film was shot”. By mixing the landscape into his process and his outcomes, Edd is able to make artwork that is ecological in all of our senses.
Edd is also involved in the Sustainable dark room project which focuses on “low waste, low toxicity options to traditional photography processes, and encourages the ethos of reusing, repurposing and recycling materials used in traditional photography”. The traditional methods are often really toxic, and so Edd searches for new ways of approaching these methods. To do this Edd describes having to “jump in at the deep end and navigate outwards instead of inwards”. This practice is a great skill to learn as a CCC, teaching us to jump right into our source and research in this way, tackling problems in unique ways.
Overall, Edd believes that through a more mindful engagement with materials, especially those that are not made by humans, we can create a better relationship with the world around us. This makes us more likely to be involved in climate action, as we have more knowledge on the ecosystems we may be affecting.
In this session students will be introduced to the CCC skill of Questioning. They will learn how to make their own paper from scrap materials, and be asked to investigate their own recycling plants in their communities. They will understand what it means to question the life cycles of materials through an artist’s deep dive of Caitlin Dicks practice.
At the end of this session students will:
• Understand the CCC skill of questioning: why it is useful, and its applications for their own futures in creativity.
• Have made their own paper
• Investigated their local paper recycling plant, conducting a simple life cycle review.
• Reflected on the materials they have given a new life through the paper making activity, and understood what it means to question the stages of a materials life span for it to be more sustainable in the future.
Materials Needed:
• Recycled shredded paper-this can be done by hand or by using a paper shredder.
• 6 to 8 mould and deckle frames (a screen attached to a frame). You can buy them, however they can be
expensive. For a more affordable version you can make them at home. Use this QR code to watch a how to video:

• Metal or plastic sieves
• Staples and staple gun
• Scissors
• Plastic netting
• Paper shredder
• Food blender (this works better) or hand blender.
• Water
• Large plastic basin or tub-big enough to fit A4 mould and deckle frame inside with room to move about.
• Sponges
• Disposable thin cloths
Start this activity with a discussion about what it means to analyse a materials life cycle. Ask the students to get into groups and get them to think about paper and how it is made. Ask them to write down all of the steps they think goes into making paper, from trees to the piece they are holding in their hands. Use these question prompts to steer discussion after the activity:
• Where does paper come from?
• Why are trees important?
• What happens to the paper once we have finished with it?
• What was paper was made from in olden day times?
• Which small and large animals live in trees, or depend on trees?
Difficulty Degree: 4/5.
Prep Time: 1 hour
Pulp to be prepped 24 hours before.
Duration: 1 hour of making- 3 hours to dry.
• How would habitat and biodiversity be affected if we cut down trees?
Using the information highlighted on the further info page (next page), utilise this time to educate the students on the biodiversity loss that comes from felling trees for our paper. Get them to think about this detrimental element of the papers life cycle, and bear in mind how this could be changed in the future.
The activity the students just took part in was a great example of the skill we are looking to learn in this activity: Questioning the life cycles of everything around us, and understanding how they could be changed for better in the future. This is a great time to introduce the artist Caitlin Dick and her sustainable materials practice.
In advance of this paper making activity you will need to prepare the paper pulp. This is done by shredding recycled/scrap paper and soaking it in water for 24 hours. It then must be blended in a food blender to create a pulp, and sieve the water out. If using later, these balls can be stored for 1-2 days to be used later. Use your hands to squeeze the excess water so it turns into a ball.
On the paper making day, set up each table with 1 large basin of water, a sponge, 20 sheets of disposable cloth, 1 mould and deckle set, balls of paper pulp.
1. Add a large handful of pulp to the basin of water
2. Stir the waster so the pulp flows loosely.
3. Dip in your mould and deckle
4. Shimmy it and lift. The pulp should have spread out in an even layer.
5. Lift off the deckle and set to one side, and get ready to transfer.
6. Layout your cloth and flip the mould onto the cloth.
7. Press down firmly on the sides of the mould, and use a sponge to soak the excess water.
8. Lift the mould and transfer the cloth to somewhere dry.
9. Leave to dry for a few hours to a day and peel off to reveal your sheets of paper!
Bring the groups back together and get them to display their work. Bring back the initial mind maps, and encourage a discussion around questioning where things are from and how they get to us.
Questioning your local paper recycling plant! Get the students to carry out their own investigation on their local recycling plant. You could visit the place, question workers, and even get to see if there is any parts that could be more sustainable. Get teams to create a new case to the class.
In this session, students will have learnt how to question the everyday materials around them. Teaching this skill through paper making allows students to learn to identify innovative solutions through questioning their reality.
Teaching young people to question the world around them is vital when addressing climate action, as it is only through this questioning and accountability that real change can occur. Often, the processes and materials that we live within have been around for hundreds of years, dating back to times of inequality and where different materials/processes were the norm. By teaching young people that these factors are now not the same as they once were; for example colonial exploitation of materials or processes with an emphasis on fossil fuels, we might be able to allow young people to develop the important skill of questioning the world they live in, and demanding for change.
Get your students to investigate their local recycling plant! Floortje, our artist for another lesson plan, did this with her students in Svalbard when testing this workshop and found some real insights.
She described the need for this as “a need for understanding the footprint of our consumption”. Her work showed the need and importance of linking the creative work back to a local context for the students, and asked the students to make a tangible realisation of the waste at the end of the session. This is a great example of an extra task for this skill, one that gets the students involved in community and action.
The History of the Paper Making Industry & Habitat/Biodiversity Loss
The first invention of paper can be traced back to the Chinese in AD 105, where old rags and tree bark were used to create sheets. The Chinese kept this amazing craft a secret for many years until it was discovered by Japan, where they started to make pulp using mulberry tree bark. Paper making then exploded across the world, and is associated with the development of machinery such as presses and hammer mills. Paper was the first means of mass communication in an otherwise more separated world, and as the demand increased, suppliers looked to new materials such as wood pulp to keep up.
Nowadays, paper making uses a significant amount of natural resources; timber and water. Alongside this a lot of electricity and gas is now needed for the process, with chemical additives thrown in to make the standard paper we know today. To make this paper, many trees are harvested, causing a devastating amount of deforestation in countries all over
the world. With deforestation naturally comes habitat loss, and paper making has been named as one of the main industries responsible for the endangerment of many species.
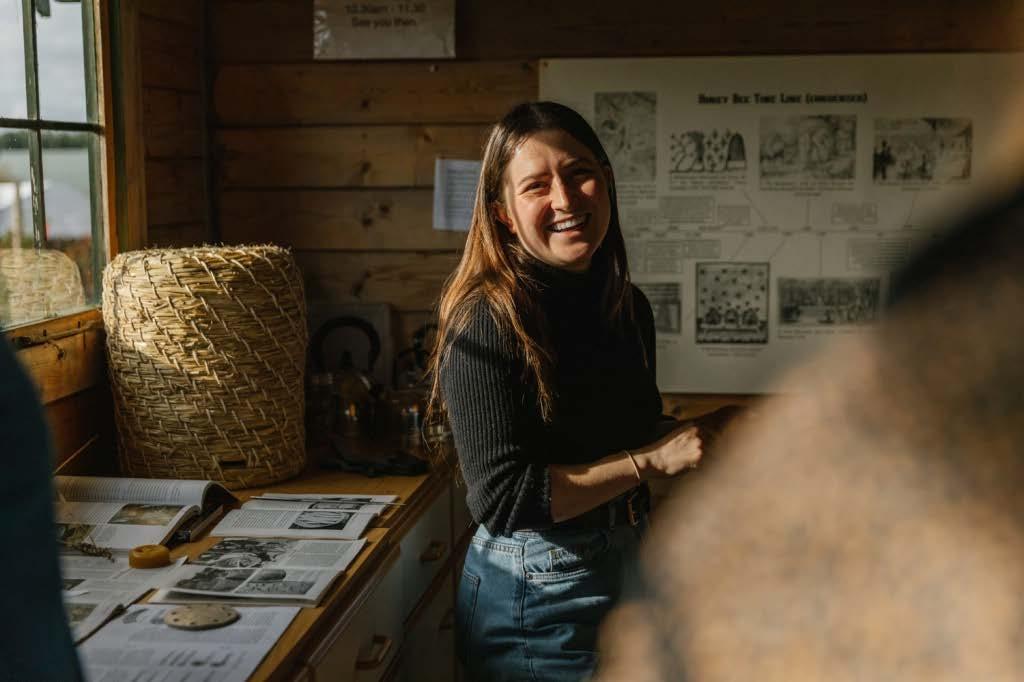
Caitlin Dick is an artist whose practice is inspired by the environment. She uses sculpture, film and printmaking to investigate the intersections between people and their environments. She likes to focus on the microscopic parts of nature that we overlook, alongside questioning how our relationships with nature can be nurtured for the future.

www.naarca.art
Created and designed by Maraid Mcewan, in collaboration with all artists mentioned.