KNITmuch
...to K, is to
KNIT TOGETHER
Exploring SIMPLE LINES in knits
2 0 Things I want you to know about fit as a starting point with JILL WOLCOTT
Transforming a Pullover with Embroidery
Cozy Fall Style

Exploring SIMPLE LINES in knits
2 0 Things I want you to know about fit as a starting point with JILL WOLCOTT
Transforming a Pullover with Embroidery
Cozy Fall Style



EDITOR-IN-CHIEF, ART DIRECTOR
Carla A. Canonico Carla@KNITmuch.com
ADVERTISING SALES
John De Fusco John@KNITmuch.com
PUBLISHER A Needle Pulling Thread
PHOTOGRAPHERS
Carla A. Canonico, John De Fusco, Contributors
BLOGGERS/CONTRIBUTORS
Cynthia MacDougall ktogdesign@gmail.com
Cristina Simionovici cris.sim@gmail.com
Sarah Dawn Adams sarahdawnsdesigns.com
GRAPHIC DESIGN
Carla A. Canonico Carla@KNITmuch.com Sondra Armas Sondra@KNITmuch.com
SOCIAL MEDIA and WEB
Maria Corina Guillen Joaquin Rojas
WEBSITE / BLOG : KNITmuch.com
Facebook : KNITmuch Pinterest : knitmuch Twitter : @KNITmuchmag
WHERE TO GET YOUR COPY
KNITmuch is a quarterly eMagazine published by A Needle Pulling Thread. It is available free for personal use online at KNITmuch.com
A limited number of printed copies of KNITmuch are available for purchase at select yarn shops and specialty stores. Ask for it at your local shop. KNITmuch is not available by subscription.
EDITORIAL Bloggers, designers, and other contributors who would like to be considered for future issues please email Carla@KNITmuch.com with a brief description of your work and your proposed project.
©2025 KNITmuch. All rights reserved. Issue 24. ISSN 2368-5913
No part of this publication may be reproduced without written permission from the publisher.
All designs, patterns, and information in this magazine are for private, non-commercial use only, and are copyrighted material owned by their respective creators or owners.

8 Stitches, Stripes & Sulky: Transforming a Pullover with Embroidery
9 Stick , Stitch, Soak: Transforming a Pullover with Sulky Fabri-Solvy
12 20 Things I want you to know about fit as a starting point
16 Casting On the Palomar Tank with UNIVERSAL YARN Bella Tweed
17 Cables 101 - working the cable pattern for the Palomar Top
18 Help! Tackling shaping in the knitted Palomar Top with Bella Tweed yarn
20 How to knit I-Cord ties for the Palomar Top with Bella Tweed yarn
21 Putting the final touches on a Palomar Top
24 Explore UY Tango for cozy transitional knits this fall
25 Cozy Fall Style | Knitting the Lawson Cardigan with UY Tango
26 K nitting the Lawson Cardigan Fronts with UNIVERSAL YARN Tango
27 K nitting the sleeves on the Lawson Cardigan and finishing TIPS
28 Final Steps: finishing the Lawson Cardigan ...to K, is to


Dear Knitting Enthusiasts,
As the crispness of fall begins to whisper through the trees, we bring you a deeply inspiring issue of KNITmuch designed to warm your needles and your wardrobe. Issue 24 is all about transition —in seasons, in techniques, and in our creative approaches to knitwear.
We begin with “Knit Together: Simple Lines,” a reminder that minimalism in stitch and form often yields timeless beauty. From there, we take things further with creative embellishment, as seen in “Stitches, Stripes & Sulky” and “Stick, Stitch, Soak,” where embroidery meets knitwear in truly transformative ways using Sulky products.
One of our most enlightening features is “20 Things I Want You to Know About Fit.” It’s a must-read for every knitter striving to make garments that feel just right. This practical, heartfelt guide is a treasure.


Next, we dive into two exciting garment projects: the Palomar Top, knit with UNIVERSAL YARN Bella Tweed, and the ultra-cozy Lawson Cardigan in UY Tango. Through a series of posts, you’ll walk through every step—from casting on and mastering cables, to shaping, adding I-cord ties, and finishing touches. These tutorials are perfect whether you're building confidence or expanding your skills.
Whether you're knitting for warmth, style, or exploration, this issue is here to encourage your journey. Fall is for layering—and not just clothes. It’s a season for layering skills, techniques, and textures into your practice.
Happy knitting,

Cheerfully,

with Cynthia MacDougall

Cynthia MacDougall
Knit Together Design Studio
PO Box 562 Stn Main
Orillia, ON L3V 6K2
ktogdesign@gmail.com
ravelry name: macknitnow

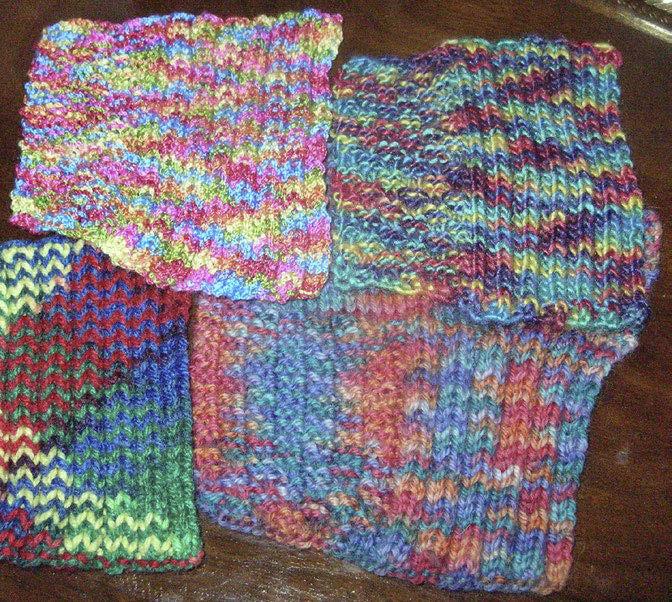
Vest Samples - These four samples were knitted for the Hummingbird Garden Vest. All were made with the same number of stitches with the same needles. The one on the bottom right was the one chosen for the vest. These pieces illustrate the importance of sampling when working with variegated yarns.
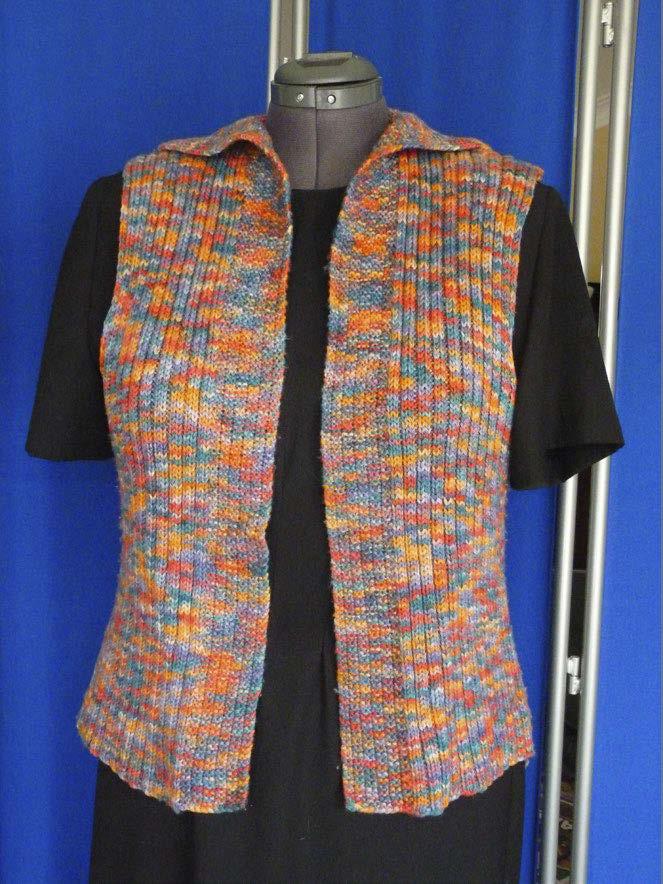
Hummingbird Garden Vest - The ribbing on this vest echoes the simple lines of the garment pieces. The collar pieces are extensions of the back and fronts. The only shaping on this garment occurs at the armhole and the shoulders.
There is comfort in simplicity. Fashion has come a long way from the over-sized skirts and layers of ruffles that appeared in centuries past. My preferred fashion statements use simple lines.
One of my favorite periods in fashion was the 1930s. During this decade, glamour ruled – gowns were made of shimmering satin cut on the bias, with simple lines that flowed over the body like quicksilver. Knitted dresses from this period also had simple, close-fitting shapes with a minimum amount of embellishment.
There is something about the way a pencil, A-line, or bias skirt skims over the hips. The simple lines of the Chanel jacket, with its boxy shape and collarless neckline is timeless, and today, we all know that nothing beats the comfort of the simplyshaped T-shirt.
Using simple lines to make garments allows the knitter (or seamstress) to make the fabric the star of the show. This can be done by using a luxurious specialty yarn in a rich textured pattern, or by using a loud novelty yarn in a very basic stitch pattern.
Variegated yarns, which have become so very popular in the last decade, lend themselves to simple lines that don’t have row widths that change. Variegated yarns have a tendency to "pool". When the stitch count changes throughout a garment – at the armholes, for example – the color pooling changes. This can add to the overall design, or it can very much detract from it.
Many of my favorite knits have simple lines. Manon is a T-shirt made with a variegated yarn. Its unique construction method avoids pooling, because the stitch count changes almost every row. Any time pooling begins, it will change within a few rows as the stitch count changes.
Ribbing can be used to great advantage in garments with simple lines. We used a 7 x 1 rib for the Kokimono project featured in this issue. The Hummingbird Garden Vest , another garment with simple lines, uses a 2 x 2 rib and a variegated yarn which play off each other; the ribbing echoes the lines of the garment, and the colors add visual interest.
One of my favorite sweater shaping is the raglan. The taper of the raglan shape draws the eye in toward the neckline, making it attractive on people who have wide-shoulders. Emphasis and interest can be added to this line by incorporating a color stripe, cable, yarn overs, or other treatment.
The straight lines of a drop-shoulder sweater are well-suited to variegated yarn because the body stitch count stays the same right up to the neck. They also suit complex patterns such as Nordic and Aran designs.
Patterns for garments that have simple lines give us a canvas that we can use in many ways. They can be a vehicle for a decorative stitch pattern, or a simple rib like the one in Kokimono. Minimal shaping means less math for such details as armscyes or shaped waistlines. A simply knitted garment can become a backdrop for a dramatic piece of jewellery, or it can be used to offset a boldly patterned skirt or jacket.
Garments with simple lines can quickly become our "go to look" on days when picking out an outfit is too much effort first thing in the morning. In short, they can become the "comfort food" of our wardrobe. z
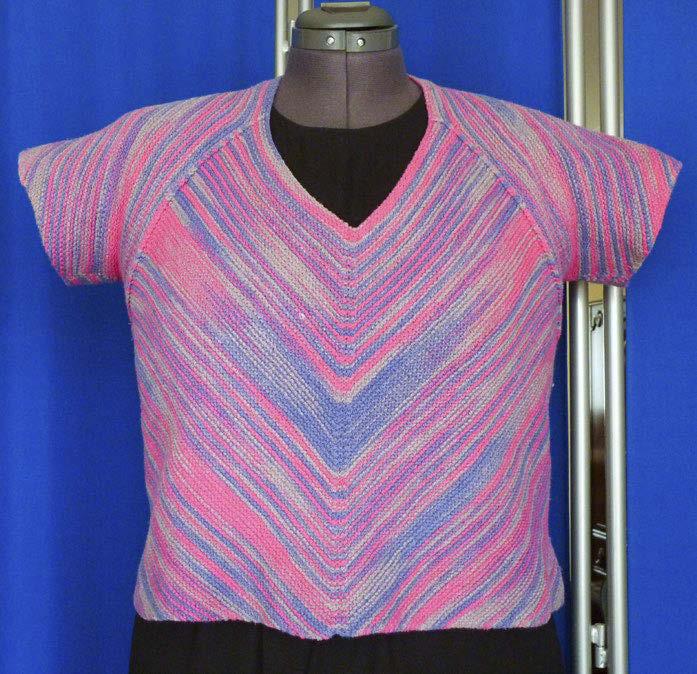
Manon - Manon’s unique construction changes stitch counts almost every row. This reduces the opportunity for colors to "pool". A garter stitch base further breaks up the colors and the raglan shaping adds interest to the garment while respecting the simplicity of its lines.
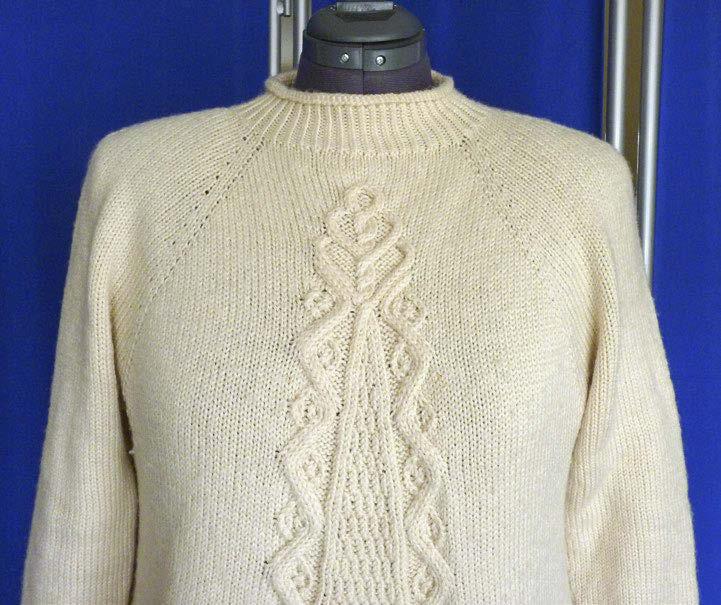
Raglan - This raglan sweater was knitted from the top down. The raglan shaping on this sweater was made with make 1 increases. Yarn overs could be used to emphasize the sleeve shaping.
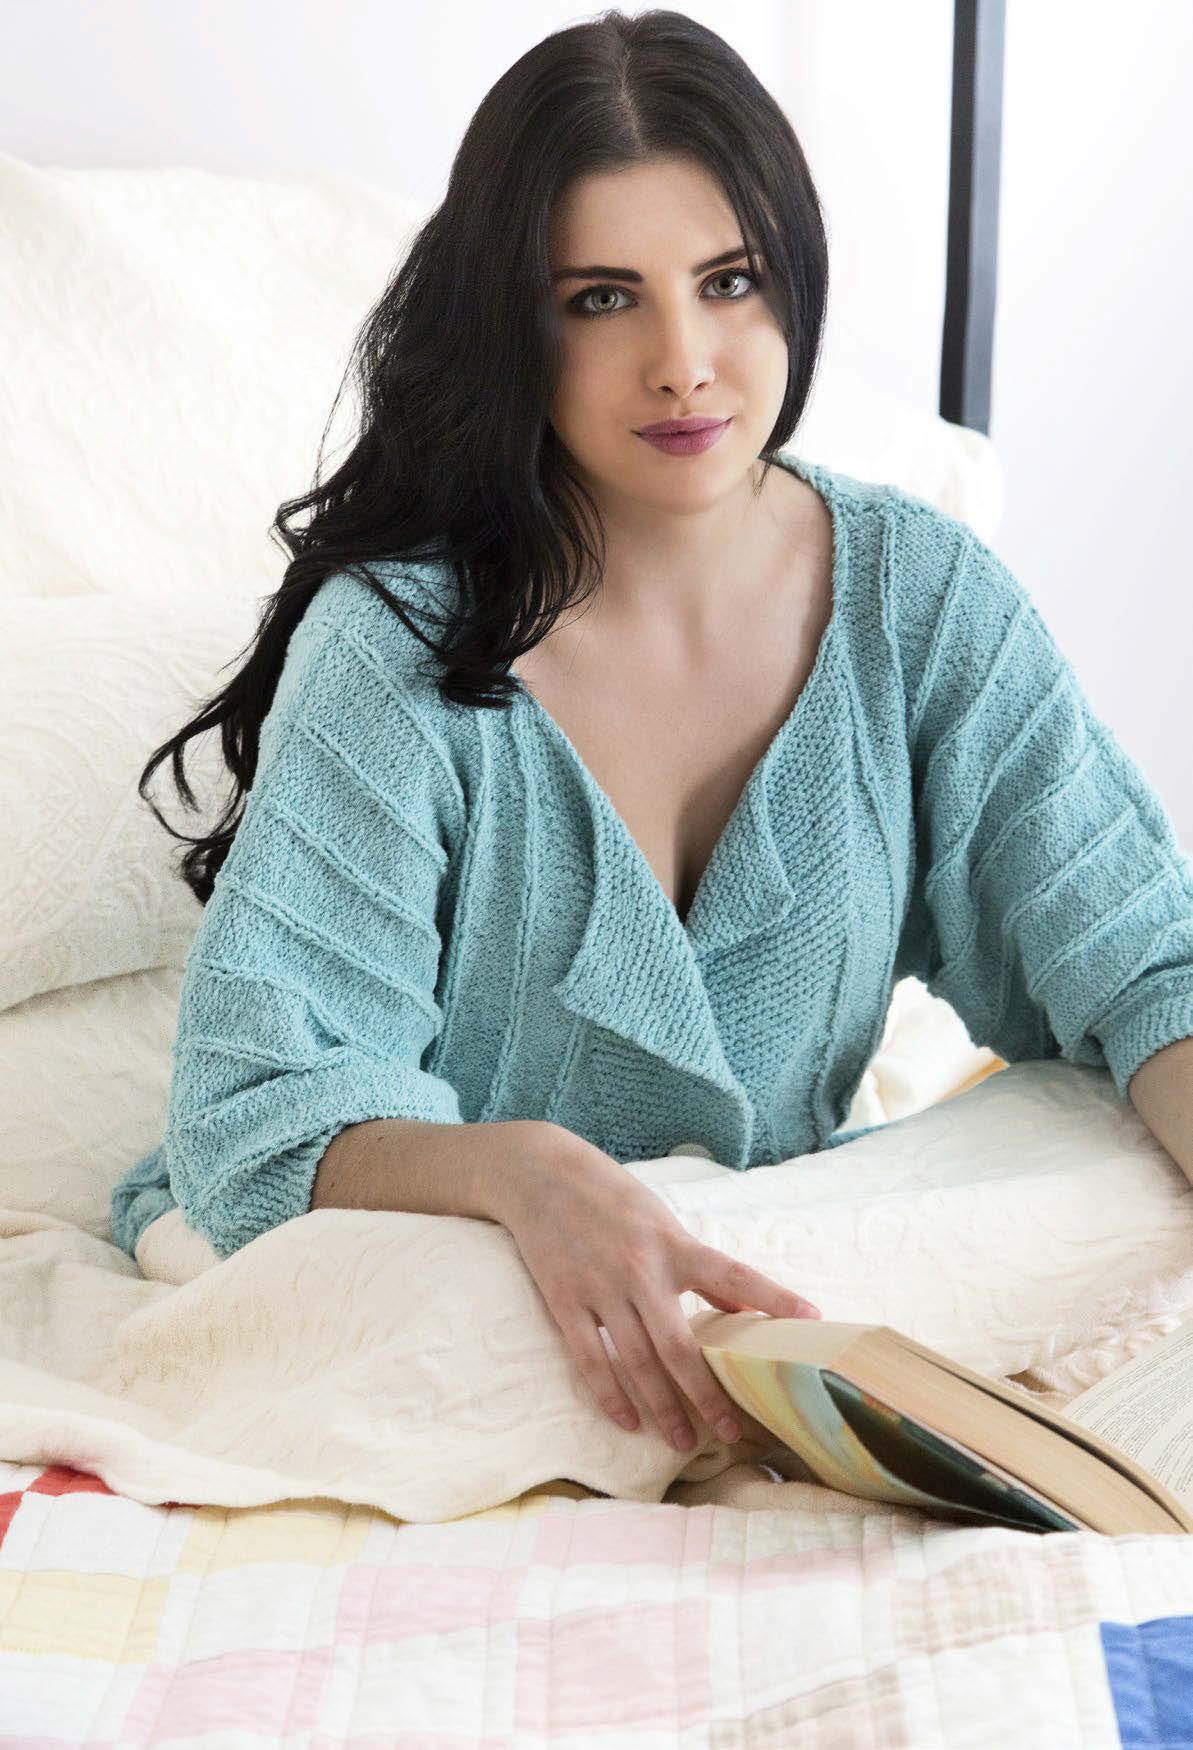
Kokimono This item, featured in this issue, uses a simple "T" shaping, and a wide-wale rib. The garter-stitch bands are worked into the front pieces and are widened to form the collar.
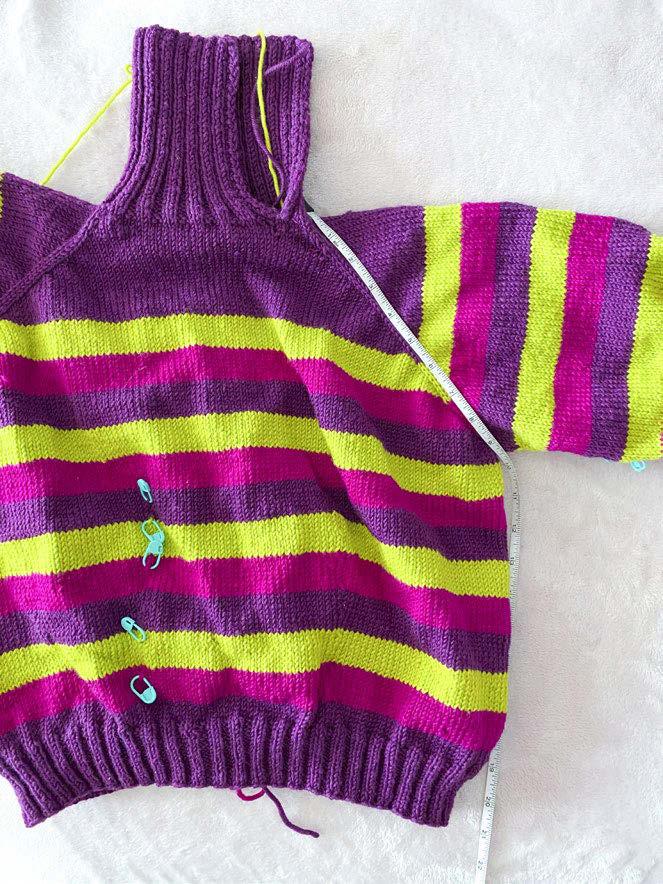
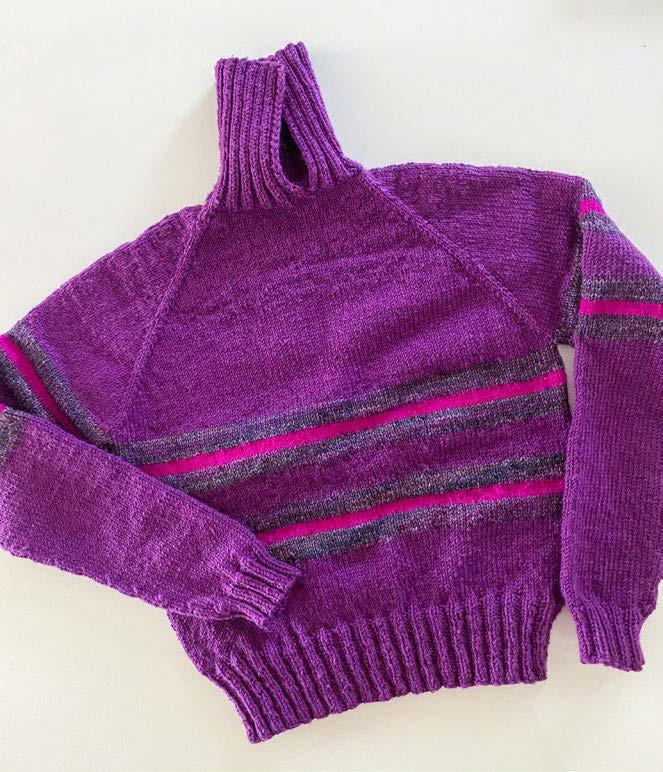
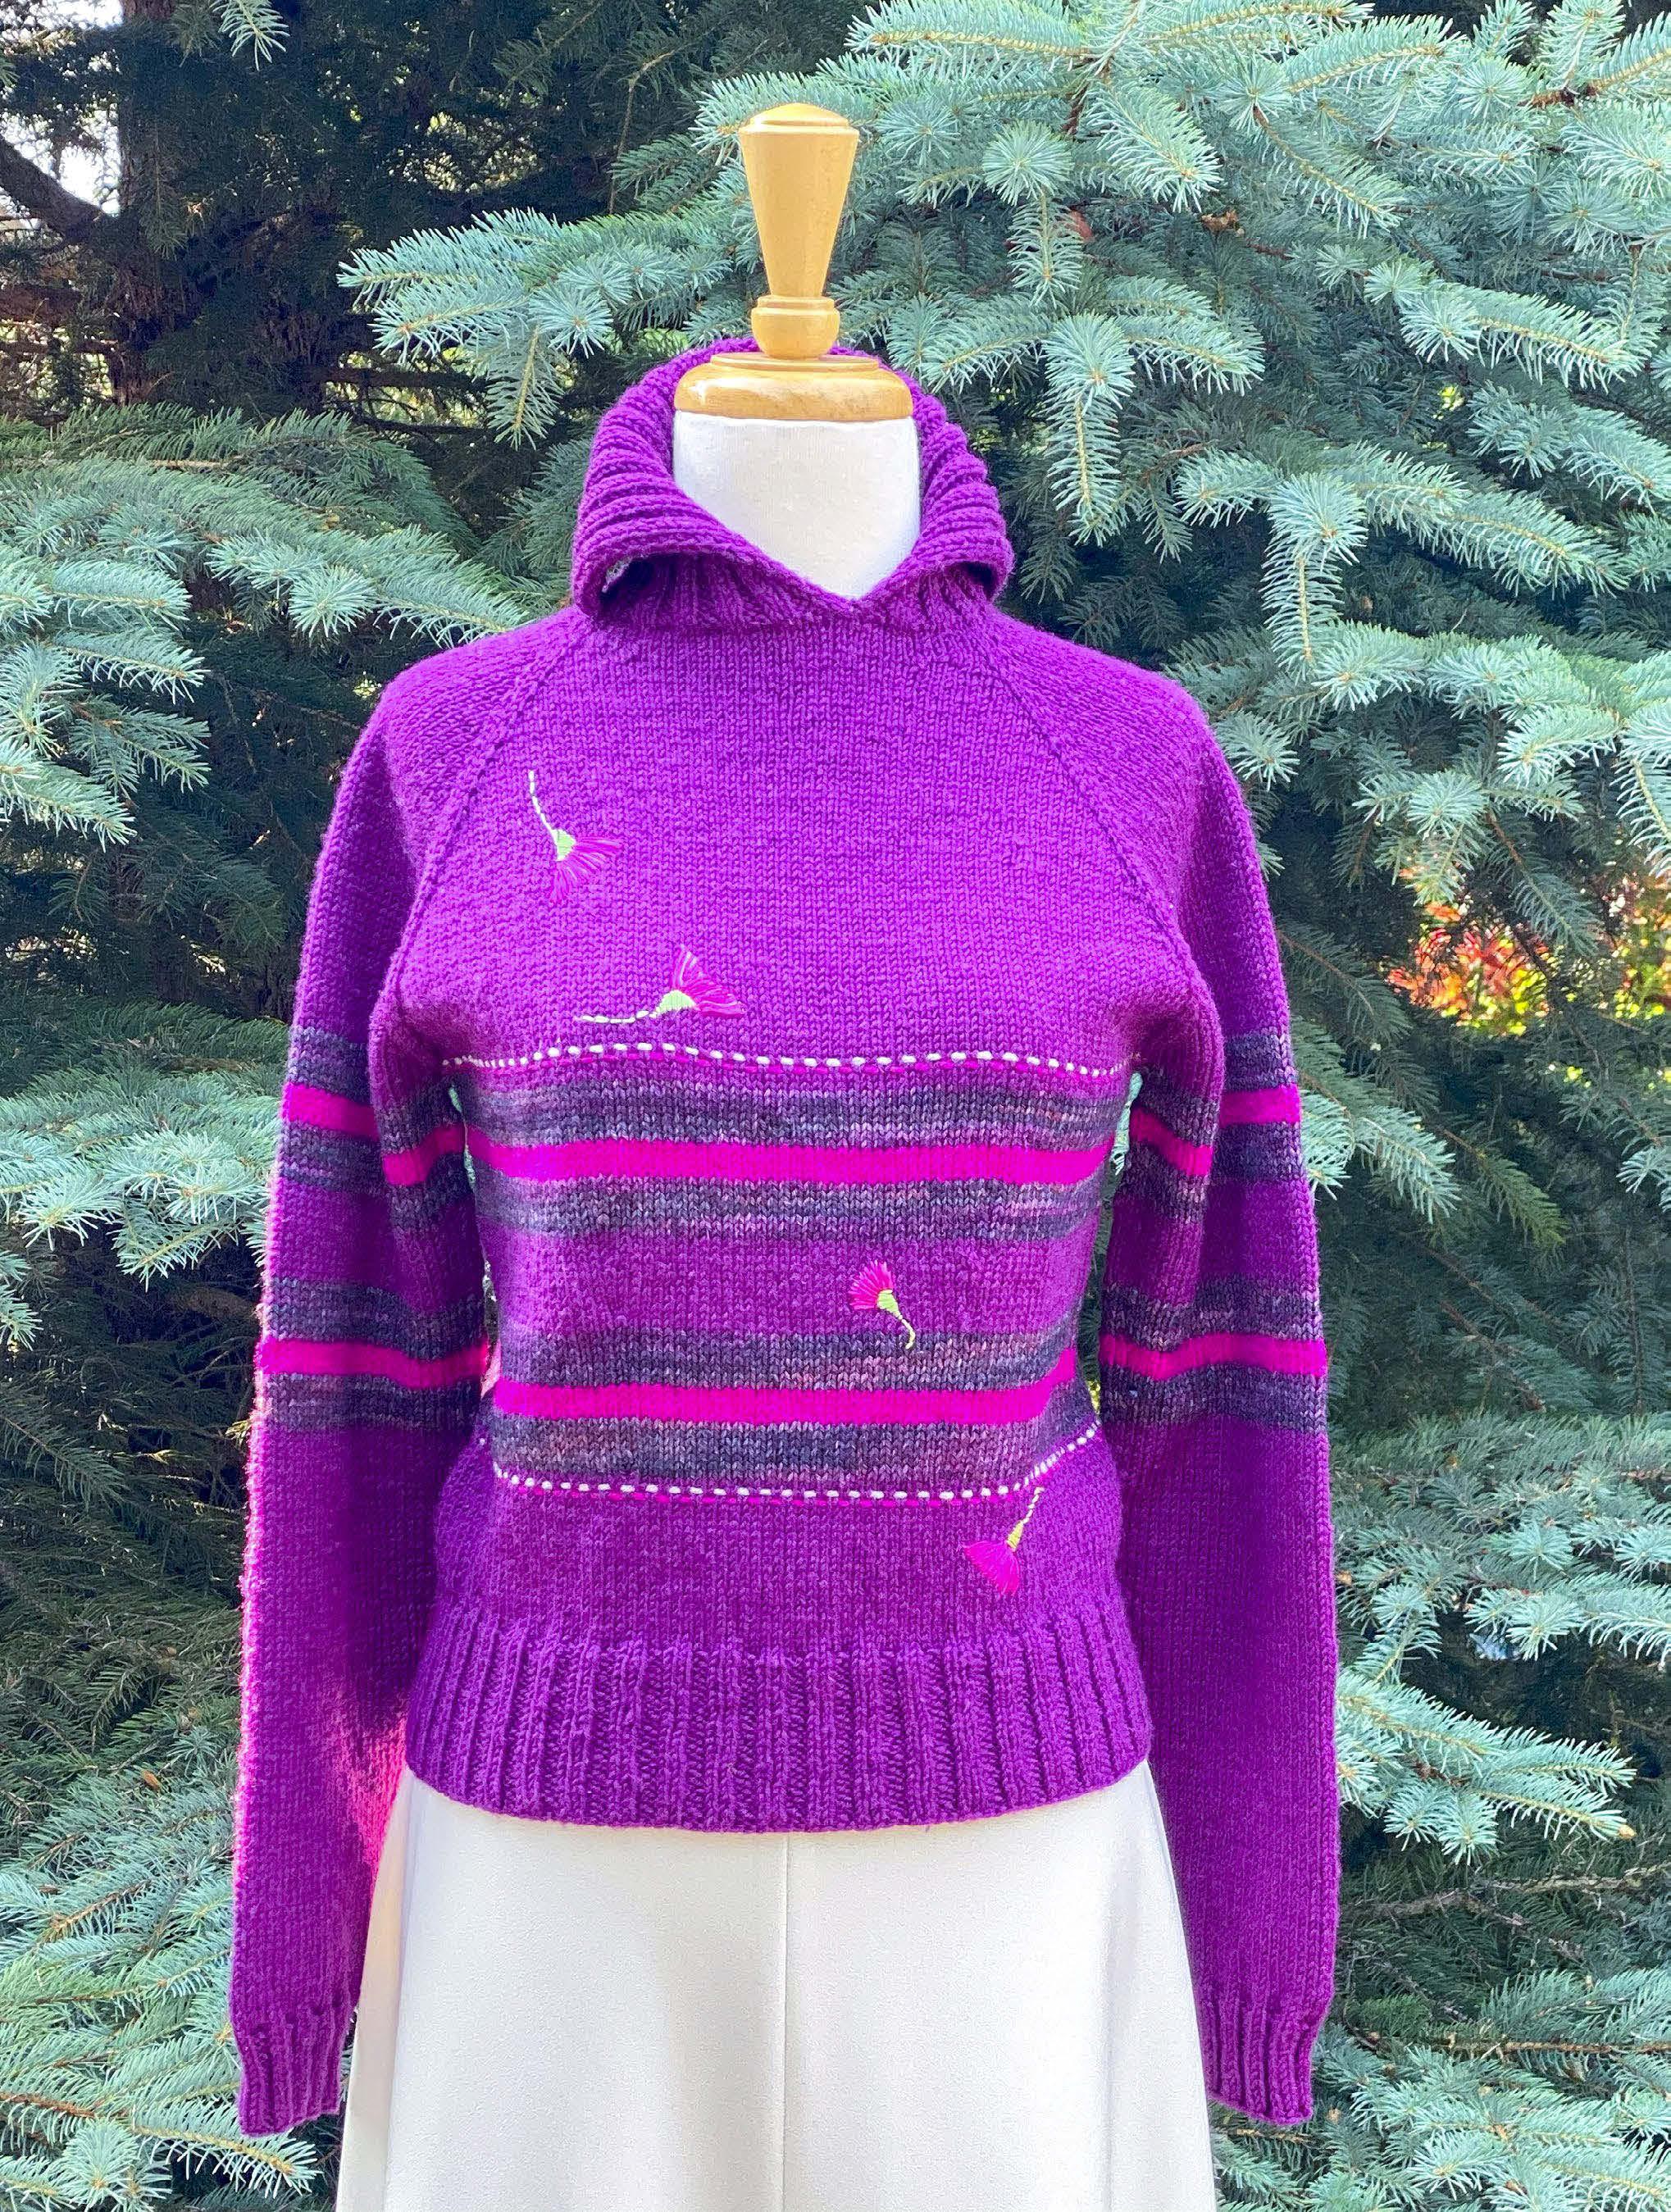
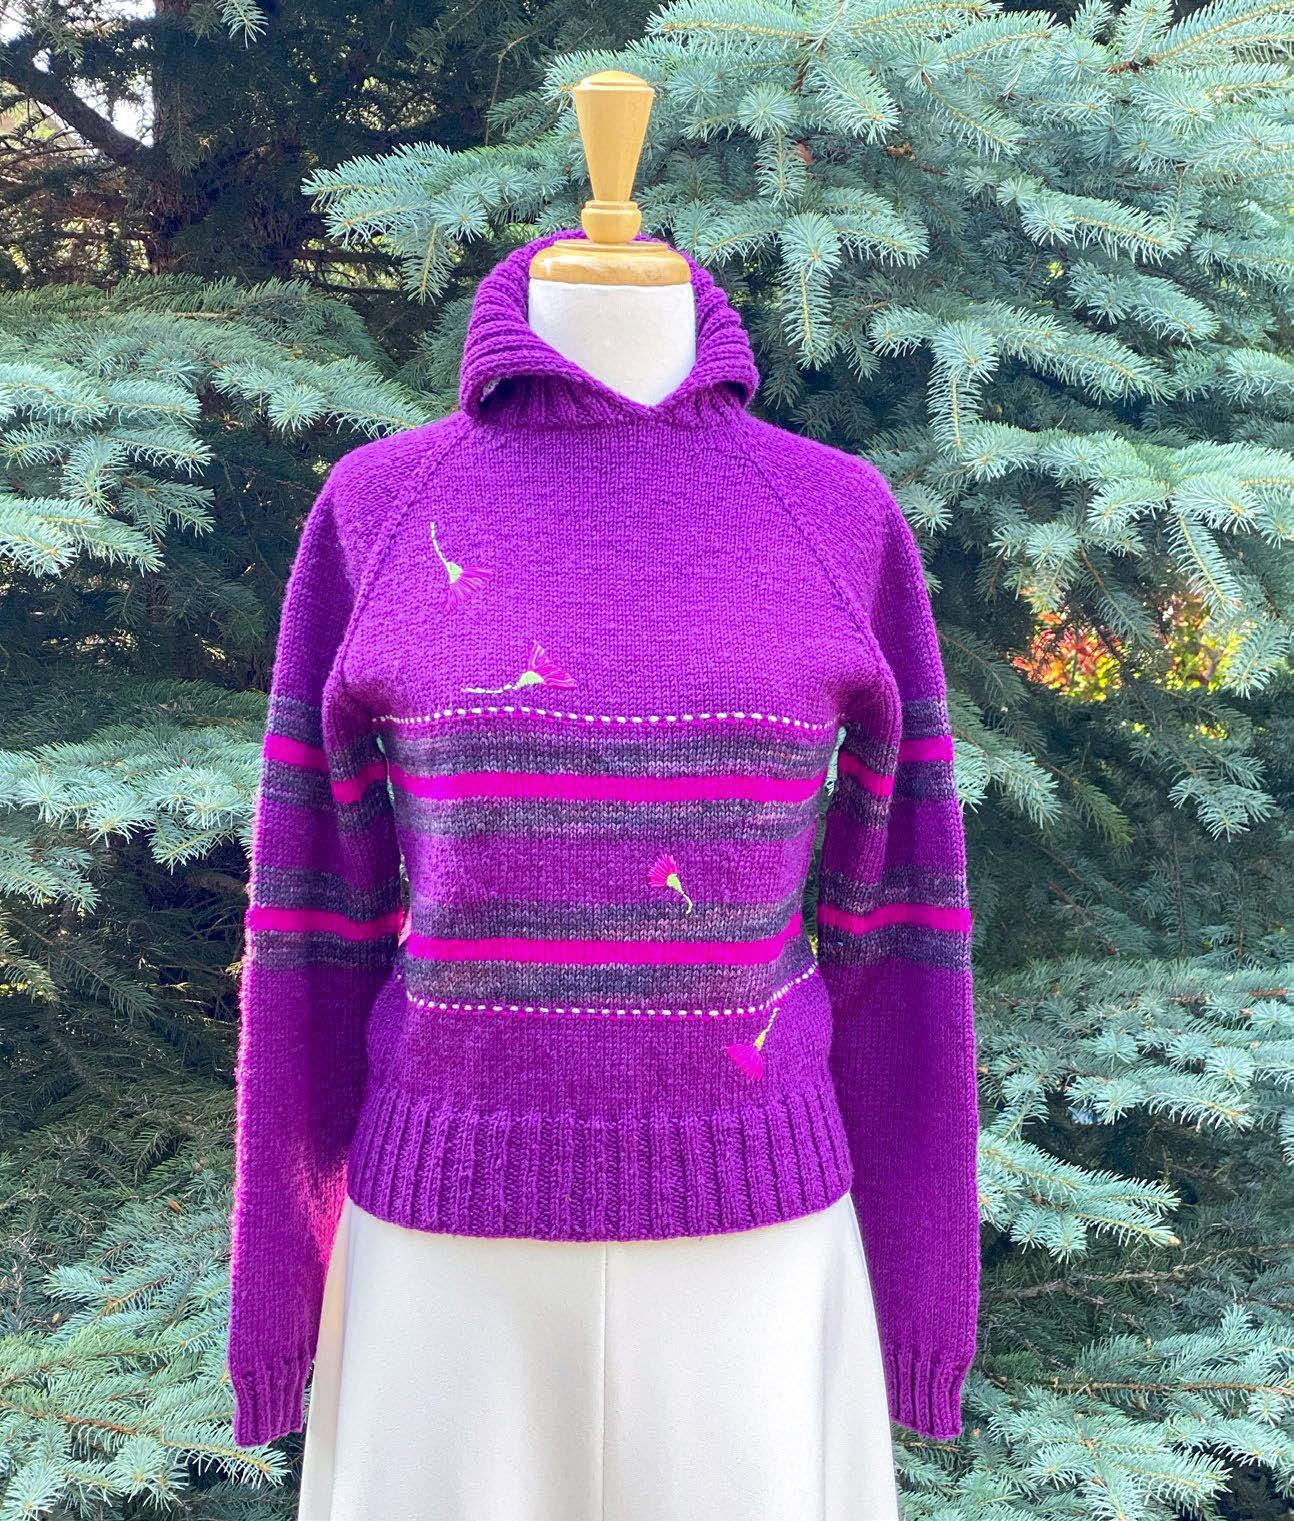
In 2023, I decided to knit a pullover using leftover yarn. It’s a DK weight yarn that's very warm, making it perfect for the cold winters we experience here. The lime color inspired me to create a zesty, striped pullover, which could lift anyone’s mood on dreary days. I was very excited about the color combination at first, but once I started knitting the second sleeve, I began to doubt whether I would ever wear it. It was starting to look loud, which for a 20 or 30-yearold could be a ton of fun, but for me? So, I stopped knitting it and set it aside. I didn’t want to suddenly rip it out, and then what? What if I changed my mind about ripping it out after I ripped it out? Every thought about it was quite nebulous. I started another project to give me time to think about it, and the experimental pullover sat in my closet for about nine months.
By the time the Summer 2024 Olympics in France began, new ideas started to surface. I was still considering stripes, without the lime green yarn as part of the mix. I must admit I was more in love with the deep purple than the other colors. I’m a porphyrophile, didn’t you know? I ripped back all the way to the collar, as I realized I had also messed up on the sleeve increases.
Shoot. That’s what I get for knitting late in the evenings. Here's where the fun begins. The pattern is both intriguing and experimental. I worked with the Pink Onyx by Ayako Monier, which I had previously knitted, and I added a collar, longer sleeves, and omitted the side faux cables. This time, I chose fewer stripes in similar purples, along with the hot purple yarn, to add some pop.
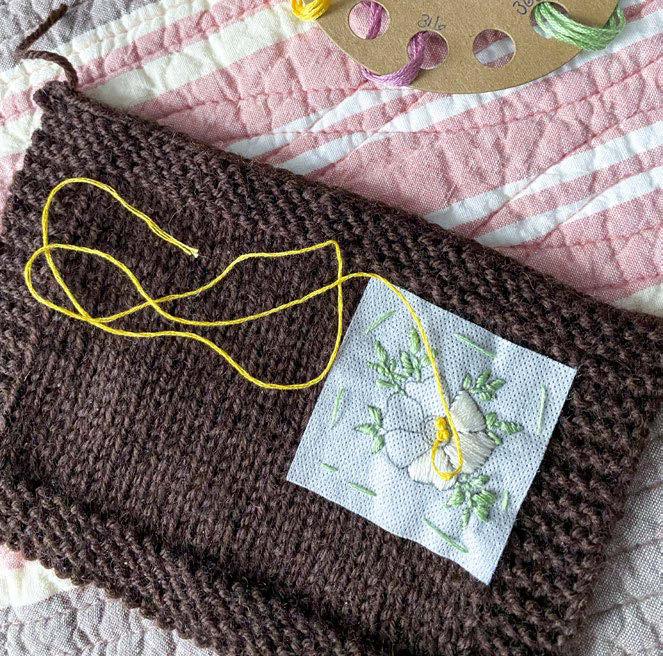
Around the same time I finished the pullover, it’s as if the universe said, “Oh, there’s more to explore and add to this experimental pullover, look here!” My local yarn store announced a class in their newsletter about embroidery on knits. As you might know, it’s not new; it’s been around for many decades. Since I already knew most embroidery stitches, my curiosity was more about how to embroider on a knitted surface than the stitches themselves. Every knitter knows you shouldn’t hoop a knitted garment, yikes! The class was exciting, and everyone focused on their embroidery for a couple of hours! My sample is on the left.
And it’s easy to get carried away with this...
So, what is the trick to embroidering on knits using embroidery floss?
...It’s a Sulky product
So, I used a more subdued colorway – deep purples. I had also decided to add interest to the pullover by applying embroidery using DMC floss, and utilizing a crucial product to make it work: Sulky Sticky Fabri-Solvy
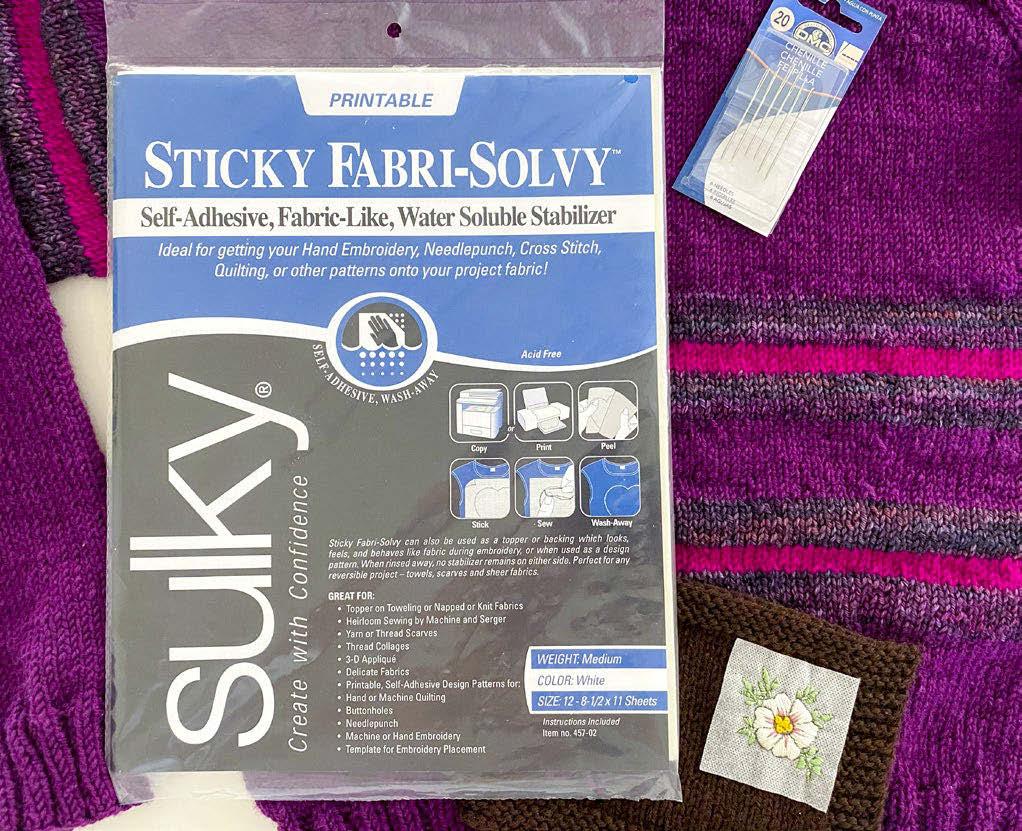
I used Sulky Sticky Fabri-Solvy, DMC floss, and DMC Chenille Needles Size 20. Sticky Fabri-Solvy adheres gently to a knitted fabric, but I also used a running stitch to secure the squares to the pullover. If you’ve never used it before, read all of the information written on the package. It’s easy to use and it’s printable. I drew my flowers on paper first to ensure I had the right flower, then I traced them onto the Sticky Fabri-Solvy.

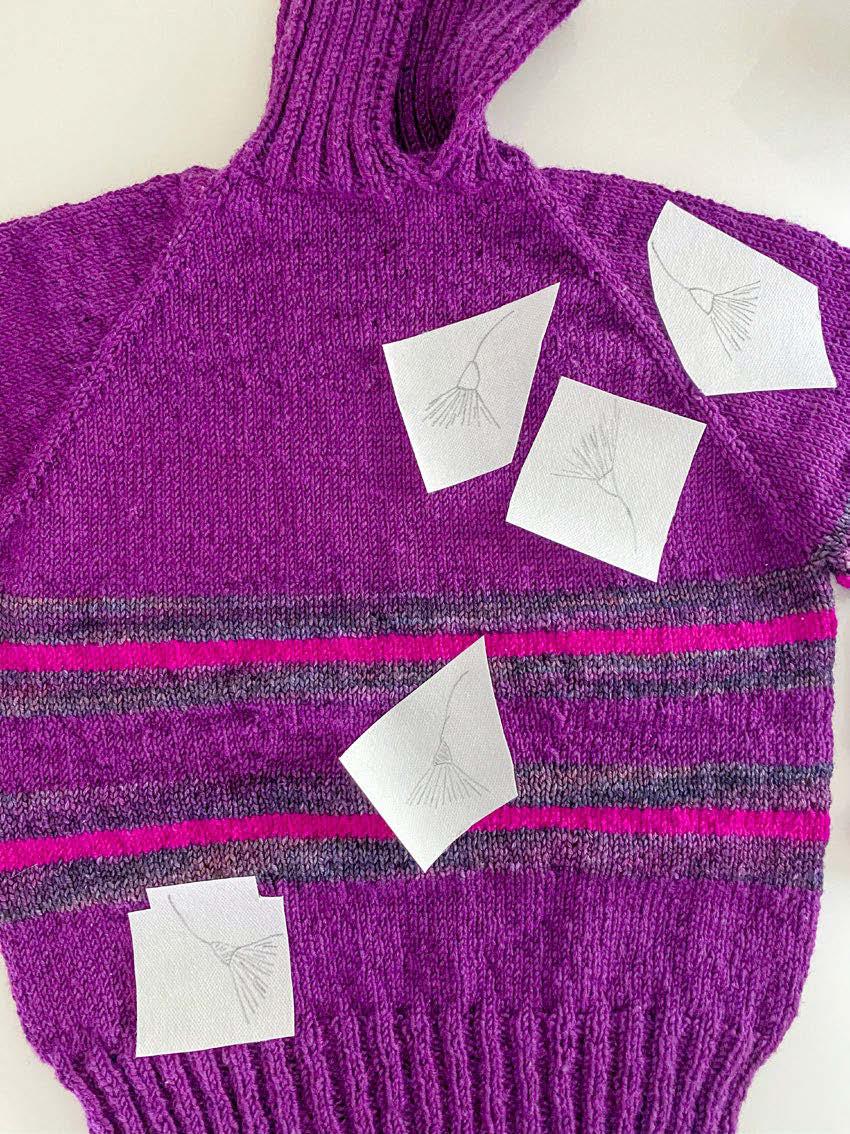
I auditioned several DMC cotton floss colors that would add pop to the Experimental Pullover, but ultimately I decided on the pink and green collections. Perhaps the purples could have been used differently, adding other varieties of flowers. Then I auditioned the placement of the flowers on the sweater. As shown in the photo below, I haven’t yet removed the paper backing, just to be quick about arranging the flowers. But if the backing is removed and the sticky part is on the pullover, it can be just as easily removed and placed elsewhere on the pullover, and it will still stick.


With all the essentials, I got to work!
I embroidered the flowers using all six strands of DMC cotton floss to add thickness to the petals. I layered the petals, starting with the darker shade, then the medium, and finishing with a touch of the lighter color for depth.
Once I finished with the flowers, I thought something was missing. The issue is, once you start embroidering on knits, it’s hard to stop. I thought of adding a trim to the stripes to make it all more simpatico. So I auditioned a few leftover yarns. The light gray yarn was the winner among all these yummy options for adding a trim to the knitted stripes.
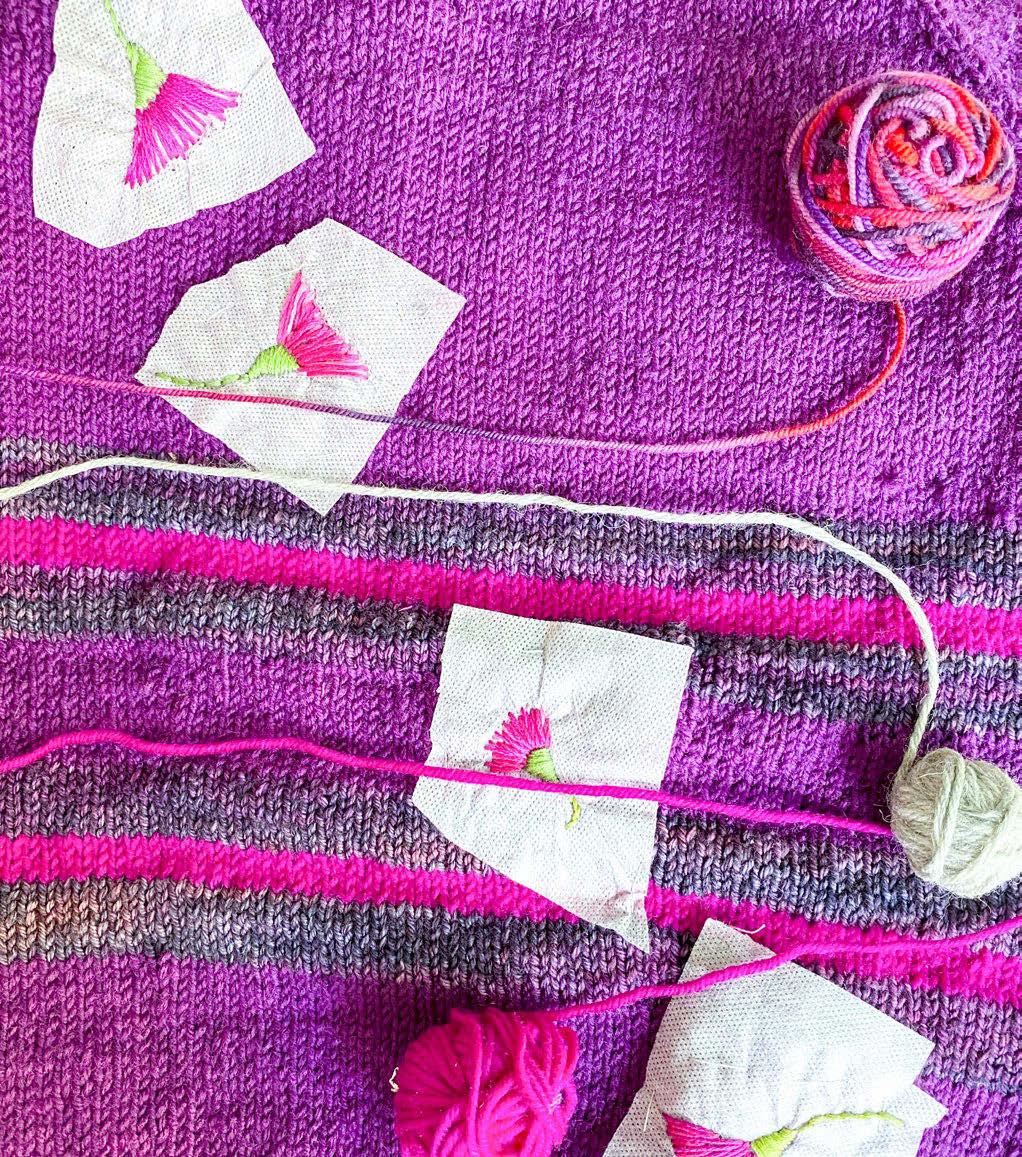
When auditioning, I rarely decide on the spot; most of the time, I leave it on the worktable and get back to it the next day.
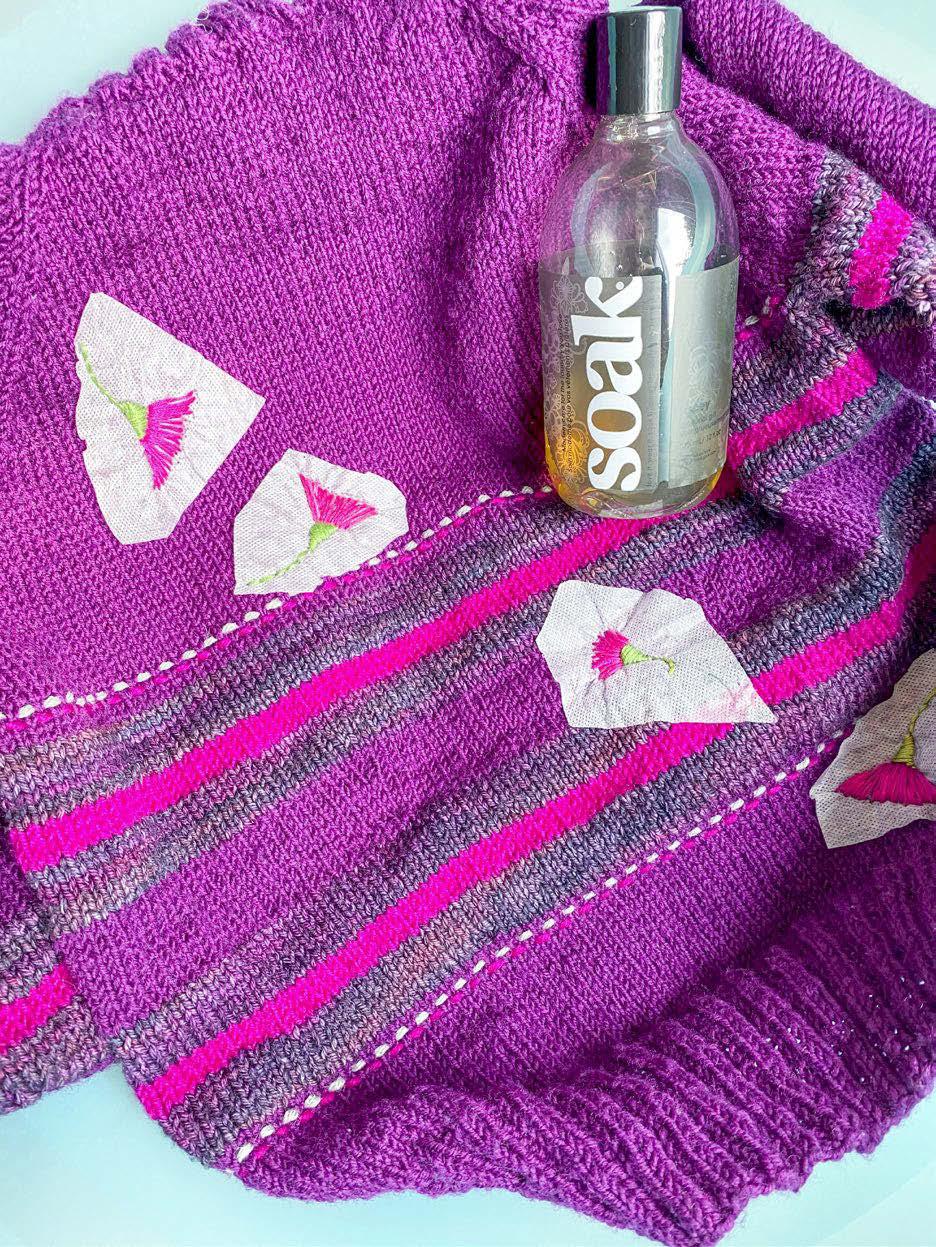
I measured the width of the chest area to determine how much yarn I would need, adding six more inches. With a yarn needle, I passed the yarn over one knitted stitch and under the next, repeating this process until I reached the beginning of the work. It’s a very meditative process, so I repeated the trim using the hot pink color. But it’s tempting to add more trim. I could add some later, as this wouldn’t affect the knitted project, but for the experiment, I’ll stop here. I then soaked the pullover using Soak Wash.

The Sulky Sticky Fabri-Solvy turns into a goo which then further disintegrates after about 5 minutes, it’s super-fast. Since I had used the yarn in my previous bold striped version of the Experimental Pullover, I left the pullover to soak overnight to remove the kinks from the yarn. I let it dry flat the following day. I’m pondering (and when am I not...), I might add more flowers, perhaps in the lighter purple shade. I’ll let the idea sit for a while and think about including other types of flowers. I’m also considering adding flower embroidery with yarn as an accent here and there. There may be an update on this later this summer. Using Sulky Sticky Fabri-Solvy... It’s easy to incorporate more embroidery into knitted projects. Let your imagination guide you. Bye for now.

Carla A. Canonico
Editor-in-Chief at KNITmuch
Hi! I’m here to help make fit accessible for anyone who wants it. My training and learning about body shapes began with a propensity for observation, continued through technical school, college, and every step of my career. Eventually, I turned to knitwear and applied everything I had previously learned about woven fabrics to knits. Much has changed since I began in the field of design, including body shapes, so I have continued my observations and studies to understand better and address the issue of fit for every body.
One of the most important things I have discovered is that our bodies are. We have very little control over their creation and development, although we are ultimately responsible for their upkeep and maintenance. A corollary to that is a recognition that we should accept what is, make the best of it, and then change what we can or want to.
Like everything, start where you are. It is my desire to have you join me in an ongoing conversation about fit, bodies, and how to integrate them. In this feature, I give you my 20 Things I Want You to Know About Fit as a starting point. The entire list is a good one, and I expect my order of importance is only my own, so read all 20!
1. Each body is a compilation of four factors: genetics, hormones, environment, and inputs. Our bodies are the outcome of a lottery over which we ultimately have very little control. These four factors appear to be equally important, although their roles may shift over time.
y First up is Genetics
o Genetics are fixed and cannot be changed.
o We are the result of a random combination of the DNA given to us by our parents (and their ancestors).
y Hormones and the Environment play a significant role forever after our moment of beginning.
o Hormones can and do change, and are ever present in our internal environment. Sometimes, external environments play a role in hormonal influences.
o The environment begins with the maternal environment as the fetus grows, but then continues throughout our lives. The environment is often beyond anyone's active control, although we can take a more active role in choosing it after we become emancipated.
y Inputs are a continual player in how our bodies develop and change. Inputs are anything you take into your body. These are often impacted by our environment and further influenced by our hormones and genetics. Inputs include the air we breathe, food we eat, liquids we consume, drugs and alcohol, and pharmaceuticals.
2. Measurements pave the path to a good fit.
Without measurements, you are guessing. It might work in one situation, but you cannot ever replicate it if you don’t know what measurements you are seeking to accommodate.
Everyone hates taking their measurements, so I have what I call “gentle measuring” to help us get through it.
3. The upper body (above the underarm) and the upper arms are key fit points. Upper arms often create fit problems beyond sleeves.
The upper body is the anchor point and hanger for garments. Lack of fit here can’t support fit elsewhere. Upper arms tend to amplify problems in upper body fit. There are two easy solutions!
4. Body types are based on skeletal framework, and then how they get padded out from there.
The density and structure of your bones and connective tissue are the framework, to which we all add various amounts of padding, which is distributed based on our individual four factors. Rarely does it go where we want it!
5. The more bodies a garment tries to fit, the less likely it is to fit anyone well.
I think of this as “dumbing down” the silhouette as each body type is forced into framework.
6. The same measurement does not present the same from body to body.
A 36” bust can be seen across most of these body types: generally the result of a difference in the amount of tissue vs. the amount of skeleton.
7. I have identified seven body types: hourglass, inverted trapezoid bust, inverted trapezoid shoulder, oval, rectangle, square, and trapezoid. One sizing table isn't enough for accurate fit for every body type.
8. Sizing is a construct of averages. It isn't meant to fit YOU.
We only have two sizing types: Missy (standard) and Plus/Women. They are both based on an hourglass figure. There are sometimes Petite and Tall options, but they are variations of the standard or Plus/Women sizes.
9. Making is a superpower, and every maker can access a better fit.
Unlike someone who purchases a garment, a knitter, sewer, or crocheter starts near the beginning and can plan to make fit adjustments that work in the context of that garment.
10. Yarn substitution is fun and often necessary, but if not done with care, it can cause fit problems.
Whatever reason you have to substitute, it will only recreate what you have seen in the sample(s) if the yarn you choose mimics the yarn originally used. See 12, below.
11. Only swatch if fit matters.
A swatch holds all the information you need for making fit changes and for yarn substitutions. Change your attitude about swatches from “this is slowing me down” to “let me discover everything I can about this yarn and stitch pattern” before committing.
12. Shoulder shaping is actually a dart that addresses drooping underarms and excess fabric wrinkles.
Shoulder shaping is one of the easiest ways to improve fit. I called it a shoulder dart recently and was challenged. That is all it is. It is a dart to refine the fit of your armhole, not to account for the slope of your shoulder.
13. Fit solutions in one garment are often replicable in other garments. When worked out using measurements, a solution can be transferred, using new gauge and ease information.
14. Find lengths that work with your proportion.
Where your neckline sits, the depth of your armholes, the length of your side seams, and where to place a horizontal bust dart can significantly impact both the fit and visual appeal of your garment. It takes experimentation.
Things I Want You to Know About Fit as a Starting point.

15. Ease needs to be applied differently to different areas. Design ease is added to create a silhouette and allow for movement. Ease amounts are a personal choice.
Ease creates the silhouette and allows for movement. A corset requires different ease than a fitted tank top, a casual pullover, or a cardigan. Likewise, the ease at the hip does not have to be the same as at the bust or waist. The shoulder ease may actually be negative!
Some people prefer a lot of ease, while others do not. They can wear the same design.
16. Bodies are not always evenly divided front to back from bust to hip.
This is important for getting a more controlled fit. Unevenly dividing the body may ease some of the fit problems created by extra padding front or back.
17. Fit solutions aren't complicated, but you must plan for them.
Since we are making the fabric and creating the silhouette at the same time, fit cannot be left to later on.
18. Tight/close, regular/standard, oversized/loose are meaningless terms when used on their own and without solid context.
First, what do those words mean to you? To the designer? Is that the fit you seek? It does change the size you choose, but will it treat all areas equally?
19. Grading is built into a good sizing table; it is the amount of difference between sizes.
Grading isn’t done each time a design is created. Grading is done when sizing is established and represents the amount of difference between sizes. It may be different across the table, and will certainly be different for each area.
20. Comfort and fit are partners in clothing that will make you happy!
All you should be concerned with is the amount of space between your body measurements and the garment's measurements.
Fit isn't fair, but it can be accessible. I have more to say about each of these topics, and I would appreciate your input on what you would like to know and how I can assist you.
Wolcott
Jill Wolcott Knits | Shop, Pattern Tailor, & Techniques
passion.fashion.knits
Read my blog on Substack
BSKY @jillwolcottknits
IG jillwolcottknits
FB Jill Wolcott Knits
don't miss these FREE projects & tutorials online!

Exploring Thula’s Texture and Shine so much more! and there's

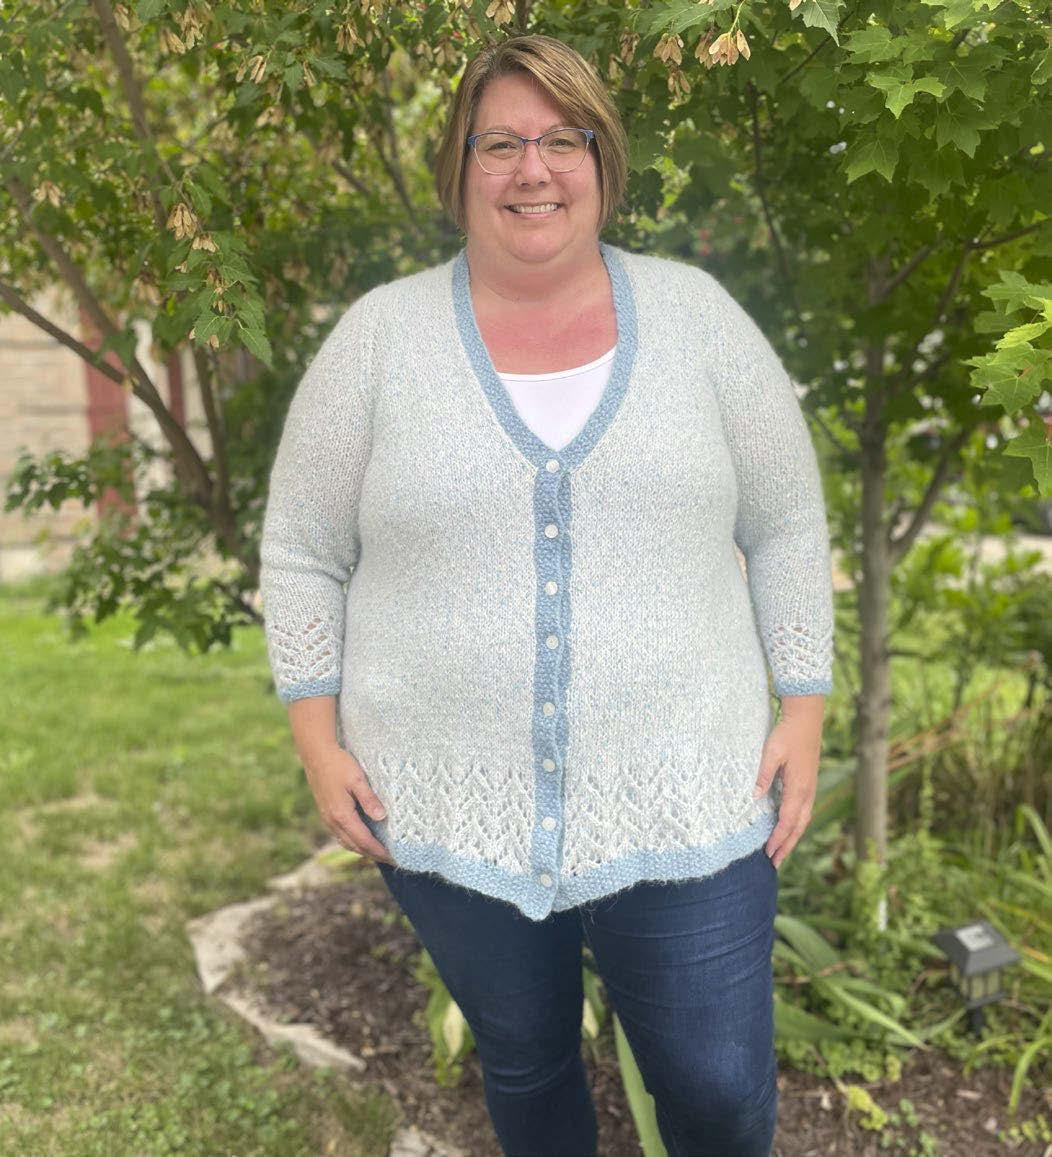
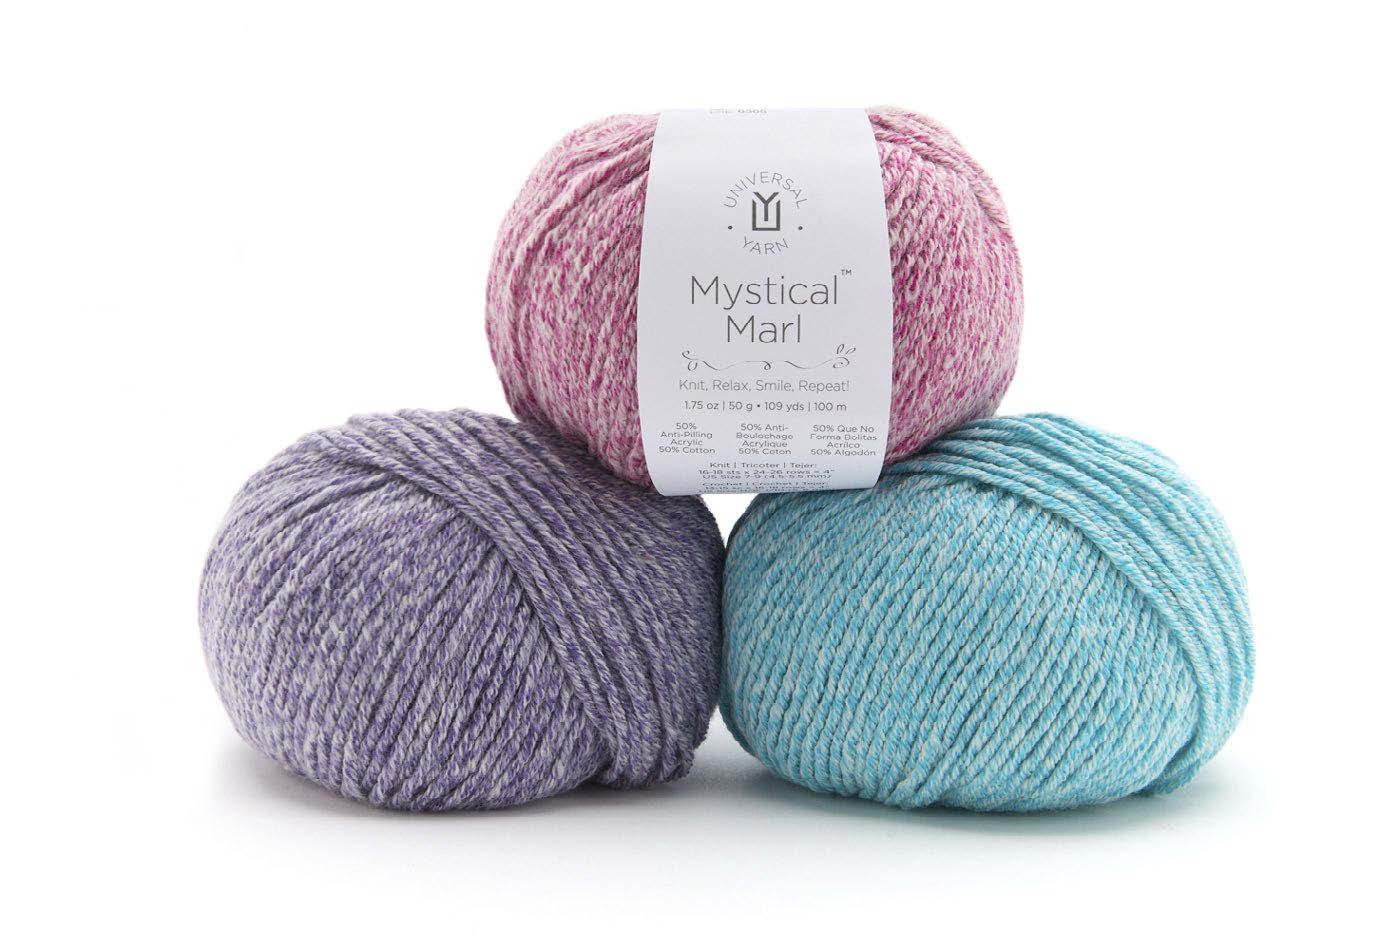
First Impressions of Mystical Marl Yarn in the Holland Cowl Project
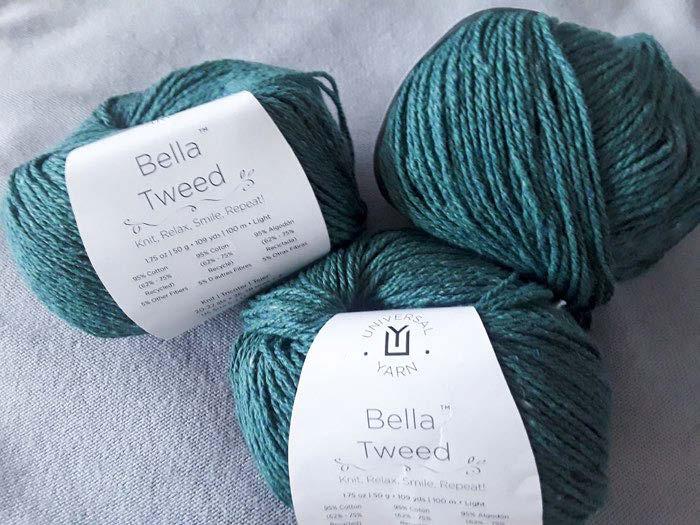
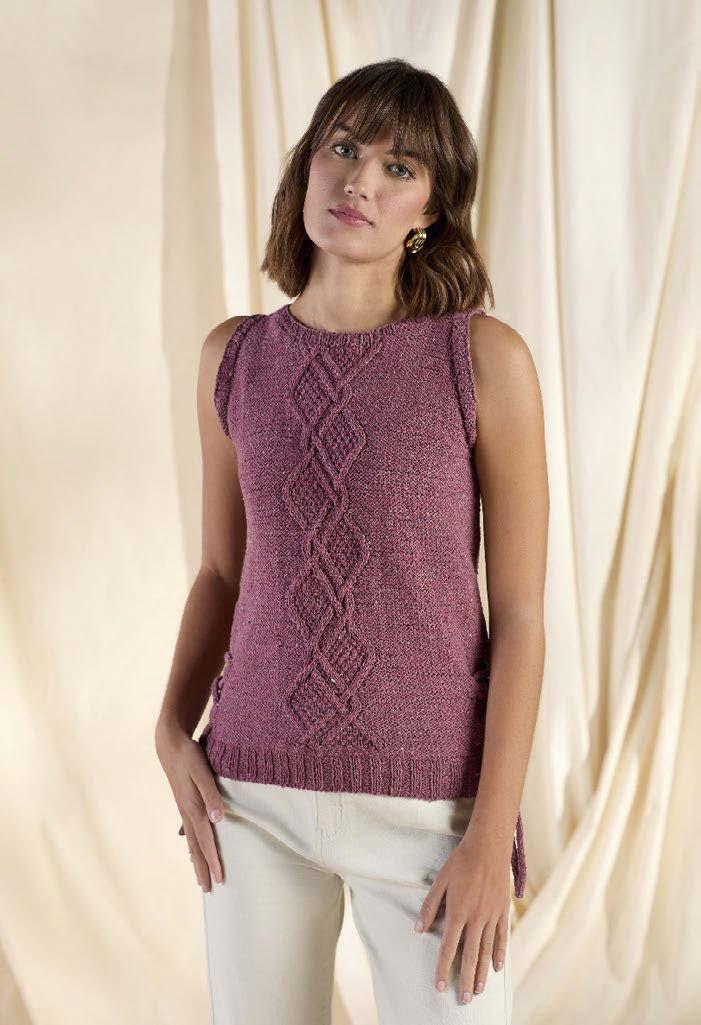
This summer, I knitted the Palomar Tank pattern, designed by Aubrey Busek–a perfect tank top for the summer heat! I cast on in UNIVERSAL YARN Bella Tweed in “Care” colorway, and it’s an ideal yarn for this top. It’s a blend of recycled cotton and other favorites, which makes it perfect for a light top. I wanted to mention that the Bella Tweed has a few tiny white neps, likely from the cotton. I think they give the yarn a bit of character and make it even more appealing! Overall, I really enjoyed it!
As for the knitting needles I chose…well, there’s a teeny bit of a saga.
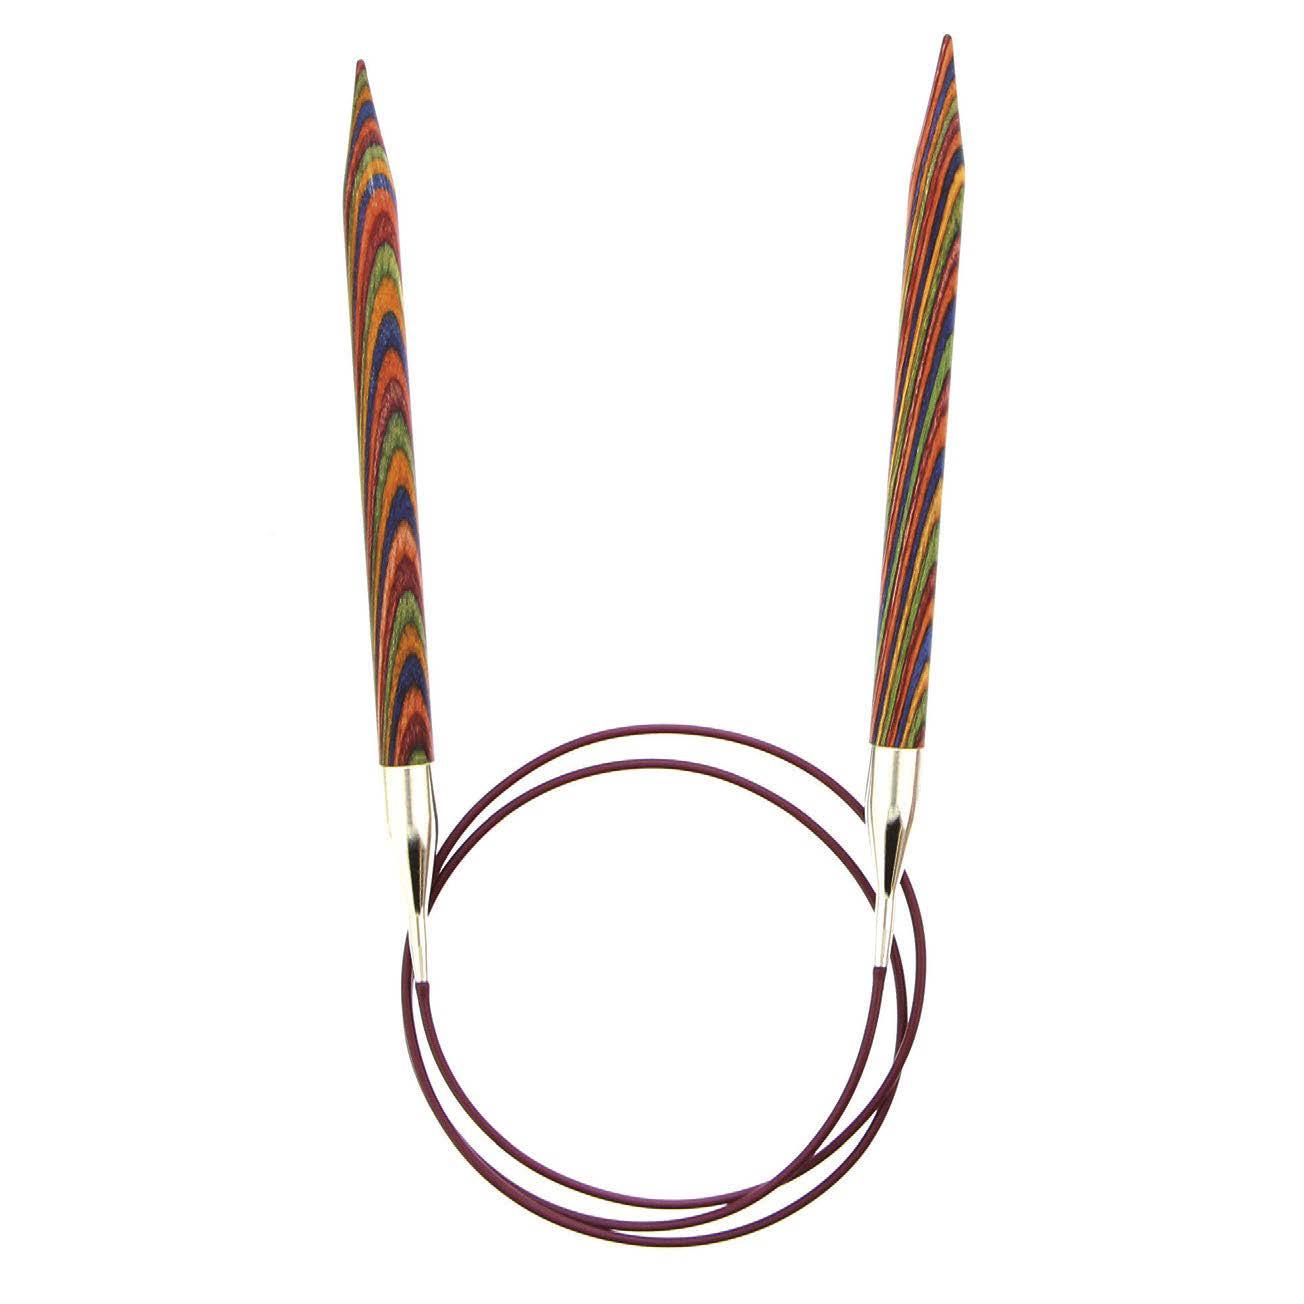
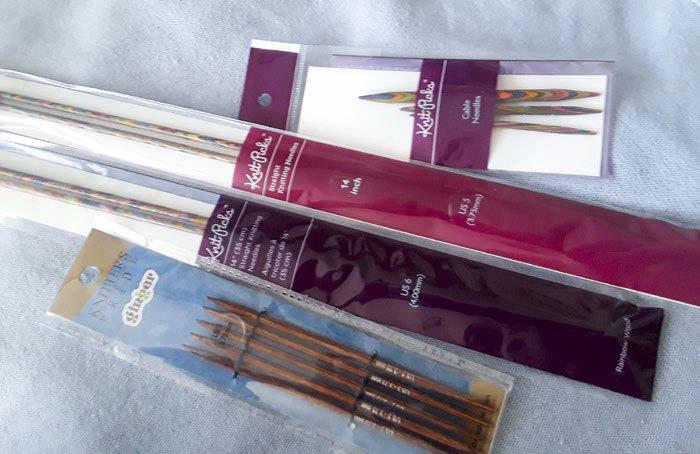
The Palomar Tank calls for two needle sizes, and I chose the gorgeous Knit Picks Rainbow Wood Straight Needles for both: 3.75mm needles for the ribbing, and 4mm needles for the main body of the top. They’re 14 inches long, which I prefer, and that made them wonderful to work with on a project like this, but it is difficult to get the full length of the needle into the camera frame when trying to take photos!
The Palomar Tank pattern also calls for double-pointed needles for the armholes and neckline. I opted for a beautiful set of KnitPro Ginger Double-Pointed needles, as well as a set of Knit Picks Rainbow Cable Needles for the cable pattern on the front and back of the top.
Unfortunately, my tension disagreed with me. The 4mm needles gave me a gauge that was too big: I was getting closer to 4 stitches per inch, rather than the 5 stitches per inch the pattern calls for. And even with the 3.75mm needles, I was still getting a teeny bit less than the 20 sts per 4 inches the pattern asked for. I had 19 stitches over 4 inches. However, I didn’t want to go down to a set of 3.5mm needles, as I was afraid that would end up being too small. After much swatching (and some colorful language!), I ended up working the entire top on the 3.75mm needles instead.
This was not too big a deal, but it does mean the ribbing pulled in a little less than I would have liked, and the top was a teeny bit looser than the pattern called for.
That said, the most important part of the knitting for me was not what the ribbing did, but rather, what the cable pattern did and how it worked at that tension.
If you’d asked me to knit this earlier in my knitting life, I would have said ‘absolutely not!’ Despite being comfor table with colorwork and lace, cables were something terrifying, something I was convinced, for some reason, was beyond me. Now, I’m quite happy knitting complex cables, and I’m hoping to help you learn too - because, I promise, cables aren’t scary, they’re actually really easy with the right tools and a bit of patience!
To start with, what are cables?
Cables are where you take a few stitches of your knitting, cross them in front of or behind other stitches in your knitting, then knit the whole row. You’re actually making a cross within the structure of the fabric. This is why many cables are often referred to as ‘crosses’ when defining stitches!
How do you do that? Well, that’s where a cable needle comes in. They come in many shapes and sizes, but the one I’m using here is the Knit Picks Wood Cable Needle They’re an extra needle designed to hold the stitches of the cable at the front of the back of your knitting while you work, so there’s less fear of losing a stitch. It’s honestly really simple. Simply slip the required number of stitches (don’t worry, the pattern will tell you!) onto the cable needle and put it either in front of, or behind, the work. Then work the stitches
from the left-hand knitting needle, then, work the stitches from the cable needle. That’s it, you’ve done a cable! The pattern will tell you how many stitches, if they go in front or behind, and if you’re knitting them or purling them.
Let's take a closer look at the cable stitches used in the Palomar Top.
First, the 2x2 Right Cross and Left Cross
Second, the 2x1 Right Purl Cross and Left Purl Cross
Honestly, once I got into the cable motif, it was pretty easy. My only challenge was remembering that sometimes there would be a knit stitch at the edge of the moss stitch section if I didn’t have the pattern chart readily available. And, the cables only happen on Right Side rows (it’s very uncommon to have a cable happen on the Wrong Side of your knitting, I’ve only ever seen it once!), so it’s easy to follow along!
What was less easy to follow along with was the shaping of the armhole and neckline.
I’ll talk about that – and the dreaded ‘at the same time’ instructions, next.
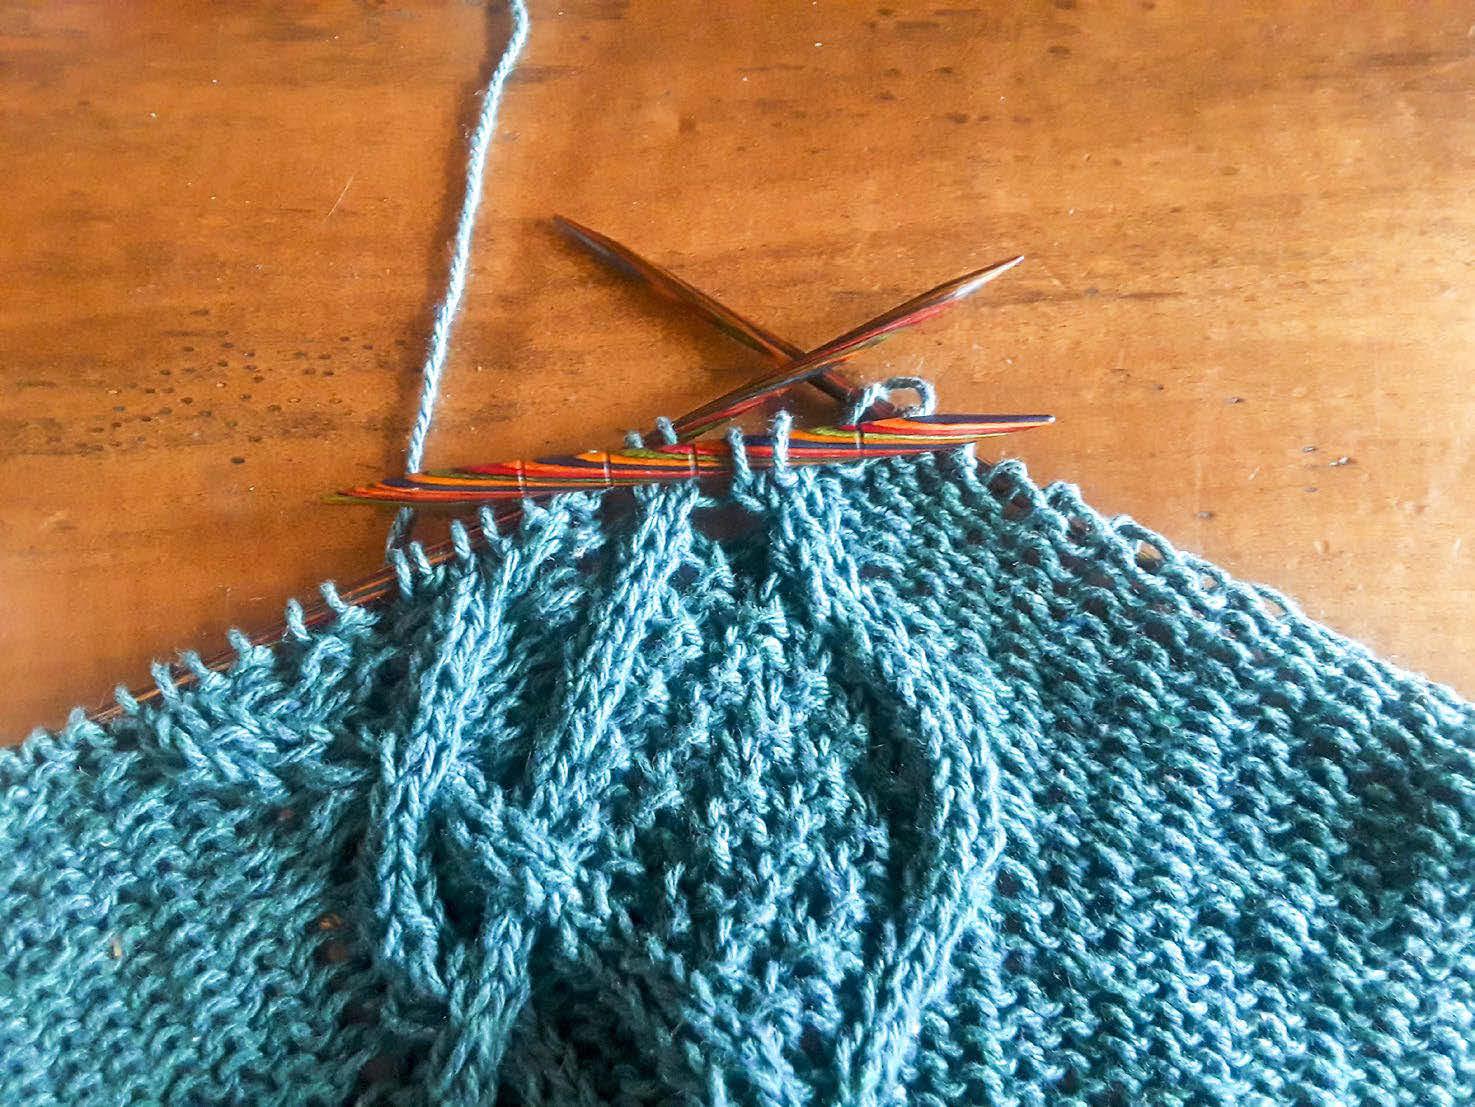
This is all about making shaping less scary! The shaping for the Palomar Top isn’t superbly complex, but it does require keeping track of a few different things. It’s most enjoyable to knit with UNIVERSAL YARN Bella Tweed in “Care”, the knitted top will be perfect even as the hot summer heat simmers down in September.

First, to ensure I was working the correct number of stitches and decreases, I reviewed and highlighted all the numbers for my size of the pattern (size small). I did this on my digital PDF, but if you work better on paper, then absolutely, use a highlighter pen for the same purpose! This helps keep me from accidentally working the wrong size.
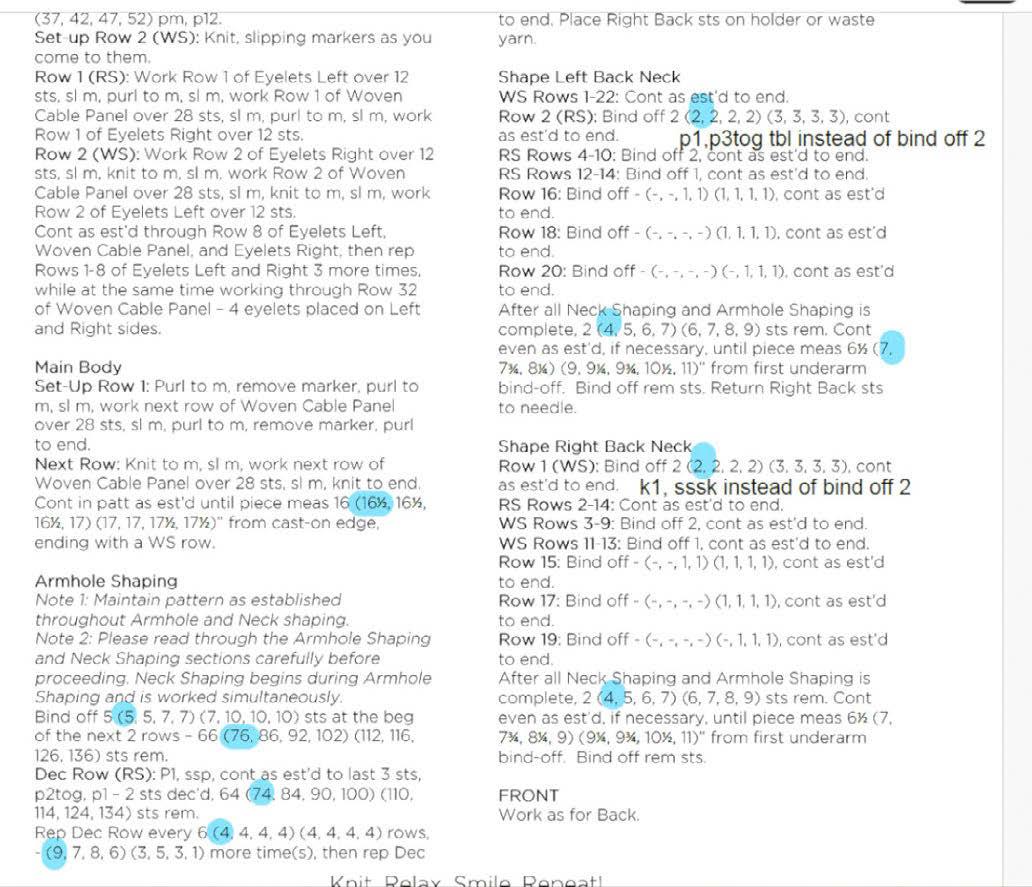
You can also see from my notes that I made a few changes to the neckline. I don’t like the ‘stairs’ that can occur when you bind off stitches for a neckline or shoulder, so I prefer to use either decreases or short rows for neckline and shoulder shaping. That’s just a personal modification I made to the pattern as I find it easier to pick up stitches for the neckline that way.
I’ve gotten ahead of myself, though, by writing about the neckline. So, let's take a step back.
The armhole shaping is the first shaping you’ll encounter as you’re working the pattern and (unlike the neckline shaping), doesn’t interrupt the cable pattern, no matter what size you’re making. So this one is the easy one, and for the first chunk of the pattern, it’s the only shaping you have to follow. For all the shaping, I suggest using a row counter; choose the one you prefer.
It’s really when you have to do both the armhole and neckline shaping that it gets tricky. What do I do? In addition to highlighting the pattern, I run three different row counters. One counter is used for the rows of the cable chart pattern, another for the armhole decreases, and a third for the neck decreases.
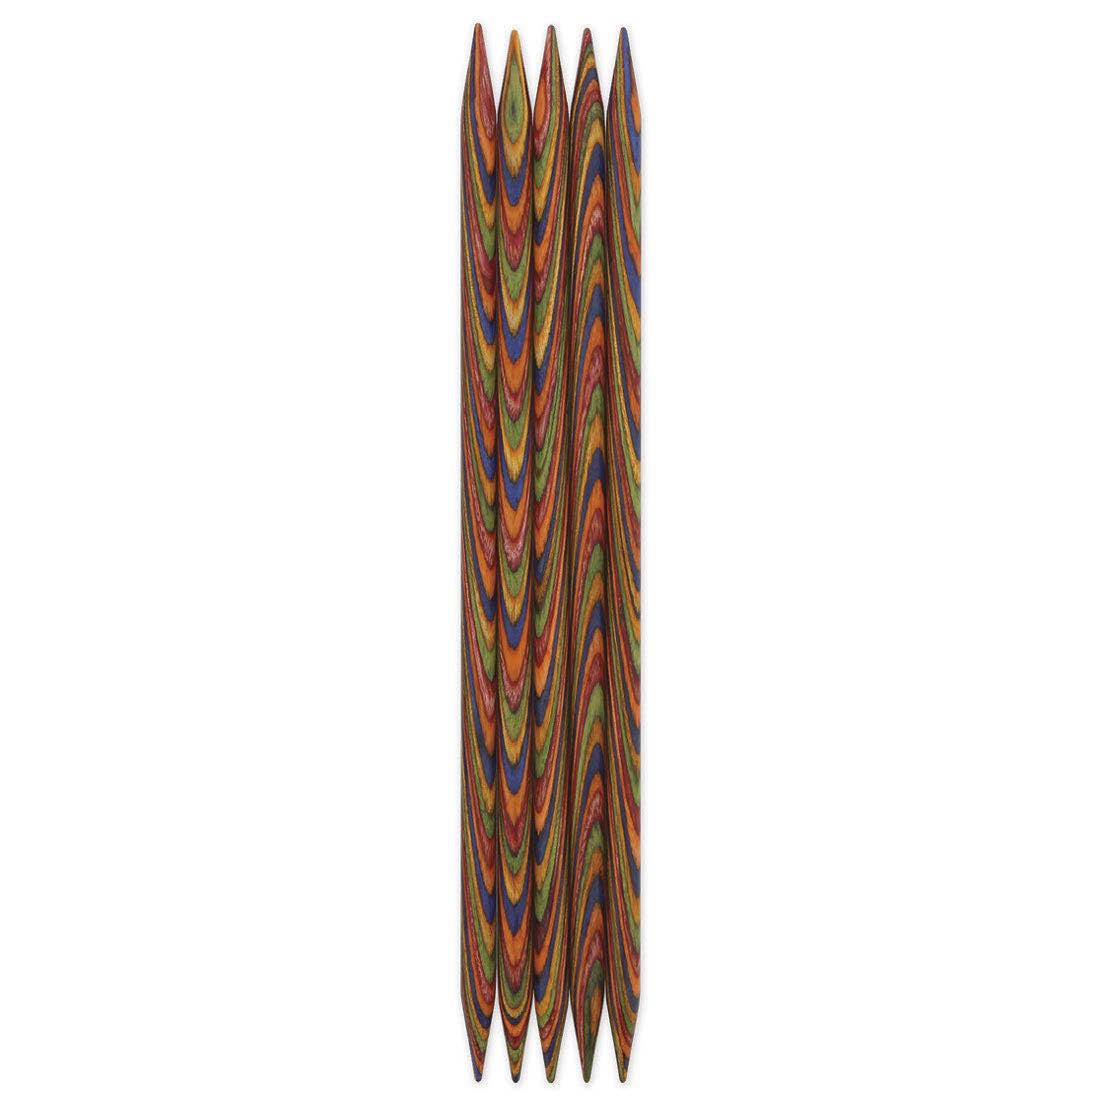
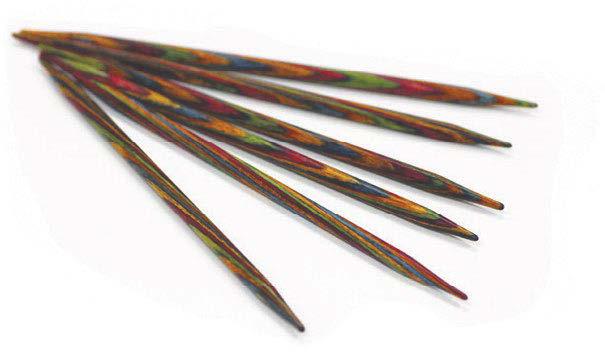
Once you’ve split for the neckline, it's really a case of taking it row by row. Take it one row at a time, and check your work each time. Some people find it helpful to go through and write out each row, which I would be doing if I were using a manual row counter.
One of the saving graces here is that after a few rows, the Cable Chart is no longer used. Eventually, the neckline bind-offs and decreases will include all of the stitches that were originally in the cable pattern. I removed the row count for that as soon as I could - it was one less thing to keep track of.
I also take notes. Since the left neck and right neck are knit separately, I want to be sure that they end up being the same (or, at least, that I don’t have more rows on one side than I do on the other!) So I take very close notes of any changes I make.
It’s also at this point where this project becomes a ‘stay at home project’ and turns into something I have to focus on. Also, it’s no longer just TV or podcast knitting.
Another advantage is that this pattern has no shoulder shaping. Once you get finished with the neckline and armhole shaping, that’s it, you’re done, there’s nothing else to worry about. You’ve made it through the most challenging part of the pattern, now, all that comes after is lots and lots of I-cord - but, don’t worry, that’s my next article. For now, celebrate making it through the most challenging part of the pattern, knitting with UNIVERSAL YARN Bella Tweed in “Care”, and Knit Picks Rainbow Wood Straight Needles!

First, what, exactly, is I-cord?
I-cord stands for the unfortunately named ‘idiot cord’. The myth states that Elizabeth Zimmerman named it thus because she thought anyone could make it; however, that claim is somewhat in question. What isn’t in question, though, is that she took the technique (originally called Victorian “Stay Lace”) and brought it into the modern knitting world, making it on two knitting needles, rather than the traditional spools or ‘corkers’ that it had been otherwise usually worked on.
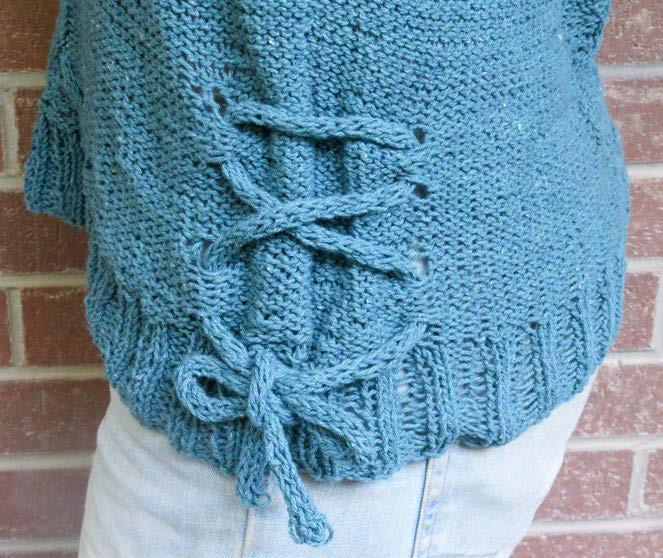
I-cord is, at its simplest, a long, very slender tube of knitting worked in the round. But, being only a few stitches wide, it’s impractical to work it in any of the traditional in the round methods of knitting. Instead, you can either use a spool (also known as a corker) or, as Elizabeth Zimmerman popularized, work it on two
double-pointed knitting needles. As a long, thin strand of knitting, it’s incredibly useful for ties and cords - like you see in the Palomar Top.
The I-cord has also been adapted further into Applied I-cord, where it’s knit right onto the edge of a garment, as well as an I-cord cast off.
How do you make one? It’s surprisingly easy.
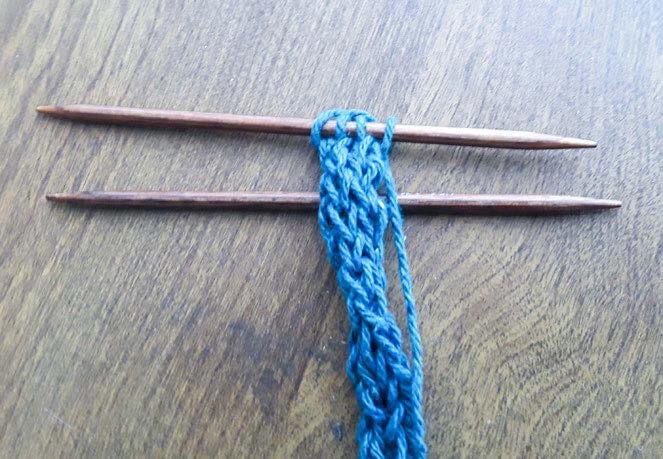
If you’re working the Palomar Top, cast on 4 stitches onto one double-pointed needle. I’m using the KnitPro Ginger 3.75 mm double-pointed needles. If you’re working a different pattern, the pattern should tell you how many stitches wide your I-cord needs to be.
Additionally, I’m using 12.5cmlong double-pointed needles here. While you can use longer double-pointed needles to work an I-cord, in this case, the shorter needles tend to be easier to maneuver.
Then, knit one row. Don’t turn your work. Bring the yarn behind the work, and knit the row again. Then, do that again. And again, and yes, again. In case you missed it, you’ll be knitting I-cord for a while - the Palomar Top pattern calls for 36 inches of I-cord, and that’s only for one tie. You need two ties! But, knitting I-cord is the perfect time to put on a favorite show or podcast, and just power through it. Though it can be tedious, it’s often very worth it.
Once you get to the end of the I-cord, bind off your four stitches, fasten off, and weave the end of your yarn into the center of the I-cord to hide the ends.
And, there you have an I-cordready to tie up your Palomar Top!
It’s looking so good knitted in UNIVERSAL YARN Bella Tweed in Care. With the I-cords done, there’s only a teeny bit more finishing to do to get a finished Palomar Top.
It’s now onto the final steps of the pattern - the assembly.
Let's start with the obvious. The Palomar Top is knit flat and seamed, so, there’s going to be sewing involved. Now, I chose to leave the neck stitches on scrap yarn, rather than binding them off as the pattern calls for, but that’s just a personal choice. I also left my shoulder stitches on scrap yarn, as I chose to join the shoulders with a 3-needle bind off (I find I just like that particular seam better - that’s completely a personal choice!)
The first step is the seaming. The pattern is stitched together with mattress stitch. And, full disclosure here, I’m not a huge fan of seaming. But, without seaming this wouldn’t be a finished top, so, I put on some podcasts and called it done. I used a UNIQUE Knitting Round Tipped Needle, so that it wouldn’t split the plys of the yarn while I was sewing.
Once we get the side seams sewn up, it’s a simple matter of picking up stitches around the neckline and knitting the ribbing, then doing exactly the same for the armholes.
Finally, take all that I-cord you knit previously, and feed it through the eyelets on either side of the side seam.
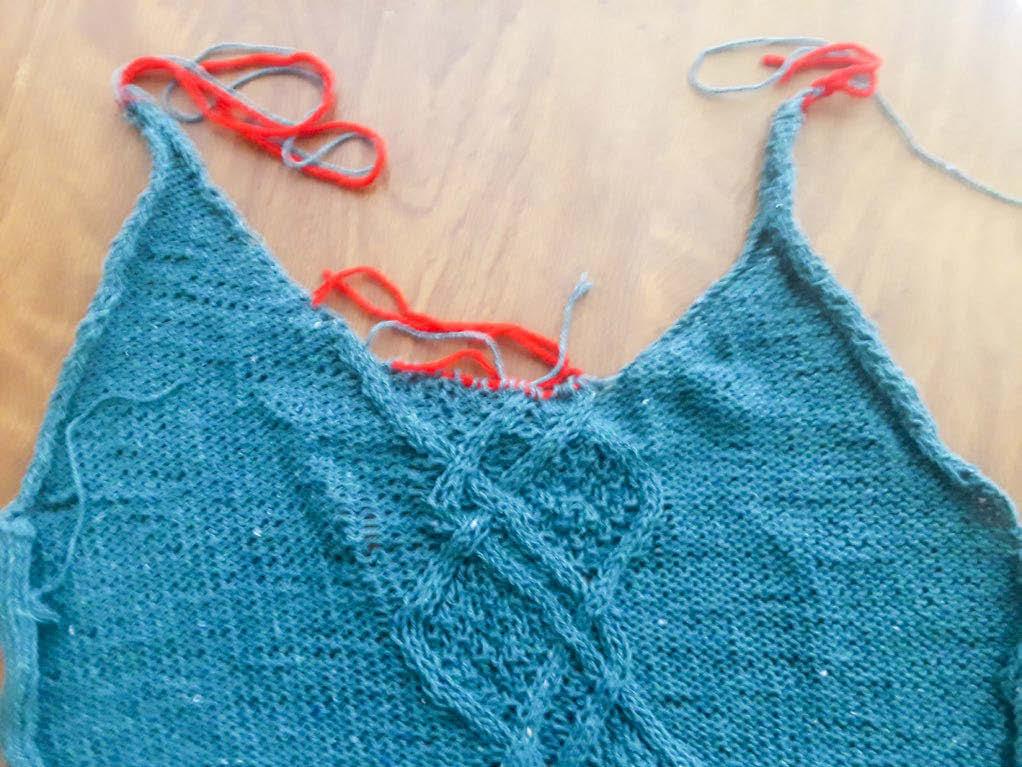

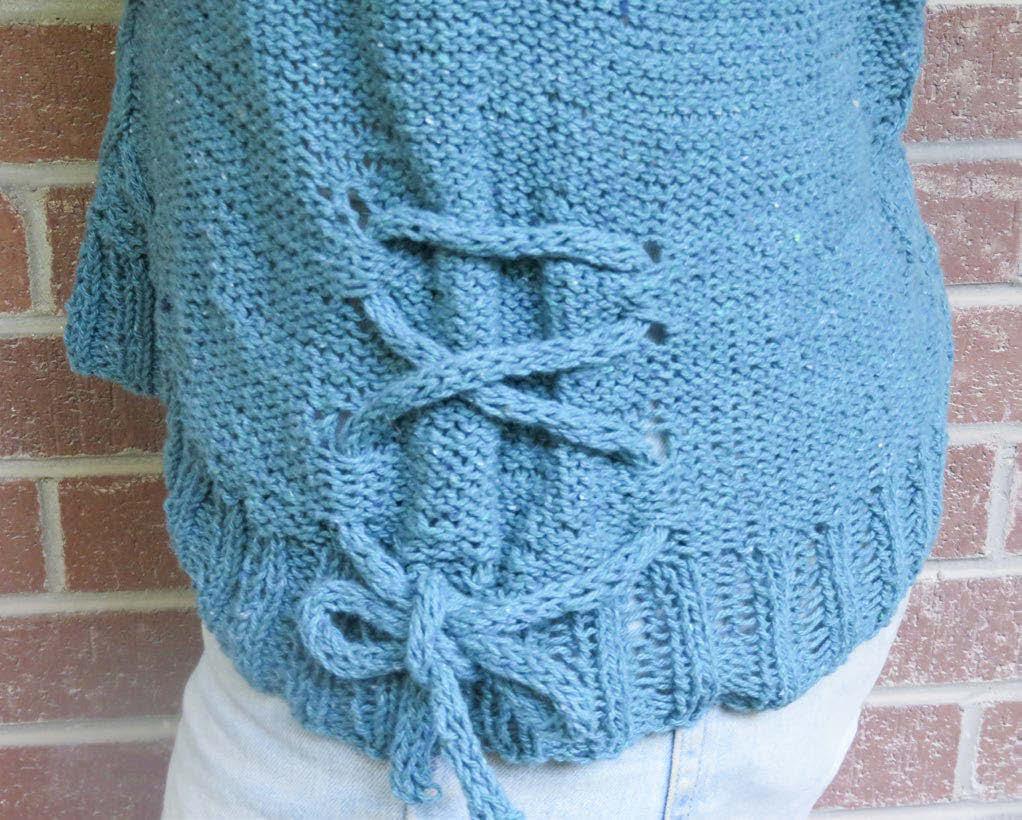


And that’s it - a finished Palomar Top, ready to keep you cool and looking great!
I’ve been wearing it out and about in this heat, and it’s wonderful. The Bella Tweed yarn, being mostly cotton, is perfect for a summer top (bonus points for being made at least partially of recycled cotton!), and, the pattern itself is perfect for summer weather. Wear it on its own in the heat, or, pair it with a shawl or a jacket for cooler summer nights, either way, it’s versatile and will hold a spot in my wardrobe for hopefully many years to come!
Sarah Dawn Adams

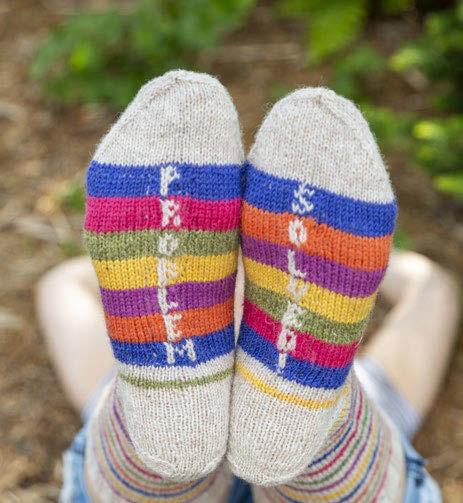
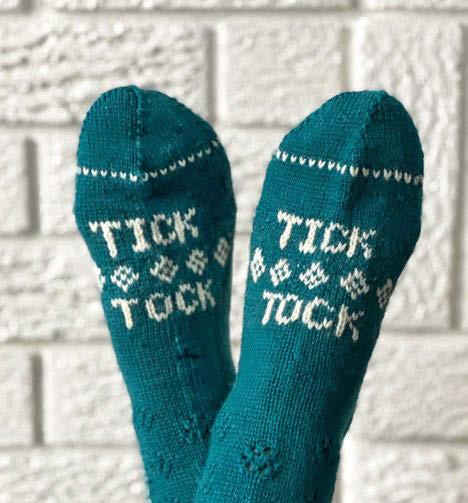
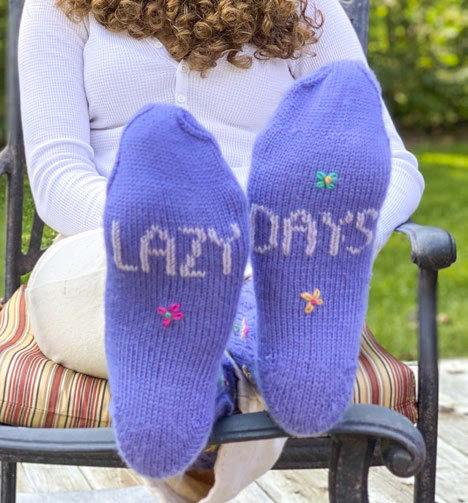








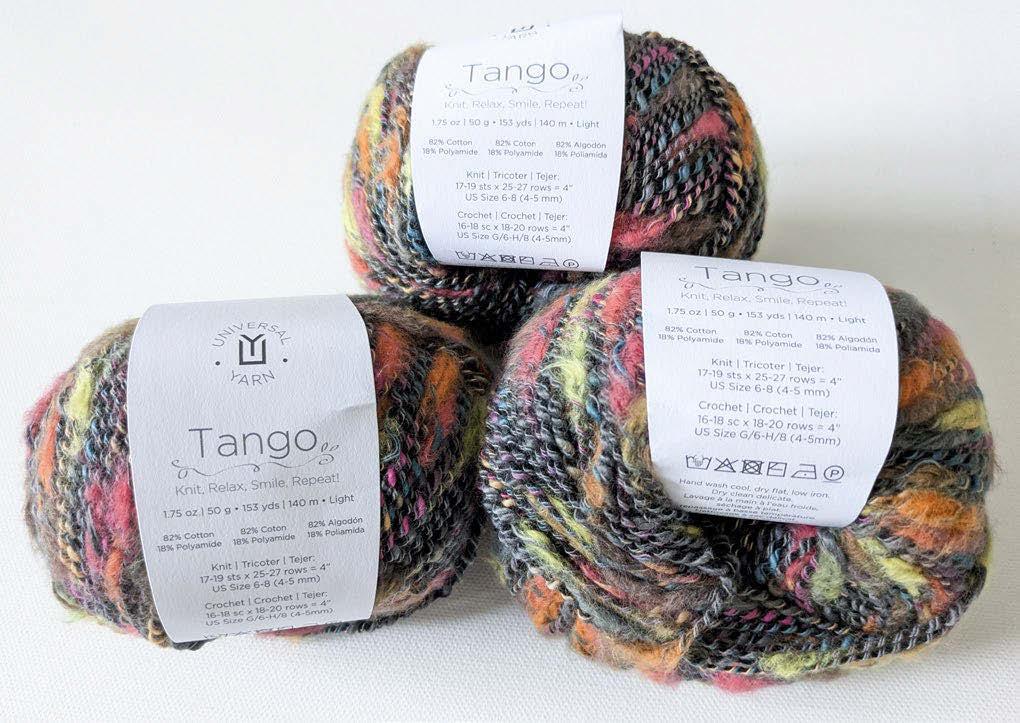
If you’re in the Northern Hemisphere, you know it’s still hot, but days are starting to get shorter, a reminder that in a few weeks, the fall weather will be upon us. I would like to talk about a few options for our knitted items that are perfect for in-between seasons, both yarn and patterns.
Breathable yarns like cotton, linen, hemp, and blends of these fibers are the best for transitional knitwear, and most yarn providers have a large selection of these yarns. The new yarns come in a variety of solid colors or multicolored, thick or thin, and even structured yarns.
Layering pieces like shawls, shrugs, cardigans, or vests is a good option for your transitional knitwear project, as you can easily adapt to weather changes.
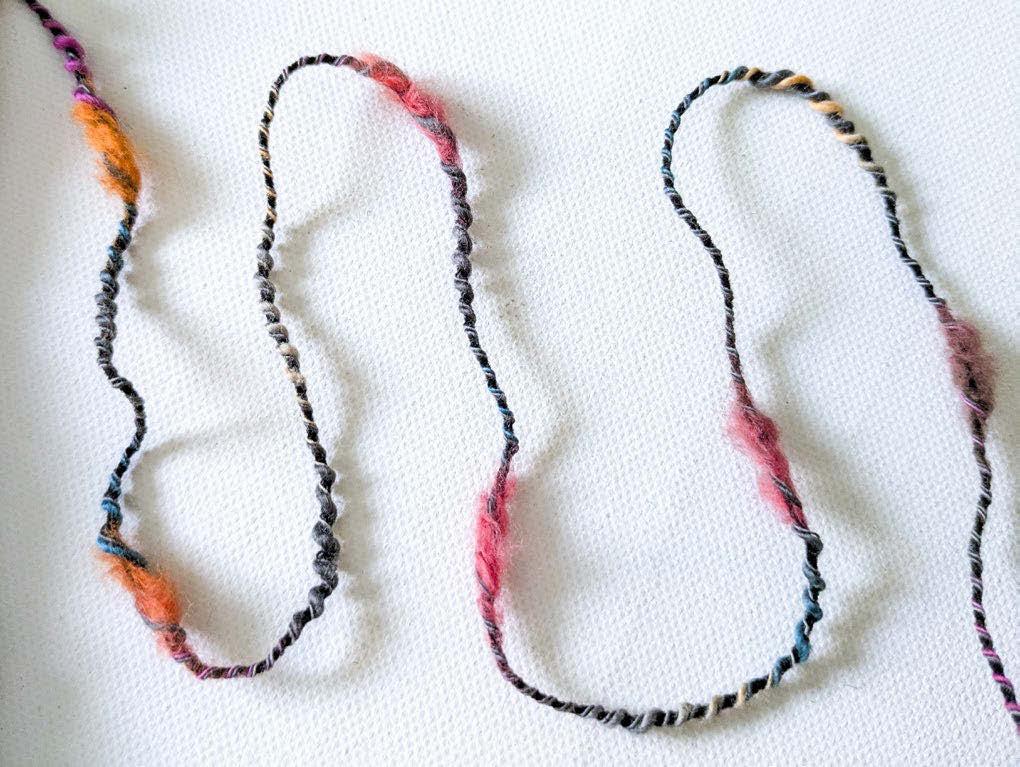
I’ll take you along in the making of transitional knitwear using a new yarn: UNIVERSAL YARN Tango, a vibrant and textured blend of cotton (82%) and polyamide (18%). The thick and thin yarn comes in a variety of colorful patterns formed by twisting together beautiful, strong colors.
Because I started knitting with fall in mind, I chose the fall colors blended in the Barrida colorway, earthy tones with speckles of orange, red, and yellow.
Even before choosing any pattern, I started swatching using the needle sizes recommended on the ball band.
I used circular needles size US 6, 7, and 8 [4mm, 4.5mm, and 5.00mm].
The yarn is forgiving with the stitch tension, the thick and thin structure hides the variations in tension, and as the yarn is stretchy due to the way it is twisted, the various sizes of needles give almost the same stitch count. I will make my decision based on the feel of the fabric and on the pattern I choose.
I won’t choose a shawl pattern as I prefer my shawls to be more drapey. The swatch shows me that I’ll be able to knit a soft, not too thick, piece. I believe a cozy shrug or cardigan will best match the yarn I chose.
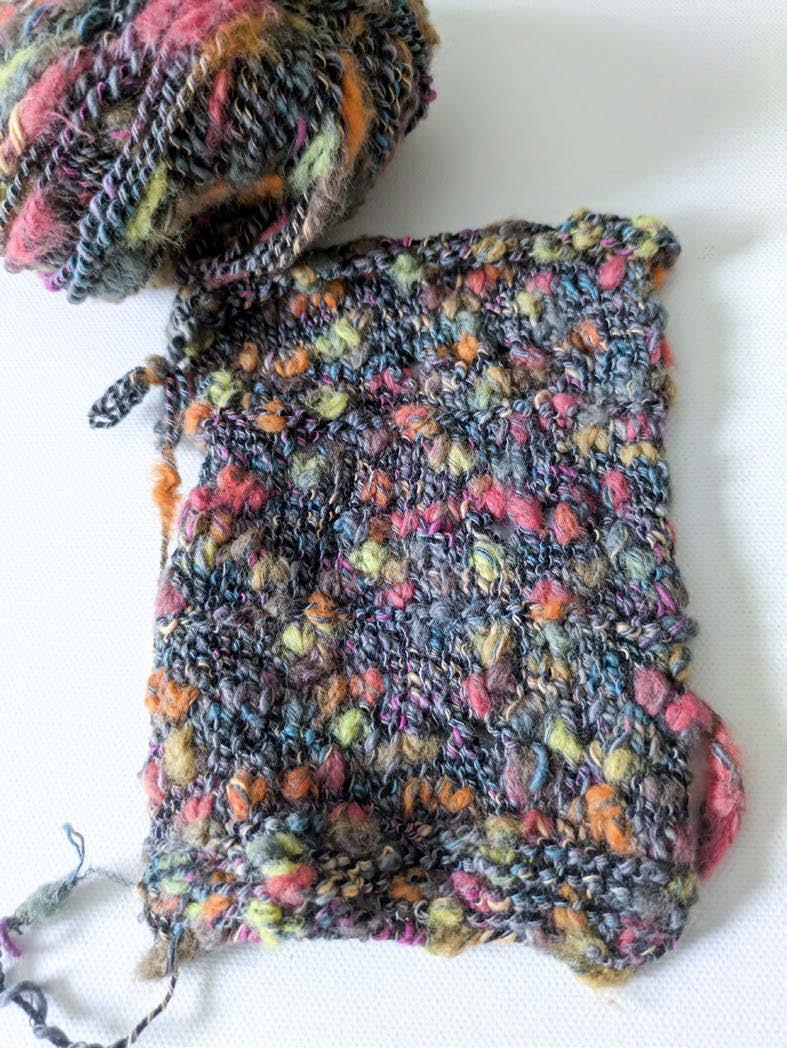
I’m certain I’ll knit up a cardigan, an ideal transitional knitwear worked in UNIVERSAL YARN Tango, Barrida colorway.
The yarn, knit up in my swatch, looks like a fall landscape when leaves are turning. I was looking for a transitional garment pattern, and, as I didn’t think I wanted to use this yarn for a shawl, I decided to look for a shrug or cardigan pattern.
I found the Lawson Cardigan pattern by Andi Javori, an open cardigan – no buttons, with an elegant border on the two fronts. It looks exactly like something I was looking for.
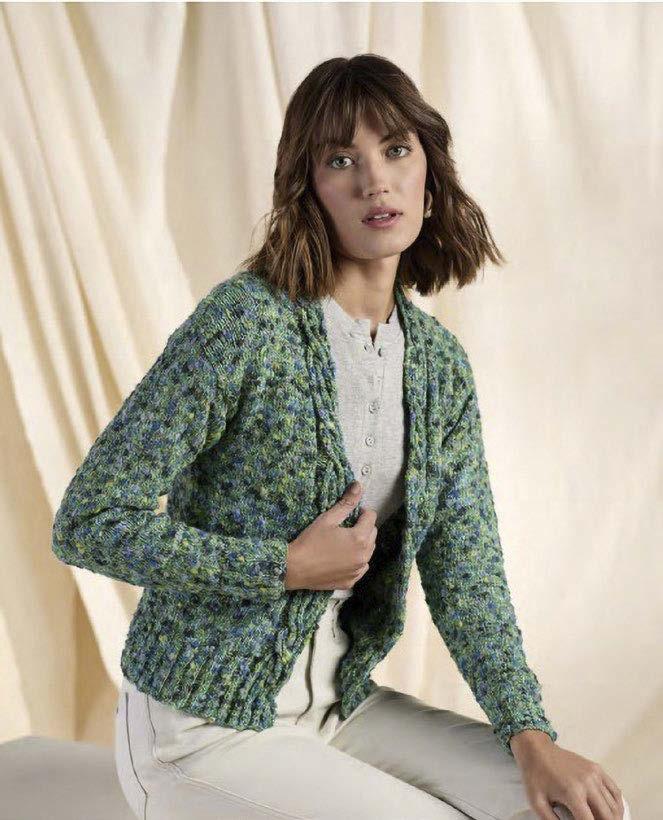
I already have my swatch knit up using 3 needle sizes. I can measure the stitches and rows on it, so I start reading the pattern from the beginning to the end.
The cardigan is knitted flat, bottom up. The back, fronts, and sleeves are knitted separately and sewn together. Hmm, I started thinking..., sewing with this thick and thin yarn may be tricky so I must use another yarn or find another way to attach the parts together: three needle bind-off or crochet.
I’ll knit the cardigan in size L. I want a roomy, cozy cardigan that I can wrap around me on a breezy summer evening or on a cool fall day. I’ll use US size 6 [4mm] needles for the ribbing and US size 7 [4.5mm] for the body and sleeves.
I’m ready to start, and I review all my supplies and notions based on the pattern requirements:
• 10 balls of UNIVERSAL YARN Tango, colorway Barrida
• The Lawson Cardigan pattern
• KNITPRO Nova Platina 100cm (40'') Fixed Circular Knitting Needle - 4mm (US 6)
• KNITPRO Nova Platina 100cm (40'') Fixed Circular Knitting Needle - 4.5mm (US 7)
• KNITPRO The Mindful Markers
• UNIQUE KNIT TING Cable Needles
I start by casting on for the back of the cardigan on the smaller needles, and after the setup row, I add my helper cotton strand of yarn to count the completed rows. Measuring the knitted work is sometimes tricky; therefore, I trust the counting of rows more for marking the armhole or to make sure the front and back of my cardigan are the same length.
The ribbing is 3” (24 rows as counted with the help of my marker thread) and I’ll have to knit flat, back and forth in stockinette stitch for the whole length of the back.
I’m on my way, knitting my transitional cardigan just in time for fall, worked in UNIVERSAL YARN Tango, Barrida colorway
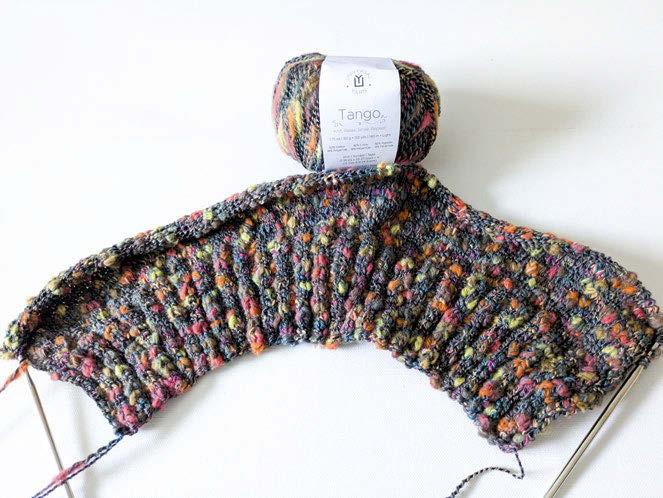
When I reach the armhole length, I mark both sides with removable markers and continue without any shaping to the end.
Even though the pattern asks for binding off all stitches, I left the live stitches on a spare needle as I want to connect the fronts to the back using a three-needle bind-off. Binding off all stitches and sewing the back and the fronts is another option, as recommended by the pattern, but I’m no fan of sewing with thick and thin yarn to do this.

I cannot wait to start the first front side. After the ribbing ends, the front side has an intricate cable pattern at the edge. This makes a clearly defined band along the front.
While working the cable pattern, I regret that some details of the intricate cable are not as visible using Tango yarn as they would be in a smooth, less textured yarn. But the cable is still beautiful, elegant, and creates a thicker border.
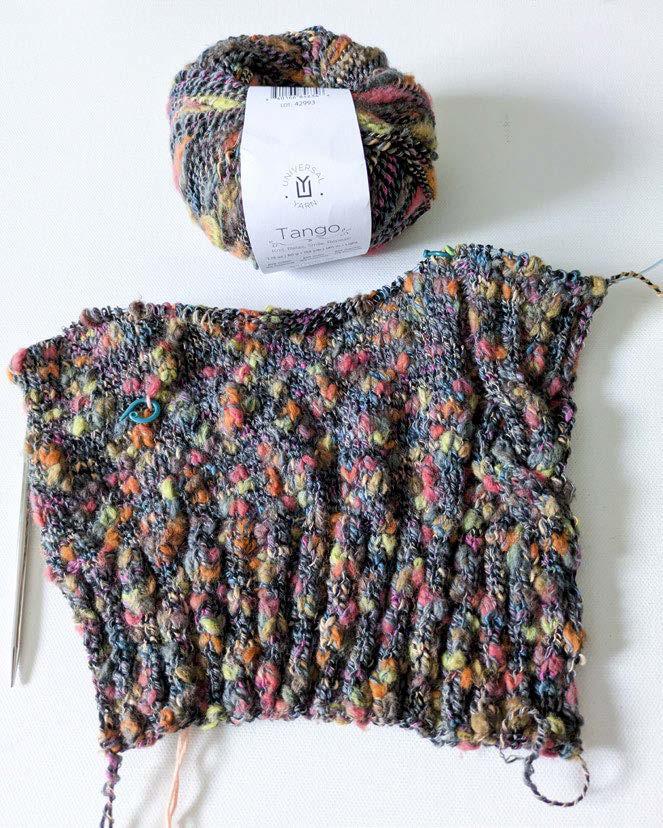
The cable motif repeats over 36 rows, and the cable is done over a 2 by 2 ribbing. Don’t get confused, follow the written pattern for the cable (or the chart as given in the pattern), and the result will please you! A cable needle is helpful!
There are some decreases for the V neckline. They start just a few rows under the armhole marker.
TIP The fronts are not fit for a social knitting night if you need to focus on both cable and decreases! The fronts are the most difficult parts of this cardigan, but they are worth the effort.
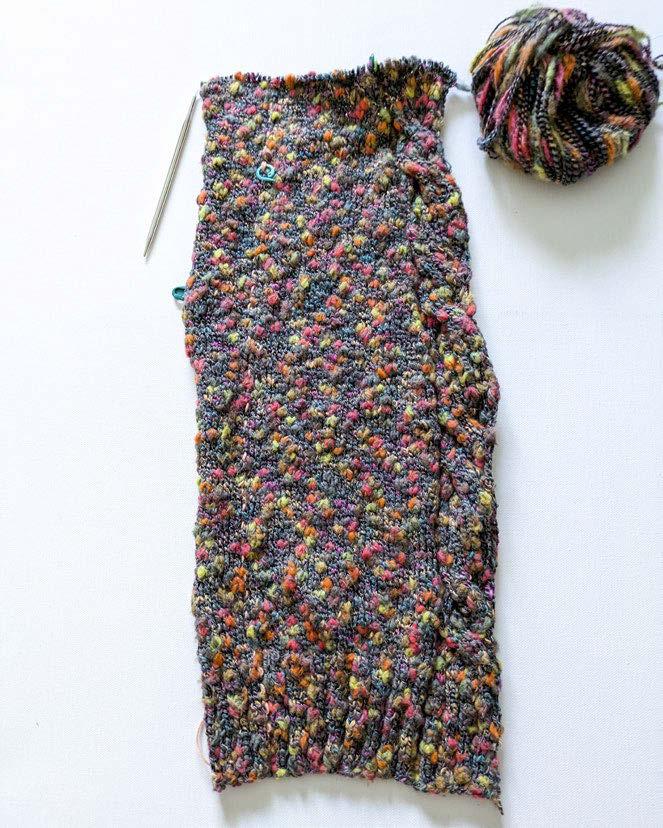
I went through the trouble of mirroring the cable motif on the other front, even though the pattern does not ask for it. I like symmetry more than other knitters!

I used the three-needle bind-off to attach the fronts to the back and finished the cable edge along the neckline.
It’s time to knit the sleeves. I will knit both sleeves at the same time, using two balls of yarn, each for one sleeve. They are knitted flat, starting at the cuff.
I joined the two sleeves with a removable marker to make sure I do not turn the work before completing the row on both sleeves. I will turn the work only at the ends that are not joined.
This way, I can make sure the two sleeves are the same length, no guessing there.
When completing the sleeves, I won’t bind off all stitches. For attaching the sleeves, I won’t follow the pattern instructions that recommend binding off all stitches and sewing the sleeves to the body of the cardigan. It’s not the pattern, it's me, I don’t want to sew the sleeves with this textured yarn.
I want to pick up stitches between the armhole markers and use the three-needle bind-off method to attach the sleeves to the body.
I can count the number of rows between the markers using my row counter yarn, and I know how many stitches are at the top of each sleeve. It turns out I have to pick up two stitches for every three rows in between the markers to get to the required number of stitches
After attaching the back and the fronts at the shoulder line and the sleeves between the armhole markers, there are still the side seams and the underarm seams to be done.
I’ll use a crochet hook and crochet the remaining seams to avoid sewing with this uneven yarn. But to make my crocheting along the sides and underarm easier, I’ll first block the work. I use Soak to wash the piece and lay it flat to dry..


I left off when the Lawson Cardigan knitted with UNIVERSAL YARN Tango, colorway Barrida, was soaked and laid flat to dry to prepare for closing the side and the sleeve seams.

As I mentioned before, I used a crochet hook to crochet together the side seams and the sleeve seams. A crochet slip stitch creates a flat seam even with thick and thin yarn!
Another option is to sew the seams using another yarn, such as a smooth cotton yarn, in a matching color, which will work, but I prefer the crochet option. Weaving the ends in is the last task on the cardigan, and now it’s finished! I have a colorful transitional knit cardigan to carry me through late summer and fall.
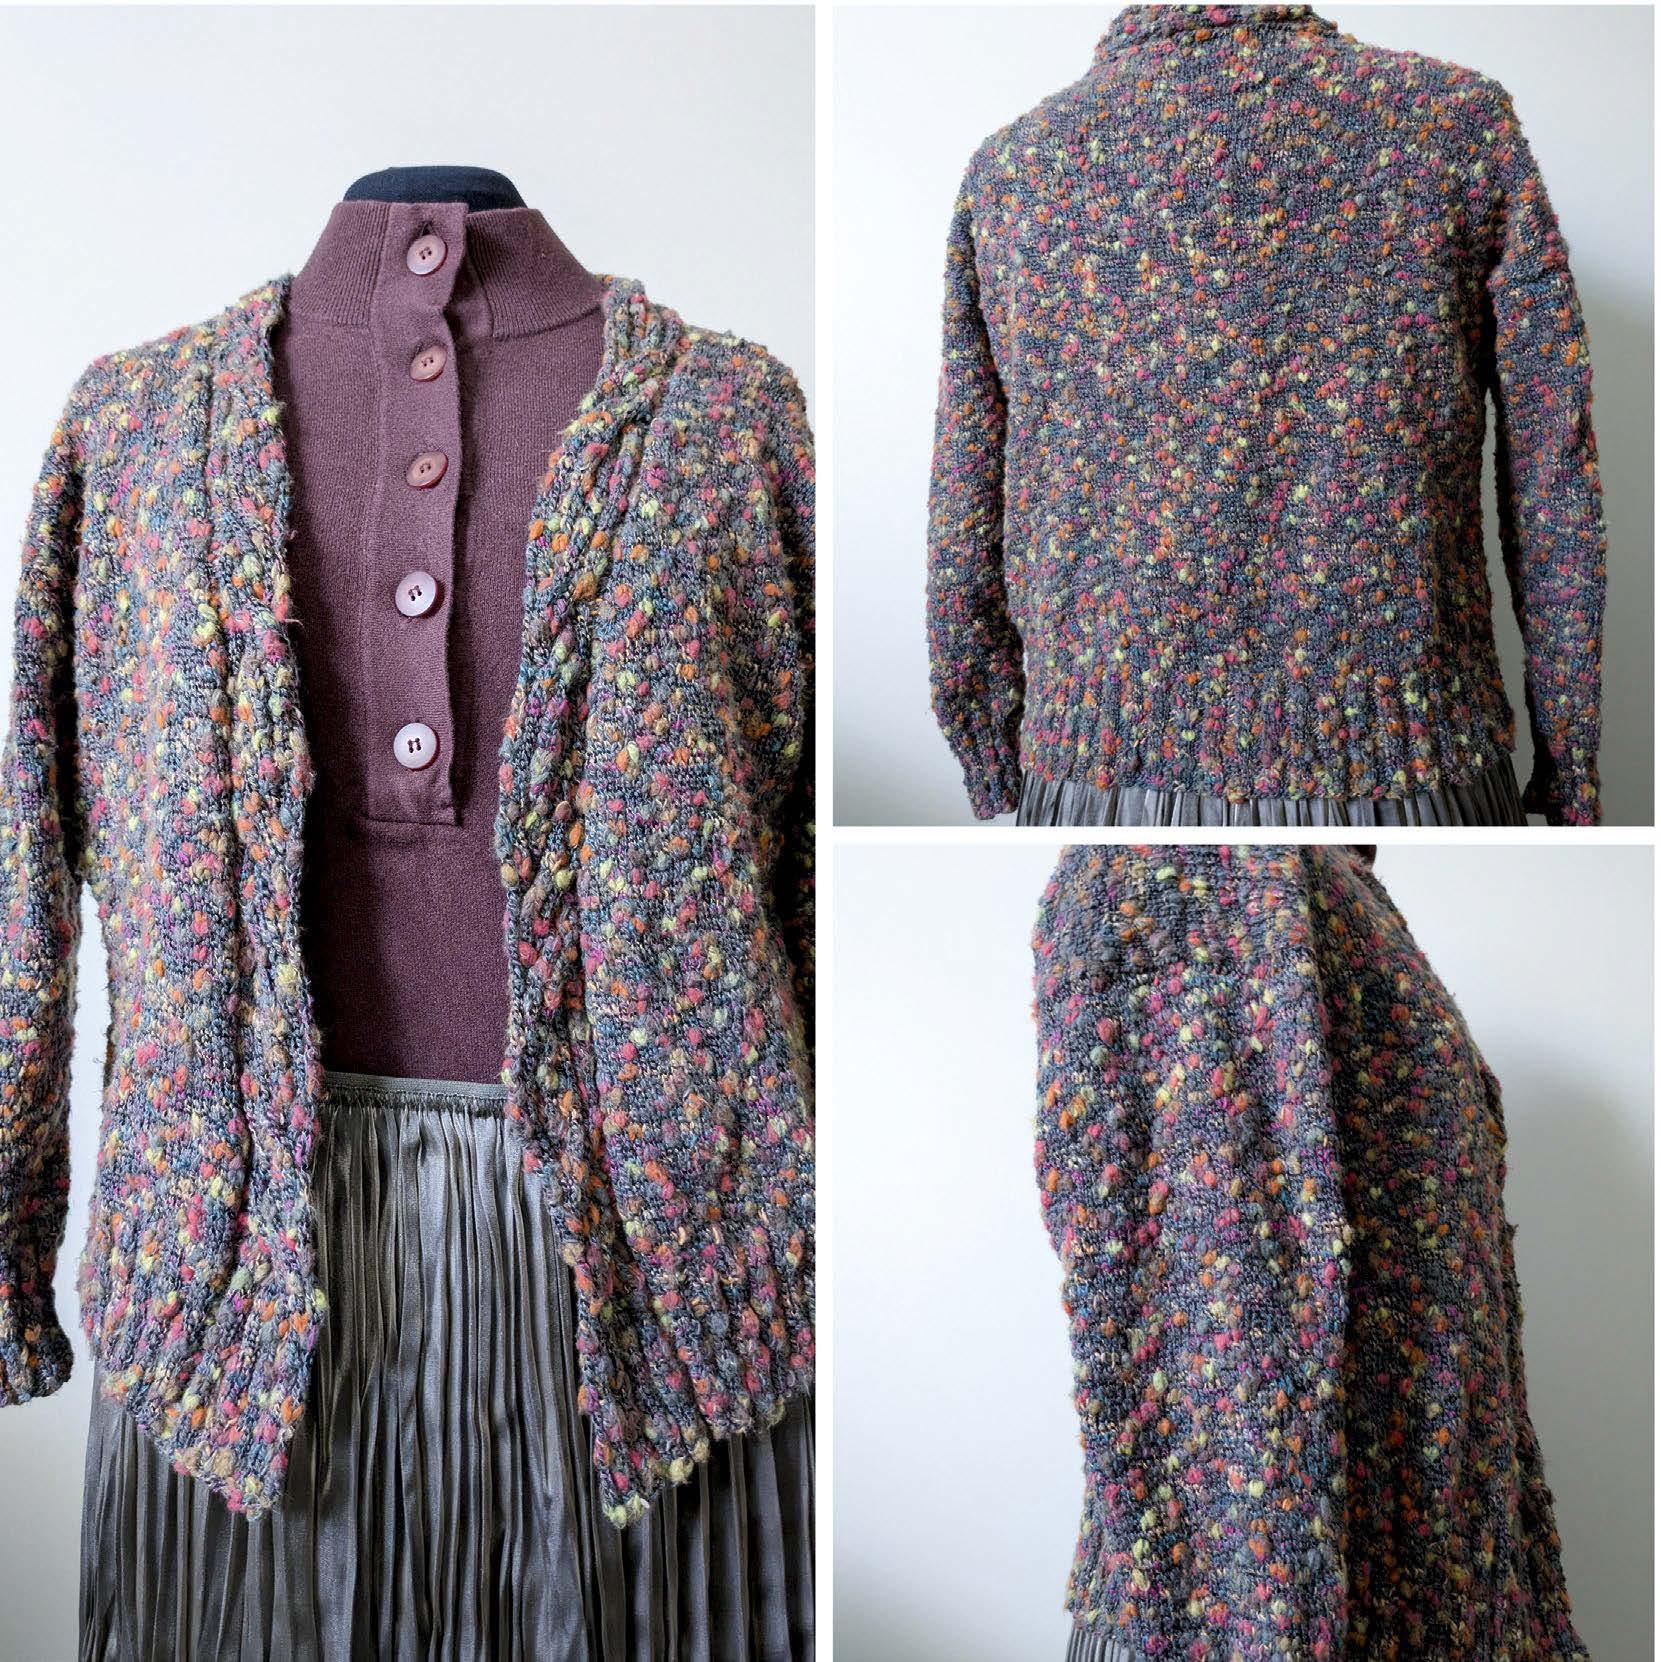
Styling this cardigan will be easy; it will pair well with jeans and casual outfits, but you could wear it over a dress or skirt as well and look great. And here’s the final look at the finished cardigan on a mannequin, front, back, and side. The yarn is vibrant and colorful and will keep me comfortable without being too warm.
Pick your favorite color from the UNIVERSAL YARN Tango color palette and make your Lawson Cardigan in time for cooler weather!


Yarn Weight Symbol & Category Names
Type of Yarns in Category Fingering, 10 count crochet thread Sock,
Yarn Weight Symbol & Category Names
Type of Yarns
Knit Gauge Range* in Stockinette Stitch
Recommended Hook U.S. Size Range
* GUIDELINES ONLY: The above reflect the most commonly used gauges and needle or hook sizes for specific yarn categories.
** Lace weight yarns are usually knitted or crocheted on larger needles and hooks to create lacy, openwork patterns. Accordingly, a gauge range is difficult to determine. Always follow the gauge stated in your pattern.
*** Steel crochet hooks are sized differently from regular hooks--the higher the number, the smaller the hook, which is the reverse of regular hook sizing.
This Standards & Guidelines booklet and downloadable symbol artwork are available at: YarnStandards.com
Standard abbreviations & terms
alt = alternate
approx = approximately
beg = begin(ning)
BO= bind off
CC = contrast color
ch = chain
cm = centimetre(s)
cn = cable needle
co = cast on
cont = continue, continuing
dc = double crochet
dec = decrease(s), decreasing dpn = double-pointed needle(s)
foll = following
g = gram(s)
hdc = half double crochet
inc = increase(s), increasing
in(s) = inch(es)
k = knit
kf&b or kfb = knit into front and back of st (increase)
ktbl = knit through the back loop
k2tog = knit 2 sts tog (right-leaning decrease)
k3tog = knit 3 sts together (double right-leaning decrease)
m = marker
m = meter(s)
m1 = Make 1 stitch: pick up the horizontal strand between 2 stitches from front to back and knit it tbl (lifted increase)
MC = main color
mm = millimetre(s)
oz = ounce(s)
p = purl
p2tog = purl 2 sts tog (decrease)
patt = pattern
pfb = purl into front and back of stitch (increase)
pm = place marker
psso = pass slipped stitch over
RS = right side
rem = remain(ing)
rep = repeat
rev = reverse
rnd = round
sc = single crochet
sl = slip
skp = slip one st, knit next st, pass slipped st over knit
st (dec)
ssk = slip, slip, knit: slip 2 sts knitwise, 1 at a time, insert left-hand needle into front of both sts and knit them tog (left-leaning decrease)
* GUIDELINES ONLY: The above reflect the most commonly used gauges and needle or hook sizes for specific yarn categories.
* GUIDELINES ONLY: The above reflect the most commonly used gauges and needle or hook sizes for specific yarn categories. ** Lace weight yarns are usually knitted or crocheted on larger needles and hooks to create lacy, openwork patterns. Accordingly, a gauge range is difficult to determine. Always follow the gauge stated in your pattern.
** Lace weight yarns are usually knitted or crocheted on larger needles and hooks to create lacy, openwork patterns. Accordingly, a gauge range is difficult to determine. Always follow the gauge stated in your pattern. *** Steel crochet hooks are sized differently from
*** Steel crochet hooks are sized differently from regular hooks--the higher the number, the smaller the hook, which is the reverse of regular hook sizing.
sssk = slip next three stitches individually, knitwise. Insert tip of left needle from front to back into the fronts of these three stitches and knit them together (double left-leaning decrease)
st(s) = stitch(es)
St st = stocking stitch
tbl = through back loop
This Standards & Guidelines booklet and downloadable symbol artwork are available at: YarnStandards.com
This Standards & Guidelines booklet and downloadable symbol artwork are available at: YarnStandards.com
tog = together
tr = treble crochet
WS = wrong side
yo = yarn over