Foreword
For many years, the application packaging industry has been ruled by a few known giants. This lack of diversity in packaging tools for IT professionals led to a market where thousands of US dollars were spent on acquiring licenses for packaging tools and their training materials.
Ever since we launched the first version of Advanced Installer, democratizing the application packaging industry became our North Star. We made it our mission to deliver not just the best packaging tool, but also the best documentation and support services. That is why all of our documentation is available for free on our website and updated consistently.
We have over 200.000 lines of content in support documentation, hundreds of industryfocused blog articles, over 300 videos on our YouTube channel, along with numerous free tools, and free books (MSIX Packaging Fundamentals, MSI Packaging and a new one that will be released by the end of 2021).
With this new free book written by Alex, we are going one step ahead on our journey. Star ting today, you no longer need to spend thousands of dollars to learn how the most used software packaging and deployment technology works, you can do it all for free using this book and our dedicated free video academy.
The team at Advanced Installer has over 200 years of experience accumulated in packaging and deploying Windows applications. Alex shows in a glimpse that experience in this new book.
When it comes to learning a new technology, Alex is the teacher you need. When he is not tinkering with his own tools and scripts, or researching MSIX, he loves sharing the secrets of Windows Installer.
Advanced Installer has enabled hundreds of thousands of software engineers all over the world to package and deliver applications to millions of end-users. By continuously democratizing this industry we want to help you deliver the first billion of installations to your end users.
Let’s go!
Bogdan MItrache, VP of Product Advanced InstallerWindows Installer
Introduction
Those who deal with software product administration inside a company know how complex an application’s installation and monitoring process is.
Its complexity is due to various factors, especially regarding the setup of software products, most of which present roadblocks that could slow down your processes.
Some of these roadblocks include the inability to properly handle the resources and other products, the lack of easy customization, the difficulty of making decisions regarding a part of the application needed by the user, and the struggle that comes with the diagnosis and repair of possible configuration problems.
Note: Classic installers (before Windows Installer) don’t know what to do when a resource (for example, a file) is already present on the machine from another application.
And here’s where Windows Installer comes to help. As part of the Windows operating system, Windows Installer is a base service used to manage software products. This includes the following aspects:
• Installations
• Modifications
• Improvement and uninstallation of software products
• Reliable application customization
• Solving Configuration issues
Windows Installer also provides a better handle of commonly used resources, imposes conditions regarding the usage of files with different versions, and fixes rolling applications. This book gives a deeper overview of the basic features provided by the Windows Installer technology and its uses.
It is particularly aimed at beginner IT Pros that want to understand the Windows Installer technology, how the installer structure is composed, learn basic scenarios with specialized applications, adopt best practices, discover helpful tools, and get more knowledge on how to debug installations.
Before Windows Installer (scripting) – legacy packages
Before Windows Installer, software products used various technologies at the application’s setup request - each of them containing specific installation rules.
It was common to encounter various errors during installation. For example, you could find an older version of a file installed on top of a newer version. Certain setups didn’t take into account the resources used along other applications. As a result, the installation and uninstallation of some applications compromised the functionality of others.
Since the setup imposed its own rules,it caused conflicts when various applications interacted between them and the modification and improvement of the applications triggered other faulty behavior. When an application stops working, any attempt to repair it could cause the system’s destabilization, leading up to the whole system’s resettlement.
Fulfilling a need – when and where Windows Installer was published
Windows Installer was released to allow for a set of common rules in the applications’ administration (installing, repairing, uninstalling).
Its release led to the disappearance of the problems mentioned above, and furthermore, eased the work of the system administrator. It was published at the same time as Office 2000, making it the first application based on Windows Installer technology.
What is Windows Installer?
Windows Installer is a service provided by the Windows operating system to manage software products.
Windows Installer is not a distribution technology for software products. But, software products distributing technologies use Windows Installer because of the benefits it offers.
What are Windows Installer’s Benefits?
Some of the main benefits offered by Windows Installer include:
• Standard formatting (Windows Installer created the MSI package, a new application format)
• Transactional install and rollback (Windows Installer packages can be easily installed according to the user’s requirements, and if the installation fails, all the actions taken upon that moment can be erased)
• The Self-healing option (or self-repair) for corrupted or erased files (when certain files are corrupted or erased, the user can trigger the Repair option, which fixes those files)
• Installation on request (packages can be installed in one simple click whenever the user wants)
• Packages can use Transform type files (which allows a package to be customized)
• Packages can use patches (great for fixing bugs in the applications)
• Managing the state of an application (Windows Installer offers developers an API for monitoring the state of a package - whether it is or it isn’t installed on the machine)
• Administrator’s rights are no longer necessary for installing applications (this depends on whether the application is user-targeted or not)
• Scriptable API (for manipulating MSI type files)
• Packages can be managed via the MSIEXEC.exe command line.
What applications should not be repackaged?
In certain circumstances, we can deal with applications that shouldn’t be repackaged, here are some of them:
• Vendor MSI files. Instead, you can customize them using Transform files.
• Patches, updates, and hotfixes for the operating system, Windows Installer Service, MDAC. Those applications shouldn’t be repackaged because they influence Windows security rules.
• Windows Media Player, Microsoft Internet Explorer, antiv irus software, and device drivers. These types of applications generate changes in the operating system which includes the protection of Windows files.
When it is still necessary to install a driver, an antivirus, or a hotfix - these are the options:
• The original setup was to be rolled using MSI as a “hiding place” (from now on, we will be referring to this as a “wrapper” or the “wrapping method”).
• Silently install drivers using the tools provided by Microsoft (dpinst.exe, DIFxAPI, etc).
Tools used for application packaging
• Advanced Installer
• Wise Package Studio
• Orca
• WiX Toolset
Advanced Installer is one of the most popular tools for repackaging applications. Advanced Installer’s GUI creates the MSI with the primary goal of delivering quality applications to the end-user. It achieves that by scanning the operating system, installing the application that has to be repackaged, then scanning the system one more time which results in an MSI from the difference between those two scans.
Orca is a tool used for editing MSIs, which offers access to all the MSI tables, but it is not meant to be a “full-featured” tool for creating MSIs.
It has the advantage of being easier to use than full-featured installers, but it doesn’t work as a replacement for them. If you’re handling big packages, Orca saves the MSI and loads the tables a lot faster than other package manipulating software would.
Wise Package Studio was discontinued, but it is still very popular and used at the time this article was written (end of 2020).
WiX Toolset was released by Microsoft back in 2004, and it was their first-ever open source license project.
Some of the most popular packages from Microsoft were built using WiX - including Office 2007, Visual Studio 2005/2008, and SQL Server 2005.
WiX stands for Windows Installer XML, and instead of having a graphical interface as we’re used to with other software packaging tools, WiX uses a different approach. You can look at WiX more like a programming tool because it uses XMLs to declare and define what elements are inside a package and what exactly happens during an installation.
WiX is designed for highly skilled software packagers and not for beginners, which is why it will not be reviewed in this book.
We will have a look further at both Advanced Installer and Wise Packaging Studio to see how they behave in different scenarios.
You can try Advanced Installer by downloading it from here
MSI package structure
Package definition
A package contains all the information Windows Installer needs for installing or uninstalling an application or a software product, and for rolling the graphical interface for the user.
The package is represented by a file with the .msi extension (Windows Installer database), which includes the database, and the data streams for different parts of the installation.
The .msi file can also have one or more transforms (.mst files), internal or external files, needed for the installation.
Application developers must authorize installations to use Windows Installer.
Because Windows Installer organizes the installations around features and components, and deposits all the information in a relational database, the authorization process for the installation of a package requires the following steps:
• identifying the features which will be presented to the users
• organizing the application in components
• populating the database with information about the installation
• validating the package
Package structure
•
•
•
•
MSI Package Resources - Features
Applications are divided into features according to their functionality.
A feature represents a functional part of an application and it can be installed independently from the entire application.
Note: The relationships between features are hierarchical.
Observations:
With captured applications, we have one mandatory feature in the package (the number of components that can be added to a feature should not exceed 1600 exceeding this number will, create new features)
Vendor MSI applications are left as they are and will be controlled using the properties or Transform Files.
The specific feature tables allocated towards Windows Installer are Feature and FeatureComponent.
More details about Feature Properties can be found here
Feature Table
Feature Feature_ Parent Title Description Display Level Directory Attributes Feature Table
This table defines the logical structure of the features. In it, you can find information such as how features are related (in the columns Feature and Feature_Patent), the title of the feature with its description (in the Title and Description column), and the feature’s installation level.
A feature can have many subfeatures. The dependency between subfeatures and parent features is the following: if a subfeature is set to be installed, the parent feature will be automatically installed at the same time, but if the parent feature is set to be installed, it is not mandatory for the subfeature to be installed.
A feature can be set to be installed (or not) by modifying the value of the column Level.
Setting the value to 0 stops the feature from being on display. For a feature to be installed, the value from the column Level must be higher than 0 and at the same time, smaller or equal to the current INSTALLLEVEL.
Read the Properties section, for more information about the INSTALLLEVEL property.
FeatureComponents Table
The FeaturesComponents table defines the relationship between features and components. For each feature, this table lists all the components that add up to a feature.
FeatureComponents Table
Columns:
Feature - an external key from the first column of the Feature table.
Component - an external key from the first column of the Component table.
Remarks: there is a maximum limit of 1600 components per feature using Windows NT/ Windows 2000 and a limit of 800 components per feature using Windows 95 and Windows 98.
Components can be shared by two or more features, meaning that the same component can be referred to by two or more features.
Components
Windows Installer installs and uninstalls an application in pieces called components, each of which has a unique code assigned called a GUID. Components are collections of resourcesthat are always installed or uninstalled as a whole on the computer. Resources could be files, registries, shortcuts, or basically anything else that can be installed..
Components represent the base unit of a package, a piece of the application/products that will be installed. They contain a file or group of files, COMs (Component Object Model, they can be a dll or an exe), registries, shortcuts, etc.
Components are hidden from the user and when a user chooses to install a feature, Windows Installer will determine which components must be installed to produce that feature.

As you will see, Windows Installer always installs or uninstalls a component as a whole piece; it monitors each component on the base of the GUID id, specified in the Component table.
Observation: If two components have the same ID, they are treated as multiple instances of the same component, regardless of their content. Only one instance of a component can be installed on the computer at a time.
Since components are often shared, packagers must follow strict rules when specifying the components of a feature or an application.
This is essential for the correct functioning of Windows Installer’s “component tracking mechanism”.
More information about Component Properties can be found here
The Rules to Organizing the Applications into Components
Components must be created so they can be installed and uninstalled without damaging other components. Uninstalling a component should not leave resources (such as unused files, registries, or shortcuts) behind. To make sure we don’t do this, we need to organize the resources we have into components following the next set of rules:
• You should never create two components that install a resource using the same name or the same location. When you duplicate a resource, we recommend using a unique name and location for every component.
• Two components can not have the same files as a “key path”. The key path must be a certain file or directory that belongs strictly to a component and allows Windows Installer to detect the component. If two components have the same file as a key path, Windows Installer will not know which of them is installed and which one is not. Two components can have the same directory as a key path, they just can’t have the same files.
• It’s not recommended to create components with resources that require to be installed in multiple directories on the user’s system. Windows Installer installs all the resources from a component in the same directory. It is not possible to install specific resources in subdirectories.
• Multiple COMs shouldn’t be included in the same component. If a component contains a COM, it must be a key path.
• More than one folder from a component shouldn’t be mentioned as a target for a shortcut.
Defining the Components
To organize an application into components, we recommend to follow the next steps:
1. Determine the hierarchical structure of all the directories and files (as well as other resources) used by the application.
2. Identify files, registries, shortcuts, and other resources used by various applications -these are provided by components that already exist, like Merge Modules.
3. Define new components for each .exe,.dll, and .ocx type file. Those files are defined as the key path for the component to which they belong -- and a GUID is attributed to each component.
4. Define a component for each file that is the target of a shortcut. Those files are set as the key path for the component to which they belong.
5. Group the remaining resources from all the directories since they should be delivered together. If a pair of resources need to be delivered separately in the future (in a newer package version), it is recommended for them to be put into separate directories. A component for each directory must be defined.
6. To improve the performance of a package, itt is a good practice to keep a small number of components. When Windows Installer has to rigorously verify the validity of the application, it will be divided into many components. In which case, any file can be chosen as a key path.
7. Add registries to already created components. Any registry that references a file must be included in the component that contains that file. All the other registriesmust be grouped logically together with the files that need them.
Component Table
Component Table
You can find a list of Components in the Component table which includes the following columns:

Component
• the primary key of the table which identifies the registered component
Component id
• a unique identifier of the GUID component
• all the letters from GUID are capital
• if the column is null, Windows Installer does not register the component and it can not uninstall or repair it.
Directory
• an external key of an entrance from the Directory table
Attributes
• this column contains a bit flag that specifies diverse settings of the component
Basic attributes:
0 = the component has a file as a key path (for more detailed information consult msi.chm)
4 = the component has a registry as a key path
32 = the component has an ODBC as a key path Settings (various values for different settings are being added the three basic attributes)
8 = a shared dll is being incremented
16 = Windows Installer reevaluates the condition from the Condition column at the reinstallation of the package
128 = Windows Installer does not install or reinstall a component if the key path of the component already exists.
Condition - this column contains a conditional statement, which controls if a component is or isn’t already installed; if the condition is null or evaluated as true, then the component is installed; if the evaluation condition is false, the component does not install.
Key path - this value points towards a file or directory which belongs to the component that Windows Installer uses to detect the component.
Two components can not share the same resource as a key path. If the column isn’t null, then the key path can be a key from the Registry table, ODBC Data Source, or Files depending on the value from the Attributes column.
If the column is null, you can use the directory from the Directory column as a key path.
To install an empty component or create an empty directory on the machine, you need to create an entry in the Create Folder table.
If the component contains WFP files, those must be specified as Key Path.
Package internal information Merge Module
Merge Modules provide a standard method through which software developers deliver components shared by Windows Installer. They are used to deliver shared resources: files, registries, etc to the applications in the form of a composed file.
A Merge Module is similar in structure to a simplified MSI. But, a Merge Module can not be installed by itself -- it must be integrated inside a package. There are free and paid solutions available for packagers that wish to use Merge Modules databases. You can create new Merge Modules using one of the multiple tools that have Windows Installer as a base (e.g. ORCA).
Advanced Installer allows you to easily create merge modules. Merge modules are the standard way for distributing Windows Installer components and setup logic. Learn how to achieve this with Advanced Installer here
When integrating a Merge Module inside an .msi package, all of the information and necessary resources for installing the components delivered in the Merge Module get incorporated into the .msi file.
A Merge Module is needed only for installing components, and it is not accessible to the user. Because all of the information needed for the installation of the components is delivered inside a single file, the Merge Module can eliminate conflicts caused by older versions, lack of certain registries, and incorrectly installed files.
The Merge Module is indicated by the .msm extension. It can not be installed on its own because it lacks some vital tables that are usually present inside a .msi.
Here are the specific tables for Merge Module:
• ModuleComponents
• ModuleDependency
• ModuleExclusion
• ModuleSignature
Taking it as a self-standing whole, a Merge Module should not be modified under any circumstances. All of the information they contain can be found inside the .msi.
Advanced Installer provides a powerful GUI to make it easy to create and manage Merge Modules. Check it out
Files
This is one of the few items that Windows Installer can not recreate or reproduce. Files can be stocked individually, near msi, and also compressed into a “cabinet” file (internal or external).
Advanced Installer offers a quick and easy way to manage your application files and shortcuts in the Files and Folders page.
Files use these specific tables: File Table and Removefile Table.
File Table
File Table
Let’s go through every column in the File Table:
• File - a unique identifying key of the file inside the msi database;
• Component - an external key from the first column of the Component table - this field identifies the component that controls the file;
• FileName - the name of the file
• File Size - the size of the file in bytes
• Version - the version of the file
• Language - the list of id for the language of the file, separated by commas
• Attributes - bit flags with specifications for the file
• Values
• Read-Only file
• Hidden file
•
System file
Sequence - the order of the cabinet files and the files inside the media
Note: Files can be versioned or unversioned.
During the installation, the Installer must determine if a file should or shouldn’t be installed based on the flag of the component where it is located.
Things get complicated when there is an existing file with the same name and placement on the machine (as the one installed from the MSI).
In these situations, the Installer verifies the file’s Version, the creation Date, and the Language. The Installer uses the following rules to determine the installation of said file:
• The higher version wins - the file with the highest version will always overwrite the existing file on the machine.
• File with a version - a file with a version will always be installed over an unversioned file.
• Product’s language favorization - if the installed file has a different language than the file already located in the machine, the file matching the language of the installed product will be prioritized.
• Keeping the multi-language file - it will keep the file that bears multiple languages regardless if it is the file being installed or the one already present on the machine.
Removefile Table
This table contains the lists of the files that will be erased.
You have the choice to erase files during installation, repair, or uninstallation of packages. If there is no file specified, the empty directory will be erased.
RemoveFile Table
Going through the RemoveFile columns:
• FileKey - the primary key for identifying entrances inside the database.
• Component - the external key in the first column from the Component table; this field refers to the component that controls the file that will be erased next.
• FileName - this column contains the name of the file that will be erased; if the column is empty, then the specified directory will be erased with the condition for it to be empty.
• Dir Property - the name of the property of the path directory where the file that will be erased is located. This property can be the name of a directory from the Directory table, the value of a property set up by a system search, or any other property that refers to a directory.
• IntallMode must be one of the following values:
1. it erases only when the associated component is installed
2. it erases only when the associated component is uninstalled
3. it erases any of the above-mentioned cases
Remarks: Inside the FileName column, you can use names of the files with characters like *(any character) or? (unknown character).

Example - *.tmp - all the files with the tmp extension.
Registries
Registries are a database that keeps different settings of the operating system.
They contain information and settings for all hardware devices, software products from the system, users, etc. When a user modifies certain settings from the Control Panel, extensions, system policies, or from other installed applications, those modifications are found inside registries.
The structure of the registries
Registries are divided into a number of logical sections or “keys”. They will have the name by which they were accessed with Windows API -- it starts with “HKEY”(Abbreviation from “Handle to Key”); often they are abbreviated with a name formed of 3-4 letters which starts with “HK”. The Windows operating system contains two hives: HKEY_LOCAL_MACHINE and HKEY_USERS, just for easy access to the information the Registry Editor shows 5 hives:
• HKEY_CLASSES_ROOT
• HKEY_CURRENT_USER
• HKEY_LOCAL_MACHINE
• HKEY_USERS
• HKEY_CURRENT_CONFIG
Each of those “keys” is divided into “subkeys”, which can contain other subkeys. Also, any key can contain entrances with different values.
The values of those entrances can be as following:
• String
• Binary
• DWORD (a number between 0 and 4.294.967.295[232-1])
• Multi-String
• Expandable
Registry keys are specified with a syntax similar to Windows paths, using backslashes to indicate the hierarchical level.
For example, HKEY_LOCAL_MACHINE\Software\Microsoft\Windows refers to the “Windows” subkey of the “Microsoft” subkey of the “Software” subkey of the HKEY_LOCAL_MACHINE key.
Values are not referenced by this syntax. Value names can contain “\”, leading to ambiguities when referenced using the above syntax.
The HKEY_LOCAL_MACHINE and HKEY_CURRENT_USER nodes have a similar structure, the applications look for their settings in the keys HKEY_CURRENT_USER\Software\Vendor’s name\Version\Settings name and if the settings are not found, they then search in the same location but using HKEY_LOCAL_MACHINE.
When writing the settings, the procedure is reversed - the settings are first written in HKEY_ LOCAL_MACHINE, but if they do not have rights to write here, then the setting gets stored in HKEY_CURRENT_USER.
HKEY_CLASSES_ROOT
Abbreviated HKCR, HKEY_CLASSES_ROOT stores information about registered applications, including file associations (extensions), and registries that help record the files used by applications.
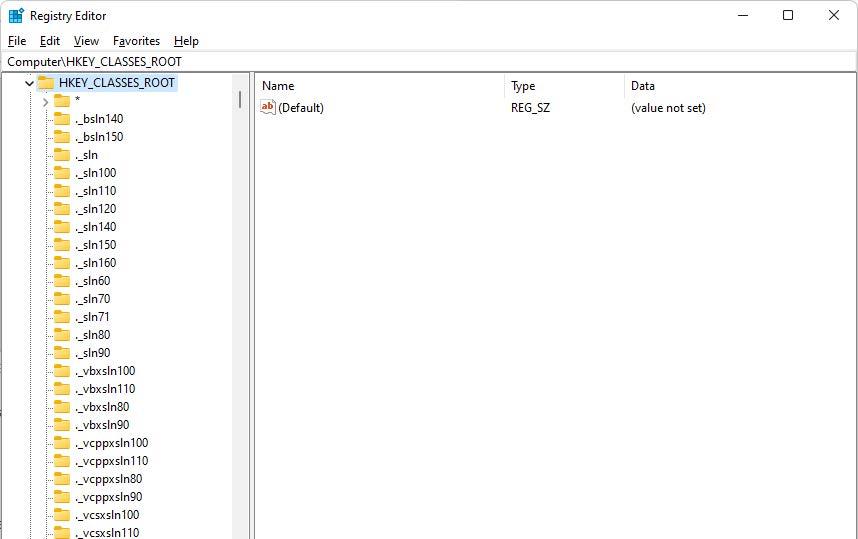
Starting with Windows 2000, HKCR is a compilation of HKCU\Software\Classes and HKLM\ Software\Classes.
If a certain value is in both subkeys, then the one in HKCU\Software\Classes is used.
Any change in HKEY_CLASSES_ROOT actually occurs in the corresponding CLASSES subkeys (either HKCU or HKLM). The same rule applies the other way around.
If a certain value is in both subkeys, then the one in HKCU\Software\Classes is used.
Any change in HKEY_CLASSES_ROOT actually occurs in the corresponding CLASSES subkeys (either HKCU or HKLM). The same rule applies the other way around.
HKEY_CLASSES_ROOT contains two types of data:
1. Keys and values that associate extensions with various programs (extension - a series of keys that begin with a period, except for the first key with *. These keys can contain any number of characters.)
HKEY_CLASSES_ROOT Registry
2. The configuration data of COMs, Visual Basic programs, etc. This configuration data uses:

• Program Identifiers (ProgID) - subkeys in HKEY_CLASSES_ROOT that define actions that can be performed by various programs on a file: bat file, doc file, inifile. Some identifiers associate programs with COMs.
COM Information in HKEY_CLASSES_ROOT Registry
• Other classes of information that uniquely identify a COM, such as an ActiveX control (CLSID, Interface, TypeLib, AppId, etc.). Ex: HKCR\ CLSID contains all class identifiers. Each identifier is a unique number of 16 bytes.
HKEY_CURRENT_USER
Abbreviated HKCU, HKEY_CURRENT_USER stores settings that are specific to the user currently logged in to the machine. HKCU is a mirror of the current user’s registry in HKEY_ USERS.
HKEY_LOCAL_MACHINE
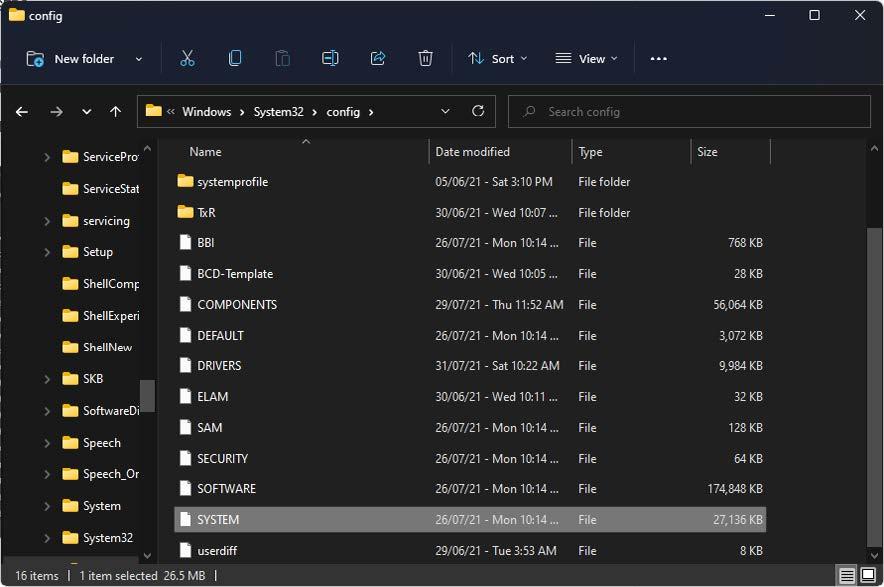
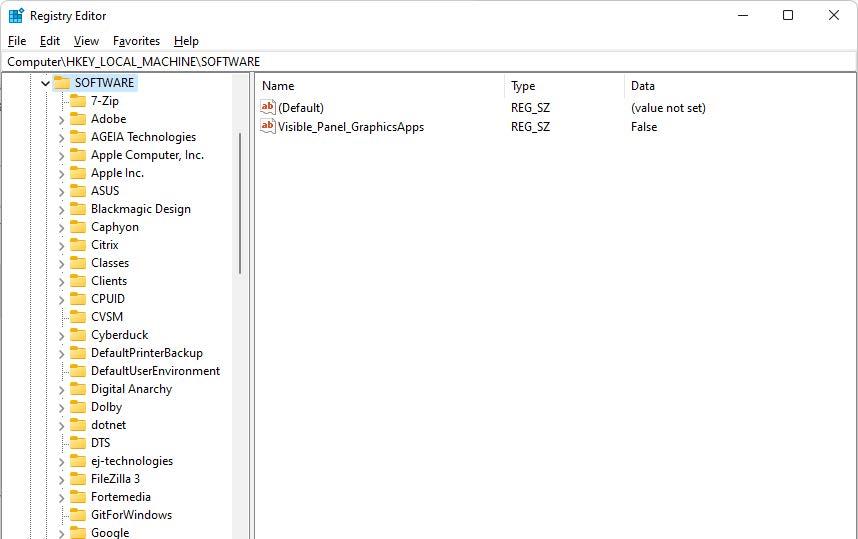
Abbreviated HKLM, HKEY_LOCAL_MACHINE stores settings that apply to all users on that machine. This key is found in the %SystemRoot%\System32\Config\system file on the NT-based version of Windows. Hardware information is located under the SYSTEM key.
HKEY_LOCAL_MACHINE storage file
HKEY_USERS
Abbreviated HKU, HKEY_USERS stores the corresponding HKEY_CURRENT_USER subkeys for each user registered on the machine.
Under HKEY_USERS, you can see which settings are applied for all users on the machine, while HKEY_CURRENT_USER only shows a small portion of the HKEY_USERS hive -- the portion for the current logged in user.
HKEY_CURRENT_CONFIG
Abbreviated HKCC, HKEY_CURRENT_CONFIG stores information during run; the information in this section is not permanently stored on the hard disk, but regenerated when the system starts.
Editing registry
Manual editing
You can manually edit the Registry using the regedit.exe or regedt32.exe programs. Note that negligent editing of registries often leads to irreversible errors, so it is recommended to always have a backup of them.
Regedit exe
Command-line editing
You can manipulate the Registry from the command line using the reg.exe utility-- which is included within Windows and can be downloaded separately.
Reg.exe utility
A reg file (a standard file for storing the registry that can be edited) can be imported from the command line, using the syntax “Regedit /s file”, where /s leads to the addition without asking the user for input (silent).
If the /s parameter is omitted, then the user will need to confirm the operation.
When using the /s regedit parameter, it does not return an error code if the operation fails as reg.exe does.
Registry permissions can also be manipulated through the command line using the subinacle.exe utility.
For example: subinacl.exe /keyreg HKEY_LOCAL_MACHINE\software /grant = Administrator

Gives full access to the administrator account on these keys.
Script editing
Some languages, such as VBScript, provide functions for editing/manipulating the registry.
To add a registry key with VBScript, you must use the RegWrite function:
Set WshShell = WScript.CreateObject(“WScript.Shell”)
WshShell.RegWrite “HKCU\KeyName\”,””, “REG_SZ”
To delete a registry key with VBScript, you must use the RegDelete function:
Set objShell = Wscript.CreateObject(“Wscript.Shell”)
objhell.RegDelete “HKCU\Control Panel\Desktop\MyValue”
To read a registry key with VBScript, you must use the RegRead function:
strLogonServer = “HKEY_CURRENT_USER\Volatile Environment\LOGONSERVER” strDNSdomain = “HKEY_CURRENT_USER\Volatile Environment\USERDNSDOMAIN”
Set objShell = WScript.CreateObject(“WScript.Shell”)
WScript.Echo “Logon server: “ objShell.RegRead(strLogonServer)
WScript.Echo “DNS domain: “ objShell.RegRead(strDNSdomain)
Location of registries
The Registry is stored in several files. Depending on the version of Windows you’re using, there are different files and different locations on the machine.
In Windows, the following files that store registry can be found in %SystemRoot%\System32\ Config:
• Sam - HKEY_LOCAL_MACHINE\SAM
• Security - HKEY_LOCAL_MACHINE\SECURITY
• Software - HKEY_LOCAL_MACHINE\SOFTWARE
• System - HKEY_LOCAL_MACHINE\SYSTEM
• Default - HKEY_USERS\Default
• Userdiff
Registry storage files location

The following files are found in the specific directory of each user:
%UserProfile%\Ntuser.dat - HKEY_USERS\<User SID>
%UserProfile%\Local Settings\Application Data\Microsoft\Windows\Usrclass. dat - HKEY_USERS\<User SID> _Classes
Registry specific tables
In MSI, you have two series of tables for Registry:
• specific tables that register COMs and extensions (AppId, Class, Extension, MIME, ProgId, TypeLib, Verb) and
• tables that add Services, drivers or ODBCs (ODBCAttribute, ODBCDriver,ODBCDataSource, ODBCSourceAtribute, ODBCTranslator, ServiceInstall).
The Registry table contains the rest of the registry that cannot be included in the tables mentioned above.
When populating registry tables, it is important to try to minimize the number of registries placed in the Registry table and maximize the use of advertised tables.
Windows Installer does not distinguish between the various keys in the registry table and cannot use the internal logic needed to take advantage of some Windows Installer advantages (such as “advertising” for example).
The tables containing the registry are interconnected and dependent on each other as seen on the diagram below. The figure also shows the Component, Feature, File and Icon tables. They are not part of the group of tables that contain the registry, but are entered in the schema to highlight the logic of the schema
Later in this book, we will discuss the second series of tables.
Extension
The Extension table contains information about file name extension servers that must be generated as a part of product advertisement.
Columns: Extension
• the extension associated with this entry
• must not exceed 255 characters
• the dot does not appear in the name of the extension
ProgId
• program ID associated with this extension
• external keys in the ProgId table

Feature
• foreign key in the Feature table
Component
• foreign key in the Component table
• this column controls the installation of the extension
MIME
• foreign key in the MIME table
• the content type associated with this extension
ProgId
This table associates program identifiers with class identifiers.
ProgID table
ProgID columns:
ProgId - program id or version-independent program id.
The progId will be written to the registry only if that progid has an associated CLSID (Class table, ProgId_Default column) or if the progid has an associated extension (Extension table, ProgId_ column), and that extension has an associated verb (Verb table).
ProgId_Parent
• defined only for independent version program ids
• is a foreign key in the ProgId column.
ProgId_Parent is defined for the version-independent program IDs. This field is the foreign key in the ProgId column. To define an independent program ID, the ProgId_Parent field must be filled into the corresponding ProgId.
Version Independent Program IDs are written to the registry only when they function in association with a CLSID. The ProgId’s child no longer needs to be associated with its CLSID (Class_ column in the ProgId table), only the parent needs to be associated with the CLSID.
Observation: The ProgId table only knows how to register one child of a ProgId. If a ProgId has more than one child and you try to register all of them in the table, you will see that the table records only one child. If you have this situation, register only one child in the table, and associate the other children with CLSID in the table and the HKCR registry\ product_name\CurVer write it from the Registry table.
Class
• a foreign key in the Class table
• this column must be null for an independent program id version
The Class_ column is the foreign key in the Class table. This column must be Null for a version independent program ID (ProgId son).

If this field is Null, the program ID will be registered via the Extension table (ProgId_ column), if that extension has an associated verb (Verb table). ProgIds registered in this way do not know how to register ProgId son
Description - a short description associated with this program id Icon
• foreign key in table Icon
• specify the icon associated with this program id
• this column must be empty for an independent program id version
IconIndex
• the icon index
• this column must be null for an independent program id version
Verb
This table associates various actions with the extensions in the Extension table.
Verb Table
Verb columns:
The Extension_ column represents the extension associated with that verb. This field is the foreign key in the Extension table.
The Verb column represents the verb associated with the respective extension. The following equivalent registry is written:
HKEY_CLASSES_ROOT\ProgId_name\shell\verb_name
The Command column represents the text displayed by the context menu of the extension (right click on the extension: e.g. Open, Edit, Print).
Argument column - in this field you can define a property in the MSI -- the value of the property will be written in the registry.
The following equivalent registry is written in:
HKEY_CLASSES_ROOT\ProgId_name\shell\verb_name

This registry has the value: the keypath file on the component to which the argument value extension belongs to.
For example, if the default registry has the value: “C:\Program Files\ABC\abc.exe” “%1” “C:\Program Files\ABC\abc.exe”
Then “C:\Program Files\ABC\abc.exe” is the path to the keypath file on the component that belongs to the extension, and “%1” “C:\Program Files\ABC\abc.exe” is the argument.
Observation: If you write [!Filename] in the registry (in the Argument column), it will write a long path. It seems that the installer does not know how to read the shortcut in this column, although its type is Formatted.
The Sequence column represents the sequence of commands associated with an extension. The verb with the smallest sequence becomes the default verb of that extension.
It appears in the registry as follows:
HKEY_CLASSES_ROOT\program_name\shell
Note: This table is referenced by the standard RegisterExtensionInfo and UnregisterExtensionInfo actions.
TypeLib
This table provides information for registering type libraries.
TypeLib Table
TypeLib columns:
The LibID GUID column identifies the TypeLib. In the registry it is written at the location:
HKEY_CLASSES_ROOT\typelib\{Identificator_TypeLib}
The Language column represents the language of Typelib. It must be a non-negative number (e.g. 0, 1).
The Version column represents the typelib version. “Minor version” and “Major version” are 4-byte encodings. “Minor version” is represented by the last 8 bits. “Major version” is represented by the 16 bits located in the middle.
Example:
If the version of a Typelib is 1.2 in the table we will write the value 258 for the following reasons:
• 2 in binary (base 2) is 10
• 1 in binary is 1
So in 4-byte transcription it would be: 00000000 00000000 00000001 00000010.If you turn this number into base 10, it will result in 258, the value to be written in the table (in the Version column).
In the registry, it will be written as follows:
HKEY_CLASSES_ROOT\typelib\{Identificator_TypeLib}\Typelib_Version
The Directory_ column is the foreign key in the first column of the Directory table. In the registry, it will be written as follows:
HKEY_CLASSES_ROOT\typelib\{Identificator_TypeLib}\ Typelib_Version\HELPDIR
The Feature_ column is the foreign key in the first column of the Feature table. This column specifies the Feature that must be installed for a TypeLib to be operational.
The Component_ column is the foreign key in the first column of the Component table. This column identifies the component whose keypath is the typelib to be registered. In the registry, it is written to the key <default> from the location:
HKEY_CLASSES_ROOT\typelib\{Identificator_TypeLib}\Typelib_version\0\Win32
The <default> registry in the above location has the value: path to the file that is the keypath of the component.
The Description column represents the description of the Typelib. In the registry, it is written in the key <default> from the location:
HKEY_CLASSES_ROOT\typelib\{Identificator_TypeLib}\Typelib_version
The Cost column represents the cost associated with registering a Typelib in bytes. This field must be a positive or null number.
Remarks:
This table is referenced by the standard actions RegisterTypeLibraries and UnregisterTypeLibraries. The standard RegisterTypeLibraries custom action needs the typelib language (Language column in the TypeLib table) to be defined correctly, otherwise, the installer will fail to register the Typelib.
It is possible to register a Typelib without mentioning its version in the table. If you have a TypeLib with version c.0 (letter.0), you can register it from the table. You can leave the Version column Null. The installer ignores what is completed in this column. No matter what you write in this column, the registry is populated with what you need (i.e. the actual version of Typelib).
If you fill in a description that is different from the one in the ActiveX file in the Typelib table (in the Description column), the registry will be populated with the description from the ActiveX file -- so practically the Description column is ignored.
If we do not specify the directory that Typelib belongs to in the Directory_ column, then the HELPDIR key will have no value. So, this column must be filled. The installer will not ignore this column.
MIME
This table associates a “MIME context type” with a CLSID or extension.
Mime Table
The ContentType column represents the MIME content identifier. It normally appears as a type/format.
The Extension_ column is the foreign key in the Extension table and associates a MIME with an extension.

The CLSID column can be a foreign key in the CLSID table or it can be a CLSID that already exists on the machine.
In the registry it is written at:
HKCR\MIME\Database\Content Type\[MIME_Name]
HKCR\MIME\Database\Content Type\[MIME_Name]\Extension
If MIME is associated with a CLSID, the CLSID will be created at the HKCR\MIME\Database\ Content Type\[MIME_Name] location.
Remarks:
A MIME must have an associated extension (Extension_ column) to be written to the registry.
This table is referenced by the standard registerMIMEInfo and UnregisterMIMEInfo custom actions.
SelfReg
This table provides information for self-registering files.
SelfReg Table
File_ - External key into the first column of the File table indicating the module that needs to be registered.
Cost - The cost of registering the module in bytes. This must be a non-negative number.

Class

This table provides information for registering class identifiers or COM objects
Class Table
A class will not be registered on the machine if one of the CLSID, Context, Component_ and Feature_ fields is not present.
The CLSID column in the table will write the following registry key on the machine:
HKCR\CLSID\<GUID>
The ProgId_Default column represents the Program ID associated with the CLSID. This column is the foreign key in the ProgID table.
The key will be created in the registry:
HKCR\CLSID\<GUID>\ProgID
A <default> key with the name of the ProgID in the ProgID table will be written in the ProgID key.
The Description column represents the description associated with the CLSID. In the registry, the associated key is the following:
HKCR\CLSID\<GUID>\<default>
The <default> key has the value in the Description column.
Note: The son of ProgID in the ProgID table will be written in the registry under the following key:
HKCR\CLSID\<GUID>\VersionIndependentProgID\<default>
The Context column will write one of the following keys, depending on the context:
HKCR\CLSID\<GUID>\LocalServer (16-bit)
HKCR\CLSID\<GUID>\LocalServer32 (32-bit)
HKCR\CLSID\<GUID>\InprocServer (16-bit)
HKCR\CLSID\<GUID>\ InprocServer32 (32-bit)
The AppId_ column contains a foreign key from the AppId table. It appears in the registry as follows:
HKCR\CLSID\<GUID>\APPID
The AppID registry key has the following value: The AppId GUID in the AppId table.
The FileTypeMask column appears in the registry in the following key: HKCR\FileType\<GUID>
If there are several patterns, they must be delimited by a semicolon (;) , and numeric subkeys will be generated dynamically: 0,1,2, etc.
The Icon_ column represents the icon associated with the CLSID ( which represents a foreign key in the Icon table, where the icons are registered binary as streams). It appears in the registry as follows:
HKCR\CLSID\<GUID>\DefaultIcon
The <default> key in the path above will have the following value:
C:\WINDOWS\Installer\[ProductCode]\icon_name_from_Icon_Table, IconIndex
The IconIndex column represents the icon index. It can be NULL, and there must only be positive numbers.
The Feature column represents the Feature to which the CLSID belongs (foreign key in the Feature table).
The Component_ column specifies the component to which the respective class belongs to. The keypath on this component represents the file in which that class will type.
DefInprocHandler column - this field must be Null if in the Context field we have InprocServer or InprocServer32 (if it is not Null, we will have validation errors).This field can have the following values:
Value Description
Non-numeric value
The installer treats a non-numeric value from the DefInprocHandler field as a system file that serves as the “process handler” specified by the registry key: HKCR\CLSID\<GUID>\InprocHandler32
Null The Argument and DefInprocHandler fields can be Null for LocalServer and LocalServer32 contexts.
1 The default 16-bit process handler (ole2.dll); In the registry, the default key in HKCR\CLSID\<GUID>\InprocHandler will have the value ole2.dll.
2 The default 32-bit process handler (ole32.dll); The default registry key in HKCR\CLSID\<GUID>\InprocHandler32 will have the value ole32.dll.
3 It will create both the 16-bit and the 32-bit process handler; The registry keys are: HKCR\CLSID\<GUID>\InprocHandler and HKCR\ CLSID\<GUID>\InprocHandler32
Argument column - an argument appears at a CLSID only if the context of that class is LocalServer or LocalServer32 (otherwise validation errors will occur). In this field, you can add a defined property in the MSI which will write in the following registry key: HKCR\CLSID\<GUID>\LocalServer or HKCR\CLSID\<GUID>\LocalServer32
Remarks:
If in the context of a class we have LocalServer or LocalServer32, then the value of the default registry in HKCR\CLSID\<GUID>\LocalServer or HKCR\CLSID\<GUID>\ LocalServer32 will be the shortcut to the file that is a keypath on the component (in which case, the attribute of the respective class is set to 0).
If in the context of a class, we have InprocServer or InprocServer32, then the default registry value in HKCR\CLSID\<GUID>\InprocServer or HKCR\CLSID\<GUID>\ InprocServer32 will be a long path to the file that is a keypath on the component.
If you write [!Filename] in the Arguments column, then a long path will be written in the registry.
Attributes column - if this field is set to 0 or Null, then the registry will be written with the keypath to the file. If the field is set to 1, then only the name of the file will be written in the registry.
AppId
To register an AppID in the registry, it is enough for a single field to be filled in, namely the AppId field (it is the only field in this table that cannot be Null). However, the AppID must be associated with a CLSID (the AppId column in the Class table must be completed).
The AppID table is used to register various configurations for DCOMs
AppID Table
AppId column - appears in the registry : HKCR\AppID\<GUID_AppID>\ and in the key GUID_ AppID in HKCR\CLSID\<GUID_CLSID>\ (The AppId is associated with the CLSID in the Class table, the AppId column).
Observation: In order for an AppId to be registered in the HKCR\AppID\<GUID_AppID>\ registry key, that AppId must be associated with a CLSID in the Class table (AppId column).
RemoteServerName column - in this field you can add the value of a property. The RemoteServerName key is written to HKCR\AppID\<GUID_AppID>\
LocalService column - in the registry, the LocalService key will be written in HKCR\ AppID\<GUID_AppID>\
ServiceParameters column - in the registry, the ServiceParameters key will be written in HKCR \ AppID \ <GUID_AppID> \.
DllSurrogate column - the DllSurrogate key will be written to HKCR\AppID\<GUID_AppID>\ in the registers.

ActivateAtStorage column - in the registry, the ActivateAtStorage key will be written in HKCR\ AppID\<GUID_AppID>\. If the value of this field is 0, the ActivateAtStorage key will not be written to the registry. If the value of this field is 1, the ActivateAtStorage key will take the value Y (“ActivateAtStorage” = “Y”).
RunAsInteractiveUser column - the RunAs key will be written to HKCR\AppID\<GUID_ AppID>\ in the registry. If the value of this field is 0, the RunAs key will not be written to the registry. If the value of this field is 1, the RunAs key will take the value InteractiveUser (“RunAs” = “Interactive User”).
Observation: The AppId table does not know how to register the Default key in HKCR\ AppID\<GUID_AppID>\. If this key has a certain value, you must register it from the Registry table.
Registry
This table contains the registry information required for the applications.
Registry Table
Registry Table Columns: Registry - the primary key that uniquely identifies the line Root
• the predefined section of the registry
• Root can have one of the following values:
Key - the path of the registry to be created
Name
• the name of the register to be created
• If this column is null, the date in the Value column is written in the default register of this register.
Value - the data contained in the register Component
• foreign key in the Component table

• this component controls the creation of the register
RemoveRegistry
RemoveRegistry contains information that the application needs to delete during installation.
RemoveRegistry Table
RemoveRegistry Columns:
RemoveRegistry - unique identifier for the line Component
• the foreign key in the Component table
• this component controls the deletion of the register referred to in the entry
Root - can have one of the following values:
Key - the path of the registry to be deleted
Name - the name of the registry to be deleted
Advanced Installer offers an easy way to add/edit your registry entries from the Registry Page
INI Files
Initialization files are configuration files that contain easily modifiable settings for applications.
The INI file format is: [section 1] ; comments on section 1
Var1 = abc
Var2 = 123 [section 2] ; comments on section 2 Var1 = 321 Var2 = xyz
Each section declaration begins with “[“ , and ends with “]”
Parameters are in the form var1 = abc, and are made up of a key (var1), the sign = and a value (abc).
All lines starting with comments are considered and ignored; Windows Installer ignores all lines starting with a semicolon (;)
Specific Tables for INI Files
IniFile
This table contains the information needed to set up an INI file.
IniFile Table
IniFile Columns:
IniFile - the primary key for this table
FileName - the name of the .ini file where the information will be written
DirProperty - the directory path that contains the .ini file; this property can be the name of a directory in the Directory table, a property set by a search system, or any other property that represents a path.
If this field is left blank, the INI file is created in the directory specified by the WindowsFolder property.
Section- section of the INI file
Key - key in sections
Value - the value to be written
Action - the type of changes to be made:
• 0 - create or update an INI file
• 1 - creates an entry in an INI file (only if the entry does not already exist)
• 3 - create a new entry or update an entry that already exists with a value, separating it with:
Component - foreign key in the first column of the Component table, and refers to the component that controls the installation of values from the INI file
RemoveIniFile
This table contains the information that the application needs to delete from an INI file
RemoveIniFile Table
RemoveIniFile Columns:
RemoveIniFile - the primary key for this table
FileName - the name of the .ini file from which the information will be deleted
DirProperty - the directory path that contains the .ini file; this property can be the name of a directory in the Directory table, or a property set by a search system or any other property that represents a path.
Section - section of the INI file
Key - key in sections

Value - the value to be deleted (mandatory when the Action field is 4)
Action - the type of changes to be made:
2 - delete the entry from the INI file
4 - delete a value from an entry in the INI file
Component - the foreign key in the first column of the Component table, which refers to the component that controls the deletion of values from the INI file
Notes: The information in the INI file is deleted when the attached component is selected for uninstallation.
If the Directory column is empty, the location of the INI file is the one specified by the WindowsFolder property.
Deleting the last value in a section leads to deleting the respective section. There is no other solution to erase an entire section than to erase all its values.
Caution: The Windows operating system uses a number of INI files to set up various configurations.
These files are WIN.INI, SYSTEM.INI, PROTOCOL.INI, PROGMAN.INI, CONTROL.INI, WINFILE.INI, MSMAIL.INI, SHARED.INI and SCHDPLUS.INI.
Some applications add sections and entries to the WIN.INI file, and INI files to the Windows directory. It is important to take great care when adding/deleting values from these files.
Advanced Installer makes it easy to add INI files, edit INI files, and offers an advanced solution for importing multiple INI files into the project
Shortcuts
Shortcuts are pointers to certain files and can be placed on the desktop or other locations.
Classification of shortcuts
A. Advertised
• When running an advertised shortcut, Windows Installer first checks that all the components of the respective feature are installed ( before running the file).
• The target of the shortcut must be present in the package.
B. Non-advertised
• When running a non-advertised shortcut, Windows Installer does not check if all the components of the respective feature are installed (before running the file).
• A non-advertised shortcut can launch any file, regardless of whether it is installed by the current package, already exists on the system or is on another computer.In practice, the idea is that if the target is present in the package, the shortcut must be advertised.
Shortcuts specific tables
Shortcut Table
This table contains information that the package needs to create shortcuts.
Shortcut Table
Shortcut Table Columns:
Shortcut - the key that uniquely identifies this entry in the database
Directory: - a foreign key in the first column of the Directory table
- this column specifies the directory where the shortcut is created
Name: - the name of the shortcut as it appears on the system
Component:
• a foreign key in the first column of the Component table
• Windows Installer uses the status of the component to determine if the shortcut was created or deleted
• this component must have a valid key for the shortcut being created; if the target column contains the name of a feature, the file that the shortcut launches is the “key” file to that component.
Target:
• the target of the shortcut ( the file it calls )
• for an advertised shortcut, this column must be a foreign key entered in the first column of the Feature table; the file executed by the shortcut is the key file of the component listed in the Component column. When the shortcut is run, Windows Installer checks if all the components in that feature are installed before running the file.
• for non-advertised shortcuts, Windows Installer evaluates this field as a formatted character string. The field must contain references recognized by Windows Installer (property names to be passed between “brackets” []), which will expand in the path to files / directories.
Arguments: - a list of arguments needed for the shortcut
Description: - a short description of the respective shortcut
Hotkey:
• the hotkey of the respective shortcut
• must be a positive number
• it is recommended not to be set by the packager, to avoid conflicts with the existing shortcuts on the system
Icon: - a foreign key in the first column of the Icon table
IconIndex - the icon index - must be a positive number
ShowCmd - how to display the shortcut run executable window
• one of the following values can be used
1 - ShowNormal 2 - ShowMaximized 3 - ShowMinimazed
WkDir:
• the name of a property that contains the path of the shortcut working directory
• preferably the directory where the shortcut target is located
Shortcuts can be easily created with Advanced Installer -- and easily modified.
Fonts
Fonts are types of recordable files. The Font table contains information for registering fonts on the system.
The Font table has the following columns:

Font Table

File_ - foreign key from the File table. It is recommended that the registered font is located in the FontsFolder (C:\Windows\Fonts)
FontTitle (Font name) - it is recommended to leave this column blank for True Type fonts because the installer can place the correct name from reading the title in the file. The title entered must be identical to the font name in the file. For fonts that do not have the names embedded in the file, this column must be completed (eg .fon files)
When installing an MSI, this table creates a registry in HKEY_LOCAL_MACHINE\SOFTWARE\ Microsoft\Windows NT\CurrentVersion\Fonts - with the font name and the value of the file.
Font registration in the registry
Advanced Installer automatically detects and registers fonts, also offering an easy GUI to control this.
Services
Services are programs that run individually in the background. This can be said of many programs, such as anti-viruses. The difference is that the services load and run regardless of whether someone logs into the system or not, unlike a program launched from the StartUp folder.
You can view Services using the MS Configuration Utility and running the msconfig.exe executable.
MS Configuration Utility

It offers rather limited information, in the sense that you can only see which services are turned on and which are not.
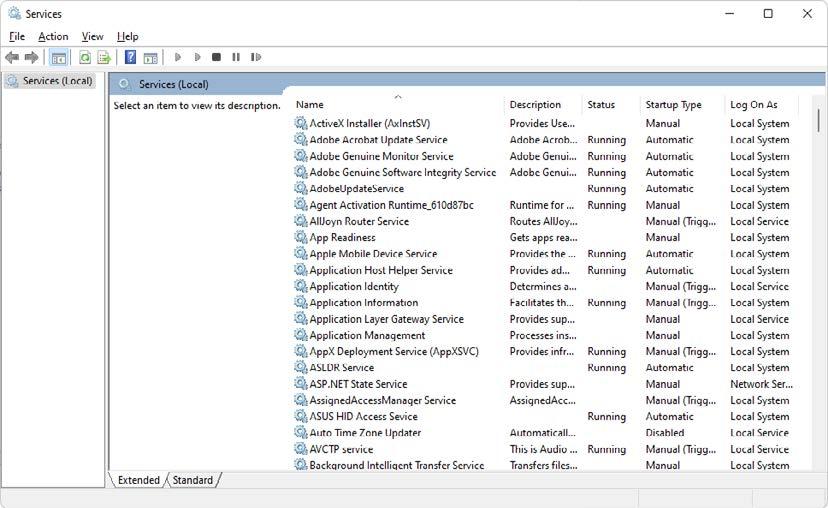
Another way to view the service is through services.msc, equivalent to the Control Panel\ Administrative Tools\Services.
Services.msc
This method provides much more information about services, such as name, short description, status, etc.
Service Properties and Settings
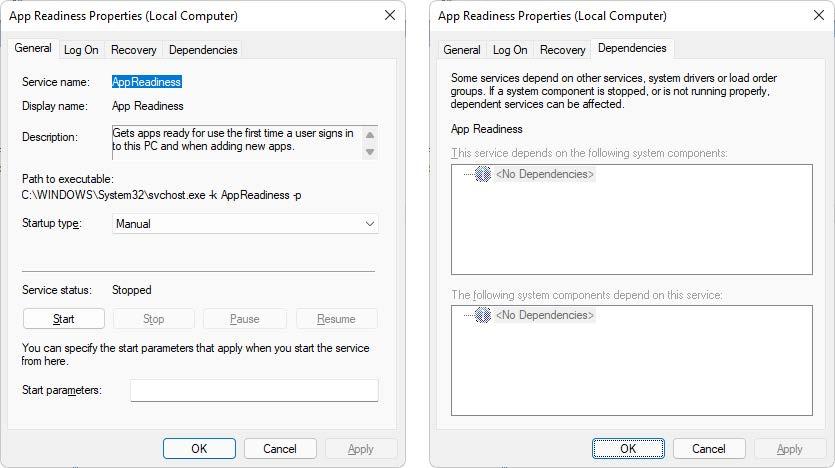
Microsoft has assigned a display name for each service. It is the name that appears in the name column of the Windows Services window.
Attributes: Service Name: The name of the service
Process Name/Path to execute: The name of the process that runs when the service is enabled.
Dependencies: The list of additional services that are required when the service is running.
These services are found “physically” in the machine registry: HKEY_LOCAL_MACHINE\ SYSTEM\CurrentControlSet\Services.
Services configuration in the Registry

Classification of services
• automatic (start with the operating system)
• manuals (are started by applications/users)
Service status:
• Start
• Stop
• Disable
Services-specific tables
ServiceInstall
This table is used to install services:
ServiceInstall Table
ServiceInstall Columns:
Name
• the name of the service, internal to windows
• must have a maximum of 256 characters
Display
• the name that appears to the user
• maximum 256 characters
ServiceInstall - primary key for this table
ServiceType
• the type of service
• accepted values:
0x00000010 - Win32 service, running its own process
0x00000020 - Win32 service, which streamlines a process
0x00000100 - Win32 service, which interacts with the desktop
StartType
• this column specifies when the process starts
• These are the accepted values:
2 - the service starts with the system (automatic)
3 - the service starts on request (manual)
4 - specify a service that cannot be started (disable)
ErrorControl
• this column specifies the action that Windows Installer must take if the service fails
to start
• accepted values:
0x00000000 - creates an error log and continues with the service start operation
0x00000001 - creates an error log, displays a message, and continues with the service start operation
0x00000003 - creates an error log (if possible) and restarts the system
LoadOrderGroup
• this column contains the order in which services will be started within a service group (if our service is also part of it)
• when left empty, it means that our service is not part of any group
Dependencies
• a list of services that must be started before starting the service from this entry
• services are separated by [~]
StartName
• the service starts with the name specified in this column
• if it has no value then the service uses the LocalSystem account to run
Password - the password of the account with which the service runs
Arguments - this column contains any arguments needed by the service to run
Component
• a foreign key in the Component table
• to create the service attached to this component, it must have the executable that is the basis of the service as key
Description - a description of the service being created
Virtually all the values populated by these columns correspond to the values in the registry:
HKEY_LOCAL_MACHINE\SYSTEM\CurrentControlSet\Services\Service_Name
From this table, you can install certain types of drivers, including Non-Plug & Play. These drivers are entered in the table similar to the services, except that in the column for the type of service (ServiceType column) other values are entered as follows:
0x00000001 - driver service
0x00000002 - file system driver service
The startup type of the driver also differs from the services. Non-plug & play drivers have 4 boot modes: Automatic, Boot, Demand, System. These startup types can be set from the table as for services in the StartType column as follows:
• Automatic - set the value to 2
• Boot - value 0
• Demand - value 3
• System - value 1
If you want the driver to be set as disabled, then add the value 0 in the StartType column. On the machine, you can check the functionality of this type of driver from the DeviceManager to Non-Plug & Play Drivers (to see Non-Plug & Play Drivers, you must first access the View\Show hidden devices menu).
Attention: With the help of this table, the service/driver is installed but it does not start. That is why it is mandatory to use it along with the ServiceControl table.
For automatic services, you must perform an installation control service (start only for automatic ones) and a service control for uninstallation (stop and delete, both for automatic and manual ones).
ServiceControl
This table is used to control the installation and uninstallation of services.
ServiceControl Table
ServiceControl Columns:
ServiceControl - the primary key of this table
Name - the name of the service to be controlled
Event
• the operation to be performed on the service
• when a service is stopped, all services that depend on it are also stopped
• when a service is deleted, Windows Installer stops it
• values accepted at installation only:
1 - the service starts
2 - the service stops
8 - the service is deleted
• values accepted only when uninstalling: 16 - the service starts 32 - the service stops 128 - the service is deleted
Arguments
• a list of arguments for starting services
• arguments are separated by the reserved character [~]
Wait
• tells the system to “wait” before an actionLeaving this field blank or entering the value 1 tells Windows Installer to wait a maximum of 30 seconds for the service to follow an action
• it can be used when you want to allow additional time for critical events to return an error code
• the value 0 means that Windows Installer waits until SCM (Service Control Manager) reports that the service is in a standby state
Component - foreign key in the Component table
Note: With the Name column, you can start, stop, or delete services not created by our package.
With Advanced Installer you can easily install, control and configure Windows native services from the Services Page. More information about configuring services using Advanced Installer can also be found here, and in the service control properties.
ODBC (Open DataBase Connectivity)
As its name implies, an ODBC (Open DataBase Connectivity) connects your application to a variety of database management systems. Essentially, it allows applications to access a database (such as Access databases, dBase or Excel, etc.).
Classification of ODBC
• UserDSN: is a “data source” that is specific to a particular user; it is saved on the machine but is only available to the user who created it.
UserDSN ODBCs are registered in the user-specific registry:
HKEY_CURRENT_USER\ODBC\ODBC.INI\Odbc Data sources
• SystemDSN: unlike UserDSN, it is saved locally but is not specific to a user.
Using a SystemDSN, any user who connects to a computer is allowed to access the data source.
SystemDSN ODBCs are registered in the machine-specific registry:
HKEY_LOCAL_MACHINE\SOFTWARE\ODBC\ODBC.INI\Odbc Data sources
• Drivers are libraries that implement functions for ODBC API; each driver is specific to a database management system.
Drivers practically play the role of a “translator” between an application and a database. The main utility of these drivers is that they allow us to interact with the databases, without the need to have a client program (provided by the database manufacturer).
ODBCs are managed through the ODBC Data Source Administrator, which is accessed from the Control Panel\Administrative Tools\Data Sources (ODBC).
ODBC Utility
As specified above, ODBC information is stored in the registry:
HKEY_LOCAL_MACHINE\SOFTWARE\ODBC\ODBC.INI
HKEY_LOCAL_MACHINE\SOFTWARE\ODBC\ODBCINST.INI
HKEY_CURRENT_USER\ODBC\ODBC.INI
HKEY_CURRENT_USER\ODBC\ODBCINST.INI,
Keys with ODBCINST.INI contain information about the drivers installed on the machine, and those with ODBC.INI contain information about the DSN on the machine.
You can also access information about ODBCs in the INI, ODBC.INI, and ODBCINST.INI files present in C:\WINDOWS.

ODBC specific tables
ODBCDataSource
This table contains the data sources related to the application
ODBCDataSource Table
ODBCDataSource Columns:
DataSource - input identifier
Component - foreign key in the Component table
Description - description of the source data
DriverDescription - the driver associated with the data source

Registration - how the data source is registered: 0 = per machine 1 = per user
ODBCSourceAttribute
This table contains information about the data attributes of the sources.
ODBCSourceAttribute Table
DataSource - datasource identifier, the primary key for the table
Attributes - attribute of the source data, the primary key for the table

Value - the value of the attribute
The ODBCDataSource and ODBCSourceAttribute tables install the DSN on the machine with all its information (both of these tables must be populated for a DSN to be installed).
The changes made by these two tables can be found in the HKEY_LOCAL_MACHINE\SOFTWARE\ODBC\ODBC.INI\DSName.
Note: A DSN from the corresponding tables can be placed even if the driver associated with the DSN is not in the package.
ODBCDriver
This table contains the ODBC drivers that belong to the application.
ODBCDriver Table
Driver - the driver identifier, the primary key for the table
Component - the foreign key in the component table
Description - the driver description
File - the dll file that generates the driver, foreign key in the File table
File_Setup - a driver-specific dll setup file, foreign key in the File table
ODBCAttribute
This table contains the ODBC drivers that belong to the application.
ODBCAttribute Table
Driver - the driver identifier, primary key for this table, foreign key in the table
Attributes - the attribute name, the primary key for the table

Value - the value of the attribute
The changes that these two tables make on the machine are the following:
1. HKEY_LOCAL_MACHINE\SOFTWARE\ODBC\ODBCINST.INI\Driver_name - the entry written from the ODBCAttribute table, that contains all the driver description registry.
2. HKEY_LOCAL_MACHINE\SOFTWARE\ODBC\ODBCINST.INI\ODBC Drivers - where a stringtype registry is created with the name of the driver and the value Installed.
3. The C:\Windows\ODBCINST.INI file is altered with the extra driver.

To check a driver (if it is installed correctly), you can go to the Control Panel\ Administrative Tools\Data Source (ODBC).

For further testing, you can add a DSN (user or system) by choosing the respective driver to set the DSN.
Note: An ODBCDriver cannot be set from the corresponding tables unless the required files (DriverDll and SetupDll) are in the package.
ODBCTranslator
This table contains ODBC translators that belong to the application.
ODBCTranslator Table
Translator - the name of the translator, the primary key for the table
Component - the foreign key in the component table
Description - the description of the translator
File - the dll file, the foreign key in the File table
File_Setup - the dll setup file, the foreign key in the File table
The ODBCTranslator table writes in the following registry:
1. HKLM\SOFTWARE\ODBC\ODBCINST.INI
2. HKLM\SOFTWARE\ODBC\ODBCINST.INI\ODBC Translators
You can find a translator in the DSN (Administrative Tools\Data Sources) dialog where you want to load the translator. The display mode of a translator differs depending on the driver.
Easily manage your ODBC connections with Advanced Installer by using the ODBC Page.
System variables
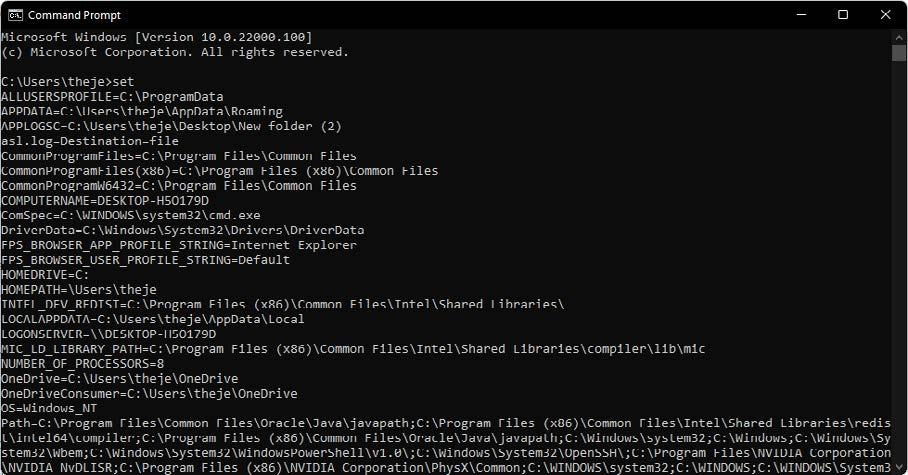
System variables are strings that replace longer data references. They already exist defined on the system and you can view them using the “set” command in CMD.
Set Command
You can also access them from System Properties\Advanced\Environment Variables.

Environment Variables View
Classification:
User variables - found in: HKEY_CURRENT_USER\Environment
System variables - found in:
HKEY_LOCAL_MACHINE\SYSTEM\CurrentControlSet\Control\Session Manager\ Environment
The system variables can be used directly in the package, using the reference type [%ENVVAR].
You can also define new variables to be used by the runtime package.
Tables specific to system variables
Environment
Environment Table
Environment Table columns:
Name: The name of the system variable: the system variable is written or deleted depending on the symbols that appear in front of the name -- there is no specific order for these symbols.
Prefix Description
= Creates the variable if it does not exist, and sets it to the given value. If the variable already exists, just set it to the given value.

+ Creates the variable if it does not exist, and sets it to the given value. If it already exists, it has no effect on the value of the variable.
Deletes the variable when the component is uninstalled. This symbol can be combined with any prefix.
! Deletes the variable during the component installation. Windows Installer deletes a variable during installation if the name and value of the variable match the entries in the Environment table.
If you want to delete a system variable regardless of its value, it is recommended to use the syntax “!”, and leave the Value column blank.
Prefix Description
* This prefix is used by Microsoft Windows NT / 2000 to indicate that the name refers to a system variable (not a user). If no asterisk is present, Windows Installer writes the variable as a user variable. Microsoft Windows 95/98 ignores the asterisk and adds the variable to the autoexec.bat file. This symbol can be combined with any other prefix. It is recommended that packages installed “per-machine”, write only system variables (not user), using the * symbol in the name.
=- The variable is set at installation and deleted at uninstall. This is normal behavior.
!- Deletes variables when installing or uninstalling.
=+,!+,!= These prefixes are not valid.
Value:
• this column contains the value to be set as a formatted string;
• if this column is empty, the variable is deleted; if the column is empty and the “-” symbol appears in the name column, the variable is deleted when the component is deleted.
• to add a new value to an already existing one, the value in this column must end with the prefix “~” and the separation character “;”. ex: [~]; Value
• to add a new value to an already existing one, the value in this column must begin with the suffix “~”, accompanied by the separate character “;” ex: Value; [~]
• if the string [~] is not present in this field, the value in this column represents the entire value to be set or deleted.
• each row contains only one value; values such as Value; Value [~] are not recommended due to unpredictability
• if the field name has the character “+” as a prefix, then you must use the string [~] in the value column; the two must be used together
Environment: - the key that uniquely identifies the record
Component: - a foreign key from the first column of the Component table; this column controls the installation of the system variable through the component
The environment variables can be easily managed in Advanced Installer in the Environment Variables Page.
Properties
Properties are global variables that Windows Installer uses during installation, with values defined either in the package or by the user.

Properties Table
Property classification
Private properties:
• used internally by Windows Installer and defined directly in the package
• their name includes lowercase letters
• the value of these properties cannot be overwritten at installation by using commands
Public properties:
• defined inside the package, they can be changed by commands, applying a transform, or through a graphical interface.
• their names must not contain lower case letters
• usually, they are set during installation (eg INSTALLEVEL)
Restricted public properties:
• for security reasons, the author of a package may restrict the user from modifying public properties
• if all of the following conditions are true, a user who is not a system administrator may overwrite an approved list of restricted public properties
• The system is not Windows 2000.
• The user is not a system administrator.
• The package is installed with elevated privileges.
There is a predefined list of restricted properties and, listed below, are the most important: ALLUSERS
INSTALLLEVEL
LIMITUI REBOOT
REINSTALL
REINSTALLMODE
A software packager can extend this list (by adding these properties as the value in this property) to include other public properties with the “SecureCustomProperties” property. These five properties are required in a package:
1. ProductCode - a unique identifier of the GUID package
2. ProductLanguage - the language that the installer uses in the LANGID graphical interface
3. Manufacturer - the name of the package manufacturer
4. ProductVersion - the application version in string format (form: major.minor.build = 255.255.65535)
5. ProductName - the name of the application to be installed (maximum 63 characters)
The required properties must be listed in the Property tables. Properties that have a null value are not listed in this table. Instead, they can be set directly through the program, custom actions, or the command line. You can also use Properties in conditional statements.
The Most Common Properties used in Packages
ALLUSERS
The ALLUSERS property determines where the package configurations are stored.
If the ALLUSERS property is not set, Windows Installer performs a per-user installation.

ARPNOREMOVE
If this property is set, the remove button will not appear in Add\Remove Programs. Its default value is 0.
ARPNOREPAIR
When this property is set, the repair button in Add\Remove Program is not displayed. The default value is 0.
ARPNOMODIFY
By setting this property, the change button in Add\Remove Program is not displayed. The default value is 0.
ARPSYSTEMCOMPONENT
When this property is set, the package is not displayed in Add\Remove Program.The default value is 0.
INSTALLEVEL
The INSTALLEVEL property sets the base level for all features whether they are installed or not; a feature is installed only if the value entered in the LEVEL field (in the Feature table) is less than or equal to the INSTALLEVEL property value.
If no value is specified, then it has the default value 1, and if the value in the LEVEL field is 0, that feature is neither installed nor displayed in the graphical interface.
LIMITUI
Setting this property leads to a very limited (basic) graphical interface. The default value is 0.
REBOOT
Setting this property suppresses the system restart request.
REBOOT value Description
Force The UI always prompts the user with an option to reboot at the end of the installation. If there is no user interface, the system automatically reboots at the end of the installation.
Suppress
Suppress prompts for a reboot at the end of the installation. The installer still prompts the user with an option to reboot during the installation whenever it encounters the ForceReboot action. If there is no user interface, the system automatically reboots at each ForceReboot. Reboots at the end of the installation are suppressed (for example the ones caused by an attempt to install a file in use).
ReallySuppress
Suppress all reboots and reboot prompts initiated by ForceReboot during the installation. Suppress all reboots and reboot prompts at the end of the installation. It suppresses both the reboot prompt and the reboot itself. For example: It suppresses reboots caused by an attempt to install a file in use at the end of the installation.
ROOTDRIVE
Setting this property specifies the default drive of the application installation location. The value of this property must end with “\”, for example “C:\”.
More information about Windows Installer Properties and how you can edit them with Advanced Installer can be found here.
Running custom code from the package
Custom Actions
Windows Installer comes with a number of standard actions. These actions are basically pieces of code included by default in the operating system to handle operations like installing files, registry and so on. But in some cases, these are not enough. When you need more control, (e.g. when launching an executable during installation on the machine, calling a special function from a dll, etc), you can resort to .Dll, .js, .vbs, .exe, and .ps1 files as sources of various custom actions.
In these scenarios, it is most common to use VBS files, run by the Windows Scripting Host service, which is available with any Windows version.
You can add these types of files as binaries included directly in the package, and pass the source code of VBS directly in a custom action.
Once you have chosen the type of file and the reference method, you must schedule the custom action in a running sequence (you cannot run a file if it has not been copied to the machine yet).
Custom Actions sequence scheduling
All the standard and custom actions from an MSI package are grouped in several sequences. Each of them must be scheduled as part of at least one sequence.
This is mostly done automatically by the MSI authoring tool you use, but when you add a custom action in the package, you will have to manually choose the sequence where you will schedule it, so, the following information is essential knowledge for any packager.
The above Microsoft docs links and the one below from the Advanced Installer team provide detailed explanations on the purpose and characteristics of each sequence.
More details can be found here
Custom Actions running modes
Custom action properties can be set in just a few mouse clicks in Advanced Installer
Depending on the sequence you choose when scheduling a custom action, you will also be able to configure additional properties for each custom action.
One of the most important properties of a custom action is the user account under which the Windows Installer service executes the custom action code. Any MSI package can schedule a custom action that runs under the current user account performing the installation or under the SYSTEM account from that machine.
This in turn, affects the permissions the custom actions have. Usually, those running under the current user have limited permissions (and we use them just to control the installation logic, but not to modify machine resources) and those running under the SYSTEM account can change any resource from the machine, like files or registry.
Immediate Execution
The action :
• is executed under the account of the user who started the action
• can be placed anywhere in the sequences list
• has the advantage that it uses the user’s account, and you can directly access its specific settings
• the disadvantage is that the user’s account often has limited rights which can block some actions
• It can read and write MSI properties
Deferred Execution / System Context
The action:
• is executed under the system account
• can be placed in the InstallExecute sequence list, only between InstallInitialize and InstallFinalize
• has the disadvantage that if you try to write in the user’s profile, it will not succeed because it will be written in the “profile” of the system
• It cannot read and write MSI properties. CustomActionData property management is the only way to pass parameters to this type of custom actions.
Deferred Execution / User Context
The action:
• is executed under the account of the user who started the action
• can be placed in InstallExecute sequence, between InstallInitialize and InstallFinalize
• has the advantage that compared to Immediate Execution, it can be sequenced more correctly
• It cannot read and write MSI properties. CustomActionData property management is the only way to pass parameters to this type of custom actions.
Rollback
This type of action is performed when the installation fails before it finishes.The rollback is executed under the account of the user who started the installation and it can be placed between InstallFinalize and InstallExecuteSequence, but it cannot run asynchronously.
Commit
This Commit action:
• is performed when the installation is successful.
• it is executed under the account of the user who started the action
• can be used to clean the temporary resources left after a successful installation
Advanced Installer offers a quick and easy way to add your custom acti ons, and it includes popular built-in solutions. More details about this can be found here.
The synchronous Custom Actions are executed in the same thread in the order of the sequence. The following ones in the sequence must wait for the completion of the previous one.
The asynchronous Custom Actions are those that open a new thread and run in parallel with the main thread.
The two options check whether the installation has been completed successfully or not.
In a package, custom actions are performed during all three phases (installation, uninstallation, repair). To avoid this, a specific condition must be set:
1. Installation Only: NOT Installed
2. Repair Only: REINSTALL
3. Uninstall Only: Installed AND REMOVE ~ = ”ALL”
To combine these, use the “OR” operator. Other properties such as “AND” may be included in the conditions.
Some frequently asked questions about Custom Actions can be found here
System Search
Sometimes, during the installation of an MSI, it is necessary to perform various checks on the system to determine a few things: if an application is installed on the machine, or if we need a path to the prerequisite in case we have to change a configuration, etc.
You can use a feature called System Search to perform these checks.
Windows Installer can search for a file, directory, registry, or component while installing a package, this is done through an AppSearch action
The AppSearch action searches the system for the signature of a file that is specified in the AppSearch table. If the AppSearch action finds the file or directory on the system, it sets an appropriate property with the location of the file or directory (also specified in the AppSearch table).
When searching for a file, the signature of the file must also be specified in the Signature table. If the file Signature is listed in the AppSearch table but not listed in the Signature table, then it searches for a directory, registry, or INI.
The tables that populate when creating a system search (depending on the type of system search that you want) are: AppSearch, CompLocator (for components), DrLocator (for directories), IniLocator (for INI files), RegLocator (for registry), Signature (for files).
Easily add searches with Advanced Installer. Here is how.
Upgrades
Applications get updated to correct various problems, change certain configurations or improve functionality.
For MSI packages, this can be done through patches and upgrades.
According to the Windows Installer Software Development Kit (SDK), there are three ways to update applications that are based on the Windows Installer technology, namely:
1. Patching, 2. Minor upgrades
3. Major upgrades.
Patching (using msps) is like installing an add-on to an already installed application to update.
Upgrading (also referred to as a small update or minor update) is the process of re-installing a new improved version of an MSI, over an already installed version of the MSI.
Major upgrades are represented by improved versions of the package installed normally (they also take into account the uninstallation of older versions already installed on the machine).
Setting up Upgrades is super simple with Advanced Installer.
Patching
A patch (.msp) is a file used to improve an MSI (if you can look at it like this). Unlike an MSI, a patch contains only the information needed to update an installed version of an application. It includes either an entire file (or more) or just bits of it to update a file(s).
Check out the Creating Patches article on our Advanced Installer User guide
One of the advantages of patches is that they can be uninstalled, bringing the application back to its initial stage. This way you avoid having to uninstall and reinstall the application (a feature available in Windows Installer 3.0 and higher versions).
To uninstall a patch and revert the application back to its initial stage, use the following command line:
Msiexec /package {GUID_OF_PRODUCT} /uninstall {GUID_OF_PATCH} /qb
Where:
•
{GUID_OF_PRODUCT} is the Product Code of the main MSI
•
{GUID_OF_PATCH} is the Revision number field in the msp file Properties, Details tab.
Patch Revision Number
By using a utility (such as Advanced Installer or other), you can create a patch from two different MSIs:
• one MSI containing the old versions of the files
• another MSI created by us (based on the old one) to replace the old files with the new ones
A more in-depth article regarding Windows Installer patches can be found here

Upgrading
Upgrading can be classified as follows:
Type of update Productcode ProductVersion Description
Small Update No change No change
Minor Upgrade No change Changed
An update to one or two files that is too small to warrant changing the ProductVersion. The package code in the Revision Number Summary Property changes. It can be shipped as a full installation package or as a patch package.
A small update that makes significant enough changes to alter the ProductVersion property. It can be shipped as a full installation package or as a patch package
Major Upgrades Changed Changed
Applying a small update
A comprehensive update of the product needing a change in the ProductCode property. It is shipped as a patch package or as a full product installation package.
A small update can be applied to an application either by fully reinstalling the application or only partially by using the command line.
Fully: msiexec / fvomus [path to updated .msi file] or msiexec / I [path to updated msi file] REINSTALL = ALL REINSTALLMODE = vomus
Partially: You need to find out which features and components are modified by this small update. msiexec / I [path to updated .msi file] REINSTALL = [Feature list] REINSTALLMODE = vomus
Applying a major upgrade
A major upgrade involves installing the improved package. Major upgrades have a different product code than the original package and they must be treated as a new product, so it installs like any other package. msiexec / i [path to updated msi file]
De-hardcoding and Variabilization
Often in our package, we have to reference directories, as well as existing or non-existing files in the package. Some references differ depending on the user logged on to the machine (for example the %appdata% folder). To sort this out, make the package more independent from fixed values, by using dynamic values. The solution is made with the help of dehardcoding and variability.
De-hardcoding
Hardcoding refers to references to various paths whether they belong to our application or not. It is solved by referring to the existing properties in our package.
References to a Directory:
• [DirectoryNameInternal]
• [$ComponentName]
File references:
• long path [#FileName]
• shortcut [! InternalNameFile]
References to system variables: [%SystemVariableName]Property References: [InternalNameProperty]
Variabilization
Variabilization refers to values that can be changed by the person installing the package, even at the time of installation. In such cases, public properties are defined with the initial values at the time of creating the package. They can be subsequently modified by the administrator, doing an installation from the command line.
As an example, let’s assume the property LICENSEKEY exists in the MSI. During installation, the administrator can install the package with the following command: Msiexec /i [path to msi.msi] LICENSEKEY=11111-11111-11111 /qb
Vendor MSI Definition
Since many software manufacturers use Windows Installer, a large number of applications (in addition to the well-known setup.exe) come with MSI files.
More about packaging options can be found here
Seller Vendor Customization
It wouldn’t make sense to recreate an MSI if an application already comes with an MSI file. Instead, it is best to customize it with the help of .mst files, and adjust it to be installed as the user wants.
The possibility for customization does not mean that this MSI file can be 100% modified. Consider any changes with great care to avoid altering the logical structure of the MSI. Nobody knows how an MSI was created and the final result shouldn’t be different from what it was initially.
There are several options to find out how to configure the MSI to be installed as needed:
1. creating an installation log, and using it to identify the parameters sent to the MSI
2. using the various tools offered by Advanced Installer or Wise, to create the mst based on the installation simulations
3. or you can read/investigate the dialogs in MSI to possibly identify what is required for each installation window.
MSI vendor do’s and don’ts:
• You can add and delete properties
• You can add and delete files, registry, services, shortcuts (paying close attention to not damage the logic of the MSI)
• You can include Custom Actions, but deleting CAs is not recommended (at most they can be commented)
• You should not modify ProductVersion, ProductCode, UpgradeCode from an MSI (because they are needed for subsequent upgrades)
Most software vendors deliver the MSI file by default, but they can also deliver this file hidden in the setup. In addition, they can also deliver msp files.
Depending on the delivery option, there are several vendor approaches to MSIs.
Direct vendor MSI
When a vendor directly provides an MSI, we customize it with a transform file (mst). At the end, you need to perform some checks to make sure the installation with the MST behaves the same as the original MSI.
To check the install behavior between the original MSI and the MST you can use one of the tools mentioned in section 5.8 of this book.
Vendor MSI hidden in setup
Most manufacturers hide the MSI in the setup. To detect if there is an MSI vendor behind a setup, monitor the Task Manager during installation. If the msiexec.exe process appears in the list, it means that we are dealing with an MSI vendor.
To find where the setup copies of the MSI file are, we can use Procmon. Usually, Windows Installer copies the files needed to install the setup ( i.e. the MSI itself with its files and possibly some configuration files) in the temp directory of the current user.
Once the MSI file is recovered, a check is performed to see if the installation is identical to the one made with the setup.
Vendor MSI with patch
In addition to the MSI file, the software manufacturer may deliver a patch--an MSP file that fixes various MSI bugs.
The patch only contains the “improvements” to the MSI. It cannot be installed alone on the machine. It needs to find the MSI to modify.
Modify an MSI vendor, from cab outside to cab inside, etc.
There are situations that require the transformation of an “MSI with cab outside” into an “MSI with cab inside”. There are two ways to do this:
• with a script
• by converting MSI to WSI
Windows Installer has a tool for modifying MSIs called MAKECAB.EXE. With its help and a script, you can transform an MSI from cab outside to cab inside, and vice versa.
There are just a few steps you need to take:
1. Perform an admin install of MSI: msiexec /a Name.msi TARGETDIR=”c:\temp\ mymsi\”
2. Perform the transformation using the command line: cscript [WiMakeCab ...] / c / u / s / e [Name.msi], right from the directory where the admin install was made (”c:\ temp\mymsi\”), with the help of the exe and vbs files
The argument (s) is the one that turns the cable outside. Following the admin install, the MSI files are expanded. If the command is run with / e --then it results in an MSI with cab inside, if you use a command without / e -- then you will get an MSI with cab outside.
Msiexec.exe commands
The executable behind the Windows Installer is msiexec.exe. This file is located in C:\ WINDOWS\system32 and can be used to control or repair the installation and uninstallation of packages in the command line.
Installing a package
The argument for installing a package is Argument: /i
Command: msiexec /i Package.msi
Repairing a package
Argument: /f - is the argument for repairing a package.
Command: msiexec /f {ProductCode}
Uninstalling a package
Argument: /x - is the argument for uninstalling a package.
Command: msiexec /x {ProductCode}
Administrative Installation
Argument: /a - is the argument for performing an administration installation of a package.
Command: msiexec /a Package.msi TARGETDIR=”C:\temp\yourdesireddrirectory”
Creating logs
Argument: /l - is the argument for making a log.
Command:
• msiexec /i Package.msi /l LogFile.log - log on installation
• msiexec /f {ProductCode} /l LogFile.log - log on repair
• msiexec /x {ProductCode} /l LogFile.log - log when uninstalling
OBS: Arguments are commutative, with the specification that after each argument, the corresponding information is passed (after an /i an MSI should be passed, after an /l a log file (.log) should be passed).
Applying a patch over a MSI
Argument: /p - is the argument for installing a patch over an MSI.
Command: msiexec /p Patch.msp - the command to install an MSP
The command can also be parsed together with an MSI:
Command: msiexec /i Package.MSI /p Patch.msp
Installation with MST
Command: msiexec /I Package.msi TRANSFORMS = Transform.mst
Check out more options and documentation regarding msiexec commands here
Active-Setup Mechanism
Self healing is one of the main features of Microsoft’s Windows Installer technology. Self healing leverages the Windows Installer database to allow for a full or partial reinstallation of a product if the installation gets broken or corrupt.
Windows Installer addresses this feature through Advertised shortcuts. When the application is installed, the self-healing feature is automatically activated if the application is launched through the advertised shortcuts. Since the shortcuts point to a file from a feature, only the components in this feature can be repaired. Therefore, if one of these components is missing, Windows Installer will trigger an auto-repair for the entire feature.
If no Advertised shortcuts (or no shortcuts at all) are present in the package, but user information and/or actions must be performed for each user, then you should use the ActiveSetup mechanism.
An exception to this rule appears if your package contains File Type Associations (FTA). An FTA is basically a file extension you can associate with an application from your package so that the selected program can perform certain operations (verbs) on the files with the specified extension. First, a ProgID is defined, which can have any number of extensions associated and each extension can define any number of verbs.
When FTAs are present in an MSI package, it doesn’t matter if you have an advertised shortcut or not, the moment the user will do the action for which the FTA exists, the selfhealing mechanism will start automatically.
Advanced Installer offers a quick and easy way to view, edit and create File Associations with a few clicks. Check out this tutorial
Windows Active Setup is a mechanism for executing commands once per user during login. When using active setup, the following keys are compared:
HKLM\Software\Microsoft\Active Setup\Installed Components\[ProductCode] and
HKCU\Software\Microsoft\Active Setup\Installed Components\[ProductCode]
If the HKCU registry entries don’t exist, or the version number of HKCU is less than the one from HKLM, then the specified application is executed for the current user. So, when each new user logs on, the operating system compares Active Setup keys between HKLM and HKCU, and runs the command line in StubPath if the HKCU entry is missing or if the version in HKCU is less than the one for HKLM.
To implement Active Setup, please create the following registry hive:
HKLM\Software\Microsoft\Active Setup\Installed Components\[ProductCode]
When a user logs on for the first time after an Active Setup has been configured in HKLM, the operating system compares Active Setup keys between HKLM and HKCU, and runs the executable if the HKCU entry is missing or the version in HKCU is lower than the one for HKLM. To update the ActiveSetup executable, just install a new version, and increment the Version registry key (second registry entry above). After performing these steps, the next time the user logs on, the active setup will run again for that user.
Active Setup is a solution for applications that require installation of components such as files or registry keys on a per-user basis, but don’t have any advertised entry points or other triggers to initiate the installation process.
Want to know how to implement the self-healing mechanism in your package? Check out this guide.
How to Create Basic MSIs
Advanced Installer
Advanced Installer is a powerful authoring tool designed to help software packagers and software developers.
It is GUI-based, and assists you to complete complex tasks in just a few clicks. As software developers/packagers, you can focus on what you do best, without having to worry much about the MSI structure, or specific rules, etc.
What I like most about Advanced Installer technology is that it comes embedded with best industry practices in accordance with ICE Validation Standards and best behaviour gathered from the tens of thousands of software engineers that have used it in the last 16 years.
It performs validation work automatically in the background for you to release top quality packages.
How to Create an Advanced Installer Project
Creating a project is simple, and here’s a quick walkthrough of the process. Let’s say you want to create a package to install a simple text file (i.e. a story you wrote).
1. Choose an already existing text file on your local disk or create one.
2. Name the file story.txt,
3. Open it in your favorite text editor,
4. Type a couple of lines to give it some content. Then, launch Advanced Installer. You will be presented with a dialog window where you will be able to choose the type of project you want to create.
Advanced Installer Project Type Window
5. Select the “Simple” type.
6. Uncheck the “Use wizard...” option.
7. Press the [ Create Project ] button.
8. The new project will be created and you will be able to edit it.
Save the project by using the [ Save ] toolbar button and choose the file name and the destination folder.

Note: This folder will also be where your MSI package will be created. Give it an appropriate name, like story.aip, for example.
When using Advanced Installer, avoid creating a project, copying it, and then using the copy as a base for a new project. Otherwise you will have a duplicate ProductCode and UpgradeCode.
Review this article on Product Identification to see why this is not the way to go -- you can find the reasons in the “Copying your project files” section.
How to Add Files and Folders
The most important step when creating an MSI package is adding a file or folder.
Switch to the “Files and Folders” page by selecting it in the left-side panel. The folders that interest you most are “Application Folder” and “Application Shortcut Folder”.
In the Application Folder, you can add the files and folders used by your application (this folder represents the installation folder). In the Application Shor tcut Folder, you can add shortcuts to your application pointing to a help file or to a URL. This folder represents a folder in the “Start > All Programs” menu of the Windows taskbar.
Note: You can read more about these folders in the Install Parameters page.
Next, click on the [ Add Files... ] toolbar button, browse to find your project’s folder and select the story.txt file you previously created.

Files and Folders Page
How to Add Registry
You can add registry keys and values to the install package in the Registry page. The keys and values you can add to any of the hives are listed in the left pane:
HKEY_CLASSES_ROOT, HKEY_CURRENT_USER, HKEY_LOCAL_MACHINE, HKEY_USERS
To create a new registry key, use the [New Key] toolbar button, the “New Key” tree/list context menu item, or press the Insert key while the “Hive” panel is focused. The new key will be added under the selected key in the left pane.
When it comes to creating new registry values, you can use the [New Value] toolbar button, the “New Value...” tree/list context menu item or press the Insert key while the “Values” panel is focused. The Registry Value Dialog will pop up, where you can set the value’s name, its type and content.
To add registry keys, use the [Add Key] toolbar button, the “Add Key...” tree/list context menu item or press the * key while the “Values” panel is focused. You will be prompted to choose a registry key from your computer’s registry using the Registry Key Picker Dialog. All of the selected key’s subkeys and values will be added.
To add registry values, use the [Add Values] toolbar button, the “Add Values...” tree/list context menu item or press the + key while the “Values” panel is focused. You will be prompted to choose registry values from your computer’s registry using the Registry Picker Dialog
To import registry entries from a Registration File (.reg), use the [Import REG file] toolbar button to import registry entries from a Windows Registration File (.reg). Only files created with Windows 2000 or higher are supported.
How to Build and Install
To build the MSI package:
1. Click on the [ Build ] toolbar button
2. A “Build Project” dialog will appear showing you the build evolution.
3. Once the build is complete, click on the [ Run ] toolbar button.
4. A setup wizard will appear that will guide you through the install process of the “story.txt” file.
Congratulations! You have created your first Advanced Installer MSI package.
By default, the story.txt file will be installed in C:\Program Files (x86)\Your Company\ Your Application.
Browse to that folder in Windows Explorer to check it out.
How to Remove an Installed MSI
You can remove an installed MSI either by going to the “Programs and Features” in the Control Panel or by using the Advanced Installer application. Simply press the [ Run ] button again without modifying anything and the Setup wizard will appear. Select [ Remove ] in the second screen and wait until the uninstall process is complete.
If you change anything in the project, pressing [ Run ] will generate a different package. The only way to uninstall the old one will then be from the “Programs and Features” in the Control Panel.
How to Edit Product and Company names
Now it’s time to name your story, and we recommend you choose an attractive name. “Your Company” or “Your Application” may not be the best suited names for the story you are distributing. Let’s change them.
Switch to the “Product Details” page by selecting it in the left-side panel and edit them to better values.
Product Details Page
Build and Run the package again to check the results. Don’t forget to uninstall it afterwards.
How to Create Shortcuts

We need to create shortcuts to the installed files after Installing in Programs Files(x86) to make sure they’re easily accessible. For this scenario, we will create two: one in the “Start” menu and another one on the desktop.
1. Switch back to the “Files and Folders” page.
2. Click on the story.txt file, and then, click on the [New Shortcut] toolbar button. The “New Shortcut” dialog will appear, allowing you to customize the new shortcut.

Shortcut Properties View
3. Change the shortcut name to “Long Story” and click [ OK ]. The new shortcut will be added to the Application Shortcut Folder. That means that this shortcut will be installed in the “Start > All Programs > Product Name” menu of the Target Computer.
4. To create a shortcut that will be installed on the Target Computer’s desktop, select the Desktop folder in the “Folders” tree and click the [ New Shortcut ] button. A file picker dialog will pop up, allowing you to select the target file of this new shortcut.
5. Select story.txt and press [ OK ]. After you change the shortcut name to “Long Story”, click [ OK ] again in the “New Shortcut” dialog. The new shortcut will be added to the “Desktop” folder.
Build and Run again to check the results, and uninstall when you’re done.
How to Change the Product Version
In the future, you may want to release a new version of this story. Or fix some issues discovered in the first release. This is super easy to do with Advanced Installer.
1. Open the story.txt file using your favorite text editor and add a couple of lines to it, so that we have an actual file change.
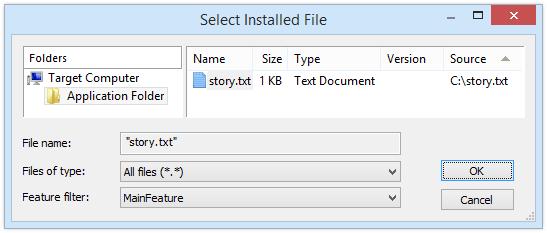
2. Then, switch to the “Product Details” page by selecting it from the left-side panel. Now, edit the “Product Version” field to “2.0.0”.
3. When building, saving or selecting another page, you will be asked to generate a new Product Code. Answer “Generate new” if you want the new package to automatically upgrade the previous version of the story (if found on the target computer). If you answer “Keep existing”, the two versions will be prevented from being installed simultaneously on the same computer.
Wise Package Studio
Wise Package Studio is a suite of tools that allows you to create and edit packages, transforms, patches, and more.
First Time Settings
Before we create MSI packages, we must install Wise Package Studio. Once installed, we need to make some configurations.
One of these configurations is related to merge modules. To include these files in the package, we must either populate the default directory of the Wise with merge modules, or we must redirect to a directory that contains these modules.
You can do this with the Windows Installer Editor, Tools \ Options \ Merge Modules menu, Default Merge Module Directory option:
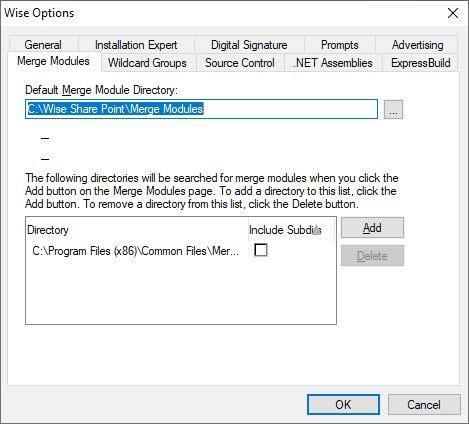
It is also recommended to set Advertising options before starting any captures. Because dll registration is done through registries, it is not recommended to have it be captured, since Wise registers them automatically.

Wise Options View
The “Automatically add self-registration” option must be unchecked.
How to Create a Project
After launching Wise Package Studio, you will be presented with a page where you can choose the type of project you want to create.
Wise Package Studio Main View
1. Select Windows Installer Editor

New Installer window in Wise Package Studio
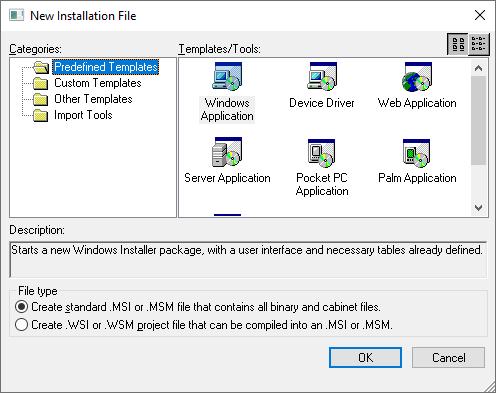
2. From the Predefined Templates, select Windows Application and click OK That’s it! The project is now created and you can start adding information to your MSI package.
How to Add Files
The most important step in creating an MSI package is adding a file or folder.
1. Navigate to the Files page by selecting it from the left-side panel.
New Installer window in Wise Package Studio
2. In this window, the explorer tabs located in the top show the folders, files and overall content stored in the machine. On the left you have the folders, and on the right, the contents of a specific folder.

3. The bottom two tabs show what’s present in the Windows Installer package. Again, on the left, you can find the folders, and on the right, the folder contents.
4. To add files, select the file you want to add, in our case story.txt, and click the Add file button.
Wise Package Studio will then create the features and components automatically..
How to Add a Registry
To add a registry to your package:
1. Navigate to the Registry page in the left pane. As with the Files page, the page is split in 4 areas. The top two areas show registries and values that are present on your machine, and the bottom panes display what will be added from the package.
2. Click the Add button.
3. A Registry Details window will appear where you can specify the registry root, key, name, value and data type.
 Wise Registry Editor Page
4. Input the values and click OK. When finished, the registry will appear in the bottom view area.

How to Edit Product and Company Names
You need to specify a name and manufacturer for your MSI. To do this, navigate to the Product Details page. There, modify the Product Name and Manufacturer Wise Product Details Page

How to Create Shortcuts
We need to create shortcuts to the installed files to allow for easier access. So, let’s create a shortcut in the Start Menu.
1. Start by navigating to the Shortcuts Page, and click the Add button from the right pane.
Wise Shortcuts Page
2. Keep the default settings and click Next Wise Shortcuts Page

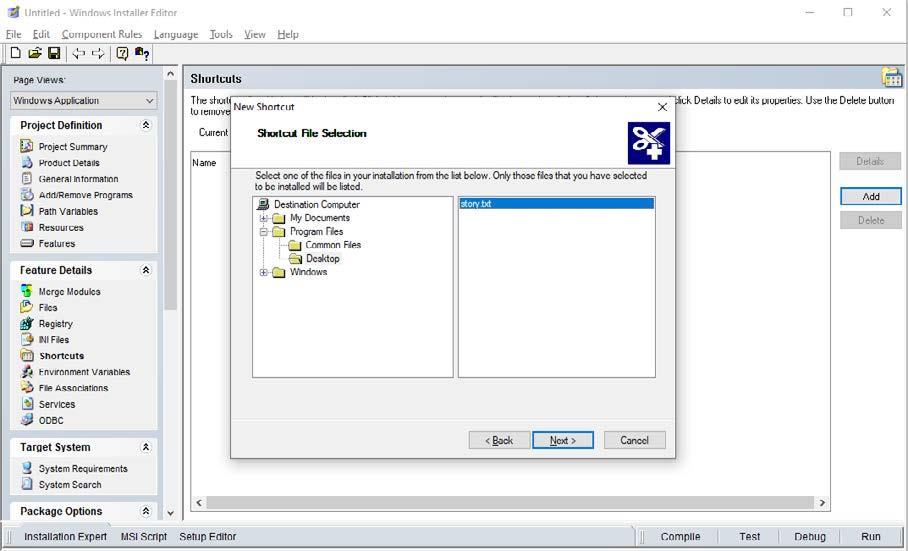
3. Select the file for which the shortcut will be made. In our case it’s story.txt. Then, click Next.
Wise Shortcuts Page
4. We also need to specify the directory where the shortcut will be created. In our case, we configured the shortcut to be placed in Start Menu\Programs. After you choose your directory, click Next.

Wise Shortcuts Page

5. If you have any additional arguments or settings, configure them here. Otherwise click OK. Wise Shortcuts Page

6. The shortcut will now be created when the package is installed on the machine.
How to Change the Product Version
At some point, you may need to release a new version of the story -- including fixes to some issues discovered in the first release.
1. Switch to the Product Details page by selecting it in the left-side panel. Then, edit the Version field to “2.0.0”.


Wise Product Details Page
Note: When changing the version of an MSI package, the Product Code must also be changed.
2. Select the Product Code and click the Change button.
Wise Product Details Page
3. Wise Package Studio will warn you that if this is an upgrade package, you shouldn’t change the upgrade code.
In our case, this is a newer version of the package, so we will click NO
Wise Product Details Page
4. Once NO is clicked, Wise Package Studio automatically generates a new Product Code. A new version of the installer is now properly configured.
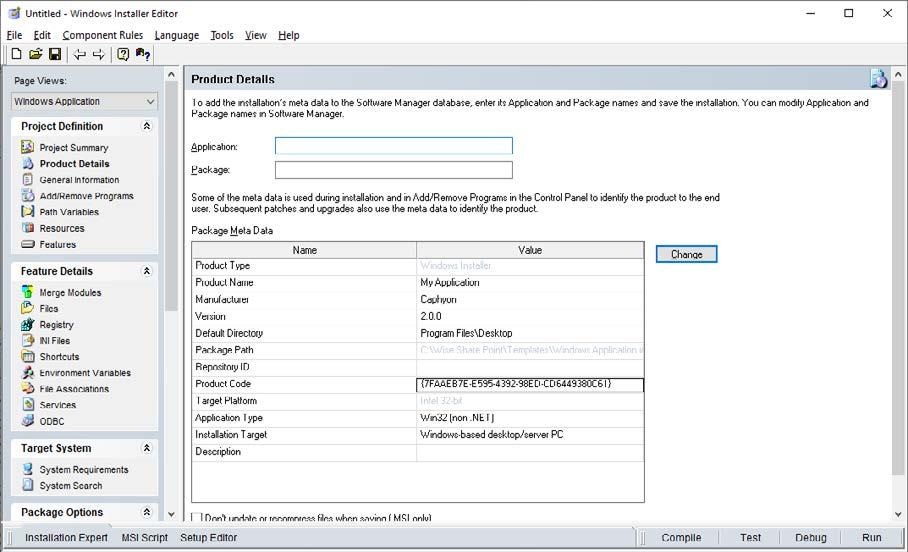
How to Build and Install
1. To build the MSI package, click navigate to File > Compile or F7. Compile the project in Wise Package Studio


2. A window will appear asking where the MSI should be changed. Type the MSI name and save it to the location you wish.
Save location dialog
Congratulations! You have created your first Wise Package Studio MSI package.
Now, if you navigate to the build location and try to install the package, all of the previous settings will be applied on the machine.
The resulted MSI installer

Capture/Repackage EXE installers
Repackaging Best Practices
Repackaging allows you to create projects based on capturing existing installations.The installation repackaging operation focuses on monitoring the file system and registry changes performed by the monitored installation.
Repackager flow
After repackaging an installation, you may need to perform some adjustments to obtain a working installation package.
When should I repackage an installation?
We recommend that you repackage installations only for these specific scenarios:

• To create consistent, standardized, and customized installations: Repackaging an installation so that it adheres to your organization’s standards reduces the cost of supporting end users’ desktops.
• To create silent installations or limit the options available to end users: This streamlines installations and eases application deployment.
• To migrate installations to the MSIX format: Migrate legacy installers to the latest MSIX packaging standard. Repackaging those installations lets you take full advantage of the latest features. Also, Active Directory deployment, SCCM, and Intune require the MSI/ MSIX format.
New to MSIX? Check out the Free MSIX Packaging Fundamentals Ebook.
Tips for an optimal repackaging result
• Repackage in a clean environment.
• Launch the Repackager remotely or install Advanced Installer on a clean virtual machine.
• Use the Repackager interface to exclude unwanted items from the new package.
• Close all other applications that might create noise during the repackaging process.
Repackaging in a clean environment
To avoid capturing unwanted modifications produced by different software running on the PC, repackaging should be performed in a clean environment where only the OS is installed.
The Repackager can be configured to capture an installation running on your local machine, where Advanced Installer is installed, or on a new virtual machine (a much cleaner system which can yield much more accurate results).
It is strongly recommended to disable anti-viruses, firewalls and Windows updates on the machine you will use for repackaging. This is because any system software working in the background may generate changes that could interrupt or clash in the newly created package.
If during the repackaging operation the system restarts, don’t worry, the repackaging operation will continue its process after the system restart.
Clean image
Description
Most of the older software isn’t based on the Windows Installer technology.
To benefit from the advantages offered by the MSI technology, they must be transformed into packages (msi extension files). Moreover, it requires monitoring for what is actually installed on a system (files, registries, shortcuts, services, etc).
There are specialized tools that capture everything a setup adds to a machine, after the system’s analysis resulting in msi files. For testing, if the capture’s result is identical to the original setup’s capture, you need to go back to the original state of the system. In technical terms, this state is called a Clean Image (clean meaning that the application is already installed).
Necessity
As we’ve stressed before, when you want to repackage an application, you need to consider the following: the system where you will capture that application has to be as clean as possible.
A clean system (also called a clean image) contains mainly the operating system and almost nothing else. Because of this, when the capture is made, there’s little to no interference with the system.
Note: Even commonplace applications like screensavers, could interfere in the capture.
If applications have dependencies, we won’t be able to use a 100% clean image, but we can try to keep the system as clean as possible by following these steps:
• Stopping all applications
• Stopping all unnecessary services
• Emptying the Recycle Bin
• Deactivating screensavers
• Deactivating the antivirus
• Deactivating any programs that are running in the background
If needed, you can add software or customizations before starting the capture of an application (Environment variables, Firewall Rules, etc).
Local vs Virtual Machine
There are various ways to repackage an application and the process you choose to do so will depend on your repackaging tool and whether or not you have a virtual machine or a hypervisor solution.
We’ll use Advanced Installer to go through some options to see which ones are the most practical.
Repackage on the host machine
Since best practices recommend to perform the repackaging on a clean vanilla machine, you need to rebuild the host device after every attempt to repackage an application -- and that is not a quick step.
This is the reason why nobody really uses the local host machine to repackage an application unless it is needed (i.e. with hardware dependent application). In the past, though, that was the only option, which made repackaging an application far more time consuming than it is now. Today, IT Professionals save time by setting up multiple virtual machines with a single host device and running them simultaneously.
You can achieve this by having Advanced Installer installed on your host machine. Once you launch the Advanced Repackager and select the installer you want to repackage, all you need to do is click on the “Start Local” toolbar button to run you through the repackaging process.
Repackage directly on a virtual machine
All the hassle caused by rebuilding the local host devices after every attempt to repackage an application is now gone. New tools, including but not limited to VMware Workstation or Microsoft Hyper-V, sorted that out. With them, you can create snapshots and revert your Virtual Machine to any previously created snapshot in no time.
Just make sure you have Advanced Installer Architect installed on the virtual machine (the one used for repackaging the application), instead of having it installed on the host itself.
Same as above, you have to use the “Start Local’’ toolbar button to run you through the repackaging process.
Connect and repackage on a virtual machine
The Advanced Installer’s Repackager supports integrations with VMware Workstation, VMware vSphere, and Hyper-V virtual machines.
This means you can connect to any snapshot of the virtual machine and fire up the Repackager from there; all of this within the Advanced Installer’s interface installed on the local host.
Just click “Start in VM” from the toolbar to open the list of configured virtual machines you can connect to and repackage your application.
Step-by-step instructions
In the Advanced Installer user guide, you can find step-by-step tutorials that show you how to repackage an application on the following machine types:
• VMWare virtual machine
• Hyper-V virtual machine
• VMWare VSphere
The tutorials will also guide you on how to edit your virtual machines profiles, so you don’t have to go through the process of manually copying and reverting your machines during the repackaging process.
Using a virtual machine when repackaging
For a faster repackaging operation, we recommend to use virtual machines, due to the fact that they allow you to quickly revert to the same state, ensuring the same conditions for the repackaging operation.
To have a better repackaging experience with VMware and Hyper-V virtualization providers, you must install Advanced Installer tools. Avoid having to install the tools every time, by copying and installing Advanced Installer Tools (osprovision.exe) from the following location, then saving the snapshot:
C:\Program Files (x86)\Caphyon\Advanced Installer 15.4\bin
This is a representation of the flow for using a virtual machine:

If you’re using Hyper-V as your virtualization provider, make sure that you select the standard checkpoint option when creating the checkpoint so that the installed Advanced Installer Tools service can be properly captured . Hyper-V Settings

Packaging and deployment of desktop applications for enterprise customers is a challenge. This is why we created a handy checklist for you to follow the Enterprise Packaging Recommendations
Testing packages in System Context
If you are repackawging applications, chances are you will use some kind of infrastructure management tool (IMT) to push them in your infrastructure .
There are a lot of IMTs out there, but the most popular (and widely used) are:
• Microsoft Endpoint Manager Configuration Manager (MEMCM), formerly known as System Center Configuration Manager (SCCM)
• Microsoft Intune
There is one general rule that applies to most IMTs: all software installations are performed via the system context (as referred to by the IT Pros).
What is the System Context
The system context refers to the LOCAL SYSTEM account, or NT Authority\System. The LocalSystem account is a built-in Windows Account. It is the most powerful account on a Windows local instance, more powerful than any admin account on that machine.
Most of the services from a Windows machine run in the system account -- the account with the highest privileges.
What is PSEXEC
A tool called PSExec must be used to access the LocalSystem account. PsExec is a command-line utility for Windows which allows administrators to run programs on local and remote computers. It’s part of Sysinternals pstools suite built by Mark Russinovich.


A new CMD window should appear. If you type whoami in the new CMD, you should appear as the NT Authority\System.

From this new CMD (which runs in the system context), it is recommended to install your MSI packages using the msiexec.exe commands. If tests are successful in this context, it means that the application can be safely deployed within your IMT of choice.
It is important to understand that in infrastructures, software packages are not installed within the user context. Moreover, in most infrastructures, users don’t have administrator rights to install or change anything on the system.
For example, if you have a package that places user registry or user files, you always have to use advertised shortcuts or the Active Setup mechanism. This will ensure that user data will be applied to all users.
It’s also good to understand that if you want to perform changes in the current user context, it will be tricky and you will need to use alternative solutions.
Advanced Installer
Capture with Advanced Installer
With the Advanced Repackager opened, you have two options:
1. Capture a setup file
2. Session monitoring
By checking “Session monitoring”, the Advanced Repackager will perform an initial snapshot, wait for your input to continue (e.g. perform any changes on the machine on this step), and then take a second snapshot of the system.
In this example, we are going through a VLC capture, so we can leave the “Session Monitoring” option unchecked.
Once the Capture Setup button is pressed, the Advanced Repackager asks for the installation source file. In our case, we selected the vlc.exe.
Advanced Repackager Main View
After the setup file has been selected, the Advanced Repackager gives you the option to configure additional settings, or create other installation profiles. These options are intended for senior IT Pros. In our case, we left everything as default.
As we are going to discuss in the chapter Local vs Virtual Machines, you can edit your virtual machines profiles with Advanced Installer and it takes care of everything.

By adding a virtual machine profile, Advanced Installer can be configured to automatically revert to a clean image, start the capture on the machine, retrieve all the information gathered during the process and close the virtual machine. In our scenario, we are already performing the capture on a clean machine, so we are going to click “Start Local”.
Advanced Repackager Main View
The Advanced Repackager asks for a location to save the repackaged output project. Select the location and name of the .rpp file and click Save
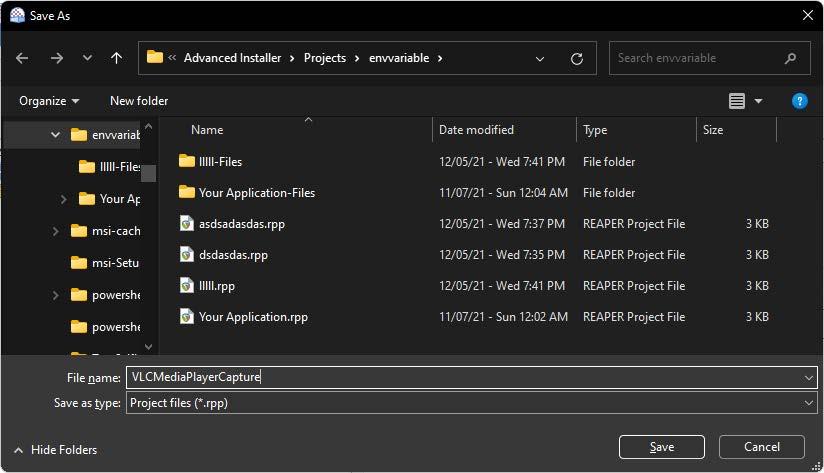

The Advanced Repackager automatically finds services and applications that could interfere with the capture and gives you the option to stop them before continuing with the capture.
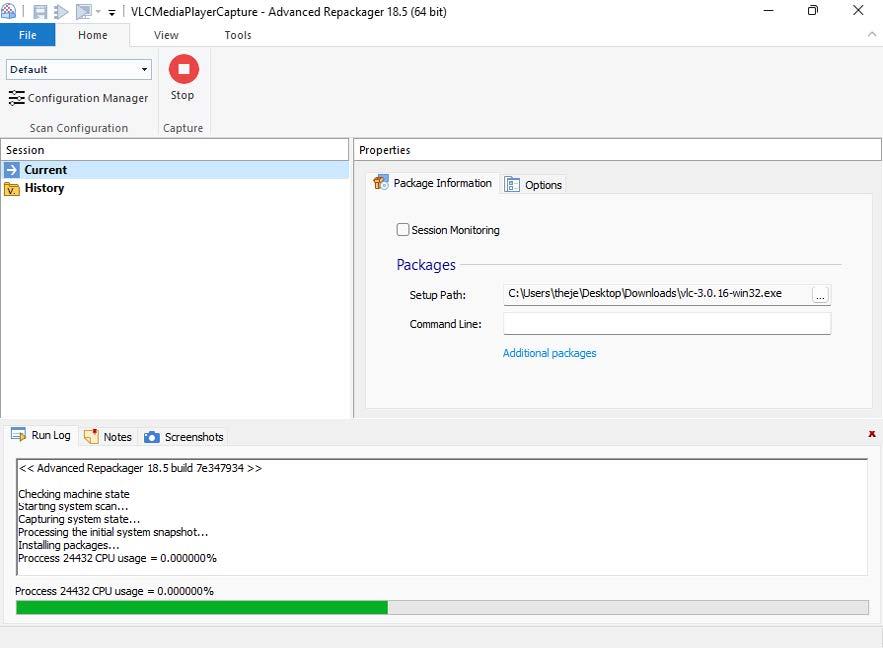
Target Machine State Window
Here’s where the first system scan starts. When this is finished, the installation of the VLC media player automatically starts.
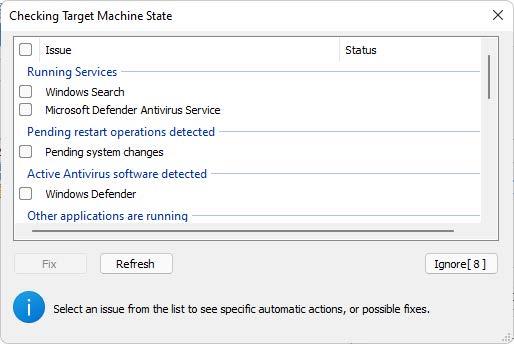
Advanced Repackager First System Scan
Initial System Scan finished
Next, we install VLC. In our case we went with everything as default.
App Installation
Once the installation of VLC Media Player is finished, the Advanced Repackager asks if you are ready to proceed. If any additional changes on the system must be performed, you can make them and click OK when finished.
Advanced Repackager confirm window to continue with the system capture

Then, the second system scan starts.
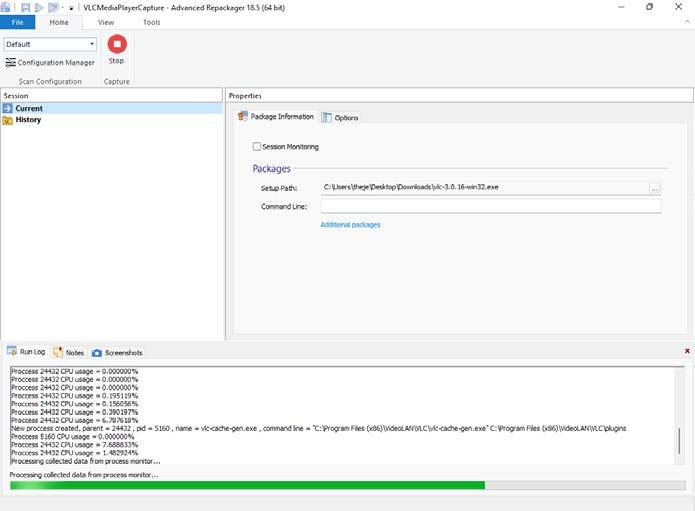
Advanced Repackager Second System Scan
Second System Scan finished

At this point, both system scans have finished and the Advanced Repackager performed a comparison, leaving the differences in the final project.
Next, a cleanup of the capture is necessary to select only the resources related to VLC Media player.
Cleaning Advanced Installer’s Captures

System captures will never be perfect and it’s impossible to avoid unnecessary data from being captured by a repackaging tool.
Before building the MSI, it is important to review and delete unwanted data. After the capture is finished, each tab must be checked.
The Information tab contains the basic information for the MSI, such as product name, version, publisher.
The Files and Folders tab contains all the files captured during the process. In this case, only files and folders related to VLC were detected by the Advanced Repackager, so there is no need to remove anything.
Of course, this is not always the case. You will need to have some knowledge of which files and folders belong to your captured application.
Advanced Repackager Files Capture Output
Any additional registry that is not related to the application can be removed in the Registry tab. As you can see from the screenshot below, there are a lot of unnecessary entries that have been removed from the project.
Again, this is not always the same and you will need to make an educated guess to decide what needs to be added and what is relevant to the application.

Advanced Repackager Registry Capture Output

The last tab we will find is System. In System, you can check and remove any additional information from the project like shortcuts, services, firewalls and the like.
For example, in our VLC capture, we removed 4 shortcuts that were pointing to a website and left only the shortcuts pointing to the executables.
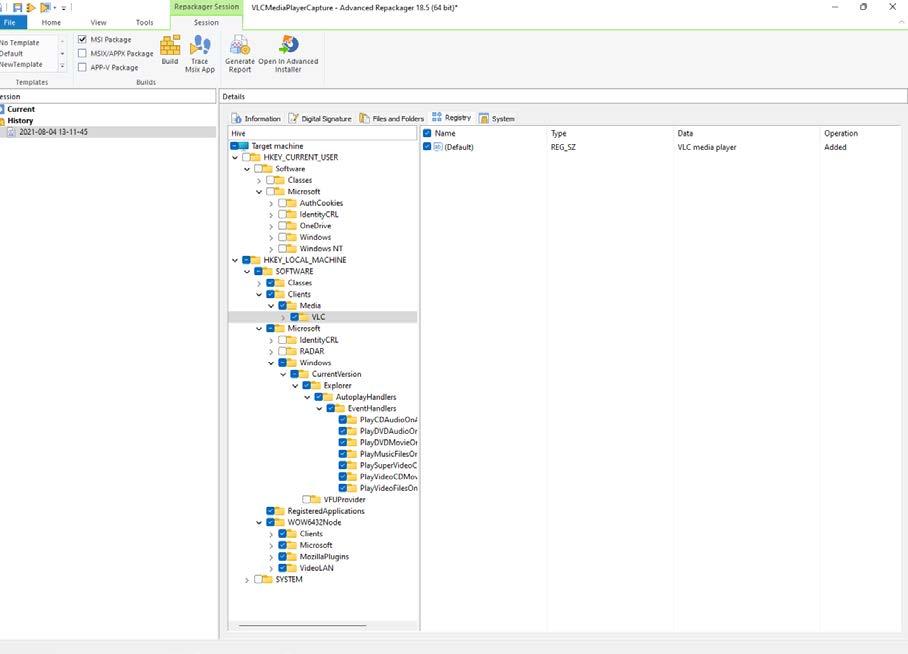
Advanced Repackager System Capture Output
Don’t worry if you accidentally exclude any relevant information for your application. The repackager project can be saved and kept on your machine, and you can always modify it.
This process takes a lot of trial and error until you have a better grasp of how applications work and what should be kept or removed from a repackaging scenario.
Editing and Modifying Advanced Installer’s captures/MSIs

When the capture is ready, all you have to do is click Open in Advanced Installer, to create an .aip project.
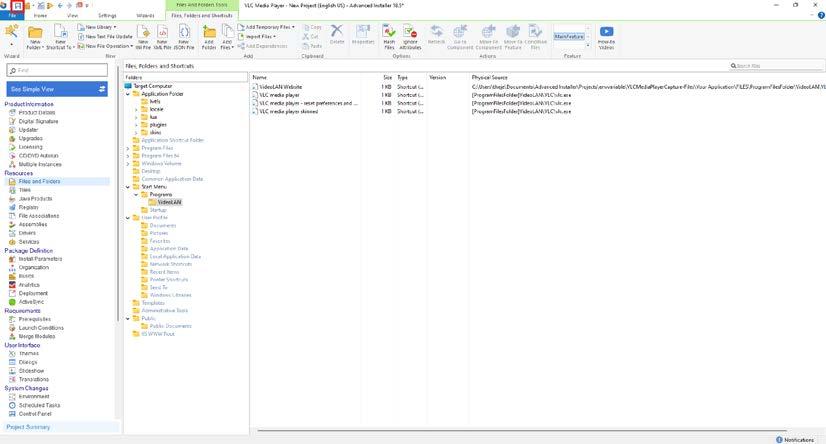
The .aip project allows you to perform additional changes and then output the final MSI. You can perform changes by navigating to the Page -- as described in our previous chapters
Once the project is adjusted to your needs, you can save it by clicking the Save button located in the upper-left corner.
Compiling .aip in .msi
To compile an Advanced Installer .aip project into an MSI, first navigate to the Builds page.

Advanced Repackager Builds Page
In this page you can add configure builds (outputs) for different types of technologies. We used a DefaultBuild which represents an MSI.
Note: Additional build types are: APP-V, APPX, MSIX, APPXBUNDLE, MSIXBUNDLE and ThinApp.
For MSI, select Single MSI with resources inside (or outside if this is the preferred method), select the output folder and MSI name.
The default project settings are more than enough to output a correct MSI file.
Next, click Build in the upper left corner.
Advanced Repackager Build Button

The MSI file is saved in your selected build location under the folder %applicationname%SetupFiles.
Wise Package Studio
Capture with Wise
When a setup is not an MSI, or is a hidden MSI inside the EXE setup, a capture is required. The capture is done with Wise by selecting the SetupCapture menu.

Double-clicking on SetupCapture brings up a new wizard which guides you through the process. For captures, the first option SetupCapture is kept and we click Next.
Setup Capture Window
The First Use Settings option gives you the possibility to install an MSI file with the settings you need, and Wise outputs a transform file (MST) with those settings included.

Since our intention is to convert an EXE installer to an MSI, in the next step, we need to determine the location of the capture result.
Target Installation and Output Directory

Target Installation refers to the location where the project will be outputted. You can choose between WSI and MSI. But first , it is recommended to create a WSI file.
The WSI file is an intermediary step to have a Wise project from where the MSI will be built. After the settings are configured as shown in the previous image, click Next.
Additional settings for capture window
Although Wise usually has all the right settings configured out of the box, it doesn’t hurt to double check that the Convert registry into an advertising info option is set. Click on Settings and perform the configurations as shown in the image below.

Additional settings for capture window
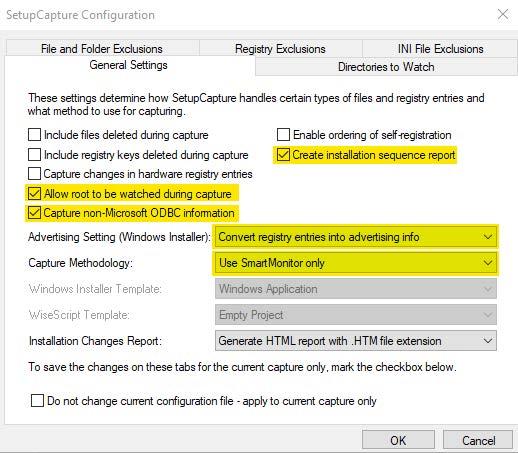

Snapshot is the preferred capture method. The resulting WSI project is created by comparing system snapshots before and after a software installation.
Capture type selector
Here’s where the initial analysis of the system starts.
Initial System Snapshot
After the initial system scan, the application can be installed.
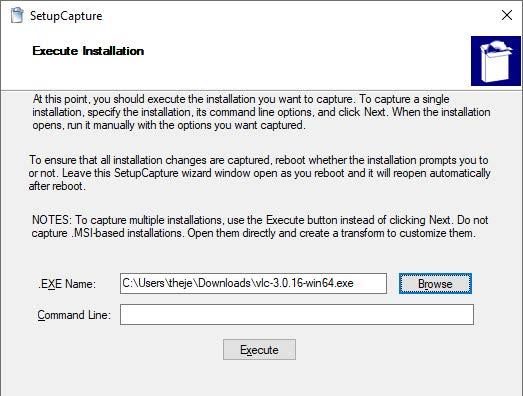
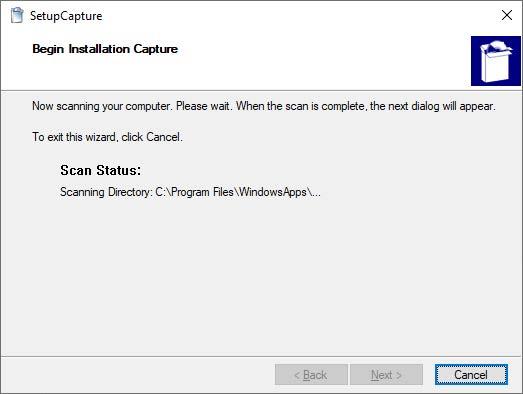
App installation
Browse to the EXE file you need, and click Next. The installation of your EXE will start. Once the installation is finished, press next.
Second System Capture
After clicking Next, the application is installed according to the installation instructions and followed by the second analysis of the system.
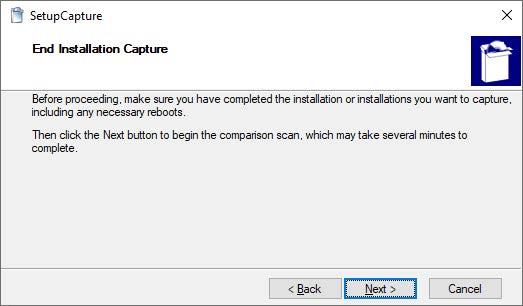
Capture output

When the second analysis of the system ends, all the changes regarding files, INIs, shortcuts and registry keys are presented by Wise.
It is recommended to clean the capture during this step. Still, depending on your needs, you could click Next and skip the capture clean up, choosing to perform it at a later time when the WSI project is created.


Once the capture is complete, you can fill in various fields: Name, Version, Manufacturer -- as seen in the image below.
General details regarding the capture
Once the capture is finished, you will have a wsi file, which when compiled, will generate our package (the MSI).
Editing / Modifying Wise captures/MSIs
For each category of information, there are some special windows you need to follow. They’re easy to use and understand.
Once your capture is ready, open the .WSI project that was previously saved

An .WSI project allows you to perform additional changes and output the final MSI. You can perform any changes by navigating to the specific tabs, as described in our previous chapters.
When the project is adjusted to your needs, you can save it by clicking the Save button located in the upper-left corner.
Once the capture is clean, it is compiled, validated, and tested.
Compile Wise Installer Project to MSI

Create MSI Transform files (MST)
MSI Transforms (MSTs) are small files that change the MSI content. They can change anything in the MSI database like adding/removing files, registry, shortcuts, sequences, upgrades, and so on.
As a general rule in software packaging, when a software installer is received in the form of an MSI, anything that is changed should be done through transform files (MSTs).
Developers will provide new MSI installers with every software update, but in an infrastructure, it is the software packager’s job to modify it as per implementation specs.
Advanced Installer
Advanced Installer makes it even easier to create transform files. When opening Advanced Installer, it offers three ways to create an MST:
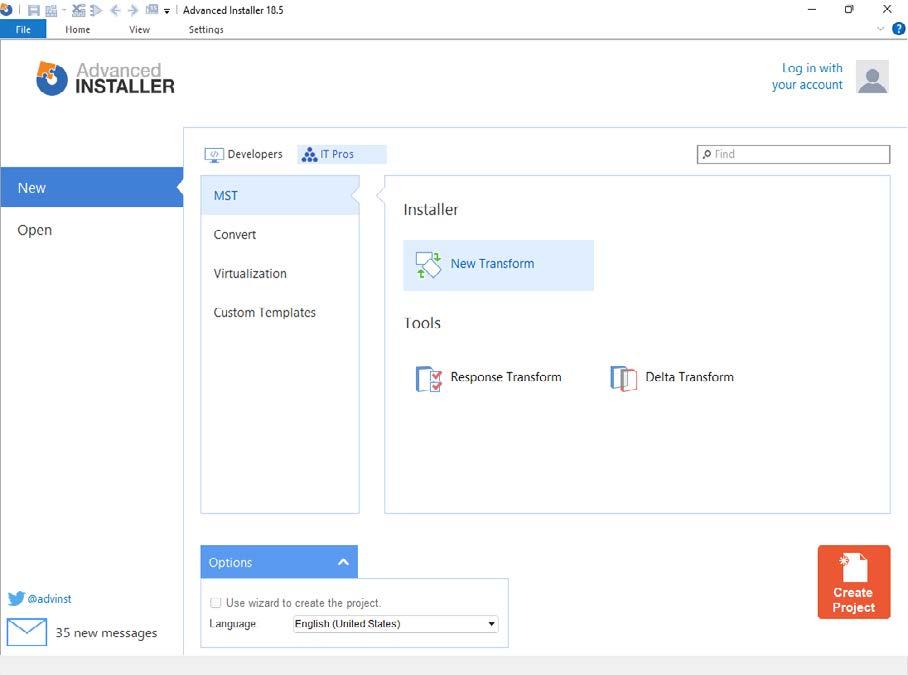
New Transform in Advanced Installer
1. New Transform : Creates a simple transform file (MST) without any customizations.
2. Response Transform: Like Wise Packaging Studio, Advanced Installer offers the possibility to create a response transform. This type of operation starts the installation of the selected MSI, captures the desired changes and creates the MST. Keep in mind that this only captures the changes and the MSI is not installed on the system .
3. Delta Transform: Creates a transform file (MST) that contains the differences between two MSI files.
In our case, we went with the standard New Transform option, not applying any changes on it.
The steps to achieve this are the following:
1. Click on New Transform
2. Click on Create Project
Select the MSI over which the MST will be created
3. Select the MSI file.
That’s it. You just created the transform file with Advanced Installer in a few clicks.
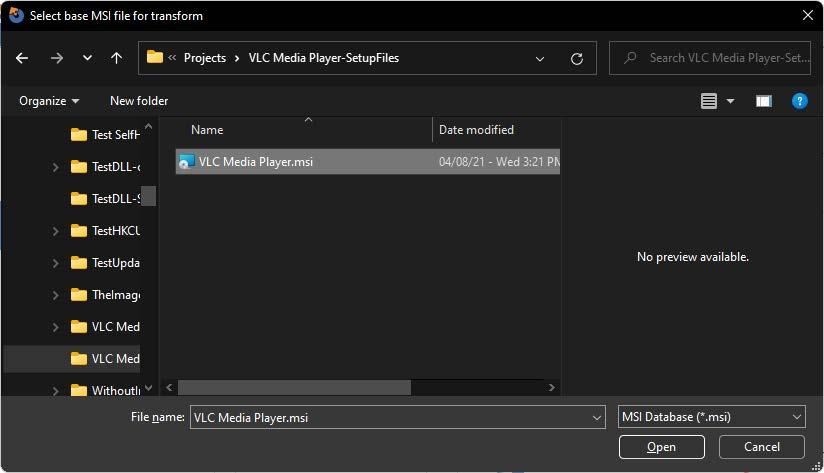
Wise Package Studio
To create a transform file for an MSI with Wise Package Studio, perform the following steps:
1. Open Wise Package Studio 2. Double-click InstallTailor Install Tailor Location 3. Select the MSI for which Wise Package Studio will create a transform. 4. Click Next

Base MSI over which the MST will be created
5. Install the package with your selected settings. Keep in mind that this doesn’t really install the package on the machine. Wise Package Studio only identifies the changes in the installation sequence. Click Next.

Response Transform creation
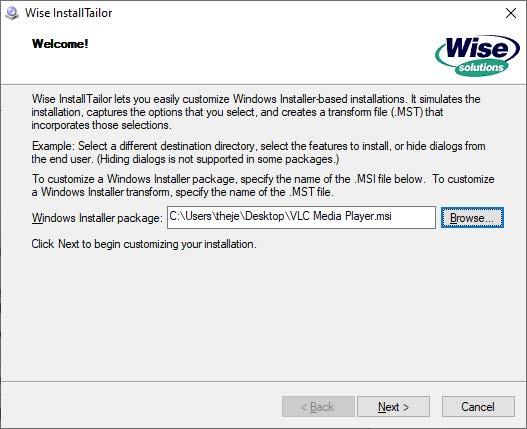
6. After the settings have been captured by Wise, click OK
Changes have been captured in the MST
7. Select a save location for the MST file. 8. Click Next.
MST Save Location
9. Once the transform file (MST) has been saved, you can open it with Wise Package Studio.


Wise View for MST
You can then apply any additional changes to the transform file as needed.
Create Patches (MSP)
A patch is an incremental update to an existing installation of your application. You cannot install a patch if the target version (the one you want to update) is missing.
You have two ways to upgrade an MSI, each with its pros and cons.
You can use a patch (MSP) v1.1. This has a reduced size because it only contains the changes brought to v1.1 of the MSI. However, it requires v1.0 of the MSI to be present on the target machine, and you must follow the rules of creation for MSP’s.
The second option is to use v1.1 MSI. You don’t have to follow strict rules for its creation like with MSP’s, you can add an upgrade to the v1.0, and v1.0 doesn’t have to be present on the machine. However, because it’s a standalone install, the size of the MSI is larger than the MSP.
When using the first option to create a patch file between two MSI files -- keep in mind the following aspects:
1. The second MSI should not change any components or features, including setting different keypaths, adding files or moving components between features. Exceptions to this are: updated registry values or newer versions of files already present in the components
2. If files must be added, create a new top-level feature and its child component(s) to contain the new files.
Note: There is a complete list of rules for you to follow when implementing MSPs here
With these points out of the way, let’s see how a patch can be created.
Advanced Installer
In order to create a patch with Advanced Installer, you need to have the initial version of the MSI (for example version 1.0) and the new updated MSI (for example version 2.0).
1. If Advanced Installer is not currently running, start it by double-clicking on the desktop icon or by selecting it from the Start > All Programs > Advanced Installer menu. When the application starts, you will be presented a dialog where you can choose the type of project you want to create.
2. Select the Updates > Patch type and press the Create Project button. The new project is created and you will be able to edit it.
3. Save the project by using the Save toolbar button and choose the file name and the destination folder. This will also be the folder where your patch package (MSP) will be created.

New Patch in Advanced Installer
4. The most important step in creating an MSP package is creating the Upgraded and Target images.
5. Select the Images page by selecting it from the left-side panel.
6. Next, click on the New Upgraded toolbar button, browse to the newest version of the MSI (for example 2.0). A Windows Installer dialog will briefly pop up while the Administrative Image is being extracted.
First MSI selection
7. Next, click on the New Target toolbar button, and browse to where the initial version of the MSI (for example version 1.0) is stored

Second MSI Selection
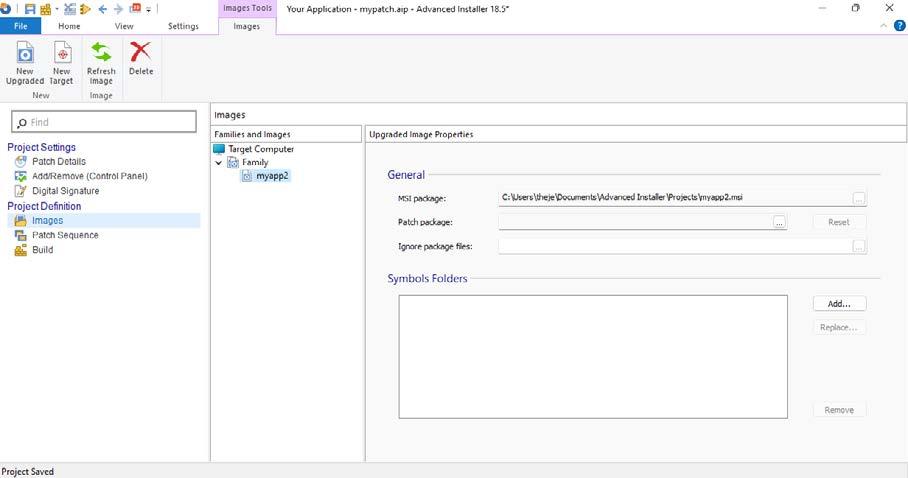
8. Now that you have created the Upgraded and Target images, click on the Build toolbar button -- a Build Project dialog will appear showing you the build evolution.
Patch build window

9. Once the build is complete, click on the Run toolbar button. The setup wizard will appear. Alternatively, you can browse to the output folder in your previously configured save location.

Resulted Patch
Keep in mind that there are some Patch Rules that you must be aware of before starting to build a patch installer.
Wise Package Studio
To create a patch with Wise Package Studio, you will need both the previous and new version of the MSI.

Assuming you have the two MSI files, and you followed the rules above when creating the second MSI, here are the steps to create a patch file with Wise Package Studio:
1. Open Wise Package Studio.
2. Double-click on Patch Creation
Patch Creator in Wise Package Studio
3. At the welcome screen, click Next Patch Creation Window

Patch Creation Window


5. Click Add to select the initial (previous) MSI.
First MSI Selection
6. In the Previous MSI Path, click on Browse and select your MSI file. Match Product Code and Match Upgrade Code must be selected.The Version to check must be set to Check Major, Minor, and Update Version. The Version Relationship must be set to Base Version must be = Installed Version.Click OK and then Next
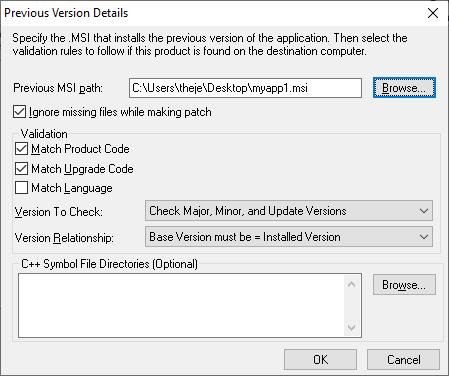
Previous MSI Path
7. In the next window, click Browse to select your newer MSI and then click Next
Second MSI Selection
8. If you have any additional patches, create a sequence of the installation. The sequence ensures that patches are applied in the correct order no matter the order in which they are provided to the machine.Click Next

Patch Sequencing Window
9. In the Output .MSP file field, click Browse and select the location where the patch file will be created. Make sure that File Sequence Start and Disk ID Start are set to 1. Setting the file sequence and disk id to 1 means that Wise Package Studio will perform a comparison between all the files and cabs present in both MSIs.Click Next
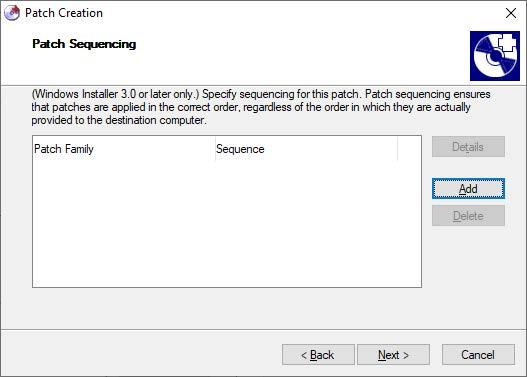
Patch Output Window

Wise Package Studio will begin the comparison between the two MSIs and output the patch installer to the set location.

Creating Suite Installations
Windows Installer is a great technology when it comes to creating an installer, but it falls short on the ability to chain multiple MSI installations
While Windows Installer has predefined support, it’s still limited in what you can do with it. To fill this void, Advanced Installer offers the possibility to create suite installations, letting you chain multiple MSI packages and define command lines. The resulting EXE extracts the MSIs and installs them one by one according to what is configured.
You can also use scripting tools like PowerShell App Deployment Toolkit, which we cover in a later chapter, to create a chain installation of multiple installers.
Now, let’s go through how to create a single bundle installation for multiple applications.
In our example, we will just use three applications, but you can use as many as you want. This gives your users a simpler UX during the installation they will be able to download a single setup package and use that to install all of your applications.
For this example, we will work with three applications, one is a license manager and the other two are separate applications that are deployed to users. The license manager would be used by all users to handle their credentials in the other two applications.

Create the project
To create a project, the first step is to create a new empty Enterprise project without using the wizard. If Advanced Installer is not currently running, launch it by double-clicking a desktop icon or selecting it from the “Start“ menu. When the application starts, you will see a dialog where you can choose the “Installer” > “Enterprise” project type.
Don’t forget to untick the “Use wizard to create the project.“ option. As we mentioned, for this project you need to start with an empty project, so you can skip the wizard.

Project Options
Setup your suite installer product details

In the “Product Details“ page, you need to configure the information from groups “Product Details“ and “Add and Remove Programs (Control Panel)“.
The most important step here is to untick the “Register product with Windows Installer“ option .
By disabling this option, you will make sure that your bundle installer will never appear in the Control Panel list of installed applications. There, you will only see the real applications that the bundle will install, each with its separate entry. Lets see how you add those applications in the project.
Product Details
Add your setup packages
To add your setup packages:
1. Go to the “Prerequisites“ page, where you need to add each package as a “Feature-based“ prerequisite. This will result in having a new feature created for each package in the Organization page. By setting conditions on the features (explained later in this tutorial), you will be able to control which applications get installed or not.
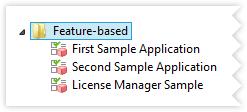
Feature-based Options

2. After you add the packages, you can select each one of them and continue configuring it from the right side pane. You will have three tabs, “Properties“, “Setup Files“ and “Install Conditions“. Each of these tabs contains important settings that you must define.
3. In the “Properties’’ tab, you must define the name of your package and other related information. In ‘Setup Files’,’ you will find a high-priority area to customize: the “Install Command Lines“. These command lines get passed to your packages when the bundle installer will execute them. It is important to set the application to install silently. For MSI packages the command line is /qn and for EXE packages built with Advanced Installer, it is /exenoui /qn
In the below image you can see a set of the command lines. It starts with the “/qn” option to specify this is a silent installation, then it sets the property APPDIR with the value of the parent installation folder, and at the end, it sets another property from the installer, configured to store a port number in this example.
Install Command Lines
In the “Install Conditions” tab, you must select the option “Always install prerequisite” for all packages, be it MSI or EXE. Create a custom selection dialog
Create a custom selection dialog
By now you’ve seen that our samples use the Graphite theme, but the same applies to other themes too. You can change the installer theme from the “Themes“ page, “Preview“ tab.
Since your suite installation will install three different applications, you might want to let the user select which application to install. This is an optional step and you may skip if you want your users to always install all available applications.
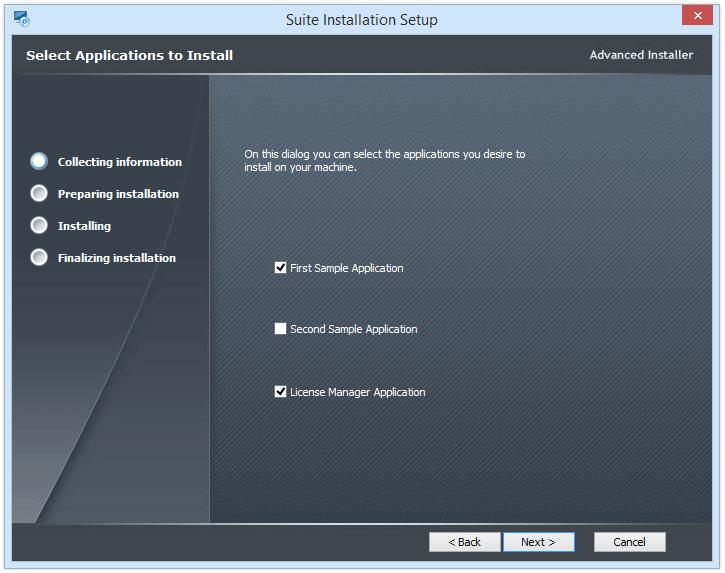
In this step, we will show you how to create a new installer dialog with custom controls on it. For this scenario, we’re using simple checkboxes from where the suite installer will decide which application to install.
1. First, you should remove the “FolderDlg’’ predefined dialog from the list, since it is not useful for suite installations. You can do this directly from the Dialogs page.
2. Once that’s clear, you can create a new empty dialog on which you can add the texts and checkbox controls, from our toolbox, to get a dialog similar to the one below.
3. Each checkbox has a property attached to it, visible in the right side pane from Advanced Installer when you select the checkbox control. This property must be set in the Organization page as an install condition for the corresponding feature.
Additional Install Options
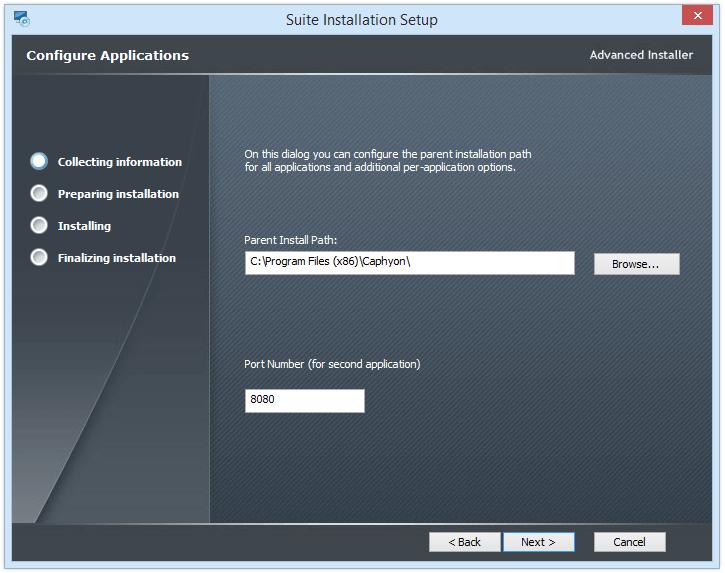
In the Dialogs page, you can create and chain as many new dialogs as you wish. You can show certain dialogs only if a specific application is selected to be installed, or you can hide/ show, enable/disable UI controls from the dialogs.
In the image below, there is an example of capturing the parent install path for all applications. We say it is the parent install path, because at the end of this path, we instruct the application to create their own subfolder, by adding this folder in the command line set. For example, for the second application, we create the subfolder “SecondFolderApp“ (as you can see in the screenshot from step 3).
Also, we capture the port number for the second application and pass that through the command line too. As seen in the image, all the parameters required by the actual installers are passed in their command lines. There is no other way to pass information from the suite installation to the independent installer packages.
Configure Output Package
To make your suite installation as a single package, you must go to the Build page and set the package type to “Single EXE setup(resources inside)“, this will make Advanced Installer generate a single EXE as an output that your users can download.
Another important configuration you need to enable is the option “Run as administrator“ from the “Install Parameters“ page. This option is important as it will ensure your applications inherit the elevated credentials from the bundle installer, so they can install accordingly. Disabling this option may lead to failed installations.
Build Project
Now that you have finished configuring the project, you can build the bundle. Advanced Installer will build a single EXE package which contains all of your applications, MSIs or EXEs, and will silently install them based on the user’s selections.
Helpful tools
ORCA
Orca is a database editor that helps create, edit packages (msi) and run modules. It provides a graphical interface for packet validation and highlighting entries that have errors or warnings.
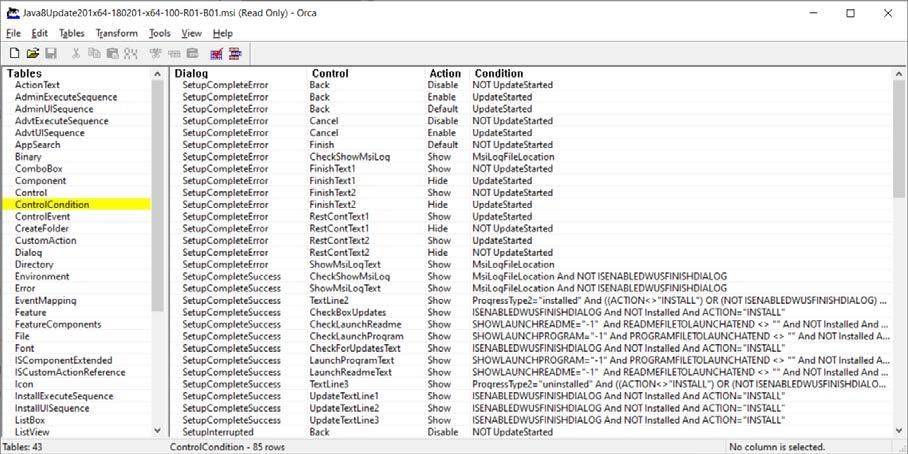
Orca Main View
Although as a first impression, it looks like Orca doesn’t allow you to edit/create transform files, it does. You just need to open the msi first, and from the Transform menu, you can open and create MSTs.
However, Orca lacks a lot of automation and doesn’t have an easy to use GUI, but it might be a suitable tool to have a look over an MSI or MST when in a rush.
Systracer
SysTracer is a utility tool that performs system snapshots and compares them to the output to see what has changed.

The steps to perform a Systrace on the system are:
1. Open Systracer
Systracer Main View
Snapshot Options Window

Snapshot Options Window

4. The first scan of the system starts. Snapshot in progress
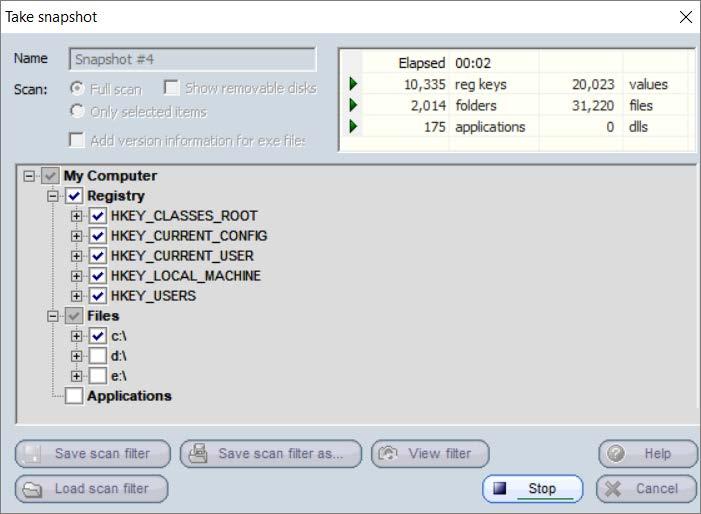
5. The initial system scan is finished. Now, perform the changes on the system.
Snapshot completed and visible in the main view
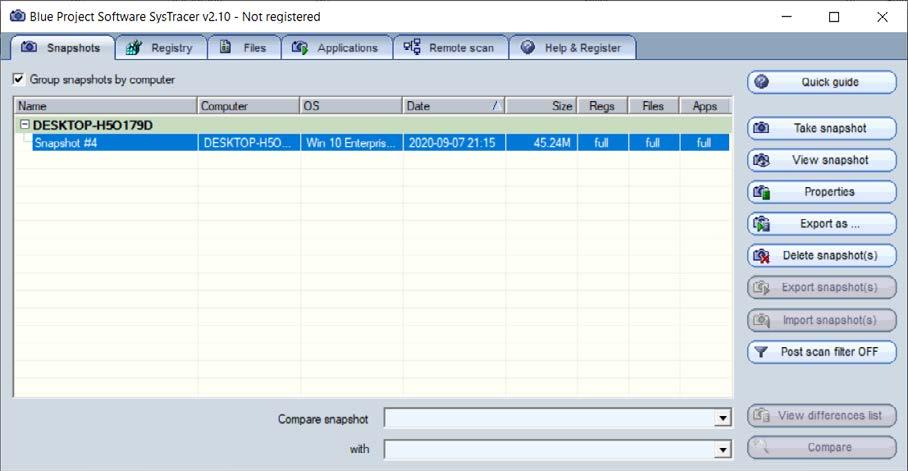
6. For this example, we changed a few settings for VLC Media Player.

7. Open Systracer again, click on Take Snapshot, select Full Scan and click Start
Snapshot Options Window

8. The second system snapshot will begin.
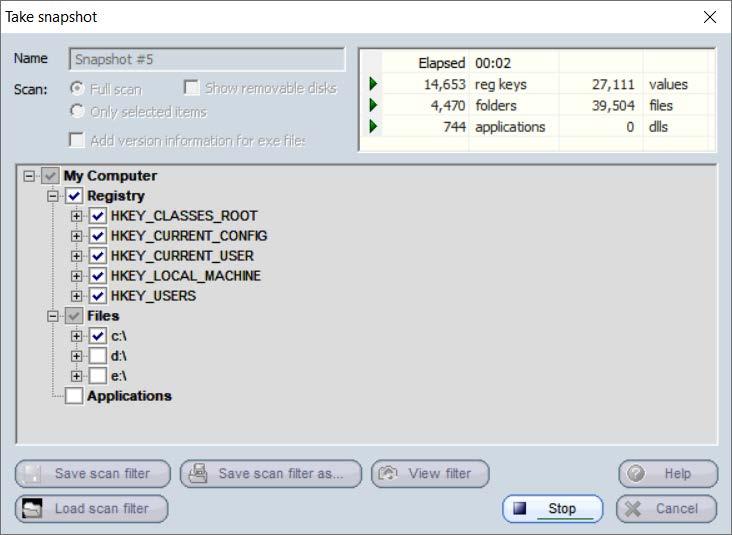
Snapshot in progress
9. The second capture is complete. Click OK
Snapshot finished
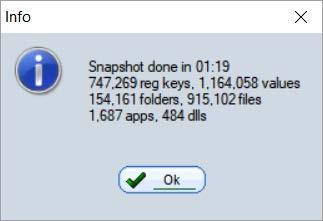
10. Compare the two snapshots by clicking Compare in the bottom right corner.
Snapshot finished as visible in the main view
11. Select Only differences.
Snapshot Registry compare


12. Search through the Registry or Files to find the needed changes. In our example, VLC kept the settings in a folder from %appdata%\VLC
Snapshot Files compare
This is an excellent tool for a software packager and we consider it a “must have” to help find the location of stored settings for all applications.

Process Monitor
Process Monitor is a real-time monitoring tool for Windows systems that displays files, accessed registry and active processes. Additionally, it adds a comprehensive list of enhancements, such as process monitoring, including termination codes, monitoring of files loaded into system memory, improved filters, process details activity, and more.
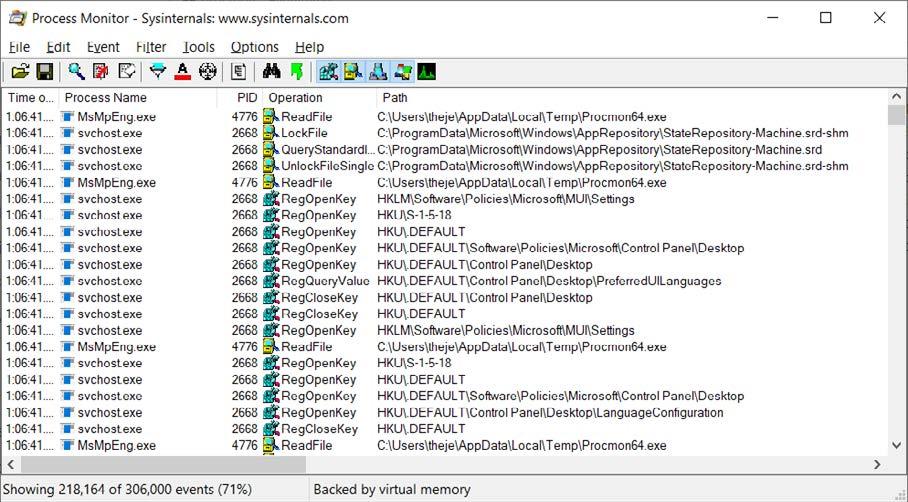
Process Monitor Main View
It can be used to debug applications, but also to check installations and see what is actually happening.
To figure out if an EXE installer contains an MSI and what additional changes it performs, execute the following steps:
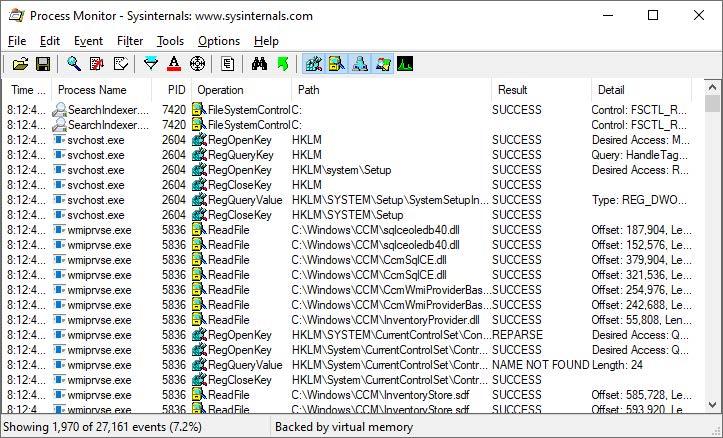
1. Open Process Monitor.

Process Monitor Main View
2. Disable Capture (CTRL+E) and Clear (CTRL+X) the list.
Process Monitor Main View

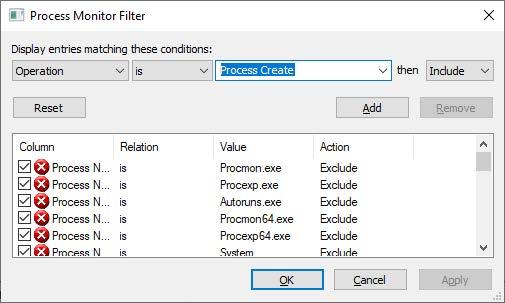
Process Monitor Filter Configuration

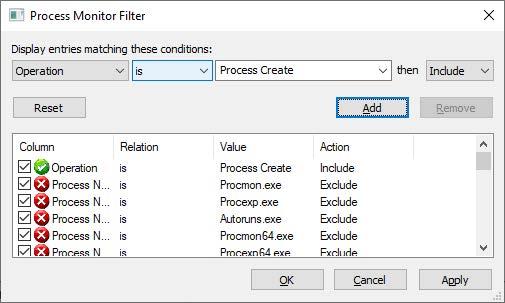
6. Start the Capture (CTRL+E) again.
Process Monitor Main View
7. Start your installation.
We started the installation of VMware Workstation, and the Process Monitor detected that the installer added two redistributables before installing the main package.
Process Monitor Main View
The paths from where the process is executed and the command lines are usually visible, so it makes the inner workings of an installer easy to understand.

Process Explorer
Process Explorer is a utility that manages the processes in the system. It displays information about a process including the icon, running arguments, memory usage statistics, users, rights, etc. When monitoring a particular process, you can list all the dll files it uses. The search option provides the ability to track the process that has resources in use, such as a file, directory, or registry.
Process Explorer Main View
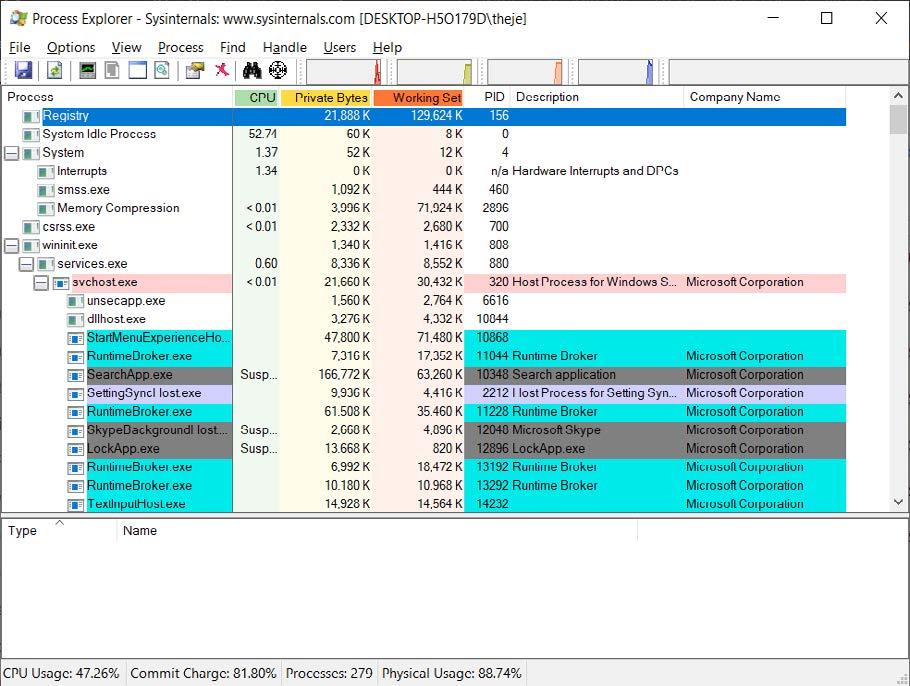
Its work window is divided into two parts. The top displays a list of active processes, and the bottom can display (depending on the settings) the dll files that are loaded into the memory and other information about the active processes.
No installation is required, no administrator rights to run.
Beyond compare
Beyond Compare is a utility for comparing files, directories, FTP site archives, etc. The main purpose of the program is to help analyze the differences in detail.

Beyond Compare Main View
It’s extremely useful when scripts or folder structures must be compared during the packaging process.
For example, if a capture is required for repackaging, it’s recommended to perform a comparison between the original installation directory and the captured directory.
Powershell App Deployment Toolkit
PowerShell App Deployment Toolkit is an open source project composed from a set of functions that allow you to perform common application deployment tasks and interact with the user during a deployment.

PS App Deploy Toolkit Install Window
It’s meant to simplify complex installation/uninstallation scripts and improve the installation success rates. With a few simple lines, you can create an installation bundle (suite), or perform additional changes on the system.
Configure PSAppDeployToolkit
Once PSAppDeployToolkit has been downloaded, extract the zip file, navigate to Toolkit\ AppDeployToolkit and edit the AppDeployToolkitConfig.xml.
The AppDeployToolkitConfig.xml is the main configuration xml for the script. There, you can choose the default log location, message icon, banner, logging options, installation parameters, languages, and more.
PSADT Configuration XML
It might seem like a tedious task, but once you configure PSAppDeployToolkit as you need, you can use the AppDeployToolkitConfig.xml for every script created in the future, not having to worry about settings each time you create a new script.
Autocomplete for PSAppDeployToolkit in
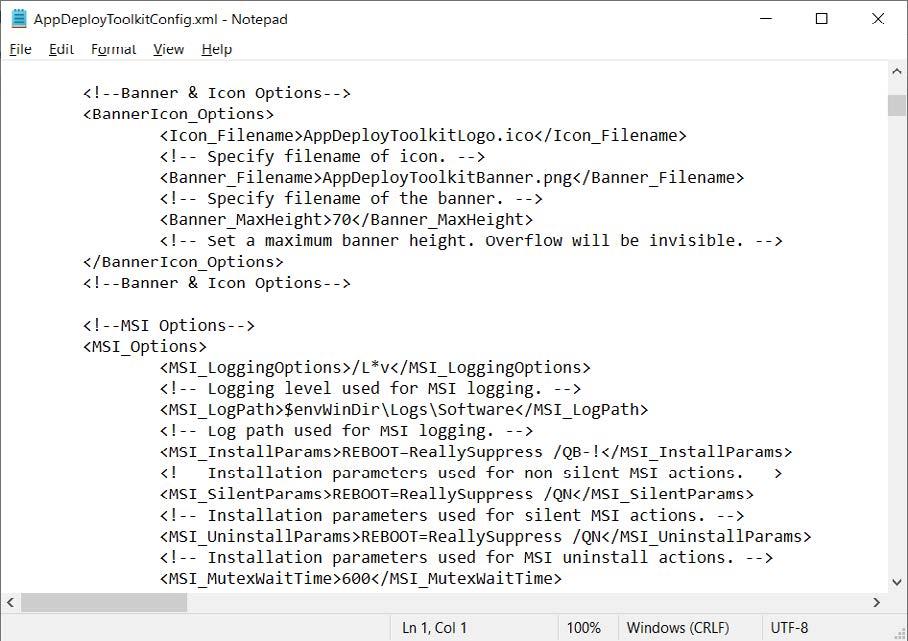
PowerShell ISE
The next step is not necessary, but it’s a quality of life trick, meant to have autocomplete on PowerShell App Deployment Toolkit in PowerShell ISE.
1. First, navigate to “C:\Users\(username)\Documents” and create a new folder called WindowsPowerShell. Inside that folder, create a new folder called Modules.
2. Next, if you downloaded and extracted PSAppDeployToolkit, navigate to the extracted location and copy the AppDeployToolkit folder (found in the Toolkit folder) in the previously created Modules folder.
PowerShell Modules
3. Go into the copied AppDeployToolkit folder and modify the AppDeployToolkitConfig.xml. Inside the AppDeployToolkitConfig.xml, change the Toolit_RequireAdmin parameter to False.

PSADT Configuration XML

4. The last step is to edit the PSAppDeployToolkitMain.ps1 with PowerShell ISE. Once opened with PowerShell ISE, save it as PSAppDeployToolkit.psm1 inside the AppDeployToolkit folder.


PSM1 Save Location
And that is it, all the commands should appear in the right pane and should auto-complete when writing.
PowerShell ISE
Create scripts
Once finished with the above configurations, you are ready to start creating scripts.
In the extracted location, navigate to the Toolkit folder where you will see a folder called Files.
The Files folder is where you will place all of your installation files, either installers like MSI, MST, MSP, or other configuration files which you can copy later during installation.
PSADT Files Folder for Installation Media
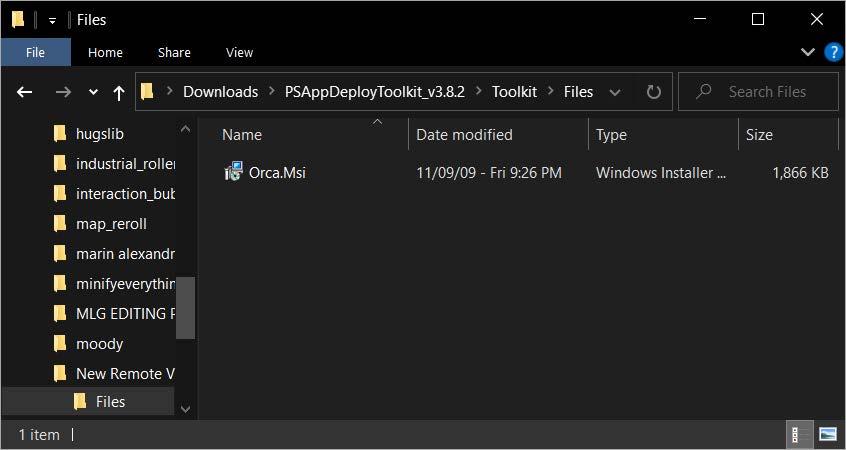
After you copied all the files you need, edit Deploy-Application.ps1 with PowerShell ISE, or another PowerShell editor of your choice.
The first basic lines that must be edited are your Application Vendor, Application Name, Application Version and other basic information about the installation. These variables will appear in the logs, toast notifications or progress box.
Deploy-Application.ps1 script
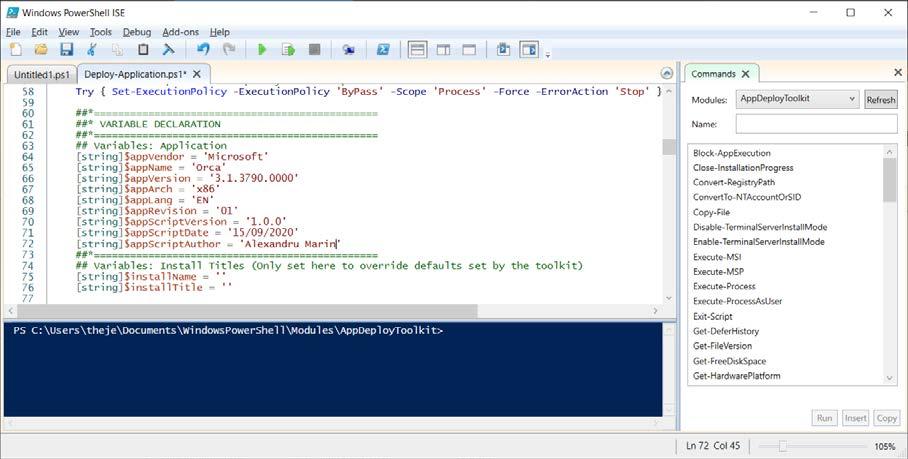
Next, the PSAppDeployToolkit installation logic is composed out of three main actions which contain three sub-actions for each. The main actions are:
1. Installation
2. Uninstallation
3. Repair
The sub-actions are:
1. Pre-Installation/Pre-Uninstallation/Pre-Repair
2. Installation/Uninstallation/Repair
3. Post-Installation/Post-Uninstallation/Post-Repair
Depending on your requirements, edit the sub-actions you need. In this example, we will modify only the Installation and Uninstallation main actions.
In the Pre-Installation action, we removed the message that informs us of closing a certain app or to defer the installation.
In the Installation action, we installed Orca.MSI with the following command:
Execute-MSI -Action Install -Path ‘Orca.Msi’
In the Post-Installation action, we also removed the message that informs us that the installation is complete. In the end, the script looked like this:
Deploy-Application.ps1 script

With a line, we have a progress box, an installation sequence and toast notifications for the user.Next, we moved to the Uninstall actions.
In the Pre-Installation section we removed the initial message.Then,in the Uninstallation section, we uninstalled Orca with the following command line: Execute-MSI -Action Uninstall -Path ‘{85F4CBCB-9BBC-4B50-A7D8-E1106771498D}’
At the end, the Uninstall sequence looks like this:
Deploy-Application.ps1 script
And that is it, the installation script is now done and can be used in the infrastructure.
Execute scripts
You can call the deployapplication.ps1 directly using powershell, and if you prefer, you could also call deployapplication.exe which sets the executionpolicy correctly. The preferred method is via the powershell script directly. For this, open an administrator command prompt and type the following: powershell.exe -executionpolicy bypass -file deployapplication.ps1

Deploy-Application.ps1 script install execution

To uninstall the application, we run almost the same command as before, but this time with the parameter -DeploymentType Uninstall:
powershell.exe -executionpolicy bypass -file deployapplication.ps1 -DeploymentType Uninstall
Deploy-Application.ps1 script uninstall execution

Additional Information
For more information about all the functions, syntax and parameters, navigate to the AppDeployToolkit folder, right-click AppDeployToolkitHelp.ps1 and select Run with PowerShell.

It will bring up the following window: PSADT Help Menu
There, you can find all the information you need, and multiple examples for each function.
Advanced Installer offers the possibility to create a chained installation of multiple packages, without needing the support of 3rd party tools.
WMI Explorer
WMI Explorer is a small utility that provides the ability to browse and view WMI namespaces/ classes/instances/properties in a single pane of view.
It helps the IT Pro search for the desired classes or instances when he wants to manipulate the WMI.
One example for this use is when you need to design/implement a kill process script in the logic of the installation.
To kill a process, you must use the Win32_Process class, which is present in the ROOT\ CIMV2 namespace, to enumerate all the instances. If the name of the process is found in the instance, you can terminate it.
WMI Explorer Main View
There are dozens of scenarios out there, and if you ever want to quickly find an instance or a class in the WMI, WMI Explorer is the perfect tool.

List features and components for installed MSIs
This is not actually a tool, but rather a script that helps you compare if you performed the right changes to an MSI with a MST.
Let’s say that you have a big vendor MSI with lots of features and components and you apply a transform to it (according to the specifications) that alters features and components (e.g. you remove certain features).
It shouldn’t be an issue. But, how do you test if everything is installed successfully? How do you know if you selected the right features and components that need to be installed?
There are cases where a setup.exe that contains a hidden MSI installs that MSI with a certain INSTALLLEVEL that could remove certain features.
Microsoft offers a VBScript called WiLstPrd.vbs which is present in Windows SDK Components for Windows Installer Developers.
With it, you can list products, properties, features, components and much more.
How can you use it to compare your original MSI with the one that has the changes you added?
It’s easy.
First, install the original MSI on a clean machine with the wanted changes.Copy the WiLstPrd. vbs to a specific location, for example C:\WiLstPrd.vbs.In the same directory, create the following batch file listfeatandcomp.cmd (C:\listfeatandcomp.cmd):
cscript “C:\WiLstPrd.vbs” {11111111-2222-3333-4444-555555555555} f > “C:\ features.txt” cscript “C:\WiLstPrd.vbs” {11111111-2222-3333-4444-555555555555} c > “C:\ components.txt”
Replace {11111111-2222-3333-4444-555555555555} with your MSI product code before executing the batch file.
The “f” parameter outputs the features and the “c” parameter outputs the components. For more details, check out the official documentation here.
After you double click the listfeatandcomp.cmd, two txt files will be created in C:\, features. txt and components.txt, each containing the installed and uninstalled features.Now, on a clean machine, install your MSI with self-designed MST and repeat the steps.
After that, with the compare tool of your choice, compare the original features.txt/ components.txt and the modified features.txt/components.txt
You can find WiLstPrd.vbs here
Wilogutl
Wilogutl.exe assists on the analysis of log files from a Windows Installer installation, and it displays suggested solutions to errors that are found in a log file.
Non-critical errors are not displayed. Wilogutl.exe can be run in quiet mode or with a user interface (UI). The tool generates reports as text files in both the UI and quiet modes. It works best with verbose Windows Installer log files, but it also works with non-verbose logs.
This tool is only available in the Windows SDK Components for Windows Installer Developers.
Debugging
It’s possible that the package we create has some issues: either it does not work properly, does not install, does not properly self-heals or self-repairs, or even fails to uninstall. So, here’s what we need to do when that happens.
Logs
First, we need to find the issue. The easiest way to determine where a package is cracking is to log in and read the log ( preferably at the time of the error as it will be easier to identify the cause then).
The msiexec.exe executable provides a parameter for creating logs, during any stage of the application (installation, repair, uninstallation). This is / l, with related sub-parameters.

Log File example
Windows Installer also automatically creates package logs in the current user’s temp directory. But to do this, we need to set the value of two registries, namely:

Windows Registry Editor Version 5.00
[HKEY_LOCAL_MACHINE \ SOFTWARE \ Policies \ Microsoft \ Windows \ Installer]
“Debug” = dword: 00000007 “Logging” = “voicewarmupX”
Analyzing
Looking at the table above, you can see that a return value of 3 is useful. In the Notepad, use the Find command and search for value 3. You may find various instances of return value 3 in the log file, so you have to determine which one caused the installation to abort. To do that, when the return value 3 is found in the file, start reading upwards from the error in the log file and see what actually caused it.
If a fatal error occurs and the installation aborts, the MSI package initiates a rollback procedure. If the installation is unsuccessful, the installer automatically performs a rollback installation that returns the system to its original state.
By manually searching through the log file, you may encounter a bunch of continuous lines with FileRemove or ComponentUnregister.
Rollback is important because the fatal error that caused the install to fail typically occurs right before the rollback process begins. Also, you can simply search through the log for Rollback.
So, for each standard action or custom action executed, its return value is displayed in the log (e.g. Action ended 16:34:29: InstallFiles. Return value 1.).
In the example above, we see that the return value for the InstallFiles standard action was 1, meaning that the action completed successfully. If this action failed and caused an error, we would have a return value of 3 -- causing the rest of the installation to stop and the rollback process to begin (which would turn the system back to the same state it was before the installation began).
So, as a general rule, if an MSI installation fails, it’s recommended to first open the log, search for return value 3 and see where the log points.
Checking the Installation Status of Features and Components
The verbose log includes an entry for each feature and component the installation package may install. The log tells us what the state of a feature or component was prior to the installation, the state that was requested by the installation, and how the installer left the feature or component.
Features and components entries appear in the log as in the following example:
MSI (s) (C8:0C): Feature: myFeature; Installed: Absent; Request: Local; Action: Local
MSI (s) (C8:0C): Component: myComponent; Installed: Absent; Request: Local; Action: Local
In the verbose log, you will see that:
• The installation state of the feature and component was absent before running the package.
• The installation package requested a local installation of these features and components
• The feature and component were both installed locally.
The following table summarizes the possible component or feature states that can appear in the log:
Log entry Value Description
Installed Local The component or feature is currently installed to run locally.
Source The component or feature is currently installed to run from source.
Advertise The feature is currently advertised. Only features can be advertised, components cannot.
Absent The component or feature is not currently installed.
Request Null No request.
Absent Installation requests the component or feature to be uninstalled.
Local Installation requests the component or feature to be installed to run locally.
Source Installation requests that the component or feature to be installed runs from source.
Log entry Value Description
Advertised Installation requests the feature to be installed as an advertised feature.
Reinstall Installation requests the feature be reinstalled. Components do not use reinstall state
Current Installation requests the feature to be installed in the default authored install state.
Action Null No action is done.
Absent The installer actually uninstalls the component or feature.
Local The installer installs the component or feature to run locally
Source The installer installs the component or feature to run from source.
Advertised The installer installs the feature as an advertised feature.
Reinstall The installer reinstalls the feature.
Current he installer installs the feature in the default authored install state.
FileAbsent The installer uninstalls the component’s files and leaves all other resources of the component installed.
In order to check for the features and components states, please search for the InstallValidate standard action. After the standard action is marked as the current action being executed, the features and components state are displayed on the following lines in the log.
Tips for log reading
The verbose log gives you useful information about the installation process. For example:
“Disallowing uninstallation of component: GUID’s component since another client exists”
This can happen if the same components are shared between multiple packages installed on the same machine. Windows Installer keeps a refCount of the components and does not allow removing them until all the applications that use them are removed.
Also, this may happen if you duplicate a project file (saved under a different name or by using the “copy-paste” method). It is strongly recommended to not do this because the created project will have the same GUIDs (Upgrade Code, Product Code, components ID) as the source/original project. To avoid this, you must use the Save as template option.
If there are files missing from the installation folder during an upgrade operation, search through the log for the following message:
“Disallowing installation of component: GUID’s component since the same component with higher versioned keyfile exists”
If you find it, this is the reason why your file is not copied on the target machine.
The upgrade process performs the following actions:
• Detect and completely remove older products. During this operation, the file will be removed from the machine.
• Install the new product. The file from the upgraded version will not be installed since its component was not marked for installation.
To overcome this behavior, you can enable the Always overwrite existing file option from the File Operations Tab of the File Properties
“MSI (s): File: C:\MyApp\MyExe.exe; Won’t Overwrite; Existing file is of an equal version”
This indicates that the installation package will not overwrite the existing file since it is the same version as the one being installed.
For a comprehensive understanding on how to read a Windows Installer verbose log file, check out this article
Event Viewer
A variant proposed by the operating system to detect where an application cracks, is the event viewer (Control Panel \ Administrative Tools).
Event Viewer
The errors made by our package can be identified quite quickly, looking at the time they appeared, or at the references to MsiInstaller.
For each error, the event viewer provides two entries.
The first window tells us which package the entry refers to, and the second one, what caused the error. Although they may seem difficult to read, the package is easily identified with the product code.

Quality
MSIDISABLERMRESTART 0
MSIRMSHUTDOWN 2
MSIRESTARTMANAGERCONTROL Disable
ARPSYSTEMCOMPONENT
File/Folder checks
Ensure that files installing to System32 or any common folder are Reference Counted
If used, it needs to be documented.
Check the log file to determine if any of the folders listed need to be shared.
No unnecessary File/Folder entries. No unnecessary entries.
Registry checks
Inspecting Registry for any unnecessary entries. Most should be included in the Exclusion List
Other checks
Shortcut placement
Start Menu\Programs\<application name> or directly in Start Menu
Check for unnecessary shortcuts. e.g. Product Registration / Readme / Vendor URL.
Also, make sureno quick launch or non standard location shortcuts exist unless specified in the approved discovery document.
No references to network drives i.e. “H:\”.
Ensure there are no unused directory table entries
No unnecessary entries.
Your company standard. In any case (capture, MST, silent), shortcut locations remain just as the vendor places them (default). Only in rare cases where the customer asks for a different Start Menu structure this is modified
Check with a table search in your MSI editor.
Delete any unused directories in directory table
Media table
• Ensure there are no unused entries
• LastSequence value should not be larger than the greatest Sequence value from the File table.
If ActiveSetup is used and a new release of a package is created (e.g. to fix an issue), then ensure the “Version” string value in the registry is incremented.
HKLM\SOFTWARE\Microsoft\ Active Setup\Installed Components\ [ProductCode]
Version=X,X
Note: Do not use decimal points in versions within ActiveSetup keys as they are ignored.
If ActiveSetup is used, check to see if it needs removal
Custom Action Check
Installation
Ensure that these Device Drivers are managed correctly within the package.
Install any prerequisites as documented.
Install a previous version of the application and check if the current package upgrades the previous package
In most cases, at uninstall, the Active Setup keys should be deleted (from HKCU).
Check if all the custom actions are correctly placed and function correctly.
Log on as Administrator and install the application under the SYSTEM context (psexec -s) ensuring that core applications are ran during the process, if integration is required
(Do not run the application as an admin user).
After installation, DELETE THE SOURCE MEDIA (MSI,MST,ENTIRE FOLDER)
FROM WHERE THE PACKAGE HAS BEEN INSTALLED TO CHECK IF THE PACKAGE REQUIRES MEDIA DURING SELF-HEALING. Use the installation command line.
Ensure pop ups / messages during installation are consistent with the wanted behavior.
Reboot / Log off and on if required by the installation i.e. check for ActiveSetup.
Launch all shortcuts as the locked down user.
Test functionality of the application as a locked down user.
Ensure no popups / EULA / first use / product registration dialogs. Check auto updates disabled in the user interface. Ensure the functionality meets all requirements.
Check that ODBC entries have been created on the machine.
Check that services have been installed on the machine.
Check services path(s) for vulnerabilities.
Confirm that environment variables have been applied correctly.
Check installation logs to verify the installation was successful.
Check permissions are set correctly
Check Firewall rules
Check Control Panel applet(s) (if any).
Ensure there are no errors / unexpected repairs after reboot.
Revert to a clean build. Repeat the installation tests above after installing and removing the previous version. (only if previous version exists)
Repair
Simulate repair
MSI repair
ActiveSetup
Remove a keypath and then launch the application.
Check if the removed item has been restored. Check if the package size has not ballooned which would indicate a problem with payload dropping during repair. Check application functionality.
Check user based components (e.g. User Profile files) are created during the repair and that no unnecessary repair happens on subsequent launches.
ActiveSetup should only be used if: a) standard MSI repair cannot be used e.g. Unadvertised shortcut. Or b) it is part of the MSI design
Uninstall
Login as Administrator and Uninstall packages running under the SYSTEM context (psexec -s) using the command line. making sure that all components that should be uninstalled are uninstalled. Ensure that core applications are launched if an integration is required by the application. (Use the installation command line from the package build document.)
Ensure pop ups / messages during removal are consistent with the needed behavior.
Ensure all running processes are closed and removed (i.e. taskbar items).
Reboot (if applicable) after uninstall. Check system state is as expected.
Ensure that all shortcuts have been removed
Ensure the application folder is removed.
Ensure services are removed.
Ensure ODBC entries/drivers are removed (if applicable).
Check environment variables are removed. The path variable should be checked to ensure that the whole path variable has not been removed.
Registry - application specific keys removal.
Installation directory removal
Firewall rules removal check.
Control Panel applets removal check.
Check file associations are correctly removed or reverted (if shared).
Depending on the nature of the package, check if the application specific registry keys have all been removed.
Check that the INSTALLDIR has been removed. If not possible, it should be documented.
Review the event log errors and warnings, ensure none exist that imply a packaging issue exists..
Check Uninstall logs to verify Uninstall was successful.
About the Author
With almost two decades of experience as an IT Pro engineer and manager in enterprises under his sleeve, Alex Marin has managed a huge amount of end-users and has many stories to share about the industry. (Follow him on Twitter to learn more)

When he is not tinkering with his own tools and scripts, Alex loves teaching the secrets of Windows Installer either by writing a new article or through his videos, posted on the Advanced Installer Youtube channel.
In this book, he’s sticking to the fundamentals of application packaging. Mainly, on the useful foundations that software engineers currently developing or managing Windows Applications can put into practice.
Alex Marin
Follow Alex on YouTube Advanced Installer Blog
IT Pro | Packaging Lead | Author
