4 minute read
Powershell App Deployment


Powershell App Deployment Toolkit
PowerShell App Deployment Toolkit is an open source project composed from a set of functions that allow you to perform common application deployment tasks and interact with the user during a deployment.
Advertisement
PS App Deploy Toolkit Install Window It’s meant to simplify complex installation/uninstallation scripts and improve the installation success rates. With a few simple lines, you can create an installation bundle (suite), or perform additional changes on the system.
Configure PSAppDeployToolkit
Once PSAppDeployToolkit has been downloaded, extract the zip file, navigate to Toolkit\ AppDeployToolkit and edit the AppDeployToolkitConfig.xml. The AppDeployToolkitConfig.xml is the main configuration xml for the script. There, you can choose the default log location, message icon, banner, logging options, installation parameters, languages, and more.

PSADT Configuration XML It might seem like a tedious task, but once you configure PSAppDeployToolkit as you need, you can use the AppDeployToolkitConfig.xml for every script created in the future, not having to worry about settings each time you create a new script.
The next step is not necessary, but it’s a quality of life trick, meant to have autocomplete on PowerShell App Deployment Toolkit in PowerShell ISE. 1. First, navigate to “C:\Users\(username)\Documents” and create a new folder called
WindowsPowerShell. Inside that folder, create a new folder called Modules. 2. Next, if you downloaded and extracted PSAppDeployToolkit, navigate to the extracted location and copy the AppDeployToolkit folder (found in the Toolkit folder) in the previously created Modules folder.
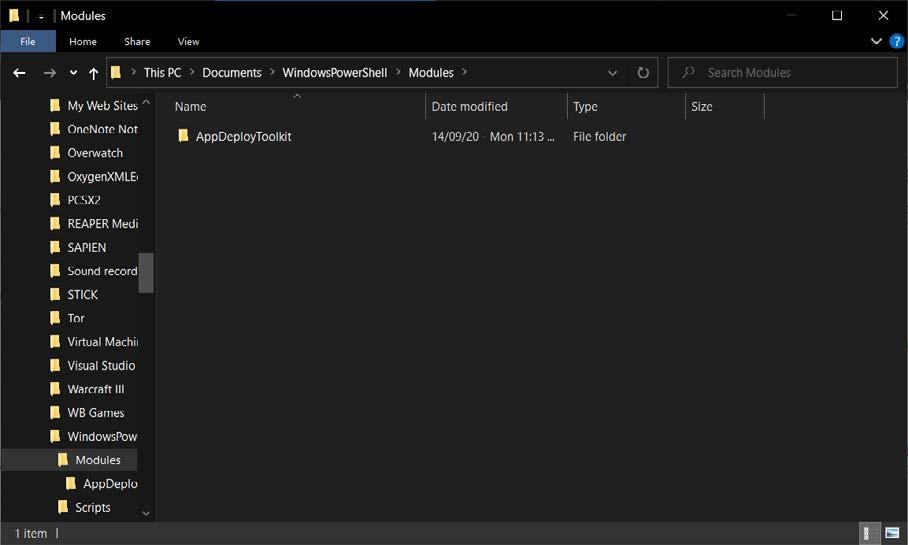
PowerShell Modules
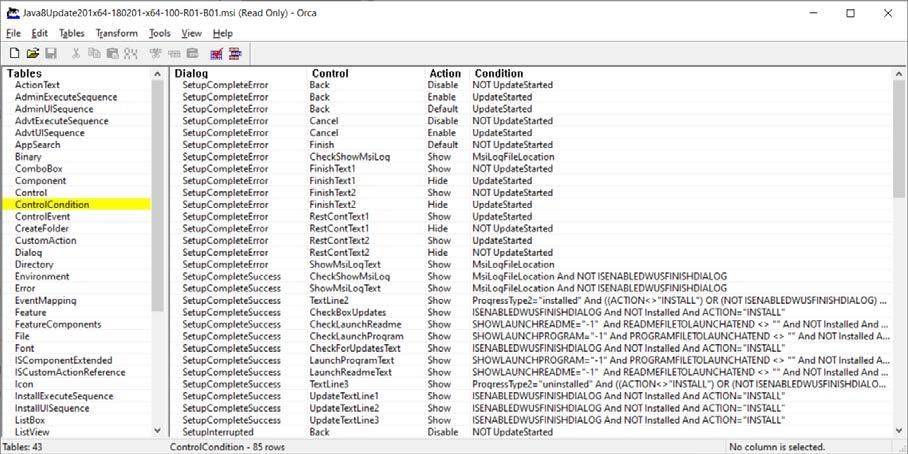
3. Go into the copied AppDeployToolkit folder and modify the AppDeployToolkitConfig.xml. Inside the AppDeployToolkitConfig.xml, change the Toolit_RequireAdmin parameter to
False.
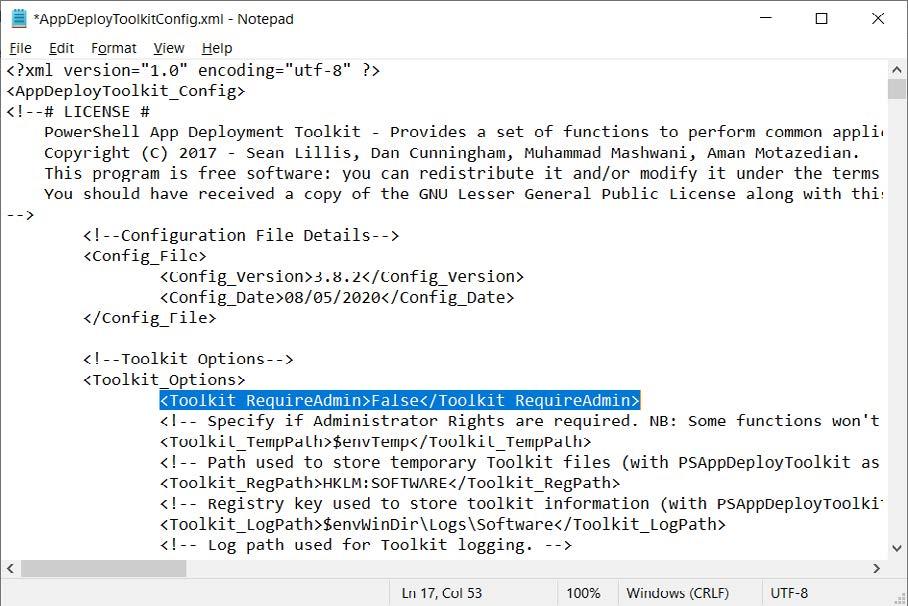
PSADT Configuration XML
4. The last step is to edit the PSAppDeployToolkitMain.ps1 with PowerShell ISE. Once opened with PowerShell ISE, save it as PSAppDeployToolkit.psm1 inside the AppDeployToolkit folder.

PSM1 Save Location
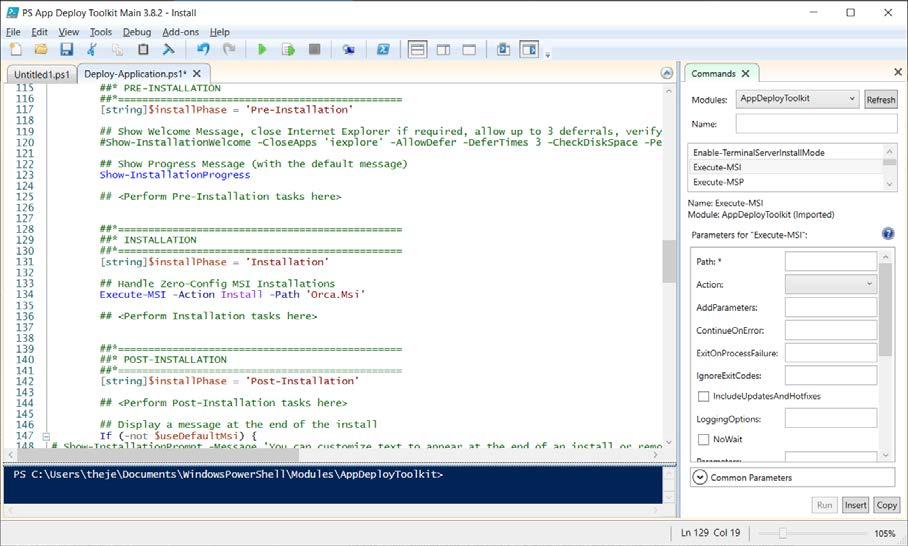
And that is it, all the commands should appear in the right pane and should auto-complete when writing.

PowerShell ISE
Create scripts
Once finished with the above configurations, you are ready to start creating scripts. In the extracted location, navigate to the Toolkit folder where you will see a folder called Files. The Files folder is where you will place all of your installation files, either installers like MSI, MST, MSP, or other configuration files which you can copy later during installation.

PSADT Files Folder for Installation Media
After you copied all the files you need, edit Deploy-Application.ps1 with PowerShell ISE, or another PowerShell editor of your choice. The first basic lines that must be edited are your Application Vendor, Application Name, Application Version and other basic information about the installation. These variables will appear in the logs, toast notifications or progress box.

Deploy-Application.ps1 script
Next, the PSAppDeployToolkit installation logic is composed out of three main actions which contain three sub-actions for each. The main actions are:
1. Installation 2. Uninstallation 3. Repair
The sub-actions are:
1. Pre-Installation/Pre-Uninstallation/Pre-Repair 2. Installation/Uninstallation/Repair 3. Post-Installation/Post-Uninstallation/Post-Repair Depending on your requirements, edit the sub-actions you need. In this example, we will modify only the Installation and Uninstallation main actions. In the Pre-Installation action, we removed the message that informs us of closing a certain app or to defer the installation. In the Installation action, we installed Orca.MSI with the following command: Execute-MSI -Action Install -Path ‘Orca.Msi’ In the Post-Installation action, we also removed the message that informs us that the installation is complete. In the end, the script looked like this:
Deploy-Application.ps1 script
With a line, we have a progress box, an installation sequence and toast notifications for the user.Next, we moved to the Uninstall actions. In the Pre-Installation section we removed the initial message.Then,in the Uninstallation section, we uninstalled Orca with the following command line: Execute-MSI -Action Uninstall -Path ‘{85F4CBCB-9BBC-4B50-A7D8-E1106771498D}’ At the end, the Uninstall sequence looks like this:

Deploy-Application.ps1 script
And that is it, the installation script is now done and can be used in the infrastructure.
Execute scripts
You can call the deployapplication.ps1 directly using powershell, and if you prefer, you could also call deployapplication.exe which sets the executionpolicy correctly. The preferred method is via the powershell script directly. For this, open an administrator command prompt and type the following:
powershell.exe -executionpolicy bypass -file deployapplication.ps1

Deploy-Application.ps1 script install execution
To uninstall the application, we run almost the same command as before, but this time with the parameter -DeploymentType Uninstall:
powershell.exe -executionpolicy bypass -file deployapplication.ps1 -DeploymentType Uninstall

Deploy-Application.ps1 script uninstall execution
Additional Information
For more information about all the functions, syntax and parameters, navigate to the AppDeployToolkit folder, right-click AppDeployToolkitHelp.ps1 and select Run with
PowerShell.
It will bring up the following window:
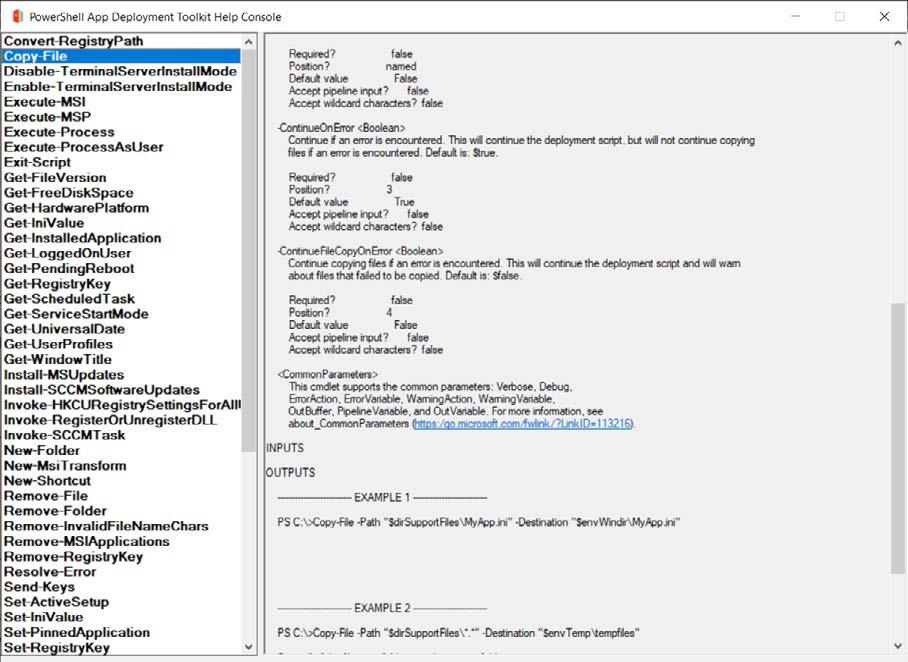
PSADT Help Menu
There, you can find all the information you need, and multiple examples for each function.
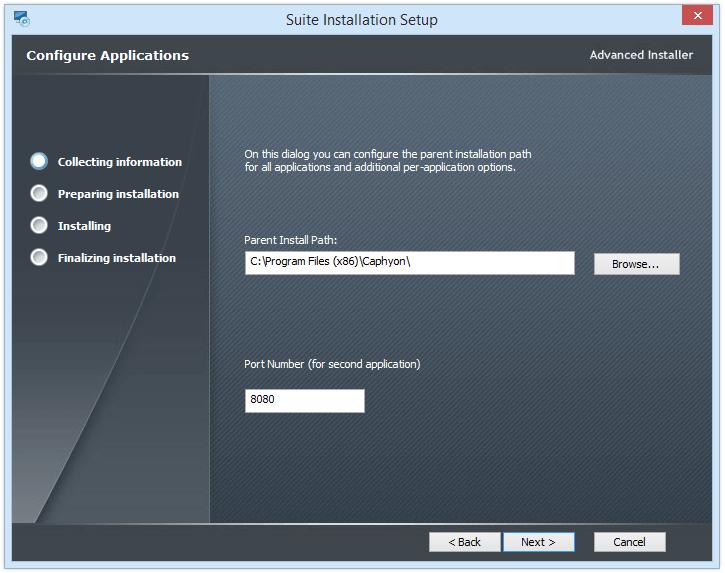
Advanced Installer offers the possibility to create a chained installation of multiple packages, without needing the support of 3rd party tools.