Development Document. Adam Parrott

N0737314

This will be in chronological order of start to finish of my design and development for the CASFA unit. Sketch Ideation Sketch Modelling Workshop Modelling Further Development/ Branding CAD Development Final Renders Project Refinement 04 - 19 20 - 27 28 - 39 40 - 45 46 - 65 66 - 75 76 - 86 02 03 &
Initial Ideation
Through research I had identified that I wanted to create a steel framed unit.
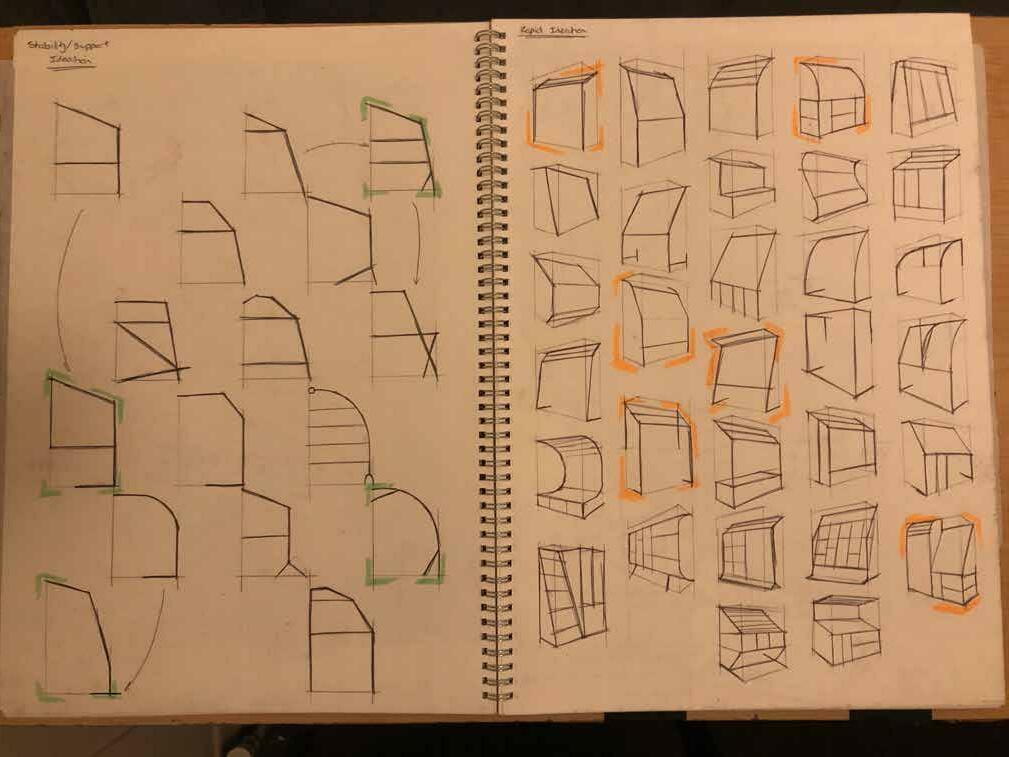
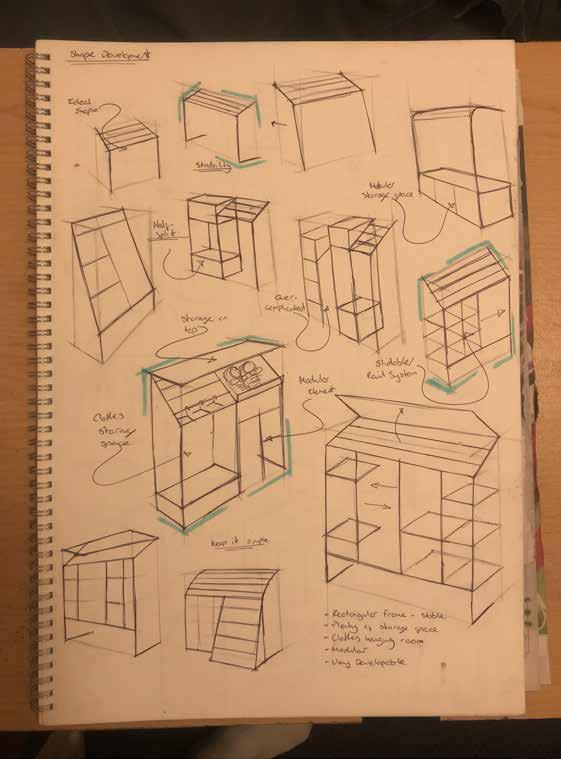
I therefore began initial ideation of a frame that could utilise space efficiently while providing lots of storage/usable areas.
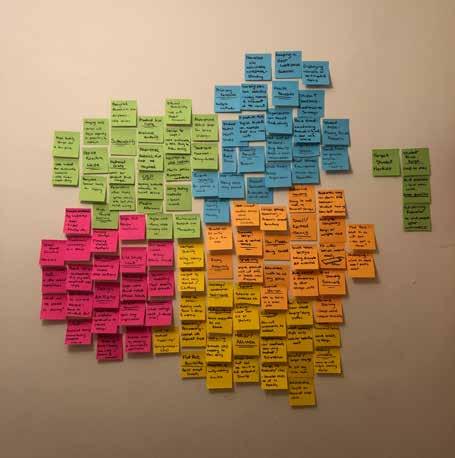
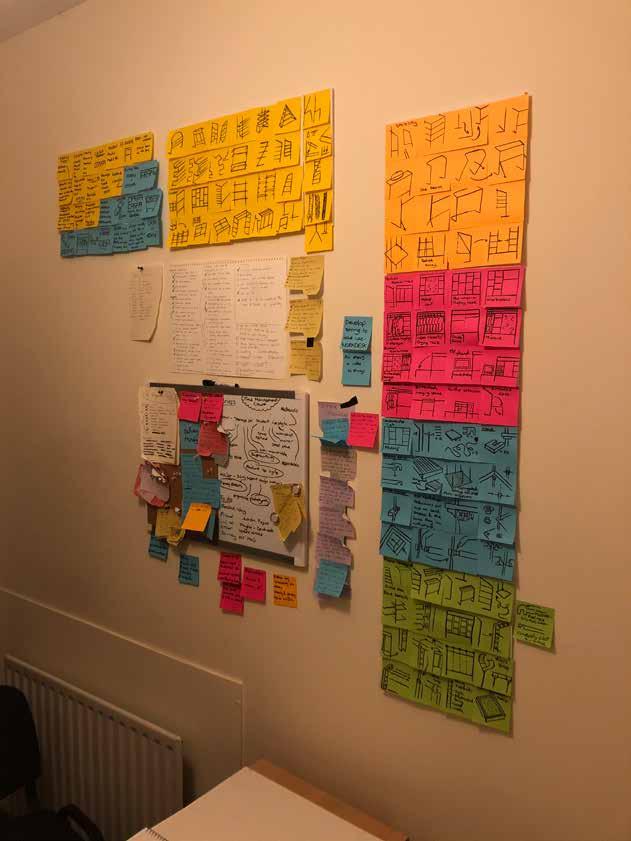
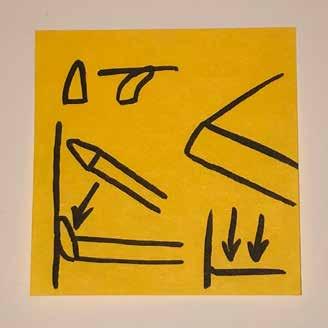
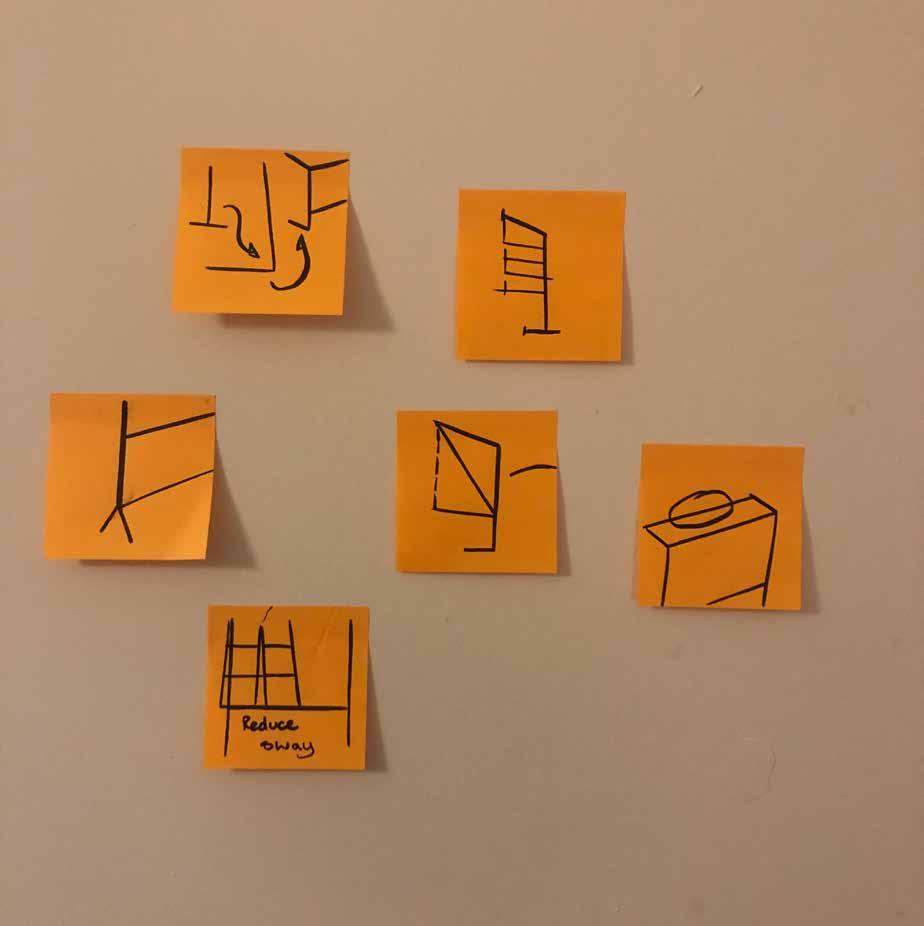
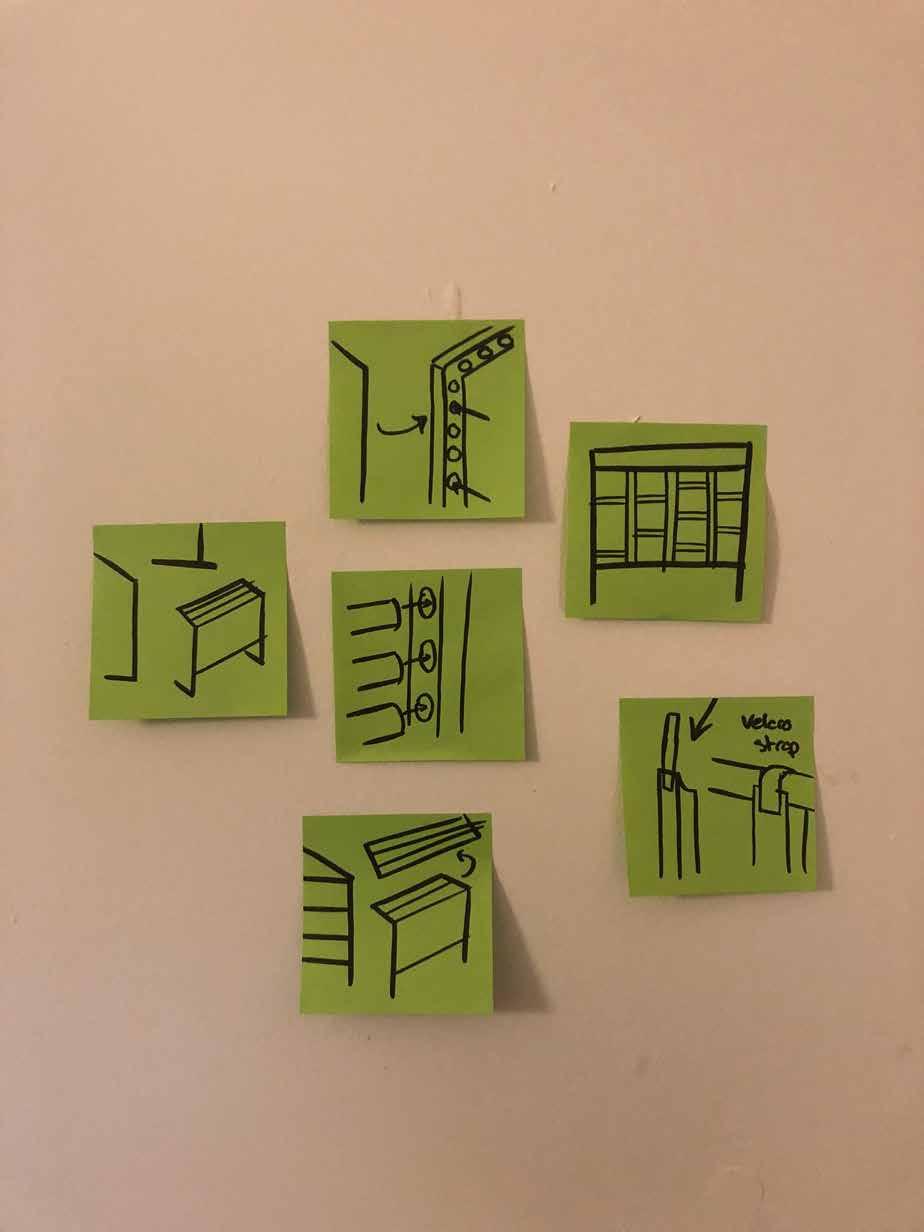
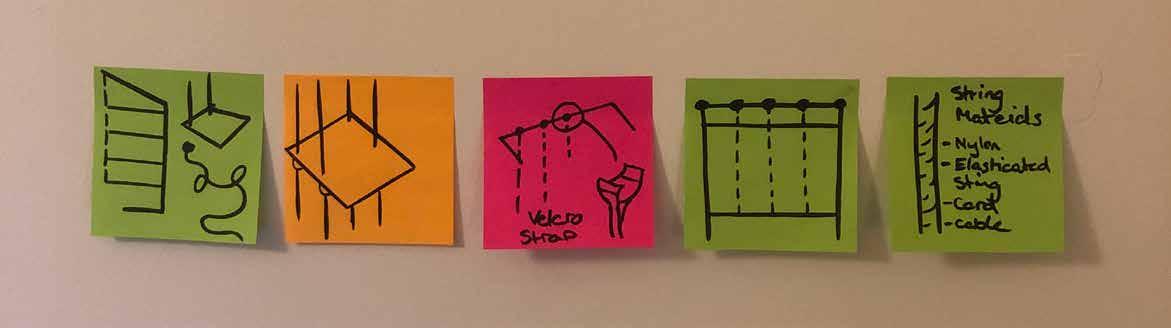
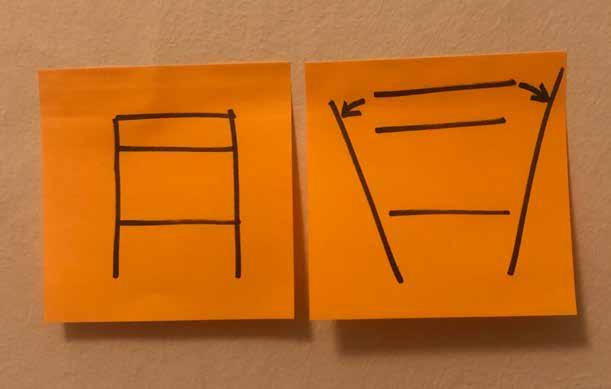
I found Post-It noting to be very useful for visualising my designs and comparing their effectiveness.
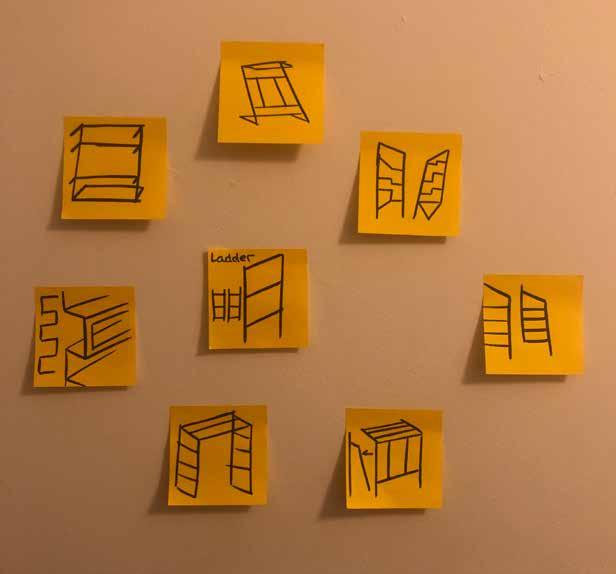

This will be a running theme throughout my development process.
I didnt want to overcomplicate the design of the frame as it would raise the cost and could interfere with modular capabilities.
I feel I couldve done more initial design development but I was very happy with my initial idea and wanted to start developing it as soon as possible.
04 05
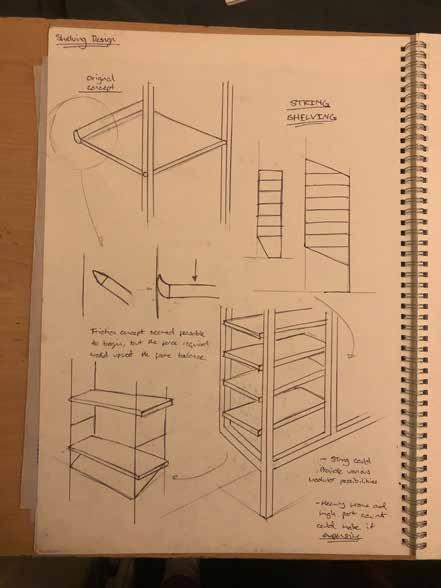
Initial Concept
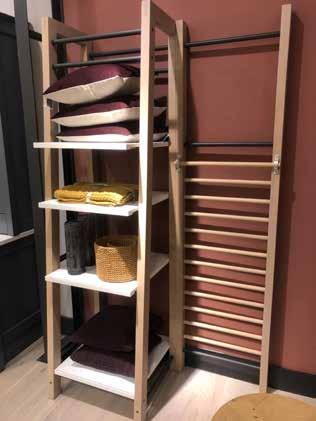
I drew inspiration from this product I found in John Lewis as it instantly indicated multifunctional possibilities, and also because of its bold and space efficient design.
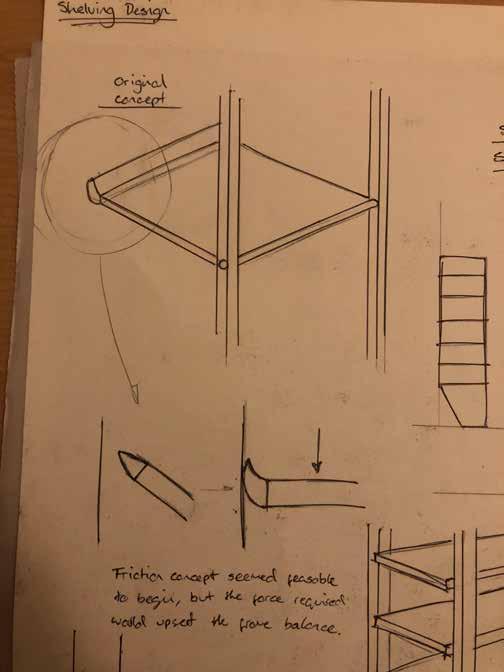

Initial
Shelving
Design
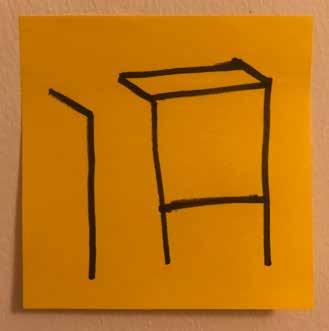
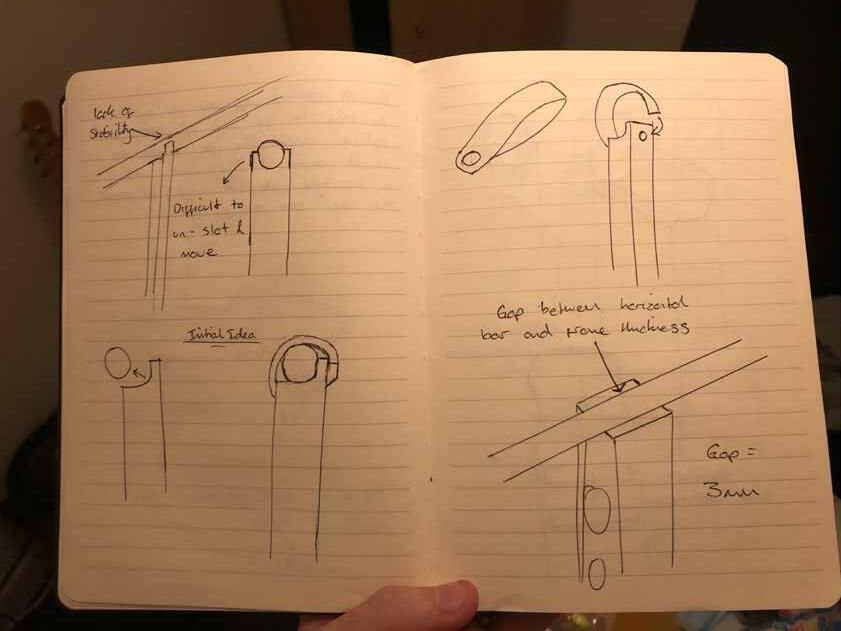
My first thought was to have a rubber stopper on the end of the shelf that would rest against the wall and create a flat surface via friction.
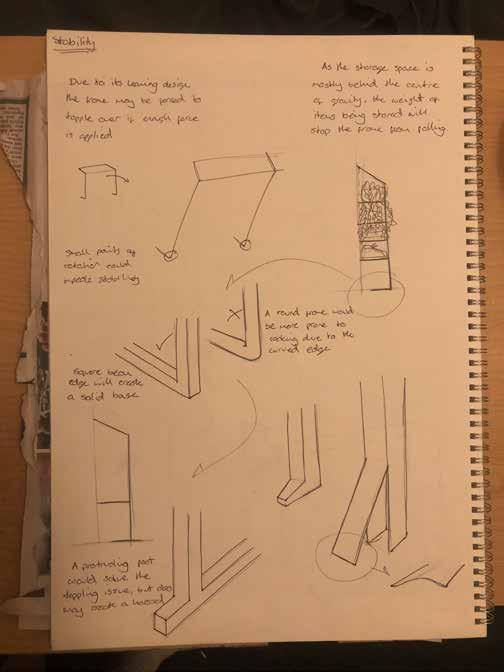
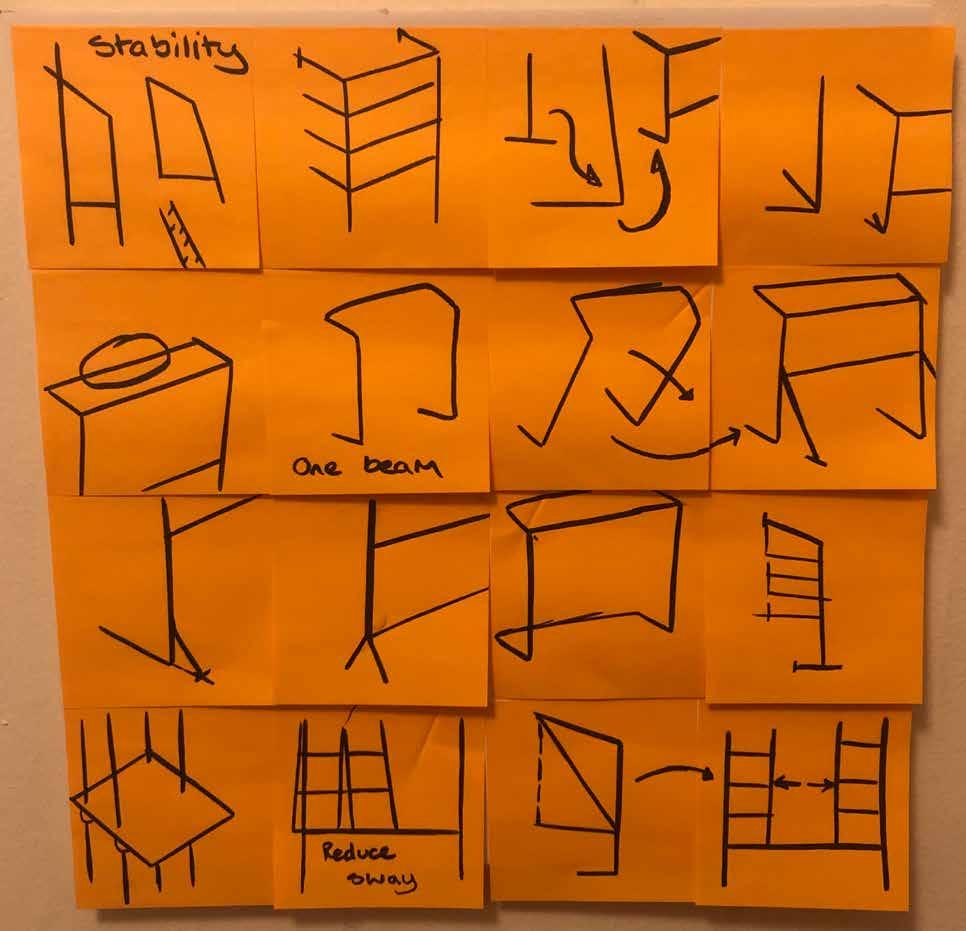
Stability was a key issue with this design, which therefore led me to test the design by modelling.
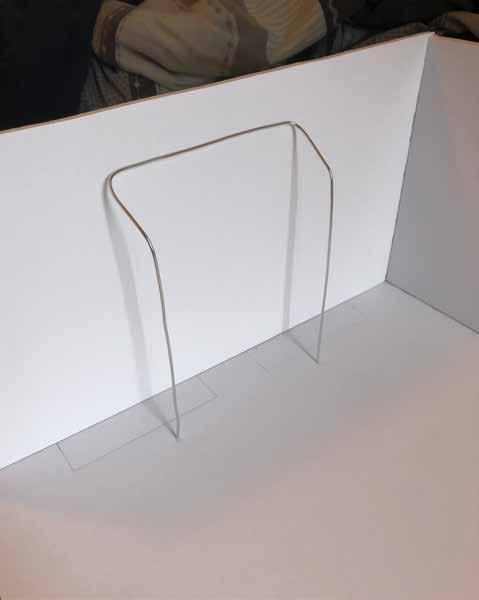
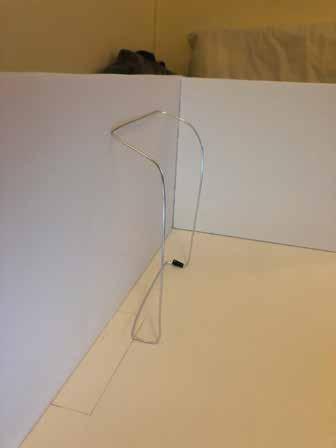
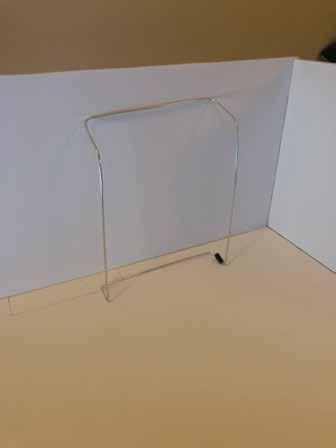
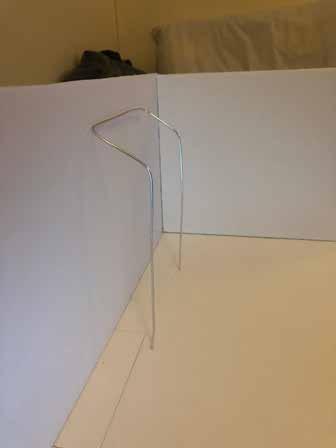
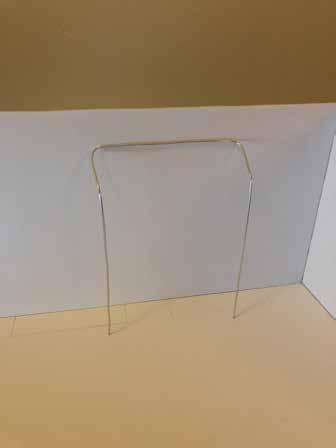
Wire Modelling
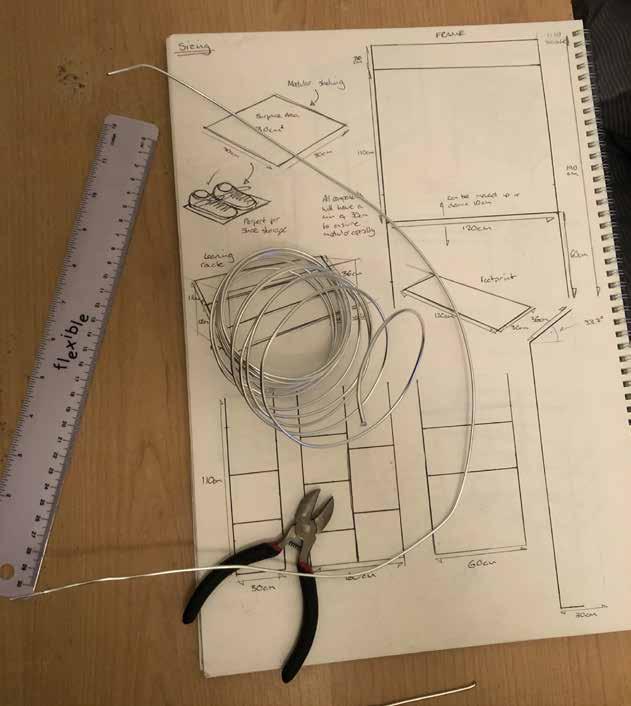
Using a rough inital mock up of the size of the frame, I began making scale models out of modelling wire to see if they would fall forwards or in any other direction.
It also allowed me to prototype initial framework designs and stability measures.
06 07
Stable on a small scale but would be very prone to toppling in full scale with no stability supports.
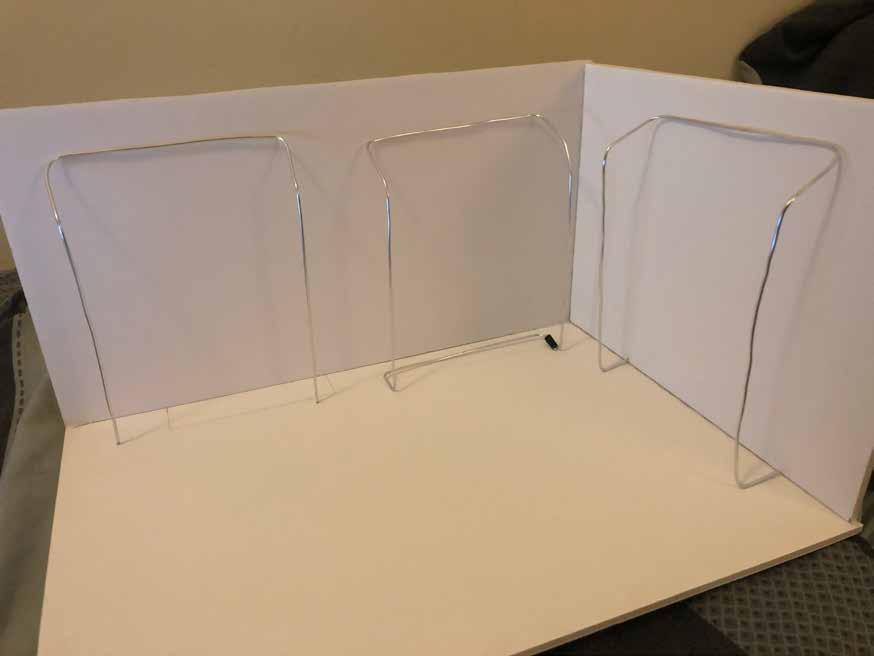
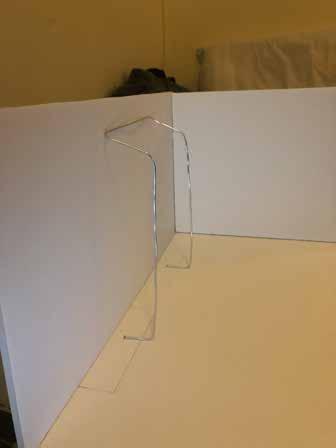
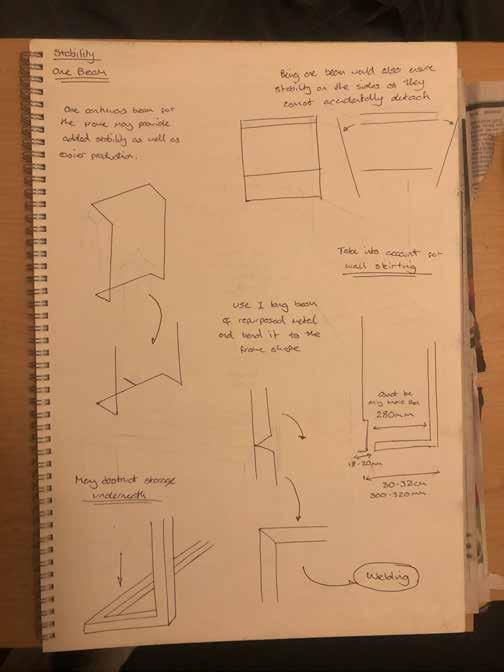
Having rear facing feet improves stability without restricting storage space underneath, making it a key development point going forward.
In hindsight, my model studio was not the most accurate way of testing the concept, however I still gained design inspiration and identified the need for feet to ensure stability.

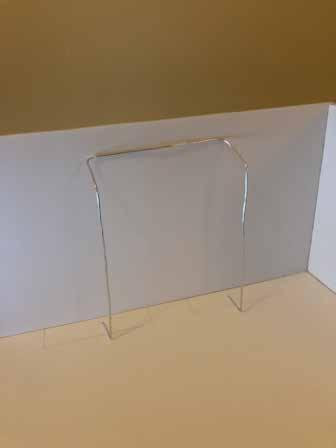
The single beam frame seemed to be much more stable, but could restrict packaging or flat pack possibilities.
08 09
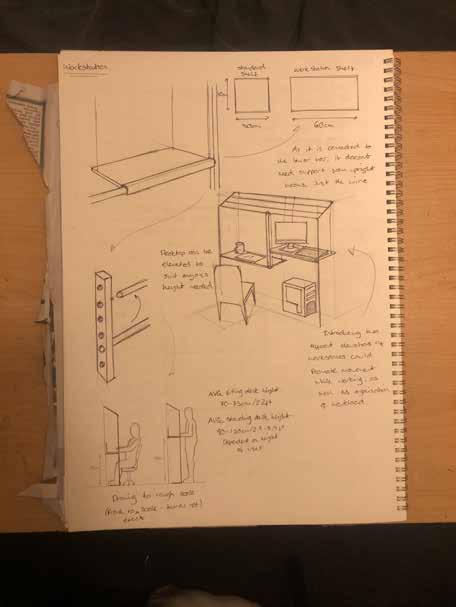
Concept Development
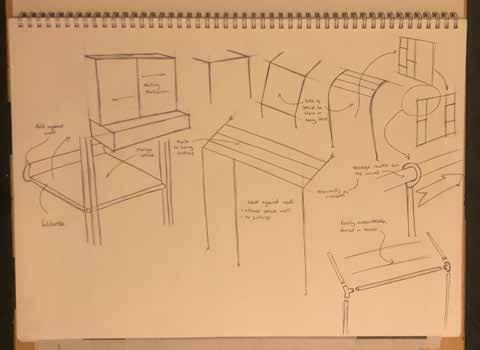
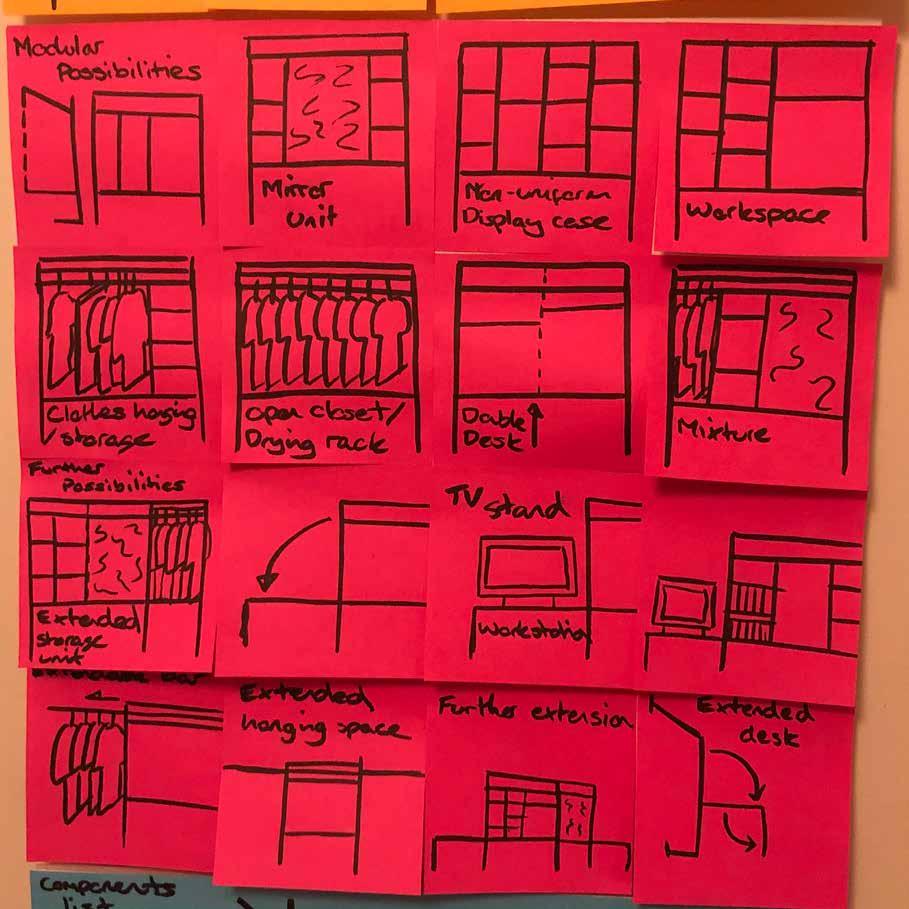
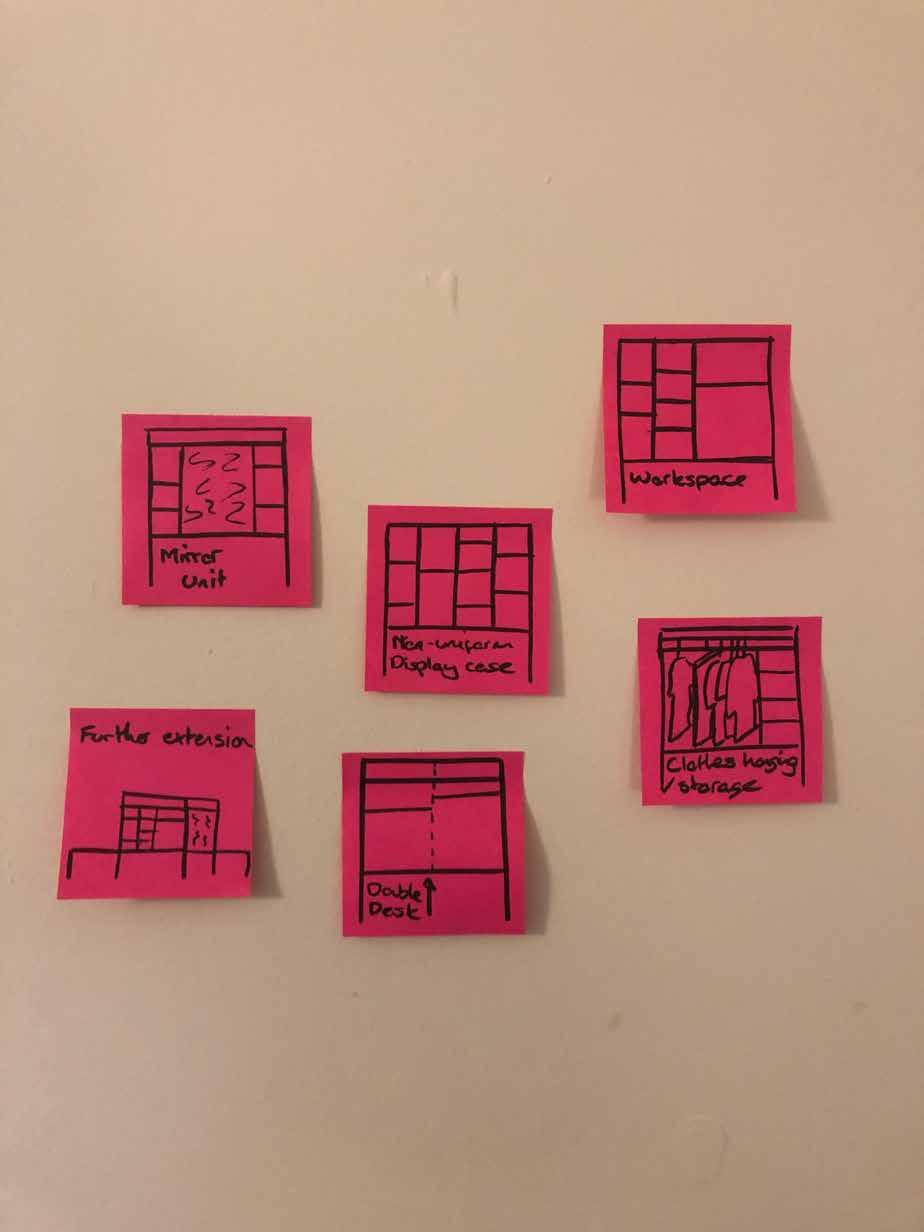
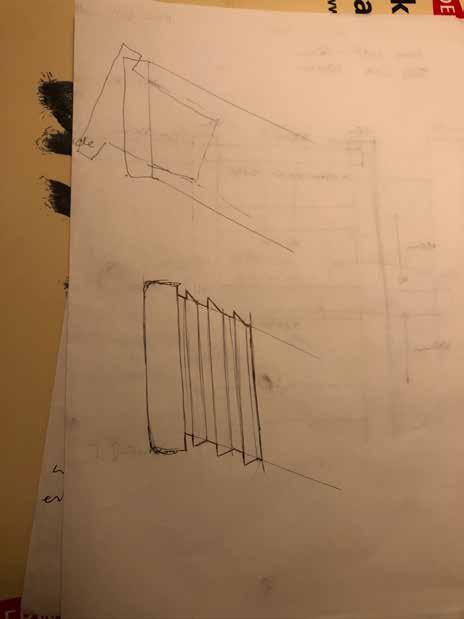
Some further development of the frame design, including potential storage features.

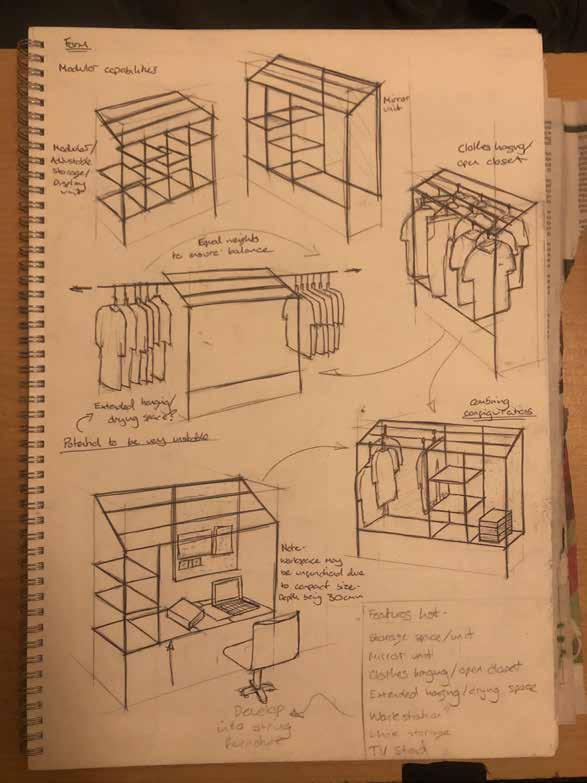
Sketch ideation of potential multifunctional ideas.
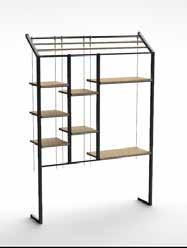
The frame design greatly compliments a variety of configurations that can suit multiple different tasks, whether it be storing belongings, hanging clothes or creating a workspace.
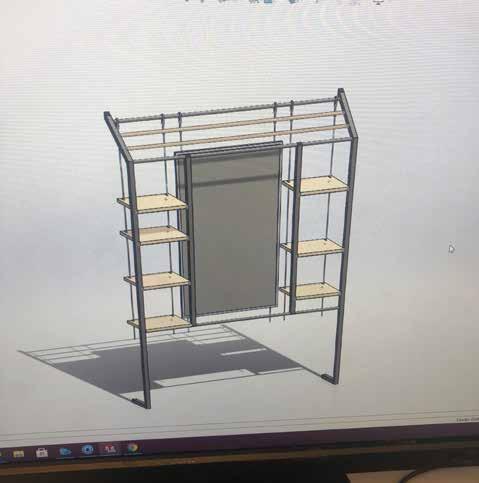
Mirror unit and open closet development, utilising the upper rails for clothes hanging and shelving for storage.
Further developments including a TV stand concept and an extending workspace.
The extended workspace may contradict the concept of the frame being build for small rooms so I didnt develop further.

10 11 &
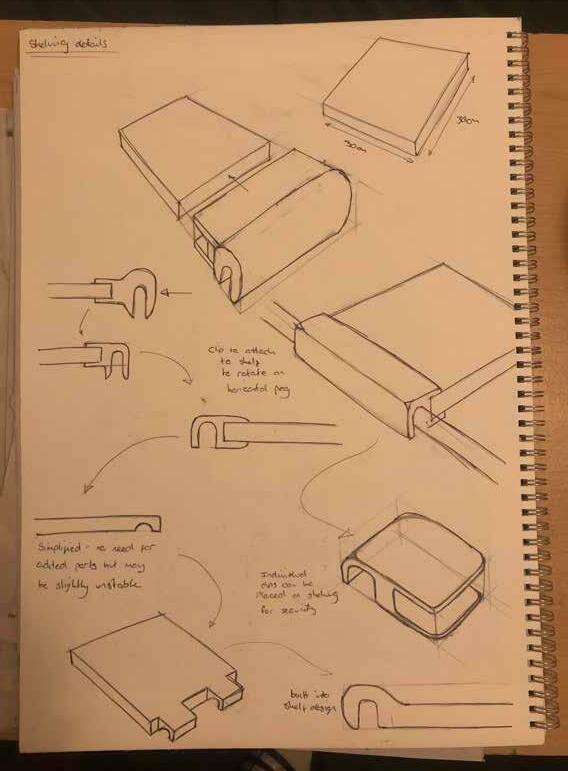
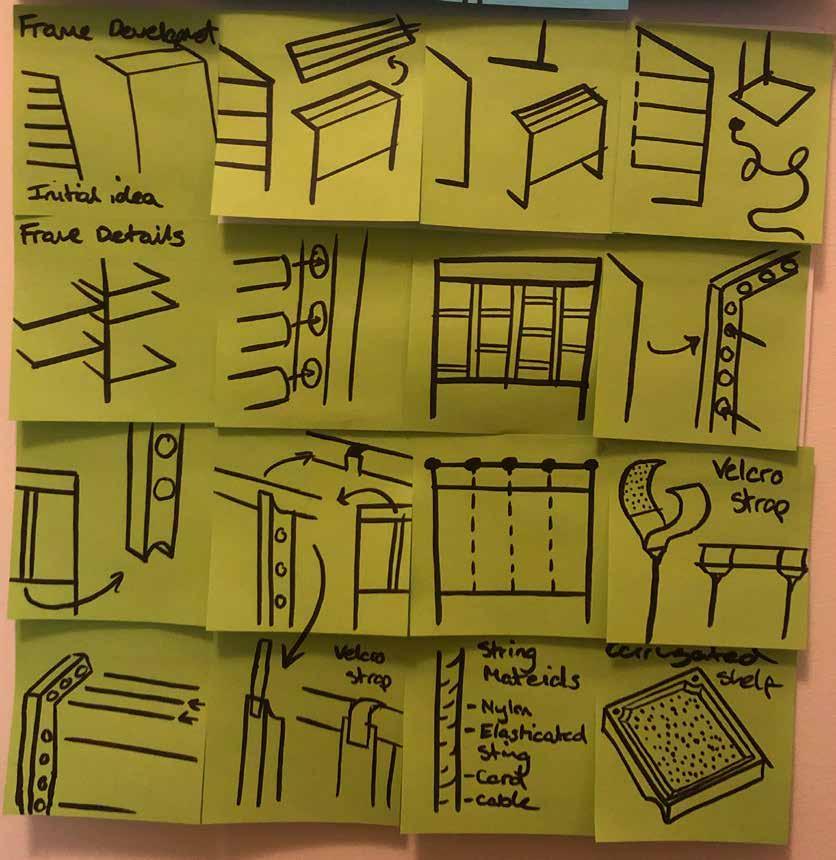
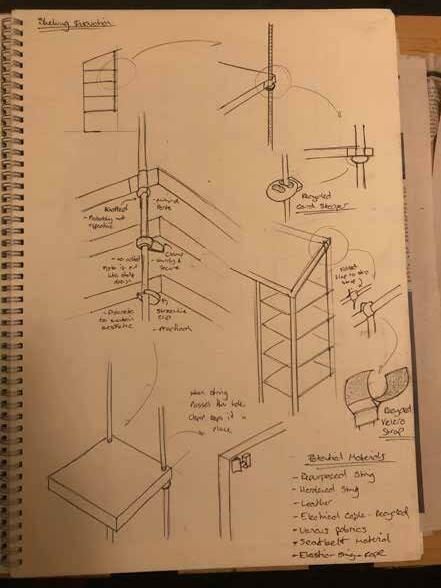
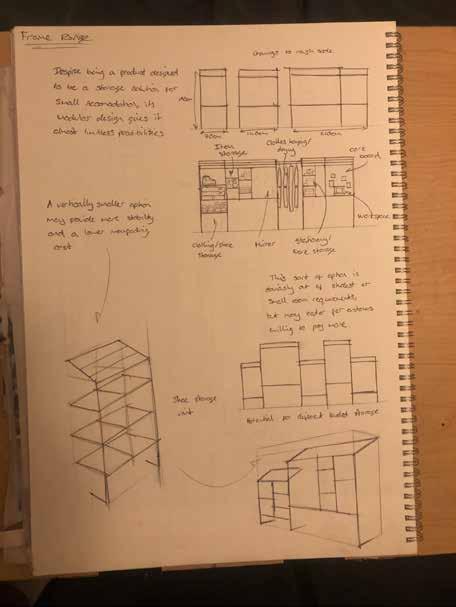
Initial shelving designs including a clip that allows the shelf to attach to the rest of the frame. This would have required added parts that could be eliminated with effective shelving design, which I developed further into the project.
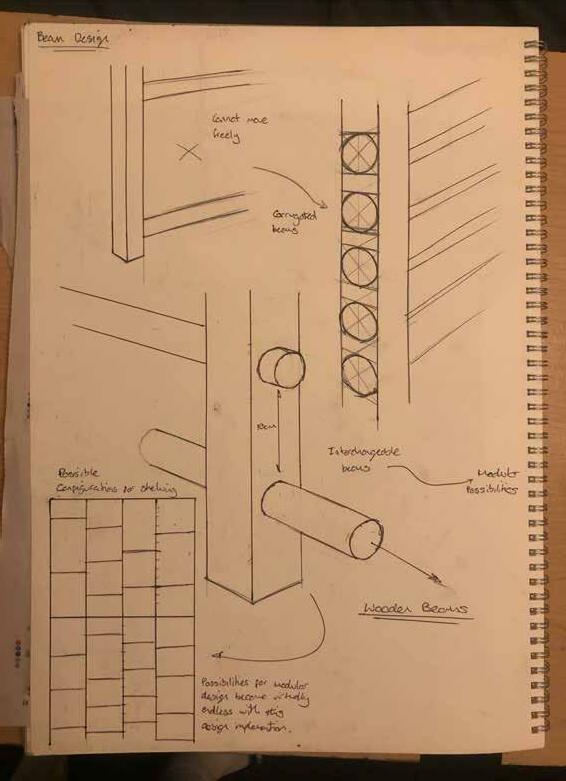
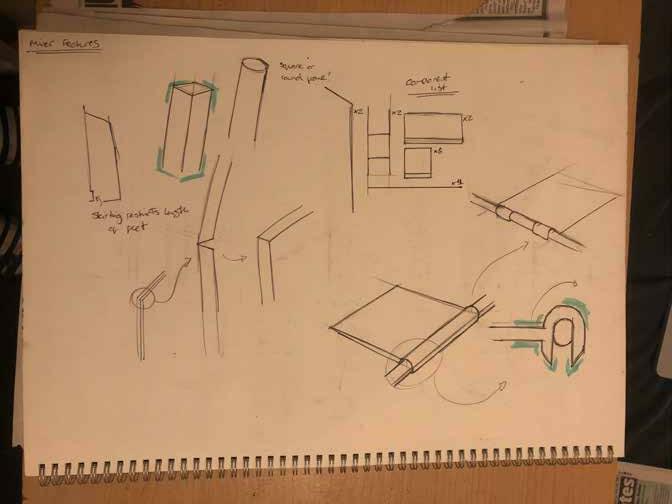
Development of the upright beam design to make them more easilly interchangable.
Further stability development including the introduction of feet to the bottom of the frames, making the unit much more secure.
The idea of having one long beam creating the frame may create a more stable unit, however it would massively disrupt packaging and therefore shipping process, so i decided not to develop this idea.
Some initial features I decided to jot down to remember, including frame joint design and shelving adjustments.
12 13
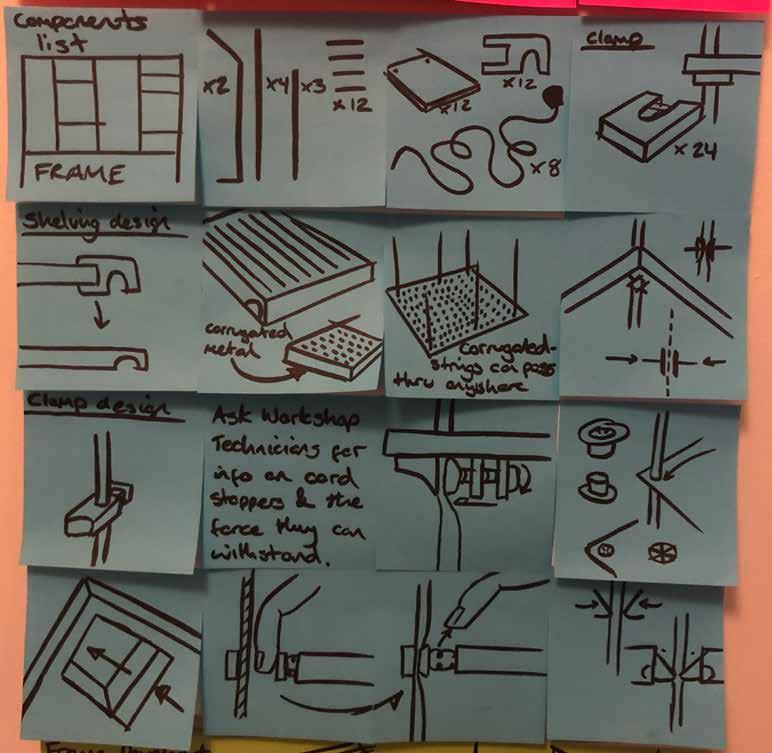
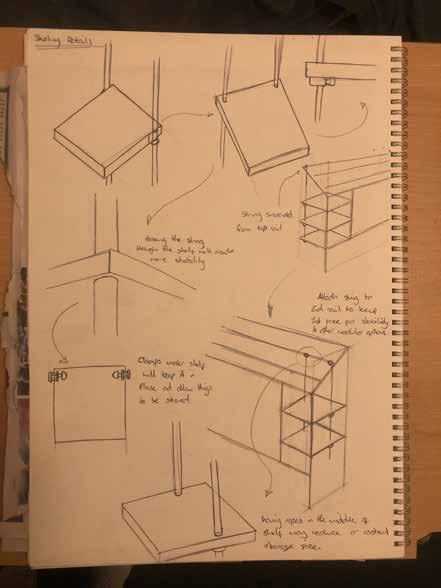
Detailing and Ideation
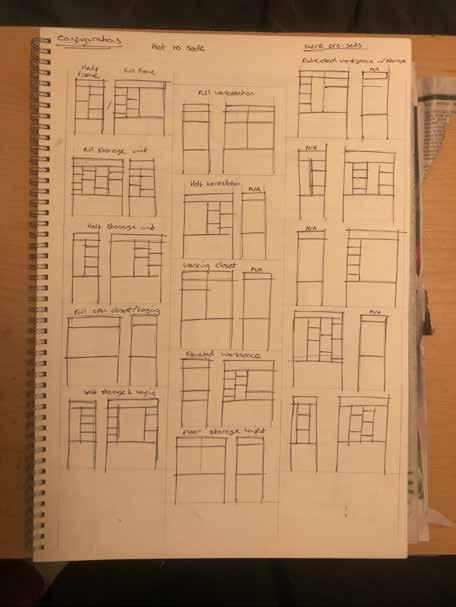
Using different coloured post-its to seperate my ideation really helped, especially for organising my design process.
Protruding footPotential hazard
Stability
Top railVital for stability Ensure ladders cannot move 14 15
Modular Capabilities Potential default configuration Clothes hanging/ closet spaceMore saleable Exdendable/ Attachable elements Survey resultsMirror would be essential 16 17
Frame Development Dual RailsMaximise frame space Slot-in elementsReduce parts & Assembly difficulty Support needed for upright framework 18 19
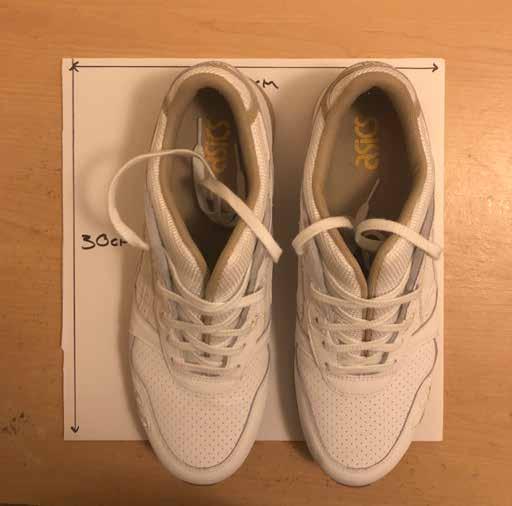
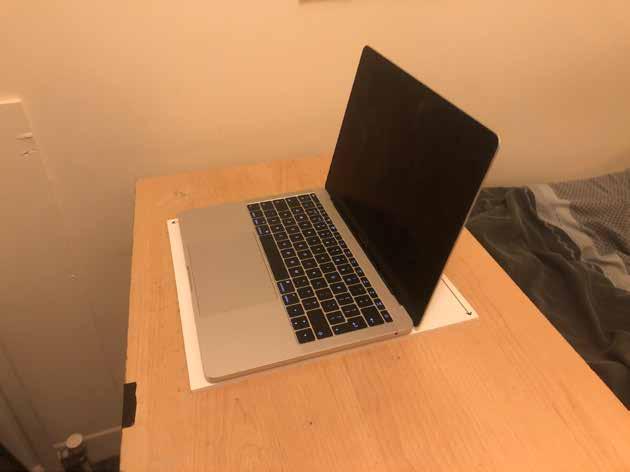
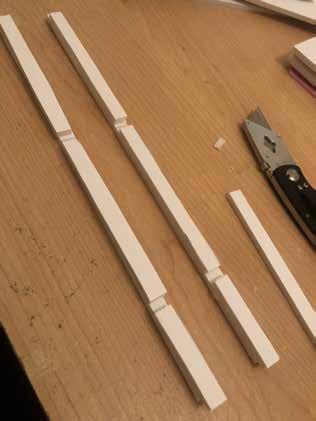
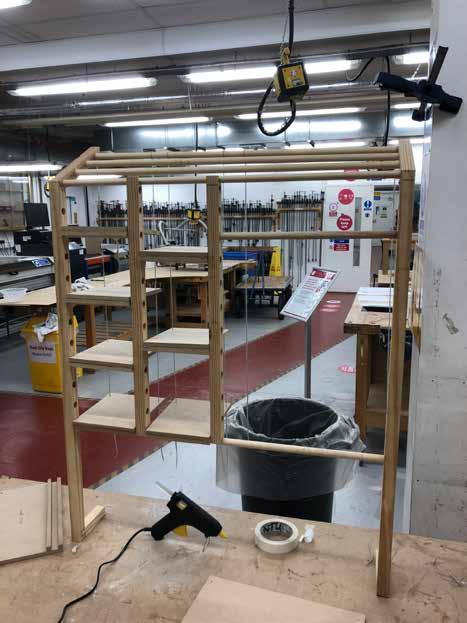
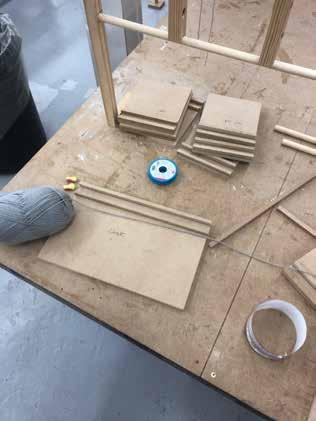
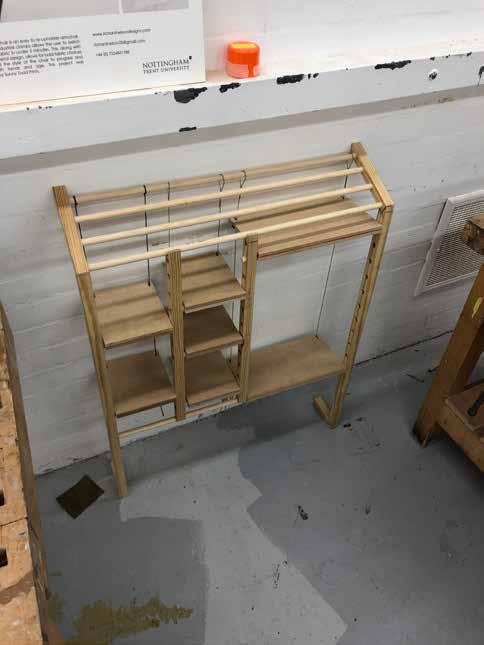
Full Scale Modelling
I chose these dimensions for the shelves as they almost perfectly fit my (size 11) shoes, along with my laptop and various other items.
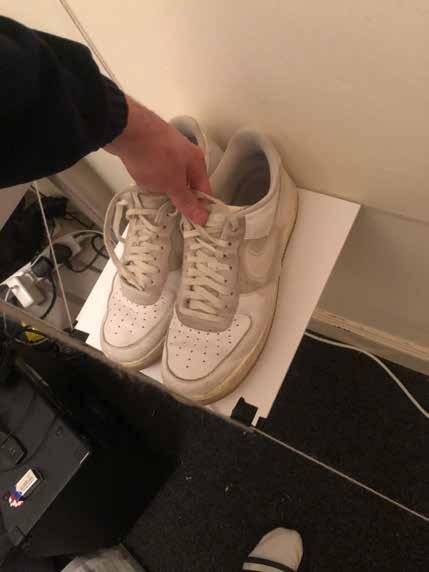
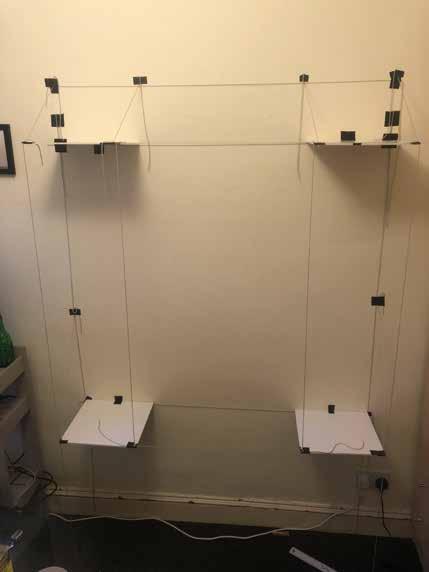
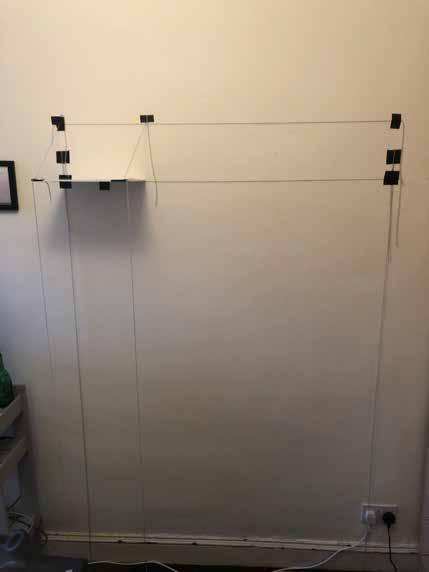
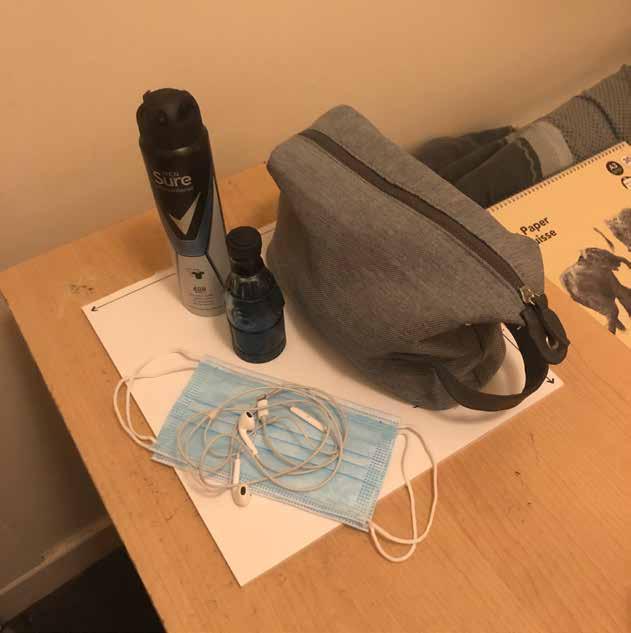
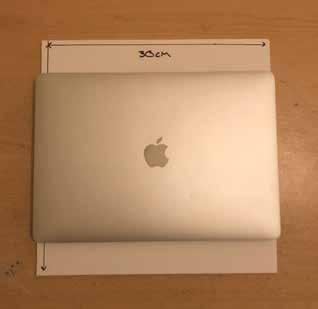
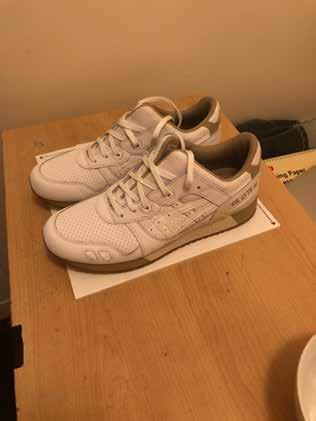
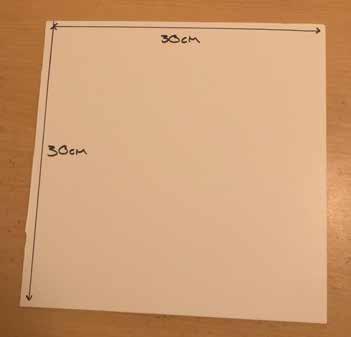
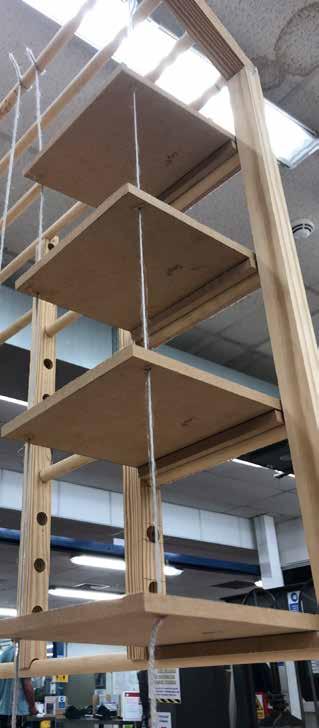
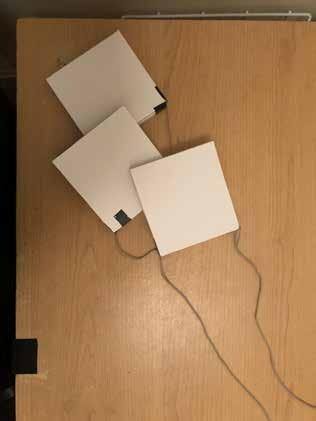
I marked the dimensions onto some wall space and began suspending the shelves with string to get an idea of the full scale of the frame.

20 21
The sketch model was excellent for visualising the storage capacity of the frame, along with fitting perfectly into my room with minimal obstruction.
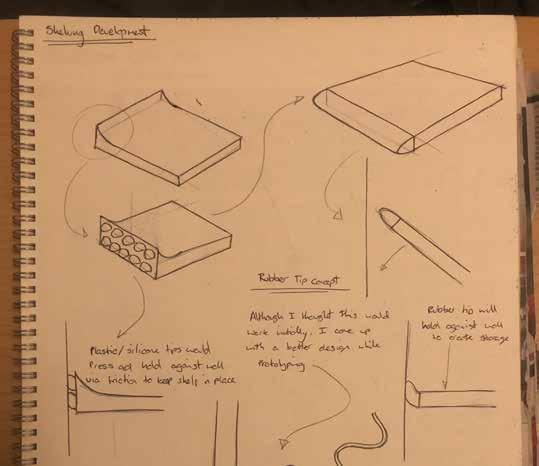
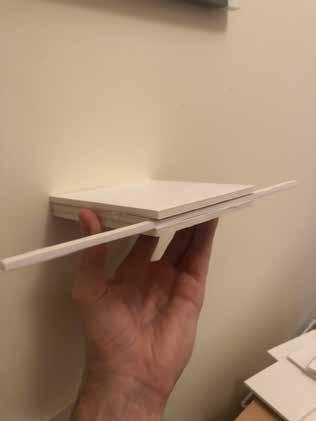
Modelling Outcome
I was wary of the rubber tip design not working, and while using the string for sketch modelling, I realised its potential for modular shelving.
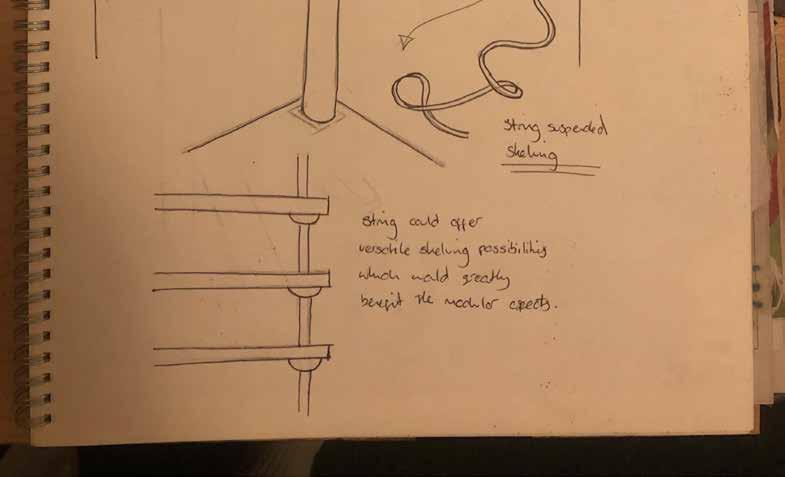
I realised that I could create a rear support for shelving by hanging ropes from the highest rail passing through each shelf with clamps underneath.
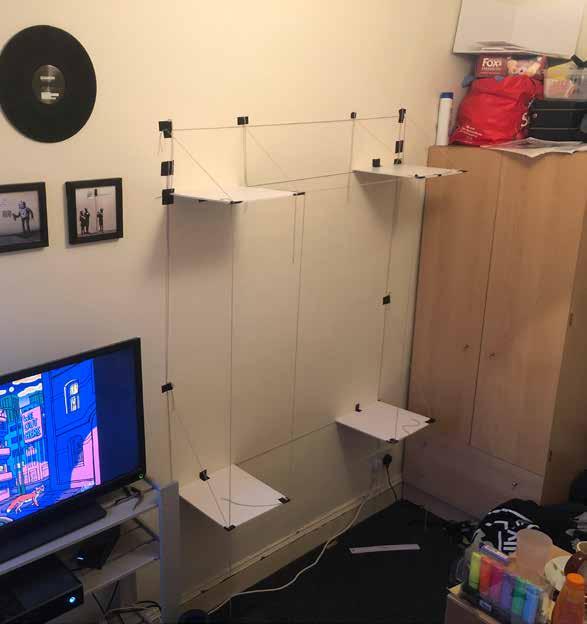
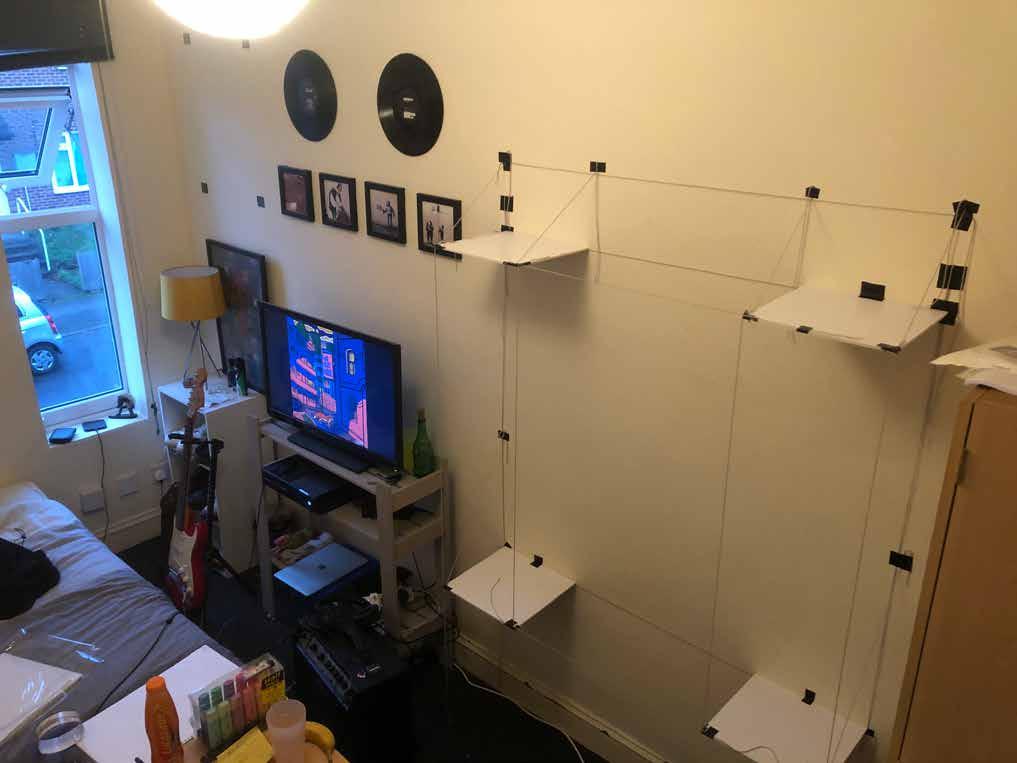
As the shelves are fixed at the front, they would not sway sideways and could easilly be taken out and moved elsewhere.
This design could massively reduce framework and cost, making it a key innovation in my ideation process.
22 23
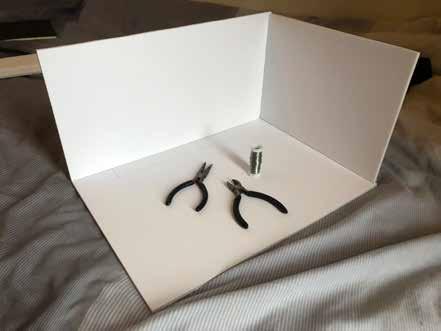
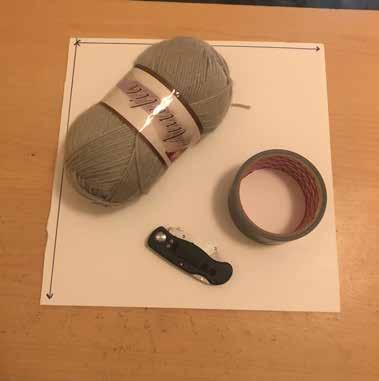
Concept Modelling
The next step was to test my concept, with a small scale sketch model providing an early conception of the strength and stability of this design.
Using foam boards and a glue gun I constructed a ladder design with slotted shelves that needed to be suspended at the back.
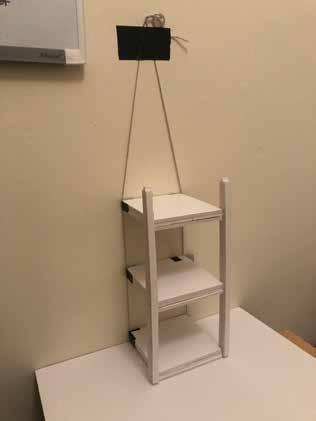
By connecting a taut string to each rear corner of the shelves, I was able to demonstrate the concept, which worked better than expected.

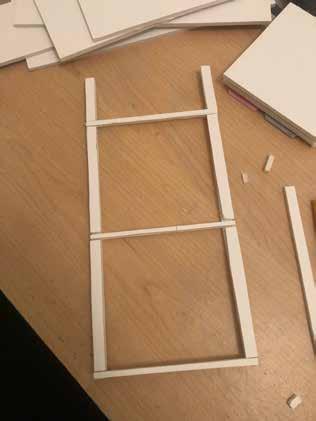
Despite only being made out of string and foam board, it could support various objects around my room, showing clear indication of the functionality of the concept.

24 25
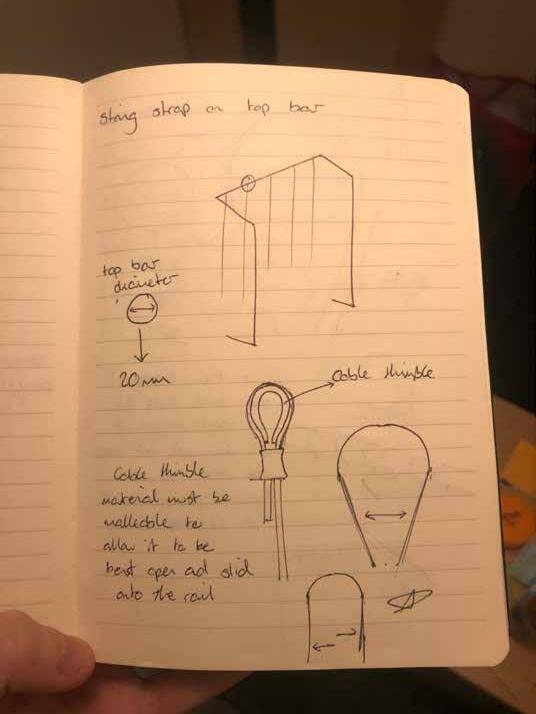
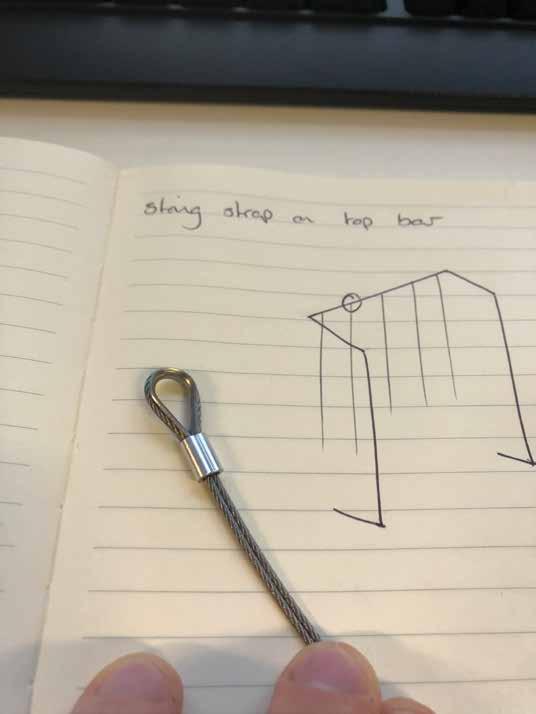
String Suspension Development
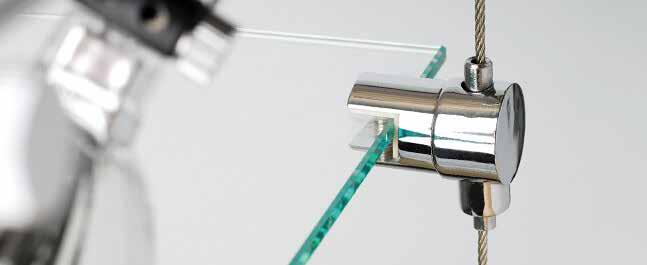
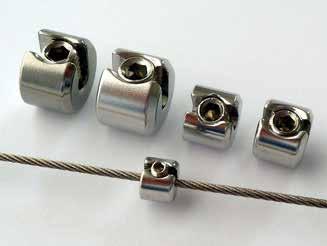
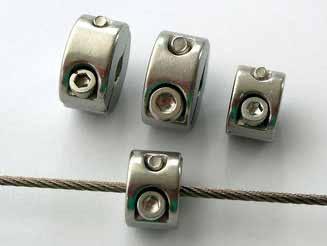
My initial clamp idea was to use cord stoppers underneath each shelf to support, but soon realised this may not be strong enough to support heavier objects.
Building the clamp into the shelf may reduce the amount of parts needed for assembily, but could prove to be more expensive than finding a clamp from a wholesale manufacturer.
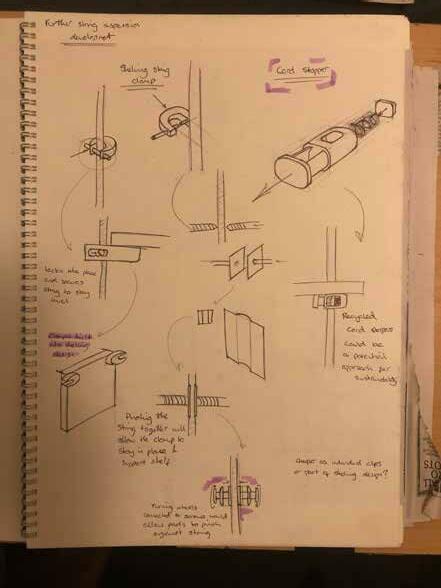
Clamp Design
26 27
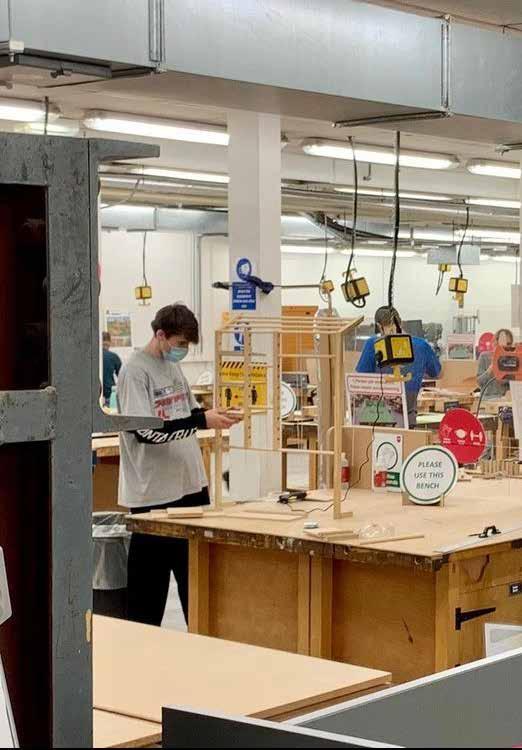
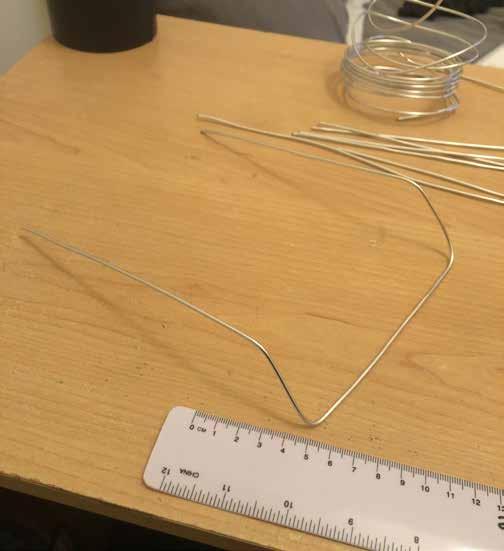
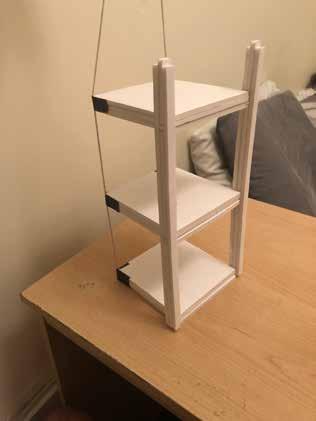
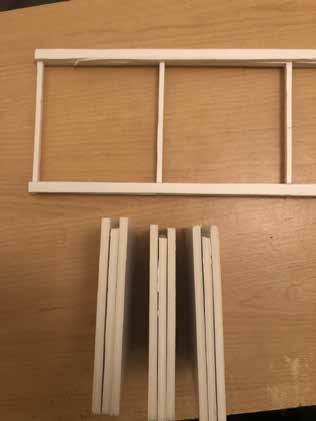
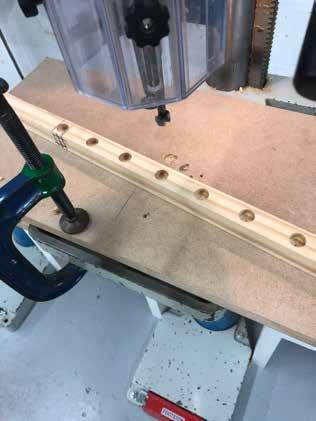
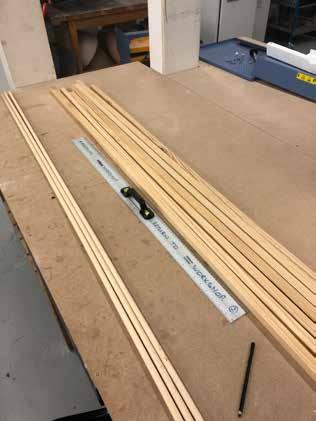
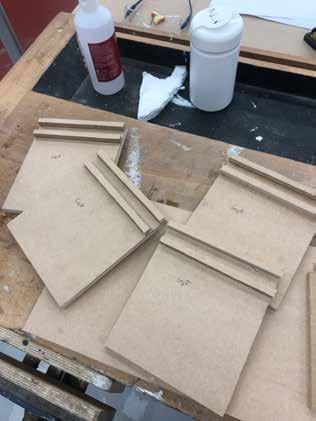
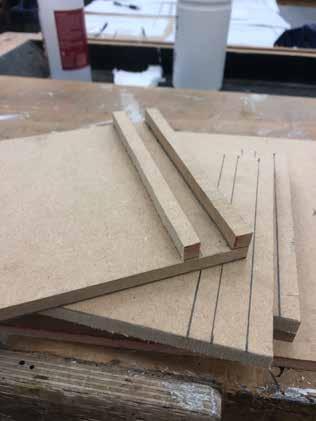
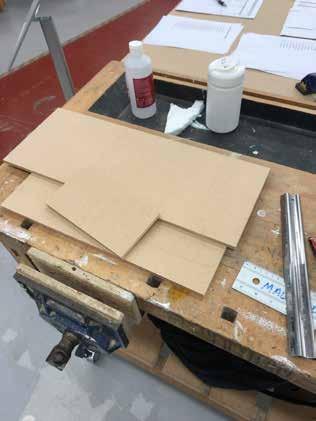
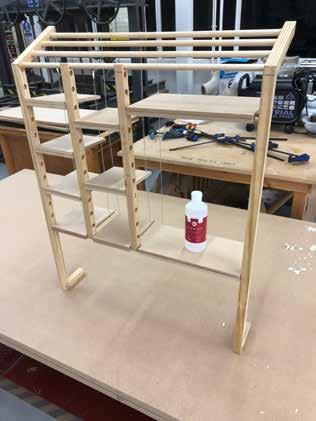
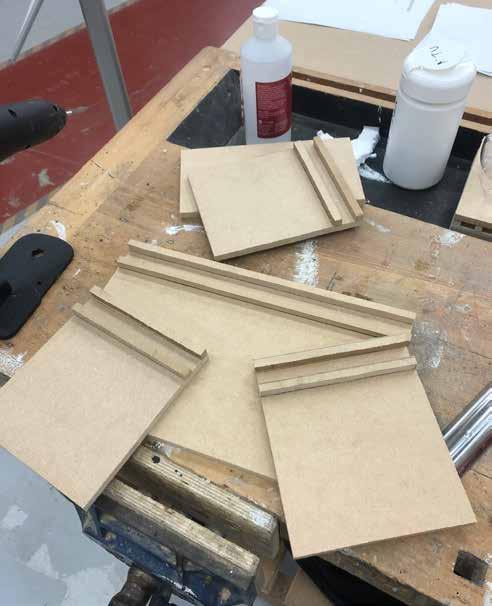
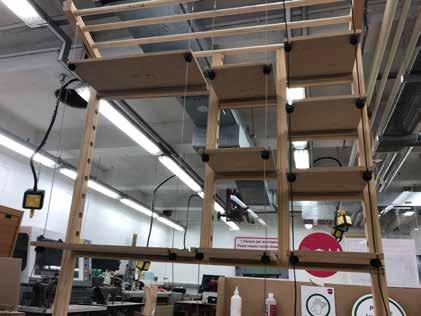
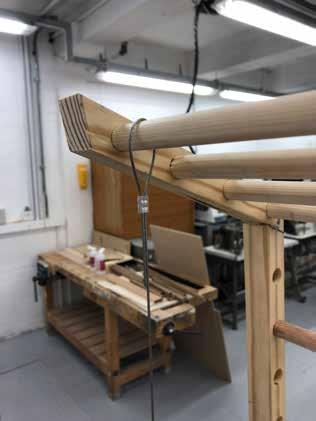
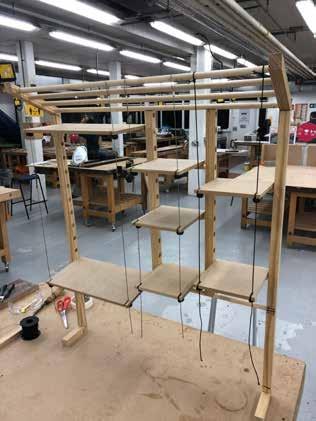
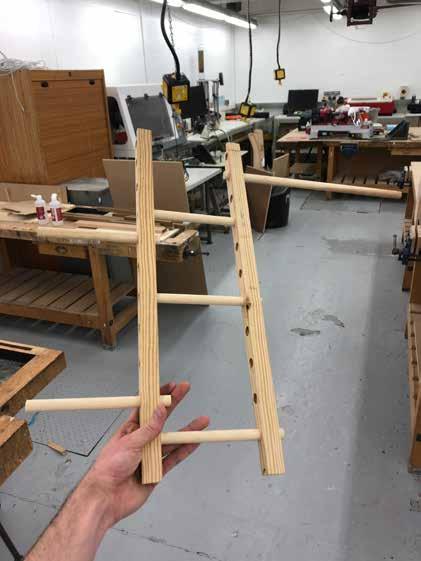
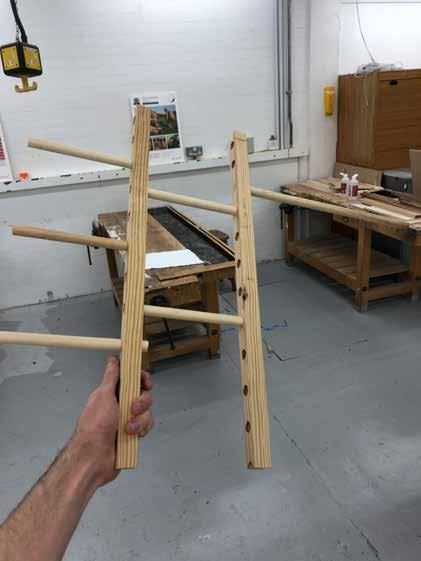
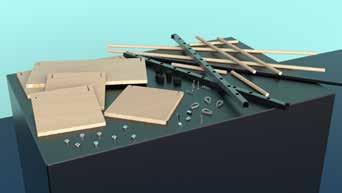
Modelling
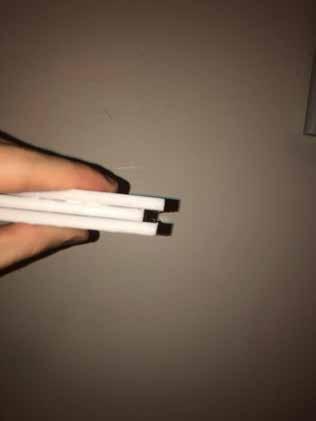
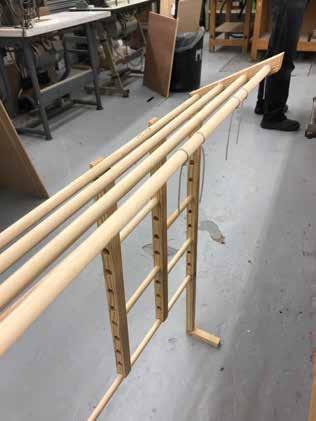
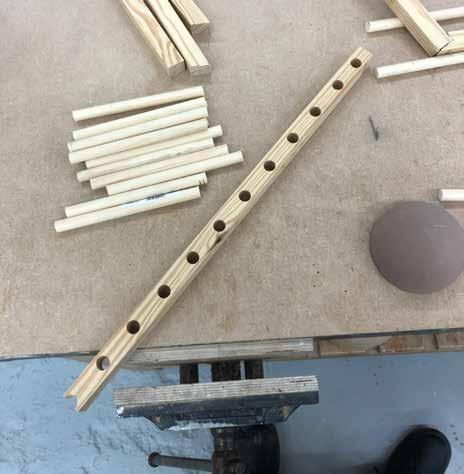
Making a roughly 1:2 scale model of the inital framework would be greatly beneficial for observing stability.
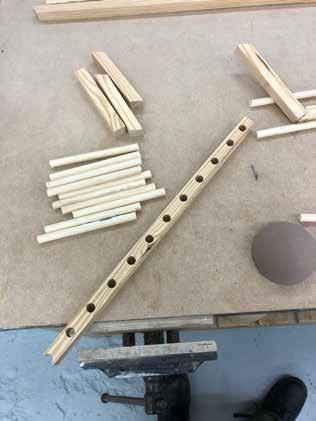
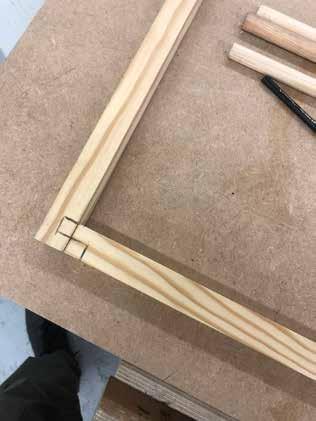
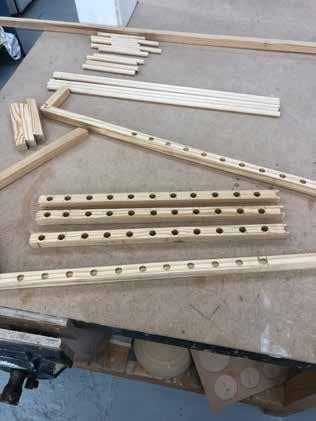
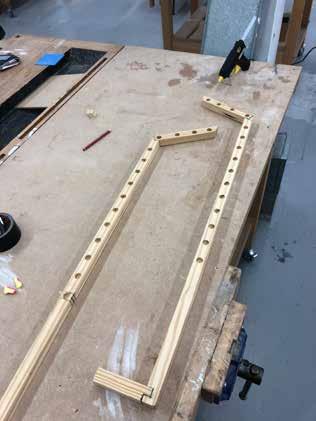
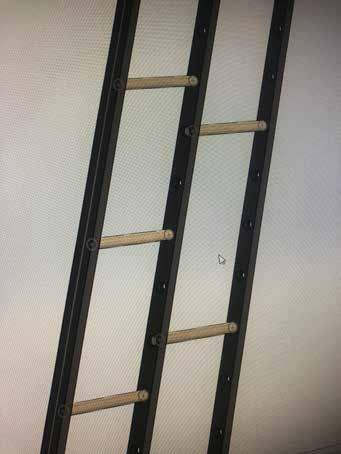
While modelling, i realised it would be better to have upright beams with holes all the way through instead of ladders for each section to reduce parts and simplify the design.


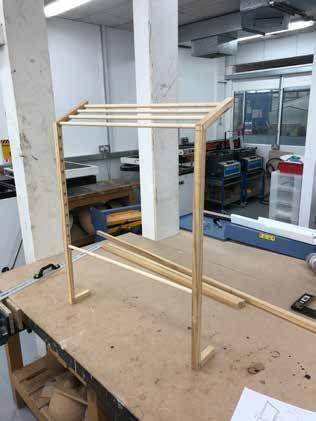
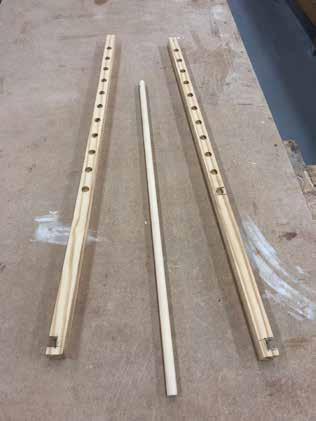
Scale
28 29
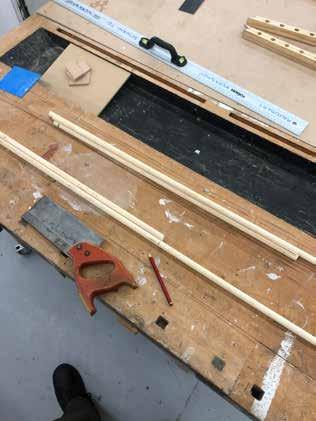
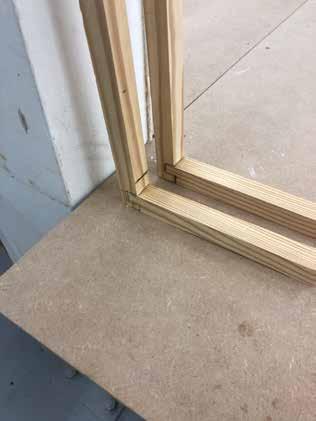
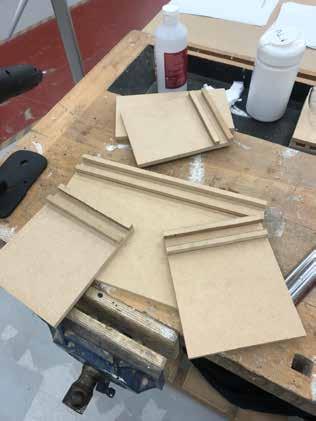
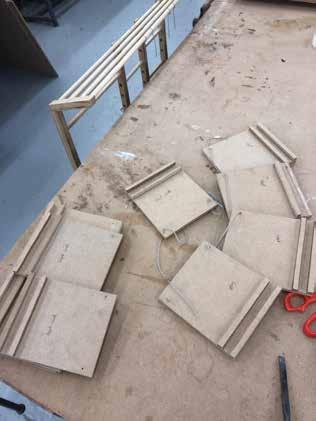
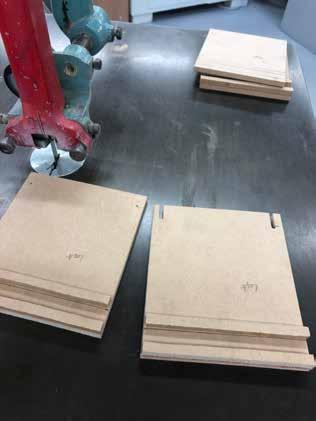
Using off-cuts from the shelving, I was able to mimic a notch to support the front of the shelves and restrict them from swaying sideways
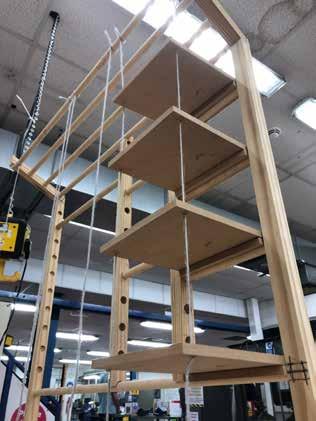
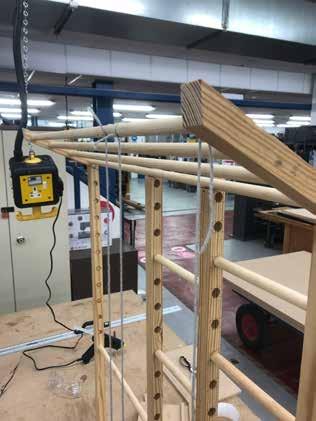
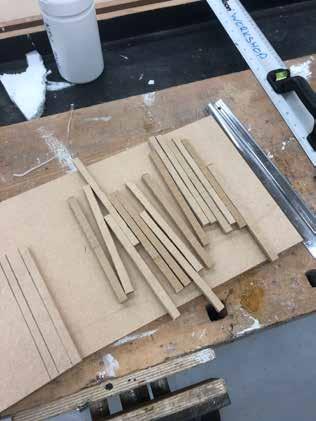
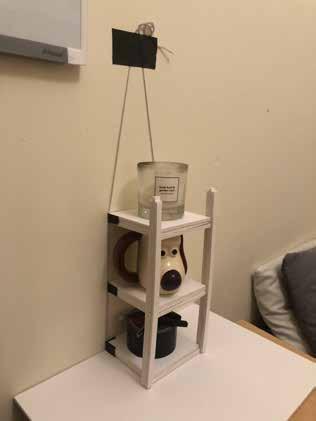
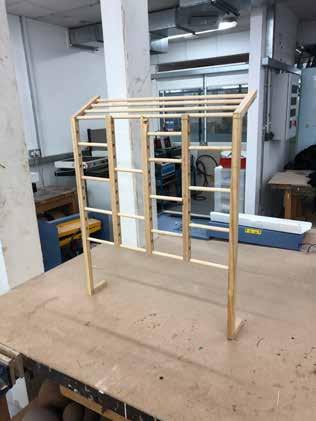
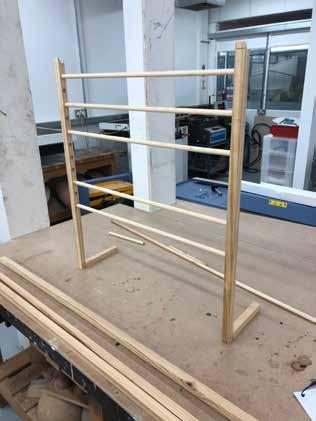
As the parts I ordered hadnt arrived at this point, I was forced to create the suspended shelving with Acryllic string and hot glue, which yeilded suprisingly good results.
30 31 &
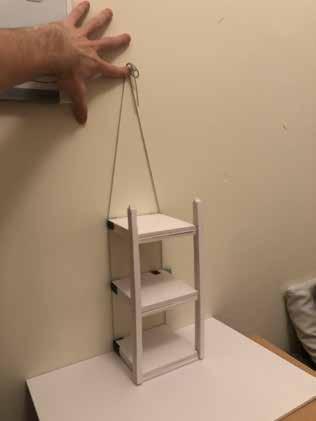
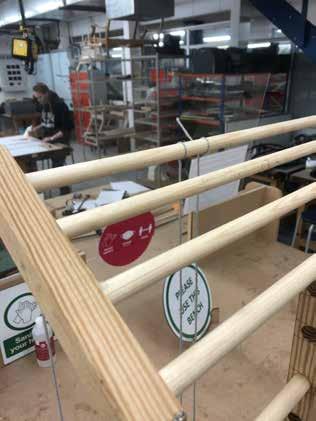
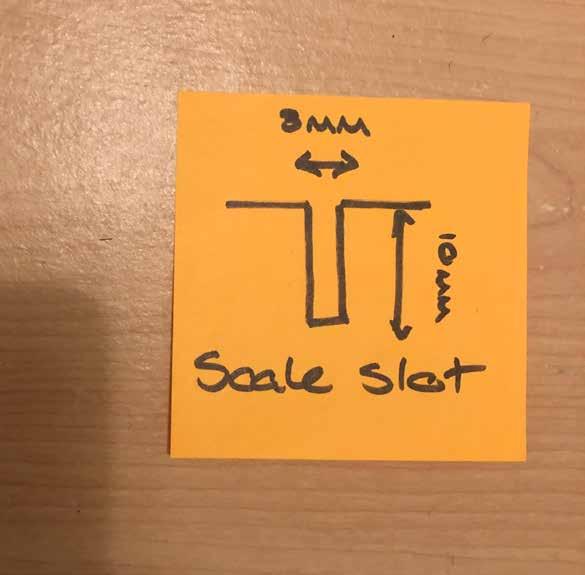
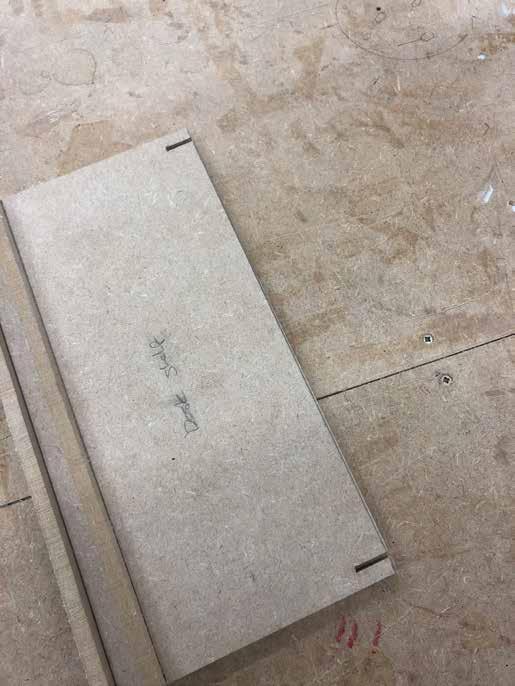
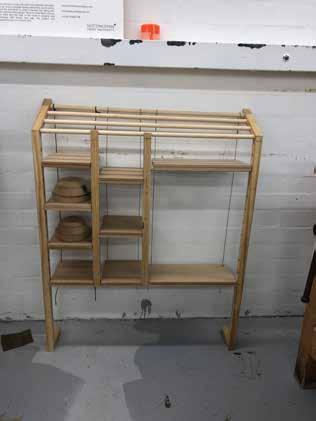
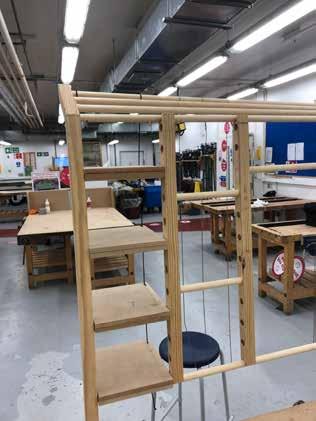
I realised that making slots in the shelving would improve the interchangeablity of the design and also secure the strings in place.

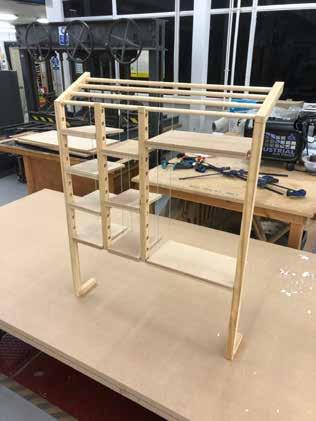
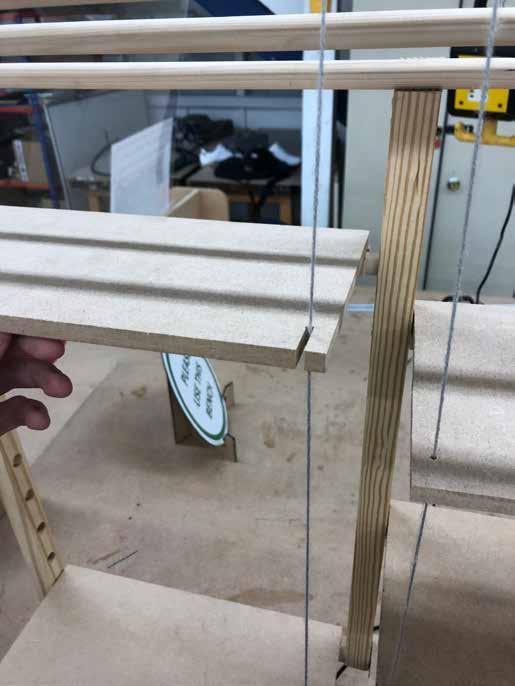
The Frame worked just as I imagined, which was very motivating to continue and perfect the design.
I tried to do light weight testing but the glue hold was not ideal for accurately measuring.
32 33

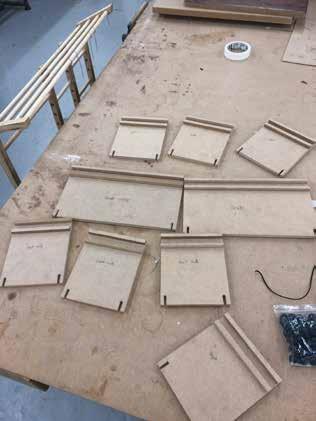

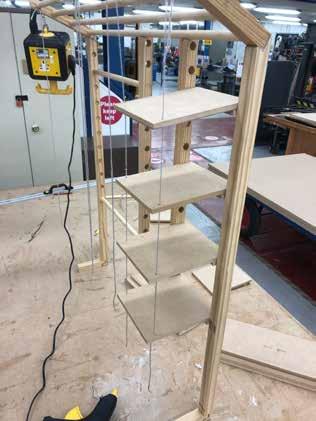
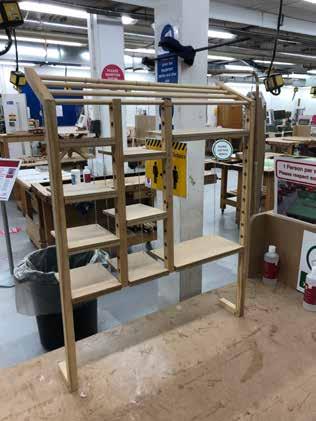
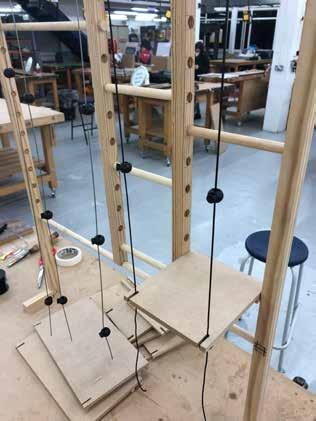
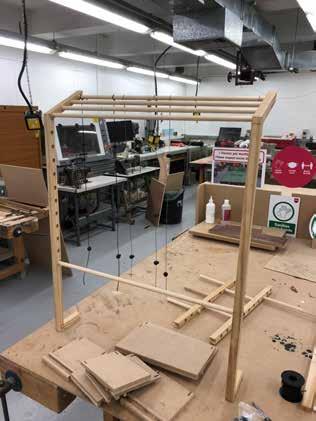
Modelling Outcome Adjust shelvesslots Further Modelling Slots instead of holes allows for much easier movement . Purchasing a 3mm steel wire rope as well as cord stoppers and a nylon wire allowed me to test the concept much more accurately. Key pointsChange from ladders to hollow beams Costcutting potentialShelf notches 34 35
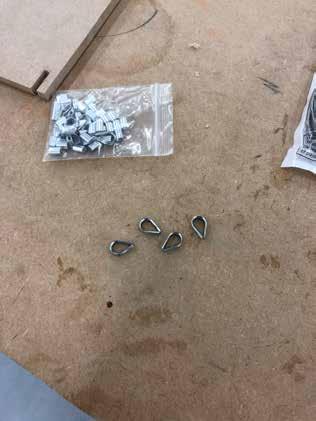
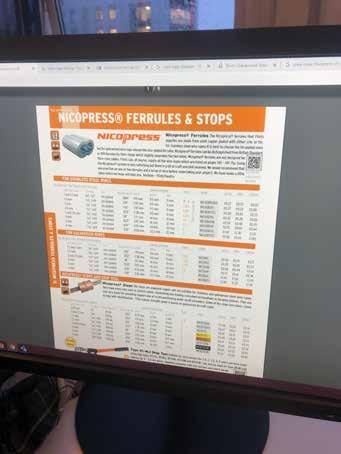
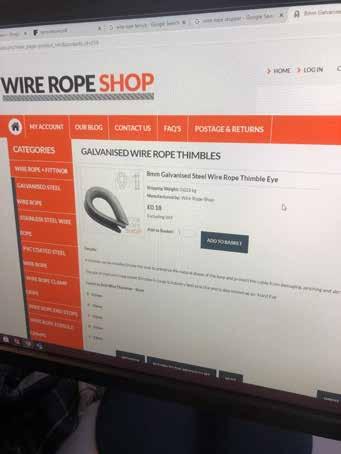
The Thimbles were far too small for the upper rail, but the Ferrules still kept it in place perfectly, indicating their necessity as part of the design.
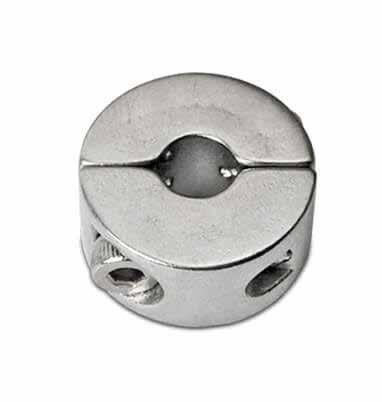
Cord Stoppers excellently simulated the support given by clamps, and were very easy to move up and down.
Basic strength testing with wooden moulds led to the realisation that wire rope’s smoothness allowed the clamps to slide, allowing it to only support the weight of the shelf.
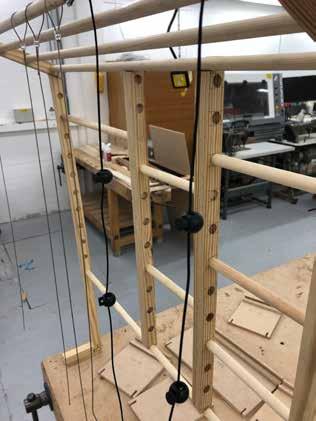

This wasnt a major issue as it was only a sketch model equivalent. The clamps designed to support weight will carry up to 30kg, making them much more secure and stable than a simple cord stopper.
36 37 &
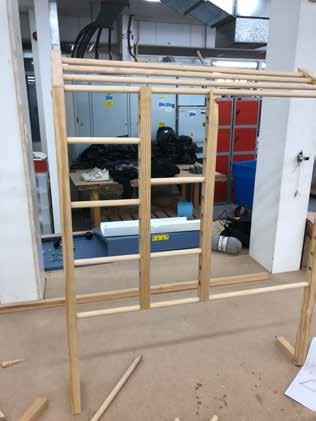
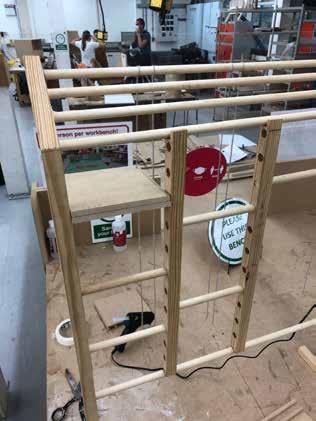
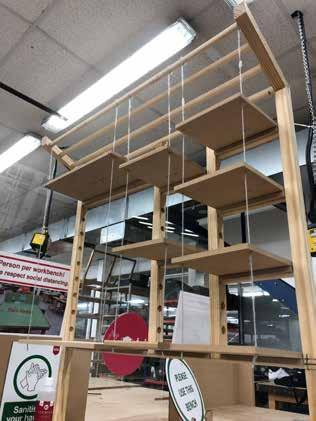
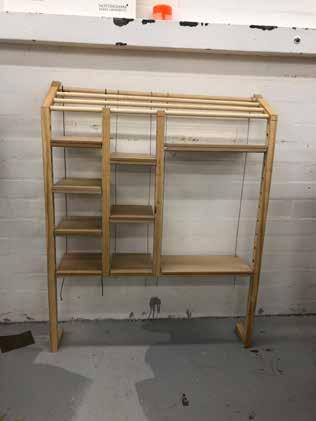
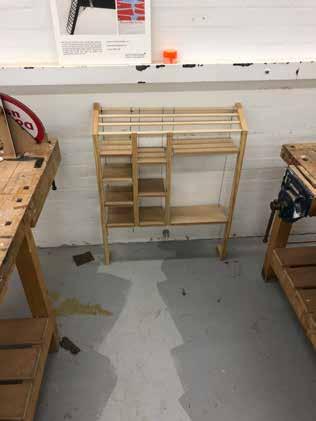
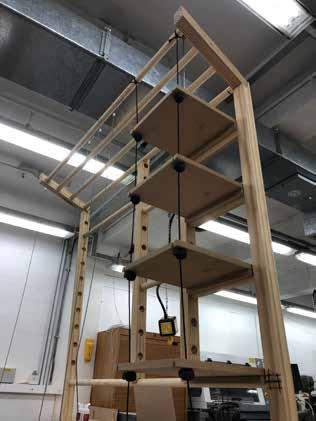
The beams were slightly stiff when changing the arrangement and may be something to be adressed for the final design.
Creating a different configuration was a something I wanted to do just to see how easy the process is.
In hindsight, the stiffness of the beams was the only real issue as the shelves slide in and out effortlessly.
I was very happy with the outcome of the model as it perfectly demonstrated the interchangeable elements of my design.
Without it, I wouldn’t have tweaked the shelf design or developed the supporting uprights from ladders.
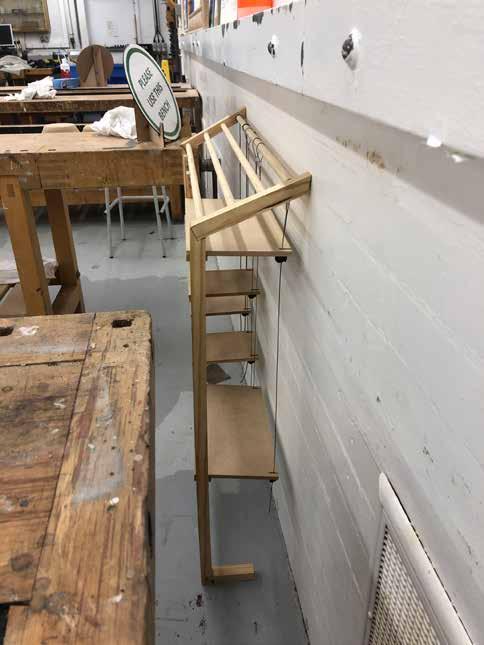

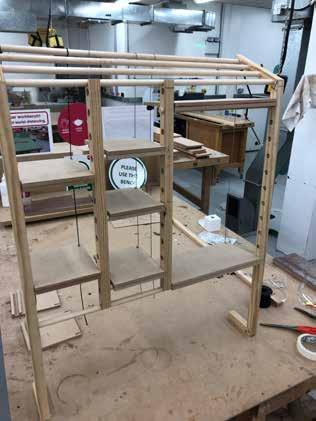
38 39 &
Further Development
Further development into configurations and smaller models led me to the realisation that a standing desk would be easilly obtainable with this framework design.
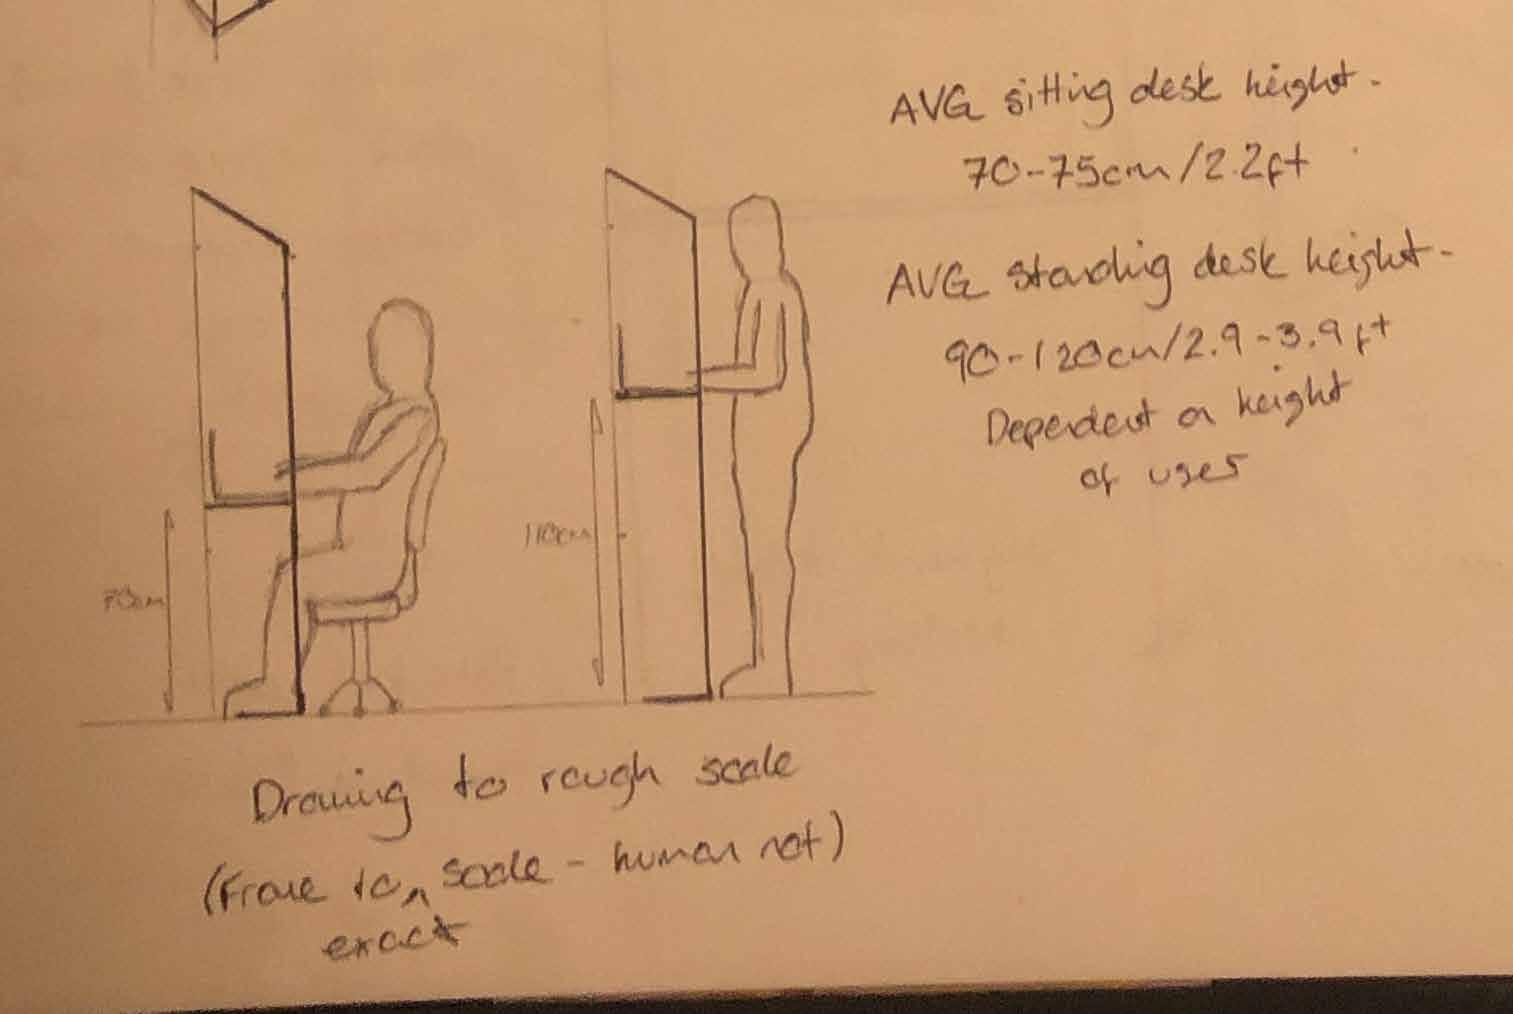

With the growing conscience of posture at the workplace, a standing desk configuration could greatly impact the popularity of the product.
40 41
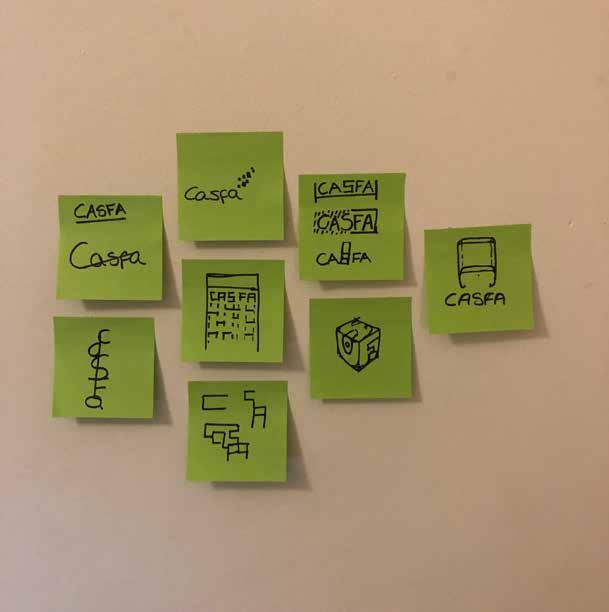
Branding Ideation
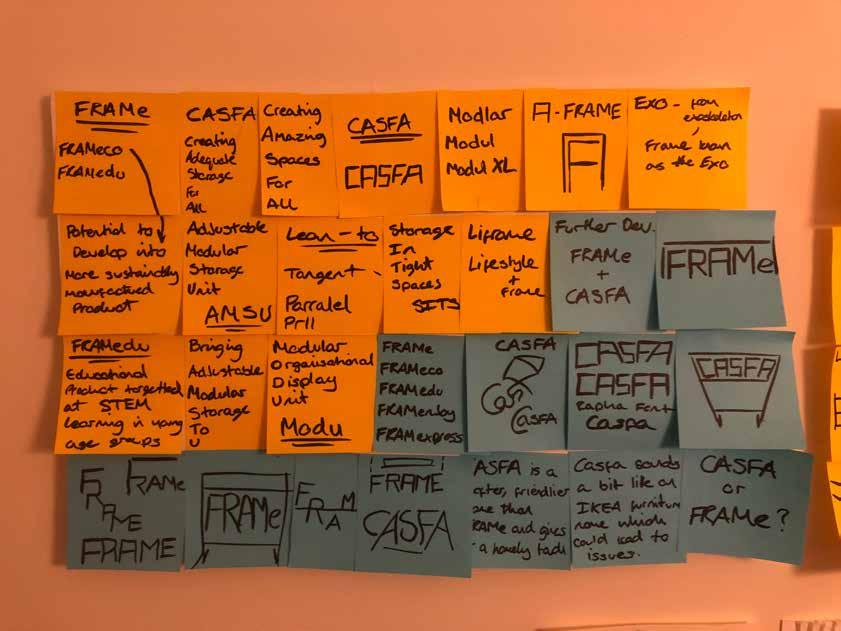
After initial ideation, the name CASFA, an acronym for ‘Creating Amazing Spaces For All’, stood out as a front runner for me as I felt it perfectly suited the design.
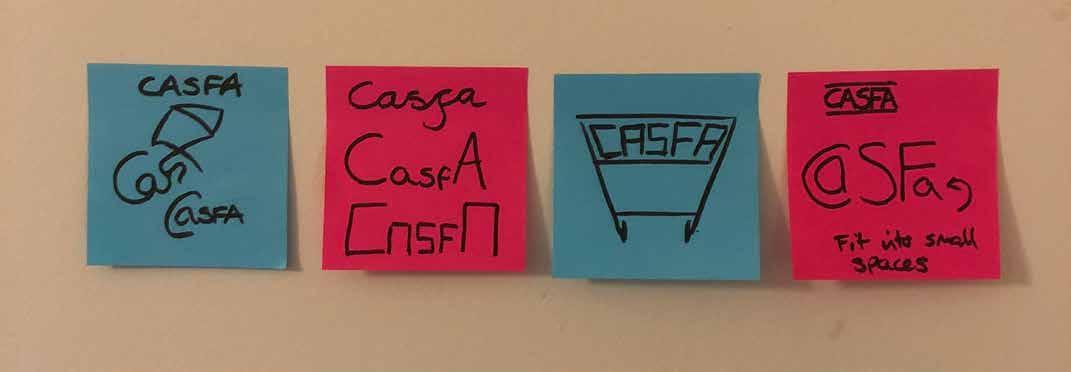

A quick Google search gave the name more traction as there were no signs of any other furniture or design work under this name.
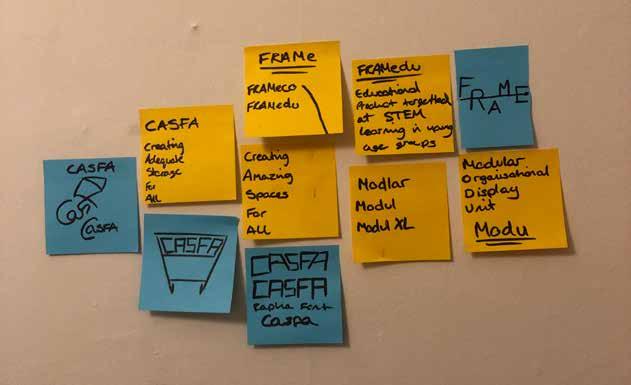
42 43 &
CASFA CASFA CASFA
Smooth and bold, reflects the design.
Bespoke, high quality font design.
CASFA CASFA CASFA CASFA CASFA CASFA CASFA CASFA CASFA
Modern font suits target market.
Montserrat Alternatives
CASFA CASFA CASFA
I was not happy with my initial logo designs as I couldn’t seem to find a fitting illustration.
Inspiration
CASFA
I came to the realisation that the majority of furniture is unbranded, with the most branding being a catchy or relevant name i.e, IKEA furniture.
I decided the logo wasnt a necessity and didnt spend as much time developing it as other more important elements.

CASFA
Font Ideation
44 45 &
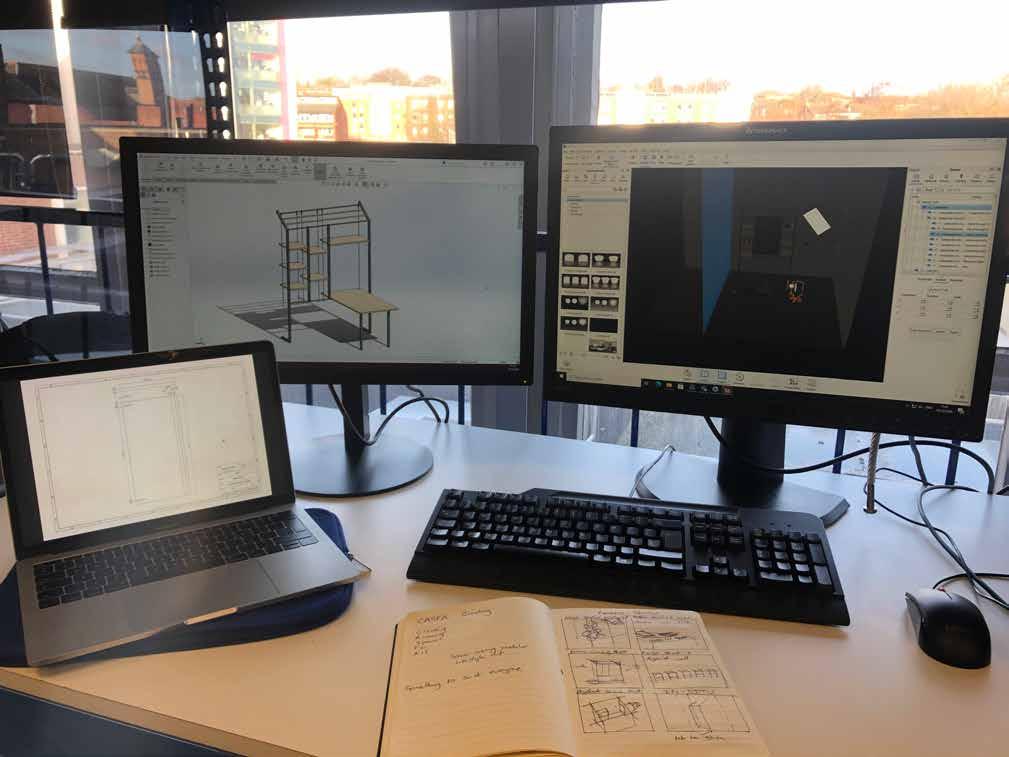
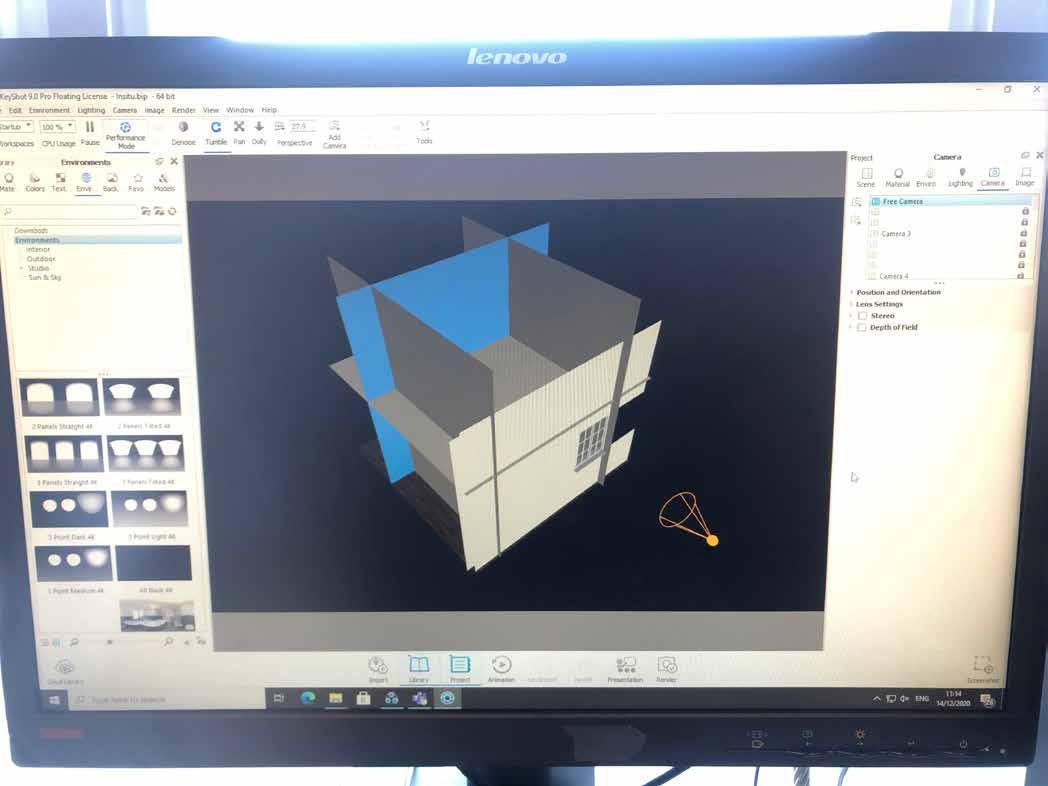
CAD Development
This will consist of the design work put into creating a realistic Solidworks model and rendering it in Keyshot
Much more intricate and technical design work to be demonstrated from here.
46 47
The glamorous finale to my design work, making the CASFA come to life.
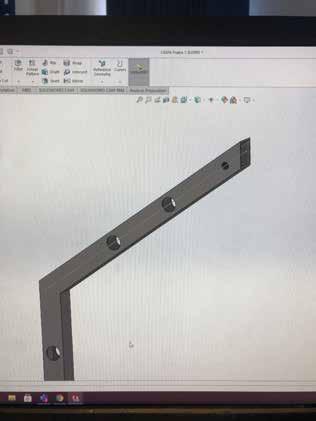
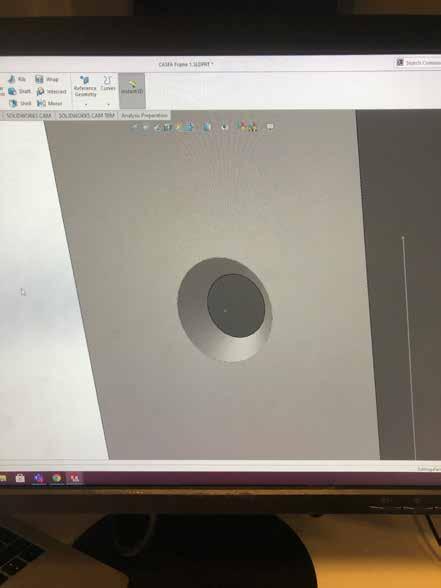
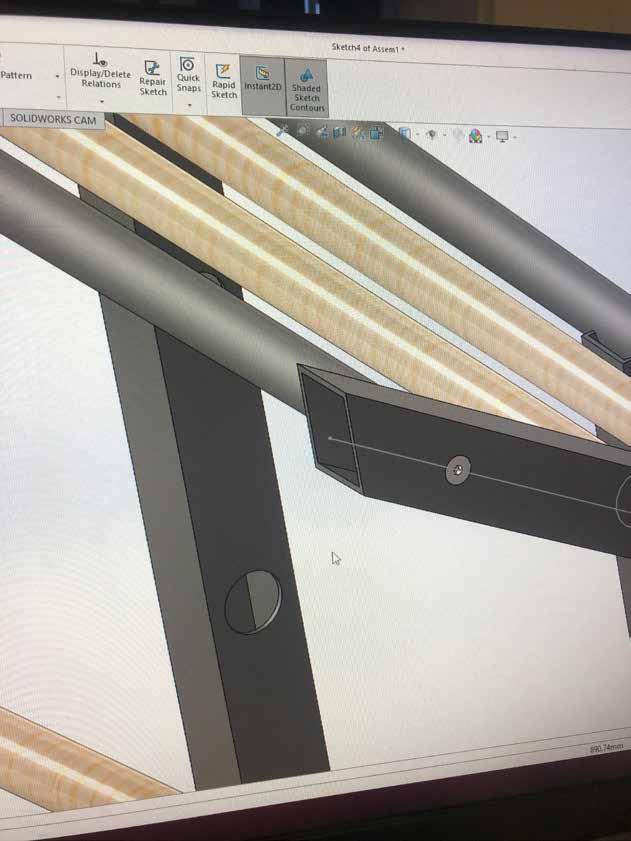
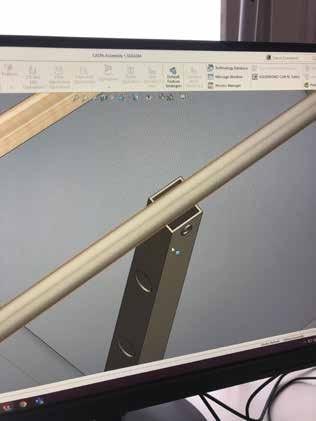
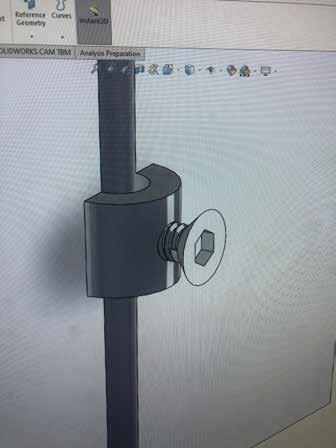
I first adressed an issue with the stability by designing the main horizontal beams to fix to the frame uprights
Product Influence
My initial idea was to screw each bar into the frames, but this would create issues as the entire frame would have to be rotated to fix in both sides.
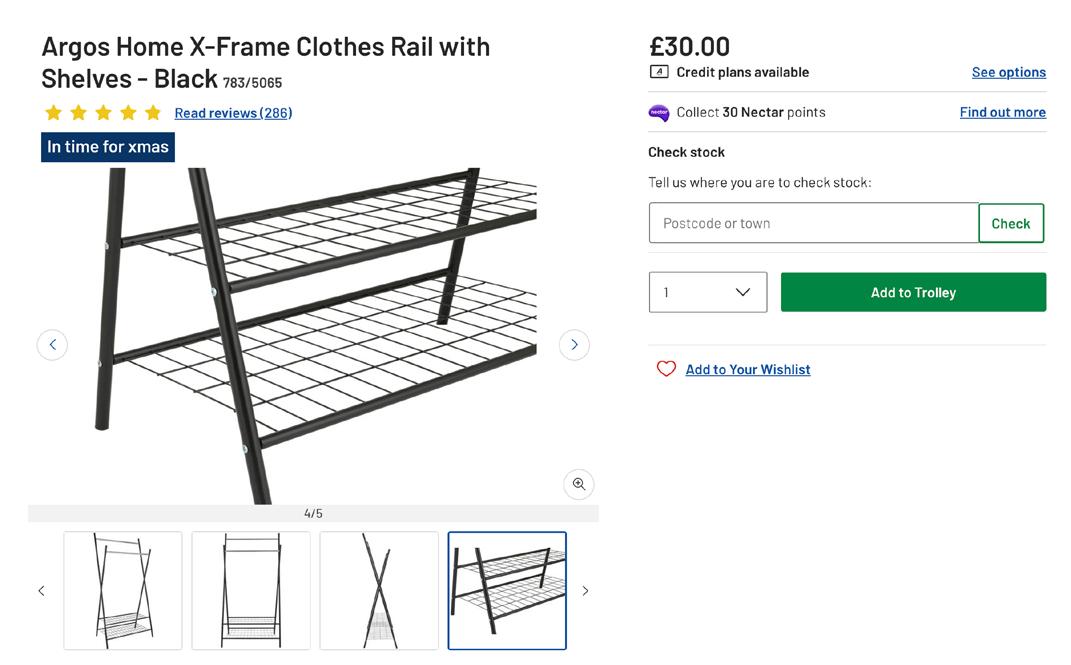
After discussing with the technicians in the workshop, it became apparent that a nut inside the beam would better suit screwing into the frame.
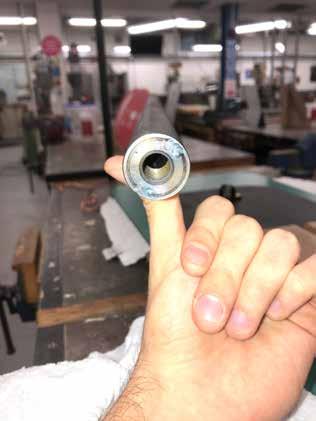
By welding a nut into each end, I could replicate the Argos frame design seen above which would provide adequate stability with minimal manufacturing difficulty.
48 49 &
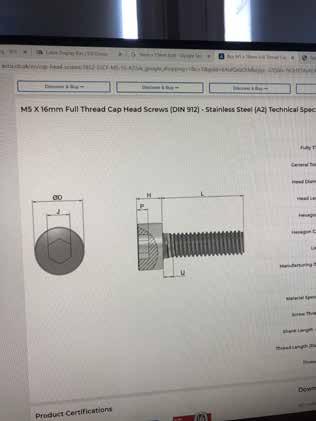
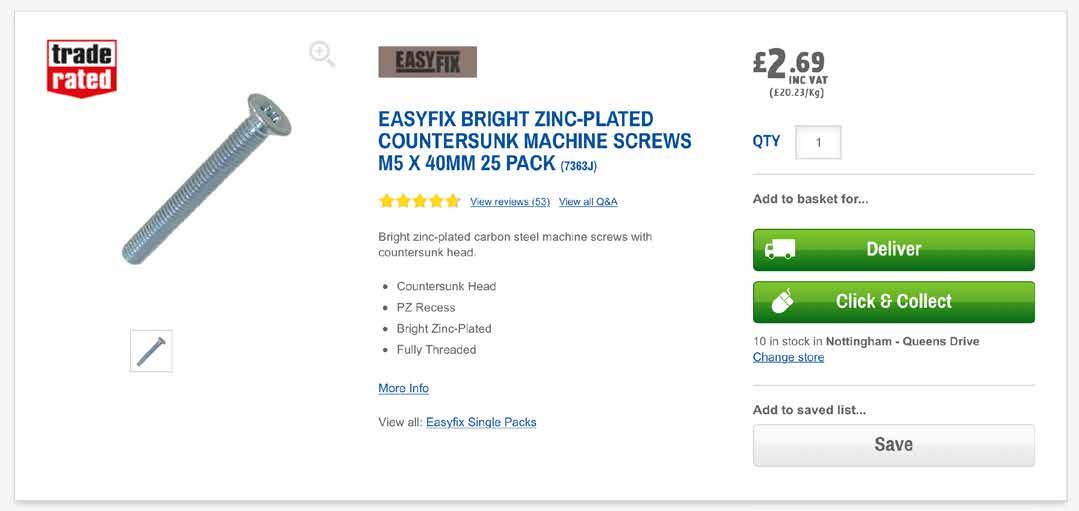
I decided a countersunk screw would look the best as it wouldnt protrude out of the frame, creating a flush frame with minimal imperfections.
The pricing breakdown from Accu. com was greatly beneficial, and their products are high quality and fairly low price.


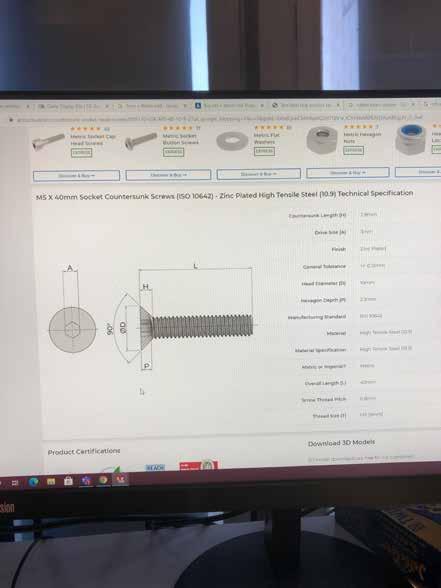
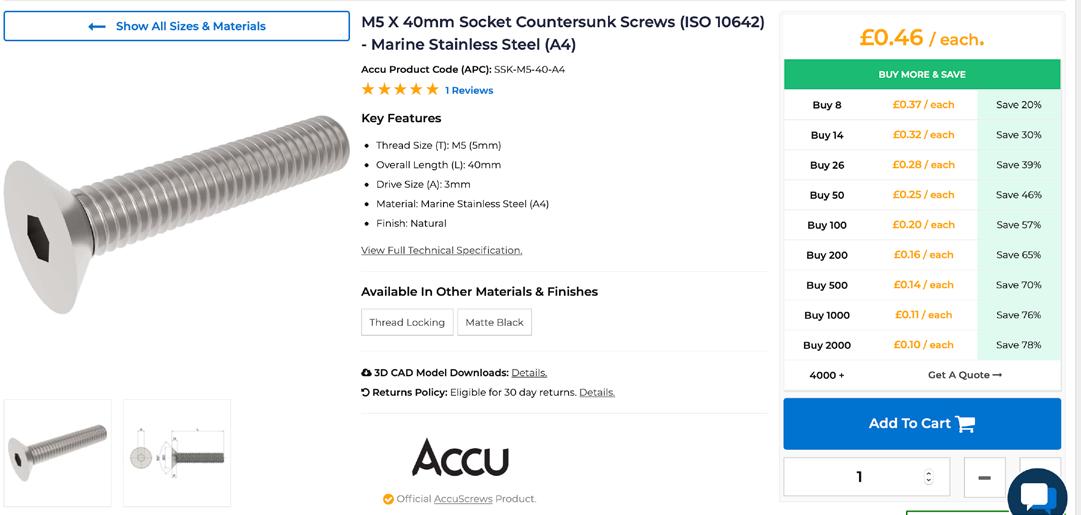
A cheaper alternative would be these screws, working out at roughly £0.10 per unit, but the material was much worse.

50 51 &
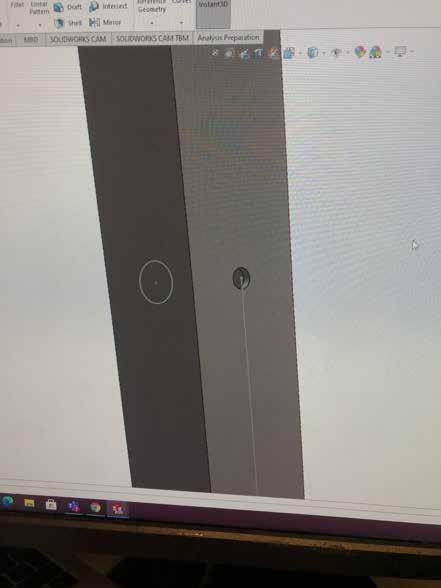
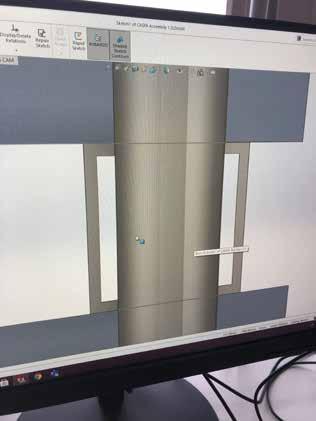
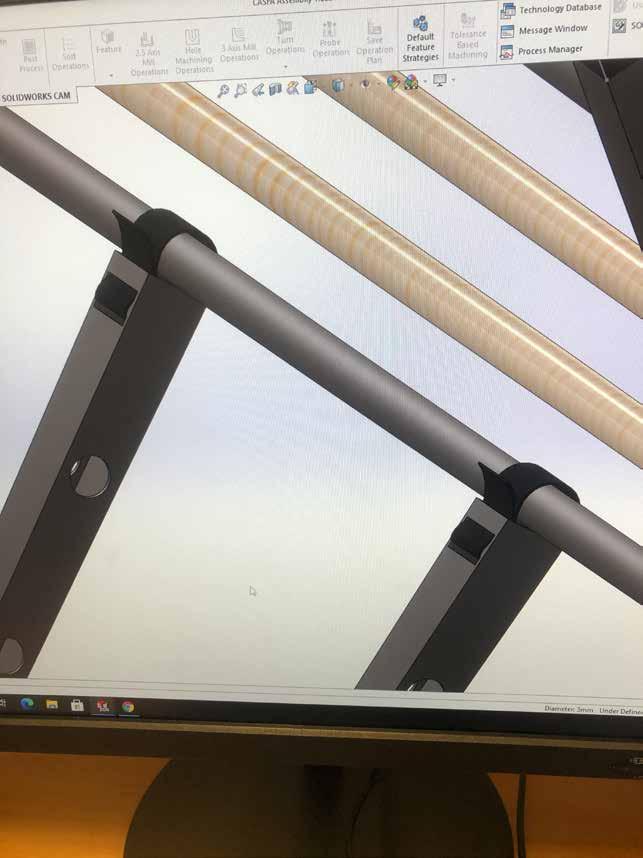
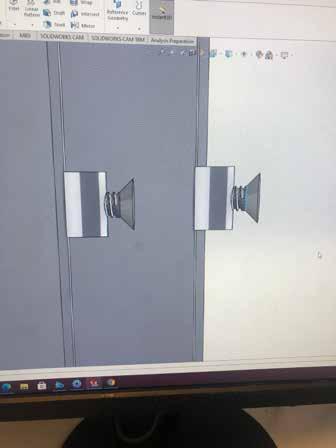
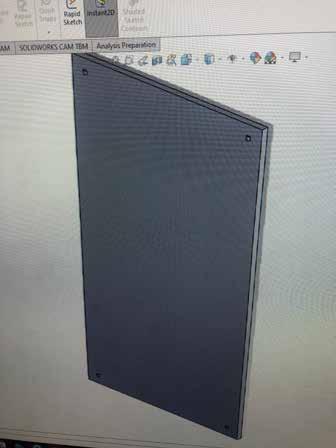
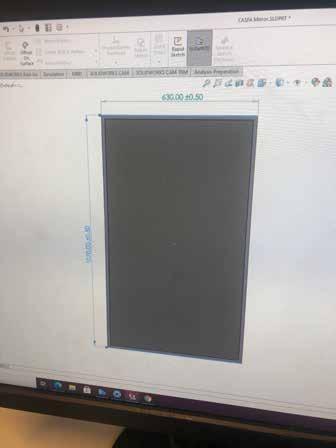
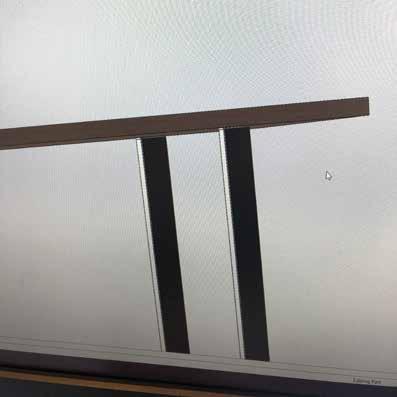
Another design tweak was to increase the length of the horizontal beams to allow them to sit in the frames, demonstrated with the images above.
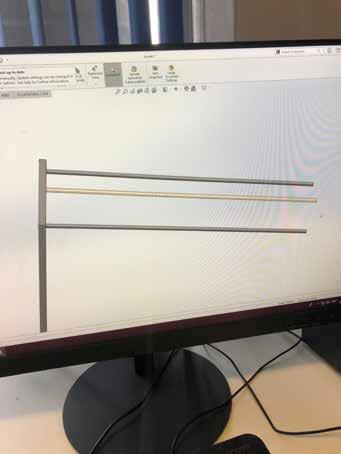
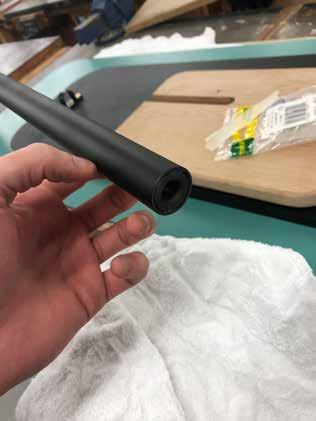
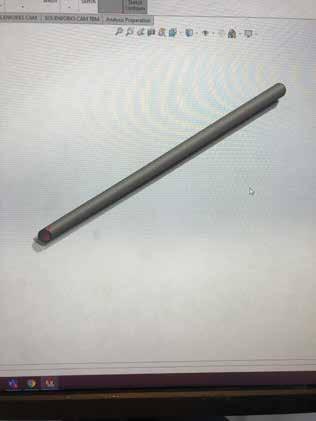
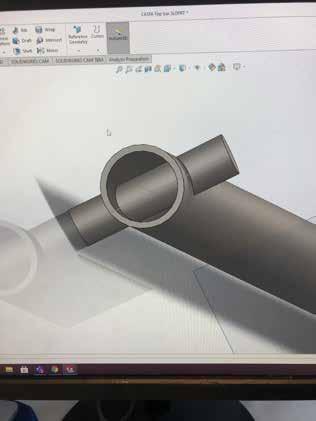
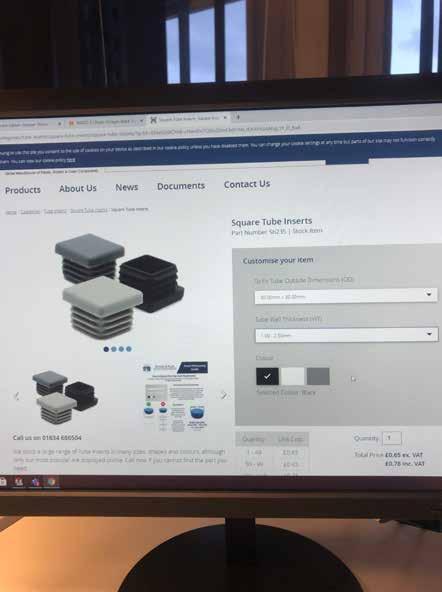
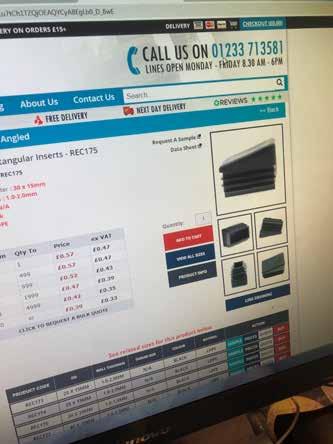
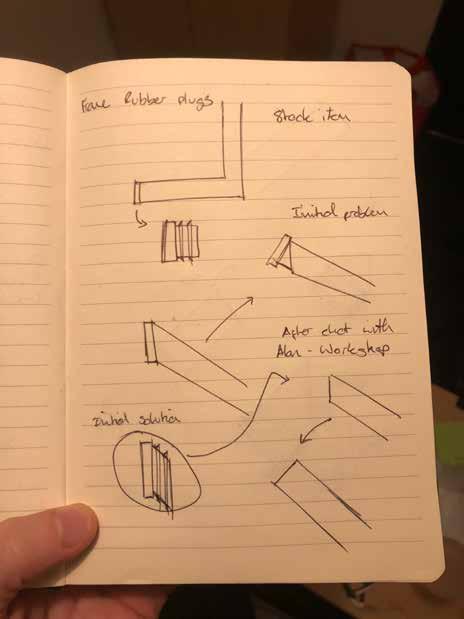
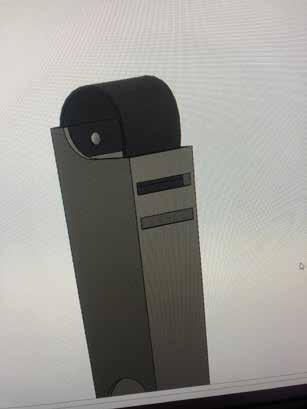
I then decided that the open ends of the frame should be covered, for aesthetic purpose and to ensure the metalwork wouldnt scratch the wall it is leaning on.
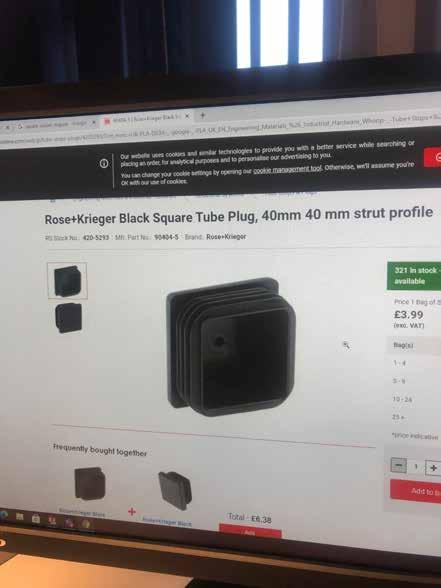
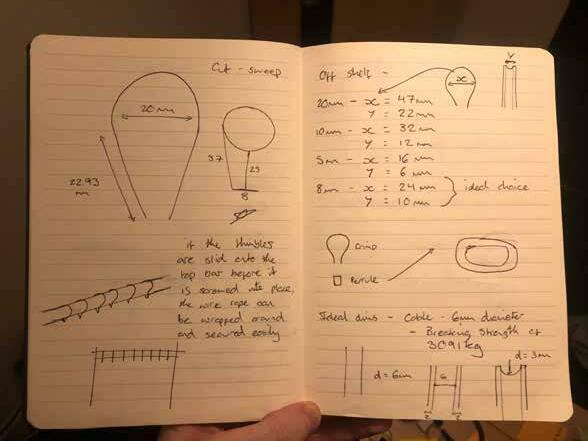
This would be another off-shelf component, with the lower tubing being much easier to fill than the upper pipe hole.
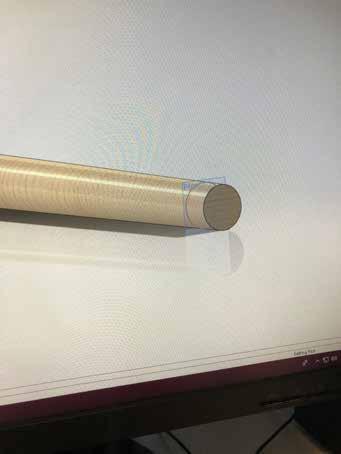
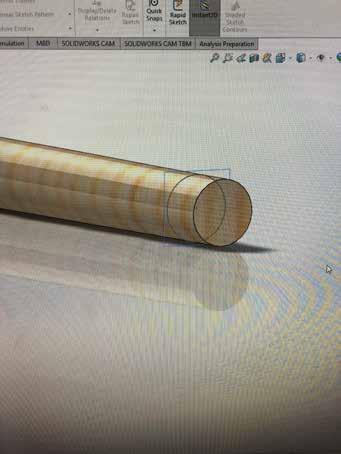
52 53
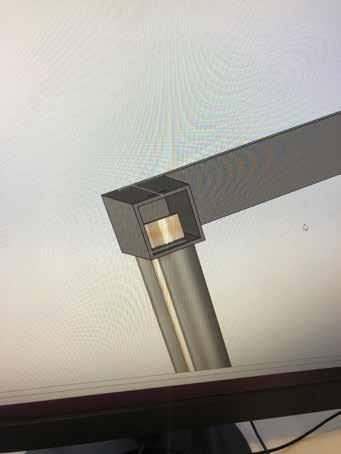
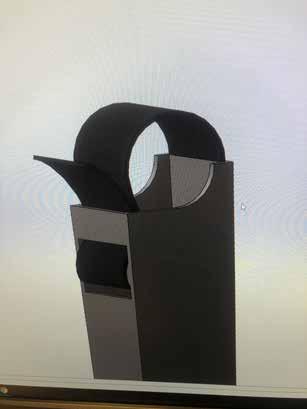
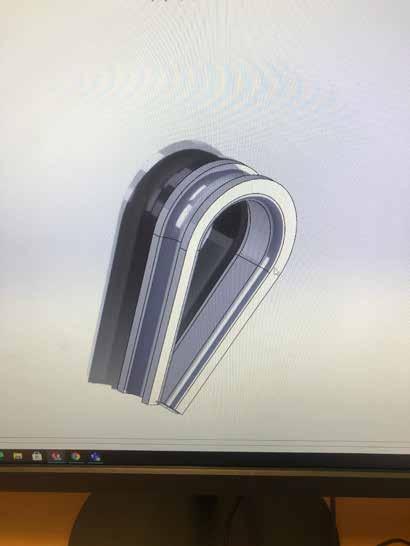
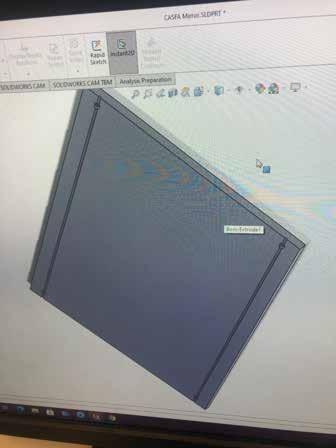
Difficulty arose while trying to figure out how i could bung the upper hole as its angle made it inconvenient for industry standard products
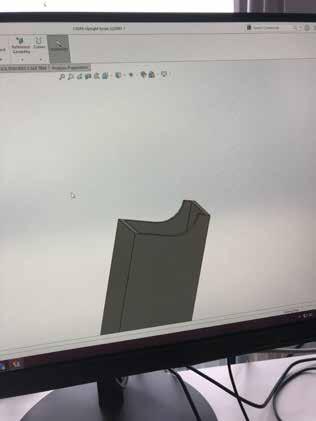
By cutting the upper frame to have a squared off end, an angled bung can be used to rest against the desired wall without damaging it.
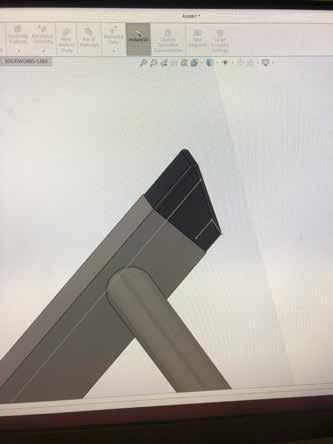
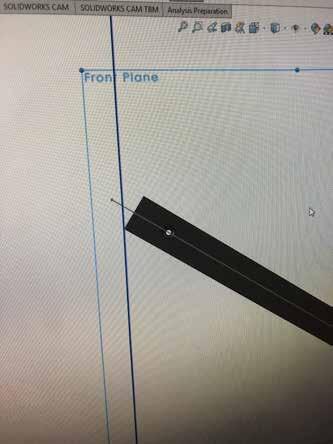
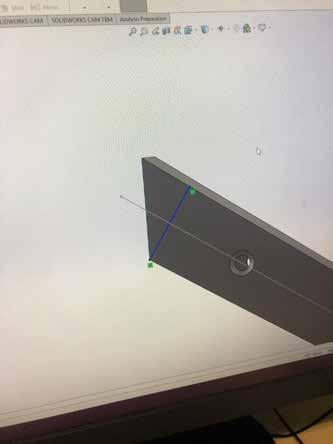
Another discussion with the workshop technicians led me to further develop the shape of the frame to suit the bung.
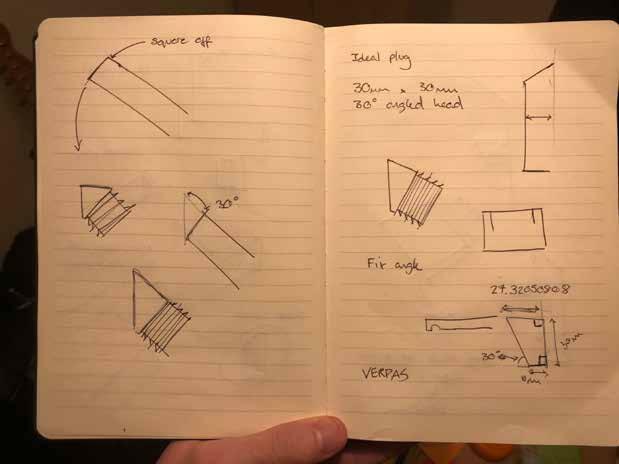
This may also reduce steel work manufacturing costs as the pipe will require less cuts if designed like this.
54 55
I realised that the gap between the internal framework and upper beam would be the perfect size to fit the strap into, and would also look a lot more sleek and well designed if it wasnt on the outside surface.

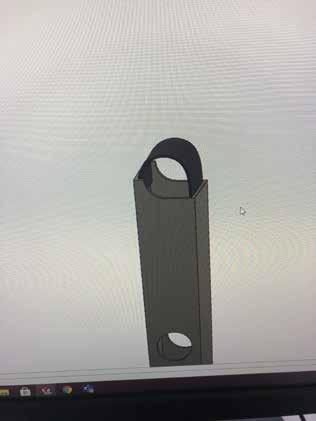
To further ensure stability, I decided the upright framework must be connected to the higher beam to reduce the risk of it falling forwards.
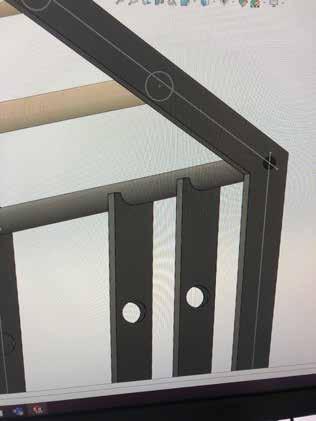
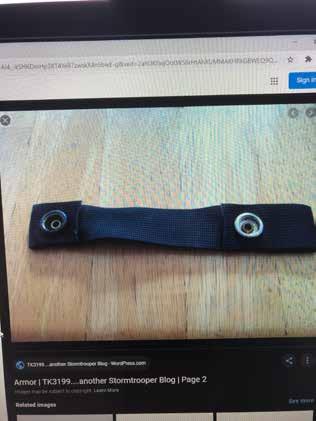
A polypropylene webbing strap was the obvious choice due to its strength and cost effectiveness.
56 57 &
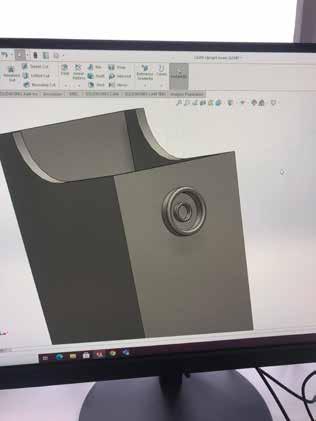
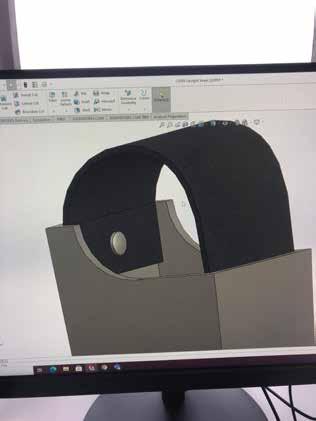
I thought about securing the strap with a button on the outside face, but instead decided to create two slots which would serve as a buckle to tighten the strap onto the upper beam.
This design is perfectly functional while providing the mostly industrial frame with a more delicate, bespoke effect.
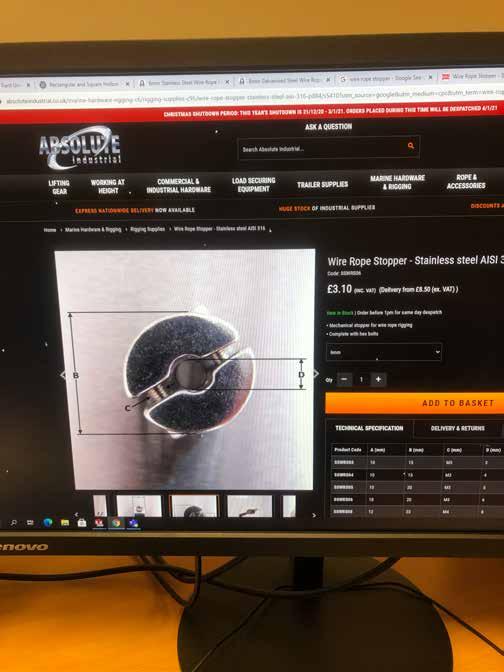
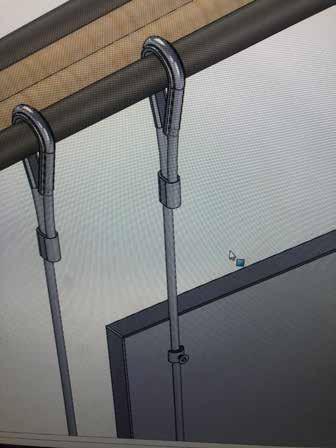
I had learned from workshop modelling that using thimbles and ferrules to attach the steel wire ropes to the highest rail would be the most secure and sensible option, which led me to finding the cheapest and best suited hardware for the job.
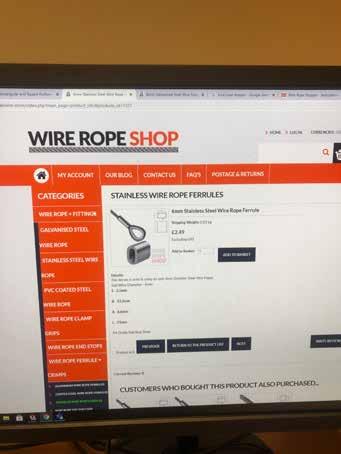
58 59 &
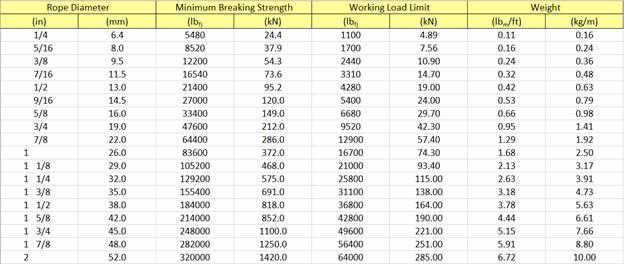
At this point I had decided that a 6mm diameter wire rope would be optimal for my design.

6mm wire would be thin enough to not become an eyesore while remaining incredibly strong.
Research into tensile strength and breaking limits led me to these graphs, which clearly indicate the immense strength of steel ropes.
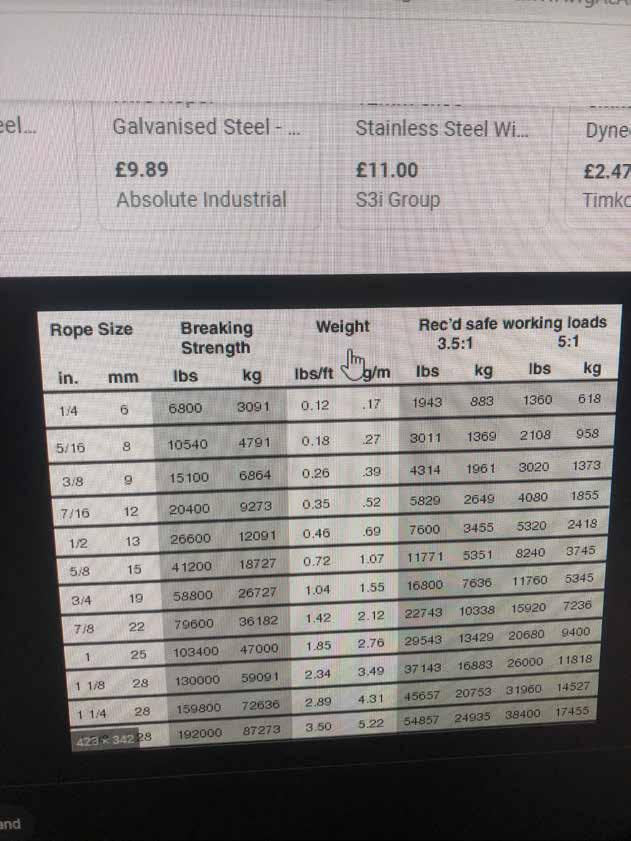
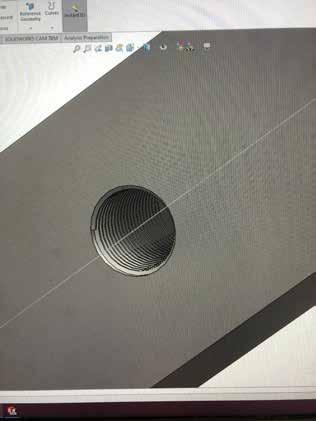
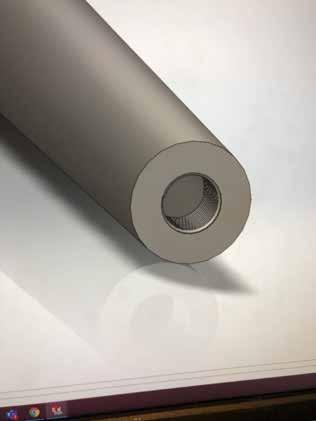
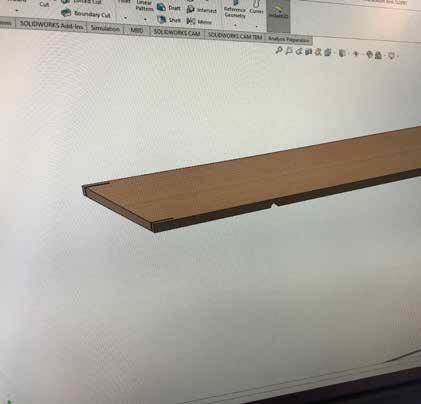
Creating a 3D solidworks model of the thimble was suprisingly time consuming. It was however necessary to create the most realistic model I could, with the wire ropes also proving to be difficult to make.
This further justifies my choice to use wire ropes for the shelving unit.

60 61
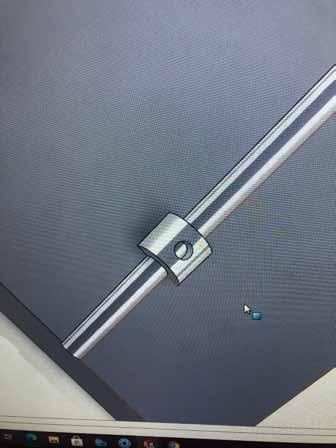
Research into the wire rope clamping also led me to producing an accurate 3D model to add to the assembily.
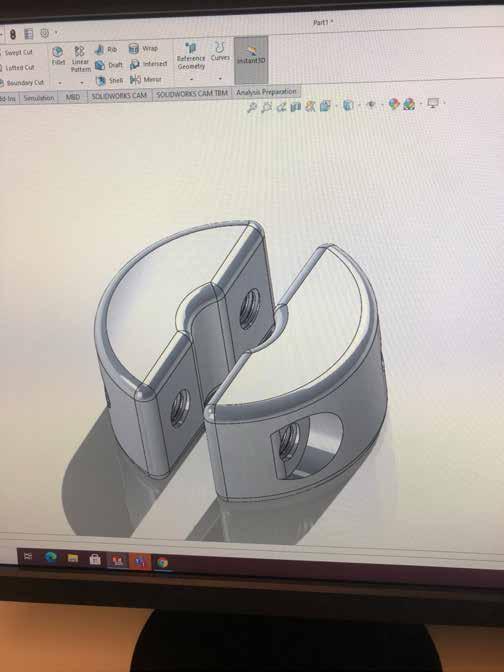
Although time consuming, this is one of my favourite parts of the design process and welcomed it with enthusiasm.
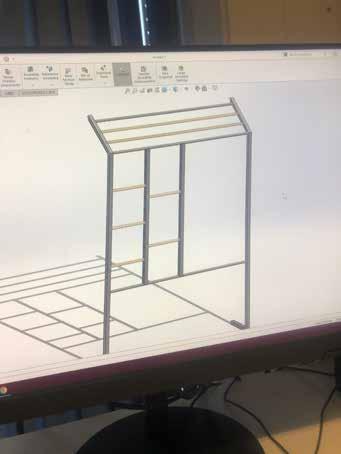
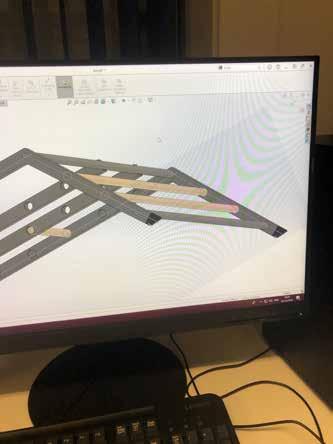
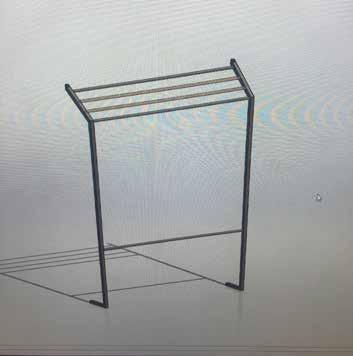
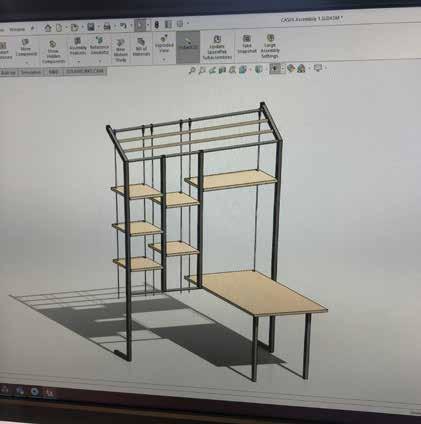
With the majority of the intricate modelling designs complete, I was able to start constructing the full CASFA frames as assembilies, which really helped visualise my product.

62 63
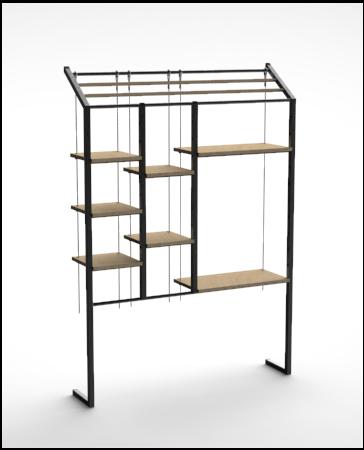
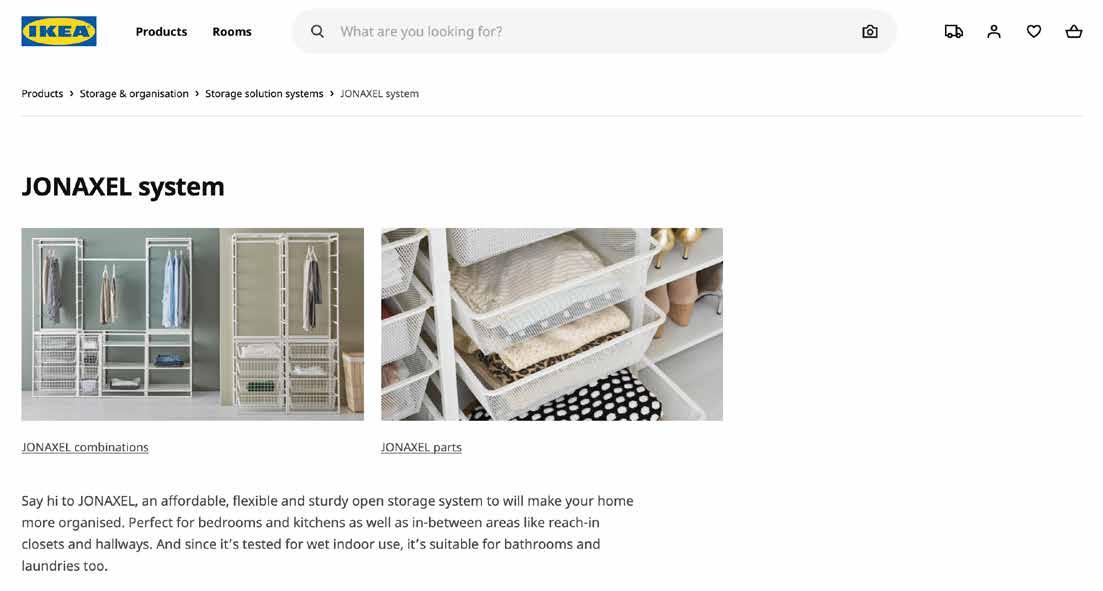
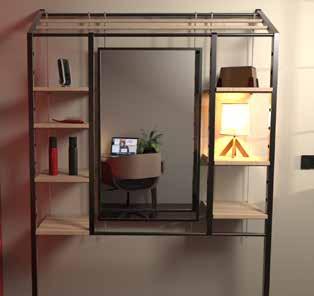
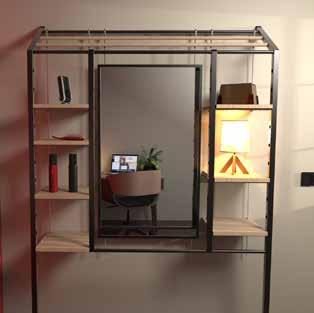
Models
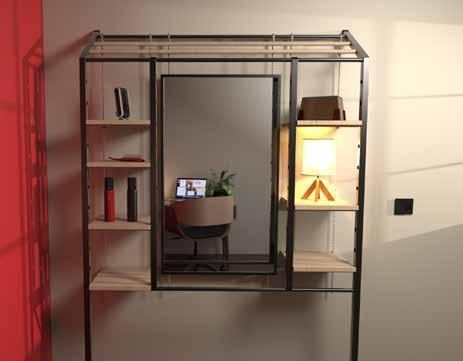
The Mirror unit design was an added extra to improve my renders, but also to further test my intricate CAD design skills.
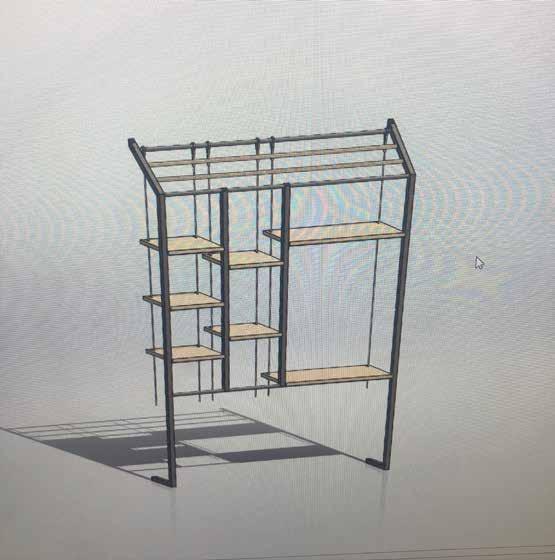
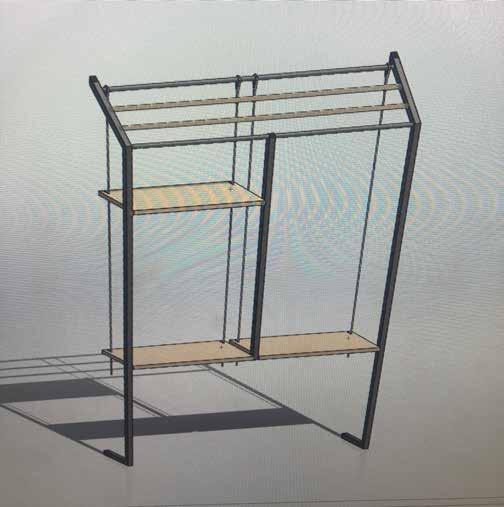
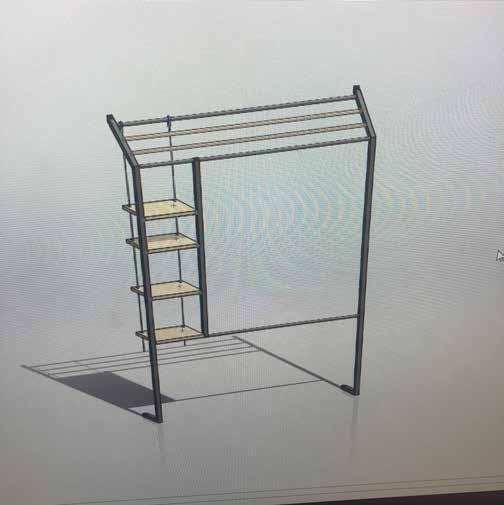

I decided this config would be the default CASFA arrangement due to its versatility and number of shelves.
Final
64 65
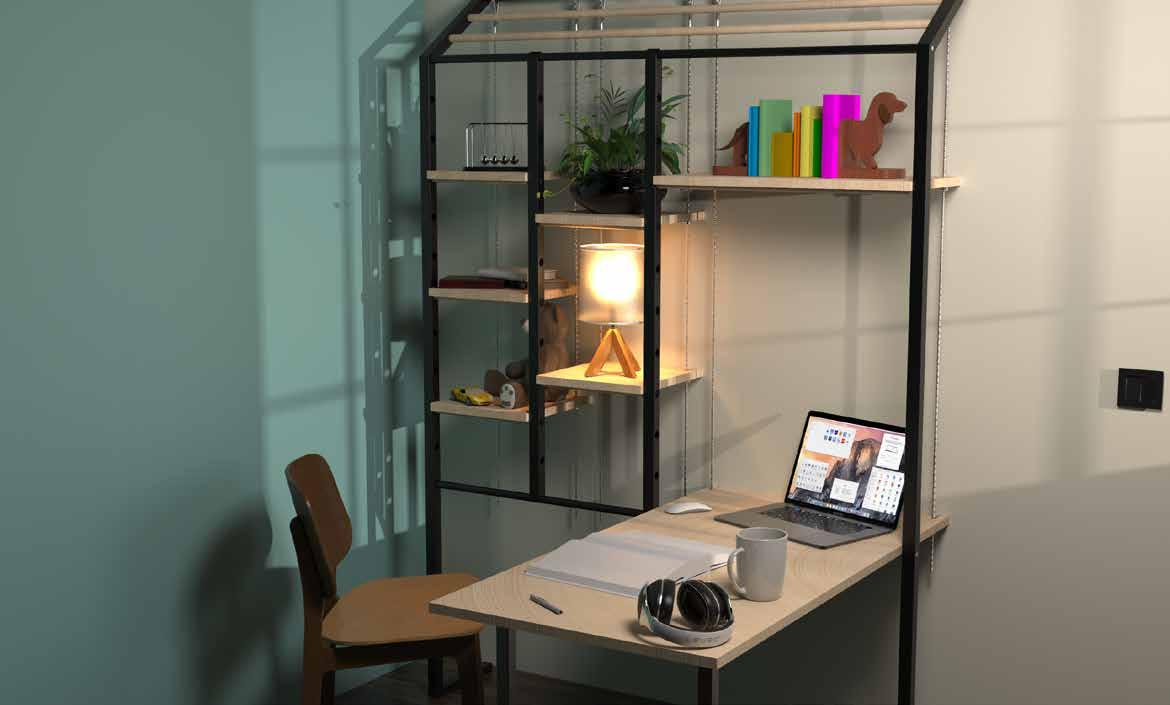
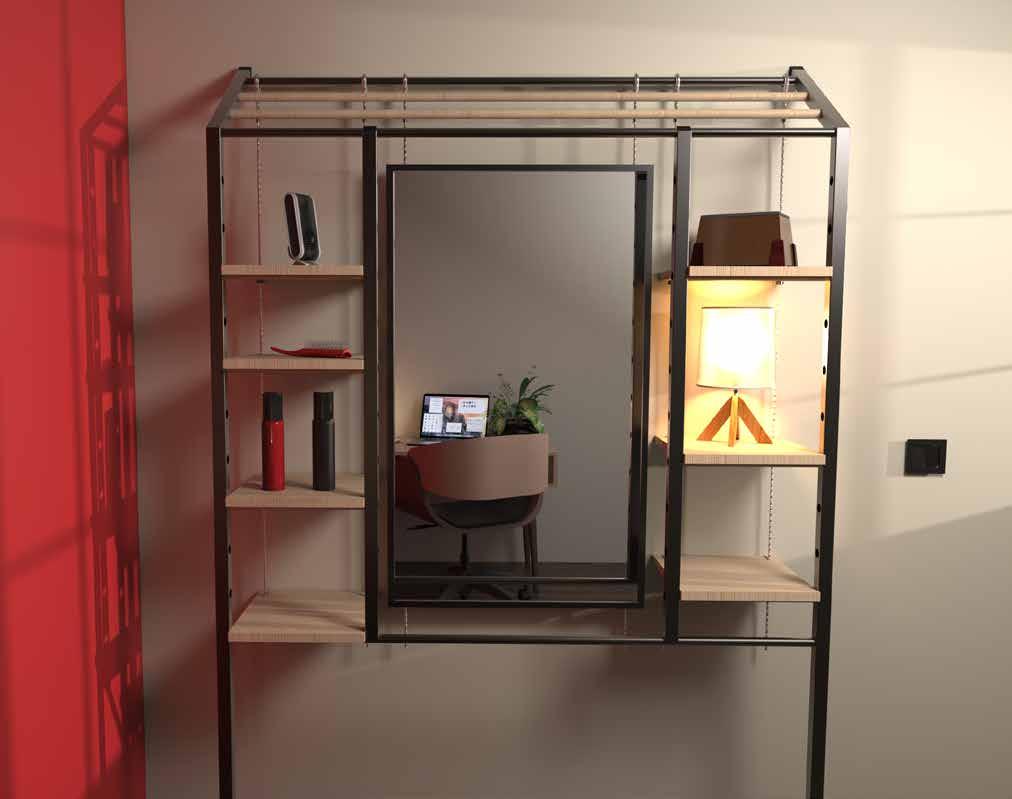
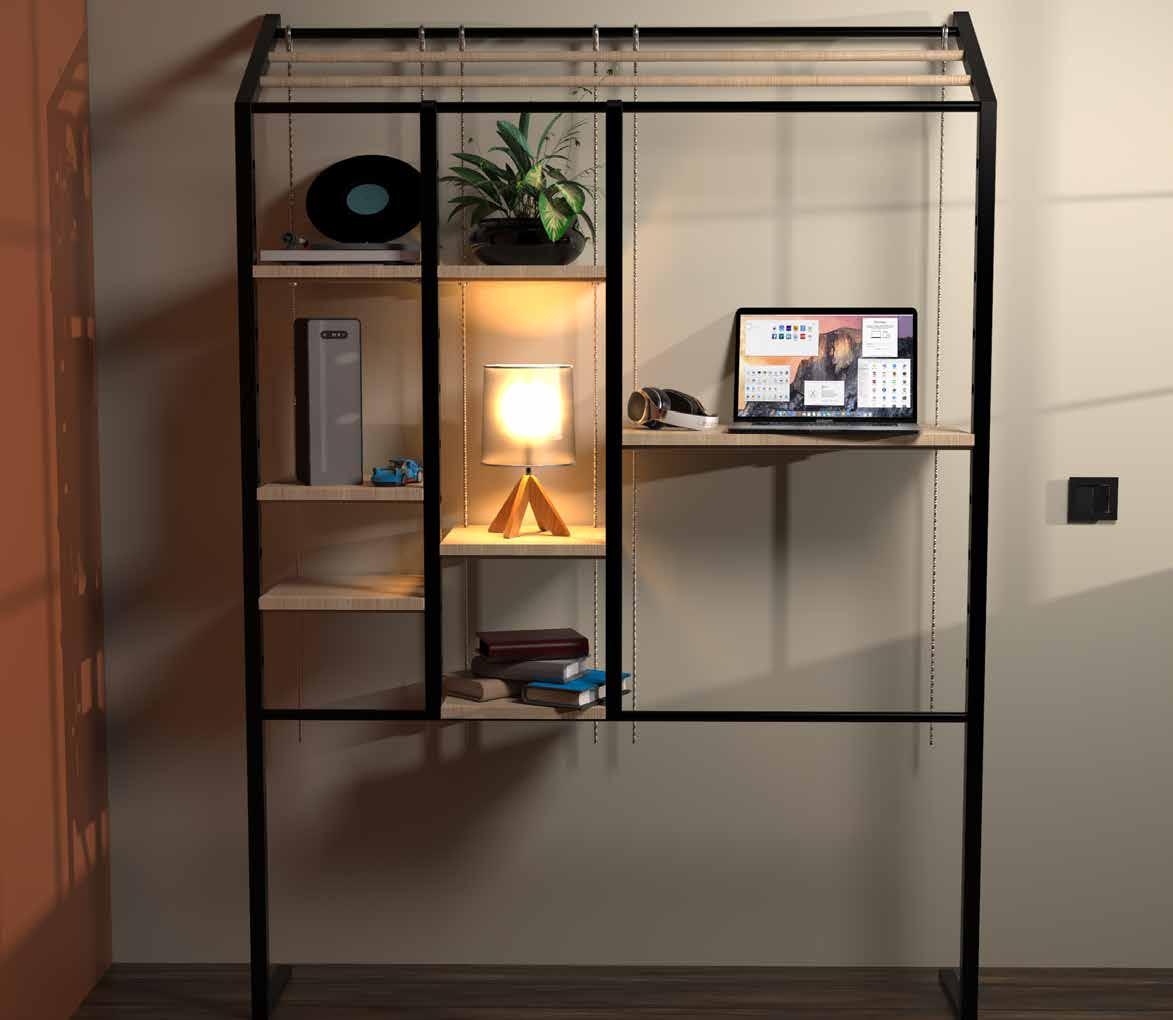
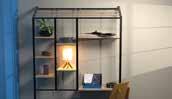
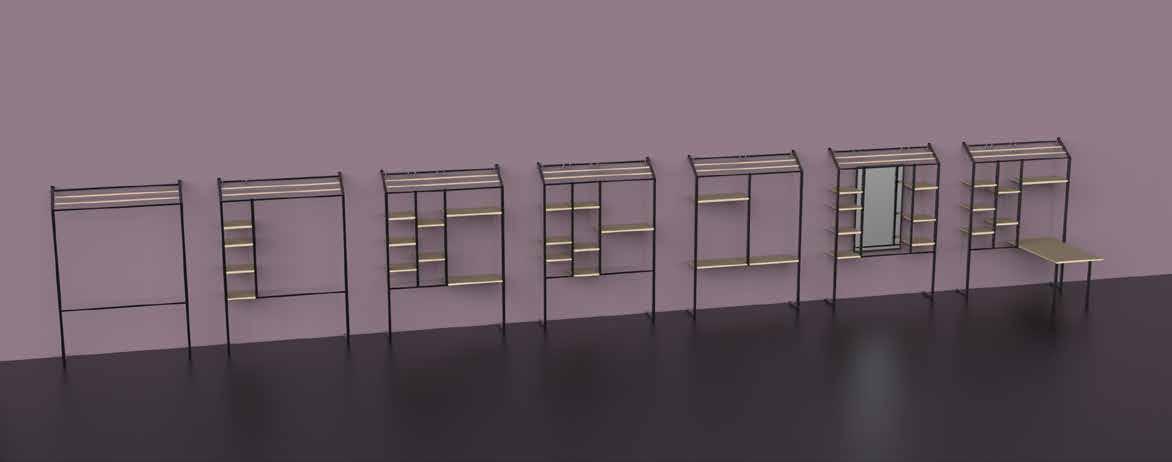
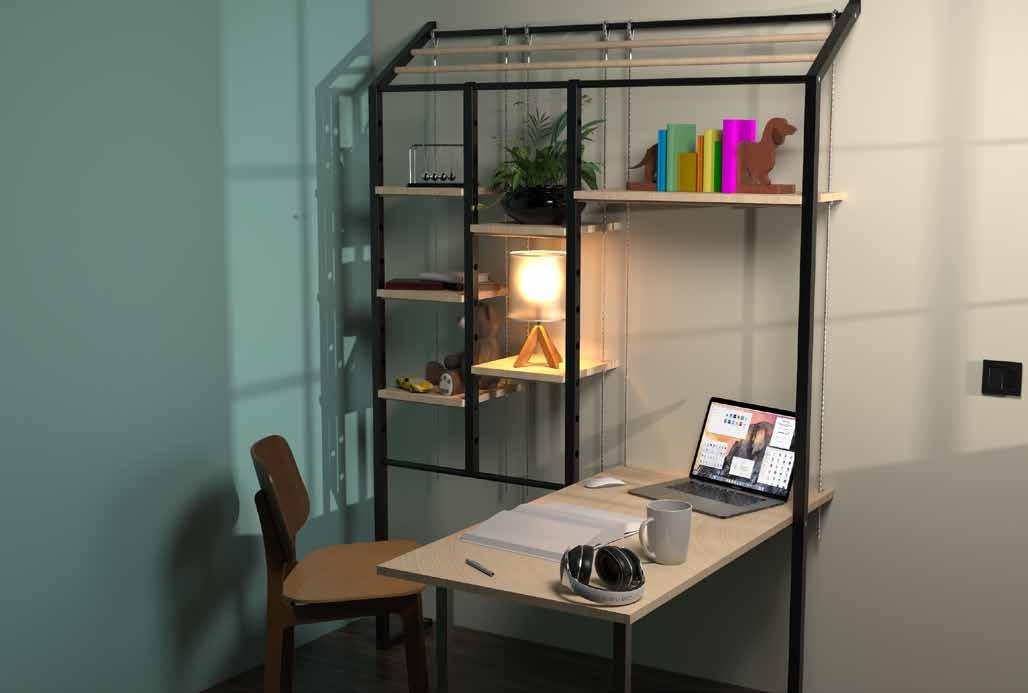
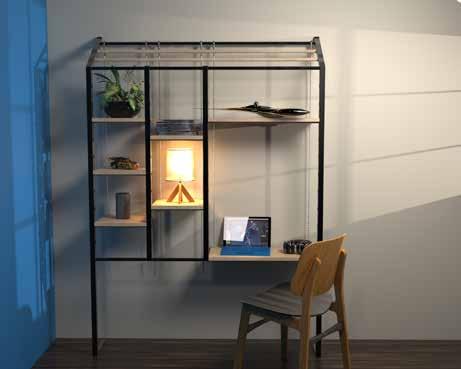
Keyshot Renders

This part of the process was essential in order to properly visualise the CASFA frame in an actual environment.
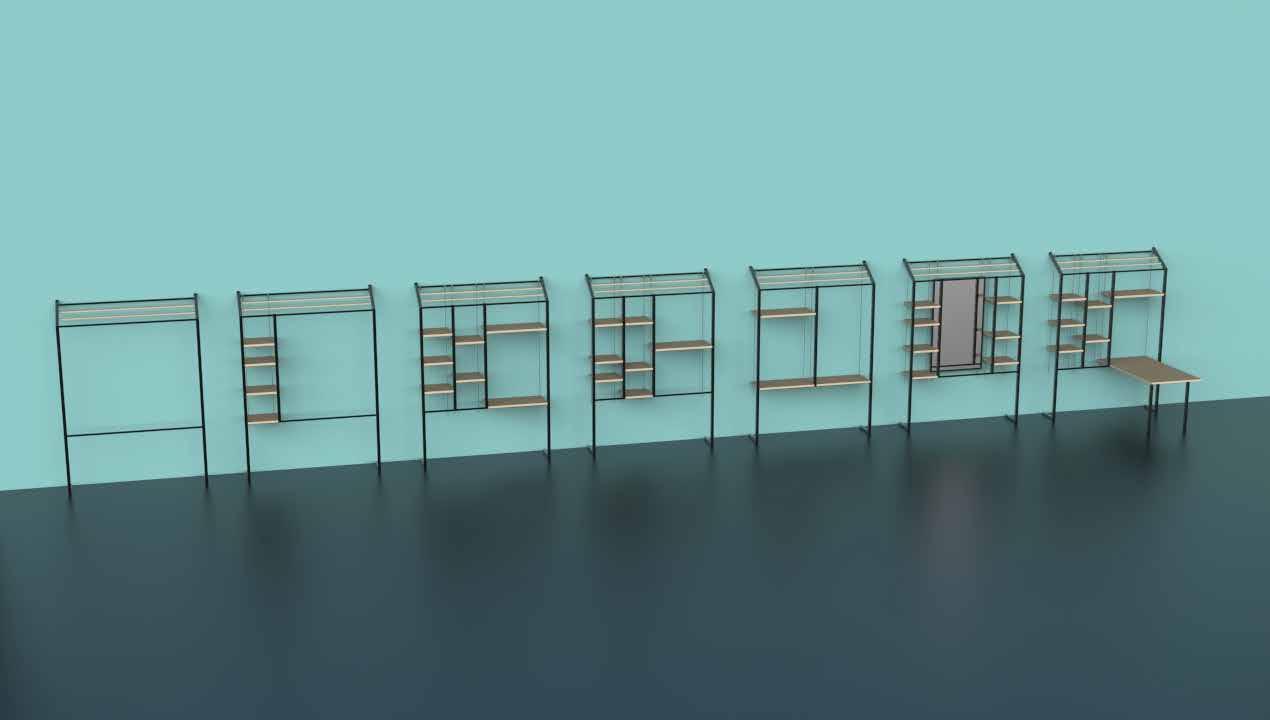
Renders of the full range look sleek and professional, while helping to find complimentary colours for my product branding.
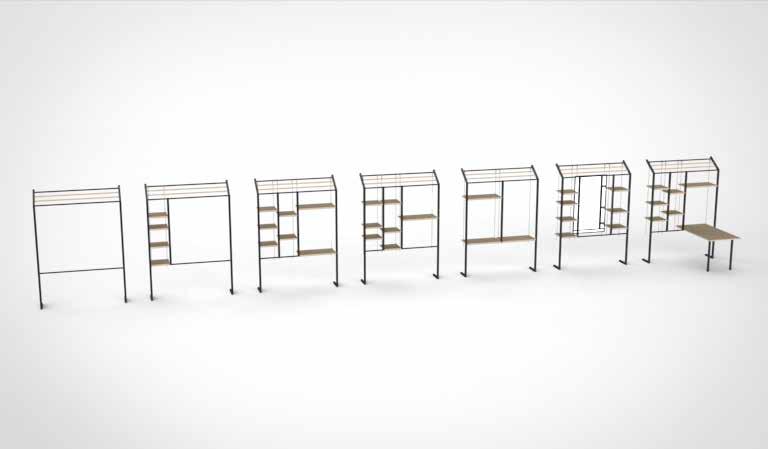
66 67
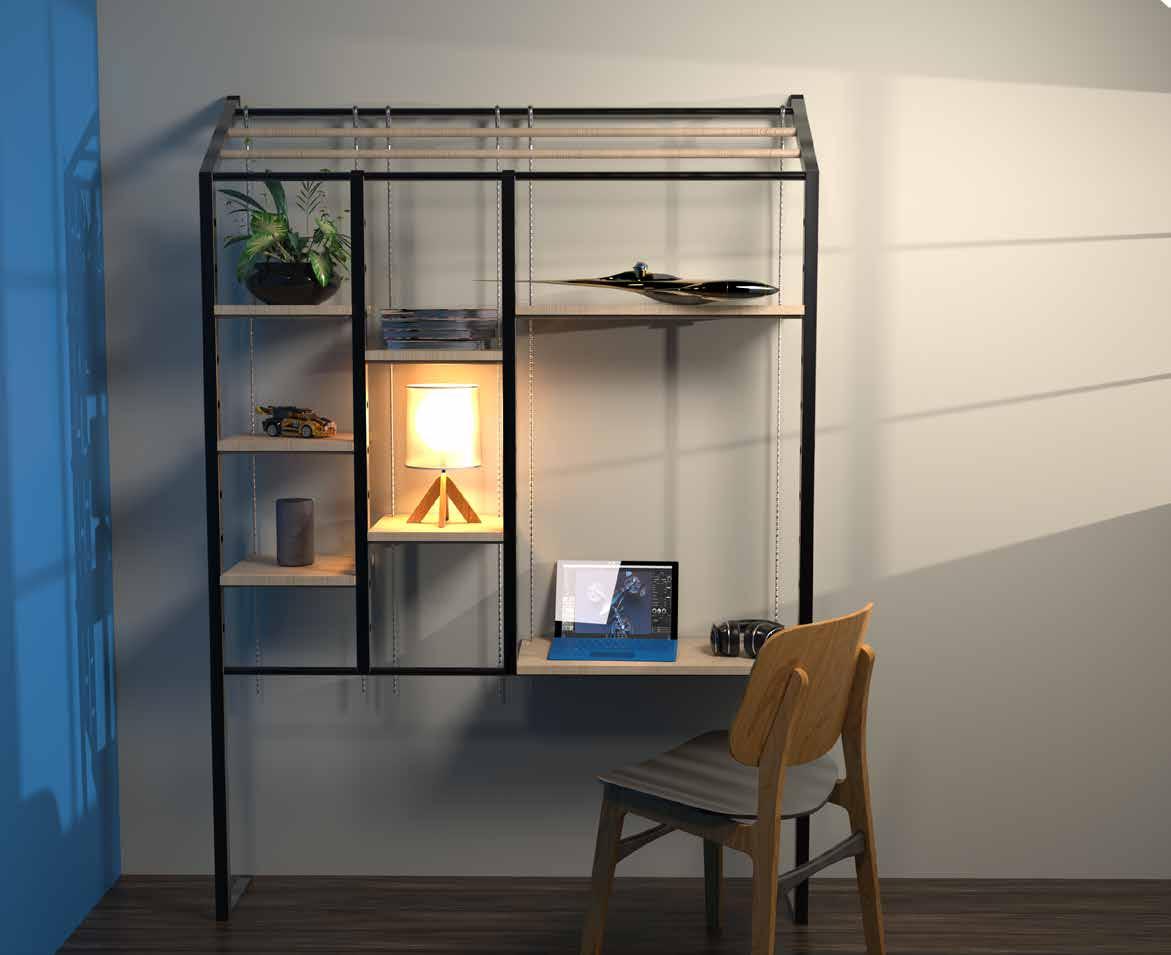
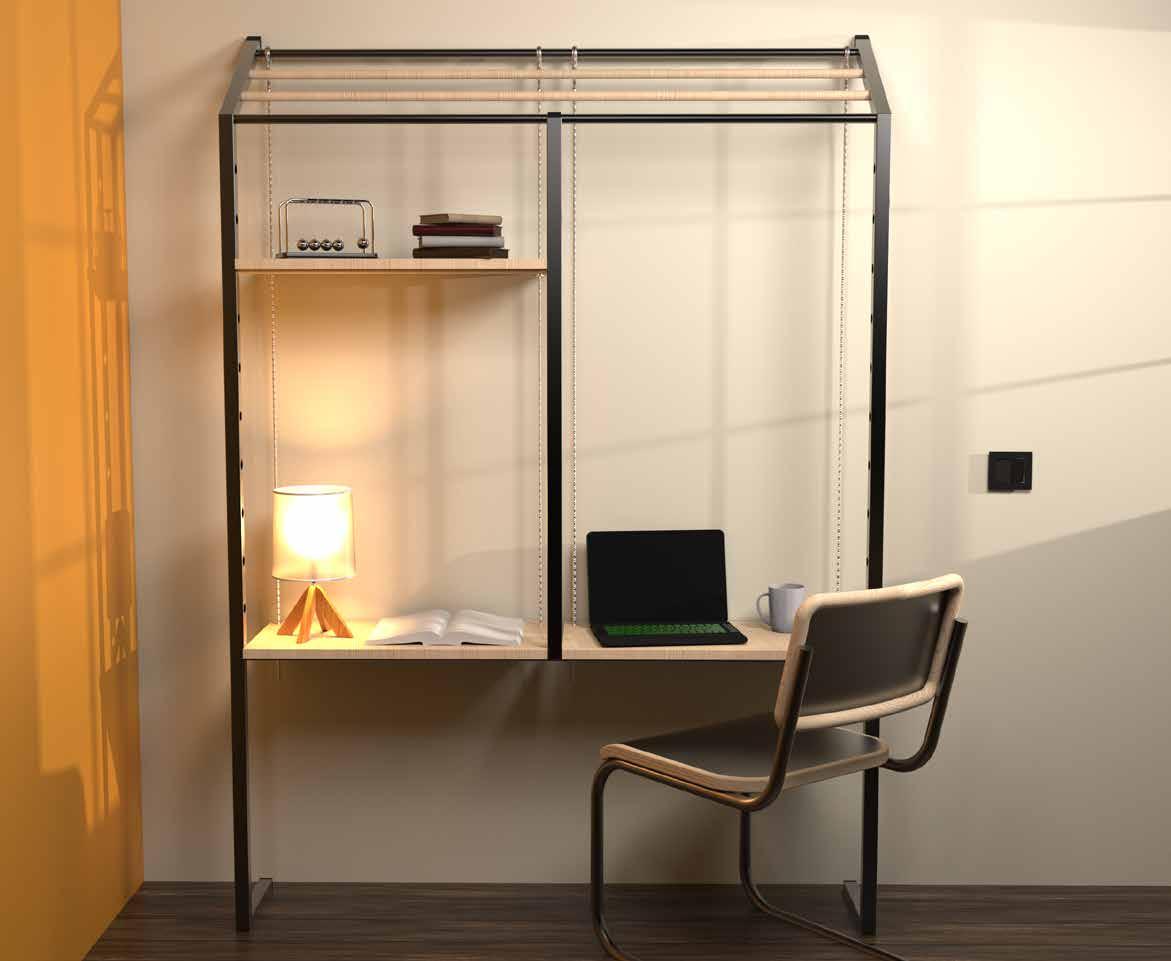
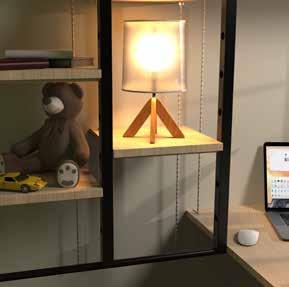
In-Situ The default arrangement, costs based around this model. “Creating a perfect blend of storage and study” Basic Config 320mm x 1250mm divided workspace, encourages seperating workloads. “Sleek and space efficient working environment for any size room” Workspace Config 68 69 &
Mirror Unit Config

Research driven config, key feedback from surveys led to this essential design.
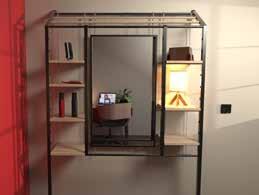
Standing Desk Config
Development from the workspace config, promoting good posture and movement while working.
“A shelving unit that caters for all your vanity needs”
70 71 &
“Thinking on your feet has never been so stylish”
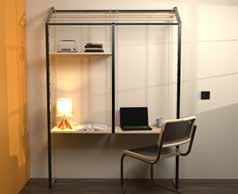
Open
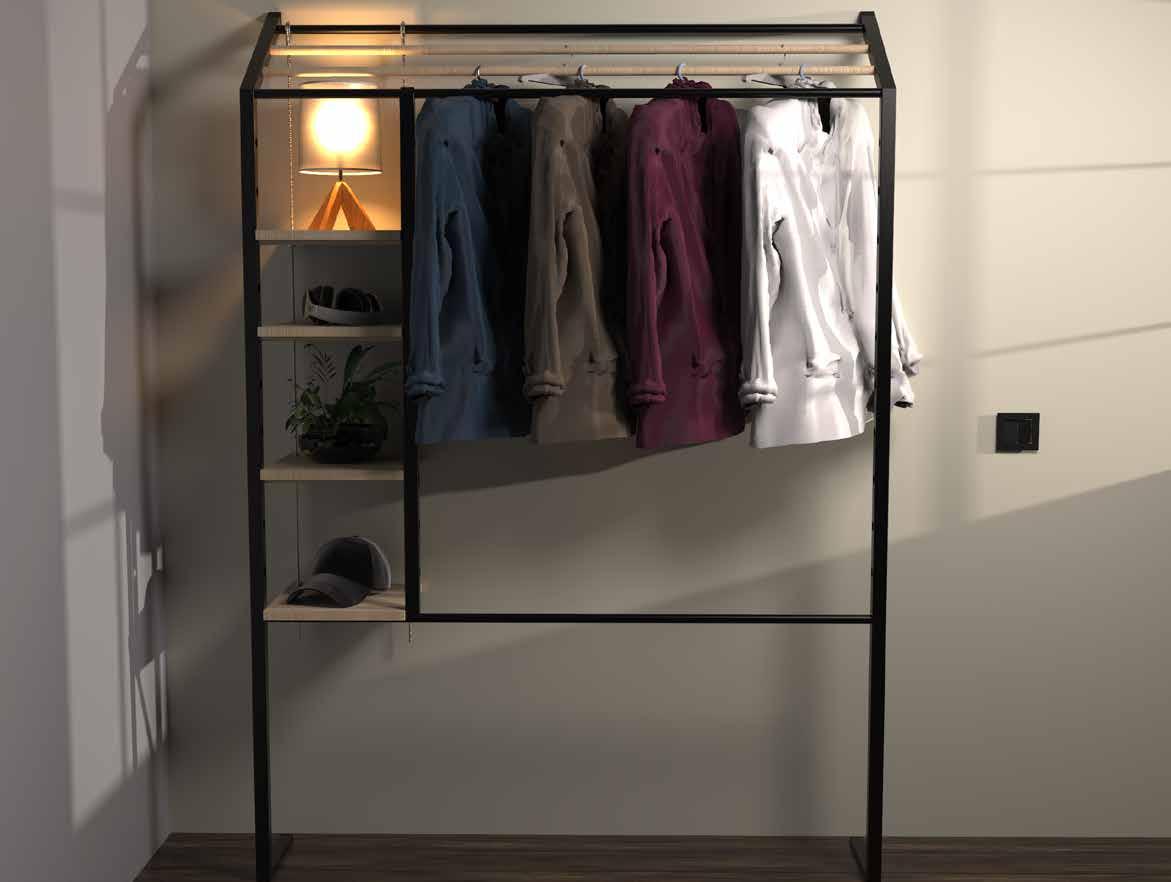
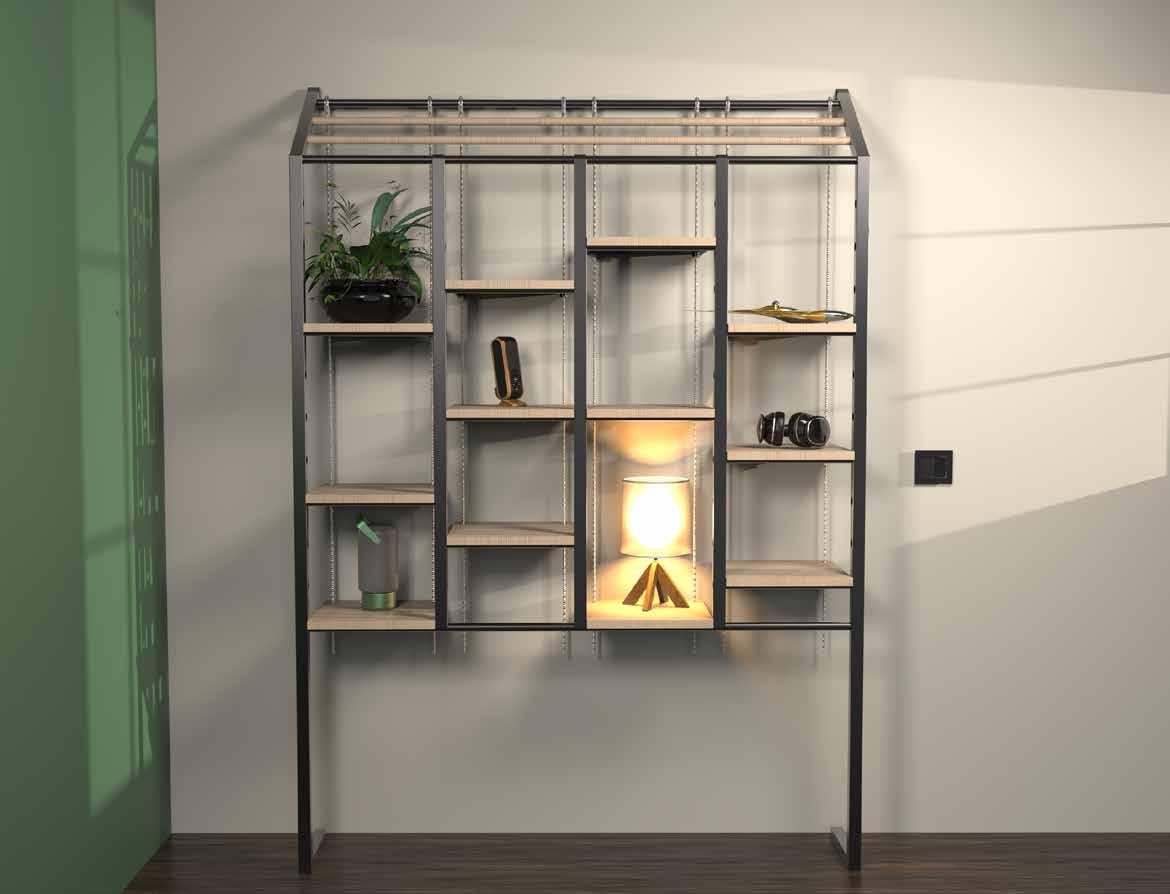
the goal of maximising storage area for small spaces.
customisable display unit for the hoarders with taste”
Unit Config
Achieving
“A
Display
key choice due to their rising popularity, perfectly suits the design.
an open closet with modular storage shelves” 72 73 &
Closet Config A
“Creating
Concious of the small desk space not catering for all types of work, I thought of an extended desk design that would perfectly suit the frame and potentially improve its aesthetic, while adding another modular possibility.
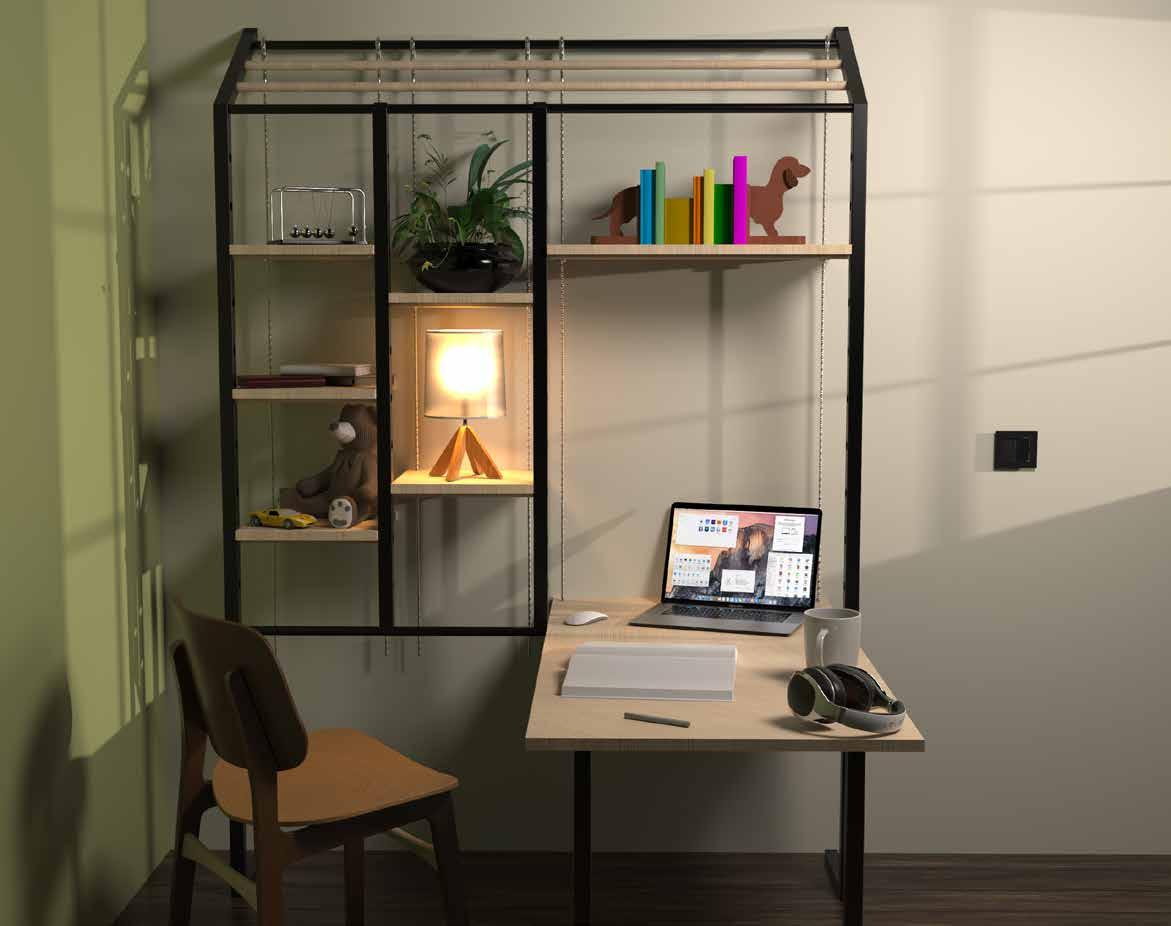

Extended Desk
designing
modular workstation shelving unit you’ve been dreaming of” Workstation Config 74 75
Provides a much larger working area perfect for
. “The
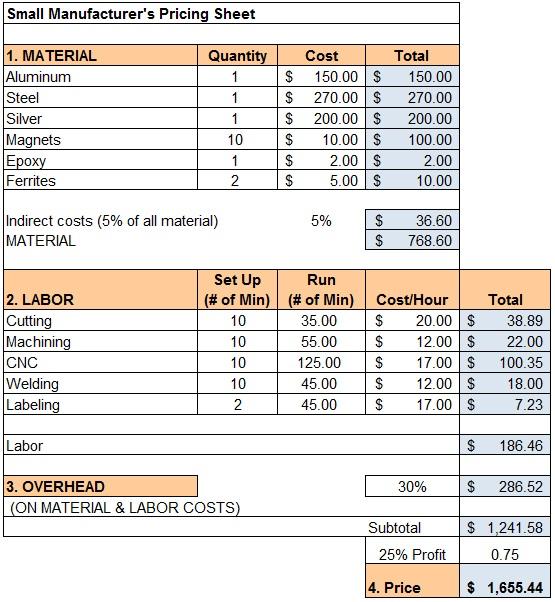
Product Cost Breakdown

My fears of the components raising the cost came true when finding prices for the raw materials.
Further research led me to another furniture pricing breakdown with costing similar to mine, greatly helping me to understand machinery costs.
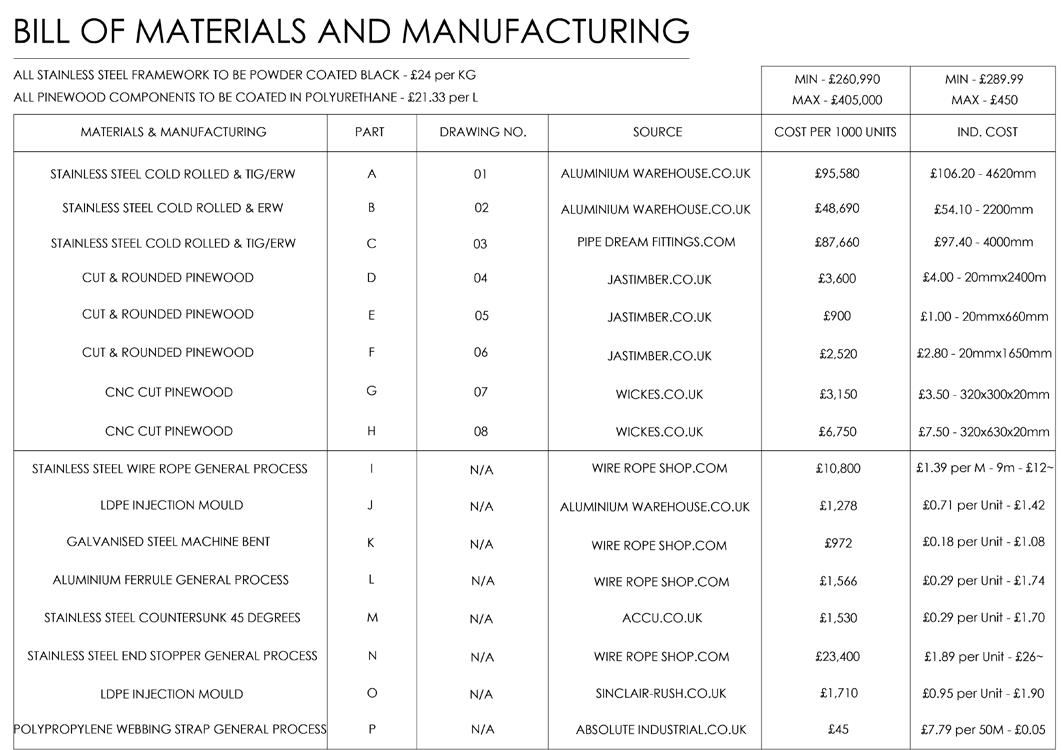
Product Pricing
Tooling/ Further Costs
Researching furniture manufacturing costs gave me a better idea of the machining and labour costs that would be involved in the production of the CASFA.
As the additional machinery, tooling and overhead costs could increase overall costs by up to £200 (rough conversion from dollars), the RRP will need to be adjusted accordingly.
Projected RRP:
£650-800
This is much higher than my original pricing idea and indicates the CASFA could settle in the Bespoke Furniture market, i.e, John Lewis, instead of low cost low quality furniture.
76 77
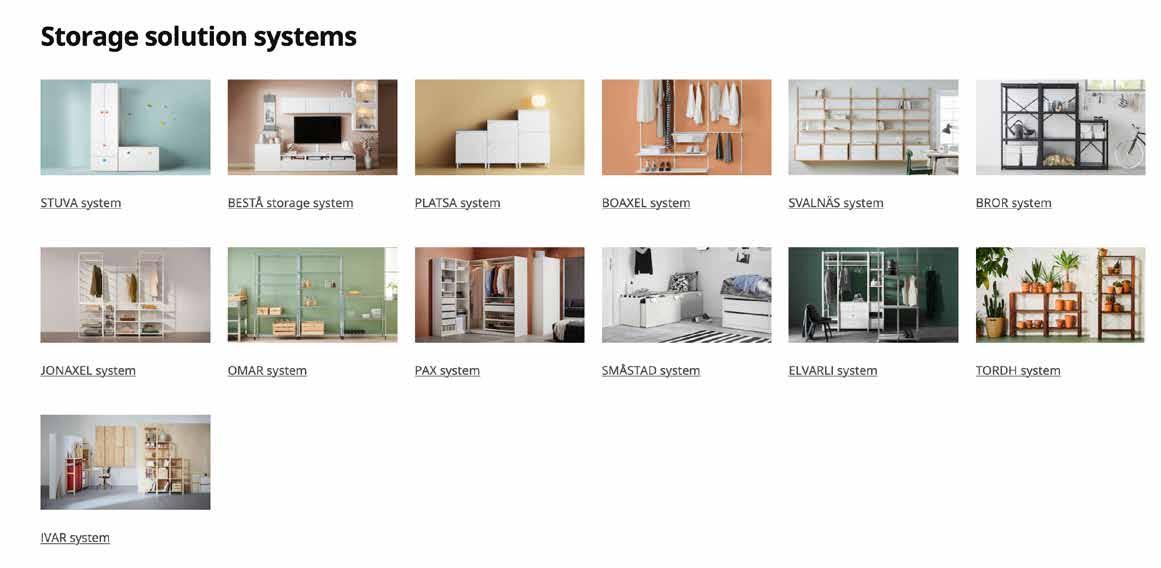
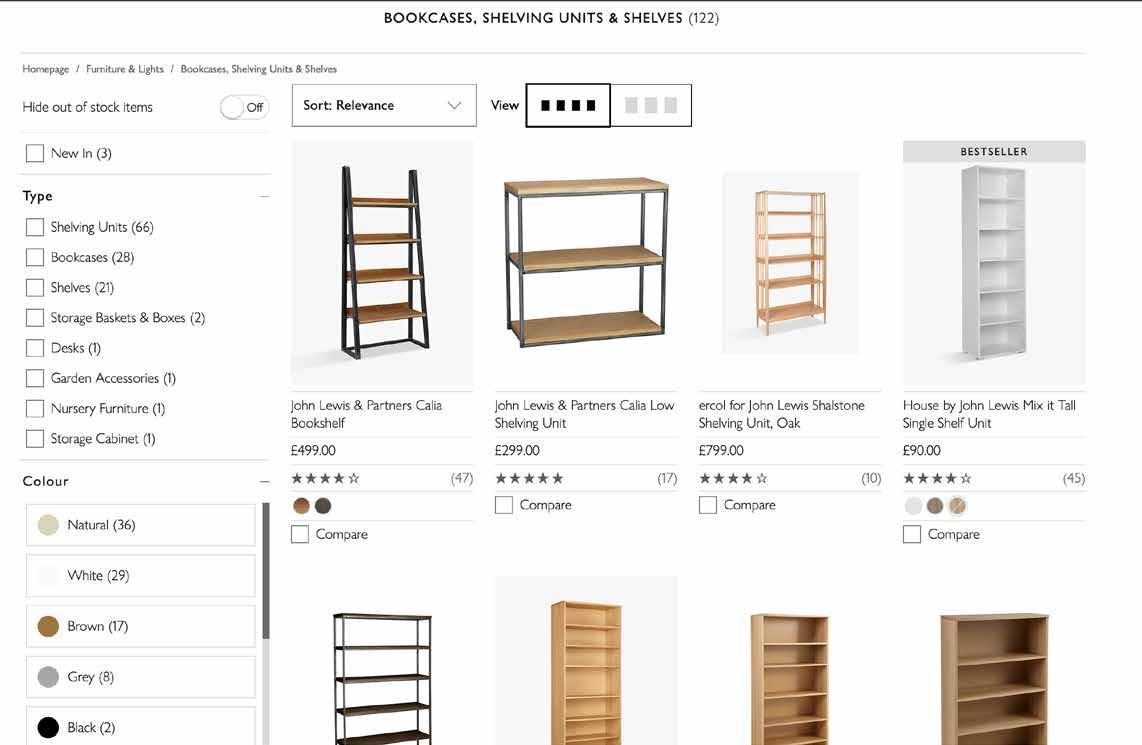


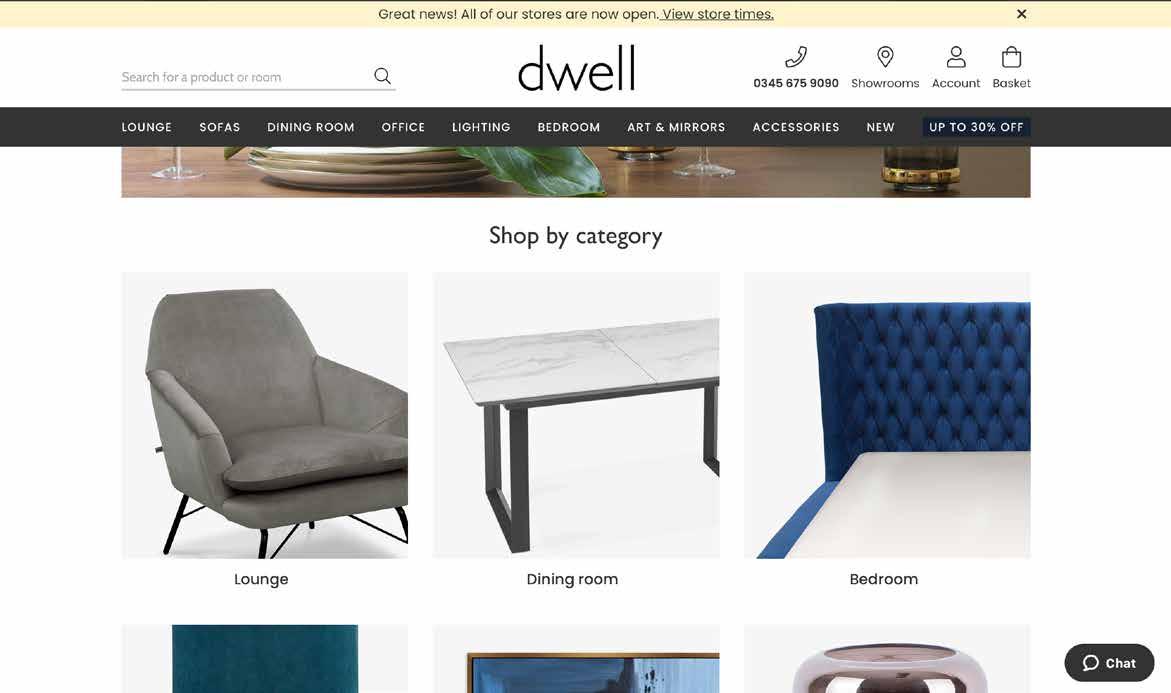
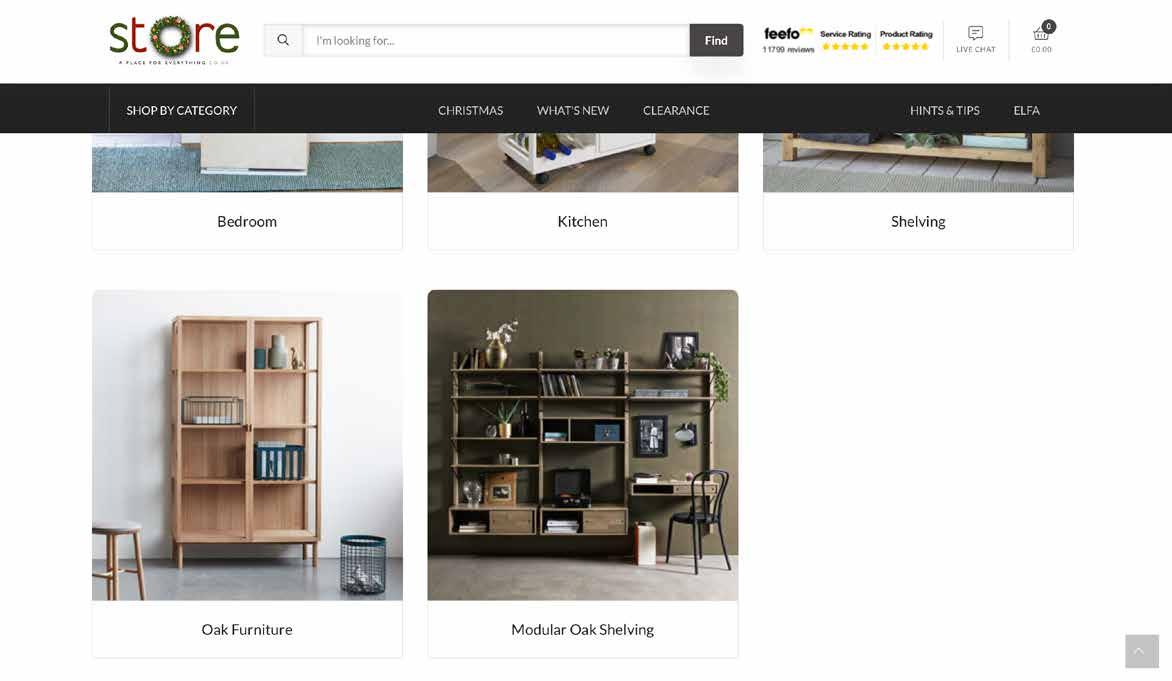
Product Placement CASFA Modular ShelvingBasic Configuration £650.00 John Lewis was an obvious choice as I had researched their prices and designs extensively. CASFA system CASFA system CASFA combinations CASFA parts Say hi to CASFA, a bespoke and completely interchangeable open storage system to make the most out of any room, any size. Adjust the design to whatever your room needs, whether it be closet space, shelving, working space or a vanity/mirror unit, the possibilities are unlimited. Although IKEA products may be much cheaper than mine, I felt the design would suit the range of storage options online. This
statement
CASFA
e-commerce. 78 79 & CASFA NEW COLLECTION SEE FULL RANGE
short
describes the
as simply as possible and is a staple for IKEA’s
I also chose these retailers as their prices were more suited to my product, making it fit in better.

As I was so happy with the final design and outcome, that the issue of price didn’t dis-hearten me, as i knew i had achieved the goal of creating a personalisable lifestyle unit for rooms of any size, function or occupancy restrictions.
However, I knew that the pricing structure wouldnt allow this product to sell anywhere less than £600 per unit, making it un-marketable to the student price range.
I therefore decided to alter the target market to young proffessionals living in small or rented accommodation.
Initial Brief
Final Brief
CASFA Modular Shelvin g
Brief
Refinement
“Design
a sleek, modular alternative to the limited storage solutions available to students or young adults living in small accommodation”
80 81
“Design
a bespoke, space efficient storage unit for lifestyle in any accommodation”
- Research cheaper materials to make the product available to lowest price ranges. - Strength testing on full scale model - build product from my technical drawings. - Plant storage/ drainage development - promote healthy interior design in bedrooms and workspaces. Product Specification
Developments Product must- Provide Storage Space - Provide Working/Study Space - Provide Closet/Hanging Space - Require No Wall Fixtures - Utilise Space Efficiently Product should- Promote Organisation - Be Sustainably Produced - Be Easilly Interchangeable - Convey a High Quality Aesthetic - Promote Positive Interior Design Product could- Fit in Multiple Rooms - Improve Productivity - Reduce Stress - Serve Further Purposes - Display Sentimental Items 82 83
Further
Project Evaluation
Praise
Critiques
My initial lack of furniture manufacturing costs knowledge may have hindered this project, but after ammending the target market I still think the CASFA is a realistic and marketable product.
I felt I could’ve done more initial ideation but had a strong idea of the frame in my head from the start and wanted to develop it as much as possible.
My lack of primary research wasnt all down to Covid, I knew I could’ve made a focus group but there was nothing to really test with my product other than design feedback which I obtained regularly with online tutorials and the Miro board.
Despite doing work every day, I still felt rushed towards the deadline which may have affected the document layout quality, especially in my development research.
I feel I have produced a much more substantial piece of work than previous projects, and have enjoyed all aspects of the ideation process, chiefly with modelling and rendering.
Identifying a gap in the market for bespoke modular storage greatly benefitted my justification, especially towards the end.
I truly believe that the simplistic design and various uses would make the CASFA a cornerstone to any room, as it can be as bold or discrete as desired.
Final Thoughts
In hindsight, I also feel I may have gone overboard with the word count, mainly in my research document. This may be something to work on for my major to try and be more consice with wording.
I would enjoy to come back to this project at some point with the focus of reducing cost. Not sticking to the original target consumer is un-professional, but I felt I should’nt restrict my design process by setting a price limit, especially as this is all just prototyping.
84 85


CASFA byAdamParrott A completely modular and adjustable storage unit designed for lifestyle in limited spaces. The sleek, wall mounted design requires no fixtures, making the CASFA suitable for any room.
