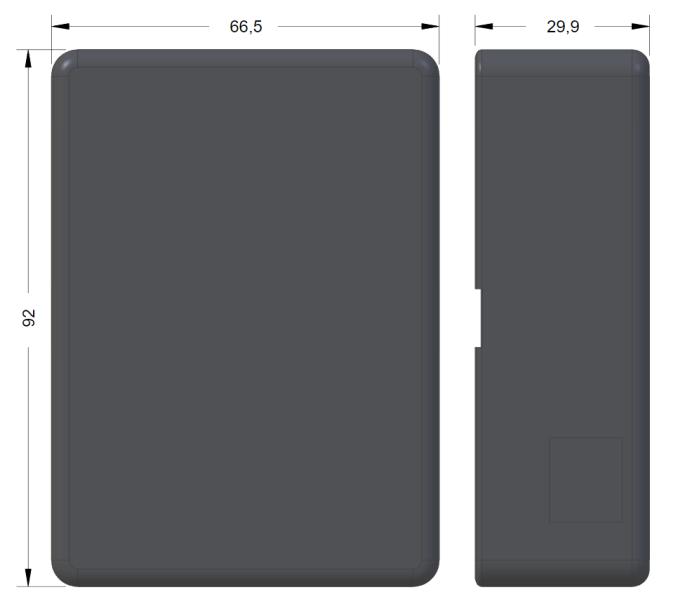
XLOCK 10


Mifare Flex
INSTALLATION GUIDE

XLOCK 10 MifareFlex o Fixcode o Freelocker

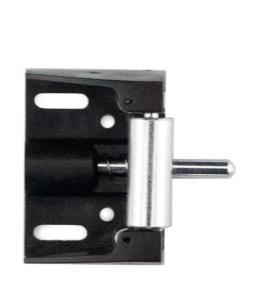
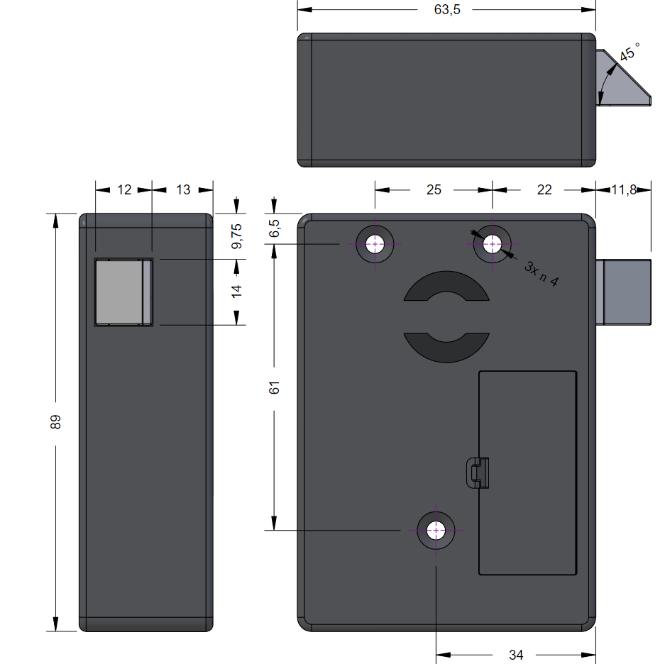
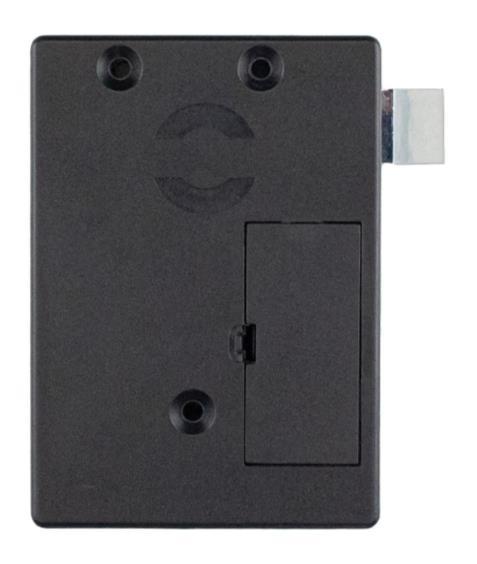
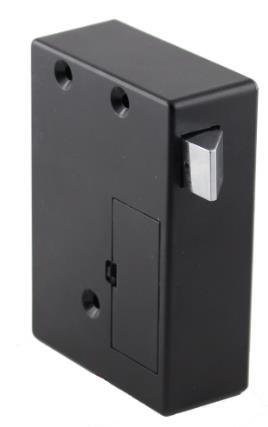
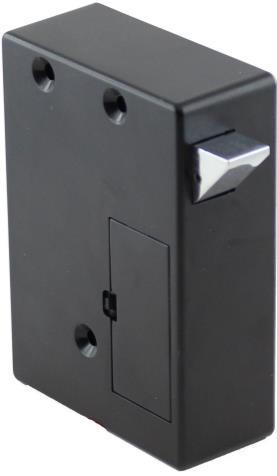
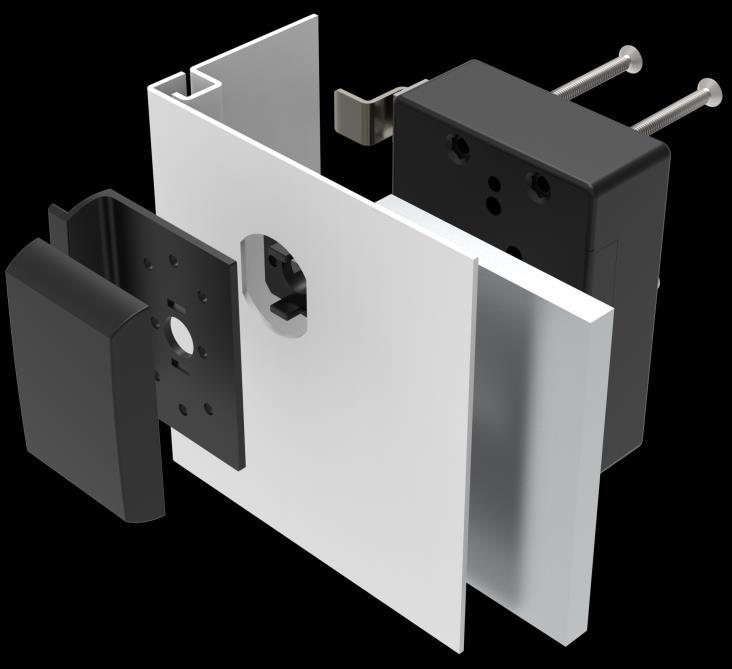
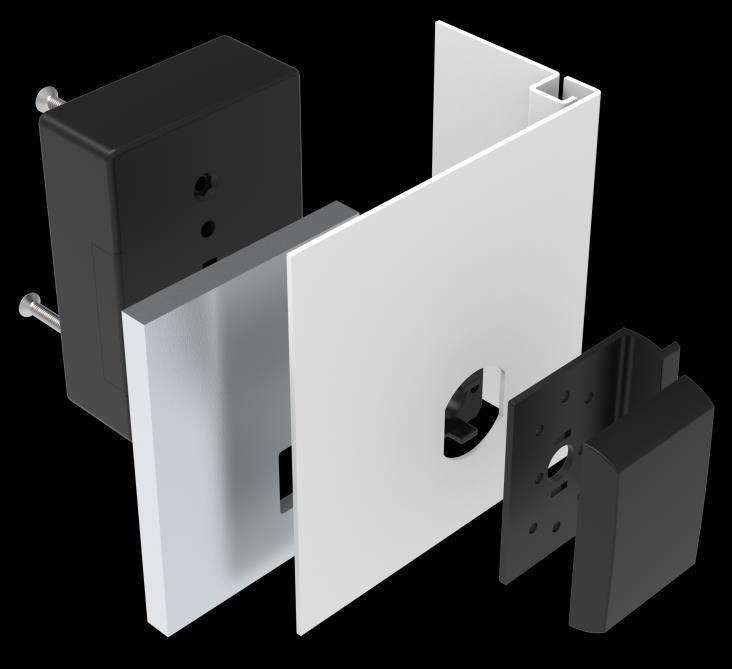
Lock
Closing part XL-S2
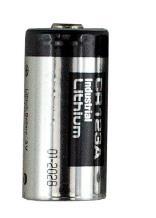
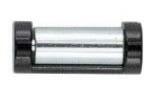
Battery CR123A 3V lithium
Warning: Closing part S2
- Please order seperataly. You will find all informations about the different closing parts on the next page
Warning: 1 pc. lithium battery
Please order seperataly
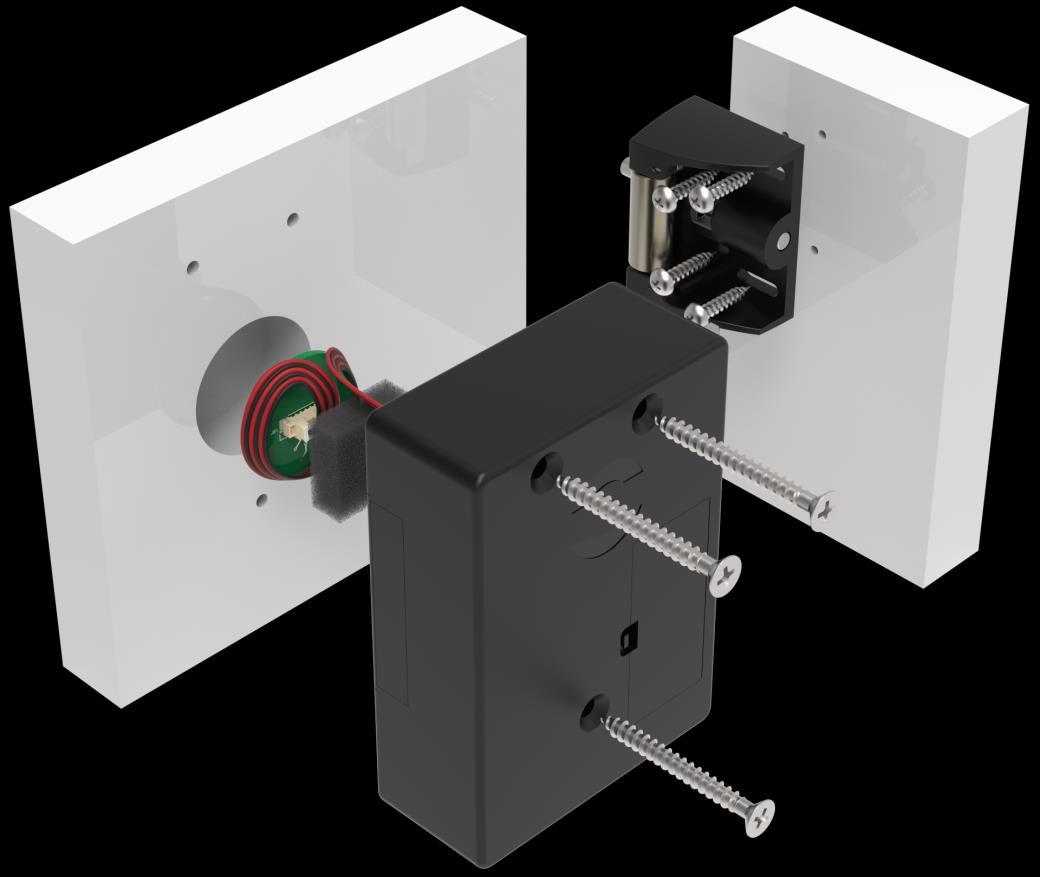
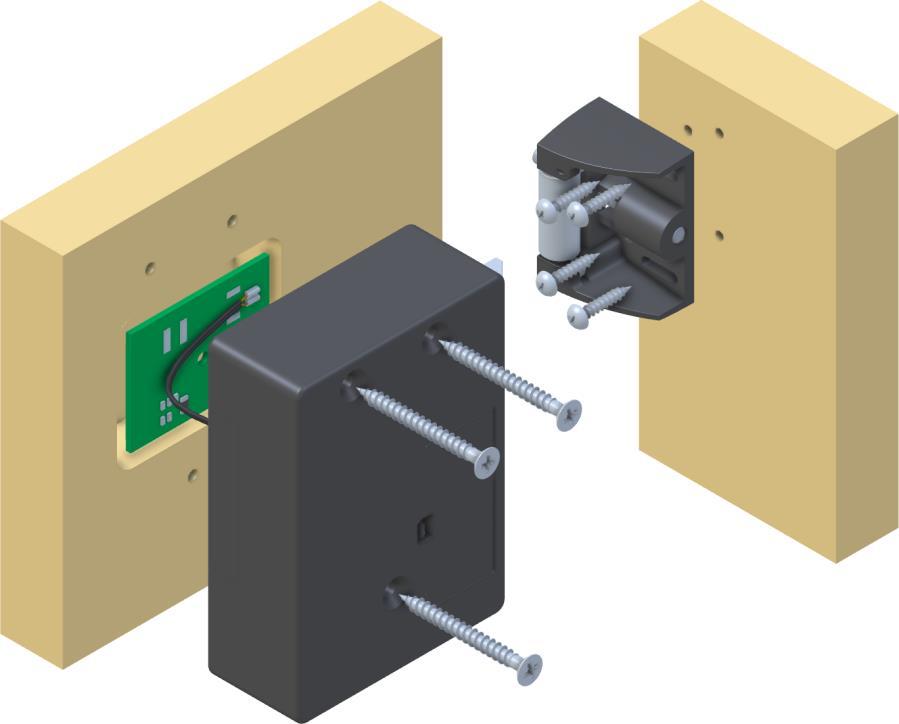
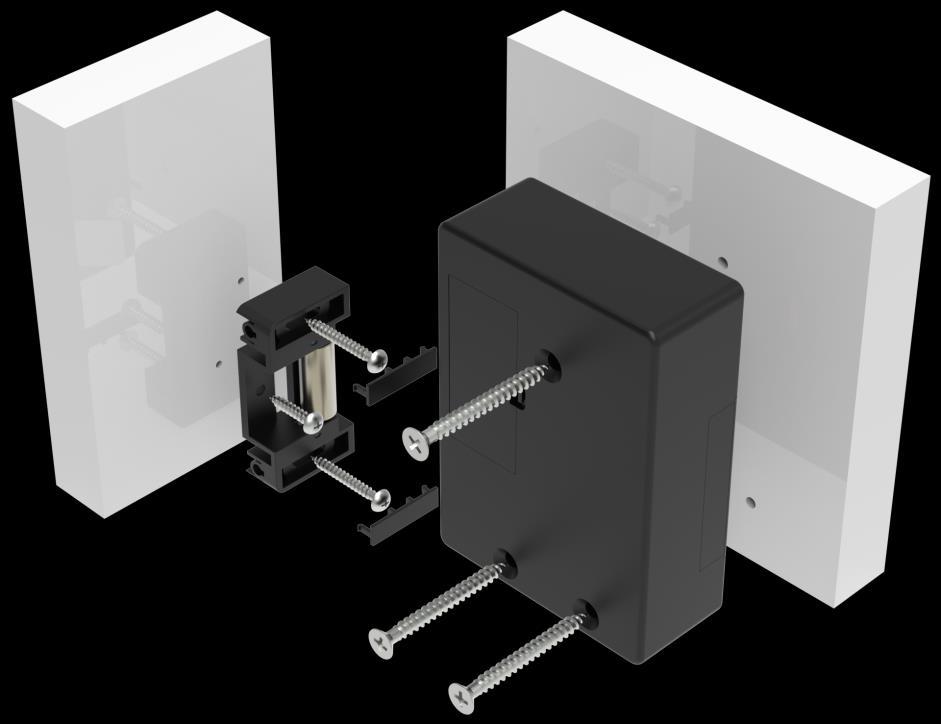
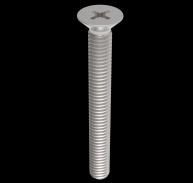
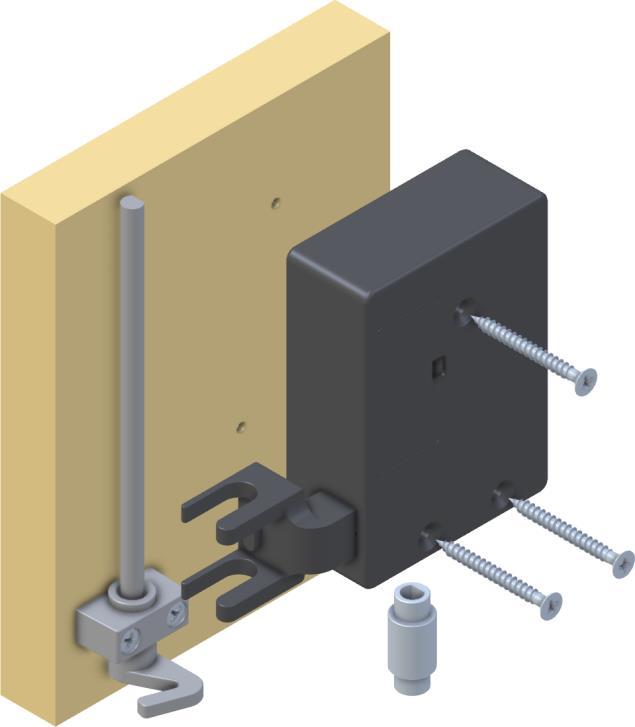
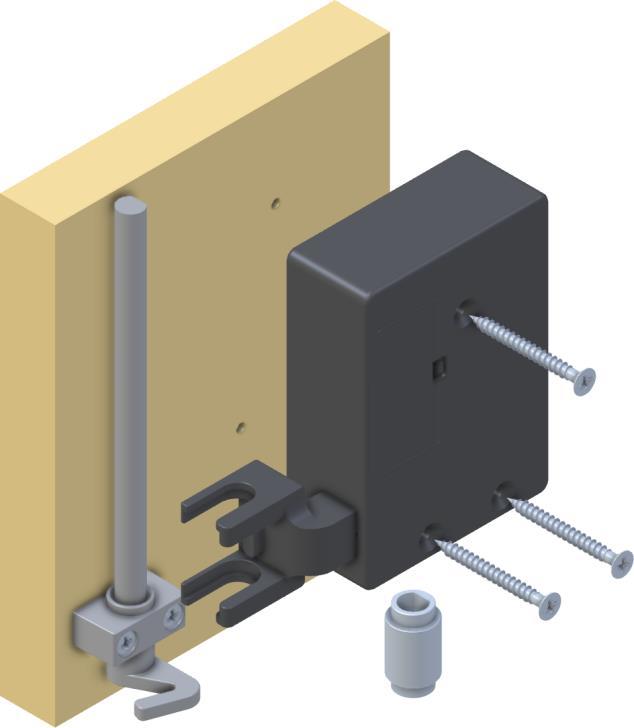
3 x countersunk screws 3,5 x 40 mm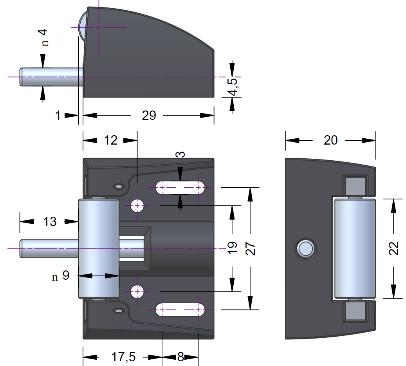
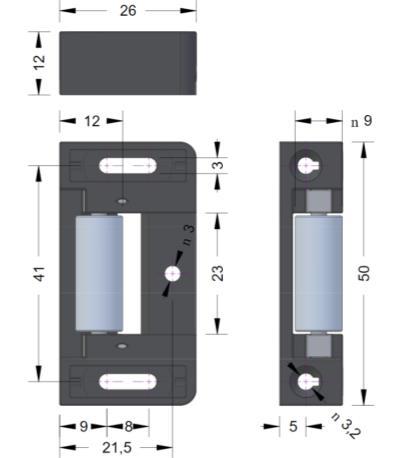
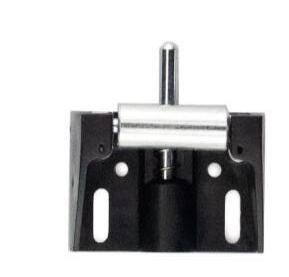
Closing part (optional)
XL-S2
Closing part (optional)
XL-S1


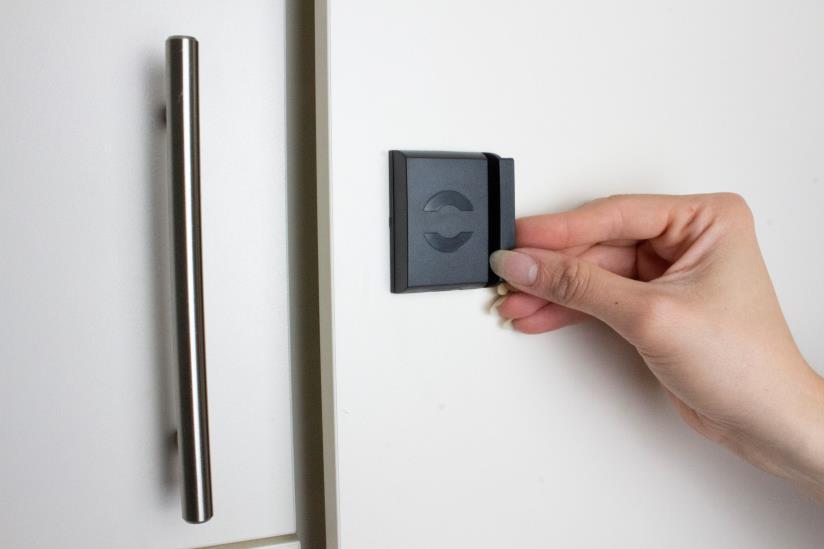
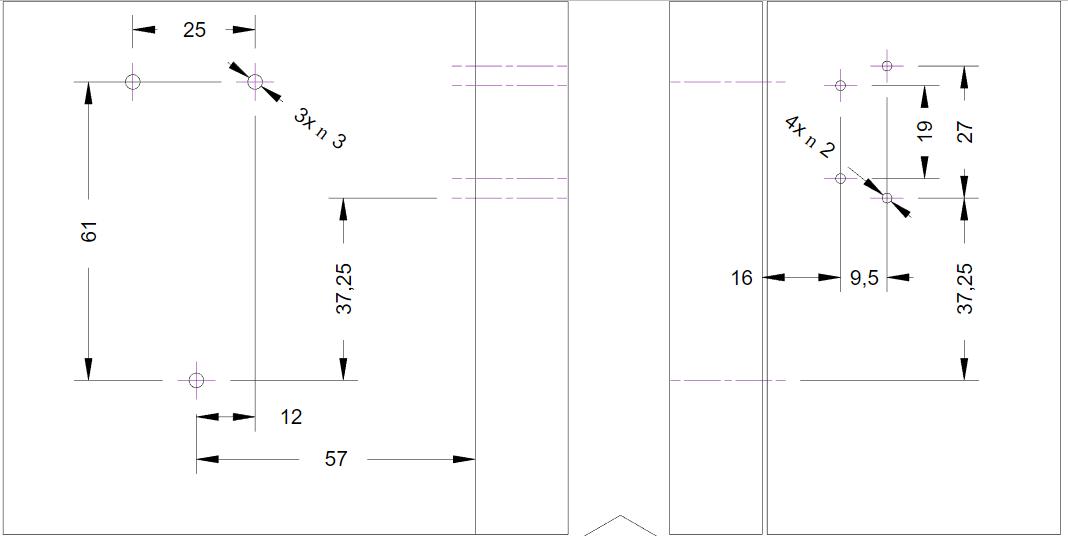
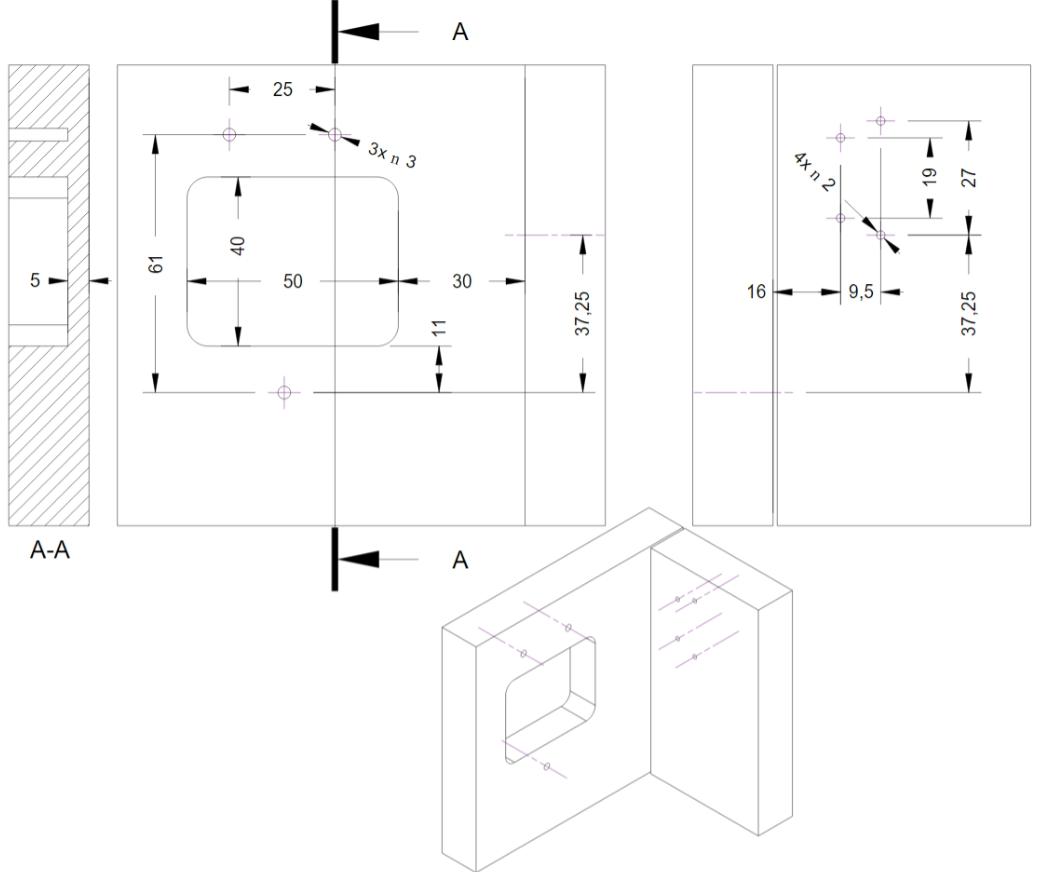
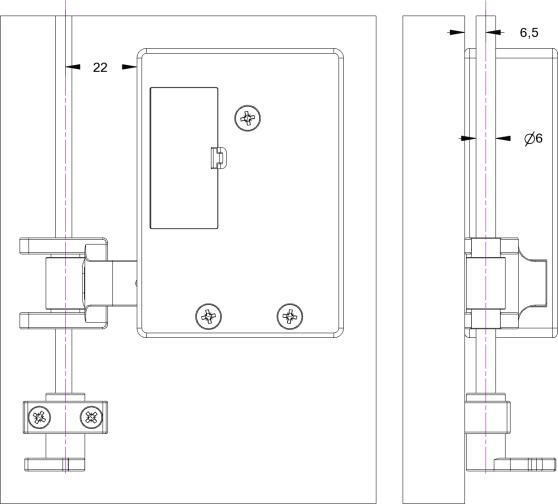
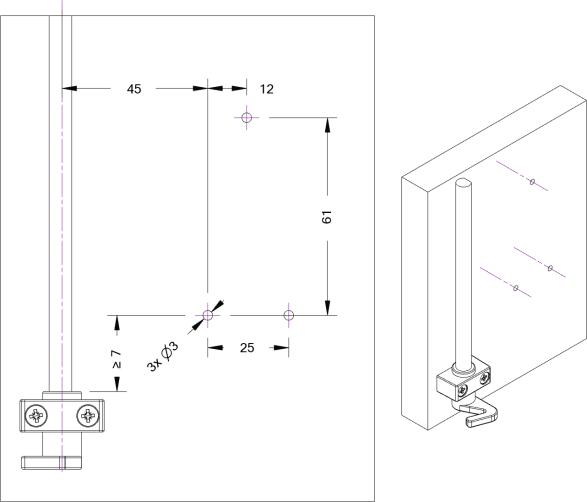
Standard Reader positioning A1
Important: Always check Reader distance!
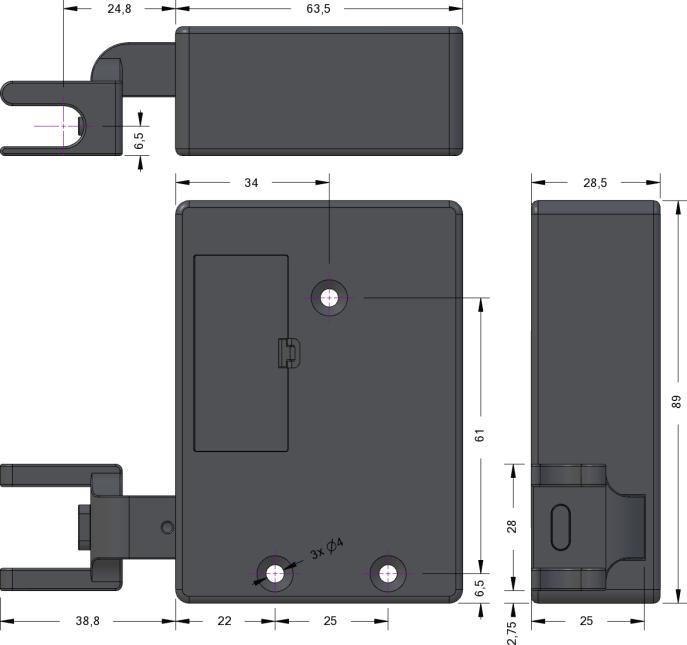
Reader positioning
A2
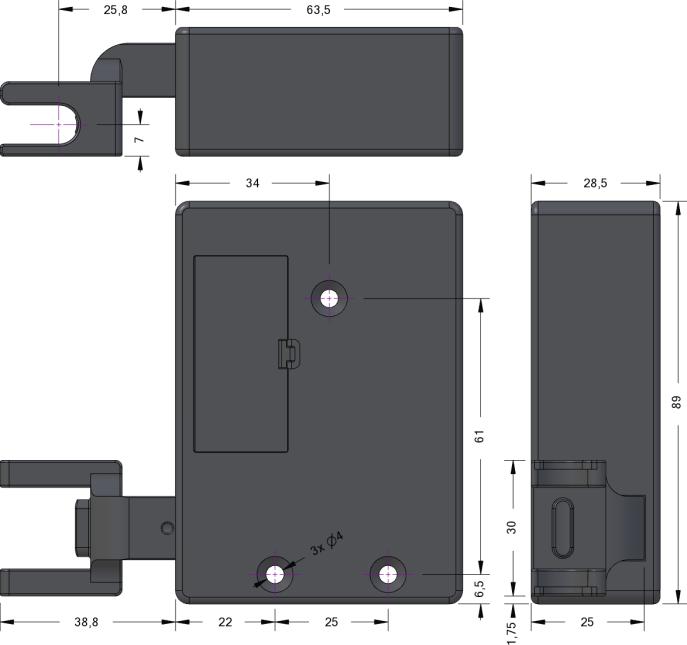
Antenna positioning A3
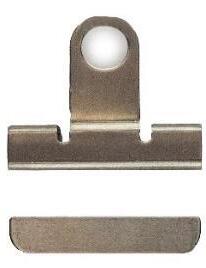
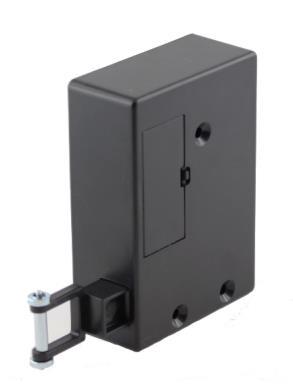
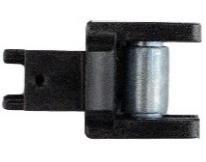
XLOCK closing Part with ejector
XL-S2
All-metal roll predetermined breaking point
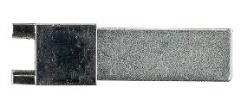
XLOCK closing part
XL-S1
All-metal roll predetermined breaking point
Closing part
XL-S5 suitable for F10 adapter adjustable locking part for glass doors 4-6mm
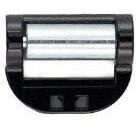

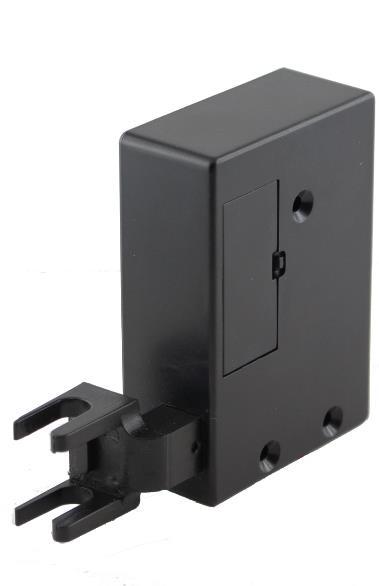
XLOCK closing part with ejector

XL-S0
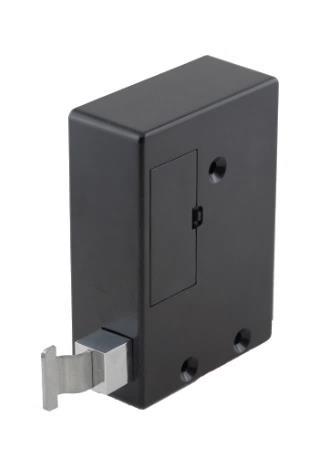
XLOCK closing part
XL-S2B
All-metal roll predetermined breaking point
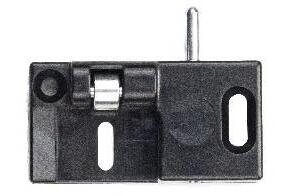
XLOCK closing part
XL-ZS4-B
All-metal roll
3 attachement points
XLOCK closing part
XL-ZS4-B
All-metal roll
2 attachment points
! Please order seperataly.
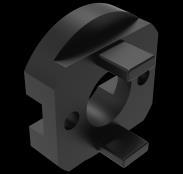
Adapter for espagnolette bolt
XL-F8
6mm roll with recess
Adapter for espagnolette bolt

XL-F9
8mm roll with recess

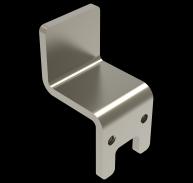
Latch Adapter
XL-F6
flexible bolt foot made of solid metal with screwed sheet metal part
Adapter for Glas vitrine doors

XL-F10
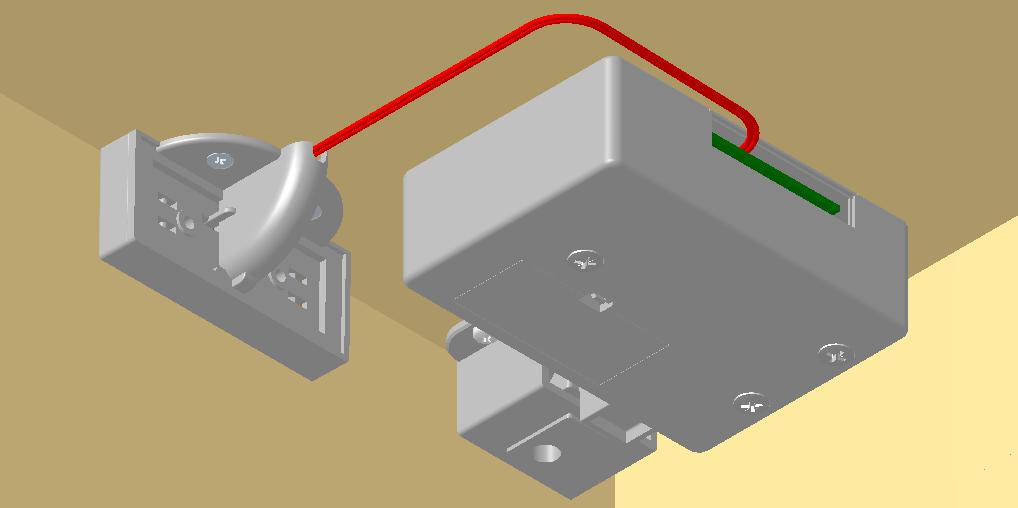
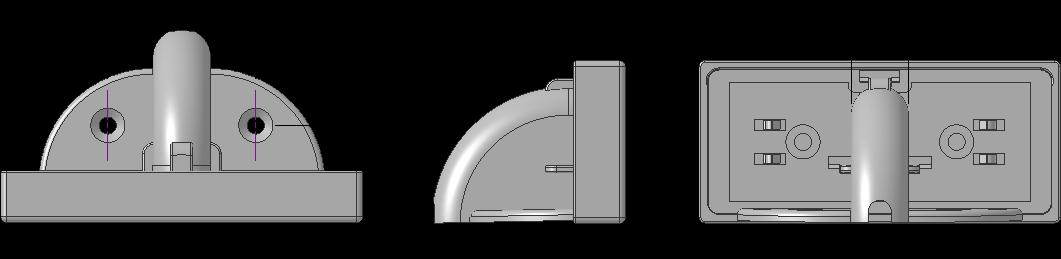
Diversion unit 90°
Important!
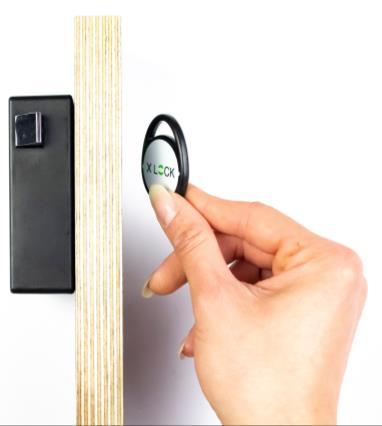
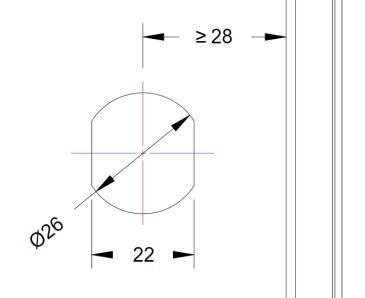
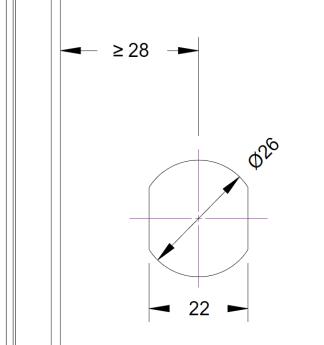
The reading distance depends on the material of the door and the transponder. In case of concealed installation, the reading distance must be checked before mounting.
The optimum RFID reading distance for Mifare® Classic key fobs is up to 22mm +/-3mm.
Important!
The reading distance depends on the material of the door and the transponder. In case of concealed installation, the reading distance must be checked before mounting.

The optimum RFID reading distance for Mifare® Classic key fobs is up to 22mm +/-3mm.
Important!
The reading distance depends on the material of the door and the transponder. In case of concealed installation, the reading distance must be checked before mounting.
The optimal RFID reading distance for Mifare® Classic 4 Byte key fobs is up to 22mm +/-3mm.
Important!
The reading distance depends on the material of the door and the transponder. In case of concealed installation, the reading distance must be checked before mounting.
The optimal RFID reading distance for Mifare® Classic 4 Byte key fobs is up to 22mm +/-3mm.
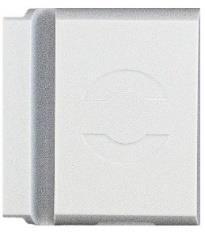

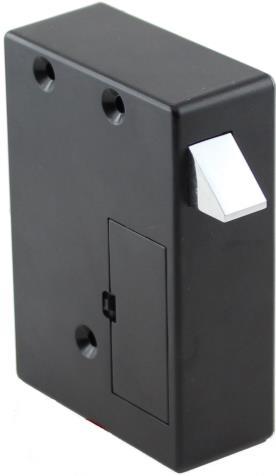
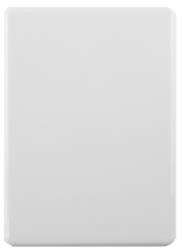
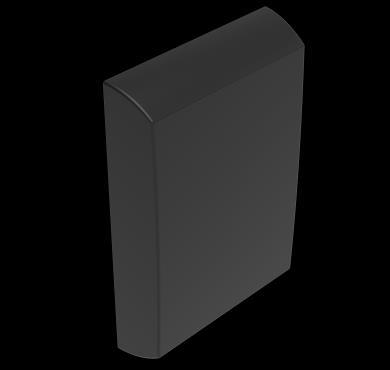
White with labelling

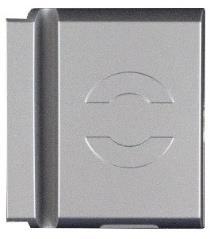
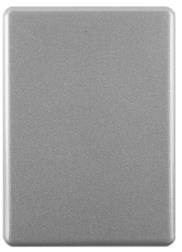
Silver with labeling
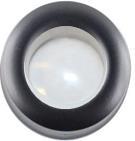
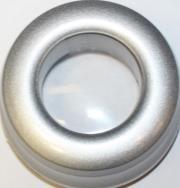

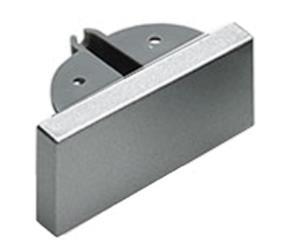
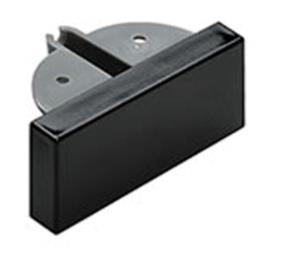
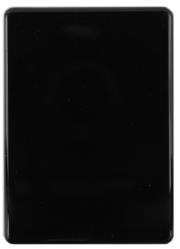
Optional ! Please order seperataly.
The covers of the XLOCK10 are an optional accessory. The cover protects the battery compartment and covers the fastening screws. Optionally, the covers can be painted in special colours.
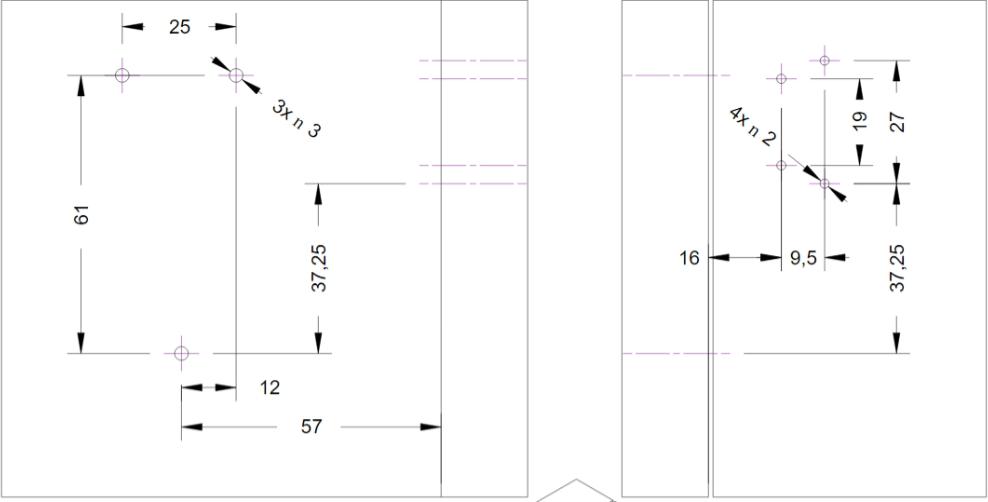
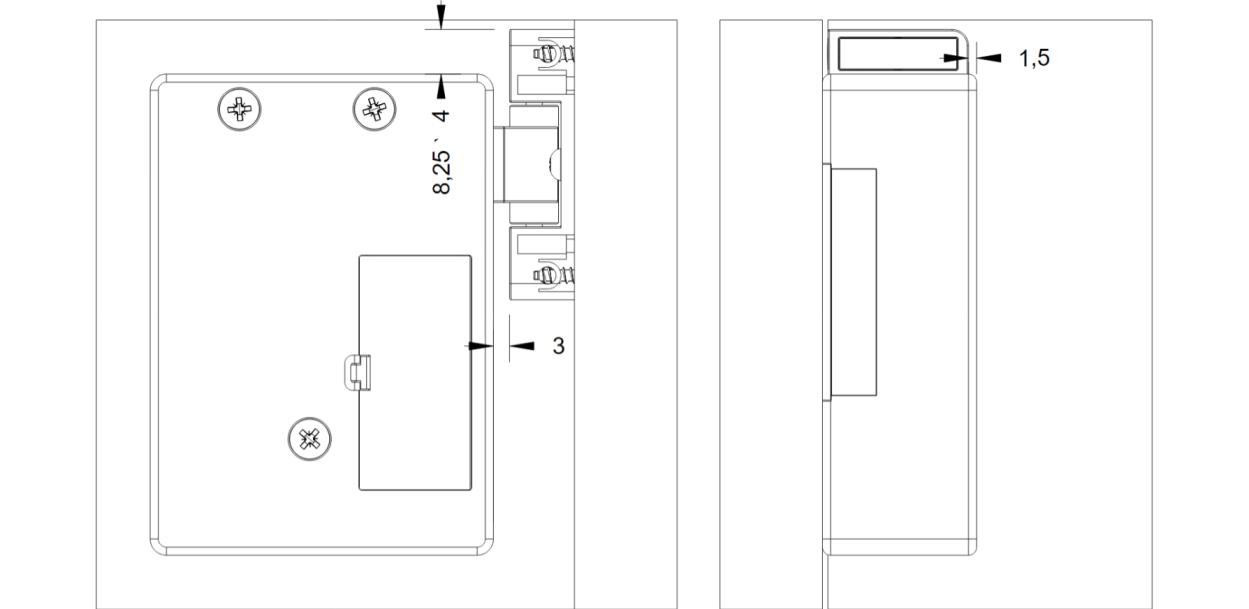
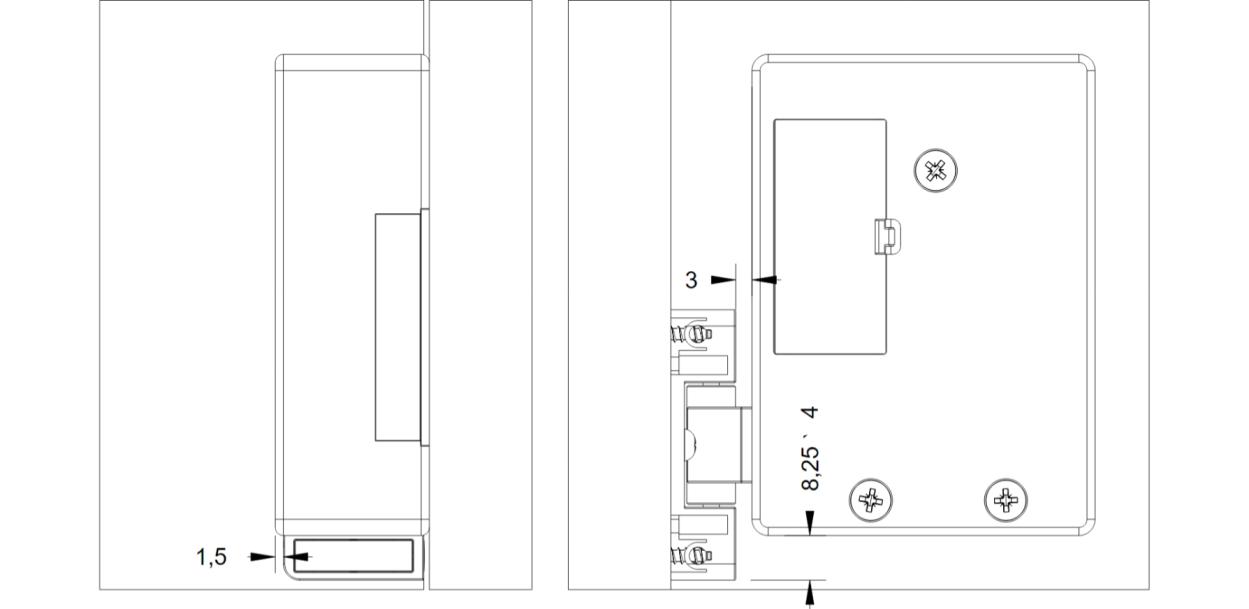
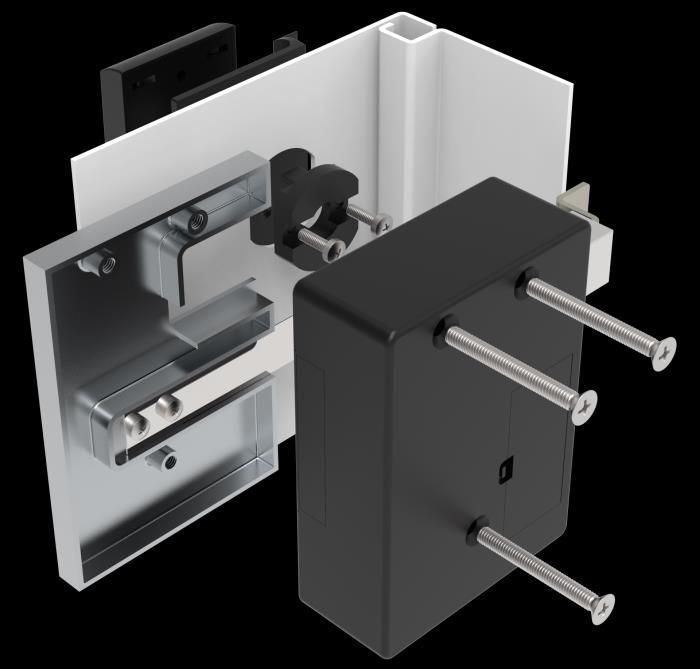
Important!
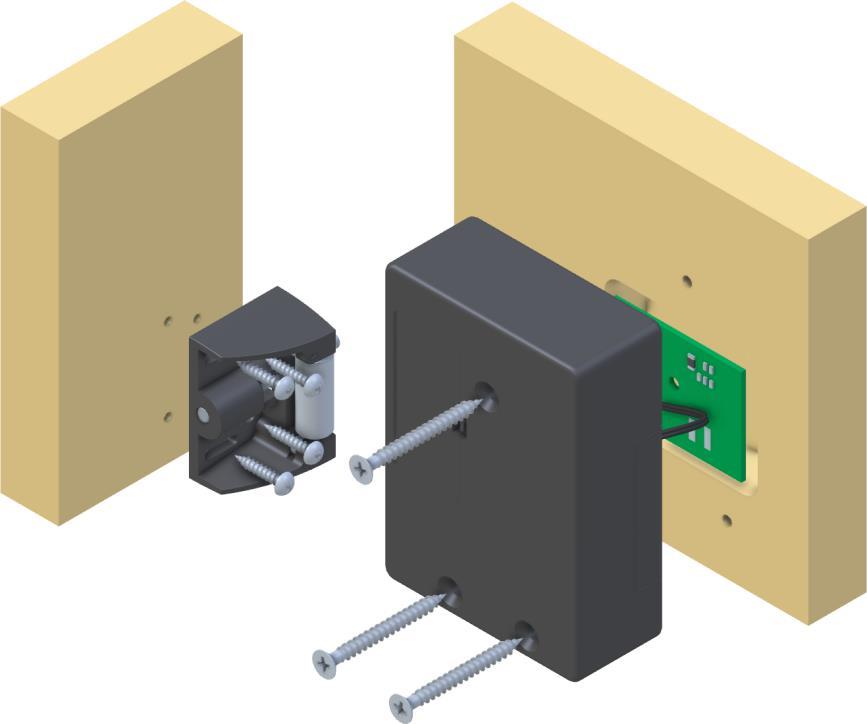
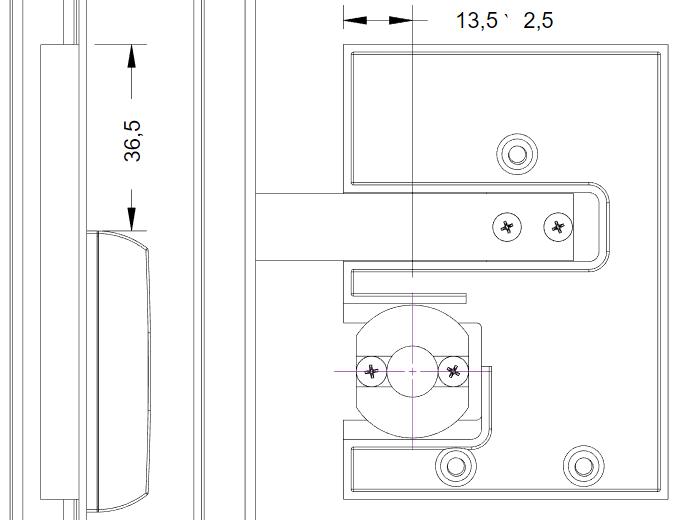
When mounting the lock, please note the additional distance of 1.5mm to the locking part.
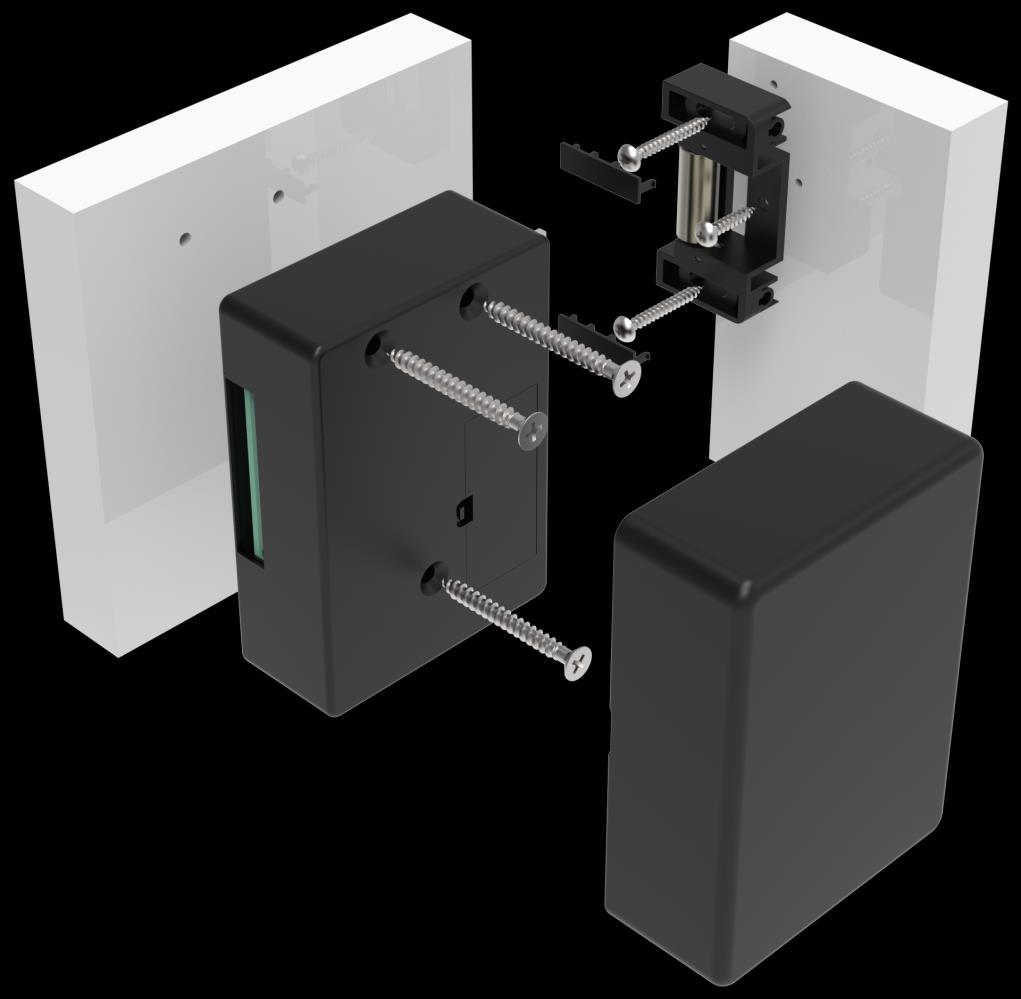
Tighten the screws with care and avoid using a drill or cordless screwdriver.
Tighten the screws with care and avoid using a drill or cordless screwdriver

Tighten the screws with care and avoid using a drill or cordless screwdriver
Tighten the screws with care and avoid using a drill or cordless screwdriver
Tighten the screws with care and avoid using a drill or cordless screwdriver
Tighten the screws with care and avoid using a drill or cordless screwdriver
Tighten the screws with care and avoid using a drill or cordless screwdriver


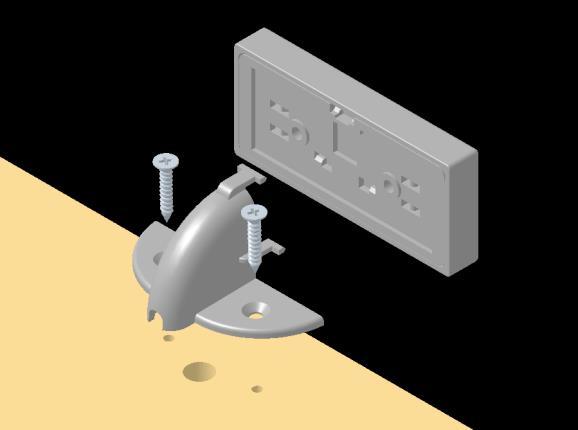
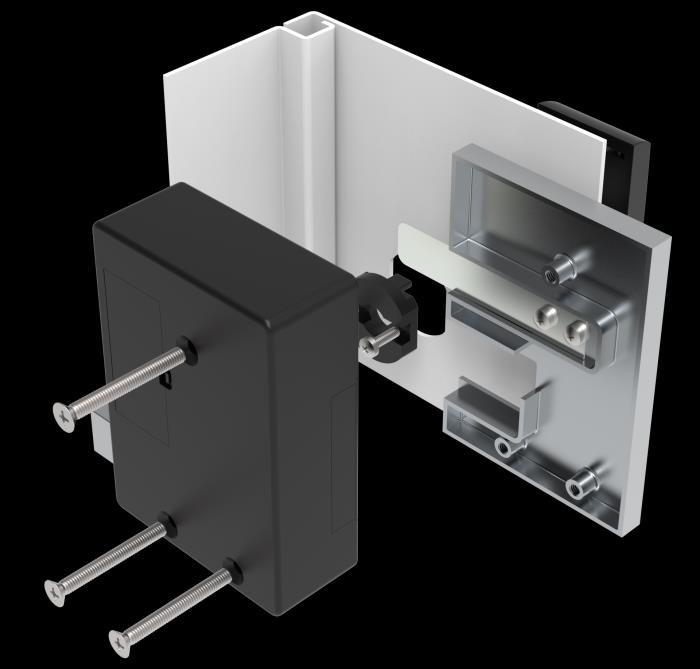
Mounting plate
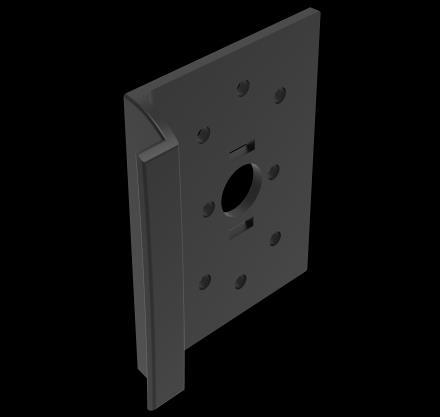
XL10-M0
Attention: The bending of the staple plate itself must be adjusted.
3 x countersunk screws M4 x 35mm Lock XL10 with rail adapter XL F6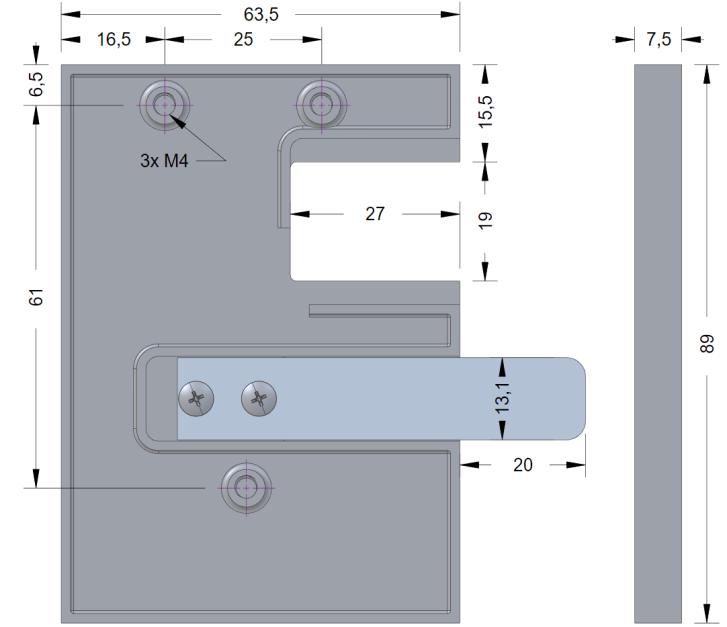


Tighten the screws with care and avoid using a drill or cordless screwdriver
Tighten the screws with care and avoid using a drill or cordless screwdriver

Tighten the screws with care and avoid using a drill or cordless screwdriver

XLOCK 10
BLOCKING 8MM bar
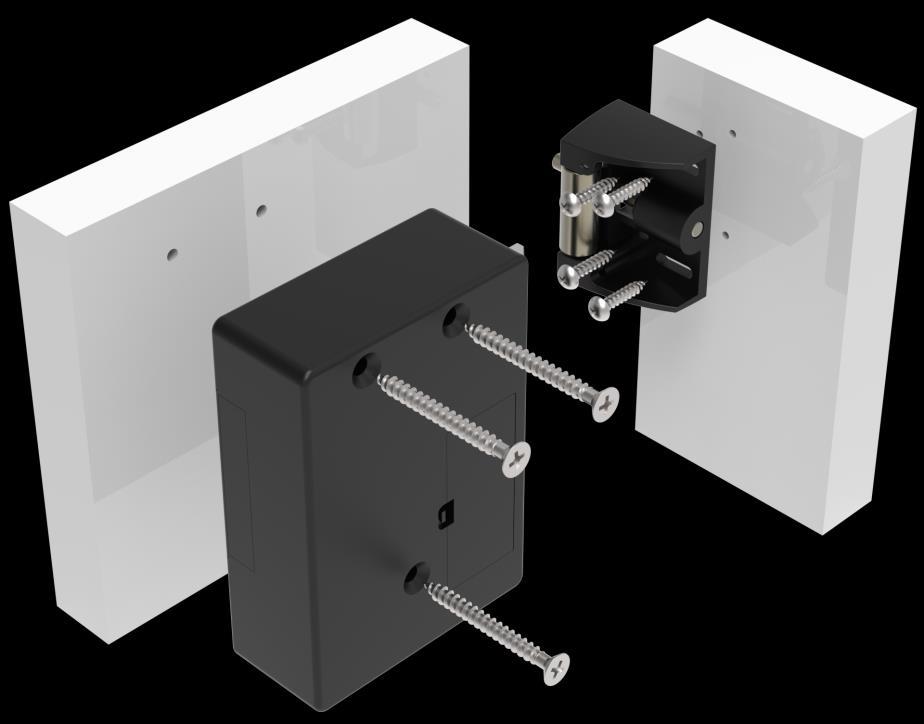
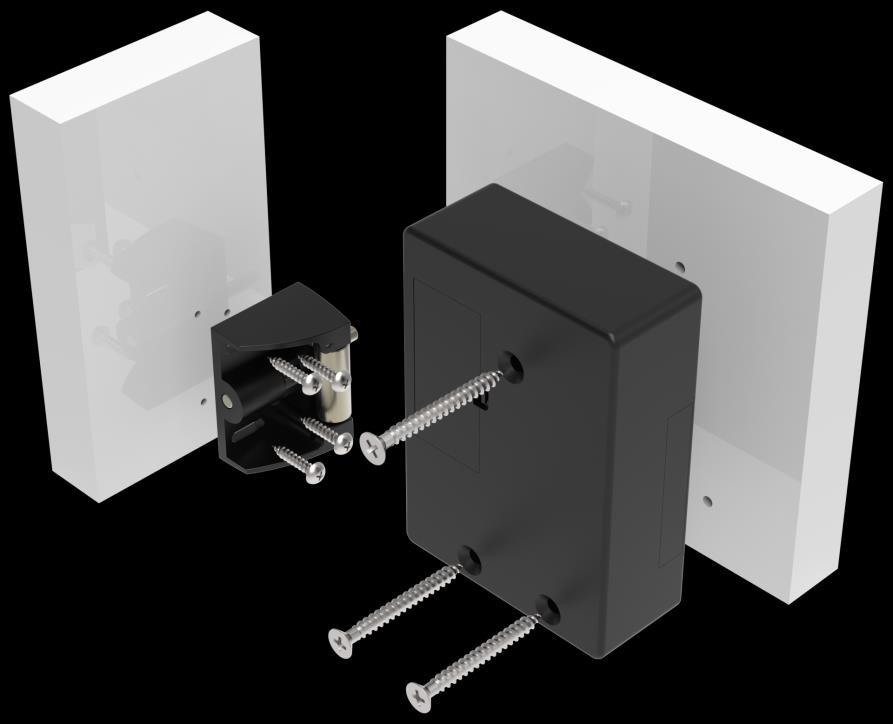
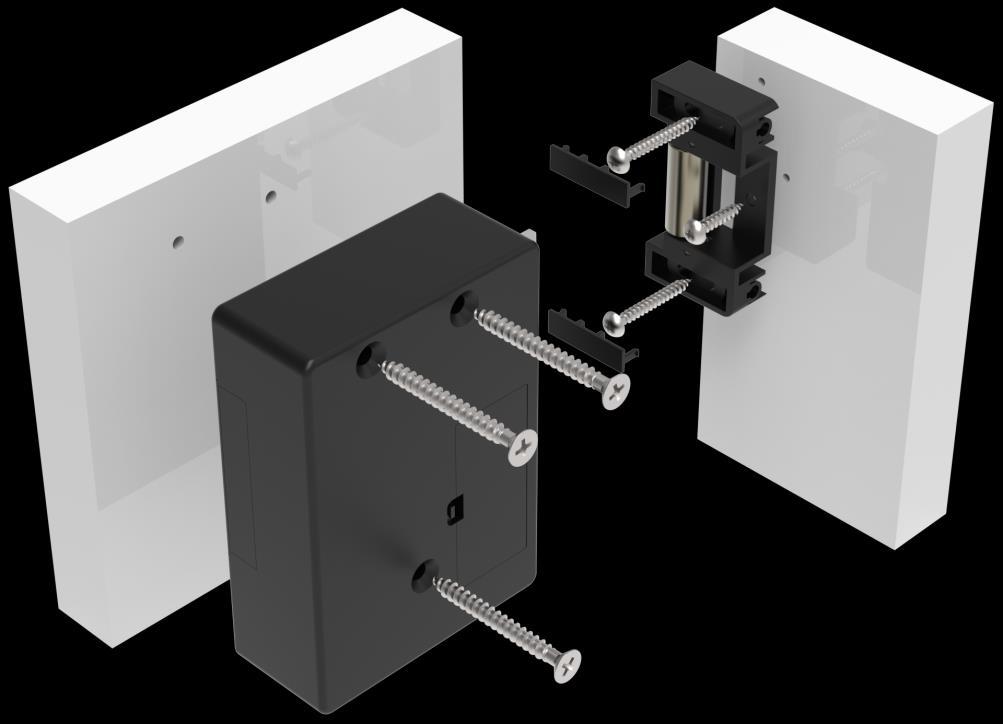
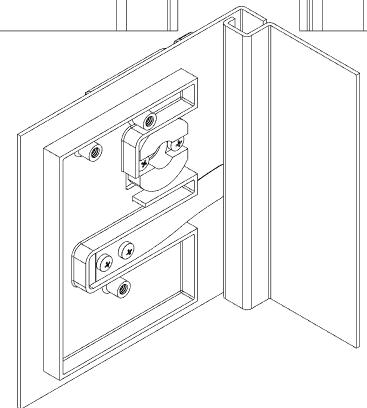
Attaching the lock
Tighten the screws with care and avoid using a drill or cordless screwdriver

Master cards are unique and will be programmed to each lock for each project/building. These cards are needed to program and delete Service Cards, Emergency Opening Cards and User Transponders. Up to 3 master cards, 5 emergency opening cards and 47 user transponders can be programmed per lock..


With a master card and the service cards 01..... to 10, the lock can be programmed in mode 01......to mode 10.

A blocked lock can be opened with an emergency opening card - only works with Freelocker Mode 7,8,9 and 10. The lock remains unlocked and can be locked again with the emergency opening card. The user ID that locked the locker remains stored. This means that the user card can open the lock again later.

With a master card and the service card 01, the lock can be programmed into mode 01. In mode 01 up to 47 transponders (type ISO14443a / NFC) can be programmed per lock. This mode is also called "Personal Locker" or "Fixcode".The type of locking is called the latch function: Only programmed data carriers can lock and unlock the lock. After an authorised data carrier has been identified, the bolt unlocks and automatically locks again after 4 seconds.
With a master card and the service card 02, the lock can be switched to mode 02 or programmed. In mode 02, up to 47 transponders (type ISO14443a / NFC) can be programmed per lock. This mode is also called "Personal Locker" or "Fixcode".The type of locking is called the locking function: After an authorised data carrier has been identified, the deadbolt moves to the open position and remains in this position. The next time an authorised data carrier is identified, the latch moves to the closed position and remains in this position.
With a master card and the service card 07, the Freelocker Mode 07 R/W - sector 10 (free locker selection) can be activated. In addition, "locker occupied" is written on the transponder. The lock is not automatically unlocked. The lock remains locked.


! Only works with Mifare 4 byte type Classic 1K / and Mifare Classic 4 K transponders !
With a master card and the service card 08, the Freelocker mode 08 R/W - sector 10 (free locker selection) can be activated. In addition, "locker occupied" is written on the transponder.The lock is automatically unlocked XX hours after the last booking.
! Only works with Mifare 4 byte type Classic 1K / and Mifare Classic 4 K transponders !
Freelocker Mode 09 R/W can be activated with a master card and service card 09. No information is written to the transponder. The lock is not automatically unlocked. The lock remains locked.
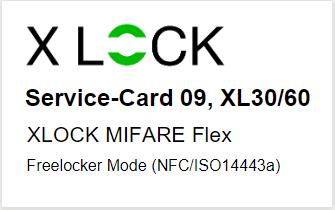
! Mifare Classic 1K (4 + 7 bytes) and Mifare Classic 4K (4 + 7 bytes), Mifare DesFire EV1, Mifare light, LEGIC® advant ATC2048 and ATC4096, NFC (ISO 14443a) can be used !
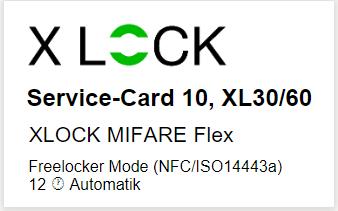
Freelocker Mode 10 R/W can be activated with a master card and service card 10. No information is written to the transponder. The lock is automatically unlocked XX hours after the last booking.
! Mifare Classic 1K (4 + 7 bytes) and Mifare Classic 4K (4 + 7 bytes), Mifare DesFire EV1, Mifare light, LEGIC® advant ATC2048 and ATC4096, NFC (ISO 14443a) can be used !


! Please order seperataly.
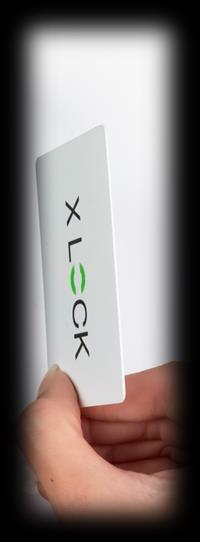
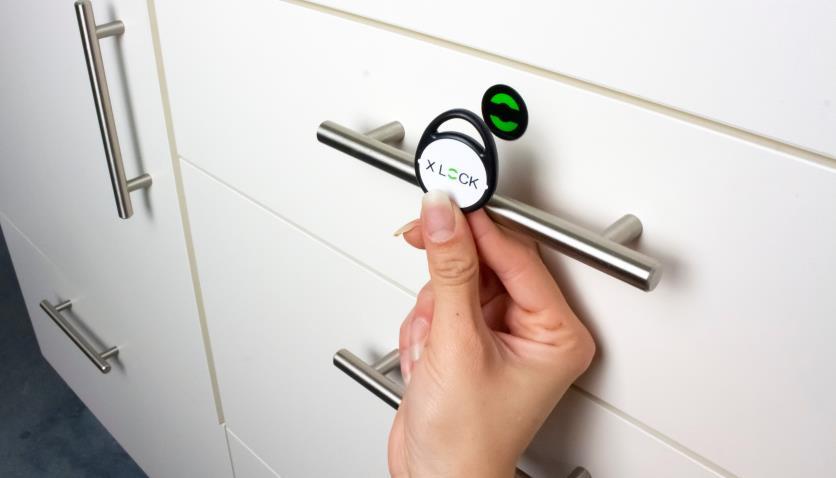
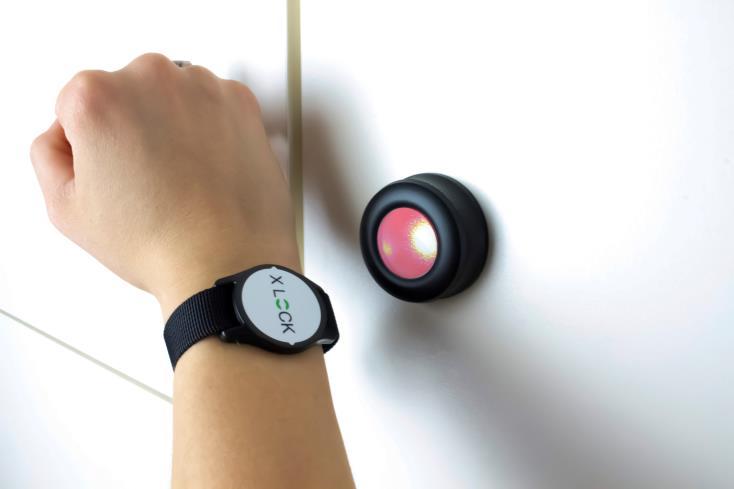
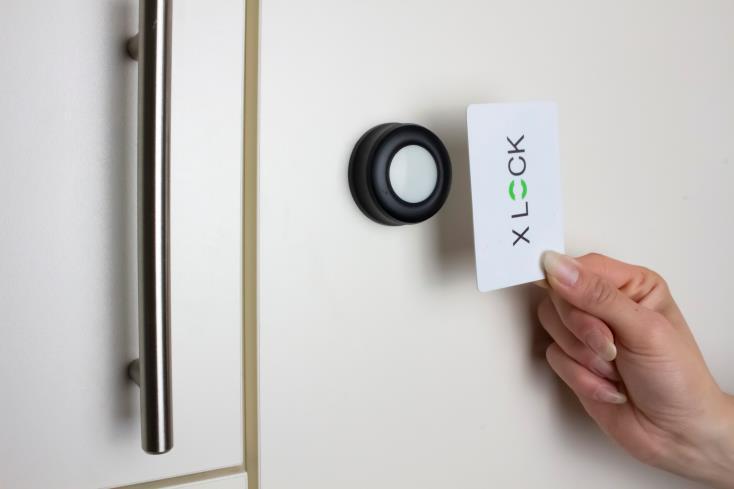
Keychain with Transponder

Wristband with Transponder
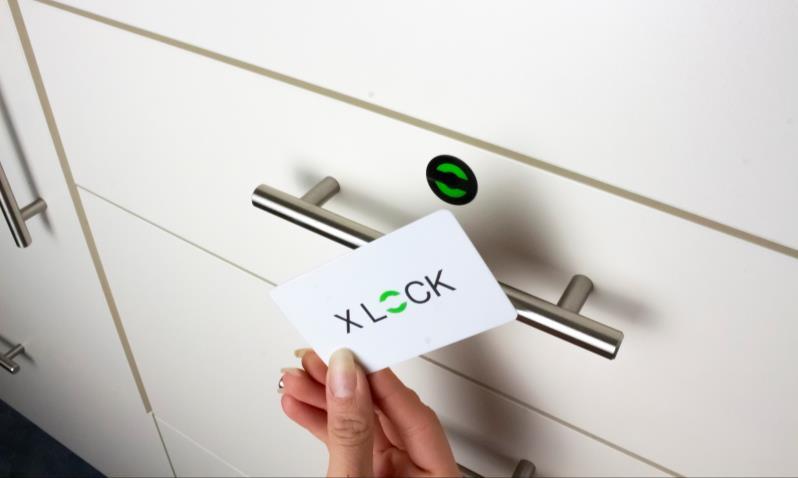
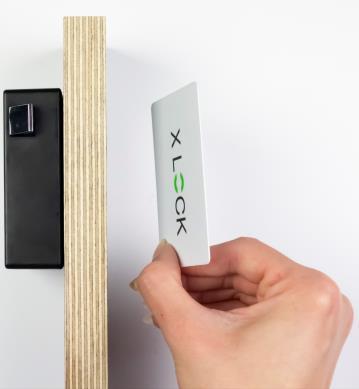
Card with Transponder

1) Remove battery strip = system active and the RFID field is activated.
2) Avoid overlapping reading field of the locks, otherwise the battery will be discharged quickly.
3) Do not activate batteries before installation.
4) Always isolate or remove batteries for transport!
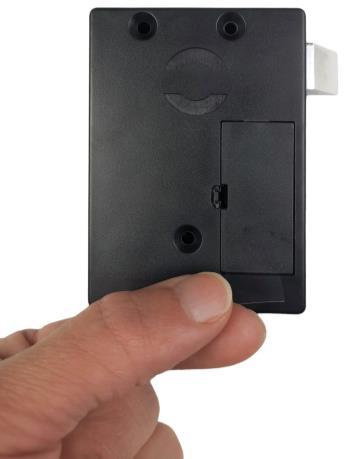
Battery CR123A, 3V lithium battery
Always use lithium batteries!
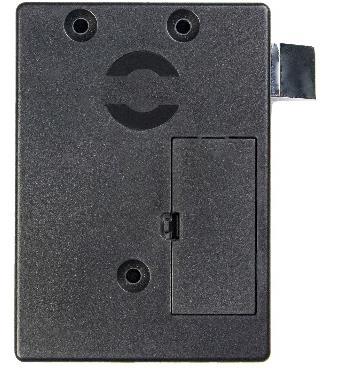
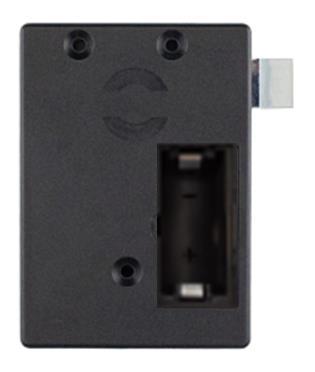
Open the battery compartment cover and insert the batteries with the correct polarity (+/-).
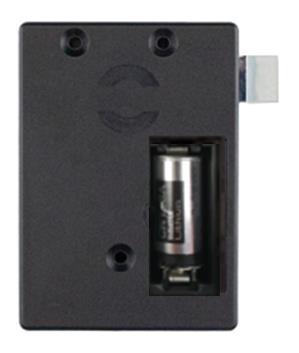
Battery inserted with correct polarity -> system and RFID field is activated
Close the battery compartment cover and fix it with the screw. Your lock is now ready for operation
Otherwise
If you ordered the locks
With the battery
Battery strip is pulled out -> system and RFID field is activated
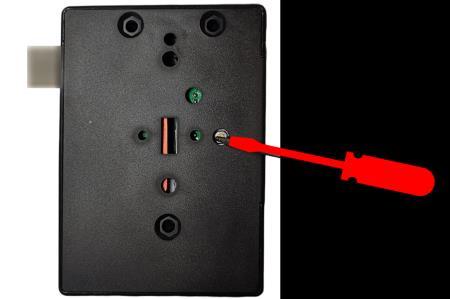
Reset the lock to the factory settings.This step is not necessary if the locks have never been programmed..
Long audio signal


Important: If the reset button is only pressed briefly, the sound is switched off = short signal. If this happens, the reset button must be pressed again briefly = long tone, tone on.


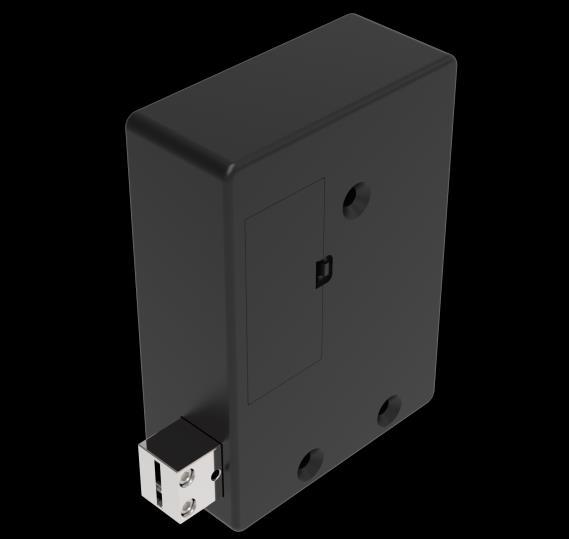
Reset button on the back of the lock gently press for 3 seconds.
1. master card is held up to the antenna field
ticks for approx. 5 seconds
ticks for approx. 5 seconds
Hold the 2. master card to the antenna field while it is ticking
Hold the 3. master card to the antenna field while it is ticking
Teach in service cards
ticks for approx. 5 seconds
User Transponder teach in only possible in mode 1 or 2
Hold the master card to the antenna field
Hold the service card against the antenna field, while it is ticking.
Hold the master card to the antenna field
ticks for approx. 5 seconds

Hold the Transponder against the antenna field, while it is ticking
A maximum of 5 emergency opening cards can be programmed in Freelocker mode
Emergency opening card programming
ticks for approx. 5 seconds Mode 7, 8, 9 & 10
Emergency opening with an emergency opening card
Hold the master card against the antenna field
While ticking, hold the emergency opening card against the antenna field. Repeat the procedure for further emergency opening cards.
The emergency opening card can be used to unlock and lock the lock (open/close mode).
The latch retracts -> the lock is unlocked.*When you hold the emergency card against the antenna field a second time, the lock locks again.
Hold the master card against the antenna field

Hold programming card against the antenna field
ticks for approx, 5 seconds
Hold the programming card against the antenna field 2 more times while ticking
The latch retracts -> lock unlockedno longer hold the card towards the antenna field.
Attention:
After the lock has been unlocked, the master card should no longer be held up against the antenna field. Otherwise, all master cards will be deleted and must be relearned..

User Transponder individually deleting
ticks for approx. 5 seconds
Hold the programming card to the antenna field
While it is ticking, hold the transponder up to the antenna field.
All Users
Transponder

Deleting
ticks for approx 5 seconds.
Hold the programming card to the antenna field
Hold the programming card against the antenna field 2 more times while ticking.
The latch retracts -> lock unlocked.
Hold the programming card against the antenna field 2 more times while it is ticking. Remove the card from the antenna field.
Attention:
Do not hold the master card to the antenna field anymore. Otherwise, all master cards will be deleted and must be taught in again.
Hold the programming card to the antenna field.
ticks for approx. 5 seconds

Hold the programming card against the antenna field 2 more times while ticking.
The latch retracts -> lock unlocked.
Hold the programming card against the antenna field 4 times while ticking.

The master cards are deleted after a long beep.
The lock then waits to be programmed with new master cards
Attention: After deleting the master cards, the lock waits for new programming cards. 1-3 new programming cards must be taught-in!
Switching sound on and off

Reseting the lock completely
Reset button is pressed briefly for 1 second -> sound on.
Reset button is briefly pressed once for 1 second -> sound off.
Press the reset button for 3 seconds until a signal sounds..
Important: After a reset, the mode of the lock remains stored.
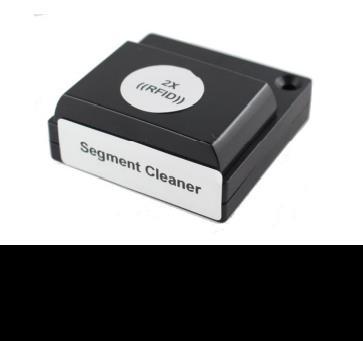
Delete the Freelocker segment on the transponder: The Segment Cleaner can be used to delete the locker number and "Locker locked" on the transponder. 2x


The transponder is held up to the antenna field 2 times.
-> Cabinet number deleted
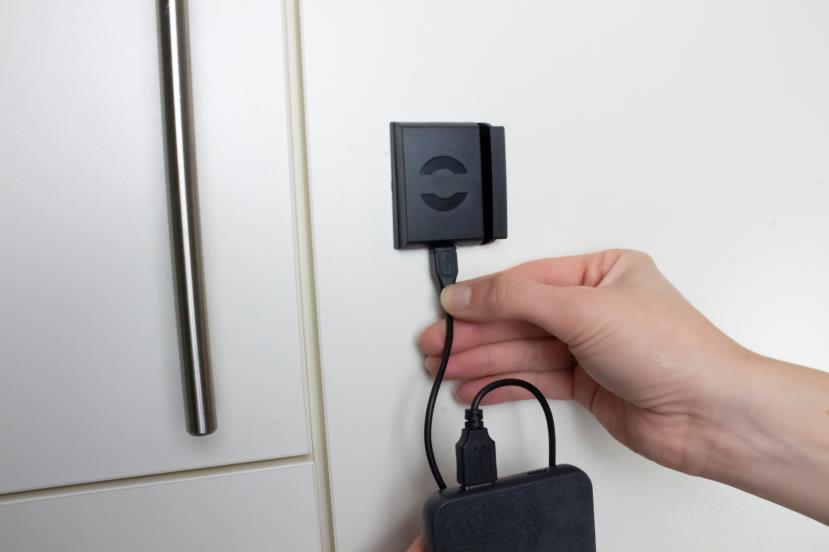
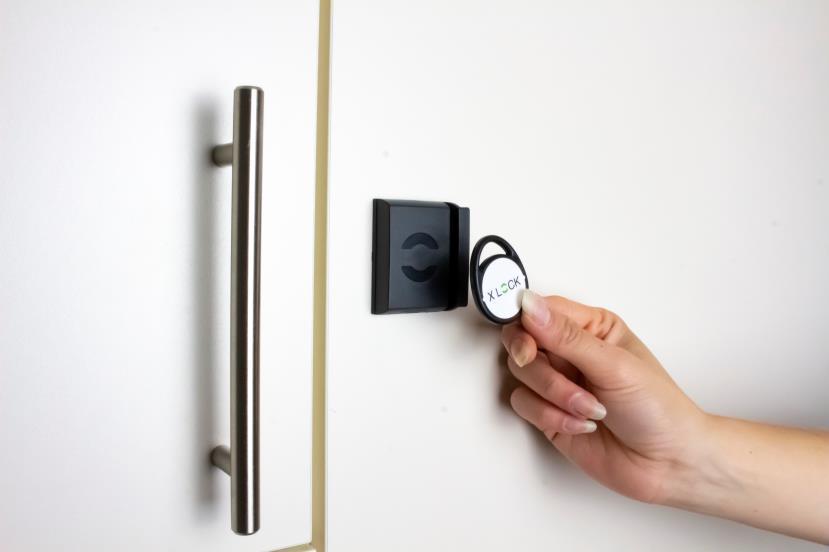
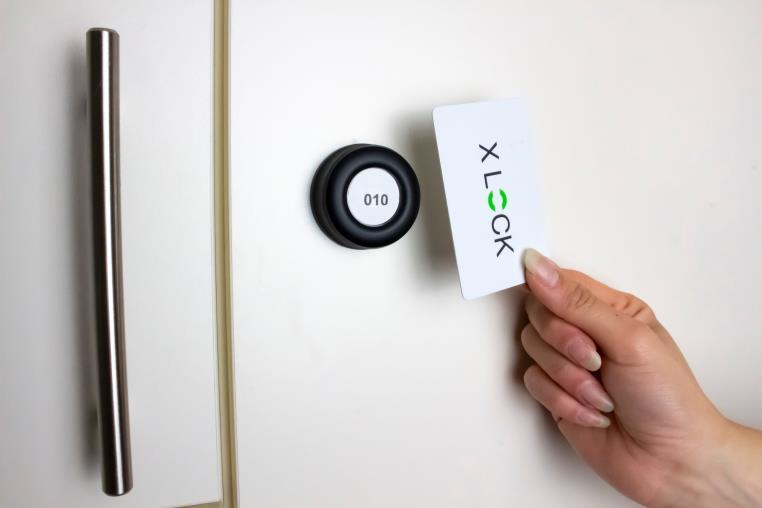
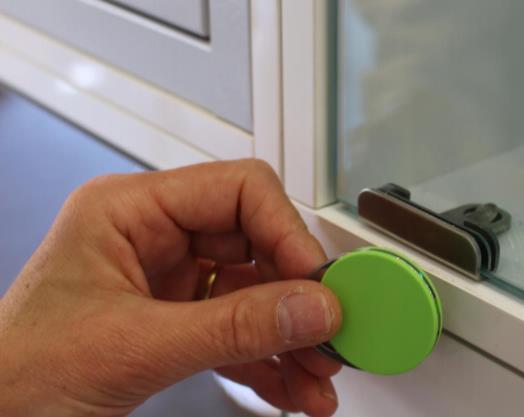
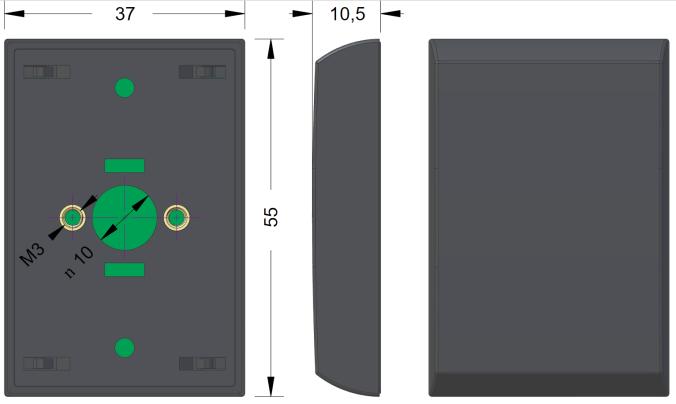
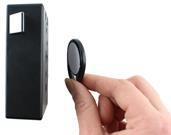
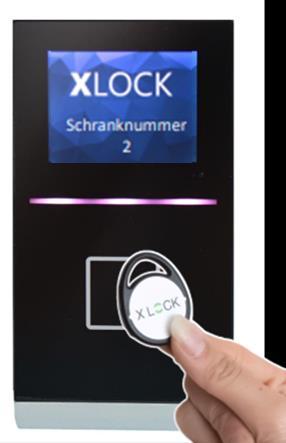
If the user has forgot which of the lockers he locked, the locker number can be checked at the info terminal. To do this, a Mifare Classic transponder (Mifare Classic 1K / Mifare Classic 4K) is held up to the RFID field of the info terminal (see picture).
locking the lock - the cabinet number is saved on the transponder
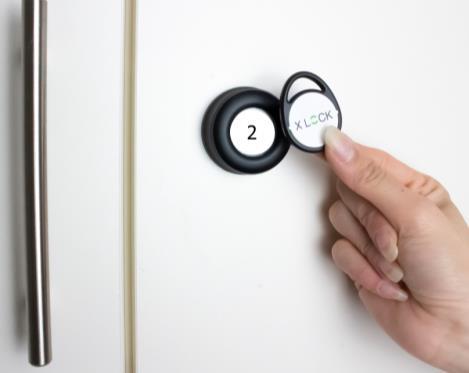
Unlock lock - locker number is deleted
