We all know there are four seasons... application season, preparation season, hunting season and, as not to be irreverent, there is the holiday season. We should all be square in the middle of our pre-season preparations. This means getting our mind, bodies, and equipment ready for the hunting season ahead. In this issue we start to get you motivated to work on all the above with some inspirational hunting stories and wrap it up with timeless advice from our editors.
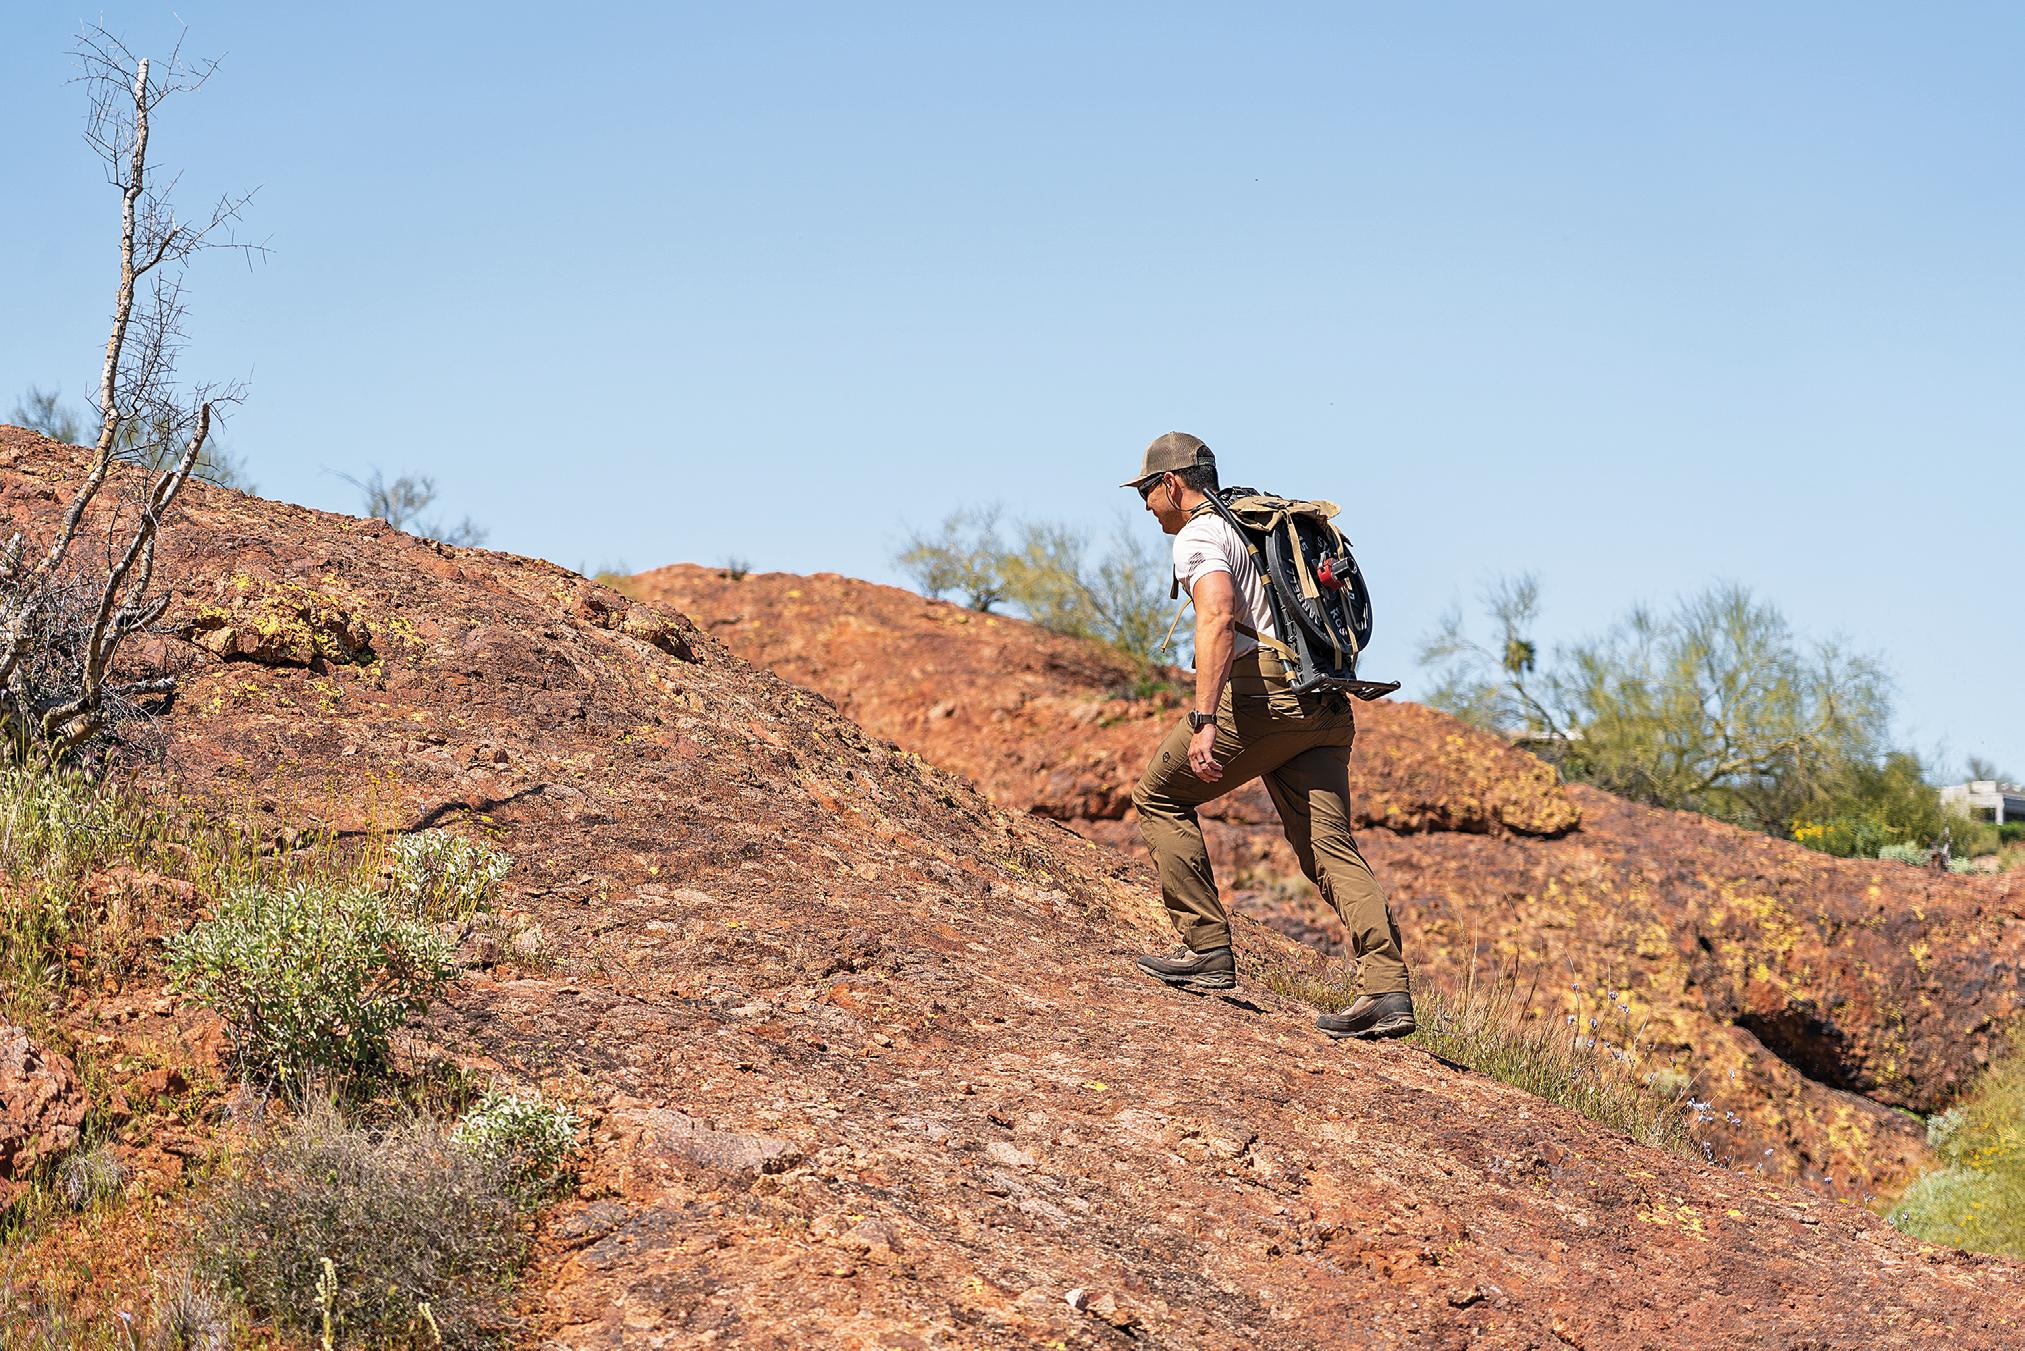
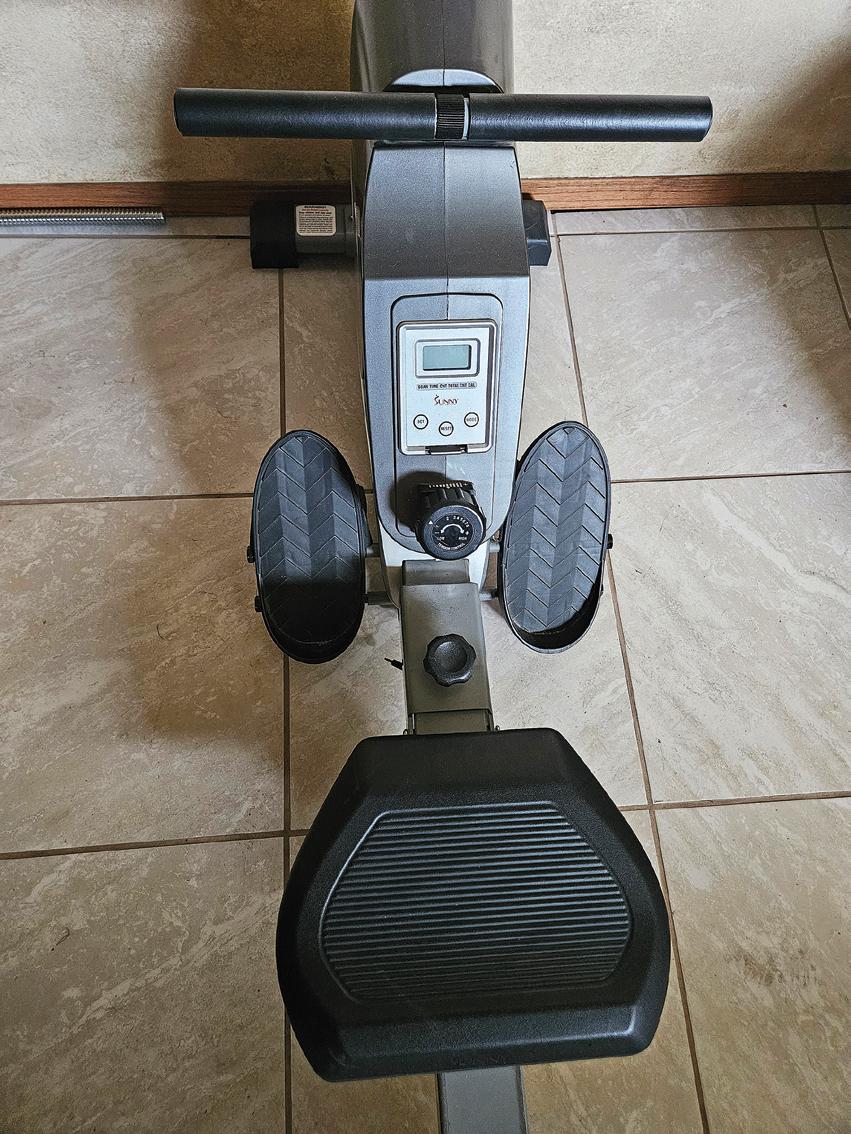
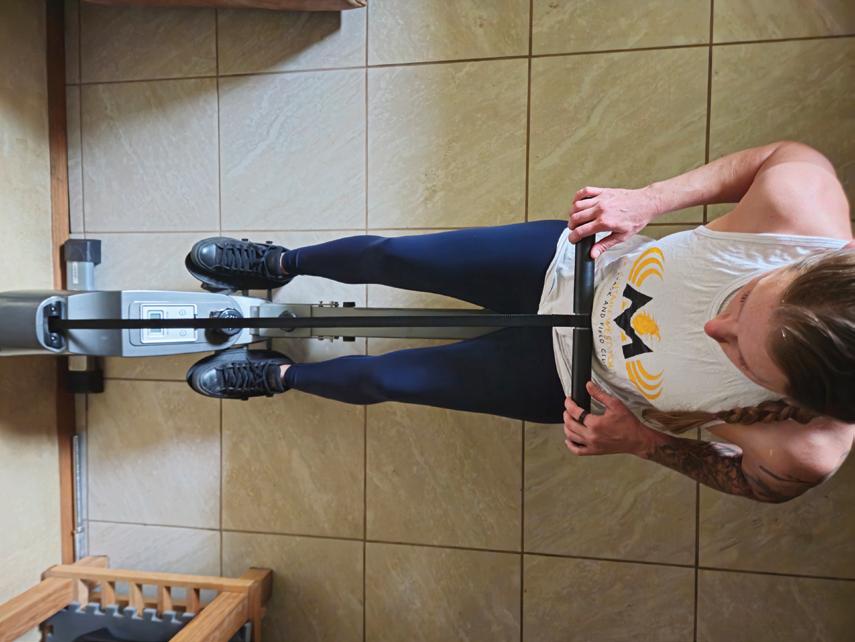
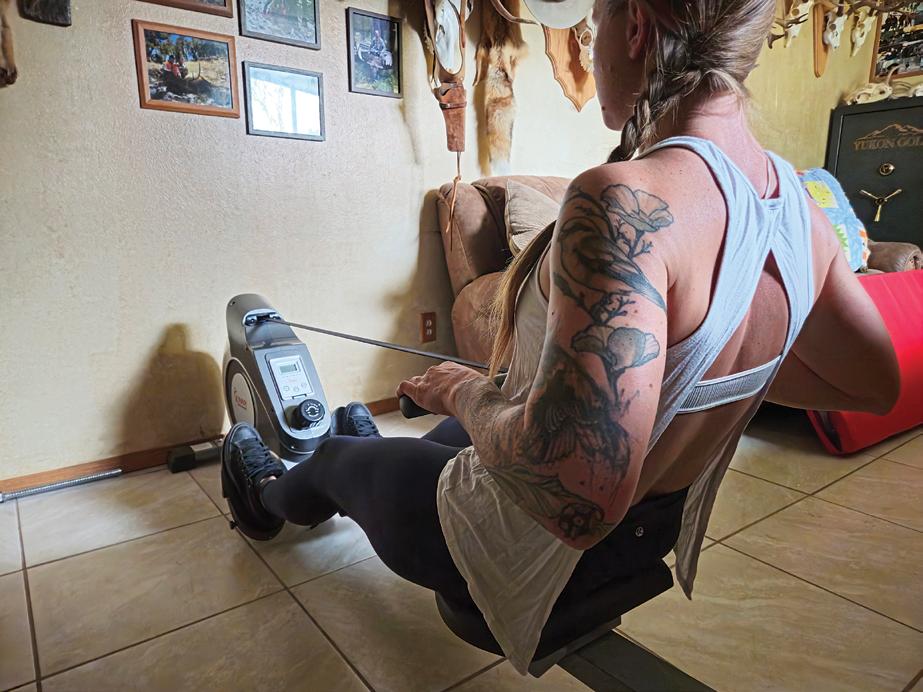
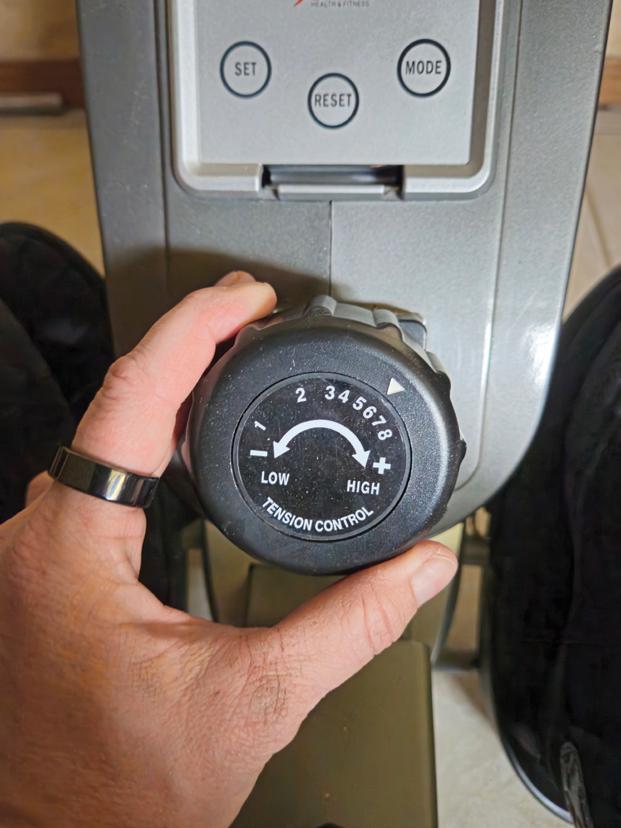
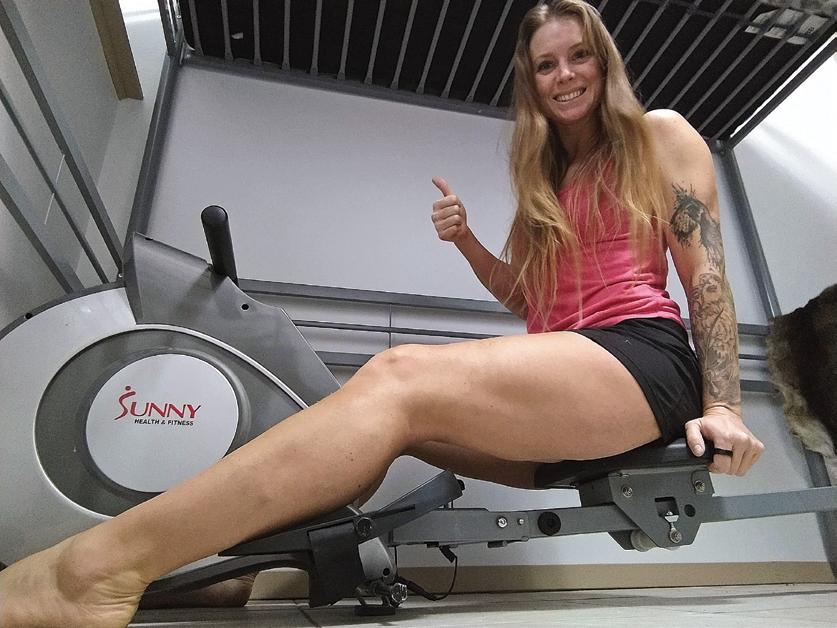
The need to by physically prepared for hunting season is obvious. The older I get the more I have realized that my preparation needs to be dialed, I can’t just show up to the gym and do random exercises and expect to be able to handle a heavy pack and many miles. Two of the best ways to get mentally and physically tough is rucking and rowing.“Rucking” is a relatively new term for putting on your pack and crushing some miles. Matt Ward delivers a detailed plan on how and when to get your personal rucking system in motion. Lindsay Persico introduces us to full body
workouts achieved with a rowing machine. If you are interested in buying a rower, check out your local Craigslist or Facebook Marketplace. During the Covid years people dumped a lot of money into home gym equipment and are now dumping them for less than half the original price.
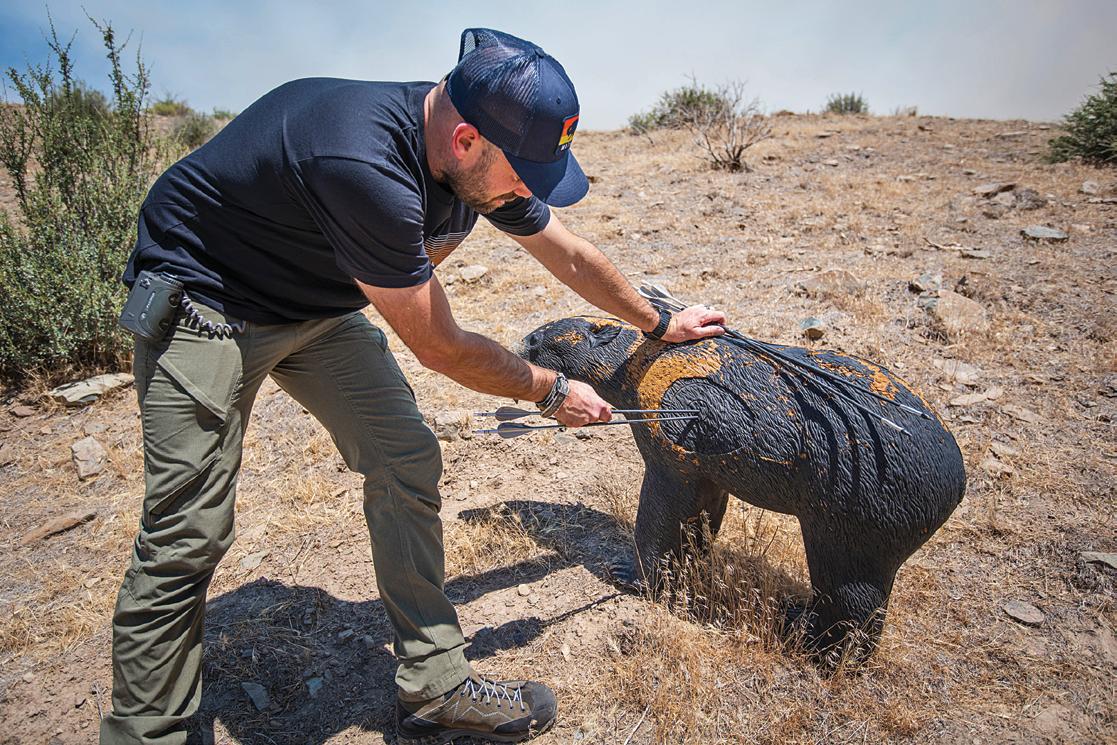
Bowhunters can all remember a time when we missed a shot or passed on a shot when stuck in an awkward situation. Remi Warren walks us through likely shot opportunities, what makes them difficult, and how to practice those shots. Honestly, this is best article I have ever read on the subject... bookmark the page and re-read this every prep season.
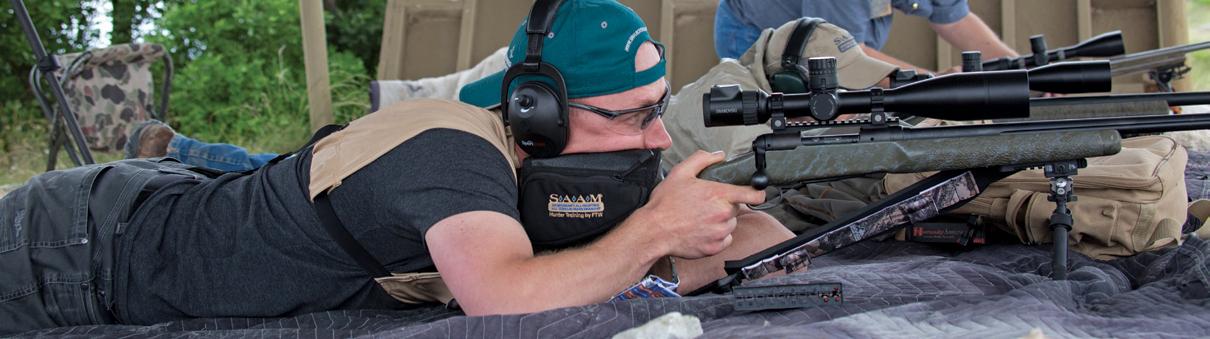
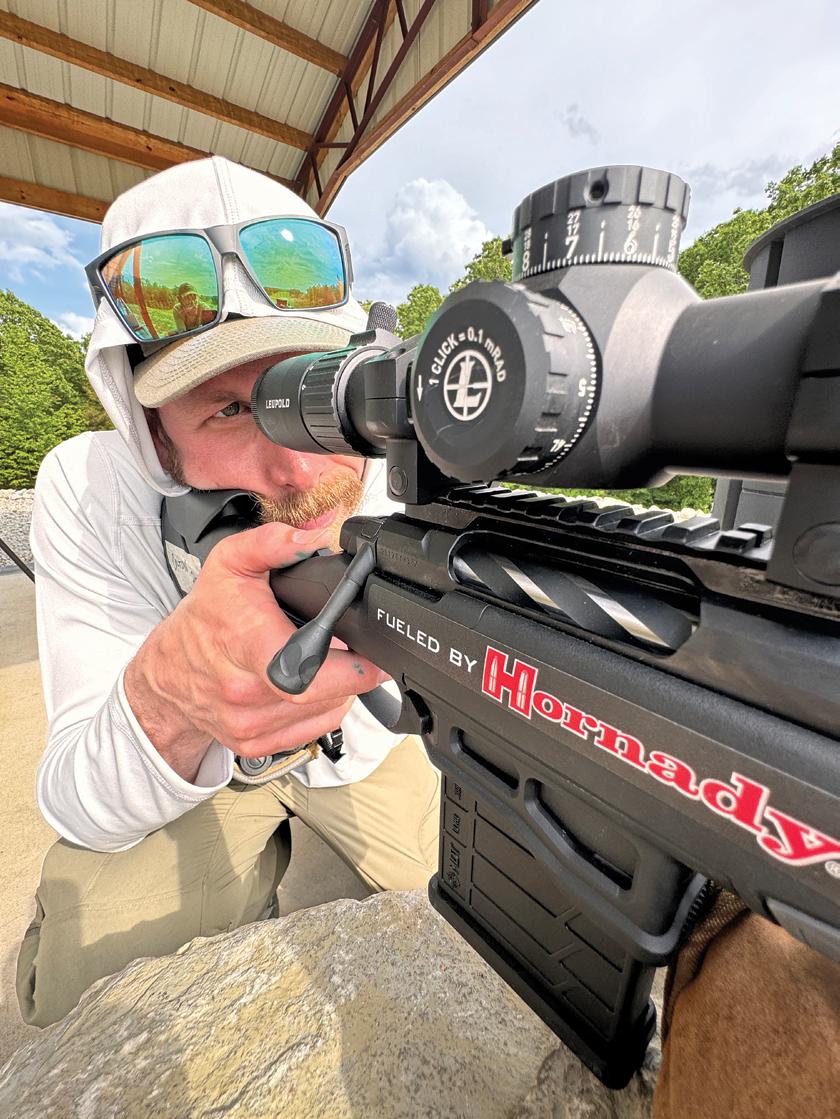
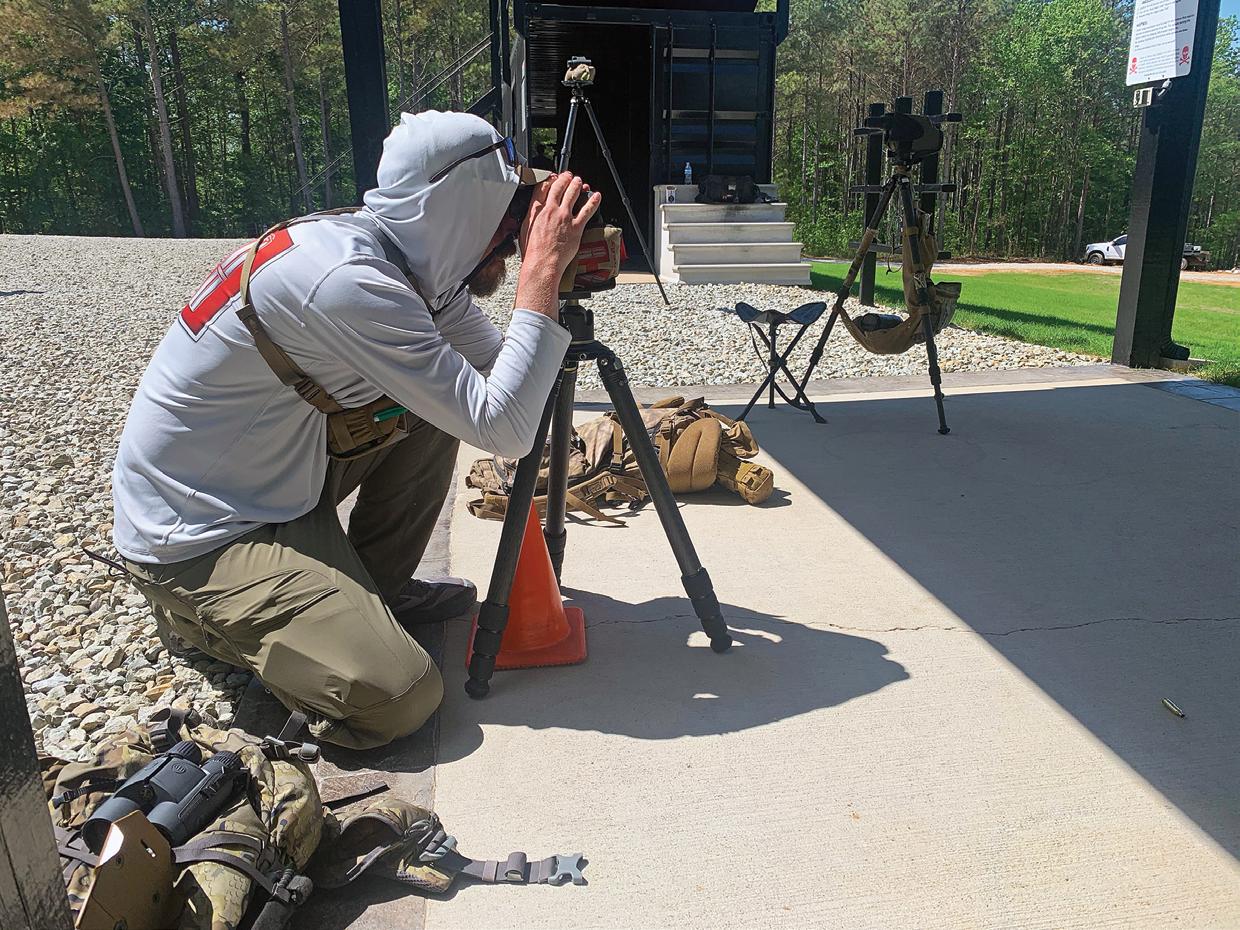
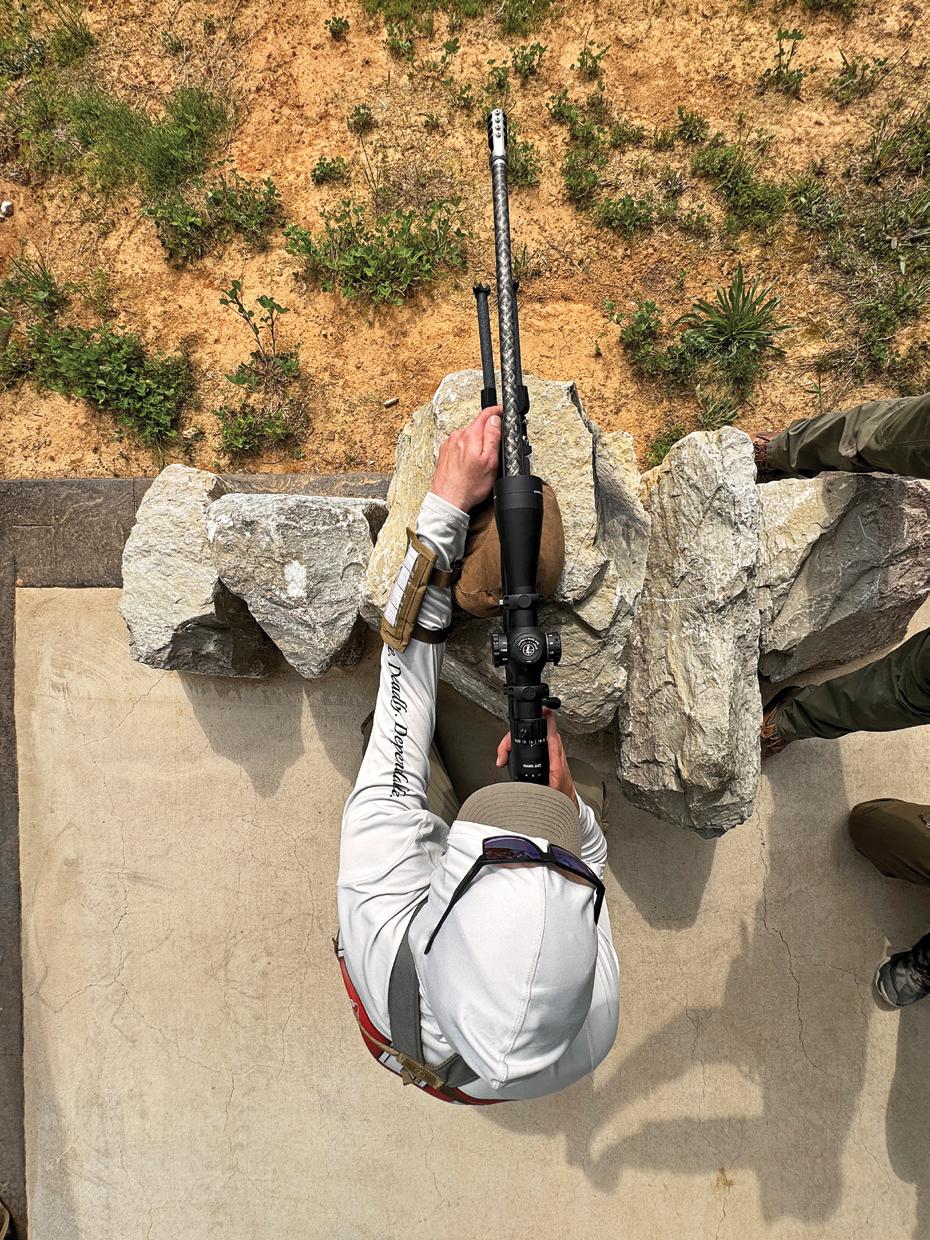
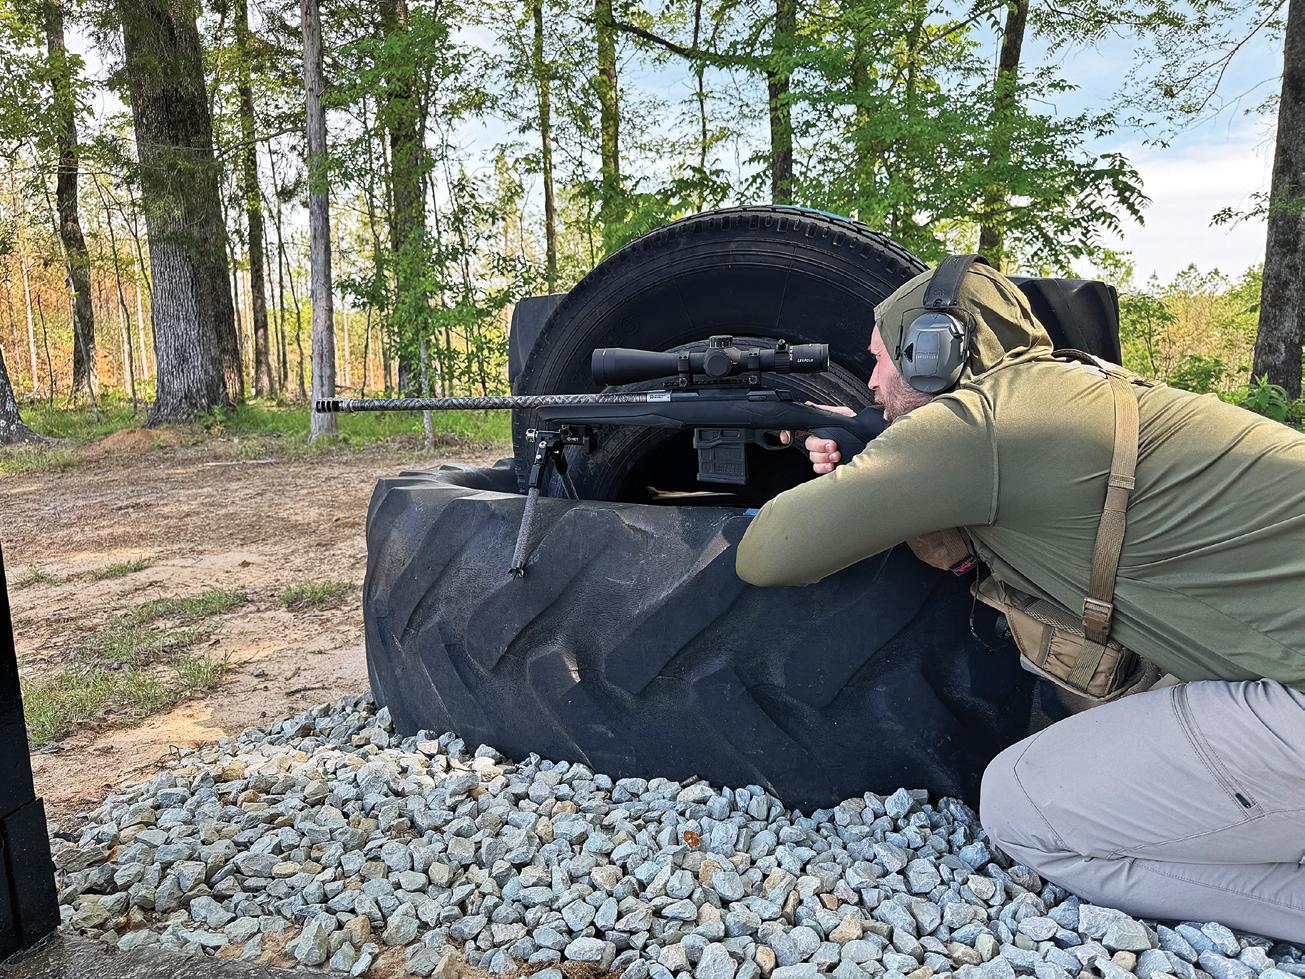
Colton Bagnoli has written about rifle shooting positions in the past. In this issue he talks about the benefits of attending a shooting school. I have attended a few rifle shooting schools and cannot over-exaggerate how much they helped me become a better hunter. Prior to these schools I was pretty good at turning gunpowder into noise, now I shoot with a purpose and a plan.
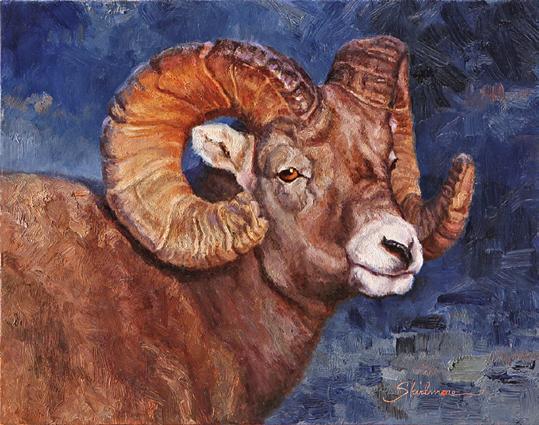
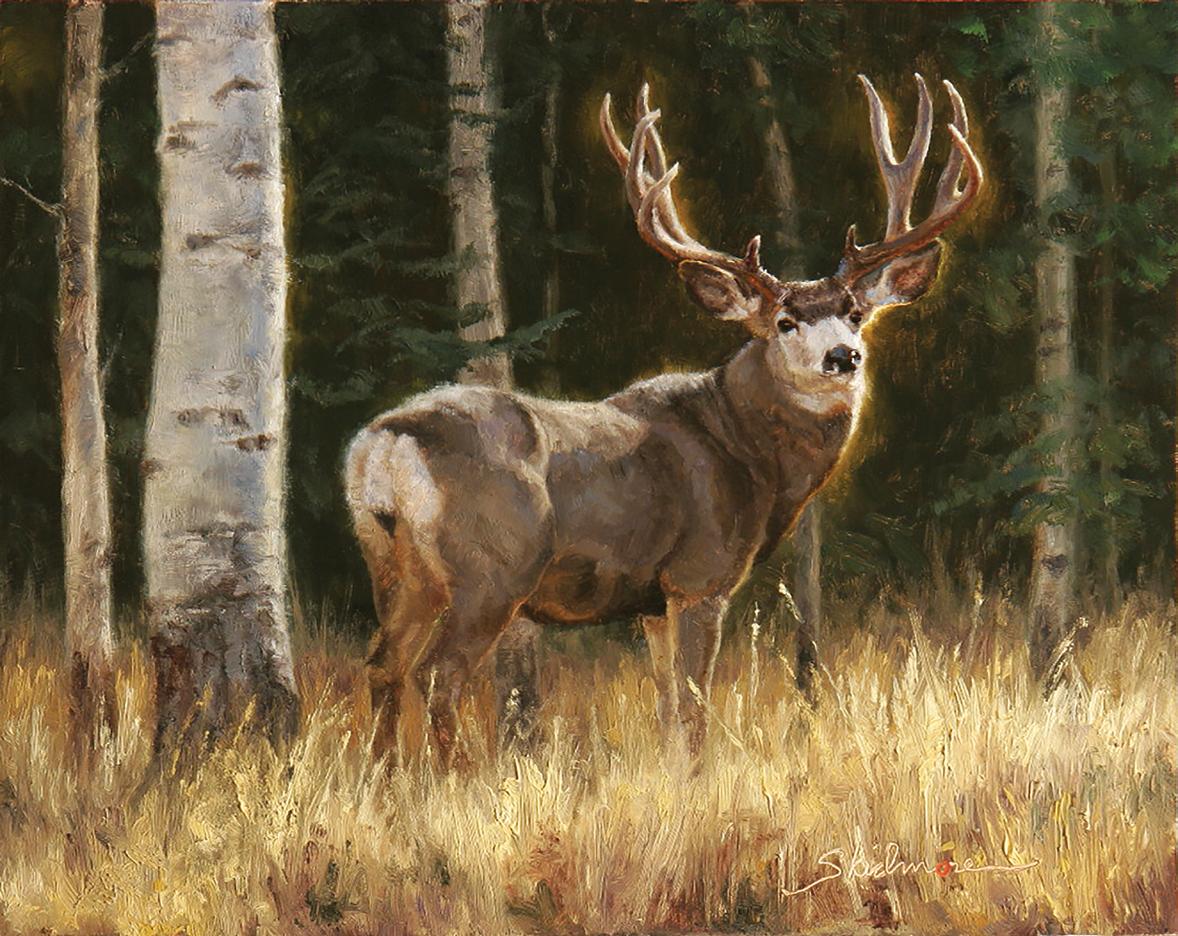
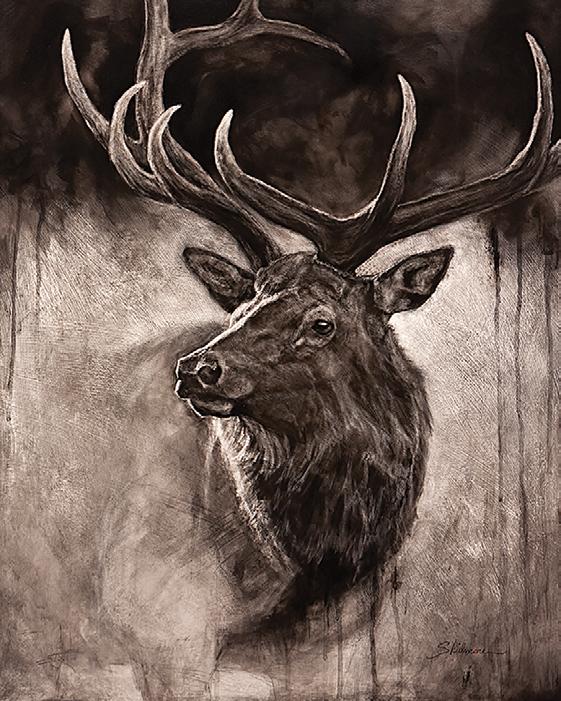
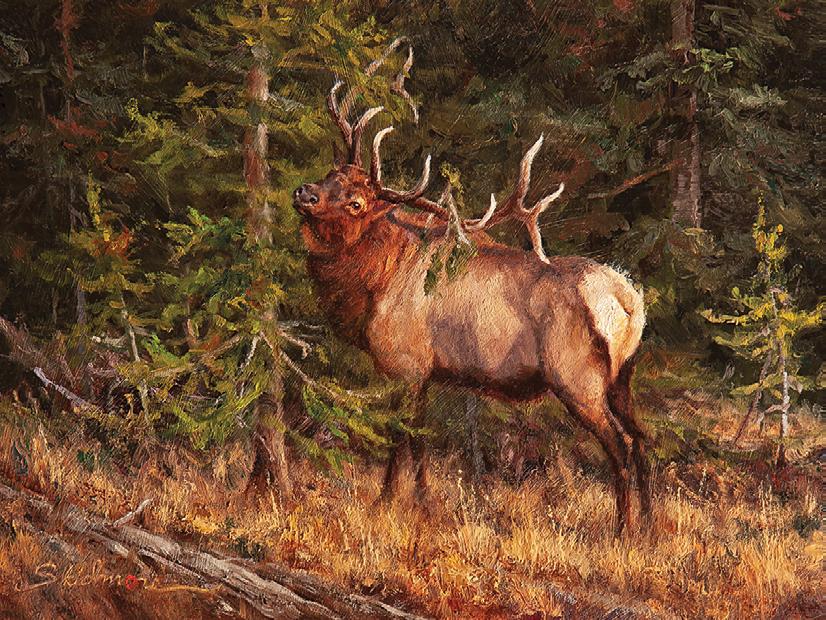
When Pedram Parvin came up with the idea of the “Featured Artist Series”, I was all for it. In our increasingly digital world appreciation for wildlife art has been waning. Our plan was to simply remind people that there are some talented folks out there producing some beautiful work that needs to be recognized. The response from our readers has certainly surpassed our expectations! In this issue Pedram interviews Ryan Skidmore, a true western hunter and stellar artist.
Speaking of getting ready for hunting season. Make sure and plan time for family and friends during the season. When we finally get that tag we have been dreaming about it’s all too easy to get preoccupied with our own agenda. Putting first things first is one of the rules for a happy healthy life, and the best way to prove you get it is with your time.
As always, your comments or questions are always welcome! Please feel free to email me at chris@westernhunter.net. I read and respond to every email.
Chris Denham, Publisher
PUBLISHERS
Floyd Green, Chris Denham
ASSOCIATE EDITOR/ART DIRECTOR
Randy Stalcup 602-228-4601 randy@westernhunter.net
ASSOCIATE EDITOR
Colton Bagnoli colton@westernhunter.net
MARKETING/ADVERTISING
Chris Denham chris@westernhunter.net
GRAPHIC DESIGN
Randy Stalcup 602-228-4601 randy@westernhunter.net
EDITORIAL STAFF
Colton Bagnoli – Shooting/Gear/Hunting Editor
Nate Simmons – Backcountry Editor
Remi Warren – Hunting Editor
Mike Duplan – Hunting Editor
George Bettas – Hunting/Conservation Editor
Fred Eichler – Hunting Editor
James Yates – Archery/Hunting Editor
Kyle Greene – Hunting Editor
Nick Gehring – Taxidermy Editor
Lindsay Persico – Health & Fitness Editor
Matt Ward – Health & Fitness Editor
FIELD EDITORS
Cody Barnes, Dave Bond, Ben Britton, Mark Denham, Kevin Guillen, Douglas Morales, Pedram Parvin, Levi Sopeland
CONTRIBUTING WRITERS
Dioni Amuchastegui, Jordan Budd, Rusty Smith, Casey Draper, Zach Bowhay
WESTERN HUNTER MAGAZINE
16851 E. Parkview Ave., Fountain Hills, AZ 85268 480-993-6972 info@westernhunter.net www.westernhunter.net
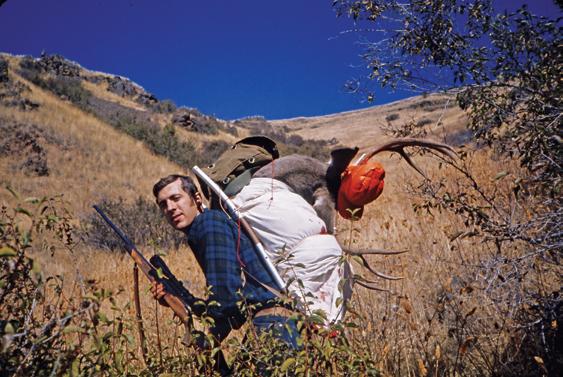
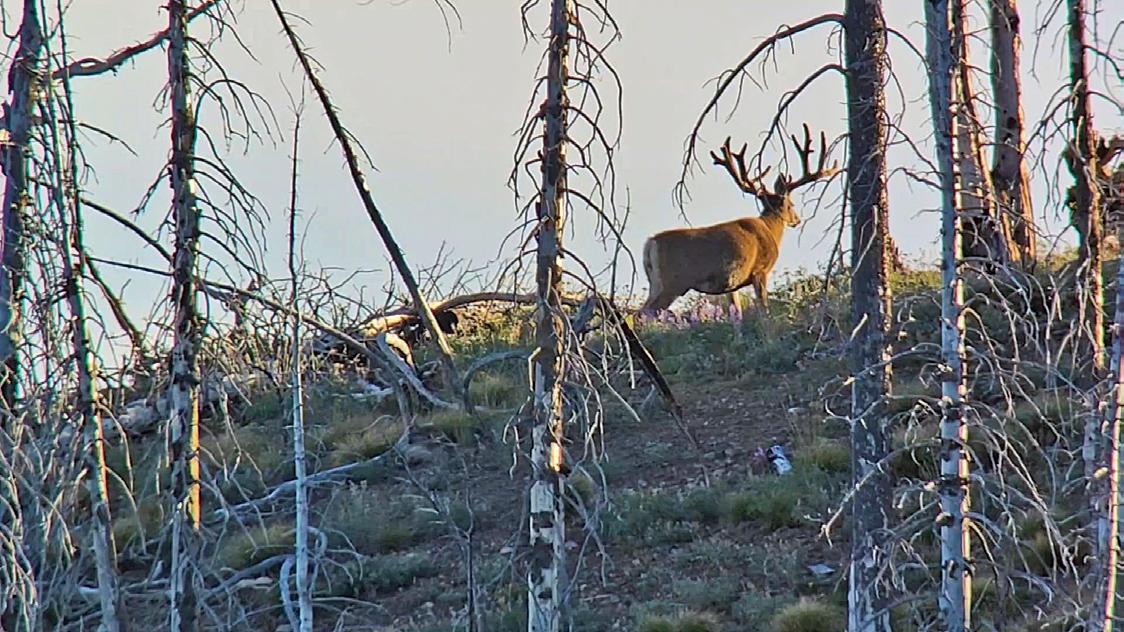
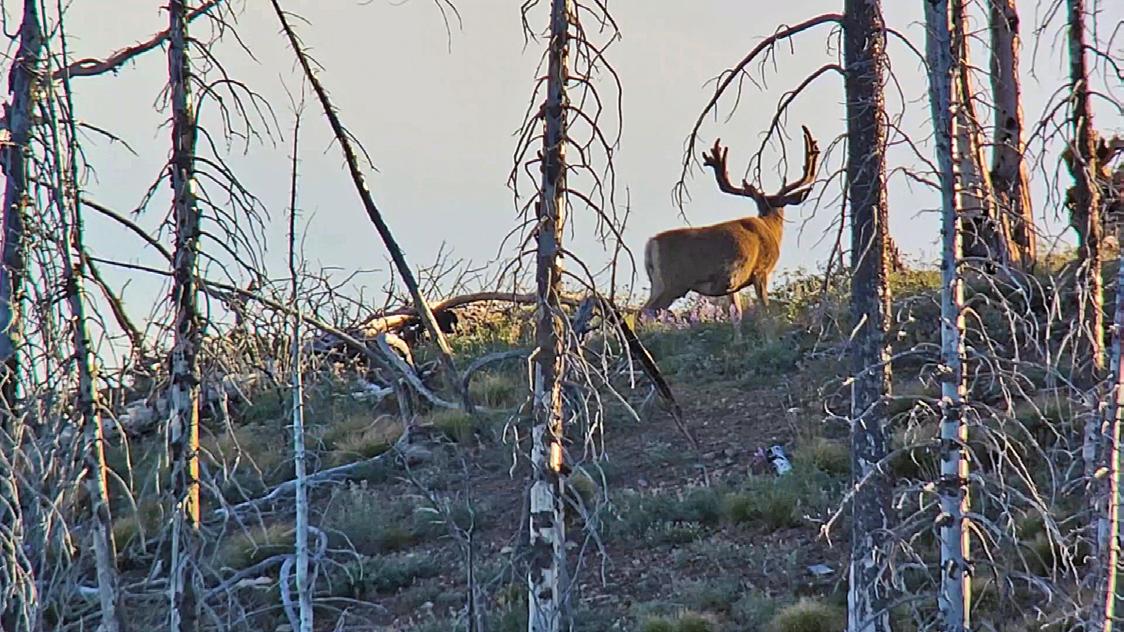
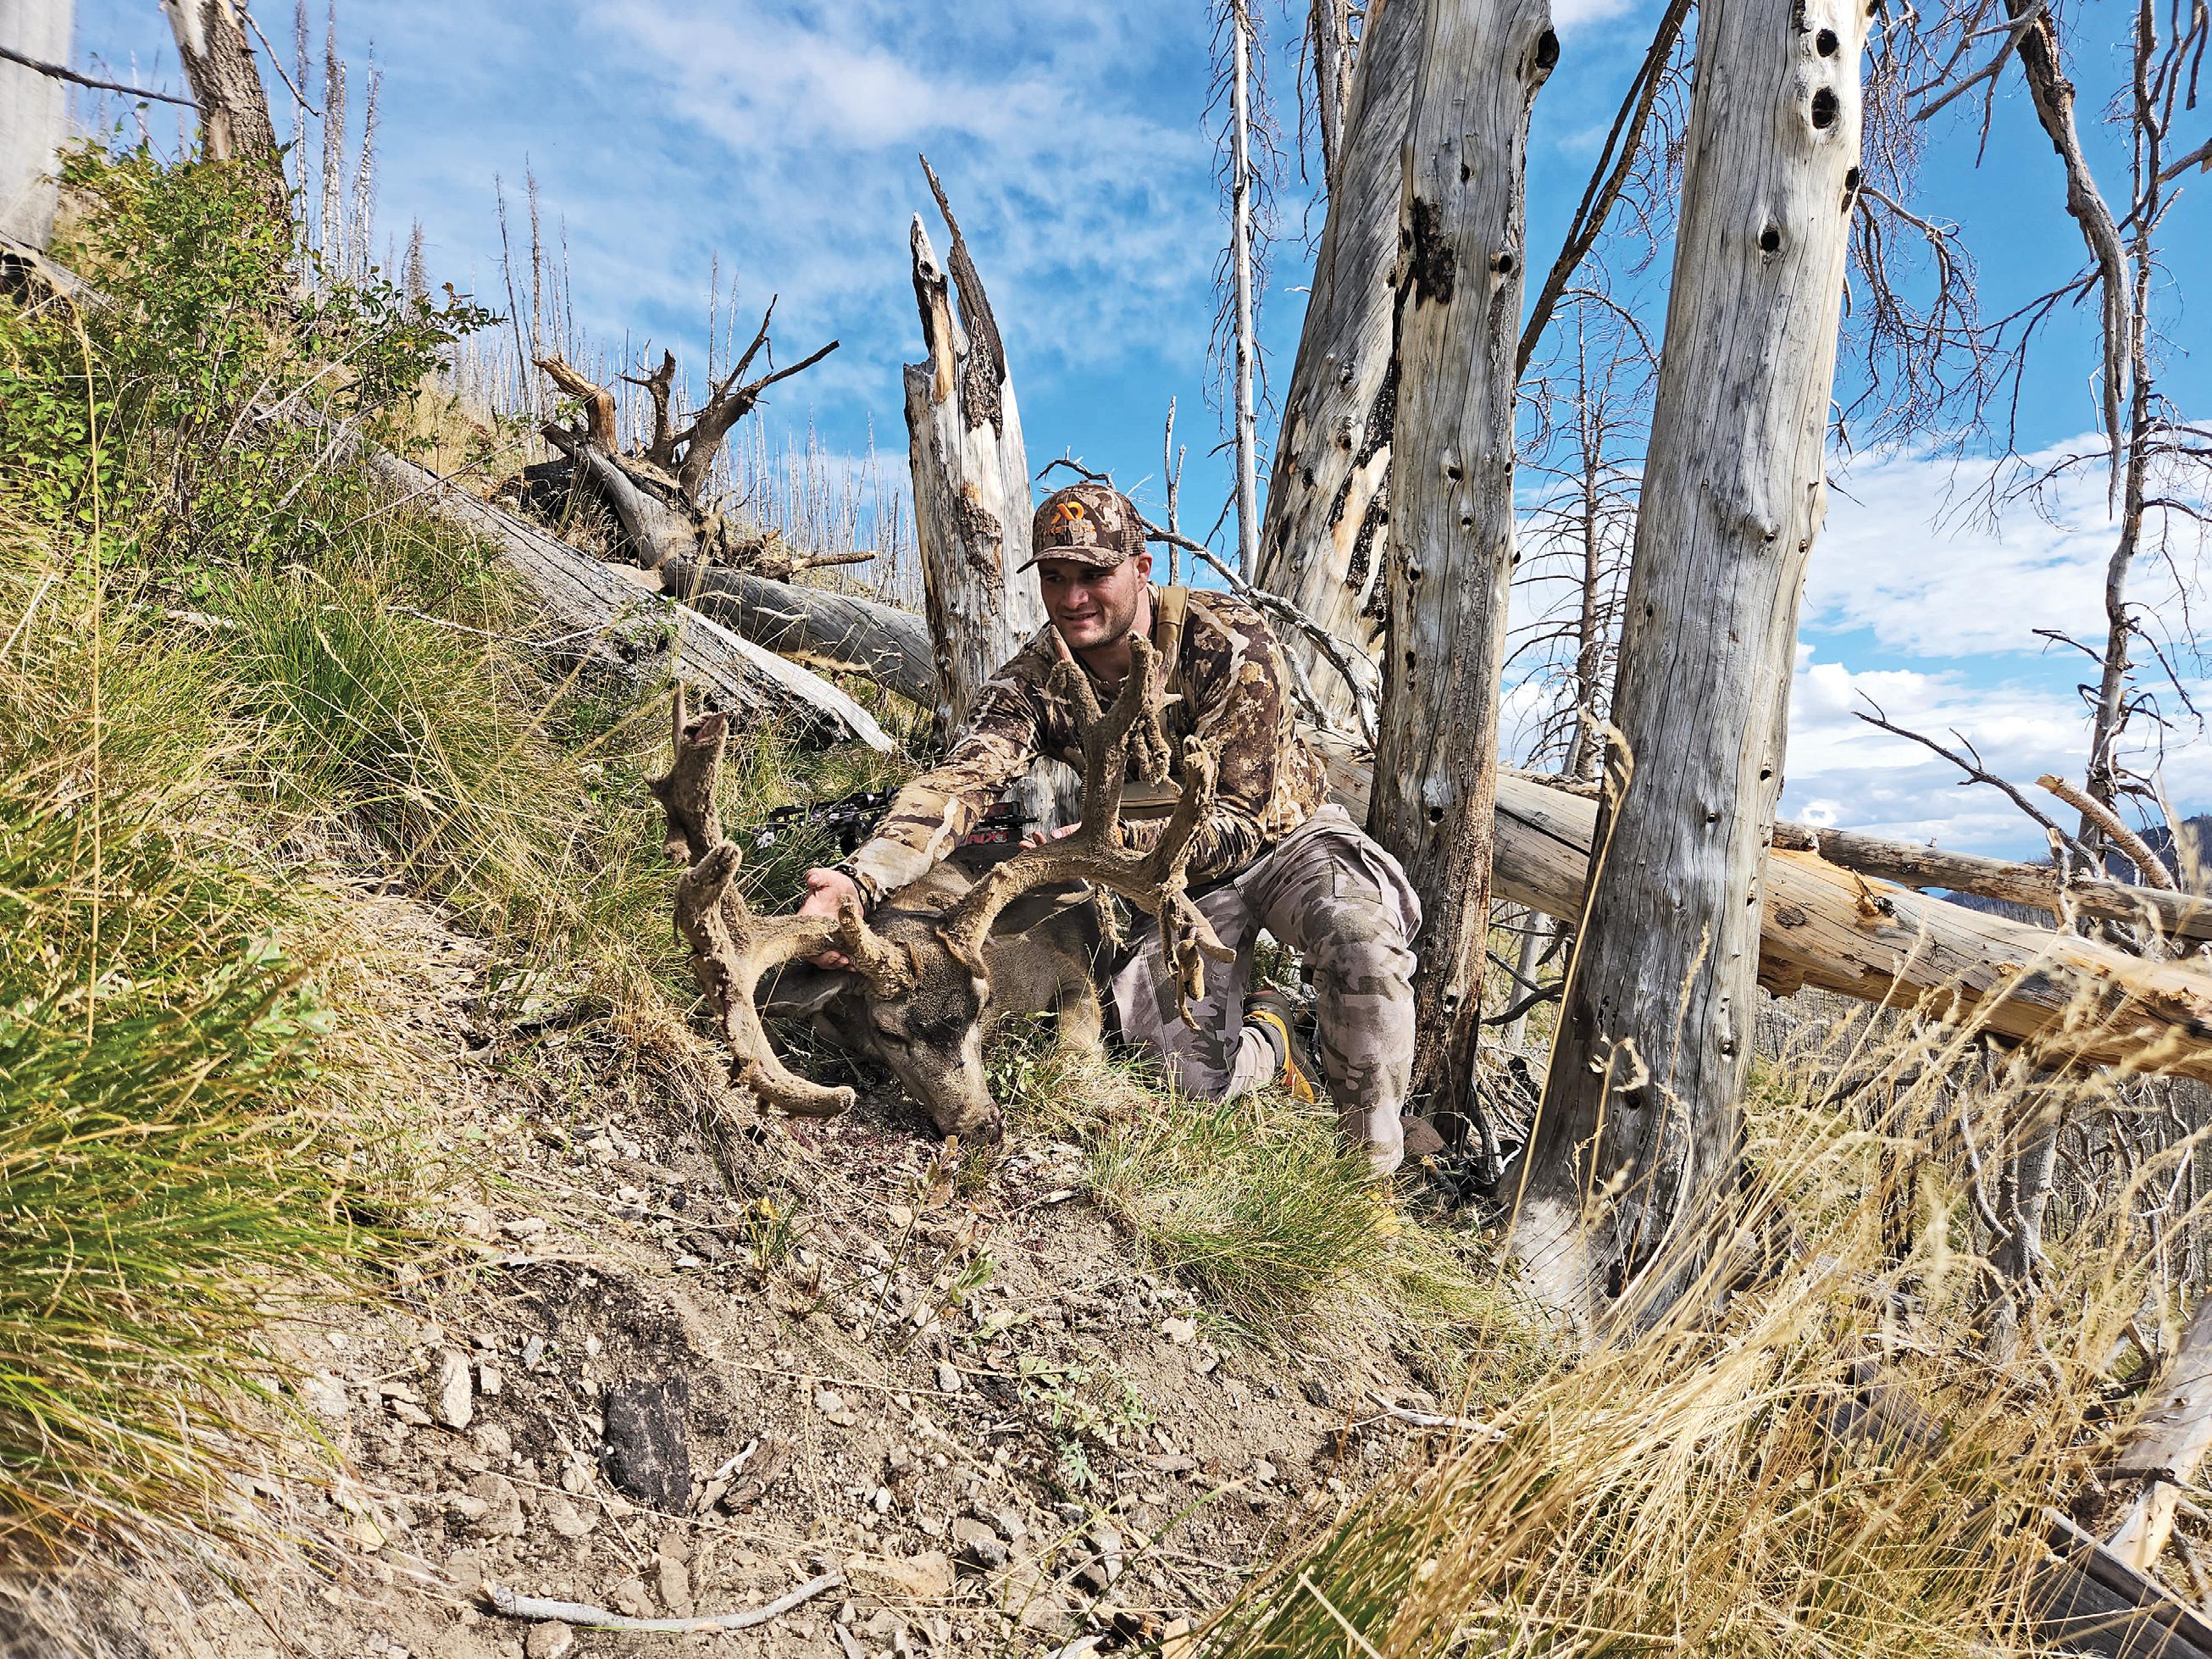
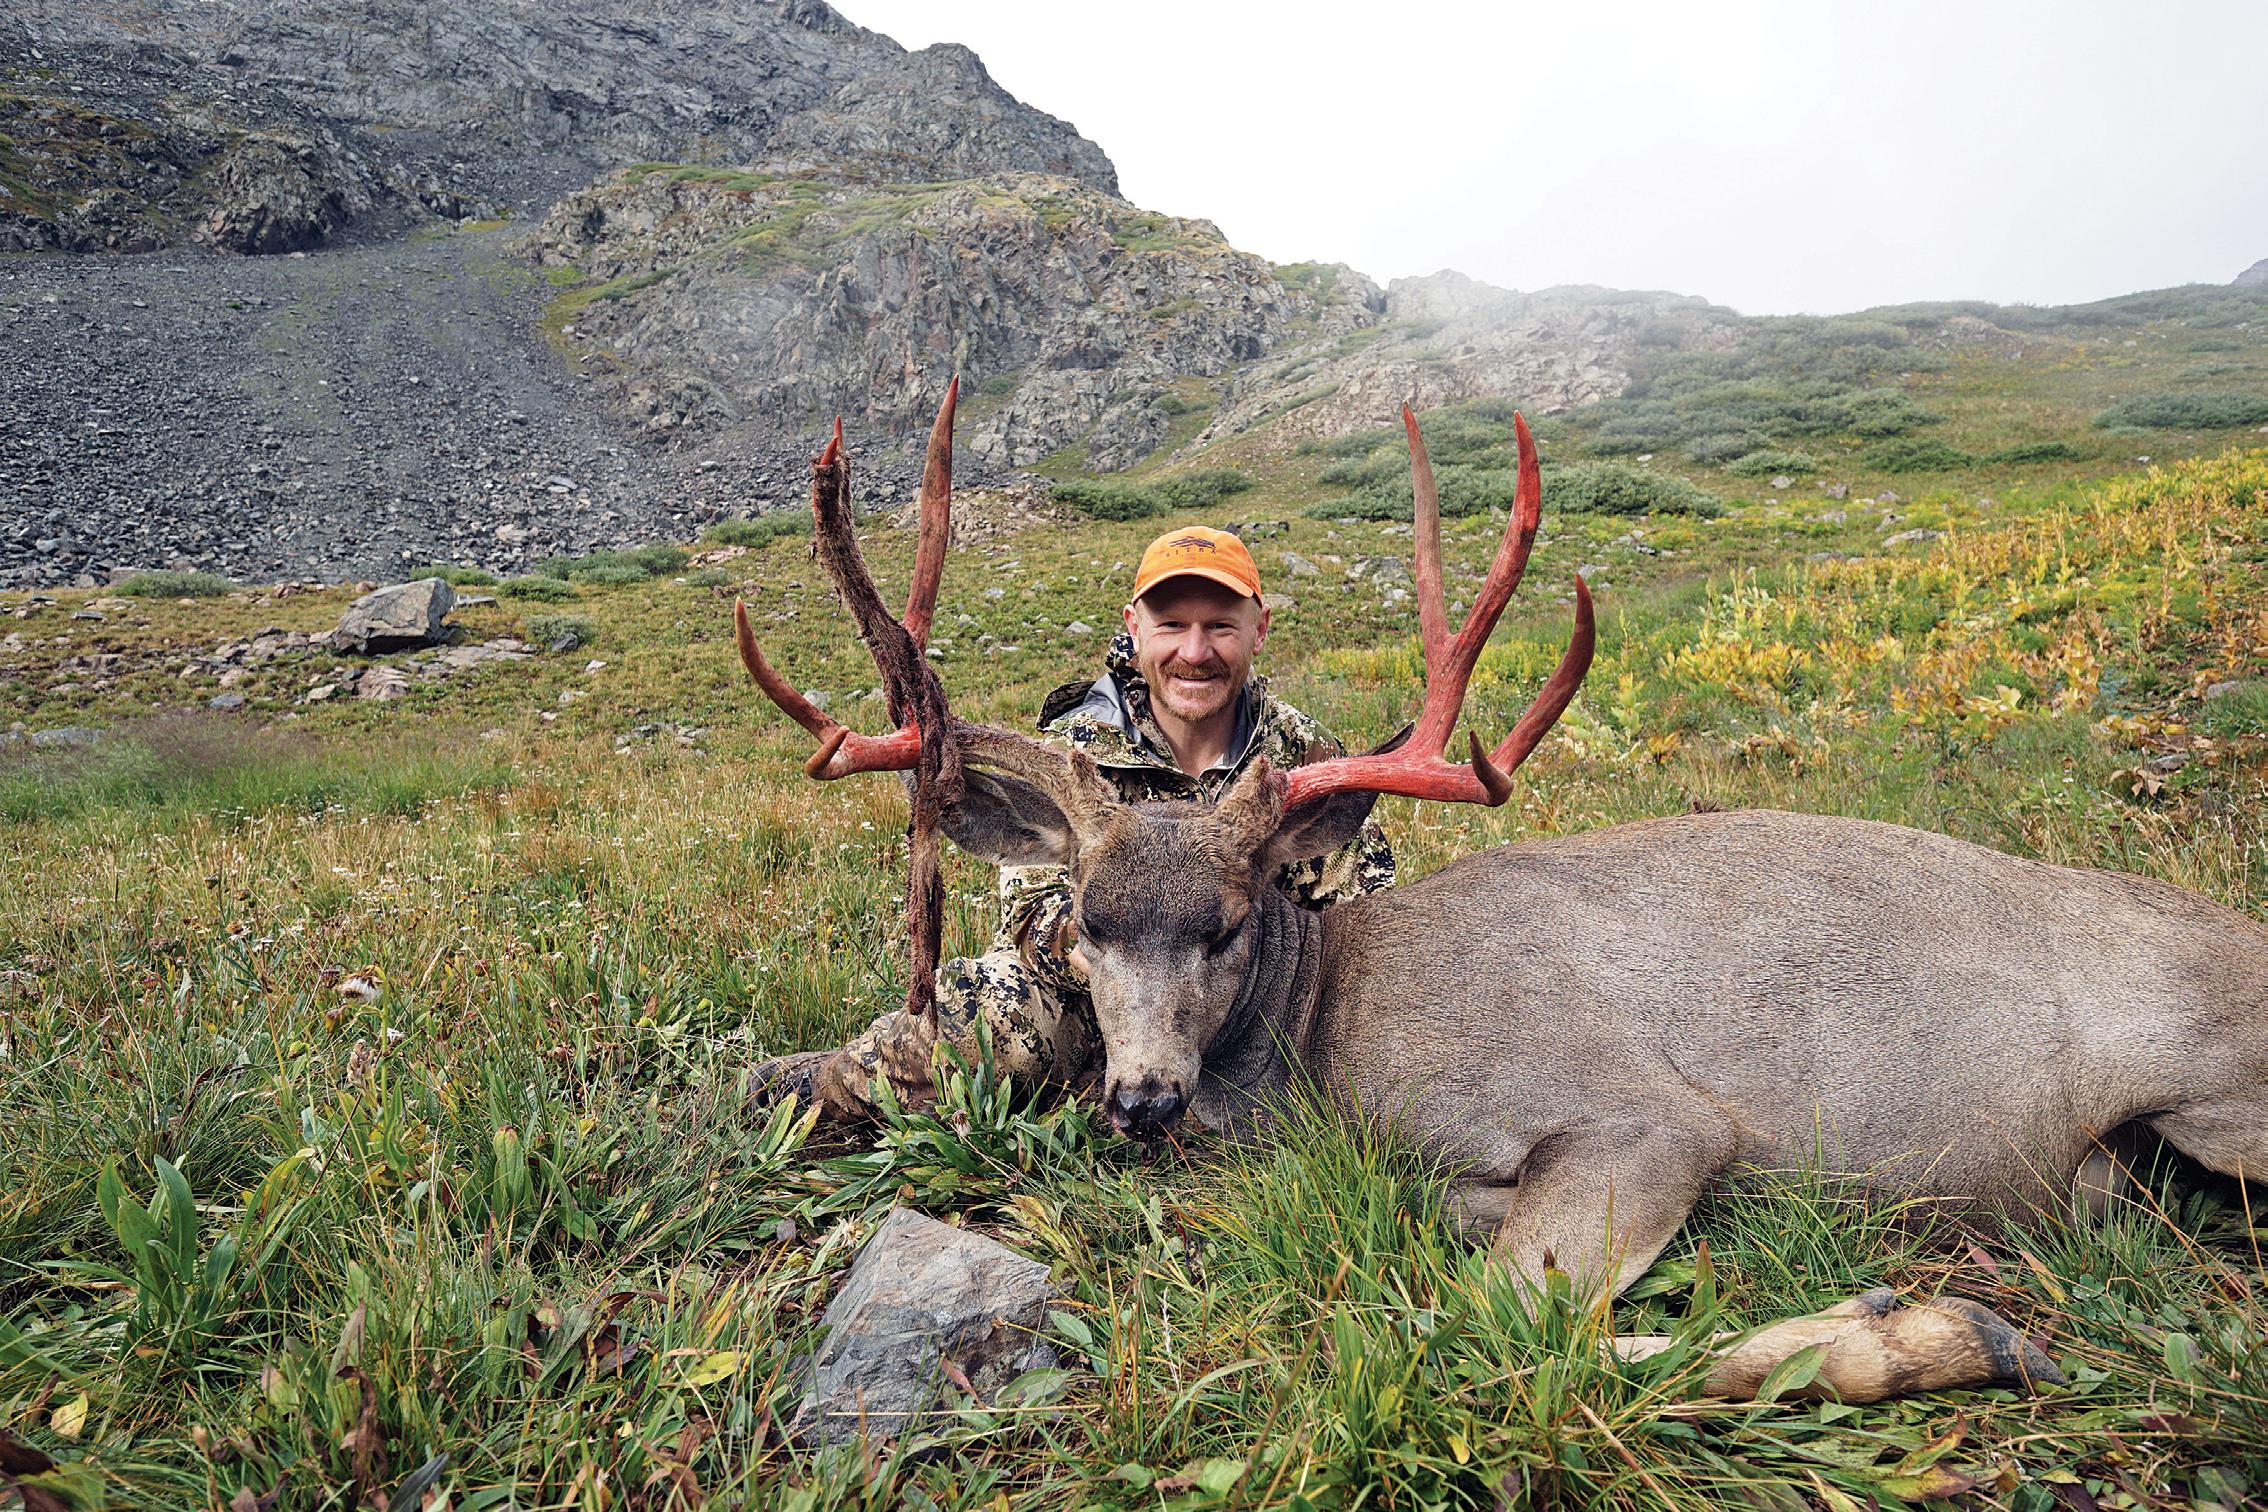
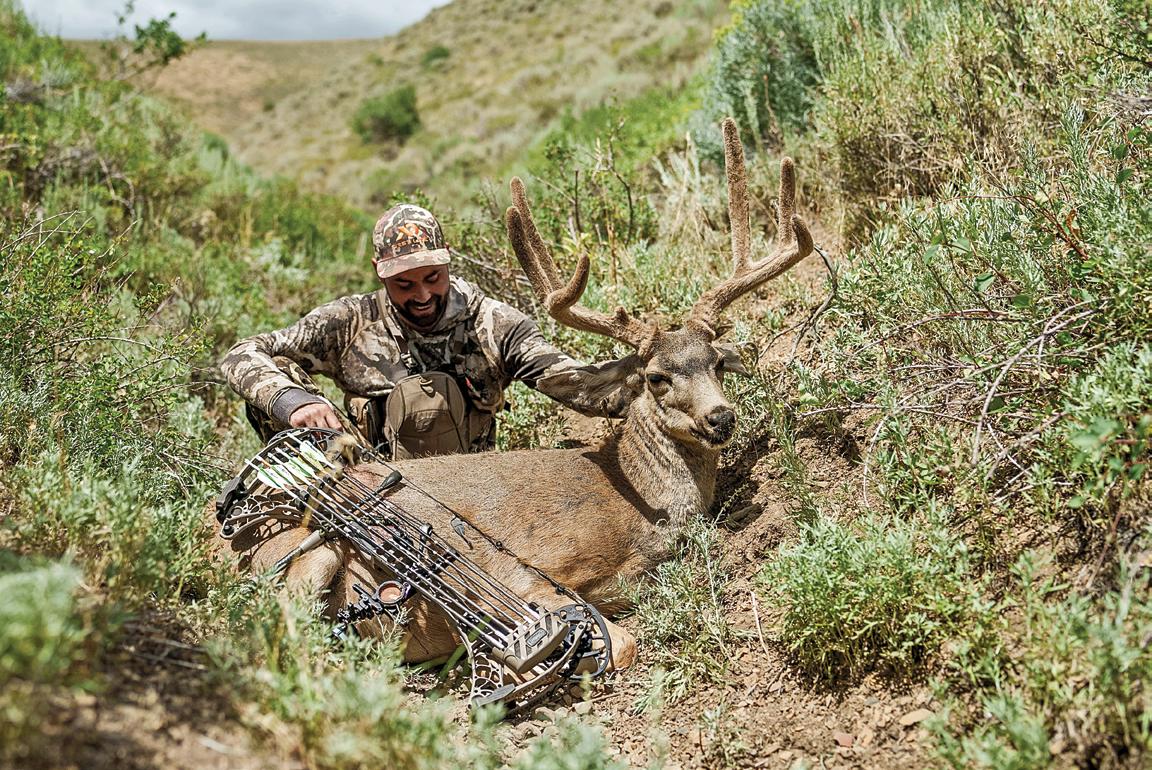
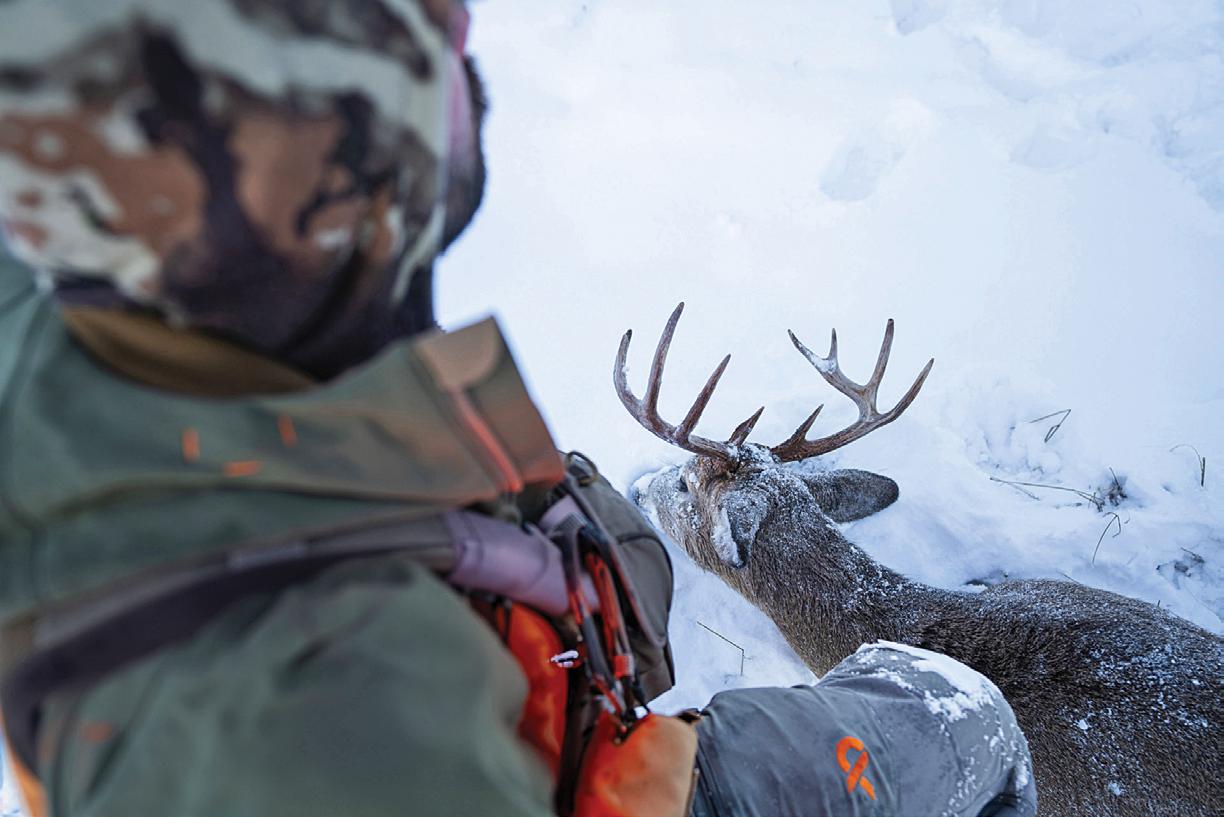
Even harder to believe was that I would kill the biggest deer I’d ever seen, and he’d be my first with a bow. I was coming off a few years of hunting in tough unproductive country. I managed to take nice bucks but knew it was time for a change of scenery, so I spent a good portion of the winter looking at OnX and Google Earth.
That spring, as soon as the snow started to melt, I ventured out with the hopes of finding something I didn’t see on Google Earth. One of my new areas strongly stood out. It was mid-July when I made my first real scouting trip. I found strong numbers of deer and quite a few good bucks. I was mostly focused on narrowing down the exact next area to scout and getting good vantages to see into them. This year I had been talking with a good friend, and we decided to hunt and scout together. Our scouting efforts produced the biggest buck I had ever seen in a general unit. I spent most of my remaining trips over the summer patterning the buck.
I am very fortunate to have many friends who I consider to be excellent hunters. I spoke with a few of them about this deer and many told me I really needed to try and kill him with a bow. Most of those guys are known for being of course, the bowhunter is telling me to hunt with a bow. Fortunately for me, I had a conversation with Robby Denning that turned me around. He is, in my eyes, the purest form of a big-buck hunter; the kind of guy who hunts whatever season or weapon gives him the best chance at a giant buck.
When he all but called me an idiot (this is something I’m used to from most of my friends), it stuck with me differently. I had already been working toward getting a new-to-me bow from a friend, but this accelerated the process. Two weeks before the season, I had my bow and was in a race to get as ready as I could. I leaned heavily on my friend James Yates for last-minute advice on setting up my bow, selecting broadheads, and planning out potential methods of closing the distance. He was one of the few people I shared pictures of the buck with early on and acted as a sounding board for me throughout the hunt.
TOTALITY
A hunter’s first archery
deer defies expectations
Dioni Amuchastegui Idaho – 2023
For so many of us with young children, fulltime work, and a wife to keep happy at home, free time is hard to come by. This year was no exception. The day before the opener, I had a 10-hour day at work, fixed sprinklers, sprayed weeds, cooked dinner, and helped get the kids to bed. After all that, I loaded up the truck and left my home at 9:00 PM. When I left, I anticipated making it to camp around midnight; boy, was I wrong.
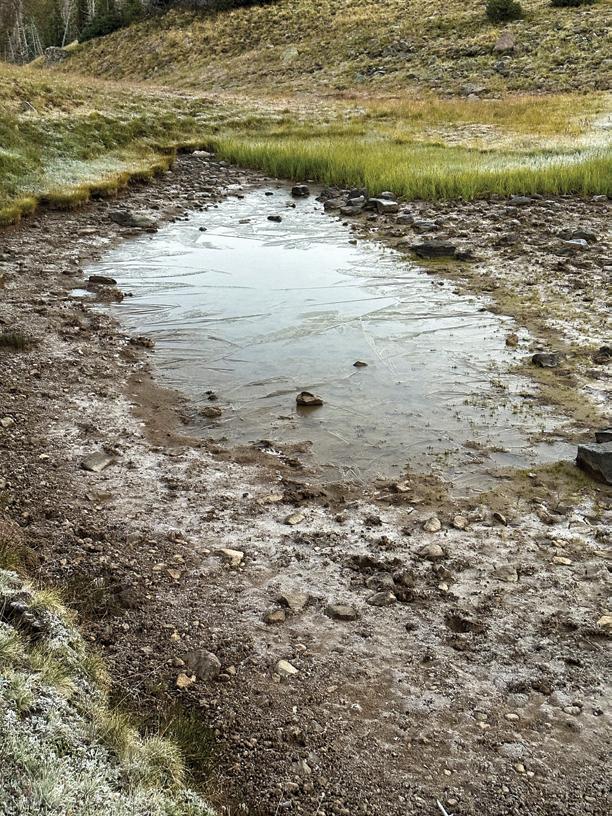
A large storm had recently come through, and I found myself cutting downed trees for two and a half hours before I could get into camp. I was already exhausted, and this was an insult to injury. Sleep was in short supply that night. I was up at 5:00 AM to make sure I had enough time to get my gear ready and hike into the glassing point. Opening morning was slow and I couldn’t turn up my target buck. I decided to change vantages and move to the other side of the mountain. I’d never glassed for him over there, but I had seen him come over the ridge from the other side before.
Unfortunate Encounters
When I made it over to the other side, there was another camp. I didn’t think too much about it at first and decided to go a bit farther to glass. Shortly after I got set up, another hunter came out from the camp and approached me. He happened to be someone I’d met before and knew to be a good hunter. It was cold that morning and I was wearing a neck gaiter over my face to keep warm, so I kept it pulled up to hide who I was. I primarily hunt mule deer and didn’t want him to know I was targeting a buck in the area. We had a short,
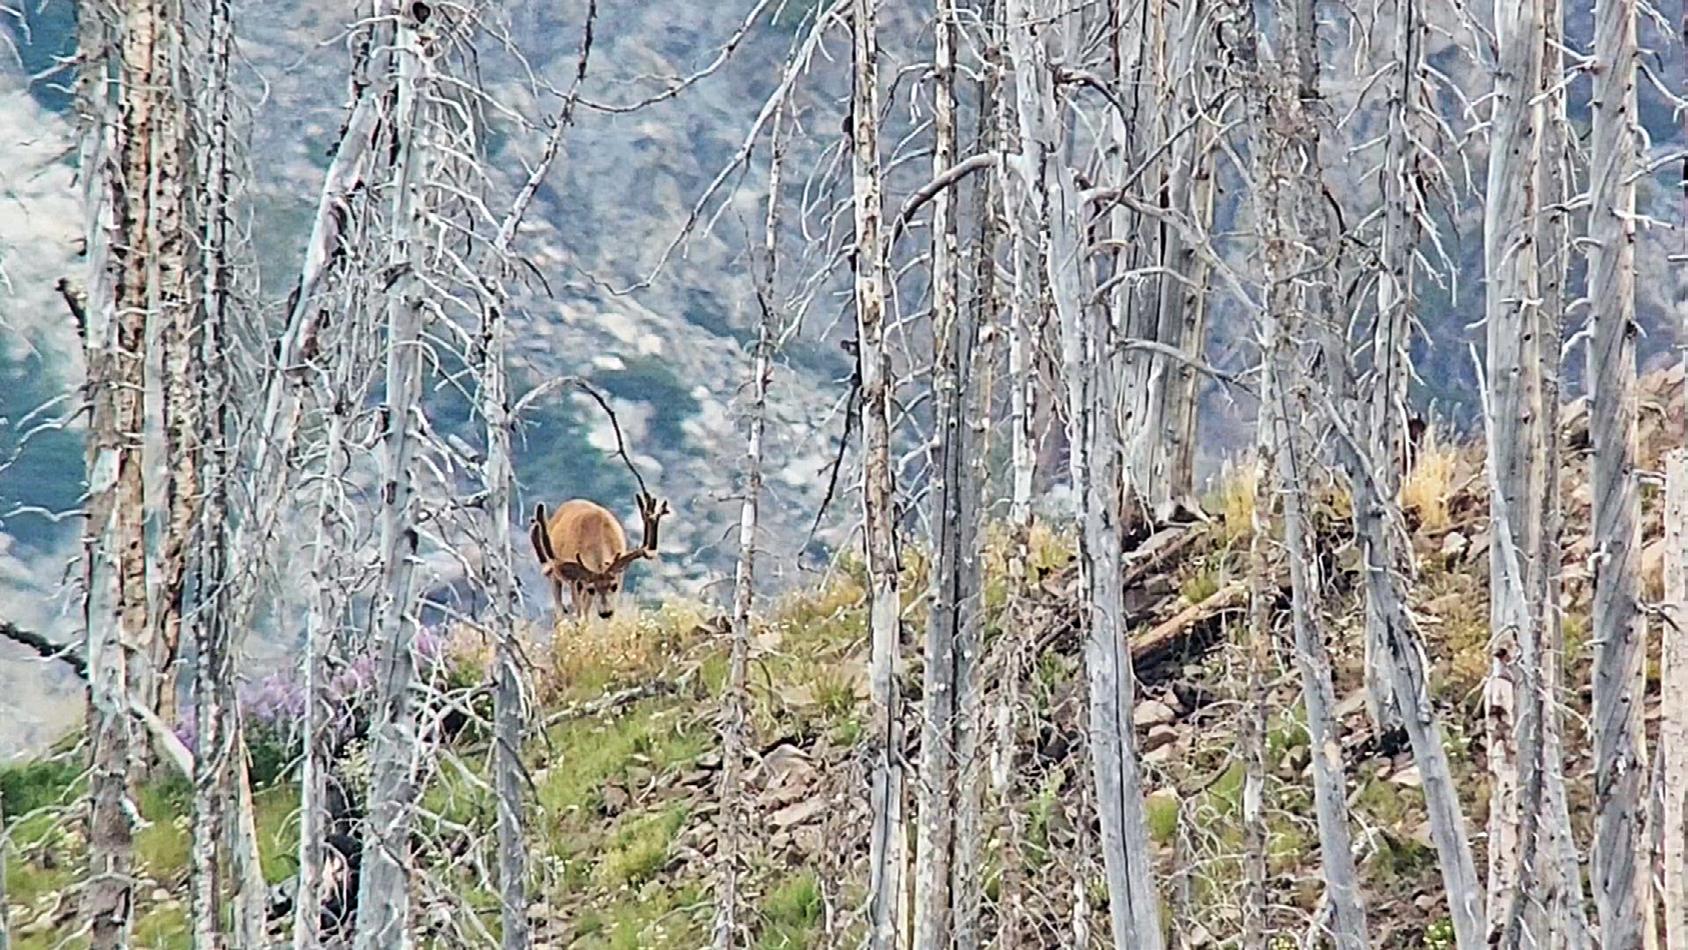
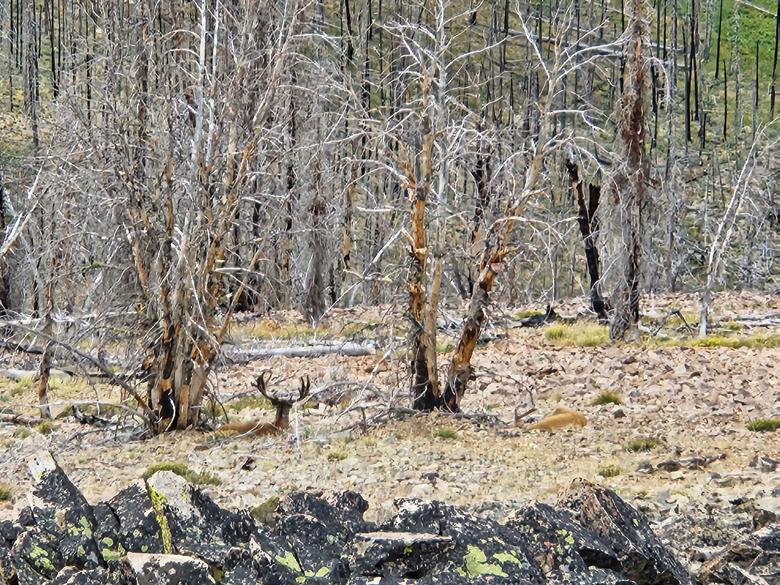
I couldn’t find the buck until late into the first evening. There wasn’t enough time to make a move on him, so I decided to film him for a while before going back to camp. As I went to put away my spotting scope, I bumped it with my camera still attached. It was then I noticed the silhouette of a hunter above the buck. I was instantly sick with anxiety. All I could do was watch as the hunter moved into bow range. When he finally got into position, it was minutes until sundown. I could barely see when he made two shots. The buck took off and was out of frame quickly. I replayed the video over and over that night. The only thing I could think to do was keep trying and hope the buck was alive.
Regrouping
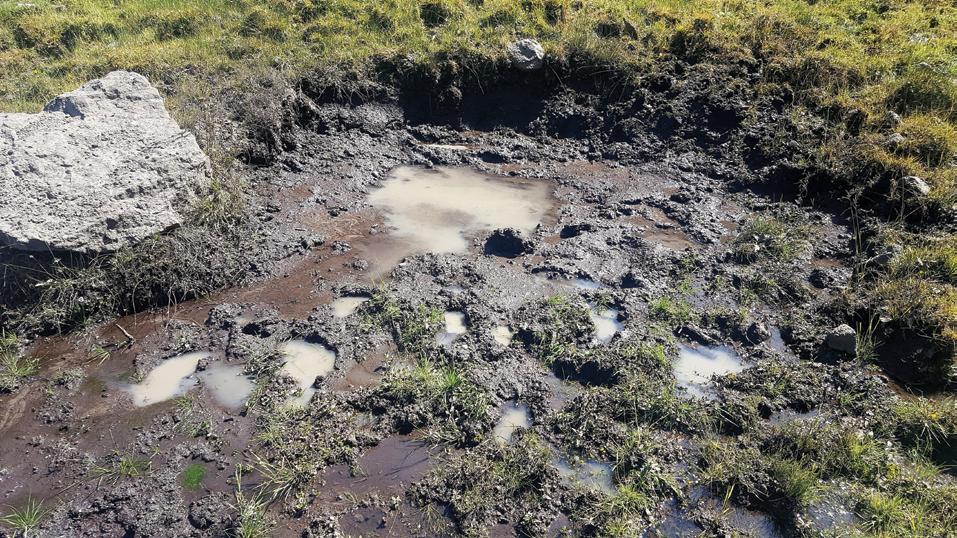
That night afforded me very little sleep as I tossed and turned anxiously, awaiting another opportunity to see if he was still alive. In the morning I decided to start glassing the farthest away area where I had seen the buck from where he had been shot at. To my incredible relief, I found him there, standing on the skyline in the earliest moments of the sunrise. Knowing I had competition and that the buck skylined himself, it seemed likely that the other hunter had seen him as well. I decided to move on him before he made his first bed, hoping he would reuse one of the beds I’d seen him in over the summer. When I got onto the ridge above where I anticipated him bedding, I began to move slowly into his basin. I hadn’t made it far before I heard the buck blow out from below and behind me. I had just been in bow range of him and blew what felt like it could be my only opportunity. Knowing that I had to go home that night and watch my kids the next day, I decided to stay on the mountain. If I could turn him back up, I would already be in striking distance. That day ended with me getting back to my truck a couple of hours after sunset and making the long drive back home.
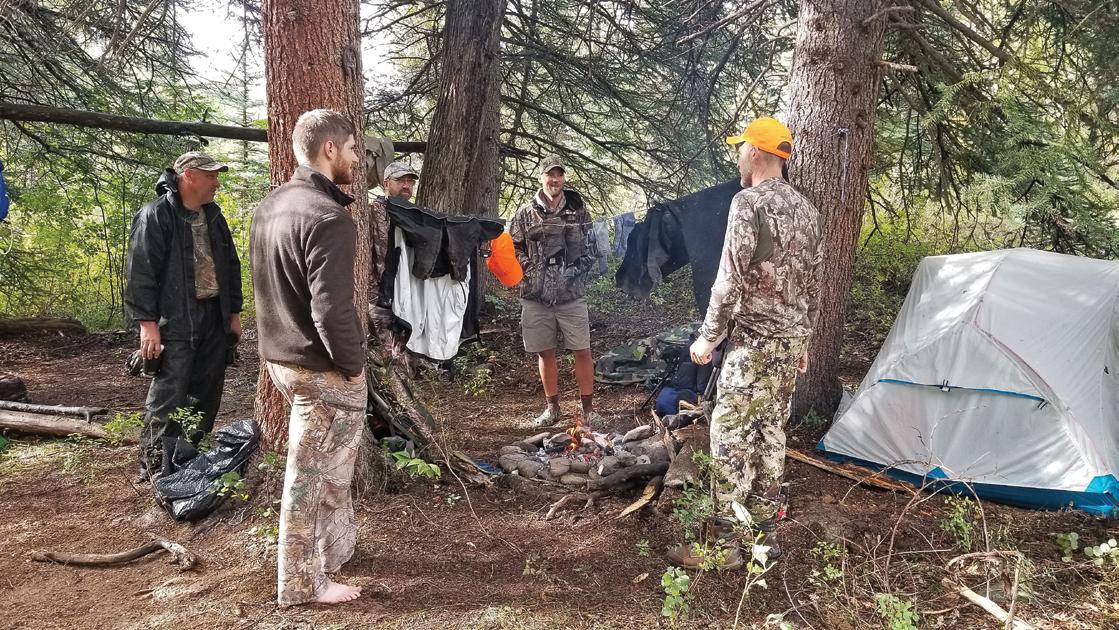
Friday September 1st will go down as one of the most stressful, anxietyinducing days of my life. I tried hard to keep occupied after dropping my daughter off at school, and my son and I kept as busy as we could the whole day. That evening, I took my family out to dinner and my wife said that if I’d take the kids home and let her get caught up on work, she’d cover the bedtime routine, allowing me to get out a bit earlier. I was desperately tired, and this was a godsend. I made it into camp around 11:00 and fortunately had my good friend Ward there to help me the next day.
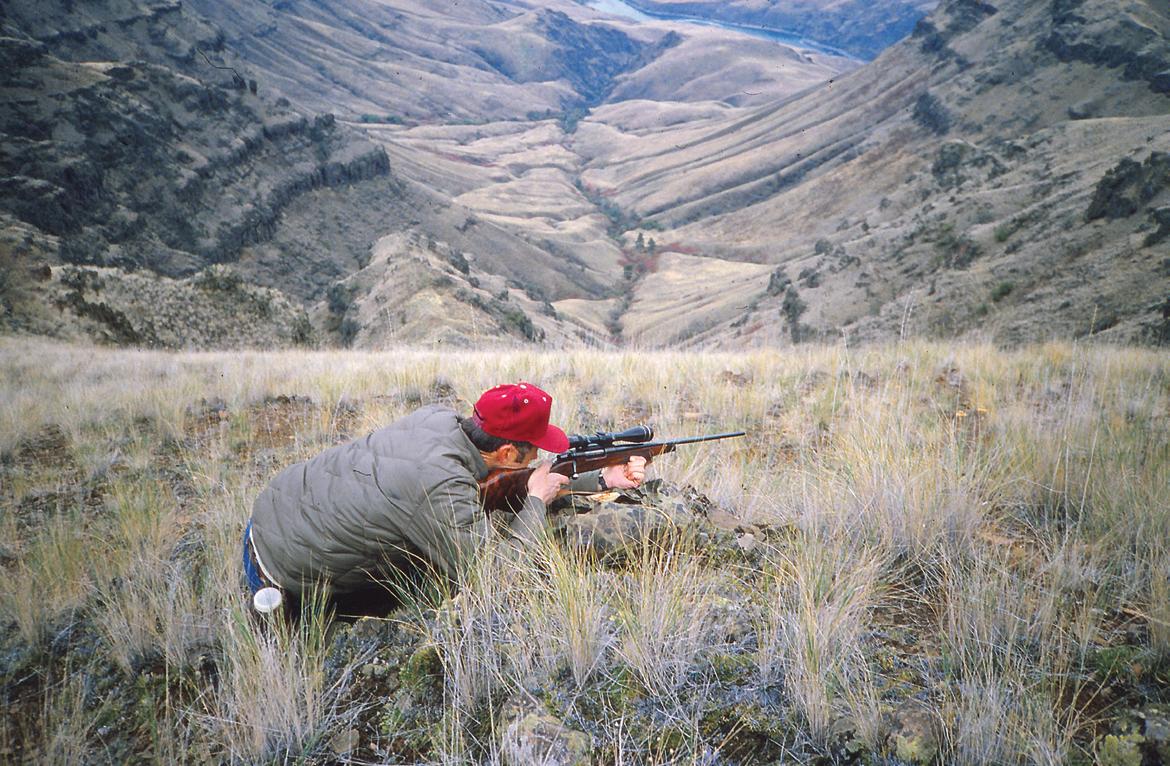
That morning we decided to split up and have eyes on both sides of the mountain. As luck would have it, I was able to turn up the buck maybe an hour after first light, feeding in the same basin I had bumped him out of two days earlier. I messaged Ward to come over to my glassing point. There was still quite a bit of time before the thermals would stabilize, and I didn’t want to rush this opportunity if I didn’t have to. When Ward got over to my location, I told him what my plans were and took off to get above the buck.
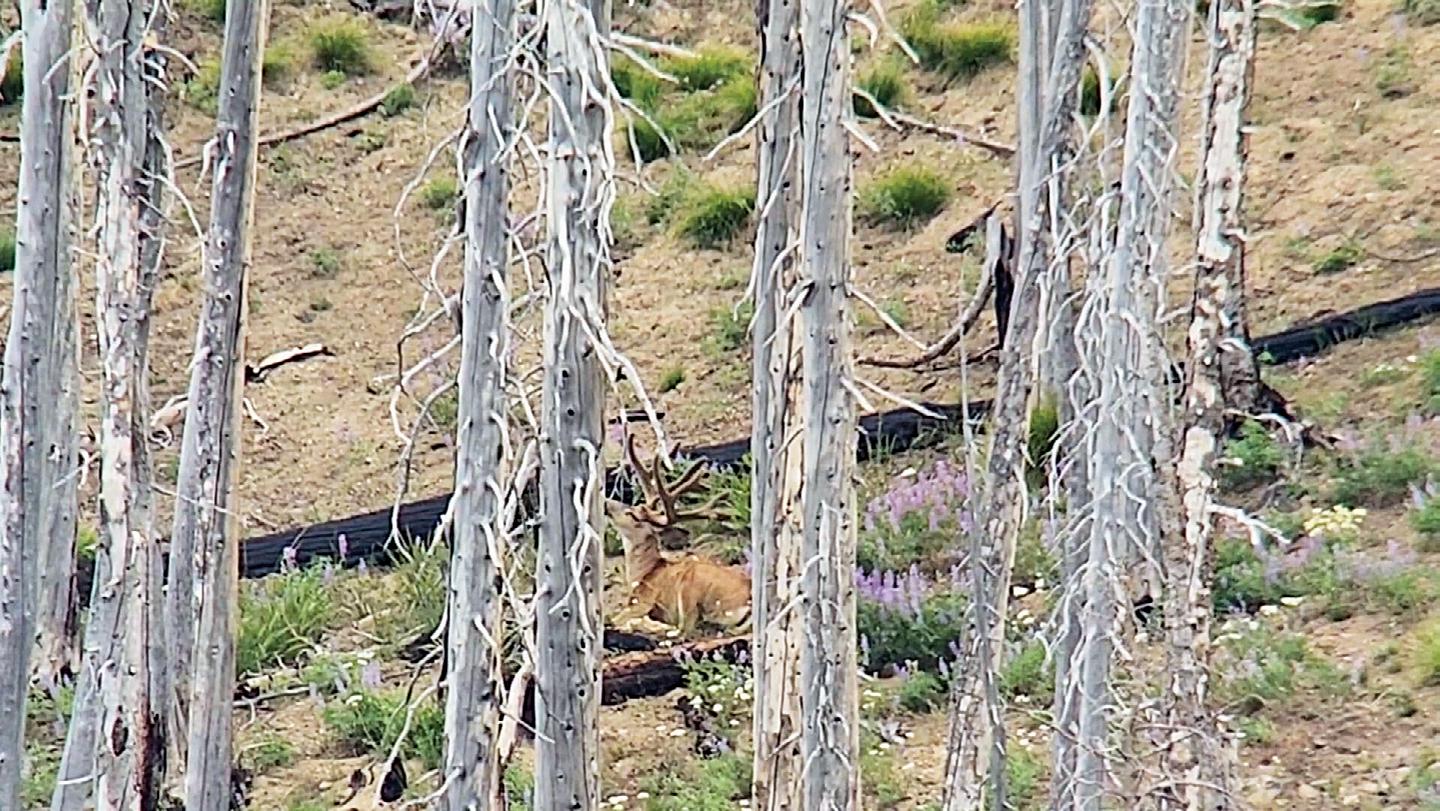
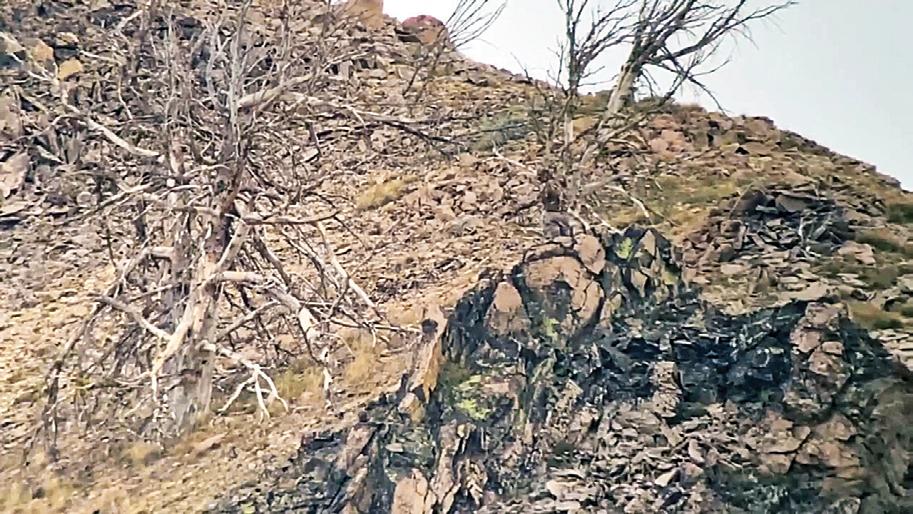
When I got to the top of the mountain, I was able to find the buck still up feeding. The wind was swirling terribly, and I sat back 500 yards, waiting for it to stabilize before I closed the distance. It wasn’t seconds after the wind switched that the buck de cided to cross the ridge onto the back side of the mountain. I had a strong suspicion that he would loop around a prominent knob and come back onto the side I was on. It was only a few minutes before the buck, thankfully, reappeared. When he popped back out, I knew he was heading to his favorite bed in the middle of a shale slide.
I had originally worried about trying to ap proach him in that bed during the summer, but af ter careful evaluation, I realized that he had bedded close enough to the ridge for me to shoot from a
While sitting above him, I was looking for any possible way to get closer. Every avenue I tried to climb down was loose and would inevitably make too much noise. Realizing this, I brainstormed other ways to improve my situation. Recognizing that the wind was gusting loudly, I thought that I might be able to stack rocks below me so that I could have a level and stable platform to shoot from. This platform took a fair amount of time to carefully construct but sig-
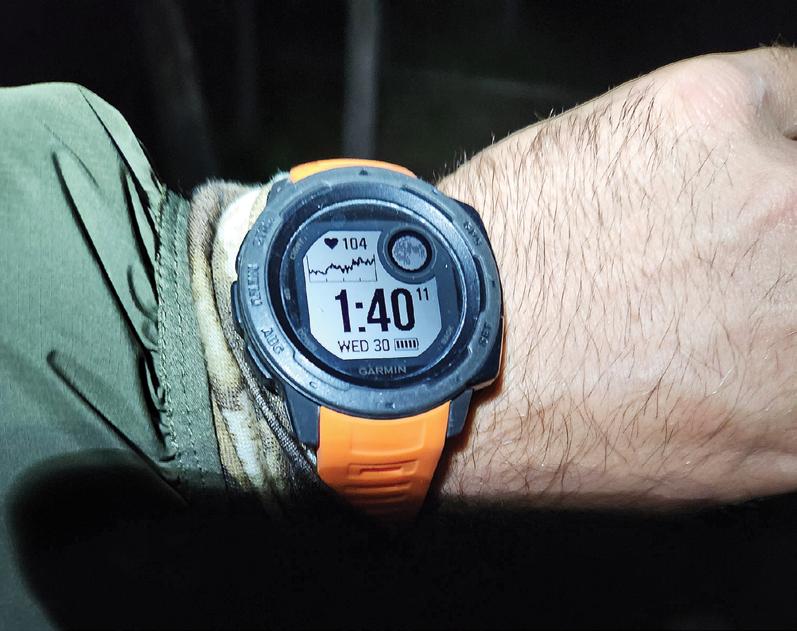
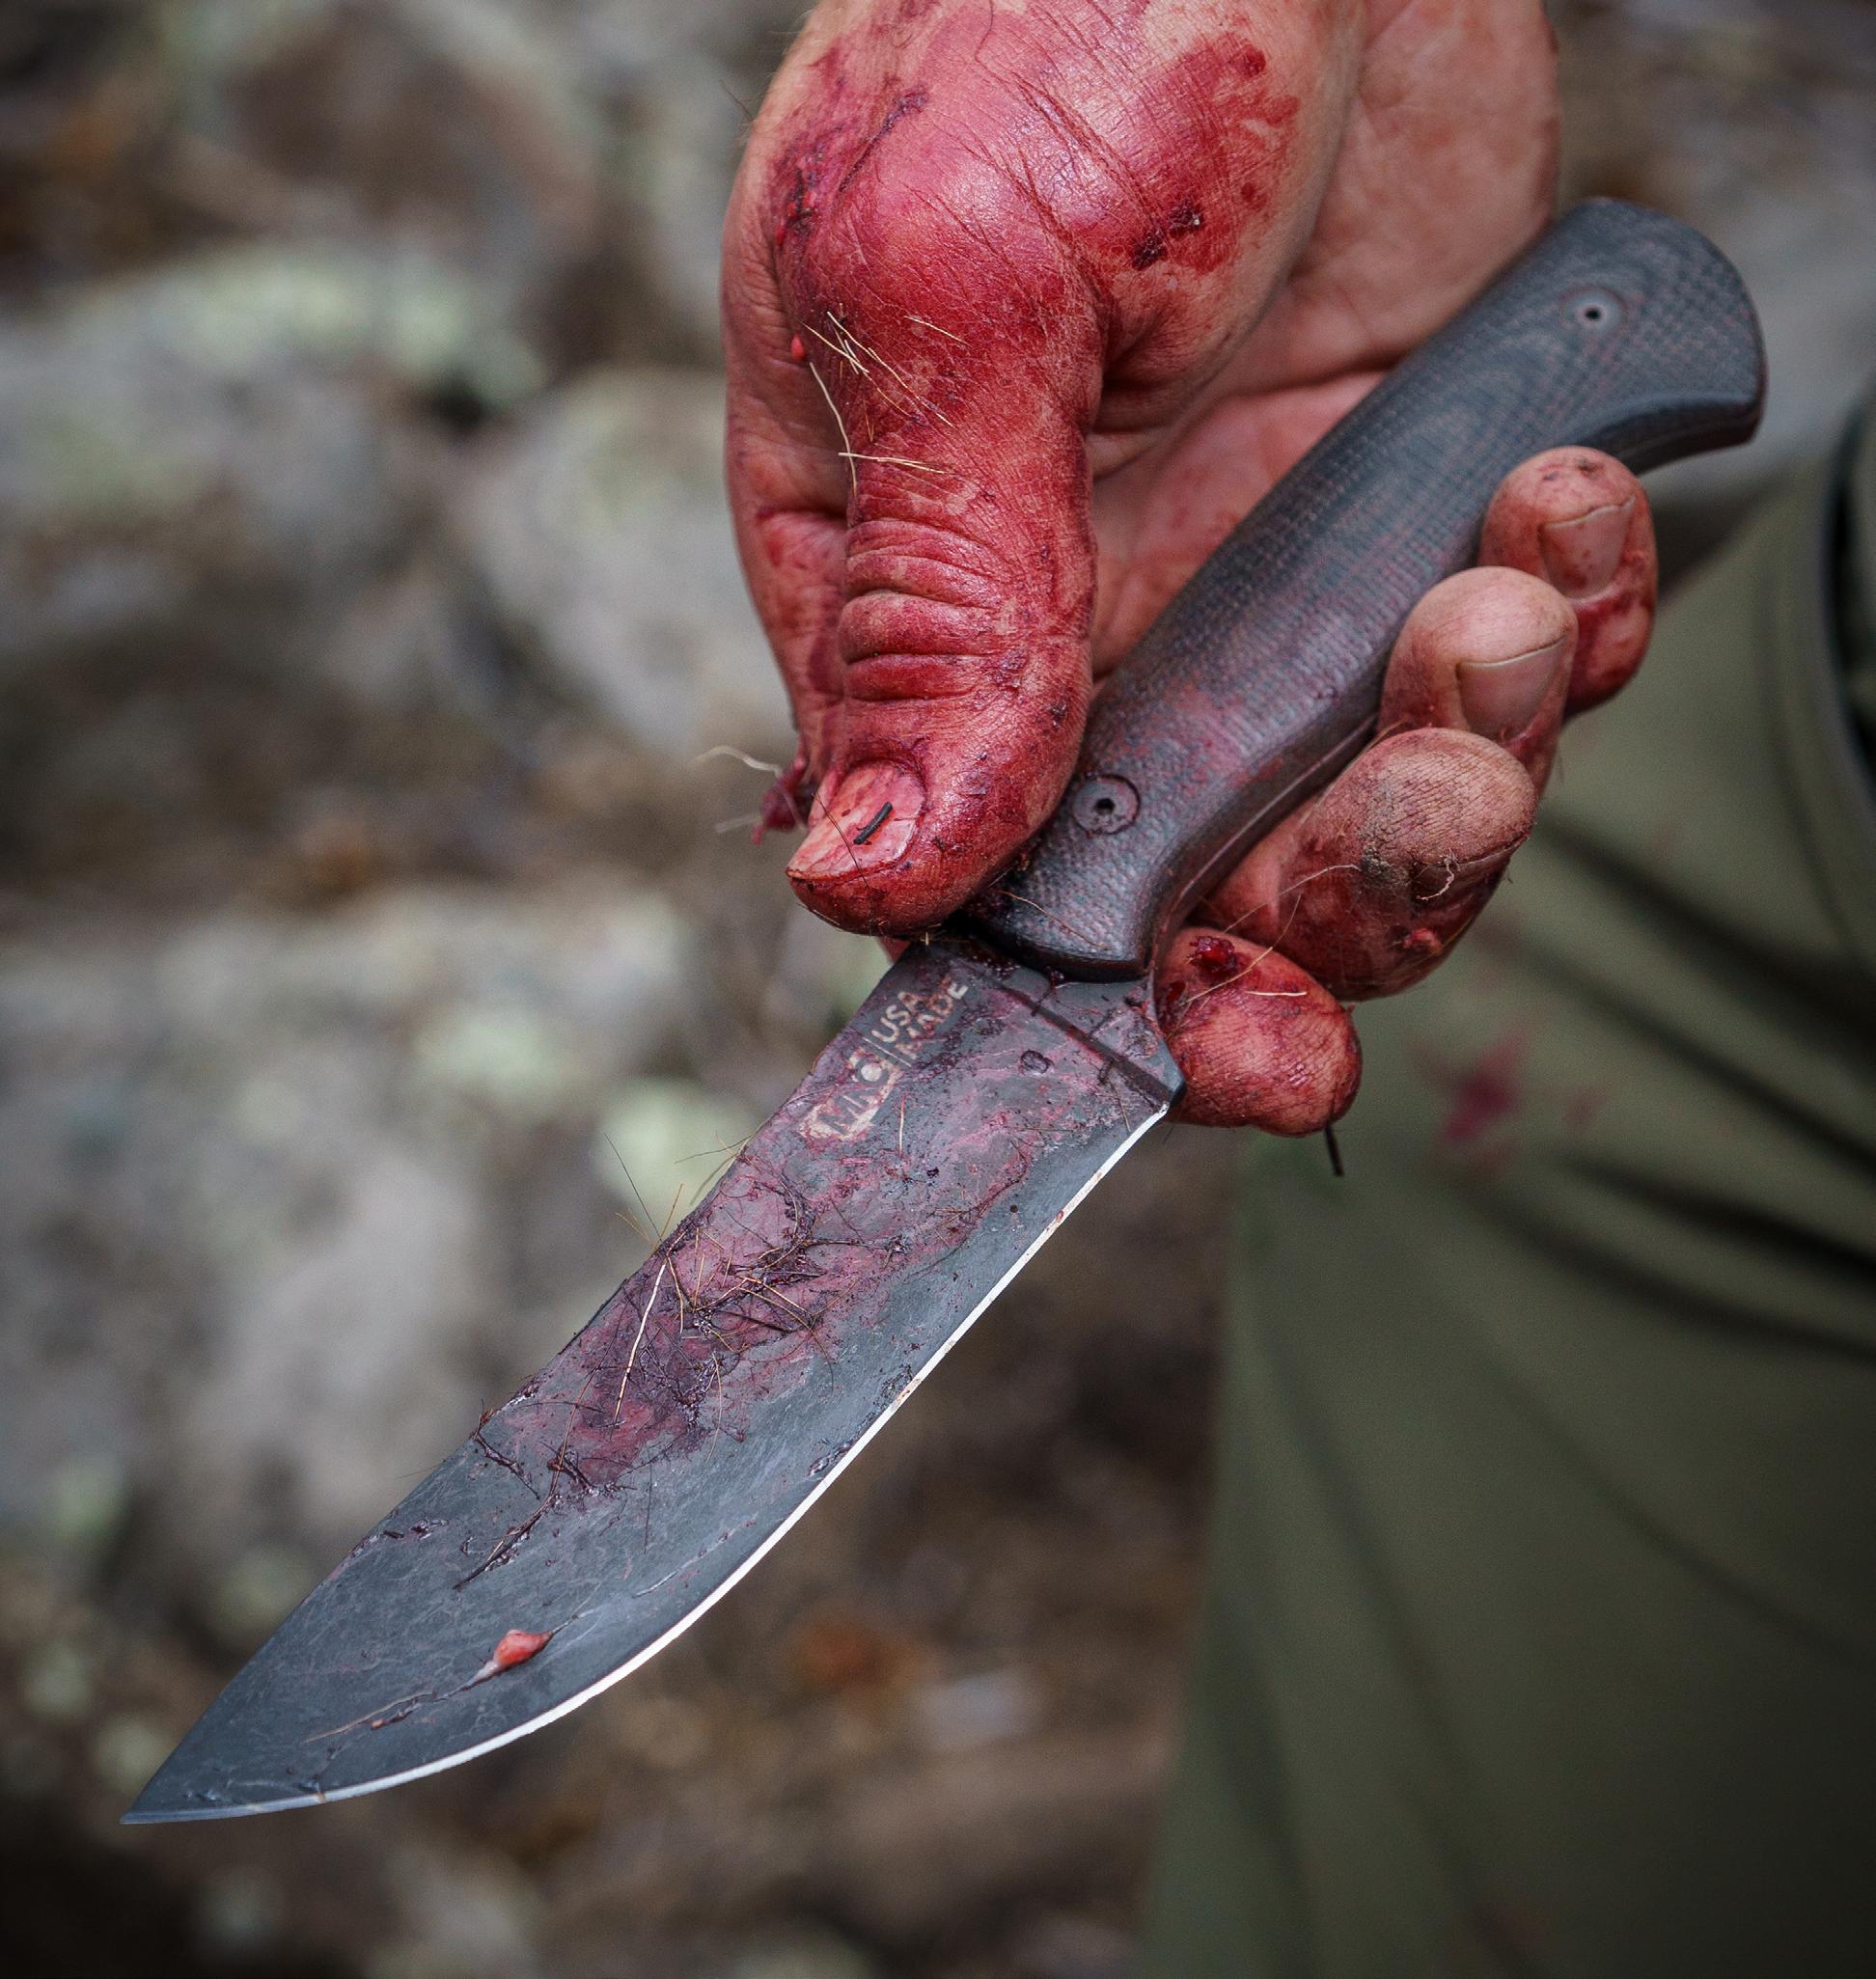
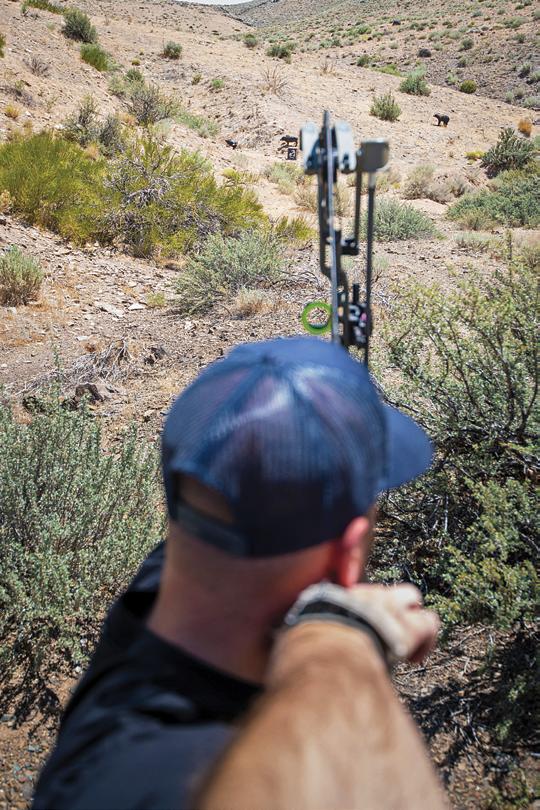
Then, I looked at my bow and decided to remove my quiver. I have heard it squeak before when taking it off so I tried spitting on the lever before carefully removing it. The buck still showed no sign of getting up, and I decided to draw and aim at him any time the wind was strong enough to cover my sound. I did this five or six times; each time going through a mental checklist of my shot sequence, focusing on my grip, anchor, level, pin, and the spot I wanted to hit. Each time I drew, I could feel the nerves melt away. I was ready. It took three hours from the time I got above him for the buck to finally stand up. When he did, he and his little buddy were both staring straight uphill. I don’t believe they knew I was there. Regardless of the way he was looking, I knew I needed to shoot quickly. I’ve seen too many bucks stand straight up and start walking. Before he was completely to his feet, I had my bow drawn. Faster than I could think through the shot sequence, I had already gone through my steps and the pin was on its mark. The bow went off without conscious
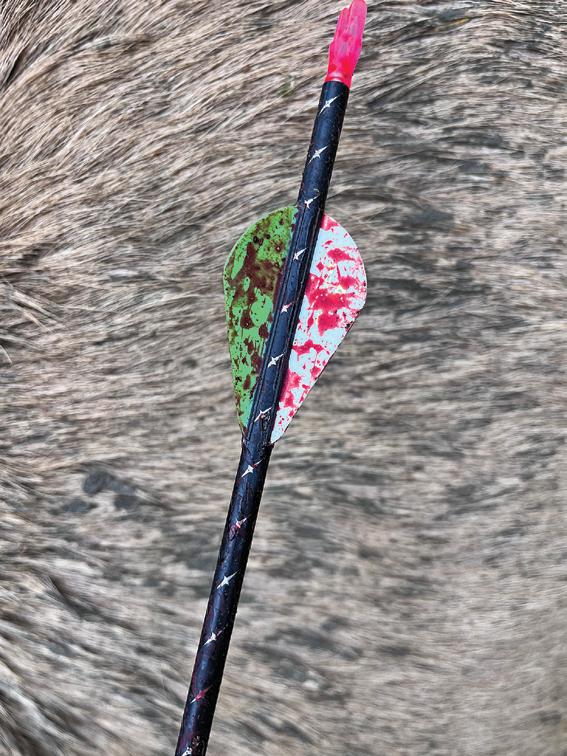
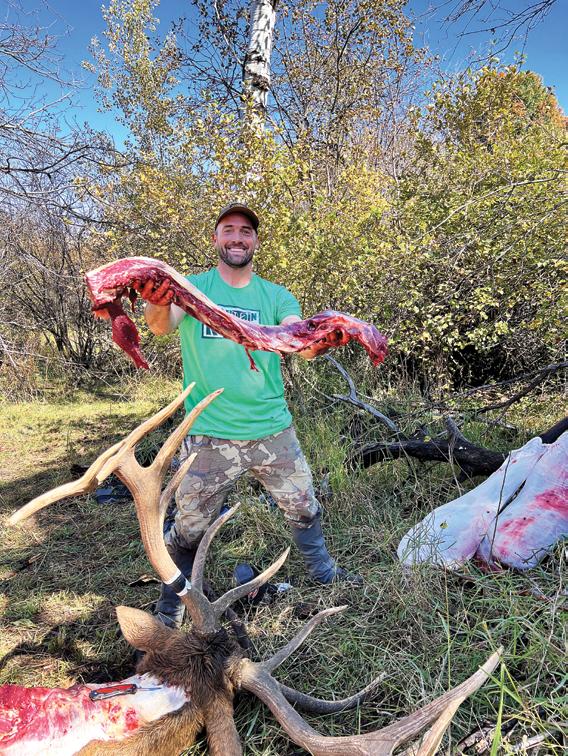
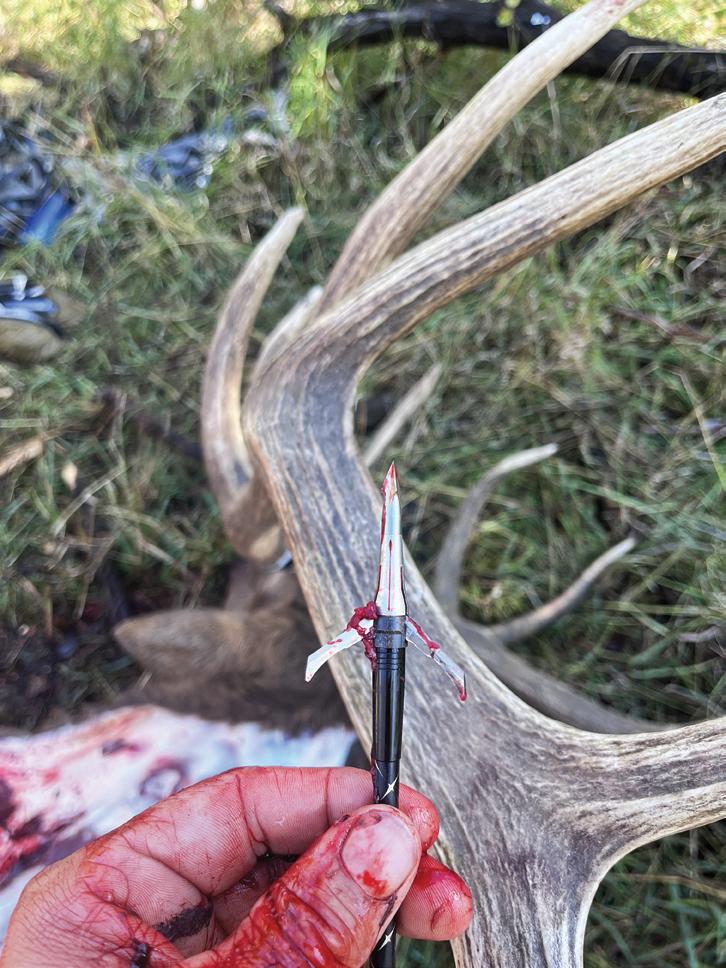
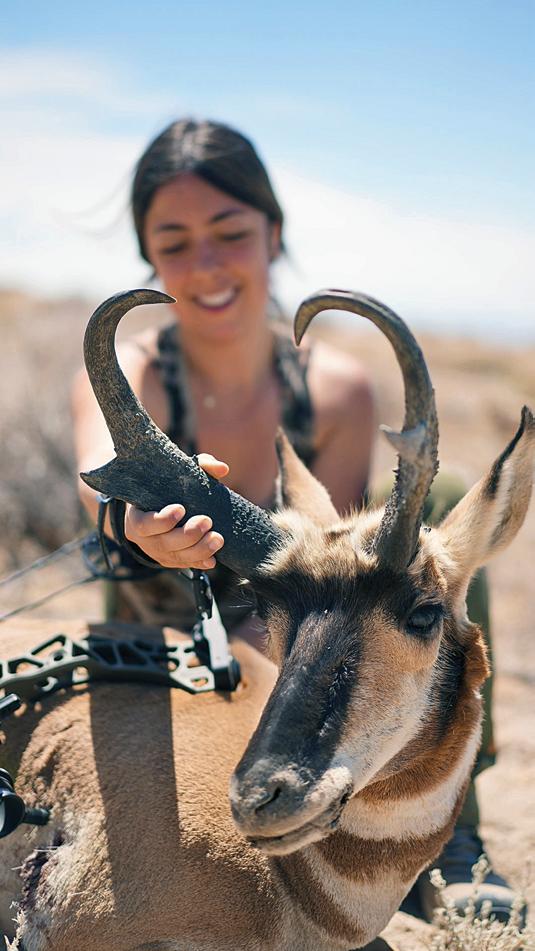
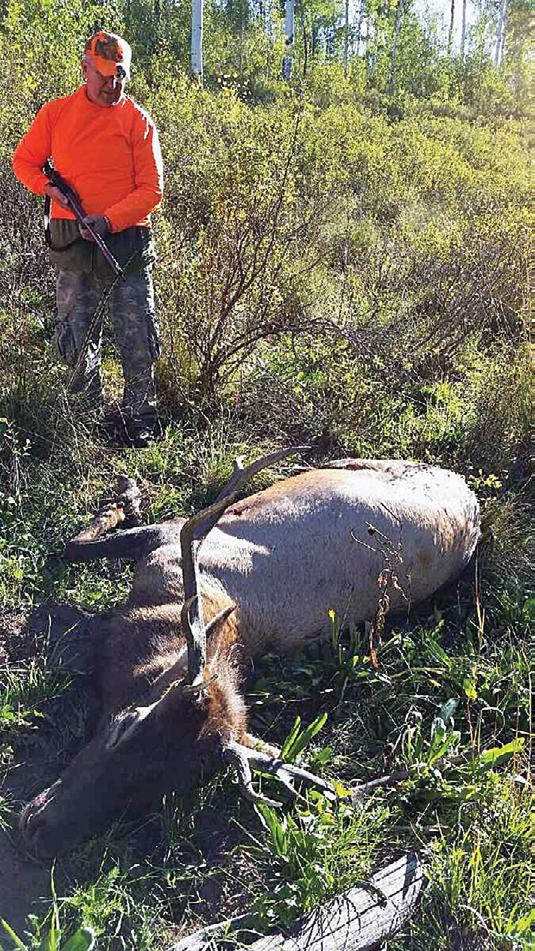
It sounded like a watermelon getting hit by a baseball bat. I could tell the buck was sick instantly, and he ran for 60 yards and stopped. When he stopped, I could see the arrow sticking out of him. It was at the perfect height but a bit
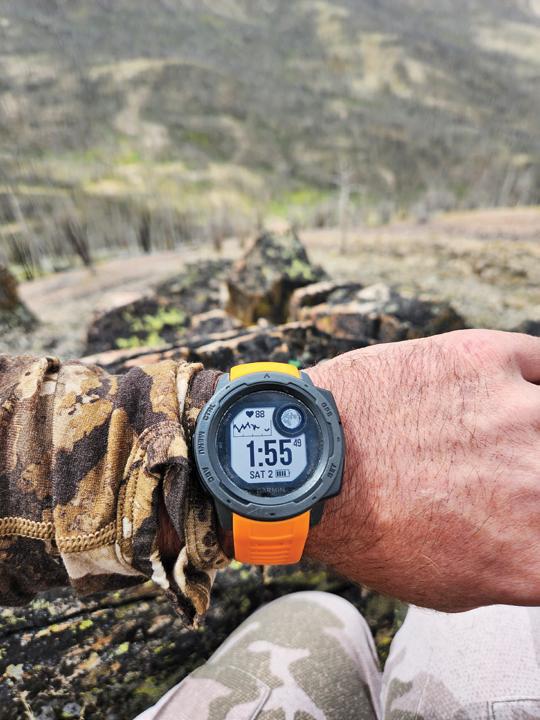
I noticed that the thermals were not stable and decided to wait another hour
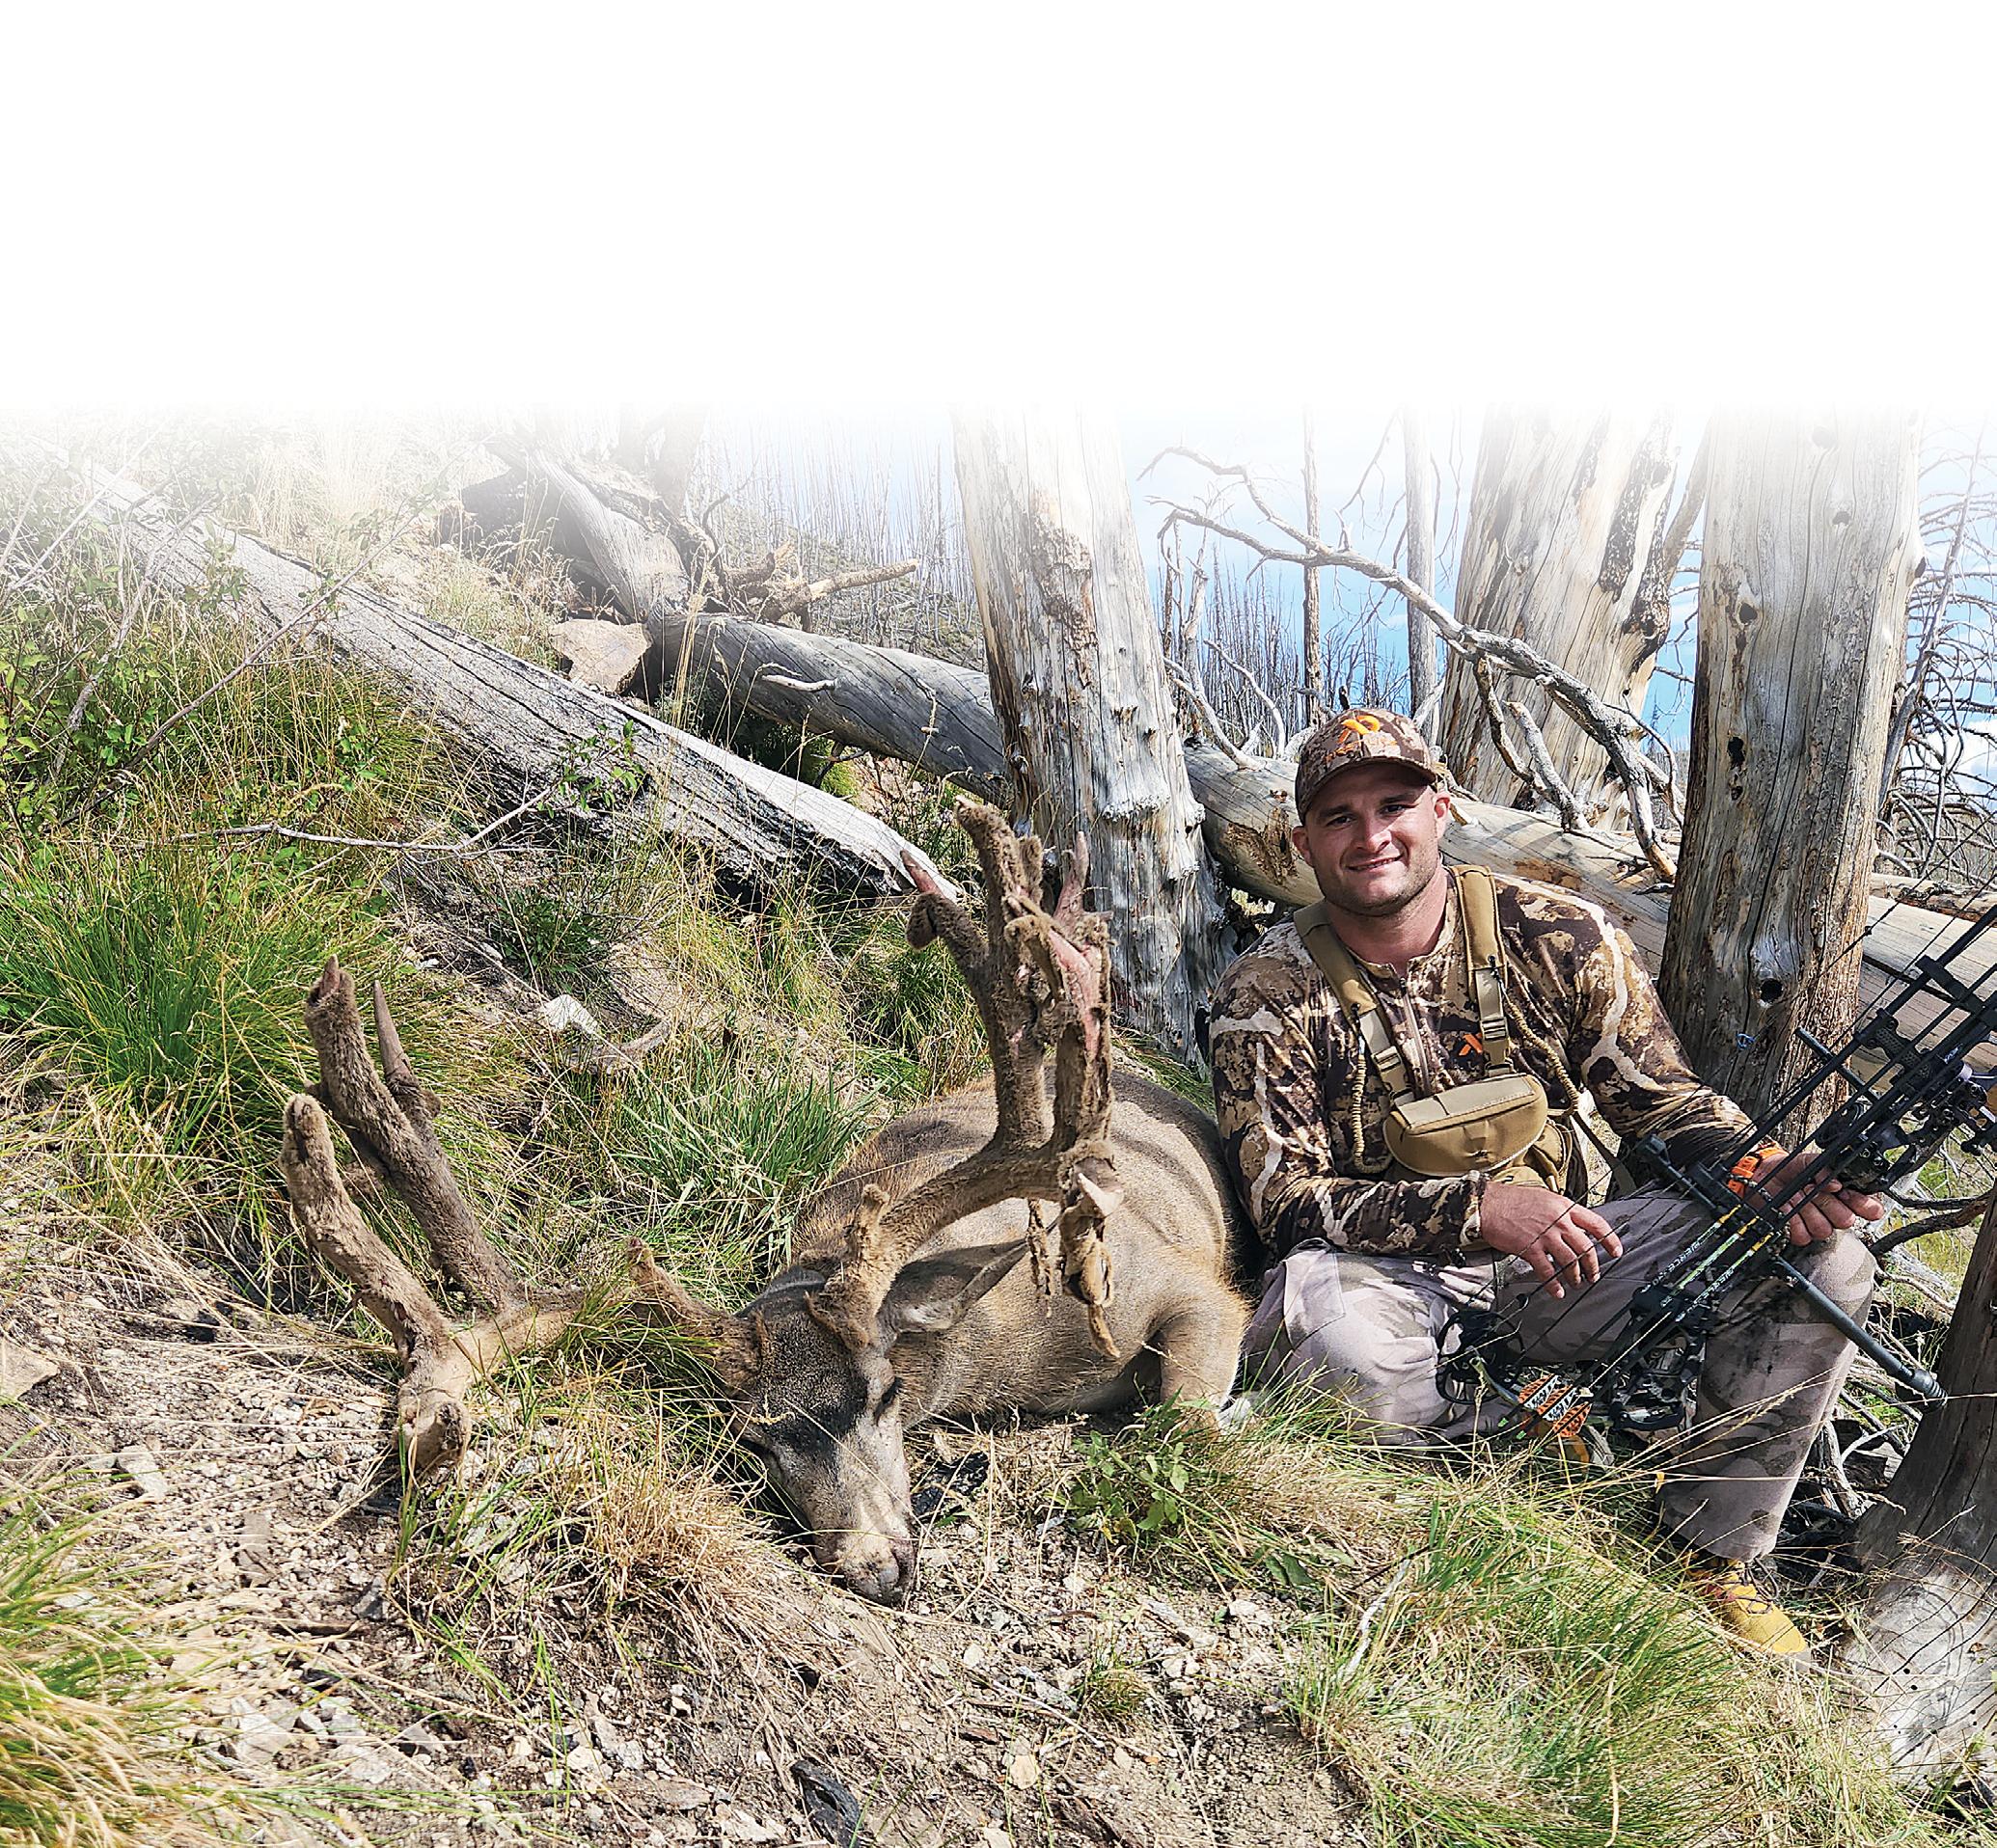
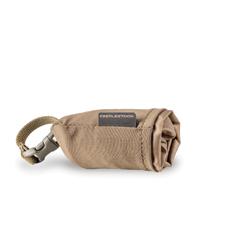
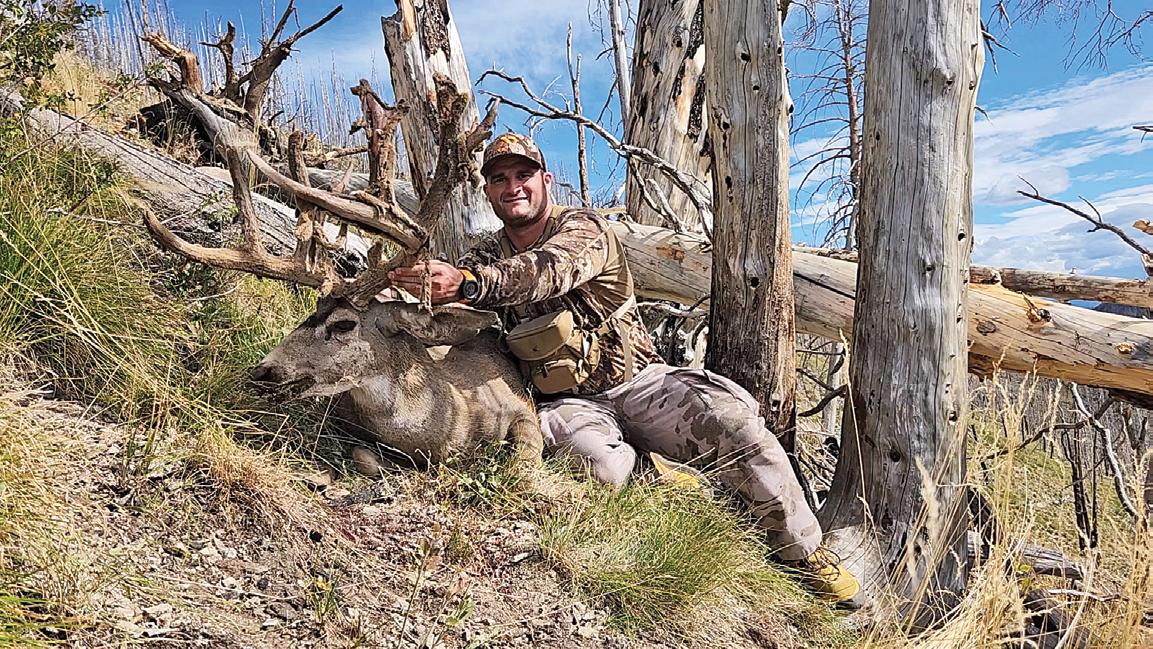
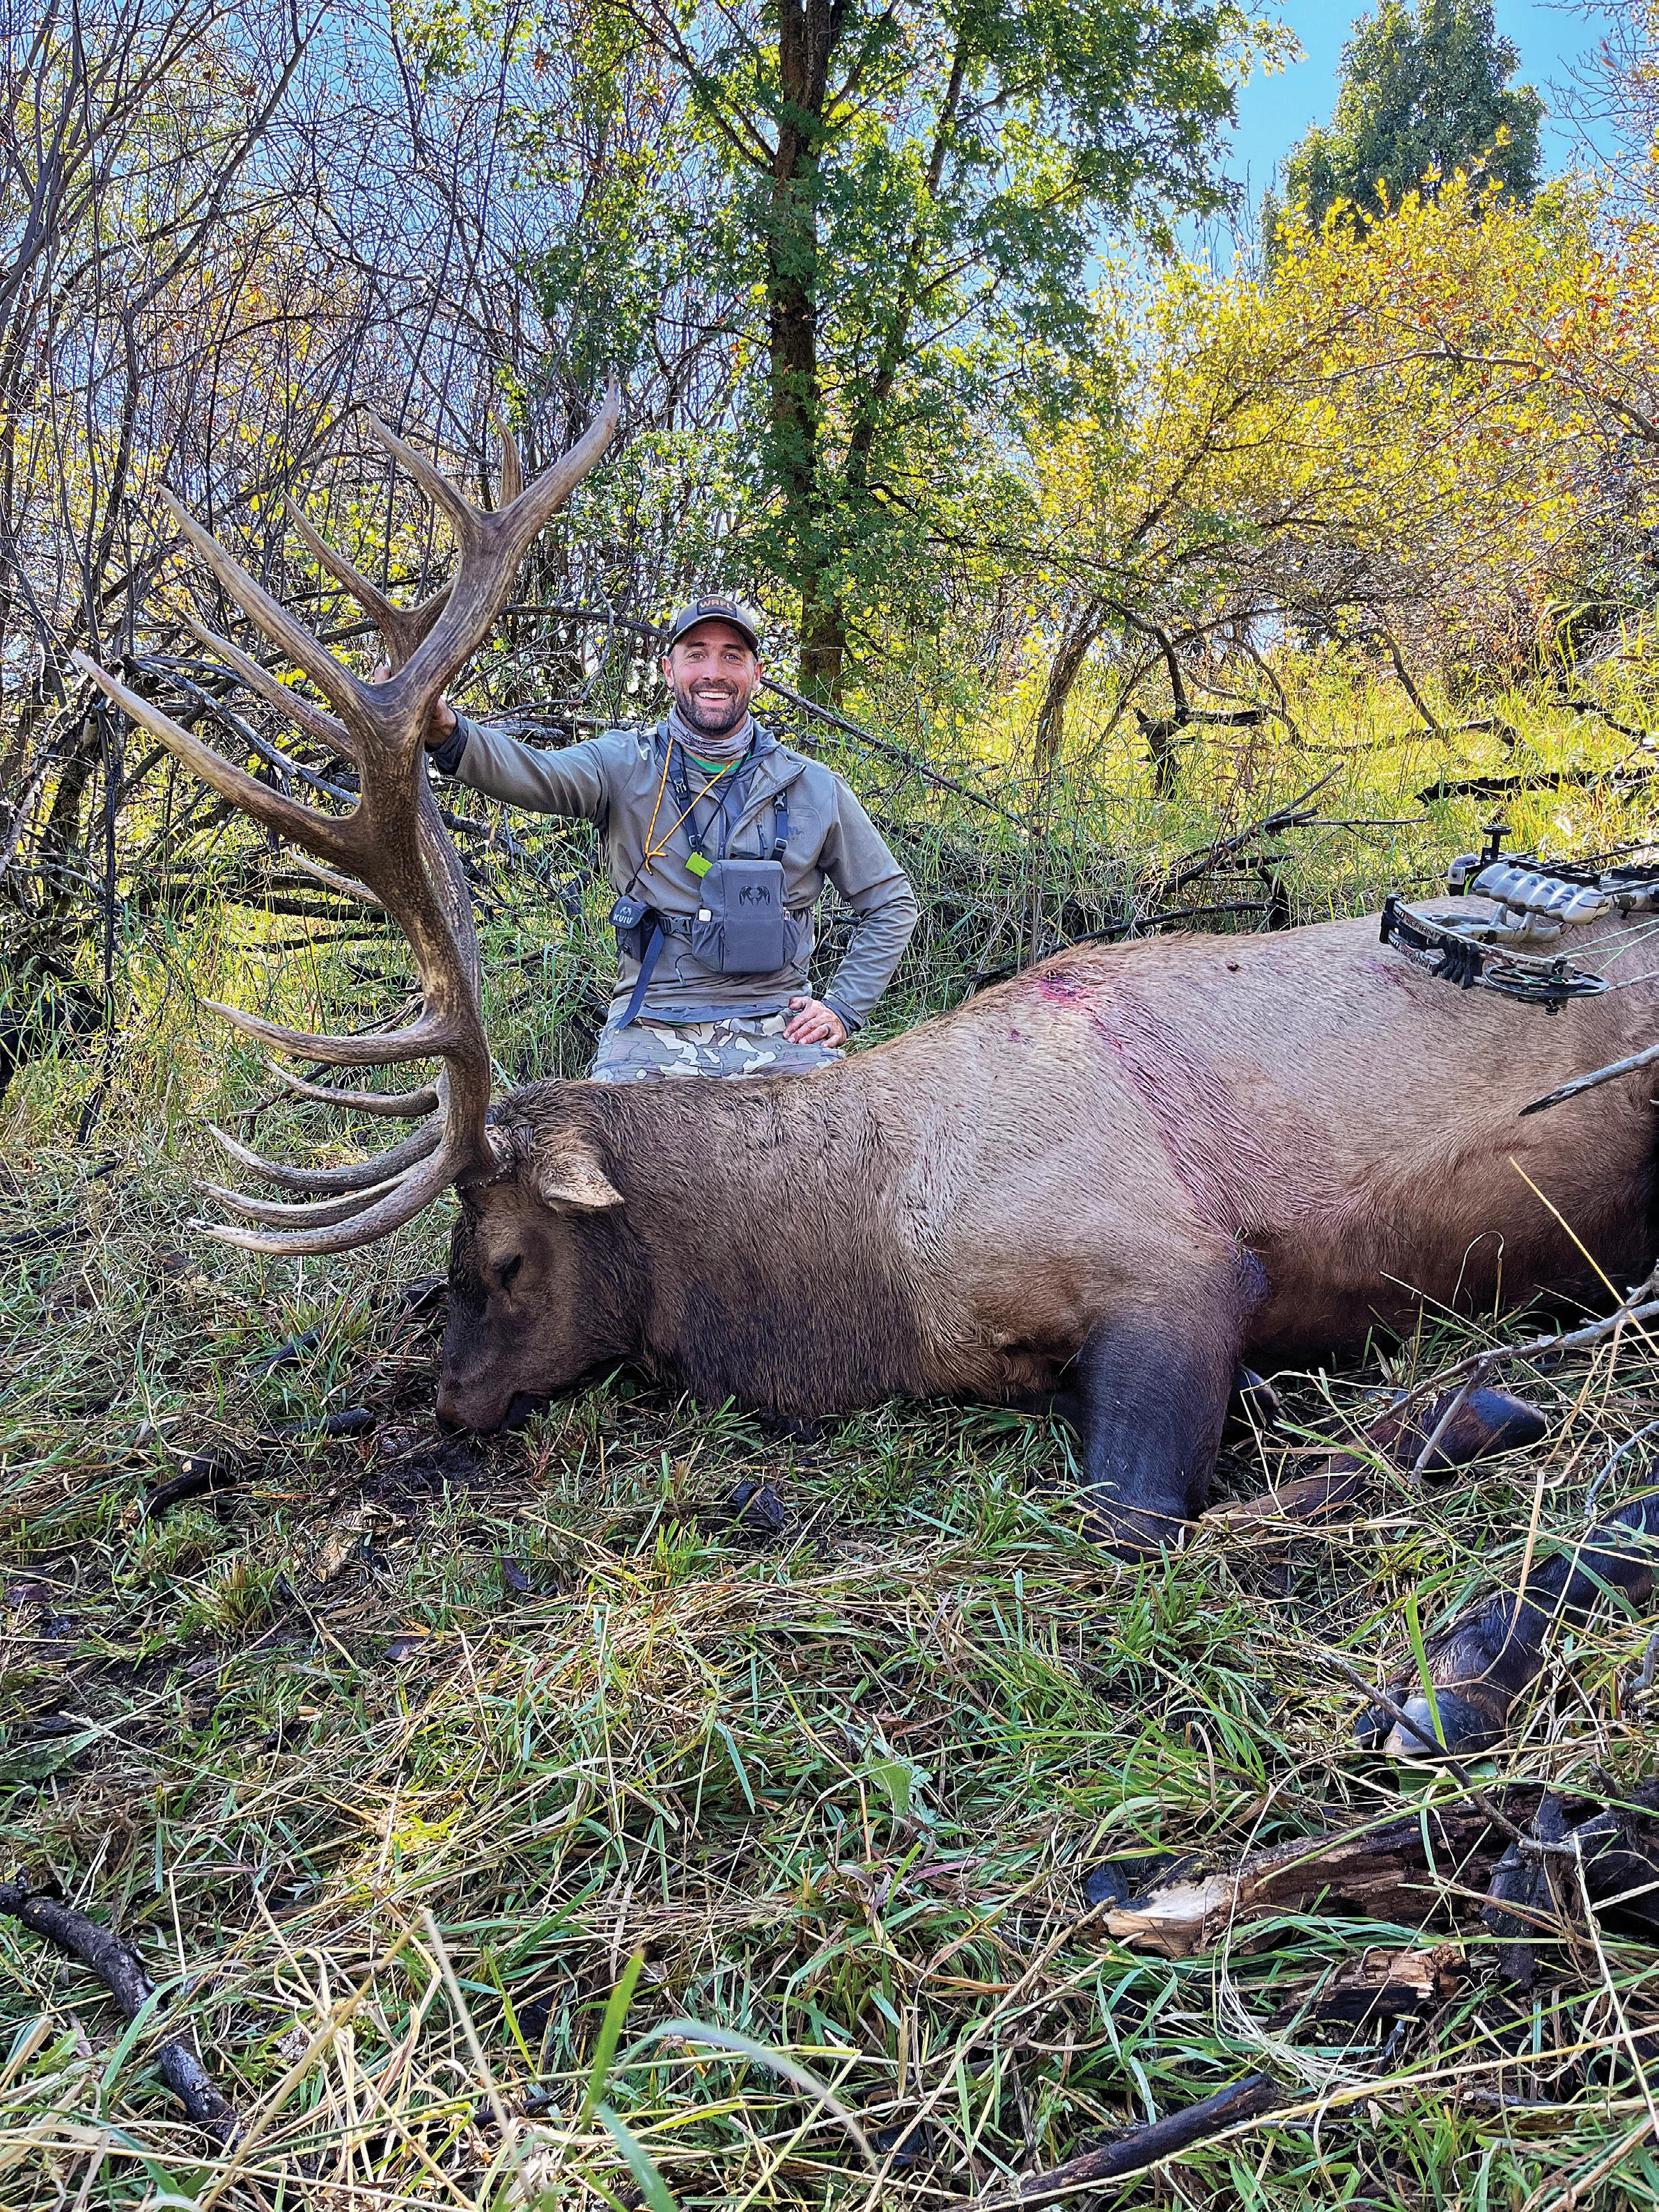
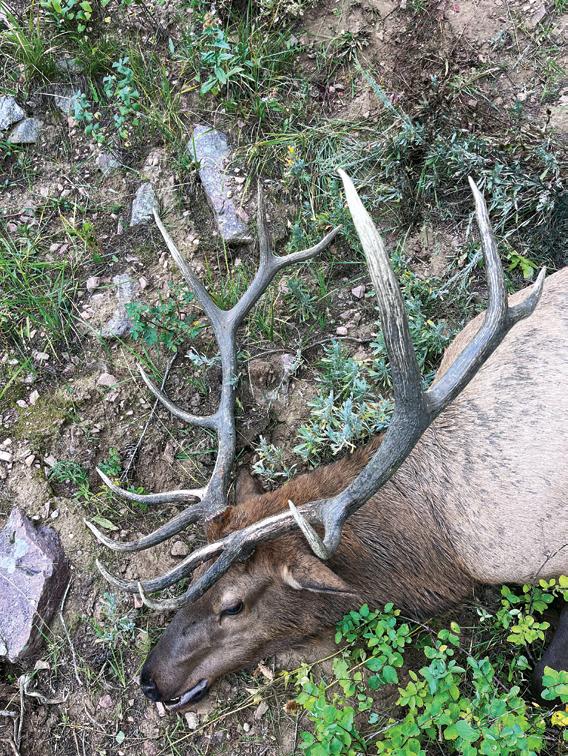
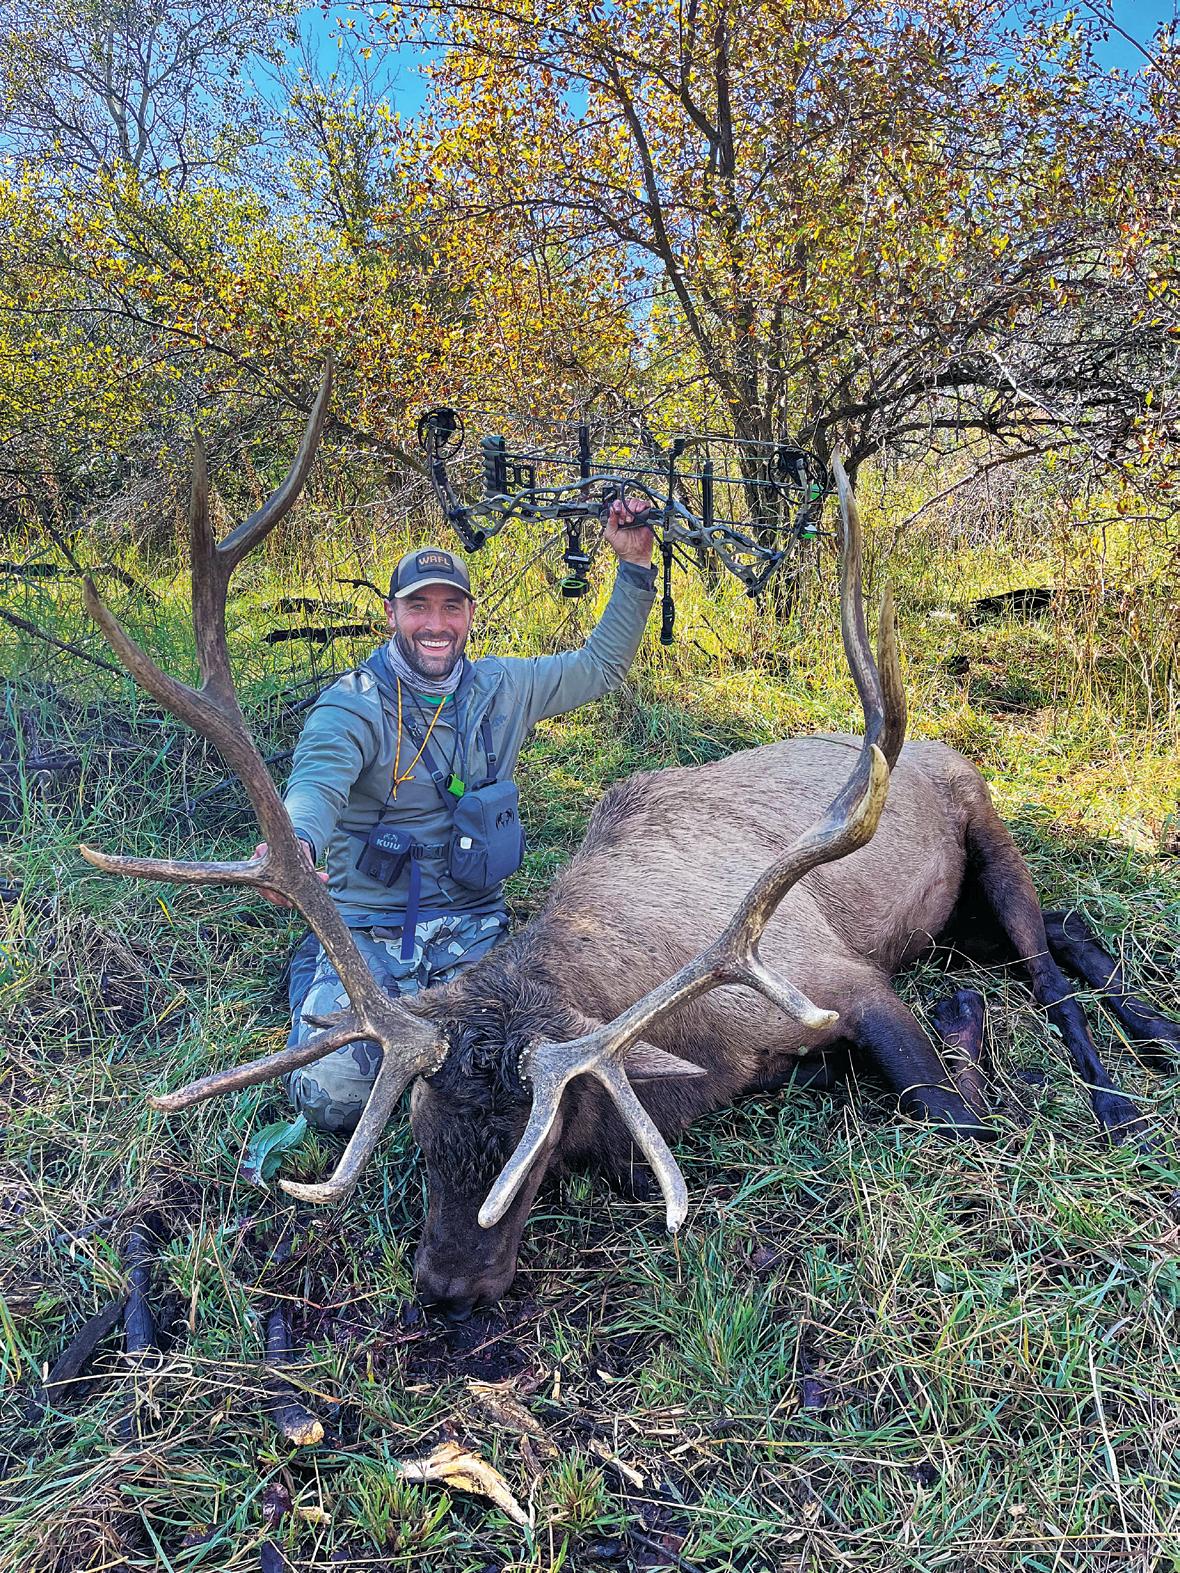
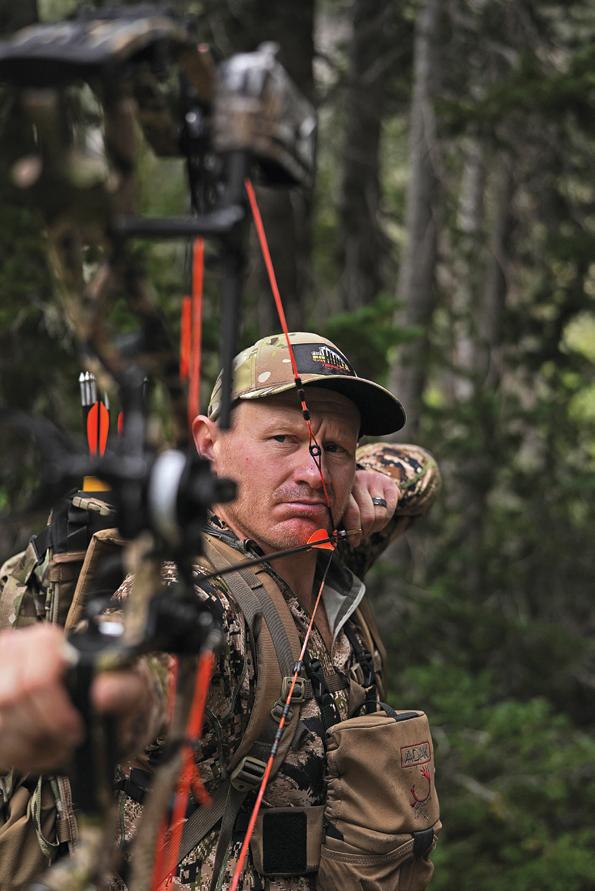
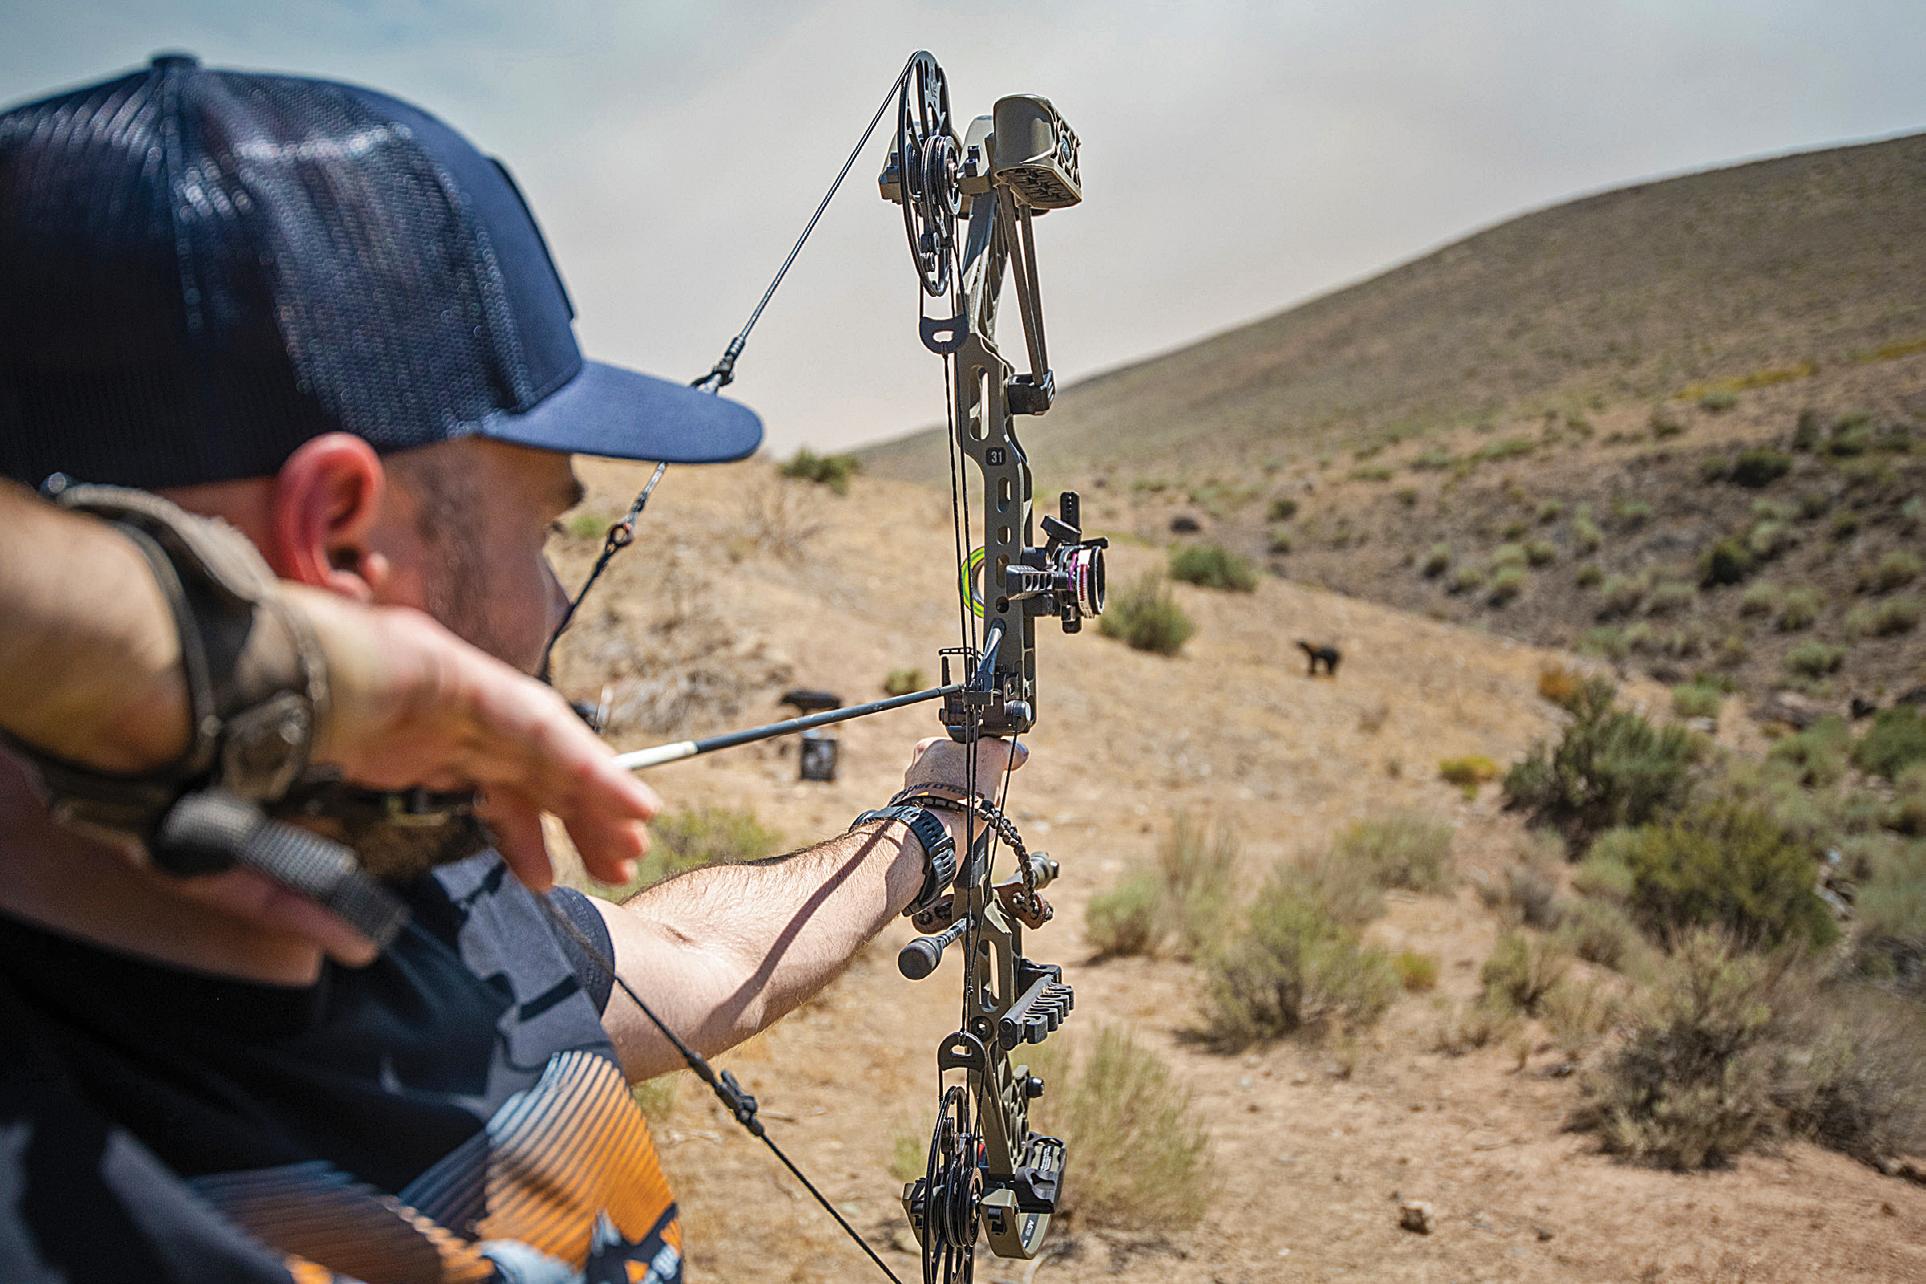
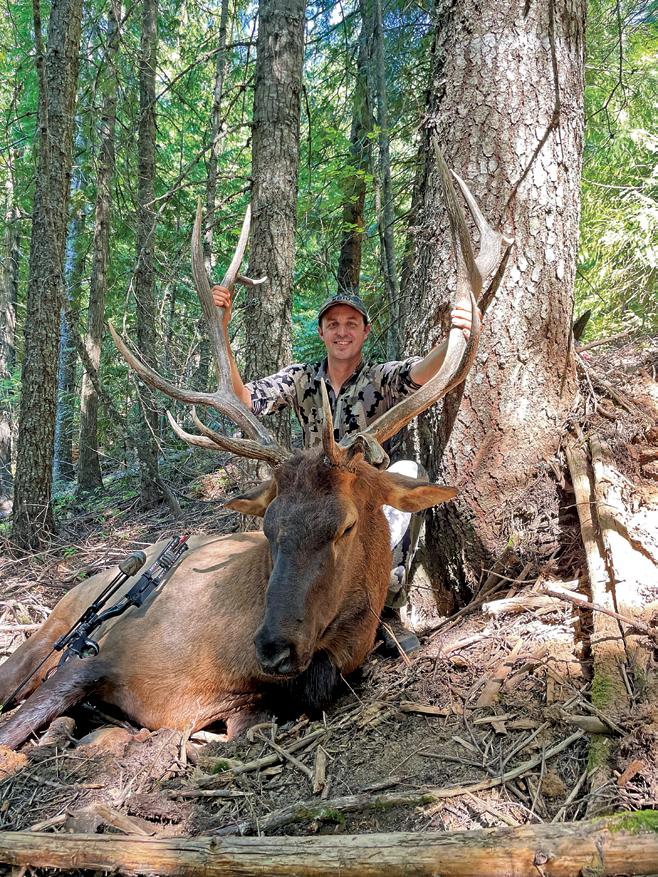
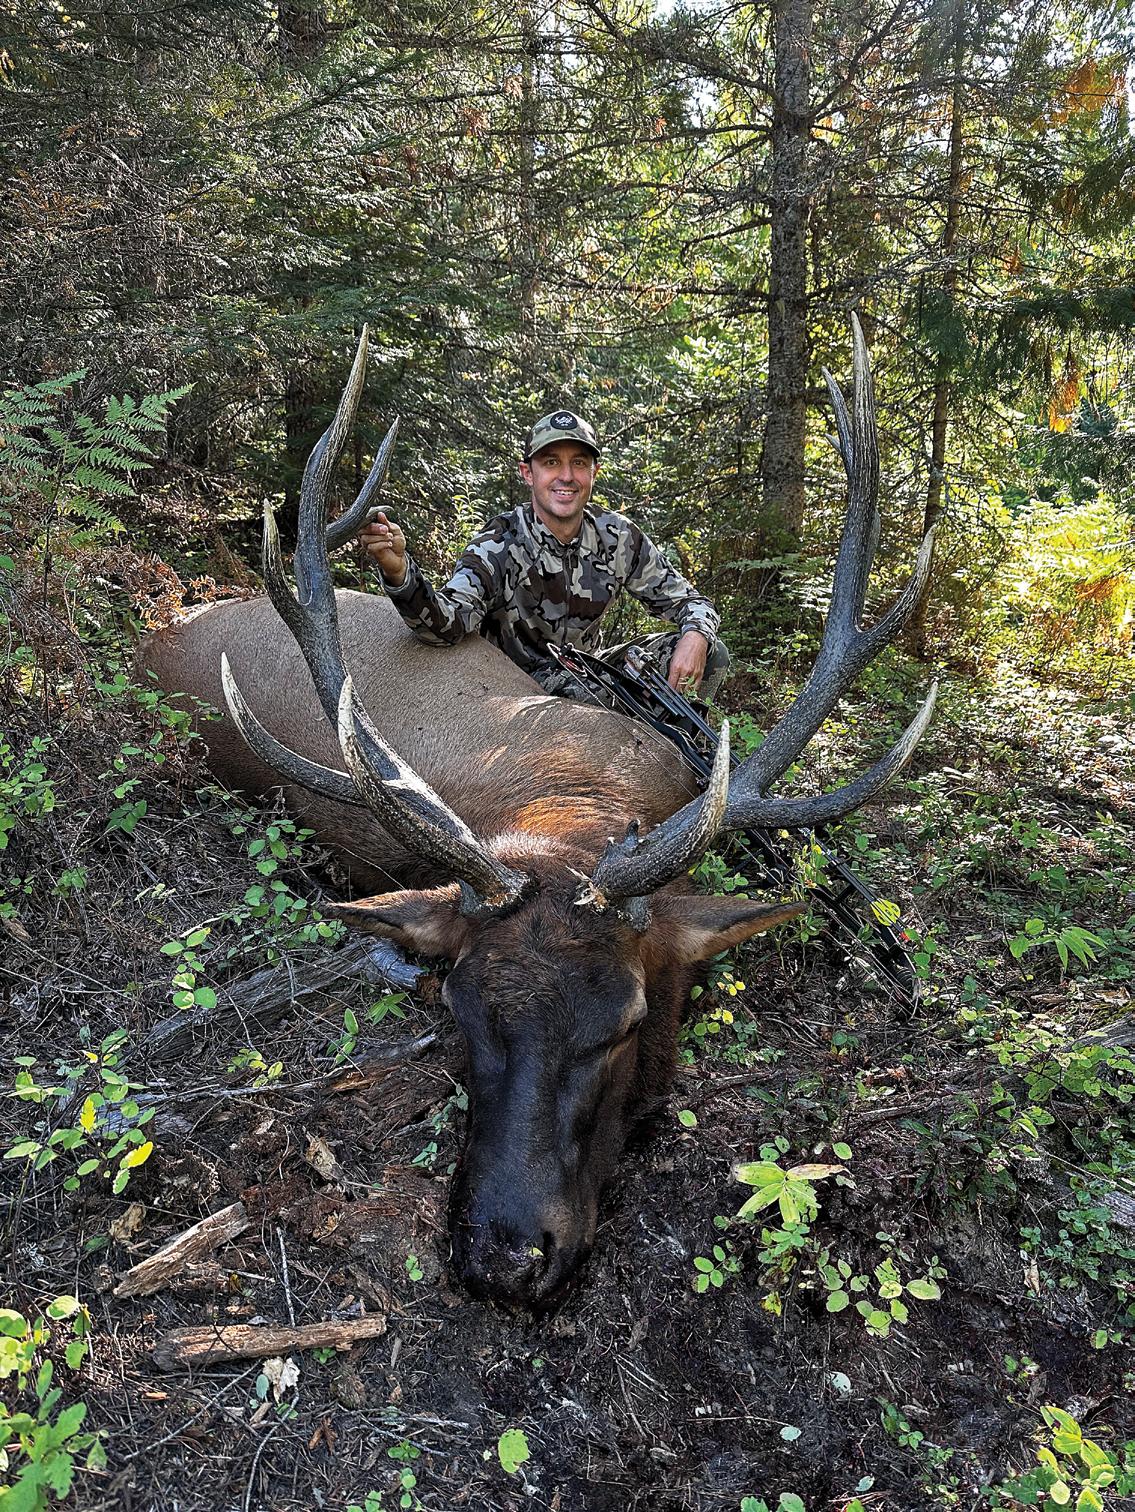
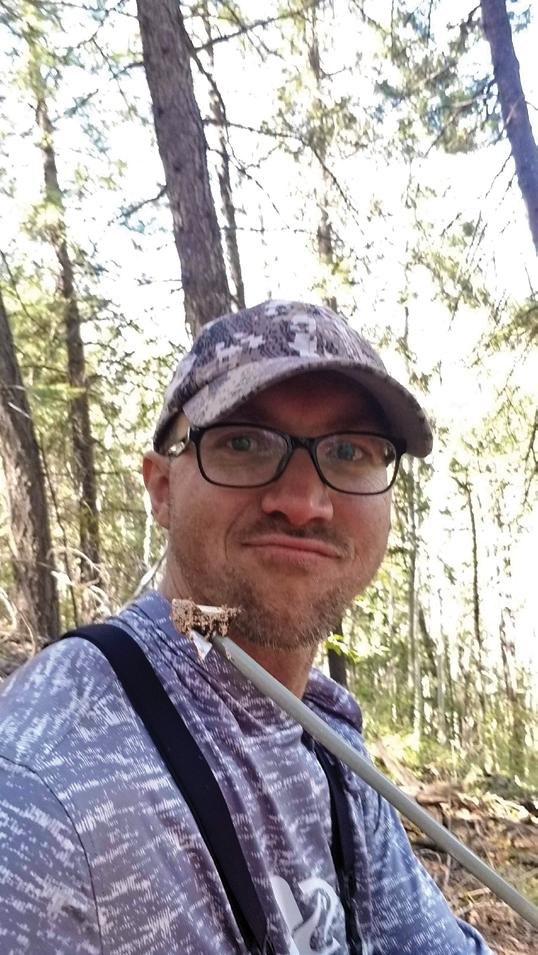
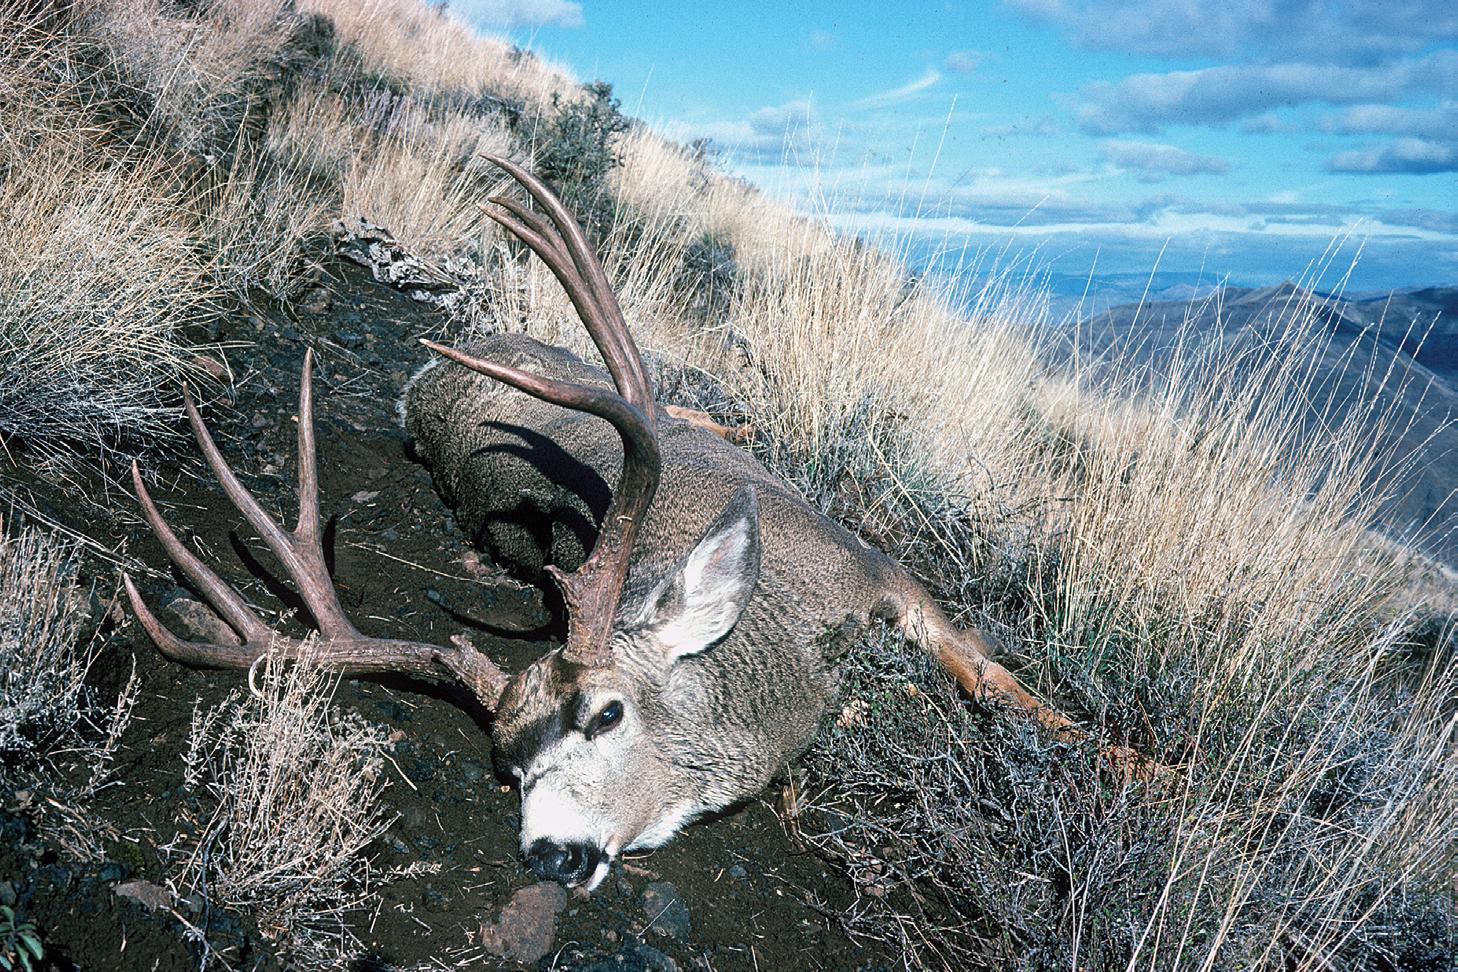
n Dioni at full draw.
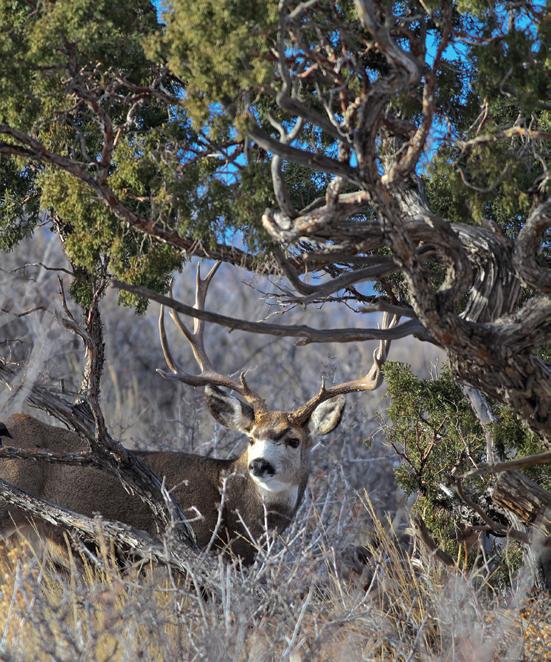
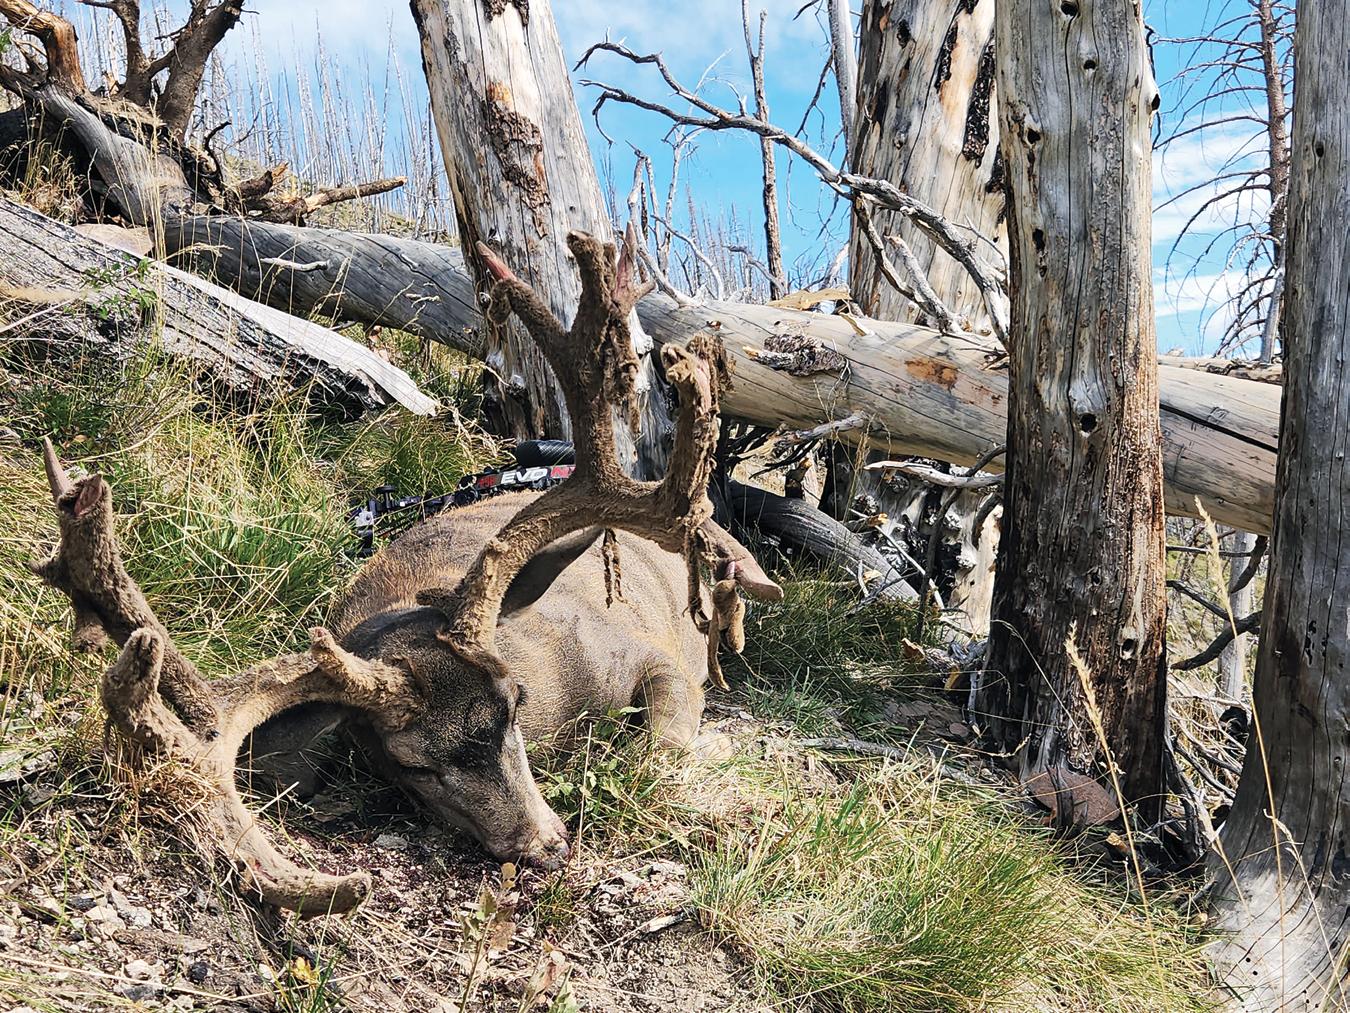
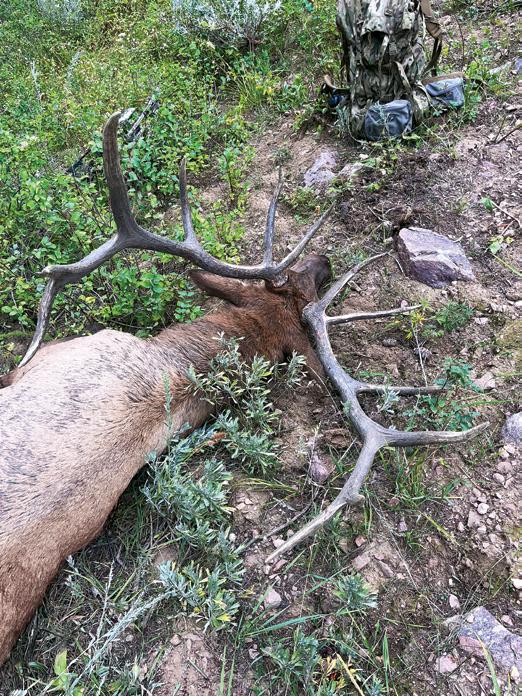
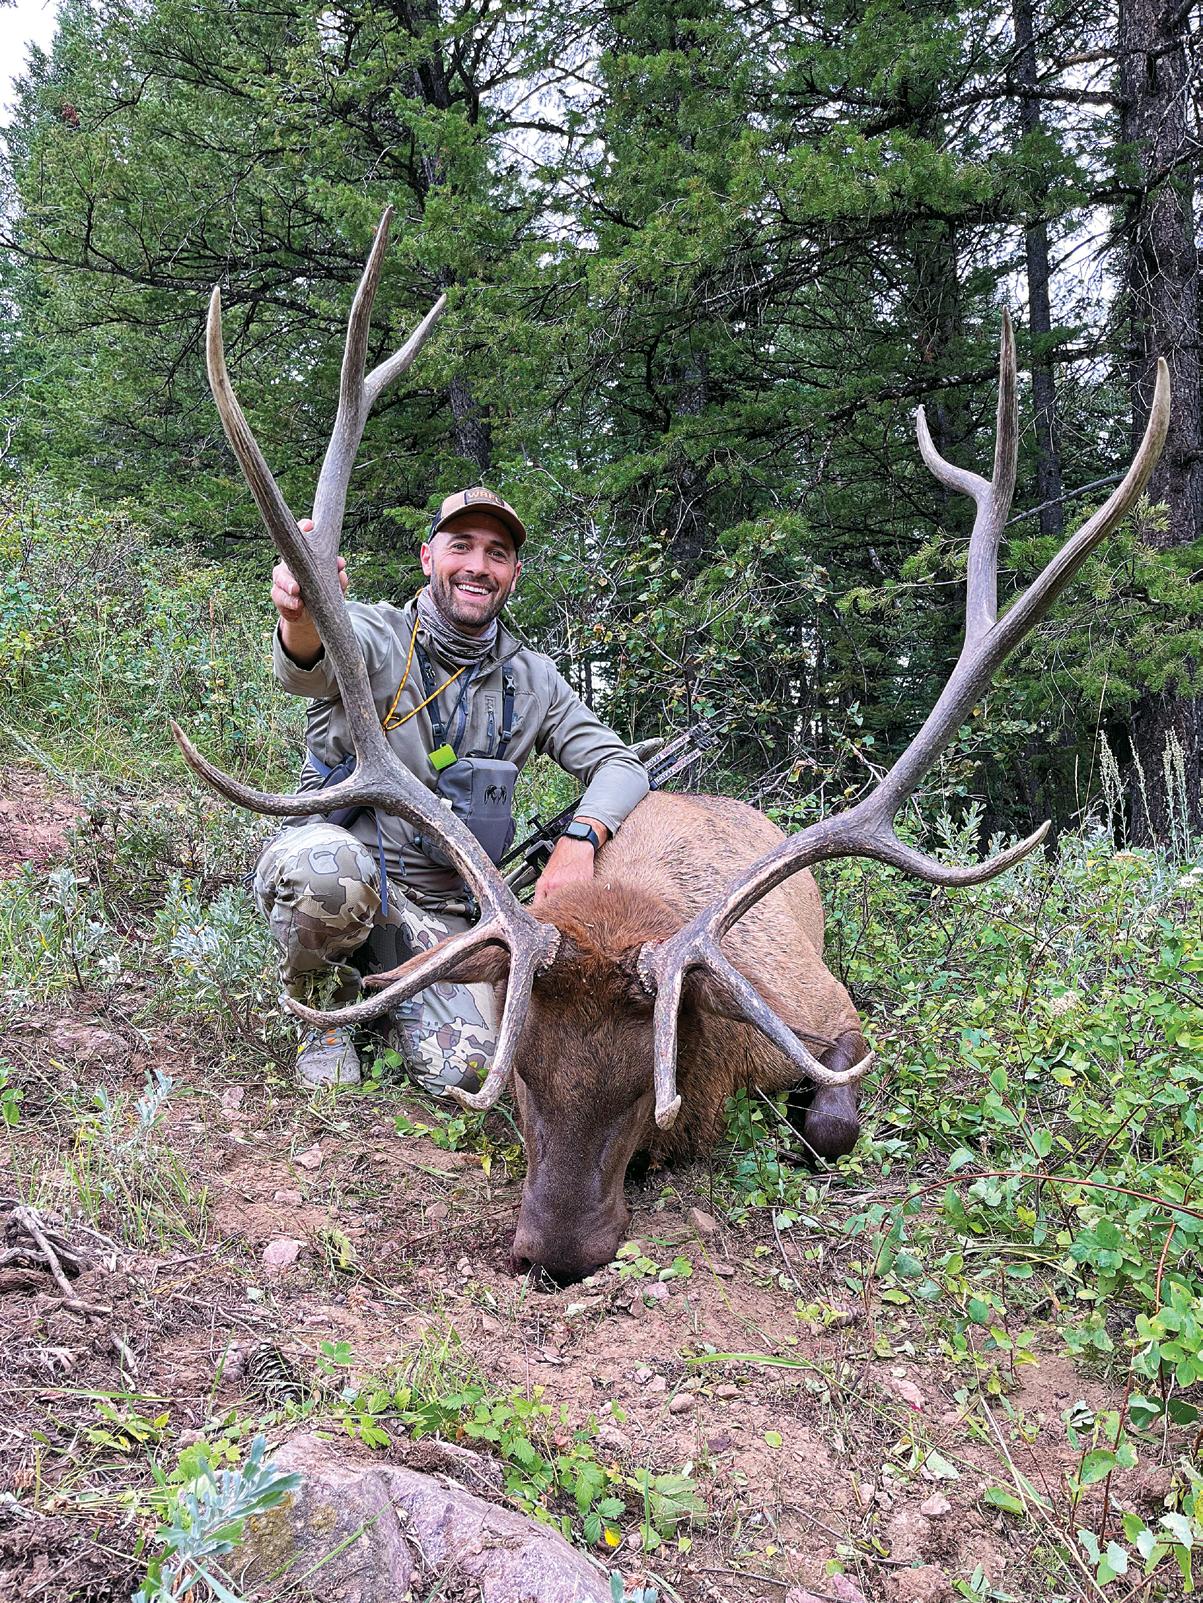
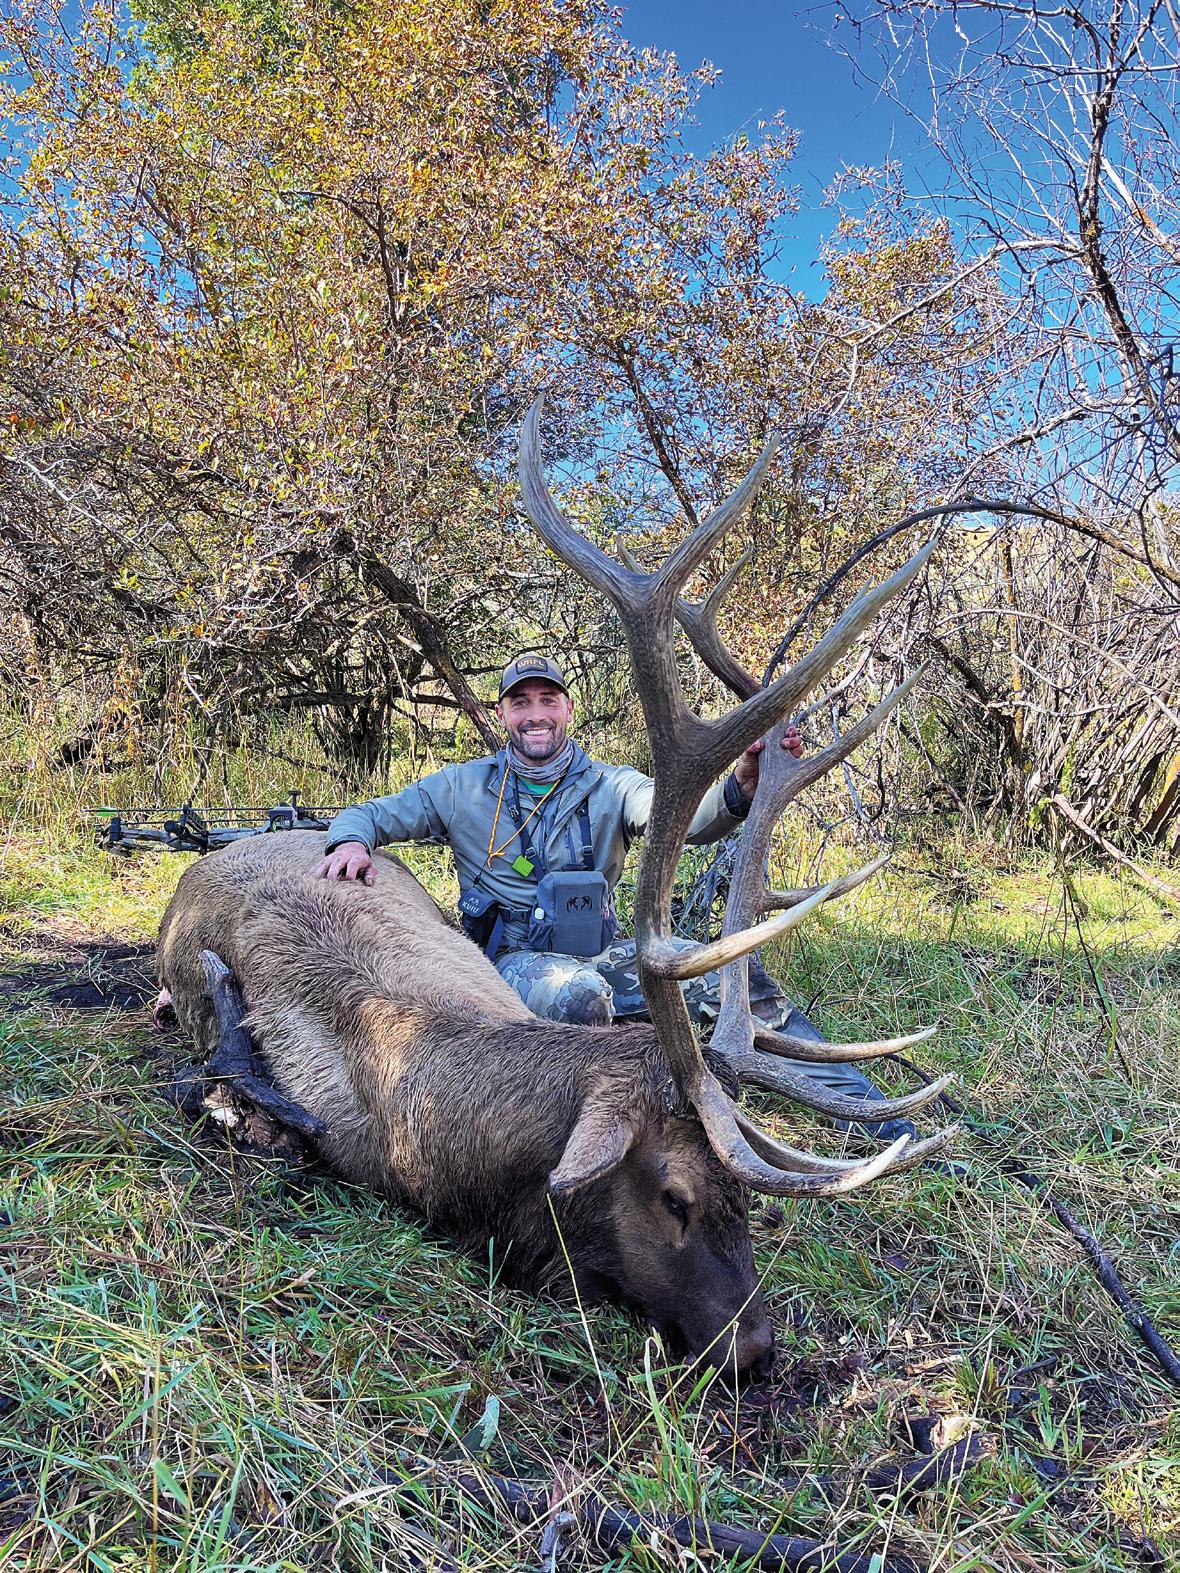
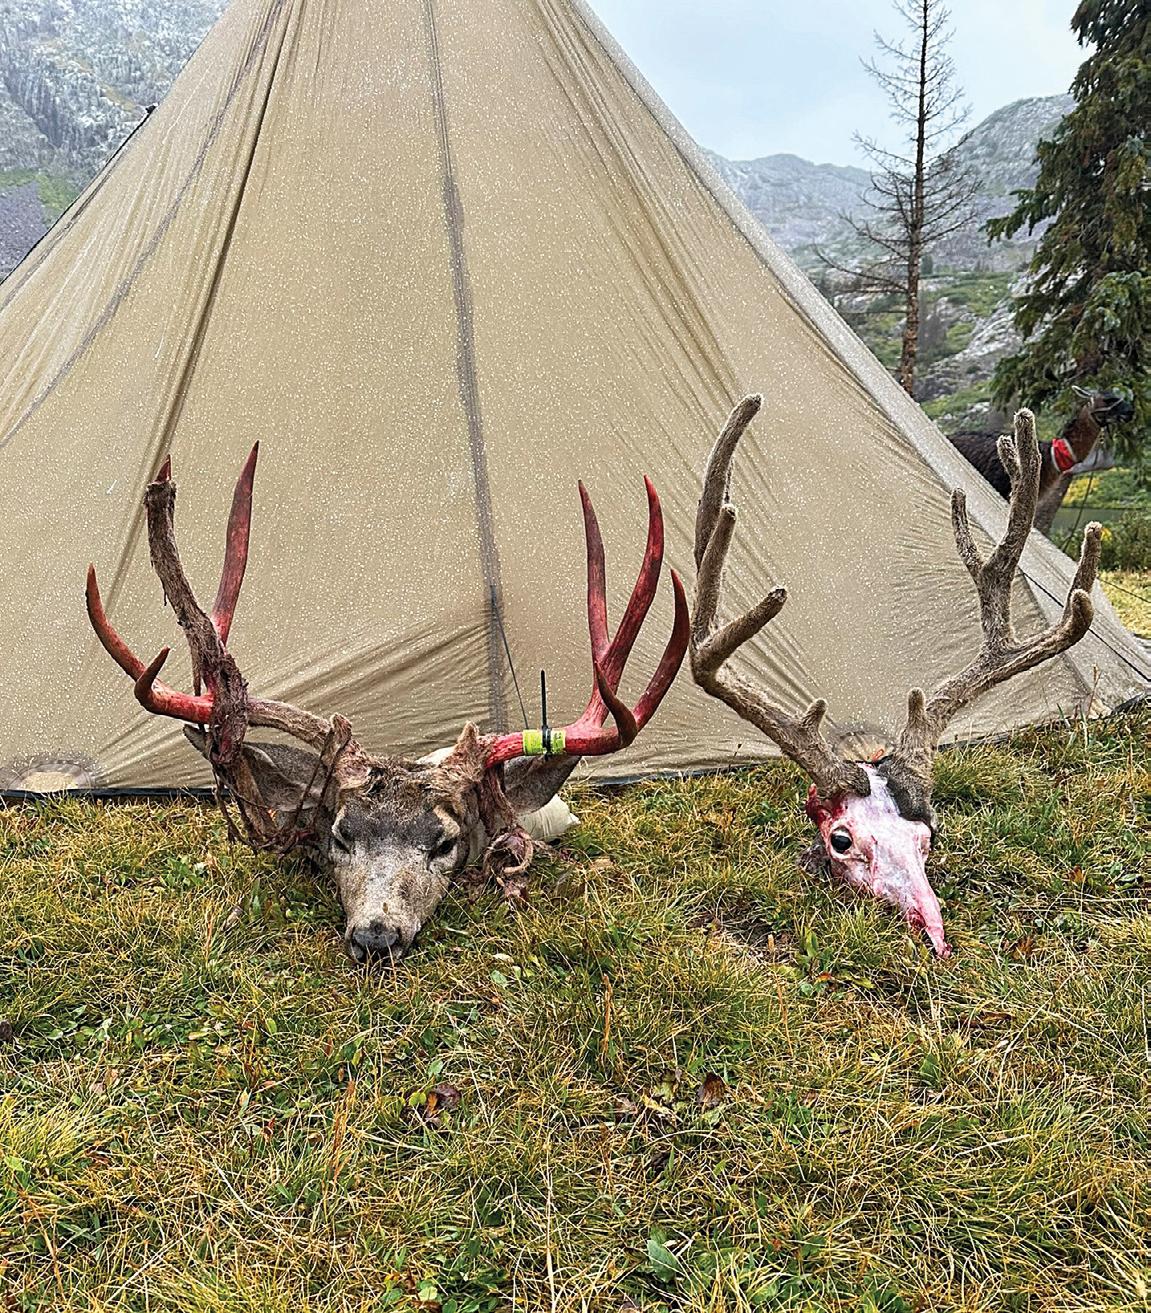
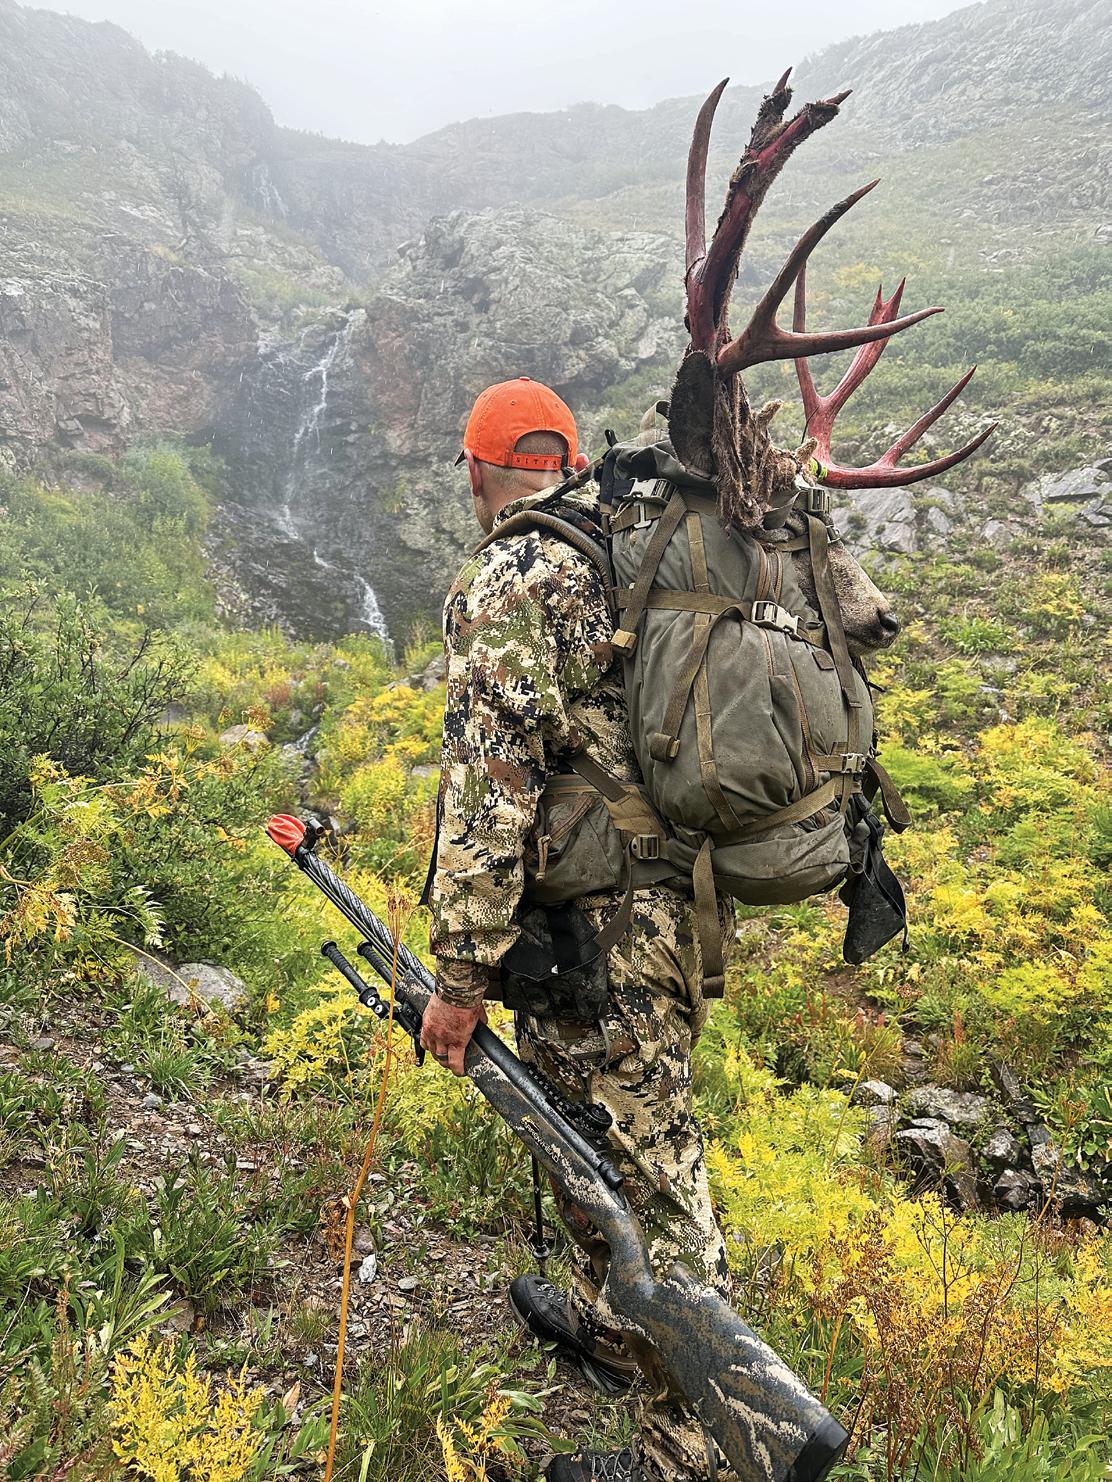
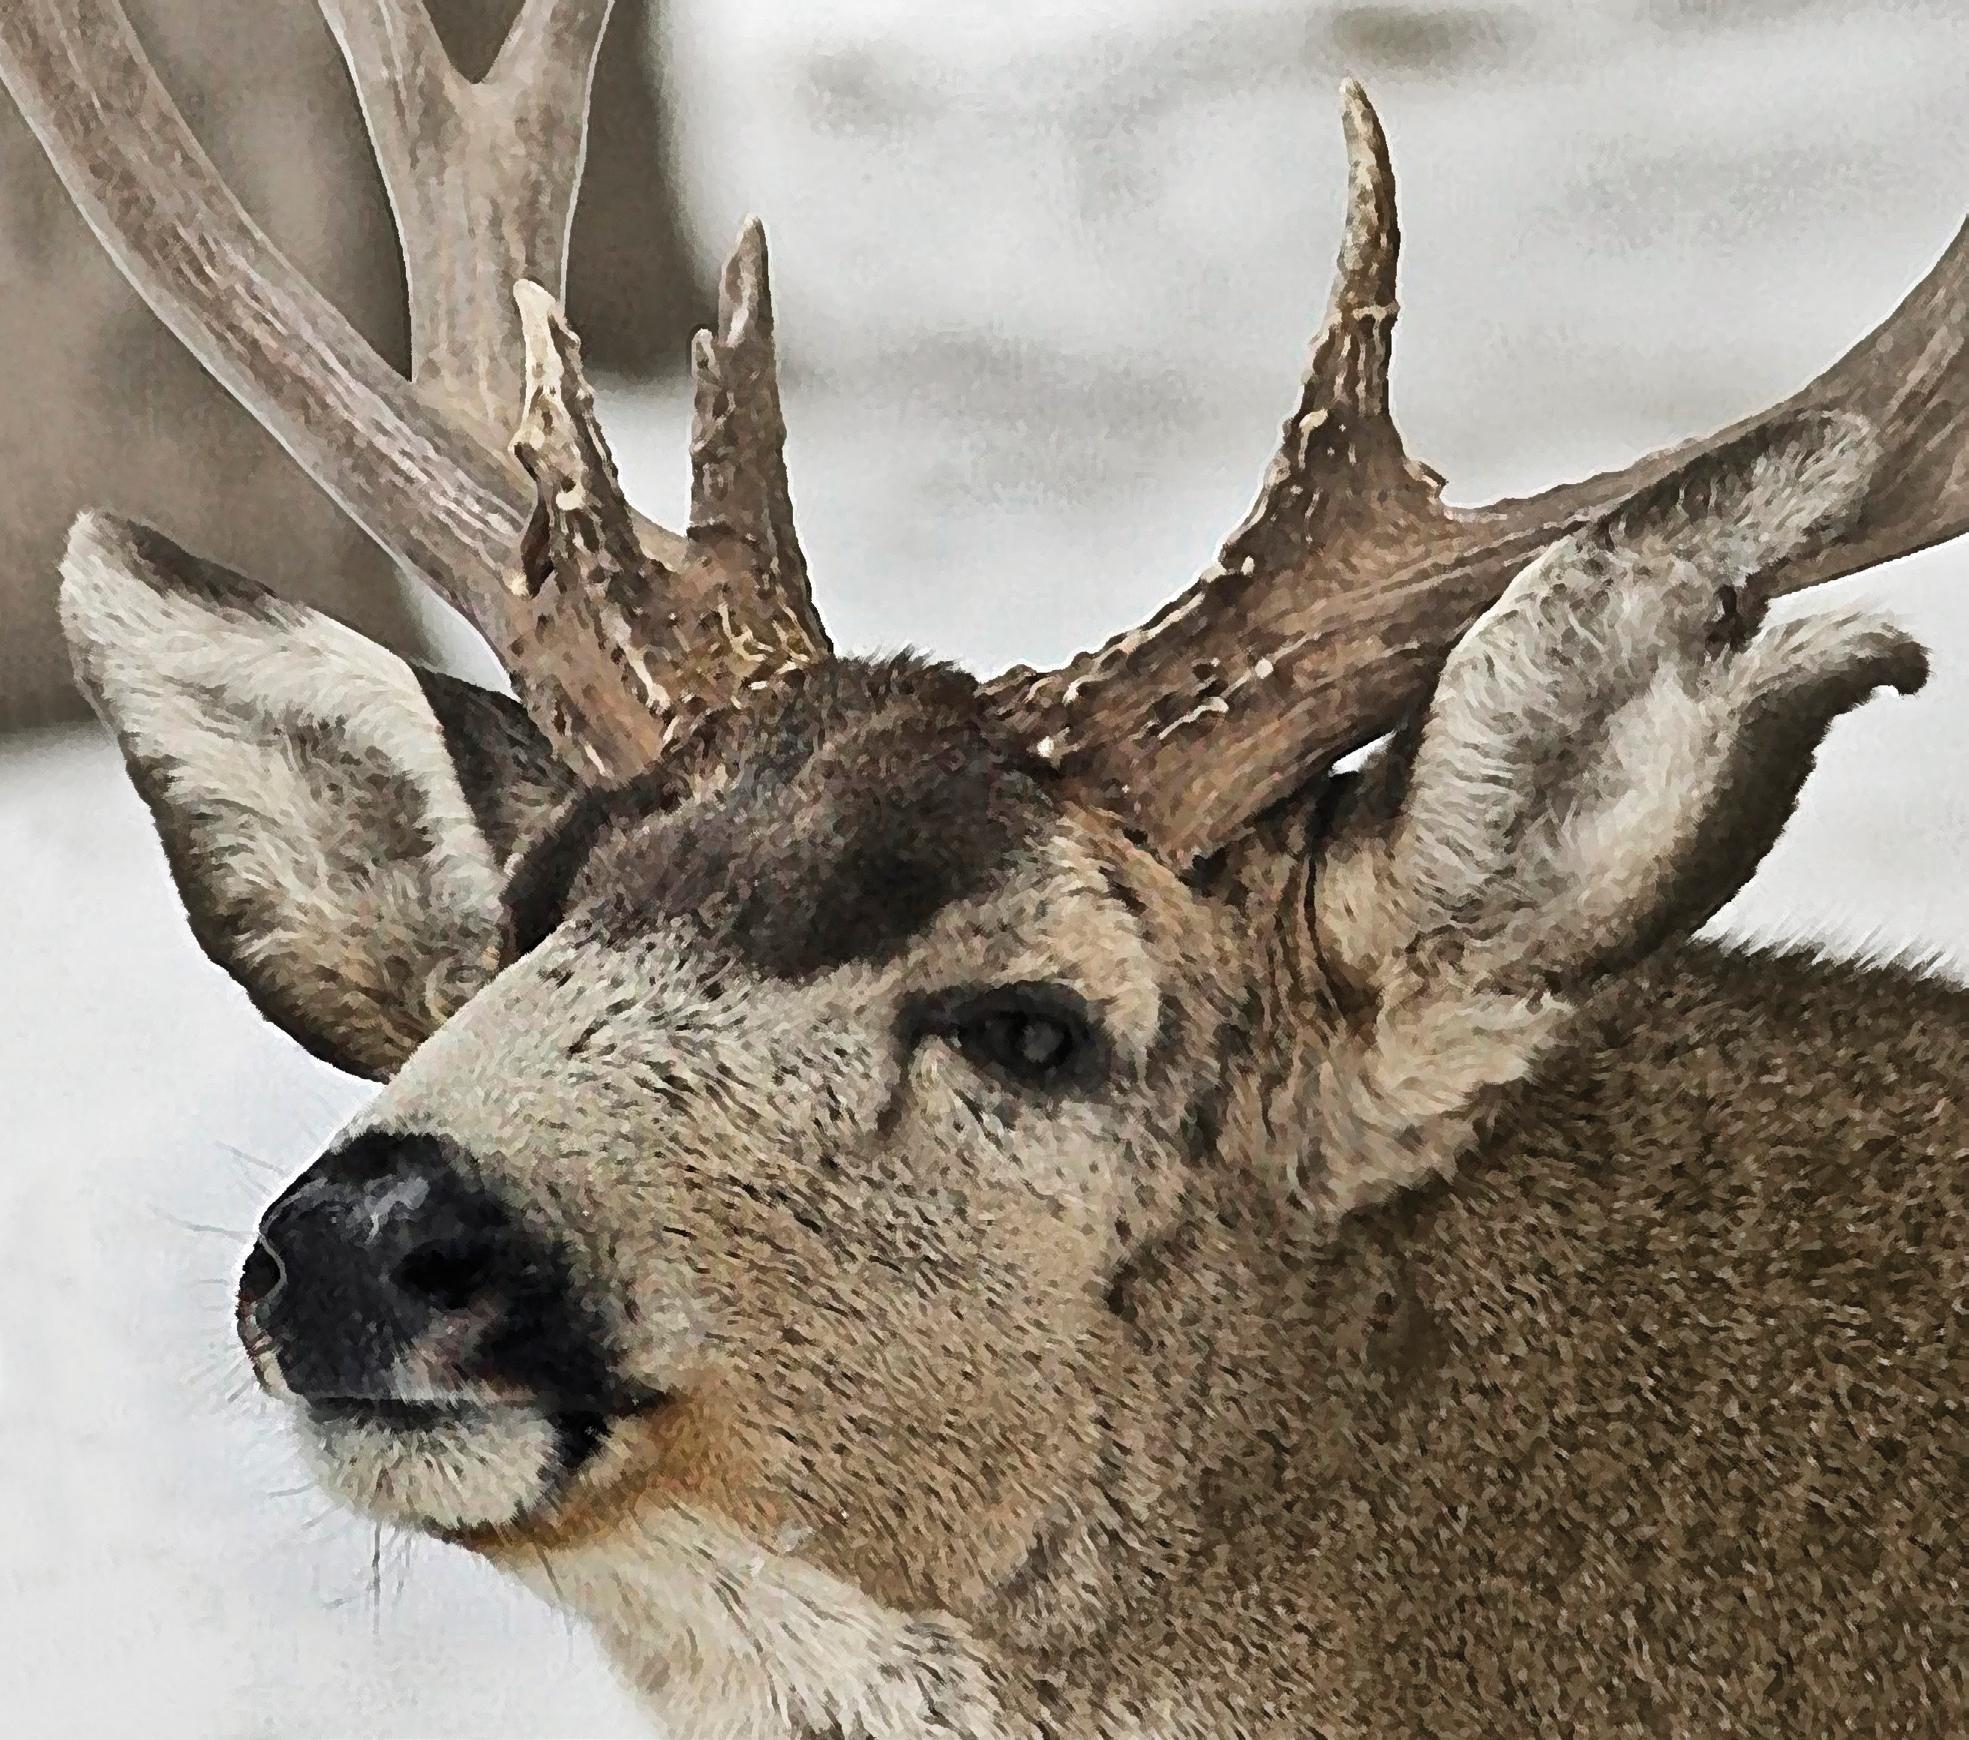
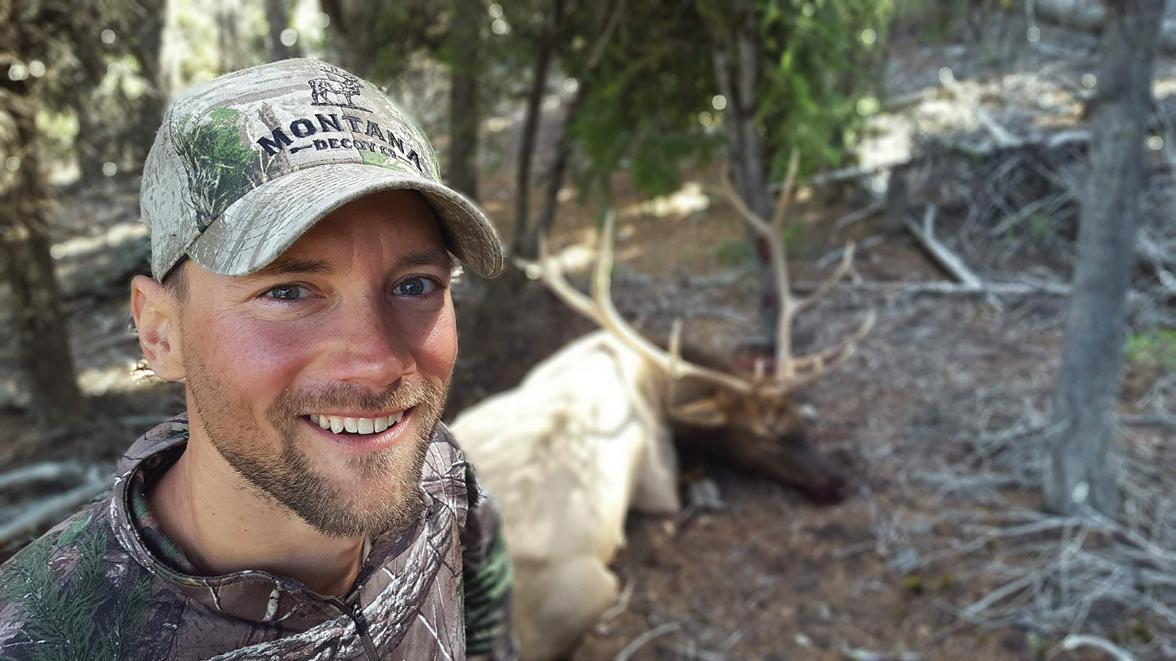
n Dioni’s first archery buck is a monster and has set the bar extremely high.
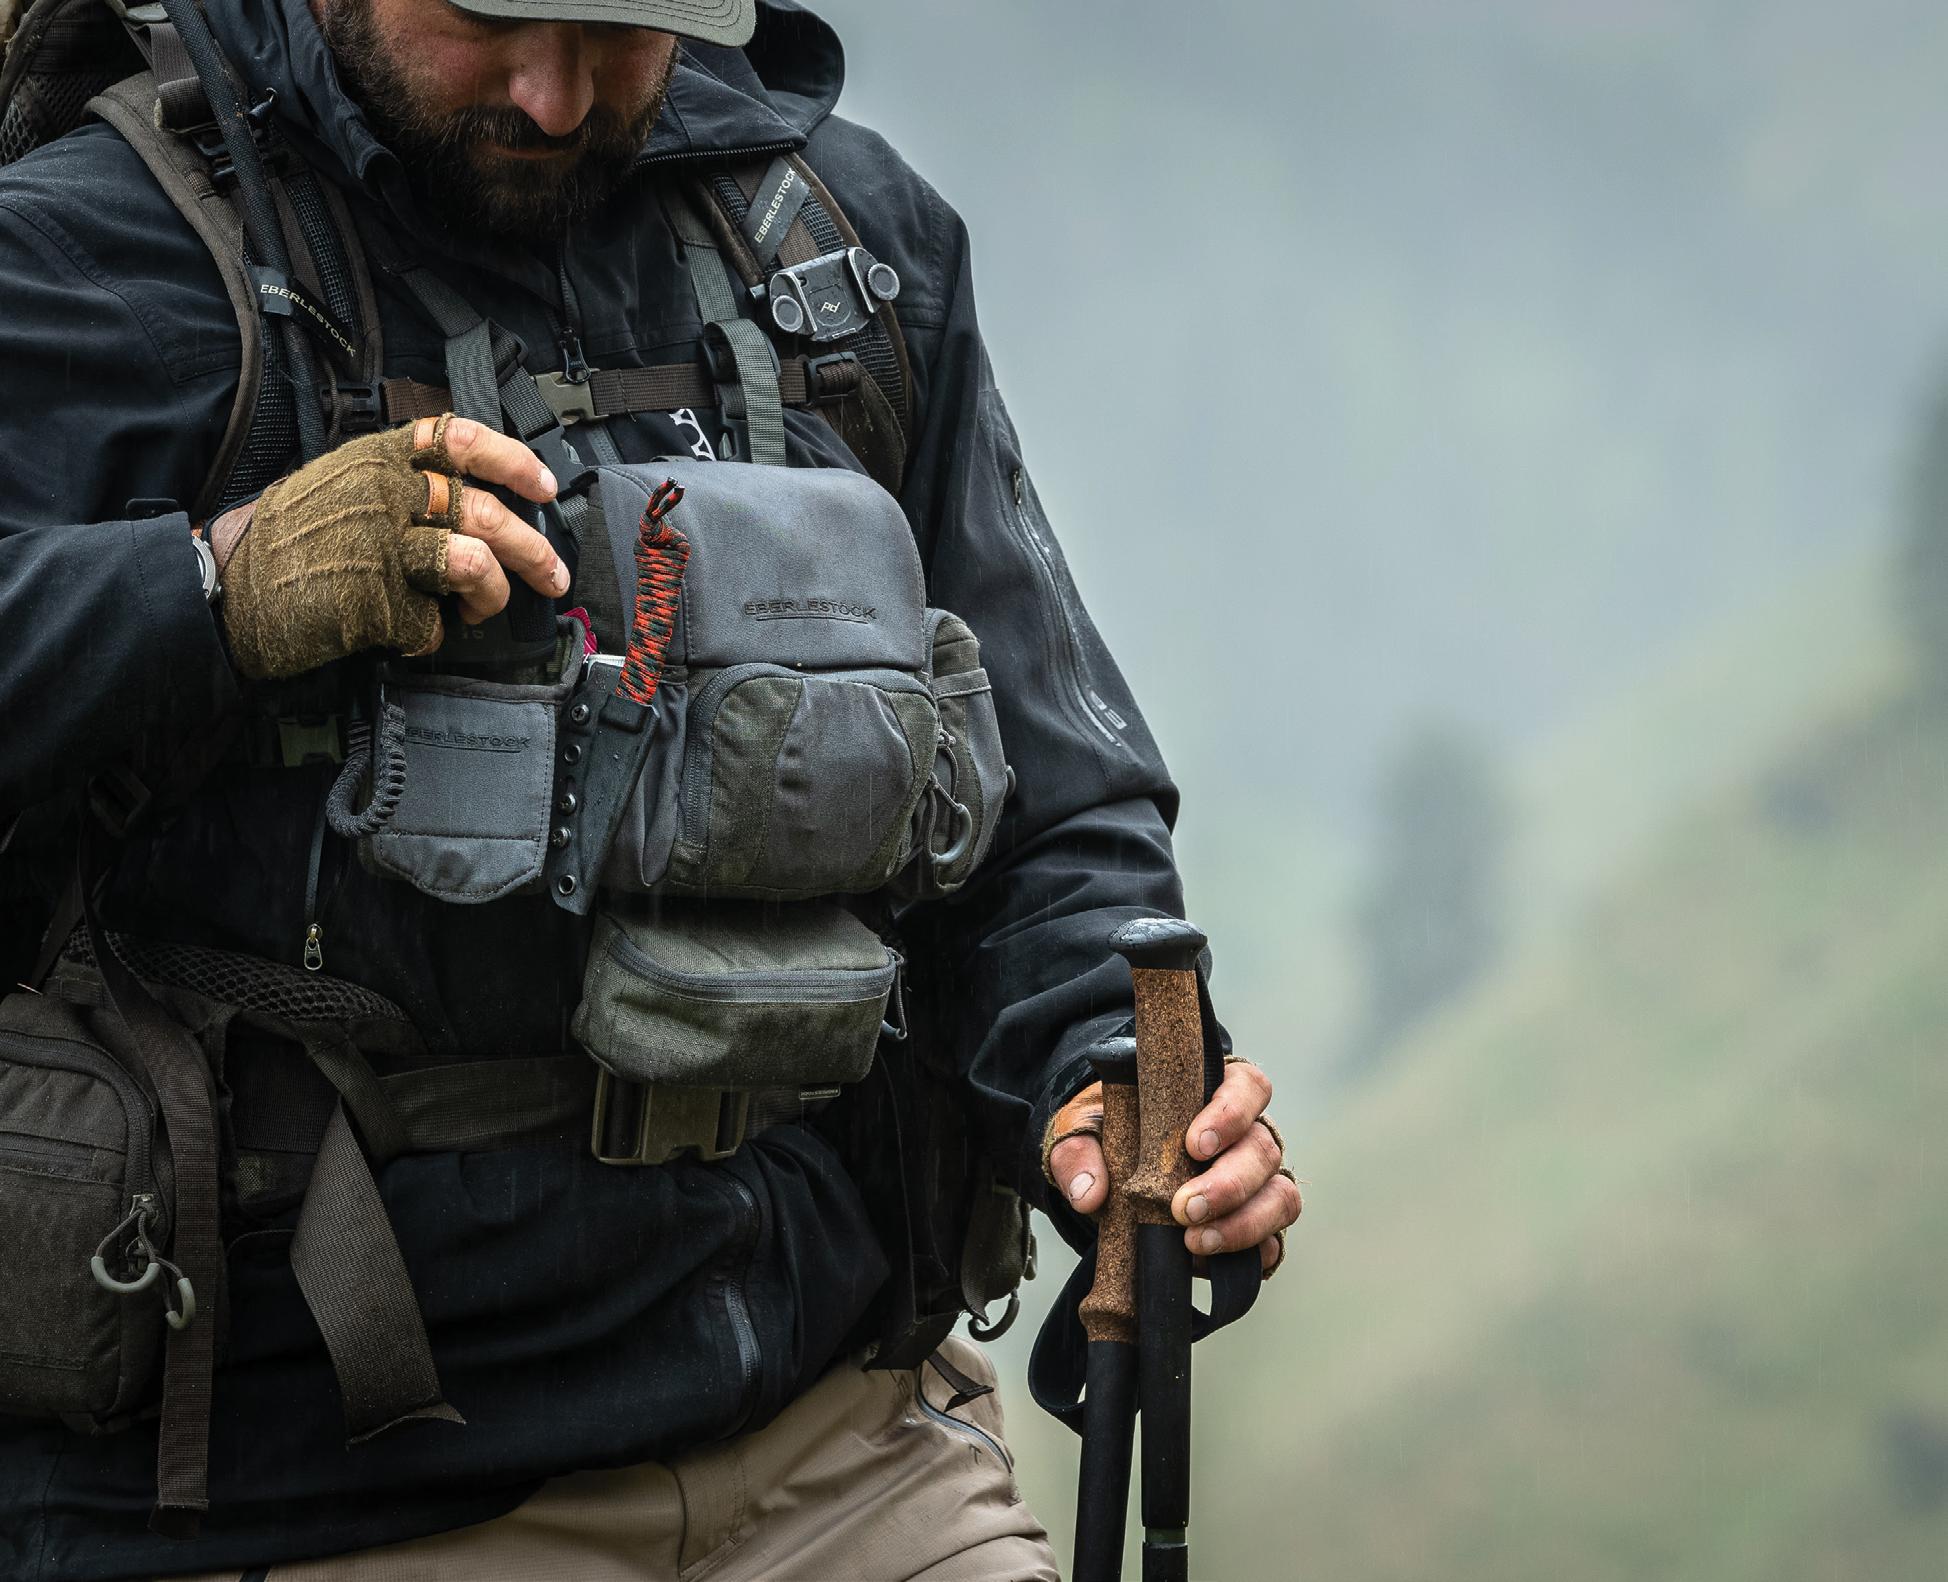
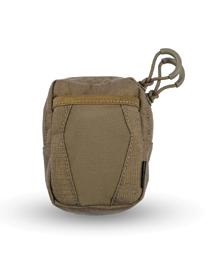
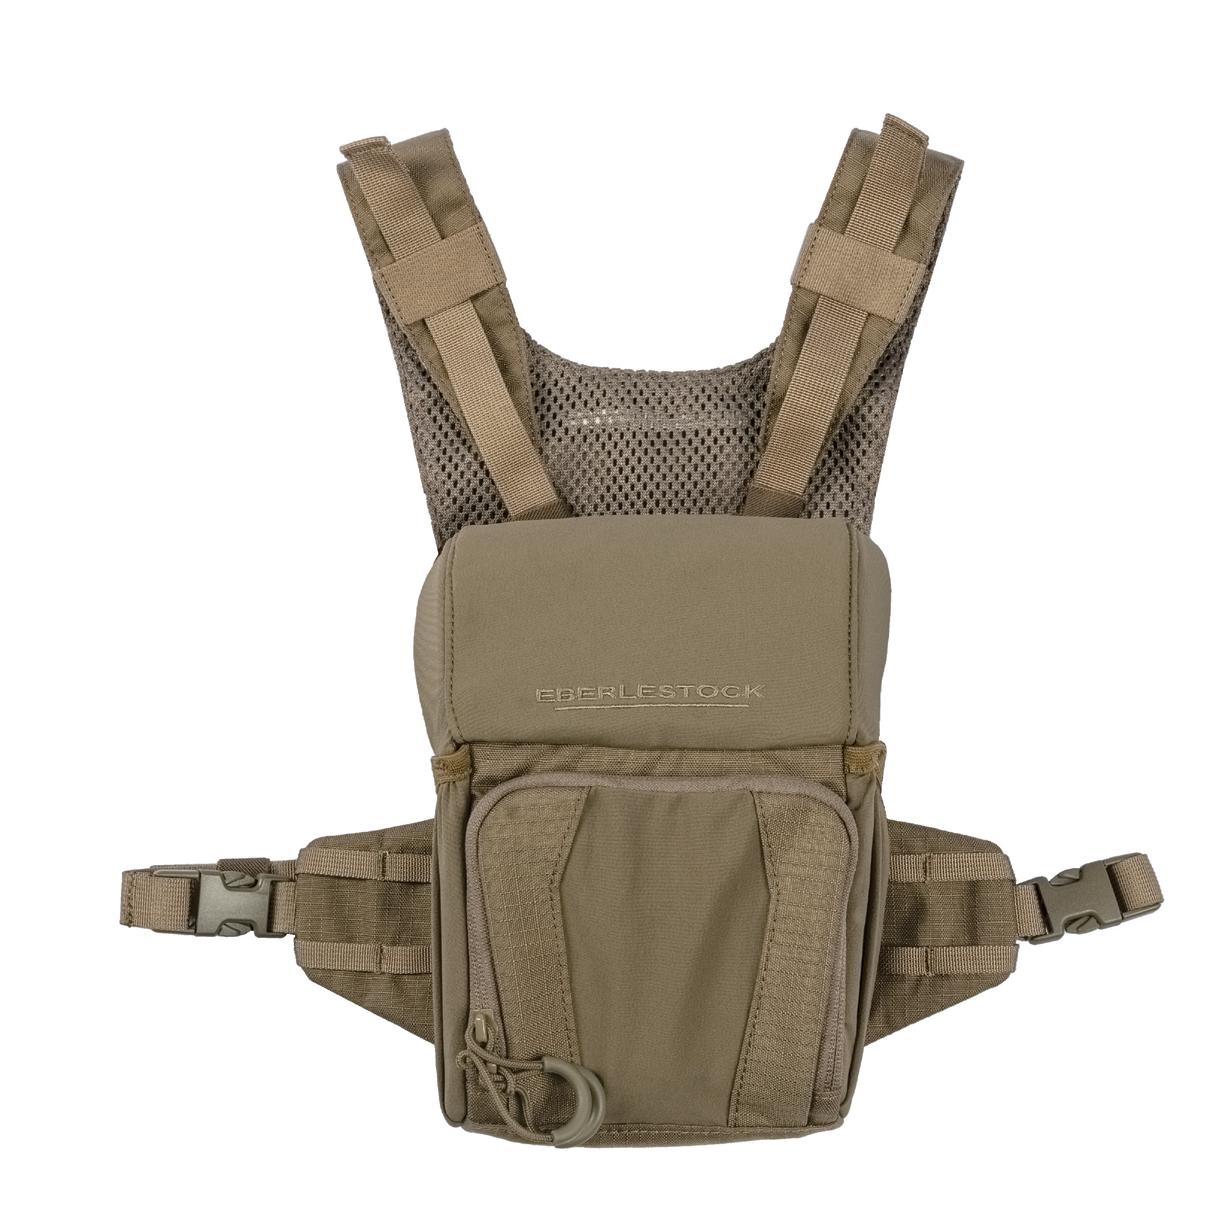
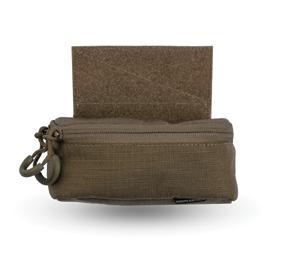
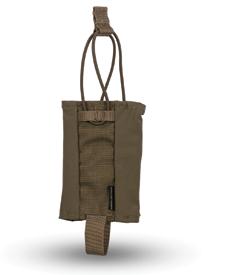
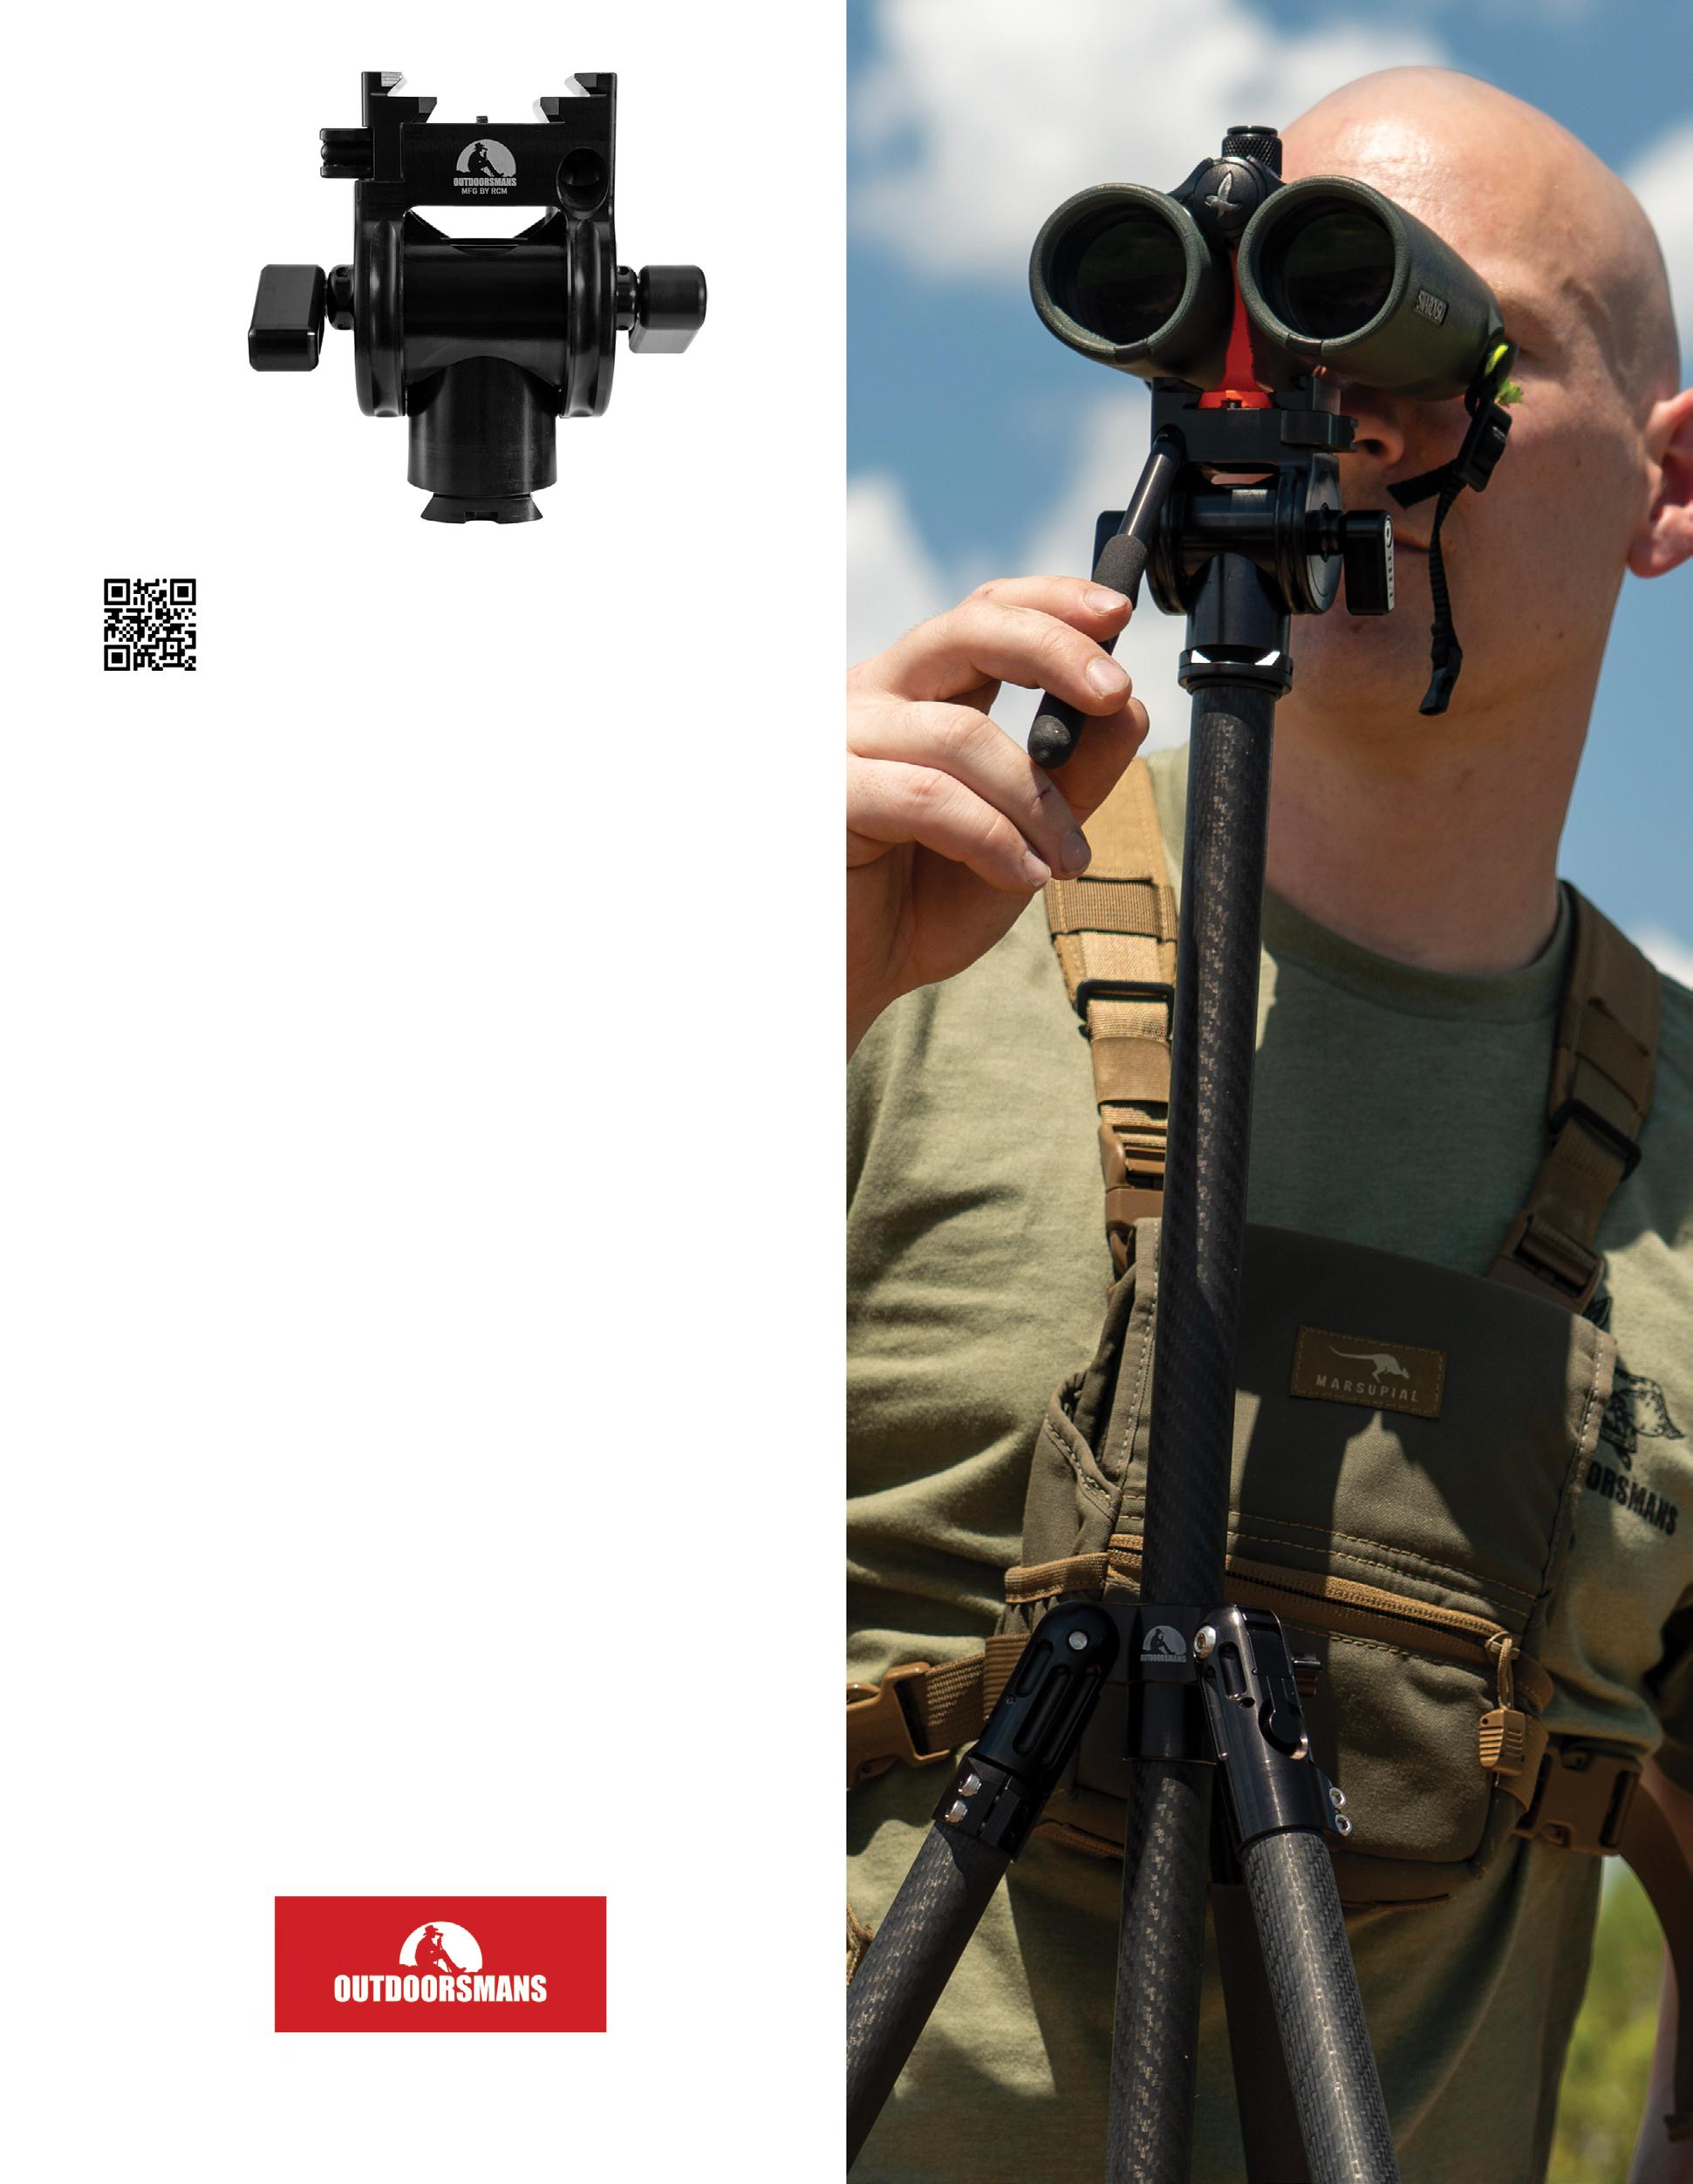
RECON
MODULAR BINO HARNESS
Designed with modularity at the forefront; the Recon Modular Bino Harness features a magnetic forward-pull access to the bino pouch, a large front zipper pocket, and stretch side pockets. Two internal bino tethers keep your binoculars secure and low profile MOLLE-compatible wings allow you to securely add Recon pouches and accessories.
messaged Ward who had watched it all happen. He had eyes on the buck and farther to the side and stood up slightly. As I rose, I could see the massive buck
CRITICAL GEAR
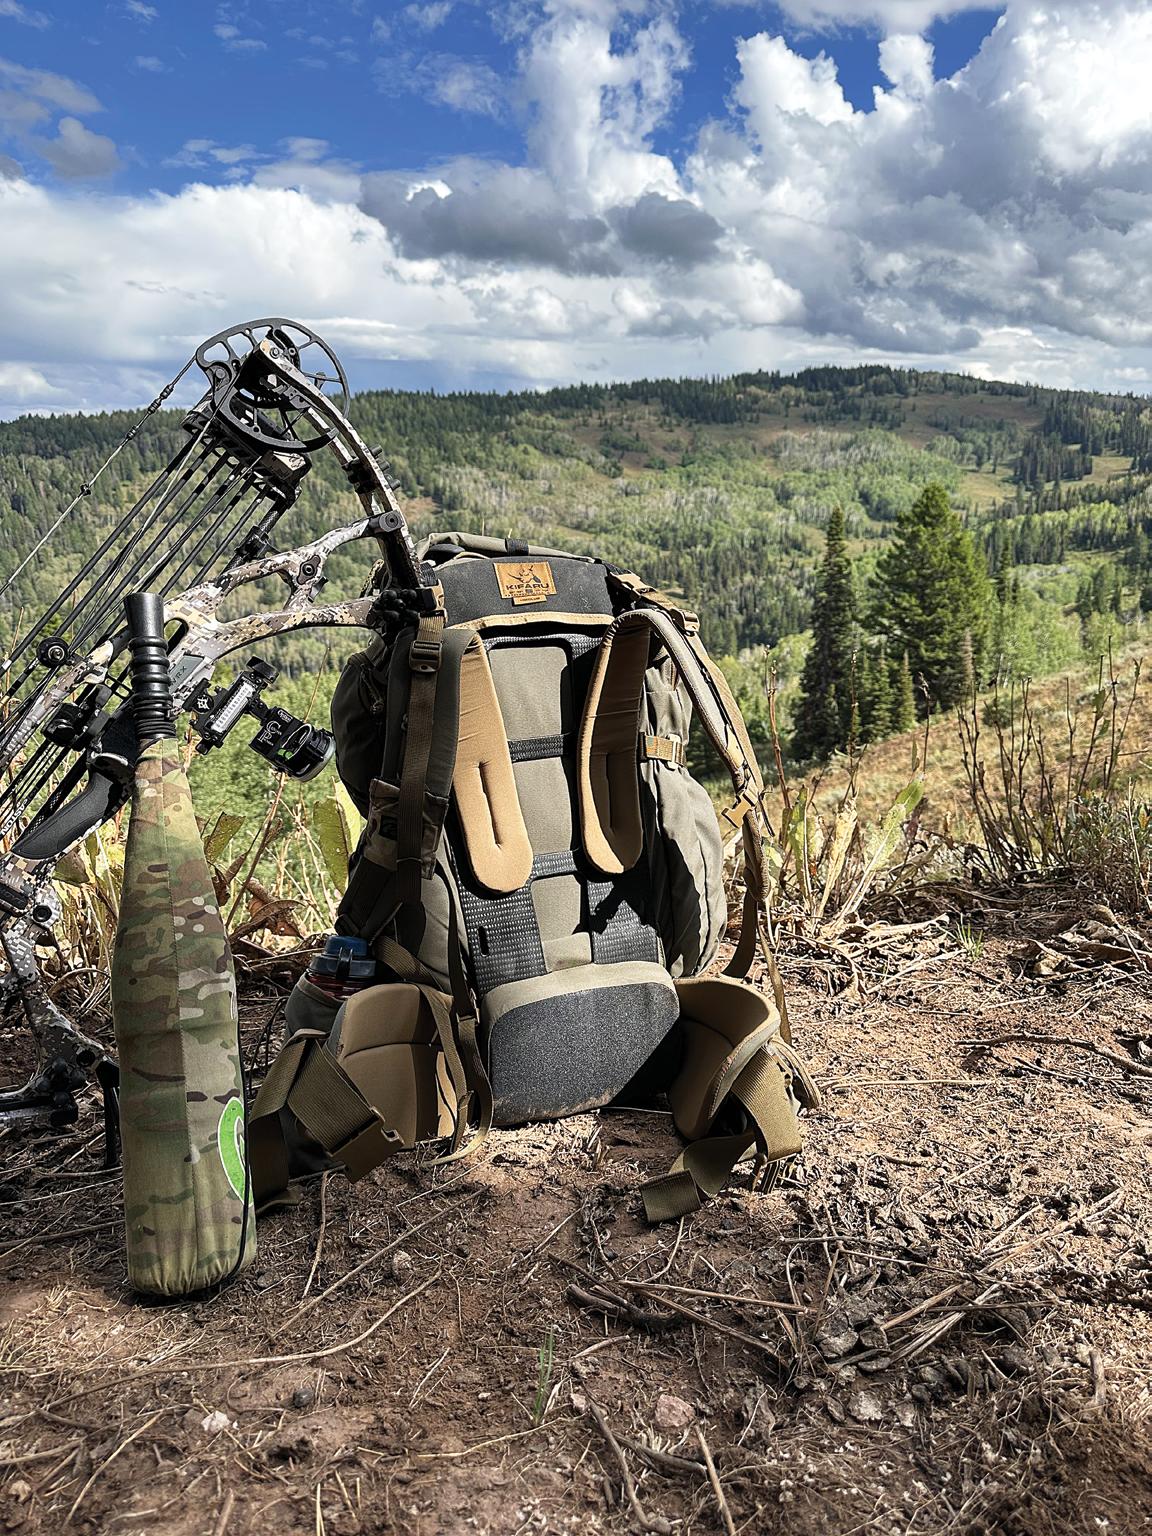
Bow: PSE Evo NXT Arrows: Gold Tip Kinetic Pierce Broadhead: SEVR 1.75 Sight: Black Gold Ascent 5-pin Binoculars: Swarovski NL Pure 10x Spotting Scope: Swarovski STX 95 Rangefinder: Leica 2800.com Scope Adapter: Olin Backpack: EXO Mountain Gear K4 5000
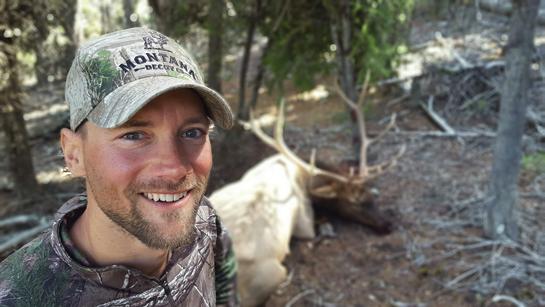
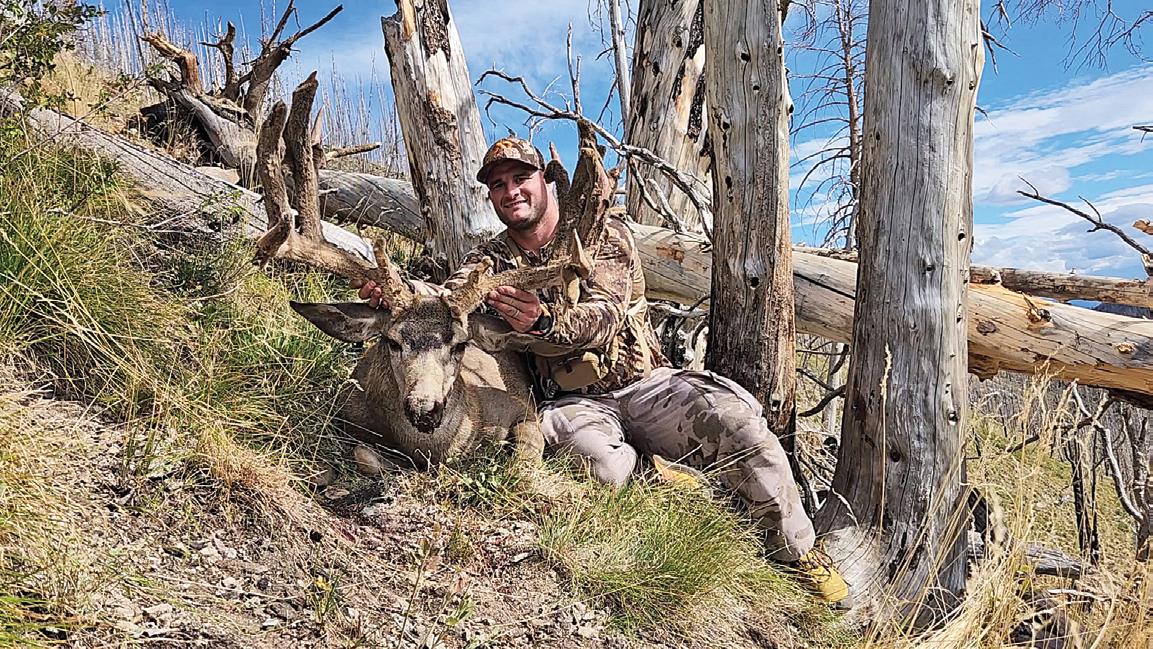
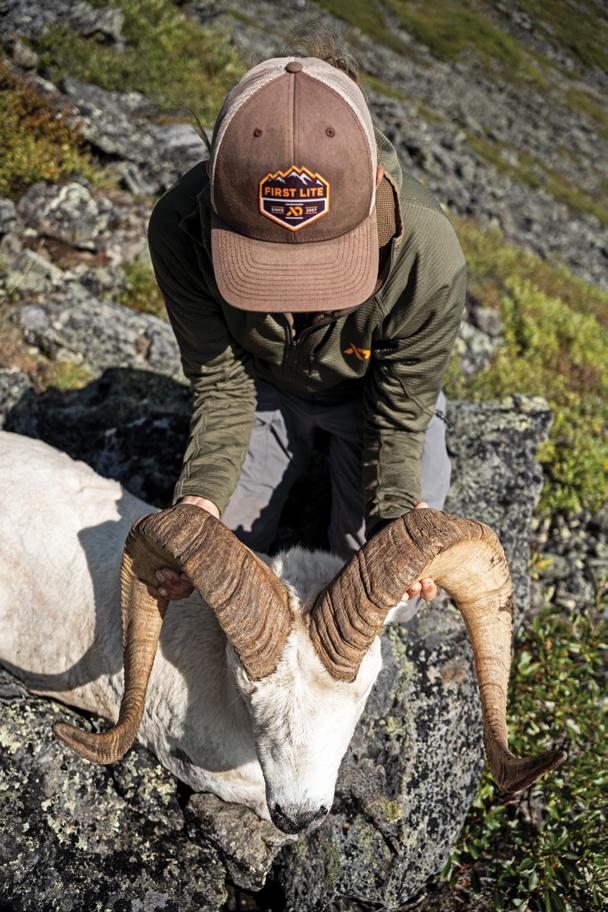
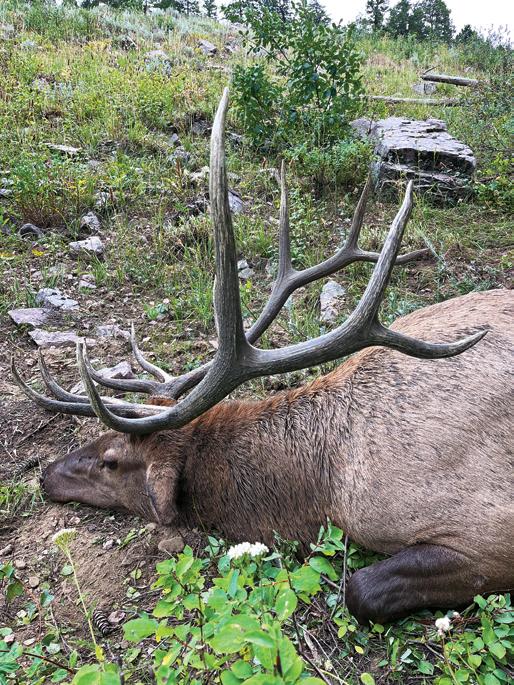
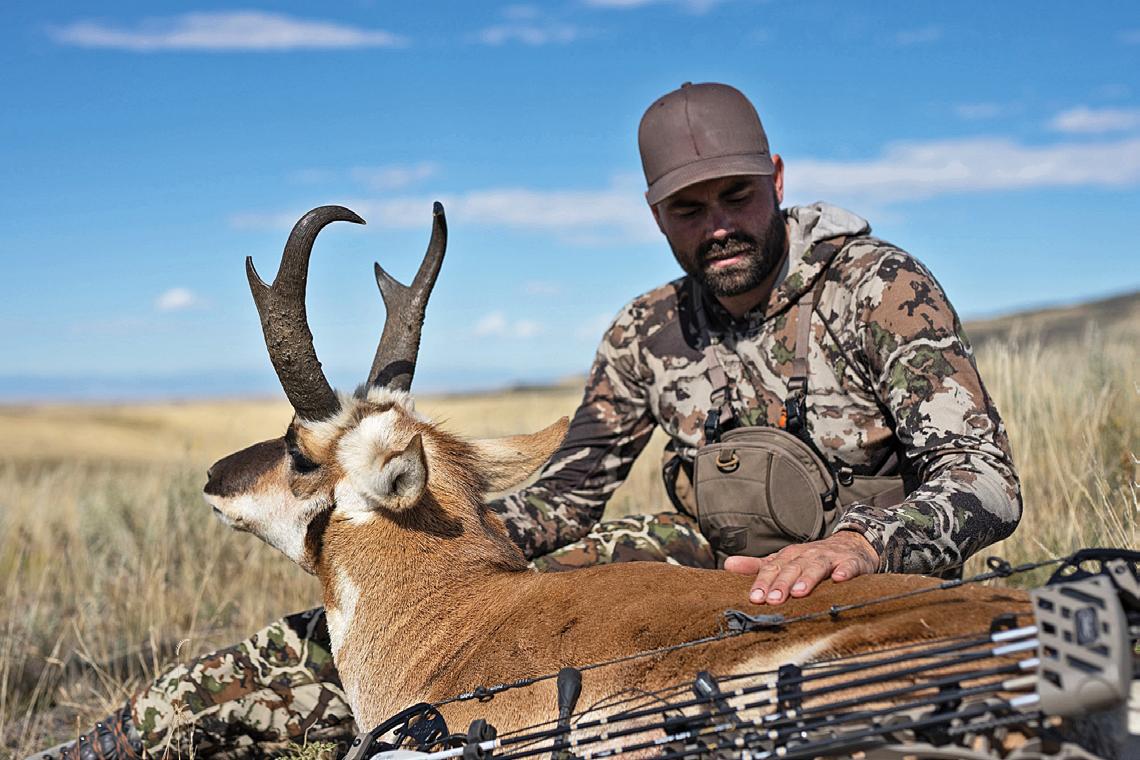
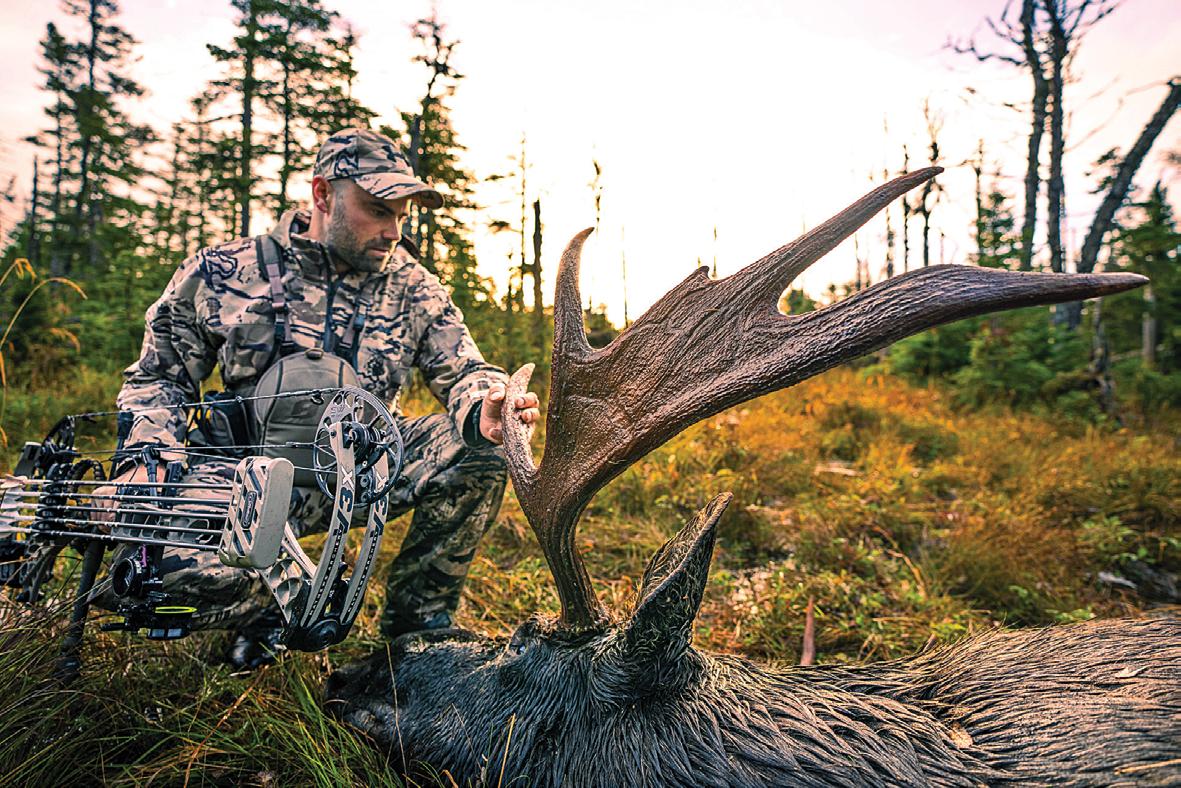
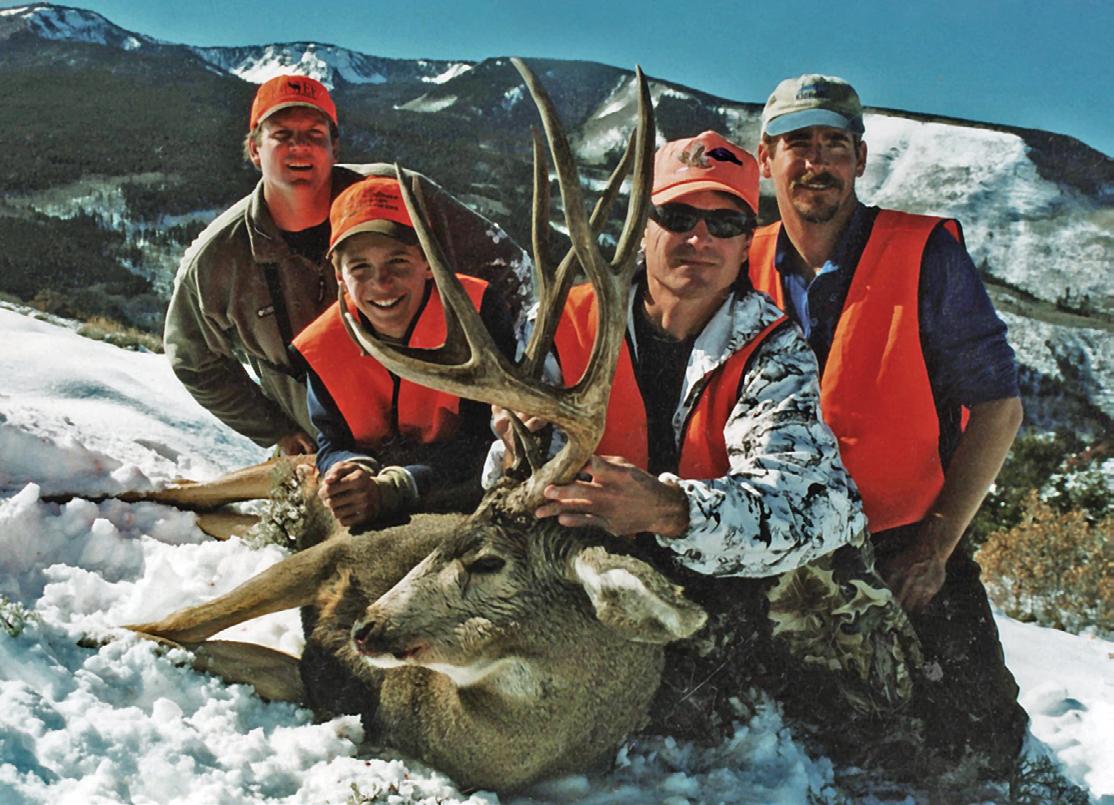
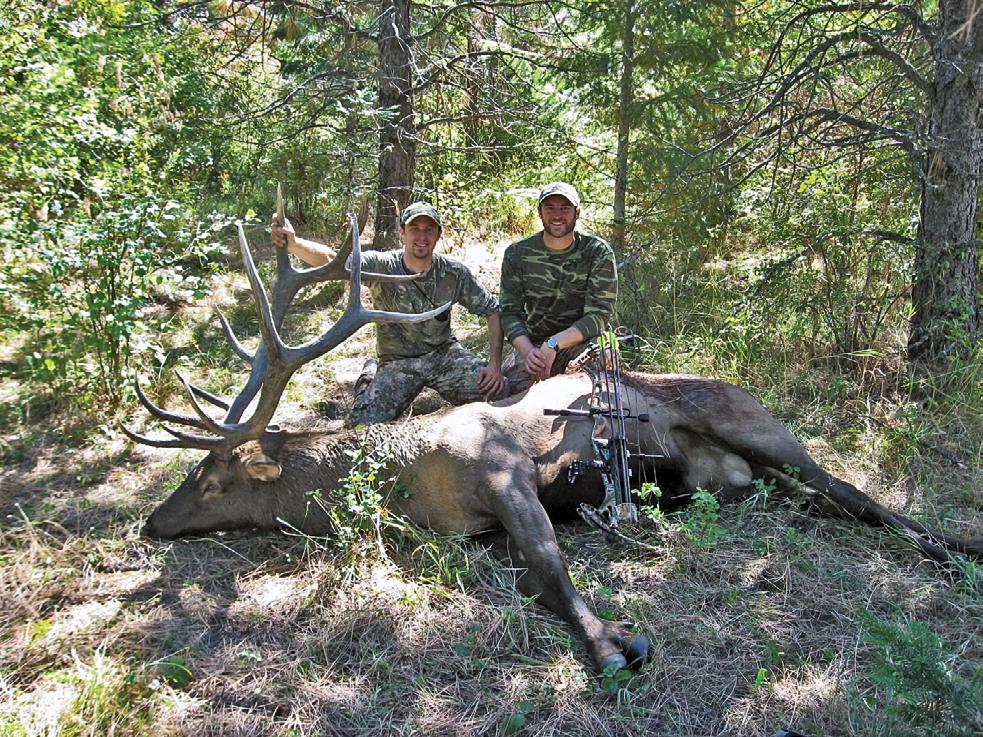
n After watching Dioni’s stalk, Ward gets to put his hands on the great buck.
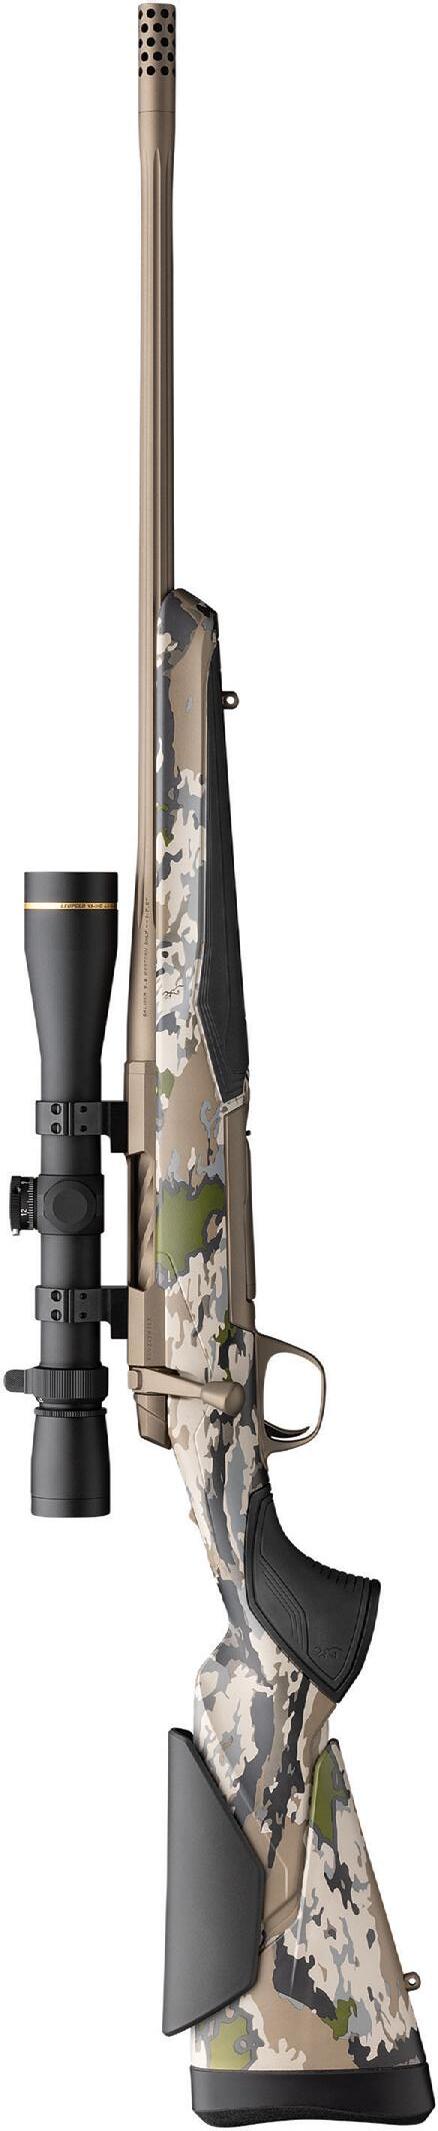
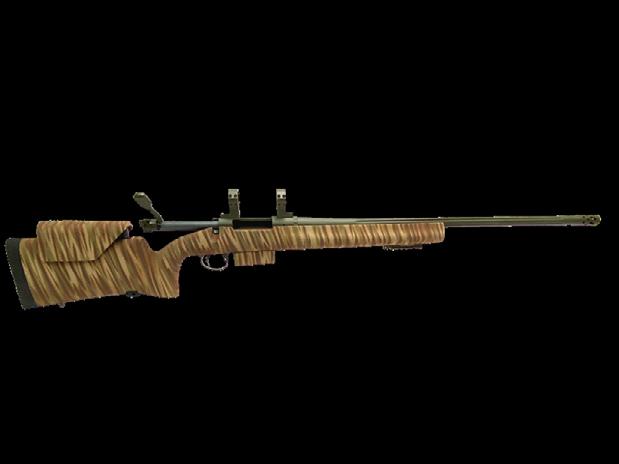
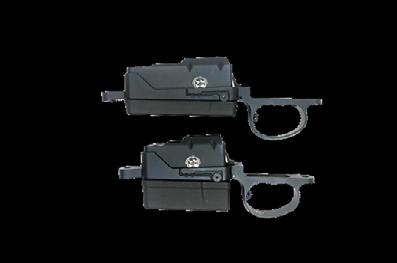
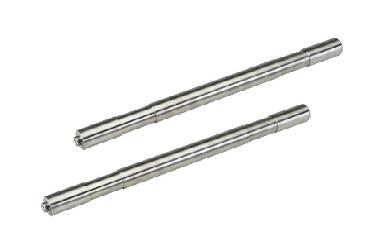
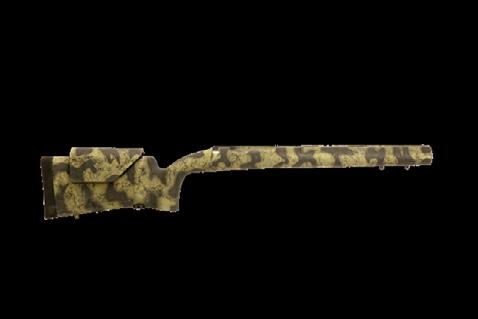
X-BOLT 2 SPEED RIFLE
Browning redefines Total Accuracy yet again with the new X-Bolt 2 and Vari-Tech stock. This new stock design is engineered with three-way adjustment that allows you to customize the fit of the rifle to meet your specific needs, helping you achieve consistent, tack-driving performance while retaining the silhouette of a traditional rifle stock.
Internal spacers lock in length of pull. Adjustable from 13-5/8" to 14-5/8" right from the box, this system is sturdy and rattle free. LENgth of pull
GRIP ANGLE
Two interchangable grip modules are available for the Vari-Tech stock: The traditional Sporter profile and the Vertical profile. Both let you optimize finger-to-trigger reach and control.
Achieve consistent eye-to-scope alignment and a rock-solid cheek weld even with large objective lens optics. Six height positions offer 1" of height adjustment. COMB HEIGHT
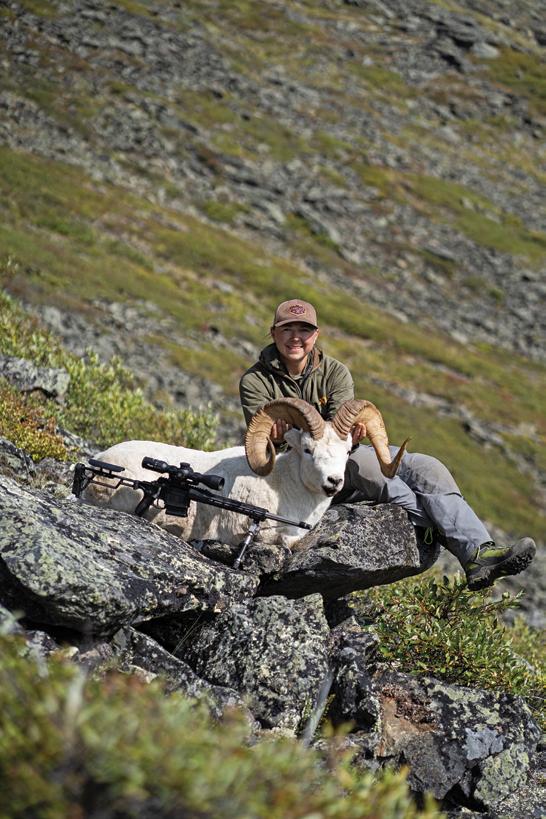
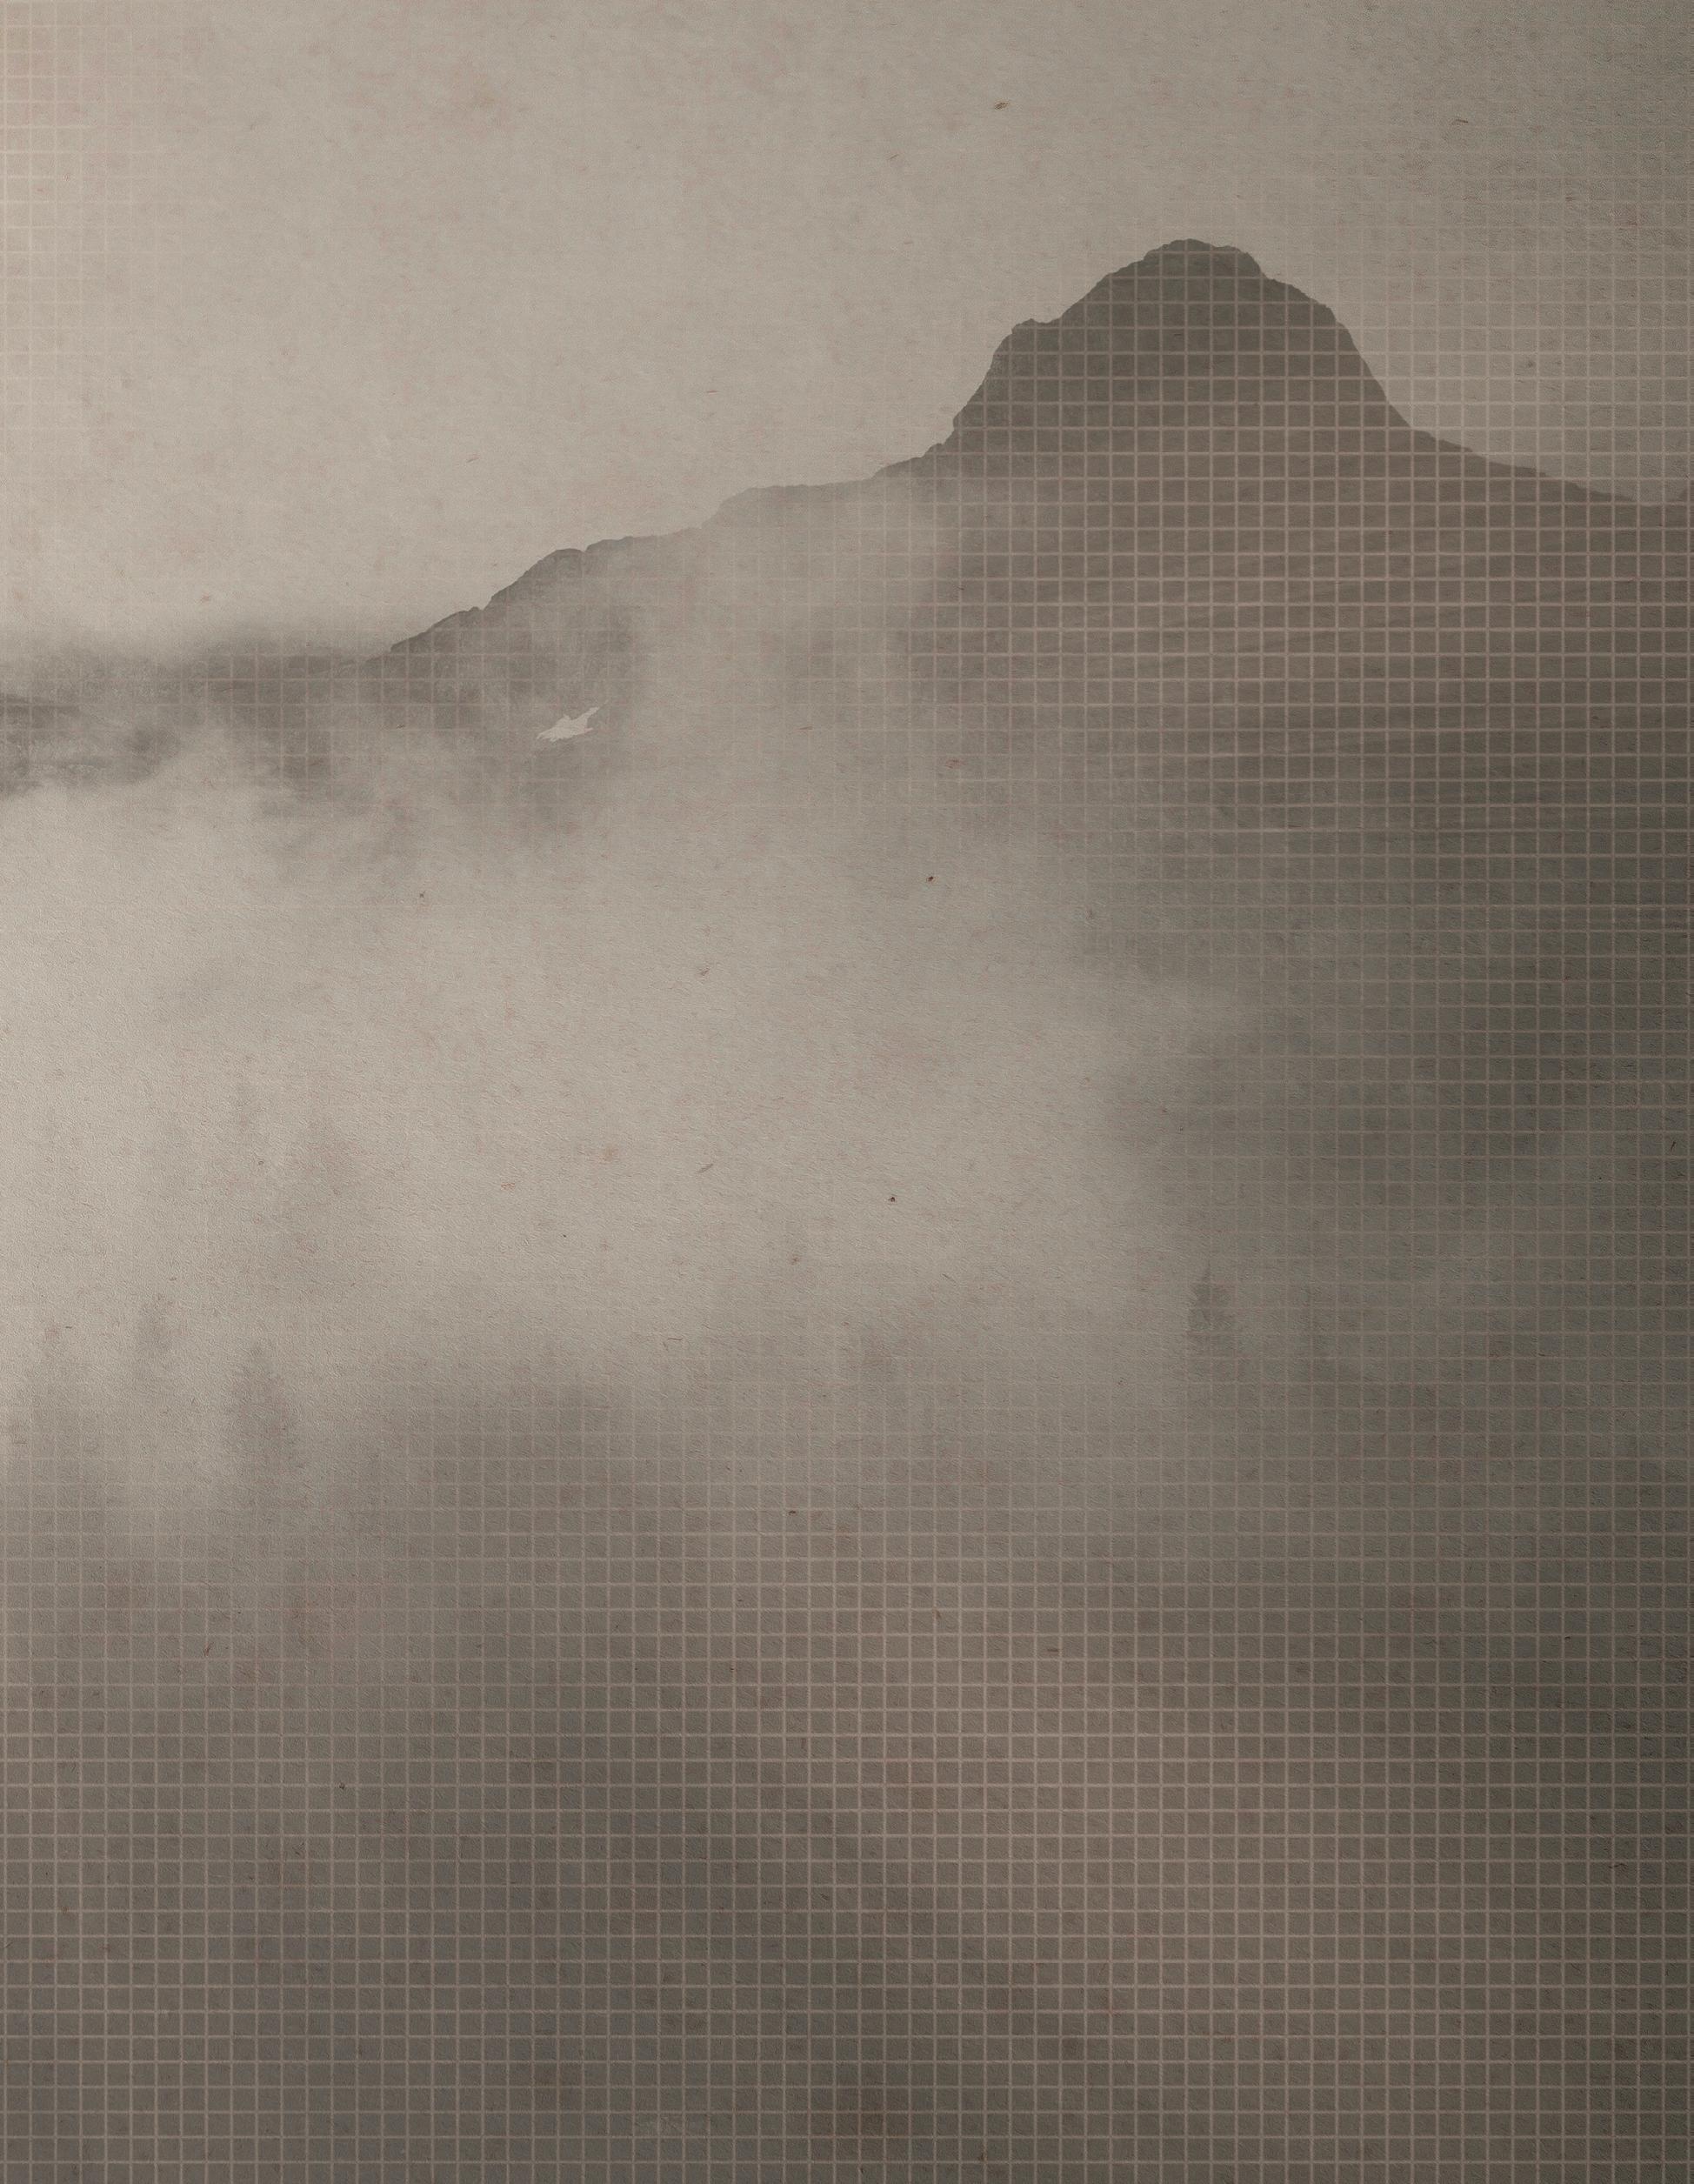
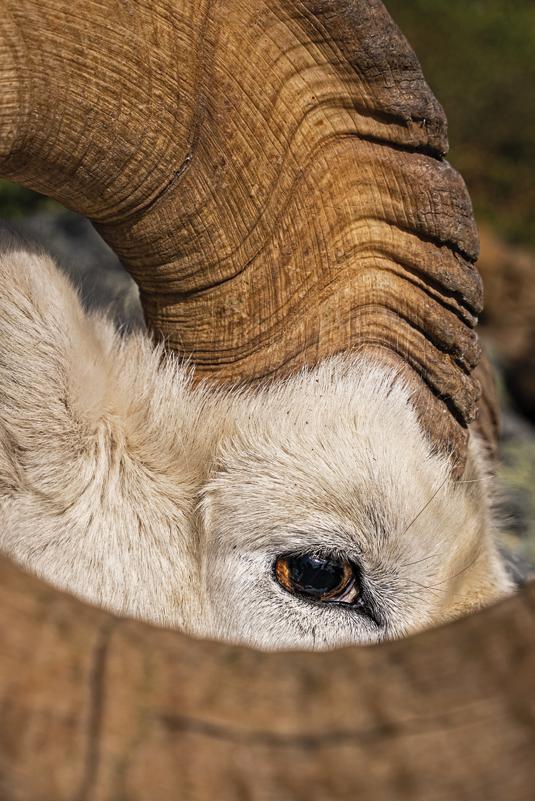
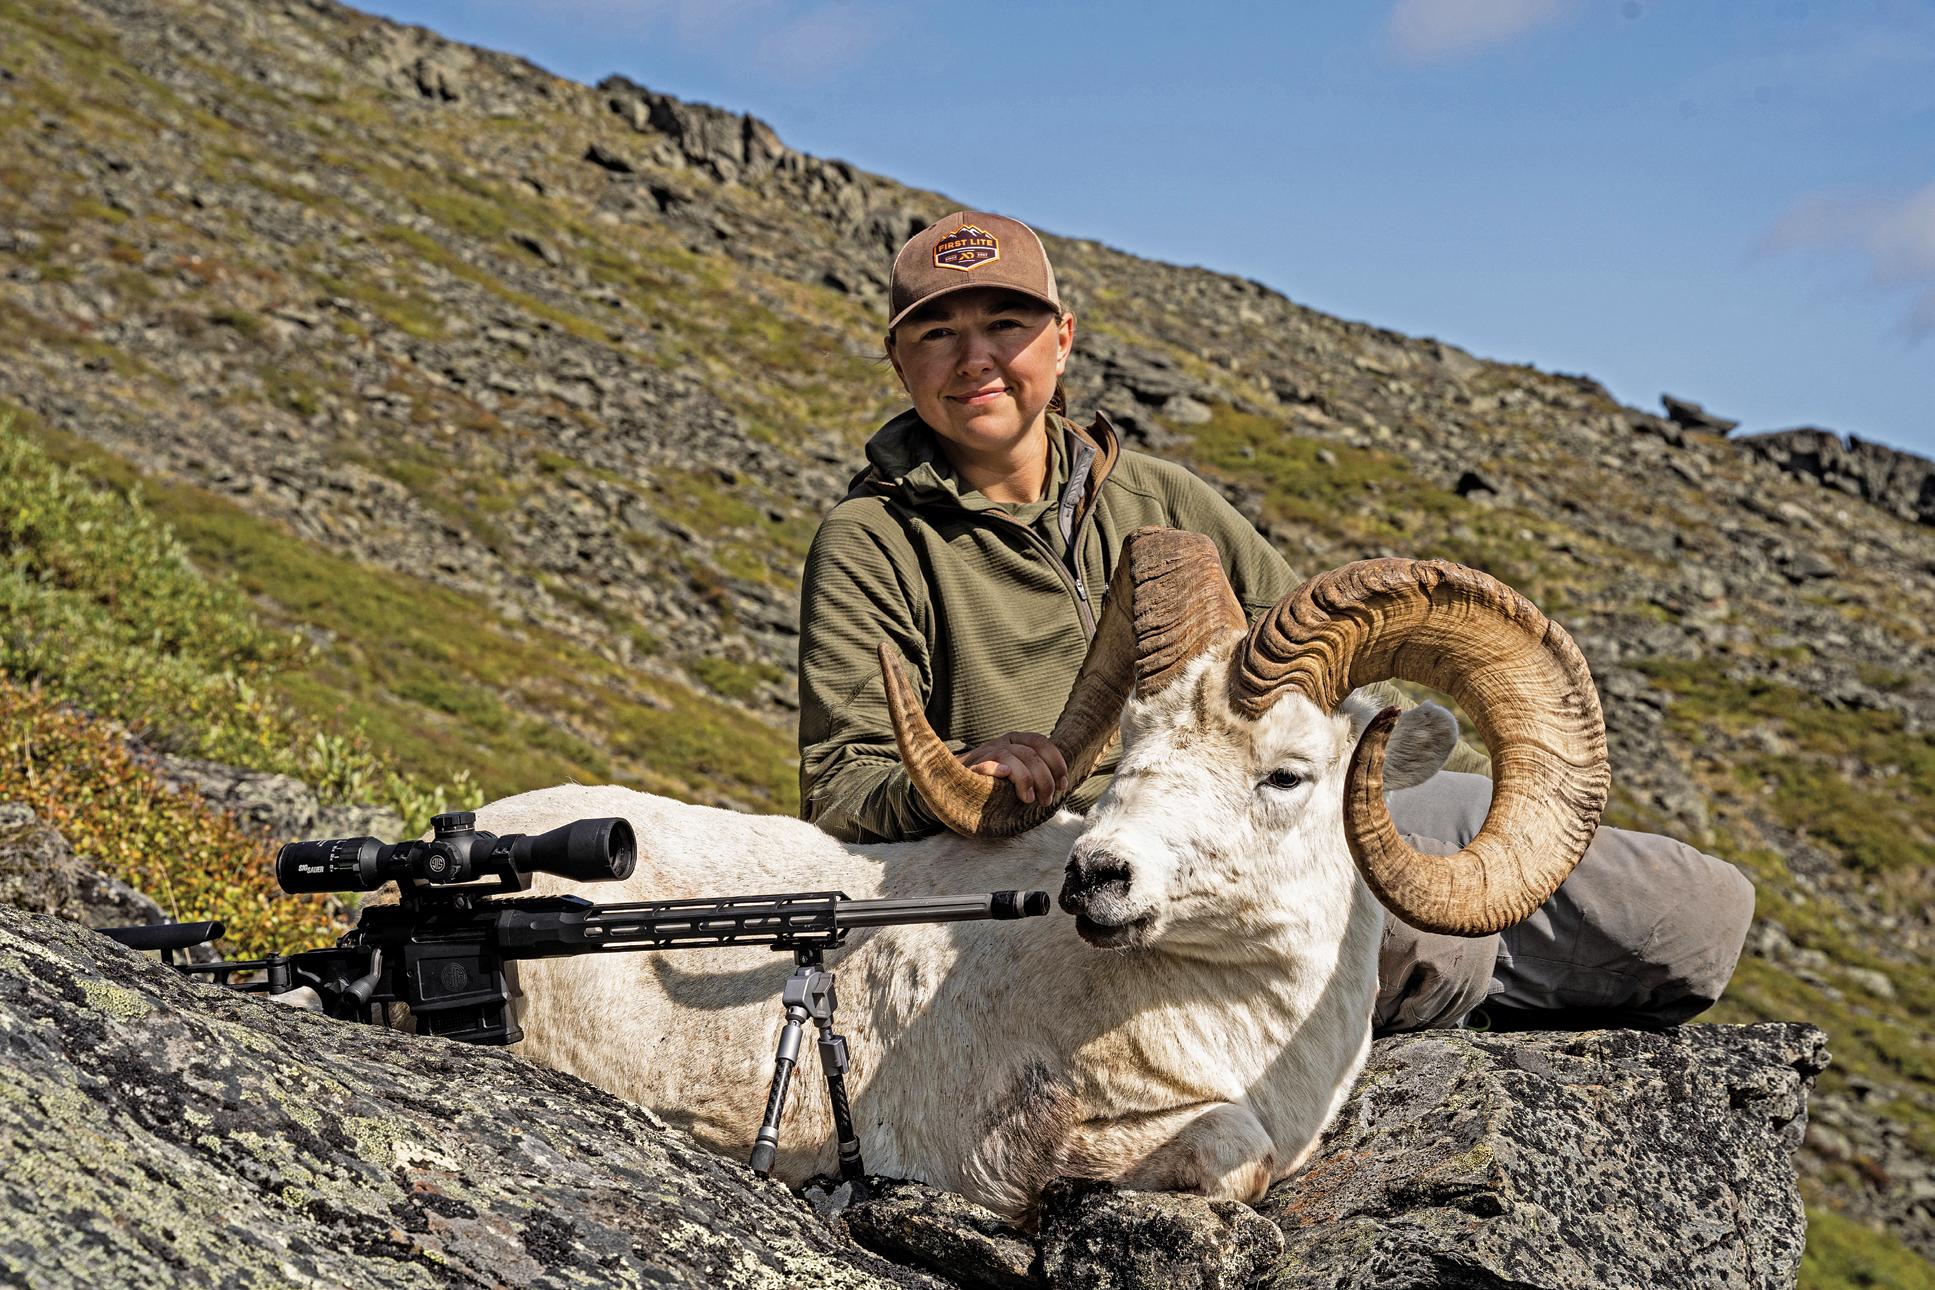
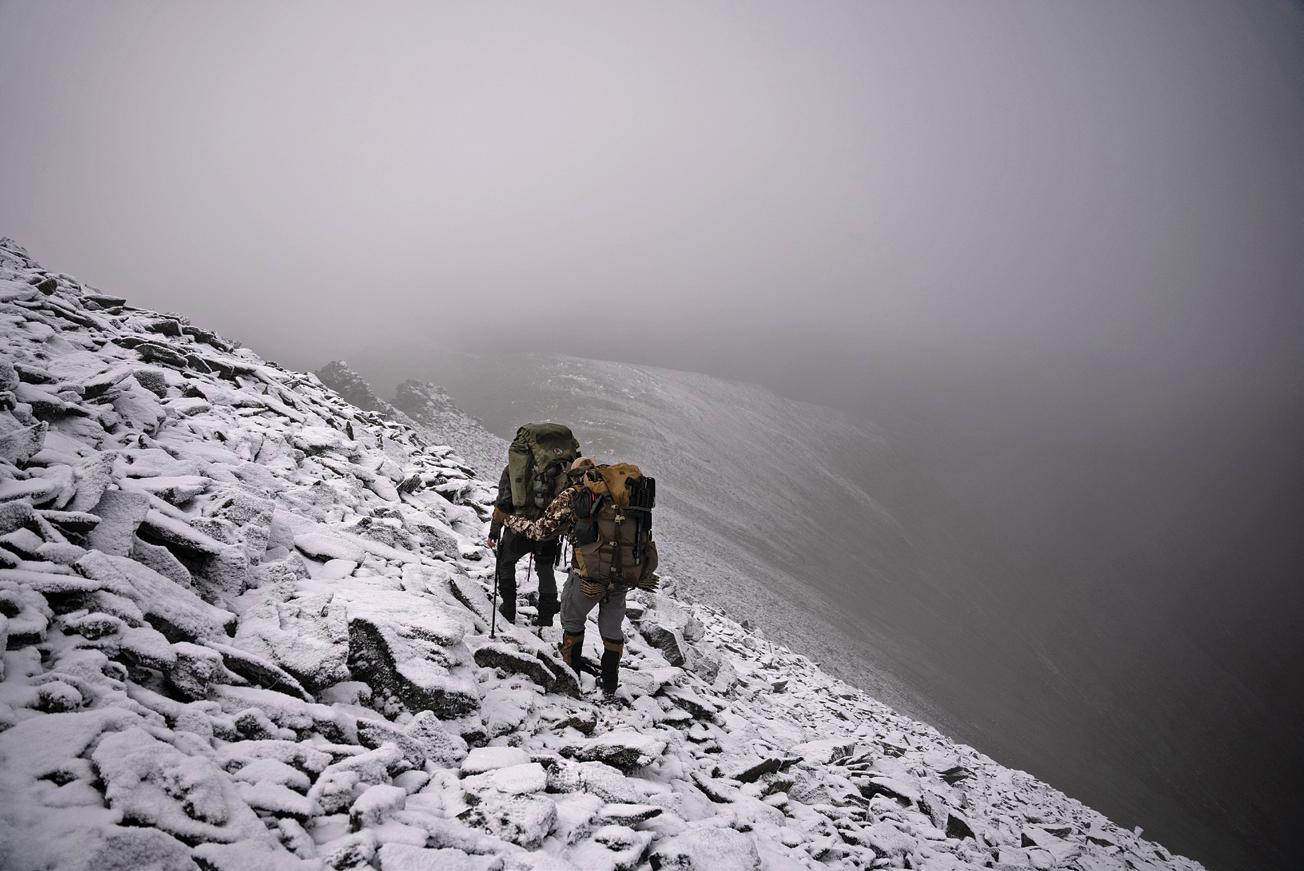
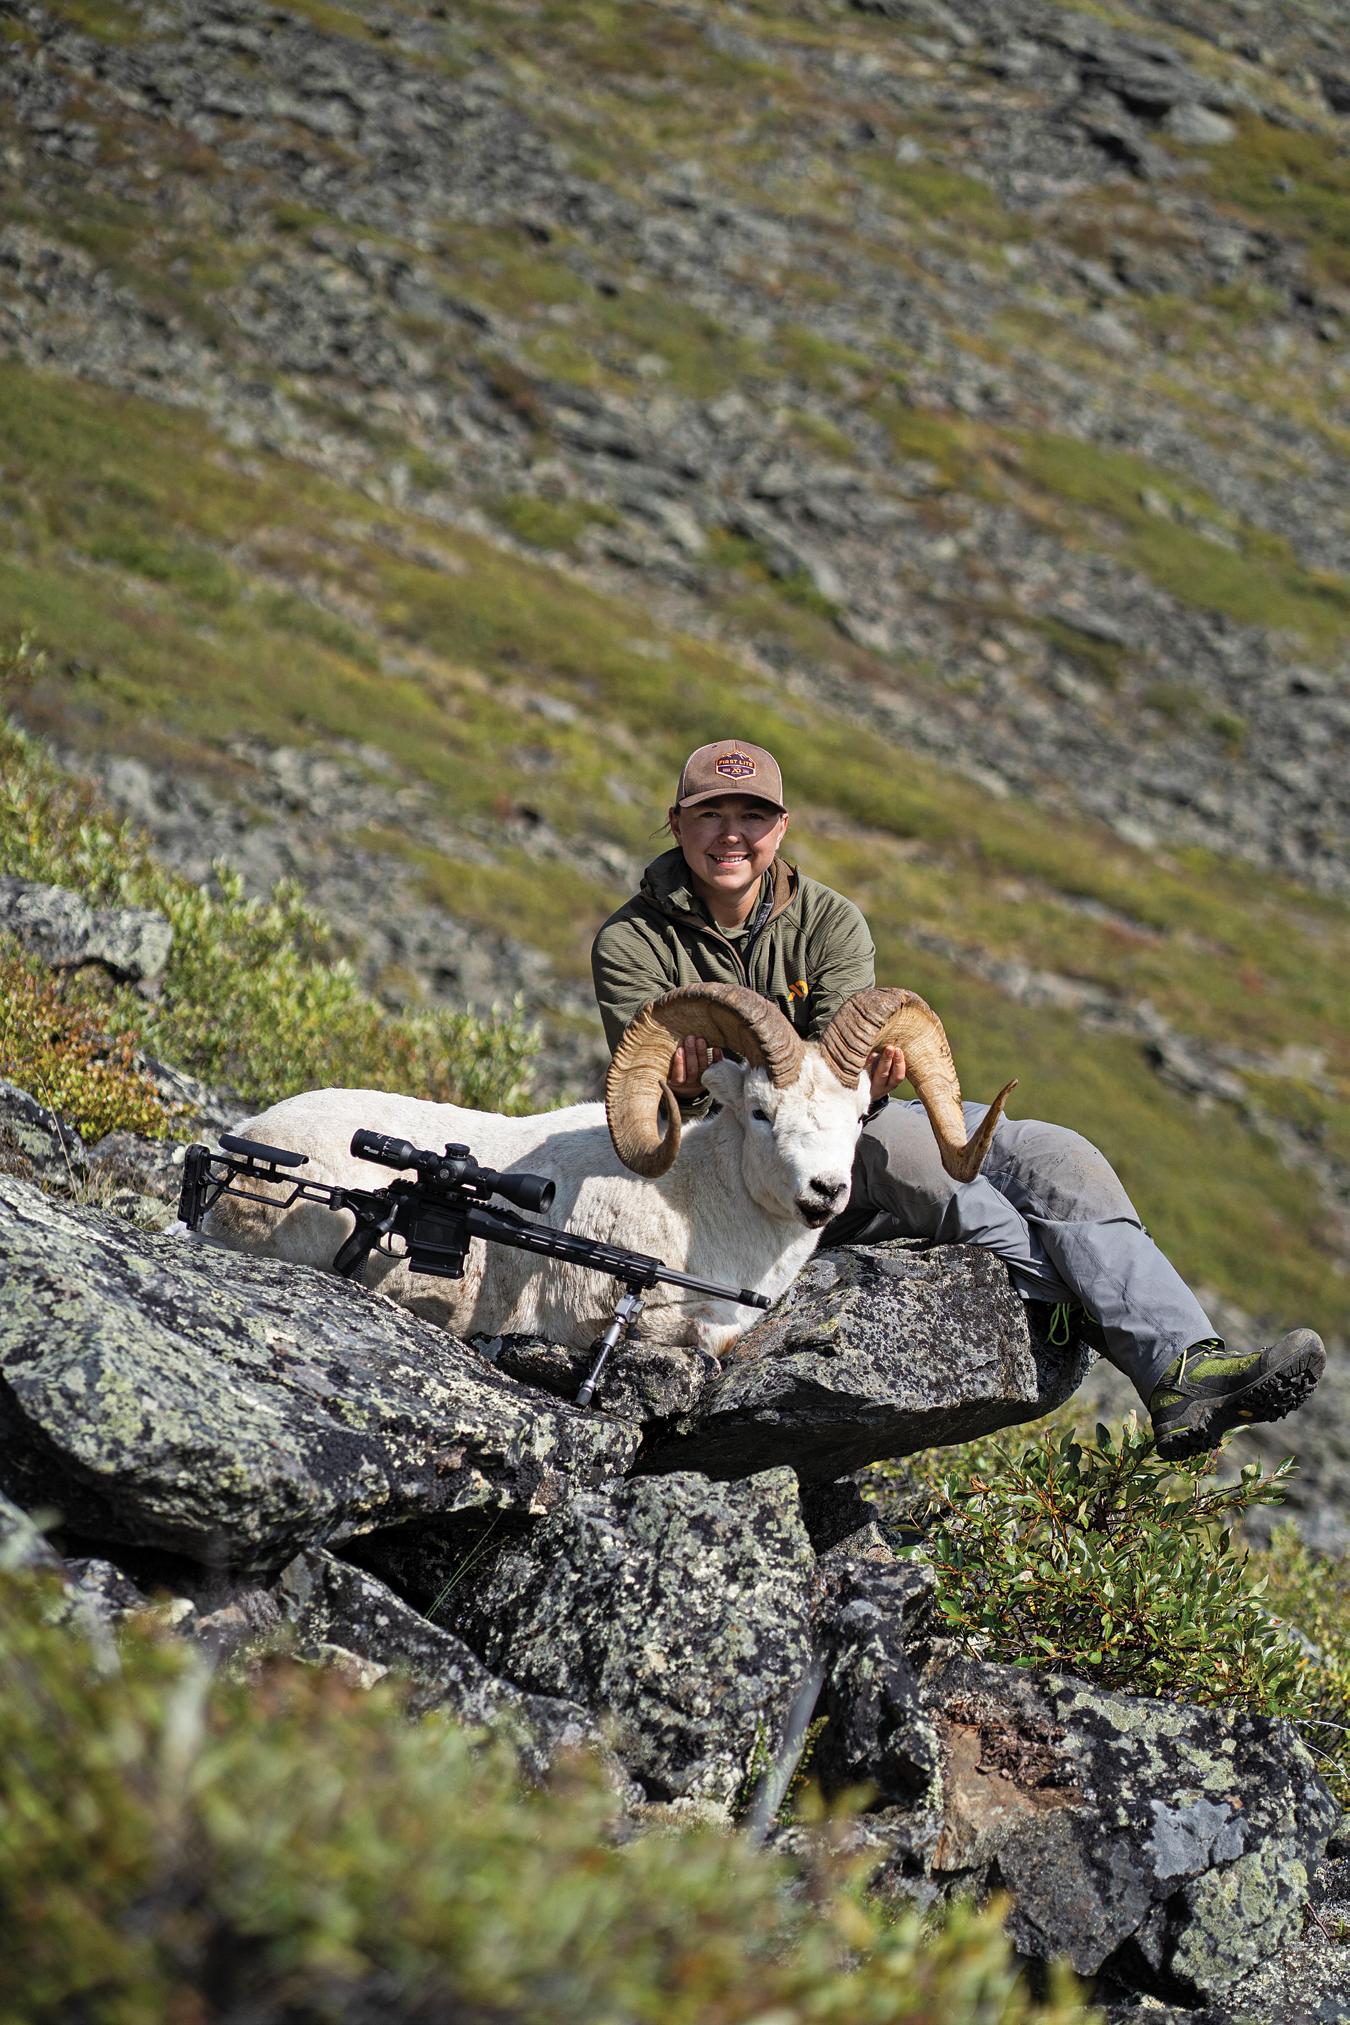
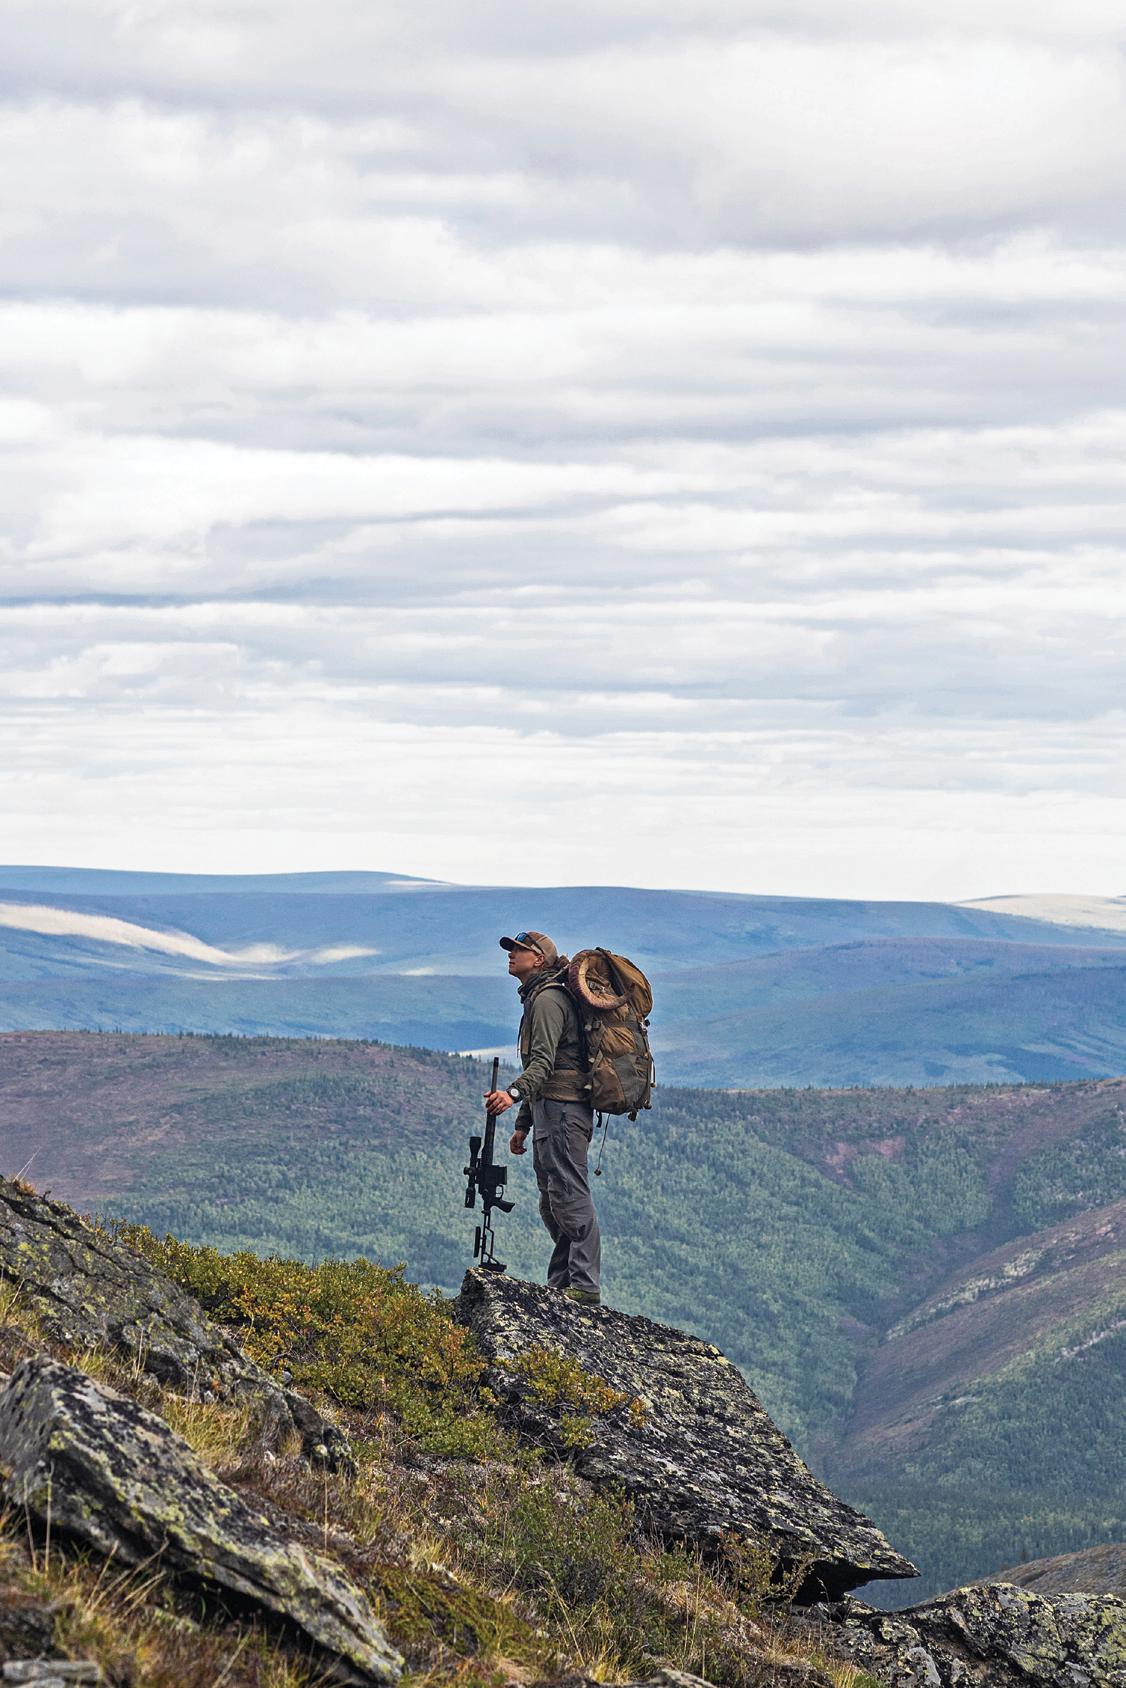
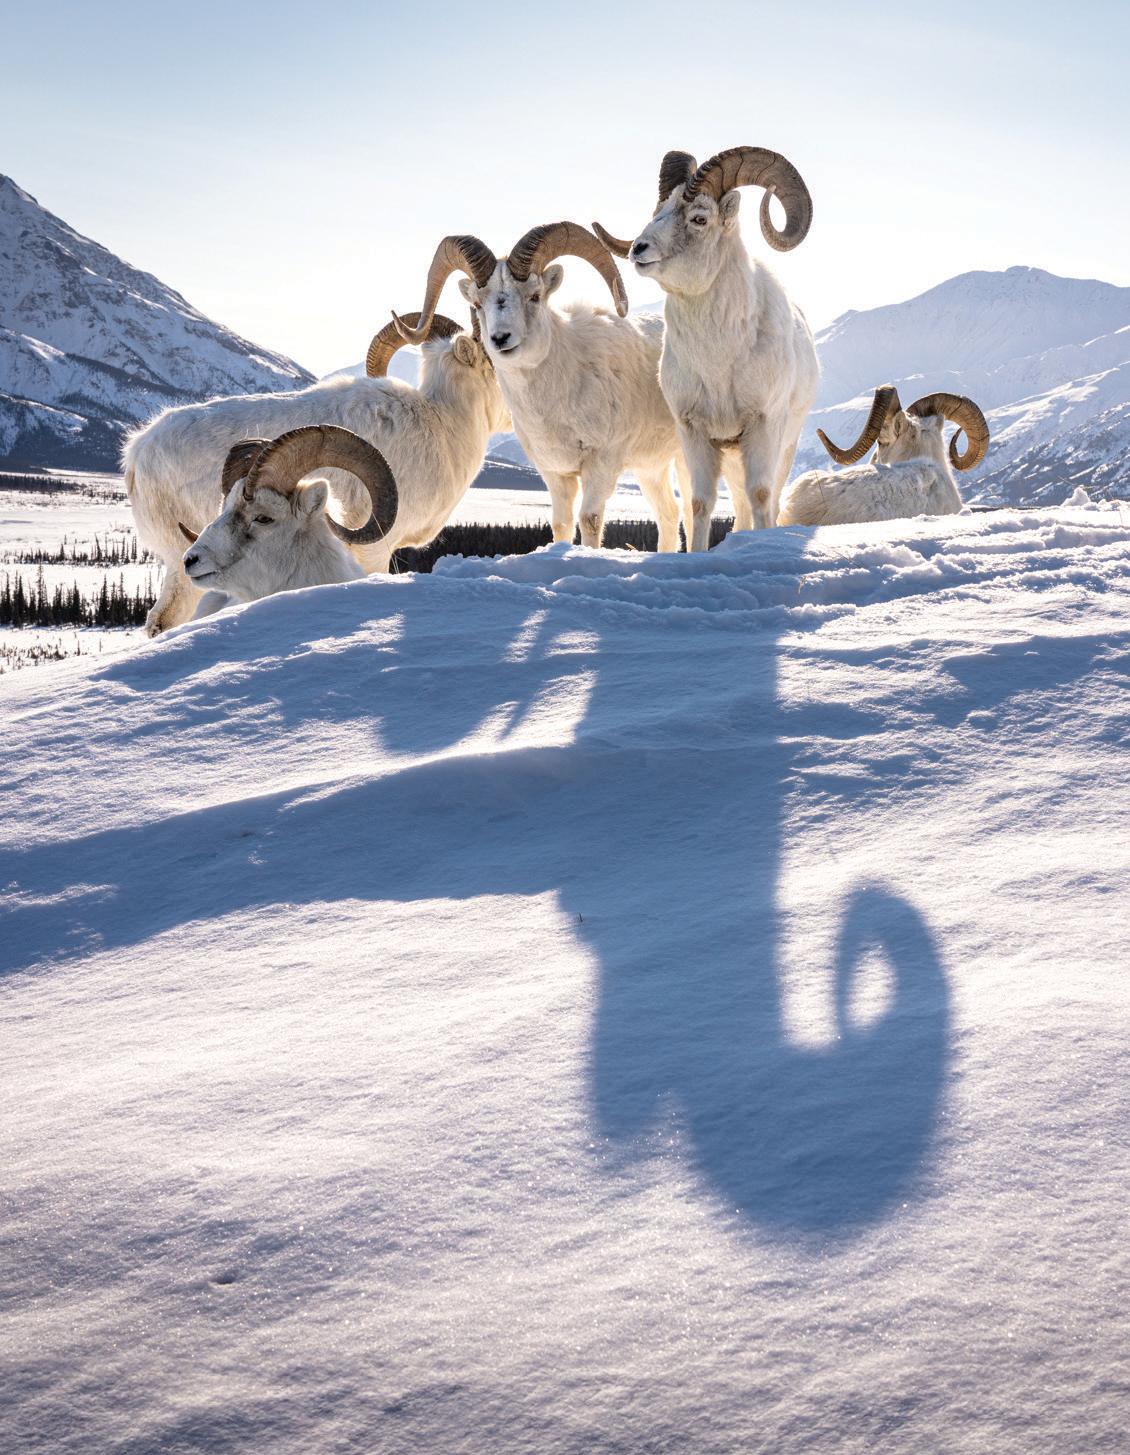
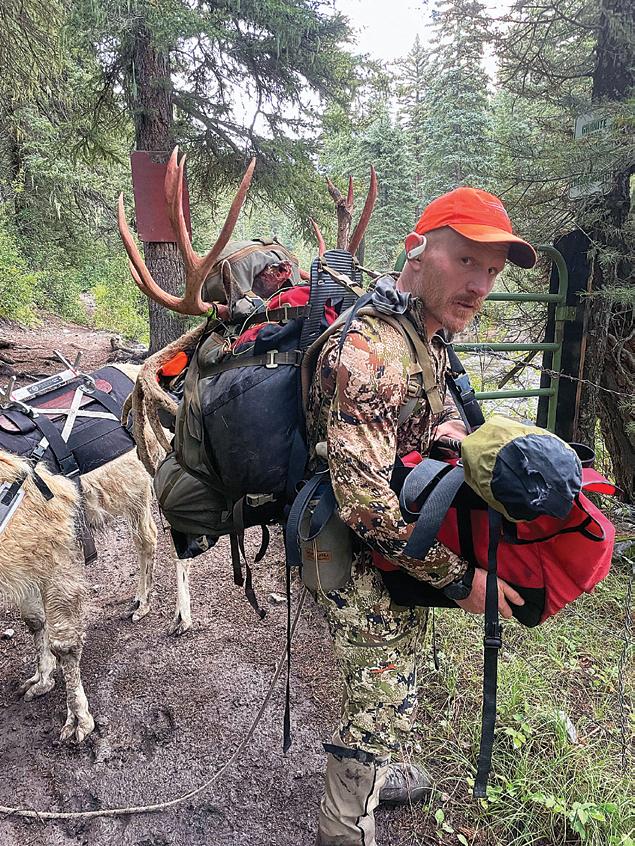
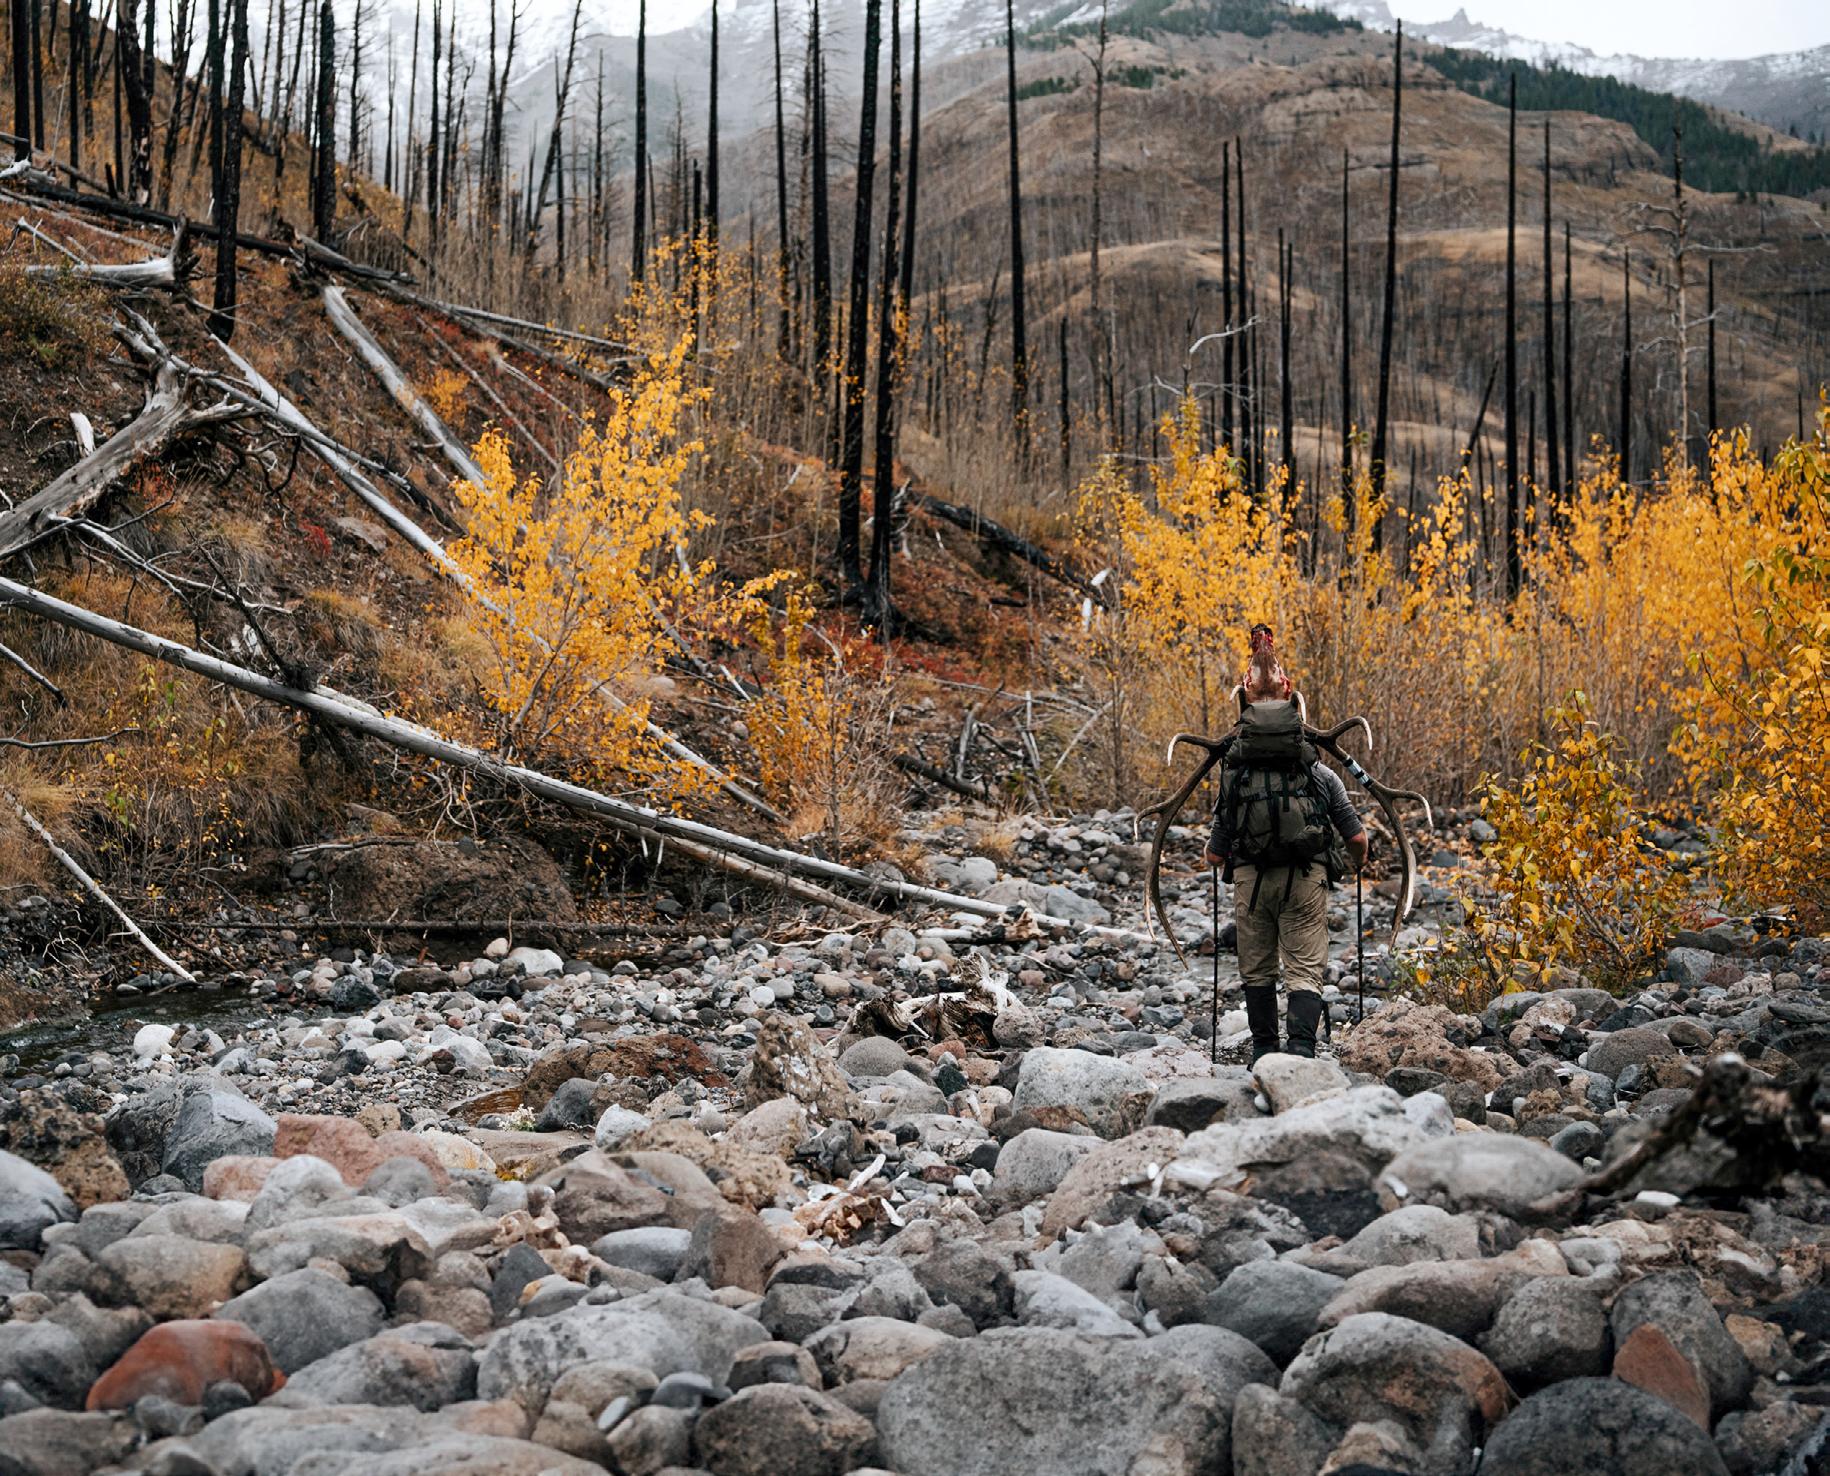
Weather forces a last-minute gamble on a Dall sheep hunt
STUCK IN THE CLOUDS
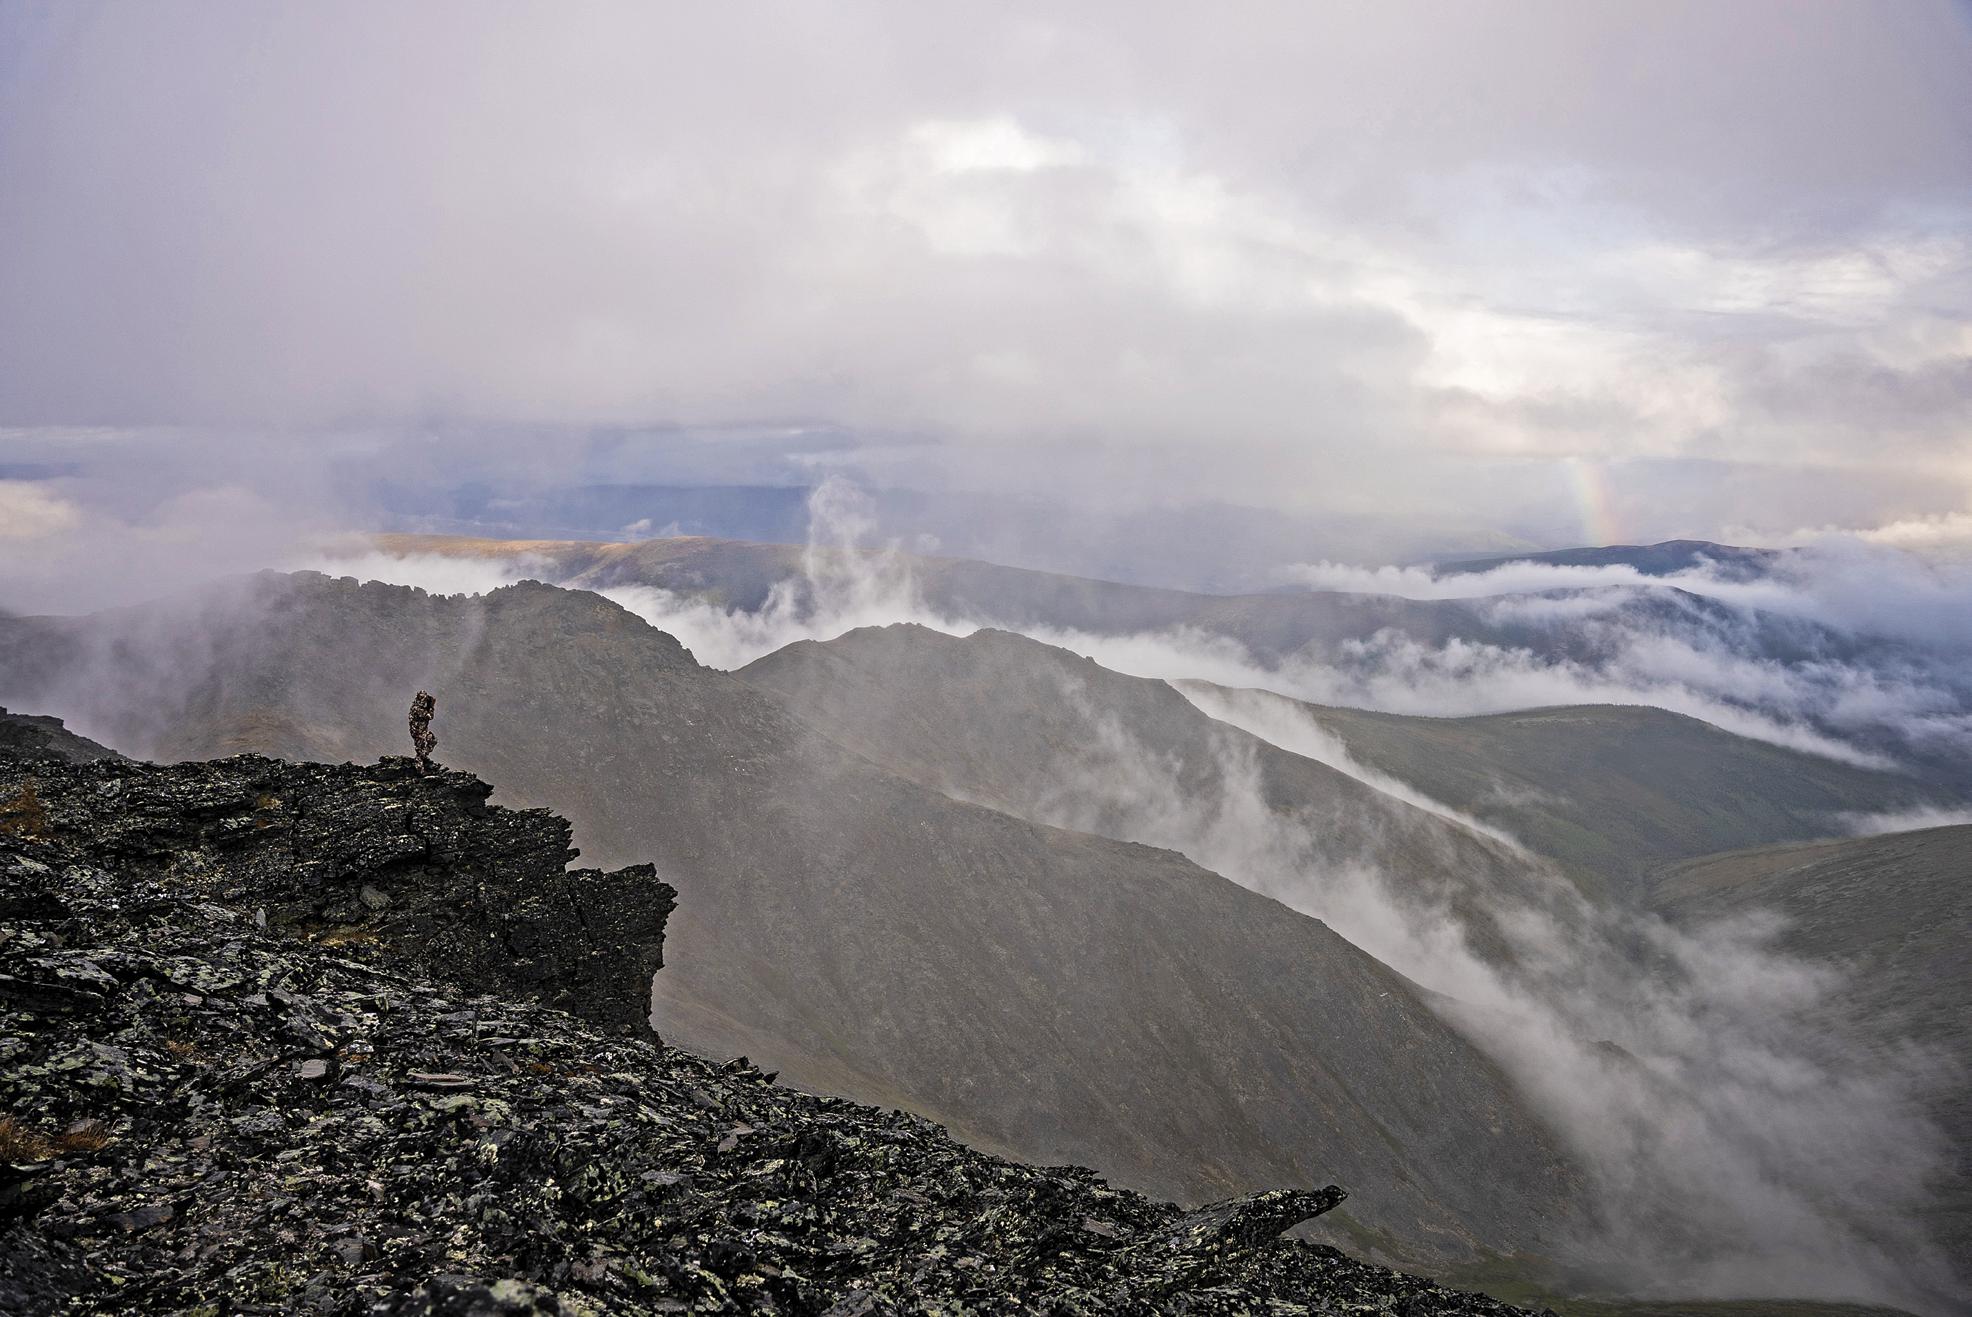
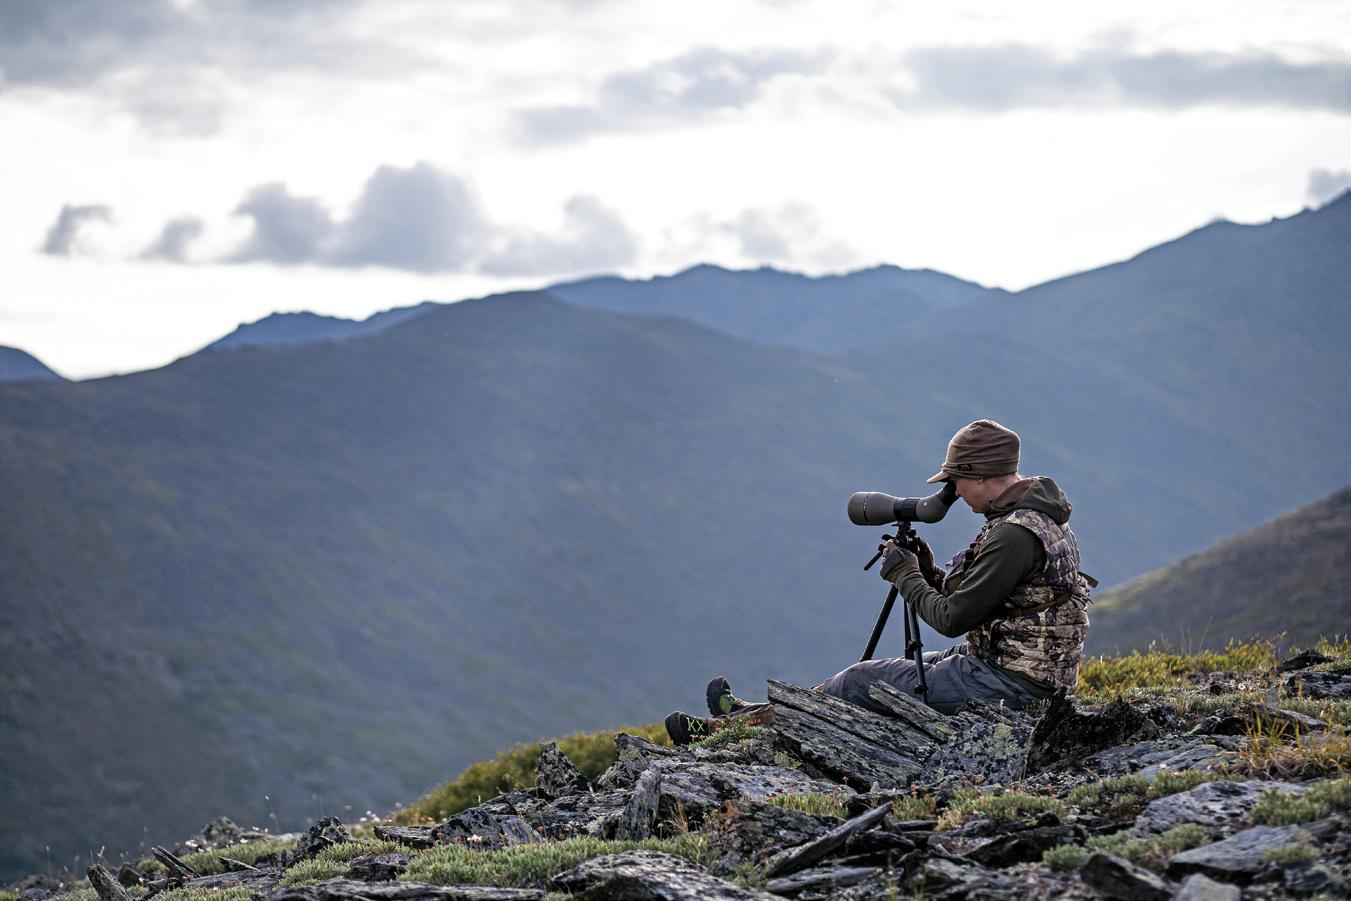
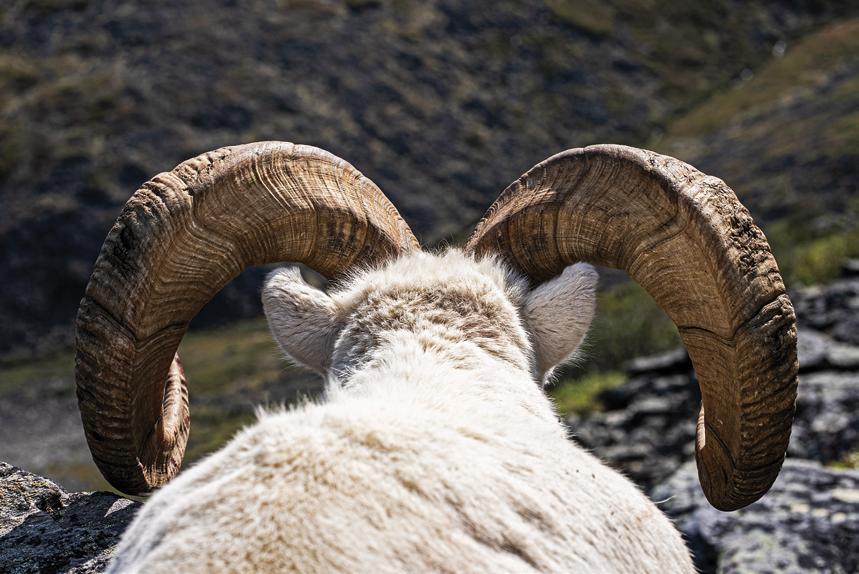
It was August 8th and I had finally made it to the Brooks Range of Alaska in search of a Dall sheep. The outfitter, Luke, had landed on a short ridge with his Piper Super Cruiser, where I met up with my guide, Wes, and packer, coincidentally also named Wes. We used the afternoon to glass the first mountain range where we’d hoped to find a legal ram while we waited for my cameraman Jonah to get flown in. It was bluebird skies with light winds. Moisture was forecasted for the week, but nothing major. Once Jonah arrived, we set up our tents and went to bed.
The next morning we glassed up a band of four rams at the head of a drainage. After a while of studying through the spotting scope at two miles or more, Wes decided one of the rams was probably legal and worth a better look. We watched the rams for most of the day, expecting to move in closer the following day when the season opened. The rams had other plans, though, as they started moving across the shale slides toward a saddle that dropped them into the adjoining drainage, out of sight.
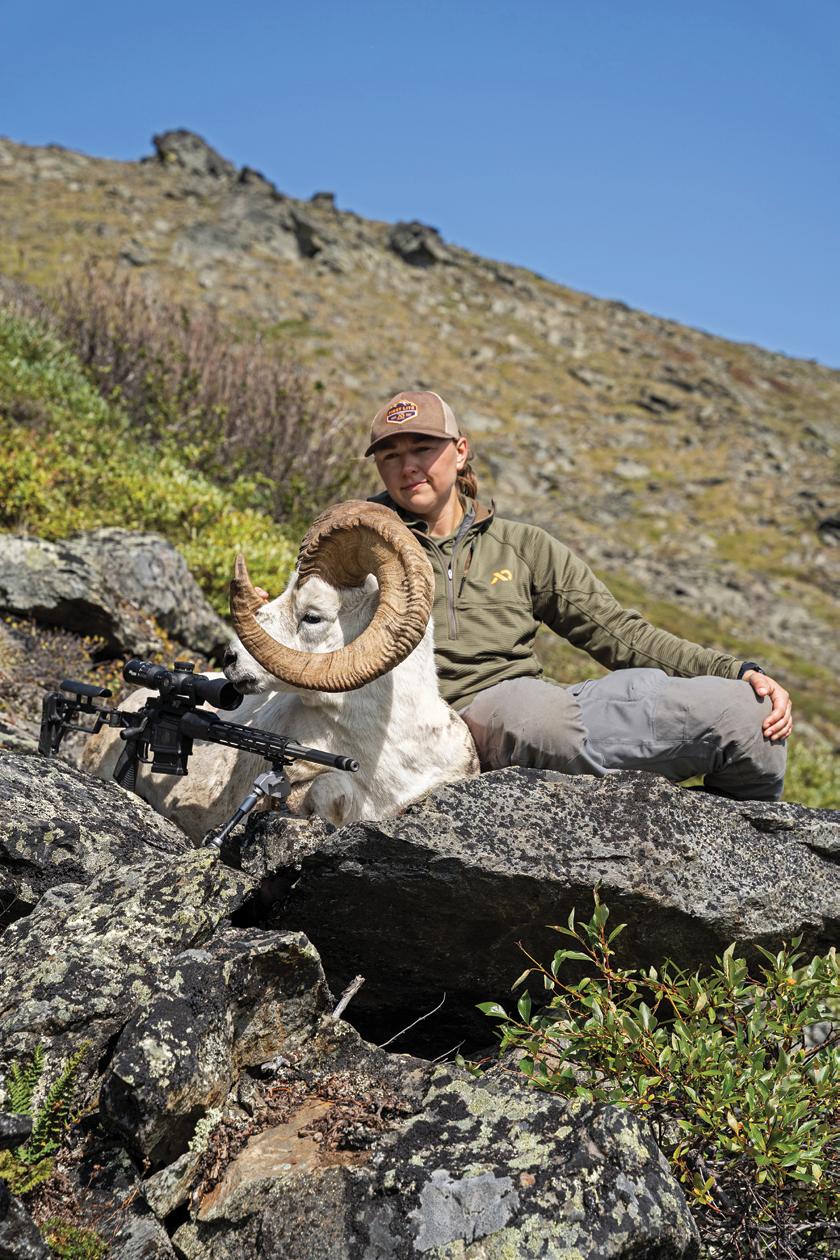
Jordan Budd Alaska – 2021
with a rifle in my hand.
Moving In
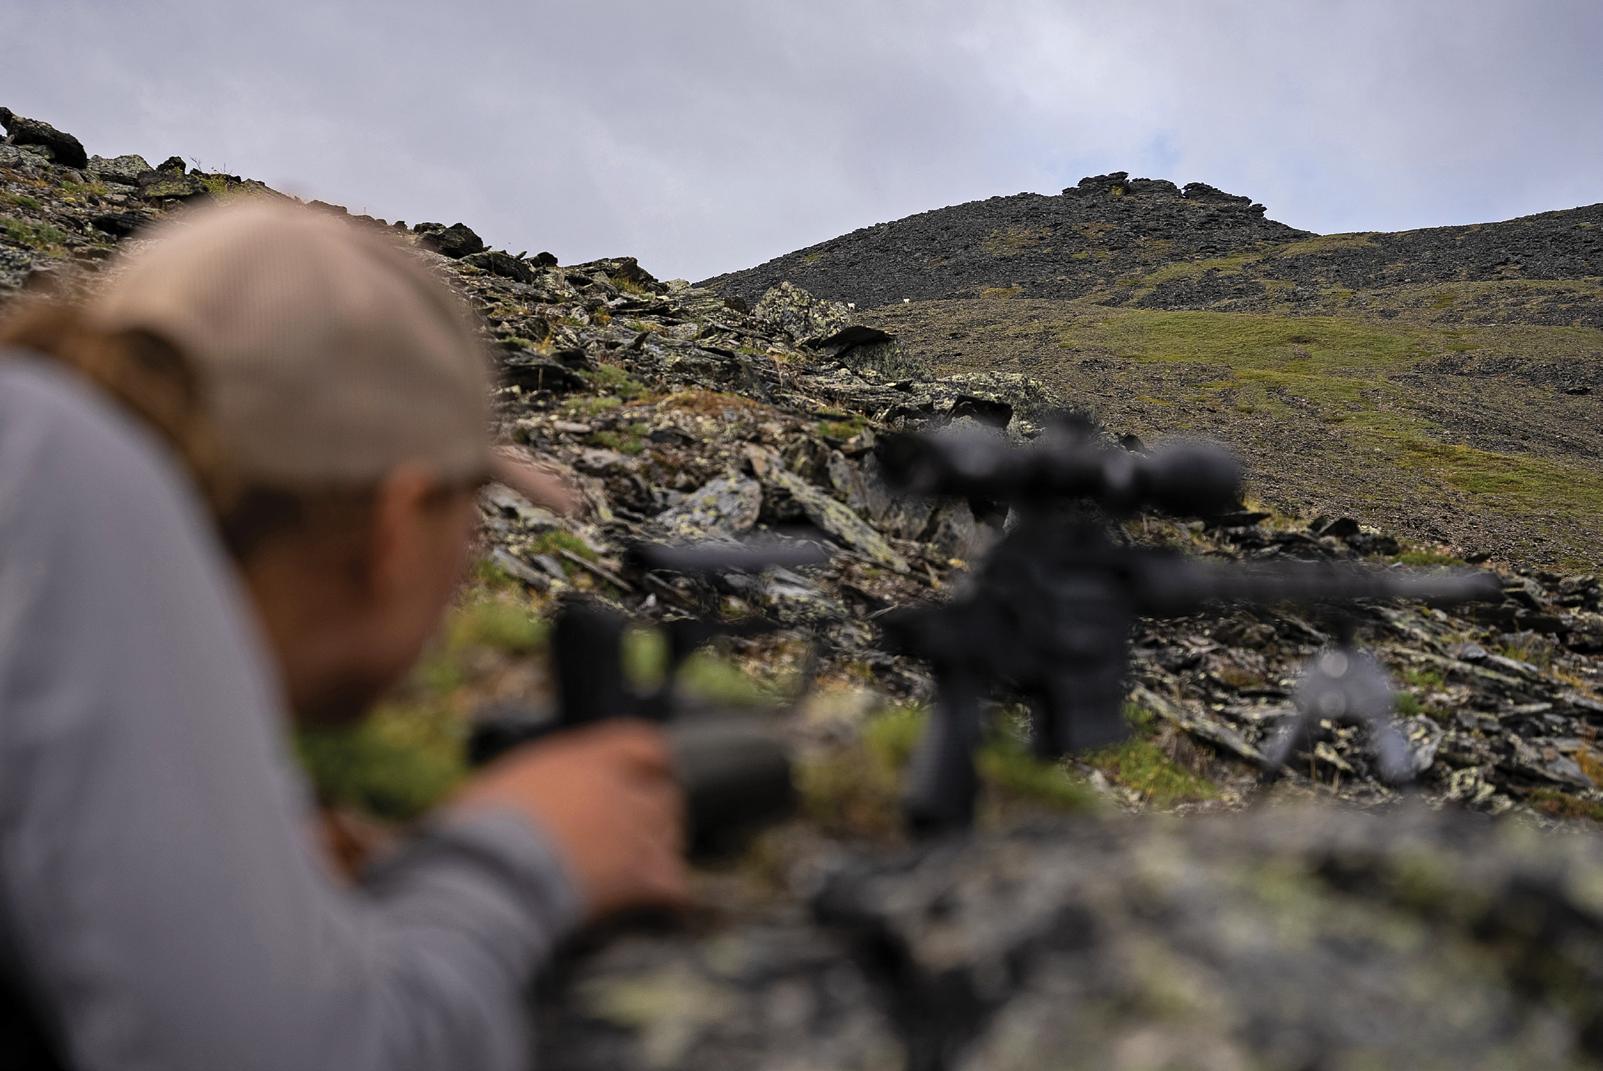
The next morning, we snuck into the saddle and Wes glassed up two of the smaller rams walking in our direction. We used the terrain and got into position for a shot while the rams fed around the hill and shortly bedded at 300 yards. I laid behind my rifle, waiting for the bigger rams to show up, but they never did.
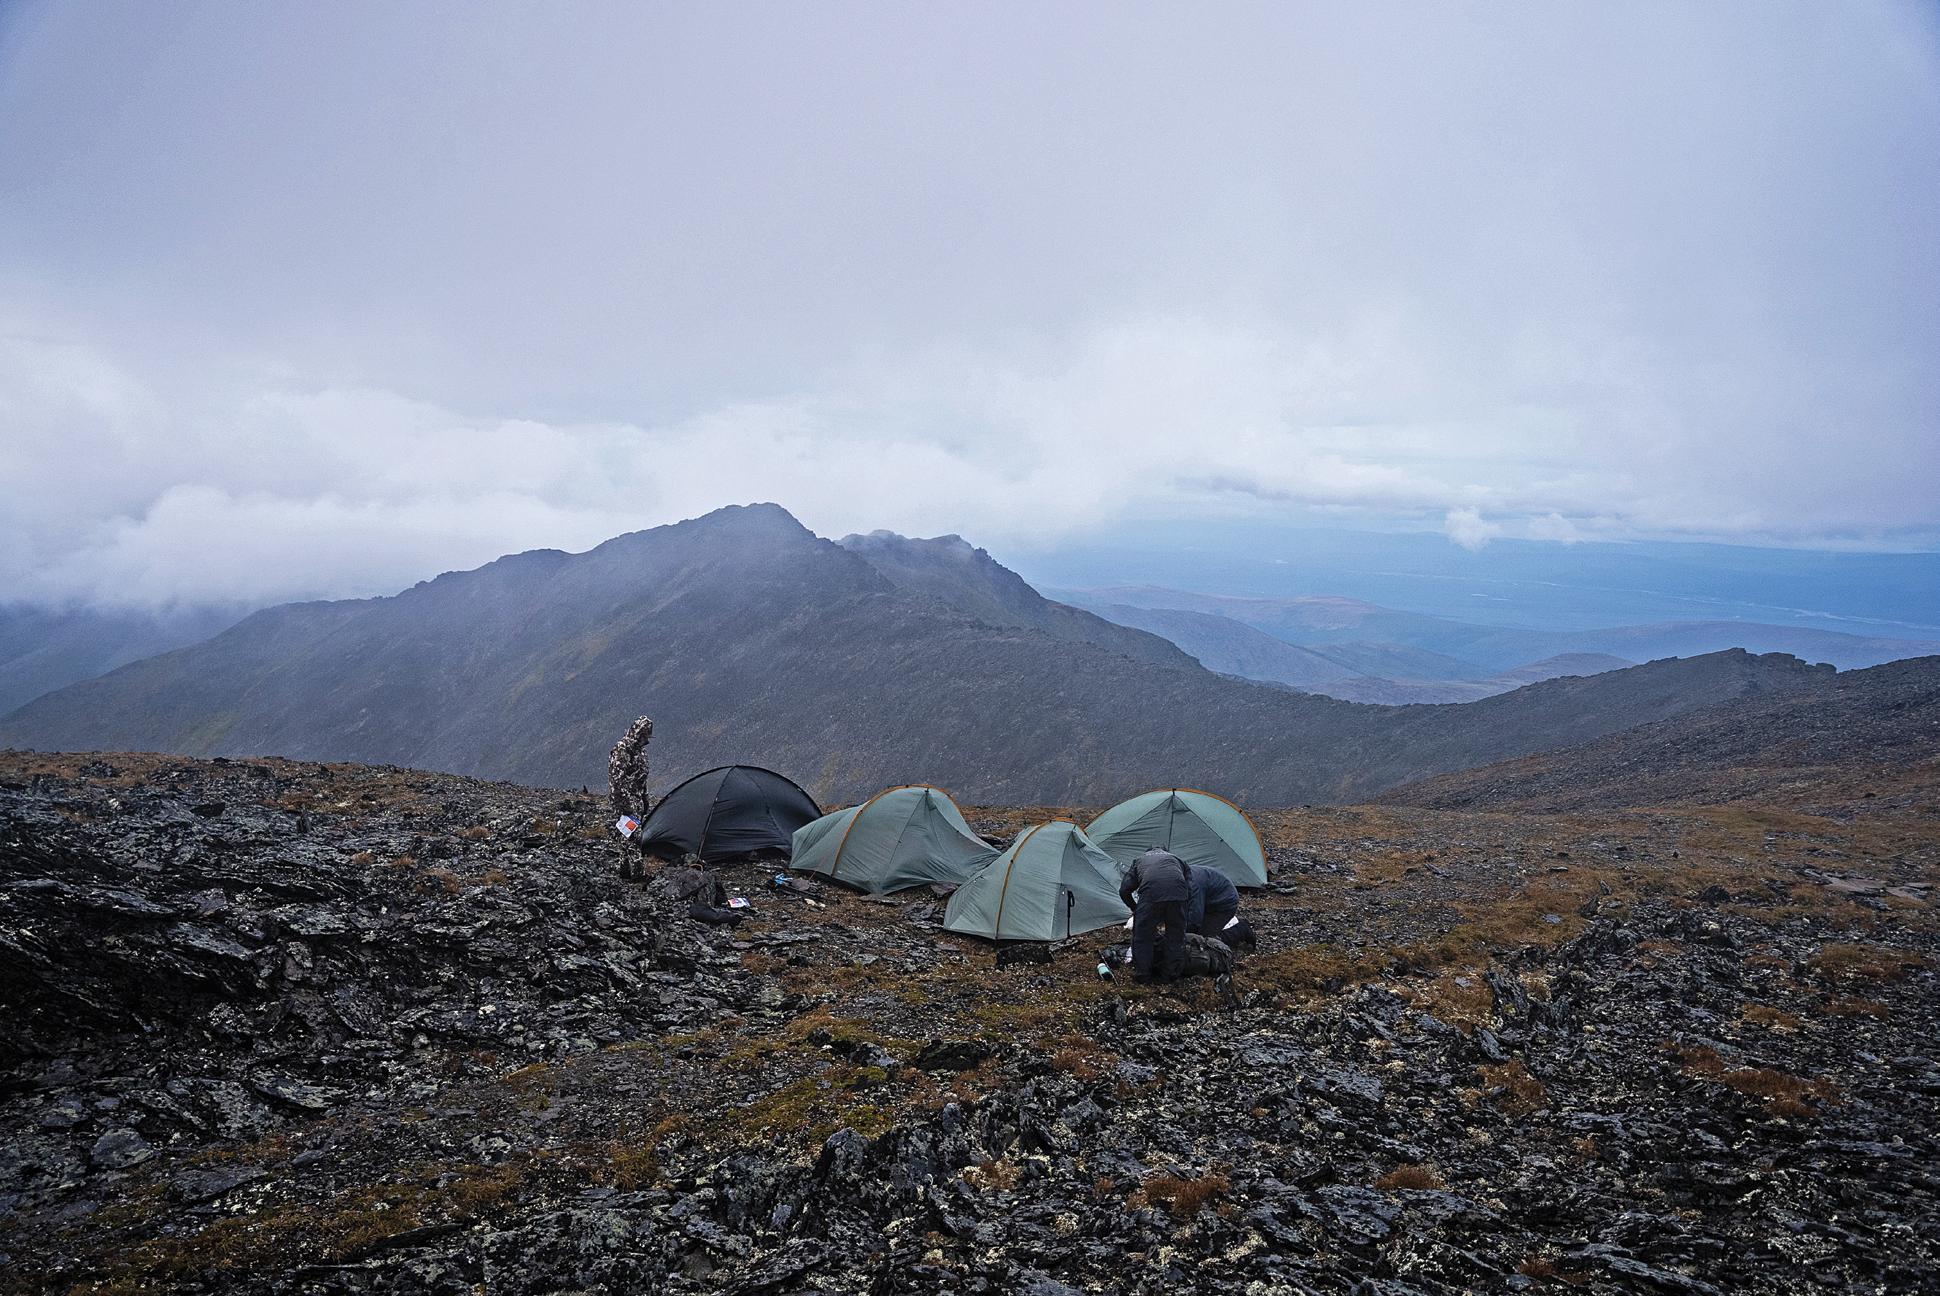
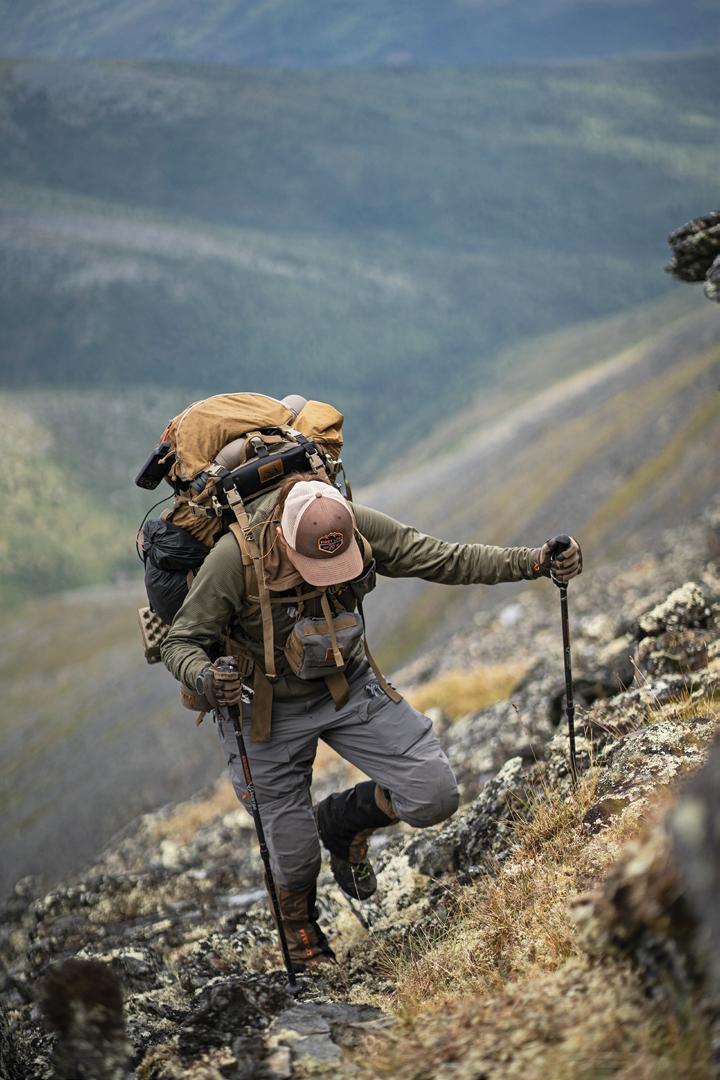
We set up camp off of a long spine ridge and went to bed with the intention of working our way up the drainage to find the rams the following day. The weather, however, had other plans. The next morning, rain was hitting my tent. Peeking out my door, I could see we were in the clouds with zero visibility. You can hunt in the rain, but if you can’t see, there is no point in leaving the tent. We spent the whole day hunkered inside our tents, waiting for the weather to break. The following morning, we awoke to the same rain and clouds. Around noon, the clouds finally began to break, and we quickly packed up camp and headed up the ridge while we had the chance. We worked our way up slowly, glassing on both sides, while intermittent clouds closed in on us.
Wes told me we would just make our way along the main ridges every day and eventually, we would
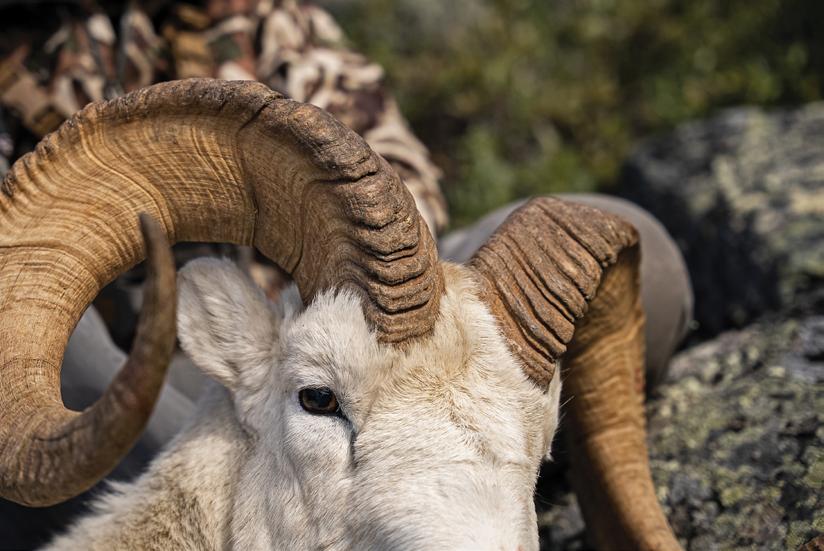
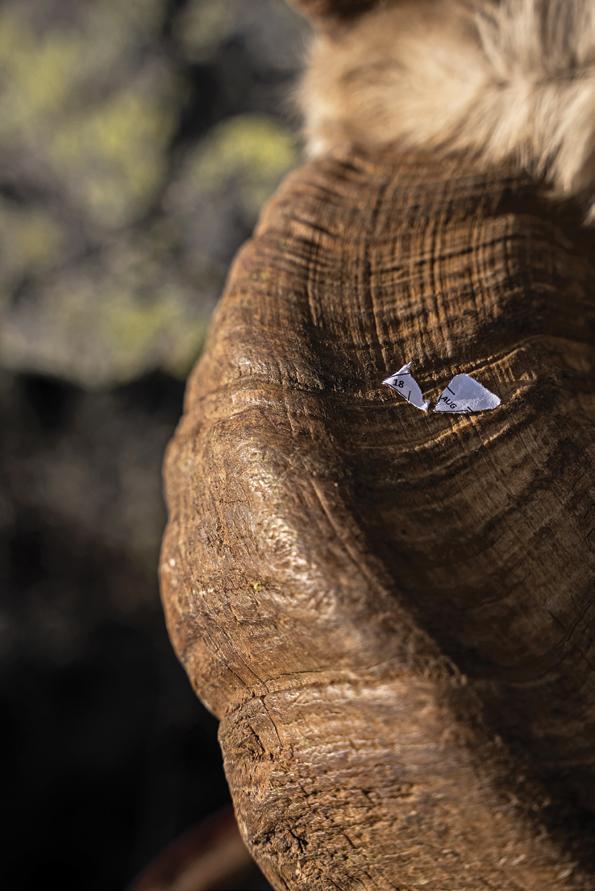
specks rounding a hill. We sat down and broke out our spotting scopes. Wes identified one ram as being legal. He had one big notch taken out of one horn. That was a cool characteristic, I thought, and was slightly broomed on the other side.
In order to get in a better position for an opportunity, we had to keep moving to the top of the peak and would also have to lose sight of the rams while we moved. Once we reached the top, we could not find the sheep. Thinking they may have moved underneath us, we crept off the edge, looking below us, but didn’t see them.
The only thing left was to stalk to where they had been before, as we thought the hill wrapped around enough that we couldn’t see them while
Alaskan Weather
I woke up the next morning to my tent violently flapping in the harsh wind and the poles flexing like I’d never seen. My vestibule had popped off of its ground stake and was blowing around, exposing all of my gear to the elements, so I tied it to my backpack. I poked my head out to see that we were in the clouds again, and then I asked, “What’s the plan, Wes?” He replied, “We need to get off of this top before things start breaking.” We packed our packs with camp as fast as we could and bailed off of the top, hoping to find a better wind block.
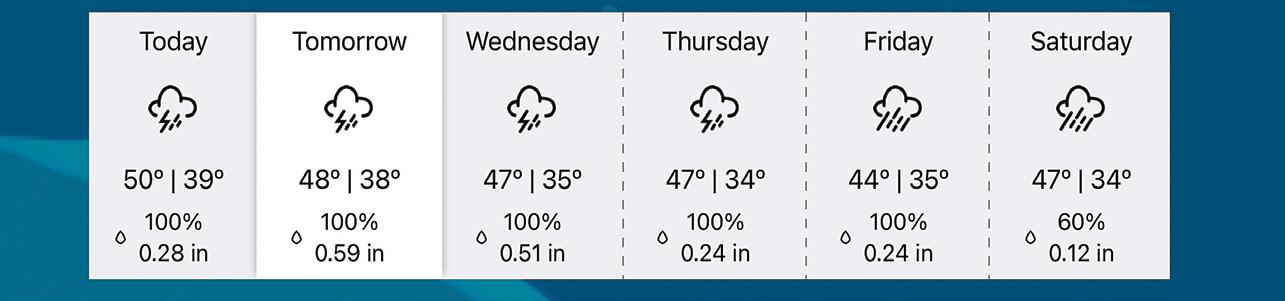
We pulled weather forecasts from our Garmin inReach, and I was a bit overwhelmed with the results. The whole week showed a snowflake symbol, up until the day we were set to leave. We’ve finally made it into sheep country and we aren’t even going to get a chance to hunt it. I was frustrated, but the only thing we could do was stay, wait for a clearing window, and hunt it hard.
Meeting the Neighbors
As we dropped into a relatively flat camping spot with water nearby, we looked 800 yards down the valley to see a sow grizzly with her two cubs headed our direction – just what we needed! With no better options, we continued to where we would camp and got the tents set up with extra large rocks on all of the stakes in preparation for the wind. We had a discussion over dinner about what we should do if the bears were to come into camp. Luckily, we didn’t get to find out.
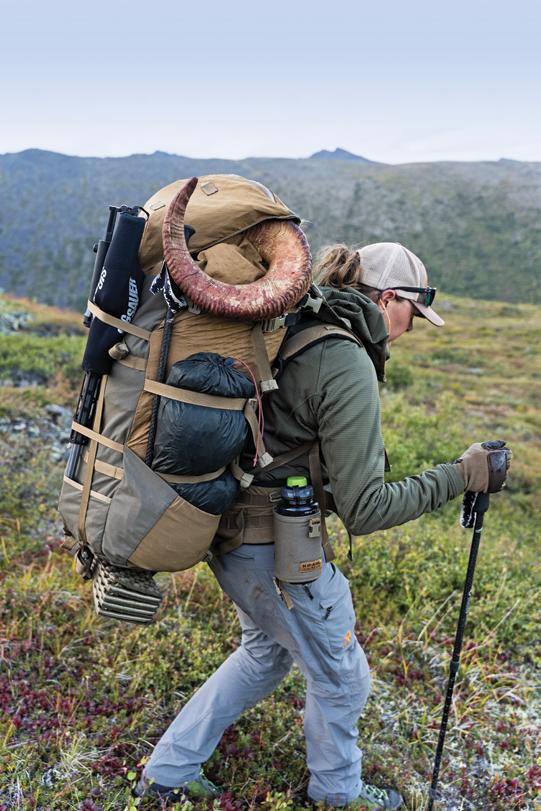
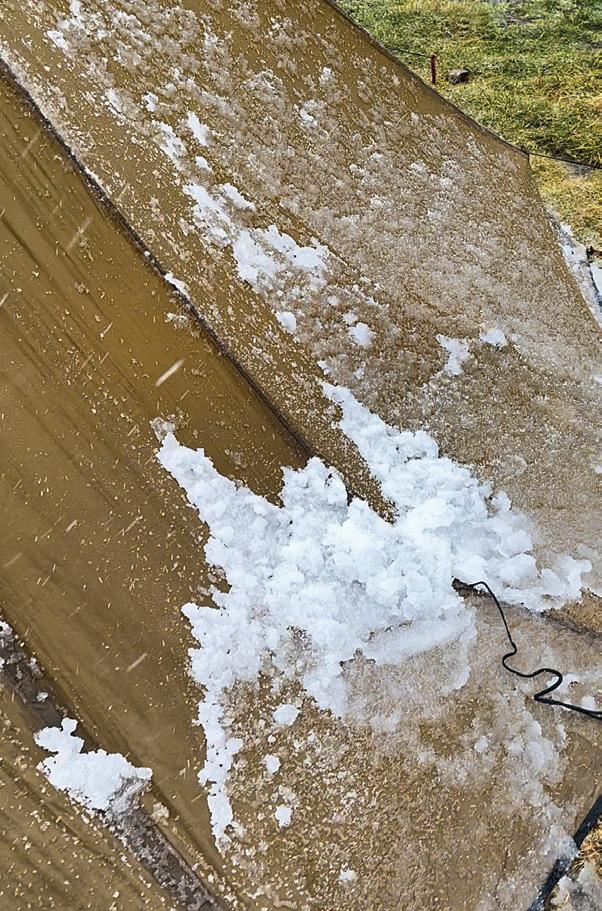
For the next two days, we were in the clouds as it rained and snowed and the wind blew like crazy. It was now Wednesday, and our flight off the mountain was set for Friday morning. The morning came with snow-covered mountain peaks and patchy, low clouds, making it huntable. We packed our camp up and
packout through the squishy tundra, thick brush, creek crossings, and one big climb, we were back to the airstrip at 5:00 AM Friday morning. With bluebird skies and not a skiff of wind, Luke was able to get us flown out of the field on time.
Looking back, I’m glad it happened like it did. I’m still not against shooting a ram the first day, but it wouldn’t have been the same experience for any of us. The weather was miserable, but the friendship was top-notch. The experiences we
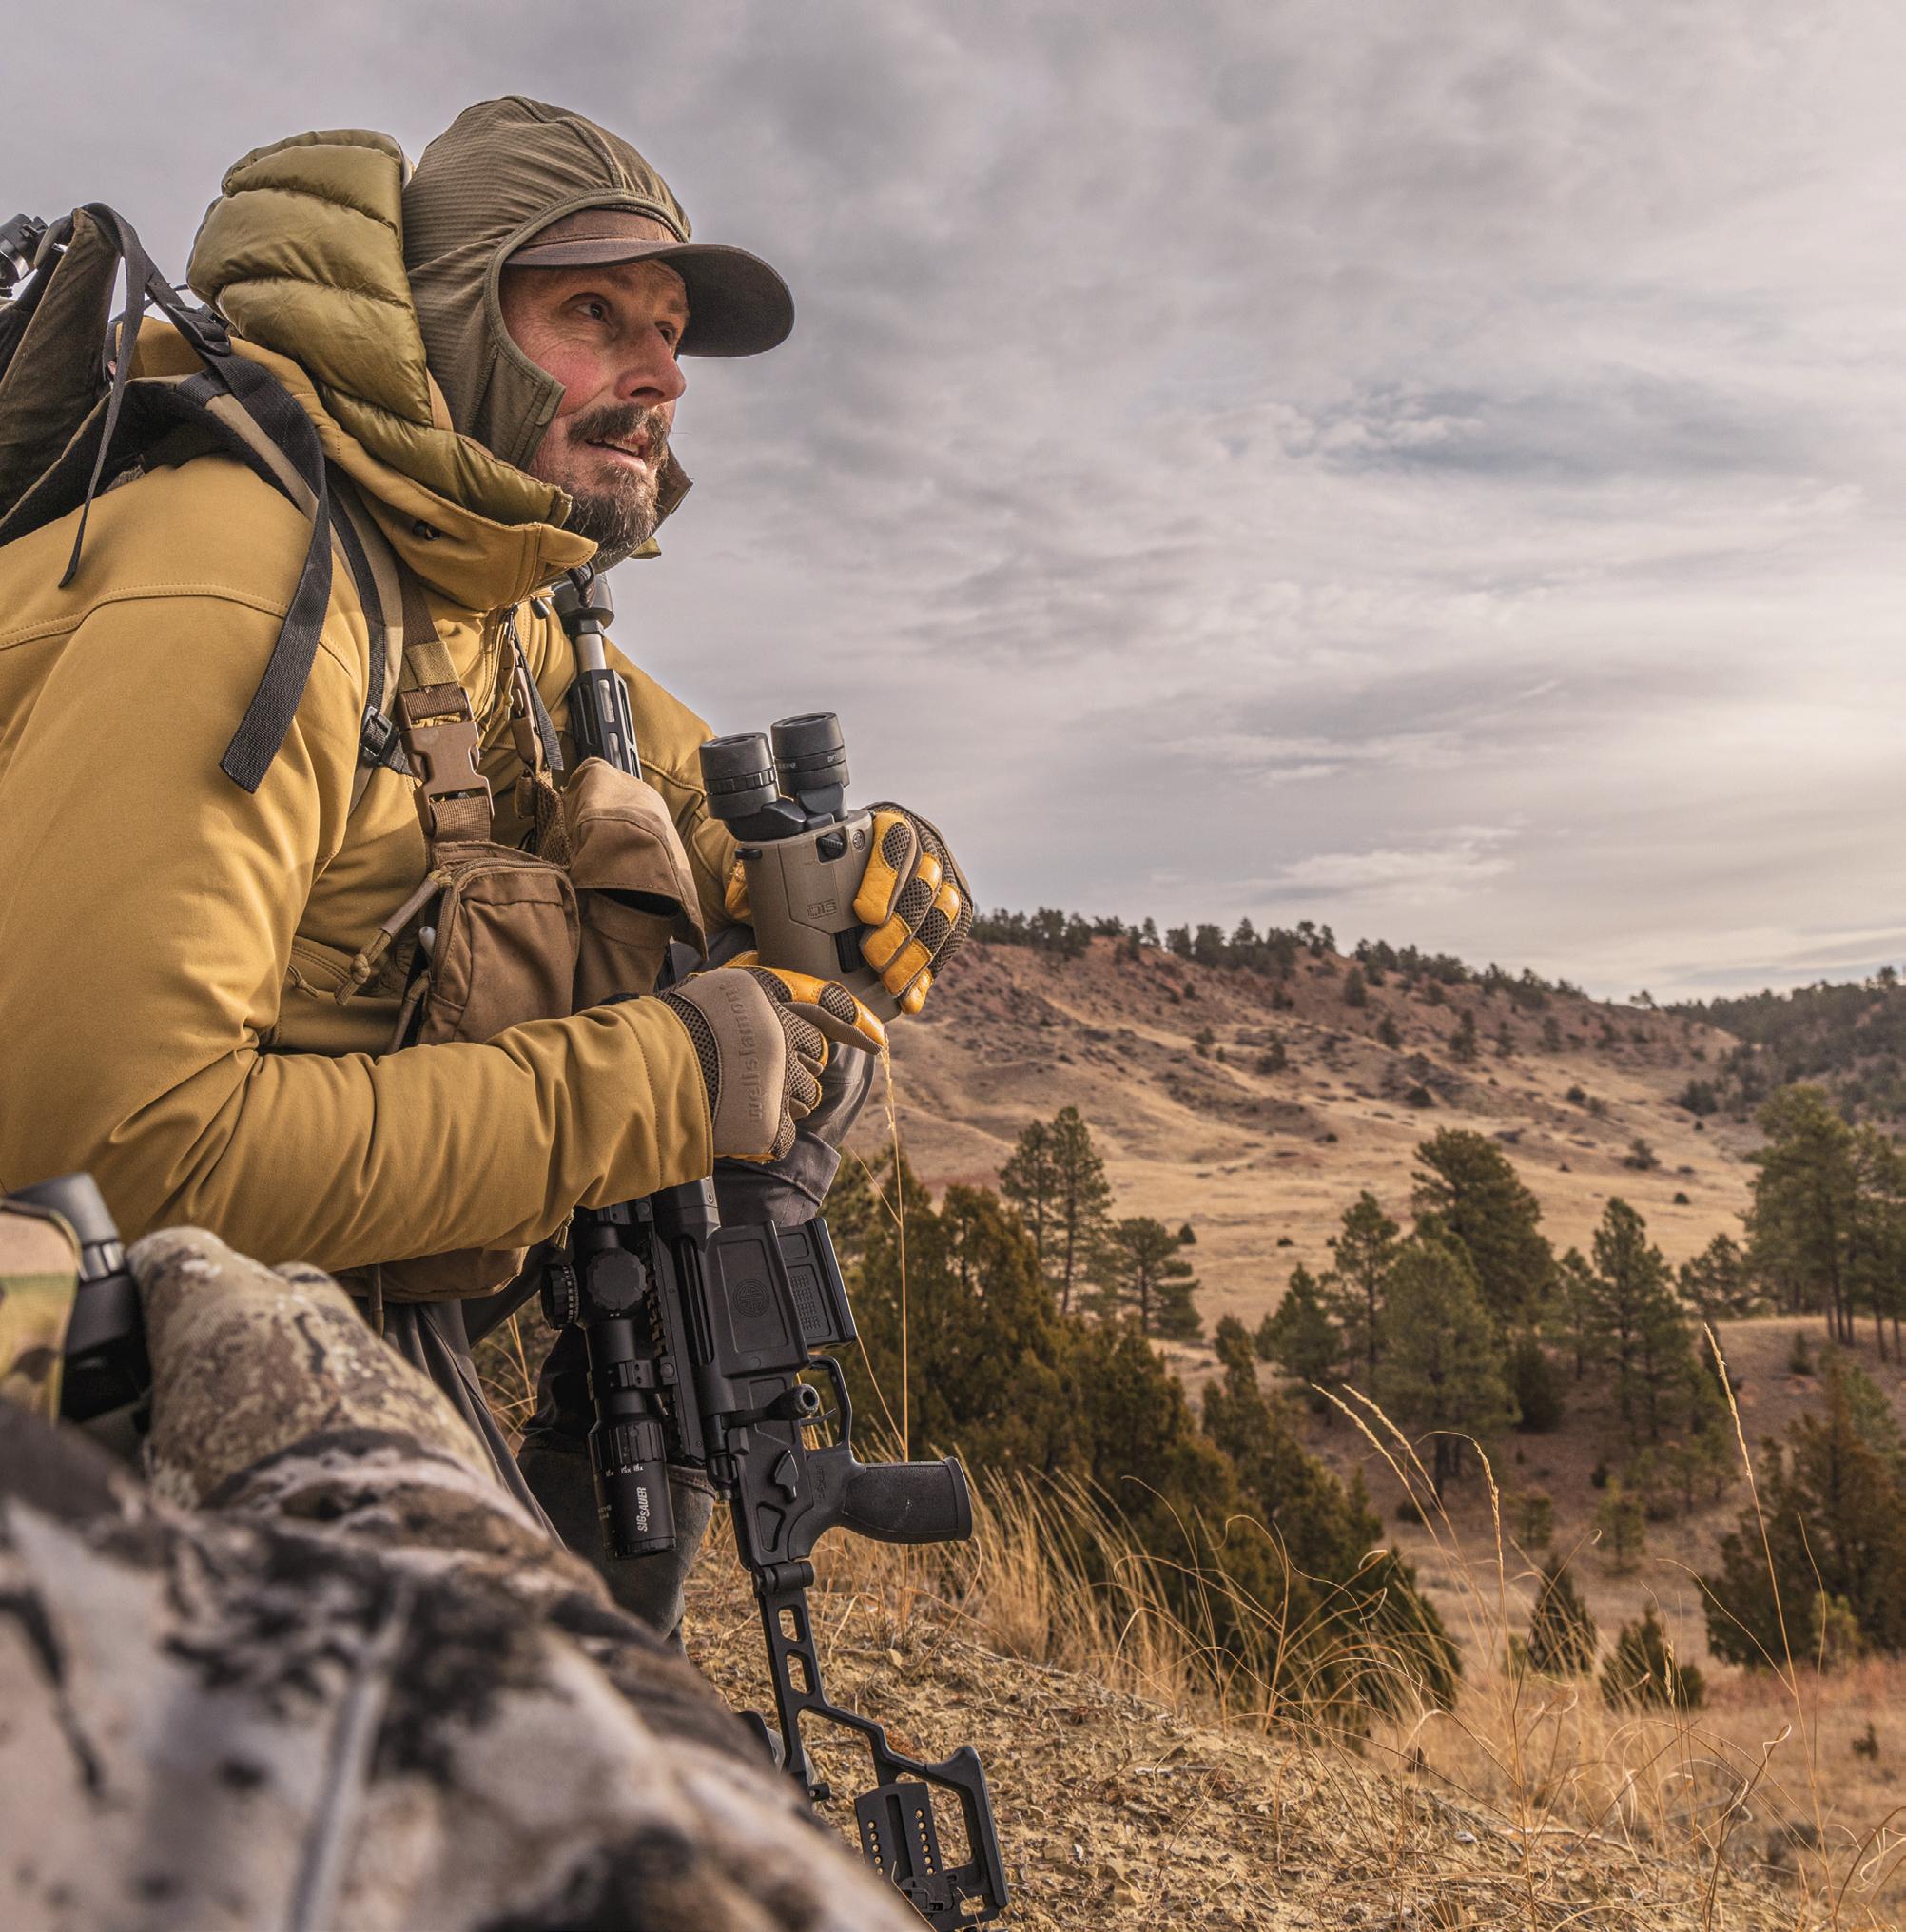
CRITICAL GEAR
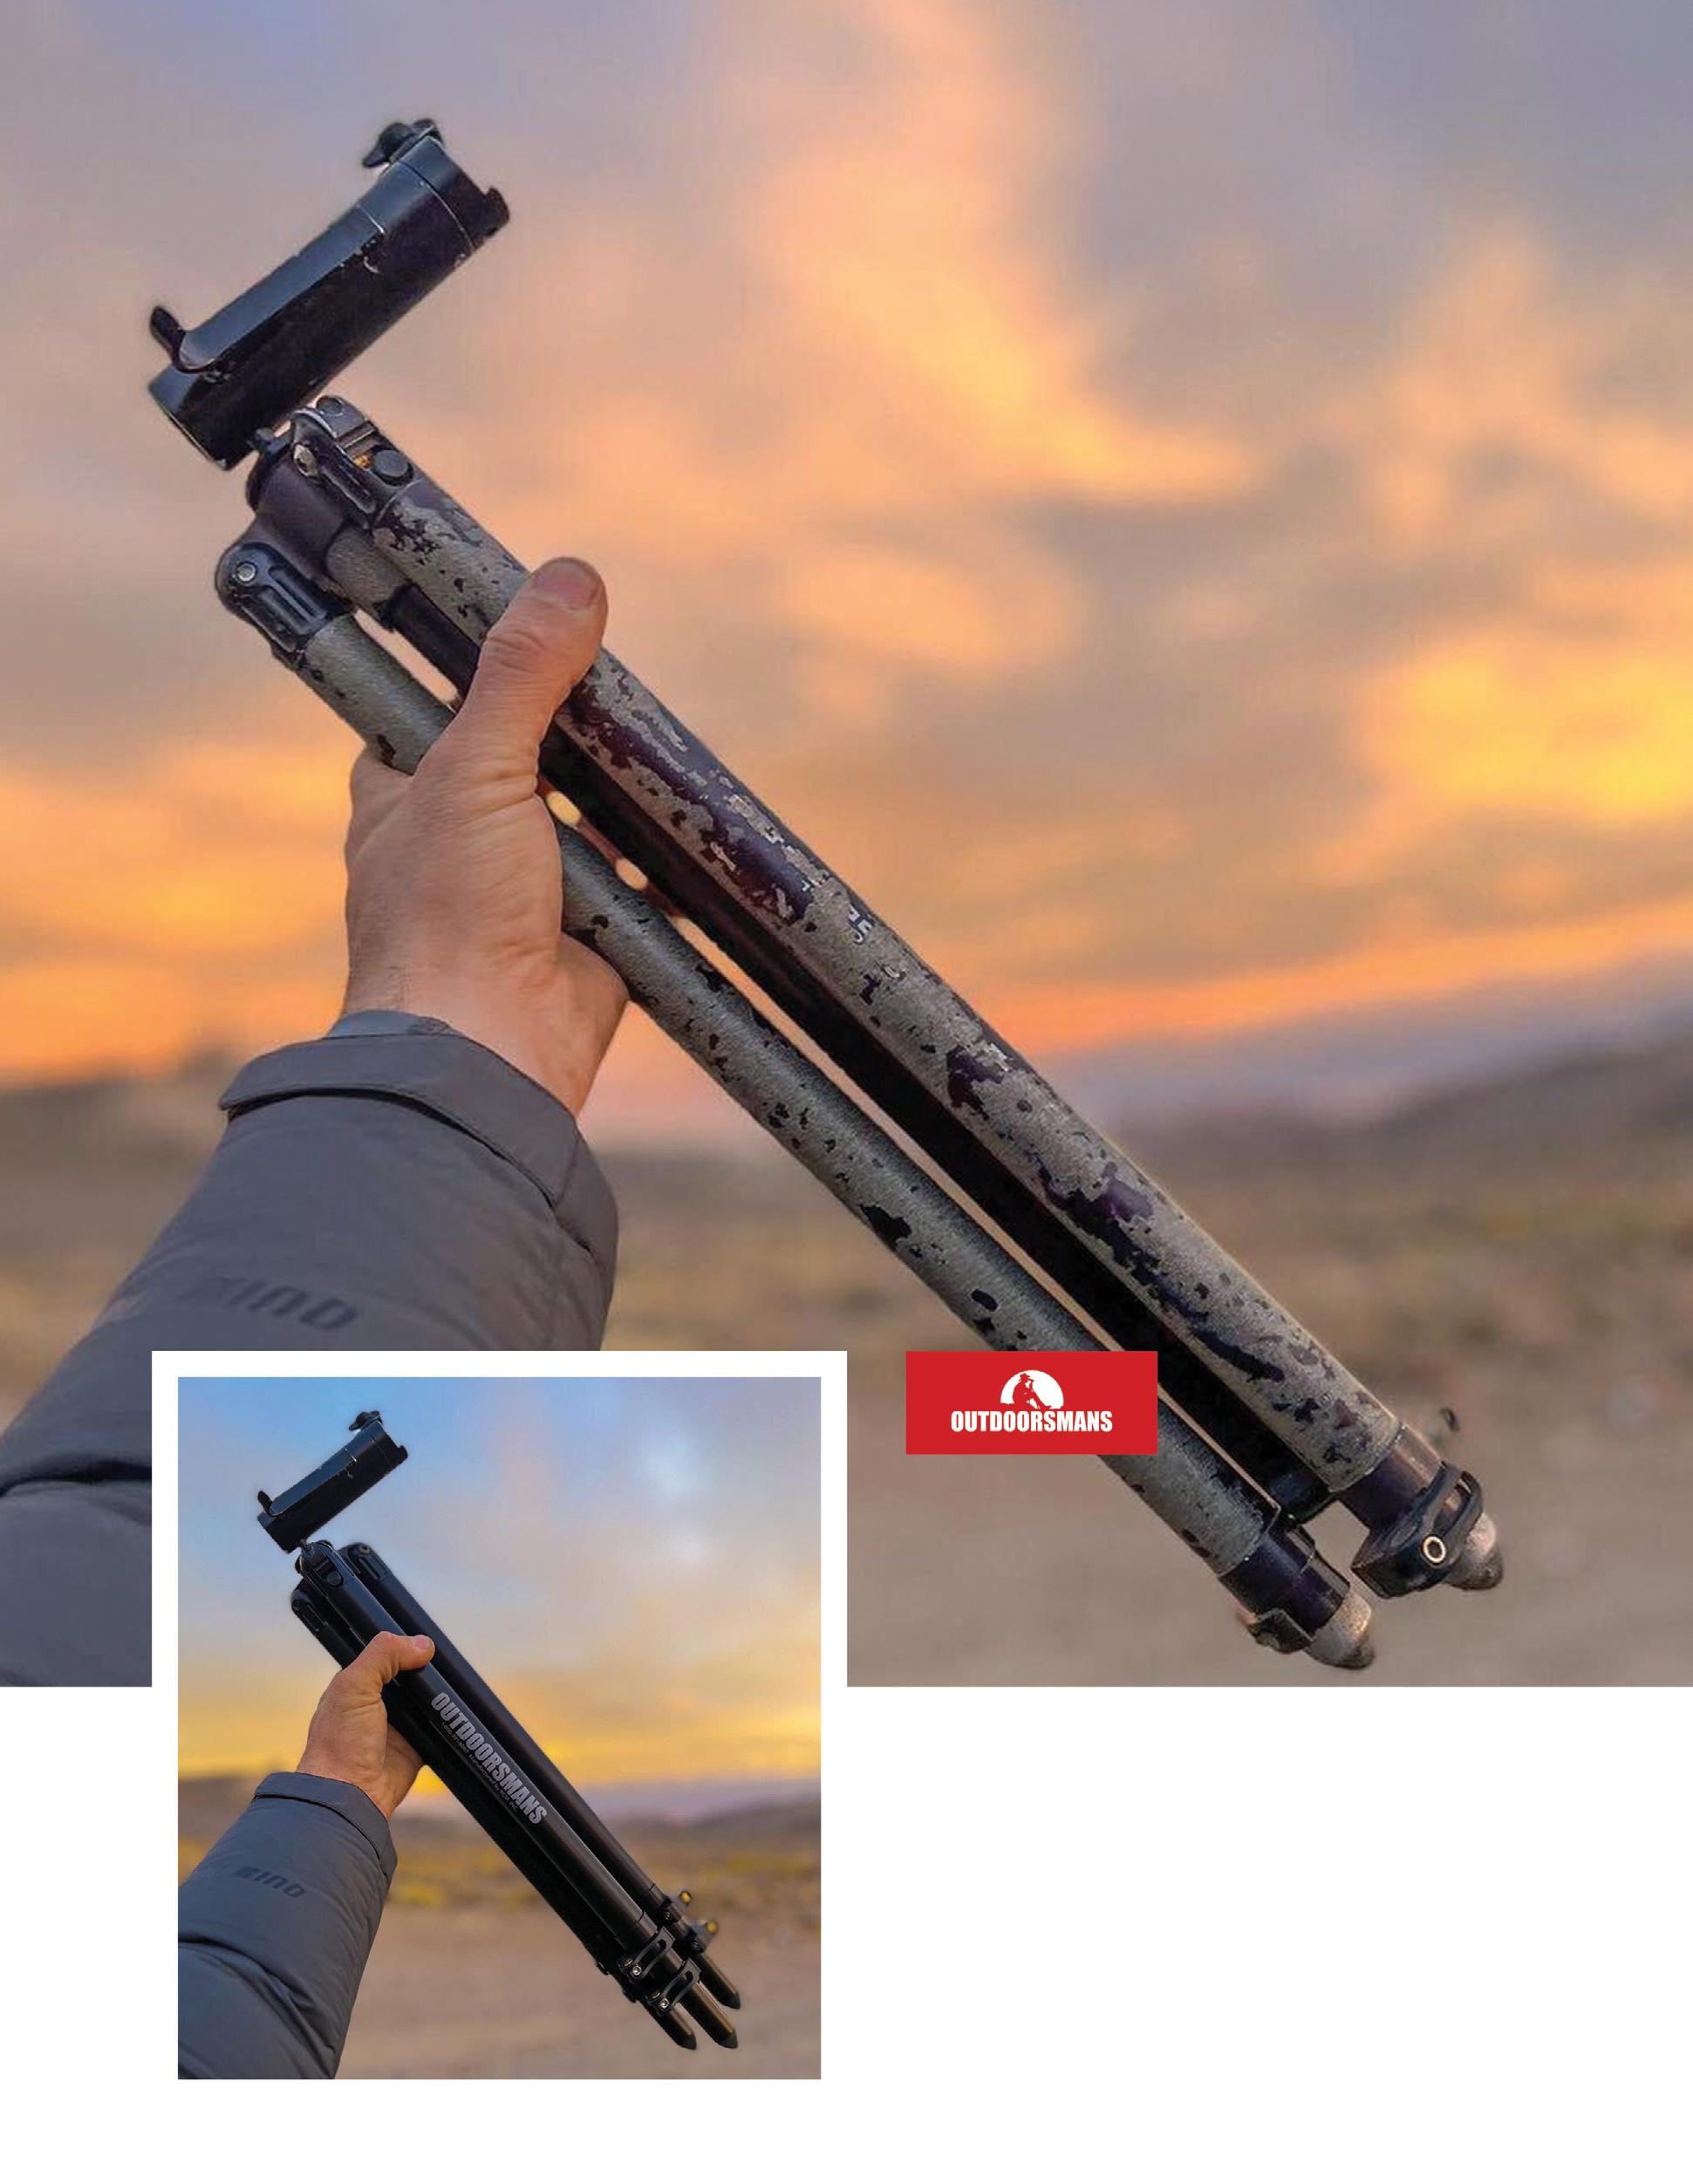
Rifle: Sig Sauer Cross Spotter: Sig Sauer Oscar 8 Binoculars: Sig Sauer 10k Rangefinding Binoculars Tripod: Outdoorsmans Compact / Panhead
Backpack: Kifaru Dall Tent: Hilleberg Niak
Sleeping Bag: Kifaru 0 Degree Clothing: First Lite
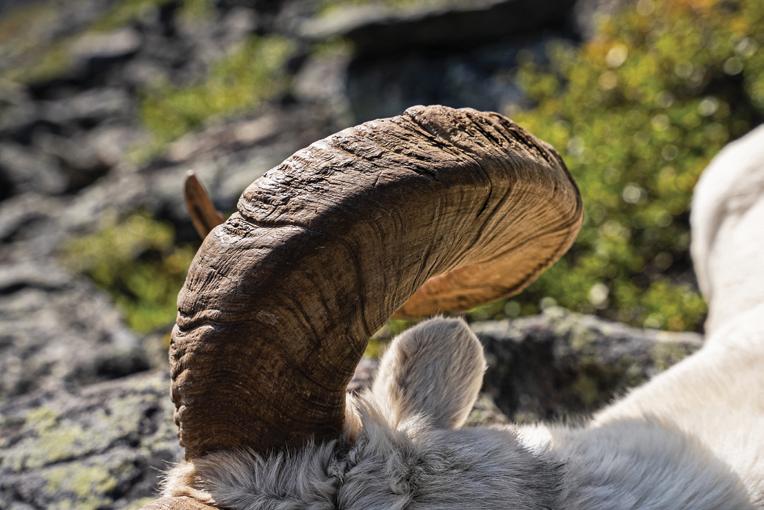
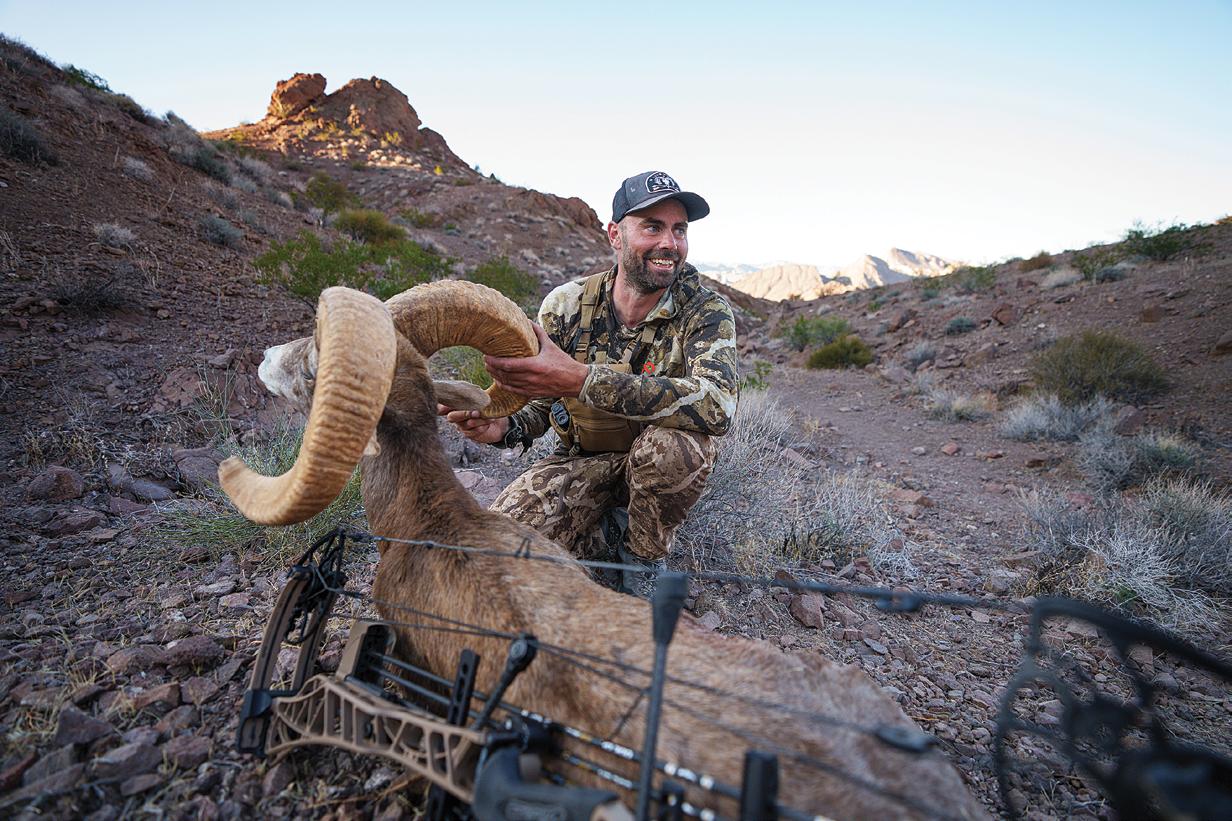
n Jordan had to overcome multiple days of extreme weather but her hard work was rewarded with a beautiful ram.
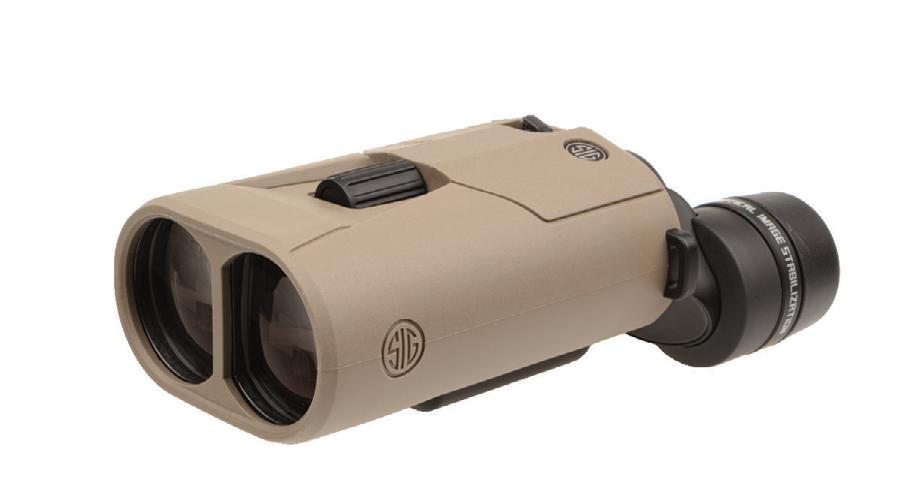
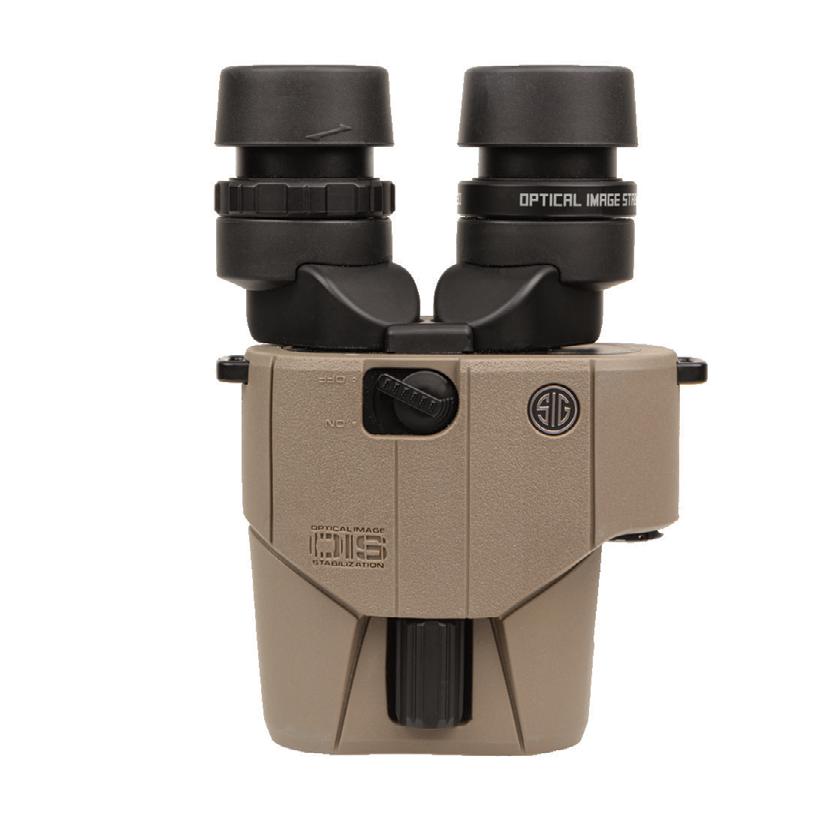
ZULU6 HDX ™
EXPERIENCE A NEW ERA OF GLASSING SYSTEMS
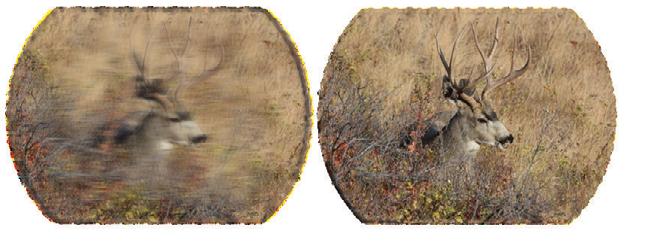
The all-new ZULU6 HDX binocular creates a new paradigm in hand-held glassing solutions, utilizing SIG’S proprietary OIS™ Optical Image Stabilization technology and updated HDX lenses. The ZULU6 HDX delivers a stable, full-resolution image without a tripod. SIG SAUER’S HDX glass lenses produce enhanced light transmission, resolution, and definition for unparalleled optical clarity, while SIG’S new OIS Target Mode feature provides additional stability up to 50%.
The ZULU6 HDX is available in 10x, 12x, 16x, and 20x magnification to match a variety of environments and applications, while the IPX-7 waterproof rating keeps your optic protected from the elements.
ZULU6 HDX binoculars from SIG SAUER. A new era of glassing systems has arrived.
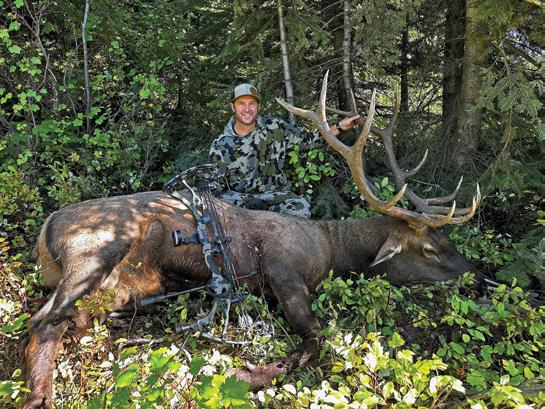
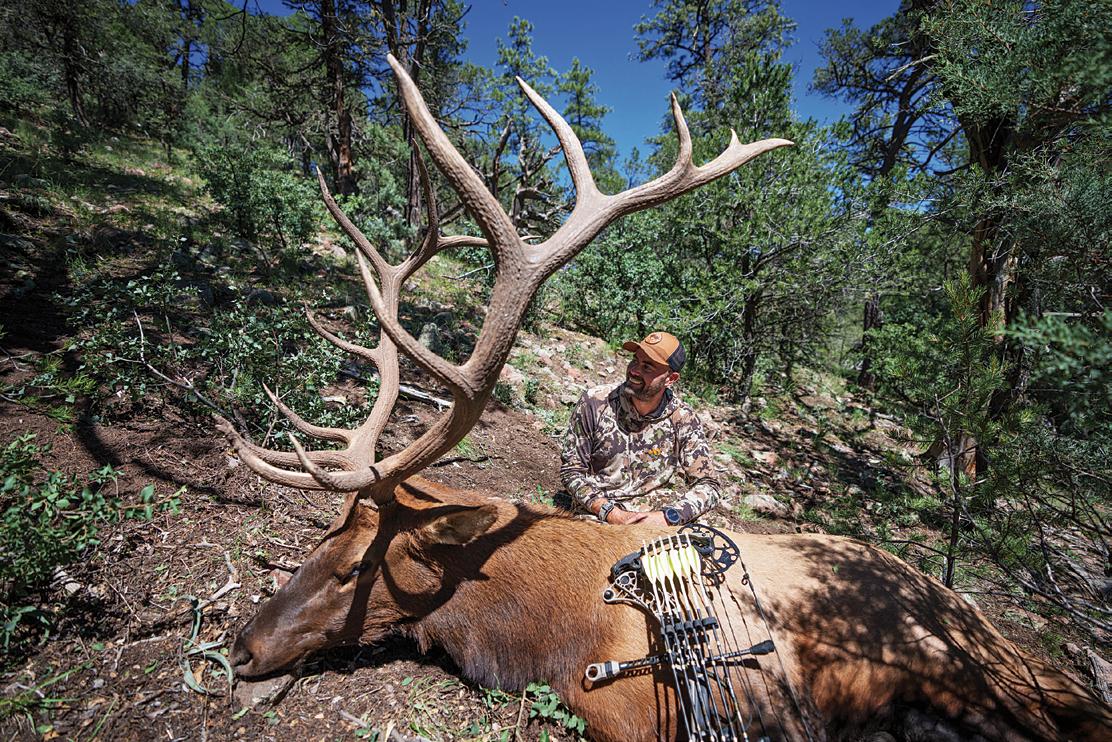
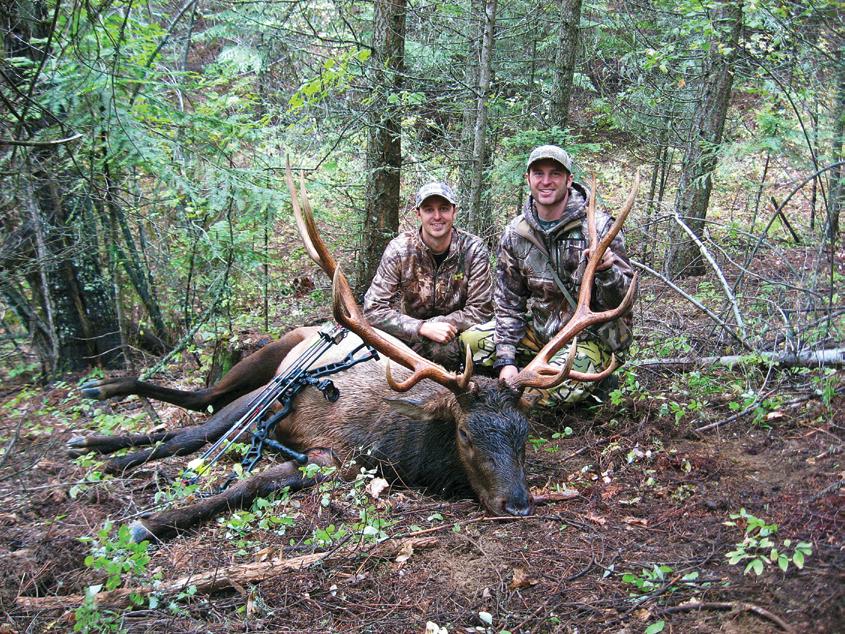
JUST PLAIN EPIC
Combat and chaos culminates a second archery elk tag for an Idaho hunter
Rusty Smith Idaho –2023
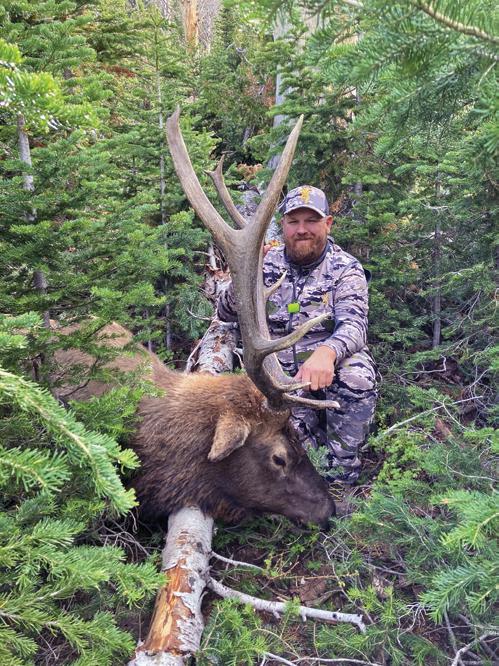
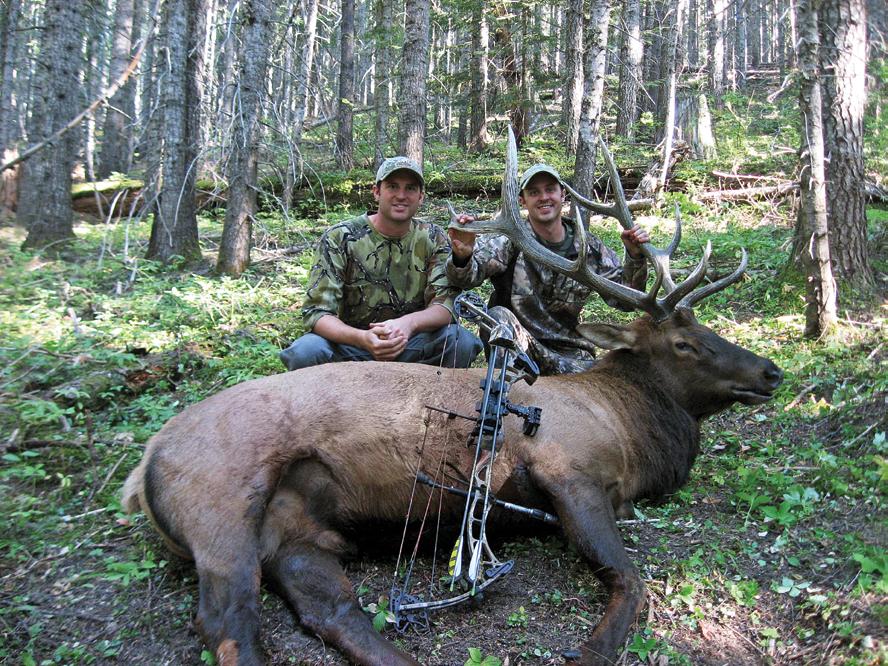
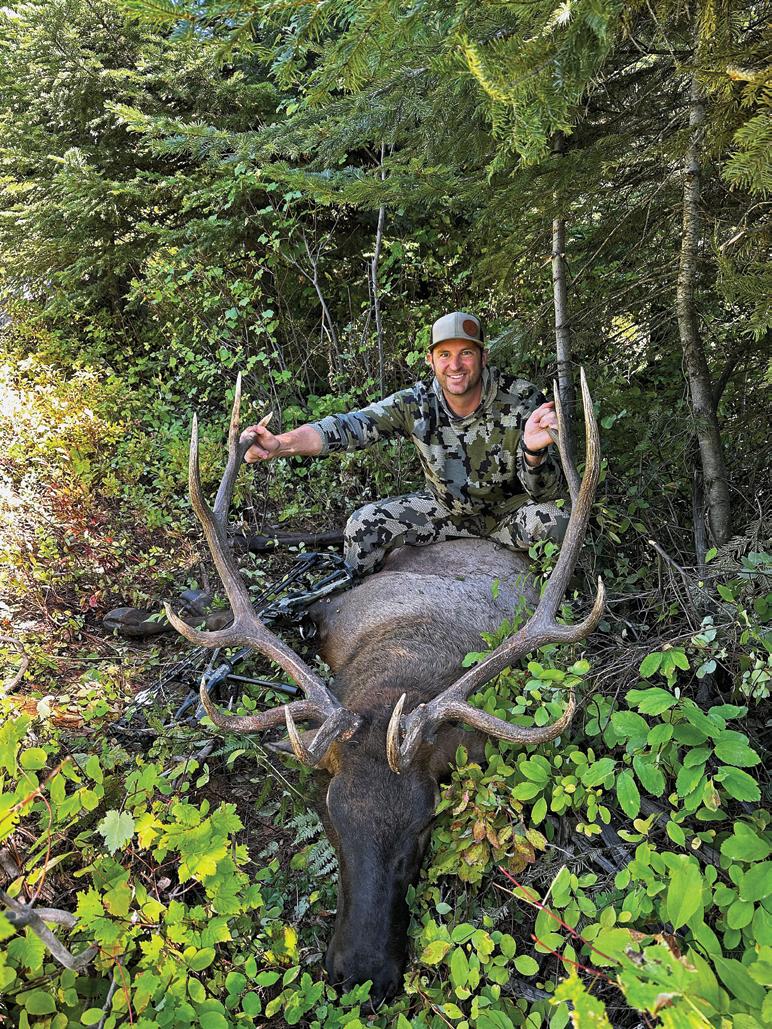
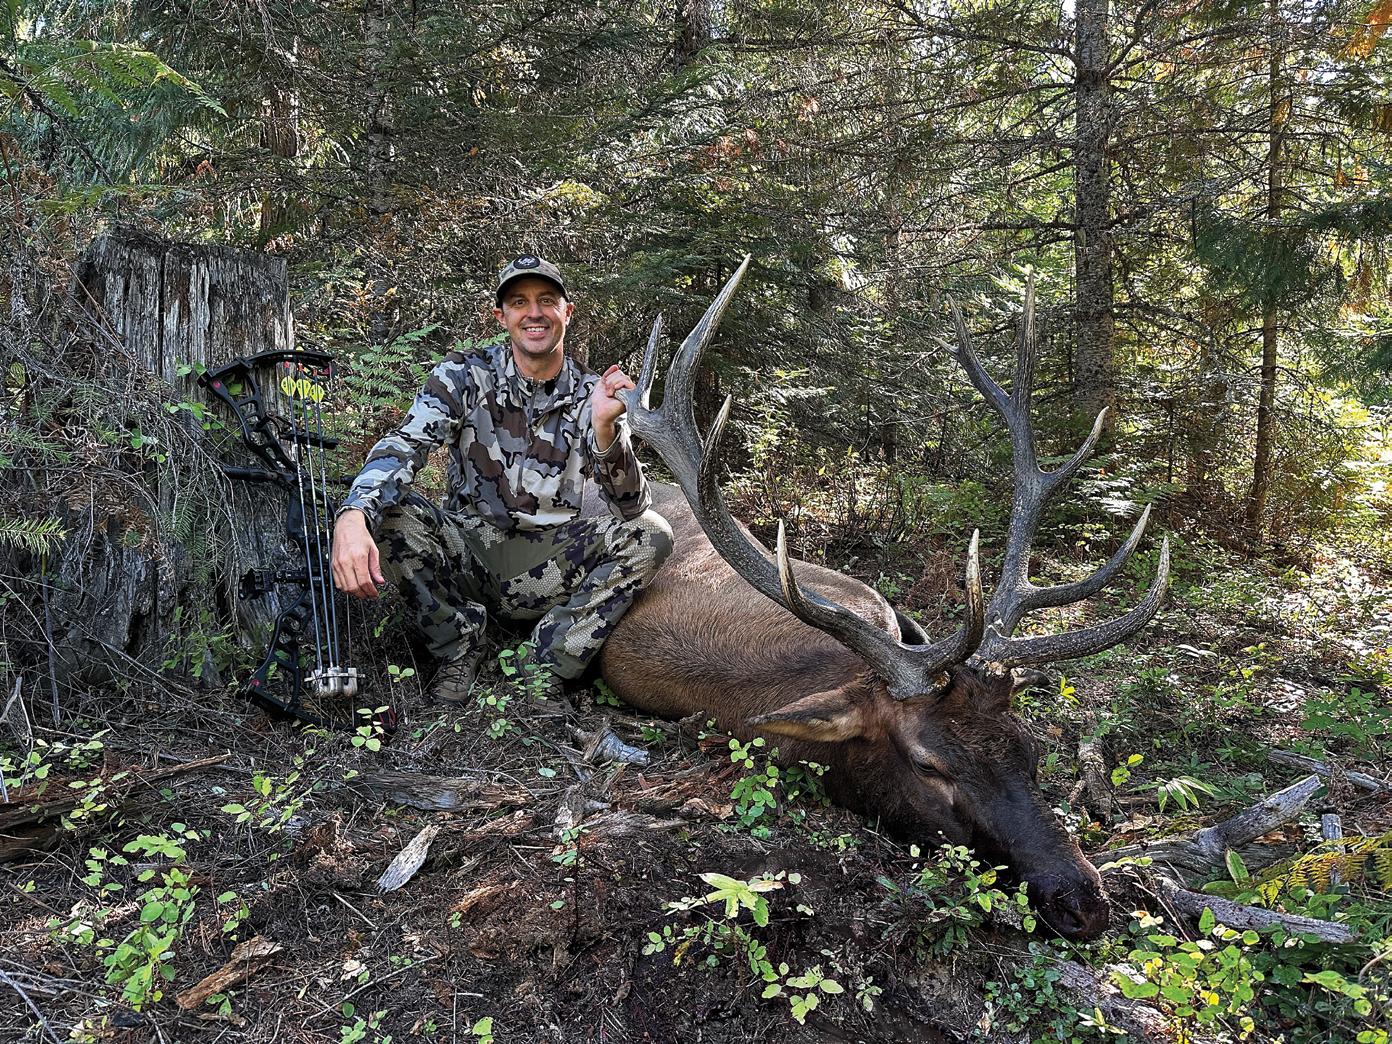
RUSTY’S FIRST BULL
n Rusty filled his first tag on a great bull just three days into the season.
well as over 40 noses. Since it was mid-morning with good weather, the thermals were fairly strong and I knew my only chance to stalk in would be to get the wind in my favor by circling down low on the hill and taking an angle in on his location.
where I believed my target bull was bedded. I be came fixated on that general area where I last saw and heard him. After taking one more step, I heard a rustling off to my right as I was looking to the left. I slowly turned my head to see a small six-point bull bedded at about 18 yards and staring at me. After a five-second stare down, he blew out of his bed and bolted through the brush.
In my mind, I had just blown my opportunity, however, the opposite was true. When this bull went crashing through the brush, it immediately set my target bull off and he let out a massive deep bugle just 40-50 yards to my left. He acted as if another bull came busting in to take his ladies away. Then, the hillside erupted with elk getting out of beds and bulls screaming at each other.
The brush was thick, and I could not see my bull but could hear him just out of visual range, circling in the brush. Soon, I started to watch elk come out of the same thick patch of brush right above me at about 50 yards. First, a five-point bull, then a six-point, then a spike, and a couple of cows. I was ranging each one of them as they came out of the brush. I could hear the big guy back in the trees behind them and felt confident he would come out
With my arrow already nocked, I waited for him to come out of the trees. When he finally did come out, he was closer than all the animals I had just ranged. He stepped out of the brush, and when he tipped his head back to bugle, I drew my bow and estimated how much closer he was than where I had previously ranged. With him standing broadside, I let the arrow fly and watched the fletchings sink and disappear with a pass-through, but my shot was high. He bolted, and the whole group of elk started to run.
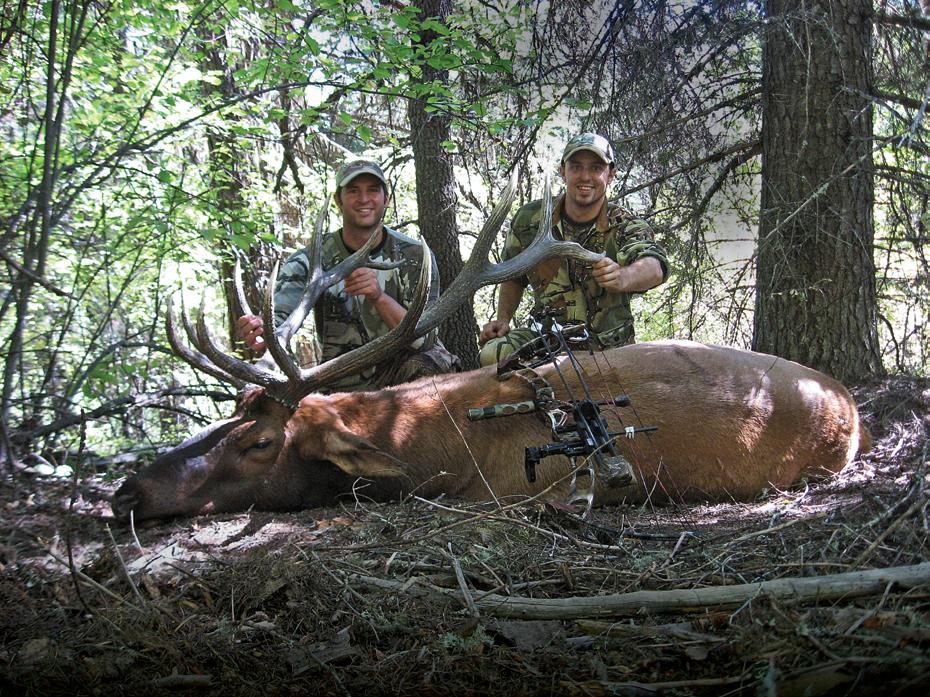
After making it only 30 to 40 yards he stopped, laid his head back, and bugled again with blood run ning down his side. I couldn’t believe it. Just a few seconds later, the large six-point that he had been fighting with earlier that morning came running down the hill to him. At this point, I had already nocked another arrow and was trying to move into a position to get a second shot.
Next thing I knew, all hell broke loose as the two bulls slammed into each other in an epic brawl. Dust was flying and brush breaking as these two were spinning and pushing each other in a full-on battle. I went running up to about 30 yards at full draw, moving around, trying to get a second arrow into my bull. With them fighting, this proved extremely difficult as they would not stop moving, at times causing me to move back down the hill to get out of the way.
After about a minute and a half of battle, they separated, and I settled my pin just as the other bull stepped directly behind my wounded bull. I let off my draw as I was worried about getting a clean passthrough and hitting the other bull. After what seemed like an eternity but was probably only 15 to 20 sec onds, the bull turned and started to walk, quartering away. I ran about 10 yards around some brush and drew my bow again. I started blowing on my mouth reed like crazy in an effort to get him to stop for a 30yard shot. With blood running down his side from the first arrow, he just kept walking and would not stop. At that distance, I settled in and squished the trigger on my release. The arrow hit him perfectly, as he was quartering away, and it buried into the opposite shoulder. He immediately bolted and started to run with the other bull in pursuit. He made it about 150 yards and went down.
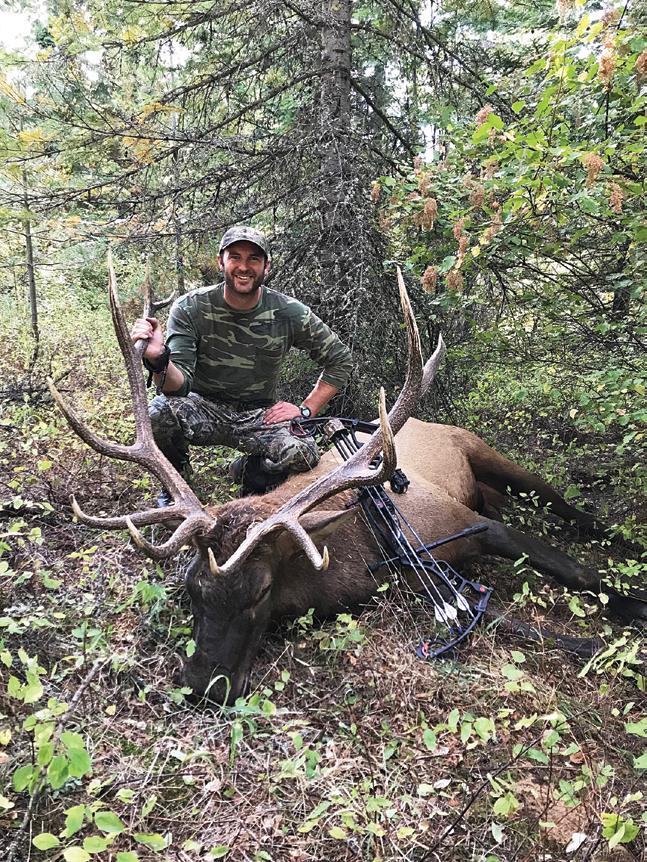
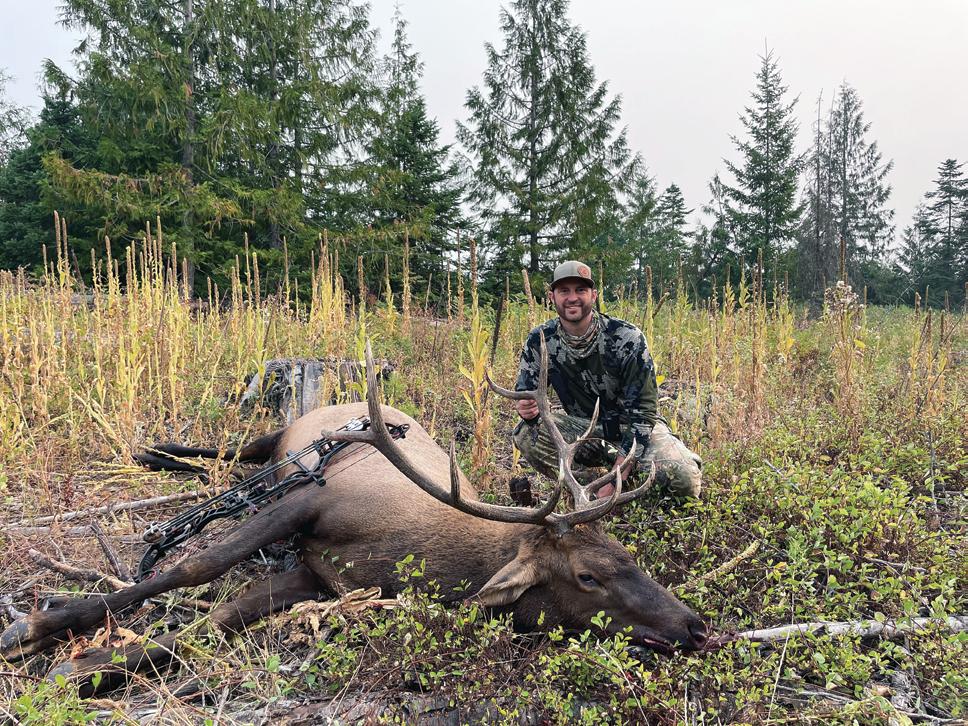
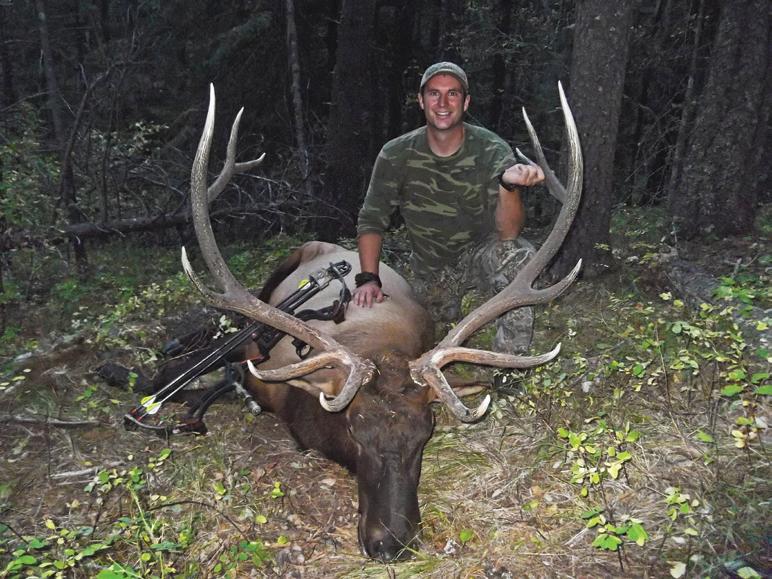
My adrenaline level was through the roof. I could hardly believe that after 20 days of looking for this bull, we had found him and that the stalk and experience worked out how it did. This was hands-down the most EPIC stalk I have done on an elk with my bow with an adrenaline high like no other. I am beyond grateful for every opportunity I have to chase these amazing animals and can only hope to have another experience to rival this one in the elk woods.
Bow: Hoyt Carbon Defiant Arrows: Easton FMJ Broadheads: Grimreaper Pro Clothes: Marco Gear Optics: Vortex RangeFinder, Vortex Razor 12x50 Binos Calls: Phelps Mouth Reeds Pack: Kifaru Reckoning
n After 20 days of looking, Rusty finally found his target bull and then made the most of his opportunity.
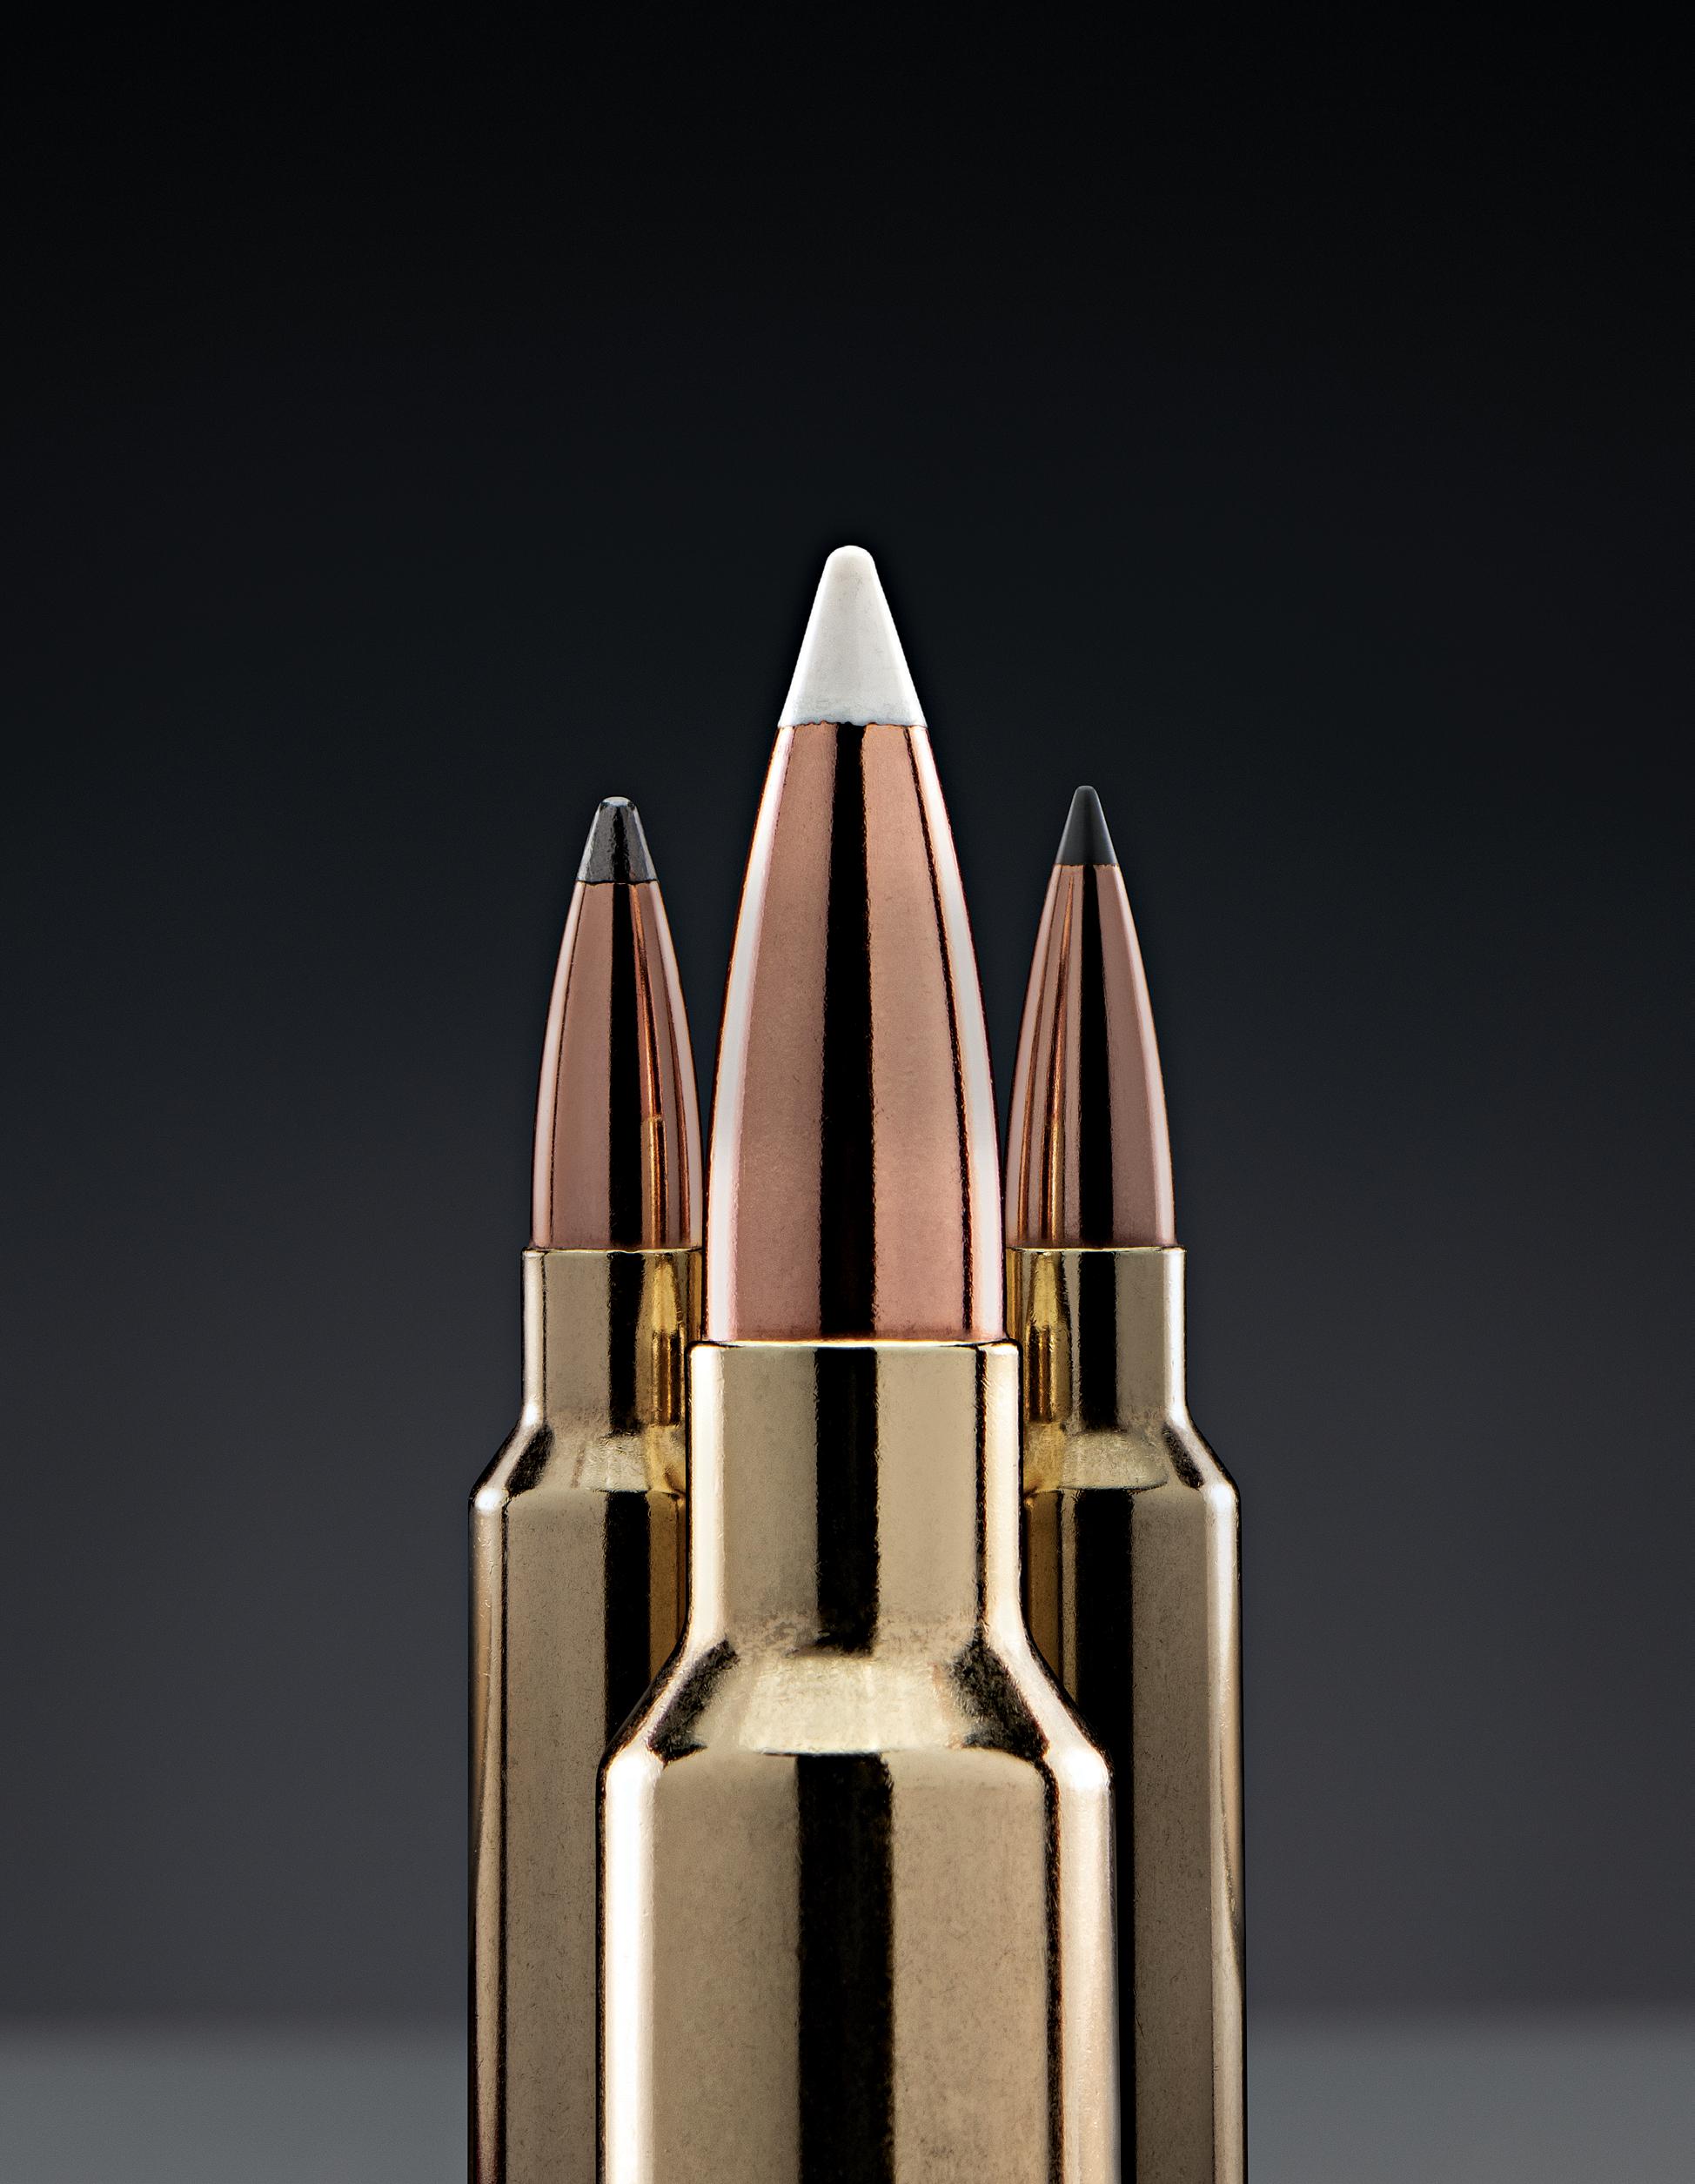
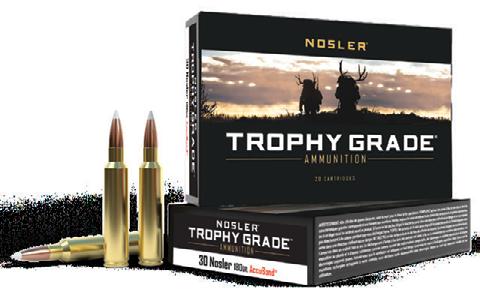
If you’re willing to go to the ends of the earth in pursuit of game, make it count. Trophy Grade™ ammunition is loaded with three of the greatest big game hunting bullets Nosler has ever created: the Partition®, the AccuBond ® and AccuBond ® -LR. No matter which you choose, you’ll get consistency, accuracy and knockdown power that leaves zero doubt.
Visit Nosler.com/TrophyGrade
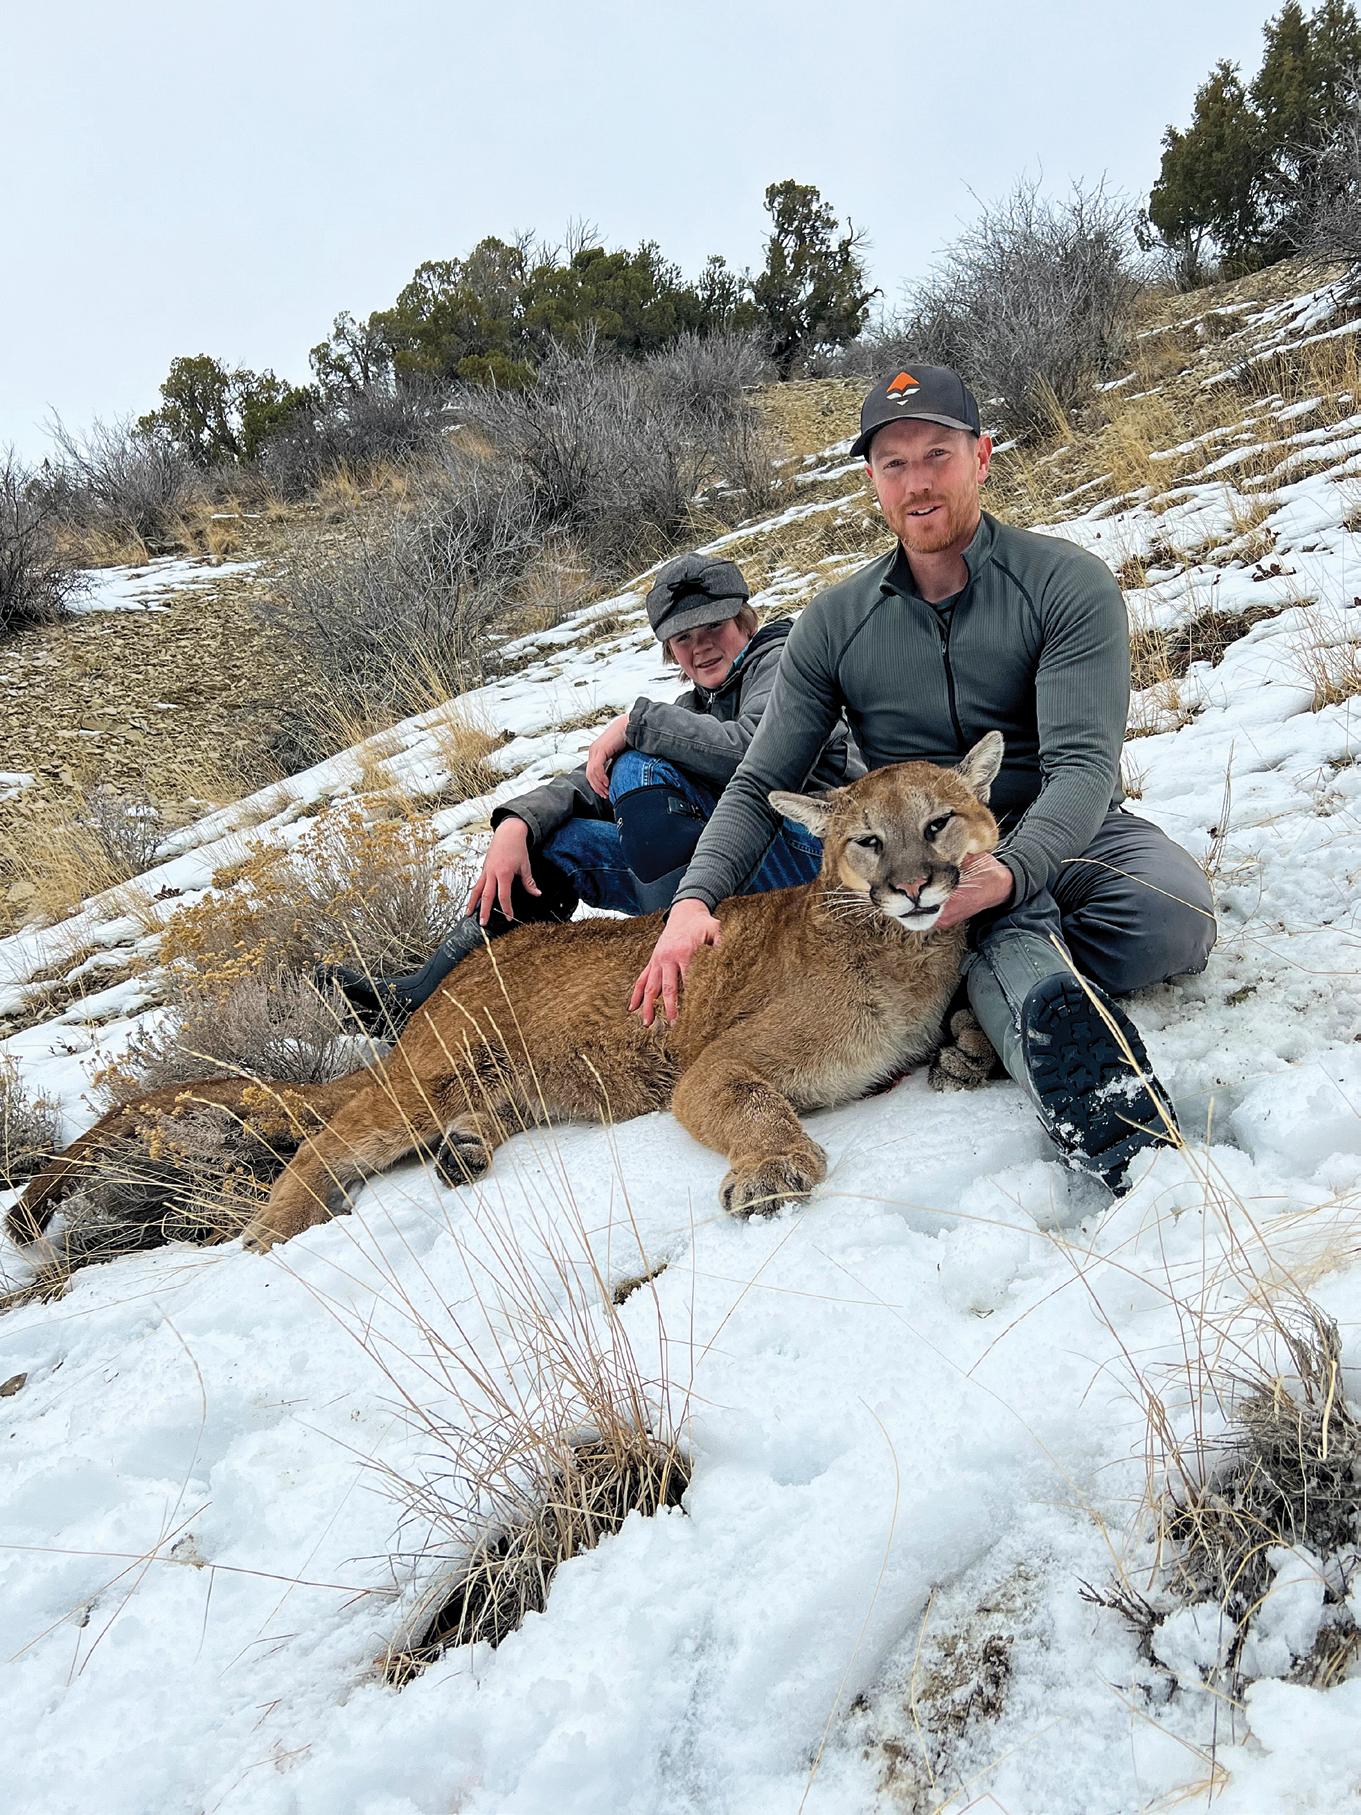
FRESH TRACKS
During late fall of 2022, the excitement and anticipation of my upcoming limited-entry mountain lion hunt was starting to spill over from my subconscious mind into the forefront. It’s kooky how the thought of something new and ad venturous stirs up a frenzy of emotions. For me, the idea and anticipation of putting a big tom cat up in a tree really got me excited.
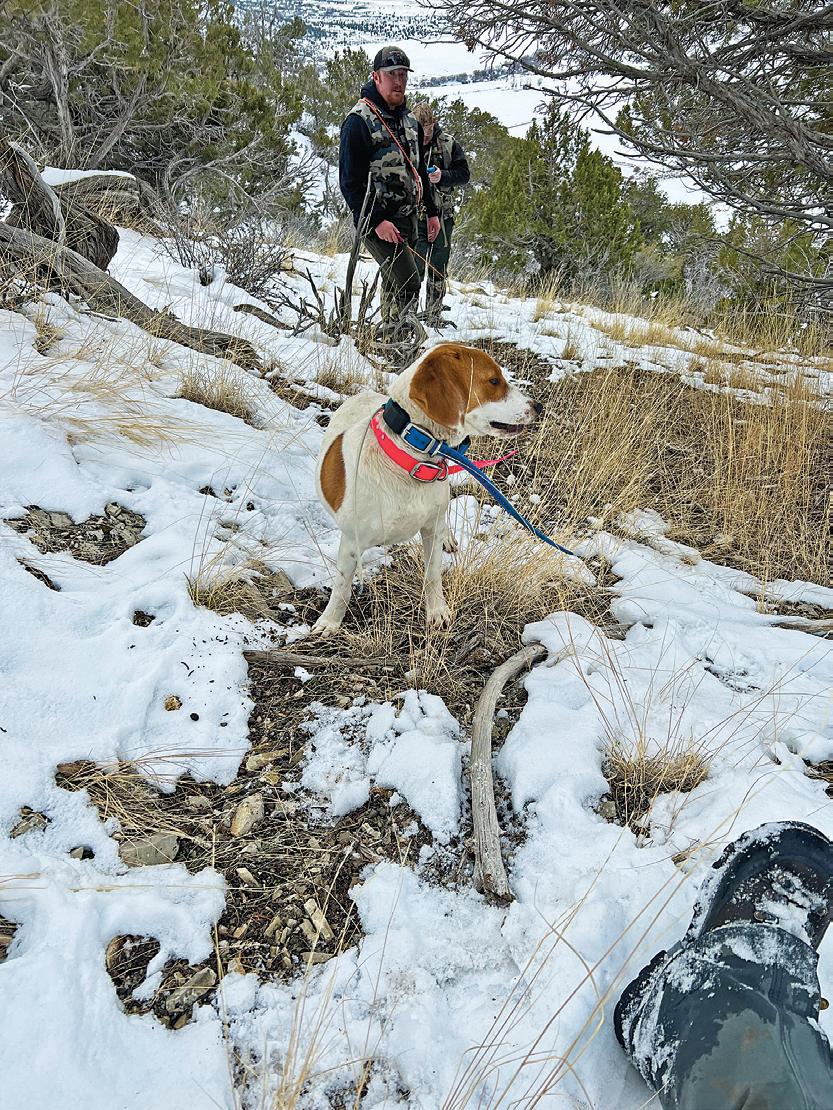
In Utah, the fall season of 2022 quickly turned to winter after a blast of snowstorms blew through just after the Thanksgiving holiday. During those next few weeks, my friend Chase and I did a lot of planning to coordinate our time off from work and the mornings just after a fresh snowstorm. Each morning that we could hunt, we would start out on different parts of the unit, driving in the dark until we found a fresh mountain lion track that we could turn-out on.
Fresh Tracks
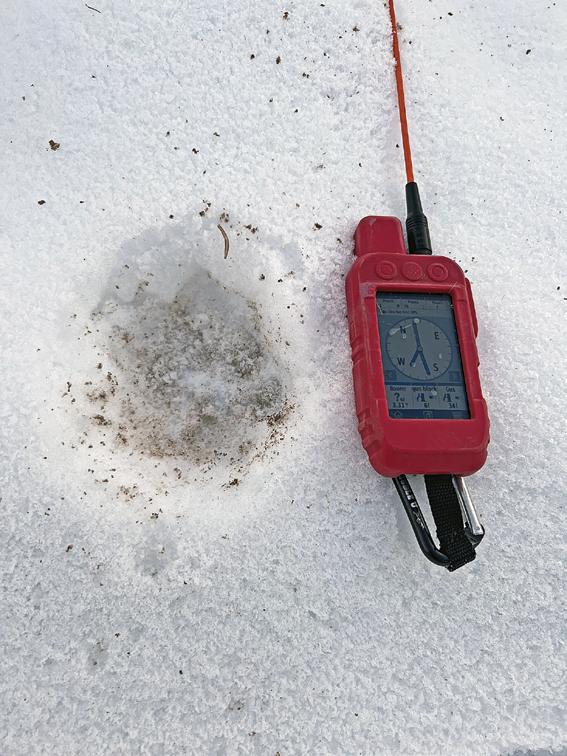
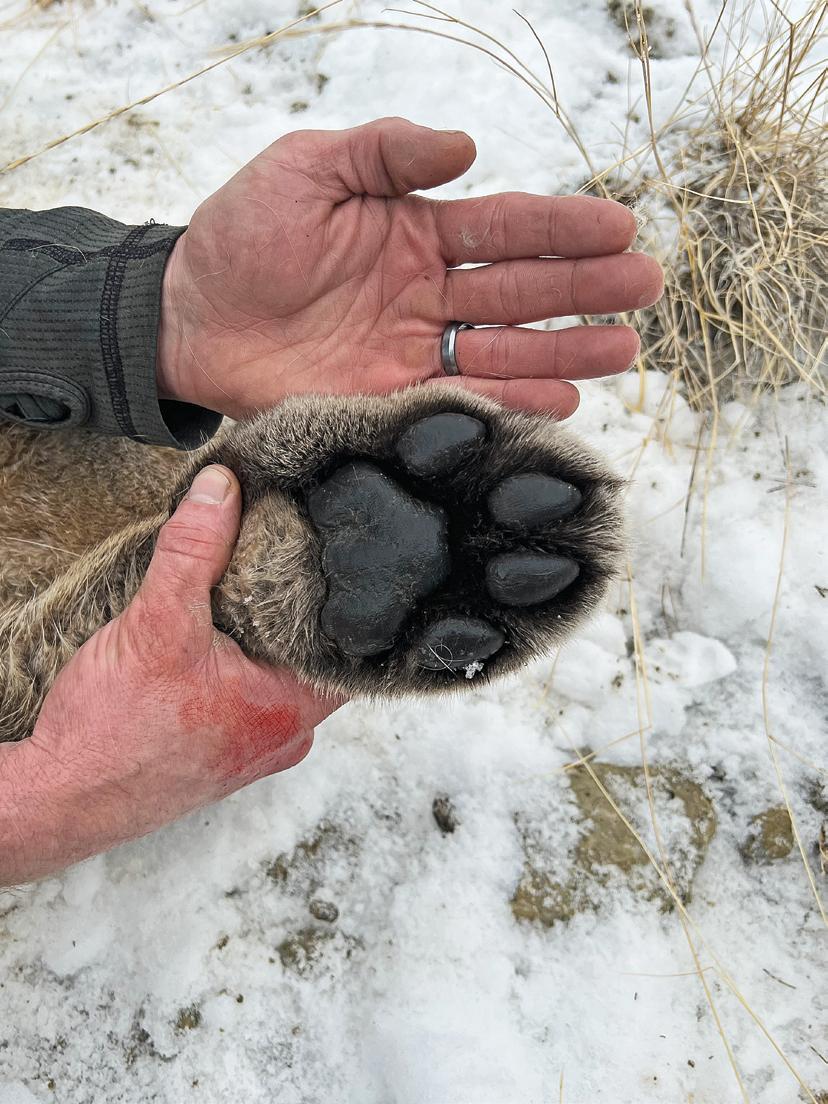
Midway through the season, during a cold and snowy winter morning, Chase, Cash, and I crossed a mountain lion track that caught Chase’s eye. Be cause of the track size and stride length, Chase felt confident that a mature cat had made it. Immedi ately he began to rifle through his dog box in the back of the truck and call out the specific names of his dogs. Having only been hunting mountain li ons for one season, I had little understanding of which tracks to follow and which dogs to use in specific situations. Soon after, I quickly learned that sweet “Maggie” was used to help sort out the lion tracks for the other dogs, and “Boone” was the top dog, known for putting lions up a tree.
A fresh snowstorm yields the tracks of a smart mountain lion
did the lion tracks go? We searched the area, trying to determine where the dogs had lost the trail. It was then we realized the lion tracks went across some frozen bare ground that paralleled the road. That witty cat had doubled back on us and walked down the frozen roadway, then bounded off where we could not see his tracks.
Casey Draper Utah – 2022
pull off. Shortly after we parked, as we watched and listened for the dogs, Chase noticed the movement of the dogs on the GPS screen had come to a stop. It was then that I realized the dogs had treed some
As we gathered around the hood of the truck looking at the GPS locator and a map, we decided to drive back down the road and come into the dogs from another direction. At the bottom of the road, we called another local houndsman to see if he wanted to get some of his younger dogs some
how far off they were, but the GPS locator showed that, for certain, all the dogs were together in one spot. Now, our only concern was if we could make it to the tree in time before the lion jumped out
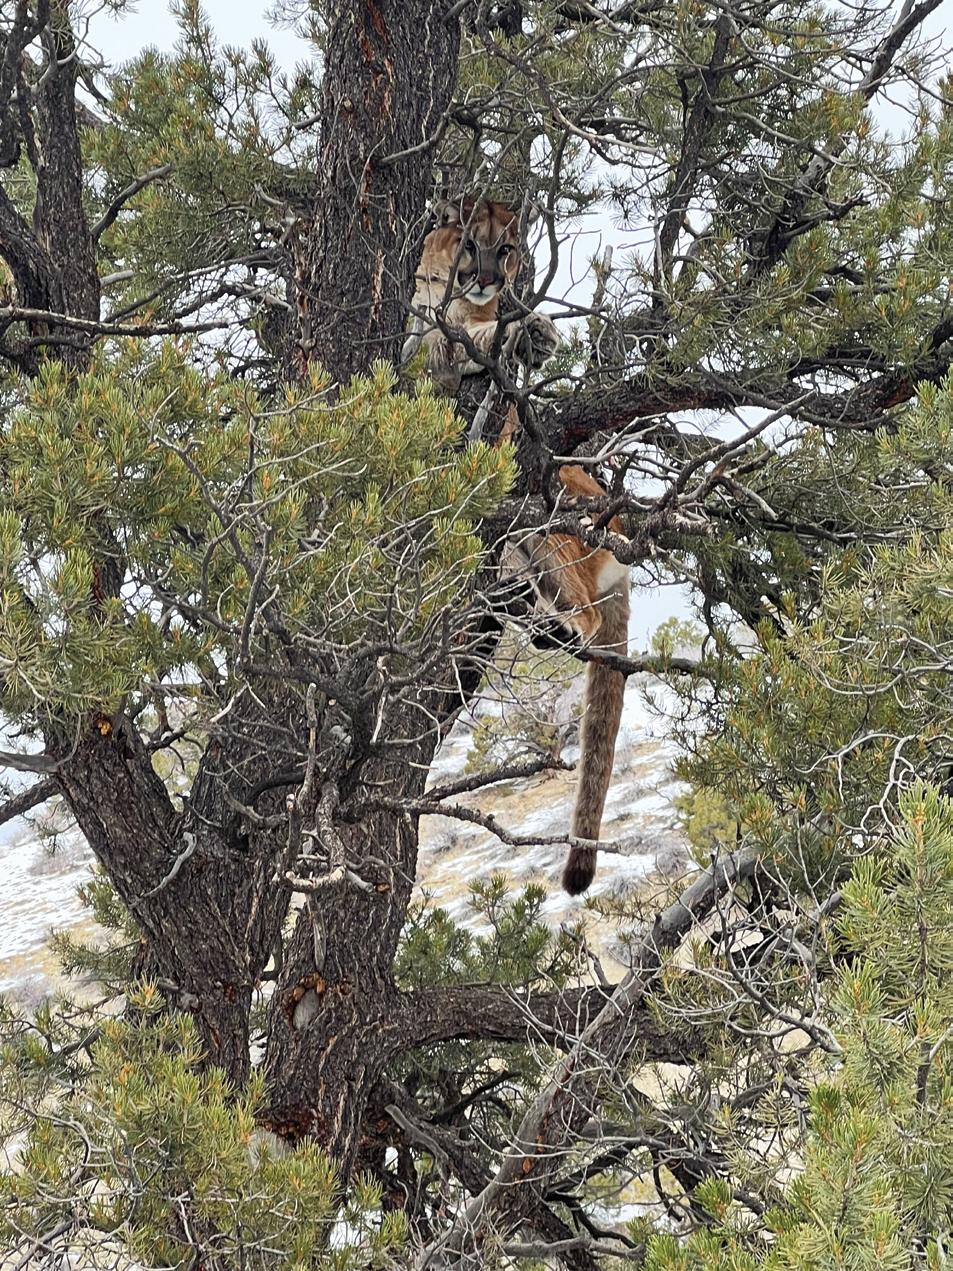
As we continued to push through deep snow, we began to crest the ridge that separated us from ly spotted the dogs across the canyon. He hollered back that he could see with his binoculars the mountain lion was halfway up in a large pine tree. With a burst of energy, we crested the ridgeline and
towards the tree. It was quite a sight to see from a distance; all nine of the dogs working together to keep that mountain lion in the tree.
er dogs that followed us up the mountain took off
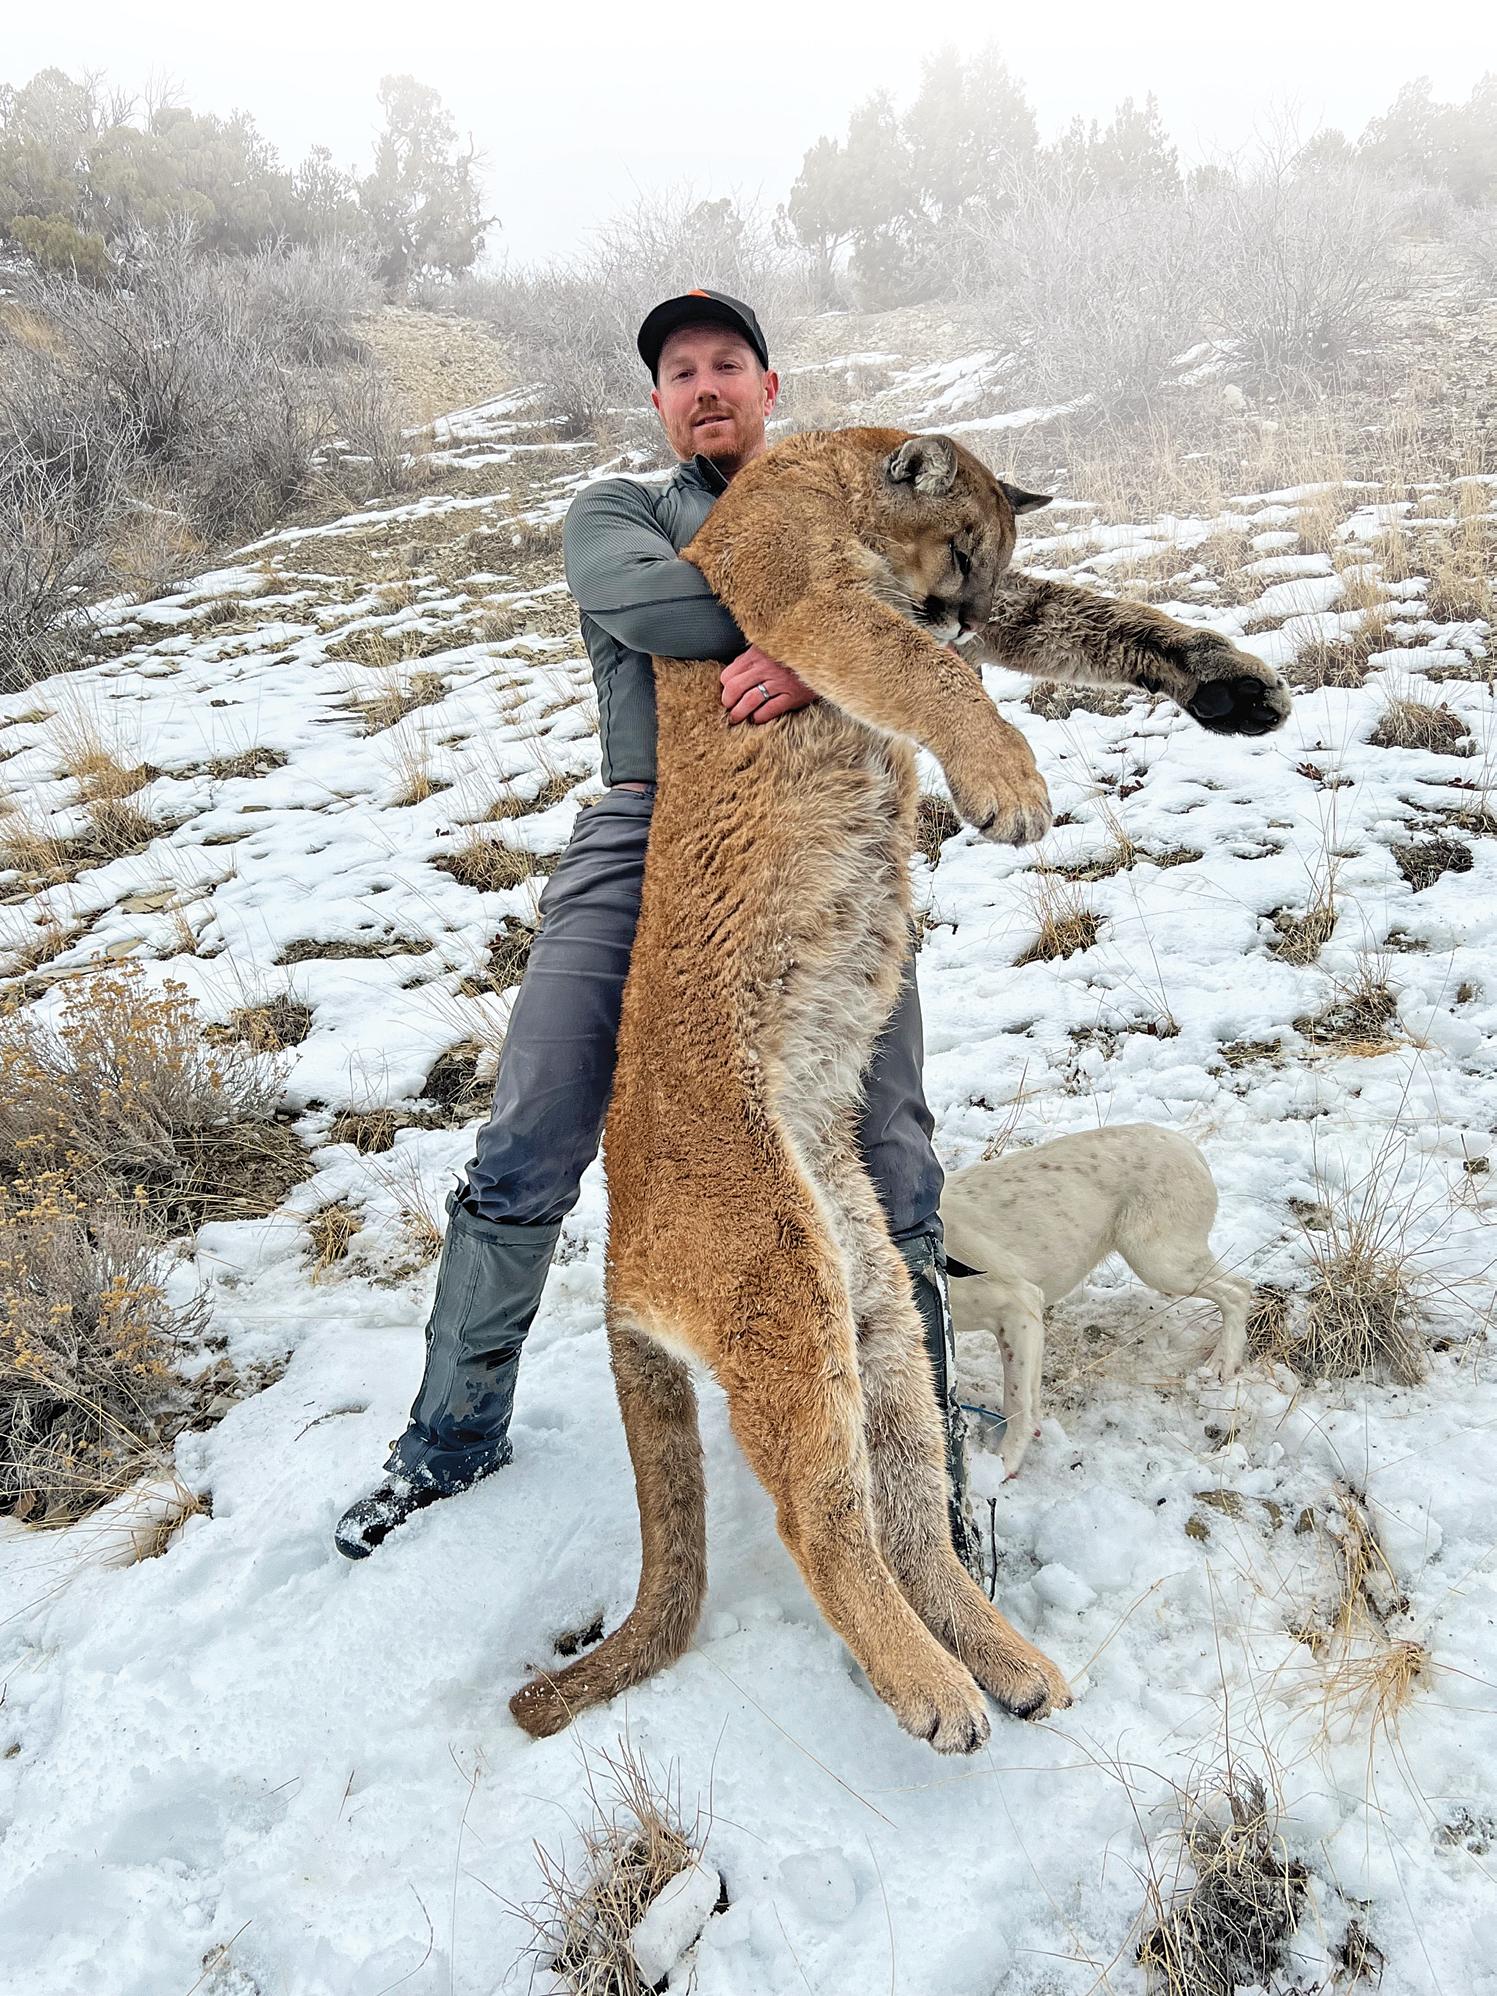
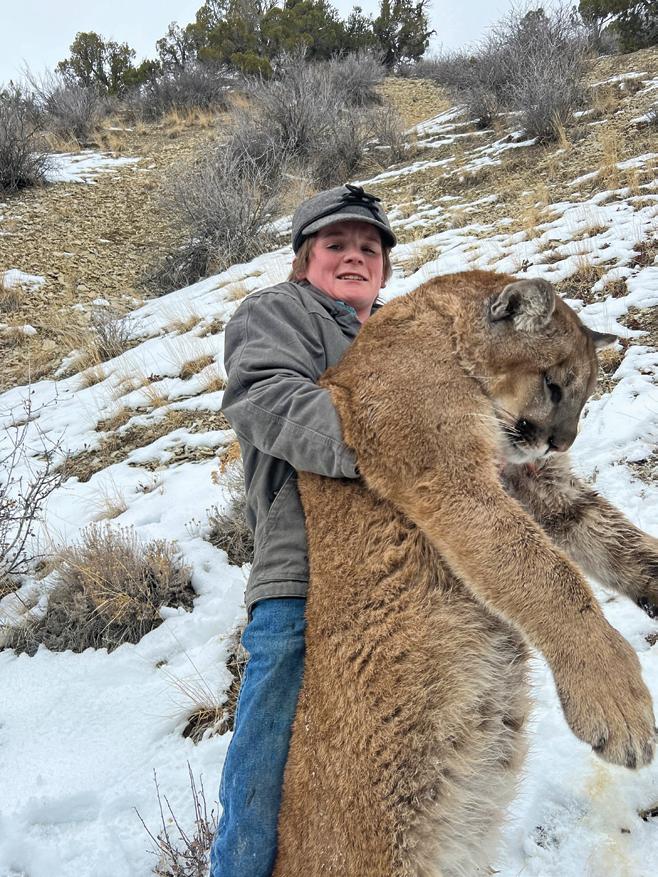
Slightly out of breath from the arduous hike up the mountain, we got to the base of the big, bushy pine tree and began trying to identify the sex of the lion. “It’s a good tom cat!” hollered Chase over the sound of baying hounds. “Dad, it’s the best one we have seen this season!” Cash hollered enthusiastically. I began to circle the tree to really get a look at the beautiful cat. It was difficult for me to see him because of the way he was positioned. I admired his beautiful black markings and long, powerful tail. After studying him for what seemed like forever, I could see he was the one that I wanted to take!
I slipped my pack off and inched around the tree, trying to find an open shooting window. The steep angle of the mountainside and the bristly branches of the pine tree made it difficult for me to line up the shot. After a few moments of slipping and sliding around on the snow, I partly climbed my way into the tree just below the mountain lion. From this angle, I felt confident that I could place my shot squarely into his chest.
I drew my pistol and steadied my nervous body against a large, outlying branch of the tree. I pressed the trigger and my first shot fired off. The big tom hunched up, and almost instantly, I heard Chase yell,“Shoot him again!” The semi-auto pistol cycled smoothly, and I fired off the second shot, hitting my mark. The big tom scrambled to stay in the tree, but the energy of the bullet rocked him backward, and down he fell. With my heart still pounding, I slowly climbed out of the tree.
What an adventure! What an animal! What an amazing hunt! It was a day that I will cherish for years to come.
CRITICAL GEAR
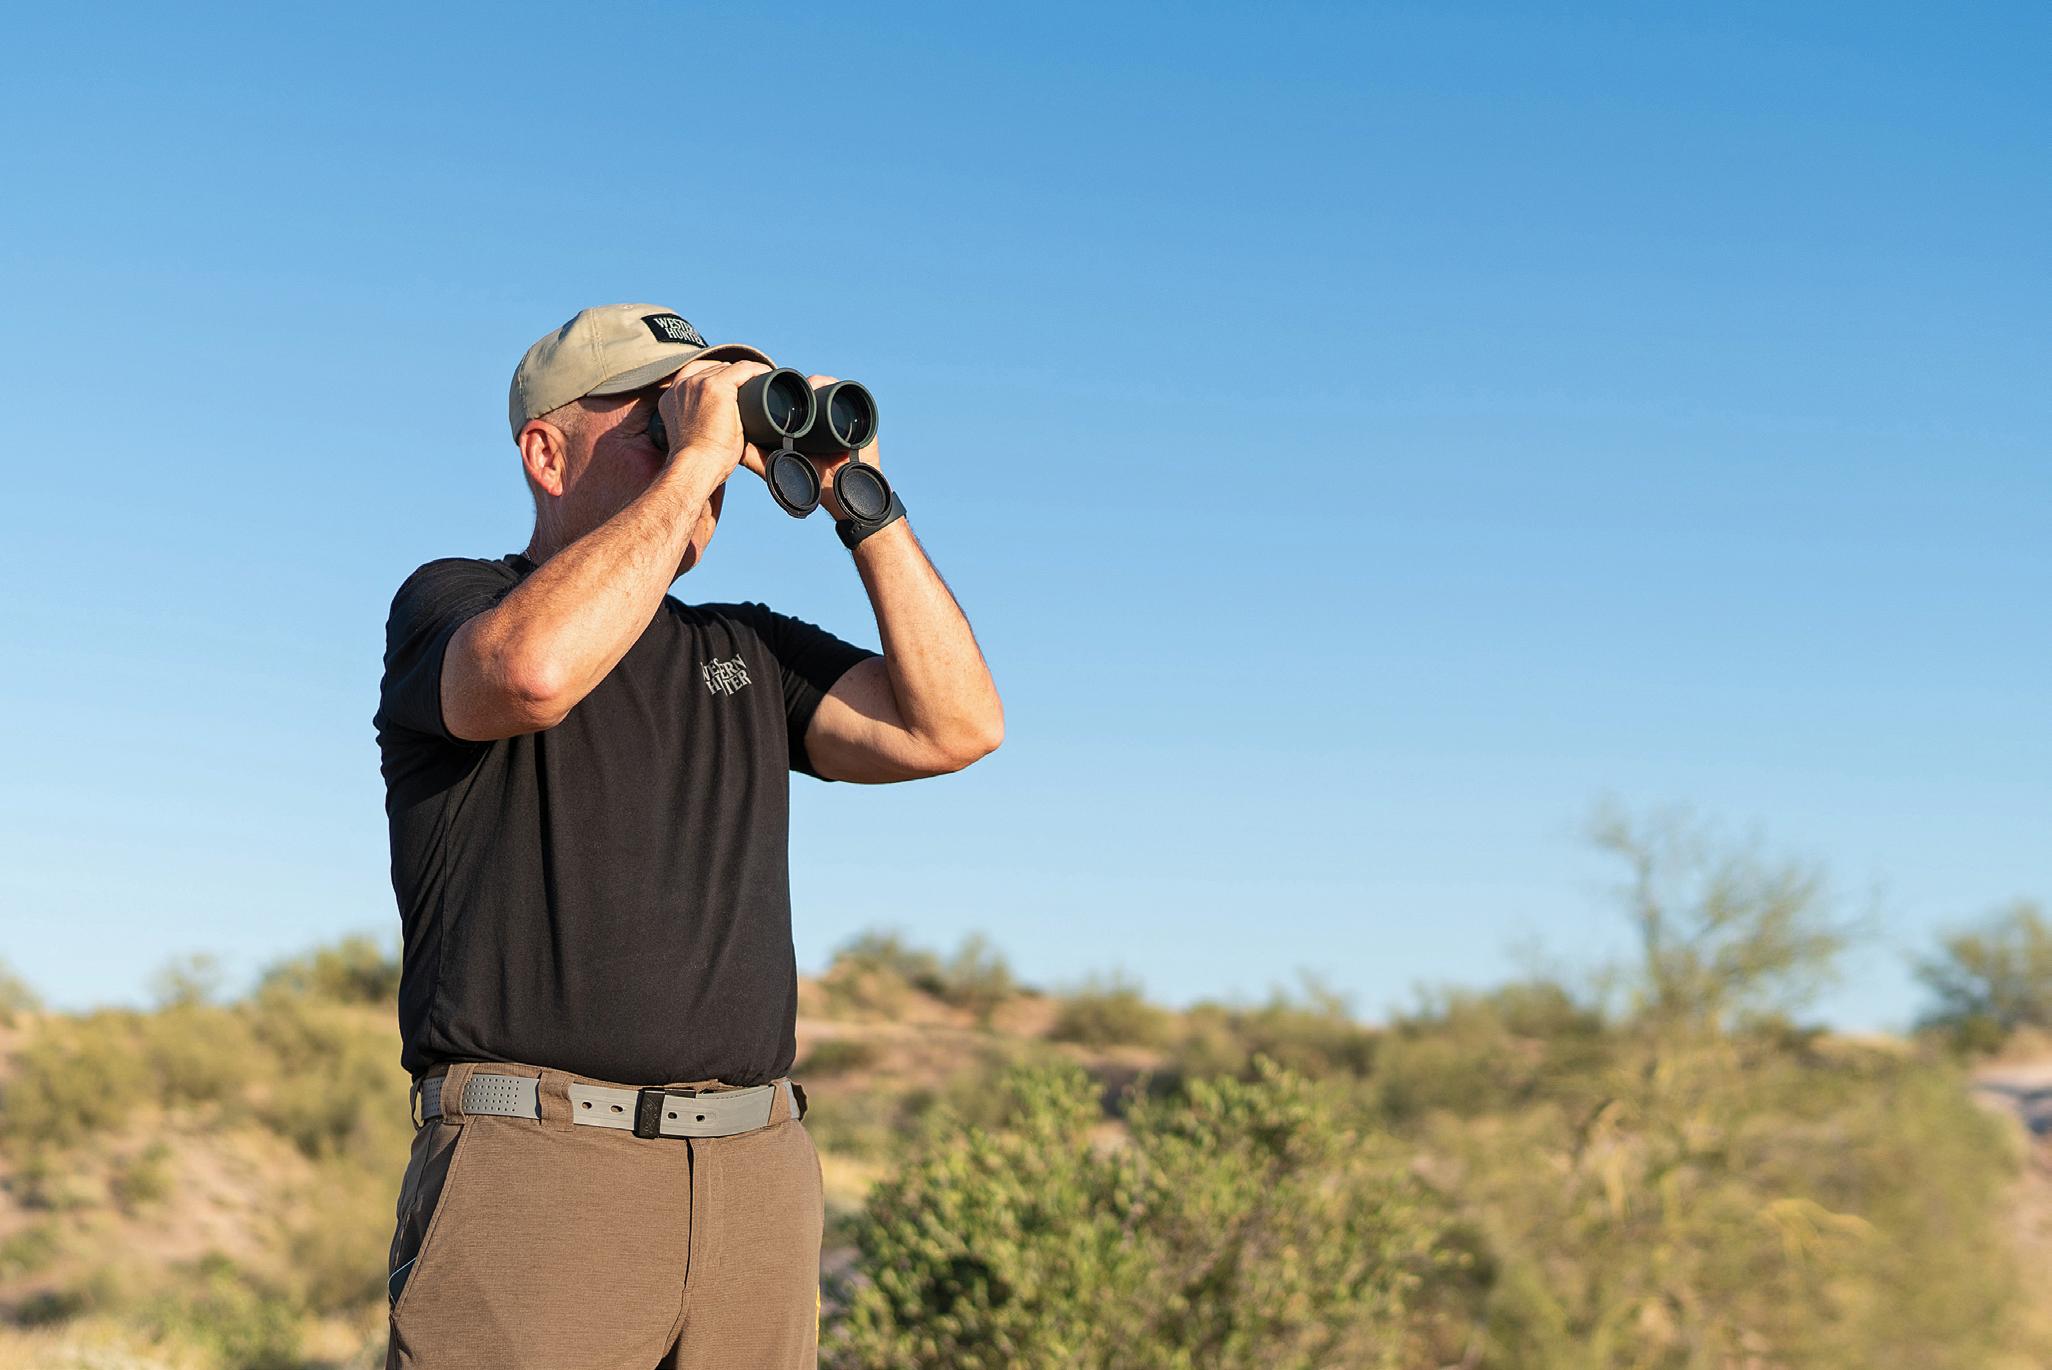
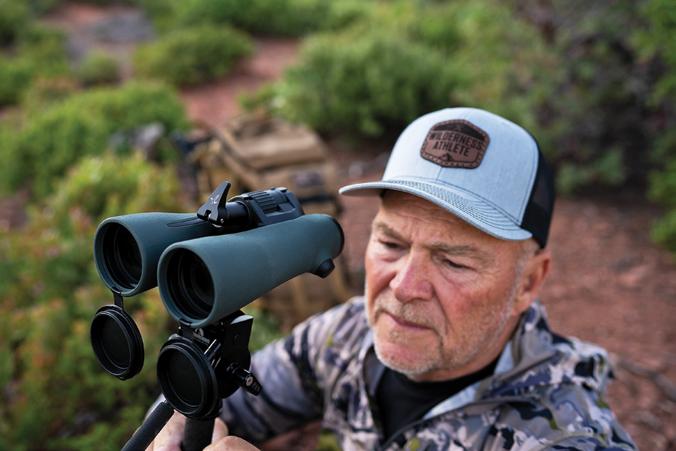
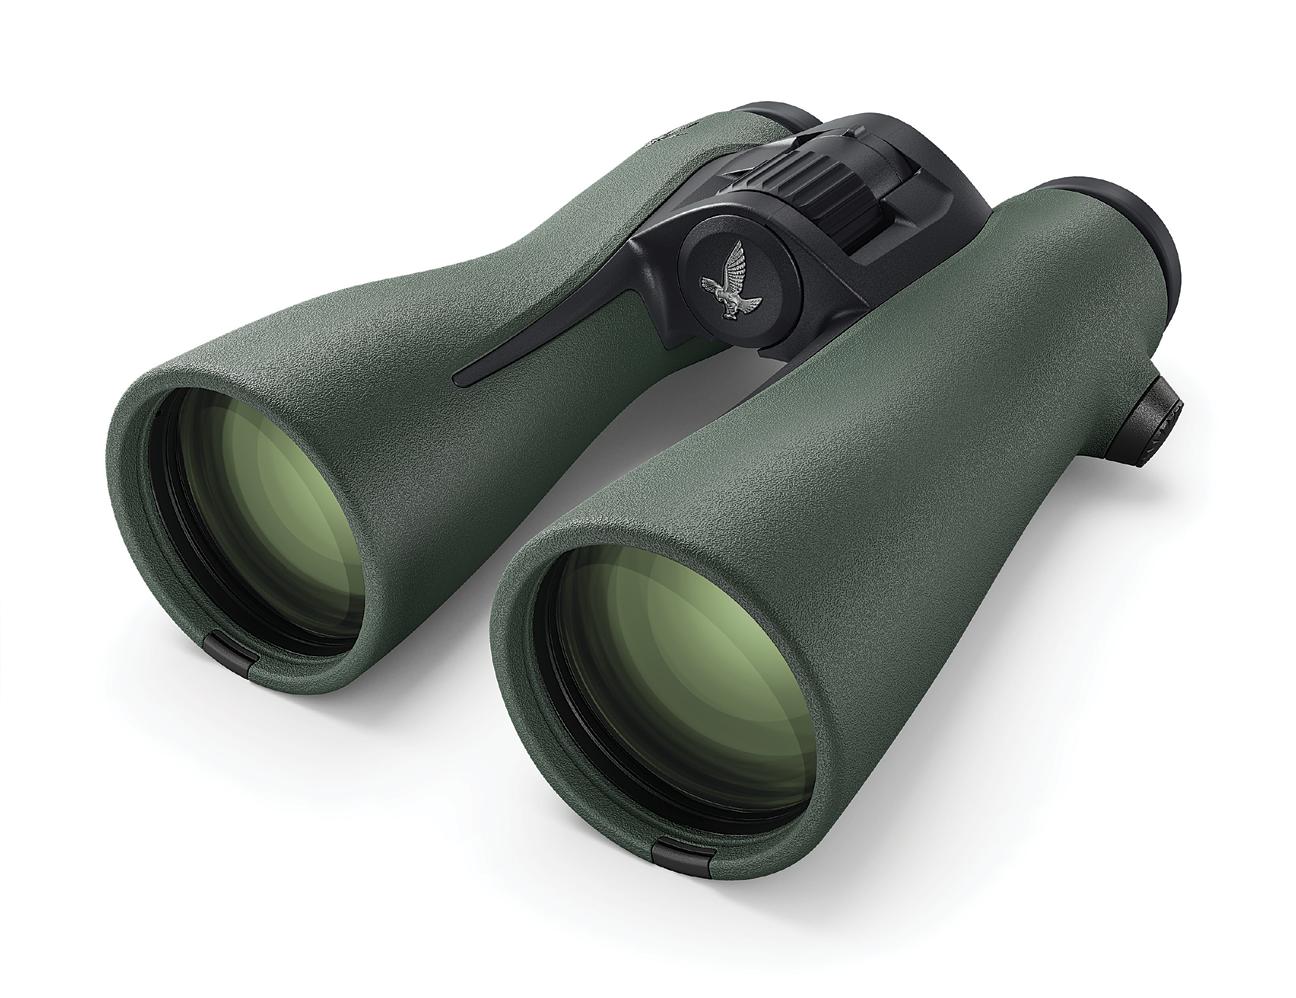
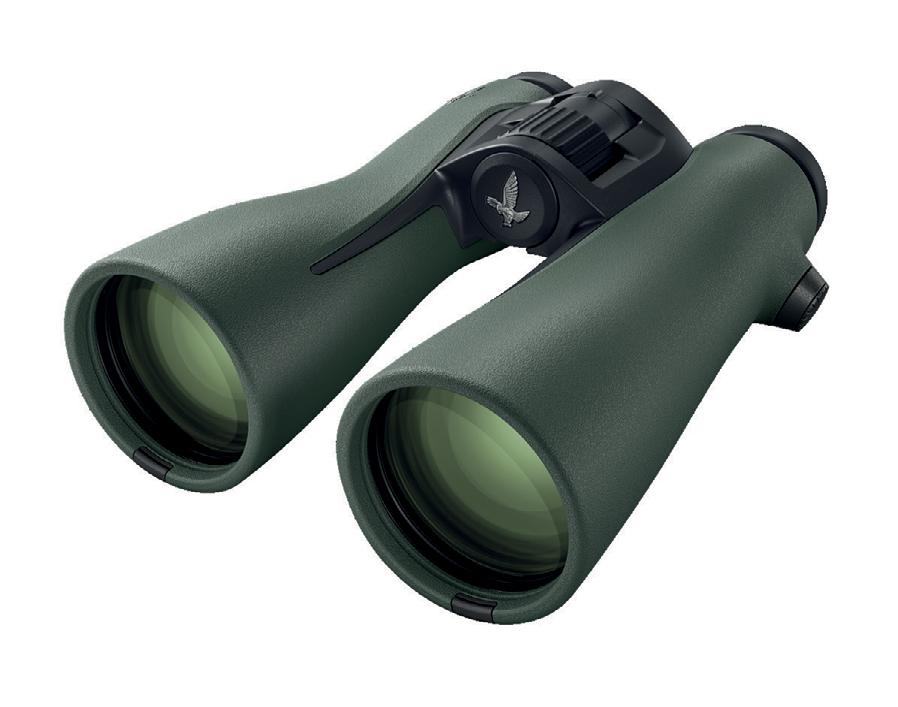
Late in the last century (1999 to be precise), Swarovski rocked the western hunting world with the introduction of the first 15x56 SLC. The sleek design and optical superiority combined with 15x magnification helped establish Swarovski’s dominant reputation among serious hunters. There have been a few optical upgrades to the original that helped retain its undefeated heavyweight champion in the optics world. Since the introduction of the 12x50 EL and the more recent 12x42 NL Pure, we western hunters have been begging for “a new 15x”.
It has arrived! Introducing the Swarovski 14x52 NL Pure.
The Real Power
The first question you might have is, “Why 14x and not 15x?” First, the actual magnification of the binocular is closer to 14.5x – so pretty dang close to 15x. Unlike many companies, Swarovski refuses to exaggerate or misrepresent their products in any way. It would have been convenient to just call it a 15 – nobody would ever know, but that is not their company culture.
While the 14x52 will get all the initial attention, the 10x52 is a spectacular product and is a heavyhitter in its own right. A wide field of view is a great selling feature, but it can come at the cost of edgeto-edge clarity and depth of field. The Swarovski engineers kept the field of view in the 10x52 to 390' at 1000 yards and delivered an image quality your eyes will love for hours on end.
THE NEW CHAMPS
INTRODUCING THE 14x52 AND 10x52 NL PURE
The Big Questions
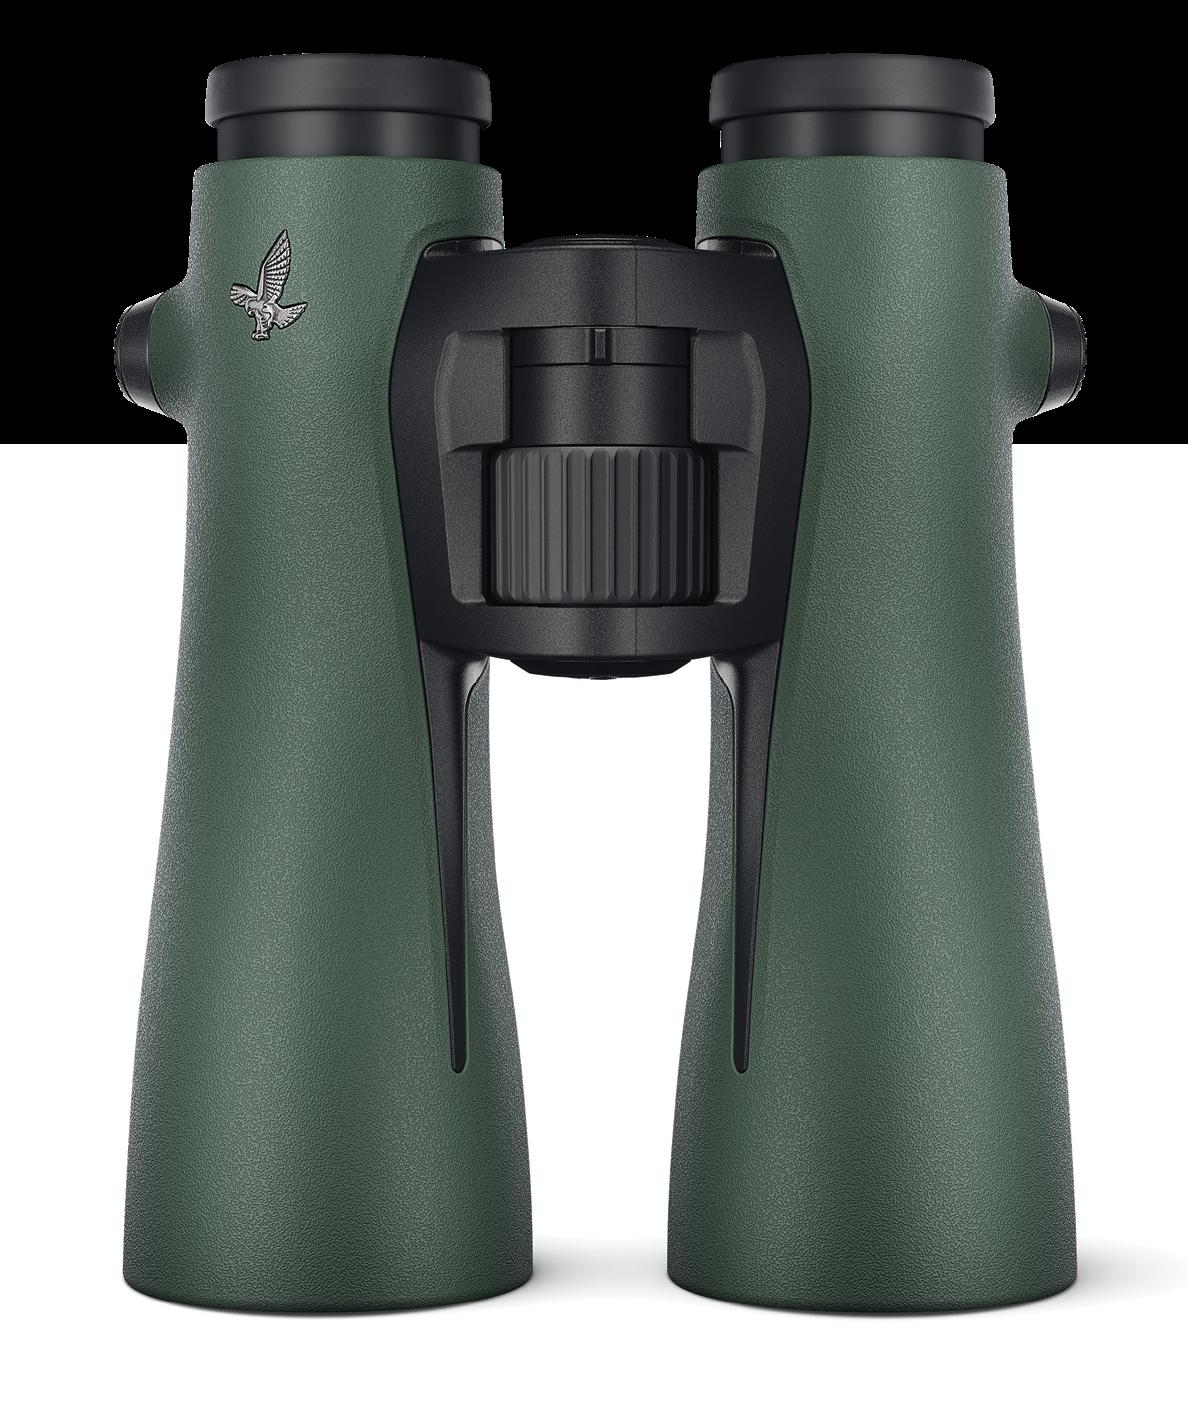
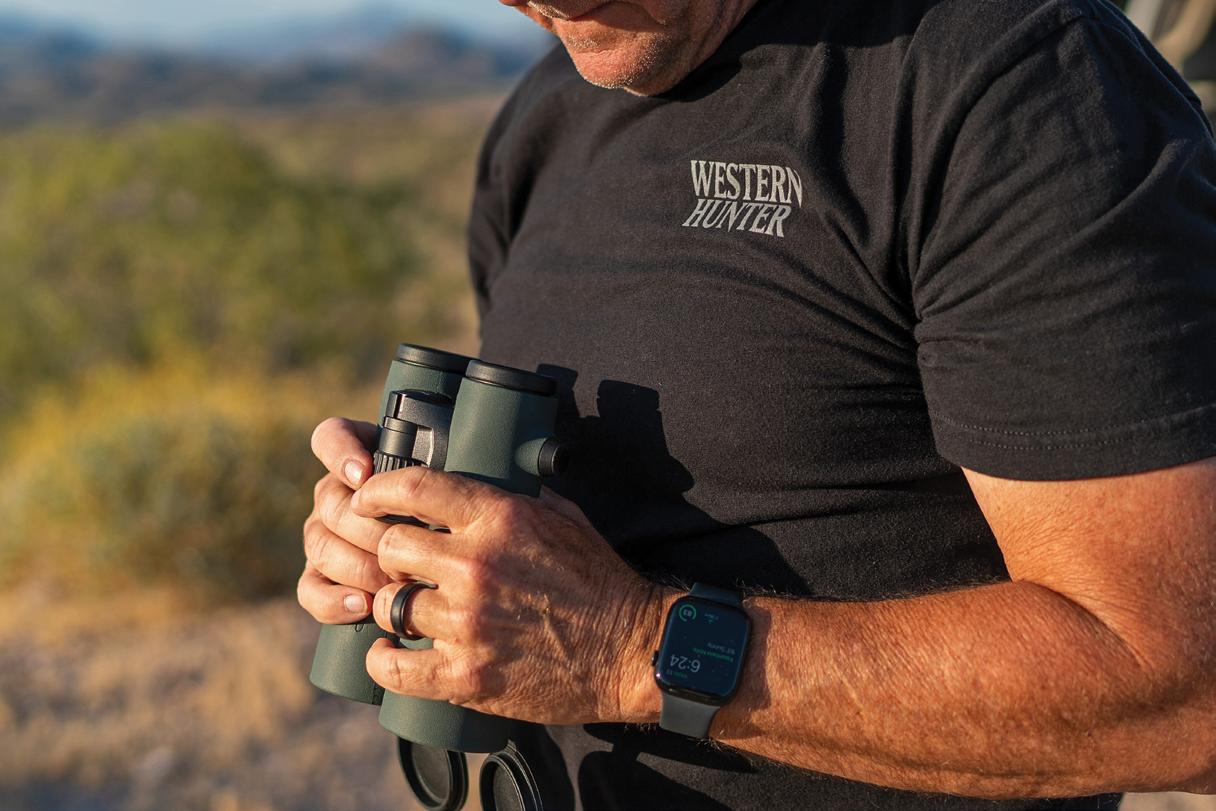
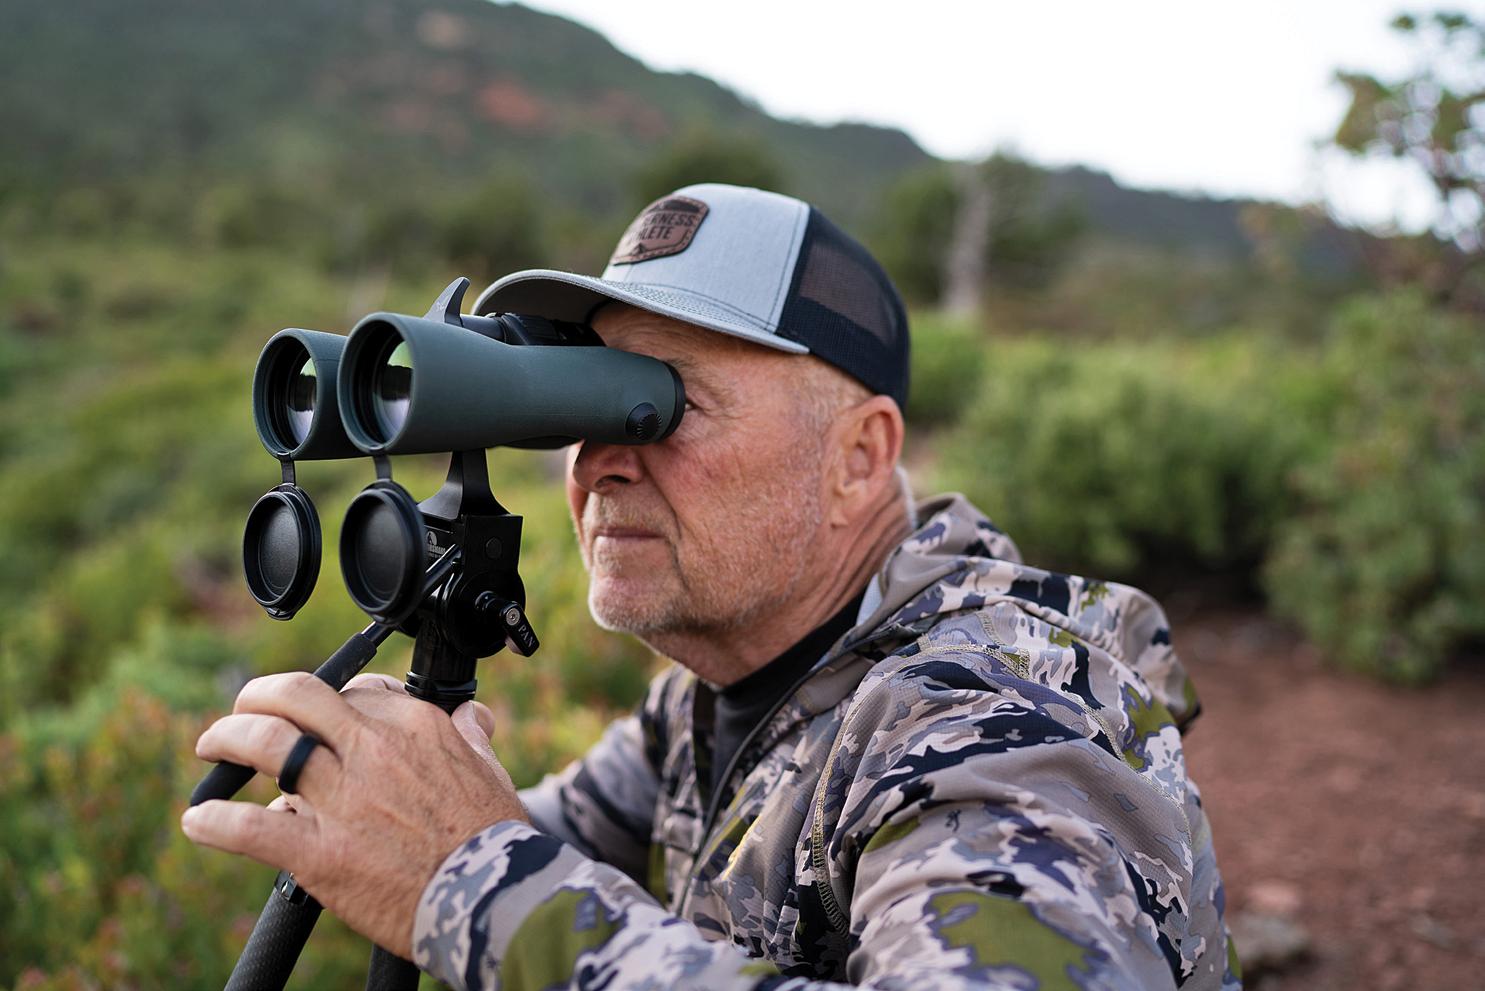
Size matters. I used to carry my 15x56 SLCs in my pack and a pair of 10s on my chest. When the 12x50 ELs were introduced, I carried only them in a bino harness to save the weight. When I heard about the new 14s, I knew I would need to rethink my system, that is, until I held them. The 15x56
measures 7.6" x 5.5" and weighs 42.3 ounces, while the new NLs are 6.9" x 5.2" weighing in at 36 ounces. It was almost impossible to fit the 15x56 in a chest rig, and the weight around my neck was always a problem for me. But the new NLs fit a standard large harness just fine, and the weight is not an issue. More importantly, I can hand-hold the
CHRIS DENHAM PUBLISHER
Gear for the Western Hunter
36-ounce NLs substantially longer than the heavier SLC 15s, which means I could stick with a onebinocular system on many hunts.
The next big question is: How do they compare? The 15x56 is an amazing optic, but the difference was obvious from the start. The field of view (FOV) is 279 feet, compared to 234 feet at 1000 yards, with better edge-to-edge clarity which translates into 20% more useable FOV. This is the most substantial improvement, in my opinion. The image appears brighter and the resolution sharper. I use vague terms like “appears” for a reason, as these binoculars are both so good that we are talking about 1-3%, and some would argue that the human eye cannot perceive changes that subtle. However, the improved image quality combined with the greatly increased FOV adds up to a big advantage.
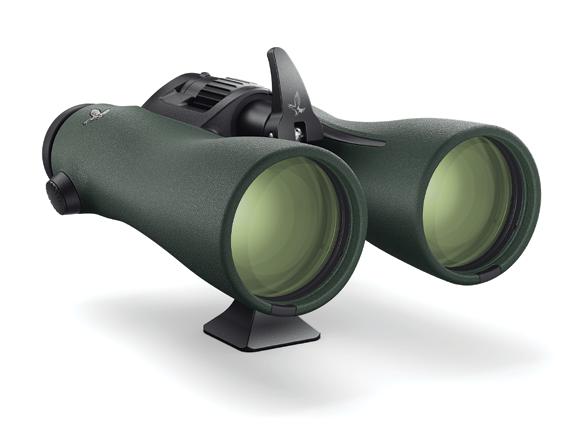
Swarovski finally designed a new tripod adapter system! The unique front-locking design is robust and provides a solid fit. The adapter has an Arca-Swiss base and is threaded to accommodate
a tripod plate. As of now, this adapter is the only mounting option available, but the Outdoorsmans team is already working on an option that would allow you to use their adapter, so you won’t have to pack multiple pieces.
The final question is how much will this much performance cost me? The 14x52 will hit the market at $3499 and the 10x52 at $3449.
Conclusion
Back when Swarovski introduced the NL Pure 42mm series, it raised the bar as the best in the industry. I could go on with flowery language, de-
scribing the optical qualities of the new NLs, but trust me, they are spectacular and a welcome addition to the NL family. The consumer demand will outstrip the supply for a long time. Get yours on order with the Outdoorsmans as soon as possible! You will have plenty of time to save up the money or clear some space on the credit card.
Price: NL Pure 10x52 – $3449
NL Pure 14x52 – $3499
Contact: Outdoorsmans.com
SWAROVSKI
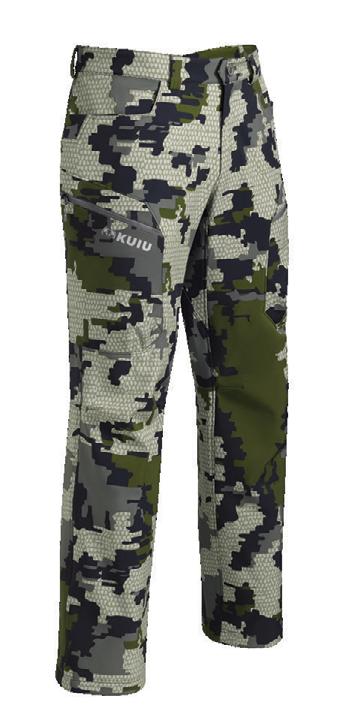
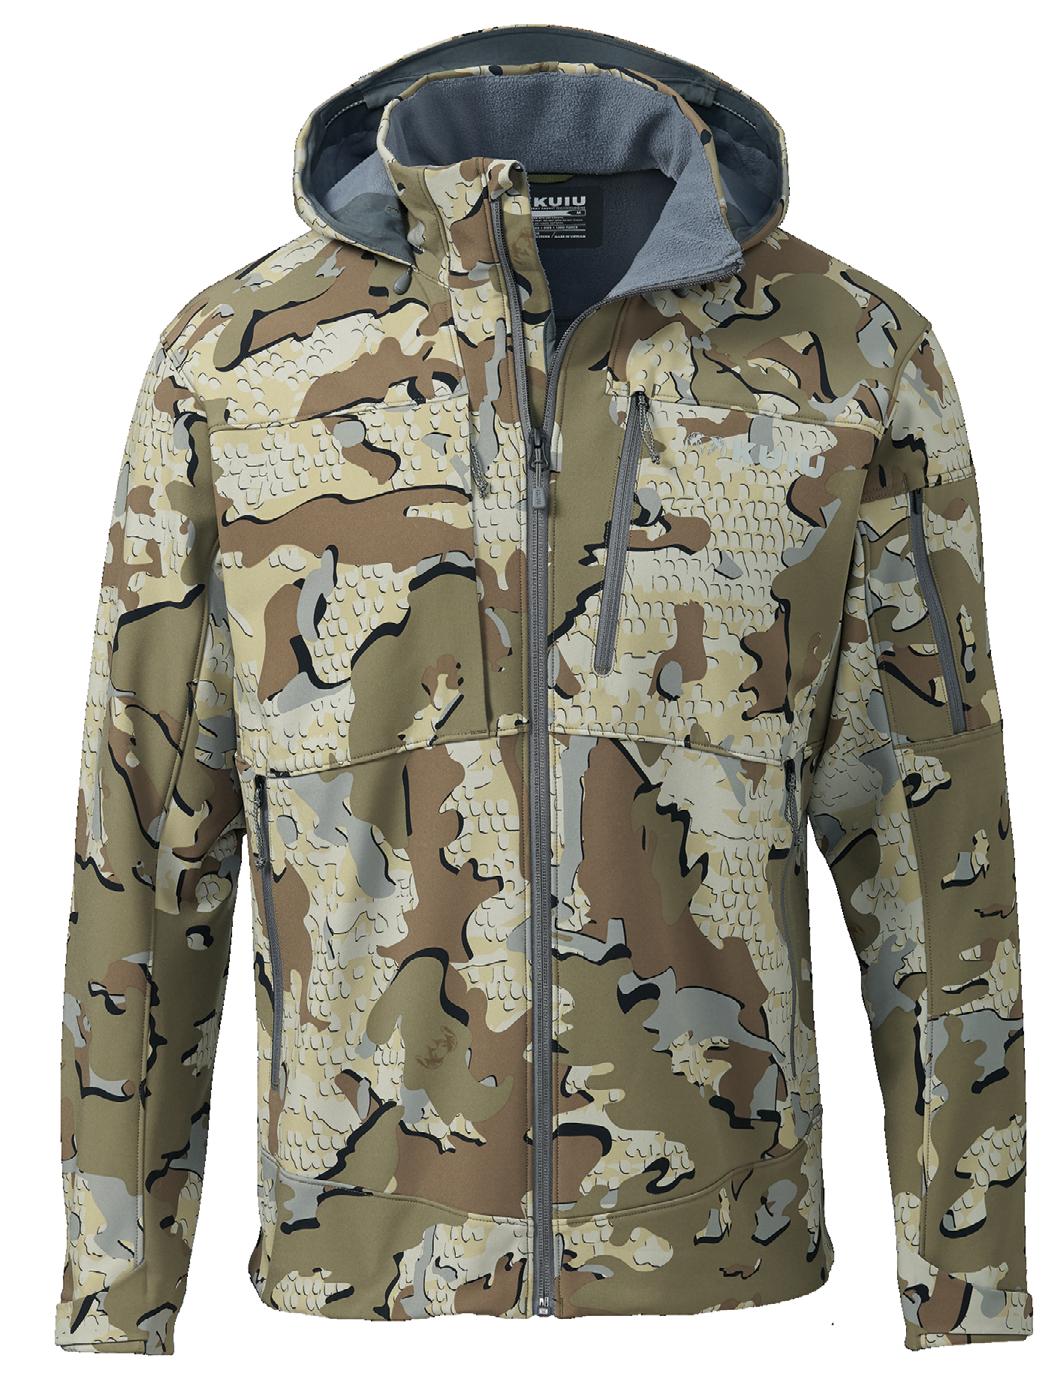
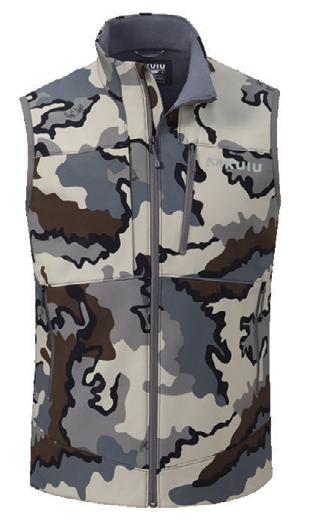
K-DWR Water Resistance beads and resists water from penetration.
4-way Stretch Toray Primeflex Nylon with an ultra-soft and comfortable micro-fleece interior.
Proprietary lamination process adds superior wind protection.
The ALL-NEW Guide Pro series provides superior performance, durability, and fit, all at a reduced weight. Designed for when heavily insulated layers and 100% waterproof protection are not necessary, this series is ideal for mountain hunting in cool, dry conditions.
GUIDE
HOODED JACKET
Quiet for Archery Hunting.
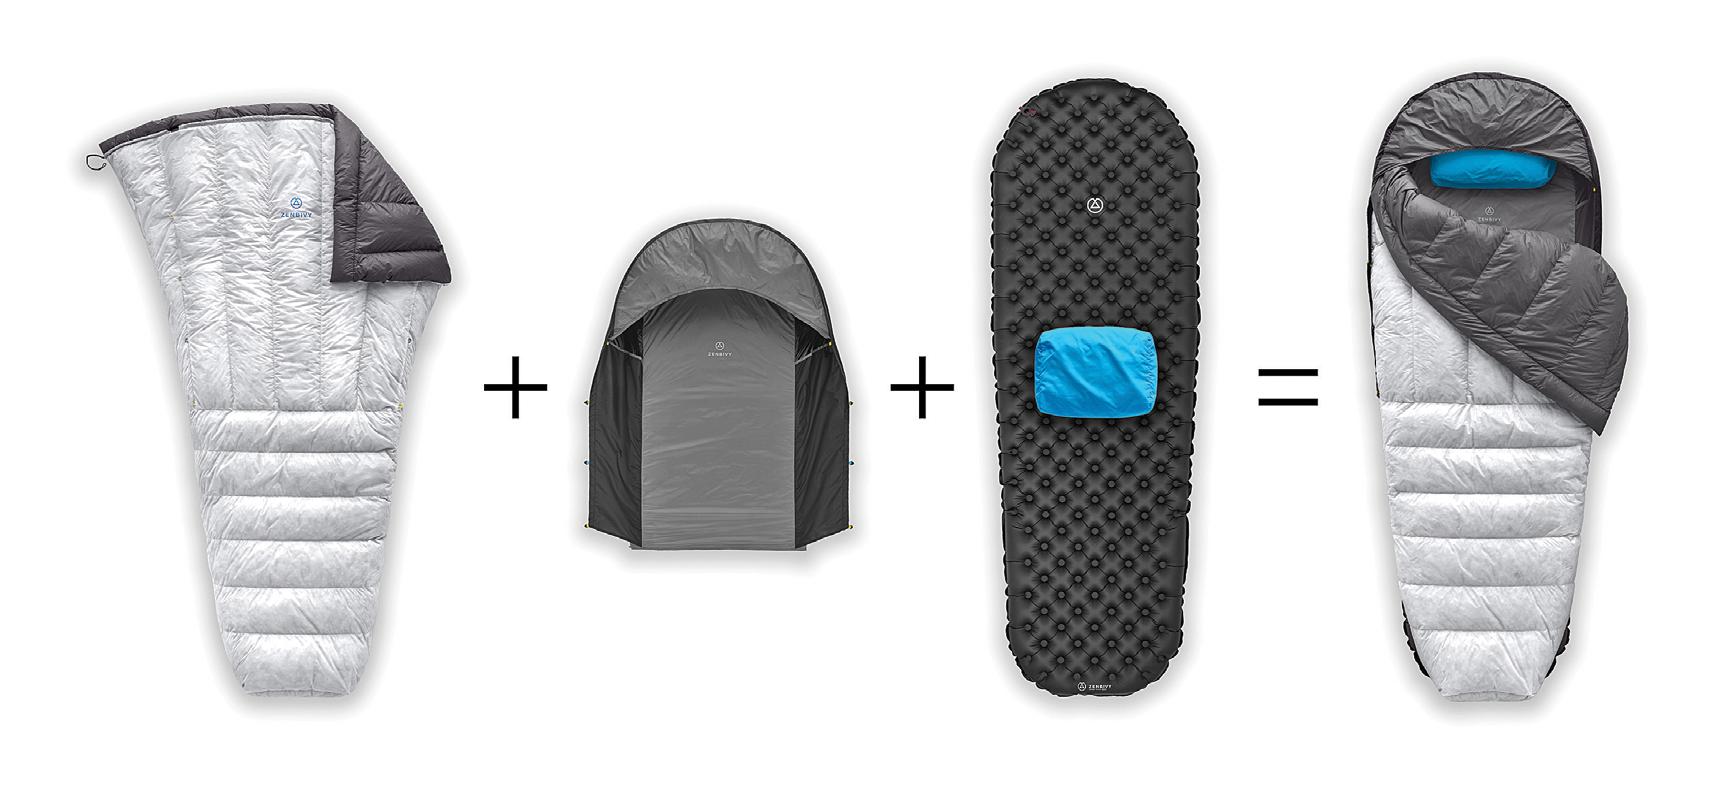
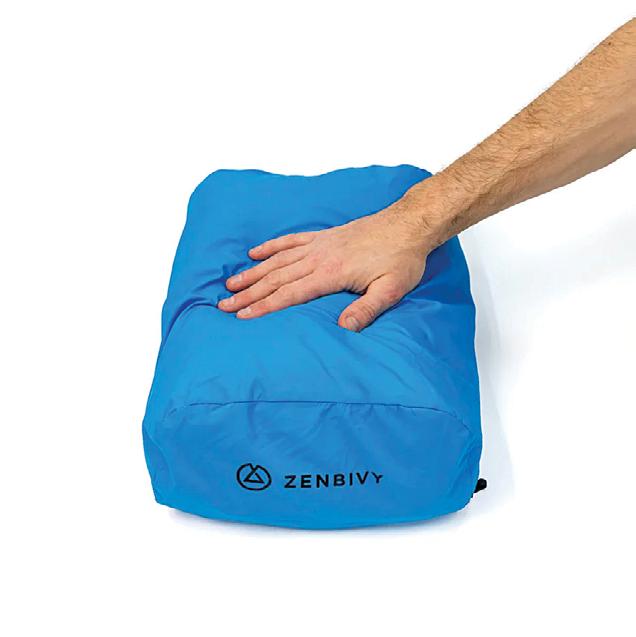
THE NEW ZENBIVY SLEEPING SYSTEM
Idon’t know if Zenbivy invented the backcountry quilt, but they certainly put the concept on the map and have remained dedicated to creating the best quilt sleeping systems available. I’ve been a Zenbivy fanboy since 2019. The versatility and sleep comfort of their quilt is unmatched. This year, they have introduced a new system of products that all deserve your attention.
Why a Quilt?
Quilts for backcountry sleeping have grown in popularity over the classic mummy bag and for good reason. First, understand that when you crush
Ultralight Quilt and Sheet
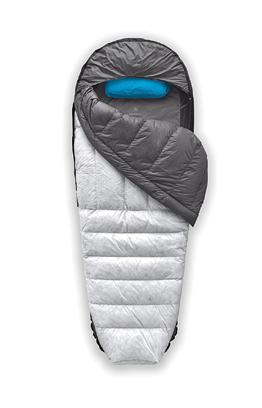
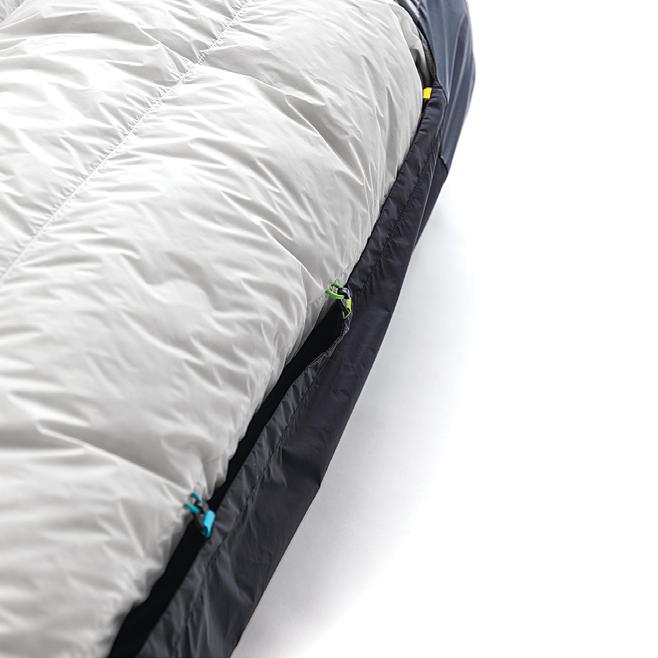
On a recent backpacking trip on the Arizona Trail, I had the privilege to test the new products, including the Ultralight Quilt and Sheet combo. The shell is constructed of a silky-soft 10D Pertex fabric, with 900-fill ExpeDRY goose down. ExpeDRY works by bonding non-toxic gold particles to the down cluster which aids in the evaporation of water molecules. The system I tested was rated down to 25 degrees. On both nights, I was toasty warm with temperatures dropping to just under 30 degrees. The entire system weighs only 19.7 ounces! Zenbivy offers the choice of a 10 or 25-degree quilt, and sheets are available in 10-degree, 25-degree, or uninsulated.
UL Quilt 25-degree: $409
UL Sheet 25-degree: $149
the insulation layer of a mummy bag under your body, you rob most of the insulation qualities, but you still must pack that layer on your back. A quilt, just like a comforter on your bed, lays over the top, traps your body heat, and allows you to move freely underneath.
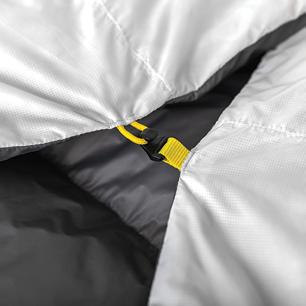
Initially, a quilt was primarily a warm-season sleeping solution until Zenbivy entered the market with their unique quilt and sheet system which pushed the limits well into a three-season product. The sheet is a one-piece hood and sheet that connects to the sleeping bag. As nights get colder, you can attach the quilt to the sheet and close the toe
box to maximize heat retention while remaining able to twist and turn over with comfort.
One important piece of advice: Practice putting the quilt and sheet system together from the comfort of home a few times. It takes a little practice, but you will figure it out quickly. Take it from me, you don’t want your first time to be in a 20 MPH wind, with a headlamp, at the end of an 18-mile day.
Contact: Zenbivy.com
CHRIS DENHAM PUBLISHER
Gear for the Western Hunter
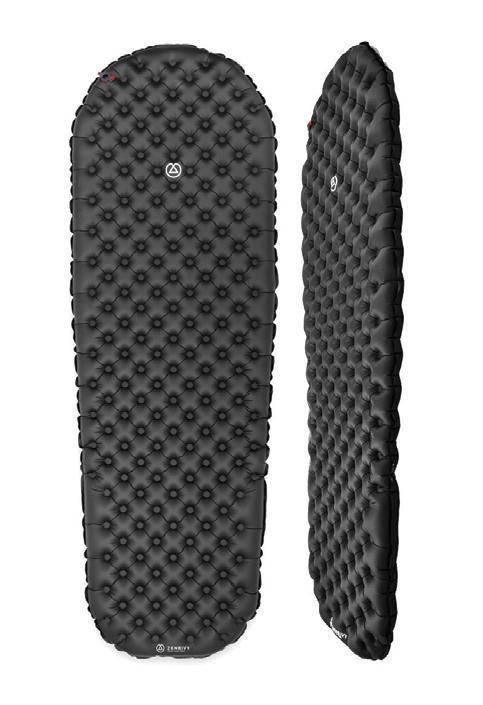
Flex Air Mattress
Aquality mattress is every bit as important to a good night's sleep as a sleeping bag. The Zenbivy Flex Air is the only ultralight mattress to incorporate a four-way stretch top fabric. This stretch quality combined with a diagonal baffle pattern is truly remarkable. Your old mattress feels like a box spring while the Flex Air feels like a pillow top! The 20x72 weighs just 20 ounces and my favorite, the 25x72, runs just 24 ounces. The 25x78 weighs 25 ounces, all with an R-value of 4.5.
20x72: $189 25x72 and 25x78: $199
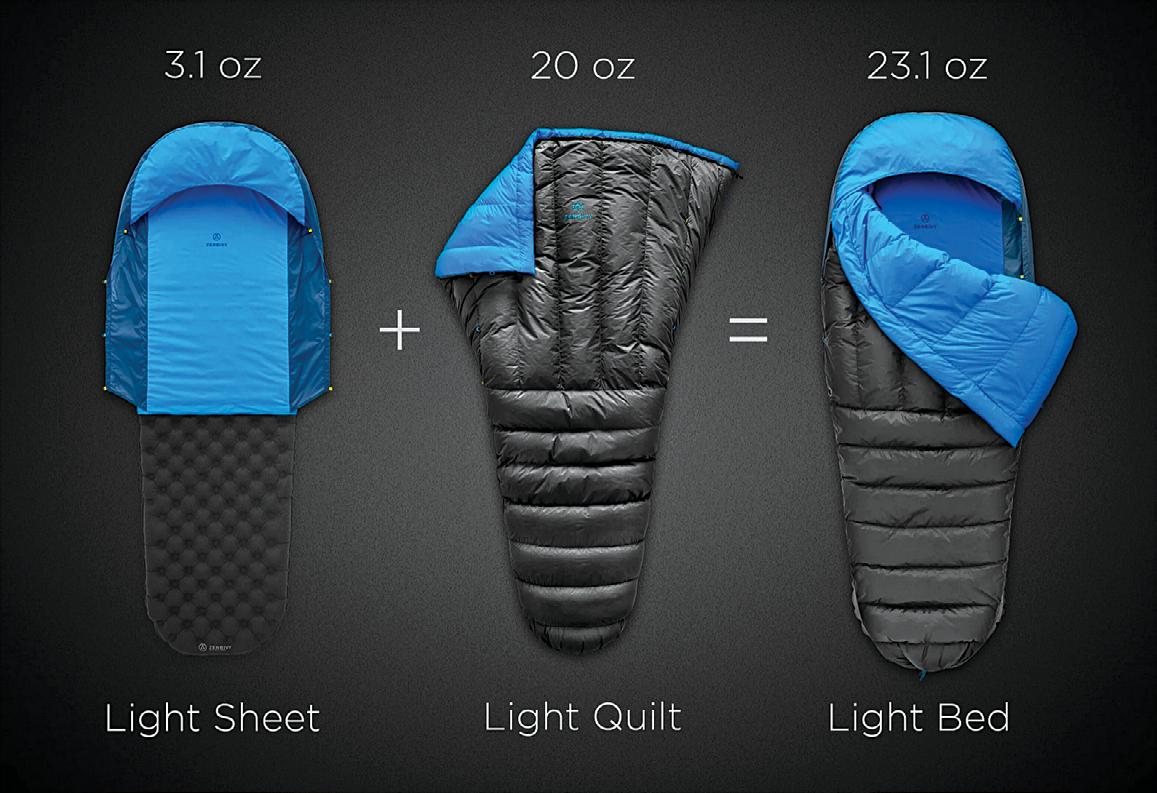
Light Quilt and Sheet System Updated for 2024
he original system has been updated for 2024, featuring a 20D fabric shell with 800-fill HyperDRY down. At 23.1 ounces for the sheet and quilt, it is incredibly light. The original version has served me well over the last five years at a very affordable price. It is available in either 10 or 25-degree ratings. Light Quilt 25-degree: $279 Light Sheet 25-degree: $99
Ultralight Mattress
If you are looking to shave a few ounces, the Ultralight Mattress will catch your attention. With a slightly tapered design, the 20x72 is 17 ounces up to 24 ounces for the big 25x78 version. With an R-value of 4.8, it will keep you warm from the ground up into the coldest hunts in the lower 48.
20x72: $189 25x72 and 25x78: $199
SoftTop Pillows
Years ago, my wife convinced me that a down jacket in a sleeping bag compression bag was a sorry excuse for a pillow. Since then, I have become a connoisseur of backpacking pillows. The new modular SoftTop pillow is my new favorite. The inflatable bladder can be matched with a pillowcase and a down pillow topper for the ultimate comfort. The complete system is well worth the 6 ounces for the Regular 14" pillow or 8 ounces for the luxurious 18" Large model added to your pack. Both pillows can be clipped into the hood of any Zenbivy quilt so it won’t slip around.
Regular System: $65
Large System: $68
Gear for the Western Hunter
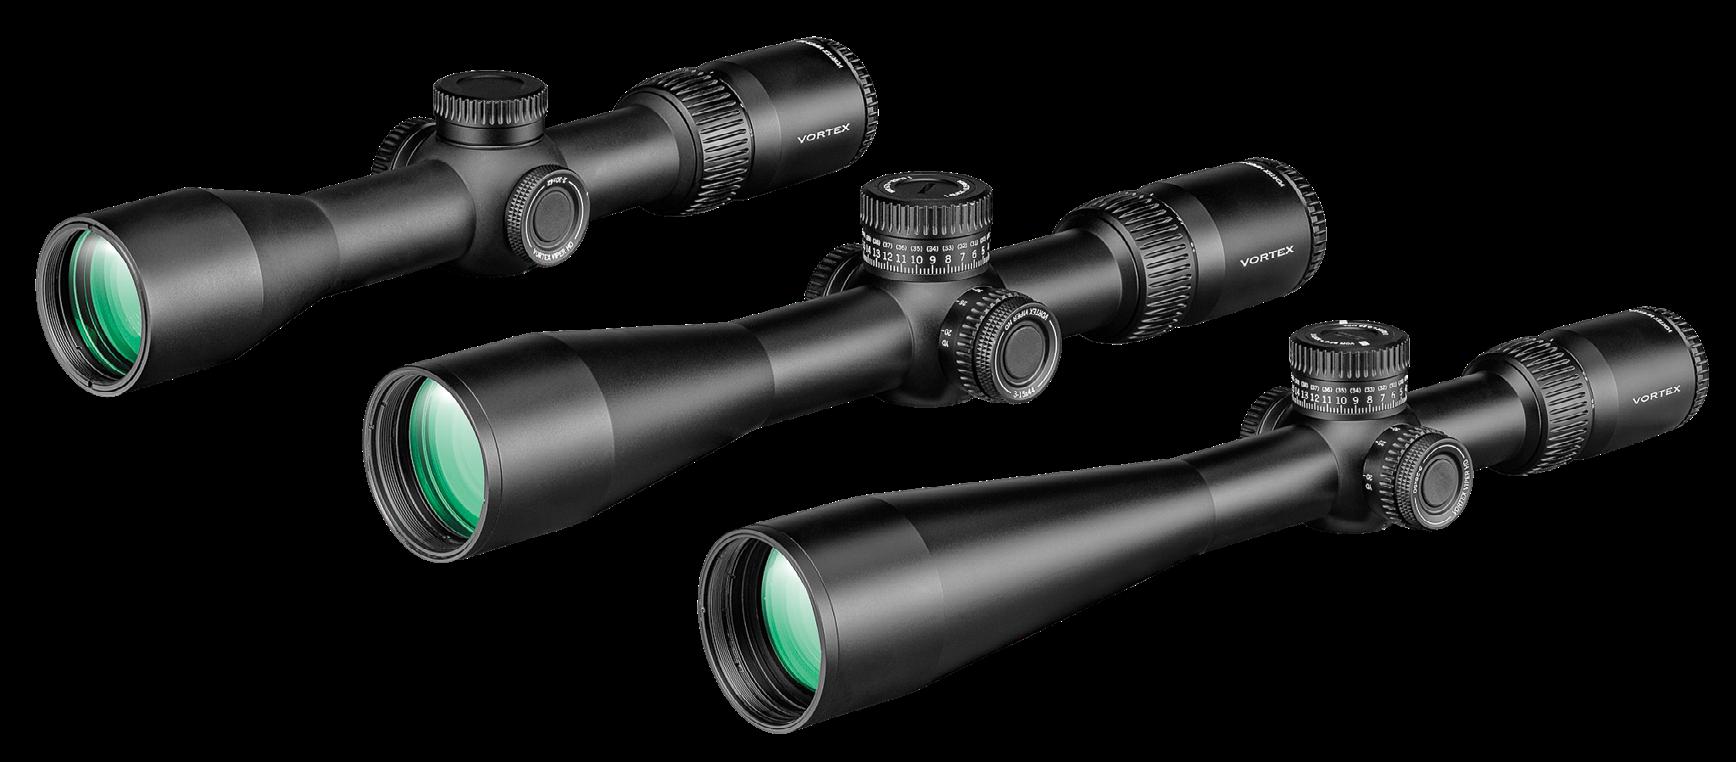
VORTEX VIPER HD RIFLESCOPES
SELECTING THE RIGHT SCOPE IN THE NEW VIPER HD LINE
Vortex just released a new series of riflescopes in the Viper HD line that have been optimized for hunting. They generously offered to send me a scope for testing and review, so I started to dig into the details of each scope, looking for a favorite. An hour later, I was still thinking about all the options and features I would choose if I could buy just one scope – which magnification range, MOA or MRAD, exposed turret or capped turret, ballistic reticle or standard–all of these options are available in the new Viper HD line. As I introduce each of the new scopes, I will cover the potential advantages and disadvantages each of these op tions offers. Hopefully, by the end of this article, I have made a decision and helped you along the way.
Magnification?
The new Viper HD is available in three magni fication ranges: 2-10x42, 3-15x44, and 5-25x50. Magnification is always my first question that needs to be answered. I have hunted with multiple scopes within these power ranges and have concluded that, at most, I “need” about 15x magnification when taking shots past 400 yards. I don’t intend to take a hunting shot past 500 yards, but I shoot hundreds of rounds each year out to 1000 yards during prac tice sessions. A range of 3-15 seems to be in the sweet spot for me.
Some would argue that 10x is plenty of magni fication to make a 400-yard shot on big game, and they are absolutely correct, but I prefer the extra confidence I get from knowing precisely where my crosshair is at the shot. The Viper 2-10x42 would be my choice if I was looking to top off an AR-15 or maybe a lever action, especially considering the parallax is fixed at 100 yards.
MOA or MRAD?
The choice between MOA or MRAD is the most widely discussed and least understood by the majority of hunters. They both do the same thing but in just a different language, in that both are a measure of angle. A minute of angle (MOA) represents the angle of one “minute” of a circle (think clock face) and was widely accepted in the US because it roughly represents a one-inch circle at 100 yards (1.047 to be precise). One milliradian (MRAD) covers 10 centimeters at 100 meters. To those of us who
MOA is the measure that western hunters are most familiar with, and that has value – it is a language we all speak. With most rifle ranges marked in yards as opposed to meters, sighting in and testing ballistics is much easier. The fact that a custommarked turret with ranges out to 500-600 yards with your personal ballistics is available for all quality riflescopes (including the Vortex line), all but nips the debate in the bud... it just doesn’t matter. One last advantage, and probably the most significant, is that MOA scopes have adjustments of 1/4
The new Viper HD line of riflescopes offers different configurations to match your unique target species and compliment your specific hunting style.
Gear for the Western Hunter
MRAD, more commonly referred to as “mil” scopes, are built on the metric system. Honestly, I wish the US would have adopted the metric system – the math is so much easier! Matty Nelson from Seekins Precision is one of the foremost rifle instructors in the military community, and during a recent visit to their manufacturing plant in Lewiston, Idaho, he summed it up for me. He asked,“How many quarters make $1.70, now how many dimes make $1.70?” The speed at which we can do math when everything in tenths is magnitudes faster. For this reason, the precision shooting scene is dominated by MRAD scopes. So, if you’re at all interested (and you should be) in this shooting format, then learning to speak the metric language is critical.
The 2-10x42 Viper HD is only available in MOA while the 3-15x44 is available in both MOA and MRAD.
First or Second Focal Plane?
This is a reference to the placement of the reticle in the scope. In a first focal plane (FFP) scope the reticle is in front of the magnification system. As you increase the magnification, the size of the reticle gets larger in direct proportion to the image. A second focal plane (SFP) reticle is behind the magnification, so the reticle stays the same size even as the image gets larger.
With the advent of ballistic reticles, FFP scopes have gained tremendous popularity because the distance between the hash marks in the scope is the same throughout the entire magnification range. With SFP scopes, the distance varies and can only be relied upon to be accurate at a predetermined magnification. When you’re hunting with an FFP scope and you know what distance or unit your hash marks represent, you can crank the scope to whatever power suits the situation and take an accurate shot.
With an SFP scope, you need to set your magnification to the predetermined power before using the hash marks, adding one more thing to think about in an already stressful situation. A first focal plane scope with a ballistic reticle can also be used as a relatively accurate rangefinder by referencing the chest size of your target species. However, it is a poor substitute for a good laser rangefinder, as it takes a lot of training to be accurate at using the reticle as a rangefinder.
The fact that the reticle does not enlarge on an SFP scope is advantageous, especially in higher magnification scopes. With an FFP turned up above 20X, the reticle will cover almost a full inch of the target, making it challenging to test your group sizes. This may be an issue when trying to shoot prairie dogs at 500 yards, but I do not find it to be a problem on big game.
In the new Viper HD line, the 2-12x42 and the 3-15x44 are available in the second focal plane only. The 5-25x50mm is available in the first and second focal plane. The fact that the 3-15x44 is not available in FFP is my only gripe. I wouldn’t be surprised if Vortex offers that configuration very soon.
Turrets and Reticles?
The choice between a capped or exposed (target style) turret is tied directly to the type of reticle you want, so I have combined these two questions. If you like things simple, and simple has many advantages, then a capped turret with a ballistic reticle is a great choice. The Viper HD 2-10x42 and 3-15x44 are available with their Dead-Hold BDC reticle in MOA. This reticle has vertical hash marks at 1.5, 4.5, and 7.5 MOA and horizontal marks in 2-MOA increments. Both feature an illuminated dot in the center of the reticle.
For maximum flexibility and accuracy, a ballistic turret is tough to beat. The human eye and brain love circles, and they love the centers of those circles. By dialing the turret to a precise distance, you allow your eyes to relax and find the center, especially with an illuminated reticle. That said, being able to use the hash marks for holdover can be incredibly valuable.
For instance, a few years back, I was hunting Montana whitetails during the rut with Western Hunter editor Colton Bagnoli. We bumped a doe on our hike in, and as she moved away up the ridge, a
DEAD-HOLD BDC: MOA
MRAD VMR-4: MOA
monster buck came out of nowhere, hot on her heels. Colton was calling yardages for me each time the buck stopped. By the time I made the scope adjustment, he was moving again. This happened at least three times in the 20 seconds he was in range. Had I known precisely what each hash mark represented, I could have held over and probably killed the biggest western whitetail I have ever seen.
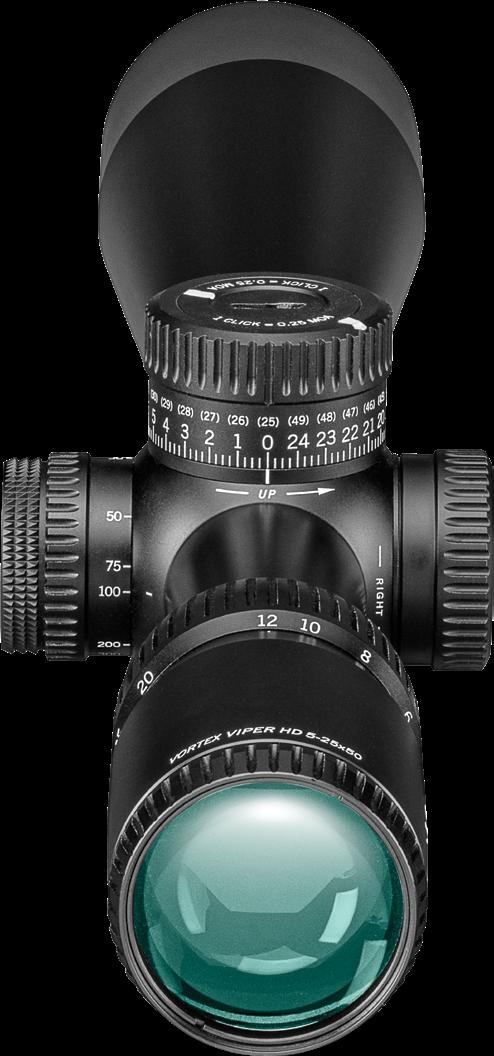
The Viper HD 3-15x44 and the 5-25x50 offer exposed ballistic turrets and ballistic reticles for maximum flexibility. The VMR-3 reticle found in the 3-15 has 2-MOA or .5-mil increments along with an illuminated center dot. The Viper HD 5-25 incorporates the VMR-3 reticle in the second focal plane and the versatile VMR-4 in the first focal plane model.
Conclusion
Hopefully, I have helped to narrow down the choices for you. So, what did I choose? I couldn’t narrow it down to just one! I ordered a 3-15x44 with the Dead-Hold BDC for a .22 trainer rifle. We didn’t talk about parallax in this article, but this scope will adjust below 20 yards, making it a perfect choice for this purpose.
I also selected a 5-25x50 FFP in MOA with the VMR-4 reticle for its versatility on the practice range. This might be my one regret. After writing this article, I feel I would be better served in the long run learning to speak the commie MRAD language better. Time will tell!
Price: Viper HD 2-10x42 – $600
Viper HD 3-15x44 – $700-750
Viper HD SFP 5-25x50 – $900
Viper HD FFP 5-25x50 – $1000
Contact: VortexOptics.com
VMR-4:
VMR-3: MRAD VMR-3: MOA
TODAY’S ELK CALLS
Early elk calls in the ‘80s and ‘90s were primitive, often made from PVC pipes before companies introduced production grunt tubes and im proved open-reed, estrus-type calls. I recall attend ing an elk calling seminar by Wayne Carlton in the early ‘90s, where he introduced the “Fighting Cow Call.” A couple of months later, on August 30th, the opening day of Idaho’s archery elk season, we sat atop a ridge after a long hike with no elk sightings or action. I suggested to Dad,“Try that fighting cow call!” Initially skeptical, Dad agreed to give it a try. While it may not have been as remarkable as I re call, after blowing the call, several bulls started bu gling, and a couple even headed in our direction. It was a unique experience; until then, the noise was exclusive to elk, unaware that hunters could now mimic them.
Following Carlton Calls’ success, several more companies like Sceery, Primos, and Abe & Sons entered the market with similar blow-type calls. Elk diaphragm calls also saw notable enhancements,
persuaded hunters that elk were challenging to call in with bugles, leading to an increase in sales of
new elk calls. The industry continues to evolve, with new players entering the market and improving call quality. It’s inspiring to see just how innovation has revolutionized our elk-hunting experiences.
Choosing the Right Call(s)
It’s not just about selecting any call; it’s about finding the one that suits you best. With many great options from different companies, loyalty to a specific brand is commendable if it works for you. Every company offers elk calls with slightly different sounds, requiring users to match the call to their hunting style, skill level, and mouth shape.
Investing in quality calls is worthwhile for better results, especially considering the importance of being a proficient caller. Improving your calling skills enhances your hunting success, mainly when dealing with call-shy, public-land elk. Having reviewed multiple calls from leading companies over the past year, I’ll highlight their new offerings and what sets each apart.
Phelps Game Calls has made significant strides in recent years, and for good reason – they produce excellent calls. They offer a wide variety of diaphragms that cater to nearly anyone. Their calls come in different sizes to accommodate various mouth sizes and shapes. With a stellar lineup of calls across the board, they have something for everyone in the market.
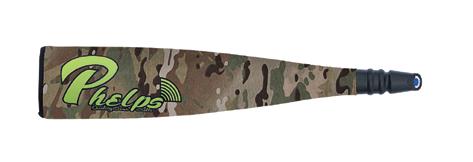
Unleashed V2 Bugle Tube/Metal Bugle Tube
I used both of these tubes over the ‘22 and ‘23 seasons with excellent results. The Metal Tube is slightly more compact with a faster-tapering bugle barrel, but it’s about 4 ounces heavier. The Unleashed V2 Bugle offers loud sound for locating and realistic tones for close encounters. The Metal Tube produces crisp, realistic tones. Both are great, with the Metal Tube having a slight edge in overall sound quality, but the weight-saving of the Unleashed V2 may be worth it. Additionally, each tube offers an option with the EZ Bugler Mouthpiece, utilizing the Amp Frames for easy use and excellent sounds.
Amp Frames
I’ve extensively used the Amp Frame diaphragm calls while hunting elk and find them user-friendly with excellent sound quality. With a normal-shaped and sized mouth, I don’t have trouble using them, which might be due to my experience. Among them, the White and Gray are my favorites for consistently producing the sounds I need. I’d recommend the Maverick for more experienced callers, as it’s stretched tighter and requires more effort to blow, although it lasts longer than other models.
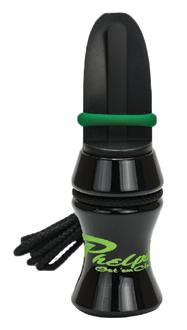
Phelps offers several different external reed cow calls. I have used several of the wood barreled calls over the last 7-8 years, including the newer Acrylic E-Z Estrus models. Both provide a smooth tone that elk seem to love. They are easy to use, even for the novice elk
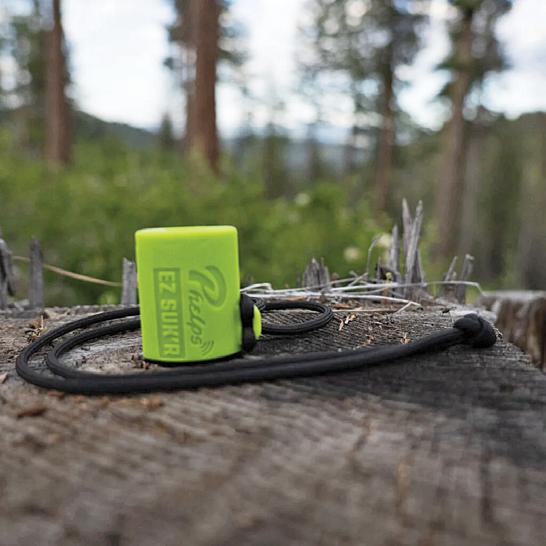
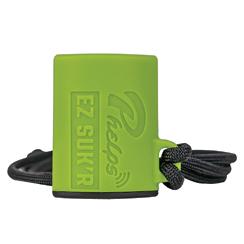
E-Z Suk’R
This is easily one of the best new elk calls released in the past several years. When I first received this call, I never gave it much thought. I thought it was a gimmick and that I’d been doing this long enough that I didn’t need it. That was until last fall when my 13-year-old son, struggling with calling, picked it up. In no time, he was making fantastic cow and calf mews. Quickly, I ordered one and put it to use. This call is about as simple as it gets to use and produces excellent cow and calf mews that are a different tone than I can make with my diaphragm calls. I use it often in conjunction with my other calls, which adds depth to my calling.
Gear for the Western Hunter
Rocky Mountain Hunting Calls buglingbull.com
Of all the calls in this article, Rocky Mountain Hunting Calls has been around the longest by far. Years ago, the company’s founder, Rockie Jacobsen, invented the palate plate. If you don’t know, this piece goes over the latex reed of an elk diaphragm that puts the call at the correct angle. This invention was the precursor to all the domes and plates that followed. Rockie, a world-class elk hunter in his own right, built the company around elk calls that sound as good on the world elk calling stage as they do in the woods. Today, under new ownership, RMHC is alive and well and still making top-notch calls.
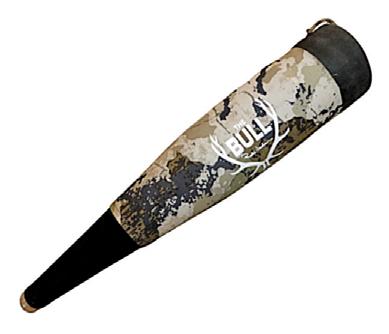
The Bull Basher
The Bull Basher, in my opinion, is an ideal size. It strikes a balance between being big enough to produce a great sound with a wide range of tones and being a little less clunky to tote around due to the smaller barrel. This tube has a hybrid design, with the first nine inches made of aluminum and the rest of the tube molded plastic. This setup provides excellent aluminum tones without the extra weight of the entire tube being made of that material. Moreover, the mouthpiece features a “helical splitter,” which consists of octave fins within the mouthpiece that, in theory, stabilize airflow as you blow and make changing notes easier.
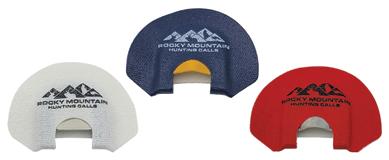
RMHC Diaphragm Calls
Rocky Mountain Hunting Calls offers various mouth diaphragm calls to accommodate every call level and different mouth/palate sizes. They have more options than we have room to list here, which is good but can also be overwhelming when trying to find the right one. RMHC has a new set of calls, the NSU 3 Pack, which, as you would guess, comes with three diaphragm calls. NSU stands for “Next Step Up.” These calls feature a recessed latex and palate plate that always positions your tongue correctly. This makes them very easy to use, even for novice elk callers. I initially didn’t find these calls quite as comfortable in my mouth as the older style palate plate calls, but I adjusted after some use and produced great sound.
While this is a “new elk call” article, I must mention the Mellow Yellow Momma Palate Plate diaphragm. This one is tough to beat for cow-calling. I have used dozens and dozens of RMHC diaphragms for the past 20 years, and honestly, they’ve all been pretty great, making it hard to go wrong.
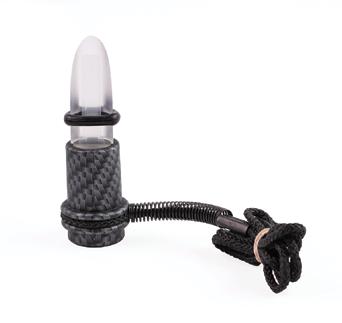
Trophy Wife and Lil’ Flirt
I’ve used multiple RMHC open reed calls over the years, including their newer calls this past year. The Trophy Wife requires more airflow and control to blow than some calls, but once you figure it out, it produces a very nice sound. I appreciate the specific, clean tone of this call. You may need more practice to perfect this one as a new caller, but it’s not overly complicated. This call can be loud, making it suitable for all ranges.
The Lil’ Flirt is a more specialized call for tighter, closer scenarios. It is easily the smallest handheld call I have ever used. It is easy to blow, and new callers should be able to pick it up quickly. This call is great for making soft calf and cow mews and making some of the more excited elk noises of louder calls, but if you want to make them when close to the herd, this is your call.
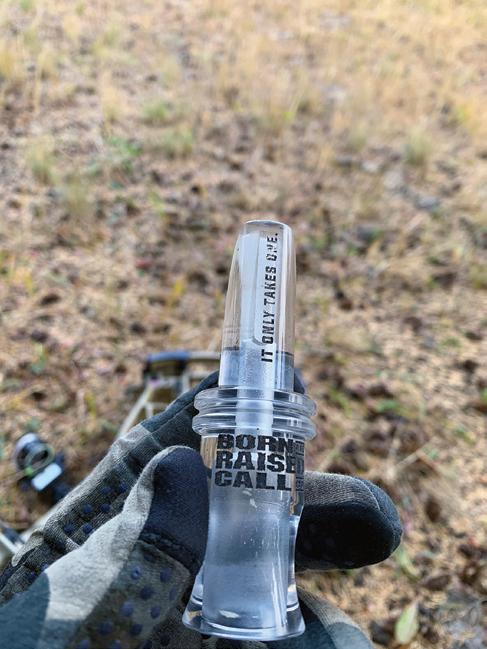
Born and Raised Call Co.
Most people know Born and Raised as the popular YouTube channel, but for several years, they have also been making some great elk calls. While they may not have as much history on the call end as some other companies, they produce excellent calls, including some innovative ones.
The Bomb Bugle Tube
The Bomb delivers big sound in an incredibly light package. This tube is 21 inches long, with a large barrel that provides all the sound and guttural tones you want, and it only weighs 8.2 ounces. I swear, some tubes could kill elk on their own, but this one isn’t like that – it’s so light you hardly know it’s there. In the style of the Born and Raised crew, this tube is made for traveling and casting bugles over long distances until you find the bull you want.
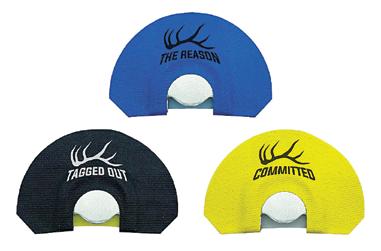
Born and Raised has a smaller but solid lineup of diaphragm calls. All of their diaphragm calls have a dome that helps place the call in the correct position in your mouth and helps to prevent users from gagging. I am a big fan of all three diaphragms in “The Kill Pack.” This three-pack includes The Committed, The Reason, and The Tagged Out. These three calls are easy to use and cover all your sounds,
Sound Bite
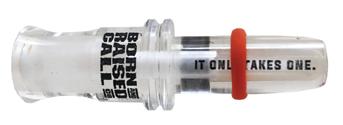
The Sound Bite is a great-sounding call I am a huge fan of. Perfecting the airflow needed to get the right sound takes time. Don’t let comments like this scare you, though. Just because some things take more practice doesn’t mean the juice isn’t worth the squeeze. Each call comes with a three-reed set, and the call can be custom-tuned to individual users. The best thing is that each call is inscribed with one of my favorite elk mottos, “It only takes one.”
Love Triangle
The most unique call in the review is the Love Triangle. When I first got this call, I thought they had forgotten to send it. There is hardly anything to it. To truly understand this call, you should jump on their website to check out the video. It takes some work to master, but the bulls love it once you do. It’s a more high-pitched sound, and I have heard a few different people call with these, and they never sound the same, which I believe is a good thing as well. This call is worth having in your arsenal, trust me.
THE BOMB BUGLE TUBE
THE KILL PACK
Gear for the Western Hunter
Native Brand Game Calls nativebycarlton.com
As I mentioned earlier, Wayne Carlton played a significant role in my evolution as an elk hunter, as well as in the journeys of countless others. He pioneered this industry, and I, for one, am grateful. I remember seeing Wayne hunting elk with his son Marc in old hunting videos. Today, Marc carries on his dad’s tradition with the Native line of calls.
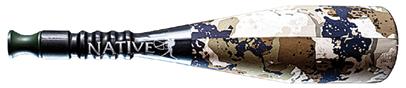
Hunter’s Tube with Focus Fit Mouthpiece
As mentioned, all of these new tubes are pretty awesome, and this one is no exception. This model is made of highly rigid plastic, making it stout and durable. It has a nicely sized barrel but tapers faster than the others, so it isn’t quite as big and bulky. I carry my bugle in my hand often when I’m in the elk, as opposed to having it slung around my neck, and the knurled portion below the mouthpiece is very ergonomic and comfortable for this. It’s hard to pick a favorite, but I really like this tube. It has excellent sound and is big enough to handle any situation.
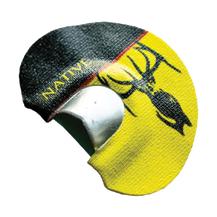
Ripit Diaphragms
I was very impressed with the Native Diaphragms this past season. I found them easy to use and capable of producing great sounds. If you are like me and carry your diaphragm in your mouth all the time while hunting, you are likely to wear them out fast. I constantly wear out calls throughout the season from having them in my mouth. I found these Native calls more durable than others in the industry. Armor tape is an option when buying your Native calls, and it doesn’t separate like others tend to. Although I like all the Native diaphragms I’ve used, the Yellow V3 Medium Frame is a personal favorite. It can be purchased with different latex weights to suit your preference.
Acrylic Belled Barrel
Native has an extensive line of open-reed calls, primarily acrylic. I have a few of these models; each is easy to blow and produces excellent sounds. They are up to the task, from light mews to excited estrus sounds. Maybe it was just a coincidence, but the first time I used the Whiskey Ribbon Belled call last year was magical. We hadn’t had much luck for a few days, so I tried this call. Immediately, I got a bull to answer, and he charged into our setup from several hundred yards out. Like I said, sometimes you must make the right call in the right tone, and that day, this call was it.
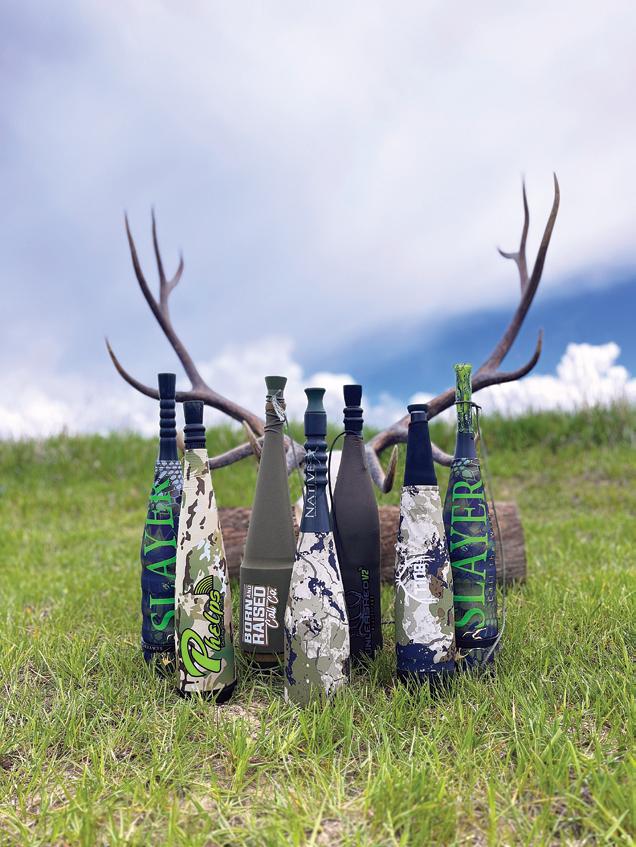
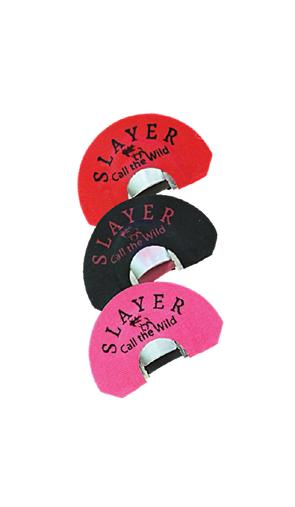
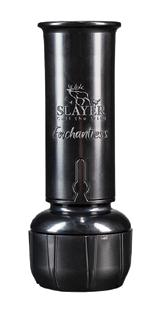
Slayer Calls slayercalls.com
The newest to the party is Slayer Calls. Don’t let their recent arrival fool you; these guys are no strangers to elk hunting and calling. Their line isn’t extensive at this point, but it’s growing, and so far, what they have made is quite impressive.
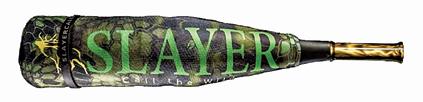
The Swagger/Archangel Bugle Tubes
The Swagger is a good-sized tube, but it is lighter and more affordable than others. It offers all the sizes, backpressures, and baffling you need to make any and all elk bugles. On the other hand, the Archangel is their flagship tube, and understandably so. This tube is visually appealing, and its acrylic mouthpiece (available in multiple color options) features the “Acrylic Sound Amplifying Back Pressure System.” As mentioned earlier, I am not an elk call engineer, but I know this bugle sounds fantastic. Either tube will do the job, but the Archangel is truly next level.
Clearwater Elk Diaphragms
Slayer has a great line of diaphragms in the Clearwater series. They all feature a dome-style reed, and I have found each reasonably easy to use. Different reeds can be bought with varying thicknesses of latex to suit different calling styles or levels of experience. It’s best to start with an easier-to-blow diaphragm and move to thicker latexes as you progress. I found their Workhorse Series 3-Pack to be a great set of calls. Each call has either a slightly different stretch or latex. I could make the full gamut of elk calls with these three calls. Enchantress Push-Button Cow Call
Another unique call is the Enchantress. I have used other push-button calls but was never overly impressed. This call, however, is fantastic. If you struggle with diaphragm calls, this is your solution. It’s straightforward to use and makes incredible elk sounds. I can’t wait to take this call into the woods this fall as another tool in my belt. It can also be attached to their Swagger bugle tube. While I never need these types of calls to bugle, I tried it out for the sake of the test. Quickly, I was making great bugles. This is an excellent option for anyone new to calling or who tends to gag with diaphragm calls.
Putting it All Together
As you can see, there are plenty of great elk calls out there to choose from. Some calls have specific strengths, but honestly, most will get the job done if you do your job and practice to perfect your calling. Having a variety of different calls to try on your hunt, though, is never a bad idea.
Some may find this silly, but with over 30 years of elk hunting under my belt, I can honestly say you never know what call may work from one day to the next.
ARCHANGEL BUGLE TUBE
WORKHORSE 3-PACK AND ENCHANTRESS
WHISKEY RIBBON BELLED
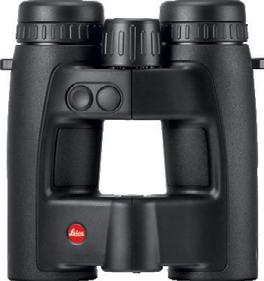
PREMIUM PERFORMANCE TRUSTED BY PROFESSIONALS
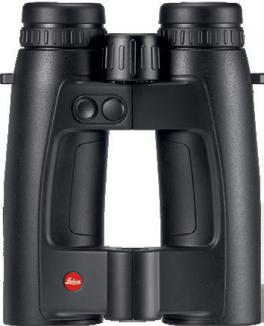
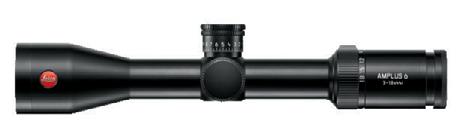
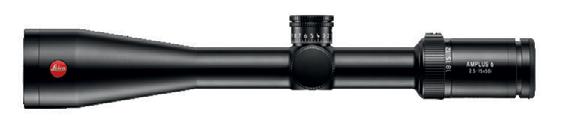
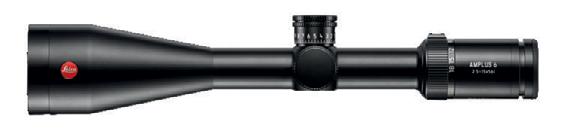
Our Geovid Pro ballistics binoculars offer the epitome of optical excellence and are relied upon by professional guides and hunters during extended hunting expeditions. When paired with our Amplus 6 scope, known for its exceptional low-light performance, precision adjustments, and multiple reticle options, you can have absolute confidence in an optical system that embodies Leica’s proven track record of delivering unrivaled performance.
Geovid Pro Models: Geovid Pro 8x32, 10x32, 8x42,10x42, 8x56
Amplus 6 Models: 3-18x44 i, 2.5-15x56 i, 2.5-15x50 i
Discover more – visit your authorized dealer or explore leica-camera.com/sport-optics
Geovid Pro Features:
LEICA GEOVID Pro 32 LEICA GEOVID Pro 42
LEICA AMPLUS
Reticle L-4w (MOA)
Reticle L-4a
GEAR & PRODUCT HIGHLIGHTS p
Marsupial Simple Bow Case
My bow practically lives in the back seat of my truck. My daily life is crazy busy, and I try to sneak in a quick shooting session at my local range anytime my schedule opens up. So, I keep my bow with me when I’m out and about, and then it comes out of the truck every night. All the back-and-forth and in-and-out of the truck puts a lot of stress and wear on my bow case. That’s not to mention during hunting season when I load the truck with all sorts of gear and my bow case gets tossed in on top.
I’ve always had in the back of my mind a worry about how much a cheap, flimsy case can actually protect my bow. At the same time, carrying a bulky, hard-sided bow case is very inconvenient. I’ve long been on the lookout for a crossover bow case that bridges the gap between a flimsy case and a bulky, hard-sided case – in other words, a bow case that provides significantly more protection than a flimsy soft case without sacrificing portability.
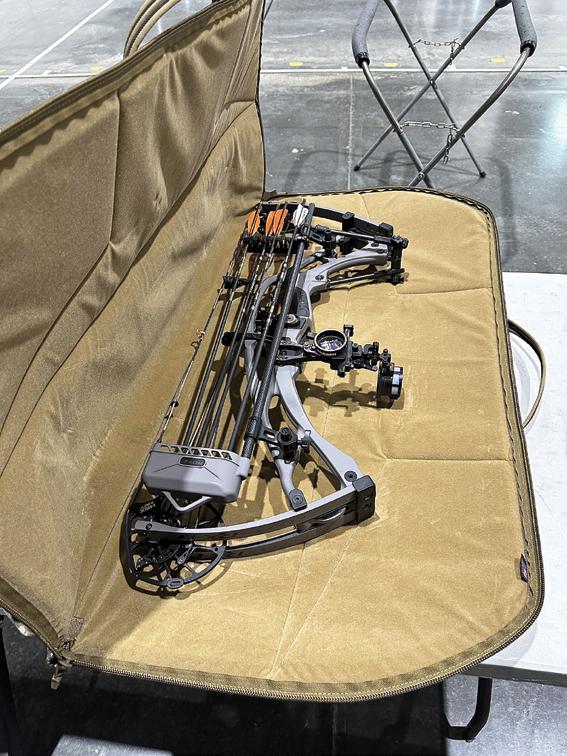
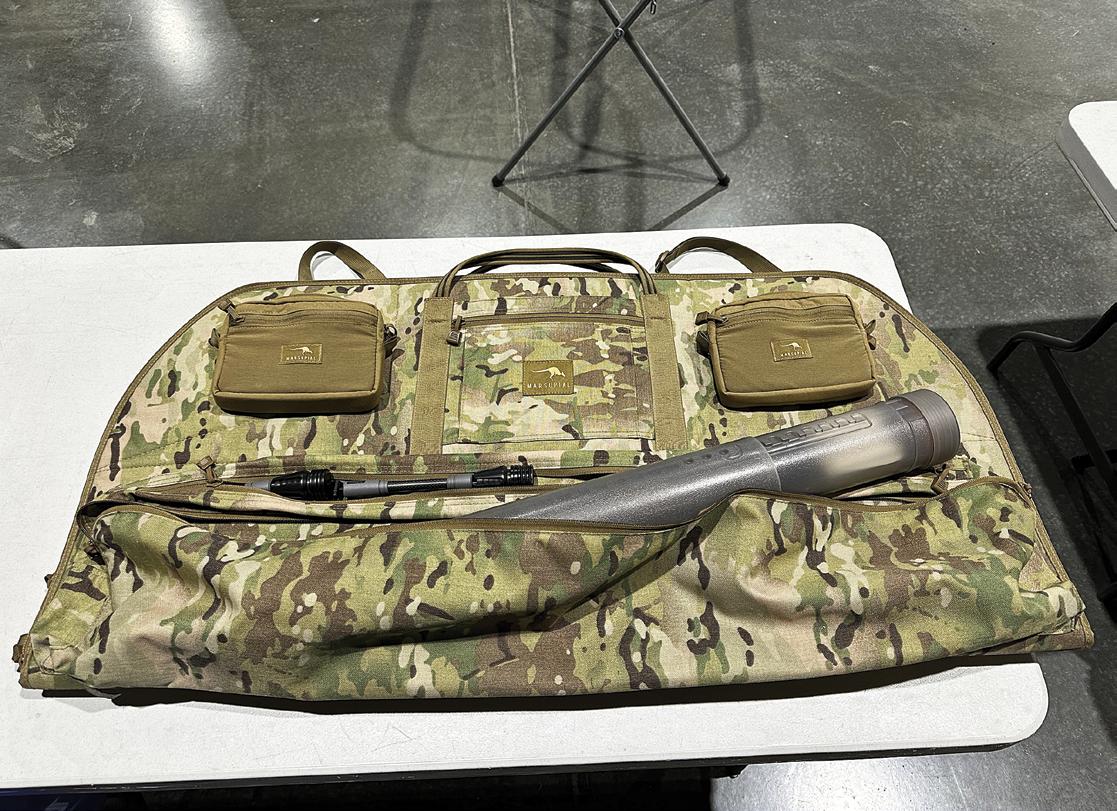
Enter the Marsupial Simple Bow Case. Marsupial released this clamshell-style bow case in 2023, and I’ve had the privilege of using it since last fall. The case fits bows up to 40" axle-to-axle, making it extremely versatile with modern compound bows. Even if your bow is shorter, the design prevents the
Materials
The case is built using premium materials. To start, it’s wrapped in 1000D Cordura for maximum abrasion resistance; it uses multiple layers of rigid foam to provide the ultimate protection from abuse; the inside is lined with a soft fleece, which ensures that your bow is protected from the inside; and lastly, it zips up tight with premium YKK zippers.
Pockets and Accessories
Besides the main bow pocket, the case has three additional pockets; a zippered accessories pocket, a long stabilizer pocket that runs the length of the bow case, and a large arrow pocket big enough to fit most arrow cases. Additionally, two locations with MOLLE webbing allow the addition of two extra pockets or other compatible accessories. The case has two grab handles at the top of each half of the clamshell sides and a removable padded shoulder strap for easy transportation.
Design
The thing I love the most about the Simple Bow Case is the protective foam. The foam is what really sets this case apart from other soft cases. It is a dense, rigid foam that gives the bow case plenty of structure and protection. The structure of the foam puts a bit of force or pressure on the bow inside when the two halves are zipped together. The pressure from the sides acts like a cradle and the bow doesn’t slide around inside at all.
The other major benefit of the dense foam is the degree of protection it provides. In this case, your bow is going to be pretty darned protected from drops, things falling onto it, or things banging into it as you drive around. Lastly, the dense, thick foam provides great thermal protection for your bow. I say this because I often have my bow in a hot car at some point during the day in the summertime, and this case is substantially better at insulating the bow from the heat.
Small Flaws
I have been really impressed with the Simple Bow Case. It is leaps and bounds better than any other soft, portable bow case I have ever used, to the point that it’s just not fair to lump it into the same category as other soft cases. That being said, there are a couple of small things that I would change to perfect the design. The one accessory pocket that is built into the case is quite small and tight. I would like it to be at least double the length and have more bellows to it so that it has more depth/volume.
I would like to see some options for bigger accessory pouches as well. The current pouches are small and can’t hold more than just a few items each. Lastly, it’s a premium bow case at a premium price point. It may not be for everyone, but for those who move and shoot their bow daily, there isn’t a better option for convenient, portable protection.
To learn more about the Marsupial Simple Bow Case, check out MarsupialGear.com p
The Simple Bow Case is a clamshell-style bow case. It unzips completely flat, but when zipped up, it cradles the bow, preventing the bow from moving around inside.
The Simple Bow Case has a generously sized arrow tube pocket, a full-length stabilizer pocket to fit long stabilizers, a zippered accessories pocket and two MOLLE webbing locations for compatible accessories.
GEAR & PRODUCT
Leupold RX-∞‚º‚‚ TBR/W Rangefinder
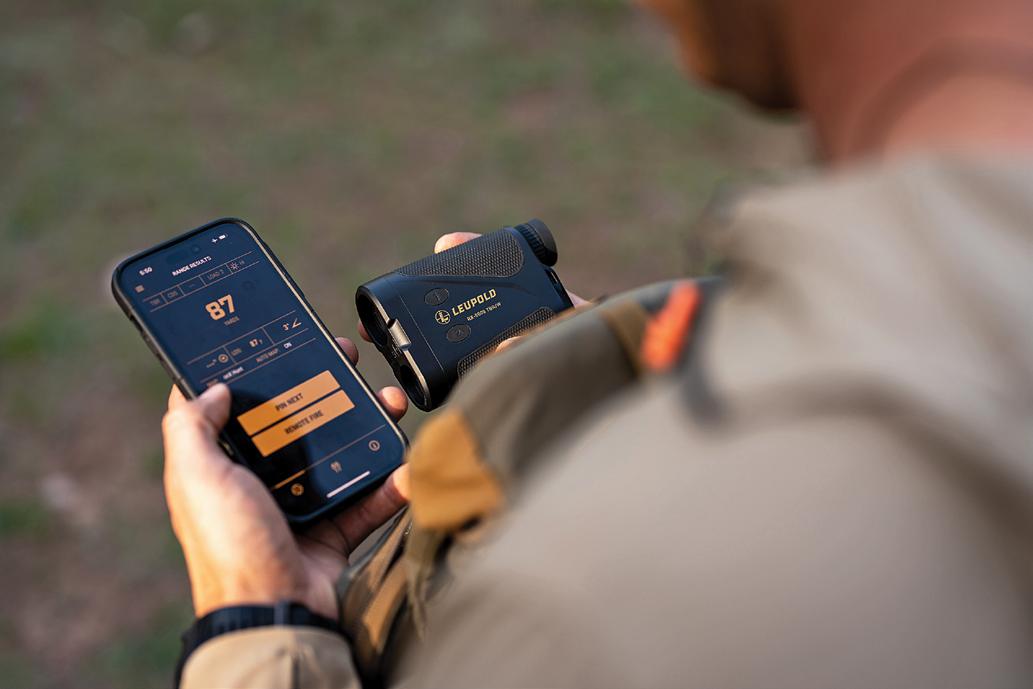
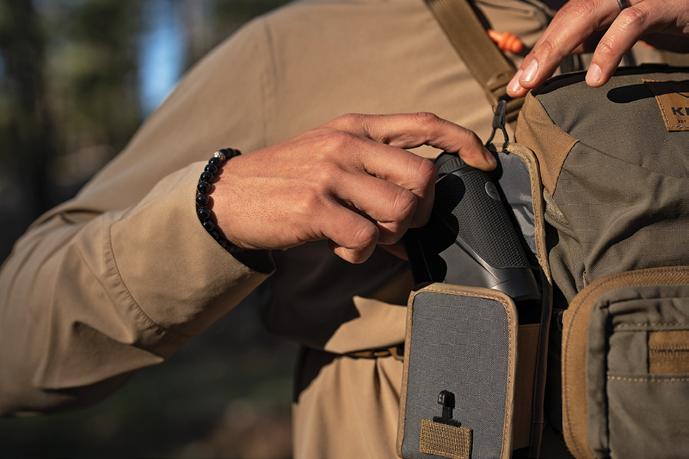
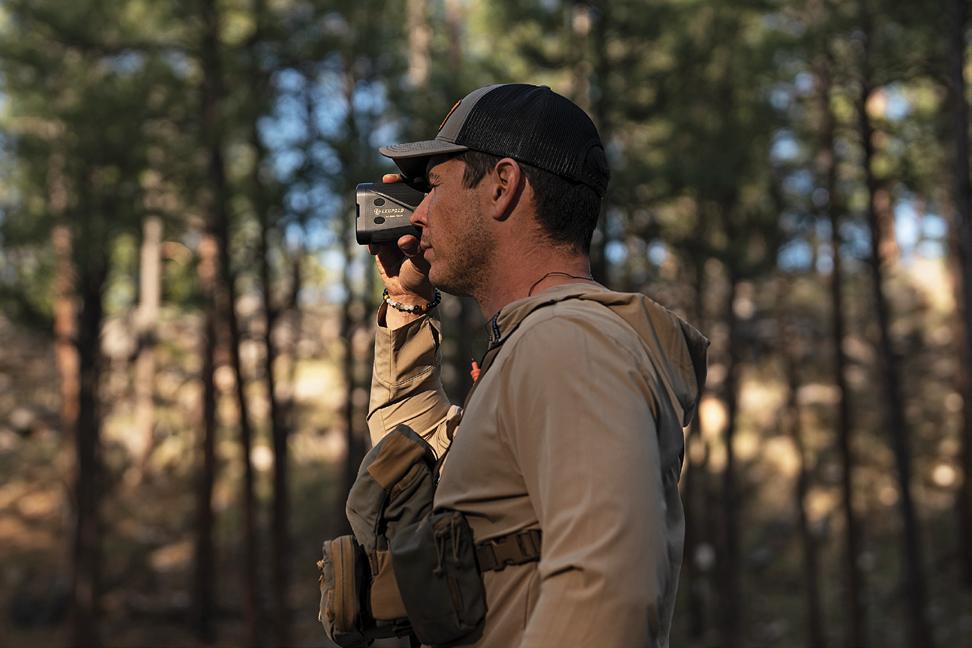
In the accelerated technology and feature-rich age of 2024, laser rangefinders need to do more than simply range a target accurately. A prime ex ample of surpassing this need is the new RX-5000 rangefinder Leupold has just released in collabo ration with onX Maps. The key feature within the device that shines brightest for me is its pinning feature – allowing you to mark your target on onX Hunt, Google Maps, or Apple Maps with a simple press of the range button.
Dropping a pin on your map to plan a stalk or navigate through the backcountry is not only high ly useful but surprisingly effortless with the use of the new Leupold Control App (free for download in app stores). One would expect a tedious setup and needing to swap back and forth between apps –nope. You simply press “Pin Target” in the Leupold Control App, then range your target, and the technology inside takes over from there by automati-
cally opening onX Hunt (or your preferred mapping software) with the pinned location you had lasered. After properly calibrating the unit, which
takes less than a minute, I found the pinning accuracy to be excellent well past 1,000 yards.
The RX-5000 boasts an impressive range capacity in Long Range mode thanks to the incredible DNA engine – 5,000 yards on reflective targets, 3,100 yards on trees, and 2,000 yards on deer-sized game. As a tool for getting my rifle on target quickly and accurately, the unit’s True Ballistic Range/Wind (TBR/W) technology offers me 25 selectable ballistic groups to choose from, and in my testing so far, the solutions for 7 PRC Hornady ELD-X have
There are more bells and whistles on board the RX-5000 and the Leupold Control App that I am still discovering and testing. Without a doubt, at a highly competitive price point of $699.99, this unit is tough to beat in its weight class. Stay tuned to our YouTube channel for further testing and reviews p
Contact: Outdoorsmans.com
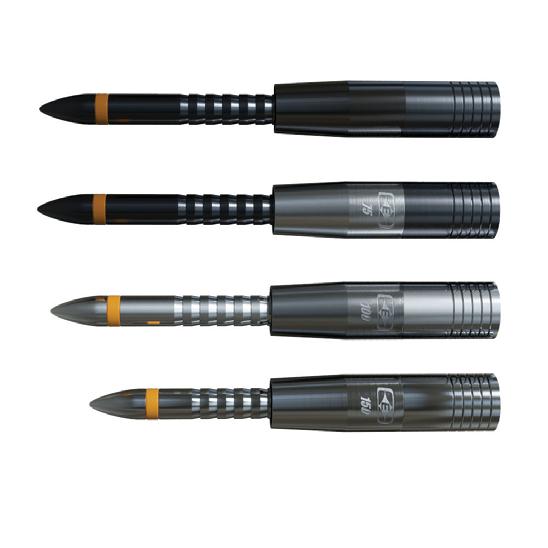
Easton ›mm Match Grade Half-Out Inserts
If you are a regular to my archery column here in Western Hunter Magazine, you’ve undoubtedly seen that I am a big believer in Easton Hidden Insert Technology, or HIT for short. I have been using Easton HIT inserts for more than 10 years. Using a HIT insert in a 4mm arrow requires you to shoot a Deep six field tip/broadhead. Deep six broadheads have a smaller diameter shank and tighter, higherpitch threads, but not everyone wants to convert all of their broadheads over to deep six.
I have been asked many, many times what is the next best option for archers who don’t want to (or can’t afford to) switch over to deep six broadheads. Up until now, I have not liked a single half-
By James Yates, Hunting Editor
out system on the market, but I am really impressed with Easton’s new Match Grade half-out inserts; they are on a completely different level than other
half-out inserts. Easton designed them with an integrated collar for strength and made them with really tight tolerances. Since these inserts have both a stem that is inserted into the arrow and a collar that slips over the outer diameter of the arrow, they need to be made precisely in order to fit BOTH the inner diameter AND outer diameter of the shaft. Better yet, this system with the internal stem and collar enhances impact durability like never before. Easton offers the new insert in four different weights (55, 75, 100, and 150 grains) so the archer has options to dial in the perfect arrow weight and FOC. Check out EastonArchery.com for more information about these new inserts. p
GEAR & PRODUCT HIGHLIGHTS
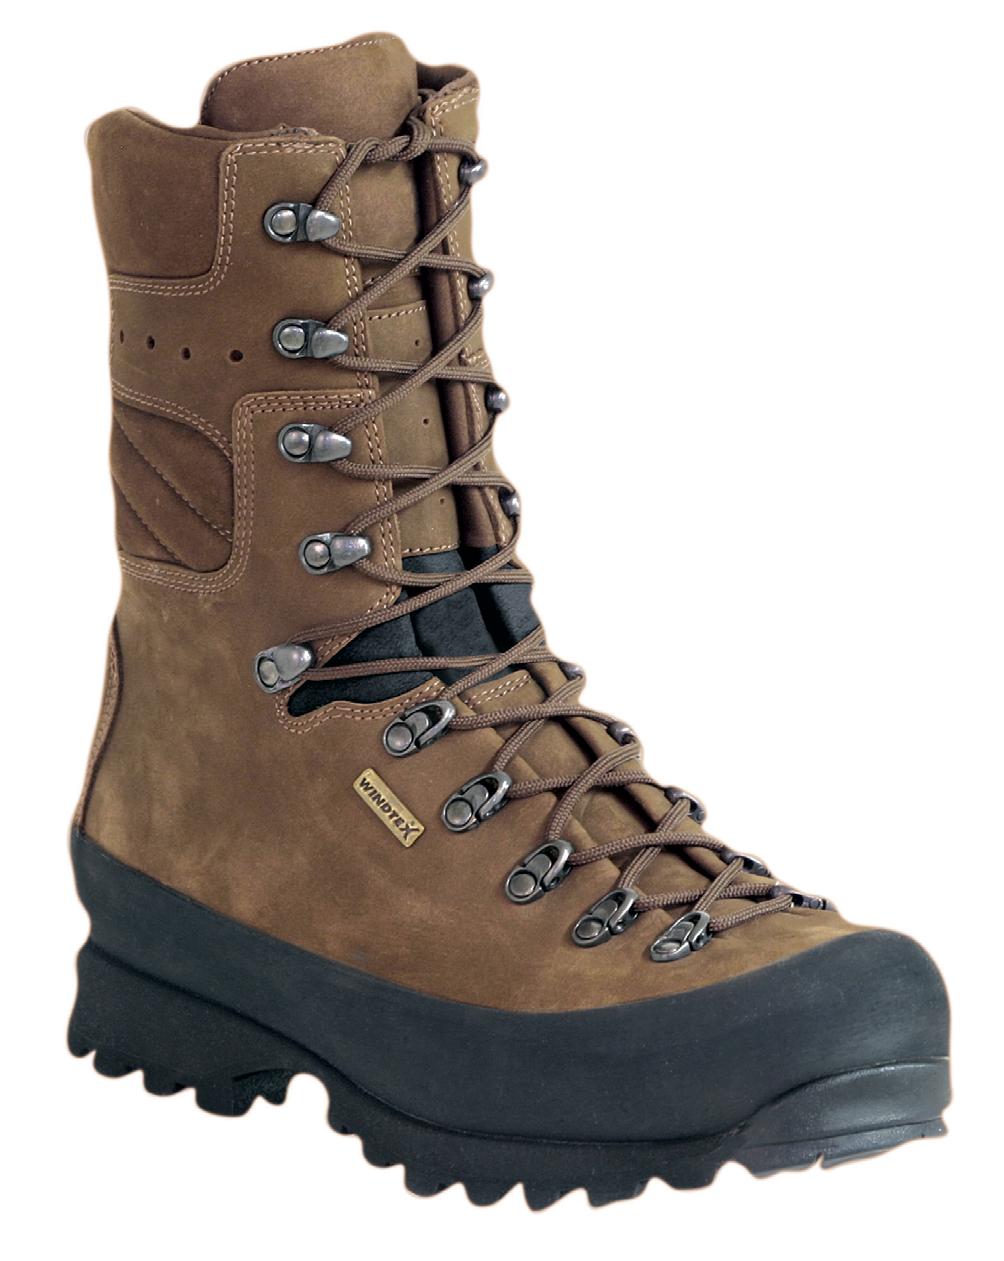
Hanwag Alverstone II Wide Boots
By James Yates, Hunting Editor
Personal fit is the most critical aspect of testing/ trying out new boots. It doesn’t matter how many Instagram influencers are using the boot; it doesn’t matter how many bells and whistles it has; the price tag (on sale) doesn’t matter; what matters most is how the boot fits you. To put it another way... if the boot doesn’t fit you, nothing else matters. I am pleased to announce the boot in this review, the Hanwag Alverstone II Wide, knocks the fit out of the park for me (and I bet it does for you too).
My journey with footwear has been a long and bumpy one. I have a very odd-shaped foot that has made it difficult to find a pair of premium boots that fit well. To sum it up, my foot is shaped like a duck foot – I have little arch and a low-volume foot, a narrow heel, and a slightly wide forefoot (but wide boots are generally too wide for me).
I generally have the most problems keeping my feet locked back in boots on steep descents because my low arch/low volume foot doesn’t engage properly with the instep of the boot and my foot slides forward. This leads to my toes being jammed into the front of my boot on steep descents, and unfortunately, it’s not a problem that is simply fixed by buying a bigger boot.
Versatile Fit
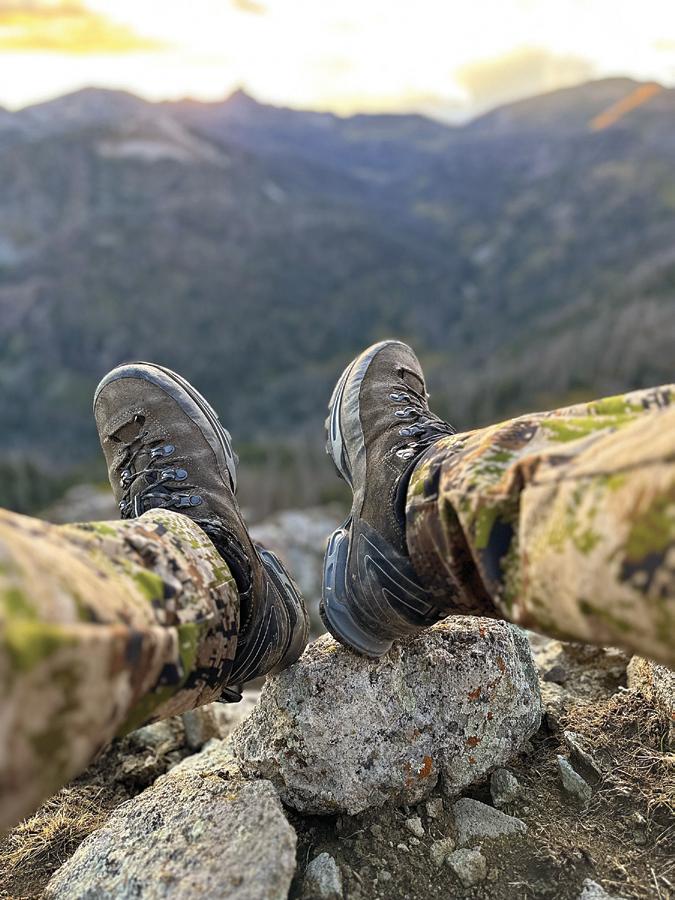
The Hanwag Alerstone II is a boot that I found about five years ago that actually fits my awkwardshaped foot pretty well. That doesn’t mean that it’s a boot designed specifically to fit duck feet. It means the boot and lacing design strikes a balance to fit a wide range of foot types. The different people that I know that use this boot all have different shaped feet and they all love the fit. I have used the Alver stone II a ton over the last five years; I have had it from the low desert flats to 13,000 feet in the high country, and it hasn’t skipped a beat.
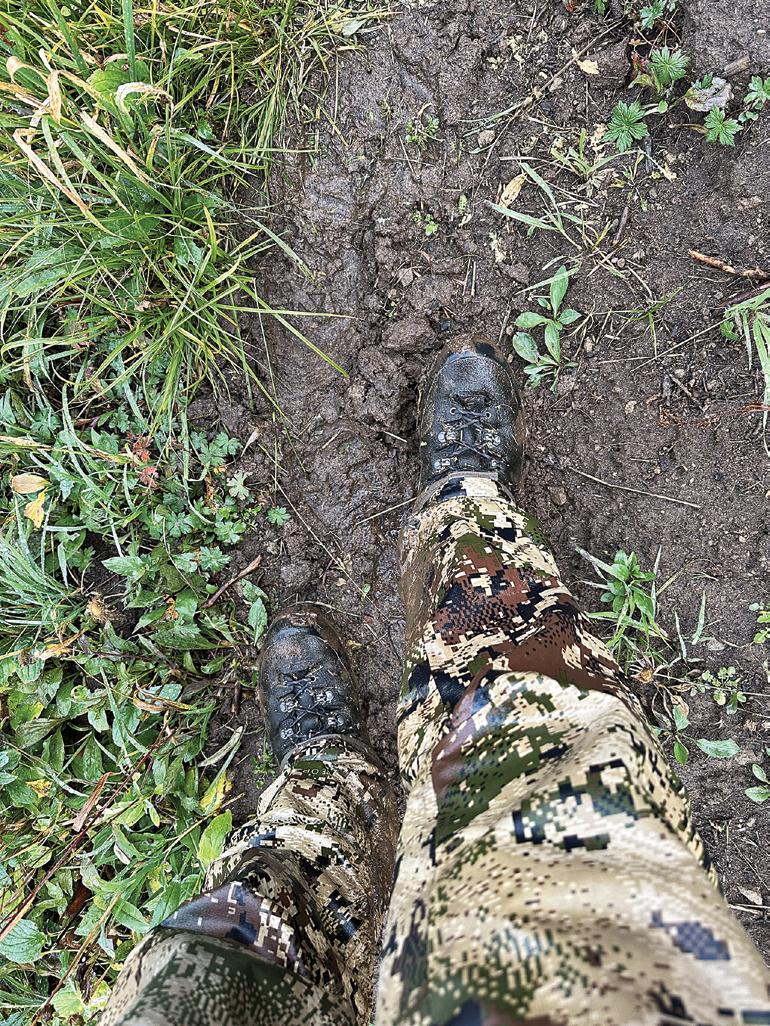
There has only been one slight nag I have had with these boots, and that is the width in the toe box. Brand new, the width is fine for me (it might be a tad narrow for some), but after a season of hard use, the toe box narrows just a tad because of the frequent cycle of getting wet and drying out. This is common for all leather boots, not just Hanwag. Once the toe box narrows a smidge, the boots are a little snugger than I like in the toe box. I still wear them with no problem, but it’s just not perfect.
Hanwag has now introduced the Alverstone II Wide. I used it all last fall, and it is basically my perfect hunting boot. It has the same fit as the original Alverstone II, except now it is wider only across the toe box, but it is not so wide that the fit becomes sloppy. Most Wide-version boots are too wide for me, and the fit becomes sloppy (my forefoot moves around too much causing blisters). The Alverstone II Wide is now the perfect fitting boot for me. It’s got a little extra width to accommodate a touch of shrinkage or thicker socks, but still maintains the great heel pocket design and the designed ability to lock down the instep of your foot (so your foot doesn’t slide forward). I don’t know of another boot that will fit a more diverse array of foot types. Believe me, if the boot can fit my awkward foot, it’s definitely worth the time to try it on yourself.
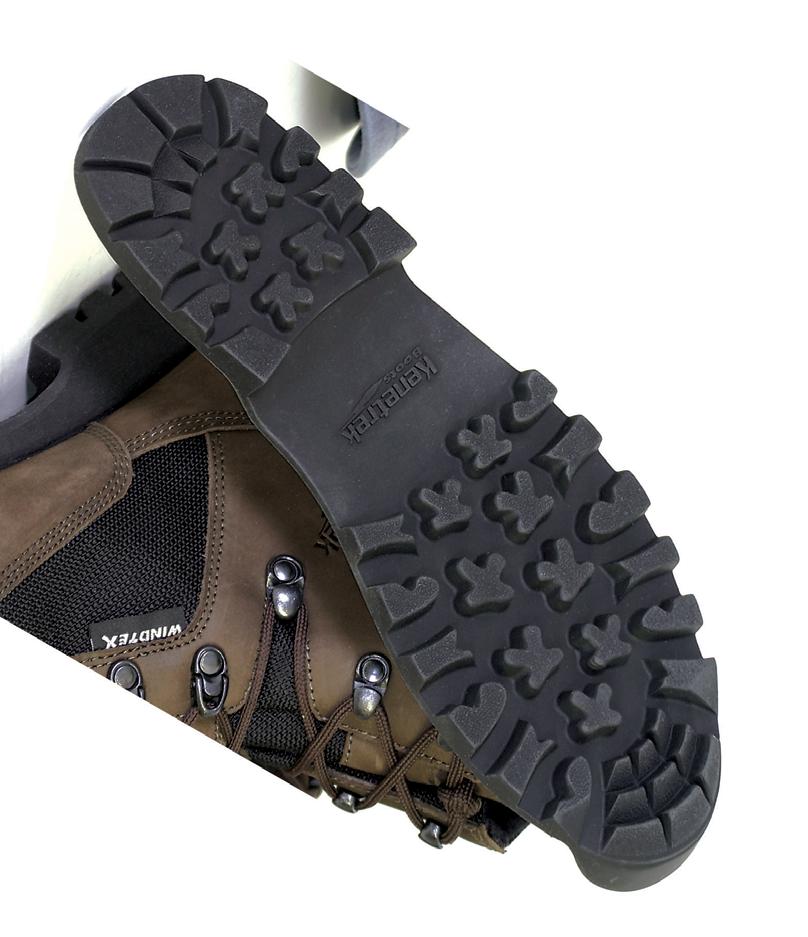
Features
Now that we have talked about fit, on to the other design details that I love. First and foremost, I love the ankle stability of this boot – it beats any other boot I have tried. It has a clever design that supports and prevents the side-to-side (roll) motion of the ankle without encumbering the frontto-back (walking) motion of the ankle. The ankle stability portion of the boot upper is pretty unique and very effective. The boot is intended as an alpine trekking boot, which means it’s meant to be used in steep terrain with weight on your back. To this end,
the boot is fairly rigid, but not overly stiff. Because of the walking mobility of the ankle and great rocking sole design, you definitely don’t get the “stiff as a board” feel with these boots like you do other stiff boots. I can comfortably wear these boots in desert flats without being bothered by the stiffness.
The boot upper is a unique combination of suede leather and microfiber synthetic. The tongue is composed of the synthetic material, which allows the boot to breathe exceptionally well. The suede leather and a full rubber rand provide great durability around the perimeter of the boot. The shockabsorbing Vibram sole has a lower stack height, providing additional stability in rugged terrain. To me, the rubber on the sole is a good combination of hard and durable. The sole doesn’t get too eaten up in rocky terrain, but to me, the rubber feels a bit harder, so it can be a touch slippery in wet or icy conditions. There is a balance here, and the Alverstone strikes it well.
Lastly, the boot has a robust GORE-TEX liner that does its job of keeping your feet dry. I’m not just saying that, either. These boots have remained waterproof even after a long, hard season, which is something I cannot say for a few other high-end boot brands I have used recently.
To learn more about the Hanwag Alverstone II Wide, check out Hanwag.com. p
I put the Hanwag Alverstone II Wide boots to the test in the high country of Colorado, logging over 100 miles in 10 days with nearly 27,000 feet total of elevation gain.
The Alverstone II has a very good waterproof liner that has not leaked on me despite being exposed to some pretty heinous trail conditions this last fall. My feet stayed dry and comfortable all season.
K&M PRECISION RIFLE WRITER SUMMIT
TRAINING FOR A NATIONAL RIFLE LEAGUE HUNTER MATCH – PART 1
The majority of hunters across the country seldom shoot more than a box of ammo a year in preparation for an upcoming hunting season. If they actually shoot the whole box, it’s likely due to the scope being off and them chasing it the wrong way with the turret before realizing left is right, right is left, up is down and, you guessed it, down is up. If they shot more than once a year, they would be more familiar with their equipment – strange how that works. The other side of the spectrum would be hunters who are chasing the proverbial rabbit through the hole to discover the Wonderland of all things rifle money pit.
Somewhere in the middle is where you should aspire to be, with an emphasis on knowing your rifle, optic, and shooting gear intimately. The best way to get intimate with your setup is to train and train often; not just shooting tiny, three-shot groups for Instagram posts or slinging lead at 1,200-yard, 40" wide steel targets. Instead, you should seek professional training from a vetted source to help you master the fundamentals of marksmanship and gain that intimate knowledge of your rifle system.
I was recently invited to attend a Writer’s Summit hosted by Hornady and Leupold at the worldrenowned K&M Precision Rifle Training Complex in Tennessee for two days of training with a great group of my fellow gun writers. The purpose of the training was to introduce the writers to some new products and prepare us for a two-day NRL (National Rifle League) Hunter Match a few weeks later. The writers had a wide array of rifle experience from novice to advanced, but almost none had ever competed in a rifle match before. The instructors at K&M would have to condense a week’s worth of training topics into two days of shooting and a halfday of classroom instruction due to time restraints, as this venue is in high demand and often booked out a year for personal training.
Train Up
when done correctly, allow the shooter to easily impact the deer vitals inside a quarter
The purpose of the train up was to introduce the writers to NRL Hunter Matches, which are, in my opinion, the perfect place for hunters to sharpen their skills for real-world hunting scenarios with their hunting rifles. These stages require the shooter to use binoculars to locate their targets, range the targets, and engage the targets with only the gear they carry in their pack (ie: tripod, bipod, rear bag, and backpack). The targets are generous in size and inside most ethical shooting distances with a few targets thrown in around 1,000 yards just for fun.
Training for this particular style of match is pretty straightforward forward with shooters being able to build positions from prone to standing using rocks, trees, and whatever else you can fit in your backpack. Pretty easy on the surface – now do all this in under four minutes. The stress factor of time helps recreate the spike in adrenaline you have during a hunt. That’s an area where most hunters fail to train and often make their biggest mistakes, resulting in missed opportunities, which can lead to a once-in-a-lifetime hunt being ruined.
The instructors at K&M knocked it out of the park, providing excellent instruction to meet every individual’s needs and skill set, making visible im-
COLTON BAGNOLI HUNTING & SHOOTING EDITOR
PHOTOS BY DAVID DRAPER AND TYLER FREEL
n Instructors teaching tripod rear support techniques to the writers. These positions,
mile.
provements for every shooter in just two short days. It was really enjoyable to watch the shooters evolve hour to hour, making more and more impacts in every training block. As a former LE sniper and competitive shooter, I was very familiar with positional shooting in a competitive environment. That said, the instructors’ knowledge of teaching shooters from all abilities shined through, and I was able to get some fine-tuning and improve my game every day. Keeping an open mind and being able to take criticism and coaching is key to growth. If you think you know everything about shooting, you will struggle to develop if you’re living in an echo chamber of how awesome you are.
Day One
The first day of instruction was meant to get the shooters comfortable behind their new Browning X-Bolt 2 Target Competition Lite rifles chambered in 6 Creedmoor. This rifle is built on Browning’s new X-Bolt Receiver and features a new adjustable trigger and beefed-up receiver scope base holes to ensure your bases won’t strip out or come loose. The adjustable trigger is factory set around 3.5 lb with a clean, crisp break. I tuned mine down to 2.25 lb and was able to maintain the crisp break.
The receiver is fitted with a Preferred carbonfiber-wrapped barrel which shot very well for a factory rifle with factory ammo, averaging under 1" groups at 100 yards. The rifle was topped with Leupold’s new Mark 4 HD 6-24x52 Mil rifle scope, which is in the first focal plane with the PR2 reticle,
set in a pair of Leupold Rings. The new optic from Leupold is a great option for hunting and competition with the PR2 reticle offering everything you need and nothing you don’t for precision shooting. Our morning consisted of “dot” drills, shooting at a small, 1/2" or 1" dot at 100 yards from the prone position. We ensured the rifles were zeroed and worked on building solid fundamentals behind the rifle with every shot. This drill can seem monotonous and boring at times, but it really is an excellent way to improve your accuracy in the field. Working with a shot timer to add stress can really show deficiencies.
Once zeros were set, we moved out to plate racks at 400 to 800 yards to verify the data on the rifles with Hornady Match 6 Creedmoor ammunition. The Hornady 4DOF app was used to build profiles for each rifle on our phones which took all of two minutes. The data was tracking, and in a short series of shots, I had rounds on steel with a nice group of three shots at 800 yards on an 8" plate. The rifle setup was ready to go at that point.
After a snack break, we continued to build our positional shooting skills, working off of props to give us reps in seated, kneeling, and standing positions. The instructors worked with each shooter to provide feedback for every shot and incorporated video of each shooter to show them what they were doing to help them better understand the critiques. After a day of rotating through several stations, everyone was starting to gain traction and making more hits than misses.
shooting bag to stabilize his Leupold rangefinding binoculars to develop a range card for a course of fire. Having a stable rest is mandatory for an accurate laser ranging of a target, this is one of the most common mistakes resulting in a missed shot opportunity.
The Browning X-Bolt rifle paired with the Leupold Mark 4 HD riflescope made for a terrific combo that serves double duty as a hunting rifle and light weight competition rifle for NRL Hunter style matches. It balances the perfect weight between light enough to comfortably hunt all day, while still offering a stable rifle for positional shooting and manageable recoil.
Day Two
Our second day consisted of a morning zero check and quick data confirmation to ensure nothing had changed in the rifles. We quickly transitioned to another range on the complex to shoot several stages designed to replicate the NRL Hunter stages we would encounter at our match four weeks later. Each stage required the shooter to locate between one and four targets, establish range cards, and engage the targets in the specified order, all in under four minutes.
These courses of fire are built around similar hunting scenarios where a hunter hikes to a ridge, glasses up his quarry, and has to range and build a shooting position to take the shot. The time constraint is meant to replicate the natural stress a hunter feels when a bull elk is feeding over a ridge, about to leave the basin, and you have a minute to range it, find a place to get a solid rest, and shoot the elk, ethically, before he leaves.
These stages did just that. The shooters con tinued to develop their skills and improve their hit ratios as they worked through the stages getting after-action coaching from the team of instructors who showed them ways to solve the problems of each stage more efficiently. This style of instruction is key to shooter development, and in my opinion, is the greatest way to start coaching a shooter into
I make more accurate shots on target in a shorter period of time? That’s the only difference between a novice and a pro – the pro just knows a more efficient way of working through the problem and making his shots count, faster.
After Action Review
A term I was introduced to in my law enforcement career was “drinking from a fire hose” regarding the sheer volume of information being thrown out at you with a high standard of expectations and your ability to absorb and retain the information. This particular Writer’s Summit was just that –shooters learning how to push themselves through the heat and humidity and stay focused on the material while keeping an open mind to instruction. The instructors did a great job breaking down fun-
shooting doesn’t have a place in (fill in the blank).” My reply every time is,“The shooter who makes the most accurate shots in the least amount of time wins every time.” In my experience, in every aspect of hunting and self-defense, this holds true.
Stay tuned in the next issue of Western Hunter to get caught up on the NRL Hunter Match and my takeaways.
As always, help keep the gun conversation alive by emailing me at Colton@westernhunter.net with your questions or suggestions for future product reviews. Follow me on Instagram @papwinkle to see my posts and reviews regarding all things precision rifles to help make you a better rifleman.
And remember, “Only accurate rifles are interesting.” –
Townsend Whelen
Hornady’s Marketing Communications Manager, Seth Swerczek, working through a training stage that required the shooter to engage targets from the tire stack within an arms reach of each blue tape. These positions transition over to boulders and large stumps in the field that can make for excellent rests for rapid shot opportunities if you know how to tackle them with your rifle.
When using a rock or other solid prop for a rest, it is vital to center the rifle on the prop to ensure the rifle has a natural balance and point of aim. Using a shooting bag to settle the rifle down to the rock will give the shooter an extremely stable rest with just the single point of contact. I was able to clean this stage with first round impacts from four different rocks.
OVERCOMING LIFE-THREATENING SITUATIONS IN THE COLORADO HIGH COUNTRY LESSONS LEARNED
formidable Colorado high country. To make matters worse, it was 10:00 PM and the temperature was dropping fast. Thirty hours earlier, an oversight that I had made at my house in my final preparations for this hunt had put me in this dire circumstance.
Not only was I being rocked by a debilitating migraine resulting from a near 48-hour lack of sleep because of this oversight, but I was also not properly equipped with my sleeping bag or other life-saving essentials. It wasn’t the onset of the migraine that had me most concerned. The bigger problem was hypothermia being a real possibility with the prospect of spending the sub-freezing night without a sleeping bag and with little ability to move because of this migraine.
Thirty hours before this critical moment, I couldn’t have been happier having just left my house and embarking on this high-country adventure, one of my all-time favorite hunts I do every year, with one of my good friends, Mike. Six hours into my drive, with about an hour to our destination, I was really tingling with excitement when, like a quick punch to the gut, I was overcome with a sickening feeling that I had forgotten a critical piece of gear. I called Mike, who was driving separately up in front of me, and immediately pulled over to verify I had everything on my packing list.
Retrieving the Forgotten
To my horror, the piece of gear that I had inadvertently left at my house was my backpack; this wasn’t just any old backpack, either. This was a prototype version of the new Kifaru International ARK frame! Words can’t begin to describe how sick to my stomach I felt, knowing how critical a good backpack is for this type of hunt. To make it even worse, my friends at Kifaru were depending on me to test this new frame and to get some good content with it. It took me all of two seconds to decide that I needed to immediately drive all the way back home, six hours one way, to get the pack.
We had llamas for this hunt (Mike was towing the llama trailer), and we decided that Mike would start in with the llamas packed with most of our gear the next morning, while I drove home to get my pack. That night, I gave Mike all of my camping gear (including my sleeping bag), food, etc, to take on the llamas and I decided I would take in all of my optics, muzzleloader, and a few odds and ends once I made it back from my pack retrieval mission.
I wanted to keep my pack weight less than 50 lb for my pack in, so I could move quickly up the 16 miles of trail and save on time. I didn’t realize it at the time, but it was an incredibly dumb decision to separate myself from such a critical, literally lifesaving piece of gear as my sleeping bag. I opted to carry my expensive/fragile gear because I didn’t want to risk things getting bumped around or damaged on the llamas. Instead of sleeping that night, I drove six hours straight back home once Mike and I separated. I arrived at 6:30 AM, grabbed my pack, and immediately started again the sevenhour drive to the trailhead.
The Root Cause
So, what had caused me to forget such a critical piece of gear? Leading up to this hunt, I had stretched myself too thin with work, family obligations, and another hunt. Just a few days before this Colorado hunt, I returned home from an Idaho archery elk hunt where my pack and sleeping bag got completely drenched and covered in mud. Once I got home from Idaho, I set all of my gear in a pile that was going to Colorado, except my pack because it needed to be washed and dried.
I set my pack out to dry away from my pile of other gear, and it was out-of-sight, out-of-mind when it came time to load my truck. The three days I had in between these two hunts were absolute chaos at work, and I was trying to get in as much family time as I could, as well. The result: I didn’t
sleep very much those three days. When the time came to leave for Colorado, I was sleep-deprived, rushed, and didn’t go through my checklists because everything was piled up from my Idaho hunt, except my pack.
By the time I made it to the trailhead after driving nearly 20 hours and ready for the hike in, it was 6:00 PM. I had taken a 45-minute cat nap in the truck earlier that day, and that was all the sleep I had gotten in the previous 40 hours. Even worse, I
previous five days combined because of the work/ home chaos between these two hunts. I was crazy tired, but my love and excitement (and too much caffeine) for this hunt had me surprisingly chipper for the 16-mile hike to base camp.
Four hours later, I had gone 10 miles and gained roughly 3,000 feet of elevation when I was blindsided by the migraine I described in the opening paragraph. It hit like a freight train, and I was in serious trouble with the temperature dropping below freezing without a sleeping bag to keep warm. With the combination of wet kindling (from several days of rain before my hike in) and the debilitating migraine, I couldn’t get a fire going. This was exacerbated by the fact that my trioxane fire starter was packed away in my camping gear, which I gave to Mike to pack in with the llamas – another big mistake.
I managed to take 1000 mg of ibuprofen, drink 200 mg of caffeine, and eat a pack of gummy bears. This I have found to be the best recipe for fighting a migraine. I put on my puffy jacket and my rain gear and curled up in a ball to try and stay warm. Despite the pain and cold, I fell asleep for about an hour, and when I awoke, my vision wasn’t as blurry and the splitting headache was subsiding some. I got to my feet and started back on the trail toward our base camp.
I found out via my Garmin InReach that Mike had stopped two miles short of our intended base camp to spend that night, which meant that I had four miles remaining instead of six miles. That was a giant miracle because the four miles that I did hike with that migraine were the most miserable of my life. It only took me four hours to go the first 10 miles with 3,000 feet of elevation gain, and it took me another four hours to go the last four miles with less than 1,000 feet of elevation gain. I finally made it to Mike and my sleeping bag at about 3:00 AM.
The Garmin InReach message log between the author and his partner when he started to suffer a severe migraine while hiking in. The InReach was critical for staying in touch while the two were separated.
The author received a prototype version of the new Kifaru International Ark frame in late summer of 2024.
Being caught without a sleeping bag in the Colorado high country in the middle of September is a recipe for disaster because it freezes hard every night.
The Downpour
The “fun” on this hunt didn’t stop there. After two days of good weather, record-breaking rain and thunderstorms came with vengeance for the rest of the hunt. I’ve never seen so much rain in my life. It rained hard for six days, putting down well over half an inch of rain each day, with some days drop ping multiple inches. Managing moisture became the hardest part of the hunt. It was just impossible to stay dry, even inside our eight-man Kifaru Tipi (with a liner). Condensation was a major problem. The ground was completely saturated, so significant amounts of water were pooling everywhere, including inside the shelter. Our campsite location was ideal, it was just too much rain.
Keeping our sleeping bags dry was another major problem. In between breaks in the weather, we’d have to pause the hunt to make rounds back to camp and pull sleeping bags out to air them out in the few rays of sun that we got. A stove inside the tipi with wood to burn would have been a lifesaver, but we had nothing to burn because we were above timberline with very little wood available. Something to consider for next time is to take the stove and camp lower down at the treeline where more wood would be available.
We finally found some good fortune on this
rain over 24 hours. That wave of rain was supposed to break during the night before the next round was supposed to hit early the next afternoon, so we got up at 3:00 AM to try to make a single, 16-mile push to the trailhead.
We knew that we would be packing/compressing our sleeping bags wet, so we needed to do everything in our power to get out in one push. Otherwise, hypothermia would be a real threat the following night. Compressing a down sleeping bag wet is a dire no-no because it ruins the loft of the down and renders the bag useless until it can be effectively dried out, which takes a great deal of time and energy.
Because of all of the rain, our gear was completely drenched and waterlogged, which meant that everything was really heavy. Packs, saddle bags, game bags/meat, sleeping bags, clothes, the tipi... I bet we had easily over 100 lb of pure water weight saturated into our gear from all of the rain. To get
everything out, Mike and I had to carry about 80 lb each on our backs, and we had to load the llamas heavier than was ideal.
The Pack Out
Despite the heavy loads and the trail being an absolute wreck with a ton of standing water, we, including the llamas, all did surprisingly well for the first 12 miles of the pack out. At mile 12, the llama I was leading laid down in the trail. It took us a few minutes to get him up and walk a few hundred yards to a spot where we could rest. We rested the llamas for two hours and then set off down the trail again. Within a mile, my llama laid down again and this time refused to get up, even with my coaxing him for nearly an hour. We decided to send Mike up ahead with the other two llamas, which were performing well, so they could get to the trailhead, unload, and potentially come back for my llama’s load.
The weather forecast on the Garmin InReach showing the severe rainstorms that were predicted for six days straight. The forecast severely underestimated the amount of rainfall for several of the days.
The author and his partner, Mike, doubled up on two fantastic mule deer bucks midway through this hunt.
A continual mix of rain, hail, and snow pounded the hunters for six days straight.
Sonny Parker
While I tried to get the llama up and going for over an hour, I thought through the ramifications of waiting for Mike to return with the other llamas to help get this llama’s load out. The llama and I were still over three miles from the trailhead. That meant Mike would need to hike out three miles, return to me three miles, and then hike back out three miles, for a total of nearly 10 miles on top of the 13 miles we had already done. I quickly determined it was simply not possible to just wait for Mike. I felt I was left with no other option, so I made the drastic decision to load up all of the llama’s gear on my pack and hike out.
I took the llama’s saddle bags, loaded up one really heavy with about 70 lb, and positioned it on the meat shelf, sandwiched in between my pack’s frame and the bag. The other saddle bag with the remaining weight (about 30 lb), I slung around my neck. In total, my load was about 180 lb. I proceeded to hike while leading the unloaded llama the most miserable three miles of my life with the heaviest load I have ever carried. I barely made it to the trailhead with significant hip and IT band pain, but I made it! In the end, I’m so grateful I had a pack and frame capable of carrying such a heavy load.
Key Takeaways
I learned a couple of profound lessons on this hunt. The most major lesson I learned was about the sleeping bag. Don’t separate yourself from your sleeping bag, no matter the circumstance. If it’s being packed on a stock animal, travel with that stock animal so you aren’t separated from it. The sleeping bag is probably the most significant life-preserving item we carry into the mountains, especially in the colder weather of the fall. It’s a beacon of warmth that you literally can’t live without in the mountains in the fall. It was foolish of me to allow myself to be separated from my sleeping bag.
The next lesson learned is related to sleeping bag construction. If I could have somehow known how wet it was going to be (the early weather report was not forecasting such severe rain), I would have taken a synthetic bag like a Kifaru Slick bag or a down bag with a waterproof shell like the Feathered Friends Ibis model. Synthetic bags are heavier and don’t compress as well, but they insulate much better than down bags when wet.
A down bag with a lightweight, breathable bivy sack is also a very good option in wet conditions. The waterproof fabric on the bag/bivy helps reduce the amount of external moisture that penetrates the down. I own a Feathered Friends Ibis with a Pertex Shield face (virtually waterproof outer fabric), which would have excelled on this hunt. Unfortunately, I didn’t take it because the weather forecast didn’t look horrible.
The ironic thing is that I actually had this Ibis bag back in the truck. I always take two premium sleeping bags on every hunt, just in case, and I debated heavily about packing it with the llamas but opted for my ultralight Feathered Friends Swift, a premium, lighter-weight, more breathable sleeping bag. Mike also owns a Feathered Friends Ibis, which
he decided to take on this hunt, and he was much better off than me in the sleeping bag department. This is a reminder to always buy the best sleeping bag you can possibly afford and not be shy about buying/taking a bag that you think is “overkill” especially for fall, high country hunts.
The last lesson I learned, which always seems to bite me in the butt and which I fail to learn yearin and year-out, is to not over-schedule myself. I should not have squeezed in the Idaho hunt (a lowquality, secondary-type hunt) just before the Colorado hunt. It left me unprepared and sleep-deprived, nearly ruined my Colorado hunt (a much more important hunt), and honestly threatened my life a bit with the whole migraine incident and lack of a sleeping bag. That may be an exaggerated statement, but it’s still true. I need to be more judicious with my scheduling and my home/work preparation. My two passions in hunting are archery and open-sight muzzleloading. Both of these seasons take place in September, so I will always be vulnerable to over-scheduling myself during this time of year. After all, September only comes once a year, and it’s one of God’s greatest gifts to us hunters!
The author carried 150 lb on the Ark frame with an additional 30 lb around his neck for nearly three miles because his llama had given up and refused to pack any more.
The author overcame some major obstacles on this hunt and was able to come out of the high country with a tremendous buck and some very hard-earned lessons learned.
PRACTICE LIKE YOU HUNT
BOWHUNTING SHOTS BY SPECIES
Sone pivotal moment, the shot. You might work an entire season just for that one opportunity. When it comes, you have to make that arrow count. I think the flaw of many bowhunters is they shoot a lot at a target, but when they get into the field they encounter a type of shot they have never had to make before. The goal of off-season bow practice should be to not be surprised by the type of shot you will have to make in the field. You should practice shots for scenarios you will most likely encounter for every hunt. With so many western big game species, I decided to break down the two best shots to practice for each animal based on common hunting scenarios that are a good idea to add to your training routine. Depending on the type of hunt I have coming up, I will ramp up my practice with these species-based shots in preparation.
Archery elk hunting encounters can be unique, as they are one of the few animals that can be reliably called in during the rut. This provides some interesting things to consider compared to other hunts. I like to practice for shots that involve timing and movement. With many hunting scenarios, timing is everything. You must draw unnoticed, but you also must make a shot at the opportune time.
In many real-world scenarios, these events do not happen simultaneously. You may need to be at full draw for a while before shooting. As you hold at full draw, the tension weakens your muscles, causing the untrained to rush the shot, get shaky, or let down. The ones that are prepared will capitalize and be successful in these situations. This happens a lot especially on a bull coming into a call, looking for the elk that was calling.
REMI WARREN HUNTING EDITOR
For elk hunts, I like to practice shots that involve timing and movement to capitalize on changing situations.
Chris Auch
The Long Hold Shot
Luckily, this can be practiced wherever you shoot. Shoot a group of four arrows that will be your baseline. Remember the type of group you shot, then do three sets of four long-hold shots.
Set a timer for yourself for, say, 30-45 seconds, draw, and hold at full draw. After the buzzer, shoot. See how this group compares to the baseline. After enough practice, these long-hold shots will start to match your baseline shots. As it gets better over time, practice increasing the length of holds and the distance to the target. You will want to continually increase the time of those holds in the set.
Once proficient at this, see how long you can maintain a full draw and still make an accurate shot. Hold for as long as you can and work on improving that time as it gets closer to the season. By doing this, you will learn ways to stay relaxed, hold longer, and make good shots. If you can hold for a long time but are making bad shots, that does not count. You need to have a combination of the two. The goal here is also to make the correct execution of the shot and learn to not make a panicked shot when fatigued.
Mule Deer
The Aim-Under Shot
For those archers using a slider-type pin, I suggest practicing a hold-under shot. Imagine you have a bull coming out at 40 yards, and you set your pin and draw. The bull then continues to come in but does not offer a shot till he stops at 20. Well, you are set for 40, can’t draw down, and have a shot at 20. Do you know where to hold?
Holdover is a lot easier in our minds to calculate, but holding under, if you don’t practice, can be difficult guesswork. To practice this, set your pin for a farther yardage and shoot a closer target. Do this at varying yardages with different pin sets. By practicing this, you will make the most of a great opportunity if a bull walks in closer than you were expecting.
Most of the mule deer I have taken with a bow were the result of sneaking in on a buck while it was bedded, and then having to wait for a shot. Most of the time, if you were to fully stand for the shot, it would leave you too exposed. Here are two shots that I practice often for mulies.
Kneeling Shot
Whether stalking from above or below, it seems a lot of my shots on deer take place on a slope, from a kneeling position. Otherwise, they involve drawing back while kneeling, then moving to a higher position or a different type of kneel for the shot.
Remember to position your knees in line with the target for this shots. If you were to put an arrow across your knees, it should point at the target. I’ve seen a lot of people forget this, draw back kneeling, and have undue torque with bad shooting form.
You will want to practice these shots by setting up your target and shooting from various kneeling positions. Also, practice drawing back and then ris
Keep the knee on the bow grip side on the ground and lift the knee on the drawing side to avoid the limb or string slapping your knee at the shot and making the arrow go wild. This happens more on angled-down kneeling shots which should be added to this type of practice as well.
The Squat Shot
In a lot of mule deer hunting scenarios, there is not enough height to kneel and shoot, but to stand up fully would cause you to be skylined and alert the deer. An example of this would be drawing on the top of a ridge or behind some tall brush where you will need to shoot just as you can see the animal over the cover in front of you. This shot is one that I encountered a lot and missed a lot before I regularly practiced it.
To practice, you will want to draw in a low kneel and then slowly raise yourself up until you are in a squat-type position. Imagine sitting in a chair with no chair there. This one requires practice, as you are not very stable in this position, and that instability
Practice long-hold shots for 30-45 seconds to learn ways to stay relaxed, hold longer, and make good shots when feeling fatigued.
For mule deer, practice kneeling shots and squat shots to be prepared for up close shot opportunities.
Practice angled-downhill kneeling shots to help build stability and keep your knees in line with the target.
Pronghorn
Pronghorn hunting from a blind or spot-andstalk can offer some unique shooting scenarios due to the open nature of where they live, the animals’ keen eyesight, and the difficulty of getting your bow drawn while remaining unseen.
Seated Shot
Rarely do people practice shooting seated, but this shot is one that you encounter more times than not on pronghorn. If you plan to sit on water, practice shooting in the chair and even the blind that you will be hunting out of.
For those doing it spot-and-stalk style, many times you will find yourself in sparse, low vegeta-
Whitetail
Pronghorn country is usually flat, and it is often windy. When shooting your bow, check the weather forecast and schedule practice sessions when it is windy. When you practice in the wind, you’ll get a feel for how your arrows behave regarding different wind speeds and directions, and you’ll be better
When practicing, make notes of the distance to the target and wind speed. Shoot at a target, aiming for the bullseye with a group of arrows, and record how far off your impacts are. This will help you better understand how your arrows behave in different winds. Practicing in the wind is mostly to
Whitetails, the most widely hunted species in North America, can offer tough shots for archers who are not prepared for them. One of the common, effective techniques is hunting from a stand, and while this is common in most of the Midwest and East, it is less common out west.
Elevated
If you plan on hunting from a tree stand, you will want to practice this down-angle shot. If you don’t have a stand to practice from, you can practice this shot at close range by standing on a picnic table or truck bed and shooting at a close target. The goal
If you plan to hunt from a blind, practice shooting sitting in the chair that you plan to use. The reward might just be a great buck!
Practice in the wind to help gauge how your arrow performs and where to hold when your shot comes.
If you plan on hunting from a tree stand, practice shooting down while retaining your form and anchor point by bending at the waist.
Obstruction Shot
Whitetails often live in thicker river-bottom country, so being able to thread the needle is important. Practice shots where your line of sight to the target may have some obstructions. I used to do this in my backyard by placing my target at 40 yards, wheeling my trash can to 20 yards, and then shooting where the trash can just starts to cover the target. This allowed me to understand the flight of my arrow and how to shoot with stuff in the way.
Moose
Moose can live in some thicker willow country and are often called in for closer shots if everything goes right, but that presents a lot of shots in thick vegetation that you may not be ready for.
Close and Brushy Shot
I like to put my target behind brush and shoot my hunting arrow (arrow and broadhead set up) to see how it reacts. This is a good way to know what you can shoot through and what you can’t. You will notice with practice that brush that’s close to the
animal has much less (if any) of an effect, increasing to a drastic effect as the target gets farther from the obstruction. When practicing this, make sure to continually flex your practice arrows and inspect for damage after each shot.
The Follow-Up
Moose are large and they can take a pretty good hit well. I like to practice making quick follow-up shots. To do this, I use two targets, one at 20 and one at 40. I shoot the close target, reload as quickly as possible, and make a quick, precise shot on the 40-yard target. This is a fun one to practice, and it gets you in the rhythm of a reload and acquiring
Sheep and Goat
Sheep and goats can live in some of the nastiest stuff in North America, and that is probably where you will get your chance at them. This means that the steep terrain is the factor you will want to practice for.
Cliff Shot
Cliffy country is what you want. This is a shot that I will travel to practice. The best way to do this is to get out and shoot at targets on a slope. You want to work on keeping your form as you angle down and up. Set the target on a steep slope, use an anglecompensating rangefinder, and shoot for that dis-
For sheep and mountain goat hunts, it is imperative that you practice steep terrain type shots.
Practice shots where your line of sight to the target may have some obstructions.
Moose hunts often require close shots in thick vegetation so know how your arrow will react. Moose are tough animals that can take a pretty good hit so I like to practice making quick follow-up shots.
Chris Auch
axis on your sight is set correctly. If you are getting impacts left or right of your aim point with a level sight as you move out farther, this is a strong indication that your third axis leveling is off.
The Long Line of Sight
This shot relates to the cliff shot and can be
tance, but to your eye, it is the same. My desert sheep last year I shot at a steep downhill. The line of sight was over 100 yards, but the relative shot distance was much shorter.
I like to practice shooting at longer ranges to get used to those steep shots where the line of sight distance is far but the angle-compensated distance is within range. I regularly shoot 100-120 yards, not to hunt at that distance but to train for a longer line of sight on a target that is within my ethical range when a steep slope is involved.
Bear
Through all my years as a hunting guide, no animal has been missed more than bears. It’s probably a combination of the adrenaline, the excitement of hunting a predator, or a lot of fur that dis tracts from picking a spot. Whatever it is, a bear is
an animal that I want to make sure I make a perfect shot on. For that reason, there are a couple of things I focus on in the off-season.
Precise Shot
Get those groups tight. You will want to really get those shots exactly where you want. One of the ways I do this is by shooting at a target with tournament archery accuracy on my mind, going for a perfect run of bullseyes. I start at 20 yards and try to shoot five perfect arrows. That is five arrows in the circle on my block or the 10 ring on my target. After the set of five perfect arrows, I can move back the next 10 yards and do the same. If I miss one 10 ring, it is back to the beginning to start over. I will try to complete these sets with the goal of finishing the field at 50 yards. It is a fun game that puts pressure on a perfect shot and a punishment for missing.
Adrenaline Shot
Bears will get most hunters’ blood pumping. To mimic this, incorporate increased heart rate with your shot. Do wind sprints, jumping jacks, sit-ups, push-ups, burpees, box jumps, whatever you want, then grab your bow and shoot. Working on these types of shots is great for any hunt, as it helps you learn to control both your heart rate and your shot. Plus, it gives you an added element of fitness which never hurts.
Practice Like You Hunt
If you add realistic scenarios to your bowhunting practice, you will put in repetitions that will allow you to perform better when those scenarios arise in the field. The last thing you want on any hunt is for the shot you take on an animal to be the first time you have done anything remotely similar. By thinking about the scenarios you are likely to encounter and putting in the time to practice them, you will become a much more success-
Bears can get your blood pumping, so try to mimic this by increasing your heart rate while practicing shots for an upcoming hunt.
I like to practice shooting at longer ranges to get used to those steep shots where the line of sight distance is far but the angle-compensated distance is within range.
Chris Auch
Practice shooting tight groups with an emphasis on “picking a spot” to help overcome an adrenaline rush.
YOU CAN FOOL HIS EYES, YOU CAN FOOL HIS EARS,
In pursuit of the heavily hunted, modern-day mule deer buck, the single most important tool in your toolbox is your brain. Evaluating, analyzing, interpreting, and executing solid tactics really matter now, more than ever. Buck-to-doe ratios are pretty darn low in many locations across the West, and mule deer numbers are down in general. Your competition is more motivated and educated than ever before, and taking long walks with a rifle and intense glassing without purpose may leave you spinning your wheels.
Mule deer operate in life by depending on their senses for survival; oversized ears relative to body size to hear better and farther at distance, keen eyesight with an incredible ability to detect motion, and most reliably, a nose that filters out a myriad of outdoor smells to select molecules of a predator’s scent. Fooling a mature mule deer buck’s nose is one of the primary tactics you must use when hunting these animals.
But you can't fool his nose!
MIKE DUPLAN HUNTING EDITOR
The Nose Knows
When I refer to fooling the mule deer’s sense of smell, I’m not talking about cover scents worn to disguise human scent or confuse the animal. I’m referring to a deliberate and thoughtful hunting approach that takes into consideration a constant evaluation of conditions, surroundings, terrain, and weather, all of which impact the travel of human scent to a mule deer.
Air movement is impacted by many factors. Prevailing westerly winds in the West are influenced by the atmospheric flow of the jet stream. When low-pressure storm systems move through a region, there is often a counterclockwise rotation of the storm, and an advancing front will bring first a westerly movement of air followed by a southwesterly flow of wind. As the storm passes, the winds will shift and start coming in from the north and east relative to your location’s proximity to the center of the storm.
The sun has a dramatic impact on air movement. The heating of the ground in direct sunlight causes warm air to rise which can increase in intensity and velocity as the day progresses. The opposite can occur in the evening when the sun drops low and disappears below adjacent mountains or the horizon. The air cools and cool air settles and sinks to the lowest area be it a valley or creek bottom. The faster the cooling and the greater the air temperature differentials, the greater the speed and intensity of the downhill cooling breezes.
Overcast, calm days often result in stable air without much wind change, but terrain and exposure still create subtle changes in wind direction constantly throughout the day. Terrain can amplify air movement in that steeper hillsides with warming air that might have a higher velocity of wind than that of a gentle slope and vice versa with cool-
ing winds. The “fickle winds” hunters refer to aren’t without explanation. This is simply a constantly evolving situation involving impacts from all the variables I laid out that are truly dynamic and rarely static.
Understanding and recognizing the basics of air movement in the mountains is a skill hunters should possess when hunting mule deer simply to allow themselves to hunt and find deer without detection. Once a mule deer buck smells a human, he is on high alert and is looking for a reason to leave the area. Many times, they will not leave until they receive some confirmation from one of their other senses. If the buck sees you and smells you, he will be gone. If they hear you and smell you, they will also be gone, often using a stealthy sneak-away maneuver or maybe just blowing out with speed and intensity.
Using Your Scent with Intention
Sometimes, a situation arises where you can use the wind to your advantage, knowing that a mule deer will react and thus present a shot opportunity. A couple of decades ago, I was hunting with some of my closest friends, Dave and Josh Schulgen and Mike Messier, during Colorado’s third season. I had to work my shift at the firehouse, and when I got off, I drove to the area and hiked in to meet the guys late in the morning. Dave and Josh had seen a nice, mature buck with some does, and the deer had gone into a 3-4-acre patch of timber before they could get within rifle range. Dave had decided to wait it out and see if the deer would feed out later in the day.
When I reached them, the guys were sitting approximately 250 yards from the edge of the timber patch and hoping to get a glimpse of the buck in an opening. I sat there and evaluated the situation and came up with a plan that might make a shot a real possibility. I reasoned that as the morning warmed, the air would begin to rise out of the canyon below and move directly from where we thought the buck was, toward us. There was a ridge-
line at the top edge of the timber, so Mike and I could sneak around the backside of the ridge, out of sight, hearing, and smell of the deer, and move around the West side of the timber patch where our scent would blow directly towards the deer.
There was about eight inches of crusted snow on the ground, so the deer would hear us moving closer and have the confirmation of danger by smelling us too. In theory, the deer would move directly toward Dave and Josh, giving Dave a shot opportunity.
Mike and I slipped over the ridge and worked our way through the oakbrush on the south-facing hillside for about 500 yards, always out of sight, sound, and smell of the deer. Once we were past the point where I thought the timber patch ended, we made our way back over to the other side of the ridge and spread out about 50 yards, moving slowly and deliberately with the wind at the back of our necks. I knew the deer could hear us and smell us, and with two sources of danger approaching, I hoped the buck would move directly away from us toward Dave’s position.
More quickly than I anticipated, a shot rang out, and I was sure the buck was down. Mike and I hustled through the Douglas fir trees and saw ahead a slide mark in the snow with blood in it, and we could see the buck piled up below us. When an excited Dave and Josh reached us, they said the plan worked perfectly, as the buck had reached the edge of the trees and paused to check his backtrail for the danger he perceived. They said the does had all blown out and bolted over the ridge, but the buck was being super cautious and didn’t want to leave cover. His focus was on Mike and me, and it gave Dave a chance to make the shot.
Dave Schugen’s buck from the hunting encounter described in the article is shown here. A Boone & Crockett class typical buck was taken with the luck of finding the deer and then a thoughtful execution of strategy and tactics to make it work. When you intentionally try and push a mature buck, be sure and have a solid plan because you might only get one shot.
This buck is scanning the area before he beds down. He’s positioning himself so the warming breezes of the morning will drift up to him, alerting him to danger from below, while the heavy brush behind him will alert him with noise if anything approaches from behind him.
Mike Duplan
The Power of the Senses
We essentially did a deer drive with sound and scent, and in my opinion, the sound was the alert and the scent the confirmation. Deer rely on their sense of smell and seem to operate in a way that they are always taking advantage of it, bedding in locations where danger can be detected by sound from behind but by scent from in front and below. Depending on conditions, deer can smell humans from over a half-mile distant. Beyond that, the scent dilutes to the point of being unreliable and/or too dispersed. It is believed that deer have almost 300 million olfactory receptors, compared to humans who have about five million. This means their sense of smell is 60 times more powerful than humans and on par with or greater than that of dogs.
With such a sensitive sense of smell comes an ability to filter the proximity of the danger in regard to the strength of the signal. The closer you are to a deer, the more scent molecules might be detected, thus amplifying the level of alertness within the deer. At that point, you are engaging the buck’s sympathetic nervous response, the “fight or flight” reaction.
Pay careful attention to where you believe the deer might be and avoid the chance that he willing spots and inconvenient access, but the effort
you make might be the difference between alerting a buck to your location or the chance at an undisturbed buck moving out to feed at last light.
Being in tune with your surroundings and having the ability to make adjustments to your strategy can contribute to hunting success. Having a plan going into your hunt day is a great idea, but you must also have the realization that what you are doing and where you’re going might simply allow your scent to be blown right into the deer you are trying to hunt. Big mulies are arguably the most coveted animals to hunt in the West right now. It’s very difficult to buy your way into one other than an auction tag, and even with the most desired draw tags, odds are long in connecting. One factor you cannot disregard is the olfactory. His nose knows, so don’t blow it!
About the Author
Mike Duplan is the co-author of the book The Edge – The Complete Approach to Hunting Mountain Mule Deer. In the book, Mike details strategies and tactics for successfully hunting these incredible animals and provides a lifetime of experience and knowledge to tap into. The book has many anecdotal stories of hunts and firsthand experiences with lessons learned.
The Edge is available through Western Hunter Magazine’s website and is a “must read” for anyone wanting to up their game in pursuit of the majestic mule deer buck. See page 77 for more information.
This buck is engaging all his senses. Pausing, nose higher to catch odor, ears listening in different directions and visually scanning the area for danger. What I noticed a few minutes after taking this photo was a coyote moving through the timber 80 yards away.
A large mature mule deer buck emerging from cover. Precipitation, be it snowfall or rain, can minimize and virtually wipe out scent so mule deer rely more on eyesight and hearing to warn them of danger. It also is a great time to still hunt as noise is muffled with snow and wet ground.
Mike Duplan
Mike Duplan
BUILT FOR ADVENTURE
FROM THE FIRST SLICE TO THE LAST
With the 15500-3 Meatcrafter® in your quiver, you can move from the field to the BBQ pit and the truck bed to the butcher's block without missing a beat. It's a hybrid hunting fixed blade knife that brings a distinctive edge to the table.
Maupin Oregon
BLOOD BROTHERS
IARCHERY ELK HUNTING THROUGH THE DECADES
f you could only hunt one animal for the rest of your life, what would it be? I’ve asked myself that question more times than I can count, and the answer is always the same – elk. I have been hunting elk for 70% of my life, and nearly all that time with a bow in my hands. For my brother and I, bowhunting elk is king. It’s like breathing air –without it, life as we know it would not exist.
When September comes, everyone knows they can count on us to not be around. Even if we kill elk for ourselves, we will continue to hunt as much as we can with family or friends until the season ends. Our love for the mountains, elk, and each other makes it so we never want the season to end.
In the beginning, we hunted together all the time, but as life evolved, we found ourselves hunting more and more independently. This past year the stars aligned, and we were able to hunt together again. The result was two dead six-points, and the two of us reaching a combined total of 40 elk killed with a bow. These are the stories of bull #39 and bull #40.
Bull 39
I stopped abruptly, peering up at the hillside in front of me. My brother honored my body language and stood motionless behind me; it did not take words for him to understand what I was looking at.
KYLE GREENE HUNTING EDITOR
Up the hill to my left were two yellow bodies that slowly materialized into feeding elk. One cow trotted off down the ridge, and I could hear elk moving around above us. Twenty yards away stood a spike bull, and on the ridge in front of us, I could hear a small tree taking a thrashing.
We’d been on a pod of elk since daylight. The bull had been driving the cows deeper into the timber, moving them closer to their bedding area. The problem he was having was his cows were still actively feeding. We had him in a state of vulnerability, although we found ourselves in an unfavorable situation... pinned in the gut of a draw, desperately trying to make a push to the ridgetop for a setup.
Time passed slowly as I waited for the spike to move out of the way. The high pitch of the bull’s bugle had faded, and he had obviously moved over the ridge. Our window of opportunity was closing, and the more time that elapsed the lesser chance we were going to have to get him to commit to a setup. The spike finally moved out of sight, and we hustled to the top of the ridge. Our ascent to the ridge was quick, and we were both breathing heavily when we reached the top.
My ears strained to hear something over my heaving breath. Almost as if we had planned it, the bull bugled again, signaling that he had moved over the next ridge. Without saying a word, we gained elevation to a roadbed and quickly cut the distance to the next ridge. I started to creep over the edge of the road but was stopped by the sound of elk milling around below me. Picking up my range finder, I quickly ranged a couple of bushes in their direction and pointed to the right, signaling my brother to get in position.
Anticipation
As soon as he started calling, I heard an elk moving to my left. There was no way of knowing what was coming in, but I knew something was going to happen imminently. Suddenly, the brush exploded 10 yards to my left. The thumping of hooves
Luckily, whatever had busted ran in the opposite direction of the herd. I smiled to myself and directed my attention down the ridge towards the bull. Down the hillside, I could hear elk moving all over. It sounded like the bull was running back and forth, driving cows into the bottom of the draw and farther away from us. Elk were running down the
That’s when I heard it, that approaching sound of a bull and his big rack moving through the brush. Things go into slow motion and your heart rate starts to elevate. In this moment you think,“This is why I hunt with a bow,” for the intimate, close-range encounters – the kind that can test you to keep it all together. So much time and effort go into making this moment happen, and that’s what makes it so special.
At first, all I could see was a six-point rack floating on top of the brush. The bull materialized in a sunny opening and stood looking in our direction. He was probably 40 yards away but behind enough brush that there was no opportunity for a shot. After a brief pause, he started walking in my direction, heading right for my shooting lane.
I eased my bow back and got in my peep just in time for him to emerge behind the bush I had ranged at 30 yards. He stopped perfectly, looking in my brother’s direction. The arrow impacted his side right where I had held my pin. He crashed down the ridge in the direction of his herd, and I could hear him wheezing and dying over the hill.
We waited our standard hour before picking up the blood trail – something I highly recommend unless you watch an animal fall over. The blood trail was steady and easy enough to follow at a walk. He had only gone 50 yards before expiring. It
One well placed arrow by Kyle started the 2023 elk season off on the right foot.
The next week, my brother and I were back in the mountains, hiking to a remote basin that often held a herd of elk. As we hiked up the grassy road towards our destination, we were stopped abruptly by a cow elk feeding in the road. We both sank to the ground, realizing we were surrounded by a small pod of elk. Ryan nocked an arrow and signaled me to let out a bugle. What happened next was wild.
This little five-point bull came charging in on us at less than 10 yards, and the only thing that separated us was a small bush. Despite being little, he was putting on quite a show, raking brush constantly. Ryan didn’t want to shoot him, so he signaled me to shake the bush next to me. I rose to my knees and started shaking the bush between me and the elk. That little guy walked right over and started raking the other side of the bush. I kept shaking and he kept raking with only a bush between us. What a cool experience.
After the showdown with the little bull, we hiked to the ridgetop overlooking the basin. Elk often bedded in the head of the basin, so I wasn’t The Stand-Off
my first bugle. The bull collapsed on us, quickly answering and grunting at me from above Ryan’s position.
What happened next, I call a good old-fashioned pissing contest. The bull stands on a knob and bugles at you just so you will bugle at him, and then he knows your location and that you are a safe distance away. I knew I had to do something different, something to make him feel threatened. Finally, I made the decision to walk at him, right through the brush so I made noise, adding to the realism. When I stopped my 10-yard advancement, I heard the bull coming down the hill. Standing motionless in the brush, I listened to hear it all unfold – approaching elk hooves, silence, arrow impact, fleeing elk, it was beautiful. I stood, listening intently for any other evidence of sound. I highly recommend gathering as much auditory information as possible after a shot. We don’t blow calls or high five, we listen for a crash, wheezing, or anything that we can use as evidence while blood trailing. Once the shooter is content, we silently withdraw from the area to wait a minimum of one hour, depending on shot placement.
Ryan and I quietly moved 200 yards down the ridge. He told me it was a beautiful bull with mass and a dark-colored rack. He had made a good 30yard shot and felt confident he had double-lunged the bull. We lay down in the grass like a couple of little boys watching the clouds, but we weren’t little boys anymore. We’ve come a long way since those first hunts. I couldn’t help but reminisce about all the years we’ve spent chasing elk together and how much they mean to us.
We recovered his bull a short distance up the ridge. As we stood there smiling and admiring his dark heavy antlers, I thought about how special this year was, and yes, we hugged next to a dead elk.
Not to be outdone, Ryan capitalized on his opportunity and took this great bull.
FROM EAST TO WEST
GO WEST, YOUNG MAN!
Irecently had a conversation with a new friend about western hunting. As an avid and accomplished whitetail hunter, he has expressed a strong interest in spreading his wings and pursuing western big game. His interest has been especially piqued as I’ve shared some of the adrenaline-filled close calls of my own hunts, along with pictures and stories brimming with wild-west adventure that simply cannot be tasted here in the great state of Wisconsin.
As I’ve aged, I’ve noticed a trend among my contemporaries, and I think it’s a trend that permeates through society as a whole. That which tantalized yesterday often becomes old-hat today, and today’s familiarity often casts a mundane shadow on any hope for excitement tomorrow. Like kids at Christmas, the eve before opening day once held little to no sleep. But in time the wonder fades, and opening-day-eve eventually becomes just another stressful night. As I mentioned, this isn’t exclusive to hunters. Everyone seems to long for bigger and better things. This is yet another detail that separates man from beast; we’re not content simply looking at stars, we want to explore them.
Inspiration
Years ago, the late Toby Keith wrote a song called Should’ve Been A Cowboy. He sings of a life filled with adventure, “runnin’ wild through the hills,” and “ending up on the brink of danger.” It’s not at all about hunting, but it may as well be. Many hunters, no longer excited about tomorrow’s adventure, dream of bigger, wilder pursuits. In Toby’s case, the option of pursuing his dream and actually becoming a gun-slinging marshal is a bygone era. Technology and civilization have replaced “Gene and Roy” and their horses with taser-wielding cops and SUVs. But for the hunter, the dream of wild adventure can be, and should be, a reality.
For as long as I can remember, I’ve dreamed of hunting western big game. It’s not that I was no longer satisfied with chasing whitetails. In fact, to this day I still love hunting big bucks in my home state. But something happened around 20 years ago that began to transform my hunting perspective. Two things, in fact. First, I tasted success. With much hand-holding and guidance from my dad, I had consistently filled tags with nice bucks on public ground. Sure, none would make the cover of a hunting magazine, but they each brought great satisfaction to me, and that’s all I cared about. But as I alluded to earlier, success and satisfaction are often temporary, carving out a void that needs filling. I wanted more.
The “Success Void”
Around this same time, the second factor came into play. In the early 2000s, our state began issuing an abundance of antlerless tags due to the belief that there were simply too many deer. Hunters capitalized on the liberal tags, and reports of 10+ deer per hunter per year were common. One friend of a friend reportedly killed 52 deer in one season. Most
of these were on public land... in the same areas where I had cut my teeth hunting nice bucks. As you can imagine, the public land could not sustain that kind of harvest year after year, and we soon learned that there was a limit to the once bountiful deer herd. Areas that would typically produce sightings of dozens of deer per hunter during the nineday gun season now routinely produce less than a few, if any.
For me, the two factors combined to create a devastating situation. Past successes, and therefore future goals and expectations, had outgrown and exceeded any reasonable opportunity for my definition of success in the coming years. Sure, there’s always a chance of stumbling into a true giant, but the odds became so slim that the effort required increased significantly each year. To have a reasonable chance of filling the “success void,” one would have to devote the entire year to hunting. As a husband and father of a young family, that’s something I’m not able, or willing, to do. But I also wasn’t willing to give it up altogether. After all, hunting is my favorite pastime.
So, while grinding it out in my home state, hoping things might change, I began looking for greener grass. I had always dreamed of western hunting, and upon graduating college in 2004, I made the unemployed commitment to be in the mountains come September. Toby’s lyrics became the basis for my mantra.“Go west, young man. Haven’t you been told? Colorado’s full of elk, mule deer, and gold! ”
NICK GEHRING TAXIDERMY EDITOR
While the Midwest has a lot to offer in terms of hunting opportunities, there’s nothing quite like pursuing elk in the Rocky Mountains. Here the author’s dad, Ron, stands with their first muzzleloader bull.
This tree, shredded by an ornery bull, is sure to widen the eyes of even the most diehard whitetail hunter.
Starting From Zero
Not knowing where to begin, my brother Shawn and I began researching. We had read numerous articles on elk hunting, and a few had mentioned the San Juan Mountains of southwestern Colorado. So, come late August, Shawn, our buddy John, and I drove west. John’s truck was loaded to capacity, primarily with what I now find to be unnecessary gear: Coleman heaters, army shovels, axes, etc.
As ignorant as we were, we were also young, brave, and determined, but determination fades quickly when you’re clueless. Upon our arrival, the areas we intended to hunt proved to be elkless. We had hiked over 20 miles the first day and never cut one elk track. Opening day was two days away, and to be honest, we were already defeated. With excruciatingly painful legs, we crawled into our tents with no idea where to try next.
A Friendly Tip
The following morning, as we pored over our Colorado State Atlas, a mountain biker cruised past our tent, and then stopped. He had noticed our outof-state plates and inquired about our doings. We described the previous discouraging day and the years of anticipation that had led up to it. A fellow hunter, he chuckled and kindly informed us that we weren’t likely to find elk in the sort of spots we had been checking. He then threw us a bone.
He told us about a large area twenty miles away that had been closed to motorized access for the past three years due to a large forest fire three years earlier. Coincidentally, the roads had reopened just days before we arrived in Colorado, and our new friend had checked it out. Grinning as he hopped back on his bike, he said, “It’s absolutely loaded with elk.”
Well, it didn’t take us long to find the area he had mentioned, and sure enough, there was elk sign everywhere! Since the season began the following morning, we rushed to town to buy our tags. We mentioned the area we intended on hunting to the game officer, and he confirmed that the spot would be a gold mine. He suggested we pack into a place known as the “amphitheater” and showed us a topo map with the best route for access. We bought the map and raced back up the mountain.
With hundreds of pounds of gear and food, we brutishly lugged ourselves three miles up and down a gated gravel road. At 10,500 feet, our flatlander bodies knew we weren’t in Wisconsin anymore! 20 years later, I still remember the relief we experienced as we painfully crested that last hill and laid eyes on our homestead for the next seven days. A five-acre meadow surrounded by aspen and dark timber proved to be the perfect setting for a basecamp, and our dreams seemed to be coming true.
Unfamiliar Surroundings
After getting settled in, we decided we should take the afternoon and try to locate some elk for the next morning’s hunt. Looking at our new US quad map, we figured we would multi-task and locate some drinking water as well. Our base camp was on the top of a large ridge, and we soon learned that while the scenery and general location seemed ideal, water was less than scarce. We weren’t worried, though, because we noticed on the map that about one mile from camp was a thin blue line at the top of a drainage. With a couple of pots and collapsible water jugs in tow, we headed toward the creek. As we walked, we joked about how blessed we had been to have found such a hot spot.
There was sign all over the place, but as we walked further, much of it seemed very familiar. Growing up in the heart of dairyland, cow pies were all too common, and we dodged many between
When exploring new hunting grounds, every corner in the trail or rise on a ridge becomes an exciting discovery. Here the author’s friend Andy is relishing the prospects of what might lie ahead.
An active wallow like this proves that elk are in fact nearby, and for rookie hunters like the author’s crew, spots like these are incredible discoveries.
camp and the map’s blue line. The big ones were obviously from cattle, which we had been told were free-ranging in this area, but we figured the smaller ones must be elk, right? We then started to question all the other sign we had seen. There were tracks all over the road we walked in, but were any of them elk tracks? Do mountain cattle rub trees?!
To be sure, we were green as could be, and even though we were uncertain, we couldn’t have been more excited for the next morning to arrive. Before long, the trail made a sharp turn, signaling our ar rival at the drainage we had been searching for, but there was no creek. We had pictured a fresh stream gushing with crystal clear mountain water, loaded with brook trout. But what we found was a small area of wet grass and mud littered with 8" Angus hoofprints. The tracks were deep enough that they formed tiny little puddles of water from a seepage just uphill from the logging road.
Per our map, this was by far the closest chance we had at any water, so we pulled out the Nalgene filter pump and got to work. About 10 pumps into the filtering process, the pumping became extremely difficult. Upon further inspection, we realized the hose had been jostling the side walls of the cow track, and the clear water was now chocolate-milk brown. With no alternatives, we kept pumping and filled our containers with fresh spring water, albeit brown as the mud we filtered it through. Did I mention we were ignorant? Again, we were so excited we didn’t care. We would simply boil the water an extra few minutes to ensure it was safe to drink.
The First Taste
Leaving our filled containers there, we walked a short way further down the trail, hoping to confirm that beef cows were not the only animals pres-
An essential ingredient to any adventure is the ability to find drinkable water. The water used during this group’s first ever trip into the mountains was more like a mud slurry than anything else, but between filtering and boiling no one got sick.
The cow barked at us and ran down the mountain, taking her calf with her. That was all we needed to see, so we turned back, picked up our water, and ran back to base camp. We didn’t sleep a wink that night. Opening morning was as exciting as any opener had ever been. With bows in hand, we left our tents with many unknowns and one guarantee: We were certain to find adventure.
Over the next week, I ended up having more opportunities at bulls than I’d care to admit. Somehow, though, the week was over before we knew it, and we were headed home empty. I remember calling my dad from gas stations the entire trip home, telling him new stories each time. I was more excited about hunting than I had been in a long time, and having tasted the adventure Toby had sung about, I assured Dad I would be returning soon. We made it home, and within one week I had talked Dad and Shawn into another 24-hour drive west.
They say that “experience is the best teacher.” Over the years the author and his crew have unlocked countless ways to not seal the deal on elk and mule deer opportunities. Those experiences, painfully, have been more instructive than any of the successes.
My First Bull
With a good idea of where we might find elk, Shawn and I struck out from camp early on our first morning back. We insisted that Dad, being 62 years old, sleep in and try to recover from the packin the day before. It didn’t take long for us to hear some bugles, and by mid-morning, we were set up with numerous bulls around us. Shawn volunteered to be the caller, and I slid down the mountain to intercept anything that might show up.
Initially, it seemed as if each bull was bedded and uninterested, but in time, one particular bugle began to sound different to me. Trying not to get my hopes up, I wondered if this could be it. It wasn’t long and he bugled again, confirming that my excitement had been warranted. Before long, his sixpoint rack appeared, and somehow I kept my cool. At 35 yards he stopped, sensing something was amiss, but it was too late, the arrow had been sent.
Big adventure and big smiles go hand in hand when hunters experience the rush that western hunting has to offer. They smile big over hard earned success as well!
Picking up Dad from camp, we told him the story and returned to take up the track. Blood was sparse, but the soft mountain dirt initially made following his trail somewhat easy. Eventually, even his track was hard to follow, though, so we split up to do a grid. With confidence fading, I became sick at the thought of wasting such a great opportunity, and worse, such a magnificent animal.
We knew the shot was fatal, but it had been a couple hundred yards since last blood, and he could have gone anywhere. Suddenly, a voice broke the sick silence. “I’ve got some blood over here,” shouted Dad. Confused by his yelling, I asked him to repeat what he had said. “I’ve got some blood here, and a lot of it!” I hurried over to see what he was looking at, only to see Dad running up the mountain toward our prize.
Shortening the Curve
It’s been 20 years since then, and I’m thankful to say I’ve learned a lot. As a non-westerner, planning a trip to the mountains is a daunting task. From essential gear to fitness, from finding a spot to locating, hunting, and retrieving the game within it, the learning curve is steep. But I’ve come to realize that it’s the process that brings fulfillment, not simply the trophy that may or may not ever come.
In this series of articles, I want to share the lessons that I’ve learned so far, including the mis-
takes I’ve made and the things that I’ve found success in. Whether it’s gear, fitness, scouting from a distance, camping in the backcountry, or what to do once an animal is down, I want to share some ideas in an effort to shorten the learning curve for newer hunters.
Western hunting has opened up a new world of excitement for me and many others, and I’ll be forever grateful for the memories it’s already given me.
It’s created deeper friendships, greater appreciation for our natural resources, and a sense of fulfillment regardless of the outcome. I’m thankful for the opportunity to share a few of the things I’ve learned along the way. Hunting the mountains might not be for everyone, but if you are at all like the me I described from 20 years ago, I’d encourage you to go on a journey... a journey from east to west!
By Bob Lacher
Alaska truly is a sportsman’s paradise. But (and this is a big but) hunting there is extremely difficult and without the right equipment, experience, or enough money it is at times almost impossible. The country is so vast and virtually roadless compared to the lower 48, that without an airplane, horse string or snowmobile most of the state is out of reach. If you want to better understand this then you need to read “Alaska Raw”.
Lacher is a native Alaskan and his book a detailed look into many of his adventures. His writing style is incredibly engaging and easy to read and difficult to put it down! From Unimak Island to the Brooks Range using boats, planes and snowmobiles while hunting caribou, bears and Dall’s sheep, these true stories are captivating.
By David Long & Mike Duplan
The modern mule deer hunter must be willing to outwork, outthink and outhunt both his competition and the highly educated mountain mule deer buck.
In the book “The Edge – The Complete Approach to Hunting Mountain Mule Deer”, authors and mule deer hunting experts David Long and Mike Duplan have collaborated to bring the reader insight into just what it takes to be successful when hunting mature mountain mule deer. “The Edge” will show the steps involved to increase your chance of success and the reader will learn that there is now a year round approach involving, fitness, conditioning and nutrition.
order your copies today at www.westernhunter.net
Alaska Raw
The Edge – The Complete Approach to Hunting Mountain Mule Deer
For the author and his crew, countless memories have been made at various elk and deer camps. Here they are enjoying a campfire as they dry clothes and come up with a game plan for the evening hunt.
IDAHO’S HELL’S CANYON
A HALF-CENTURY OF GOOD HUNTING AND LESSONS LEARNED IN IDAHO’S LAST BEST PLACE
This is the second in a two-part series. Part one was printed in the 2024 May-June issue of Western Hunter.
In the first part of this series, I told a story of my first experience in this legendary place. It included the method by which we had gained access to hunt the area and the details of my first deer hunt there. Along with the story were some lessons I learned about working with landowners, hunting mule deer, and dealing with issues that may arise between hunting partners. In this second installment, I will tell the story of the rest of that hunt, another hunt that followed, and some other unexpected challenges that arose, along with more lessons I learned about both hunting and hunting partners.
Pack Out Logistics
This was my very first experience with backpacking a mule deer out of the Snake River Canyon, so once again, I asked my vet student hunting partner for guidance. His “rule” was to cut the deer in half at the last rib and put each half in a meat bag.
The person who shot the deer was obligated to pack the front half, and the hunting partner would pack the rear half. Each half was strapped to a pack frame. Knowing no better I followed his directions and strapped the front half to my pack frame and the rear half to his pack frame. I picked up my pack, which weighed about 120 lb, and began climbing out of the canyon. The kill site was about one mile and 800 feet of elevation below our camp.
My hunting partner was very opinionated, so I chose to listen and be a “good hunting partner” by not arguing and complying with his rules as best as I could. In my role in the University Housing department, there was always a surplus of worn-out
mattress covers. A mattress cover cut in half made two big meat bags, so the custodians always gave me some clean ones before they threw the rest out. I put a half mattress cover over the front half of the buck and tied it down to my Recreational Equipment Inc. (REI) aluminum frame. I did the same with the rear half of the buck which we strapped to my partner’s Kelty Frame.
I lashed on my Army Surplus daypack which contained my water, food, map, compass, knife, etc, and began my climb back to the camp, some 800 vertical feet above the kill site. I had almost reached the first ridge when my partner yelled for me to stop. He had carried his “half” about a quarter mile and said he couldn’t carry it any farther. I dropped my pack and went down to where he was waiting. He’d taken the rear half off of his pack and seemed exhausted. I told him I would pack his half the rest of the way and suggested that he go on hunting. I marked the location with surveyor’s ribbon and went up to my pack, picked it up, and took it to camp. I took my empty frame back down to the rear half, loaded it, and went up to camp.
Undisclosed Intentions
It had rained the night before, and I immediately noticed where a vehicle had turned around and left earlier in the morning. I was puzzled by Tony’s anxiety during the night and his need to get out of camp in the dark. The tire tracks told the story. We were camped where Tony’s vet school
classmate had taken him the previous fall and shot a buck in the brushy draw just below camp. I hung and caped my buck and skinned the hind quarters and hung them as well in the shade behind camp.
Tony had scoffed at my .240 Weatherby and proclaimed all of the advantages of a Ruger Number 1 chambered in .270 Winchester. He also was a strong advocate of a one-shot kill. The sun was getting low in the western sky, and I had all of my camp chores finished and was sitting in a camp chair enjoying the coming sunset. There weren’t any hunters anywhere near us that we knew of, so when I heard three shots in the canyon below camp, I pretty well knew it was my hunting partner. Ruger Number 1 single shot... hmm.
GEORGE BETTAS HUNTING EDITOR
My hunting partner was anxious to get a Boone and Crockett score on my buck.
I put half of a mattress cover on the buck, tied it on my REI aluminum pack frame, and tied my Army surplus daypack and gear on top of the pack. From there I began the climb out of the canyon to our camp 800 feet of elevation above the kill site.
I made dinner and an hour after dark, my partner showed up. He immediately asked about my buck and couldn’t wait to eat dinner before he was pulling a tape on it. He didn’t say much during dinner, and we went to bed with the plan for me to help him backpack out his buck the next morning. I didn’t ask any questions and went to bed. I did ask him about the tire tracks and he didn’t seem to know much about them.
The next morning, we had a hurried breakfast and dropped down into the canyon to get my partner’s buck. I volunteered to carry the front half. It turned out that he had shot the larger of the two bucks we saw just after daylight that morning. Once we reached our camp, we loaded our gear and deer and left for home. On the way home we spoke in “pleasantries” and saw each other throughout the fall at various sportsman’s association meetings.
Lessons Learned
If you choose to go on a trip with a new hunting partner, it is best to not take anything for granted. I was working full-time while pursuing my Doctorate, and my hunting partner was immersed in veterinary school, so we both had limited time to plan our hunt and both of us took a great deal for granted. This led to issues I will now call a “lack of communication and expectations” 50 years later. The “whoever sees the deer first gets first choice as to whether to shoot it or pass it on” leads to competition when hunting together instead of going our own hunting routes. I was my partner’s “spot,” so I deferred to his wishes.
I should have been more prepared and learned how to quarter a big mule deer and pack it out on a pack frame. Assuming my hunting partner was physically fit to pack half of a mule deer was also a lesson to be learned, and after packing out my buck by myself, I was ready for the pack out of his buck the next morning. Rifle caliber choices are person-
al and I learned to separate the “wheat from the chaff” on this trip. Some people talk like they are great shots, but until you have seen them on the range, you will not know.
The other thing I learned was to ask more questions about my partner’s vet student classmate who had told him about this spot. Was he coming back to hunt here? The ranch foreman had told me this was an OK place to camp, but neither he nor I knew it was the spot where my partner’s classmate had taken him the fall prior. Trust and honesty are the most important values of any friendship.
Year Two
In part one of this series, I described that during one of my first visits to Hell’s Canyon, I had met a ranching couple who were extremely hospitable and allowed us a tour of their land. They had agreed to let Tony and I come back to hunt this area.
After the deer hunt, I followed up with Cal, and I maintained communication with both he and Michele, visiting them twice that summer. On the second trip, I took my father, George Bettas. My father marveled at Cal’s handiwork with an axe with a curved head for cutting “saddles” to rest logs in at the cabin corners. These trips were mostly cordial visits, usually with a special gift, such as WSU Cougar Gold cheese. During these trips, I got to know the Samsels and established a mutual feeling of trust between us. Near the end of my second trip, Cal suggested that my hunting partner and I could come to the ranch on Tuesday evening and leave on Friday morning, as the school teachers from Grangeville would not be hunting until Friday. Thus, we wouldn’t interfere with their hunt. This invitation pleased me because we would not have to encroach on my partner’s vet school classmate.
On this trip, we took my partner’s Toyota Landcruiser and camped on the brink of the rims that dropped into Hell’s Canyon. It was a magical place with nobody for miles in any direction. The night was short and we were glassing the first canyon at daylight. It was the same plan as the first year; first to spot gets the shot. We had not gone 300 yards when my partner stopped short of the ridge, and after a few minutes he said,“I’m going to shoot that buck.” I said, “OK” and stepped back while he got into a prone position over his daypack and shot the buck at about 250 yards. I went to the kill site and helped him dress out the buck. It wasn’t very far from camp in vertical or horizontal distance, so I told him I was going to find a buck of my own as it was getting late in the morning.
I had a wonderful morning creeping along the breaks, marveling at the sun hitting the various ridges that led to the Snake River thousands of feet below. Late in the afternoon, I spotted a nice buck about a mile away, and after an hour-long stalk, my 240 Weatherby proved its efficiency once again.
The second year we hunted the ranch, we camped on the rim from which you could see the Snake River.
I dressed out my buck, cut it in half, and caped it out, covering each half with a half mattress cover. I moved it about a quarter mile to a flat spot on the ridge for an early morning retrieval, cut the head and cape off, tied it on my pack frame, and began hiking the mile-plus distance back to camp. I figured that leaving the head and cape would make for a more balanced load. It was dark when I reached camp, and I was surprised to find that my partner was not there. I lit the lantern and it wasn’t long before I heard him yelling that he needed help, just over the rim.
Abuse of Hospitality
I walked over to the rim and could see him 100 yards below with two horses, one with a pack saddle that had slipped under its belly and the other a saddle horse standing quietly beside my frantic hunting partner. Puzzled, I took my 6-volt light and dropped down to my partner’s “mountain rodeo.” I held both horses while he untied the two halves of his buck and got the mess untangled. I led both horses up to camp, tied them to the fence rail, and went down to see what he was up to. He had tried to backpack the two deer halves but decided he could not. He had walked back to the ranch HQ and borrowed the riding horse and pack horse from Cal.
The horses had not been fed or watered all day, so I was a bit “chippy” and suggested we take the horses back to the ranch HQ. He was adamant that we take the horses to retrieve my buck, and when I realized I could not talk him out of it, I drove his Landcruiser out the two-track ranch road along the rim while he rode the one horse and packed the other. The ridge down to my buck was fairly gentle and had a good cow path traversing the sidehill.
Cal’s horse was super gentle, and we finally got the deer balanced as best as we could. I gave the horse his “head” and walked alongside him, holding the lead rope and hanging on to the load across the hillside and up the ridge. As I look back on this photo, it has to be one of the most stupid but nec-
essary things I have ever done... With a hunting partner scolding me and barking orders, I am lucky to have gotten both the horse and myself out of there safely.
When we got to camp, Cal was waiting for us. My partner was to have returned the horses the previous evening. I contacted Cal when I got home and apologized for my partner’s behavior. We mutually agreed that this was my partner’s last trip to the ranch. After that hunt, I enjoyed decades of good hunting and making good friends among my hunting partners, ranch managers, and landowners in Idaho’s Hell’s Canyon.
Lessons Learned
A great hunting partner is like a great spouse. You can trust each other, understand each other, and respect binds you together. Obviously, I didn’t do my homework on learning about my new hunting partner, discussing expectations, and understanding physical abilities and personal traits. I also learned to understand that when horses are involved, just because a partner is a veterinary student, it does not mean he is a horseman. Landowners are like gold, and you treat them like gold. Respect their property and stock, and never take advantage of them.
When I reached the ridge a drink of water was priceless, as were Cal’s two unbelievably good horses.
I gave the horse his “head” and walked alongside him, holding on to the lead rope and hanging on to the load across the hillside and up the ridge.
After spotting this buck over a mile away, a long stalk was rewarded with my second Hell’s Canyon buck.
PRONGHORN ANTELOPE
HUNTING THE FASTEST LAND MAMMAL IN NORTH AMERICA
TFRED EICHLER HUNTING EDITOR
he pronghorn antelope has got to be in the top five big game animals that truly symbolize the West and western hunting. Its unique characteristics make it the perfect animal to highlight in my Super Slam series this issue. Although they are commonly called speed goats, prairie goats, lope, antelope, or just pronghorn, the proper name is the pronghorn antelope. What’s funny about that is that they actually aren’t “horned” at all. The first Europeans to see them named them “Antilocapra Americana.” The name means American goat/antelope, but they aren’t related to goats or any of the antelope found in Africa.
When looking at the pronghorn antelope, they do appear to have horns like those found on African antelope, Rocky Mountain goats, or even domesticated goats, so it’s easy to see why the name would be related. The problem is that true horned animals
like bighorn sheep, Rocky Mountain goats, or any of the African horned animals continue growing their horns for the entirety of their lives, whereas antelope shed their horn-like sheaths every year and regrow them like antlered animals – whitetail, elk, and moose, to name a few. So, the antelope’s unique headgear is neither an antler nor a horn. This puts the pronghorn antelope in a class by itself.
To add to their unique status, they are the fastest land mammals in North America and second fastest in the world. The only mammal that can best their speed is the African cheetah, but the pronghorn antelope can keep their top speed up for longer distances compared to the cheetahs. So, I give the pronghorn antelope the win in my book.
Pronghorn antelope are not big animals – a large buck may tip the scales at 120 pounds. Both bucks and doe have horns, though the doe horns are usually much smaller. I did have a client take a doe that had 6" long horns a few years ago, which is longer than usual.
The Start of an Addiction
For my super slam quest, I harvested an antelope with my recurve from a windmill that was supplying a cattle tank with water. It was about 32 years ago. I had a few 2x10 pieces of lumber set sideways in a support brace of the windmill (certainly not OSHA-approved, but it worked). I was so excited about that little antelope buck that I instantly became addicted to hunting this unique prairie goat.
Since that first pronghorn antelope, I have taken them with a recurve bow, longbow, compound bow, handgun, and rifle. I have incorporated all kinds of hunting methods and strategies, including waterholes, agriculture, spot-and-stalk, antelope decoys, moo cow decoys, flagging, and even horses to get in range. Out of all the different strategies I’ve employed for myself or for clients I was guid
This is my first pronghorn antelope taken over 30 years ago with a recurve.
consistently successful method is water hole hunting – as long as the area is dry with a limited supply of water. The most fun way to archery hunt them, in my opinion, is decoying or using horses to slowly walk into bow range. The most difficult method is spot-and-stalk archery, and that is, again, in my opinion from my experience in all methods of take. For rifle hunting, the most efficient method to me is spot-and-stalk, even out on the plains where the terrain seems to be flat as a pancake. Usually, the diligent hunter can find some breaks in the terrain or an old creek bed to utilize for concealment. The most fun way to rifle hunt pronghorn, in my opinion, goes to the decoy, hands down. I use a Montana decoy, and to have an antelope buck run from 1000 yards to 20 at a dead run is exhilarating. Caution should be used decoying antelope during rifle season and should be limited to private land where no other hunters are looking to tag a doe antelope during the season. Public land could be a dicey venture with current long-range shooting tactics keeping hunters from positively identifying their target like they should.
Tips and Strategies for Antelope Hunting
To make my top two most effective strategies work for these different weapon choices, there are a few things that will help tip the scales in your favor.
For archery water hole hunting, it’s best to hunt out of a blind. I have used pop-up blinds like an Ameristep, and I have even hunted them from permanent Muddy blinds as well as from blinds that I made myself. I have the best luck if I give it some time for the antelope to acclimate to the blind. I prefer a month but have in some cases popped a blind up and taken an antelope the next day.
If you don’t live in antelope country and want to hunt public or only have a limited time to hunt, my suggestion is to figure out what area of the pond or cattle tank they are drinking from predominantly. In almost all cases there is a side they prefer to approach and drink from, and it’s usually because they have the best visibility from that part of the water.
Since they are often attacked by coyotes, bobcats, and even mountain lions while drinking, you don’t want to put your blind on the side they prefer to drink from. Put it on the opposite side. Trail cameras can help with this where legal. I like a Stealth Cam and usually run it in video mode so I can see
NORTH AMERICAN SUPER SLAM
THE SUPER SLAM IS COMPRISED OF THE FOLLOWING SPECIES:
Whitetail Deer • Mule Deer
Coues Deer • Columbia Blacktail Deer
Sitka Blacktail Deer
Rocky Mountain Elk • Roosevelt Elk
Tule Elk • Alaska Yukon Moose
Canadian Moose • Shiras Moose
Rocky Mountain Bighorn Sheep
Dall Sheep • Stone Sheep
Desert Bighorn Sheep
Barren Ground Caribou
Central Barren Ground Caribou
Woodland Caribou
Quebec Labrador Caribou
Mountain Caribou
Rocky Mountain Goat
Pronghorn Antelope • Mountain Lion
Polar Bear • Brown Bear
Grizzly Bear • Black Bear
Muskox • Bison
their direction of approach and where they drink from. You can also sometimes funnel or position antelope by placing a small clump of sagebrush or some small brush to direct them to where you want them for a shot. They will usually go around and not drink right where the brush will obscure their vision. I suggest, even if using a pop-up blind, that you use some natural brush to help the blind blend in, especially if hunting right after setting it up.
I took this buck from a tree near a waterhole. Trees are a rarity in the desert.
I took this beautiful buck at a waterhole from an Ameristep pop-up blind.
Try to find where antelope prefer to drink from on individual water holes.
A buck I took from a permanent Muddy blind.
Archery: Decoys
My favorite ways to hunt antelope involve decoying or using horses, which both require some work. Decoying requires the right aggressive buck, as sometimes bucks will ignore the decoy or it will even spook them. But if you find the right buck, it’s amazing. I simply use the terrain to get as close as I can without getting spotted, and then I show a buck the decoy. It’s as simple as that. If they come, it’s a rodeo, as they often get super close at top speed, then screech to a halt (minus the screeching noise). You have to shoot when they stop, so be ready! Talking about using horses to get in range, I am still trying to get this one perfected. I went with an outfitter in South Dakota where I learned from watching them and was blown away by this fun method. My horses don’t think it’s as cool as I do. Simply put, you slowly let the horses walk and feed
posite side of the horse. It’s amazing when it works, but it takes a good horse or sometimes two and a lot of patience.
Rifle: Spot-and-Stalk
For spotting, you can cover a lot of ground with a truck, four-wheeler, bike, horse, or walking. Once you’ve spotted the animal you want to stalk, it’s time to put together your approach on how to get as close as possible, depending on terrain and foliage. The advantage to a rifle is, of course, longer-range capability over a bow which is my usual weapon of choice. So, getting within range is much easier, but it can still be a challenge with hunted or spooky pronghorns. I use the three “C” rules – cover, crafty, and camouflage. I tend to hunt along areas where small breaks in the terrain or creek beds give me the advantage. Even thick patches of cactus or sage
If you want to try my most exciting choice for rifle antelope, try a decoy. I still use my camouflage, available cover, and craftiness to get close, but then I show them my Montana decoy. Since the rut often coincides with rifle season, this can be a super exciting way to get a buck to come to you instead of having to close the range to the buck. Bear in mind whenever using a decoy to always think safety and make sure you are in an area where no other hunters could confuse your decoy for a buck.
Speed Goat Gear
When choosing equipment for antelope, some gear is just mandatory, in my eyes, whether you are archery or rifle hunting. For example, good boots are a must. Between heat and cactus, cheap boots just don’t cut it. Also, make sure they are worn-in because sweaty socks and new boots seem to just breed blisters. Another must in my opinion is good optics, including a spotting scope, binoculars, and a rangefinder. I like Leupold and am currently using the range-finding 10X binoculars because I can eliminate carrying a separate rangefinder. I also like a 60x spotting scope that I have both a small tripod and a window mount for mounting.
Sometimes you can use horses to close the gap and sneak into bow range.
Decoys can increase your odds of getting within bow range of a rutting buck.
Another nice thing about a horse is you can use it to tote your animal out if you are successful.
This buck was taken on a spot-and-stalk hunt.
North American Super Slam Series
A Thermacell can also save you from mosquitoes during archery or rifle season if the weather is warm. It seems a desert wouldn’t be a place you had to worry about them, but I assure you in the early fall, they are bad enough that they can ruin a hunt in some places. I am also a firm believer in sunscreen. I have had enough precancerous stuff
frozen off my face that I now try and protect myself from that high desert burn.
Knee pads and gloves can also help save you from a lot of cactus thorns and a bad experience. I crawl a lot when bowhunting and rifle hunting for antelope, and I’ve seen some people get covered up with thorns and not be able to finish a stalk without them. Some equipment is more specific to the weapon of choice, and my list for that is relatively simple since much of it is personal preference.
Bow Setup
For archery equipment, almost anything will do since antelope are small animals – 120 pounds at best, usually. I have passed completely through them with a 40-lb recurve at 20 yards and a cut-onimpact broadhead. I do advise a large-diameter broadhead or even an open-on-impact to create a large wound channel. This is because if they are alive for a minute after being hit with a marginal hit, with top speeds of 60 MPH, they could potentially run a mile before expiring.
With a recurve or longbow, I prefer a shorter bow when possible so I don’t have issues with hitting the blind if I am blind hunting. For compound shooters, I definitely advise a rangefinder because precise shots help take them down quickly, and they can look deceivingly large in a flat mostly dirt and short grass desert.
Rifle Setup
For rifle shooters, I advise a flat-shooting cartridge with a rapidly expanding bullet. I have great luck with Hornady ELD-X or even the ELD Match bullets as they come apart and expand quickly. I’m a firm believer in the Bog Death Grip tripod for a stable rest, but any tripod will help add rest options. I also recommend a custom dial system on your rifle scope for accurate shots at longer ranges.
Conclusion
Lastly, I want to add that despite sometimes getting a bad rap, antelope meat is incredible and one of my favorites. If it is handled correctly, there is zero sage taste and it’s delicious. The key to great meat is to get the hide off quickly. The mistake many make is thinking that gutting the animal quickly is the key. It’s not. When you gut the antelope but leave the hide on, the carcass dries out and the moisture from the hide and glands is pulled into the meat, giving it a strong sage-like taste. So, if you want to enjoy some amazing meat, take the hide off quickly and get it cool on ice as soon as possible.
If you have not hunted the fastest animal in North America, I hope you will give it a try. They are as beautiful and unique as the country they are found in.
In my opinion, having a quality spotting scope while antelope hunting is a must.
& FITNESS
RUCKING: WHY YOU NEED IT
ENRICH PHYSICAL ABILITY AND CONNECT TO THE OUTDOORS
When it comes to rucking, there are several key considerations to ponder. Firstly, it’s essential to understand how to properly fit your pack to your back, ensuring optimal comfort and functionality. Secondly, mastering efficient rucking techniques is paramount for maximizing performance and minimizing strain. Lastly, determining where to commence your rucking program is crucial for setting realistic goals and progressing effectively.
Fitment
n Adding rucking to your offseason training regimen will better prepare you for long physical pack outs. 7 3
Rucking has surged in popularity in recent years, with brands like Goruck and Outdoorsmans gaining mainstream recognition. Yet the concept of rucking – carrying weight while moving – has been ingrained in human history for millennia. Whether it was carrying water to a village, transporting a kill home to feed the family, hauling climbing gear to a wall, or even lugging golf clubs for 18 holes, the act of rucking has been a part of hu man existence.
But do we need to ruck incessantly? While spending extensive time in the field with a pack may necessitate focused training, it’s not essential to maintain a year-round regimen. In fact, providing your body with a diverse training rou tine offers numerous benefits, from maintaining joint health to bolstering over all strength and longevity. By prioritizing a well-rounded fitness regime, you’ll ensure the resilience needed to continue exploring the backcountry alongside friends and family well into your golden years.
However, let’s return to the focus of this article – rucking. As I write, ex citement courses through me as I prepare to transition from the gym to the field, embarking on endeavors such as checking cams, observing critters growing antlers, and hunting bears. It’s a time of year when the magic of hunt ing season begins to unfurl, and rucking plays a pivotal role in this seasonal transition.
Pack fit is crucial, yet often overlooked, particularly at the outset. Many folks find themselves constantly adjusting straps and belts, encountering discomfort and rubbing. But more often than not, it’s not the pack itself – it’s the fit. Your goal is to position the pack correctly before tightening it down. Can you comfortably hike with moderate weight using just the shoulder straps? You should be able to. Poor fit not only causes discomfort but can also disrupt your natural gait cycle. For instance, if the pack sits too low, it restricts hip movement, forcing you to shorten your stride, which feels as awkward as walking with your pants around your ankles. So, get your pack positioned cor rectly from the start.
The key is the lumbar support pad – it should align with your lumbar spine, just above your belt line. With the shoulder straps snug, the pad should nestle perfectly there. If it’s too low, it’ll press against your sacrum and SI joints, hindering movement. Additionally, a low-sitting hip belt leads to chaf
Rucking Efficiently
While it may seem like just walking, mastering efficient rucking involves much more. We’ve all encountered someone who glides effortlessly through mountain terrain, barely making a sound and seemingly impervious to fatigue during long climbs. Sure, fitness plays a part, but a significant factor is what’s known as the “economy of effort.” This concept boils down to refining the art of walking on uneven surfaces while carrying weight.
If you are someone who has to look down and concentrate on the ground a lot because you are notorious for tripping a lot or falling, then you need to work on some balance exercises. Here are a few I recommend.
Dowel Walking
• Equipment Needed: Dowel
• Instructions: Place a dowel on your living room floor and walk back and forth across it barefoot for 2-5 minutes. Repeat exercise 2-5 times a week.
• Benefits: Improves foot grip and stability on uneven terrain, strengthens foot muscles.
Agility Exercises
• Equipment Needed: Cones or markers
Once the lumbar pad is in place and the hip belt secured, tighten the shoulder straps until there’s no space between them and your back. Any gap indicates the pack is too long, necessitating adjustment. If the lumbar pad rides up, the
A word from experience: packs tend to stretch with use and weather conditions, so anticipate mid-trip adjustments. After all, schlepping a 120-lb load
And that’s it for pack setup – simple yet crucial. It’s like wearing boots that don’t fit and hoping for the best. Take the time to find the right fit – your back
7 3 7 3
• Instructions: Set up cones and perform agility drills by running around them forward, backward, and sideways. Start slowly to prevent injury and gradually increase intensity over a few weeks.
• Benefits: Enhances lower leg and foot muscle strength, improves agility and coordination.
Balance Board Work
• Equipment Needed: Balance board
• Instructions: Stand on a balance board for 1-2 minutes at a time, gradually progressing to squats, lunges, and single-leg squats on the board.
• Benefits: Develops stability and balance on unstable surfaces, strengthens core and leg muscles.
If you struggle with the added weight on your back, incorporating core work into your routine is essential for backcountry endurance. But forget about traditional sit-ups and leg raises – odd object lifting is your ticket to success. Here are a couple of options.
Variations in Pack Carrying
• Instructions: During your training sessions, experiment with different ways of carrying your pack to engage your core muscles. For example, carry your pack on one shoulder for 60 seconds, then switch to the other side. Alternatively, sling your pack over one shoulder and maintain an upright position for 60 seconds before switching sides. Lastly, try carrying your pack on the front of your body for around 60 seconds. These unconventional pack-carrying techniques will enhance your body’s ability to resist rotational forces when carrying weighted objects.
Sandbag Training
• Instructions: Incorporate sandbag training into your regimen using sandbags as a versatile tool. For instance, you can use sandbags in your pack to simulate varied weights. Additionally, utilize a range of sandbag sizes, such as 60, 40, and 20-lb sandbags for your pack, along with a 100-lb sandbag for lifting. While I won’t delve into a specific training program here, a quick online search for “sandbag training” will yield numerous effective workouts to incorporate into your routine.
The shoulder strap needs to fit flush to the back like the picture on the left. The excess space created with the shoulder strap on the right will lead to an uneven load on the body, pinch points and most importantly shows that the pack is not adjusted correctly for spine length.
The hip belt on the left is as it states, over the hips. On the right the hip belt is too low and will end up creating excess friction over the lateral part of the hip and limit range of motion of the hip.
HEALTH & FITNESS
Breathing
Finally, optimizing your breathing is paramount for efficient rucking. Allow me to share an anecdote from my recent experience. I conducted a VO2max assessment for an underwater welder employed on offshore oil rigs. Despite being middle-aged, not particularly active, and weighing over 220 lb, I expected his score to fall within the 45-50 range. To my surprise, he achieved a remarkable score of 62. Scores exceeding 62 are considered elite. I’ve even tested accomplished athletes whose scores didn’t surpass 60.
What set this welder apart? His job demands impeccable breathing technique for safety and efficacy. This underscores the importance for all of us: by honing our breathing and maximizing oxygen intake, we enhance our endurance for outdoor endeavors. Here are some methods to improve your breathing.
1. Nasal breathing is a fundamental practice. During walks, hikes, or rides, challenge yourself to breathe solely through your nose. If you find it difficult, it indicates a need to reduce your respiratory rate. Slow down or pause until nasal breathing feels comfortable.
2. Swimming offers invaluable lessons in breath control during aerobic activity. Head to the pool and focus on breathing every 3, 5, 7, 9, or 11 strokes while swimming. Avoid panicking and resorting to rapid, gulping breaths.
3. Engage in breath-hold exercises by simply holding your breath and pinching your nose shut. Gradually extend your breath-hold duration through consistent practice.
4. Breathing is a vast topic deserving thorough exploration. Stay tuned for a
Here’s a suggested program to work towards this goal.
Week 1:
2x a week, ruck 30-35 lb for a total of 2-3 hours combined in the sessions.
Week 2:
2x a week, ruck 35-40 lb for a total of 2-3 hours combined in the sessions.
Week 3:
2x a week, ruck 40-45 lb for a total of 2-3 hours combined in the sessions.
Week 4:
2x a week, ruck 50-55 lb for a total of 2-3 hours combined in the sessions.
Week 5:
2x a week, ruck 55-60 lb for a total of 2-3 hours combined in the sessions.
Week 6:
2x a week, ruck 60-65 lb brick-style workout:
• Ruck 1 – Afternoon 80 minutes with 60-65 lb.
• Ruck 2 – The following morning 60 minutes with 60-65 lb.
Week 7:
2x a week, ruck 65-70 lb brick-style workout:
Ruck 1 – Afternoon 80 minutes with 65-70 lb.
Ruck 2 – The following morning 60 minutes with 65-70 lb.
2x a week, ruck 70-75 lb brick-style workout:
Ruck 1 – Afternoon 80 minutes with 70-75 lb.
Ruck 2 – The following morning 60 minutes with 70-75 lb.
That’s about as straightforward as you need for an eight-week rucking program to get into mountain shape. In addition to this structured program, I also recommend incorporating heavy pack work into your daily routines. For instance, try wearing a 100-lb pack while watching a 20-30-minute show, mowing the lawn, or washing the car. Getting comfortable with discomfort, especially with heavy packs, is crucial for mountain preparedness, and these simple yet effective activities can help achieve that.
The resurgence of rucking, exemplified by brands like Goruck and Outdoorsmans, reflects a timeless human practice with diverse historical roots. While rucking offers benefits for physical conditioning, maintaining a yearround regimen may not be necessary. A holistic fitness approach is recommended for long-term health and resilience.
Nevertheless, focusing on rucking demands attention to pack fit, efficient techniques, and program initiation. From proper lumbar support alignment to balance exercises and breathing techniques, preparation is key. Embracing discomfort through structured training or daily heavy pack activities is essen-
In essence, rucking represents more than just a fitness trend – it embodies human adaptability and connection to nature. As enthusiasts embark on their rucking journeys, they are encouraged to explore, discover, and steward the landscapes they traverse, enriching both their physical abilities and their connection to the outdoors.
The Outdoorsmans Atlas Trainer allows you to attach up to 90 lb of olympic barbell plates to your pack frame for a snug fit and a sturdy ride.
Over $1,400 Saved!
& FITNESS
TRUE FULL-BODY EXERCISE
ROWING YOUR WAY TO A BETTER HUNT
Rowing is often associated with CrossFit gyms and extremely fit athletes competing in high-level competitions, but it has incredible benefits for your body that carry directly over to improved hunting experiences as well as greater overall function in everyday life. In this article, I will cover the basic techniques and equipment for rowing, the potential benefits and how they can be used to increase our hunting fitness and skills, and why rowing is one of the foundational tools I use to prepare for my upcoming hunts.
Rowing allows you to get a great workout indoors, but with the right machine, you can take your workout outdoors if you prefer. The machine I use is pretty easy to transport as it folds and has wheels for rolling. On a nice day, I will roll my machine outside on the deck for my workout, but in the winter, it is one of my favorite ways to get in my cardio indoors while also building strength.
There are a few different kinds of rowing machines. To create resistance, machines use water, air, hydraulics, or magnets. Each type has pros and cons related to its noise level, overall cost, performance, and durability. No matter what your goals are, there is a rowing machine in your budget range that can
LINDSAY PERSICO
do the job. Each machine has a seat, footrests, and a bar on which you pull. The basic technique involves planting your feet in the footrests with your knees bent, sitting upright in the seat, and bending slightly forward at the waist to grasp the handles while your arms are straight and extended.
Technique
When you begin the rowing movement, you start by pressing into your feet to straighten your legs and smoothly, in one motion, engaging your back through your shoulders to draw the bar straight back to your belly button as your legs reach full extension. It is important to draw the bar back with the power originating in the upper back with a drawing of the scapulae both back
A rowing machine has foot rests, a seat and a bar that you will use to pull against the resistance.
The starting position will be with your feet planted on the foot rest, legs bent at the knees and a slight forward lean at the waist to enable your hands to
At full extension your legs will be straight and your upper body will slightly tilt back at the waist.
HEALTH & FITNESS
Although this is the focus during the movement, the act of rowing is a full-body workout that engages the legs, core, and upper body together. You can change some of the primary muscles used in the movement by adjusting the way you grip the bar. You can alternate between overhand, underhand, and neutral grips to help you better engage all of the muscles involved in the arm and to help prevent overuse injury.
Benefits
Rowing improves cardiovascular health, flexibility, grip strength, heart health, bone health, posture, and overall strength, burns calories, improves mental health, and reduces stress. Two areas of the body that are often neglected are the upper back and latissimus dorsi or lats. This area is often difficult to strengthen with limited equipment, and people will often do movements they are familiar with such as push-ups, sit-ups, or squats without ever working these important muscles.
With many jobs requiring long hours sitting at a computer or desk, it is even more vital that we prioritize strong, healthy backs to improve posture and prevent pain and injury. When the muscles of the chest are worked with push-ups or chest presses but the back is overlooked, it creates a muscle imbalance that draws the shoulders forward and down. The tight chest muscles pull everything forward, and the weak upper back muscles allow this to happen. This directly creates poor posture, putting strain on the neck and back as well as reducing the space for the lungs to expand during cardiovascular activities and hindering performance. Rowing directly targets these important muscles and helps to create a balance in upper body strength to support good posture and better cardiovascular performance. Strengthening the upper back will also translate to better archery performance, as these muscles are used in the drawing motion and holding motion during a shot.
Versatility
The upper back is only one muscle group that rowing works. You can also get a great cardiovascular workout from rowing. You can adjust the resistance on the rower to match your goals for the rowing session. You can use light resistance and go for maximum repetitions, or you can use more resistance and work on developing strength. If you find your sweet spot with resistance, you can reach a working state for cardiovascular effort and strength training, allowing you a perfect full-body workout, including cardio. You also work your legs and your core as you row.
Engaging your glutes as you push through with your feet and keeping your core engaged throughout the movement will allow you to maintain good form, work those muscle groups, and help prevent injury. Grip strength is also improved with rowing. Grip strength is directly related to overall strength and is a good indicator of upper body strength. Even though we focus on the upper back engagement during rowing, you will also work all the muscles of the forearm and upper arm, especially when you adjust your grip periodically during the session.
During hunts, we need a combination of good cardiovascular function, strong legs, good stability, core strength, and upper body strength. If we are archery hunting, a strong upper body, rotator cuff, and upper back are essential. Rowing benefits every single one of the physical needs for hunting and is a
When you pull back the bar aim for the bar to reach your belly button.
Neutral grip option.
Overhand grip option.
Underhand grip option.
HEALTH
great option for training for hunting during the off-season. I prefer to pair rowing with rucking to maintain and build my cardio and strength for hunting and supplement those two foundational pieces with weight training. I have found this method to be quite effective.
Setting up your rowing machine for a steady, long session can also help to develop the endurance needed for long hunts. Some hunts are simply a grind and require a variety of workouts to help develop the varying physical needs. Sometimes you need brute strength, sometimes it is endurance and some times it is balance or stability. You can adjust your rowing workouts so that sometimes you are focusing your session on strength and other sessions are focused on endurance.
focus this squeeze in an upward fashion, you will be including more engage ment of your trapezius muscles at the top of your shoulders and the base of your neck. If you focus on a downward squeeze, you will be engaging more of your latissimus dorsi muscles. Each is beneficial.
Every Facet of Fitness
Aside from the cardio, strength, and endurance benefits, rowing has a lot to offer on the mental health front. As with most exercise, rowing has positive impacts on your brain health, mental health in general, and stress. There is a direct correlation between exercise and improved neurologic function. With the complexity of mental health, it is encouraging that we have something so simple and so proven to provide positive side effects for our minds. We cannot control all aspects of mental health by simple means, but we can control whether or not we tap into the benefits available to everyone through simply moving our bodies and strengthening them.
The last benefit of rowing that I want to highlight is the impact it can have on weight loss goals and overall body composition. Due to its cardiovascular potential, rowing can burn substantial calories and fat, but it is also building muscle which inadvertently improves metabolism with the increase of overall muscle mass. When we increase muscle mass and decrease body fat percentages, we will see huge improvements in body composition. The fact that rowing can provide all of these benefits while being incredibly low-impact makes it a powerhouse tool in our fitness and health arsenal.
Often overlooked and underutilized, the rowing machine provides so much positive potential that it deserves a place in our routines. I love that this machine is affordable and can be included quite easily in a home gym. I have a very small space set aside for my workout equipment, but my rower, dumbbells, and rucksack have the potential to create an incredible level of fitness, limited only by my dedication to utilizing them. These few tools take up minimal space but pack incredible power for progress and results.
See which setting challenges your strength and which setting challenges your cardiovascular function and then create your baseline within these settings. As you incorporate rowing into your routine, you can challenge yourself by increasing overall time, increasing repetitions, decreasing time to complete a number of repetitions, increasing resistance, or increasing distance. The possibilities are endless.
Rowing provides an excellent full body workout that can be done from home with a simple, inexpensive rowing machine.
Rowing works the muscles up the upper back which directly translates to the pulling and holding actions performed in archery shots.
You can easily adjust the resistance to match your strength and workout goals.
PEDRAM PARVIN FIELD EDITOR
Ryan Skidmore
you grew up, where you live now, and how you got started with your art.
RYAN: I grew up in Northern Utah in a town called Roy, studied art at Utah State in Logan, and currently live in Morgan, Utah. My humble beginnings in art came at a young age, admiring my Grandmother’s paintings and trying to copy them when we would visit my grandparents’ farm. She started painting late in life and was quite talented. Like a lot of my artist friends, I was an “art kid.” All I wanted to do growing up was hunt, fish, play football, and draw – all of those things. Oddly enough, that is still all I want to do.
WHM: How has hunting influenced your artwork?
RYAN: I am a much better artist because I hunt. I spend countless hours in the field pursuing the subjects I paint, mostly with a camera and brush, to be able to understand them and have the photographs and studies I need to make accurate and interesting paintings. Along with these photography trips, I also find it necessary to pursue game on a life-anddeath level to truly know the animals I love. My perception is much more acute with a weapon in hand than with a camera.
Harvesting and processing game gives me a much better understanding of anatomy from seeing the structure under the hide. Studying muscles and bones helps my paintings have more accuracy and authenticity. Being a hunter, I am also more likely to portray the animals hunters dream about. It also works in reverse, the observational skills of an artist also help me be a better hunter.
WHM: What makes your art unique?
RYAN: As a wildlife artist, it is difficult to come up with unique ideas. It has all been done before. Although my vision of what is interesting and paintable may not be too different than a lot of other wildlife artists, it is very important to me that my paintings are filtered through my experiences with the animals and landscapes I paint. I do not paint animals I haven’t witnessed in their natural habitat, so no polar bears or African animals until I get to see them on their turf – hopefully soon.
I am a firm believer that paintings should look like paintings. In order to achieve this, I use thick paint, painterly brushstrokes, and layers to achieve a looser style. Leaving out minute details allows the viewer to finish my works in their own mind and take part in the creative process, which ultimately makes the art much more enjoyable for years to come.
High Country Survivor 10x12
30x24 Charcoal
WHM: What is your favorite hunting memory?
RYAN: I have so many awesome hunting memories that it is hard to pick one in particular to be a favorite, so here are a few. I was lucky enough to draw a limited-entry early rifle elk tag in Utah a few years ago and took a great bull. After a few cow calls, he worked his way directly at us from across a sizeable meadow that was socked in with fog. We could hear him coming, but with the fog as thick as it was, we didn’t get a visual until he was about 30 yards out.
video. Another favorite memory is of missing the largest mule deer I have ever shot at, just to have my 14-year-old son take him for his first mule deer harvest. Also, watching my younger son take his first buck will be something I never forget. My favorite hunts all revolve around family and adventure.
ly after my father passed away unexpectedly in a farming accident. After applying for over 30 years, he finally drew a coveted Henry Mountain tag, and I was lucky enough to accompany him on a Bison hunt a year before he passed. It was the last hunt any of us would get to enjoy with him. Every time I paint a buffalo, it reminds me of my dad.
You can learn more about Ryan and his artwork by visiting RyanSkidmore.com
One lucky subscriber will receive “Aspen Idyl” by Ryan Skidmore. All you have to do is subscribe to Western Hunter to be entered into our next drawing. Visit westernhunter.net to subscribe, renew, or give a gift subscription to a friend.
Our 2024 May/June winner is Don Smoot. Subscribe today and you could be the next winner!
In the Thick of It 9x12
Time Tested 24x30 Charcoal
Aspen Idyl 16x20
FTHE WILD KITCHEN p Quick Venison Fajitas
By Lindsay Persico, Health & Fitness Editor
ajitas are a delicious meal and a great way to use a variety of cuts of venison. If you choose to use a tougher cut of meat, it helps to break that down and add flavor with the use of a mari nade. I will add an optional marinade at the bottom of this recipe, but the focus of this recipe is a quick and easy fajita that you can make for dinner on short notice. The trick to making delicious fajitas that don’t need a marinade to have great flavor is choosing a tender cut of venison and slicing it very thin. The flavors here are excellent and have just a slight bit of heat. You can elevate that heat by adding more crushed red peppers.
Ingredients
• 1 Pound Venison Roast or Steaks I used a round roast sliced in half to get thin, long strips.
• 3 Bell Peppers, Sliced Thin Red, yellow, and orange have a nice, sweet taste that pairs well with the spices.
• 1 Onion, Sliced Thin
• 1 Teaspoon Salt
• 1/4 Teaspoon Black Pepper
• 2 Tablespoons Chili Powder
• 1 Teaspoon Cumin
• 1 Teaspoon Smoked Paprika
• 1 Teaspoon Granulated Garlic
• 1/2 Teaspoon Coriander
• 1/2 Teaspoon Dried Oregano
• 1/2 Teaspoon Crushed Red Pepper
• 2 Tablespoons Olive Oil
• 8 Small Flour Tortillas
Carb smart tortillas have a wonderful side benefit of 15 grams of fiber per tortilla.
Optional Toppings
• Avocado or Guacamole
• Sour Cream
• Cilantro
• Pico De Gallo
• Lime
Instructions
Slice your onion and peppers into long strips. Heat olive oil in a pan over medium heat. Sauté the peppers and onions with half of the spices until they are soft and the onion is translucent. Meanwhile, slice the steak into thin strips and coat with the remaining spices. Once the peppers and onions
have finished cooking, remove them from the pan and set aside. Add the steak to the pan and sear it until just browned on all sides, stirring often. Add the peppers and mix well. Build your fajitas on the tortillas, adding the toppings to your taste.
Cut the peppers and onion into strips. You can cut them really thin or quite thick depending on your preference. It will take longer to cook the thicker the slice.
You can add as many or as few toppings as you like. There is so much flavor in this spice combo that I kept these simple and just added sour cream but they would be great with lime, avocado and pico as well.
THE WILD KITCHEN p
Optional Marinade
• 1/2 Cup Lime Juice
• 1/3 Cup Orange Juice
• 2 Tablespoons Worcestershire Sauce
• 3 Tablespoons Avocado Oil
• 2 Minced Garlic Cloves
Optional Marinade Instructions
Place marinade ingredients in a Zip-Loc bag and add sliced steak. Coat well and let sit overnight in the fridge. Take it out 30 minutes before cooking and remove meat from the marinade. Let the steak drain and coat with dry seasonings from the original recipe. Refer to the original recipe from this point on.
The combination of these spices adds wonderful flavors to these fajitas. I ground the red pepper flakes with my mortar and pestle to break them down a bit more.
Fry the vegetables in olive oil until tender and the onion is translucent.
Cutting the steak very thin helps to keep this dish tender. It also cooks very quickly.
Generously coat the meat in the spice mixture before adding to the pan to sear.
Set aside the cooked peppers and onions while you cook the steak in the pan.
Cook the steak just until it is browned on all sides over medium heat.
Add the vegetables back into the steak when it finishes cooking and mix well.
Using carb smart tortillas gives you an added benefit of 15 grams of fiber per tortilla.
DIALING IT BACK
CHRIS DENHAM PUBLISHER
COMPARISON IS THE THIEF OF JOY
Igraduated college with a degree in agriculture and went to work for a consulting company, testing soils for farmers and golf courses. My wife and I moved to Tucson, AZ when she was accepted to medical school, and I needed any job I could find to pay some bills. I took the first one I was offered, making $3.85 an hour at Jensen’s Custom Ammunition, a sporting goods store and a Mecca for hunters. It was supposed to be temporary, but when the owner offered me a managerial position, I jumped at the chance.
I was a kid in a candy store, working beside and talking to serious hunters all day, every day. This is where I was introduced to glassing with a tripod and it literally shaped my future. Agriculture was behind me until I started intense gardening years later.
About a year into my grand adventure, I found out that the other two managers I was working alongside were making substantially more money than me. Sure, I was the new guy, but I was stuck with working weekends and more hours than either of them. It didn’t seem fair.
I approached the owner in hopes he would level things up. He gave me a “look.” He wasn’t the yelling type, but there was serious volume in that look. After what felt like an hour, he agreed to give me a raise and praised my work performance. Then, he taught me a lifelong lesson.
He asked, “Before you knew how much they were making, you were totally happy with your pay, right?” I affirmed his question with a nod. He then
added, “Look, Chris. Your deal is your deal. If you go through life comparing yourself to others, you will never be satisfied.” Man, did that sink in. That was over 30 years ago, and I can remember every detail of that office, how he was sitting, where I was standing, and how humbled I was when I walked out. The monetary raise paled in comparison to the life lesson. Thank you, Bob Jensen.
I have been a vocal critic of social media for this reason. When we scroll through pictures of hunters with big bucks, impossibly happy families, shiny new trucks, or margaritas on a beach it can make our situation feel a little desperate... Face it, you are scrolling on your phone, so it is desperate. It is a research-proven fact that social media contributes to dissatisfaction. But blaming social media for the downfall of society is like blaming guns for crime, it leaves out personal responsibility. Comparison is the thief of joy.
By the way, that saying,“Comparison is the thief of joy...” I got that from Instagram. I was watching a video of a guy in a gym bench-pressing heavy dumbbells. His girlfriend commented on how strong he was, but he responded by saying there were lots of guys in the gym stronger than him. To that, she replied, “Comparison is the thief of joy.” I doubt she coined this phrase, but she will forever get credit from me. Thank you, IG girl.
Along these same lines, I am sensing a trend in the hunting community that I find disturbing. Ironically, I know about this from social media. If a hunter posts a picture of a monster ram that wasn’t
a draw hunt, it won’t be long before someone minimizes his accomplishment because he spent a significant amount of money for that opportunity. God forbid a hunter spends $500,000 to buy an auction tag and kills a 250" mule deer buck. How is that fair to the common man? Well, it is not fair... It is life, there will always be someone who has more money than you.
I had a mailman a few years back who had four young boys, all of whom wanted to hunt. He was a post office contractor, not an employee with union wages and benefits. His wife was a homemaker, so they lived on a very modest income. He would hand-deliver my mail some days just to talk about hunting. When application season came around, we talked about his strategy. They couldn’t afford to buy a hunting license and tags for each of his boys; that would have been about $400 out of the family budget. He never complained. In fact, he was incredibly excited to forgo his own opportunity at a tag when each boy turned 10 years old (the legal age in AZ).
Was that fair? Was that consistent with the North American Model of Wildlife Conservation? I never offered to pay for his boy’s tags or licenses; my gut told me that would be insulting, he didn’t want charity. He and his wife had decided to live a certain way, and that was his deal. To this day, he still gets Western Hunter Magazine at no charge. I hope one day one of his boys blesses us with a story of those days hunting with his dad and brothers. Thank you, Mailman. p