


www.westernhunter.net 4 WESTERN HUNTER Gravitas Big Country, Big Bucks 28 A Hunt for Dad’s Journal The Real Prize 22 ADVENTURE WHM Our readers share their best stories VOLUME 23 • ISSUE 1 • JANUARY/FEBRUARY 2024 WHM GEAR • TACTICS • INFORMATION Insights for the Western Hunter GEAR TACTICS INFORMATION ADVENTURE Western Hunter Magazine • 16851 E. Parkview Ave., Fountain Hills, AZ 85268 • 480-993-6972 • Copyright ©2024 Western Optics Hunter • All rights reserved. ~ Chris Denham Teton Leather Company Rifle Slings ~ Pedram Parvin More info for your hunting arsenal 46 Gear & Product Highlights: ~ WHM Staff 92 Stabilize Your Core ~ Lindsay Persico 96 The Wild Kitchen ~ Lindsay Persico 98 Dialing It Back ~ Mike Duplan
Hunter Featured Artist Series 12 58 66 Skinning and Fleshing A-Z – Part 1 ~ Nick Gehring 76 Building A Strong Pack ~ Kyle Greene 82 52 72 10 Bulletproof Knees ~ Matt Ward 86
Western


So, what do you think about the cover of this issue? Our production team discussed this idea for many months and decided now was the right time to launch the Western Hunter Featured Artist Series. I live in awe of folks with artistic talent, if there is someone with zero artistic ability, that would be me. Art appreciation seems to be declining with time, not long-ago hunting expos would feature a dozen artists or more, these days there is only a few displaying their works. In each issue this year we will feature a different artist working in different mediums. It is our hope that shining some light on their amazing talent will spark a new appreciation for human creative skills.
At the end of each hunting season, which for me coincides with the new year, I find myself doing some self-evaluation of the year. In 2022 I experienced one of my least successful seasons in that I did not punch a single tag! I didn’t even shoot a bullet or an arrow the entire season. In 2023 it was
the complete opposite, besides a two-day archery javelina hunt, I was successful on every hunt.
It has been self-satisfying to give away so much game meat to friends and family, but besides that, my comparative memories of the two years is not dramatically different. Except for one thing: last year I made a commitment to shoot better, with both bow and rifle. I committed extra time to my mental approach to archery and shot many thousands of rounds of .22 ammo. The repetition created muscle memory and confidence, which led to a perfect record. We can all improve our shooting skills, and we owe it to the wildlife we cherish to end the hunt as quickly and humanely as possible.
In this spirit of reflection, Mike Duplan’s Dialing it Back article on the last page, is particularly thought provoking. We always want this last page of each issue to cause some level of introspection and Mike delivered that in a big way. Our goal is always to deliver a well-rounded issue regarding
the topics covered, but with depth and detail. This issue may be the best example yet! The editorial team nailed it; each article is unique and deep.
Thank you again for your time, attention, and subscription. It goes without saying that Western Hunter could not survive without you! We do want to hear from you. If there is something you particularly appreciate or dislike about our content, please share that with me.
Happy New Year and I hope to meet as many of you as possible this coming show season.
Chris Denham, Publisher chris@westernhunter.net
www.westernhunter.net 6 WESTERN HUNTER
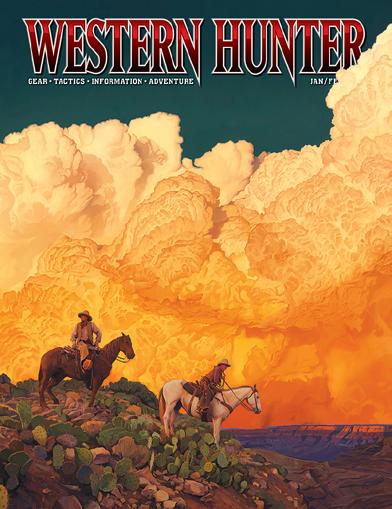
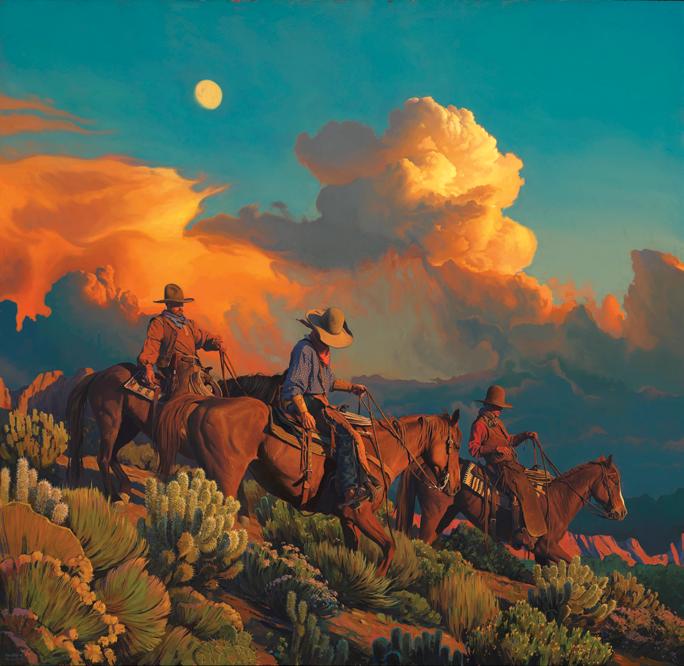
On the Cover: Sonoran Magnetism by Mark Maggiori
PUBLISHERS
Floyd Green, Chris Denham
ASSOCIATE EDITOR/ART DIRECTOR
Randy Stalcup randy@westernhunter.net
ASSOCIATE EDITOR
Colton Bagnoli colton@westernhunter.net
MARKETING/ADVERTISING
Chris Denham chris@westernhunter.net
Dave Bond 602-695-8282 dave@westernhunter.net
GRAPHIC DESIGN
Randy Stalcup
EDITORIAL STAFF
Colton Bagnoli – Shooting/Gear/Hunting Editor
Nate Simmons – Backcountry Editor
Remi Warren – Hunting Editor
Mike Duplan – Hunting Editor
George Bettas – Hunting/Conservation Editor
Fred Eichler – Hunting Editor
James Yates – Archery/Hunting Editor
Kyle Greene – Hunting Editor
Nick Gehring – Taxidermy Editor
Lindsay Persico – Health & Fitness Editor
Matt Ward – Health & Fitness Editor
Dave Bond – Field Editor
Ben Britton – Field Editor
Kevin Guillen – Field Editor
Douglas Morales – Field Editor
Pedram Parvin – Field Editor
Levi Sopeland – Field Editor
CONTRIBUTING WRITERS
Jason Reid, Bob Rimsza, Kelley Crimmings, Joe Orr, Casey Draper
WESTERN HUNTER MAGAZINE
16851 E. Parkview Ave., Fountain Hills, AZ 85268 480-993-6972 info@westernhunter.net www.westernhunter.net
Copyright
Printed in the USA

info@westernhunter.net 7 WESTERN HUNTER
©2024 Western Optics Hunter. All rights reserved.
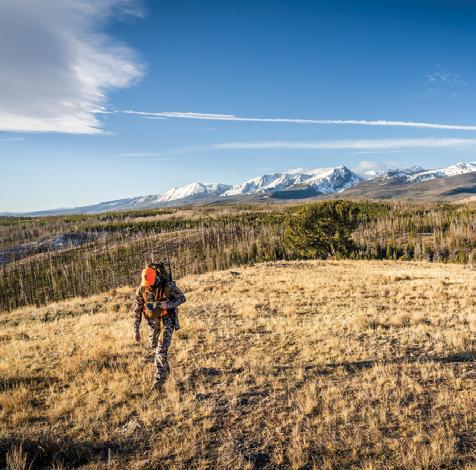
THE BIG
WHM www.westernhunter.net 8 WESTERN HUNTER
PICTURE
Victor Trujillo

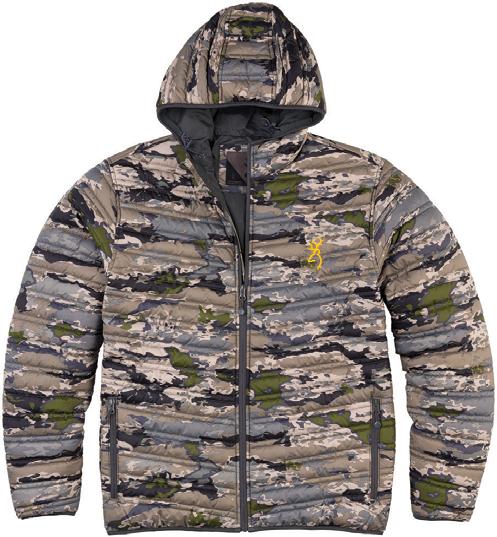
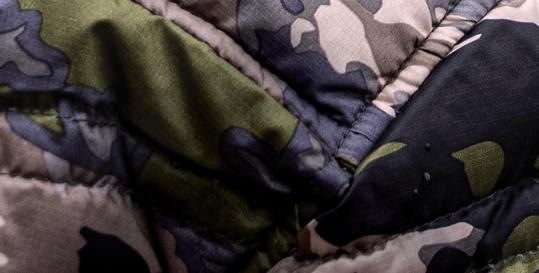

PACKABLE PUFFER JACKET browning.com → in OVIX Concealment

Introducing the Western Hunter Featured Artist Series!
Everyone here at has a high ad miration for Western art, and we have decided to share this enthusiasm with you. We are excited to announce that over the course of this year each
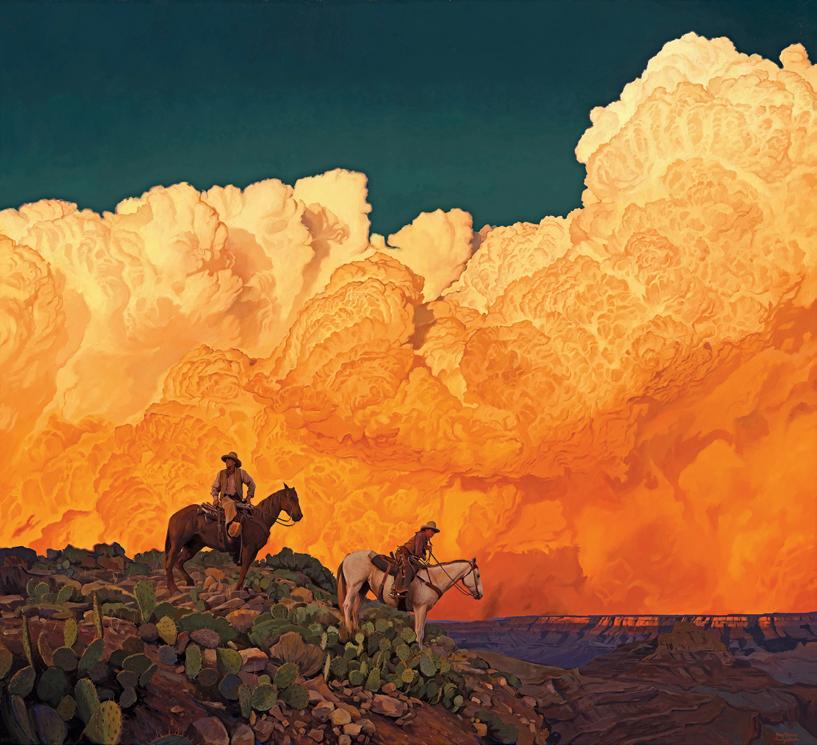

Our first featured artist in the series, whose painting Sonoran Magnetism is on the cover, is Mark Maggiori. Mark’s exclusive interview with Western Hunter can be found on page 12.
We hope you enjoy the new Featured Artist Series. Starting with the March/April issue, every current Western Hunter Magazine subscriber will have a chance to win a piece of art from that issue’s corresponding featured artist! Trust us, you won’t want to miss these!
Scan the QR code on the right to subscribe, renew, or give a gift subscription to a friend or family member. p

www.westernhunter.net 10 WESTERN HUNTER
Pedram Parvin FIELD EDITOR
Sonoran Magnetism 53x48
 Parvin FIELD EDITOR
Mark Maggiori
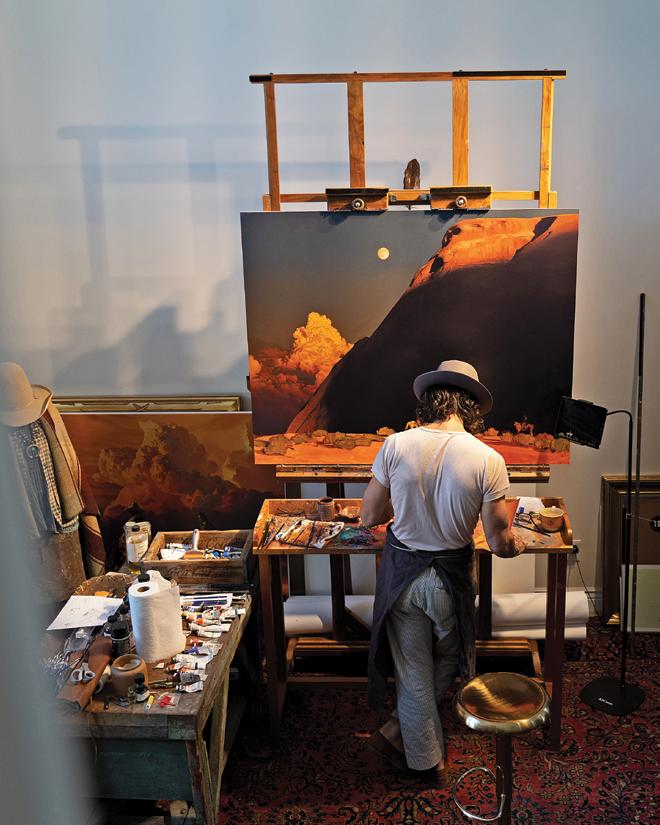
Waims to highlight some of the most creative, talent ed artists whose subject matter relates to the West. The Western lifestyle and the tradition of hunting have deep ties to visual art, as many of the most beautiful things in the world are found right here in our backyard. Our first feature is one of the greatest Western artists of our time, probably of all time, Mark Maggiori.
Truth be told, I could write an entire book about Mark’s experience, technique, and career, and delve deep into the story of each and every one of his iconic paintings. If you’re drawn to West ern art like I am, you’re more than likely very fa
and gave us access to get behind the scenes of his creative process, see a glimpse of such a brilliant mind, and see some artwork that nobody else has even seen yet. From the moment we walked in, Mark was working on his most recent painting, Dibé Yázhi, and you could honestly feel the creative energy in his studio. It’s difficult to put into words how this moment felt, but it was one we will not soon forget. Being able to see an artist of his caliber paint an original in person was indescribable, and if you’ve ever been in the presence of one of his originals, then you know exactly what I mean.
to gain some insight into how and why his paintings are so powerful. There’s something about his landscape that makes you feel so small in comparison to the West, and as hunters, we can all relate to that feeling.
www.westernhunter.net 12 WESTERN HUNTER
Pedram
Iconic Clouds
We’ve all seen images of Mark’s electric clouds that are bursting with life. In fact, they’re the reason you’re reading this article. This issue’s cover photo of Mark’s Sonoran Magnetism is just that, a magnet to those of us who have seen our fair share of sunrises and sunsets on the side of the mountain while hunting.
When I asked him what is so fascinating about clouds, he responded, “Clouds are the most magical element I’ve ever seen, from thunderstorms to the way they reflect and bend light, there’s an essence of clouds that is like a magic trick – especially at the end of the day when they get hit with yellows and pinks. Once the sun goes down, it becomes dark and the clouds are mysteriously gone. A cloud doesn’t remain. One moment they’re there, and the next, poof they’re gone!” Mark’s trademark clouds can be identified at first glance, and there is nothing else like them. The complexity, attention to detail, and color palettes are captivating, to say the least.

Creative Process
Mark truly has generational talent, and there is no denying that. However, he shared that it all starts with real people, real experiences, real settings, and real stories. The power of authenticity and human experience is unmatched, and the emotions and inspiration those experiences provide him are the driving force behind his work. Every single one of his paintings is from an actual experience with actual people.
He may take thousands of photos, and he may end up creating 1 to 2 paintings from those. In fact, one of my favorite quotes from Mark during our interview in regards to how long these paintings take him was, “Coming up with the idea is what’s important, the time you spend on the painting doesn’t matter. For me, it’s not good when it’s finished, it’s finished when it’s good.”
info@westernhunter.net 13 WESTERN HUNTER
Tuah Tah 80x54
Living with the Mountains 38x48
It’s an unbelievable amount of work, but the end result is undeniably worth it. When I asked Mark about what makes his paintings feel so real, he responded, “I’m actually out there with real cowboys, real Native Americans, in real places. I think what we as humans have left is the experience and the feeling that we have when we’re out there. When you hunt, nobody can replace that feeling, the thrill that you have being there. If you play a video game about hunting, it’s different than when you’re actually hunting. So, it’s the same as painting; it’s the exact same thing. You need to be there in order to feel it and then paint it, simple as that.” Mark’s footprint on Western art is so impactful, and his creative process is an integral part of the final product and story.
Obtaining a Mark Maggiori Piece
It’s no secret that his original paintings sell for upwards of $500,000, and for good reason. He’s one of the greatest living Western artists, and owning an original of his would be a dream come true. However, we know that that’s just not attainable for the majority of us. Luckily, you can purchase his prints in limited edition and timed edition drops twice a year. The quality of the prints is by far the best I’ve ever seen, and I can’t recommend them enough. I own several, and I have no plan to stop collecting these incredible prints anytime soon. I must warn you – if you start, you likely won’t ever stop (and that’s a good thing).
We want to extend a huge thank you to Mark and his team for making time in an incredibly busy schedule to meet with a group of sweaty, nervous hunters.
You can find more info on Mark Maggiori’s upcoming drops, sign up for his newsletter, and see much more of his work by scanning the QR code below or visiting MarkMaggiori.com. p

www.westernhunter.net 14 WESTERN HUNTER
In the Middle Runs a River 32x36
Superstition, The Land Of Thorns 60x58

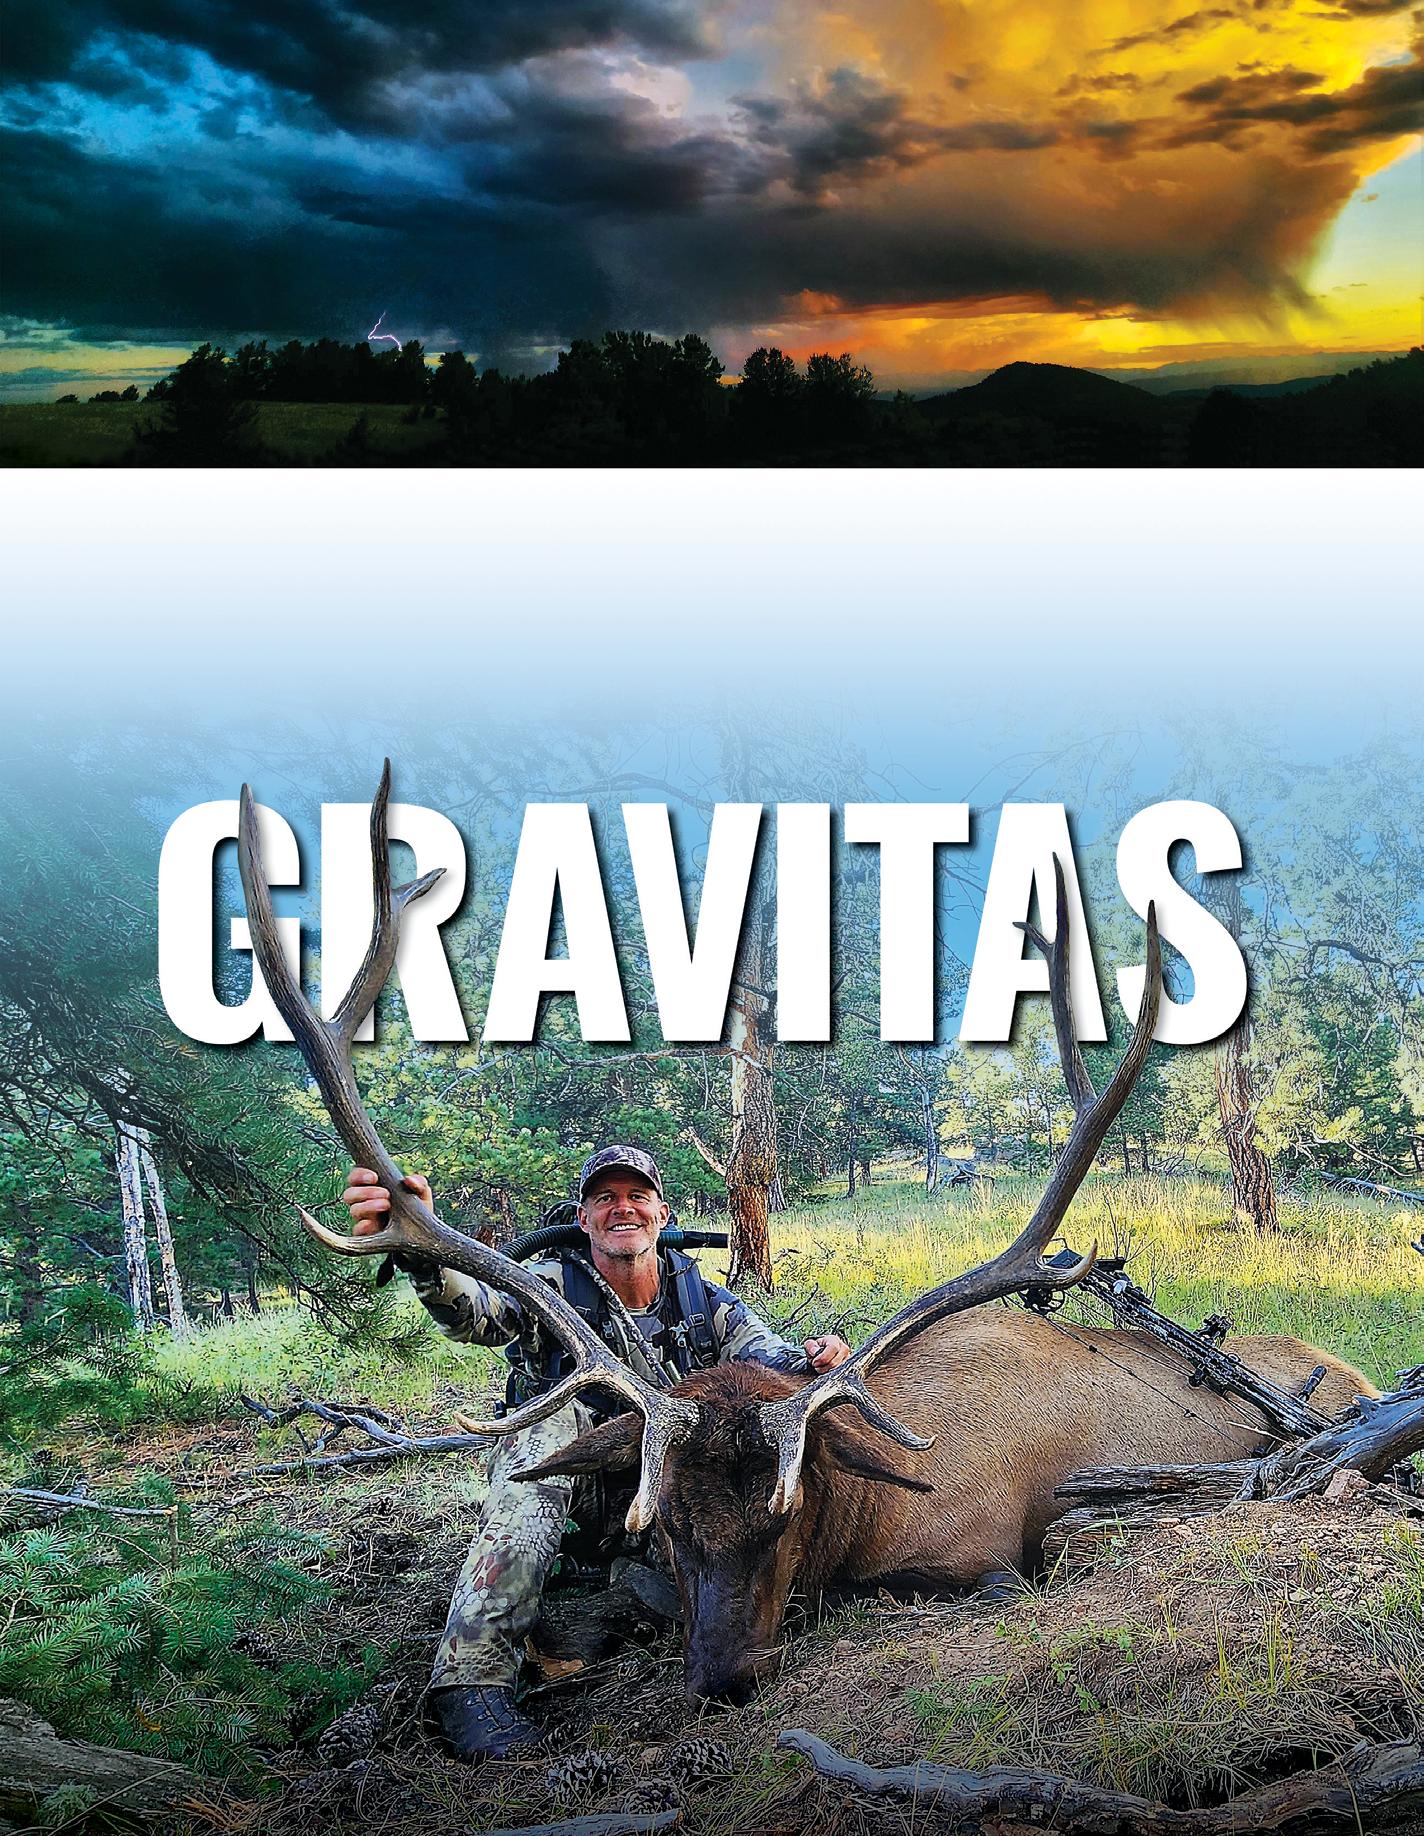
/gravitas/: Seriousness and dignity. Carrying weight, importance, sense of responsibility, and commitment to the task.
 Jason Reid Colorado, 2023
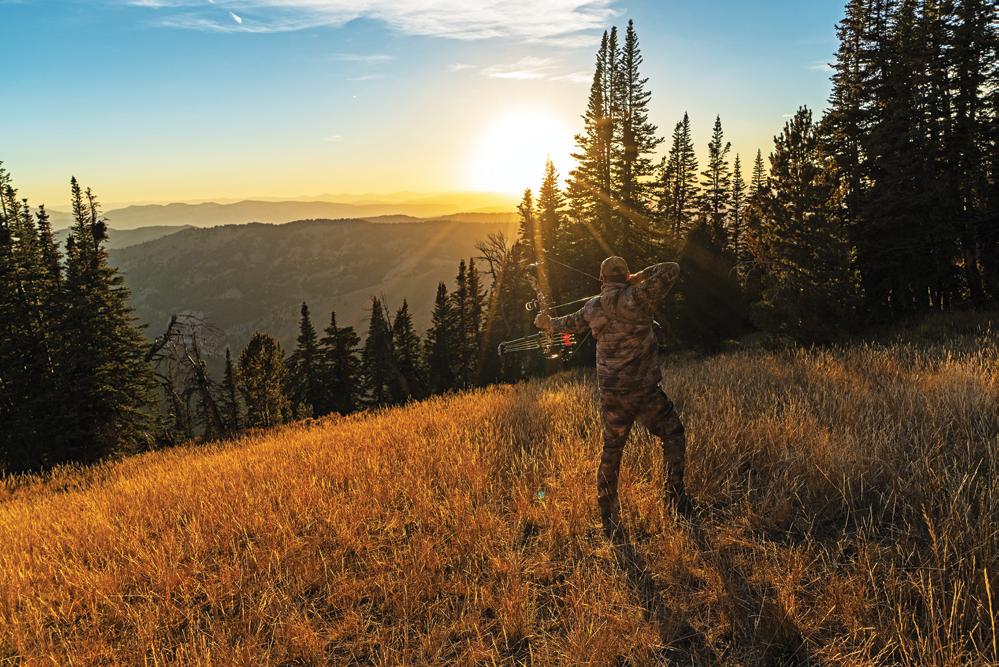
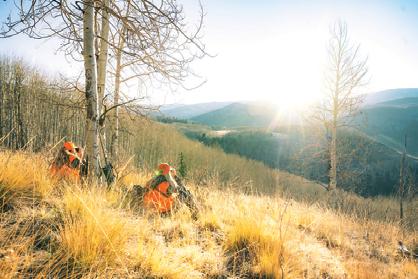
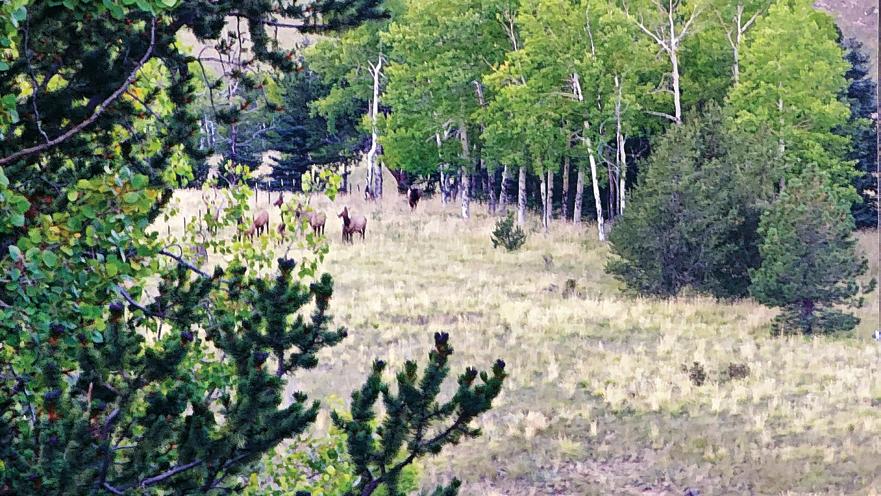
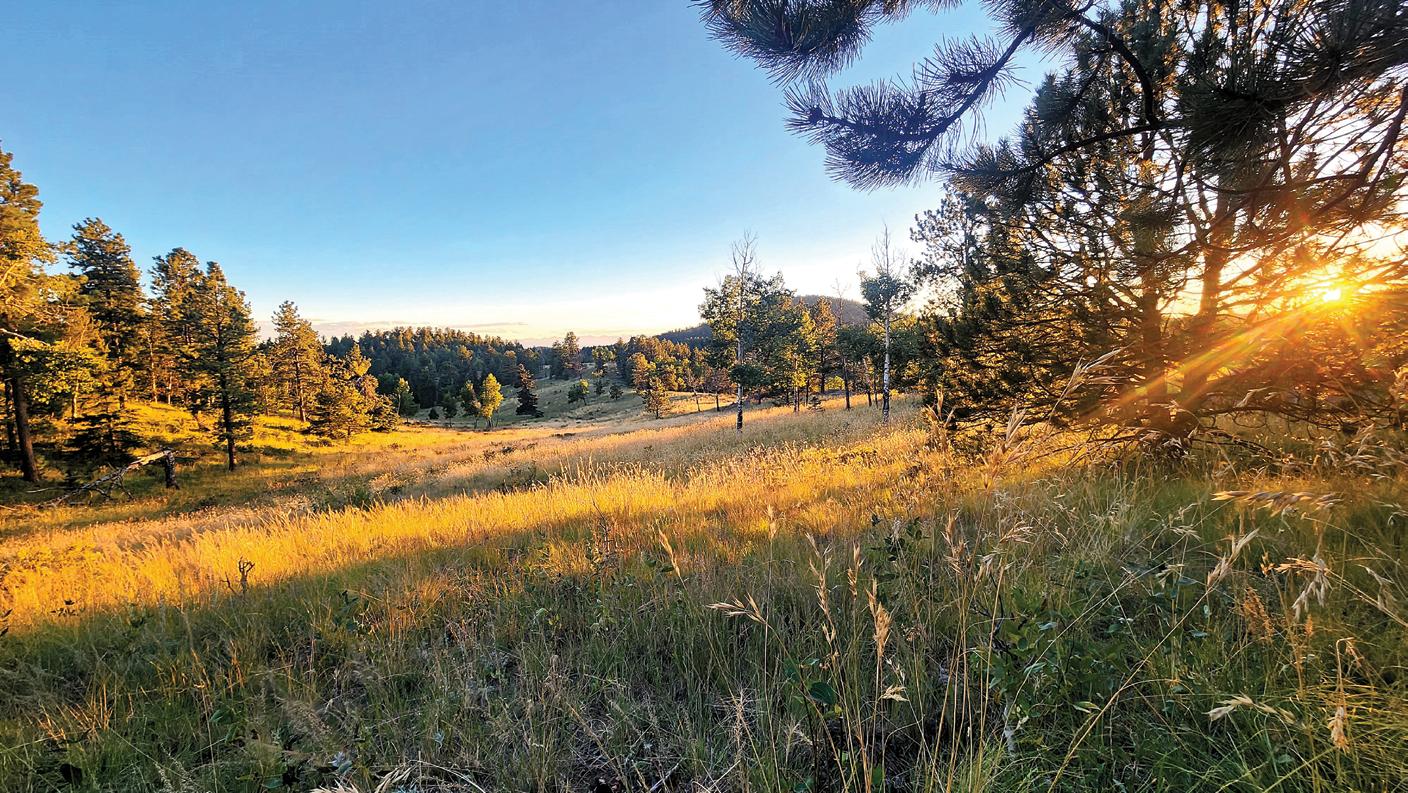
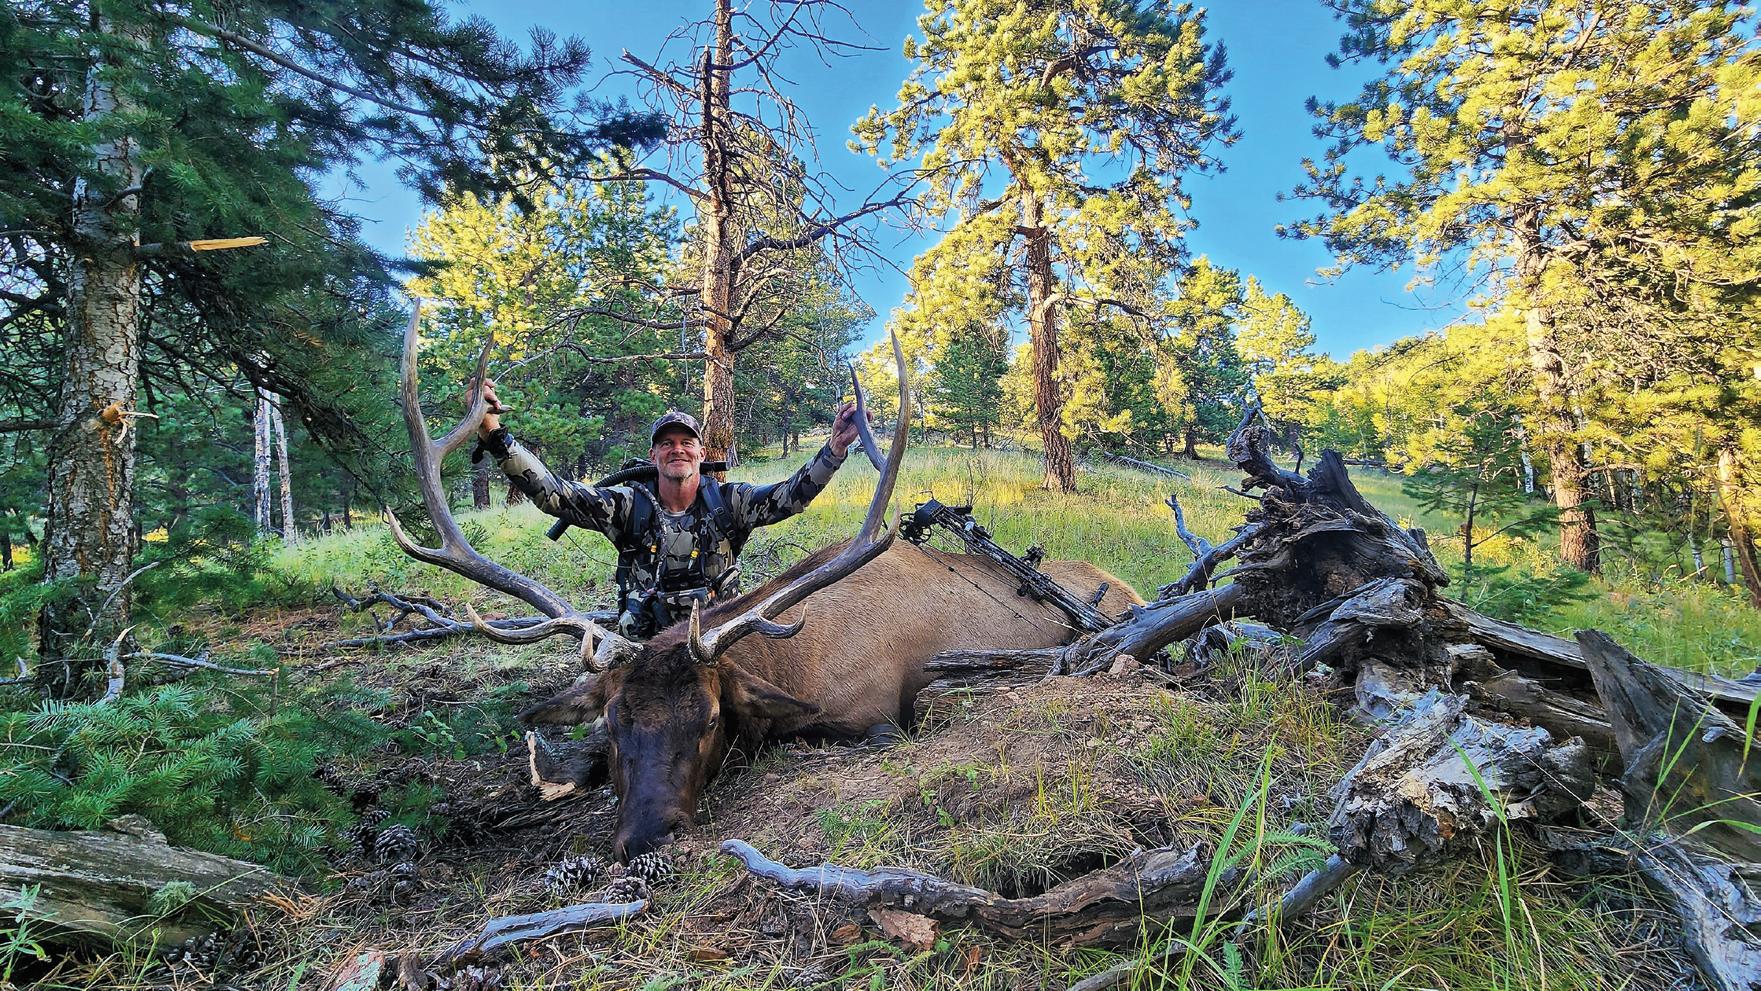
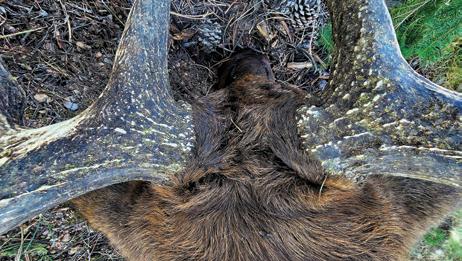
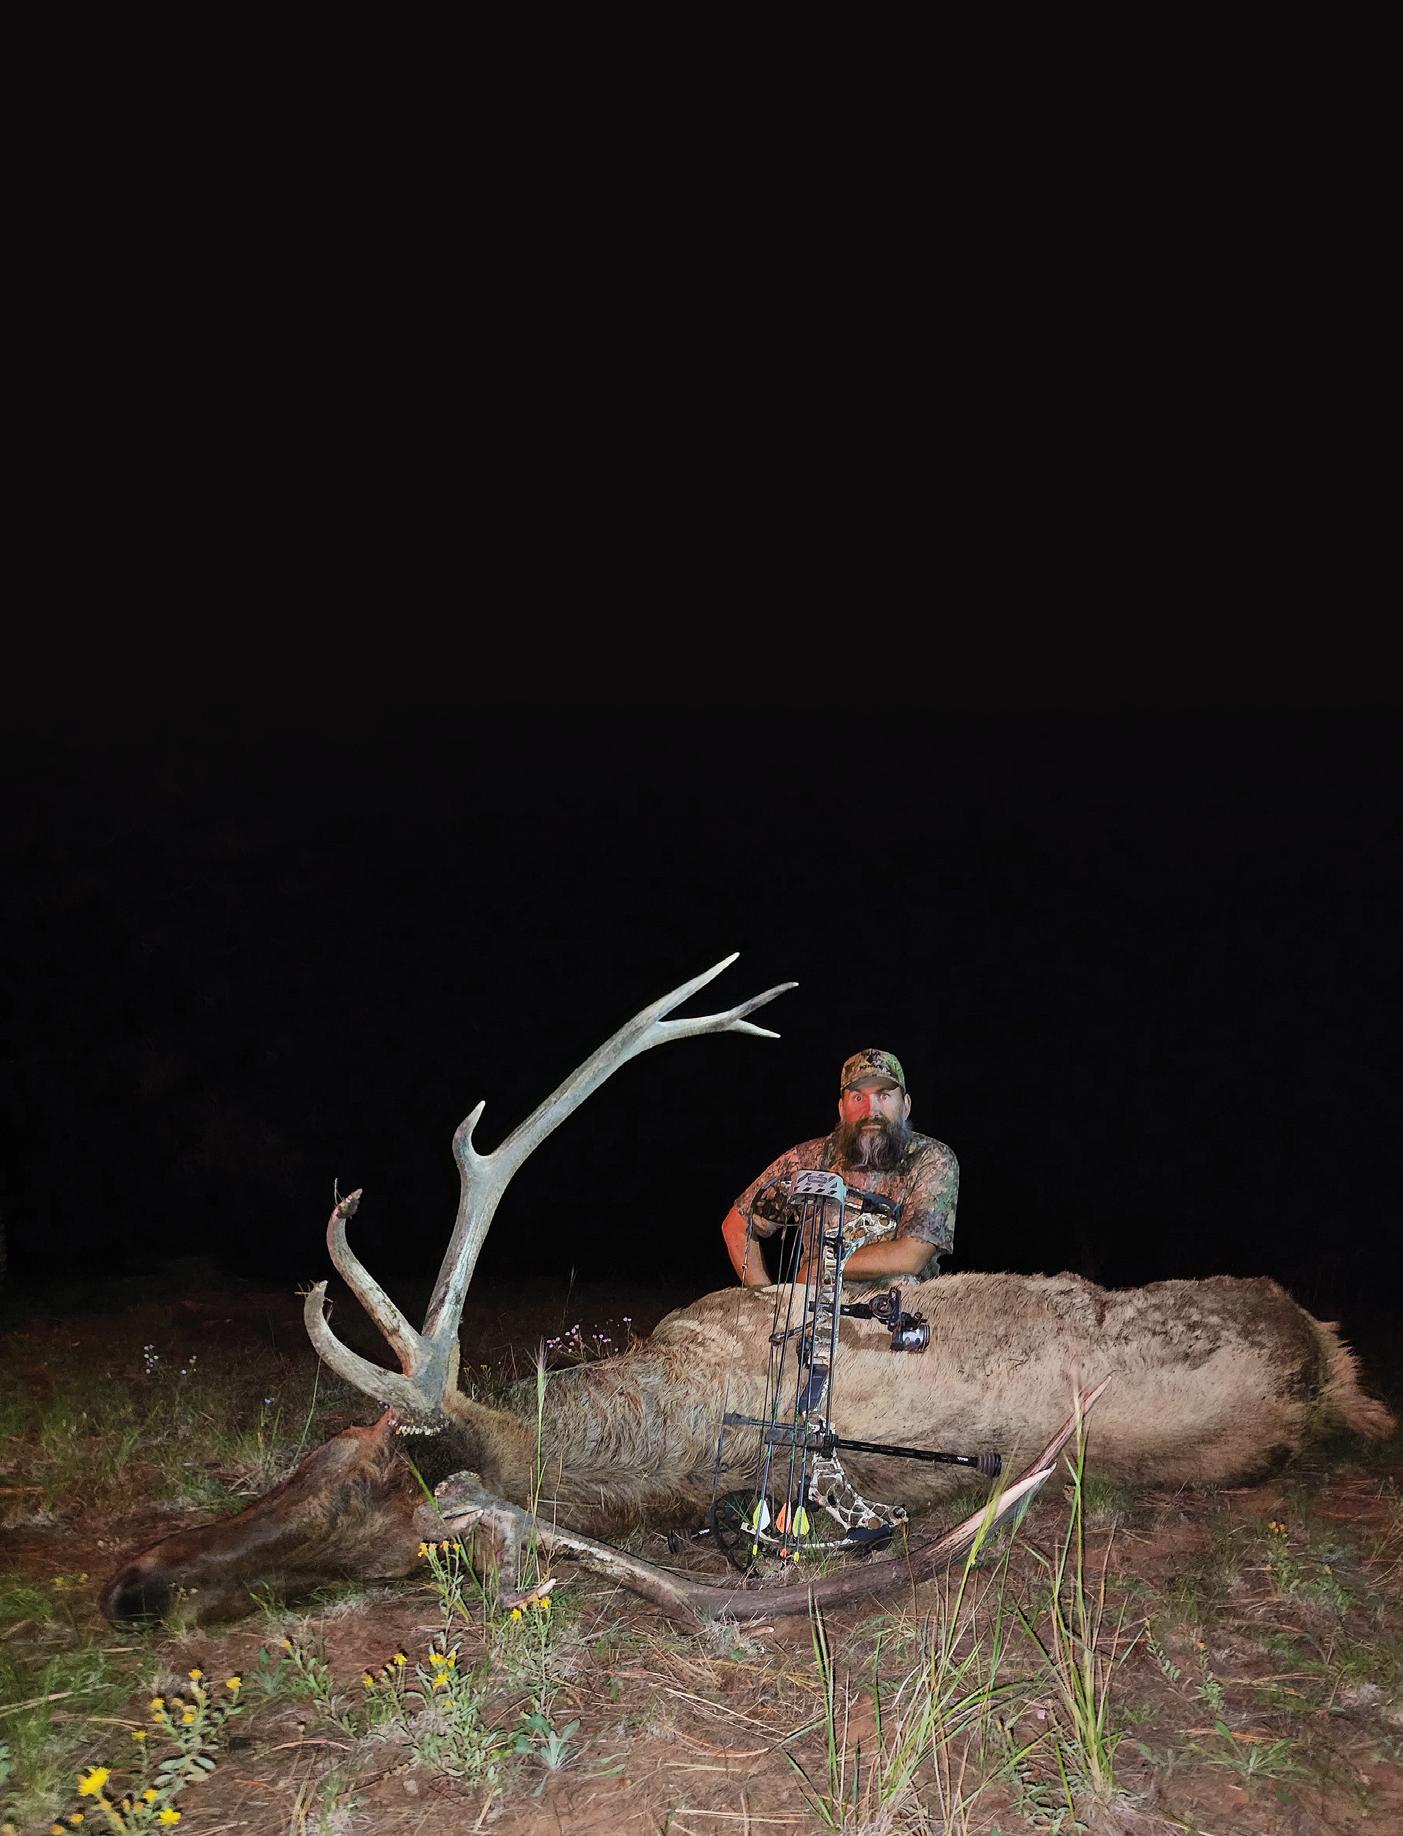
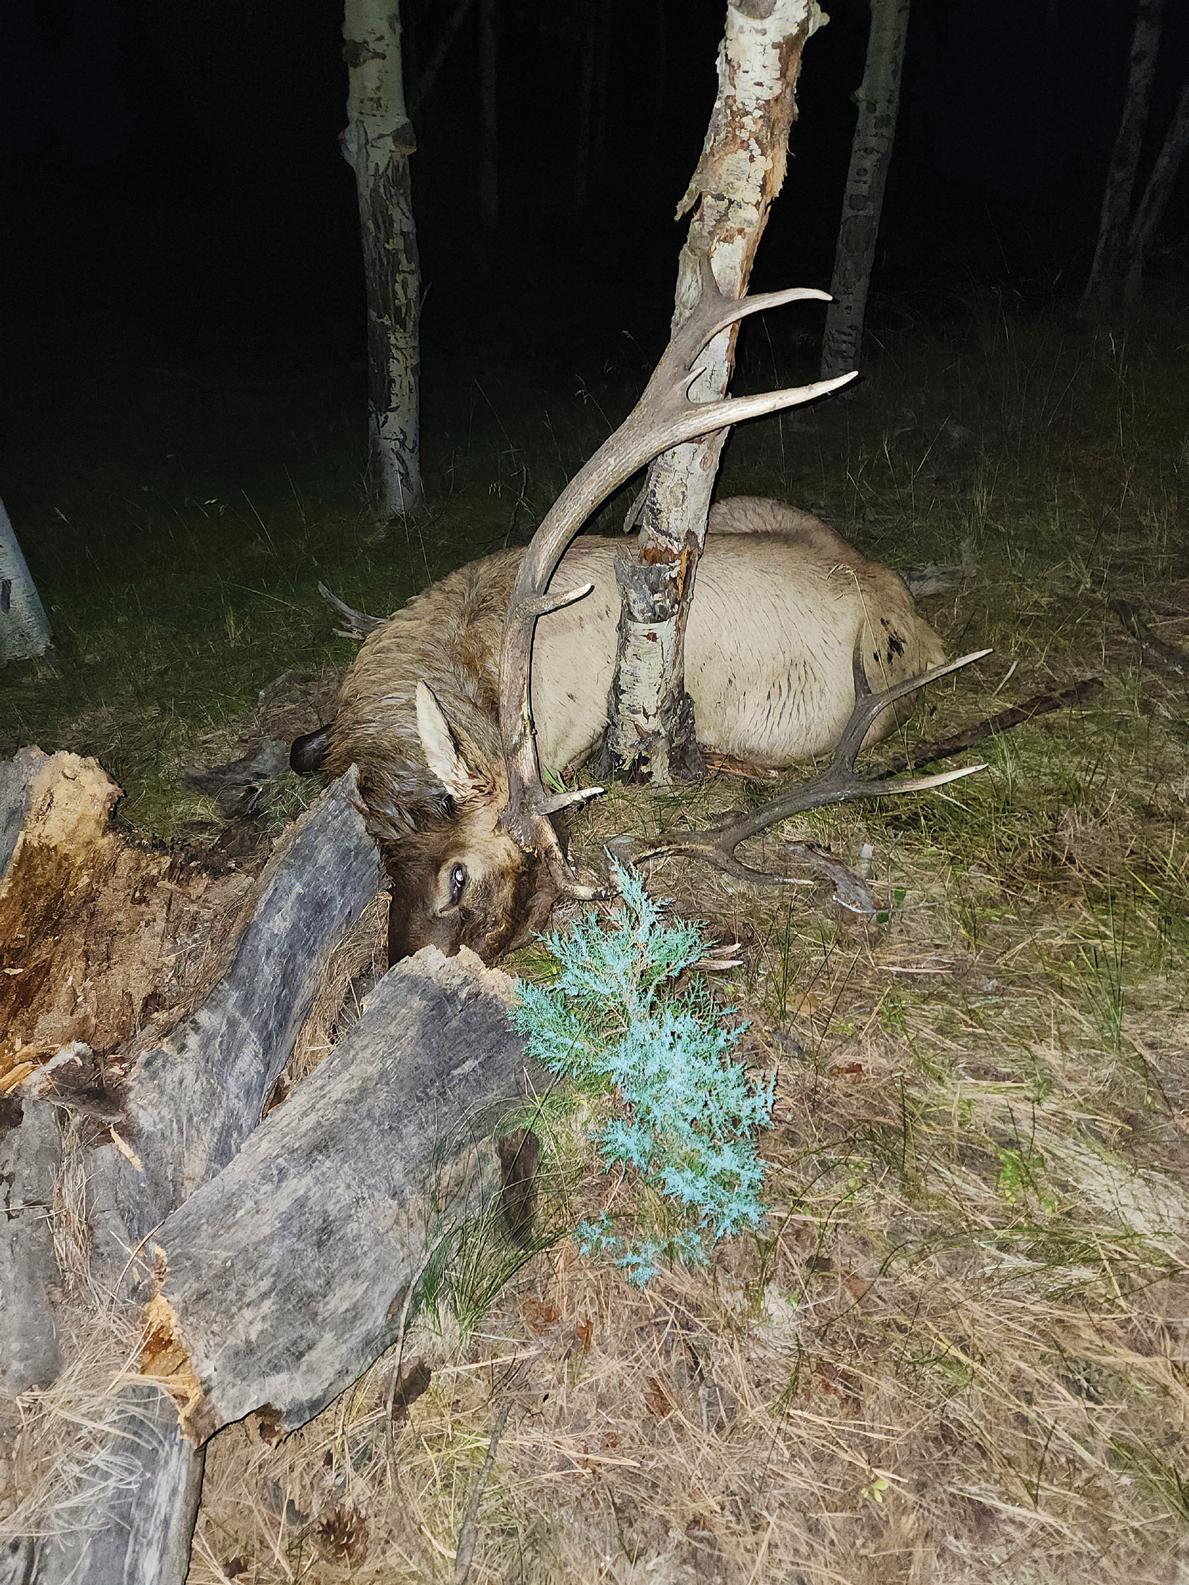
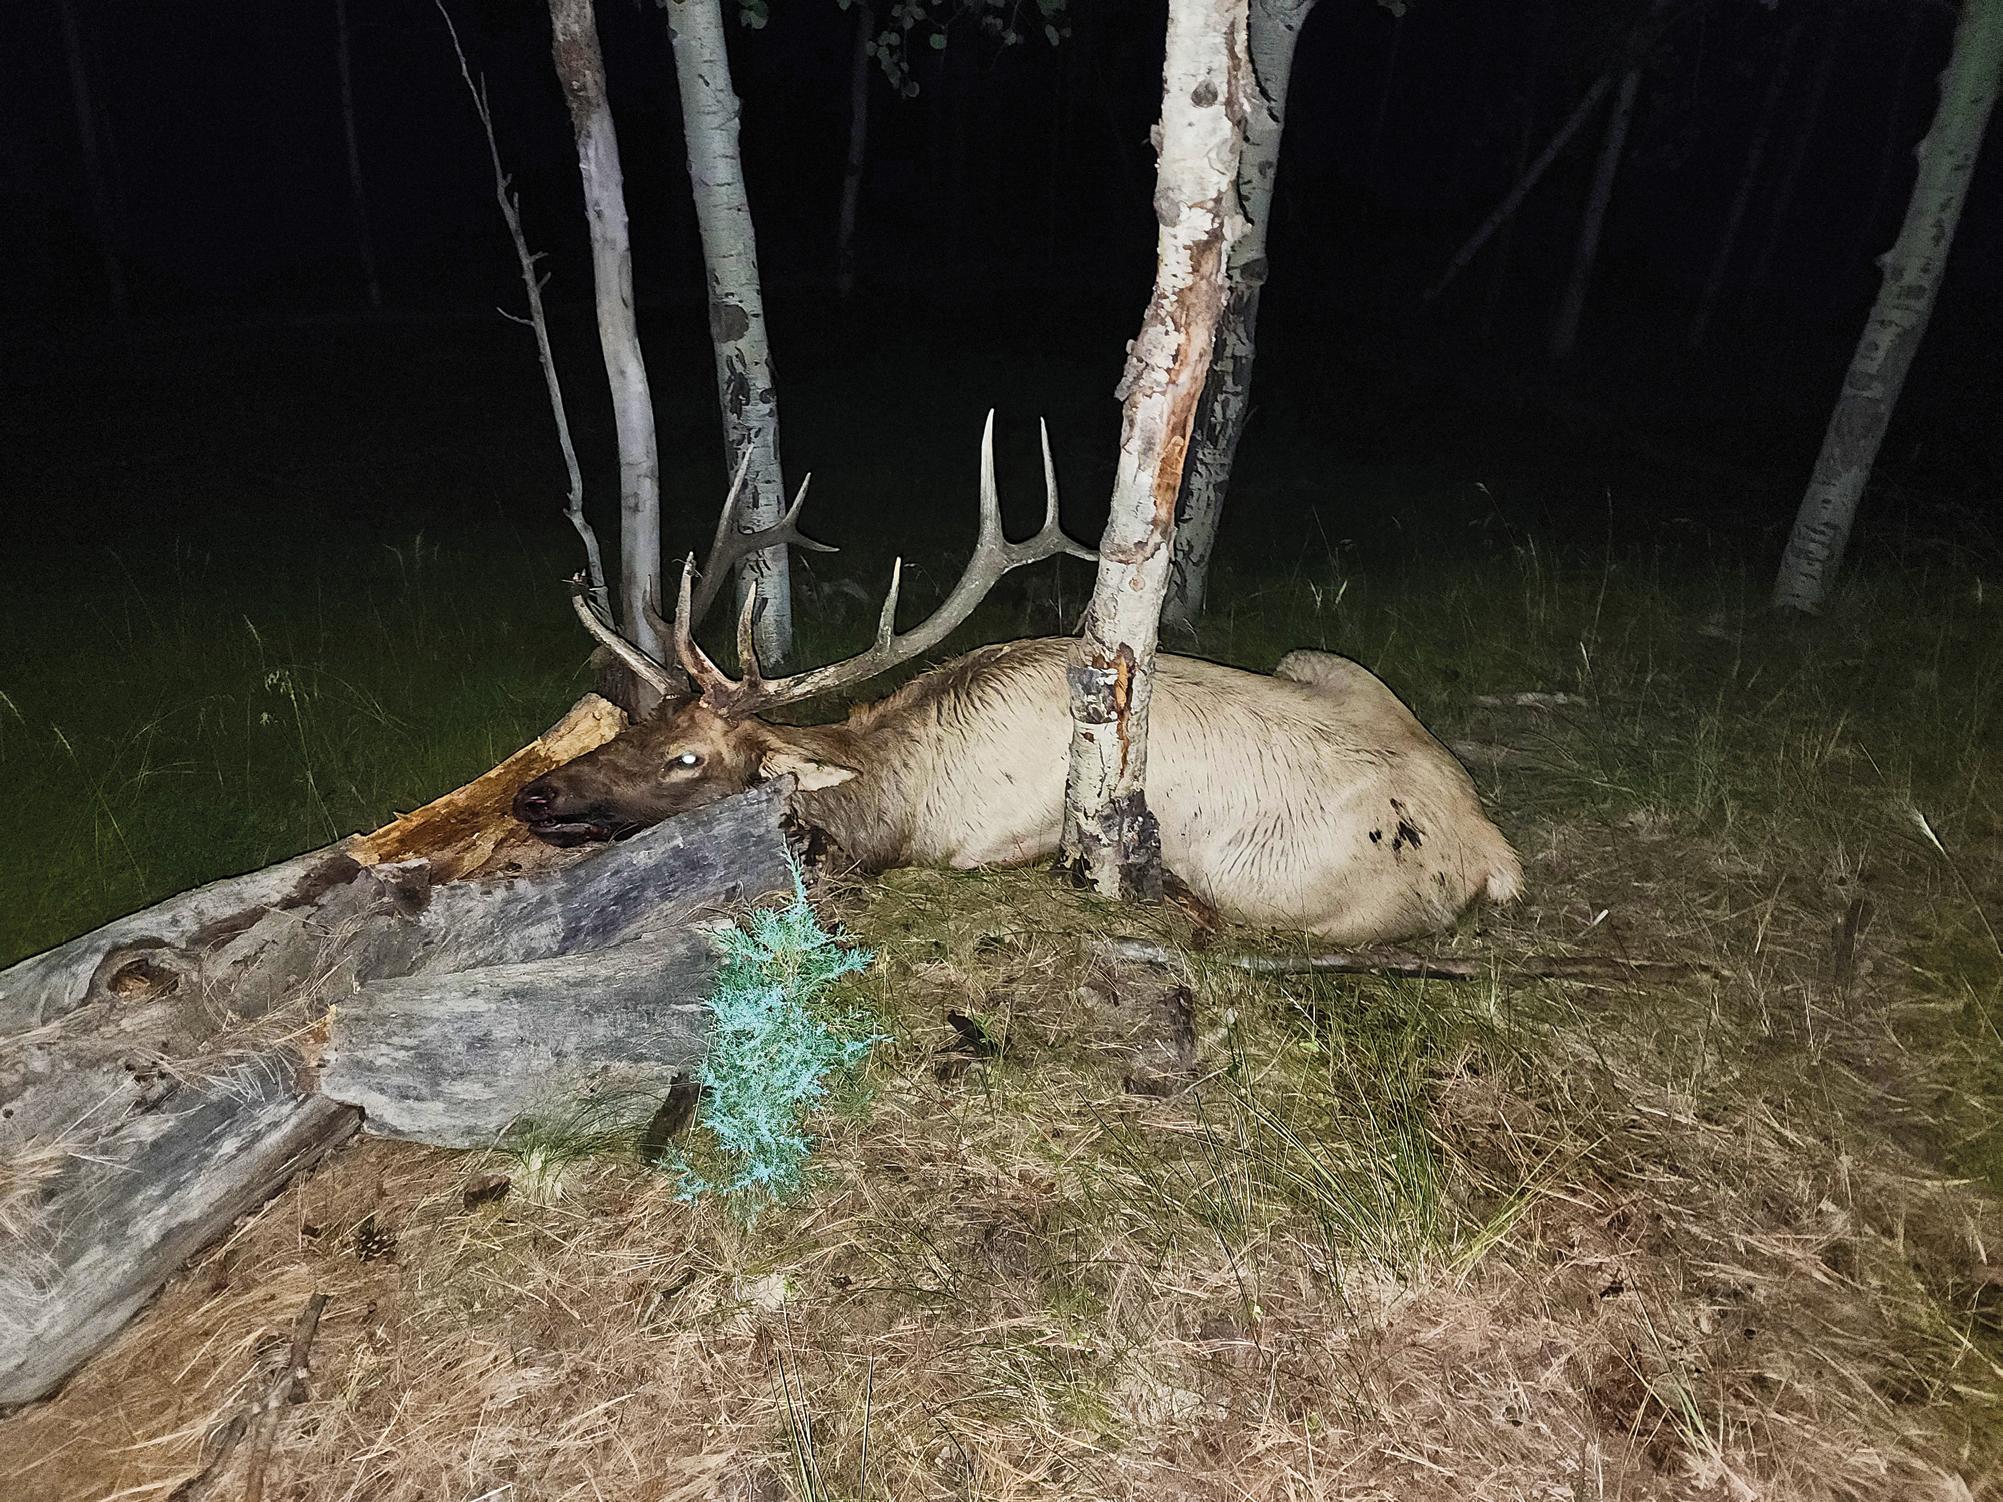
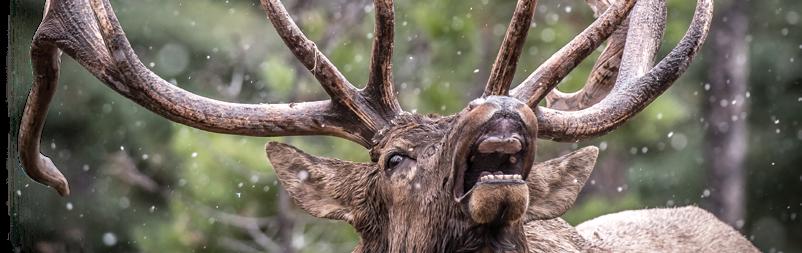
The weather report for the area called for a zero percent chance of rain for the next several days; an easy prediction, given the hot September weather across most of Colorado. But tell that to the brief, fast-moving rogue storm cell that was throwing rain and lightning just over the ridge. That’s what I love about the mountains and archery elk hunting. Nature has its own rules. It doesn’t care about our rules, our opinions, our predictions. While predictions can and do come true, it’s more common that they don’t. So, targeting one specific bull elk I named Gravitas was like catching a lightning bolt photo from a storm cell that wasn’t predicted to be there. It would be an exercise in patience, stamina, and luck.
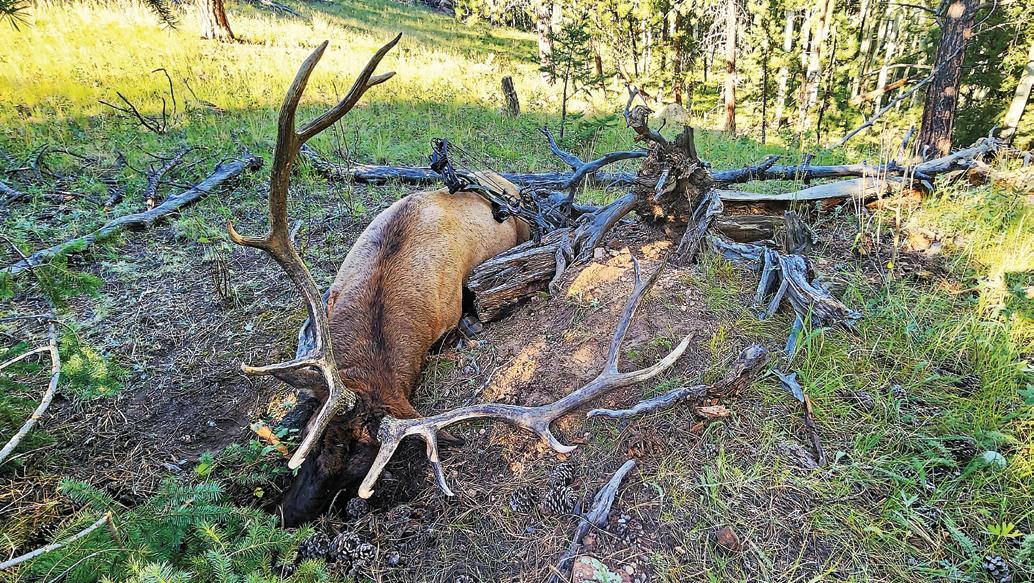
I took over one hundred failed photos of this rogue storm, trying to catch a single lightning bolt. I did it by engaging in life and creating opportunities where few others attempt to look. What I didn’t know yet is that my elk hunting season would require far more patience, stamina, and luck than the elusive lightning bolt catch. And, like the lightning bolt that demands respect, seriousness, and gravitas, so too do the elk and the prospect of taking the life of one. I ultimately ended the season with a magnificent herd bull, but more importantly, I came down off the mountain with a fortified appreciation of the gravitas in life.
WHM
www.westernhunter.net 16 WESTERN HUNTER
hides emerged as a few elk worked their way into the open. A huge herd bull materialized, tilting his head side to side to avoid his antlers contacting the trees. I quickly took a few shaky long-distance photos of the super wide bull with long white G-4 tines. My heart punched my sternum as a blanket of warm adrenaline filled my veins.
The herd bull radiated gravitas from his entire being – an older war horse of a bull that had survived much and now reaps the benefits of overcoming life’s challenges. He had undoubtedly thwarted numerous hunters’ and lions’ attempts over the years to take him down and escaped the brutality that mother nature can serve up – like winter starvation or freezing to death. He carried himself with gravity, confidence, and enormity. He exuded dignity and commitment to task as this year’s herd bull and had literally fought, at risk of serious injury and or death, other bulls for the right to breed the
He looked at the arrow to his right and then looked back left in my direction.
Before I could nock another arrow, he disap peared into the thick aspen grove, running his herd hard. I was happy for the clean miss but heartsick for the missed opportunity at such a rare herd bull, especially for this area. Although I knew I may never see him or his herd again, I couldn’t help but wish that lightning would strike twice for me on such an experienced and magnificent herd bull.
Thrilling Moments
I had a good idea where the herd might be go ing to bed down for the day. Utilizing the remaining adrenaline in my veins from the encounter, I quick ly climbed back up to the ridge top and began to run south, attempting to beat them there. My des tination was a particularly deep, steep, and darktimbered north-facing ridge with a hidden, small, grassy wallow tucked in the otherwise thick pine forest. I set up about fifty yards uphill of the secluded wallow and attempted to slow my rapid heartbeat and loud breathing. No sooner than I confirmed that the morning thermals were moving upwards in my favor, pops and cracks from the dry forest floor alerted me of approaching elk. As an addict of bowhunting adrenaline, I embraced the next warm surge flooding
Surprisingly, five young bulls made their way through the pines on a trajectory towards me. A young 4x4 bull traversed just fifteen yards past me and bedded down twenty yards away. Three other young bulls slowly weaved through the timber. One took a higher route that would soon lead him to my scent. The largest 5x5 bull took a lower route to check the wallow. The bull above me caught my scent, spun, and bolted back in the direction from whence he came, taking all the bulls with him. The encounter was over, but I smiled at the experience of having an elk bed down next to me.

Desperately trying to steady my trembling sight pins, I sent the arrow. The bull launched forward into the deep timber, sending all the elk ahead of him running with a fast-paced symphony of broken branches and hoof beats.”
info@westernhunter.net 17 WESTERN HUNTER
transitioned into a small, grassy aspen grove.
Cow elk fed quietly in the grass around the aspens. The herd fed from my right to left, anywhere from thirty-five to seventy yards away. Everything was quiet except for the sound of grass being pulled from the ground as they fed. When their heads were down or behind trees, I would take ultra-slow, deliber ate steps, inching my way forward toward a shooting lane. As most of the cows slowly moved north out of the aspen grove and back into deep timber, I took my final few steps and anxiously awaited the bull’s arrival.
It felt very much like waiting for another lightning strike, not knowing if it would come or where from. To the right, a flash of tan and antlers moved qui etly through dense timber. The bull had no idea I was there, and the only ques tion was how far away he would be when he moved into the aspens. I dropped to my knees, pulled the rangefinder, and with a trembling right hand, struggled

MODULAR BINO HARNESS
A low-profile, quiet, modular harness system designed to adapt to any hunt, mission or adventure. The Recon is streamlined, adaptable, and built with a mission-proven design. Take on any environment with this purpose-built harness and available accessories.
SCAN
TO SHOP OUR RECON SYSTEM
Several hours later, I re-engaged and planned to systematically sweep several ridges in the direc tion I last saw him. With the wind in my face, I painstakingly glassed and slowly walked the tim ber on the first ridge, but to no avail. I hiked back up and moved over to the next ridge, positioning back into the wind. I worked methodically down the ridge while scanning every inch with binocu lars. Glassing a small, flat bench, my heart soared as I spotted the bull’s antlers in the shade. He was lying down, his head was up but heavy, and it was clear his energy was waning. As I ranged him at eighty-eight yards, my heart thumped hard with another surge of adrenaline.
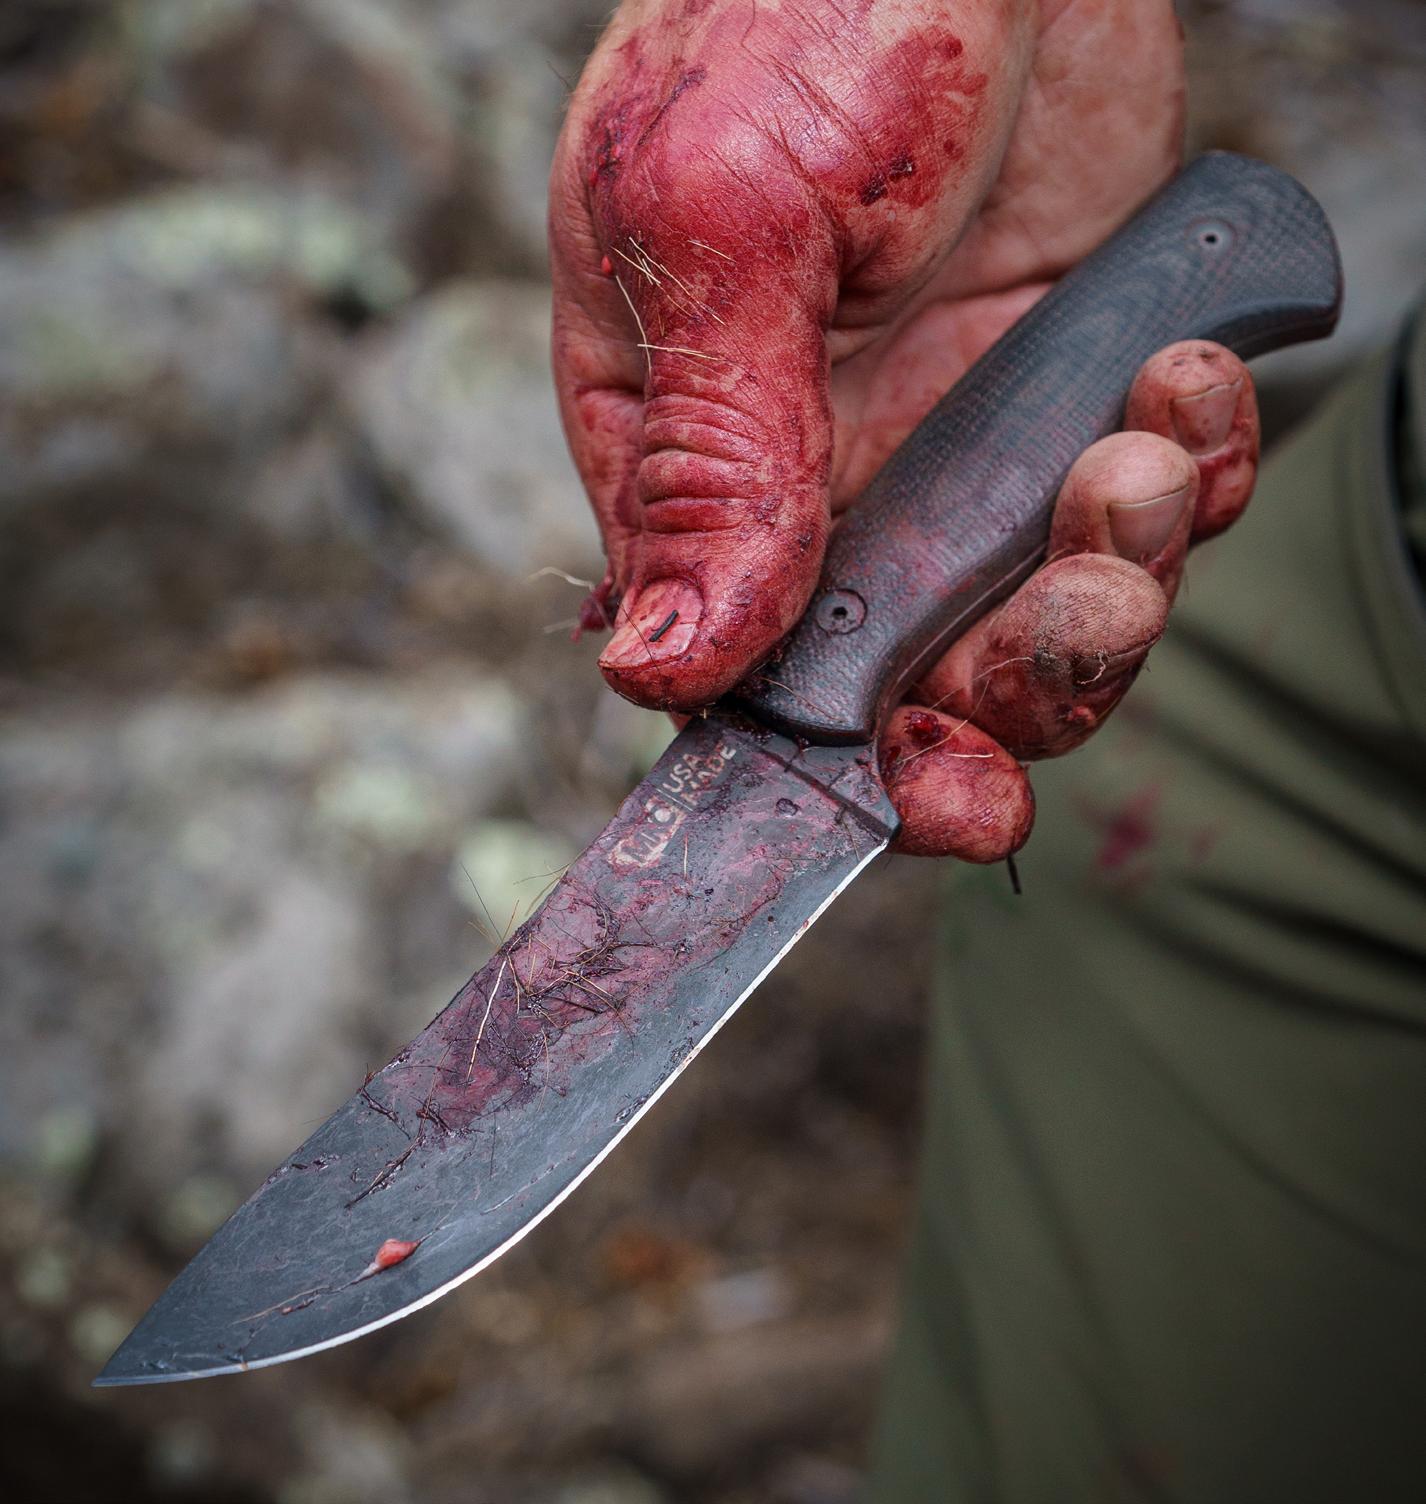
Checking the wind, I nocked an arrow and made my approach, keeping trees and brush be tween us. During the stalk, the bull repositioned his body and, fortunately, faced away, placing me mostly in his blind spot. Closing in to just over fifty yards, I was comfortable with the shot. But the cir cumstances gave me the confidence to negotiate a much better one. I stalked to within twenty-eight yards and leaned out from behind a tree and ranged him one final time to confirm he was now at topsight-pin distance. From behind the large pine, I drew my bow, took a deep breath, and slowly stepped out. I settled the top pin well behind his last rib on his left side which targeted the arrow’s exit out the opposite shoulder given that steep of a quartering away angle. The arrow disappeared exactly where I aimed. While it was likely the bull may have expired here without the additional arrow, I knew that shot trajectory would all but guarantee and expedite that fact.
death. With his nose pointing straight up, his final breath was taken from the ground and pointed up to the sky. It’s often the case that the portion of lightning that can be seen with the naked eye goes from the ground upwards. Negative electricity is lowered from the sky as positive energy from the ground sends a streamer to meet the negative energy. When the two paths meet, the flash of light that can be seen emanates from the ground up. Just like the lightning bolt in the photo that reached up for the storm cell above, the bull’s last exhalation was rooted from the ground and disappeared towards the sky.
The lightning I had wished for had struck twice on this hunt, and that was a most humbling feeling, to say the least. To take a life and watch it fade from the body has such a gravity and magnitude to it; one that I believe is so astonishingly powerful and so devastatingly beautiful that its impact must be experienced to be felt and understood. Taking a life puts your own life into perspective – and the life that death provides. With every elk I harvest with a bow, I am forever changed, yet again, from the ex perience. In honor of each elk harvested, I add an other arrowhead tattoo to my side. We are forever bonded by the hunt. The experience and lessons of this hunt, the spirit of this magnificent bull, and its clean healthy protein will follow me off this mountain and into my everyday world. I leave the mountain with a fortified respect for life and in complete awe of its, and this magnificent herd bull’s, Gravitas.
CRITICAL GEAR
Bows: Hoyt RX7 Arrows: Easton 5mm FMJ
Sights: Spot Hogg – The Grinder 5-pin Quiver: Hoyt Broadheads: G5 Montec 100-grain
Rest: Hamskea Epsilon Stabilizer: Bee Stinger
Release: True Fire Edge FT Camo: Kuiu, Krypetk
Bino: Vortex Diamondback 10x42 Bino Harness: Kuiu
Spotting Scope: Vortex Diamondback HD 20-60x85
Boots: Zamberlan Backpack: Kuiu Pro 3600
Rangefinder: Vortex Ranger 1000 GPS: Garmin

Knives: Josh Smith. Dallas Damascus
www.westernhunter.net 20 WESTERN HUNTER

KNIVES DESIGNED BY HUNTERS FOR HUNTERS OWNED BY MASTER BLADESMITH JOSH SMITH WWW.MONTANAKNIFECOMPANY.COM @MONTANAKNIFECOMPANY WARNING: MKC knives are incredibly sharp out of the box and may cause lacerations of the skin if handled improperly. MONTANA KNIFE CO™ KNIFE MODEL: THE STONEWALL SKINNER STEEL: 52100 CARBON STEEL HANDLE: G-10

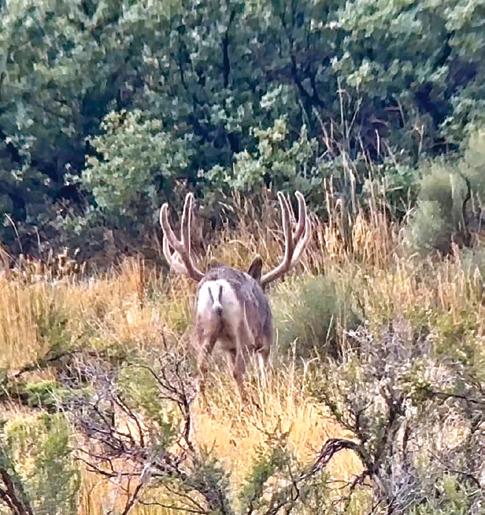
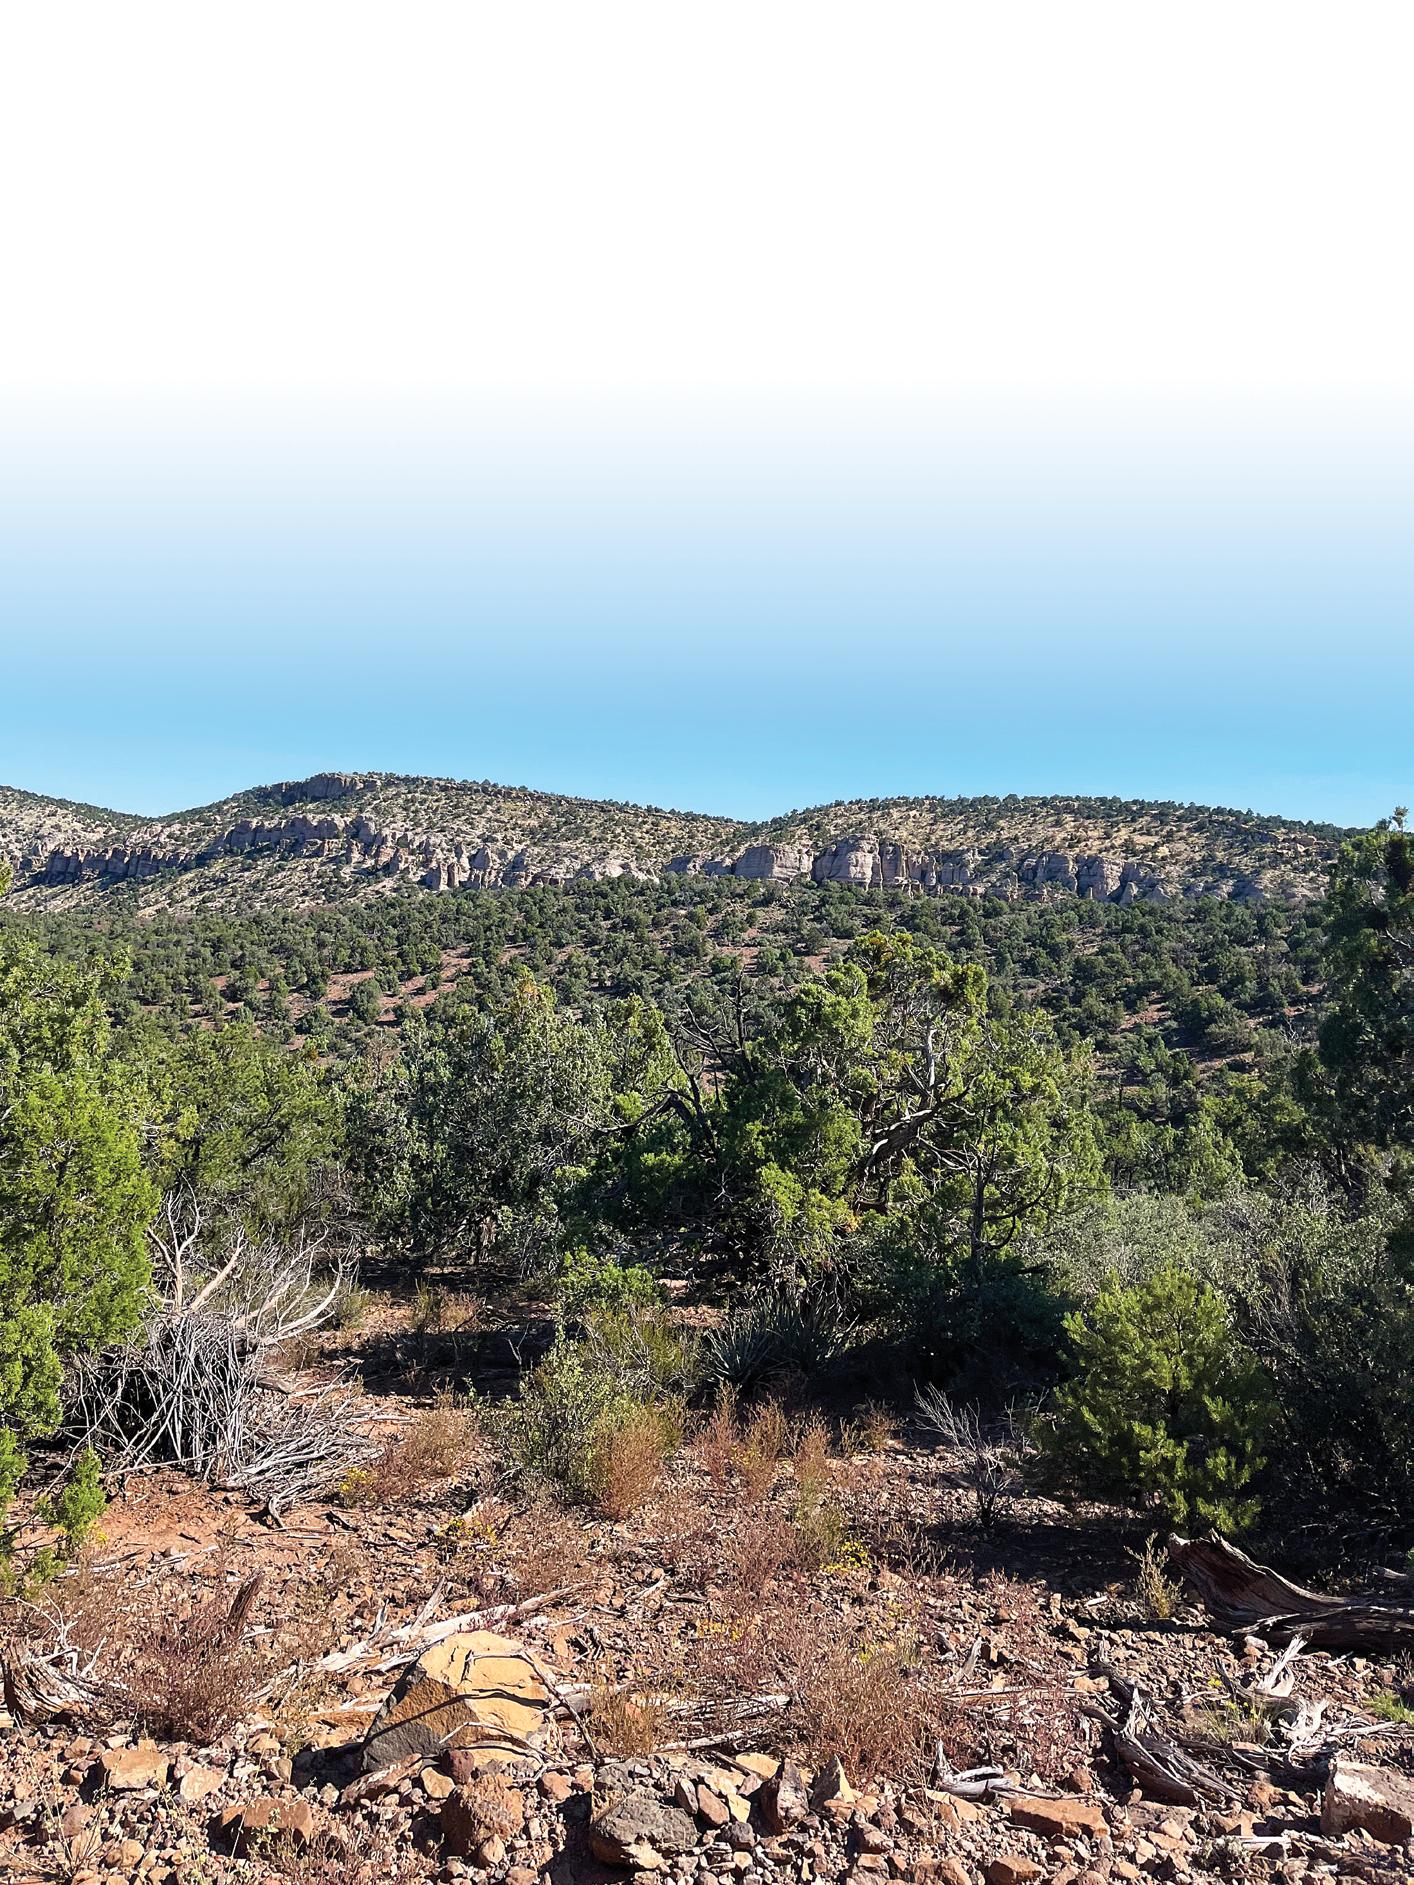
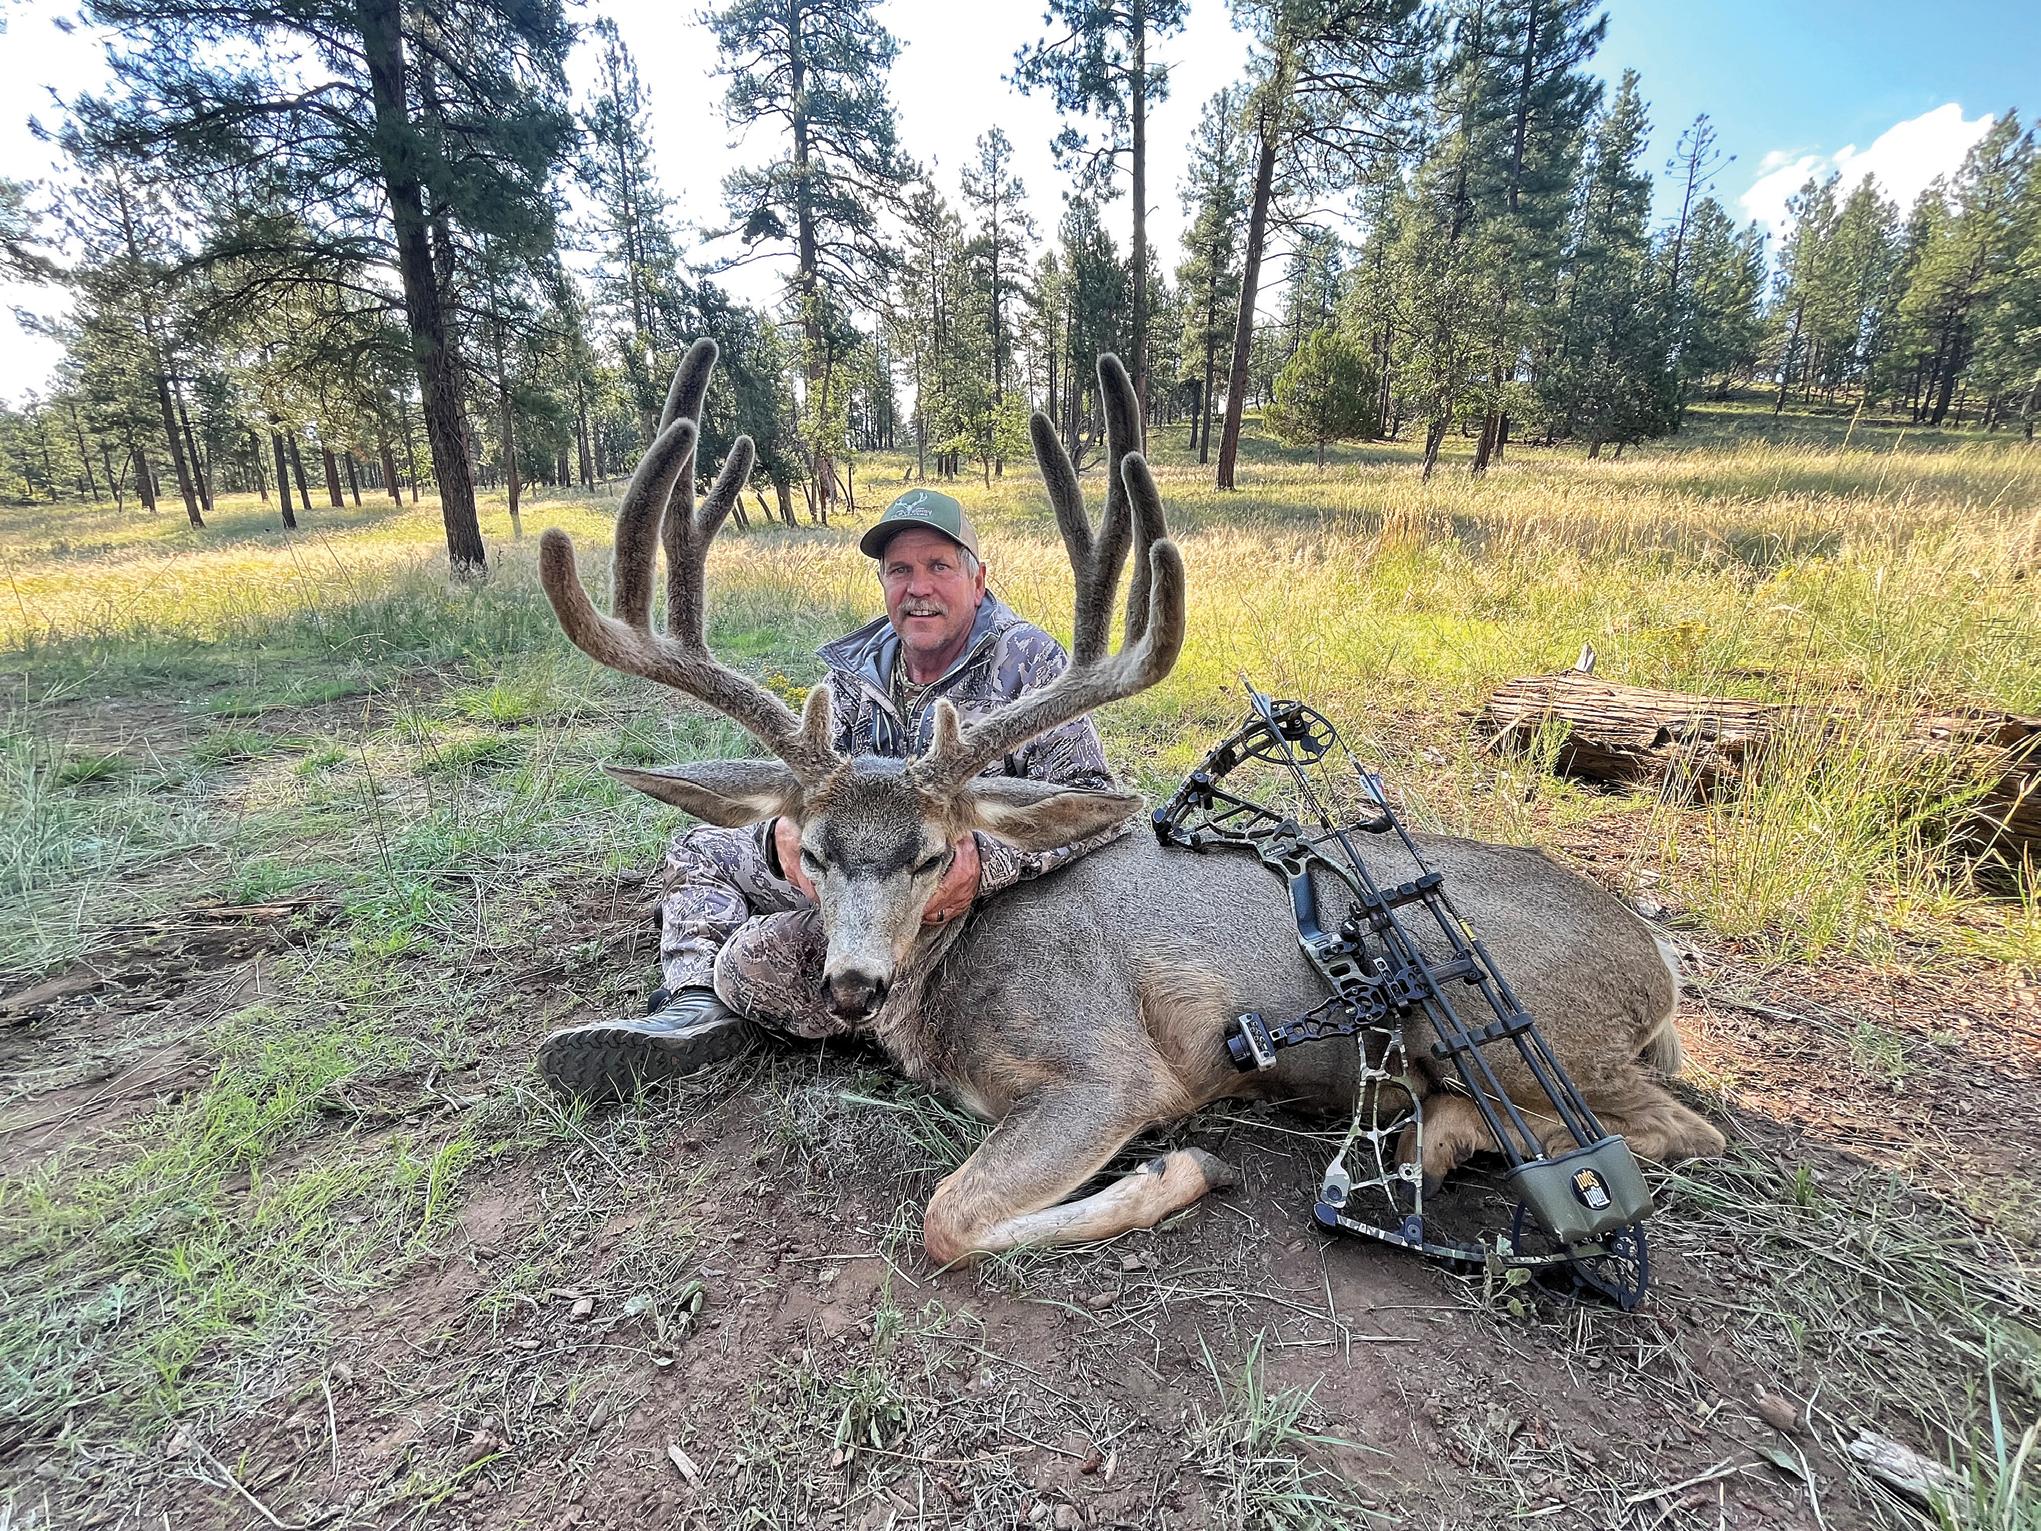
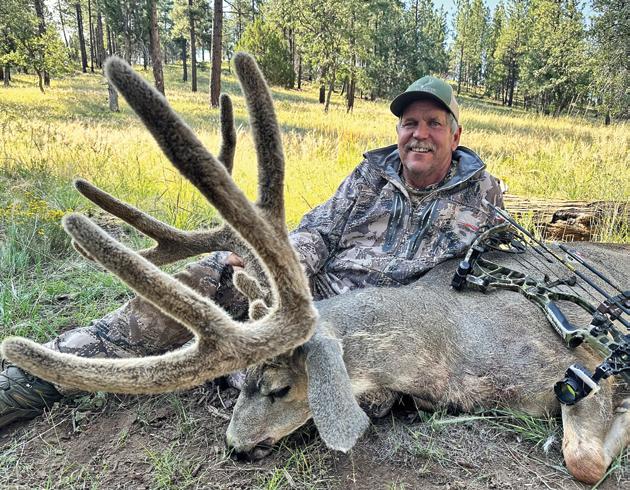
Hunting big bucks in a legendary area above the Grand Canyon
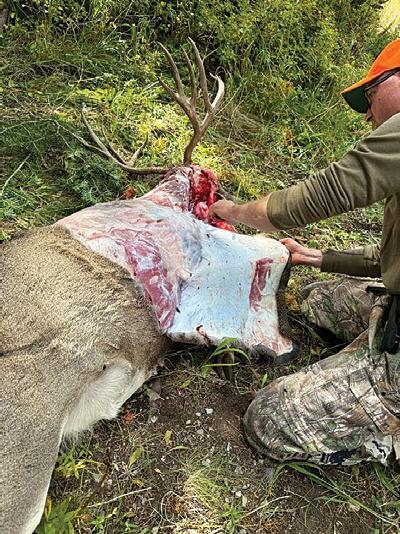
Isaw the deer moving through thick cedar trees. There were three bucks, a large four-point in full velvet, what I thought was a 4x5 or maybe a 5x5 that was just as tall and just about as big but not as heavy, and a smaller 2x3. I decided to pursue the bucks and started sneaking quietly through the cedars, hoping that I could pick up their tracks, follow them, and maybe get in position for a shot. As I approached where I had last seen the deer, the smaller buck stepped out about 30 yards in front of me. He sensed my presence and trotted back into the trees.
www.westernhunter.net 22 WESTERN HUNTER WHM
Bob Rimsza Arizona, 2023

Suddenly, the large velvet 4x4 walked out and stopped broadside. He turned in my direction at 30 yards and looked straight at me. I drew my bow and shot him right in the middle of the chest. I thought it was a perfect shot. It was late in the evening and I only had about 15 or 20 minutes of daylight left. I went to where the arrow struck the buck and it was easy to find because of the lighted nock. The arrow was broken off about halfway and there was a very good blood trail. I followed the blood trail a short distance, but it was getting too dark to proceed. I decided my best option was to back out and wait and find the buck in the morning.
Suddenly, the large velvet 4x4 walked out and stopped broadside. He turned in my direction at 30 yards and looked straight at me.”
Extended Stay
I had been hunting the famous Arizona Strip for the last 10 days. Assisting me in the hunt was Clay Bundy Guide Service. We’d seen a lot of bucks with a few over the magical 200-inch mark, and I’d had a couple of near misses on some very large bucks. I had booked with Bundy Guide Service for 10 days and I had used up my time with them, but they allowed me to stay at their ranch house and would continue to help me in my quest for a buck until the end of the season. The day I shot the buck, I was hunting alone.
I gathered up my gear and headed back to the ranch house. After getting to the ranch and talking to the guides, we discussed going back and looking for the buck that night, but I always think it is better to wait. So, we decided to wait which led to a long restless night’s sleep. At first light the next morning, guide Bill Bundy and I headed out to track my
We got to the spot where I shot the buck and started our pursuit. The blood trail was easy to fol low, and we were able to walk along without much searching for tracks or blood, it was obvious. Soon, I found a spot where the buck had bedded during the night. We continued our tracking and when we came to an open field of sagebrush, we noticed that the other group of hunters was parked off the side of the road glassing out in the middle of the sage. As it turns out, my buck was still alive!
Closing Act
One of the other guides, Barry Bundy, and his hunter had seen the buck walk out into the middle of the sage flats, two or three hundred yards away, and lay down. They had been watching my deer as we came out of the trees following the blood trail. We walked over to them and started glassing the buck, of which we could only see the antlers stick ing above the sage. We waited a while to see what the buck was going to do and after about an hour, we decided I needed to stalk back in and get an other shot on him.

CRITICAL GEAR
Bow: Hoyt Axius Arrows: Gold Tip Pro 340
Release: Scott Broadheads: Grave Digger 125-grain
Binoculars: Vortex Fury HD 5000 10x42 Pack: Kuiu
Bino Pack: Marsupial Camo: Sitka Boots: Salomon
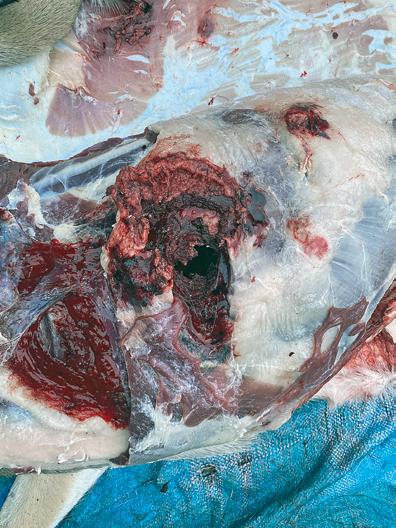
I circled the buck to keep the wind correct and slowly moved in. I got within 60 yards and the buck stood up and started walking straight away. I picked up his trail and I began to angle slightly, hoping to cut off its path, as he was walking at almost the same speed that I could sneak through the sage. After about 15 minutes of following the buck, I could tell he was obviously hurt badly and he laid back down. That allowed me to stalk to within 20 yards and shoot him again. He jumped up, stopped 30 yards away, and I put in one final shot.
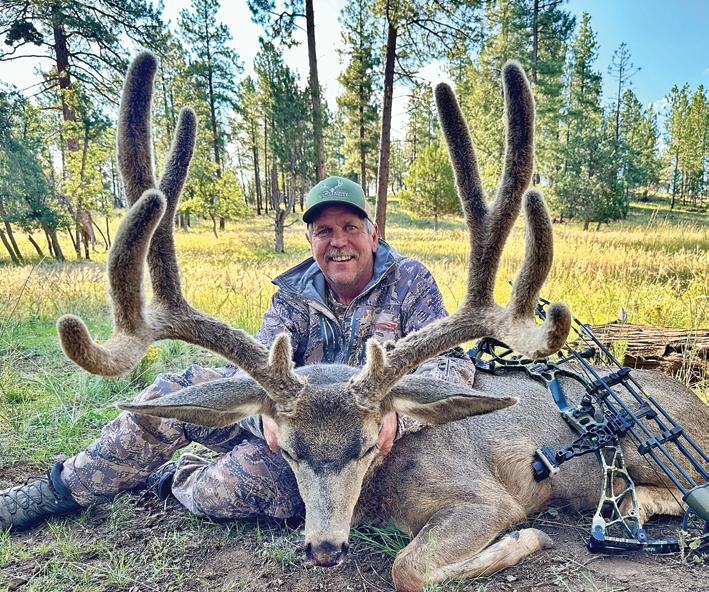
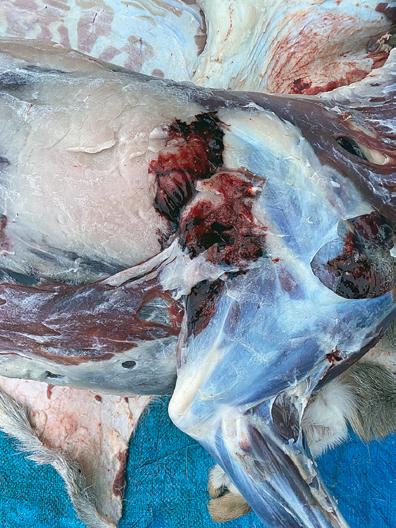
The buck was a very symmetrical 4x4 and his velvet antlers were in perfect shape. When we gutted and skinned the buck, we could see that my first arrow had entered the front of the deer and penetrated into the right shoulder, only hitting one lung. This is why he lasted through the night and it reinforced my decision to wait on pursuing him.
I hunted for 10 days in beautiful country on the north rim of the Grand Canyon, saw some of the largest mule deer bucks I will ever see, and I met some great people. It was an amazing hunt with big bucks in big country. Thanks to Clay Bundy Guide Service and my guides Bill Bundy, Payson Fails, and the entire crew who stayed to help. Most importantly, Thanks to my wife Lisa who is always encouraging me to pursue my hunting dreams.
info@westernhunter.net 25 WESTERN HUNTER
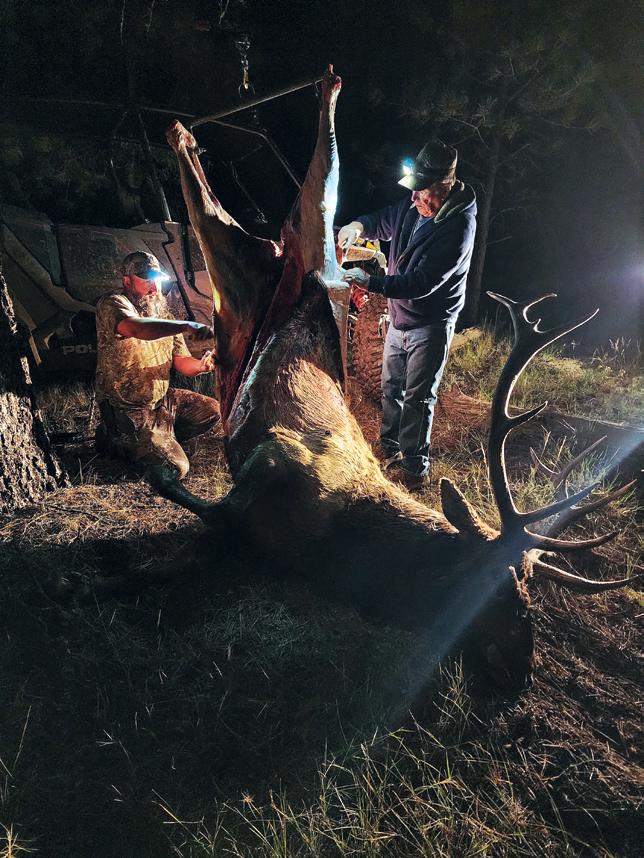
A HUNT FOR DAD’S JOURNAL
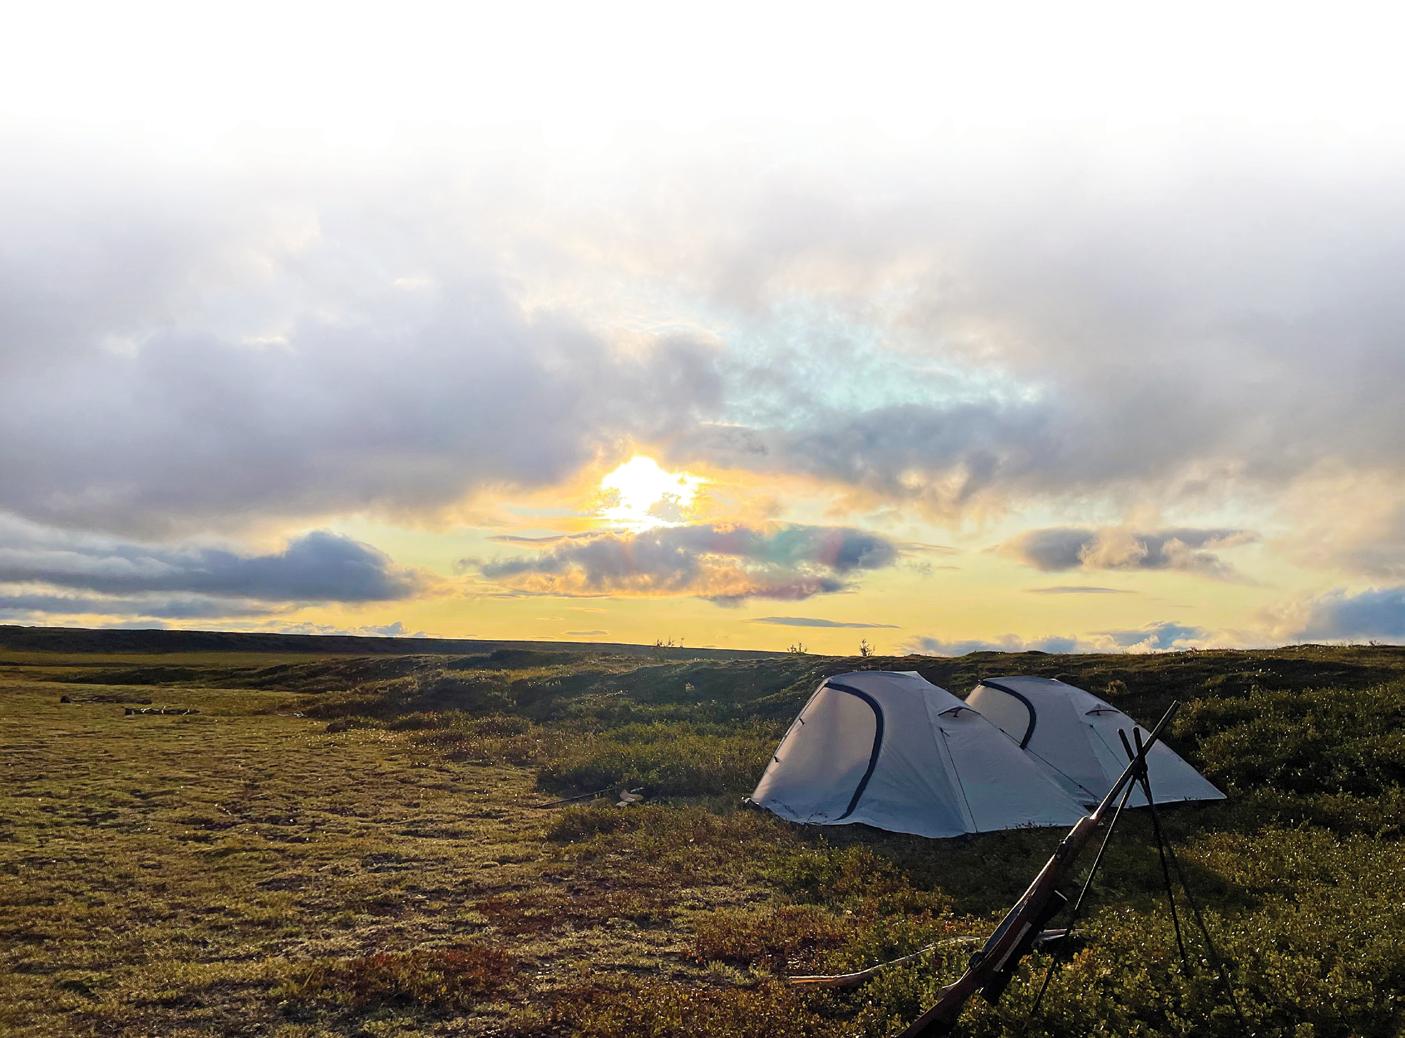
A worst-case-scenario encounter with a Brooks Range grizzly
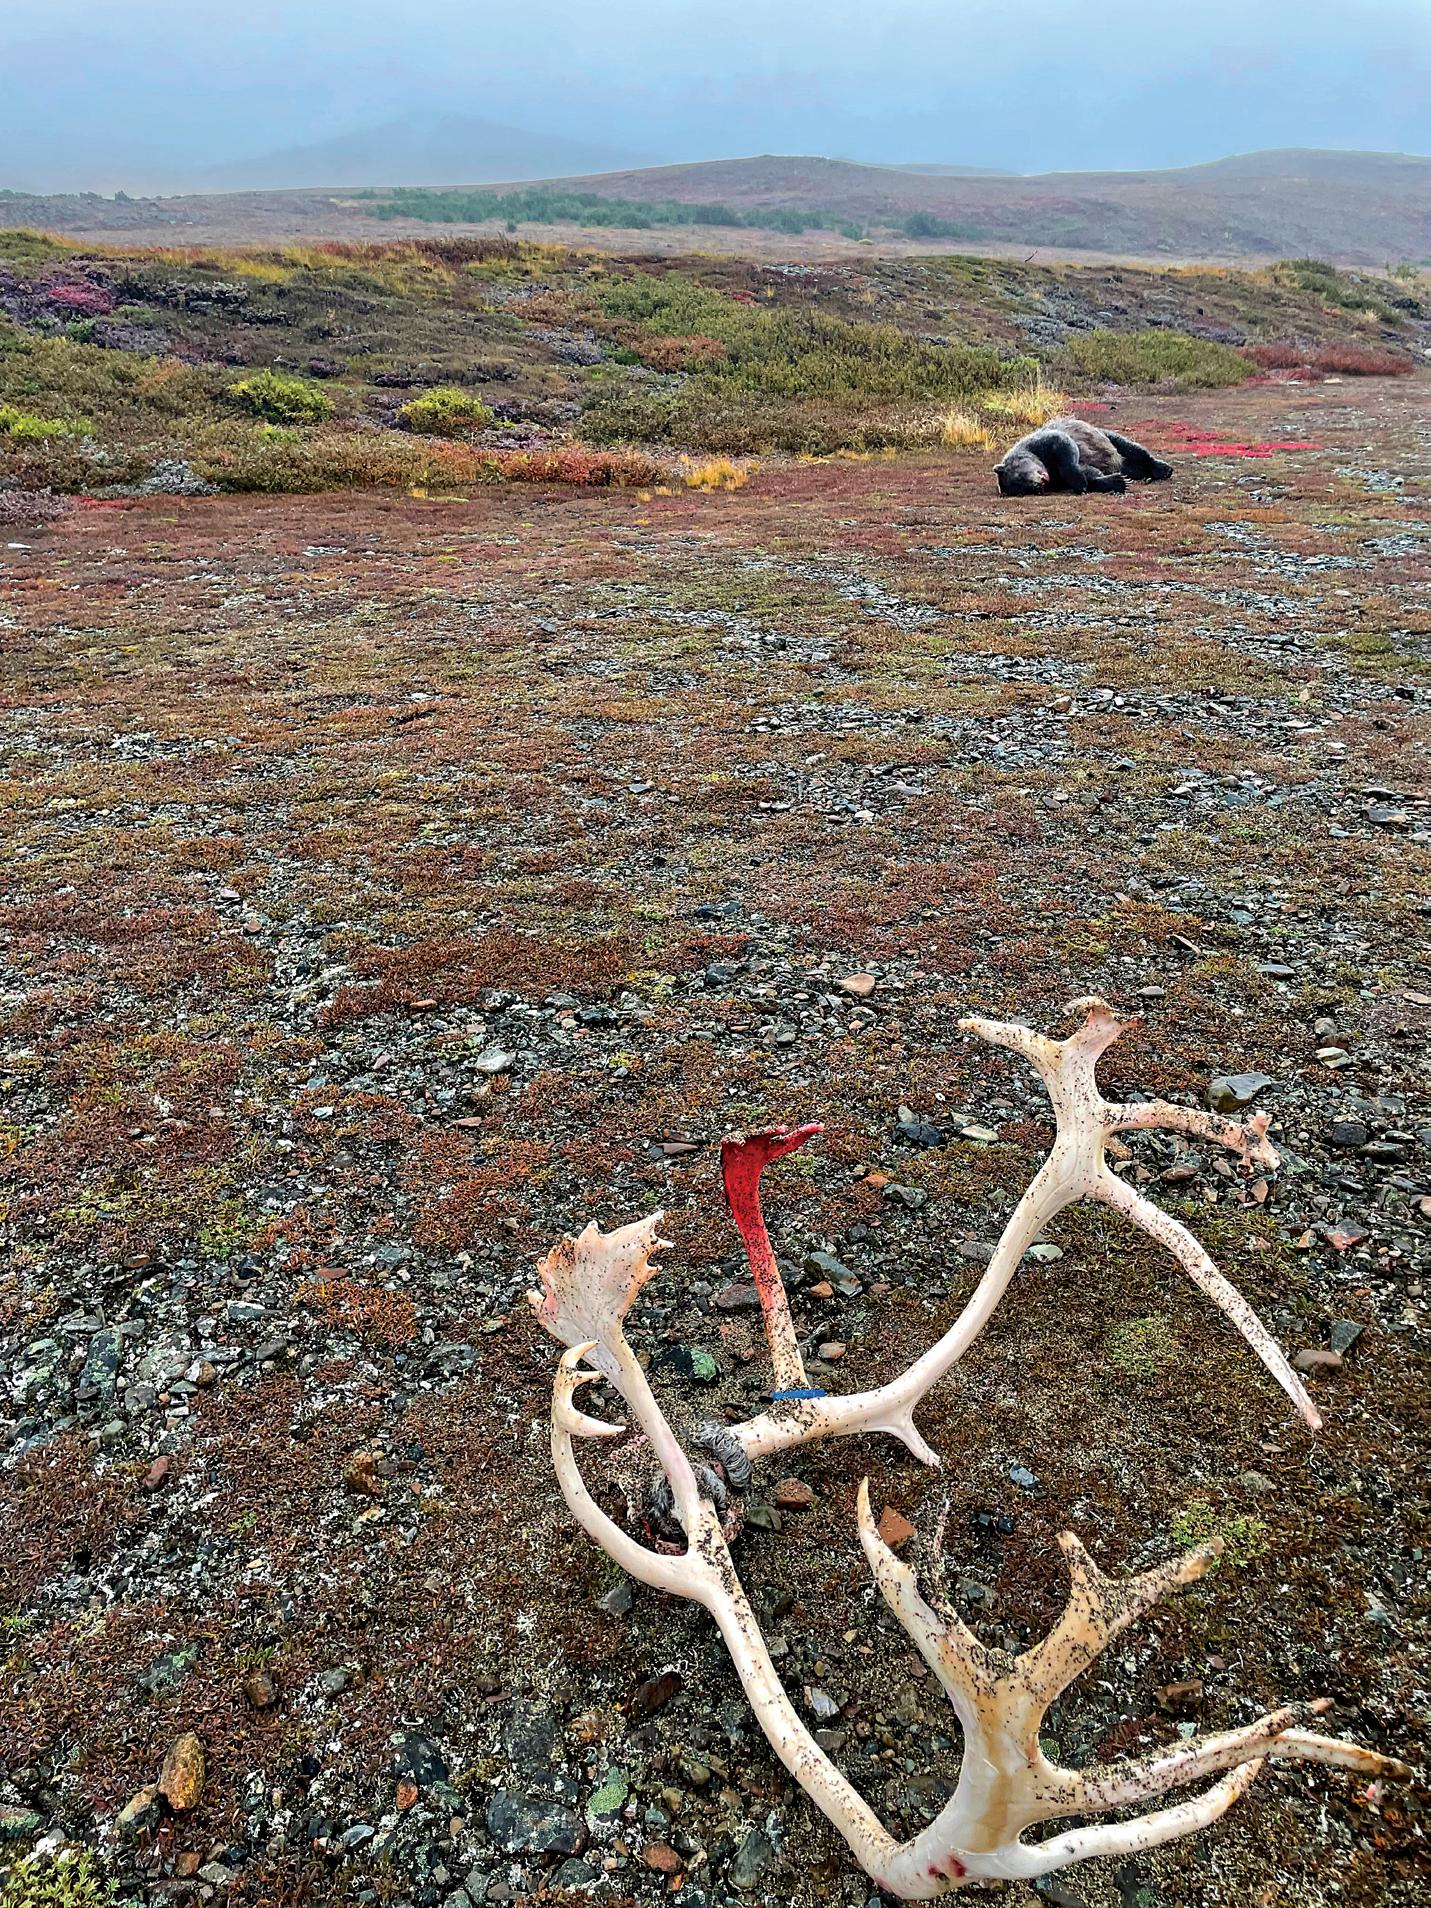
Iwoke up to a dreary Alaskan morning after barely sleeping with horrific thoughts of what may come. Unzipping the tent door zipper, I ventured outside to water the tundra. As my sleepy eyes cleared, I felt uneasy about being watched. As I slowly turned to the right, I looked face to face into the terrifying black eyes of a drooling Brooks Range grizzly; my worst fear had come true. He looked like a demonic creature
lurking in the low illumination; only 70 yards from our tents. He circled our camp in less than two minutes and started toward me as I knelt beside the tent with my .41 magnum revolver in hand. I knew he was up to no good after decimating my freshly killed bull caribou the nights before, and now he was back for the main course... us. This would be a door-die moment, but my combat experience had prepared me for this day.
WHM
Kelley Crimmings Alaska, 2021
Rising Action
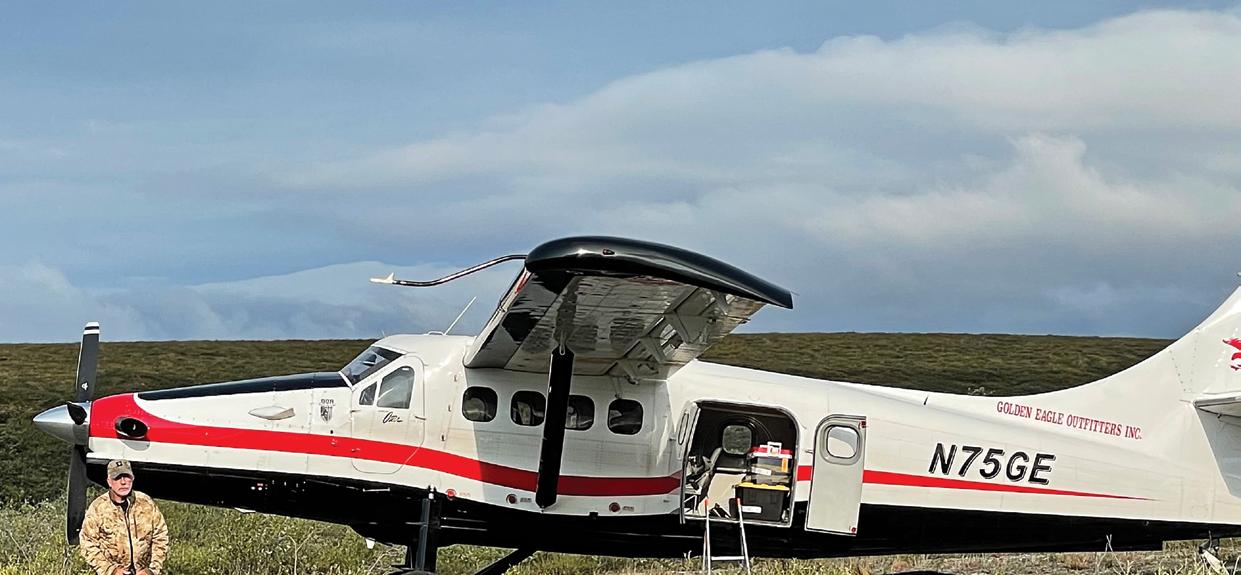
The day had finally arrived. After months of planning, my Dad and I embarked on a long-awaited Caribou hunt in a remote area of the Arctic Circle. We both lived in Alaska in the past, so we packed our gear for another beloved experience in the Alaskan wild, one not expected to become the trophy of our lifetimes. We each packed camping and survival gear, food, living essentials, but most importantly, guns and ammunition. Our flights left on August 12th, mine out of San Antonio and Dad’s out of Milwaukee; we would meet up in Anchorage at the hotel late that evening. Our next flight left the next day, connecting through Nome to the remote village of Kotzebue, Alaska. The weather was overcast and rainy, but we were finally there!
After a day of inclement weather, we arrived at the hangar with Jared, our outfitter/pilot, who was already firing his Otter up, ready to depart. We had gotten a weather window, and before we knew it, we were on the plane flying through the Noatak National Preserve into a secluded area of the Arctic Circle; a location that no longer allows hunting access.
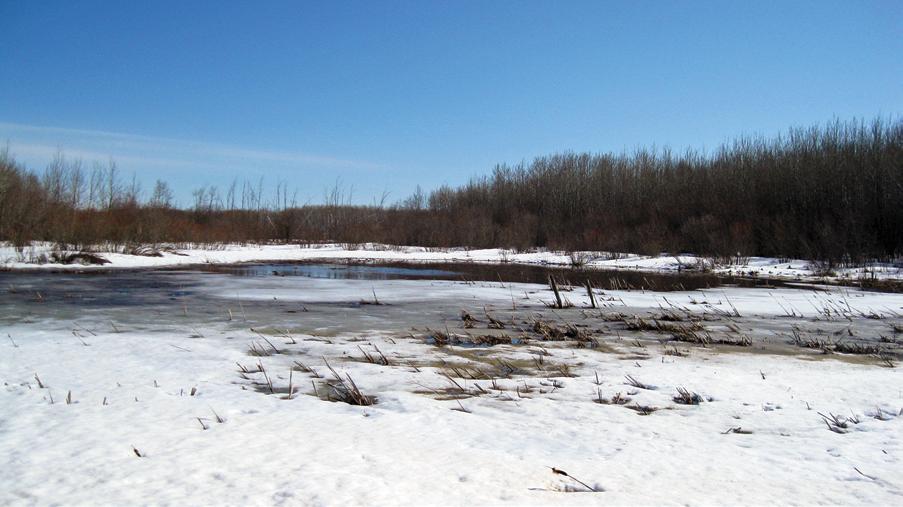
The Primal Nature of Primus Creek
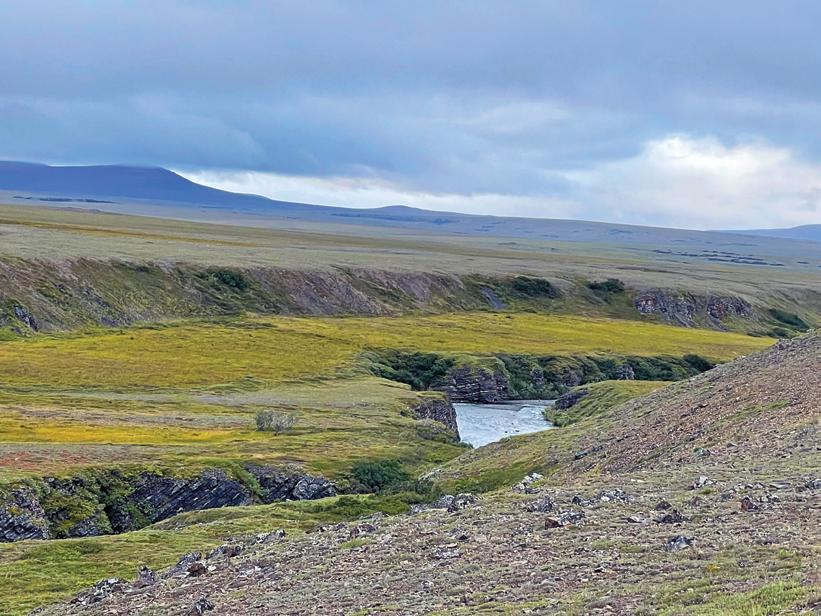
We landed and decided on a place to set up camp just off the airstrip next to a prominent berm situated on our windward side. We had two expedition tents for sleeping and our gear and a “teepee” tent to cook and store our food and supplies. After just over an hour, we set up our camp and began to discuss our game plan for the hunt. We also walked to Primus Creek, about 300 yards from our camp, to establish our water source and place to fish for food in the days ahead. As soon as we approached the creek, Dad identified bear tracks around the bank and cautioned me to be on the lookout.
We had Primus and Desperation Lake directly to the east, sizeable open tundra to the west, the foothills of the Brooks Range to the north, and another more enormous river valley to the South. It was stunning to digest the sheer majesty of the landscape and appreciate our tirelessly planned adventure. My
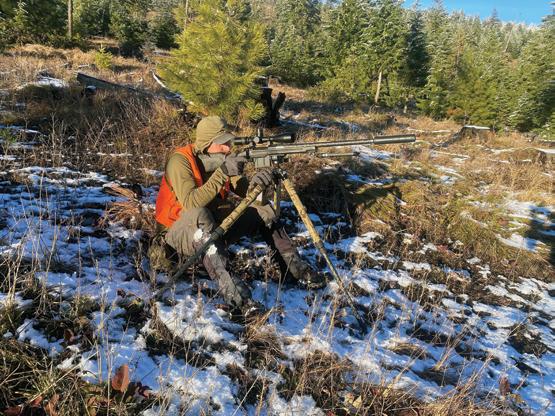
We got moving earlier the next morning because we wanted to be at our hunting spots before 8:00 AM when we spotted herds beginning to move the day before. We wished each other good luck and headed out across the vast tundra through the hills down a ridge until we arrived at our overwatches. I set down my pack, laid down my shooting position, and then used a rangefinder to identify objects across the river gorge onto the plateau I hoped the herd would travel through. The closest shot I would get would be 410 yards. Then, I identified 450, 500, and 600-yard markers for shooting reference.
He lowered his big brown head, showed his glowing white TEETH, and began to CHARGE. I can’t tell you what I felt or thought, except it was a quickly fleeing moment to make the shot of a lifetime to save us from this fearless bear.”
info@westernhunter.net 29 WESTERN HUNTER

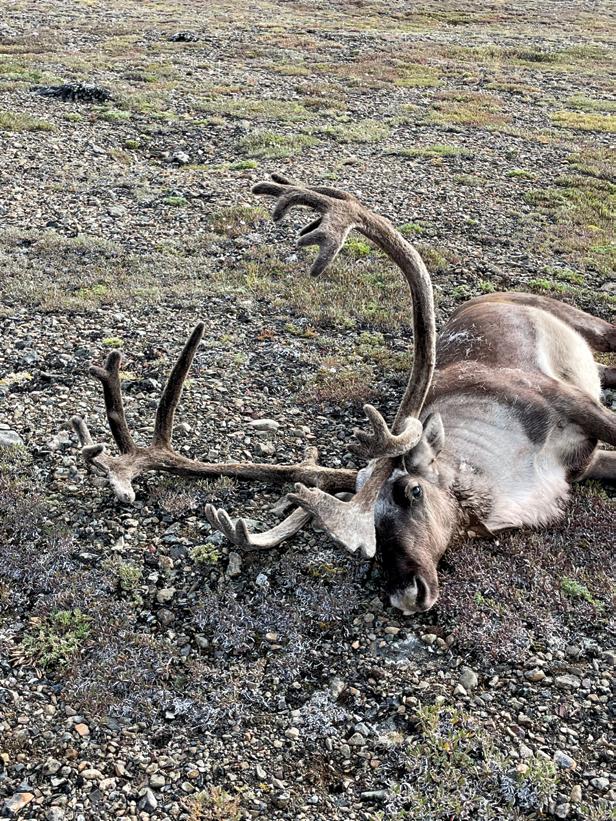
I was mildly concerned because these shots would be further than I had ever shot at an animal. However, I was confident in the gun my dad had given me for the hunt; a 7mm STW rifle with 160grain Game King bullets and a Burris 4-12 power scope. I scanned the adjacent area for a couple of hours and waited patiently. To my surprise, a monster bull emerged from one of the waterholes to the Southeast, about two miles away. What a wonderful experience to witness as he lumbered step-bystep in my direction, stopping only momentarily to get a bite of grass.
I got myself set in a prone shooting position, rifle on top of my pack, praying that this monster would come into my shooting zone. Thankfully, he continued toward me and stopped just beyond my 600-yard marker. The time every hunter dreams about became a reality. I quickly aligned my crosshairs on the top of his back, unclicked the safety, aimed another foot higher, aligned on his front shoulder, and touched the trigger... BANG!
The shot echoed across the wide-open expanse of terrain, and the bull reared back and immediately went down on his front knees, then stood up and began to hobble further to the north. I ejected the first round, put another in the chamber, and got back on my scope. By then, he had begun to circle back toward me.

I shot again, aiming higher than before, and the monster animal fell to the earth. I jumped up and watched impatiently for movement; there was none. By this time, Dad had heard the shots and began moving toward me, cresting the ridge to see the caribou down. I motioned, and he came to me as quickly as he could. We then planned for him to provide an overwatch of the animal and me while I crossed the gorge and climbed up to get to the bull. The glacial water I had to cross was ice-cold and immediately caused pain in my feet and legs. Careful not to fall while traversing the frigid rapids, I commenced the arduous climb almost straight up. Dad gave me reports on our comms that the caribou was still down but I needed to hurry because blood was in the air.
The grizzly bears were likely already on their way to the kill. I moved as fast as I could, reaching the top of the plateau, and could see the caribou lying down. The real work began, gutting, skinning, quartering, and dragging 200 lb of raw meat across the tundra. This was one of the most demanding, challenging physical tasks I had ever done. After about two hours of struggle and colorful language, we got it back to a spot about 200 yards from camp.
Hunters Become the Hunted
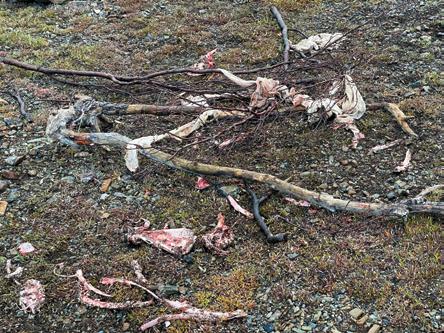
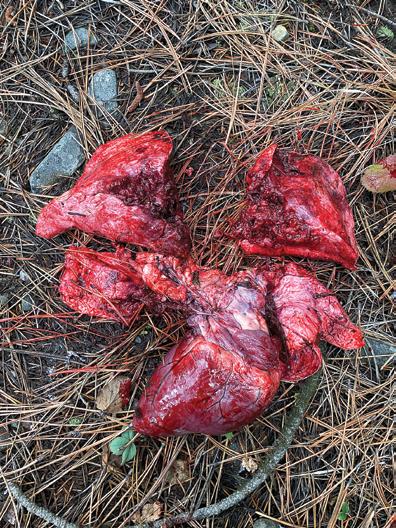
We both woke up the following day to an eerie feeling that something had happened overnight. We immediately scanned the area and confirmed our suspicions when we saw something had gotten into the meat while we were sleeping. The white game bags were scattered, and the caribou meat was spread into a large circle of carnivorous mayhem. Dad said, “Let’s get our rifles and go down and check the meat.” Over half of the meat was gone, eaten by a large animal that was none other than our most significant concern: a Brooks Range grizz. It was astonishing how much was gone; the remnants looked like something had pulled the meat from the bones, like a person eating a rack of ribs.
Weather moved in shortly after, and we were camp-bound due to relentless wind and rain, spending most of the afternoon in the teepee telling stories and planning what we would do if the bear returned. I texted our pilot about the bear threat and weather concerns, and he said he would do his best to get us out the following day. Around 6:00 PM, a break in the weather arrived, so we crawled out of the tent to stretch our legs. When we got out, we looked around, and there he was! The Grizz was circling our camp about 100 yards to the north, so we fired warning shots from my .41 magnum pistol with hand-loaded, 205-gr Wadcutters to scare him away. I had brought limited ammo as the gun was only for emergencies. I had eight rounds, and we used five that evening, firing warning shots and scaring him back into the hills.
www.westernhunter.net 30 WESTERN HUNTER
n
The remnants of the caribou meat.
STARTING FROM SCR ATCH


O U T D O O R S M A N S . C O M 1 - 8 0 0 - 2 9 1 - 8 0 6 5

Akiak Tulok, “Brave Warrior”
I was shocked to have my fears come to pass with the Grizz about 70 yards looking at me. I slowly crouched behind my tent and quietly said, “Dad, the bear is in our camp.” He rustled and replied, “What? well, don’t let it get too close.” He had told me years ago that a grizzly bear is said to be as fast as a horse at a quarter mile. My adrenaline raced, so I grabbed my .41, which I purposely placed next to the tent door, and got ready as I watched him walk toward my caribou horns. The night before, I had put them on top of the yellow fuel tanks left for emergency refuels.
Dad asked, “What is he doing? Is he coming closer?” I had eyes on him as he continued toward the horns. The bear stopped, put his snout in the air, and began to circle back toward us. I couldn’t believe it. Seconds seemed like minutes, but he was heading right toward our tents. My training kicked in as I took a deep breath and poised myself for a shot I hoped I wouldn’t have to take at the 10-foot grizzly bear coming directly for me. Everything went silent, and I knew I only had three rounds left in my pistol, and my rifle was out of arm’s reach, so I had to make these shots count.
He had gotten within 40 yards when I shot the first warning over his back; he didn’t flinch. He kept coming, about 25 yards now, so I fired the second in front of his feet, hoping it would scare him into running away. He initially flinched away, but it made him angry this time. He lowered his big brown head, showed his glowing white TEETH, and began to CHARGE. I can’t tell you what I felt or thought, except it was a quickly fleeing moment to make the shot of a lifetime to save us from this fearless bear. He was now under 15 yards and moving swiftly, so I put the sights on the vital area where his heart would be, uttered a quick prayer, and squeezed… BANG!
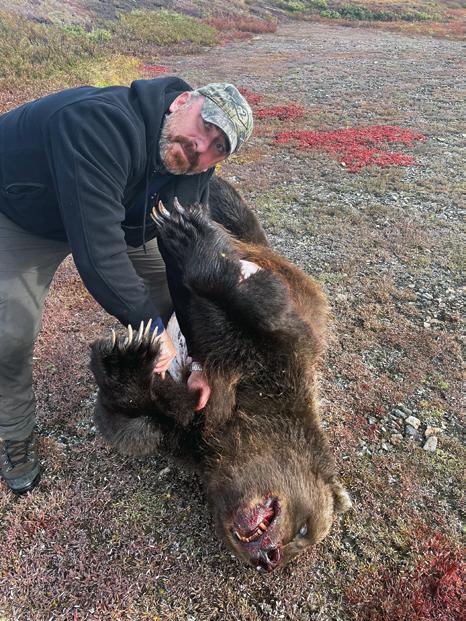
The bear reared up on his hind legs, and now I could see how gigantic he was. He then quickly came down with brunt force, crumbling into the tundra. He slowly struggled back up, turned away toward the tundra, and walked about ten steps before finally he collapsed, rolling down the berm to his final stop. After hearing the gunshots, rifle in hand, Dad unzipped his tent and looked at me, startled. I said, “Dad, I killed the bear!” He couldn’t believe it when he saw the pistol in my hand, thinking I had used my rifle, saying, “You shot him with your pistol?!” He then looked in the other direction and saw the giant mound of brown hair on the ground; the bear was DEAD. One shot... one kill.
The Aftermath
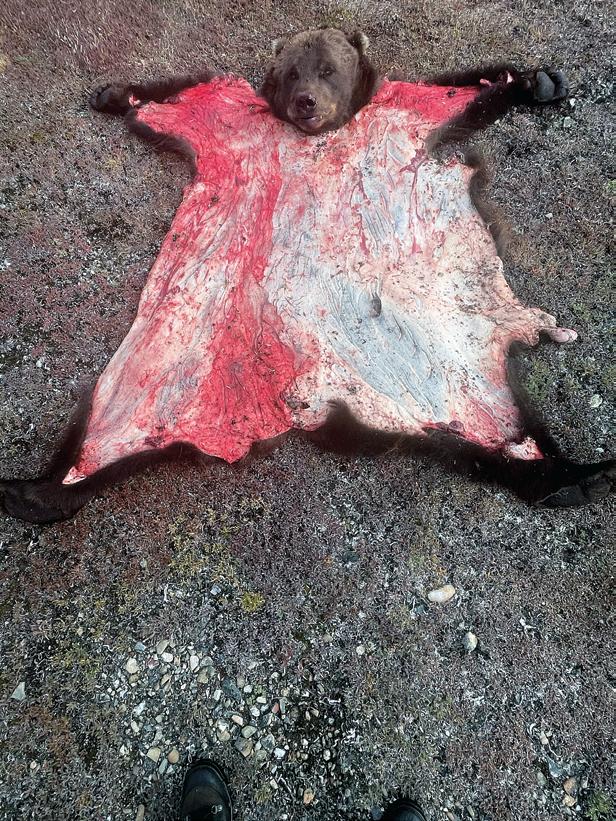
We knew we had a lot of work ahead of us because state law mandates you skin the bear and turn it in to state troopers. His hide was like leather, the most difficult animal I had ever skinned. We went through four razor-sharp hunting/skinning knives to complete the task, but we got it done. I texted the pilot to tell him of the Defense of Life or Property (DLP) kill so he could inform the state troopers. Once we packed up and landed back in Kotzebue, the trooper was waiting and separated us to take Dad’s and my statements. The questioning was intense: “Tell me the story... where was he when you shot him... did you any fire warning shots... what was the angle at which he charged you.” It was very unsettling, and at one point, I asked him, “Am I in trouble?” He stated it was standard procedure and needed to conclude it was a legal DLP kill, which he immediately did after questioning Dad. He then loaded the bear rug into the back of his truck. I asked, “Can I at least keep a claw or something?” He sternly said, “No, that would be illegal.”
The Journal’s Last Page
Dad wrote in his journal’s conclusion, “It was a great hunt, a vast experience and adventure. I am grateful to my son; he’s a tough man and a great companion, none better. Most men put in the same situation would have faltered; he showed no sign of fear. I would like to take some credit for that, but he’s a Ranger; the best of the best, except for a Marine, but that’s our argument! I call this hunt Knees and Zippers; only he would understand.” Thanks for the tough love, your never-quit attitude, and your dedication to making me the man I am today. My Dad is my best friend; we have become a partnership of two men routinely looking for the next challenge in life. Most of this comes from Dad’s little black journal that he kept during our adventure.
CRITICAL GEAR
www.westernhunter.net
Rifle: Winchester 7mm STW Ammo: 160-grain Game King Binos: Vortex 15x50
Pistol: S&W Model 57 .41 Magnum Ammo: 205-grain Wadcutters Rangefinder: Sig Sauer KILO4 Backpack: REI Co-op Flash 55 Boots: Danner
Tent: Alps Mountaineering Zephyr 3 Sleeping Bag: Klymit KSB 20
HANDLE WITH CARE
O U T D O O R S M A N S . C O M 1 - 8 0 0 - 2 9 1 - 8 0 6 5
THE REAL PRIZE
A hunter finds a great bull with several different tags in his pocket
Here in New Mexico, the late archery elk season is every elk hunter’s dream. You can hear bulls go wild with bugling and chuckles all night into the early afternoon and then it starts again before dusk. Archery elk hunting in the woods is the thing that really gets my blood pumping. It doesn’t matter if it’s a spike or a 400-class bull – I get excited just getting close.
This year was a little different. I was fortunate enough to draw tags for both deer and elk. Seeing that the deer tag started on the first of September and the late archery elk tag did not start until the 15th, I decided to use the deer hunt as an excuse to scout for elk for two weeks before the elk hunt began.
Being familiar with the unit I had drawn, I had a good idea of where I could find a few elk and have a chance of seeing a good mule deer in the process, so I went with it. I hiked every public land ridge and glassed
everything I could find for 10 of the 15 days. I saw three bulls but heard zero bugles. I was a little discouraged, to say the least. I was seeing rubs and fresh sign, but it was like nothing was getting interested. Location bugle after location bugle went unanswered. It wasn’t until the 13th that I finally found a small bull with two cows. It wasn’t much, but I was hopeful the rut was going to kick off soon.
Too Close
On the morning of the 15th, I was barely able to keep myself still. I got to my spot and I wanted to see if I could stir up a bull an hour and a half before daylight. I got 500 yards down the ridge where I knew they liked to cross and I waited for the sun to peak over the mountain, hoping I would get some action. And wait I did... it was silent, and I didn’t hear anything bigger than a woodpecker that morning.
Joe Orr New Mexico, 2021
WHM
www.westernhunter.net 34 WESTERN HUNTER
As I watched him slowly work his way toward me, my heart was going 140 bpm. I could not believe it. I never call elk, I just find them and get to where I need to be. I was in disbelief that this bull was coming to me with just three cow calls.”
I decided to test the waters and hike down to the middle of the ridge where three fingers full of scrub oak filled the bottoms with flat open ridges between that were about 150 yards across. I knew the elk liked to hang out on the flats in the morn ings. There were pools of water in some of the rocks and the grass was belly-deep on a horse in spots. I made my way about a mile from where I watched the sun come up and into some tall timber, doing the “walk, stop, and listen” operation. Suddenly, it sounded like a tree fell and then got thrashed for a good bit. The sound was close, so I hustled through the trees and got to where I could see what was making all the noise. It was a solid 5x5 bull work ing over a 4" round pine tree.
The bull was 78 yards from me, I had enough cover, and the wind was perfect. I just needed him to walk toward me a little and get in the open. After he was satisfied that he had done what he came for
to go to the top of a mountain that had a couple of good water holes on it and see if I could find a buck or even the bull with two cows from earlier in the week. I got about 300 yards from the water hole and sat and listened. With about 20 minutes of shooting light left, I heard something break on the ridge. It was that hollow, heavy, hoof-stepping-on-half-rotten-branch sound, and it deserved a little investigation.
I grabbed my bow and my Phelps bugle and slipped over to a giant ponderosa pine at the base of the hill where the suspect noise came from. After getting set up, I blew a few cow calls. Lo and behold, the noise at the top bugled in response – and he was close. He would bugle and work back and forth, whimpering and whining the whole time. I would cow call, and he would bugle. I would bugle, and he would whimper and get a little closer. Finally, he got to where I could put eyes on him, and I soon discovered that he was what I call a “juvenile delinquent.” He was one of those young bulls that just figured out he could tear trees up with his antlers, but being overzealous, had broken off every point on his main beams.
35 WESTERN HUNTER
across the fence. They would just stick their heads over to bugle and dare me to come get them.
This was an every-other-day occurrence. They just would not play on some days and would be all fired up on others. I spent every morning there in hopes that I would get it right. When they made no noise, I would go explore some old logging roads and hunt deer with hopes of seeing an elk. After one of those explorations and going to visit some family that have a little ranch about 15 miles away for a sandwich and a good luck hug from my nieces and nephews, I decided to head back to the bottom of a ridge where I had found some new sign and hang out for my evening hunt. As I made my way down to that area at about 5:30 PM (shooting light ends at about 7:45 PM), I looked up and saw an elk in the tree line. I reached down, turned off the key
www.westernhunter.net
n Joe got use to seeing the private property signs where the elk retreated to each day.

our products. START
FINISH O U T D O O R S M A N S . C O M 1 - 8 0 0 - 2 9 1 - 8 0 6 5
TO
A calf and I arrived at that pond at almost the same time, and I was not anywhere close to where I wanted to be. I was high on the hill. The close side of the pond was 52 yards away and the far side was 76. It was a little far, but I was confident in my ability, so I just tucked in and waited, watching the calves
They were having a blast, kicking and splashing when the bull bugled from not far away, announcing that it was his turn at the water. When he showed up, he didn’t just put his head down to drink, he walked straight to the middle and started stomping and splashing, putting on a full show. I pulled it together, ranged him, and adjusted my sight to 64 yards. Just when I thought he was going to stop, he decided it was time to swim to the other side of the pond where I had no hope of getting an arrow in him.
After a trip back to the middle, he walked back to the shore where I ranged him at 71 yards. I adjusted my sight, but the waterline was still too high on his chest to make the shot I wanted. Two more steps were all I needed. He took one and I drew my bow. He took the second step as I settled my pin on his opposite shoulder, put some pressure on the release, and the arrow left, landing about 3" back from where I wanted. The entire pond exploded with him coming out of that water with more force than I can imagine an animal producing. I knew the shot was good as I watched the cows walk away, looking back at where the bull had gone, and I knew it was where he had expired.
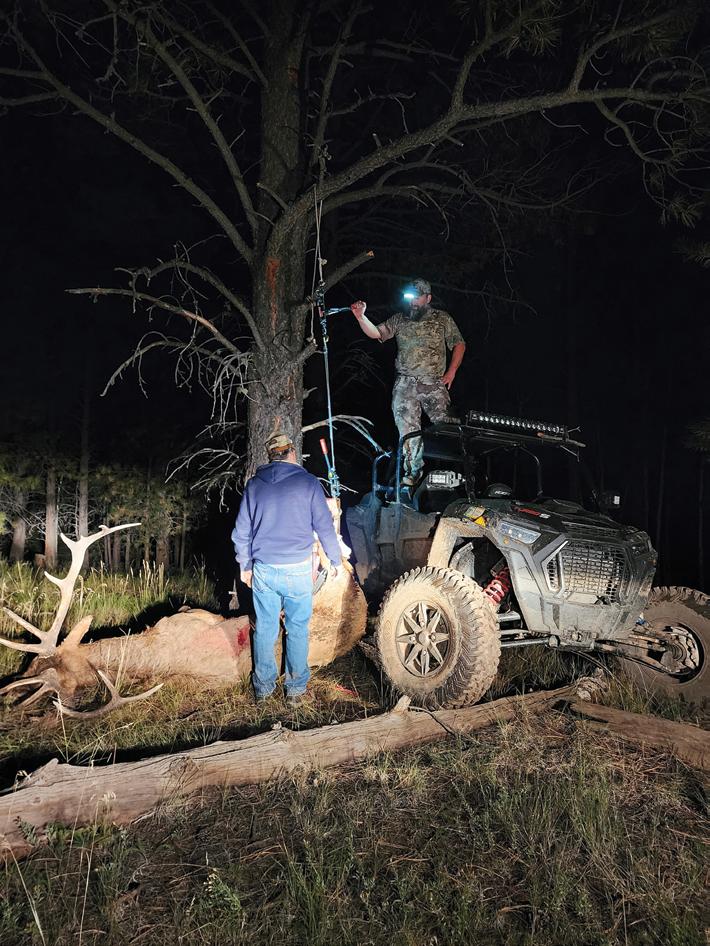
Now in no hurry, I headed back to my UTV and drove to the top of the ridge where I knew I could make a couple of phone calls to get some assistance (I didn’t know how big he really was). Then, it was time to go collect my prize.
CRITICAL GEAR
Bow: Mathews Phase 4 Broadheads: Slick Trick
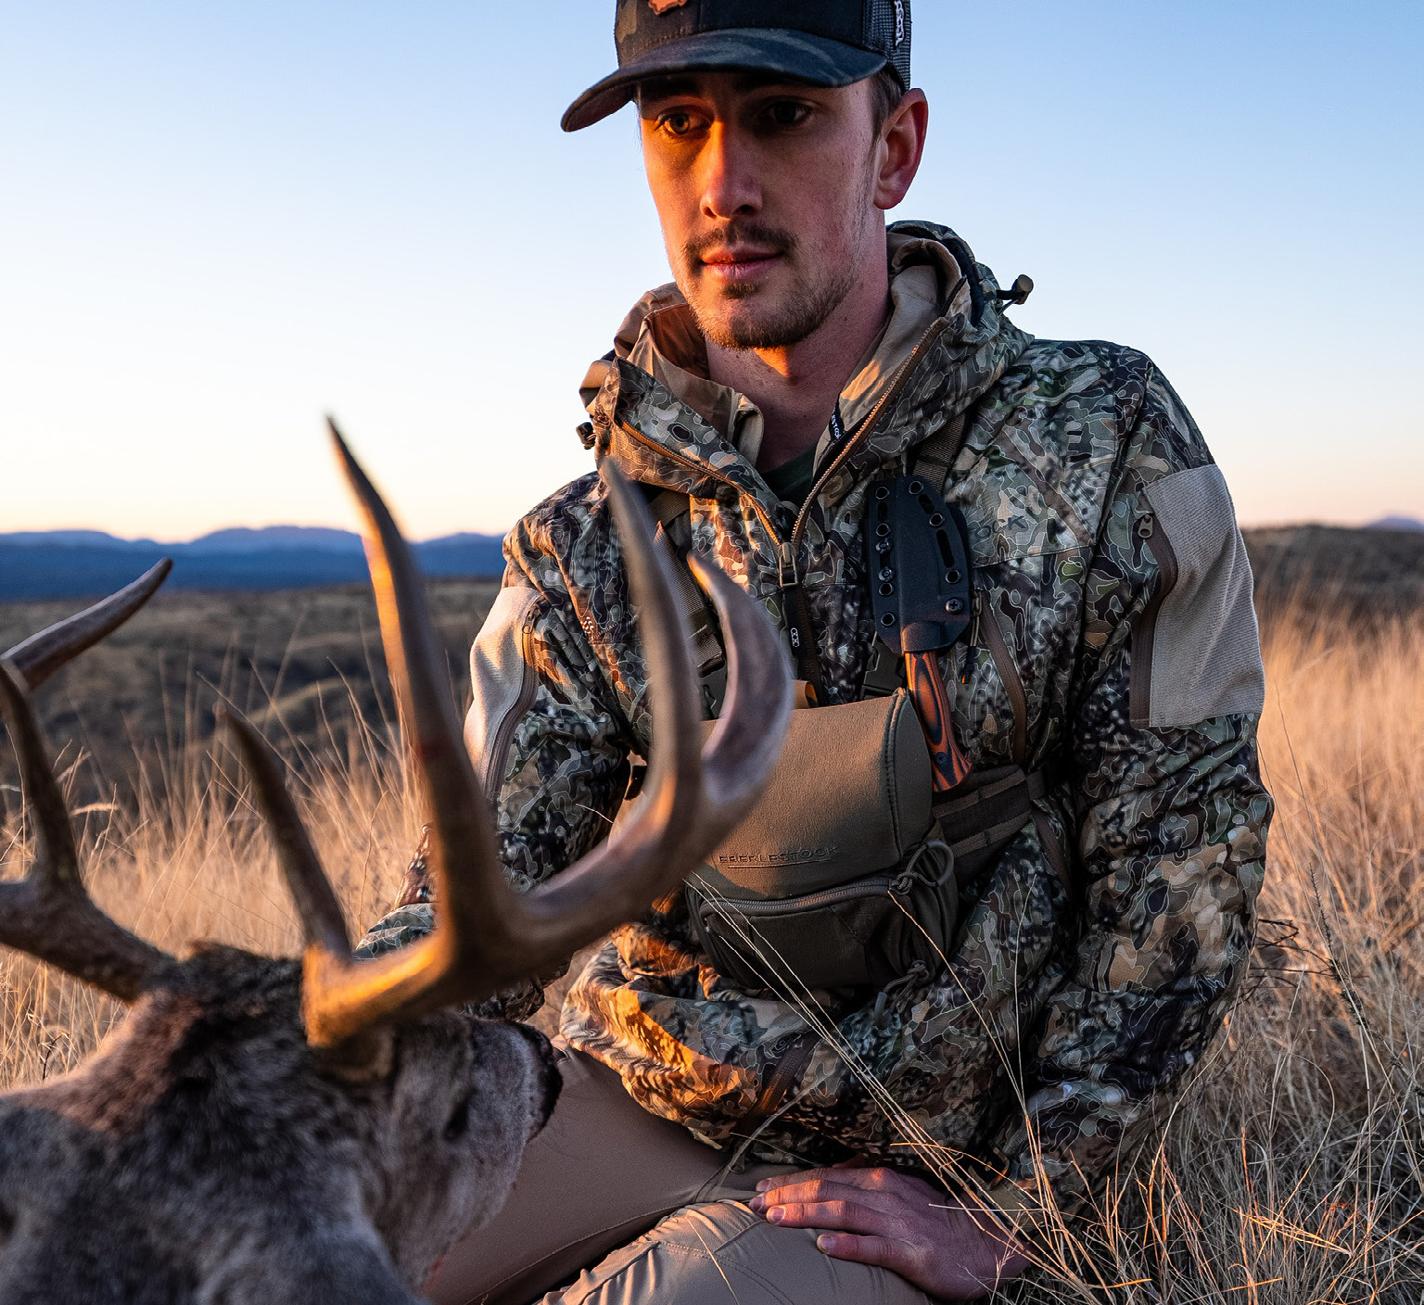
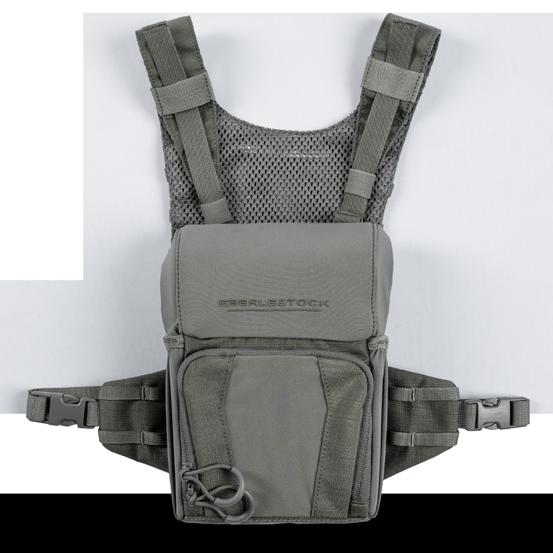
Arrows: Victory VAP Binocular: Sig Sauer KILO 6K Bino Harness: Eberlestock Nosegunner
Boots: Under Armor HOVR
Calls: Phelps EZ SUK’R, Metal Bugle with EZ Bugler
www.westernhunter.net 38 WESTERN HUNTER
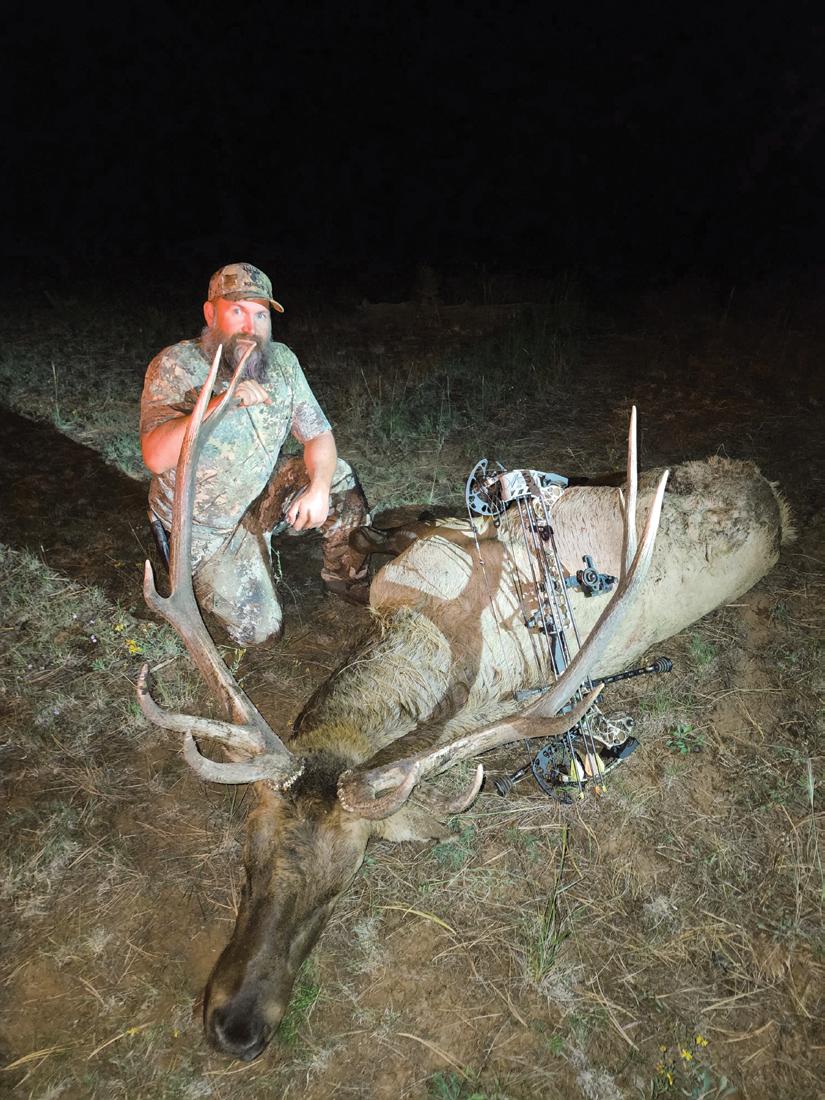
n Joe played his cards right and was rewarded with a great prize.
TABLE TO FIELD

time worrying about it
O U T D O O R S M A N S . C O M 1 - 8 0 0 - 2 9 1 - 8 0 6 5
A young man shows maturity and poise on a difficult bear hunt
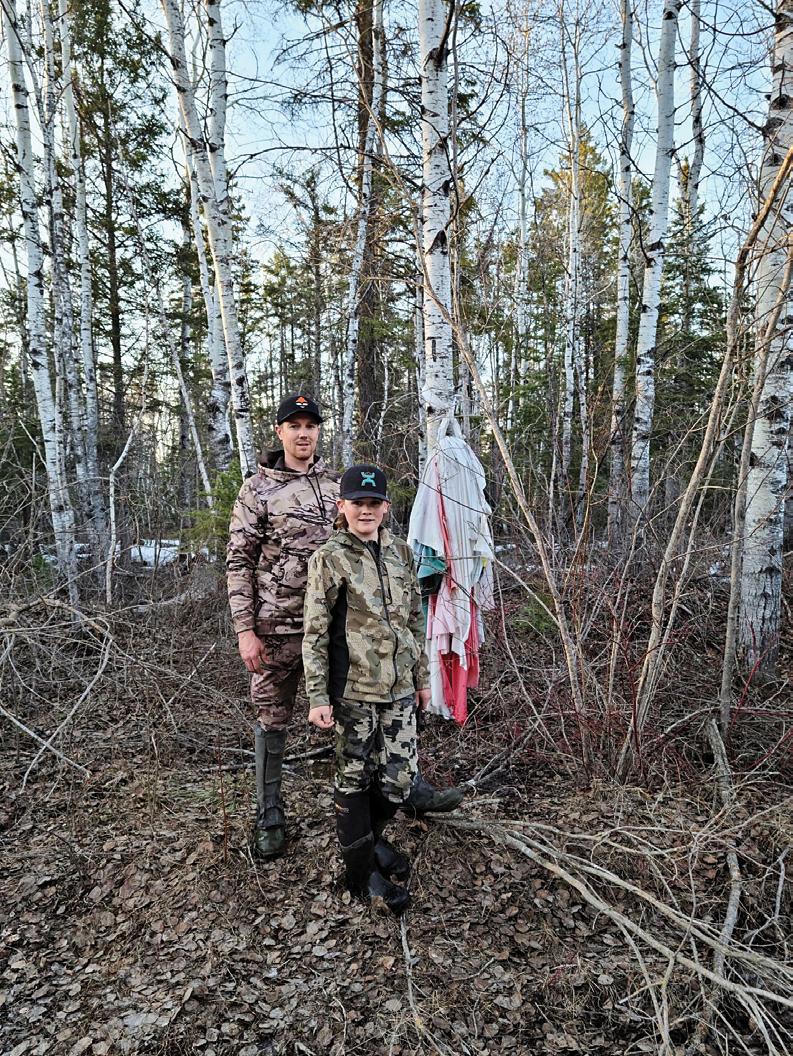
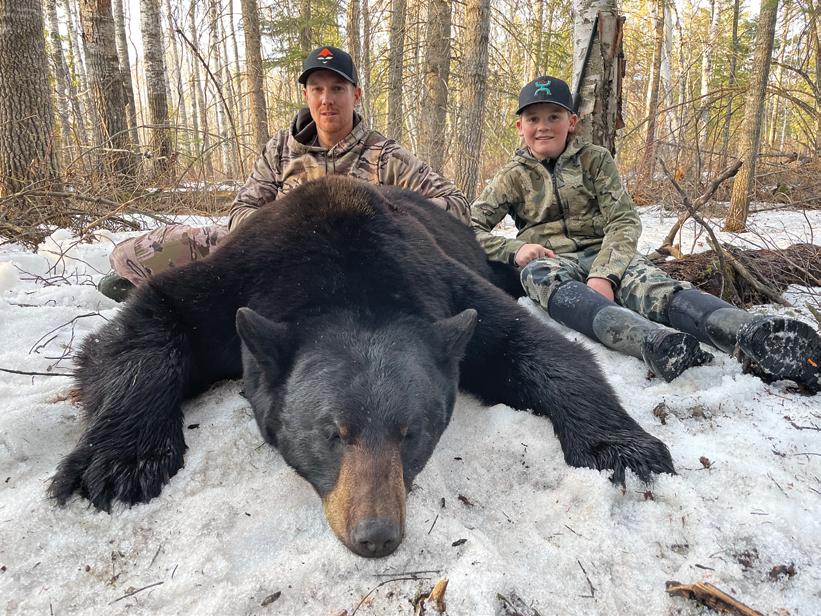
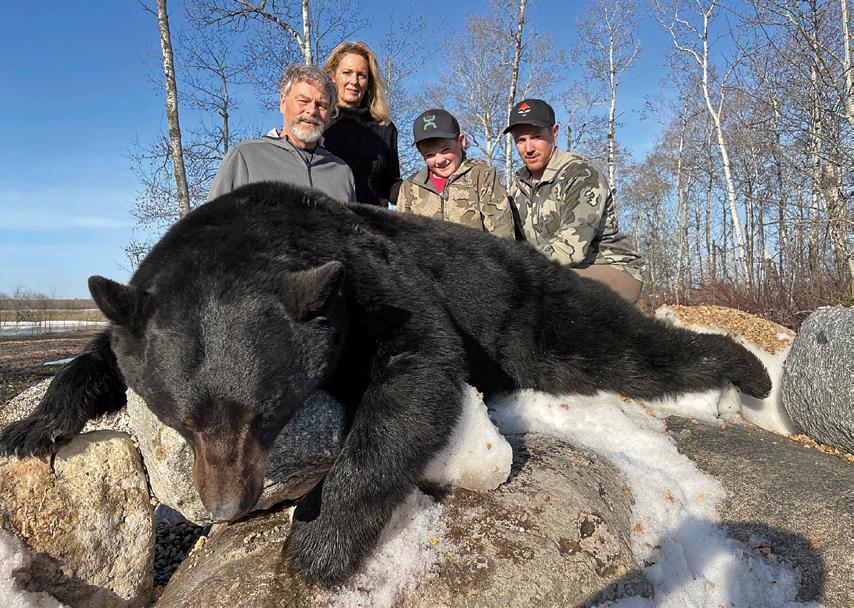
As the spring season of 2022 came into view back home in Utah, some reassuring news came from our outfitter and guide Jason Lambley with Interlake Safaris. He explained that the Canadian border had now re-opened to international travel, and although his area was several weeks behind the typical season cycle, we were welcome to come up and hunt. That was when the reality of my son Cash’s postponed hunting trip began to really sink in. Shortly after, with our passports in hand and hunting gear in tow, our family boarded a plane to Winnipeg, Manitoba to pursue a spring black bear.
During the year prior, twelve-year-old Cash received an amazing opportunity, provided by his grandparents, to embark on an adventure of his choice. During this trip, they intended to spend time together and create memories that would last a lifetime. Originally, the black bear hunt was booked for May of 2021, yet because of the upheavals caused by COVID-19, the on-again, offagain arrangements eventually turned into a postponed hunting trip.
 By Casey Draper
THE HOODOO BEAR
WHM
Draper Canada, 2022
Cash
Arrival
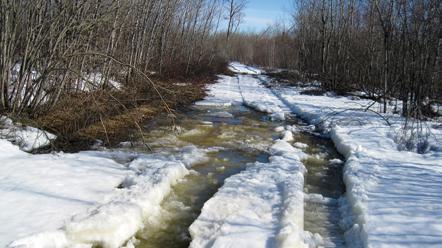
Once on the ground in Winnipeg, we met up with Jason at the airport. We loaded up our luggage and gear and drove two hours north. During the drive, Jason told us about the prolonged winter conditions, which caused him to push the dates back for several of his other clients. This being the case, our family would be the only ones staying at the hunting lodge. He also described the excessive weather in the area and some of his logistical concerns. Later, in the headlights, we started to visualize the prolonged winter conditions and the large amount of water that was causing severe flooding in the area located between Lake Manitoba and Lake Winnipeg.
No Sugar-Coating
After a good night’s rest, the next morning we had the opportunity to get better acquainted with our guide Jason and his wife Wendy while reminiscing over a few photos of past bear hunts. A little while later, we began loading gear and baiting supplies onto an ATV trailer. Meanwhile, Jason started explaining to us how unusual the weather had been
and mentally exhausting. All the while having no bear activity, we could see Cash’s optimism slowly begin to fade. By day three, the weather started to warm up and the sunshine began to peek through more consistently. As we trudged down a weatherbeaten road, through deep water, and past a First Nations Hoodoo doll hanging in the tree. We eventually found a bait site with some bear activity. Yet, by the size of the track, and a few trail camera photos, it was determined that it was a juvenile bear and not one of age or size that we’d hoped for. But we found a bear, Cash was excited, and things were looking up!
Later that evening, after checking a few more bait sites, Jason asked Cash if he wanted to sit the bait site down the Hoodoo trail. He explained that since it was the only place with bear activity, it just might be the turn of luck he needed. So, with an hour or so of daylight left, Jason dropped us off at the base of a big fir tree with double tree stands overlooking a travel corridor and the bait barrel.
While in the stand, as the light through the trees was starting to get gray, we saw a bear emerge from the woods. What an amazing sight! This bear was our first encounter and a great opportunity for Cash to notch his tag. We whispered back and forth a little as the bear was feeding around, and this allowed us to process the scene. With a level of self-control and hunter maturity that shocked me a little bit, Cash decided to pass on this opportunity. Meanwhile, as the evening faded away and we eventually climbed out of the tree stand, I couldn’t help but wonder if he missed his only opportunity.
The Hoodoo Bear
Now on day four of five, and yet again dealing with the adversities of flood water and the disappointment of checking bait sites with no bear activity, you could see that the pressure was beginning to build on Cash and our guide Jason. During a lunch break, as we gathered around the flatbed of the truck, we contemplated the evening hunt. What to do? There were a few other bait sites we could check further down the road, or we could sit the bait site from the previous night. Jason suggested that Cash and I sat the stand down the Hoodoo trail in hopes other bears in the area had found the bait site. Meanwhile, he would go back to the hunting lodge and pick up Cash’s grandparents and take them out to set up a few more tree
info@westernhunter.net 41 WESTERN HUNTER
n Casey and Cash check out the First Nations Hoodoo doll.
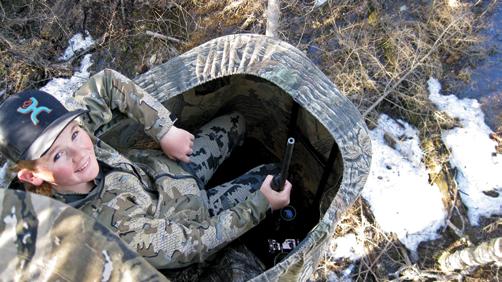
Around 3:00 PM, Cash and I made our way up into the tree stands, fully anticipating a long evening hunt with a little uncertainty. What should Cash do if the bear from the previous night came back? After a few hours of sitting with nothing but a few chipmunks stirring around, my optimism began to fade that a bear would come in.
After another hour or so went by and the temperature started to dip, I caught a glimpse of movement in the outlying trees. Trying to get Cash’s attention without startling him, I reached down and tapped him on his shoulder. Cash raised his head and peered towards the tree line as we watched a bear slowly come into view. Right away we could tell he was more mature than the bear from the previous night.
With poise and swagger, the big boar slowly came into the open. Ever so slightly, the boar inched closer while cautiously raising his head to check the wind. Eventually, the bear made it to some of the bait that was scattered on the ground. The forward-facing aspect of the bear gave us an excellent perspective of his broad shoulders and large head. As Cash and I shared eye contact and gestures back and forth to get his gun ready, a minute or two had gone by. Eventually, after what seemed like forever, Cash gave me the thumbs-up signal that he was ready to shoot!
ahead of him. The big boar ever so slightly turned towards Cash, giving him a frontal shot opportunity. Remembering what he was coached back at the lodge by his guide Jason, Cash fired a perfectly placed shot at the base of the bear’s neck, directly between his front shoulders. The big boar went down to the ground hard! Meanwhile, in the heat of the moment, Cash cycled his bolt action rifle flawlessly and fol lowed up with a second shot, anchoring the bear to the ground.
one bear in four days of hard hunting to having a thirteen-year-old young man take what could potentially be the trophy of a lifetime!

Beyond His Years
With excitement in his voice, Cash phoned his grandparents and told them he had taken a bear. Without giving much detail, he asked them and Jason to come down the Hoodoo trail to pick us up. With the evening slipping away, we climbed down from the tree stands and marveled at the exquisite bear. Soon we saw the headlights of the ATV coming down the trail.
As Jason walked up to the bear, he assumed Cash had taken the bear from the night before. It was then, as he circled the downed boar, that he shouted,“Kid, do you know what you just did? This could be one of the biggest spring bears taken for a long time!” All Cash could do was smile because he was at a total loss for words. Cash did it! Against variable odds, he passed on a good opportunity and waited for a great one that allowed him to take a true giant Manitoba black bear.
www.westernhunter.net 42 WESTERN HUNTER
CRITICAL GEAR Rifle: Savage 6.5 Creedmoor Ammo: Hornady 143-grain ELD-X Clothing: Kuiu, Under Armour Boots: Lacrosse, Dry-shod
n Cash passed on a good opportunity and was rewarded with a huge bear.
Gear for the Western Hunter

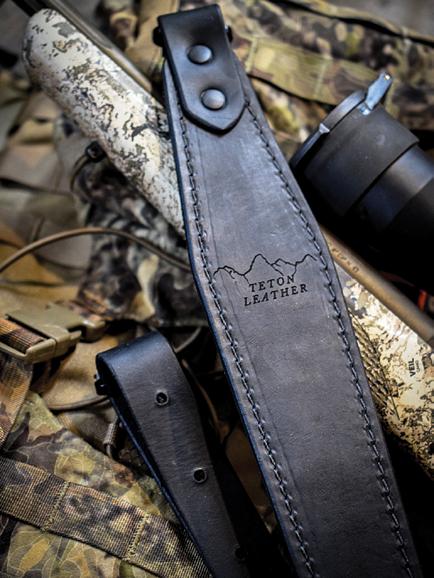
TETON LEATHER COMPANY
TETON AND DAM IT RIFLE SLINGS – THE LAST RIFLE SLINGS YOU’LL EVER OWN
Pedram Parvin
We invest a lot of money into our rifles, scopes, mounts, stocks, and barrels. We take pride in taking the time to pick out exactly what piece of gear we like best and doing our due diligence to make sure our hard-earned money is well spent. At least I know that’s the case for me, and I think a lot of you reading this might agree (after all, this is a magazine with a focus on gear). However, I feel like most of the time we don’t pay as much attention to the rifle sling that we opt to use with them.
It wasn’t until this past rifle season that I found myself wanting more out of my rifle sling. I’d always carried a nylon sling of some sort from varying brands, but over the years I’ve discovered that each time I use them I’m less and less impressed, and I’m left wanting more. Although I didn’t have any failures from my sling, the comfort and the feel were far less than desirable. I know this may seem like a small thing to some of you, but I believe every detail matters and if you have a quality product you’re much less likely to have a failure in the field. In a world full of plastics, I’m much more old school and prefer the look and feel of quality leather.
If you’ve ever had a plastic holster, you know what I mean. While they perform fine, there’s just something about a high-quality piece of leather
that resonates with me. Maybe it’s because it devel ops more character over time, maybe it’s because it contours to your body better, maybe it’s the feel and the scent of leather, or maybe it’s because it reminds me of the American West. I don’t know that it’s one of those things specifically, but rather it’s all of them combined.
I decided it was time to find the best rifle sling that I could. I did my research and came across the Teton Leather Company, a family-owned and oper ated Idaho-based company committed to premi um craftsmanship in the USA. I reached out to them to learn more about their handmade Teton Sling, and the owners Francesca and her husband Zach told me about their goal to make the very best rifle sling.
I learned of their extensive experience work ing with various leather and exotics their entire lives. Their company story embodies the Ameri can dream – a hard-working family doing things for their business the right way, without shortcuts. They had been working on developing this Teton Sling over the last year and a half, determined to find a product they could proudly stand behind.
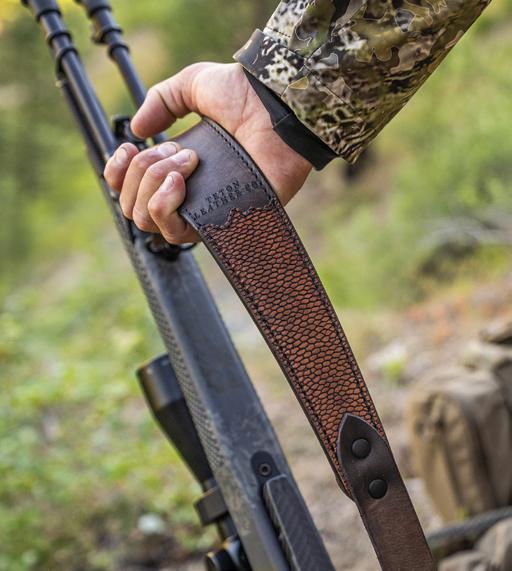
I chose to try out their Teton Sling, which is a stuffed American steer hide with hand-shaped shoulder padding. It features an anti-slip backing which has been thoroughly weather and abrasion tested. It’s stitched with the highest-quality braided polyester thread, meant to handle anything you throw at it. Francesca and Zach hand-dye each sling and it’s offered in brown, black, and another option I’ll get to in a moment. A lot of other slings on the market either don’t come with swivels or sell them separately (and often they are low-quality swivels, causing failures). The Teton Sling comes with solid cast swivels already attached, and you get to choose between standard swivels or QD mounts.
There’s also an even more premium Teton Sling option available that’s made from North American beaver tail. One of my favorite features is that they decided to name this version the “Dam It.” The North American beaver tail is hand-dyed and stitched on top of the steer hide in a way to represent the Teton Range in Wyoming. From the moment I received my rifle slings, I was absolutely blown away by the quality. First and foremost, this was the best-smelling package my house has ever received. The craftsmanship and attention to detail are far beyond any leather item I’ve ever purchased and certainly any rifle sling I’ve ever imagined. The quality of the leather and stitching is top-tier, and the swivels are extremely well-made.
I can’t explain how beautiful the “Dam It” beaver tail sling truly is, but the contrast in color and material between the beaver tail and the steer hide is stunning. I immediately put these slings to work and they’ve been on my rifles since the day I got them. I’m excited to see the character and stories these slings will start to show and tell in years to come. It’s refreshing to see a company create a product like this in the USA, and while I set out to find the best rifle sling on the market, I didn’t think I’d find one that was made to pass down to the next generation.
In my opinion, I believe I completed my mission to find the best rifle sling, but don’t just take my word for it – try it out for yourself. For those of you looking to upgrade your rifle slings, I highly recommend the Teton Sling from Teton Leather Company. Whether it’s an upgrade for yourself or a gift for your dad, grandfather, or spouse, you won’t be disappointed with these premium rifle slings. You can find out more information about them by scanning the QR code below or by visiting TetonLeather.com


www.westernhunter.net 44 WESTERN HUNTER
SCAN THIS QR CODE FOR MORE INFORMATION
FIELD EDITOR
$150
TETON SLING:
DAM IT SLING: $245


REDEFINING PRECISION
ONE COMPONENT AT A TIME

DETACHABLE MAGAZINE KITS
H-S Precision is a complete gun manufacturer producing high-quality firearms and products for the shooting sports industry using world-class techniques, proprietary technology, and state-of-the-art equipment.
DESIGNED, ENGINEERED, & MANUFACTURED IN THE USA
HSPRECISION.COM 605-341-3006 RAPID CITY, SOUTH DAKOTA
CUT-RIFLED BARRELS


Crispi Shimek GTX
By Kevin Guillen, Field Editor
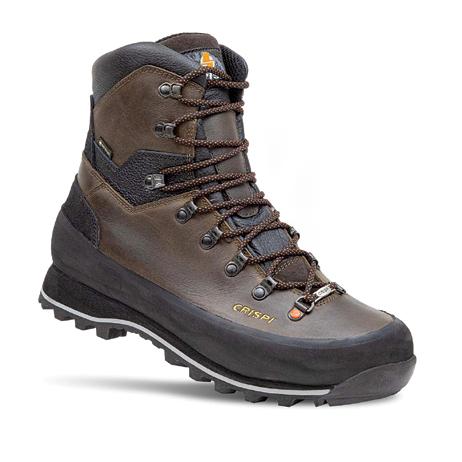
Growing up hunting in Northern California, and now predominantly in Arizona, boots with insulation never felt necessary. With a good pair of socks and a water-tight, uninsulated boot, I’ve been able to stay reasonably comfortable through just about everything. My needs changed once I began planning my first hunt on Kodiak Island this November.
Knowing I would be hunting in far colder and wetter conditions than usual, I selected the Crispi Shimek GTX, mostly for its 400g of Gore insulation. Straight out of the box, these boots were like a
was as if the boots were saying “Relax, I know what to do.”
When my feet finally touched ground on Kodiak Island, the design of this boot really proved itself. With only a 2-flex rating (I’m used to a stiffer, 4-flex boot) and a pleasantly lightweight and flexible frame, I felt agile and mobile – a big advantage when negotiating the maze of alders and salmonberry thickets on the island. Moreover, my feet stayed dry through repeated stream crossings and seven days of hunting the drenched, snowy, and soggy island of Kodiak.
As for warmth and comfort, my feet only got truly cold a time or two after standing still in the snow for a little while. Once we started moving
again, they heated right back up. I suspect there is a combination of sock weight and boot insulation I need to figure out that will allow my feet to breathe better, sweat less, and thus stay warmer when I’m
I’m going to continue putting miles on these boots in a much more arid place when I hunt Coues deer a short week from now. The warmth and dynamic comfort of this boot is a combo too good to leave at home. After my Coues deer hunt, I will be writing a more detailed review on the Westwebsite. For now, I can confidently say that I chose the perfect boot for hunting Kodiak Island, and I strongly suggest you consider it for your mid-late season hunts. p
$415.00
Crispius.com
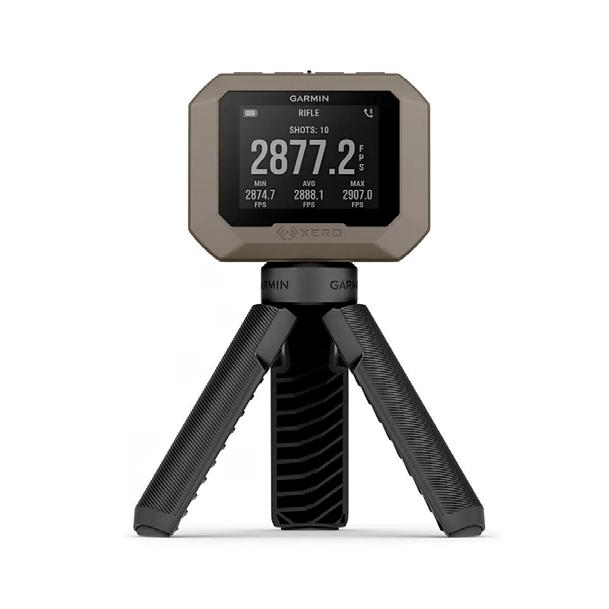
Garmin Xero C⁄ Pro Chronograph
By Colton Bagnoli, Hunting & Shooting Editor
Achronograph is an essential gear item for bow hunters and rifle hunters alike. Knowing your arrow speed for sight tapes or muzzle velocity for building a custom turret for your new rifle are the latest trends for the dedicated western hunter. Garmin has released a new tool for this task with the new Xero C1 Pro Chronograph. This new, free-standing device allows shooters to shoot their projectiles (arrows or bullets) from 100 FPS to 5,000 FPS next to the receiver for accurate velocity readings.
The Xero records standard deviations, extreme spreads, and average velocities on a user-friendly screen. The simple button display makes it easier than ever to scroll through and change functions.
The Xero also features an app that syncs with your smartphone to track your data.
The device is weatherproof and features a 6-hour or 2,000-shot battery life to make the most out of your next range session. No more attaching a bayonet reader to your barrel or aiming carefully between light sensors – the future of the chronograph is a benchmounted device that can fit in your coat pocket.
Watch for a full review of the Garmin Xero Chronograph in a future issue of Western Hunter p
Price: $599.99
Contact: Garmin.com
www.westernhunter.net 46 WESTERN HUNTER WESTERN HUNTER MAGAZINE GEAR & PRODUCT HIGHLIGHTS p
CRISPI
SHIMEK GTX

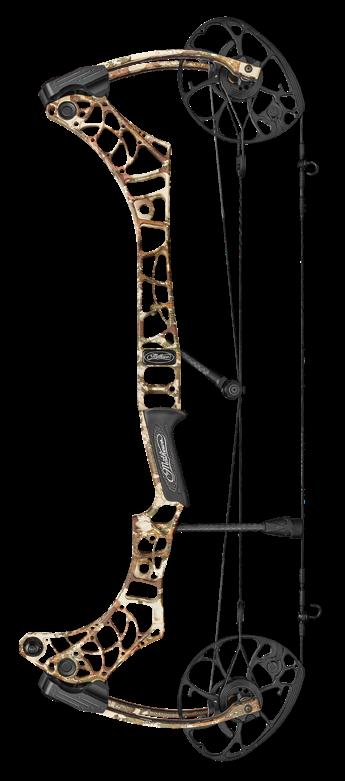
Mathews 2‚2› LIFT... First Look
Mathews recently introduced the LIFT as the new flagship bow for the 2024 season. Over the last few years each new bow came with a few improvements over the previous season’s bow. I don’t say that disparagingly at all; I was thrilled that these small improvements made them even better. But the new Mathews’ LIFT is different from last year’s Phase4 in every respect, and arguably better in each category.
A bow is a relatively simple device; you have a riser, cams, strings, and cables. The main contributor to the overall weight of the bow is obviously the riser. Mathews started from scratch to build a completely new aluminum riser which dropped the bow weight from 4.5 lbs. down to 3.99 lbs., basically the same weight as the new Hoyt RX-8 carbon riser bow. I am particularly excited about this weight loss. I shoot my Phase4 better than any bow I have ever owned. I can simply hold it better, and I attribute this to the weight and balance. With the new LIFT I have a full half pound to play with regarding stabilizers and other accessories and still be at my optimum weight.

The new SWX Cam is also a complete redesign from the previous Crosscentric cam, providing a rock-solid wall which will improve our ability to shoot more consistently. Fortunately, the SwitchWeight modules are compatible with the SWX Cam
system, but with draw weights up to 80 lbs. in 5lb. increments. The LIFT 29.5 comes in draw lengths from 24.5" to 30", while the LIFT 33 stretches all the way to 31.5".
n The new LIFT riser design allows for a dramatic reduction in overall bow weight over the stellar Phase4 model.
Phase4 LIFT

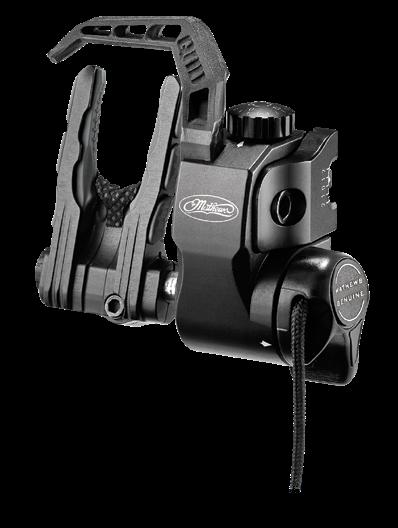
n Mathews teamed up with QAD to produce the new UltraRest Integrate MX2 rest, with .0019 thousandths of an inch adjustment per click.
In the spirit of full disclosure, I have had the new LIFT for about four weeks but between an Idaho elk hunt and an Alaskan adventure I have had very little time to shoot it, but the physical characteristics of the bow speak for themselves. There are multiple in-depth reviews currently on YouTube, but I recommend you visit your local Mathews dealer for a hands-on test. p
MSRP: LIFT 29.5 $1329.00
LIFT 33 $1429.00
Contact: Mathewsinc.com
info@westernhunter.net 47 WESTERN HUNTER GEAR & PRODUCT HIGHLIGHTS NEW GEAR AND PRODUCT INFORMATION
Stone Glacier Mirka Gloves and Altimeter Mitts
By Colton Bagnoli, Hunting & Shooting Editor
Every year I work on perfecting all my apparel systems, including my gloves and hand warming system for late-season hunting in Montana. I need a durable glove for hiking into the backcountry that protects against brush, thorns, and rocks, yet is thin and provides enough dexterity to shoot a rifle or bow. The Stone Glacier Mirka Glove has been my glove of choice in this arena. With its synthetic suede palms and nylon/spandex back, this glove is the perfect fit. It’s a durable glove that fits the tasks at hand and has become my go-to
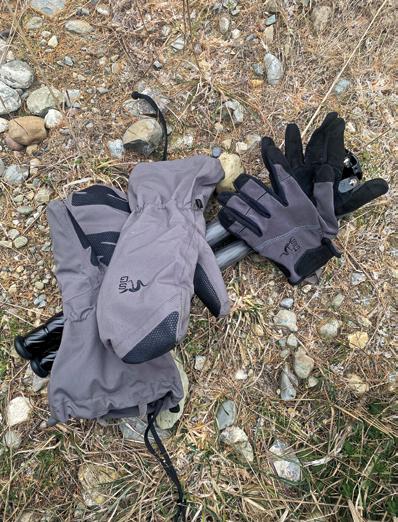
glove for all my technical hunting needs. Where this glove starts to slip is during cold weather glassing. As a thin glove with lots of dexterity, it offers very little insulation, obviously. Enter the Stone Glacier Altimeter Mitts.
Stone Glacier did a great job in the design of these mitts that fit perfectly over the Mirka Glove to make the system work seamlessly. The Altime ter Mitt is a Primaloft-insulated core mitten with a waterproof, Hydrashield outer shell to provide the perfect combo for cold glassing sessions. The mit ten allows hours of glassing while holding onto a frozen aluminum tripod head in search of quarry. Throw a Hot Hands warmer in the mitten and you are set, even when the temps are below zero!
These gloves from Stone Glacier really have be come mission-essential items in my gear list for all my western hunts. After two full hunting seasons of use, these gloves are holding up extremely well without a single stitch out of place. Check them out at StoneGlacier.com and download the new Stone Glacier app on your smartphone to simplify your shopping and receive new product updates.
Price: Mirka Gloves $69.00
Altimeter Mitts $159.00
Contact: StoneGlacier.com
Ollin Snapshot Spotter System
By Colton Bagnoli, Hunting & Shooting Editor
Digiscoping, or filming through observation optics, has been one of the fastest-growing trends in the last 10 years across the hunting industry. With more people self-filming hunts and range sessions, an easier, faster setup has been in high demand. Bucks and bulls don’t stand around forever, so users needed a device that could be attached in seconds to catch that fleeting image of the monster bull before he walked into the dark timber.
For the last year, I have been using the Ollin Snapshot Spotter System for filming through my Swarovski ATX 85mm spotting scope while shooting and hunting. This magnetic eyepiece and phone case combination is by far the fastest and easiest way to do so. With custom eyepiece adapters that fit your specific optic, the Ollin phone case snaps on with a magnet for the perfect view, every time. No more adjusting the adapter to get the proper distance between your camera lens and the spot-
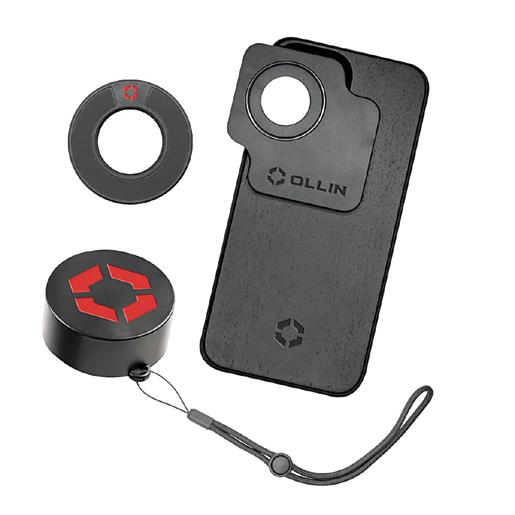
ting scope eyepiece. Just set the phone case on the adapter, and the magnets will self-align the connection in a snap.
This device really is a must-have piece of gear for anyone wanting to film or photograph wildlife in the field. I have found the Ollin system to work great when shooting long-range without a spotting partner. I just hit record once I’m set up on target, and I shoot. I can review the video afterward and make adjustments in my wind call or DOPE that I may not have seen while shooting. I also leave the phone connected to the spotter even when I’m not filming so I can view the target on the larger iPhone screen instead of having to get up and look through the eyepiece, saving time at the range. This is one product I will always have on my spotter and phone going forward for its simplicity and ease of use. p
Price: $174.99
Contact: Ollin.co
www.westernhunter.net 48 WESTERN HUNTER GEAR & PRODUCT HIGHLIGHTS NEW GEAR AND PRODUCT INFORMATION
OLLIN
SNAPSHOT SPOTTER SYSTEM
The Mirka Glove and Altimeter Mitt combination keeps my hands warm and allows me to glass for hours on late-season Montana hunts.
Hammer Bullets – Hunter Tipped Copper Bullets
By Colton Bagnoli, Hunting & Shooting Editor
Hammer Bullets has been manufacturing allcopper hunting bullets for over 80 years in northwest Montana and is rapidly becoming a leader in uncompromising quality and performance with the Hunter bullet line. Hammer bullets are lathe-turned from solid copper bars to exact tolerances and specifications These lathe-turned bullets are some of the most consistent bullets available on the market today and offer hunters a lead-free option with excellent terminal performance not always found in monolithic bullets.
The Hammer Hunter bullet design is a boattail hollow point projectile that looks very similar to many cup-and-core bullets often found loaded in hunting ammunition. The Hammer Hunter is designed for initial expansion through the hollow tip nose which is larger than most hollow point bullets. This system works well but was recently updated with a new polymer tip to help initiate expansion and also increase the Ballistic Coefficient of the projectile. The new polymer tip also protects the meplat during loading or feeding, which in some open hollow point bullets can cause failure to expand when damaged. This combination will offer hunters better external ballistics in flight and terminal performance on game once the bullet arrives on target.
This fall, I was able to harvest several whitetail does and a nice mature buck with Hammer Hunter Tipped bullets in 7mm 145-grain and 30 cal. 203grain hand-loaded ammunition. The performance was exceptional, with the copper petals shedding inside the chest cavity. This created massive trau-
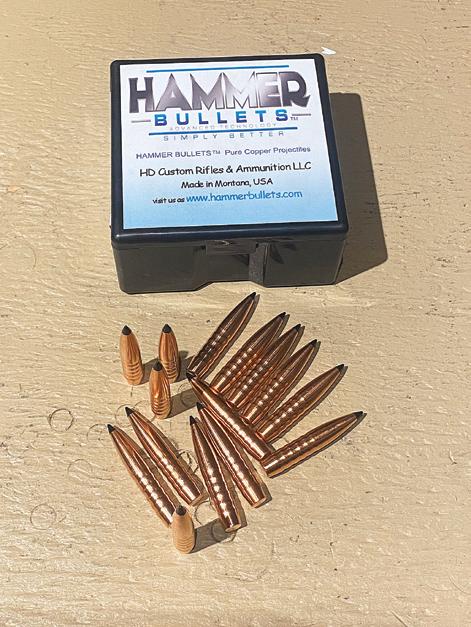
ma instantly on all three deer with broadside shots from 40 yards to 200 yards. None of the deer made it more than 25 yards before expiring. Quick, clean kills with zero meat loss is about as perfect as you can ask for performance-wise.
Hammer Hunters are designed to expand and shed the petals down to 1800 FPS muzzle velocity, which for most common hunting cartridges is 500-600 yards on average. Magnum cartridges like the 7 PRC and 300 PRC can maintain the minimum muzzle velocity to 700-800 yards, depending on load data. While Hammer currently only sells their bullets to the hand loader, Hammer bullets are found in loaded ammunition from Unknown Munitions, Weatherby, and Gunwerks just to name a few manufacturers.
With hunting season wrapping up, now is the time to start developing loads for our rifles, and Hammer Bullets should be high on your list for allcopper projectiles for next season. Many hunters today are hunting for meat, so save more meat for the freezer while keeping it lead-free in the process. There is no reason to not incorporate lead-free bullets into your rifle this year for fear of poor performance. Monolithic copper bullets are going to be my bullets of choice for many seasons to come after seeing the performance of the new tipped Hammer Hunters.
Find out more information and order bullets for hand-loading at HammerBullets.com or email Hammer Bullets at info@hammerbullets.com and
info@westernhunter.net 49 WESTERN HUNTER GEAR & PRODUCT HIGHLIGHTS NEW GEAR AND PRODUCT INFORMATION
Whitetail doe taken at 75 yards with the author’s 280 AI and 145-grain Hammer Hunters traveling 3150 FPS. The doe made it less than 30 yards before collapsing.
The Hammer expanded perfectly and shed the four petals into the chest cavity creating massive trauma to the lungs and heart causing the deer to expire in less than 20 seconds.
The copper bullet doesn’t leave the blood shot ruined meat often found with lead bullets. Instead you find a watery, blood gel between the muscle membranes that scrapes right off the
EXIT
ENTRANCE
Only at KUIU.COM LIFETIME WARRANTY ON ALL OUR GEAR BASE LAYERS | INSULATION | OUTERWEAR | PACKS | SLEEP SYSTEMS | FOOTWEAR | ACCESSORIES
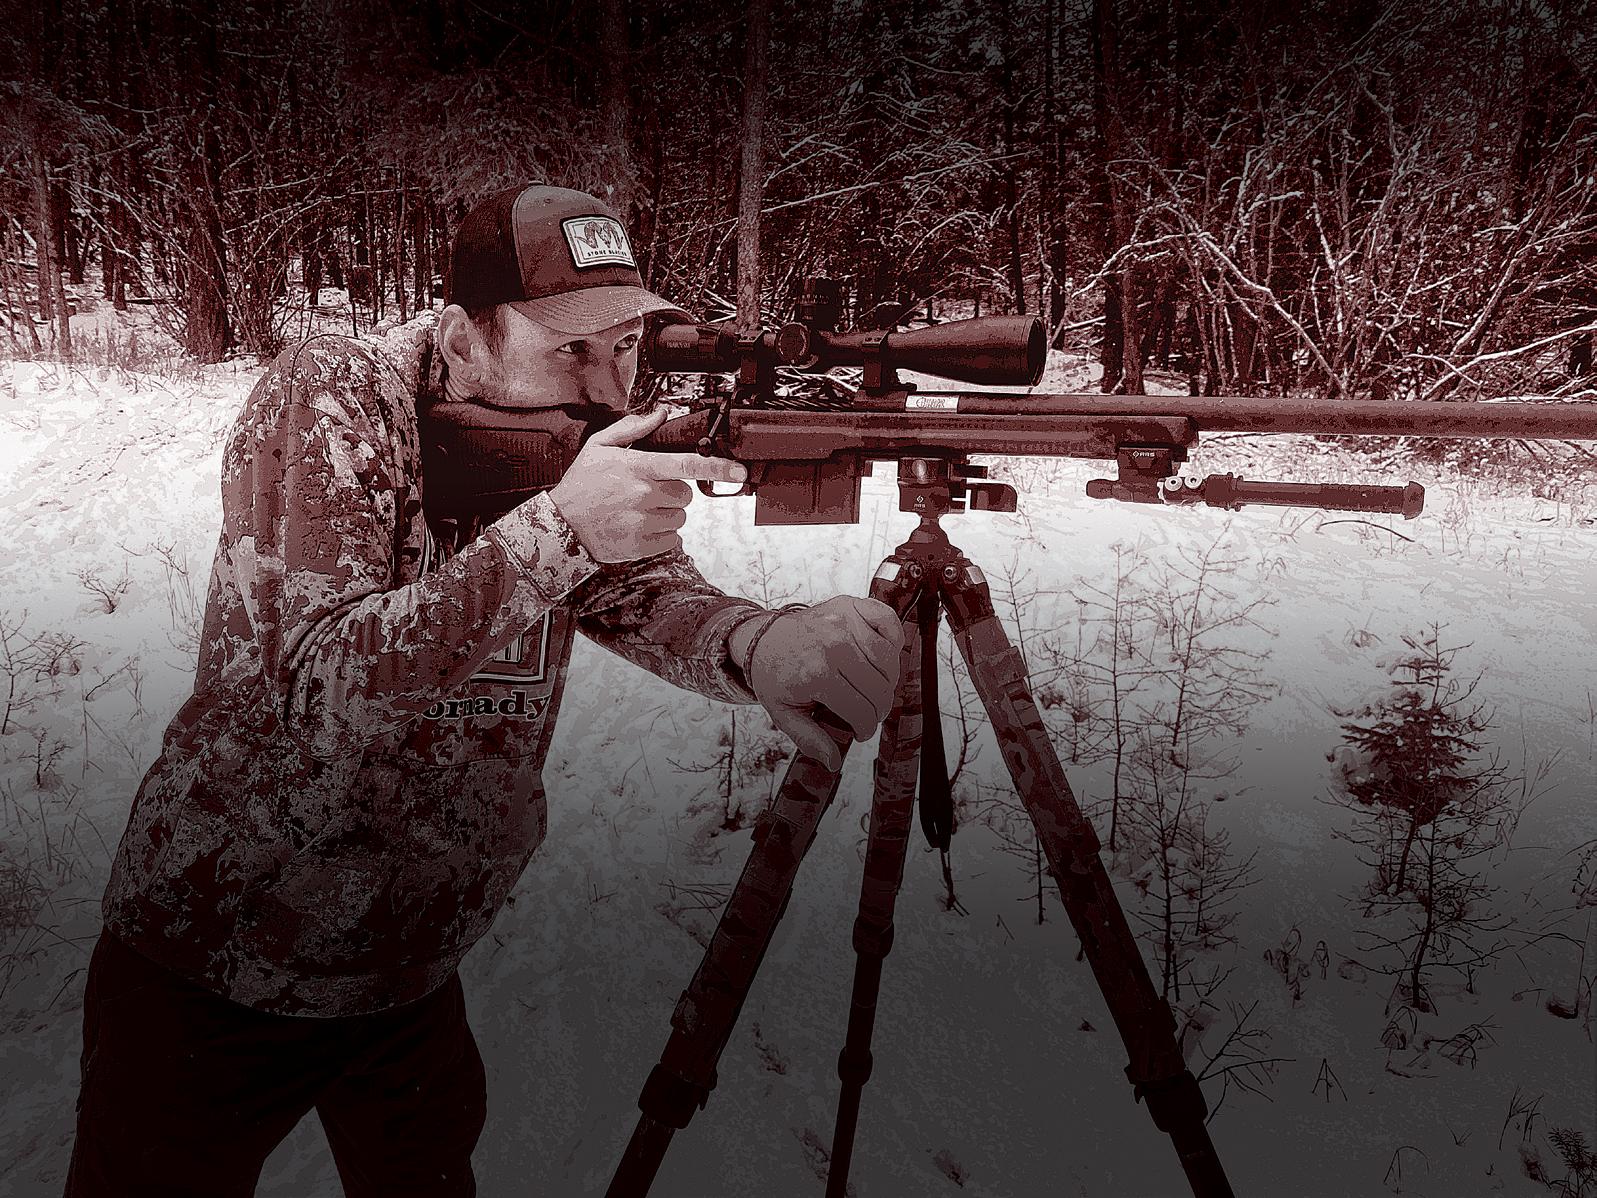
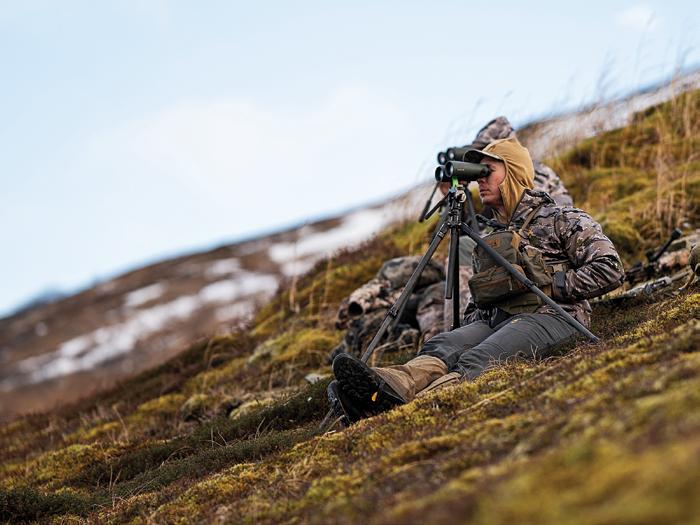
TRIPOD SUPPORTED SHOOTING
MAKE YOUR OPTICS PLATFORM INTO YOUR RIFLE REST
 HUNTING & SHOOTING EDITOR
When it comes to hunting the West, the first skill set a hunter should master is the art of glassing from a tripod. Second, he should master utilizing the tripod as a shooting support. A proper tripod should be able to offer the hunter a wide variety of shooting positions in the field to increase their odds of success. So many times I have seen hunters glass off a tripod and locate their quarry, then struggle to find a prone shooting position on the side of a hill and miss out on an opportunity. It should be this simple: Remove your glass from the tripod, clip your rifle into a tripod head or rifle rest, adjust leg length accordingly, range, and shoot. With the proper rifle setup, tripod, and some practice in the off-season, you should be able
to transition from glassing to shooting in seconds and increase your odds of success this fall.
When selecting a tripod for hunting purposes, there are a few key things to consider before buying. First, the tripod should have three adjustable leg sections to fit the user from standing to seated positions. These leg sections should be twist or leverlocked and should open and close silently and lock securely with zero slipping. Second, the legs should be able to change their angle from the trunnion to lay the legs nearly flat for seated shooting with a total of three positions. I consider these adjustments from standing, kneeling, and seated to allow the widest and most stable base for each position.
If a tripod has a center post for added adjustment height, you won’t be able to get the legs to lay flat in the other positions without cutting down the center post. I prefer to cut my down to about 4-6" to allow full use of the legs. Keep in mind extending the center post of your tripod out for shooting is a huge sin. Keep the center post down to the lowest position and keep the center of gravity as close to the tripod head as possible. Lastly, the tripod should also have a pan-style head with an ArcaSwiss plate attachment to allow direct attachment of the rifle’s Arca rail to the pan head. This is the quickest, most secure, and easiest way to attach a rifle to a tripod.
Attachment Points
Rifle attachment is the next part of the puzzle. Machined rail sections are available in Arca, Picatinny, and Outdoorsmans dovetail to attach to your rifle’s stock through the front swivel stud holes. These plates offer the ability to attach the rifle for
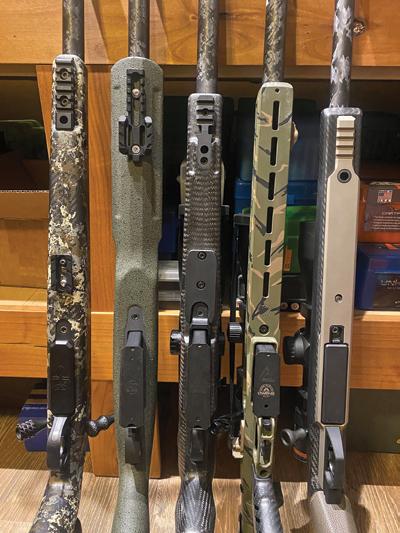
www.westernhunter.net 52 WESTERN HUNTER
COLTON BAGNOLI
SHOOTING & FIREARMS
The TS Custom KS1, Manners Pro Hunter and Gunwerks stocks are just a few of the leading stock manufacturers to mold Picatinny and Arca rails into their stocks.
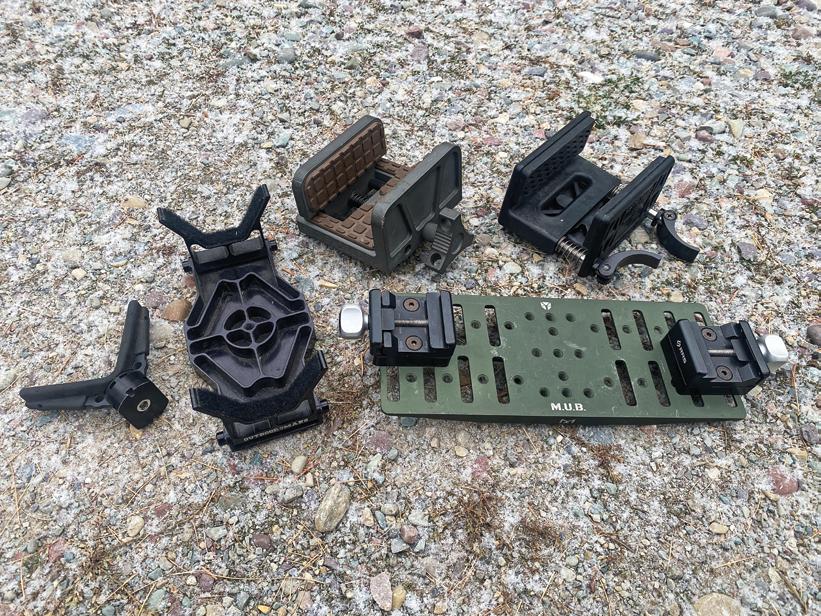
direct clip into your tripod head just like your binoculars and spotting scope. This is by far the best method and should be your primary goal, as it is the fastest and most secure method for tripod rifle shooting. Many new rifles on the market have Arca rails built into their stocks from the factory to allow tripod connection without modifications.
There are rifle rests that clamp to your stock that work great in certain applications where you can’t attach a rail to your rifle stock. This is often the case with a plastic injection molded stock or wood stock. They do not offer the same stability and rock-solid accuracy as directly clipping your rifle to the head of your tripod. If your rifle doesn’t allow for direct clip-in by a rail or you are unwilling to modify your existing rifle, by all means, pick up a rifle rest from Triclawps, Hogg Saddle, or Outdoorsmans that fits your budget and application. The ability to shoot your rifle from a tripod is paramount, so make it happen however you can. With practice, these systems will offer ample stability to make some lengthy field shots on game for those willing to put in the work.
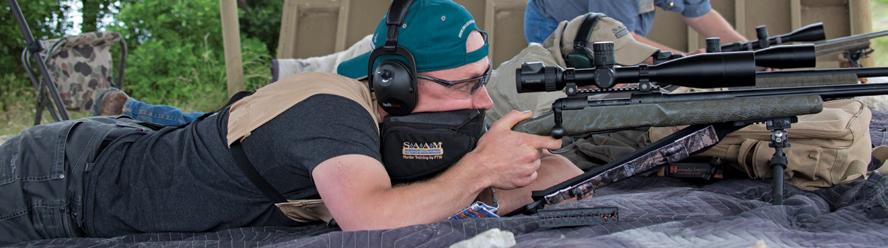
Once your rifle and tripod have the ability to connect, we can start the training process of building proper shooting positions to fit just about any field shooting opportunity you can think of. Of course, this requires you to omit the shooting bench from your shooting practice to build the skill set properly from the ground up, starting with body position, as always.
Seated
I start by clipping my rifle onto the tripod with the legs set for sitting in the same position as I would for glassing. I keep the legs open to the middle notch to widen the stance of the legs with the
bottom leg extension fully extended. Always start with the lower legs extended first so you can use the upper and middle leg sections to adjust height easily without having to reach down and lift the tripod up to adjust the lower leg.
Once the legs are set for your usual seated glassing position and the rifle is clipped in, ensure the rifle is at the proper height for you to comfortably see through the optic and have a normal cheek weld with the rifle shouldered atop your pectoral muscle and across your collar bone, not out in the shoulder pocket. Shouldering the rifle closer to the centerline of your chest will allow much better recoil management as opposed to blading your body off sideways. If you need to make adjustments to height, do so now and work a system out so you can make adjustments quickly and smoothly without
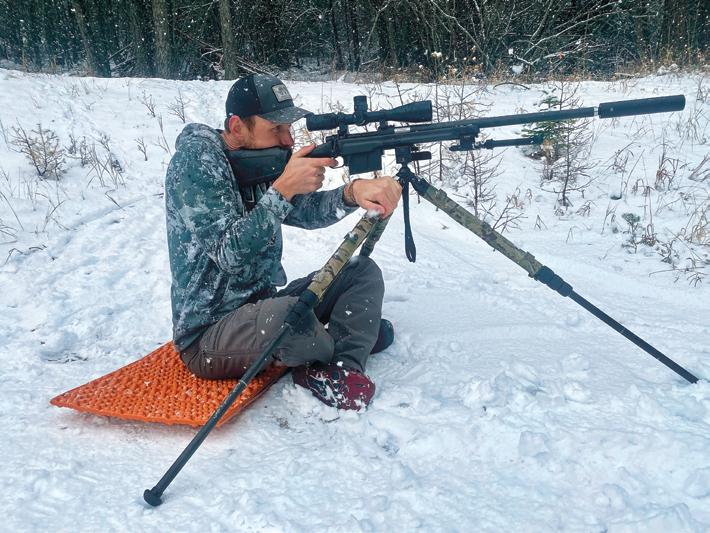
obtrusive movements and noise.
With the tripod and rifle set up properly, we need to build our body position around the rifle and tripod while it is pointed on target to minimize torque and external influences on the rifle and tripod. You want to avoid flexing the stock or lifting a tripod leg off the ground in order to get on target. This is where guys get into trouble, moving the rifle and tripod around them and fighting the process. Move your body to make mass adjustments and then adjust the tripod to make micro and macro adjustments to get a natural point of aim behind the rifle. NPA or Natural Point of Aim is the rifle’s ability to rest with the crosshairs on target without input from the shooter. Building a position around
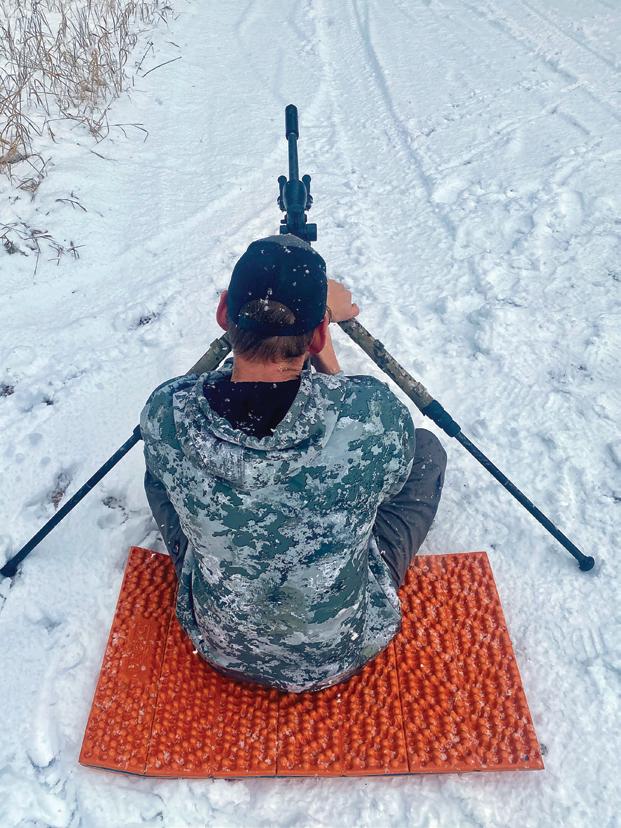
info@westernhunter.net
Rifle rests vary in shapes, sizes and configuration. A simple “V” style rest or Outdoorsmans Rifle Rest (center and far left) are the lightest way to add stability to a tripod. The Clamp style rests such as the Hogg Saddle and Triclawps (top center and right) offer great stability for rifles that lack a rail section matching your tripod head. The MUB board (bottom right) offers multiple attachments for glassing and shooting.
Running the legs of your tripod wide and long allows for better body position under the tripod. This is an extremely stable position to shoot from and is the same sitting position for glassing, making it very efficient to setup.
When we build our body position behind the rifle properly, we also have a squared stance to the rifle’s recoil pad to increase our ability to manage recoil and stay on target for spotting our impacts and prepping for follow-up shots. Clipping the rifle directly to the tripod head instead of a rifle-clamping rest will limit the rifle’s ability to move independently from the tripod.
A rifle not clamped tightly will move with recoil, forcing you to make adjustments to the rifle and tripod by force with flex and torque in the rifle at its attachment point which can cause it to shift of impact in certain rifle setups. A rifle clipped directly to the tripod and supported properly by the shooter will move slightly but stay on target for rapid follow-up shots and impact spotting with minimal adjustment. The seated position is the most stable and comfortable to shoot from, so we start here and work our way up.
Kneeling
While seated shooting is the most stable, kneeling is sometimes required to shoot over rocks, tall grass, or brush. Following the same process of prepping the tripod and rifle to the proper height ensures the shooter is set for proper cheek weld and contact with the recoil pad. Most often, I add about 8-10" of extension in the middle leg from the sitting position to get the proper height for kneeling. Everyone is built differently, so find what works best for you.
Build your position around having both knees together with your feet tucked flat and your butt resting atop your heels. If time permits, I use my Phoenix Shooting Pad under my knees to help keep sharp rocks or freezing snow and ice from destroy-


ing my kneecaps. Try to avoid flexing your feet un der your butt with your boot tread still touching the ground. This will add a ton of muscle tension under your torso which will create shaking and fatigue. The key to kneeling and seated shooting off a tripod is reducing muscle tension and ensuring a natural point of aim behind the rifle.
Once you have built solid positions behind the tripod with your rifle mounted and feel comfortable, take a sharpie and mark the leg position for sitting and kneeling to make reference points for rapid deployment. Use different colors or multiple bands to separate each position if needed. This is a huge time saver for hunting or competition shooting when it comes to setting up a tripod under stress.
Standing
The standing position is the least stable and requires the most practice to get comfortable with for most shooters. With the tripod legs extended,
you want to have the rifle about nipple high when you’re standing up straight behind the rifle. This will allow you to lean forward slightly and load the rifle and tripod leg while keeping a wide stance with your feet just outside of shoulder width. If the tripod is too high and you have to stand flat-footed and straight-legged, you’ll get a big push from recoil moving the tripod off target and lose your target.
The stance for the standing position is crucial for recoil management to see your impact after riding through the recoil impulse and stay on target for follow-up shots. Be sure to work this one thoroughly in the off-season at 100-400 yards and get comfortable. If your rifle doesn’t return to the target after shooting, change your stance and work it out. Obviously, if you’re shooting a 7-lb 300 RUM off a light tripod, it’s going to move a lot. With some practice, you’ll be able to stay on target with minimal adjustment after the shot. With a good tripod and rifle setup, you’ll be able to spot your impacts at 500-600 yards and beyond with ease.
www.westernhunter.net 54 WESTERN HUNTER
Keep the butt stock deeper in the chest away from your shoulder pocket. Alignment of the rifle more in the center line of your chest dramatically improves your recoil management.
Shooting in the standing position behind a tripod can be very useful in the field. Proper body position and having your weight slightly forward helps reduce recoil jump and keeps you on target.
PREMIUM PERFORMANCE TRUSTED BY PROFESSIONALS
Our Geovid Pro ballistics binoculars offer the epitome of optical excellence and are relied upon by professional guides and hunters during extended hunting expeditions. When paired with our Amplus 6 scope, known for its exceptional low-light performance, precision adjustments, and multiple reticle options, you can have absolute confidence in an optical system that embodies Leica’s proven track record of delivering unrivaled performance.
Geovid Pro Models: Geovid Pro 8x32, 10x32, 8x42,10x42, 8x56
Amplus 6 Models: 3-18x44 i, 2.5-15x56 i, 2.5-15x50 i
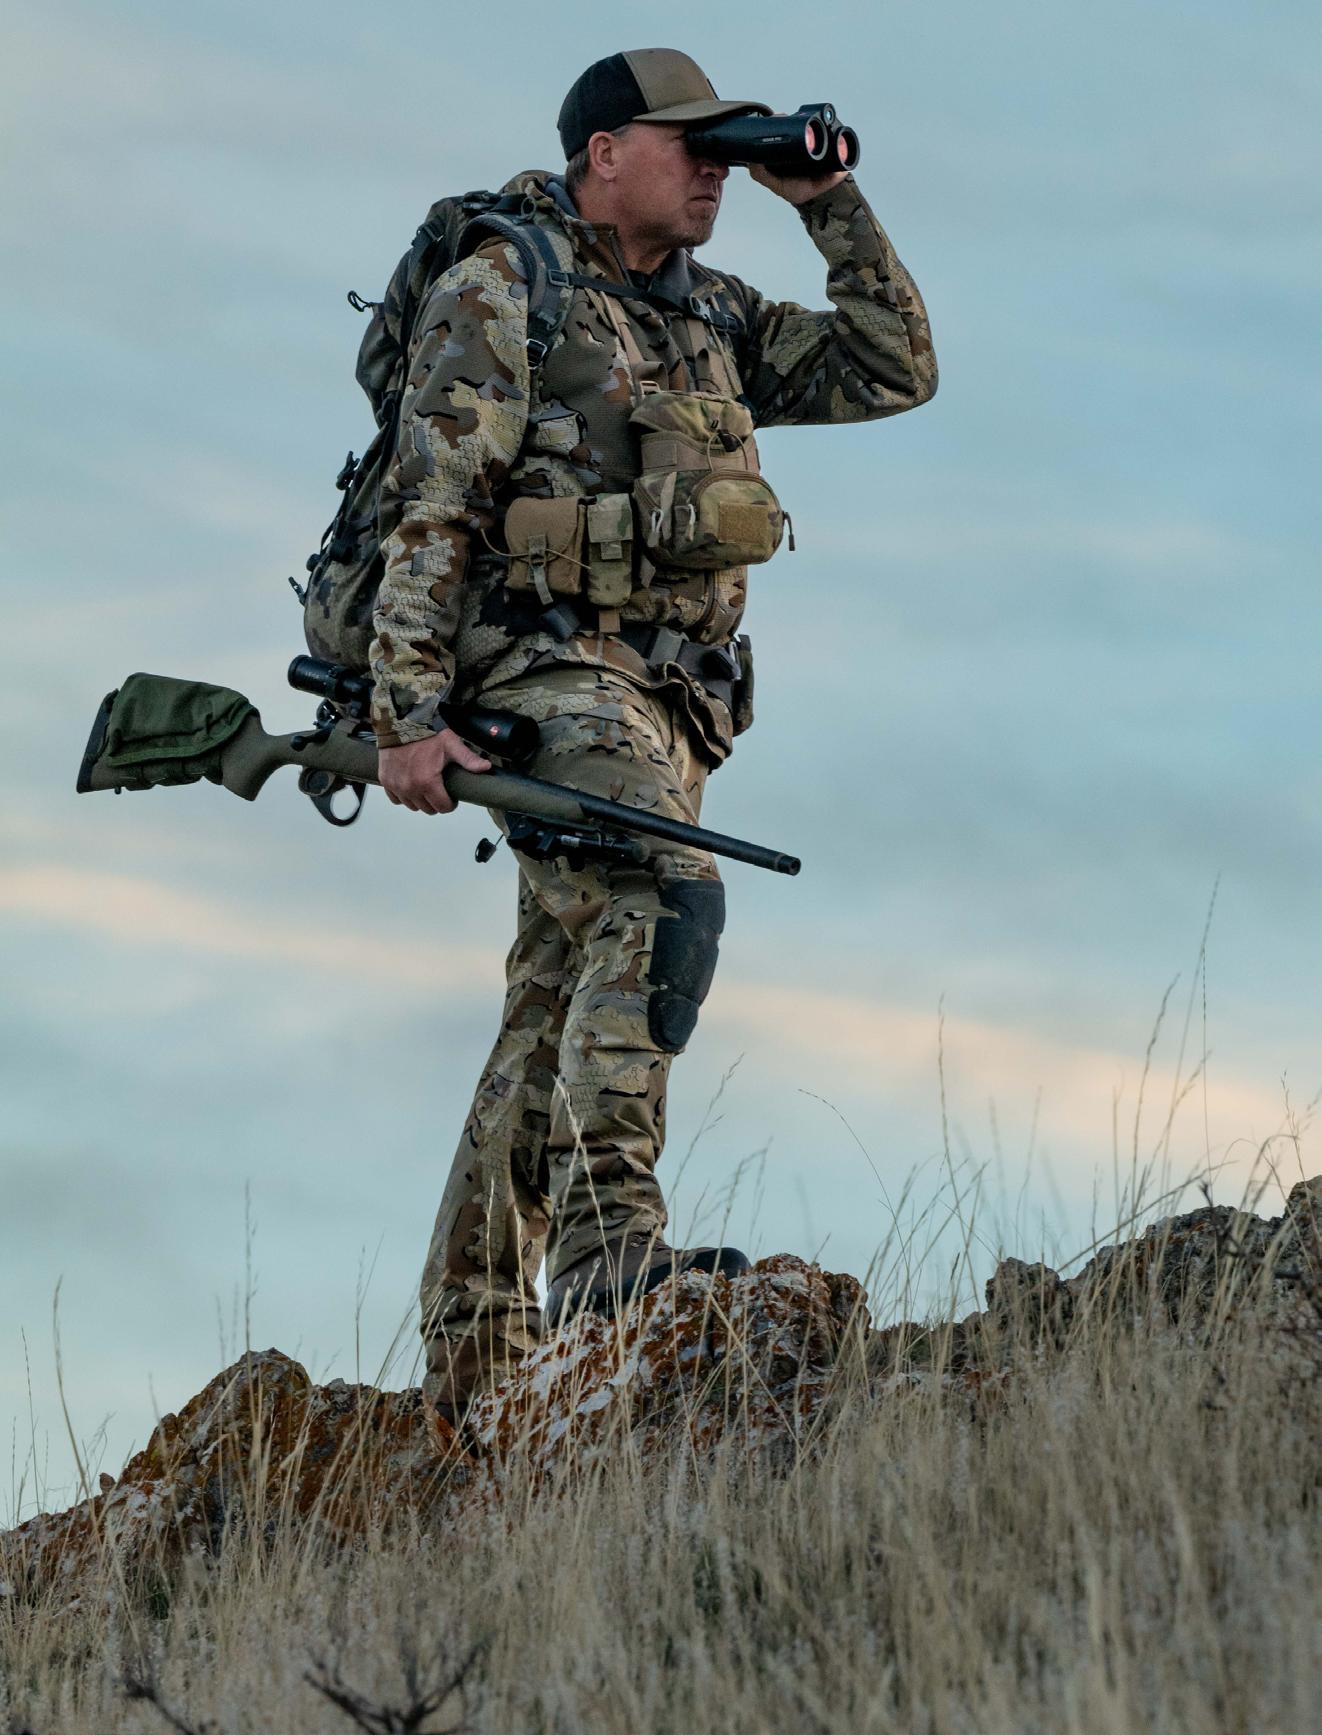

Discover more – visit your authorized dealer or explore leica-camera.com/sport-optics
Geovid Pro Features:
W
@LeicaHuntingUSA
Calculation Bluetooth Applied Ballistics Atmospheric Sensors Leica ProTrack Ballistics made easy Wind Correction
LEICA AMPLUS 6 2.5–15 x 56 i
LEICA GEOVID Pro 32
LEICA GEOVID Pro 42
LEICA AMPLUS 6 3–18 x 44 i
NEW
Reticle L-4w (MOA)
LEICA AMPLUS 6 2.5–15 x 50 i
NEW
Reticle L-4a
Learn Your Weapon
Just like in any field shooting position, keep your rifle scope below 15x when shooting from the tripod positions. The lower power range and wider field of view will help get you back on target faster to spot impacts. Many hunters struggle with posi tional shooting as they keep the power up to 20-25x and the wobble in the reticle can be nauseating. Lowering the magnification will help settle the ret icle and make aiming a whole lot easier.
It’s also not uncommon for your zero to wan der slightly from the bench where the rifle was ze roed to shooting off the tripod. The stock or chassis you use will flex and respond differently under re coil and can sometimes move your point of impact 1-2" at 100 yards, so be aware of this change po tential in your setup. The softer injection molded stocks of most factory rifles are the most vulnera ble to this change. Also, some aluminum chassis rifles I have shot will change impact, and the whole chassis is basically a tuning fork, so vibration will travel throughout the entire rifle.
For most hunting distances of 100-300 yards, these small changes won’t really matter if you make a good shot on the animal, as you get 6-8" of wig gle room in a deer’s vitals and 8-10" on an elk. Just be sure to work your system out before the season to avoid losing any confidence you had in your rifle when you first shoot it off a tripod two days before the opener and find that your rifle and tripod don’t jive. Start now and have a system dialed by summer.

Just like anything, shooting a high-power rifle off a tripod takes some practice to master. I always recommend shooters to train with a rimfire 22LR or .223 Rem-chambered rifle to help get reps in at lower costs than training up with your 300 PRC hand loads if you’re on a budget and want to maxi mize your trigger time. The extra reps will ensure you get the tripod set up properly for a variety of positions.

Once you’re comfortable with sitting, kneeling, and standing on flat ground, start incorporating angled hillsides and obstacles to work through the reality of the hunting terrain we find ourselves in every fall. If you start your training with a smaller caliber rifle, be sure to finish training strong using the hunting rifle and ammo you plan to use in the field to establish confidence with your rifle and setup.
As always, help keep the gun conversation alive by emailing me at Colton@westernhunter.net with your questions or suggestions for future product reviews. Follow me on Instagram @papwinkle to see my posts and reviews regarding all things precision rifles to help make you a better rifleman.
And remember, “Only accurate rifles are interesting.” –
Townsend Whelen
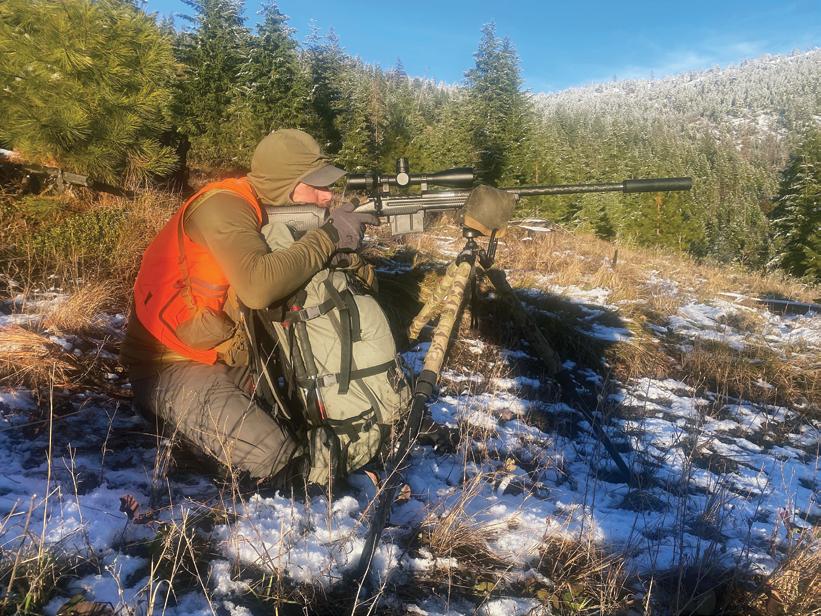
www.westernhunter.net 56 WESTERN HUNTER
While glassing for deer, I will often snap my rifle into the tripod if I see a small buck I may not want to shoot just so I can get practice setting up to see if I really could make the shot.
Utilizing your pack as a rear rest helps make an “ok” position a “solid” position especially if you may be looking at an extended wait for an animal to show itself or present a broadside shot. It takes a little more time but I am always working towards building a better rest if I am afforded the time.
If you don’t have a rifle and tripod system established you can still make a good rest by placing a dense fill rifle bag atop your tripod head and use your pack as a rear rest. Here the Game Changer Medium with GIt Lite fill makes a great bag for the field as it is dense but extremely lightweight and versatile.


SAVE HUNDREDS ON PREMIUM OPTICS 1 - 8 0 0 - 2 9 1 - 8 0 6 5 | O U T D O O R S M A N S . C O M / U S E D
$1,400 Saved!
Over
RELEASE AIDS
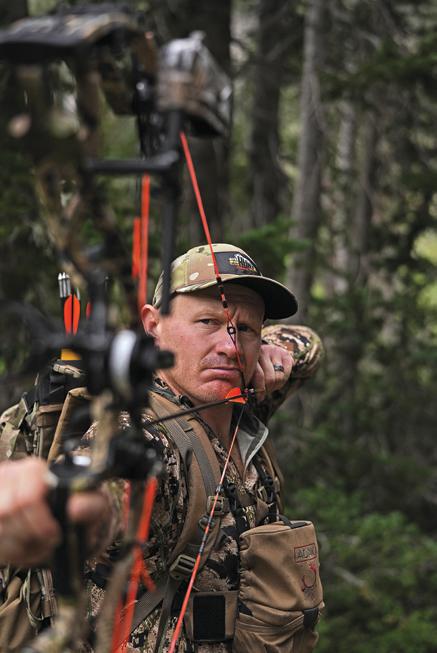
WHY I CHOOSE AN INDEX FINGER RELEASE DESPITE AN INDUSTRY SHIFT
shoot a thumb, hinge, or back tension release to shoot that well. I emphatically tell them, “NO!”
In this article, I am going to discuss why I continue to shoot an index finger release for hunting, how it compares to different handheld releases, and when you may need to consider a different shooting release.
Don’t Base Decisions on Fads
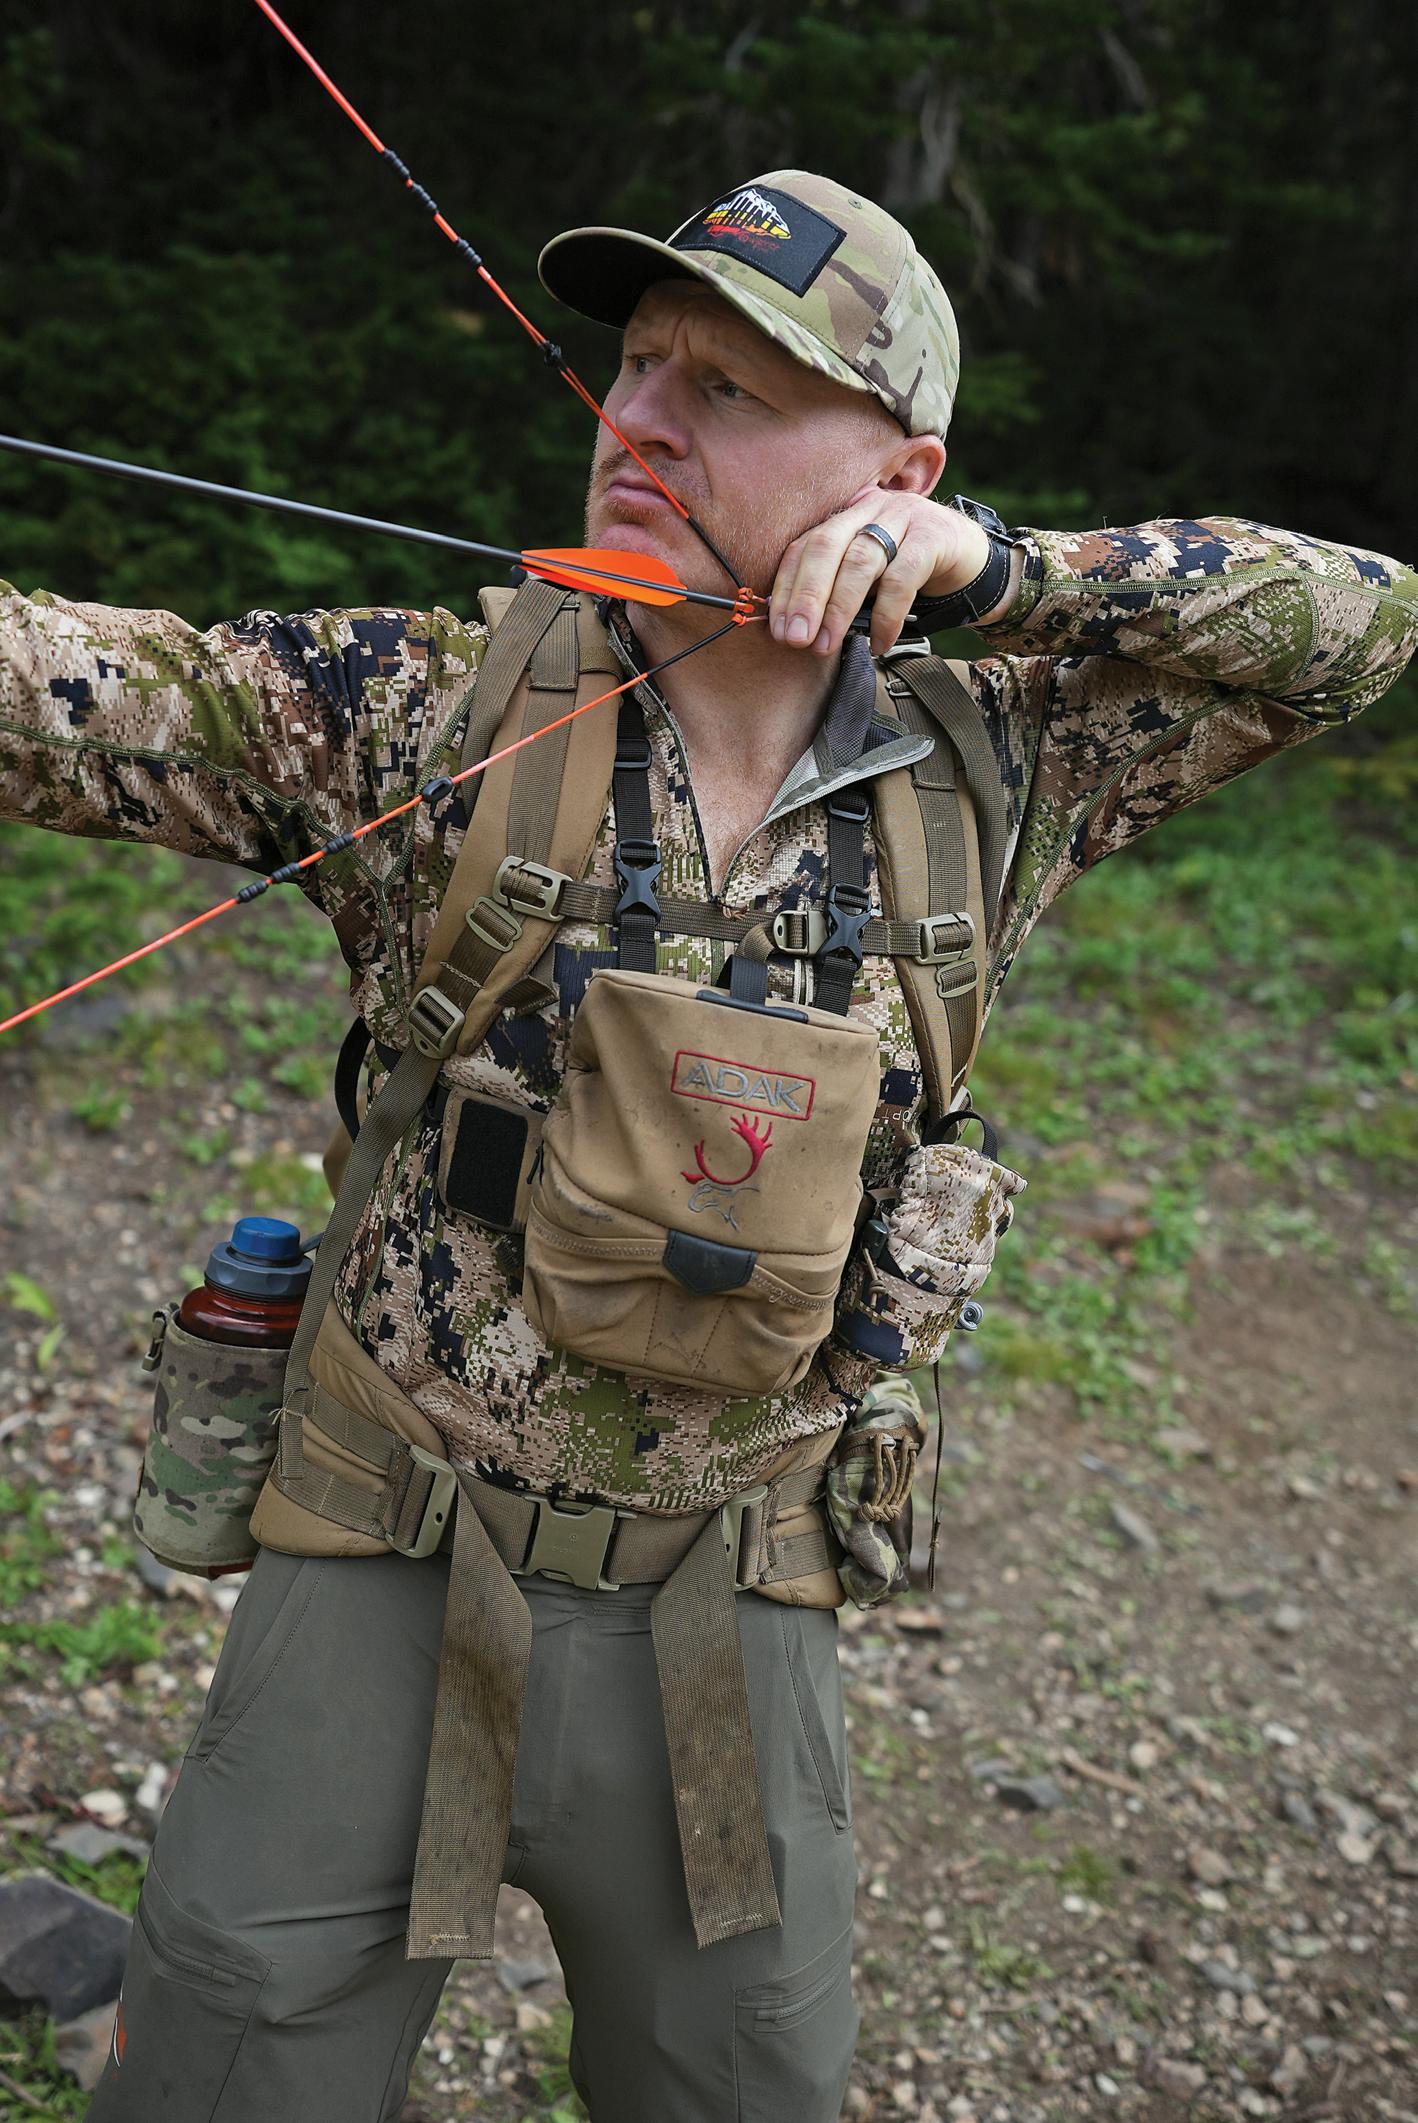
when I am shooting at 80 yards frequently, I can consistently put four out of four arrows in a 3-to-4inch circle with my hunting bow. It’s funny when I see people at my local Easton Foundation Shooting Center and they are shocked that I can shoot that well with an index finger release. It is as if they think an index finger release is an ancient Neanderthal’s tool. They just suppose that you need to
There is, undeniably, a fad or train of thought in the industry right now that you need to shoot a hinge, thumb button, or back tension release to shoot accurately. I see many bowhunters at my local shooting range trying to shoot these releases because they are the “hot thing” right now, but they really struggle to shoot them, and they don’t give themselves enough time to practice with them. Many of them reach out to me for help, and I inevitably ask them why they switched from an index finger release.
The answer usually goes something like this: “I’ve seen lots of guys in the industry convert to one of these, so I thought I needed to in order to be really accurate.” The other answer I get is, “Oh, I’ve
shot the trigger finger release for years and I am ready for a more advanced release.” This implies that an index finger release is a beginner’s release, which is just wrong. I occasionally have someone tell me they are switching because of target panic, which can be a valid reason (more on this later).
I think our industry is prone to being swayed by trends and fads. Believe it or not, many hunters see an influencer using a particular product and they purchase that product simply because that influencer is using it. They don’t base their decision on research or testing, just the influencer’s opinion. I think this can often be the case with releases, based on what I have seen at my shooting center.
I try to base my decisions and gear choices on research and personal testing and seldom follow trends or fads. I try to do the same with my articles. When I evaluate something, I try to approach it from an unbiased, factual, or research-based approach. I spend a great deal of time writing my articles for Western Hunter and endeavor to provide good, meaningful information so that you, the reader, can make an informed decision as opposed to just taking my word for it.
www.westernhunter.net 58 WESTERN HUNTER
Command Style Shooting
The first thing that needs to be said is there is a big difference between shooting on a line in Vegas and shooting in a rockslide in Colorado. What makes for a good Vegas target setup and technique IS NOT what makes for a good hunting setup in my opinion. They are entirely different things, but I think the industry as a whole wants to try and make them the same, thinking that if a hinge release is best for ultimate accuracy for Vegas Three Spot, it must be the best for bowhunting as well. I don’t believe this; I think there is a time and place for different techniques and styles depending on the archery discipline.
I shoot my index finger release “command style.” While I’m holding on-target, I lightly rest my finger on the trigger (my finger is physically touching the trigger), I continue to hold on-target, pulling into the back wall consistently, and when my pin float is minimized over my target, I slowly start
(if you are off just slightly to the right or left), the force required to pull the trigger can torque the string a minute amount and influence the right and left impacts of your shots. I have experimented with many index finger releases, and I’ve seen more inconsistencies with the ones with stiffer triggers. The best way to test a new release for consistency is shooting through paper.
People will often confuse punching the trigger on an index finger releases with command-style shooting. Command-style shooting is the ability to break the trigger at any time in the process of squeezing the trigger without altering the sight picture. Punching the trigger generally happens if your mental discipline breaks down and you start anticipating the shot or feel the urge to slam the trigger as soon as the pin floats through the target (often called “drive-by-shooting”).
New archers who don’t know any better and archers who suffer from target panic may keep
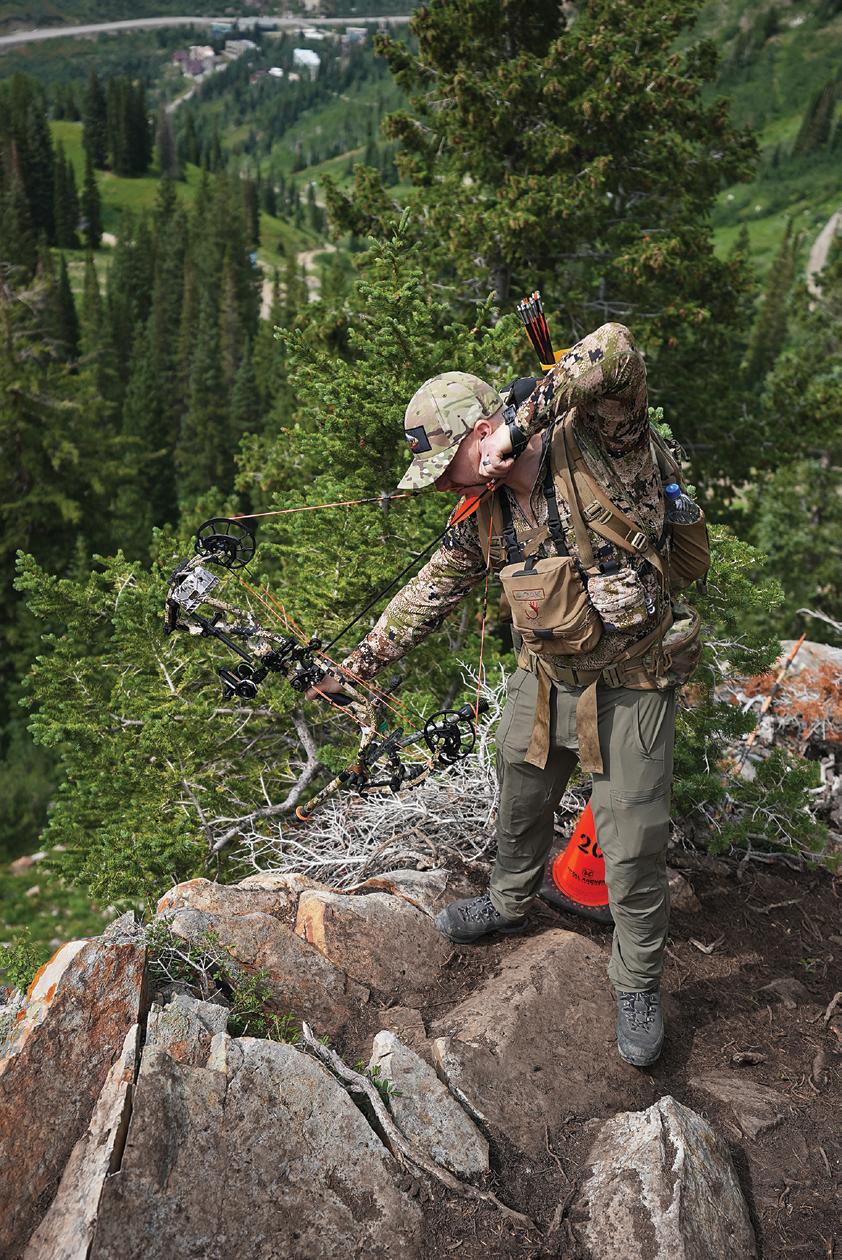
Benefits of an Index Finger Release for Hunting
There are many benefits of an index finger release for hunting. First and foremost, the shot process of shooting an index finger release is quick and can be on command. Once you’ve settled on your target and are ready to execute, you squeeze your finger, and the shot goes off. Your index finger has very high motor control, which makes it very quick and simple for the brain to send a signal to the finger to squeeze (this is a double-edged sword, however, and will be discussed later). A quick shot pro
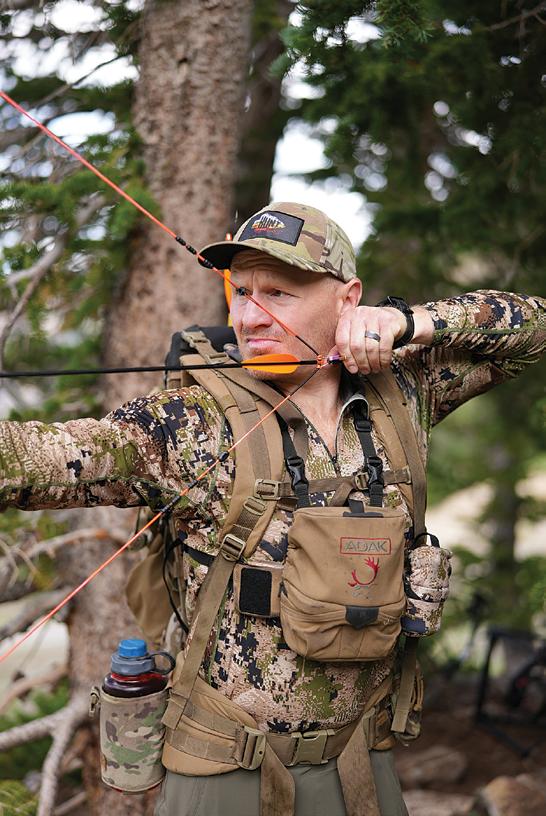
 The author uses an index finger release for hunting because it has advantages over other releases in uncontrolled hunting situations, like with wind, weather, steep angles, and quick shots.
The author drawing a heavy poundage (80 lbs) hunting bow with a wrist strap index finger release. It is generally easier to draw heavier poundage bows with wrist strap index finger releases. Notice his finger is behind the trigger when drawing.
Once the author is settled on target he lightly places his index finger on the trigger, with his other fingers in an open relaxed position (not closed, gripping the wrist strap).
The author uses an index finger release for hunting because it has advantages over other releases in uncontrolled hunting situations, like with wind, weather, steep angles, and quick shots.
The author drawing a heavy poundage (80 lbs) hunting bow with a wrist strap index finger release. It is generally easier to draw heavier poundage bows with wrist strap index finger releases. Notice his finger is behind the trigger when drawing.
Once the author is settled on target he lightly places his index finger on the trigger, with his other fingers in an open relaxed position (not closed, gripping the wrist strap).

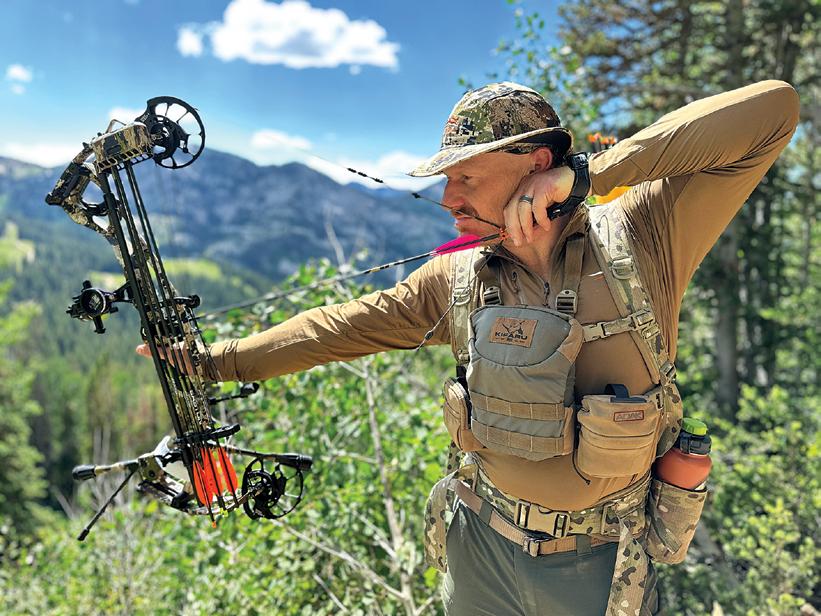
speaking, rushing a shot with a thumb button can still be pretty accurate; rushing a shot with a hinge is dicey at best and I would not recommend it;
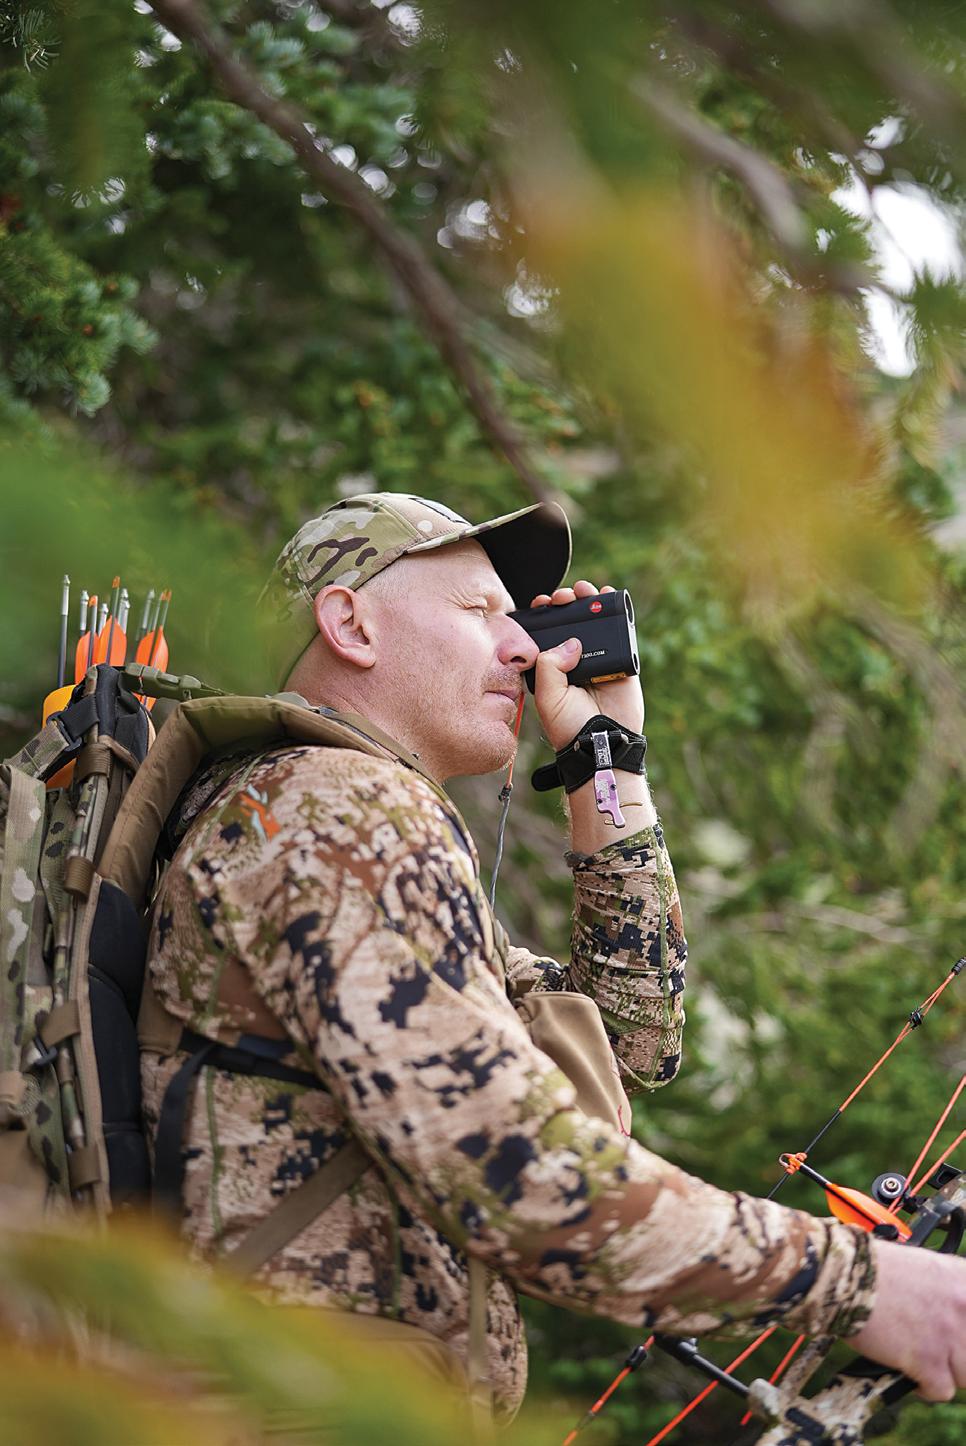
Along those lines, I have heard horror stories of guys drawing (or letting down) their bow with a handheld release with wet or sweaty hands and the release slipping out of their hand mid-draw. The release rockets forward, damaging the riser and usually destroying the rest. The other benefit of the index finger release is that it’s always attached to your wrist. Very seldom do you hear of guys losing their index finger release while hunting, but you hear about it all the time with handhelds. Could you imagine arriving at your final position for a stalk, getting ready for the shot, and not having
Spot Hogg Wiseguy Release
I use the Spot Hogg Wiseguy release and have for nearly ten years. I’ve experimented with many, many releases during this time, both index finger and handhelds, and I keep going back to the Wiseguy. I’ve preferred the leather strap model with the rigid stem. Across the board, I prefer rigid-stem index finger releases over the flexible tether kind. There are two reasons for this, one, I find it much easier to get the release head into my hand and quickly hook the D-loop with the rigid stem over the flexible tether kind. The second reason is that with most rigid-stem index finger releases, you can fold the stem back out of the way, so the head isn’t dangling below your wrist and banging into stuff like with the tethered kind.
I do make a couple of modifications to my Spot Hogg Wiseguy. The release comes set from the factory with an extremely light hair trigger. It is set much lighter than I prefer, so the first modification I make is to completely back out and remove the tension adjustment screw, which makes the release as stiff as it can be. Don’t get me wrong when I say stiff – the Wiseguy, even in its stiffest setting, is still a light trigger. At this stiffest setting, I can rest my finger on the trigger with cold hands without fear
www.westernhunter.net
With a solid stem index finger release, it is very easy to hook the dloop on the bowstring even without looking.
The author demonstrating good form shooting an index finger release. Notice that his elbow is high and straight away, forearm parallel to arrow and the wrist is straight not cocked down.
The author heavily favors solid stem index finger releases because of the ability to fold the release head back out of the way so the release head is not banging into stuff.


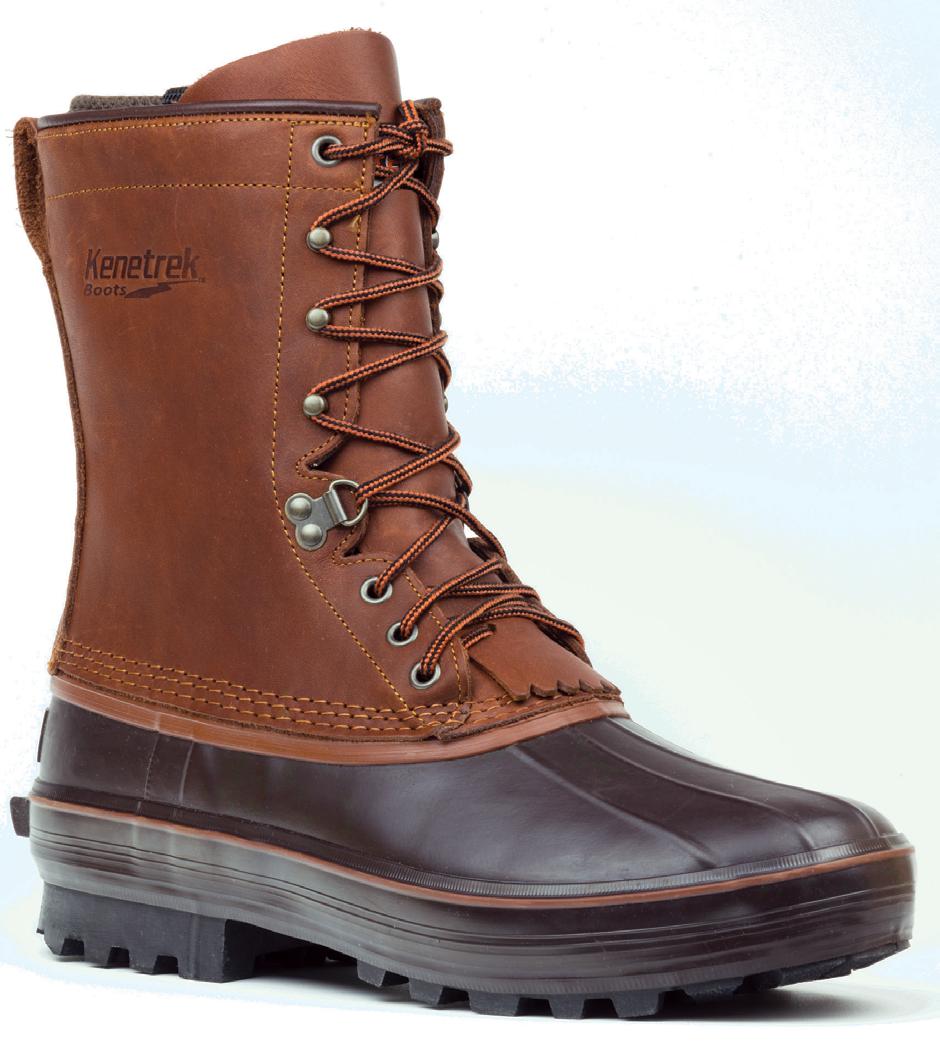
GRIZZLY PAC BOOTS
From the morning sits in the late season Whitetail stand to chasing after hounds hot on the trail of a Colorado Cougar, your boots are arguably the most important piece of gear you will use. Stay out longer, hike further, and perform better with Kenetrek Pac Boots. Built with the mountains in mind, our supportive leather uppers and high traction K-Talon™ outsole will keep you upright, while wool felt liners and extra insulation in the bottoms will keep you toasty warm in temperatures down to 0°F.

©KENETREK, LLC 2023 VISIT US ON SOCIAL WWW.KENETREK.COM 800-232-6064
ULTRA WARM + ALL DAY COMFORT FOR LATE SEASON HUNTS
of it going off. It doesn’t require much force at all to squeeze and make it go off. This is a matter of user preference, so you can adjust the set screw as you see fit, but that max setting is perfect for me. When setting the tension on any release, be sure to keep in mind things like shooting with cold hands or with gloves.
The only thing that I don’t like about the Wiseguy is the stem length. You can adjust the length of the stem, but even at the shortest setting, I feel like it is too long, and I don’t even have small hands. I shoot with a very relaxed and straight wrist, I don’t cock my hand down at the wrist at all, which is why I think I need a short release. If you feel like the release is too long for you, this is an easy thing to alter if you have any sort of “DIY fix-it” in you. To make my release shorter, I have physically cut both pieces of the stem and drilled and threaded a new hole to attach them. It took me all of 30 minutes to make this alteration. I started modifying my Wiseguy releases like this about eight years ago and haven’t looked back.
Target Panic
There is one potential pitfall associated with index finger releases that needs to be covered: target panic. Target panic develops in some archers because their mind associates aiming on a target with the bow going off. Target panic can manifest itself as flinching when on-target or a punchy trigger finger when your pin passes through the bullseye. Target panic is a big deal and can develop with any release, but it tends to develop more with an index finger release. The reason why I think target panic develops more with an index finger release
ability that requires hand-eye coordination and motor control.
I think this connection between the mind, the eye, and the index finger can get short-circuited and result in target panic. Shooting with other releases like a hinge or a back tension release can alleviate target panic because these releases are activated using different muscle groups that don’t have a high degree of motor control. For instance, a back tension release uses your bow-drawing back mus cles to activate the release, and your back muscles have very little motor control.
Even though I shoot a light trigger on an index finger release, I have been able to keep target panic at bay because of blank bale training. Shooting a high volume of reps on blank target bales helps break the natural connection that your mind makes that aiming on a target means the bow is going to go off. If half or more than half the reps you shoot have no aiming involved, your mind breaks that connection. Because blank baling has helped me keep target panic away, I have been able to contin ually shoot my index finger release, which I feel is the most effective hunting release available.
If you are suffering from target panic shooting with an index finger release, I’d highly recommend you experiment with blank bale training before you give up on the index finger release, especially if you are a bowhunter. I just think there are so many ad vantages to an index finger release for hunting that it’d be a shame to lose those advantages by giving up on that release if you could help it. For some guidance on blank bale training, check out my ar ticle “Blank Bale Training” in the January 2023 is sue of Western Hunter Magazine
panic than others. If after thoroughly experimenting with blank bale training, you still have target panic, you need to pick up another release. I believe the most effective release at curbing target panic is a pure back tension release. With this type of release, all you do to execute your shot once you are stable and locked on target is release the safety, and
62 WESTERN HUNTER
The author modifies his Spot Hogg Wiseguy release to shorten the stem.
If you suffer from target panic, check out the author’s article “Blank Bale Training” in the January 2023 issue of Western Hunter Magazine.
The best method to find consistency shooting a new release and getting it set up to you is to shoot through paper, so you can track your consistency.
the release goes off. The set point force to activate the release is user-adjustable. The reason why the bow doesn’t go off while you are using a lot of force to draw the bow is because of that safety. Your back muscles are big muscle groups that are not very sensitive, so your mind can’t anticipate the shot as it does with the index finger. The result is a consistent, surprise release.
In my opinion, this is a double-edged sword, however. In a hunting situation, since you don’t have fine control of your back muscles, you may use more force than necessary to activate the release. If you are excited and pull too hard and too quickly into the back wall, this will most certainly influence the shot, especially with a broadhead on. I know several people, including my wife, who can shoot a back tension release well in a practice situation, but combine it with a little buck fever and the accuracy falls off. In theory, like the index finger release, the lighter you can set the trigger, the less the shot will be influenced by excessive force.
As you are trying to decide on the best tension set point for the back tension release, you should experiment with the consistency of that set point by using variable amounts of force to activate the release. The best way to do this is to shoot through paper and intentionally vary your shot, pulling harder and faster into the back wall than normal to see how forgiving that set pressure is. Much like with a trigger release, don’t set the release so light that it’s too hard to control. In a rushed situation, where you are trying to shoot on command in between wind gusts or right when an animal steps into a small clearing, the back tension release can
Thumb Button Release
A thumb button release is similar to an index finger release in how it is activated. Instead of squeezing your index finger, you simply squeeze your thumb. The big difference is the thumb but ton is obviously a handheld release and the index finger release is a wrist strap release. I think of all the handheld release types, it’s easiest to hunt with a thumb button release for the same reasons as the index finger release. In theory, you can try to shoot both an index finger release and a thumb button release like you would a back tension release, but I find this to be pretty clunky.
The idea is to lightly wrap your index finger or thumb around the trigger and once you are ready, you just start pulling into the back wall. Theoreti cally, as the pressure in the system builds against the back wall, the pressure on your finger or thumb against the trigger will also build. Eventually, the shot is supposed to go off, but I think it’s pretty in consistent. My opinion is if you are going to shoot with back tension, just get a back tension release.
Hinge Release
The hinge release is a relatively new and intriguing concept. The basic principle to activate a hinge release is rotation. The release head rotates on a half-moon shape around a pin and once the release rotates enough the shot goes off. This release rotation can occur through back tension and pulling into the back wall, but it seems most archers activate the release through a transfer of tension in the fingers from the index finger to the second, third, and fourth fingers. I shot a hinge release for about six months and to be honest, if I ever pursue archery from more of a target shooting standpoint, that’s the release I would shoot. Since I do archery for bow hunting’s sake, I’ve chosen to stick with my index finger release.
What’s good about the hinge release is since it has a more intricate activation process, your brain is less likely to anticipate the shot and develop target panic. I think it is an ideal release for shooting in a controlled, high-pressure environment like Vegas Three Spot. From a hunting standpoint, I don’t like a hinge release for a few reasons. First, you need to be very, very smooth in your draw. If you aren’t, the shot could go off while you are drawing. For this very reason, most archers don’t like drawing heavier poundage bows with hinge releases.
Similarly, you need to be very careful letting down with a hinge release and ensure you are only applying pressure from the thumb and index finger. This can be tricky. The uncontrolled environment of shooting during the hunt – steep angles, uneven footing, wind, extra layers, weird body angles, etc, can really complicate shooting with a hinge. The single hardest thing to overcome with a hinge is a rushed shooting situation where you need to get an arrow off quickly on command. It’s hard to be accurate when rushing a shot with a hinge.
I’m not saying that it’s impossible to hunt with a release other than an index finger release. Plenty of people do it. For me, I just think there are clear advantages to hunting with an index finger release. If you’ve developed target panic with an index finger release, I think it is worthwhile trying to work through it with blank bale training before you decide to switch release types. If you must switch releases, that’s okay, just don’t do it because you think you need to because everyone else is doing it.
If you do switch, it is of utmost importance to allow yourself PLENTY of time to practice with the new release before hunting season. You should start shooting the new release now, during the winter, before hunting season, and you should start with

info@westernhunter.net
Brody from Western Hunter demonstrates using the Nockon Nock-2-it thumb button release.
Brody from Western Hunter demonstrates using the B3 Range hinge release.
There are many benefits of an index finger release for hunting so give one a try.
Great new prize opportunities, a bigger audience, and a new ruleset, will make this film festival one you won't want to miss out on.
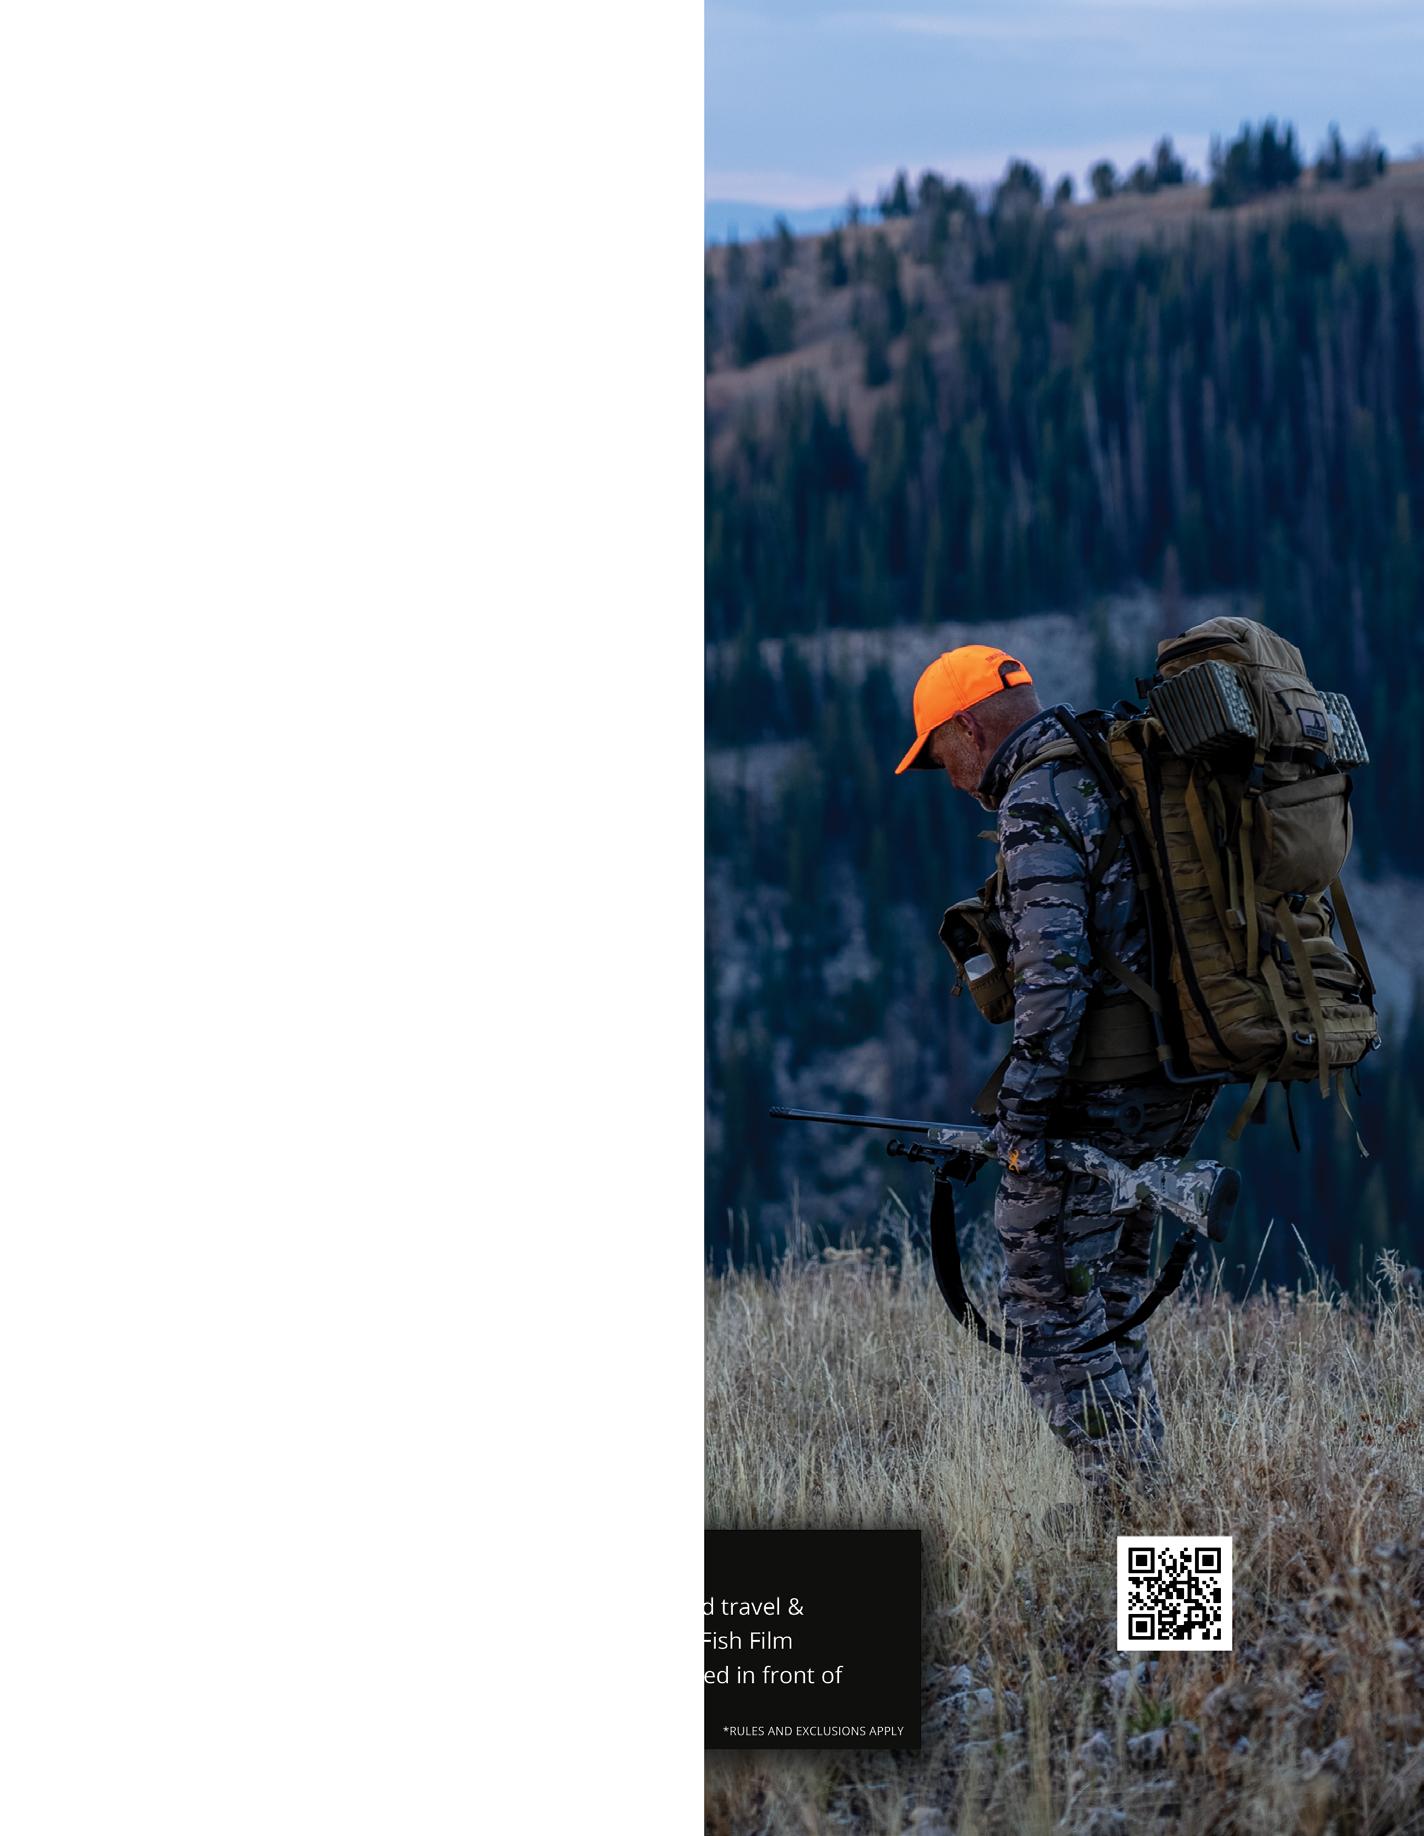
Learn More and Submit a Film at:
FILM FESTIVAL IS BACK!
THE
F I L M F E S T . W E S T E R N H U N T E R . N E T


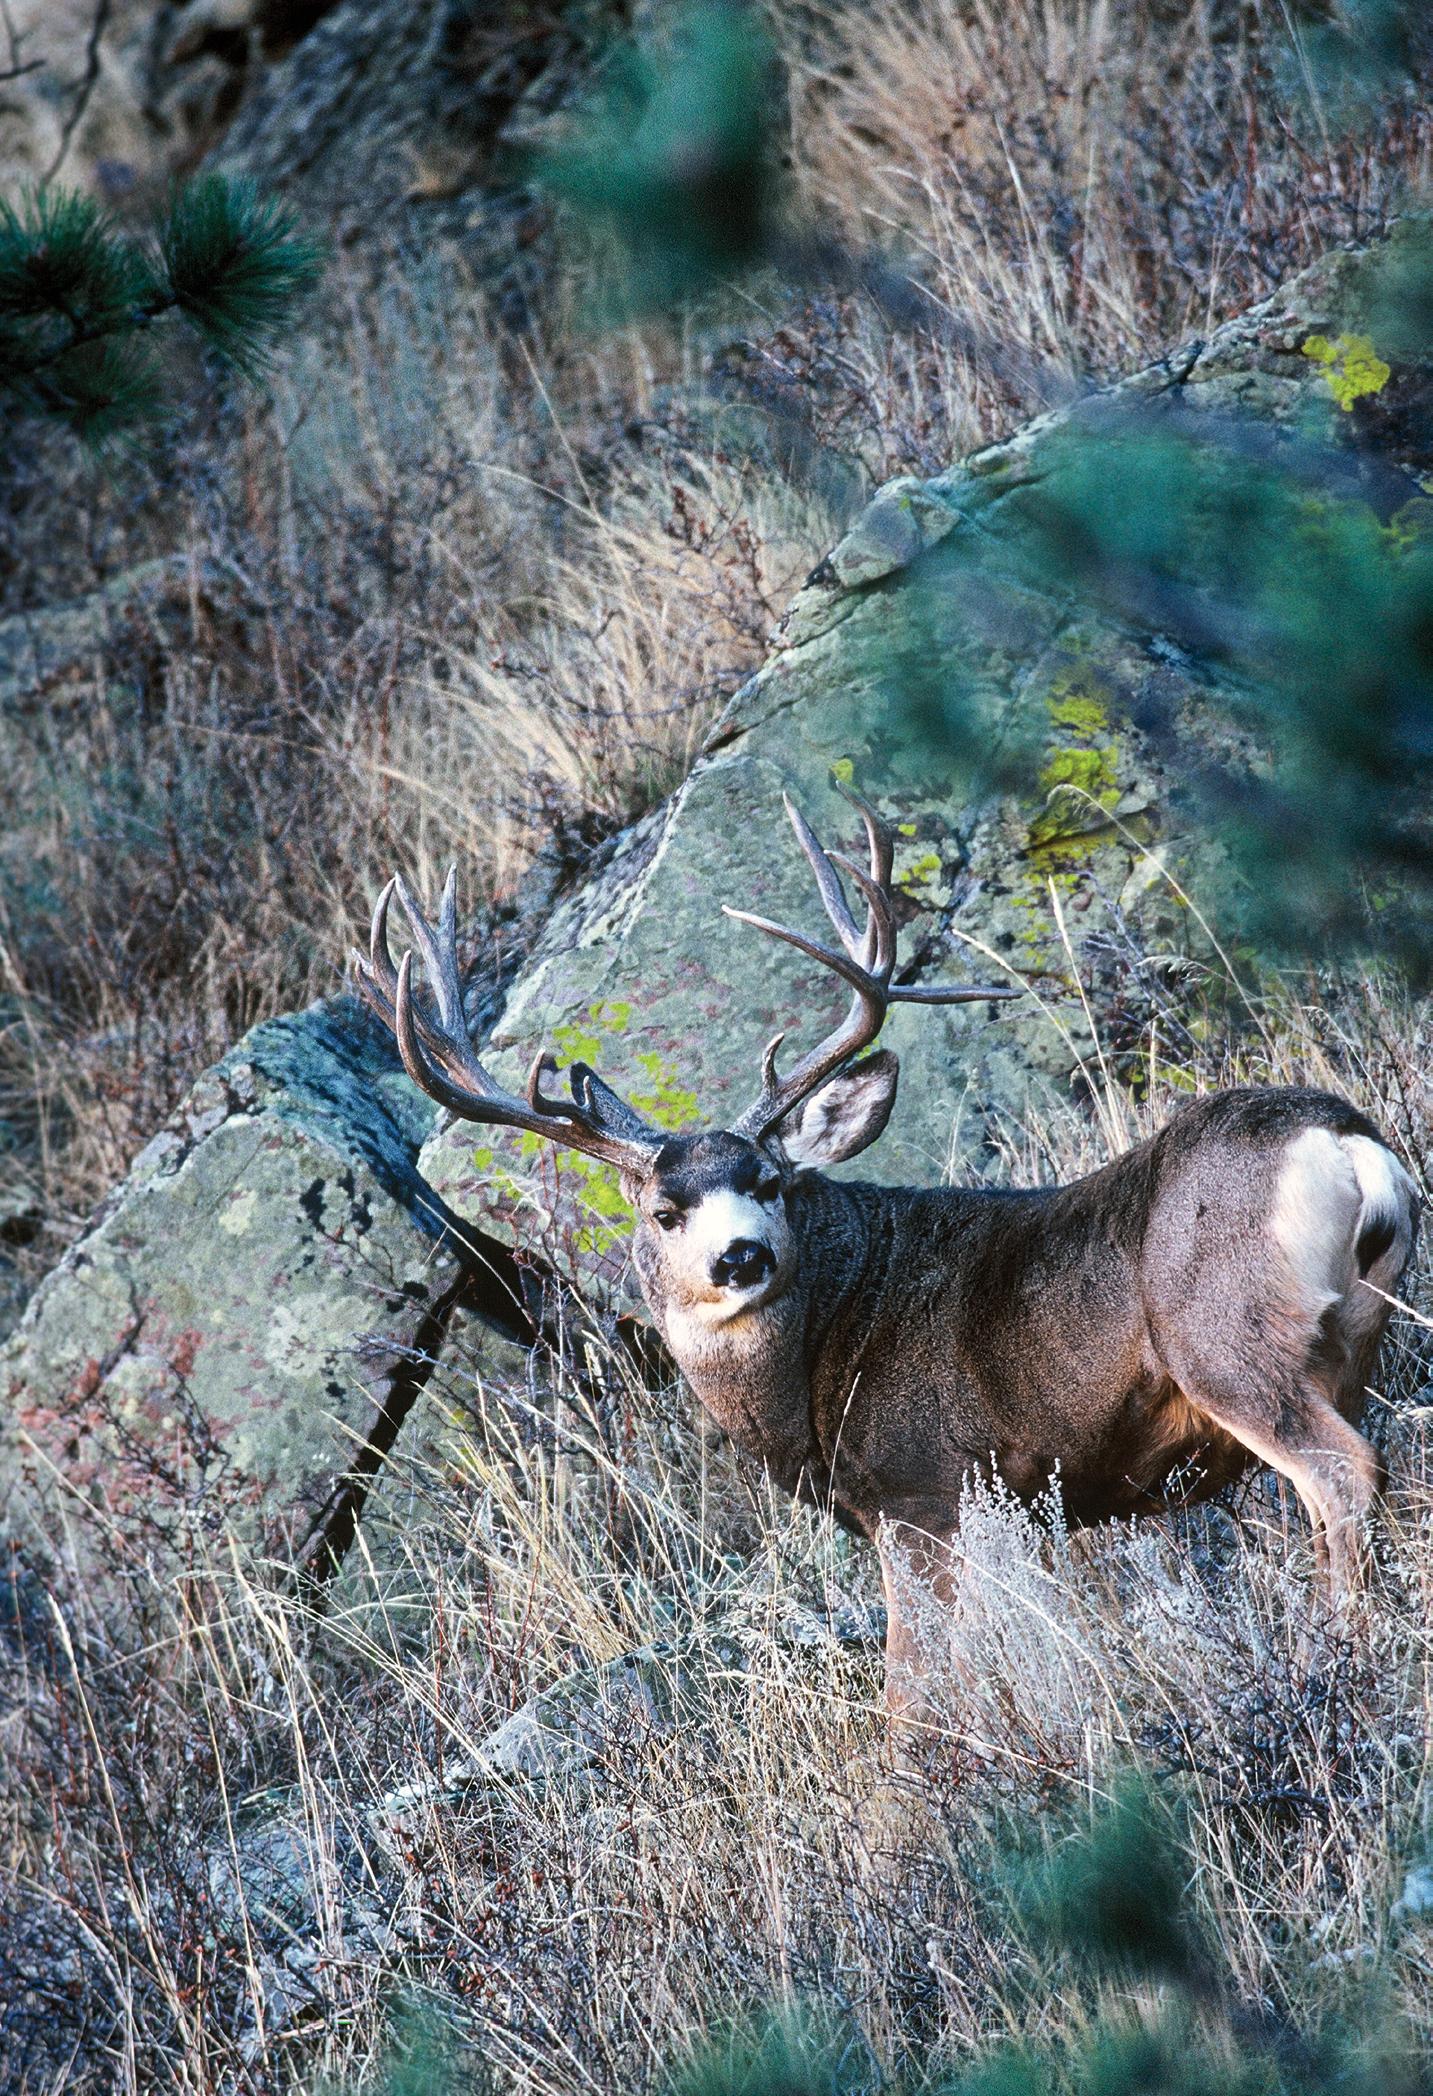
PLANNING AND PRIORITIZATION
THE ULTIMATE HACKS FOR LONG-TERM HUNTING SUCCESS
 MIKE DUPLAN HUNTING EDITOR
I’ve often been asked what are some of the secrets to my hunting success. Sometimes through messages on social media, sometimes at hunting shows, and sometimes on the podcasts I’ve done, this question will come up. To be honest, it’s not an easy or quick answer. When I find out that some of these people don’t read my articles here in Western Hunter or haven’t purchased my book, I do think it is amusing and to be honest a little offputting. Doing some homework would seem like a reasonable and common-sense approach to gaining some understanding.
Since you are reading this, I will assume you’re interested enough to invest not only your time but also some money into a Western Hunter subscription. You might be curious, or maybe you are trying to improve your hunting success by learning from others. There are a few tactics to approaching this challenge of becoming a more successful hunter, and I think these are worthwhile considerations.
Less is More
The advent of social media, hunting television, and YouTube has given rise to hunters who hunt many states and species every year to provide a relatively heavy stream of both internet and television content. Many of these individuals have this as their primary occupation and interest, and there are so many out there doing it now that much of the content is diluted to maximize exposure and also generate a more consistent revenue stream.
The unintended consequence of this is the portrayal of an aspirational lifestyle that many wish to emulate. No longer are people content with an annual hunting trip or two. Now, there is an impression that has been delivered that you must hunt multiple states, multiple species, and spend weeks every year in pursuit of bucks and bulls.
For most people, this is totally unrealistic with career and family obligations, but hunters are resilient and driven by nature, and the allure of big-
www.westernhunter.net 66 WESTERN HUNTER
Mike Duplan
antlered bucks is more than some can resist. Add to this situation the uncertainty of getting tags in the post-COVID demand for hunting opportunity and the only reasonable approach seems to be to throw as many applications into the draws in as many states as you can afford to.
It is a gamble of feast or famine and will rarely strike a balance in your life as you try to explain to your significant other that you have two once-ina-lifetime tags in two different states again. The temptation is there to work out an almost unrealistic schedule, all while factoring in “best possible outcomes” to the hunts you have. Murphy’s law will kick into high gear in most cases, throwing variables at you. Vehicle troubles, family issues, weather, and other potential problems.
I used to be heavily prone to chase this scenario simply because I love hunting, the experiences, and the allure of finding that buck or bull of my dreams. What I learned along the way is that, in most cases, trying to fit too many hunts into your season will cause something to suffer on some level. The exception to that is that you are independently wealthy, with no serious job commitments and a very understanding wife. I say wife not to be sexist, but in general, I find women to be more reasonable in this planning process and men to be prone to try and over-do this pursuit of the hunting drug for many reasons. This is a generalization based on
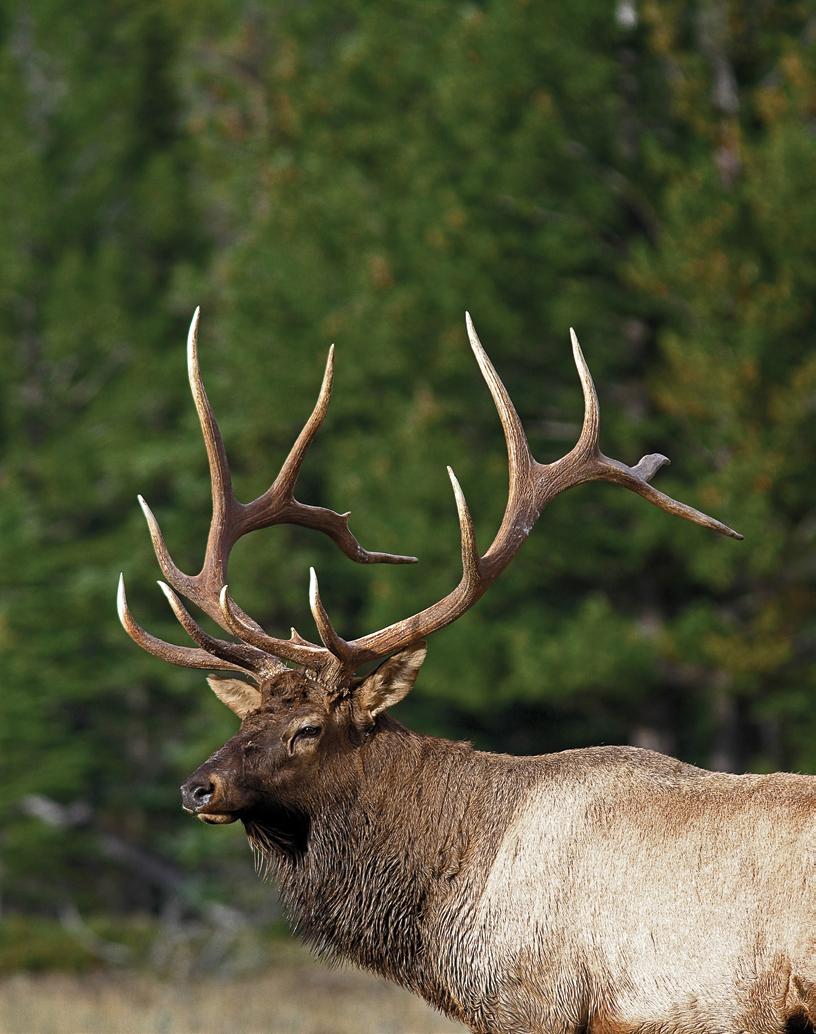
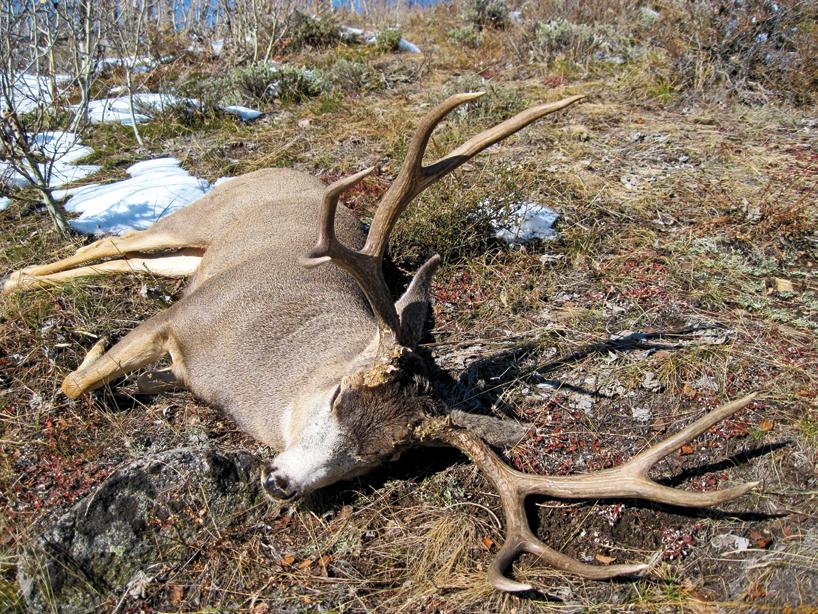
Walking up on a 30" Boone & Crockett mule deer is an experience fewer and fewer hunters will undergo under management strategies and struggling mule deer populations across the West. To take a fully mature, giant antlered mule deer is generally not going to happen by a plan of hunting multiple states, with shorter duration hunts but instead a plan of maximizing individual experiences, garnering local knowledge and an absolute commitment to these individual hunting experiences.
anecdotal observations and does not warrant a Time Kills
A primary stumbling block for success after drawing a great tag is a lack of local knowledge of the terrain, access, and places to hunt. Many people cannot afford fully outfitted hunts and are reasonably competent hunters, so there is a temptation to show up in the unit with a plan to hit it hard and outwork other hunters. This is not an unreasonable approach and can result in some degree of success, but local knowledge will beat the hard-core superstar hunter with seven grand worth of optics in most cases.
A plan to arrive a day or two early quite often isn’t enough, and when you daisy-chain a few hunts together in October, the master plan that was concocted in July can blow to pieces quickly. A failure to allow adequate time can result in shortcuts, weak scouting, and a “settling” for immature animals that truly aren’t what you had hoped for.
When you finally have in your possession a coveted tag that you might never draw again, I would strongly encourage you to throw everything at it and maximize the opportunity and your time. I was faced with this very dilemma this year in Colorado. I had drawn a bighorn sheep tag in a unit with historically poor success rates, and I had applied with the intention of hunting for a single 12-year-old ram. This ram had proven to be very elusive the three previous seasons to three other hunters I knew who had also set sights on him and his big cohort. This other ram had been taken the previous November by the raffle winner of the statewide ram tag, so that left the ram I wanted as the sole subject of my quest.
info@westernhunter.net 67 WESTERN HUNTER
Bulls like this are not common. Yes, this is stating the obvious but unless a hunter draws a special limited draw tag or hunts large parcels of conservatively managed private land, taking a bull like this is very, very challenging, hence the cliché “Bull of a Lifetime”. For average hunters with life commitments, desire to take a bull should involve a prioritization of a long term approach and a realistic plan to fit life demands and family obligations. If you want it to be more than a fantasy photo in a magazine, make it your hunting priority and pass younger bulls.
Mike Duplan
Mike Duplan
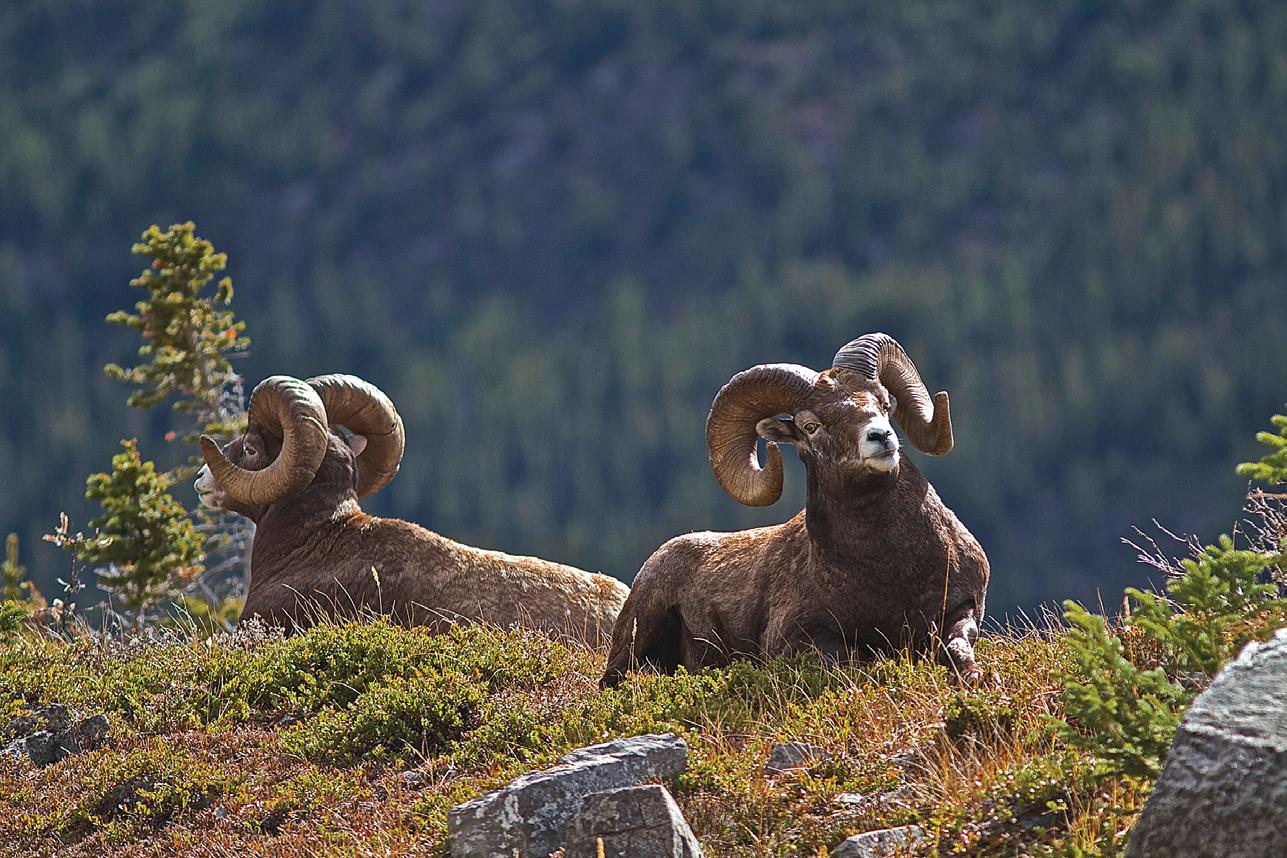
Not knowing I would draw this tag, I had decided to also apply for a muzzleloader antelope license in a quality unit with a September season and burned 17 preference points. Additionally, I had drawn a Kansas muzzleloader buck tag in a September season that conflicted with the Septem-
sible, then head to Kansas for the deer hunt and come back for a few days to scout for the pronghorn hunt.
This scenario seemed “doable” but tight, with not much wiggle room for inevitable variables that creep in. In Colorado, you must turn your tag in no
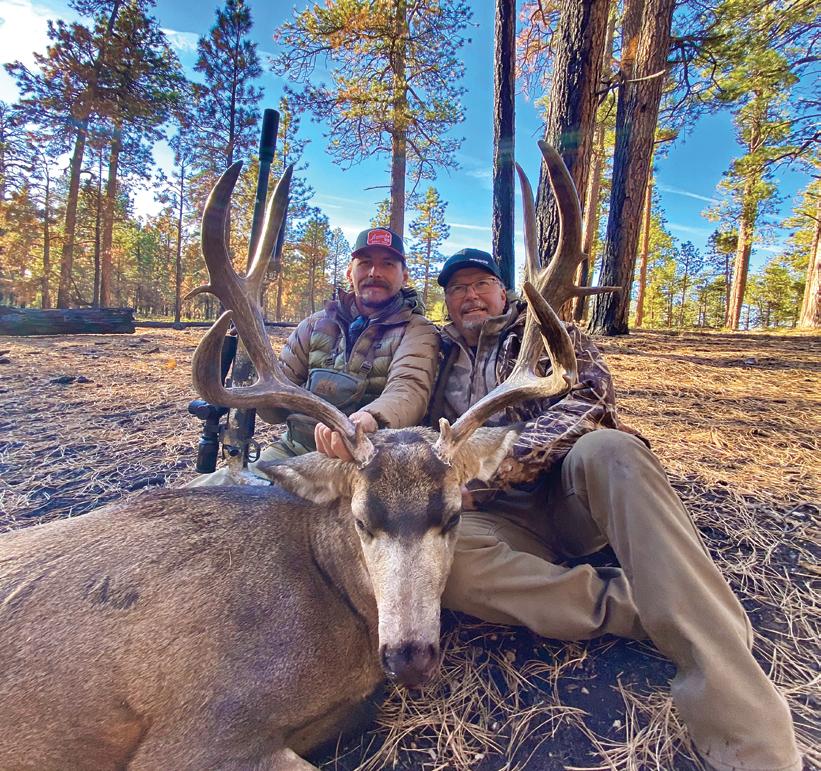
cost of a resident pronghorn license, so I smartly elected to turn in my tag and eliminate this potential conflict and or loss of nearly two decades’ worth of preference point accumulations. The Kansas situation was an easy adjustment because the state allows you to hunt in rifle season with a muzzleloader if unsuccessful on the early hunt. With this knowledge, I could postpone my hunt for a Kansas whitetail until late November.
With some effort and luck, I located the big ram two days before the season, took him on the third day of the hunt, and ended up going to Kansas. I would have had ample opportunity and time to hunt antelope later in September, but if the events played out differently, I could have been put in the position of choosing to abandon the other hunts in prioritization of the sheep hunt which ran into the first week of October. Having a sheep tag wasn’t a problem to complain about, but not having any distractions and allowing full commitment to the hunt made the process and the outcome all the better.
Working Through Challenges
Western Hunter Shooting and Hunting Editor Colton Bagnoli and I had a recent conversation about a hunt he experienced in Arizona this year. Colton had drawn the cliché “coveted tag” and set aside six days before the opener for scouting. Colton said “I thought I had enough time to figure things out, but in reality, there weren’t sufficient days to gain the local knowledge I needed. I struggled for a few days and was still learning when the season opened. The hunt ended with success, but if I had it to do over, I would hire an outfitter. I generally don’t even consider that as an option, but special hunting opportunities are so limited that I feel like it would be worth it, knowing I may not ever get this tag again.”
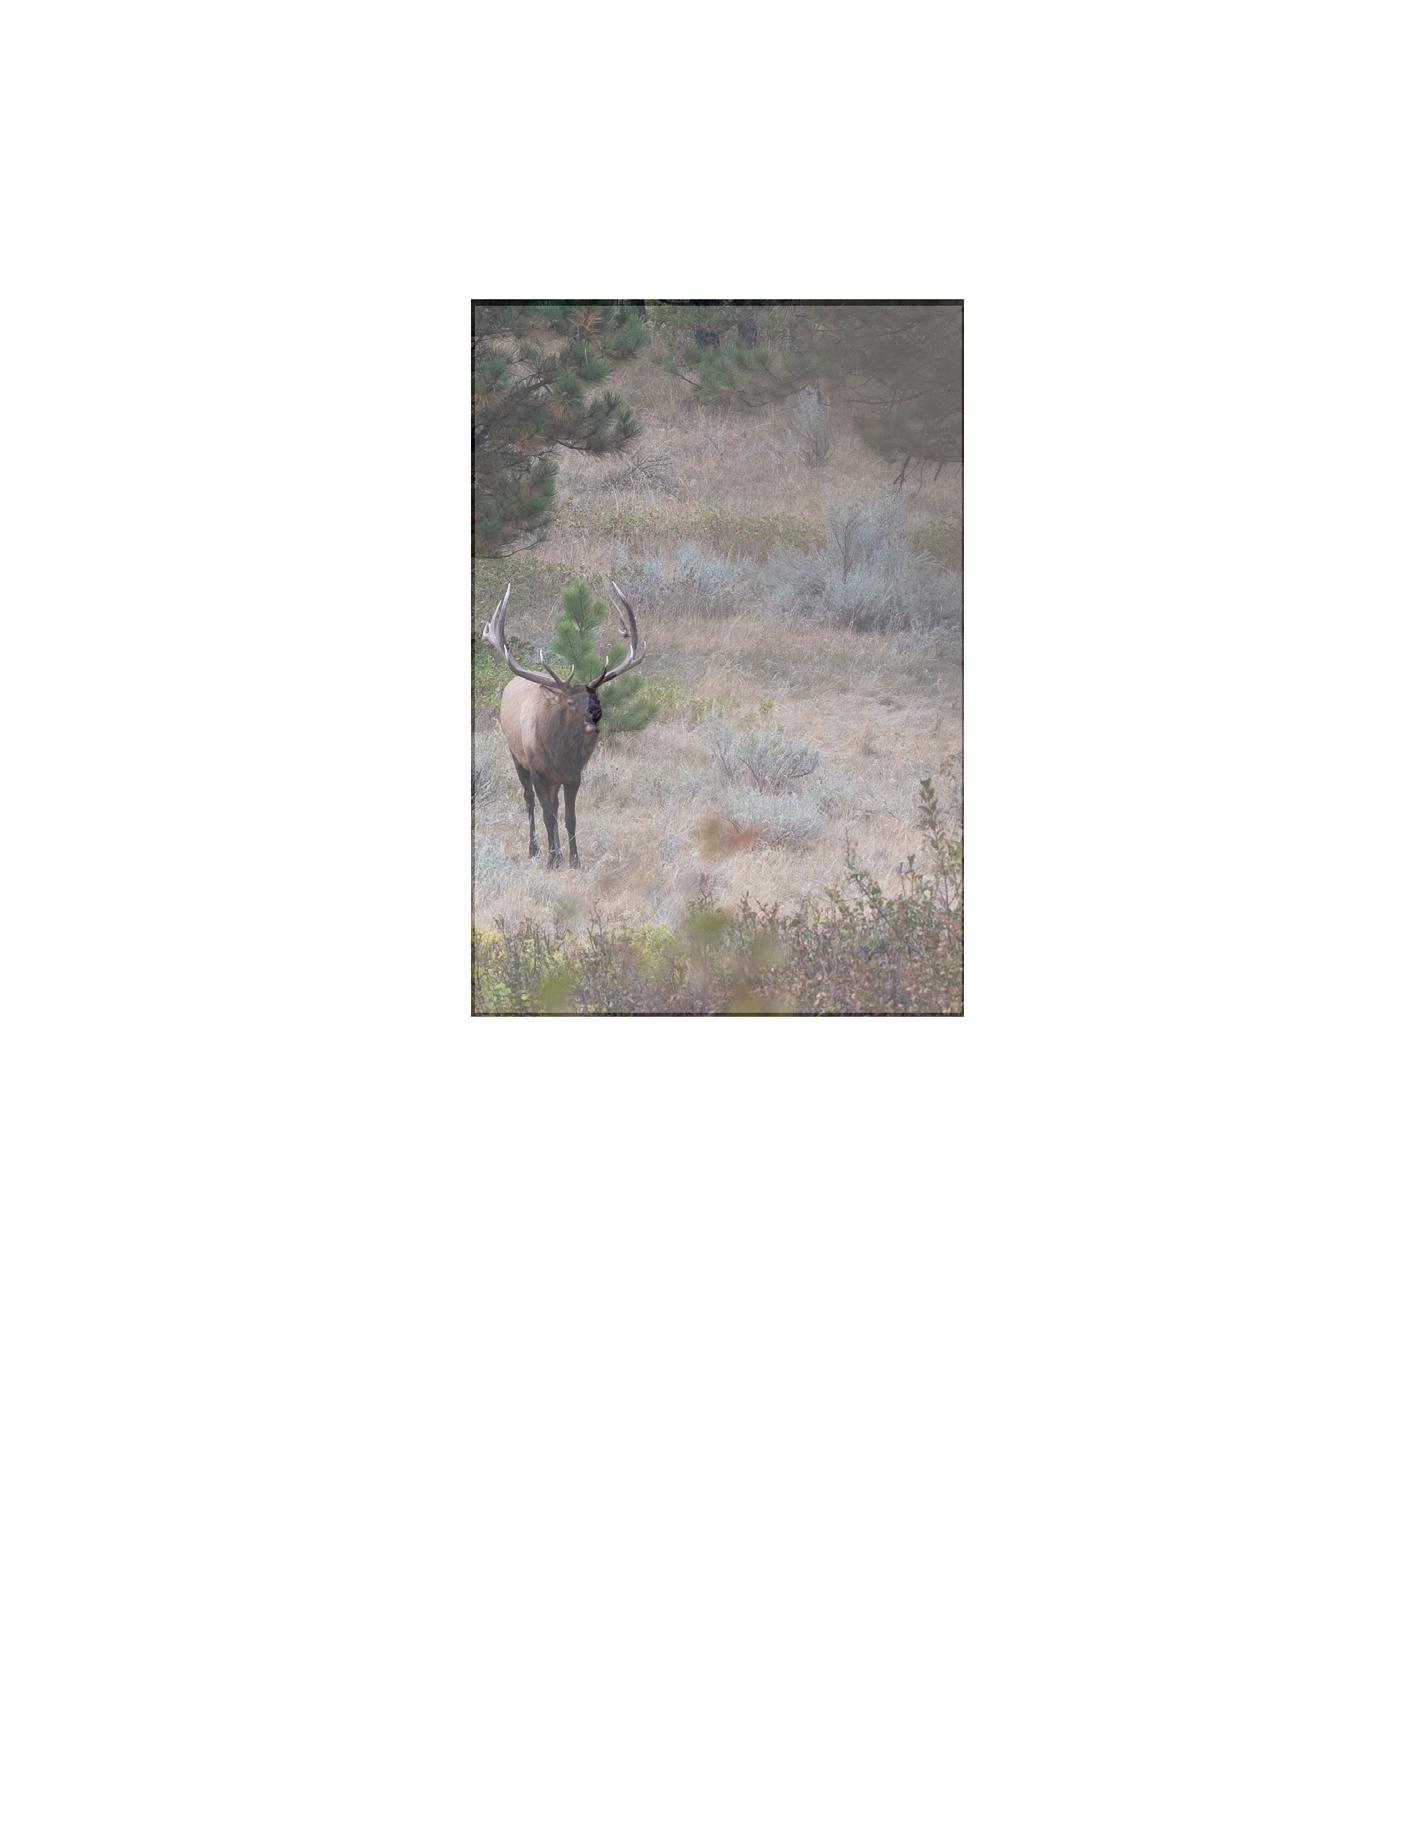
www.westernhunter.net 68 WESTERN HUNTER
If there is one hunt in the West that seems to garner a level of commitment and dedication like no other, it is drawing a tag for a bighorn sheep hunt. Rocky or desert, the awareness and appreciation for the rare opportunity is universally appreciated and is an example of high level of prioritization for hunters. Generally, the outcomes for these hunts are pretty successful and much of it has to do with the prioritization and this commitment.
Mike Duplan
Shooting Editor Colton Bagnoli spent nearly a week scouting before the season on his 2023 special draw tag. These tags are becoming harder to draw every year and the competition is as high as ever. Finding the areas that mature bucks use to avoid pressure is key and often local knowledge from outfitters and guides are the best source of this information. This seasonal knowledge is not something a hunter can learn with five days of scouting.
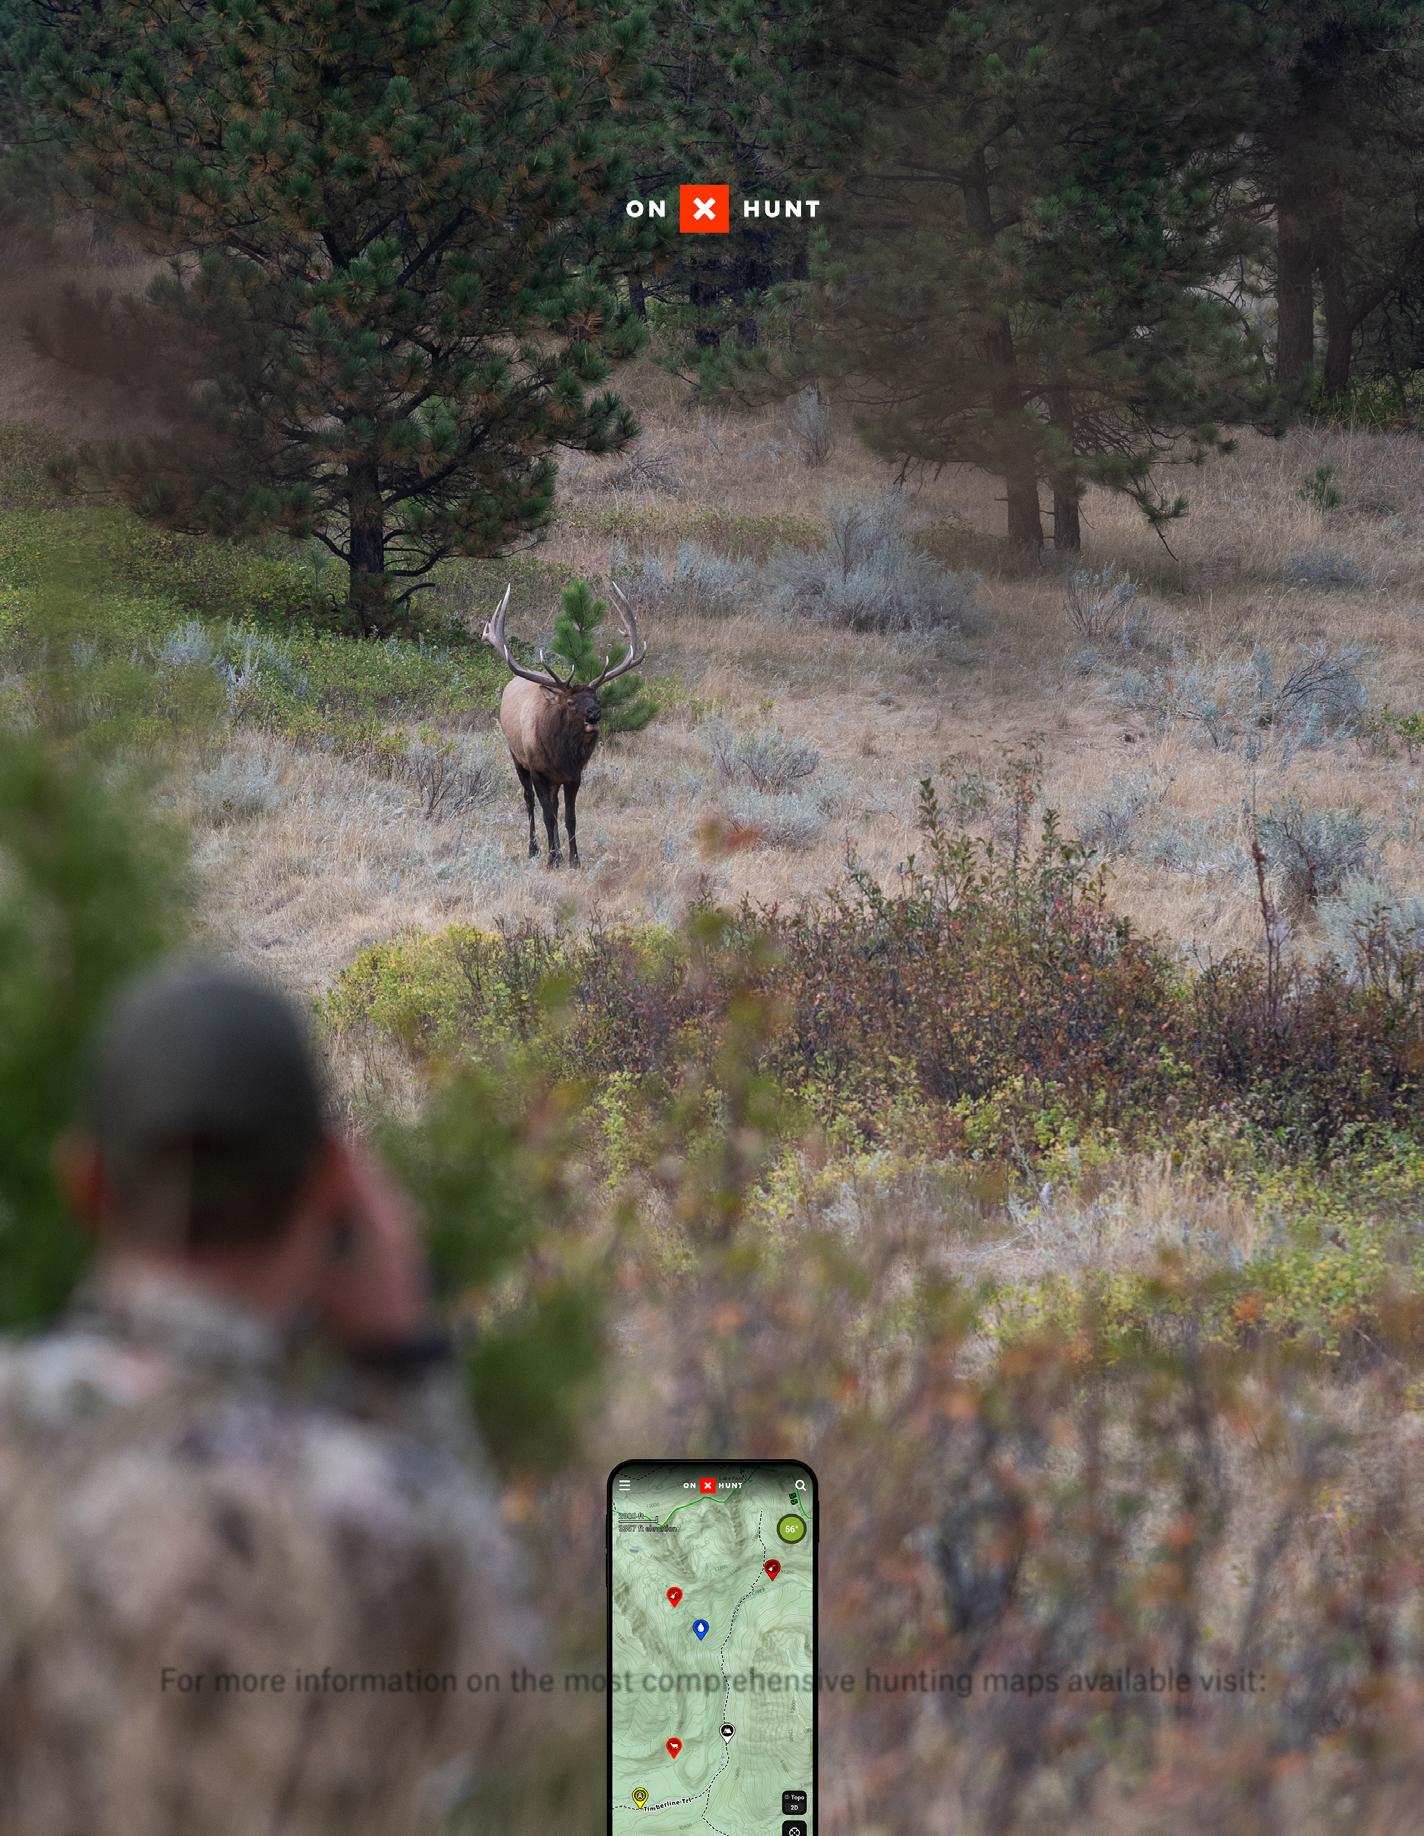
Colton’s hunt is an example of planning and priorities and how there might be instances where it makes sense to hire a quality outfitter with local knowledge to take advantage of the increasingly limited quality hunting opportunities we have. Most people reading this are do-it-yourself-types with the grit and resiliency required to hunt the West. A guided hunt is expensive and not something everyone can afford. I have said myself that there are a handful of hunts where I would consider hiring an outfitter to maximize a rare opportunity. This would be a priority that requires early planning and a decision that probably needs to be made immediately, as the best outfitters book up right away.
One of the strangest conundrums of tag draws is the unlikely mathematical event of beating steep odds in draws and getting two or more special tags in one year. It’s certainly not that difficult to prioritize one hunt, but when a person has two or more of these rare opportunities, it can become stressful. Colorado resident Brent Morrill had this incredible fortune in 2021 when he drew a Shiras moose and bighorn sheep tags in the same year. What’s worse is the season ran concurrently.
Brent told me,“To be perfectly honest, the situation felt like a burden. Obviously, it was a good burden to have, and I wasn’t looking for sympathy, but I also knew each hunt was a big challenge and a very rare opportunity. I wanted to give both hunts maximum effort and do my best. On my first scouting trip, I found a giant moose that I kept tabs on

all summer, and I had also planned on spending the week before the sheep season scouting.
When the time arrived to leave, my mother-inlaw came down with COVID and my wife left town to take care of her. Then, my daughter also became sick with COVID, and I made the obvious decision to stay home and take care of her. I knew I needed help with my sheep hunt, so I called an outfitter and was extremely lucky he didn’t have another client booked. Outfitted hunts are not what I generally do, but under the circumstances, I made the decision to use one and came home with a really nice ram.
The moose hunt worked out great too, but it wasn’t without stress. I accidentally bumped into the bull I had scouted for, spooking him the night before opening day. I was relieved to find him close by the next morning, and I ended the hunt quickly. It was a dream come true to take a really nice ram and an exceptional moose in the same year, but I did endure more stress than I had expected simply by how life played out.”
Quality > Quantity
If you are a selective hunter with high standards for the animals you hope to take, the considerations I have laid out become magnified. This is even more true with once-in-a-lifetime tags. There is no substitute for putting in your time when hunting trophy-class, mature animals. These are generally seasoned bucks, bulls, or rams that have evaded hunters for years and have gotten old. They can be difficult to locate, more difficult to hunt, and don’t
tolerate sloppy hunting tactics that offend their senses of smell, sight, and hearing. What they will do is leave the area, become more nocturnal, and also be hyper-aware. They will make mistakes, but patience and time are required to sort them out.
A mistake many hunters make, in my opinion, is scouting too much too early. The temptation is real, and I get it completely, but I do believe a hunter is better off spending as much time as possible immediately before the season scouting as opposed to committing time earlier in the summer or waiting until opening day and planning a longer hunt. Much can be learned in the week before the hunt, and this is more valuable knowledge than seeing the animals in July when they might not even be settled into their late summer habits.
Quality hunts and hunting quality animals take time. What I have found is I have rarely taken two great animals in one year, but over the last three decades, I have taken what most would consider a pretty substantial collection of exceptional big game animals. This isn’t meant as a brag but instead, a statement to reinforce my point. Time and dedication are the keys to hunting success, much more than simply exposing yourself to multiple opportunities per year. Take advantage of the increasingly limited opportunities and don’t chase quantity. What you might experience is a few less bucks or bulls in the freezer but instead, a special animal that represents an exceptional experience and treasured memory.
www.westernhunter.net 70 WESTERN HUNTER
Colorado resident Brent Morrill with a great Colorado bighorn ram and a 51" Boone & Crockett Shiras moose that he hunted the same month in September of 2021. An incredible stroke of luck to get two once-in-a-lifetime tags in the same year but not without extreme challenges. As shown, Brent maximized the opportunities with careful planning and preparation, and also dealing with the “curve balls” life dealt him.
MOUNTAIN HUNTING IS WHAT WE DO
RAISE AND DIRECT FUNDS FOR WILD SHEEP RESTORATION, CONSERVATION, ADVOCACY AND EDUCATION... WE DO THAT TOO OVER $25.7 MILLION IN THE PAST FIVE YEARS


RESPECT CAN BE HARD TO EXPLAIN, BUT YOU KNOW IT WHEN YOU LIVE IT


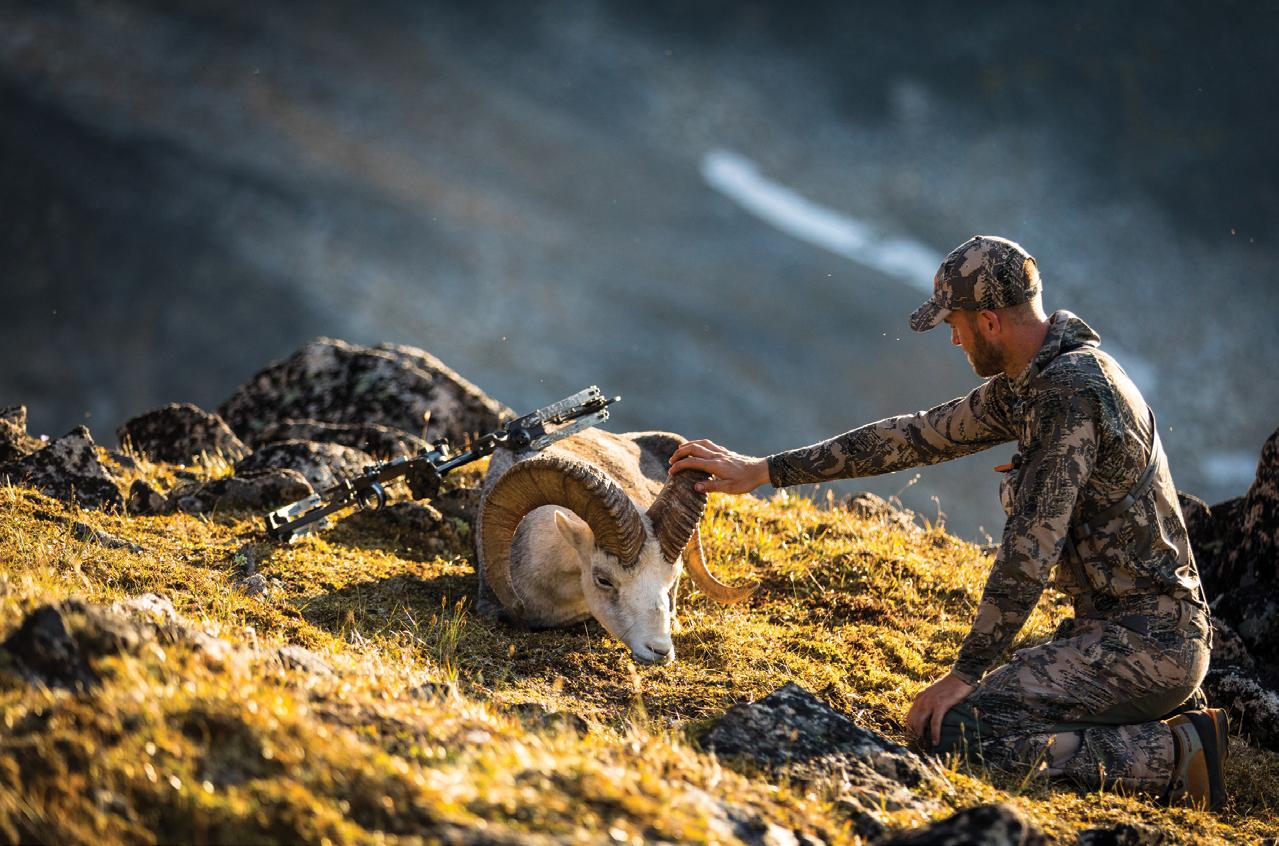
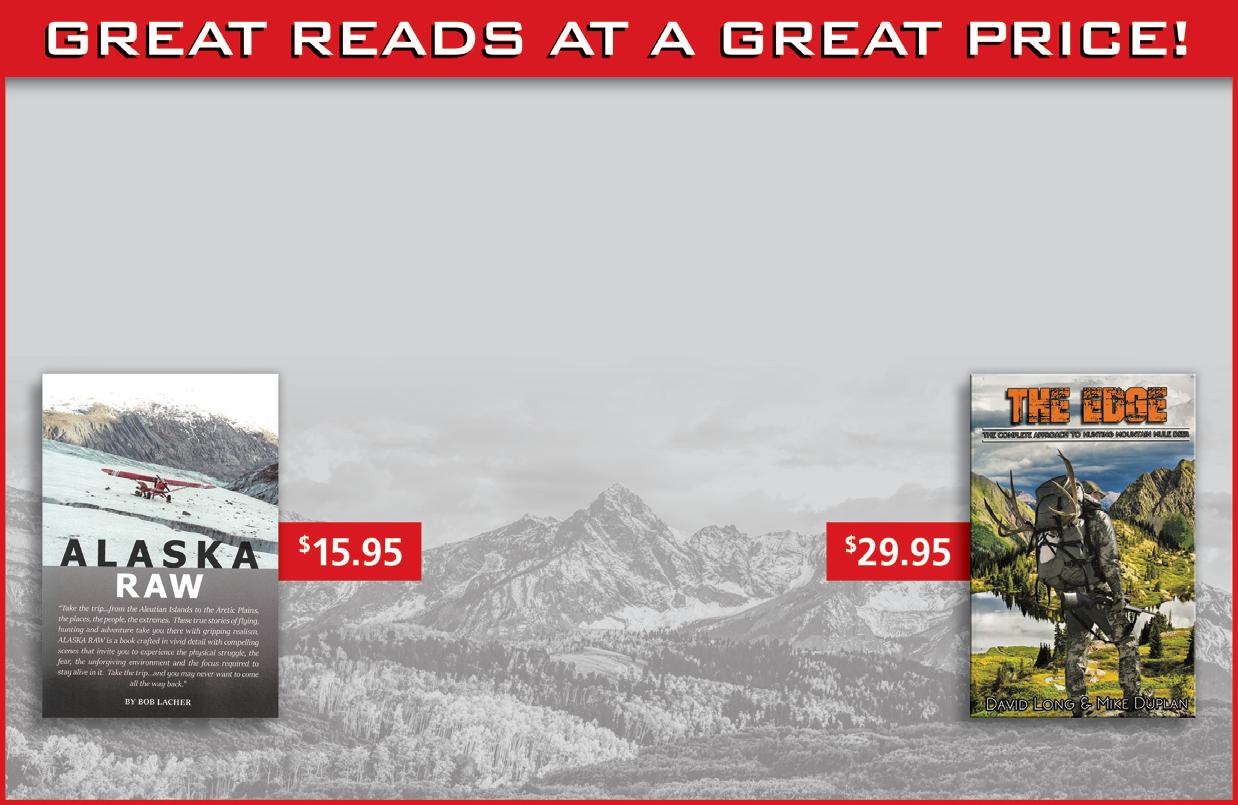 By Bob Lacher
Alaska truly is a sportsman’s paradise. But (and this is a big but) hunting there is extremely difficult and without the right equipment, experience, or enough money it is at times almost impossible. The country is so vast and virtually roadless compared to the lower 48, that without an airplane, horse string or snowmobile most of the state is out of reach. If you want to better understand this then you need to read “Alaska Raw”.
Lacher is a native Alaskan and his book a detailed look into many of his adventures. His writing style is incredibly engaging and easy to read and difficult to put it down! From Unimak Island to the Brooks Range using boats, planes and snowmobiles while hunting caribou, bears and Dall’s sheep, these true stories are captivating.
By David Long & Mike Duplan
The modern mule deer hunter must be willing to outwork, outthink and outhunt both his competition and the highly educated mountain mule deer buck.
In the book “The Edge – The Complete Approach to Hunting Mountain Mule Deer”, authors and mule deer hunting experts David Long and Mike Duplan have collaborated to bring the reader insight into just what it takes to be successful when hunting mature mountain mule deer. “The Edge” will show the steps involved to increase your chance of success and the reader will learn that there is now a year round approach involving, fitness, conditioning and nutrition.

info@westernhunter.net 71 WESTERN HUNTER
Alaska Raw
The Edge – The Complete Approach to Hunting Mountain Mule Deer
order your copies today at www.westernhunter.net
JOIN US! WILDSHEEPFOUNDATION.ORG
ANNULI COLLECTIVE | STEVEN DRAKE

ALASKA YUKON MOOSE
THE LARGEST NON-PREDATOR GAME ANIMAL IN NORTH AMERICA
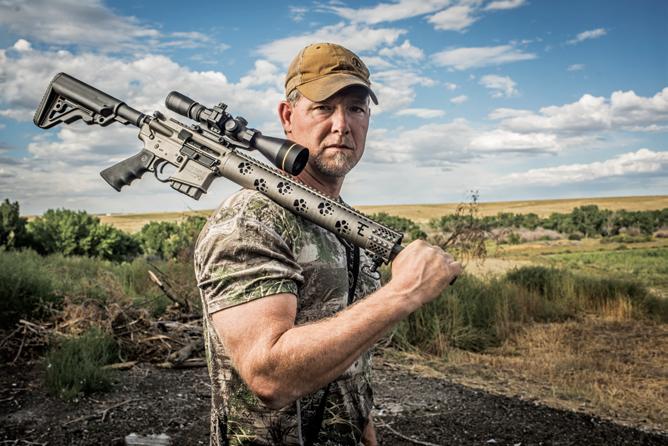 TFRED EICHLER HUNTING EDITOR
here are three species of moose in North America recognized by both Pope and Young and Boone and Crockett. They are the Shiras, Canadian, and the Alaska Yukon. The Alaska Yukon is the largest in stature, weight, and antlers of the three. As the name implies, this largest species of moose is found in both Alaska and the Canadian Yukon.
My first hunt for these impressive animals was a non-guided hunt in Alaska. I had my recurve bow and was more than a little excited when I left camp that first day by myself in search of the giant deer I knew nothing about. As luck would have it, I stumbled on a group of cows being rounded up by what, to me, was the biggest moose in the world. The embarrassing part of this story is that although I could clearly see them from my elevated position a few hundred yards away, as I started to close the distance I was swallowed up by the thick brush and totally lost sight of them.
Fortunately, the bull was grunting and I was able to head in the general direction but I was moving painstakingly slowly and way more loudly than I wanted to in the thick brush. I popped out into a small clearing and the bull was standing broadside in the tall willows, but I could see half of his chest. It was a long shot for my recurve but for some reason, I felt confident in the shot – at least I did until I actually shot.
As I watched my arrow racing toward the bull, it started to arc downward slowly and I feared I had missed low. The bull didn’t react at all and I silently cursed myself for missing the huge bull. I decided to slip backward into the thick brush. Once totally concealed, I planned to circle around and try to close the distance. I looked back at the bull to make sure he was not looking as I stepped back in the brush, and I saw the huge rack swaying side to side. Then, the bull just fell over.
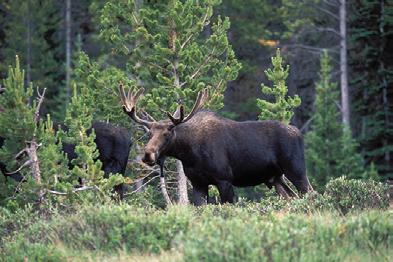
72 WESTERN HUNTER North American Super Slam Series
www.westernhunter.net
Mike Duplan
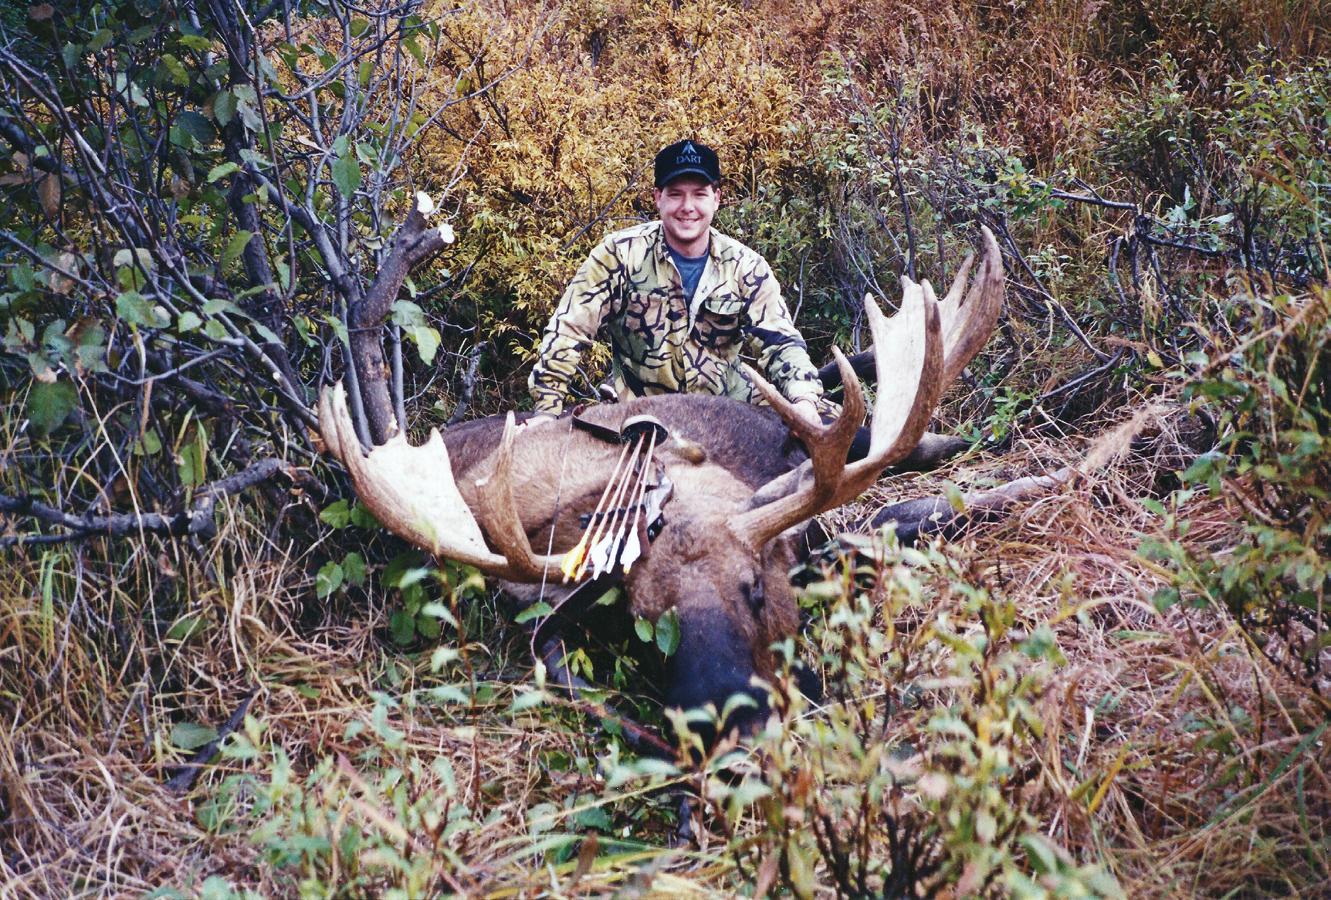
I stared in disbelief for a few seconds. I had lost sight of my arrow’s arc right at the brush line where it met the bull’s chest. Since I had no idea how huge of a chest a moose has, I thought I had missed low. When I ran up to the bull, cows scattered through the brush. I was still in disbelief and fully expect ing the bull to jump up at any second when I saw my arrow had hit him perfectly. To say I was excit ed would be a gross understatement. I would also have to say I was not quite prepared for the packout job I had in front of me. I had never thought twice about where I shot an elk in the backcountry, but I quickly realized that being far from camp is even more difficult when you are dealing with a huge Alaskan moose.
A mature bull moose can tip the scales at 1,400 to 1,800 pounds or nearly double what a big elk can weigh. They can also measure almost seven feet tall at the shoulder thanks to their long legs that are mounted on large hooves that can splay out to make walking in the marsh and muskeg easier. Just the antlers on a bull moose can weigh 60-70 pounds without the head. Racks can measure up to 75" wide.
Both males and females are very vocal, espe cially during the rut, and the cow’s loud wails used to attract males can be heard miles away, as can the bull’s grunt responses. They are impressive in every category, and that makes moose truly the king of the deer.
NORTH AMERICAN SUPER SLAM
THE SUPER SLAM IS COMPRISED OF THE FOLLOWING SPECIES:
Whitetail Deer • Mule Deer
Coues Deer • Columbia Blacktail Deer
Sitka Blacktail Deer
Rocky Mountain Elk • Roosevelt Elk
Tule Elk • Alaska Yukon Moose
Canadian Moose • Shiras Moose
Rocky Mountain Bighorn Sheep
Dall Sheep • Stone Sheep
Desert Bighorn Sheep
Barren Ground Caribou
Central Barren Ground Caribou
Woodland Caribou
Quebec Labrador Caribou
Mountain Caribou
Rocky Mountain Goat
Pronghorn Antelope • Mountain Lion
Polar Bear • Brown Bear
Grizzly Bear • Black Bear
Muskox • Bison
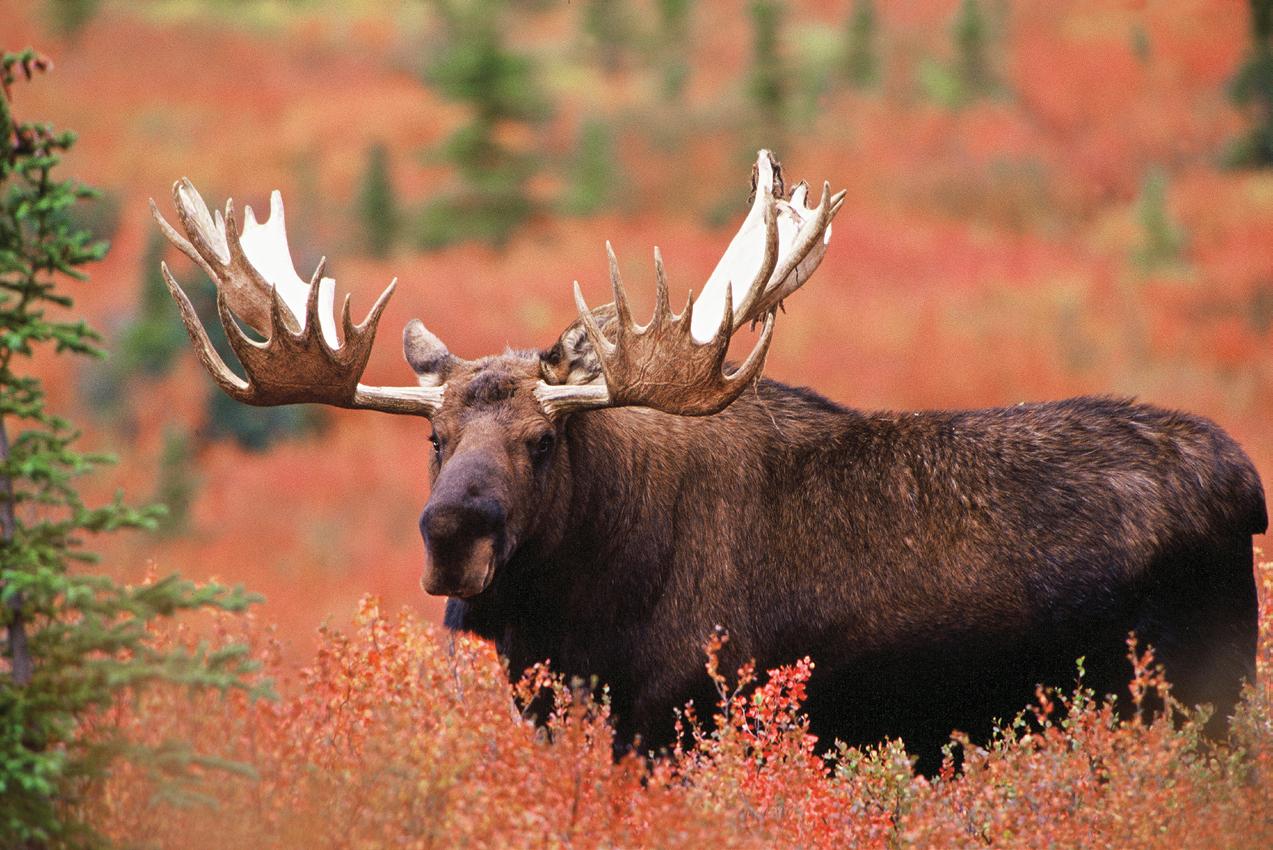
info@westernhunter.net 73 WESTERN HUNTER
The first moose I shot with my recurve bow over thirty years ago on a self-guided hunt in Alaska.
Mike Duplan
North American Super Slam Series
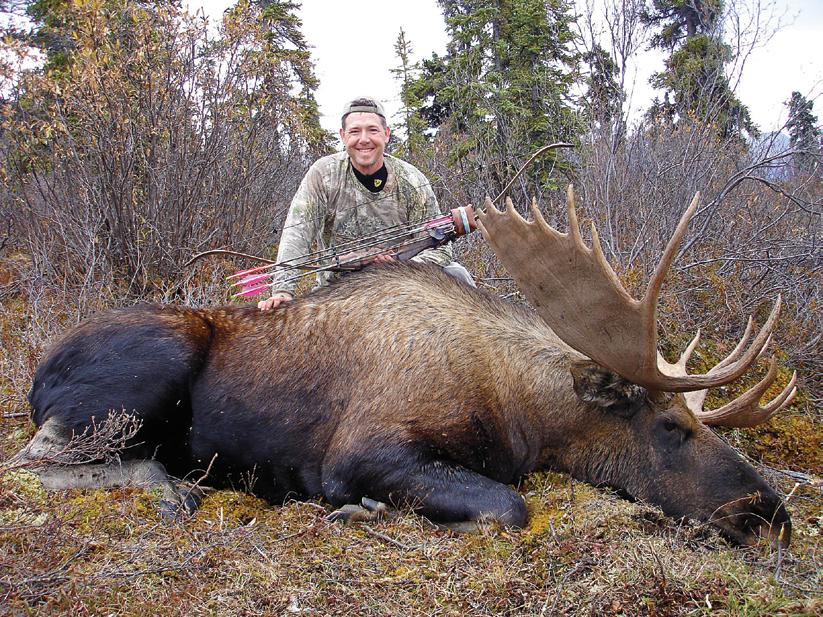
Adaptive Tactics
My second hunt for moose was up in the Canadian Yukon with outfitter Mack Watson. I again had my recurve, and my guide and I had an amazing hunt and spotted several bulls that we wanted to go after. It just always seemed that deep water or almost impenetrable brush foiled our stalks. The good news is that I was learning a lot about calling, how vocal moose are, and how susceptible they can be to being called in. A moose grunt is relatively easy to emulate, and the loud whining sound of a cow in heat is also not that tough to do after practicing a little.
On the fourth day, we got on a beautiful bull. He would come into the calls, but before getting in bow range he would turn and slowly ease back to his cows. My guide would call again and the bull would charge in, only to return to his cows shortly afterwards. He would not close the distance, so I made an aggressive move. While my guide continued to call, I set up closer to where the bull had been approaching from. The bull once again closed, but this time I was ready and I sent a broadheadtipped arrow in his direction. My arrow struck the bull and angled up into his chest. The bull only made it about 75-100 yards before piling up.
Archery Tackle
Despite their large size, moose do not take an arrow well, and an arrow in the vitals puts them down fast. I subscribe to the Fred Bear rule of thumb that an arrow should weigh 10 grains for every pound of bow weight. So, if you are shooting a 50-lb, bow your arrow should be around 500 grains. Depending on the state or province, be sure to check the regulations on bow weight as many areas have a minimum.
fixed blade, but I am not a fan of open-on-impact broadheads for moose. Before you write a letter to the editor, this is just my opinion based on the fact that it takes more energy to drive an open-on-im
pact broadhead through a moose than a standard fixed-blade broadhead. I prefer the Muzzy 3-blade with the trocar tip or the Muzzy One fixed blade.
Finding Opportunity
I am certainly not a moose expert, having only taken six with a bow, but I can tell you I have seen prices for guided hunts soar. The best deals are found by going self-guided in Alaska or looking into guided hunts in one of the Canadian provinces. I also tell people to not overlook draw opportunities in the lower 48. I increase my odds by drawing cow moose tags because I love the meat and cows are usually easier to find than bulls.
I have drawn a cow Shiras moose tag in Wyoming and two cow moose tags in Colorado over the years. Sure, it’s fun to shoot the bulls, but if you like moose meat as much as I do, a cow starts sounding pretty good when you look at the increased chance of drawing and the money saved by going self-guided versus guided.
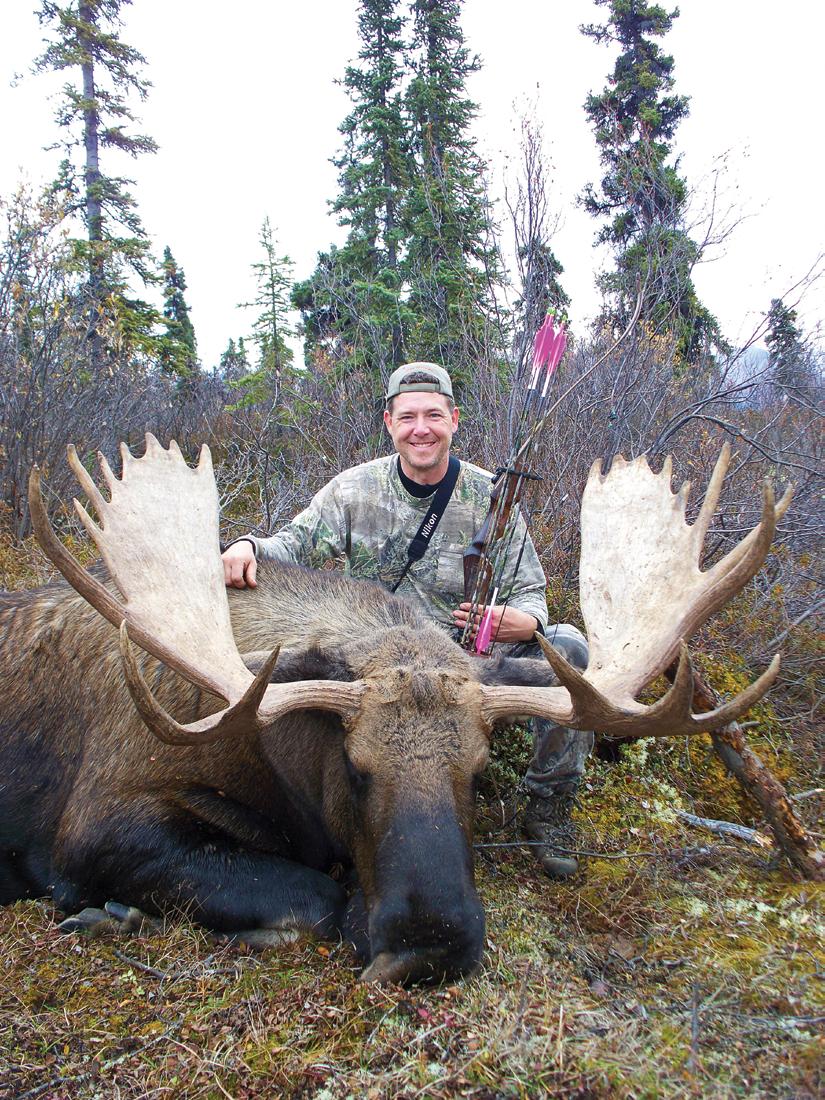
www.westernhunter.net 74 WESTERN HUNTER
My second moose in the Canadian Yukon on a guided hunt was also taken with my recurve.
KEEPING THAT CAPE
 NICK GEHRING TAXIDERMY EDITOR
There’s an interesting paradox deep in the backcountry when a tag gets punched. Initially, at least for me, there’s an overwhelming sense of fulfillment and elation. All the time spent studying maps, calling biologists, in the gym, at the range, and money spent upgrading my gear feels worthwhile as I stand beside my long anticipated quarry. In a way, the burden of the pressure to succeed that I’ve placed on myself is instantly lifted, and it feels amazing. At that very moment, however, another burden often begins to grow in my mind: “How are we going to get this thing out of here?”
In most cases these adventures are extremely demanding simply to notch the tag before I need to return home. But once the animal is down, a more shrewd clock starts ticking, and depending on the environmental conditions (heat, distance, terrain, manpower), it is possible to lose the meat and cape to spoilage. Having a plan is critical. In a previous issue I discussed some ideas to help get meat cool and keep it cool during long packouts.
In this series of articles I’m going to go step by step on how to handle caring for the cape of an animal, particularly when hunting the backcountry in warm conditions. In this issue, Part 1, I will be describing the initial caping process (removing the hide from the animal). In Part 2, I will walk through the process of how to “turn” or “split” the eyes, ears, mouth, and nose. Finally, in Part 3, I’ll describe how to completely flesh and preserve a hide with salt in the backcountry.
SKINNING AND FLESHING A 1
The first step in preserving a cape when a large freezer isn’t accessible is to get it off the body. In fact, even if a freezer is available, most freezers won’t accommodate an elk head and rack, let alone a body! Even mule deer racks can be too much for an average well stocked chest freezer, so knowing how to remove the cape from an animal’s head is a valuable skill. Now, add the variable of backcountry hunting with a packout that could require a few days, and this skill becomes paramount.
While animals come in many shapes and sizes, for the most part the caping process is generally the same. In this step by step tutorial, I’m caping a mule deer buck for a shoulder mount deep in the mountains during warm conditions. (These same techniques can be used for elk, antelope, moose, bear, wolves, etc.)
The first and most basic incisions that need to be made are the dorsal, thorax, and leg cuts. To make the dorsal incision simply start near the last rib of the animal and follow the spine all the way up to the base of the head between the ears. To make the thorax incision, essentially draw a line straight from the back of the dorsal cut to the bottom of the deer, as if you’re cutting the deer in half.
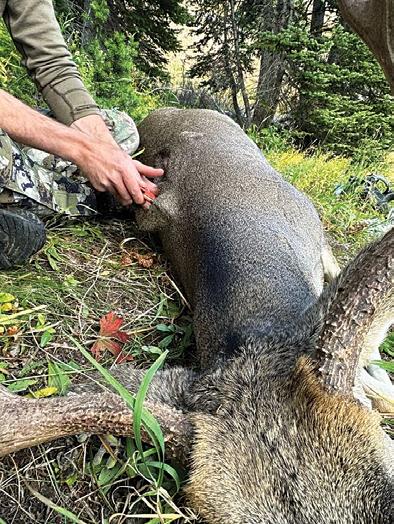
76 WESTERN HUNTER
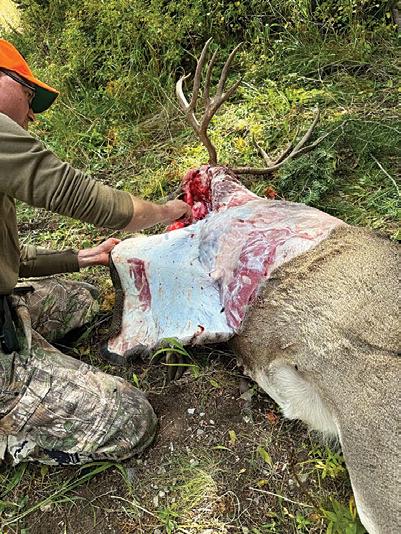
Now, for the leg incisions you’ll want to start at what I refer to as the “wrist” of the deer. This is the joint between the meaty forearm of the deer and the skinny, boney part that leads to the hoof. To remove the hide from the leg, make a circumferential cut around the wrist, and then make an inci-
With these basic incisions made, you can begin skinning/peeling the hide forward toward the head. With horned/antlered game, you’ll now need to make an incision to each horn/antler base which will allow you to remove the skin from around the bases. I like to use what’s called a “7 cut.” Starting at the back of the right antler, I’ll make an incision at an angle toward the spine to connect with my dorsal cut. This incision will be the angled portion of the “7”. To make the top line of the “7”, I’ll cut from the medial side of the left base straight across to the medial side of the right base. When viewed from above these two incisions will look like a “7.”
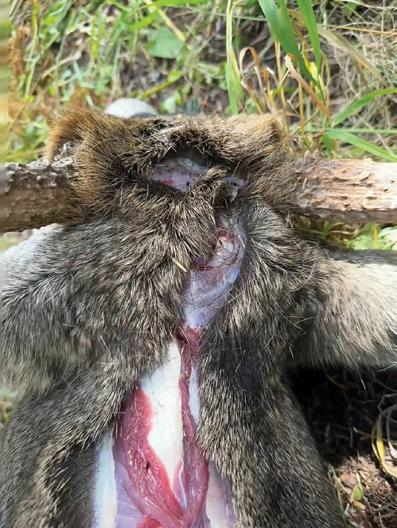
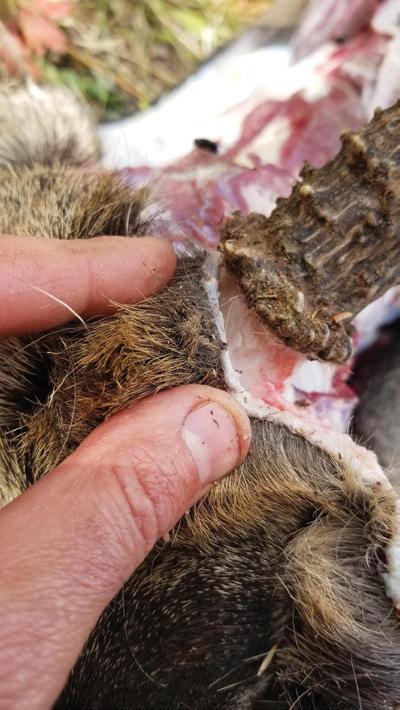
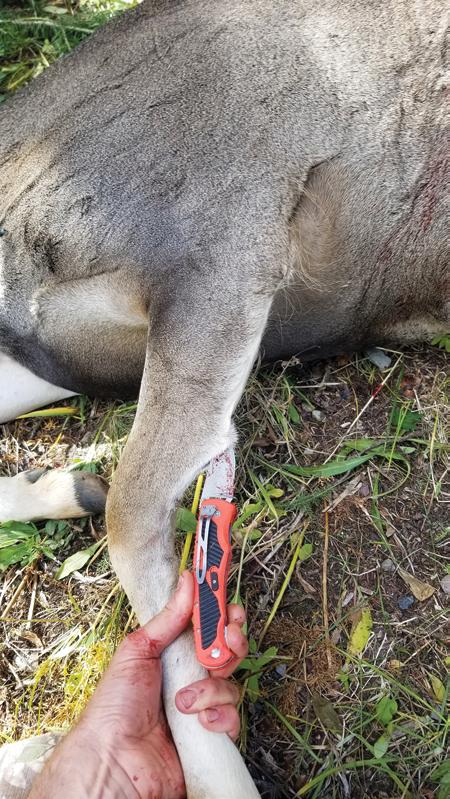
At this point, continue this incision straight back toward the deer’s hind quarter, perpendicular to the thorax incision.
At this point, I can start peeling the hide away from the base of the antlers. (If this was a horned animal like an antelope or sheep, I’d have to make a circumferential incision around the base of the horn where the horn meets the hairy skin.) To peel the skin away, I start by using the tip of a stout knife to simultaneously cut and pry the skin away
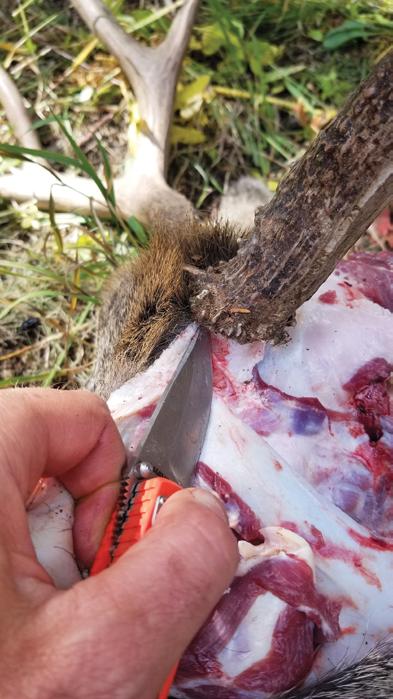
Once I have freed enough skin for me to grab onto it with my left hand, I’ll firmly try to peel the skin away by hand so as to not butcher it with a sharp knife. (With larger cervids like elk and moose this generally isn’t possible as their skin is often too thick and is not easily removed.) To aid in the process, I’ll continue skinning forward along the back and side of the animal’s head.
of muscle and cartilage called the ear butt where the ear meets the head. This muscle allows the ear to be positioned in whichever direction the animal desires to focus its listening. The ear canal travels from the skull through the ear butt, out to the external ear which serves as a satellite dish of sorts picking up audible signals.
When caping an animal, we want to disconnect the ear canal as close to the skull as possible, as this will aid in recreating the anatomy of the ear during the mounting process. To do this, skin the hide away from the back side of the ear butt until you can identify where the ear butt meets the skull. Keeping your knife tight to the skull, cut through
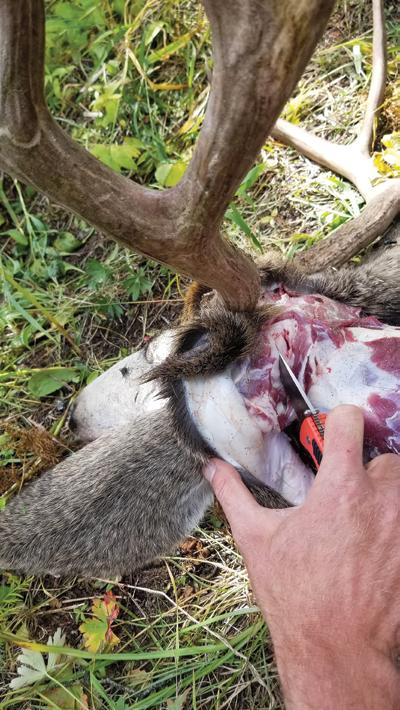
info@westernhunter.net
2
3
5 6 7
4
With the ears separated from the skull and the hide removed from around the bases, it’s time to skin around the eyes. Without a doubt, the eyes require the most caution, as they have very thin skin, and they have little to no hair to cover imperfections. Sloppy knife work around the eyes can be difficult for even the best taxidermist to hide. With that said, a sharp knife and a slow hand make the task quite simple. As you approach the eye from the temple area you’ll want to insert the index finger of your non cutting hand into the eye socket while
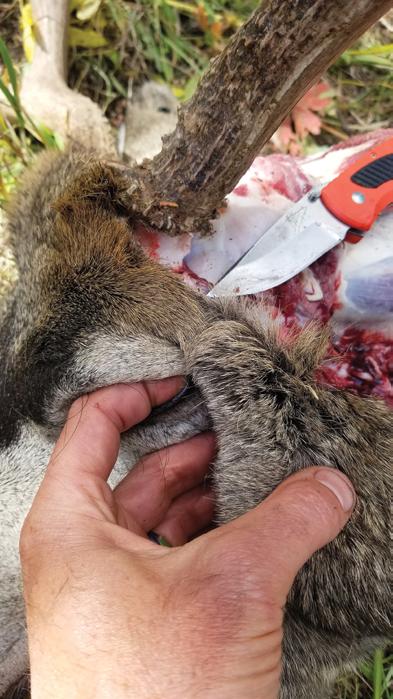
Doing this allows you to feel when the knife is getting close to the skin of the eye. Now, at this point you’ll discover that there is actually skin on the inside of the eyelid that connects to the orbit of the eye socket. The inner skin of the eyelid will need to be removed from the socket without cutting the outer eyelid. Slowly advancing a sharp blade will allow you to remove the entire circumference of the eyelid until you’re at the front corner of the eye, which is called the tear duct.
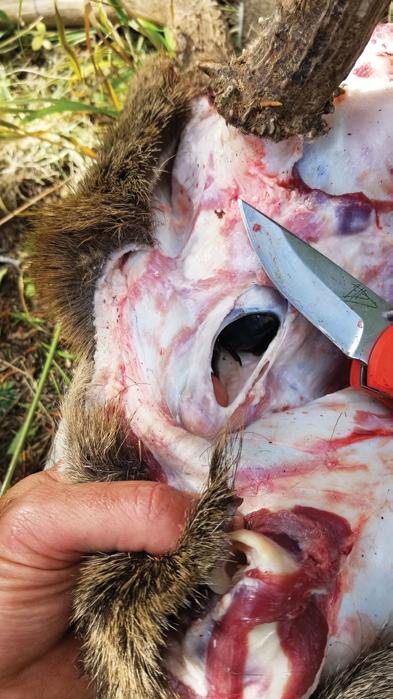
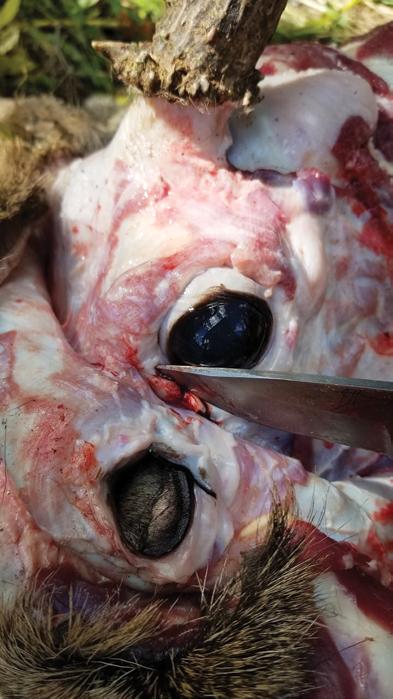
While many mammals have tear ducts, they are especially pronounced on cervids because of what’s called the preorbital gland. Bucks and bulls regularly use the scent produced by this gland to communicate with other deer in the area, which is why they will often be seen rubbing their faces in branches, particularly during the rut. At any rate, this is the most challenging aspect of caping a buck or bull, bar none. Since it’s a gland, the skin here is quite soft and thin. Couple that with the fact that it is positioned in a deep groove in the skull directly in front of the eye, and it’s very easy to have a knife mishap here.
The best way I’ve found to remove the tear duct without mutilating it is to essentially pry it out with the tip of your knife. Starting near the corner of the eye, slowly work the tip of the knife forward and inward (pointing into the boney groove), being certain to keep in constant contact with the skull until

With the most delicate area behind us, it’s now time to advance down the face toward the nose. While I recommend keeping the cutting edge of the knife in constant contact with the skull around the eyes and ears, I will point out that in general it can be helpful in the longterm to keep the blade as close to the skin as possible.
For example, when skinning an animal near the ribs, you’ll notice there may be multiple layers of muscle, fat, and connective tissue between the skin and the ribs. Pulling firmly on the skin, and cutting nearest to the skin will leave all the unnecessary tissue on the carcass, not on the cape. This serves three advantages. First, extra meat and tissue that is attached to the cape will add unnecessary weight to the cape during packouts. Ounces equal pounds, and in these situations every ounce matters.
Second, thick chunks of flesh left connected to a skin will retain heat, which can result in bacterial growth and hair slippage down the road. Third, staying near the skin avoids cutting large vessels that will bleed all over the pelt. As you can see in this photo, there are two large veins running parallel to the tear duct on this buck.
By pulling tension on the hide and slowly cutting with my blade near the skin, I can avoid cutting these vessels and keep the hide as clean as possible. Obviously blood is inevitable during any skinning process, but there are ways to minimize it. When it comes to fleshing the hide in the next part of the process, a clean hide is easier to work with than a bloody mess.
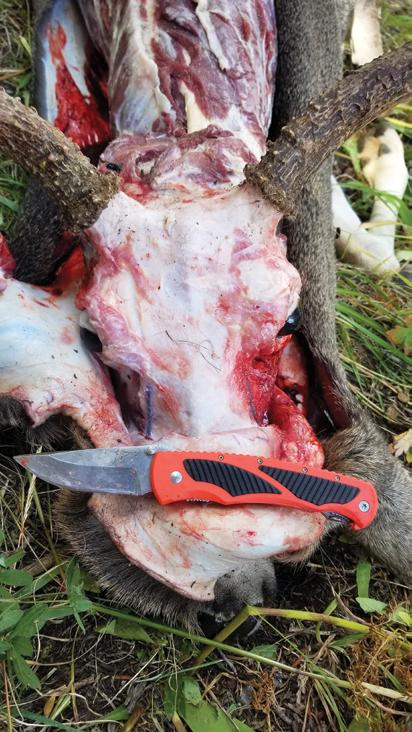
www.westernhunter.net 78
8 9 10 11 12
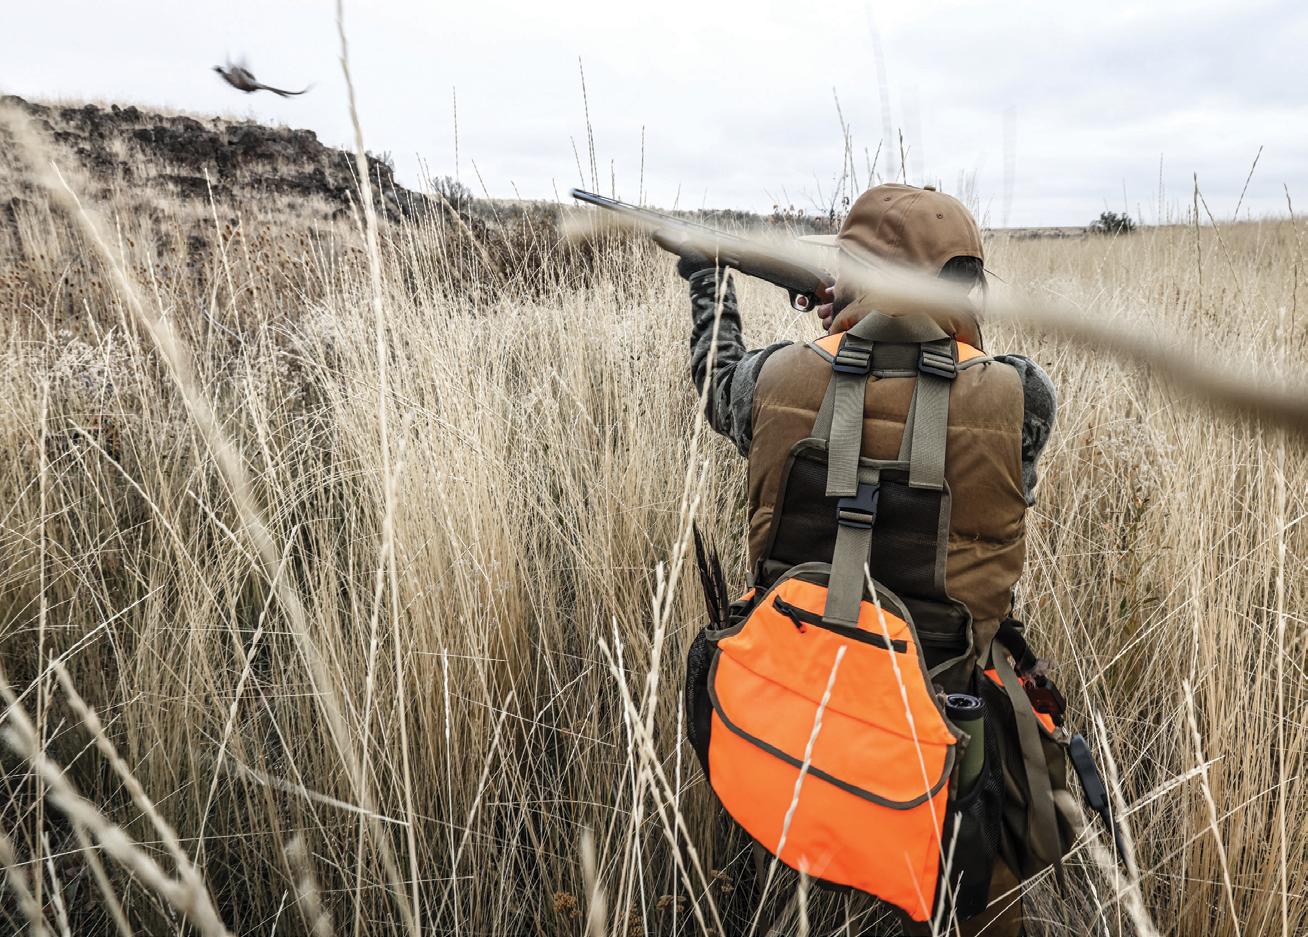


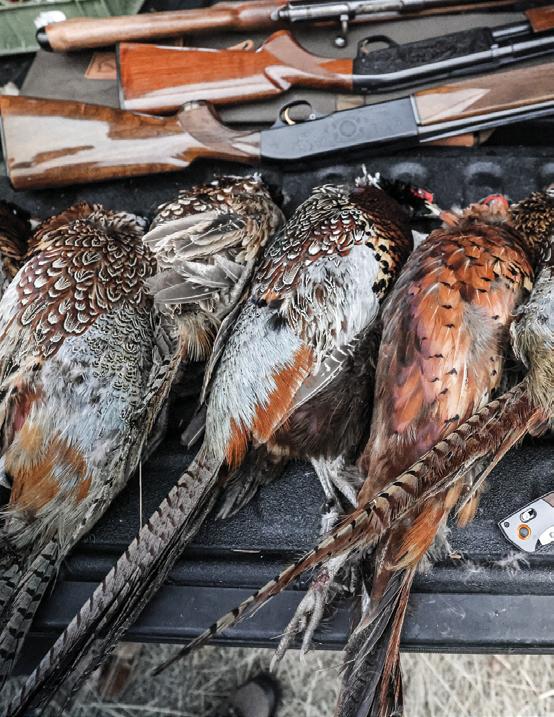


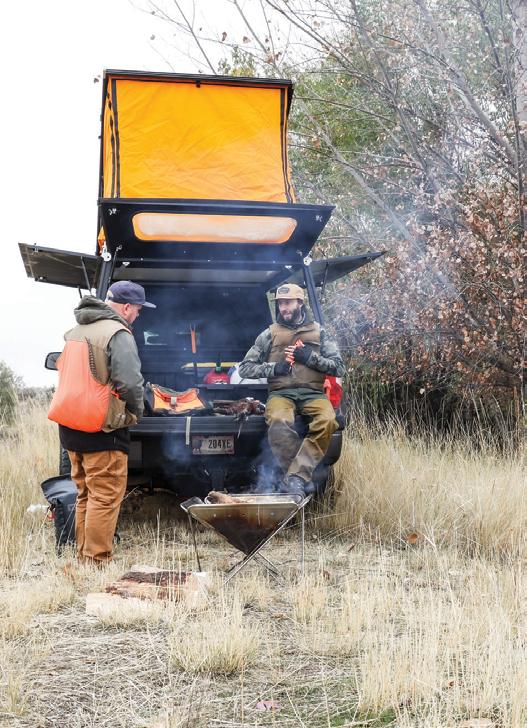
FOR ADVENTURE
THE FIRST SLICE TO THE LAST
the 15500-3 Meatcrafter® in your quiver, you can move from the field to the BBQ pit and the truck bed to the butcher's block without missing a beat. It's a hybrid hunting fixed blade knife that brings a distinctive edge to the table. MEATCRAFTER® 15500-3 GET YOURS LocationMaupin Oregon
BUILT
FROM
With
At this point I’m getting close to having the cape completely removed from the deer’s head, but I need to free the nose and the mouth. To do this, it’s often easiest to open the deer’s mouth and make an incision where the inner skin of the lips meets the deer’s gums.
13
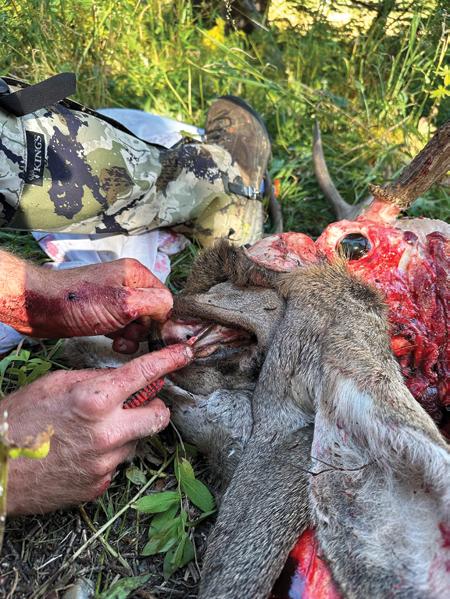
Once this incision is made, I can start to peel the skin around the mouth and nose back and away from the lower and upper jaws. When it comes to the nose, I need to be careful to cut far enough into the nose so that I don’t cut any of the external skin around the nostrils. The easiest way to do this is to grab the nose with your non-cutting hand and cut the cartilage septum (just above the upper jaw) back toward the bridge of the nose until I’ve completely disconnected the cartilage and skin from the deer’s skull.
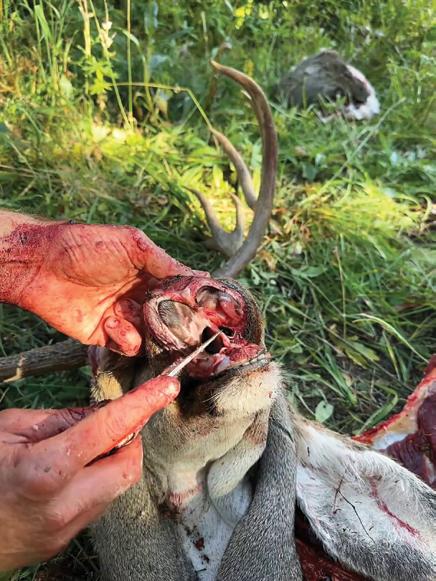
16
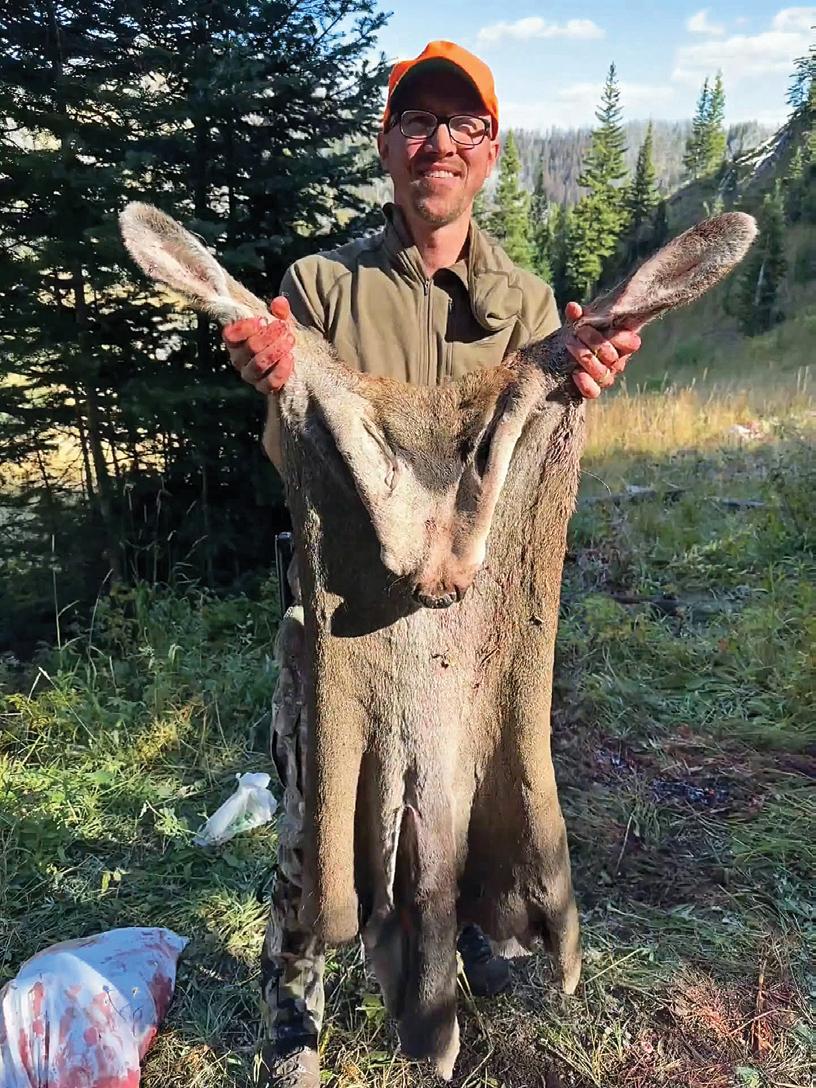
taxidermist. However, if the weather permits and there are still tags in our pockets, I’m in no rush.
In Part 2 of this series I’m going to address this situation and the strategy of beginning to actually “flesh” a cape in the backcountry to prepare it for being salted. Until then, hunt hard, and keep your knife sharp!
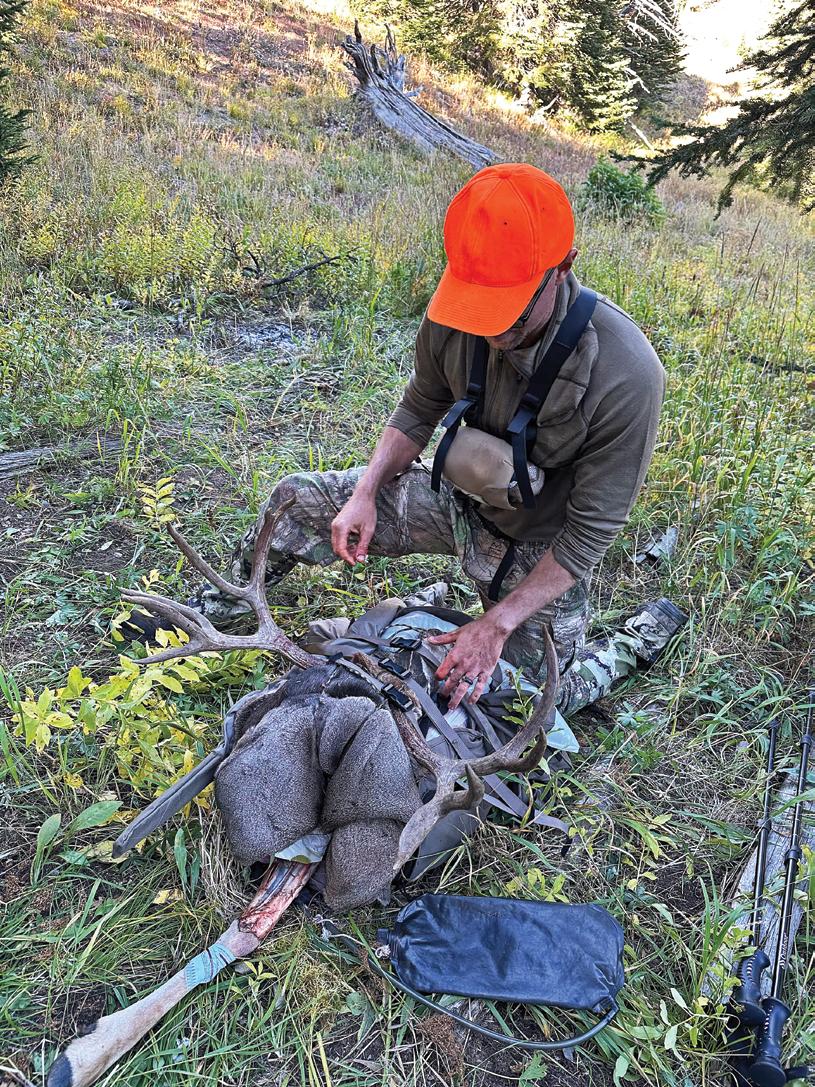
80 WESTERN HUNTER
15
14
Western Hunter Canvas Duffel
This rugged canvas duffel bag will contain and protect all of your valuable gear. Built to last with heavy-duty zippers, strong stitching, and a water-resistant finish. Like all high-quality canvas gear, you can count on this duffel looking even better with each season of use and abuse on your adventures.
• HEAVY-DUTY #10 100% COTTON CANVAS
• WATER-RESISTANT
• HEAVY-DUTY MOLDED YKK TOP ZIPPER
• FRONT POCKET WITH A VELCRO CLOSURE
• WRAP AROUND HANDLES FOR EXTREME DURABILITY
Order Online at westernhunter.net
n Having control over your dogs will help stop them from running undesired game. Here I have called my dogs to heel while I hike trying to identify tracks.
HUNTING WITH HOUNDS
BUILDING A STRONG PACK
HOW TO CREATE A COHESIVE TEAM OF HUNTING DOGS
Today, I have a successful pack of hounds. I built them one by one, and I am proud of what they have become. Raising those dogs has been one of the most fulfilling experiences of my life, and because of the way I raised and hunted them, I have the confidence in any one dog to go out and perform independently. There is definitely more than one way to skin a cat, but these things helped me get to where I am today, and maybe some of them can help you, too.
Breeding
It taught me more about hounds and the game we were after than I ever would have learned by just turning my pup loose with a finished hound.
If you are interested in getting into hounds or adding another dog to your pack, the most important thing for you to consider is the breeding and background of the dog you are going to get. Raising and training hounds is very time-consuming, and you want to make sure you are getting dogs with natural hunting ability bred into them. There are wonderful dogs within every breed of big game hound, but that doesn’t mean that they are all bred to be great hunters. Do your research and make sure you are getting dogs from the best hunting bloodlines you can find.
In today’s social-media-crazed world, it has never been easier to network and seek out the best
hunters and breeders to get your dogs from. My recommendation is to start with the most successful hunters and breeders in your area. Find out what they are using and why. If they aren’t using a certain type of dog, there may be a reason for it. For example, a dog bred for trailing lions in the northern states may not do as well trailing lions on dry ground in the Southwest, etc. Do yourself a favor and do a lot of research before you take on the responsibility of a new prospect.
Bonding
When I get a new pup, I devote a lot of time to them in the first year of their life, especially in the first six months. My goal is to bond with them, imprint myself as their master, and create a desire for the pup to want to please me. I will let them inside my home and let them ride in the cab of my pickup until they start to grow. I also prefer to be the primary person who feeds and waters the dog early in their life.
Once they are fully vaccinated, I will take the dog everywhere with me. Every small adventure is an opportunity to bond and train the young dog. They get to learn and experience new things every time the tailgate drops. I slowly introduce the other
www.westernhunter.net 82 WESTERN HUNTER

young dog to bond with me, but with all my dogs, and we try to do most things together as a team. The young dog will absorb tendencies and learn from the other dogs very quickly, and I give them lots of opportunities to run together even if we are not hunting. Every time I drive somewhere I try to take a couple of dogs with me, sometimes alternat ing them so they all get to spend time with me.
The dogs don’t care if they are going hunting, they just want to be with me and go somewhere exciting. I take them everywhere with me and try to prevent them from being isolated in individual kennels as much as possible. We can’t always hunt, but we can load our dogs up and go on hikes or
nity to learn smells, solve problems, and navigate through the country. Aside from his training, his
ery day until they started to run undesired game.
little bit, but I use the proximity alarm on my Garmin to alert me should they leave my property. I grew up with bird dogs, so it was different for me to let dogs range out on their own, and I made the mistake of having too much control with my first hound. She didn’t want to range out on her own and would frequently come back on a track to make sure I was still there. Now, my pups will often range off my property to explore. I don’t shock them or scold them, but I do train them to recall with the tone function on my Garmin. We want our hounds to range away from us, sometimes for miles until we get to the tree. By letting them run loose and build confidence, we are setting ourselves up for success in the woods. It is our job to teach them what is acceptable game to run and recognize when it’s not safe for them to do so.
Individual Training
I like to think of a hound like a five-tool player in baseball. If I could pick those five tools for a hound to have, they would be speed, grit, trailing ability, treeing ability, and intelligence. We all hope that every pup we pick will fall out of the womb and be perfect, and that’s what you should be striving to find from your breeder. Unfortunately, there are no “perfect” hounds. They all have quirks and
83 WESTERN HUNTER
Letting young dogs run loose is the best way for them to expand their mind. They will learn smells, build confidence, and conquer small obstacles like this one.

areas of strength and weakness. What I focus on is eliminating areas of weakness by giving them experience or coaching them.
You can improve speed with diet and exercise to a certain degree. Grit can improve with maturity and building up a dog’s confidence. Trailing and treeing ability is all about reps, reps, reps. The best way to extract the highest level of intelligence is to let your pup run loose, explore, and learn from another dog. Every pup I get latches on to one of my older dogs. It’s very easy to see which one they admire the most. I use that dog specifically to help train the pup and show it the ropes.
Every time I get a new pup, I start out training them independently, eliminating the distraction of other dogs. All obedience training and scent drags are done without other dogs until they are really catching on. I will teach them to ride in the truck and on the ATV without other dogs that bump into them or make it chaotic. The first caged game and mock hunts they do will be alone until they have
one success. Once they have figured out the objective, I will introduce that one dog that they admire to ride, train, and hunt with them. Having a buddy really gets them excited about going, and they start to learn from the other dog very quickly. Then, I slowly introduce other dogs and we start hunting as a team. The young dog will learn from the other dogs and start to experience real hunting somewhere between six months and a year old.
Sometime between one and two years of age the dog should be a functioning member of the pack and catching game independently. At the end of the day, you must ask yourself if the dog can perform as an individual and help the pack with a little coaching, or if it lacks the tools necessary to be a productive member of the team. A team is only as strong as its weakest link, and a pack of hounds is no different. Each dog in your pack should be able to independently catch the desired game. If they can’t then they should be replaced with a dog that can.
Running Undesired Game
One of the biggest reasons I spend so much time with each of my dogs is to have control. As the young dogs start to experience the world around them, they will surely come across a scent or animal that they will want to pursue. Our job is to educate them on which scents are acceptable to run and which are not. By having control you can make this process very easy.
The first step to breaking a dog from running undesired game is giving them good obedience training and making sure they understand simple commands like “No,”“Come,” and “Heel.” That’s why I spend so much time with each new dog, taking them on small trips and hikes in safe areas. I will carry a lead with me and make them walk at heel for small durations and then release them to go play and hunt. I will call them back to me and repeat this process multiple times during a single outing. I start this process at a very young age, and I am consistent with it throughout their entire life.
Once the dog understands verbal commands, I will start training it to recall with the tone from a Garmin track and train collar. Every time I call the dog back to me, I will use the tone function in conjunction with my verbal commands. It doesn’t take long for them to catch onto what the tone means, and as soon as I touch the tone button, they usually wheel and run to me. I praise them well and release them to go play and hunt again. All of this has been accomplished without the use of electricity.
Now that I have the dog obedience trained and tone trained to recall, I will start breaking it of running undesired game. From this point on I take the dog on mock hunts or hikes with my other dogs. I will specifically take them to places where I know we will encounter undesired game like deer and coyotes. Hopefully, we jump some undesired game and give the dog an opportunity to chase it. If they do decide to chase it, I will let them scent trail the animal until they start to open on the track. At this point, I correct the undesired action with verbal commands, then tones, and lastly electricity on the lowest level that will get them to return to me.
After only a few times they will typically respect my verbal commands, and I seldom must use electricity again. I often have deer jump right in front of my dogs, and they will watch them run
www.westernhunter.net 84 WESTERN HUNTER
It’s always easy to see which dog in your pack a pup admires the most. I recommend using that dog specifically to help train the young dog.
Easy tracks like this one are great opportunities for a young dog to develop. Building a strong pack requires each dog to be able to catch desired game independently.
Going on mock hunts or small hikes with your dogs is a great way to practice control, and provides opportunities to train them off undesired game.
Hunting
I prefer to get my pups sometime during the spring. By doing this, they are usually around seven to eight months old when lion season opens and are ready to start hunting. The first big game animals they see all usually climb a tree, and there isn’t as much risk of injuring the dog’s confidence at a young age. When spring bear season arrives, the young dog will be a year old and have experience and confidence before encountering a bear on the ground.
When I start hunting young dogs with my pack, I try to be careful not to injure their confidence in any way. I don’t put them in the dog box with any foreign dogs and try to eliminate things that could set them back. Once my dogs tree a lion, I try to tie back all the old dogs except one that does a nice job of treeing and usually sits calmly when barking treed. You don’t want a tree-jumping dog to land
tinues to repeat the behavior, remove it from the pack completely.
At some point within the first few trees a young dog makes on his own, I will pull my dogs off and let the animal go. Once the animal leaves, I will return to the tree and turn the pup loose alone or with one other dog to catch it again. Sometimes you must wait an hour or two for this to happen, but you create an easy scent trail that isn’t sightinduced. This is something I will only do once as I don’t condone unnecessary harassment, and if we have an animal jump on its own in the first few hunts, I will negate the process entirely.
Once a young dog has got some experience, I recommend giving it a solo rep on a track of its own. If you find an easy track, leave your finished hounds in the box and give your young dog the opportunity to do it independently or with one finished dog. People really have a hard time doing this, but it’s imperative that they get opportunities to develop, and they often will surprise you with how well they do. Even if they mess it up, you can still
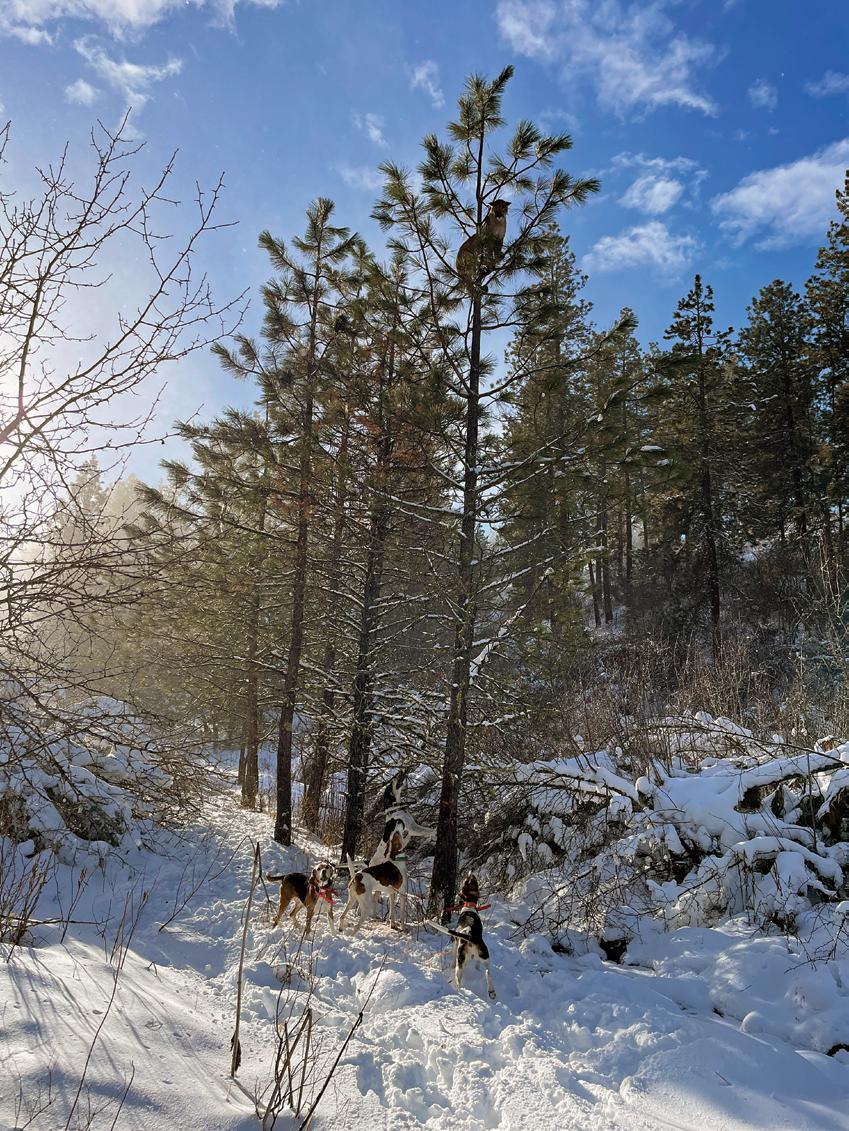
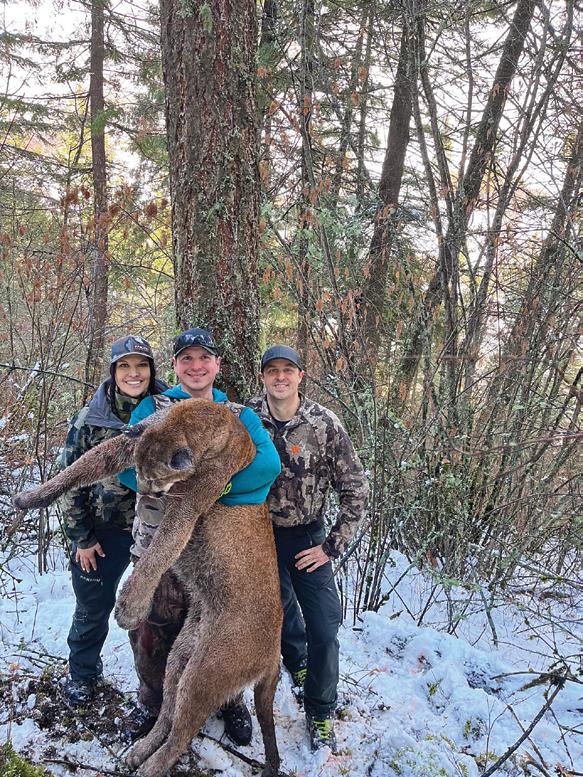
Unless I am free-casting my dogs, I like to cycle them as much as possible, letting different combinations of dogs start tracks. By doing this you are ensuring that any dog can be used with any other dog and get the job done. This process is something that never really stops. You just keep giving them opportunities, and soon it will become very clear which dogs hunt well together and which do not. Over time you’ll develop confidence in any combination to produce.
Conclusion
Hunting with hounds is all about repetition. The more times your tailgate drops and your dogs go hunting, the better. They need to be put on a ton of game and be given a lot of opportunities to hunt and develop. Each victory will bring your dogs closer together, and you will start to see strengths as well as weaknesses.
Early in my career I borrowed a couple of dogs and tried to go tree a mountain lion. I had little to no control over these dogs. I had to keep them on a leash until I let them go, and once I did, it was like a wild goose chase to catch them again. Most of the time I spent getting drug through the trees and worried one of the dogs would run away. I swore I would never hunt like that again, and it prompted me to train my dogs differently.
The things I do help me to control what transpires out in the field. My dogs are a cohesive team that handle extremely well, and it makes hunting much more enjoyable. It takes a lot of work, but I see a direct relationship between time spent and reward received. Building and maintaining a strong pack of hounds is very challenging. We never really know when we’ve made it. All we can do is try to build strengths and eliminate any weaknesses that could hinder our success. The process never really ends – we just keep striving for perfection and have some awesome experiences along the way.
info@westernhunter.net 85 WESTERN HUNTER
By letting your dogs run and hunt together as much as possible, you will develop a cohesive team that runs trails and trees together consistently.
BULLETPROOF KNEES
REINFORCING THE KNEE BY STRENGTHENING THE HIPS AND ANKLES
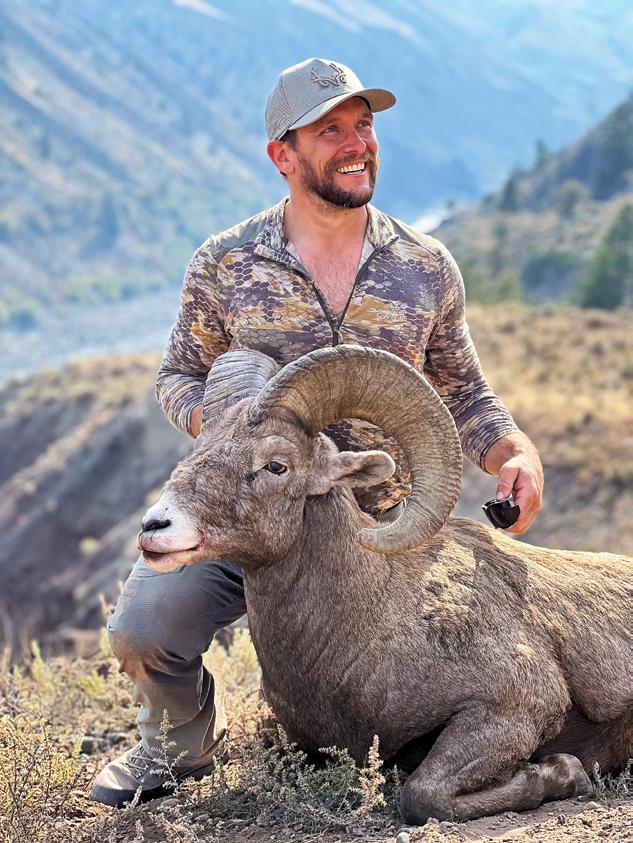
ver the years of hosting my podcast and engaging with questions on social media, it has become abundantly clear that knee-related concerns are a topic of paramount interest among my audience. Whether it’s knee pain while ascending a hill, descending one, during exercise, or even post-workout discomfort, the knee seems to
MATT WARD HEALTH AND FITNESS EDITOR
While it might be surprising, the knee is, in essence, a relatively straightforward and somewhat “unintelligent” joint. It primarily operates as a hinge, sandwiched between the hip above and the ankle below. What’s crucial to understand is that it’s much easier to negatively impact the knee by compromising the mobility and
In simpler terms, if you’re grappling with knee pain, the primary culprits are often the ankle and hip. The only exception to this rule is acute knee pain resulting from a traumatic event, such as tearing an ACL, fracturing a bone, or damaging the meniscus. When individuals reach out to me about their knee pain, it typically involves a relatively straightforward process. I ask them a series of questions or request video footage of specific tests to gain a clearer perspective of their condition. This allows me to prescribe targeted exercises
The tests I employ are relatively simple, yet highly informative. The kneeto-wall test involves standing about 3-4 inches away from a wall with your foot flat and hips level and parallel to the wall. This test assesses foot stability and dorsiflexion, which is how much your knee can move forward over your toes. In the single-leg step-down test, I observe how individuals load their knee and hip, ensuring that the knee stays aligned over the middle of the foot while stepping down. I also pay close attention to how well the lower leg, ankle, and foot maintain stability throughout the step-down phase. Of course, the presence of pain during these tests is a crucial aspect to consider.
Now, let’s talk about an essential but often overlooked aspect of knee health: self-care and respect for our bodies. I often say that when a Formula 1 car takes a warm-up lap on the racetrack, it’s subjected to the scrutiny of an entire team of engineers, mechanics, and experts who meticulously fine-tune every aspect of the vehicle. In contrast, we put our bodies through countless hours of physical strain, like hiking, without affording them more than a momentary rest in a chair and a couple of beers for recovery. The point here is that our bodies are sophisticated machines, and they deserve our care and attention. By nurturing and looking after them, we can expect them to return the favor and serve us well for many years to come.
In conclusion, while knee pain may be a common concern, it’s often closely intertwined with the health and stability of the ankle and hip. By understanding this connection and incorporating exercises and self-care into our routines, we can mitigate discomfort, prevent injuries, and ensure our bodies continue to perform at their best.
www.westernhunter.net
HEALTH & FITNESS
Calvin Connor
Tissue Quality Improvement with Foam Rolling
Begin by addressing tissue quality issues with foam rolling. This practice can help alleviate tightness, release muscle tension, and improve blood flow, all of which contribute to knee stability. Dedicate some time to this self-myofascial release technique, and you’ll lay a solid foundation for further exercises and mobility work.
1. Figure 4 on the Foam Roller
• Step 1: Sit on the floor with your legs extended in front of you.
• Step 2: Place the foam roller under your right thigh, just above the knee.
• Step 3: Cross your left ankle over your right knee, creating a “figure 4” position.
• Step 4: Use your hands for support, lift your hips off the ground, and begin to roll back and forth over your right outer thigh.
• Step 5: Apply gentle pressure and focus on areas of tension or discomfort.
• Step 6: Roll for about 30 seconds to 1 minute, then switch to the other leg.
2. Quad with Knee Flexion and Extension
• Step 1: Begin by lying face down on the floor with the foam roller under your thighs.
• Step 2: Support your upper body with your forearms and toes, keeping your body in a plank position.
• Step 3: Bend one knee, bringing your heel towards your glutes while rolling up and down the front of your thigh.
• Step 4: Extend your leg and roll up and down again, targeting the quadriceps muscles.
• Step 5: Continue this rolling pattern for about 1-2 minutes on each leg, paying extra attention to any tight or sore spots.
3. Calf with Ankle Flexion and Extension
• Step 1: Sit on the floor with your legs extended.
• Step 2: Place the foam roller under your calves, just below your knees.
• Step 3: Cross your right ankle over your left ankle.
• Step 4: Place your hands on the floor behind you for support.
• Step 5: Flex and extend your left ankle (point your toes and then pull them back toward your shins) while rolling over your calf.
• Step 6: Apply moderate pressure and roll up and down the length of your calf muscle.
• Step 7: After about 1-2 minutes, switch to the other leg and repeat exercise.
4. Tibialis Anterior Rolling
• Step 1: Sit on the floor with your legs extended.
• Step 2: Place the foam roller under your shins, just above your ankles.
• Step 3: Support your body with your hands behind you.
Tibialis Anterior Rolling
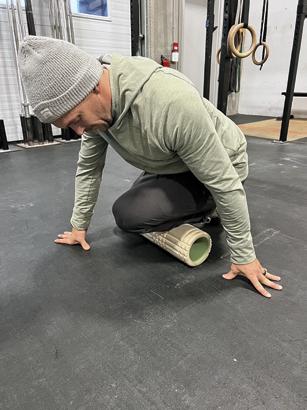

• Step 4: Apply gentle pressure and roll up and down over your shins, targeting the tibialis anterior muscle on the front of your lower leg.
• Step 5: Be cautious and use lighter pressure on this sensitive area, as it can be uncomfortable.
• Step 6: Continue rolling for about 1-2 minutes, paying attention to any points of tension.
Knee Stability Exercises
While it’s true that knee pain often originates from issues in the hip or ankle, prolonged dysfunction can also result in a lack of stability within the knee itself. To address this issue, here is a curated list of my favorite knee stability exercises. If you’re someone who has been dealing with stiffness for a significant period, chances are you possess a fair degree of strength, but your problems might be rooted in mobility issues within the hip or ankle. Starting by enhancing the range of motion and control of these joints is often the simplest and most effective approach. Even if it doesn’t directly alleviate your knee pain, your hips and ankles will certainly appreciate the extra attention in the long run. So, why not give it a try?
1. Low Box Step Downs
• Step 1: Find a stable, low box or step (around 6-12 inches in height).
• Step 2: Stand facing the box with your feet hip-width apart.
• Step 3: Lift your right foot and place it on top of the box.
• Step 4: Lower your body by bending your left knee and hip, keeping your back straight.
• Step 5: Gently tap your left heel on the floor or let it hover slightly above the ground.
• Step 6: Push through your left heel to stand back up.
• Step 7: Repeat for the desired number of repetitions on one leg and then switch to the other.
Heels Elevated Squats
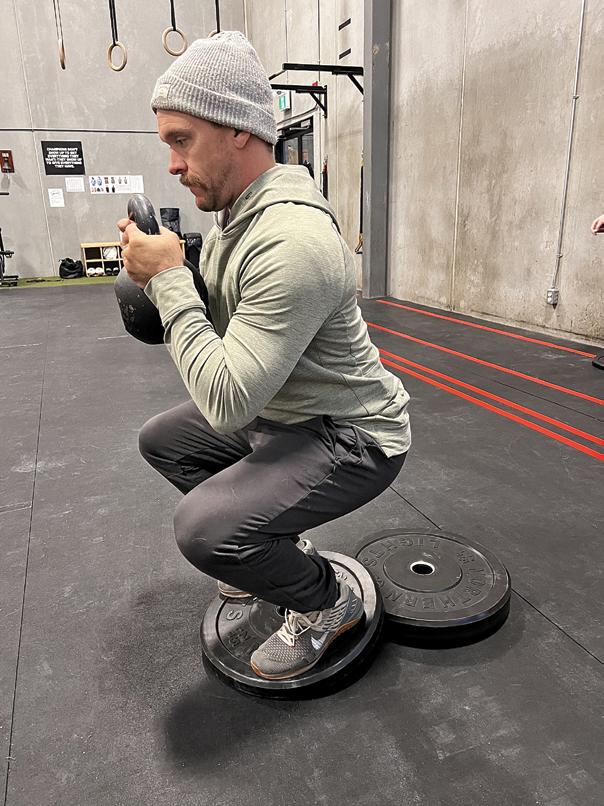
info@westernhunter.net 87 WESTERN HUNTER
Don’t let the tears fool you. If you hike in the mountains this will become a favorite of yours post hunt... eventually.
Your knees will thank you when you’re packing a sheep downhill for a few hours if you have trained this exercise.
2. Heels Elevated Squats
• Step 1: Stand with your feet hip-width apart and place your heels on a stable surface like weight plates, a small step, or a heel wedge.
• Step 2: Keep your chest up and your core engaged.
• Step 3: Lower your body by bending knees and pushing hips backward.
• Step 4: Keep your weight on your heels and maintain a neutral spine.
• Step 5: Squat down until your thighs are parallel to the ground or as far as your mobility allows.
• Step 6: Push through your heels to stand back up.
• Step 7: Repeat for the desired number of repetitions.
3. Nordic Hamstring Curls
• Step 1: Kneel on a soft surface with a partner or secure your ankles under a heavy object.
• Step 2: Cross your arms over your chest or extend them forward.
• Step 3: Slowly lower your upper body to the ground, leading with your chest and keeping your back straight.
• Step 4: Use your hamstrings and glutes to pull your torso back up. Your body should stay straight throughout the movement.
• Step 5: Repeat for the desired number of repetitions.
4. Reverse Nordic Curls
• Step 1: Kneel on the ground with your feet and ankles secured under a sturdy object or have a partner hold them down.
• Step 2: Lower your upper body backward toward the ground.
• Step 3: Control the descent with your hamstrings and glutes.
• Step 4: Once your upper body is near the ground, use your hands to push yourself back up to the starting position. Keep your core engaged and your body in a straight line throughout the movement.
• Step 5: Repeat for the desired number of repetitions.
5. Tibialis Anterior Raises
• Step 1: Sit on a bench or chair with your feet flat on the ground.
• Step 2: Place a weight plate or object on your feet (over your toes).
• Step 3: Lift your toes, and weight, as high as possible by flexing your ankles.
• Step 4: Lower your toes back to the ground.
• Step 5: Repeat for the desired number of repetitions.
6.
Straight Leg Calf Raises
• Step 1: Stand with your feet hip-width apart.
• Step 2: Keep your legs straight and your core engaged.
• Step 3: Lift your heels off the ground as high as possible by pushing through the balls of your feet.
• Step 4: Lower your heels back down.
• Step 5: Repeat for the desired number of repetitions.
7. Bent Knee Calf Raises
• Step 1: Stand with your feet hip-width apart.
• Step 2: Slightly bend your knees.
• Step 3: Keep your core engaged.
• Step 4: Lift your heels off the ground as high as possible by pushing through the balls of your feet.
• Step 5: Lower your heels back down.
• Step 6: Repeat for the desired number of repetitions.
Hip and Ankle Mobility Enhancement
As we delve deeper into the process of resolving knee pain, it’s essential to focus on hip and ankle mobility. These two joints play a pivotal role in your overall lower limb function. Stiffness and limited range of motion can cascade into knee issues. By engaging in exercises that promote flexibility and control in the hip and ankle, you’re not only aiding your knee but also laying a foundation
for long-term joint health. Don’t be surprised if your hips and ankles thank you for the effort as well.
1. Hip CARs (Controlled Articular Rotations) – Standing
• Step 1: Begin in a standing position with your feet hip-width apart.
• Step 2: Lift your right knee as high as you can while keeping your thigh parallel to the ground.
• Step 3: Begin to externally rotate your right hip, moving your knee out to the side.
• Step 4: Continue to rotate the hip until your knee is pointing forward, away from your body.
• Step 5: Slowly lower your right leg back to the starting position.
• Step 6: Repeat the same sequence in reverse, moving your knee inwards, back to the starting position.
• Step 7: Perform the full sequence for the desired number of repetitions, and then switch to the other leg.
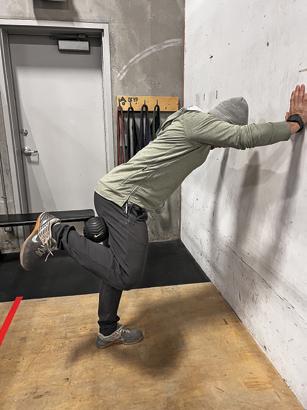
Hip Controlled Articular Rotations – Standing

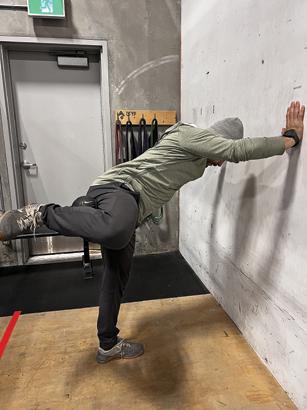
Taking the time to learn how to control your hip in many ranges of motion will lead to a long career in the backcountry.
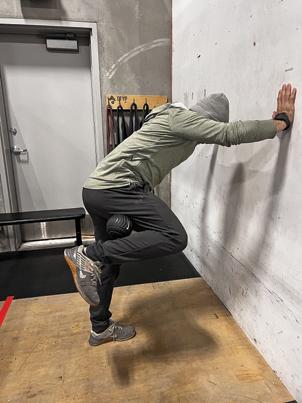
2. Hip CARs (Controlled Articular Rotations) – Quadruped (On Hands and Knees)
• Step 1: Start in a quadruped position on the floor with your hands under your shoulders and your knees under your hips.
• Step 2: Lift your right knee off the ground, maintaining a 90-degree angle at the hip and knee.
• Step 3: Begin to move your right knee out to the side, externally rotating your hip.
• Step 4: Continue the rotation until your knee is pointing forward, away from your body.
• Step 5: Slowly bring your knee back to the starting position.
• Step 6: Reverse the movement by internally rotating your hip, bringing your knee inwards.
• Step 7: Perform the full sequence for the desired number of repetitions, and then switch to the other leg.
www.westernhunter.net 88 WESTERN HUNTER
1 2 3 4

3. 90-90 Hip Rotations
• Step 1: Begin in a seated position with your legs bent at a 90-degree angle.
• Step 2: Place your right foot behind you so your right knee points backward and your left knee points forward.
• Step 3: Lean slightly to the left and bring your hands to the ground on either side of your left knee.
• Step 4: Slowly rotate your upper body to the left, keeping your hips anchored to the ground, and reach your left arm behind you.
• Step 5: Rotate as far as your mobility allows without straining, then return to the starting position.
• Step 6: Perform the desired number of repetitions to the left and then switch to the other side.
• Step 7: Repeat the exercise with your left leg behind, rotating to the right.
Ankle Mobility Exercises
1. Banded Ankle Distraction
• Step 1: Sit on the ground with your legs straight.
• Step 2: Loop a resistance band around the ball of your foot.
• Step 3: Hold the ends of the band in your hands.
• Step 4: Gently pull on the band to create distraction, stretching your ankle.
• Step 5: Move your foot through a range of motion, flexing and pointing your toes, and rotating your ankle.
• Step 6: Perform for about 2 minutes on each ankle.
2. Ankle Dorsiflexion Stretch with Wall
• Step 1: Stand facing a wall with your feet hip-width apart.
• Step 2: Place one foot about 4-6 inches away from the wall.
• Step 3: Keep your heel on the ground and bend your knee to lean your body forward.
• Step 4: Gently push your knee toward the wall, keeping your heel down.
• Step 5: Hold for about 2 minutes on each ankle.
Functional Range Conditioning (FRC) Ankle Mobility Drills
1. Active Calf Stretch
• Step 1: Sit on the floor with your legs extended.
• Step 2: Use a resistance band or towel to wrap around the ball of your foot.
• Step 3: Keep your leg extended and actively pull your toes toward your shin (dorsiflexion).
• Step 4: Release and repeat for about 10-15 repetitions on each ankle.
2. 90/90 Ankle Rotations
• Step 1: Sit with one leg bent at a 90-degree angle in front of you and the other bent at a 90-degree angle behind you.
• Step 2: Place your hands on the ground to support your upper body.
• Step 3: Lean forward and actively lift your front foot’s heel while keeping your toes on the ground.
• Step 4: Lower your heel back down and repeat for about 10-15 repetitions on each ankle.
3. Ankle CARs (Controlled Articular Rotations)
• Step 1: Sit on the floor with your legs extended.
• Step 2: Lift one leg off the ground and perform controlled circular motions with your ankle.
• Step 3: Move your ankle through its full range of motion by flexing, pointing, rotating, and moving it in different directions.
• Step 4: Perform 5-10 controlled rotations in each direction on each ankle.
Go-To Hip and Ankle Stability Work
Now, let’s shift our focus to the core of the issue, which is building strength in the relevant areas. The exercises outlined below are generally considered
foundational, and they’re designed to address and rectify stability concerns. You can easily incorporate them into your daily exercise routine, distributing them across several workout sessions. These exercises are crucial for enhancing hip and ankle stability, which, in turn, contributes to long-term health, especially when you’re out in the backcountry. Making these exercises a regular part of your regimen is a no-brainer for anyone seeking to maintain balance,
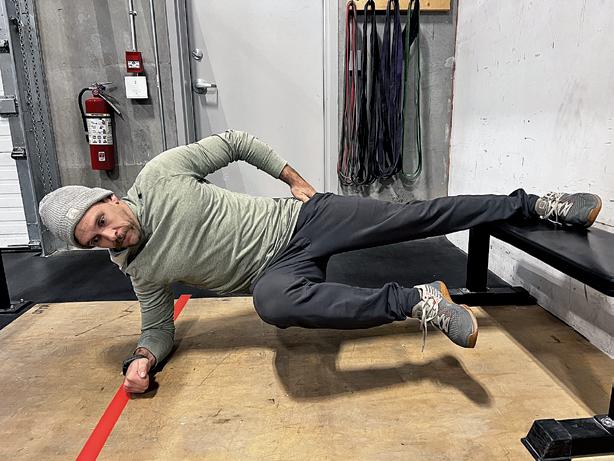
Copenhagen Planks
Often overlooked but stabilizing the inside of the thigh with this exercise leads to very stable footing on long heavy packouts.
1. Copenhagens (Copenhagen Planks)
• Step 1: Lie on your side with your elbow directly under your shoulder and your legs straight.
• Step 2: Stack your feet on top of each other.
• Step 3: Lift your hips off the ground, keeping your body in a straight line.
• Step 4: Hold this side plank position for the desired amount of time (start with 20-30 seconds and progress from there).
• Step 5: Switch to the other side and repeat the exercise.
2. Sumo Deadlifts
• Step 1: Stand with your feet wider than shoulder-width apart, toes pointing slightly outward.
• Step 2: Place a barbell or a set of dumbbells in front of you.
Sumo Deadlifts
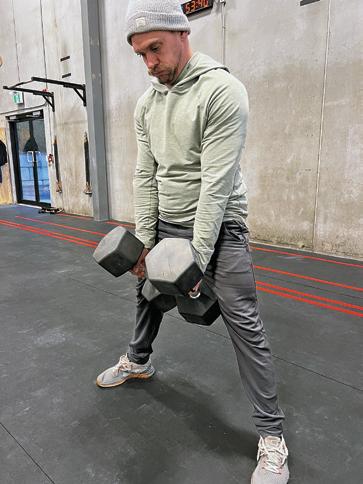
No matter the implement used, this is the most function lift to pick up items.
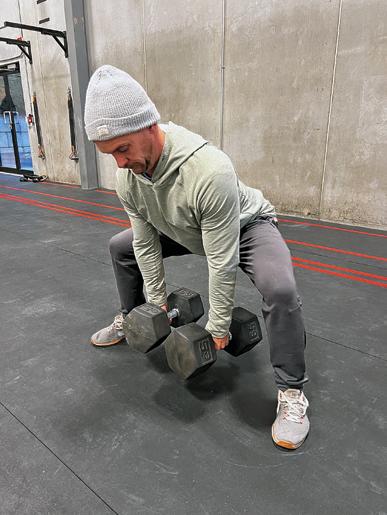
www.westernhunter.net 90 WESTERN HUNTER
• Step 3: Bend at your hips and knees to lower your body down, keeping your back flat and your chest up.
• Step 4: Grip the barbell or dumbbells with both hands, palms facing you (the sumo grip).
• Step 5: Keep your arms straight and your back flat as you lift the weight by extending your hips and knees.
• Step 6: Stand up straight with your shoulders back and chest out.
• Step 7: Lower the weight back to the ground with control.
• Step 8: Perform the desired number of repetitions.
3. Sumo Box Squats
• Step 1: Set up a sturdy box or bench behind you.
• Step 2: Stand with your feet wider than shoulder-width apart, toes pointing slightly outward.
• Step 3: Keep your chest up, shoulders back, and your back flat.
• Step 4: Lower your body down by pushing your hips back and bending your knees until you gently sit on the box.
• Step 5: Pause for a moment, maintaining good posture.
• Step 6: Push through your heels to stand, extending your hips and knees.
• Step 7: Perform the desired number of repetitions.
4. Dumbbell Romanian Deadlifts (DB RDLs)
• Step 1: Stand with a dumbbell in each hand, palms facing your body.
• Step 2: Keep your feet hip-width apart and your knees slightly bent.
• Step 3: Hinge at your hips, pushing your hips back while maintaining a straight back.
• Step 4: Lower the dumbbells along the front of your legs while keeping them close to your body.
• Step 5: Go as low as your flexibility allows without rounding your back.
• Step 6: Push through your hips to stand back up.
• Step 7: Perform the desired number of repetitions.
5. Pistol Squats
• Step 1: Stand on one leg with your other leg extended out forward.
• Step 2: Lower your body into a squat, keeping your balance on the single leg.
• Step 3: Extend your arms forward for balance.
• Step 4: Go as low as your mobility allows, ideally until your thigh is parallel to the ground.
• Step 5: Push through your heel to stand back up.
• Step 6: Perform the desired number of repetitions on one leg and then switch to the other.
Ankle Stability Exercises
1. Calf Raises
Pistol Squats
Dumbbell Romanian Deadlifts
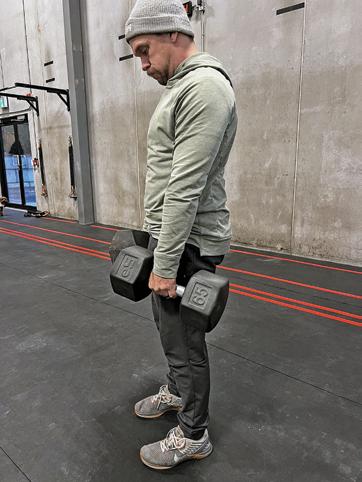
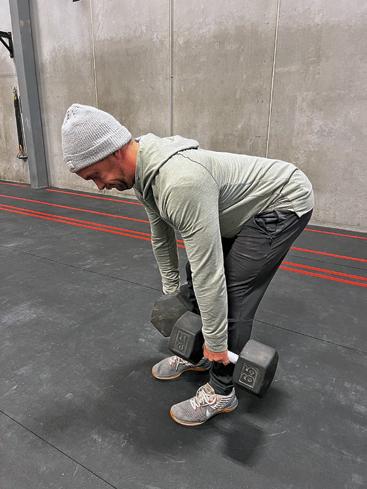
If you know someone with a big back and strong legs this is probably a staple in their workout routine.
2. Tibialis Anterior Raises
• Step 1: Sit on a bench or chair with your feet flat on the ground.
• Step 2: Place a weight plate or object on your feet (over your toes).
• Step 3: Lift your toes and the weight as high as possible by flexing your ankles.
• Step 4: Lower your toes back to the ground.
• Step 5: Perform 10-15 repetitions for multiple sets.

No weights? No problem! Your body weight is usually enough to make this one hard.
• Step 1: Stand with your feet hip-width apart.
• Step 2: Raise your heels as high as possible, lifting your body onto the balls of your feet.
• Step 3: Hold this position for a moment.
• Step 4: Lower your heels back down.
• Step 5: Perform 10-15 repetitions for multiple sets.
3. Ankle Circles
• Step 1: Sit on the ground with your legs extended in front of you.
• Step 2: Lift one leg off the ground, keeping the other foot flat.
• Step 3: Rotate lifted ankle in circles, moving it in a clockwise direction.
• Step 4: After several rotations, reverse the direction and move your ankle counterclockwise.
• Step 5: Perform 10-15 circles in each direction for each ankle.
4. Foot Inversion and Eversion
• Step 1: Sit on a chair with your feet hovering just above the ground.
• Step 2: Lift your right foot slightly and turn the sole inward (inversion).
• Step 3: Then, turn the sole outward (eversion).
• Step 4: Continue this inversion and eversion motion for about 1-2 minutes.
• Step 5: Switch to the other foot and repeat.
5. Single-Leg Balancing
• Step 1: Stand on one foot with the other leg lifted off the ground.
• Step 2: Keep your core engaged and focus on balancing on the single leg.
• Step 3: Hold this position for 30 seconds to 1 minute.
• Step 4: Switch to the other leg and repeat.
Conclusion
These exercises are your ticket to not only improving knee stability but also optimizing the health and function of your hip, lower leg, and ankle. As you embark on this journey, remember to prioritize proper form, control, and gradual progression. Your body will thank you for the extra care and attention, leading to better performance and well-being in the long run. So, what are you waiting for? Get started on your path to greater lower limb stability today to get you deeper into the backcountry.
info@westernhunter.net 91 WESTERN HUNTER
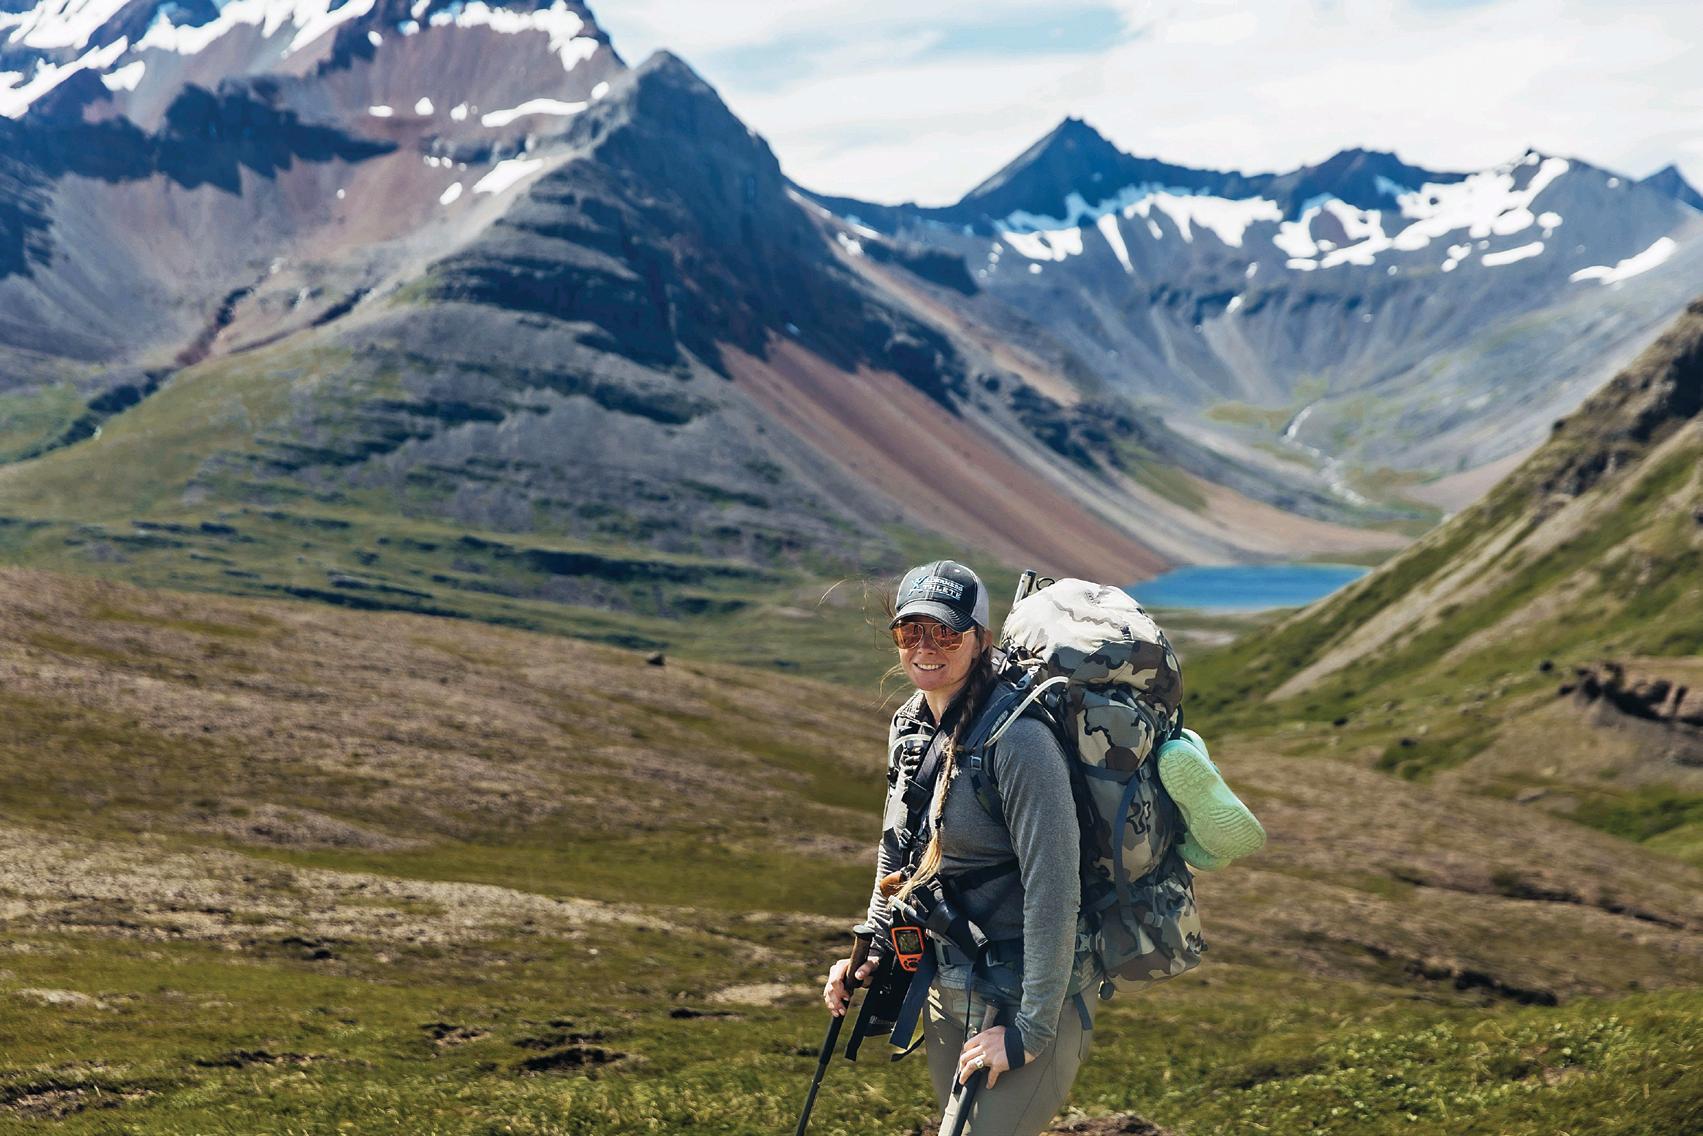
STABILIZE YOUR CORE
LINDSAY PERSICO HEALTH & FITNESS
30 MINUTE LOWER BODY/CORE STRENGTH AND STABILITY WORKOUT
Interval training is a great way to build strength and stamina as you alternate between high-intensity training and periods of rest and recovery throughout the workout. This has great benefits for heart health and allows for more effective workouts in shorter periods of time. This workout is focused on building core strength and stability, both of which are crucial for our hunting adventures. Carrying packs, traversing unstable terrain, and many other aspects of hunting all use our core for strength to accomplish what we need to do and stability to help us navigate treacherous terrain and balance heavy packs.
Interval Workout
Three rounds of 30-second intervals followed by a 30-second rest. Get as many repetitions as possible done with proper form in your 30-second interval.
Equipment
Small Band, Dumbbells, and Timer
Intervals
• 30 Seconds – Banded Side Steps • 30 Seconds – Rest
• 30 Seconds – Single-Leg Deadlift • 30 Seconds – Rest
• 30 Seconds – Single-Leg Hip Bridge
• 30 Seconds – Rest
• 30 Seconds – Single-Leg Step Up and Raise
• 30 Seconds – Rest
• 30 Seconds – Curtsy Lunge • 30 Seconds – Rest
• 30 Seconds – Plank Twist • 30 Seconds – Rest
• 30 Seconds – Oblique Bend • 30 Seconds – Rest
• 30 Seconds – Russian Twist • 30 Seconds – Rest
• 30 Seconds – Hollow Body Holds • 30 Seconds – Rest
• 30 Seconds – Mountain Climber to Rear Leg Kick • 30 Seconds – Rest Repeat for ALL for three rounds.
Banded Side Steps
This movement is designed to help you warm up your lower body and core while engaging your glutes and your stabilizers. We often neglect the muscles involved in side-to-side movements, but these are important as well. Perform this movement in a slight squat position while engaging your core and keeping a neutral spine. Hold this form as you take three steps to the right and then back three steps to the left. Continue this for the duration of the 30-second interval.

www.westernhunter.net 92 WESTERN HUNTER
HEALTH & FITNESS
Banded Side Steps: This movement is designed to help you warm up your lower body and core while engaging your glutes and your stabilizers.
Single-Leg Deadlift
Single-leg movements are essential for building stabilization which is important on back country hunts. To begin, hold a dumbbell in your right hand. Lift your right foot just off of the floor as you balance on the left foot. Maintain a neutral spine and slight bend in the knee as you balance and bend forward at the hip to lower your dumbbell to about mid-shin height. As you bring the dumbbell back up, you should feel the work being performed in your glutes and hamstrings, not your back. Perform these movements on the same leg for
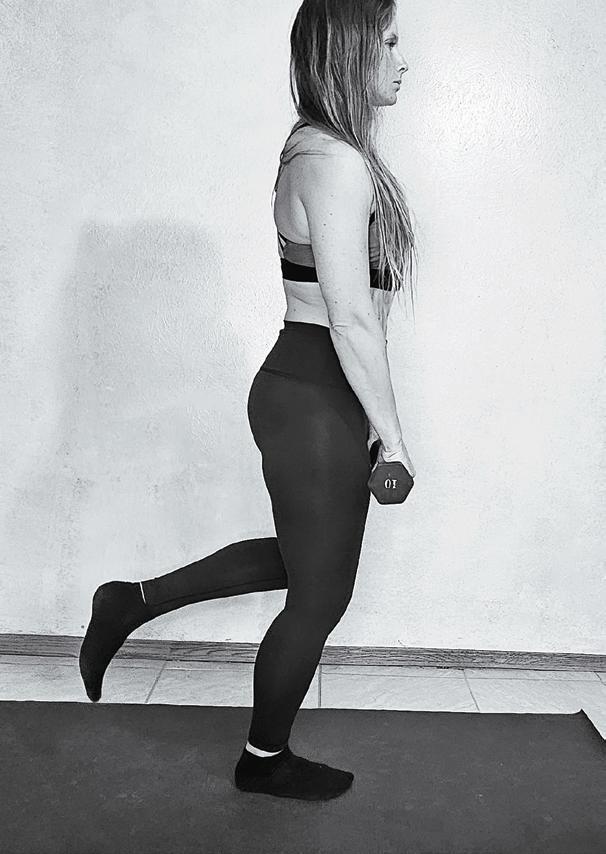
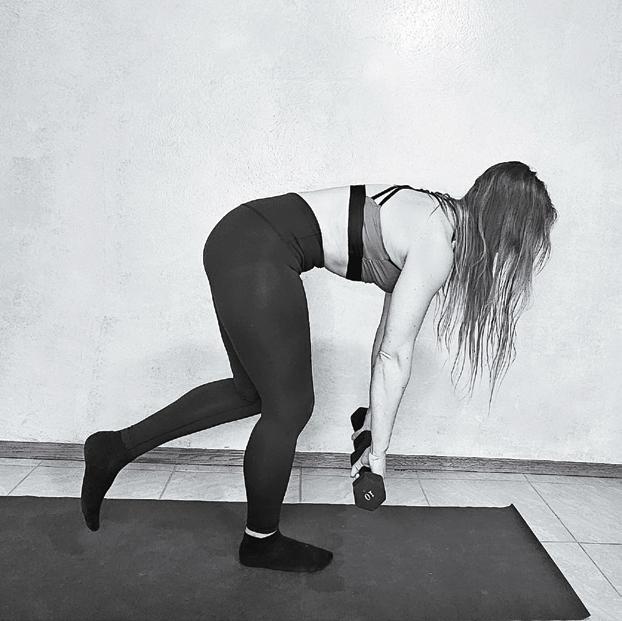
Single-Leg Hip Bridge
This is another great single-leg movement. The hip bridge is a great way to engage the glutes which are important to have firing for optimal movement and minimal pain on long hikes. Often, with our more sedentary lives and extra time sitting at a desk or computer, our glutes are not as easily engaged and we tend to use our muscles ineffectively which leads to pain and injuries. Instead of our large glute muscles being responsible for the bulk of the job, we use our hip flexors which are tight from being in a sitting position so often. If this applies to you, spending time stretching and foam rolling your hip flexors while activating your glutes with exercises like the hip bridge can go a long way to help you with more efficient movement and keep you pain and injury-free.
Start by lying on your back with your knees bent and your feet hip-width apart. Lift your left leg straight out in front of you and hold it as you press your hips off the floor with your right leg. Use your glutes as you press up, hold for one second, and slowly bring your hips back down to the floor. Continue this motion using your right leg for 15 seconds and then switch to the left side for the remaining 15 seconds. This will complete this 30-second interval. If you want to increase the difficulty, you can rest a dumbbell on your hips to add weight to the movement. Only add as much weight as will still allow you to perform this movement with proper form.
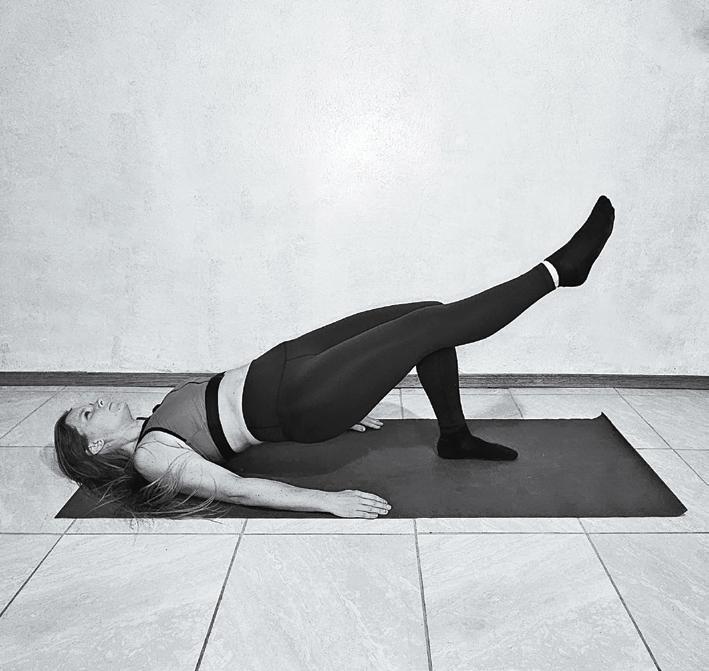
Single-Leg Step Up and Raise
Hiking up mountains uses the same movement as a step up and raise. As you step up, you use primarily your glutes and your stabilizers for balance and then raise your next foot ahead of you. This exercise helps to develop the glute strength for the push up the mountain, and the stabilizers to keep you steady as you climb. You can perform this movement with a weighted pack to help increase your strength or you can perform it on a Bosu ball to develop more of the stabilization needed in mountainous terrain.
If you are a beginner, performing this movement on a step without weight is ideal. Stand in front of your step with both feet side-by-side and hip-width apart. Lift your right leg and place it on the step that is in front of you. Activate your glutes and push with them to stand up on the step while simultaneously lifting your left foot up in front of you with your knee bent. Hold this position for one second, then lower your left foot back to the ground and step your right foot back next to your left. Repeat this movement for 15 seconds on the right leg and then switch to the left leg for the remaining 15 seconds. This will complete this 30-second interval.
info@westernhunter.net 93 WESTERN HUNTER
Single-Leg Hip Bridge: The Hip Bridge is a great way to engage the glutes which are important to have firing for optimal movement and minimal pain on long hikes.
Single-Leg Deadlift: Maintain a neutral spine and slight bend in the knee as you balance and bend forward at the hip to lower your dumbbell to the lowest point in which you can still maintain this form.
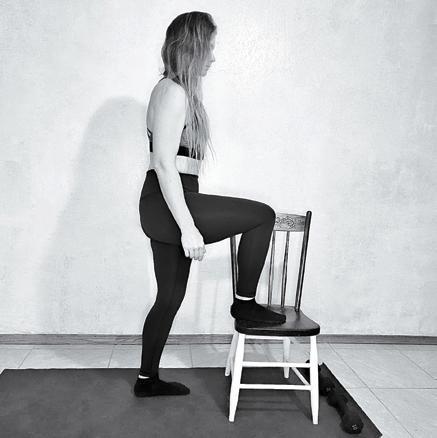
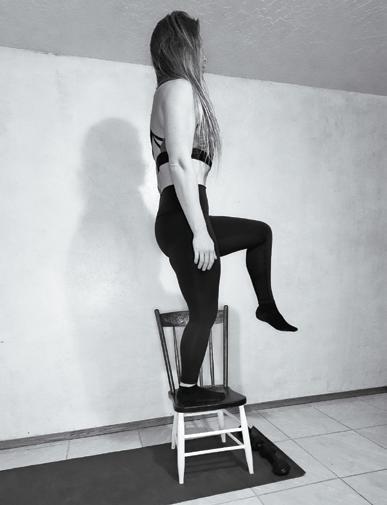
Curtsy Lunge
The curtsy lunge is a great way to build strength and stability simultaneously. This exercise provides stability in the hips and utilizes the same muscles as a traditional lunge but with added glute activation due to the lower body position in a curtsy. Begin by standing with your feet hip-width apart and your arms held at your sides. Bring your right foot out and behind your left foot in a semicircle motion. As you do this, keep your right toe tucked and raise your hands together to chest height as you lunge your right knee down toward the floor. Keep your left knee over your left toes. Slowly rise out of the curtsy position and repeat on the right side for 15 seconds. Switch to the left side for the remaining 15 seconds to complete your 30-second interval. You can add difficulty to this movement by holding a dumbbell at your chest throughout the movement. Always choose a weight that still allows you to complete the move
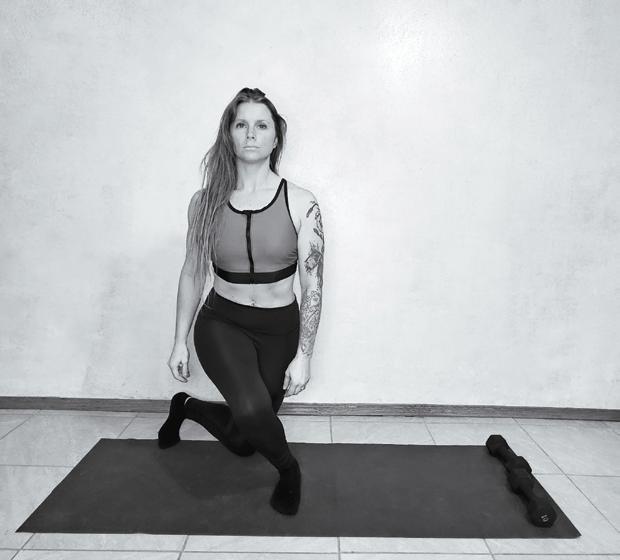
Plank Twist
The Plank Twist is a variation of the plank that further engages the muscles of your core, as you are not simply holding the position but incorporating a twist as well. Start in a standard plank position by placing both palms on the floor, shoulder-width apart. Keep your legs fully extended behind you, balancing on your toes. Keep your head, spine, hips, and legs in alignment. Engage your core and twist your torso away from the floor while lifting your right arm out and upwards toward the ceiling. Twist back to the start position and repeat on the left side for your 30-second interval. If this movement feels too difficult and you are struggling to keep your body in alignment, you can move down

Russian Twist
The Russian Twist builds strength and stability for rotational movement and balance. You can perform this exercise while holding a dumbbell or without added weight. Begin by sitting on the floor with your knees bent and your feet flat on the floor. Hold your hands in front of your chest or hold your weight in your hands just in front of your chest. Balance into your seat as you lean slightly back at the waist and lift your feet up and slightly out in front of you as a counterbalance. Engage your core and twist to the right at the waist. Keep your hands in front of your core as you twist, or if you are using weight, bring the weight with you as you twist, holding it slightly out in front of you. Return to your starting position and repeat on the left side. Continue this alternating
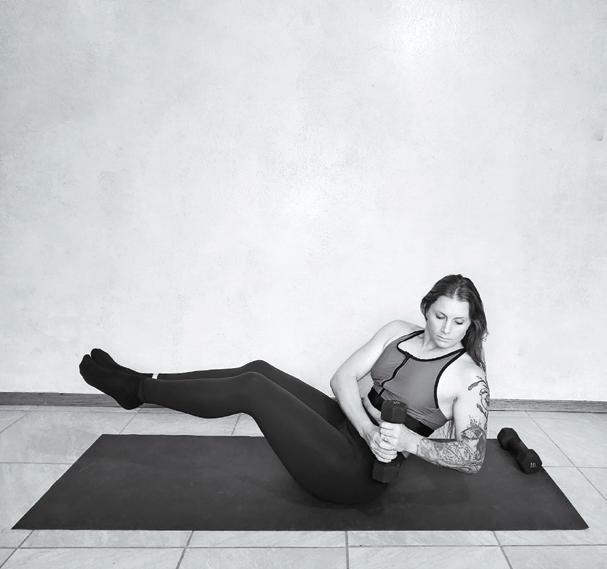
www.westernhunter.net 94 WESTERN HUNTER
Single-Leg Step Up and Raise: This exercise helps to develop the glute strength for the push up the mountain and the stabilizers to keep you steady as you climb. You can perform this movement with a weighted pack to help increase your strength or you can perform it on a bosu ball to develop more of the stabilization needed in mountainous terrain. As you step up you use primarily your glutes as well as your stabilizers as you balance and then raise your next foot ahead of you.
Curtsy Lunge: The Curtsy Lunge is a great way to build strength and stability simultaneously. This exercise provides stability in the hips and utilizes the same muscles as a traditional lunge but with added glute activation due to the lower body position in a curtsy.
Plank Twist: The Plank Twist is a variation of the plank that further engages the muscles of your core as you are not simply holding the position but incorporating a twist as well.
Russian Twist: The Russian Twist builds strength and stability for rotation movement and balance. You can perform this exercise while holding a dumbbell or without added weight.
Oblique Bend
Oblique Bends work the large muscles on the sides of your abdomen. Hold a dumbbell at your side in your right hand with your palm facing your thigh. Stand with your feet shoulder-width apart and slowly lower the dumbbell along your right leg toward your knee. Keep your core engaged throughout this movement and slowly lift the dumbbell back up to the starting position using your obliques. Continue this movement for 15 seconds and then switch the dumbbell to your left hand and repeat the movement on the left side for the remainder of the interval.
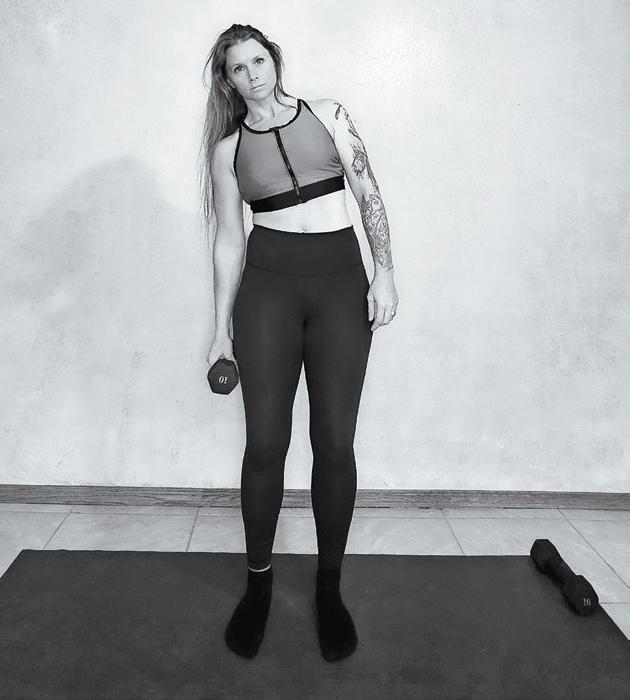
Mountain Climber Kickback
The mountain climber kickback is a combination exercise that works your core in two different ways. The mountain climber movement engages your abdominals as you tuck your knee into your belly. The kickback movement engages your glutes and lower back as you drive your leg upward. To perform this exercise, begin in a full plank position with your hands flat on the floor and underneath your shoulders.
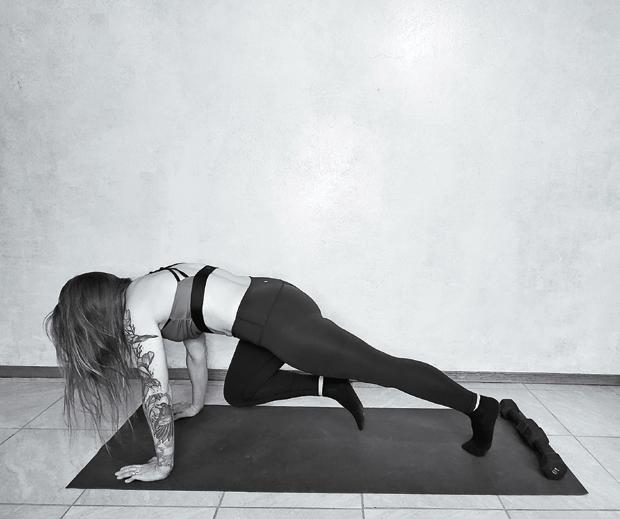
Keep both legs extended and balance on your toes while keeping a neutral spine. Your head, shoulders, hips, and legs should all be aligned. Keep your core engaged as you drive your right knee up toward your right arm and belly. Extend the leg back and up as you drive your foot into the air behind you using your glutes and lower back. From here, return to the starting position and repeat for 15 seconds before switching and performing the movements on your left side.
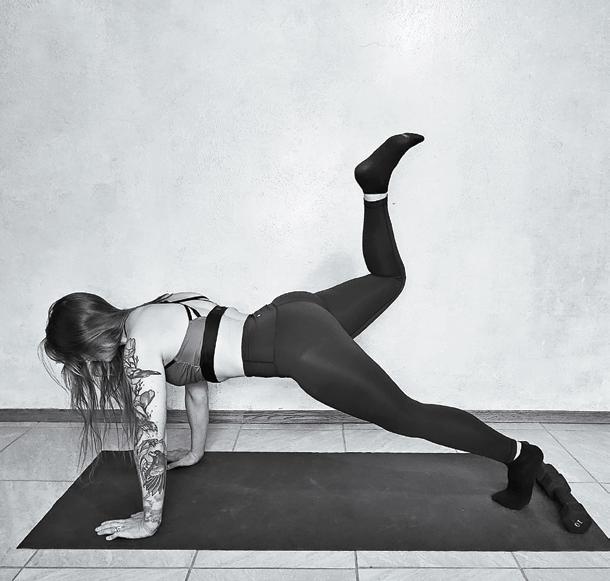
Hollow Body Hold
The hollow body hold builds strength and stability in your core. Begin by lying flat on the floor, face up, with your hands at your sides. Engage your core and drive your lower back into the ground. Squeeze your inner thighs together and maintain a solid connection between your lower back and the floor as you raise your legs off the floor. Raise your head off the floor as well and extend your arms up and overhead toward your ears. Hold for your 30-second interval and then release.

Disclaimer: You should consult your physician or other health care professional before starting this or any other fitness program to determine if it is right for your needs. This article offers health and fitness information and is designed for educational purposes only. You should not rely on this information as a substitute for, nor does it replace, professional medical advice, diagnosis, or treatment. If you have any concerns or questions about your health, you should always consult with a physician or other healthcare professional. The use of any information provided in this article is solely at your own risk.
info@westernhunter.net 95 WESTERN HUNTER
Hollow Body Hold: The Hollow Body Hold builds strength and stability in your core as you hold the position for the duration of the interval.
Oblique Bend: This exercise works the large muscles on the sides of your abdomen which are important for core strength and stability during a pack out.
Mountain Climber Kickback: The Mountain Climber Kickback is a combination exercise that works your core in two different ways.
Mountain Climber Kickback: The Mountain Climber movement engages your abdominals as you tuck your knee into your belly. The kickback movement engages your glutes and lower back as you drive your leg upward.
THE WILD KITCHEN p
Venison Steak Salad
By Lindsay Persico, Health & Fitness Editor
This is a great way to make a one-dish meal in the heat of the day that is packed with protein and healthy fats. You can add ingredients to your liking. I often add sunflower seeds or chopped walnuts and almonds. You can also add different fruits such as mandarin orange slices or chopped apples.
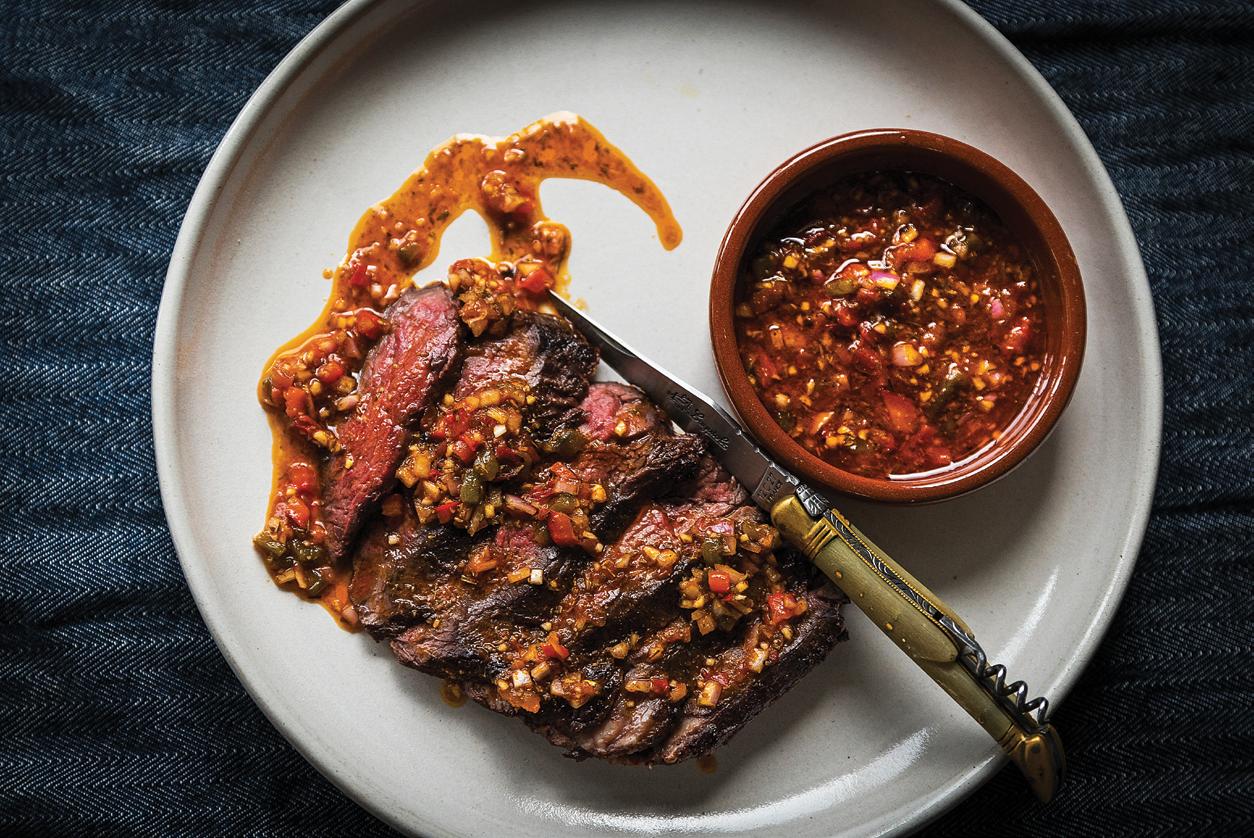
This recipe makes two servings and the mac ros for one serving are:
Calories: 509
Protein: 54 grams
Carbohydrates: 26 grams
Fat: 20 grams
Ingredients
• 12 oz Venison Steak – cut into bite-sized pieces
• Salt, Pepper, Granulated Garlic, and Granulated Onion to taste
• 2 Tablespoons Butter
• 1 Cup Baby Spinach
• 1 Cup Kale
• 1 Cup Mixed Greens
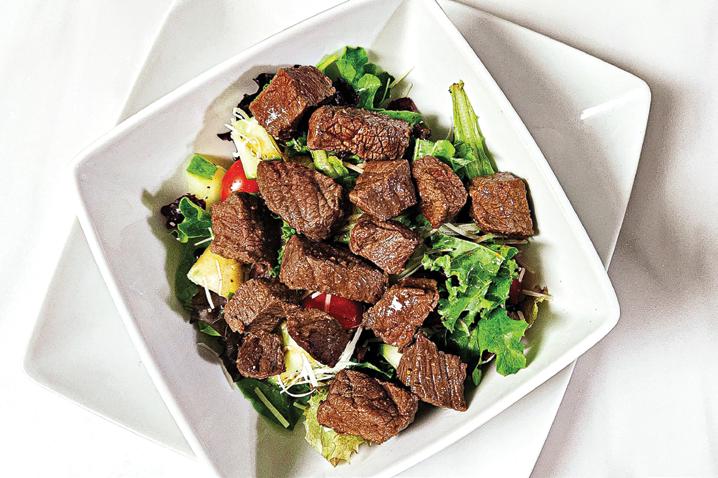
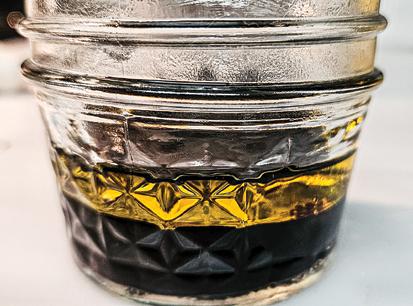
• 2 Tablespoons Grated Fresh Parmesan Cheese
• 1/4 Cup Dried Cranberries
• 1/2 Sliced Cucumber
• 1 Cup Baby Tomatoes
Dressing
• 3 Tablespoons Balsamic Vinegar
• 2 Tablespoons Olive Oil
• Salt and Pepper to taste
Instructions
Assemble your chopped spinach, kale, mixed greens, tomato, cucumber, cranberries, and parmesan cheese. Toss to combine in a large mixing bowl. Combine your dressing ingredients in a separate bowl and mix well then pour over the salad and toss to coat. Heat a cast iron or equivalent fry pan until hot. Meanwhile coat steak pieces in salt, pepper, granulated garlic, and granulated onion.

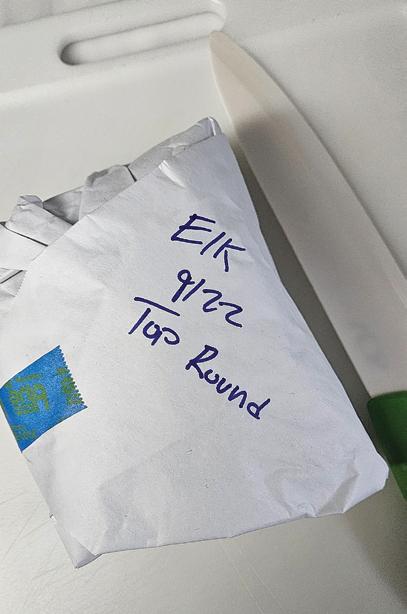

When your pan is hot, add butter to the pan and coat the bottom. Add your steak pieces and flip/stir until seared on all sides, approximately three to four minutes. They should be rare to medium rare. Remove meat from the pan and place in a bowl covered with foil to rest for five minutes. Plate your salad ingredients and top the salad with the seared venison.
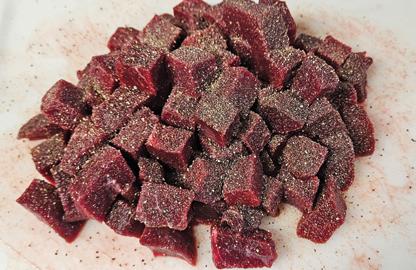
www.westernhunter.net 96 WESTERN HUNTER WESTERN HUNTER MAGAZINE
A variety of greens, cranberries, baby tomatoes, cucumber, and parmesan cheese add great flavors and micronutrients to this meal.
Mix the salad ingredients well before topping with the bite-sized steak pieces.
steak into bite-sized pieces and coat gener-
with salt,
2
4 5
I used elk top round for this dish, but any venison steak will work great in this recipe. Cut
ously
pepper, and granulated garlic. 1
3
This dish is incredibly quick and easy to make and provides a healthy, protein-packed meal.
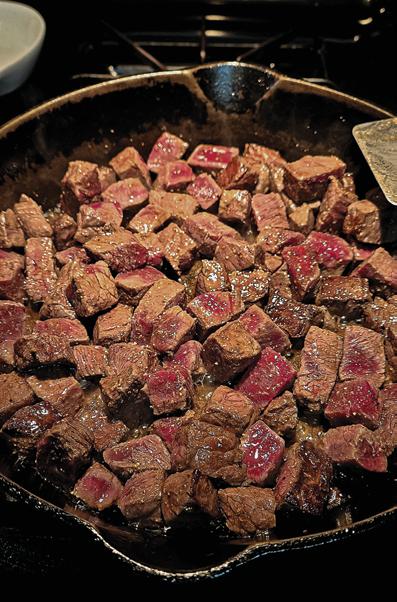
brown, stirring often to brown all sides. Do not overcook, as the venison will become tough and dry due to a lack of marbling.
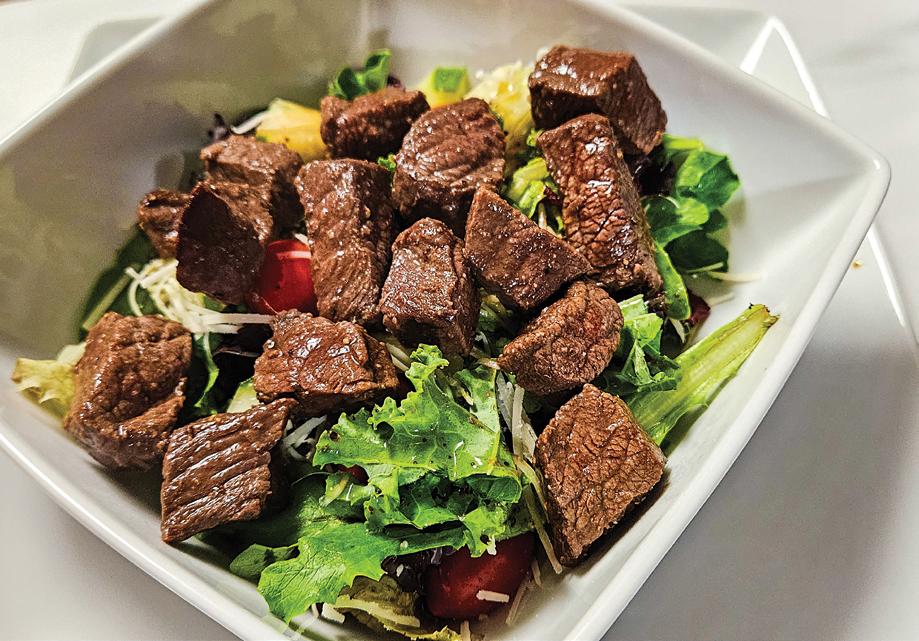
I like to use some of my smaller cuts of venison for this meal – cuts that are tender but too small for a standard steak are perfect cuts for bite-size.
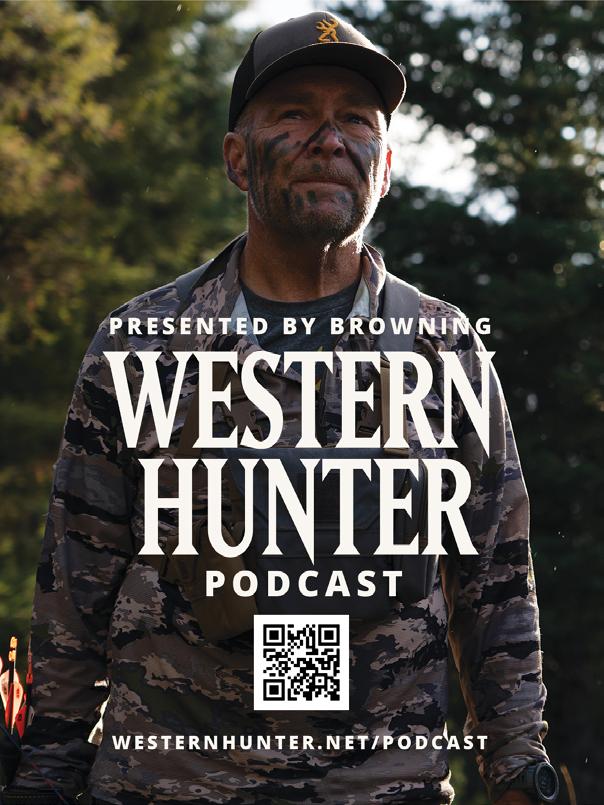


info@westernhunter.net 97 WESTERN HUNTER THE WILD KITCHEN p SWWBC Mountain Classic Tournament Age Groups 9u-18u, July 25-28, 2024 THE ULTIMATE OUTDOOR FAMILY BASEBALL VACATION! Baseball & Girls Softball Camps (ages 5-18) July 22-25, 2024 602-694-0976 TELLURIDEBASEBALLFESTIVAL.COM
6 7
 MIKE DUPLAN HUNTING EDITOR
IT BACK
IS WESTERN HUNTING A RUNAWAY TRAIN?
We have experienced drastic changes to the world of hunting in my lifetime. It is sometimes difficult to grasp because to be perfectly honest, I’m older than I feel and memories I made in hunting for over four decades don’t seem that long ago to me. Yet these memories and times I reflect upon might be longer ago than the age of some reading this.
Change is part of life and the luxury of getting older is the ability to reflect on time passed and the changes we experience with lament and nostalgia. I recently posted a photo of my first rifle on social media with a pair of blue jeans and a red cotton flannel shirt. I wanted to take this Remington 700 .30/06 bolt action rifle elk hunting this year and weather permitting, wear the type of clothing I hunted in when I was a younger man.
I sold this rifle to a friend for his son to use many years ago and recently bought it back for this trip down memory lane I was embarking on. Unfortunately, the years had not been kind to the rifle, and I couldn’t get it to group smaller than about 3" at 100 yards. To use it would be irresponsible, in my opinion, when I have guns that shoot cloverleafs, so I opted to leave it in the safe and instead took my hyper accurate modern rifle. I knew the intent of what I was going to attempt to do with the old gun was grasping for some feelings I felt I had lost through the passage of time. Chasing nostalgia is a fickle pursuit because the temptation is to filter the negative and only embrace the golden hued memories.
This sentimental gesture on my part, was in essence a bit of a rebuke to this runaway train of hunting technology and innovation. The steep technological curve that our culture has experienced in around two decades is not really flattening and it’s concerning to wonder where we are going. Embracing these changes comes with a cost not easily measured, but we may pay in losses to our primitive roots that anchor us to the very nature of hunting and the psychological rewards that the hunt provides.

The transfer of technology to the hunting world is here and accelerating. At this point, state wildlife agencies are playing a game of reactionary catchup to the existing advances in technology with laws on cellular trail cameras, camera drones, smart optics and more to come. Two decades ago, who would have thought there would be an ability for someone to purchase a consumer grade, affordable small flying machine with a camera to look for wildlife? Who would have thought we would have trail cameras with the ability to take high resolution color photos and send them to a device in your pocket that you could immediately access? Who would have thought you could get a rifle with the accuracy and velocity to kill animals at 1000 yards simply by accessing a website and placing a credit card order and have it delivered to your local gun shop? Who would have thought we would have mapping programs to immediately access landownership boundaries and topography with a level of accuracy that you could immediately identify an unmarked piece of private land simply by referring to a prominent tree or rock outcropping on the phone screen to what you saw in front of you?
The list could go on and it will, and this list will continue to grow and become more complex. All of this fueled by human desire for success, for advantage and for money. The paradox lies in the problem at hand. How do we maintain a reasonable association with this primitive psychological connection
to the hunter/gatherer within us that motivates us to engage in hunting? How do we inject some control and tapping of the brakes on this juggernaut of a hunting industry that is driven by money, sales and innovation? There is only one way in my opinion and that is a self-prioritization of the human connection with family and friends during the experience of hunting and also a level of self-policing our value sets and the setting of priorities.
I’ve admittedly been caught up in the process of technological advances and have continued to upgrade my gear, and for the most part have not increased my success or enjoyment of hunting in the process. What I have done is comforted my insecurities about doing the most that I can do to increase my chance of success. What I have not done is to approach the hunt with an intent to enjoy the experience as much as humanly possible, but I’m self-aware and will acknowledge that I’m still a “work in progress”.
This year I drew a bighorn ram tag in my home state of Colorado. I was driven and motivated to be successful and spent the summer pushing myself to be in sheep shape to go the distance on the hunt. I really wanted to share the experience with my wife Shellie and my daughter Erica. I had a scenario all drawn out in my head about the hunt and worked hard to make it happen.
I ended up taking the ram I had dreamed about on the third day of the season, and it was an incredibly rewarding and gratifying experience, and my success gave me a great feeling of accomplishment. But now, reflecting back on this journey of planning and preparation, what I feel is some incredible gratitude for the all those days my wife and I hiked together throughout the summer in the mountains of Colorado. I savored the hope and anticipation leading up to the hunt. I enjoyed sharing the planning process of the hunt with friends, and was consumed with the dream of finding this elusive 12 year old mystery ram in his wilderness haunt. You can look, but I don’t believe there is a phone app for that.
DIALING
www.westernhunter.net 98 WESTERN HUNTER
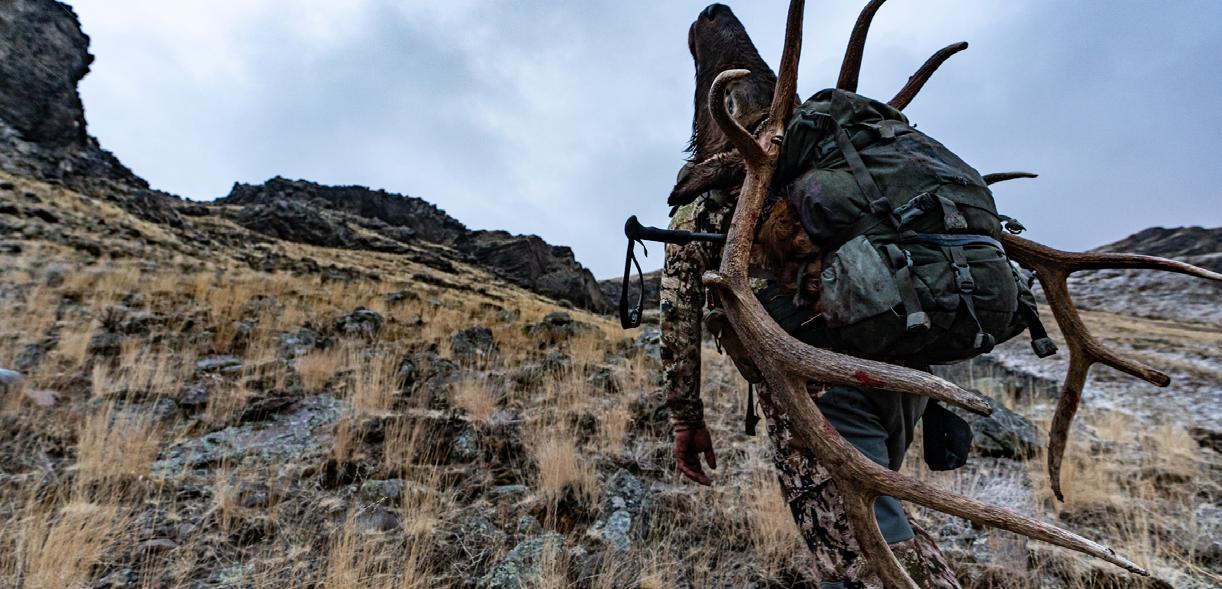

The VX-6HD 3-18 x 44 is built to outlast and outperform. While others warranty failure, we guarantee unmatched optical clarity and rugged reliability for life. Because at Leupold, failure is not an option.

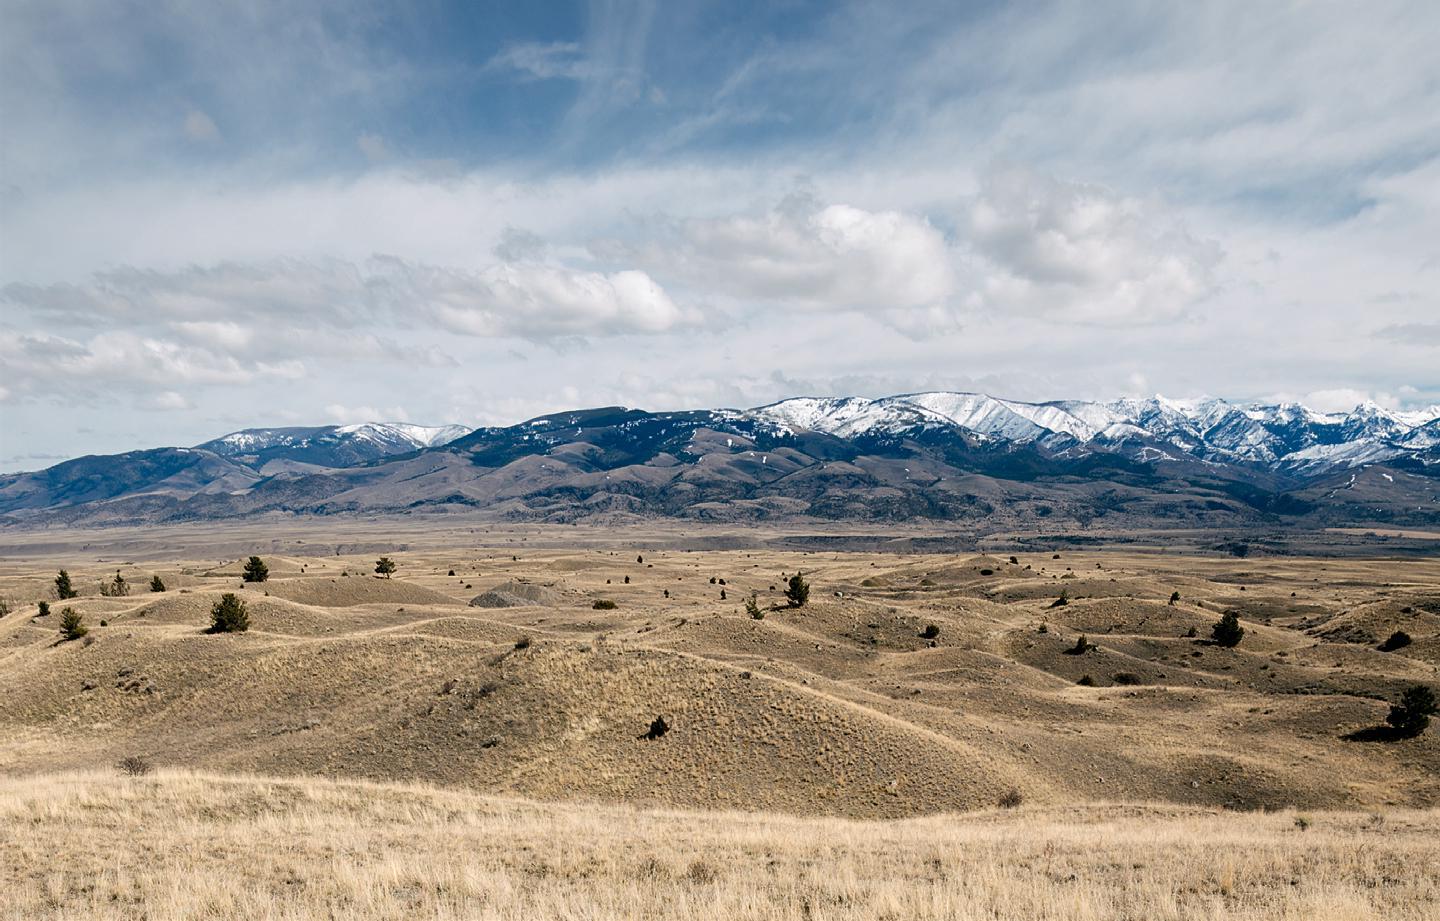
SEE THE UNSEEN
ADVENTURE AWAITS
