Vermicomposting

Page 1


Vermicomposting

Revive Your Soil and Reduce Your Environmental Impact

Vermicomposting, or worm composting as it is more commonly known, is the process of using worms to break down discarded food and other organic wastes and convert them into compost and liquid fertilizers. Not only will this process save you money, but it will also downscale your environmental footprint. Vermicompost systems can be purchased online or assembled cheaply by upcycling materials found around the house or at a local thrift store.

Why Vermicompost? Save Money

Implementing vermicomposting into your lifestyle benefits you financially.

• Avoid “tipping fees” for green waste implemented by many landfill diversion sites.

• Make your own nutrient-packed organic fertilizers for free; purchasing similar nutrient-rich fertilizer costs an average of $50 per 10-pound bag.

Create Nutrient-Packed Fertilizer

Products of your vermicompost can be used horticulturally to benefit houseplants and gardens.

• Vermicompost has more nitrogen, phosphorus, potassium, copper, zinc, and iron than farmyard manure.

• Produce useable compost year-round and faster than alternative methods.

• Increase moisture and nutrient retention in your soil.

Highlights

• Vermicomposting is using worms to break down discarded food into compost and liquid fertilizers

• Vermicomposting can save you money and provide your plants and gardens with high-quality fertilizer.

• Choosing the right worms for vermicompost can make or break your compost system. It is important to understand the difference between earth worms and composting worms.

• Lessen crusting and other physical damages common to soils in arid climates.

Hayley Wald b illig and Roslynn Brain , updated in 2025 by Scott Kent and Roslynn Brain McCann
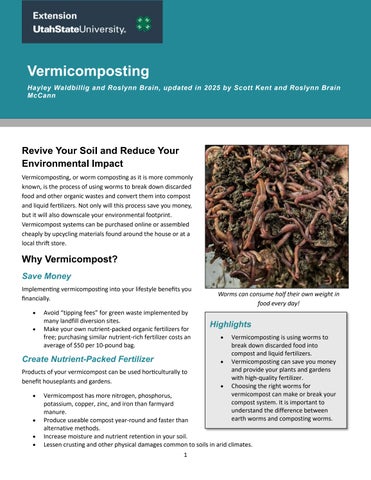
Worms can consume half their own weight in food every day!

Improve Your Local Environment

Vermicomposting encompasses all three R’s: reducing, reusing, and recycling.

• Worms will reduce your waste production by reusing food scraps and recycling nutrients. The U.S. generates more than 66 million tons of food waste each year (EPA, 2019). Prevent this unnecessary waste from ending up in landfills.

• Save energy that is typically required for waste removal and transportation.

A Word About Worms

All worms are not created equal! Choosing the right worms for vermicompost can make or break your compost system. It is important to understand the difference between earth worms and composting worms.

Earth Workers vs. Composters

The worms you see most often, crawling on pavement after a long rain or burrowing deep into your garden are known as earth workers, or earth worms. While beneficial in their own way, earth worms are not ideal for composting. Composting worms, such as red wigglers (Figure 1), are a non-native species preferred for composting; they process large amounts of organic waste daily, can handle disturbances, and thrive in confinement, whereas earth workers do not.

Did You Know?

The largest earthworm ever found was in South Africa and measured 22 feet from its nose to the tip of its tail.

Conversely, composting worms are not ideal for aerating mineral soil. Since they lack the muscle to dig through soil, it is not recommended to add red wigglers to soil unless it has been amended with sufficient organic matter.

Composting Worms

According to Mary Appelhof, worm expert and author of Worms Eat My Garbage (1997), red worms are the most satisfactory worms to use in home vermicomposting.

Red worms, also called red wigglers, manure worms, red hybrids, tiger worms, striped worms, etc., are common names that represent a few species of worms, including Eisenia fetida (the most common), Eisenia andrei, and sometimes, Lumbricus rubellus. Be sure to know the species or genus name of the desired worm specimen before ordering or visiting a dealer.

It is best to source your worms locally. You may be able to find a fellow gardener in your community who has extra compost worms to spare, or worms can be mailed to you from a trusted worm supply business.

The following steps will help you begin your own vermicomposting system.

Figure 1 Red Worms Are the Best for Vermicomposting

Step 1: Make the Worm Bin.

Materials Needed:

• Container. Get creative! Use old buckets, garbage cans, tool boxes, etc. Rubber and plastic containers are cheap, easy to use, and durable. Wood will eventually be eaten but will work in a pinch. Be cautious of any chemical treatments containers may have undergone. It is best to use something that is 6 inches deep at the very least.

• Drill. A 1/16-inch bit is best for the optional drainage holes on the bottom, but a 1/4-inch or larger bit is best for ventilation.

• Landscape fabric or window screen mesh (optional). You can use this to cover holes so that insects cannot access the worm bin, but the worms can still get oxygen exchange.

A. On the lid, drill several ¼-inch or larger holes to provide airflow. If the holes are drilled on the side of the bin, worms may escape through the holes

B. Optional: Use breathable fabric or window screen to cover these holes so that insects cannot enter or leave the worm bin.

C. Optional: Drill 1/16-inch holes along the bottom of the bin to allow excess water to drain, but not so big that the worms could escape through them. This is a safety measure; if your worm bin gets so wet that water pools in the bottom, it can be released through the holes. However, do your best to manage your bin so it never gets that wet. This liquid is not “worm tea” (see recipe at the end of the fact but is referred to as “leachate.”

Step 2: Prepare Worm Bedding.

What Is Worm Bedding?

There are two classifications for the organic matter you’ll add to your worm bin. Bedding material is high in carbon and low in nutrients, moisture absorbent, and provides structure for airflow.

Though worms do eat bedding, its purpose is not nutrition. The purpose of using bedding is to maintain healthy conditions for the worms so they can be moist but still have access to oxygen (Figure 2).

Without bedding, a worm bin can fail and become stinky, pest-ridden, and the worms can die.

Some examples of worm bedding can include:

• Coco coir

• Straw

• Shredded cardboard

• Aged compost

• Shredded paper *

• Aged manure

• Fall leaves *

• Sawdust *

• Peat moss

*These materials are prone to matting or clumping, which will restrict airflow. It is best to mix them with another bedding that will provide physical structure to facilitate airflow. Air should be able to permeate throughout all your bedding.

A. Once you’ve chosen what materials you’ll use to make your worm bedding, add it to your worm bin until you have 4 to 6 inches of depth in the bin.

B. Add water, preferably non-chlorinated, to your bedding until it has the same feel as a wrung-out sponge. It should not be fully saturated. The bedding should be moist enough that worms won’t dry out, but not so wet that the worms can’t access any pockets or channels of air.

Figure 2 Worm Bedding Maintains Healthy Conditions for the Worms

Hint: If you grab a handful of bedding and squeeze it, you should only see one to three drops of water come out. If you see less, it’s too dry. If a full stream of water comes out, it's too wet.

Step 3: Add the Worms.

Upon receiving your worms, they will likely experience transplant shock. If they were shipped to you, you can mist them with water to help them rehydrate.

Handle them with care and place them on top of your bedding. Keep a dim light on the worms and see if they willingly move into your bedding. If they work their way into your bedding it means they have given it their stamp of approval!

If they are remaining balled up and aren’t moving into the bedding, they are communicating that there is something wrong with it. If this happens, ensure the moisture is in a good range, check that it’s not too hot or too cold, or you may need to check your bedding’s pH or salt levels.

It is also advisable to leave a dim light over the worm bin the first night or two to encourage them to stay in their new home instead of looking for their old home. If the worms are consistently trying to escape, even with a light, assess why they are not burrowing into the bedding. It’s typically the same reasons already mentioned

Step 4: Feed the Worms.

This is the fun part! Although you can add foods to the bin before the worms’ arrival, we advise waiting until after they settle in.

Materials that are considered “foods” (similar to “greens” in classic composting) are organic matter high in nutrients, which are typically naturally high in moisture content.

This includes:

• Fruits and vegetables

• Manures

• Trimmings

• Grains, beans, or breads (without butter, margarine, or mayonnaise)

• Freshly cut leaves.

• Tea bags.

• Coffee grounds and filters.

• Lawn clippings and weeds. You can use these foods in small amounts once you have some experience:

• Citrus products.

• Spicy capsicum waste products, such as peppers.

• Starchy foods like bread, rice, and pasta. It is best to entirely avoid:

• Meat products

• Dairy products

• Oily products

Figure 3. Foods for Worms Are Organic Matter, Naturally High in Moisture Content

Worm Foods

Feed worms by burying food in a different area of the bin each time. For example, the first time you feed, you may choose the northeast corner; the second time, the northwest. Continue a pattern of choosing a different spot each time you feed to ensure even distribution of castings.

Quick Tip

Avoid fruit flies by covering food scraps with a few inches of bedding and/or freeze food scraps before adding them to your vermicompost bin.

As long as it wouldn’t cause the bin to begin to hot compost, attract insect pests, smell bad, or get too wet, you can continue to add more food. However, as you are beginning, it is recommended to wait to add more food until the previous food is mostly consumed. This helps to avoid harming your new worm colony by adding too much food at once.

If you think you may have added too much food, simply remove it and do a quick check through the bin to make sure the rest is at a good moisture level and seems healthy. Add bedding as needed.

A cup or two of food at a time per pound of worms is a good starting point.

Worm Bin Maintenance

Once the worms have settled in, continue monitoring the following factors to ensure the worm farm remains functioning healthily.

Temperature

• Worms thrive best at temperatures between 55 °F and 77 °F. Keep your worm bin in a location with an average temperature that resides between these two extremes. Keep in mind, the temperature in the bin will be different than the ambient temperature the internal temperature being more important.

• Red wigglers can survive to near-freezing temperatures, and their cocoons can survive even colder, but their production will suffer. Any temperatures approaching 90 °F can be fatal.

Moisture and Oxygen

• Worms need moisture to survive, but their need to breathe is more important. Your bin should stay wet, but not so wet that it displaces all the oxygen out of the bedding’s pore space. They should be able to find pockets or channels of air as they move through their moist bedding.

• To help you gauge whether your material is at an appropriate moisture level, grab a handful from the bin. It should feel like a wrung-out sponge in, and if you squeeze a handful of the material, you should see about 1 to 3 drops of water come out. Below that amount is too dry, and above it is too wet.

• Add dry bedding as needed to balance out water brought into the bin from high-moisture-content foods. Too much moisture can be especially concerning with fruit and vegetable waste, as it can be around 90% water by weight.

Managing Odor

• Odor is a common concern among those interested in vermicomposting. Because you bury the food and worms are voracious eaters, the most common smell described from vermicompost systems is “earthy.”

4. Balance the Moisture Content of Your Worm Bin, as Vegetable Waste, Like the Pumpkin Shown, Can Be Around 90% Water

Figure

• Bins are generally kept with lids (don’t forget to drill holes!) either in a basement, garage, or under the kitchen sink If you have a large enough compost pile, you can possibly keep your system outdoors year-round.

• If you are experiencing foul odors, it means the bin is being mismanaged. A healthy bin will smell earthy. Remove excess food, add fresh bedding, and check to ensure moisture is at a healthy level, and any unpleasant smells should dissipate.

Escape Attempts

• If worms are unhappy, they will let you know. If your worms are attempting to escape their bin, they are not happy.

• Some common causes of worm escapees are vibration, excessive or insufficient moisture, and extreme temperatures.

Options to Harvest Compost and Castings

Generally, it takes 2 to 3 months for a newly developed worm bin to generate a good amount of vermicompost (a combination of castings and compost). Employ the methods shown in Table 1 to obtain the vermicompost from the bin; use the methods in combination for best results. For example, bait worms to an area, remove the worm-rich material, and then use the “light fright ” method to get a more precise separation.

Table 1. Harvesting Compost and Castings

Baiting method

Light fright

Mass migration

Compost screener or sieve

Method procedures

• Shine a bright light on the worms. They will avoid the light and burrow down through the vermicompost.

• Remove the top layers of vermicompost until you see the worms again.

• Repeat. Eventually, the worms will congregate at the bottom of the bin. Place them into fresh bedding.

• Move old compost to one side of the bin and fill the empty side with fresh bedding.

• For the next few weeks, bury food waste only in the newly bedded side of the bin.

• The worms will follow the fresh food and migrate to the new bedding. Then you can scoop out the castings (the old compost).

• This method is best for when the bin is mostly, or fully, finished vermicompost.

• Similar to mass migration, you can place some of your worms’ favorite food in your bin, let the worms congregate to eat it, then remove them and place them in a new bin.

• This works best if the worms have not been fed in a while before adding the bait.

• Repeat this procedure until you are satisfied with how few worms remain in the finished vermicompost.

• If you have access to a soil screener or sieve, this can be a viable option to harvest worm castings.

• Be sure to save the worms that get separated out. The “large overs” (undecomposed organic matter) can also be placed back into a bin to continue breaking down.

• Note: It is best to add fresh bedding when you remove large amounts of castings from your bin.

Using Worm Bin Products: Castings and Compost

Worm Castings

Deposits that have moved through a worm’s digestive tract are worm castings. Castings are more homogenous and have a slightly higher salt concentration than regular compost. To achieve a higher concentration of castings in your bin, feed worms smaller amounts, less often.

Bait method

Use worm castings for potting soil, top dressing, and liquid fertilizer:

• Potting soil: Mix with other potting materials to decrease salt concentration.

• Top dressing: Put castings around (not directly touching) house plants.

• Worm tea: Mix castings with water and use as a liquid fertilizer (see the “How to Make Liquid Fertilizer” callout box).

Worm Compost

A dark mixture of worm castings, organic material, and bedding in varying stages of decomposition is called worm compost To achieve a higher concentration of compost in your bin, feed your worms larger amounts, more often

Use vermicompost for seed bedding, transplanting, and topdressing:

• Seed bedding: Mix in with soil in seed rows to give seedlings a boost.

• Transplanting: Mix with soil into a prepared transplant hole.

• Topdressing: Sprinkle around the base of growing plants, not directly touching the plant.

Acknowledgments

• Scott Kent of Hungry Worms provided all photos in this fact sheet.

How to Make Liquid Fertilizer

Worm Tea

Insert 1 cup of castings and 1½ tsp. molasses into a 2L soda bottle.

Fill the bottle with non-chlorinated water, leaving about an inch of air at the top. Tighten the cap and shake the bottle to aerate the solution. Then remove the cap or pressure will build in the bottle as bacteria grow (bacterial growth is a good thing).

To aid in growth, aerate the contents several times a day, remembering to remove the cap again after agitating the bottle. After 24 hours, the entire contents may be used as a liquid fertilizer.

• The authors did not use generative AI in the creation of this content, and it is purely the work of the authors. This content should not be used for the purposes of training AI technologies without express permission from the authors.

Sources

Appelhof, M. (1997). Worms eat my garbage: How to set up and maintain a worm composting system (2nd ed.). Flower Press.

United States Environmental Protection Agency (EPA). (2019). 2019 wasted food report [EPA 530-R-23-005]. chromeextension://efaidnbmnnnibpcajpcglclefindmkaj/https://www.epa.gov/system/files/documents/2024-04/2019wasted-food-report_508_opt_ec_4.23correction.pdf

In its programs and activities, including in admissions and employment, Utah State University does not discriminate or tolerate discrimination, including harassment, based on race, color, religion, sex, national origin, age, genetic information, sexual orientation, gender identity or expression, disability, status as a protected veteran, or any other status protected by University policy, Title IX, or any other federal, state, or local law. Utah State University is an equal opportunity employer and does not discriminate or tolerate discrimination including harassment in employment including in hiring, promotion, transfer, or termination based on race, color, religion, sex, national origin, age, genetic information, sexual orientation, gender identity or expression, disability, status as a protected veteran, or any other status protected by University policy or any other federal, state, or local law. Utah State University does not discriminate in its housing offerings and will treat all persons fairly and equally without regard to race, color, religion, sex, familial status, disability, national origin, source of income, sexual orientation, or gender identity. Additionally, the University endeavors to provide reasonable accommodations when necessary and to ensure equal access to qualified persons with disabilities. The following office has been designated to handle inquiries regarding the application of Title IX and its implementing regulations and/or USU’s non-discrimination policies: The Office of Equity in Distance Education, Room 400, Logan, Utah, titleix@usu.edu, 435-797-1266. For further information regarding non-discrimination, please visit equity.usu.edu, or contact: U.S. Department of Education, Office of Assistant Secretary for Civil Rights, 800-421-3481, ocr@ed.gov or U.S. Department of Education, Denver Regional Office, 303-844-5695 ocr.denver@ed.gov. Issued in furtherance of Cooperative Extension work, acts of May 8 and June 30, 1914, in cooperation with the U.S. Department of Agriculture, Kenneth L. White, Vice President for Extension and Agriculture, Utah State University. July 2024 Utah State University Extension

November 2025

Utah State University Extension

Turn static files into dynamic content formats.

Create a flipbook
Issuu converts static files into: digital portfolios, online yearbooks, online catalogs, digital photo albums and more. Sign up and create your flipbook.