

1 The Stitchbook www.thestitchbookcollective.com Issue No 4
This month we are looking at some different ways in which you can add a 3rd dimension to your work … to stuff, or not to stuff, that is the question?
We will look at the differences between quilting, traputo and boutis, and also look at some of the effects you can achieve by ‘trapping’ items between layers of fabric.
2 CONTENTS Page WORKSHOP 4 Featured Artist 12 Noticeboard 14 Stitch of the Month 15 Book Review 15 PROJECT UPDATE 16 MEMBERS PAGES 20
STUFF ING & LAYERING
This workshop looks at some of the more conventional techniques of quilting and stuffing fabric ... but it wouldn’t be The Stitchbook Collective if we didn’t experiment a bit, and subvert the techniques slightly!

It doesn’t matter which direction you take not everything will work out, but you’ll learn from it anyway!
DON’T PANIC or feel stressed! Take a deep breath and just get started ... see where it takes you!
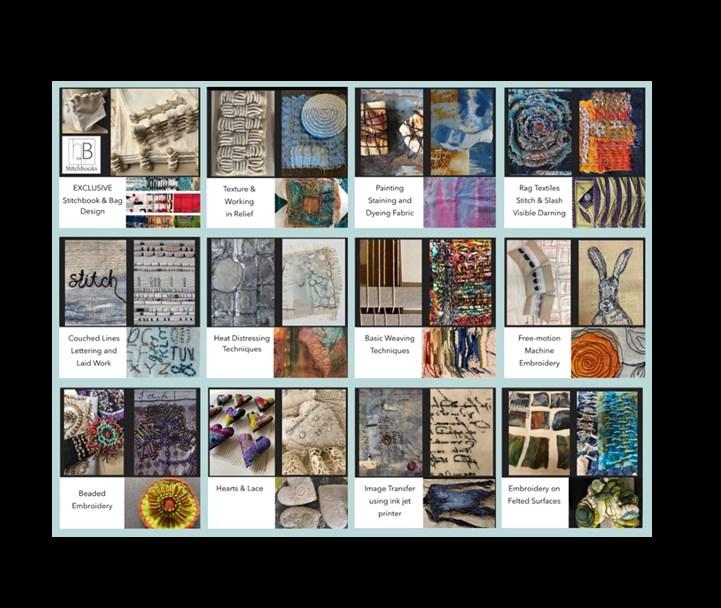
The group is here to support and encourage everyone. We have members with enormously varying levels of expertise remember to share knowledge and ideas generously, and BE KIND. The archive of 12 techniques is permanently available to you whenever you want to try something new, and the monthly workshops and the magazines are there as inspiration and encouragement.
3
WORKSHOP www.thestitchbookcollective.com presented by Helen Birmingham Issue No 4: first published April 2023
Introduction
WORKSHOP
All of these techniques are easier to demonstrate than to explain in words .. don’t forget to look at the WORKSHOP VIDEO on www.thestitchbookcollective.com
If you are a complete beginner, you might also like to watch the following archive videos to familiarize yourself with some of the basic techniques shown in this workshop.
Texture and Working in Relief
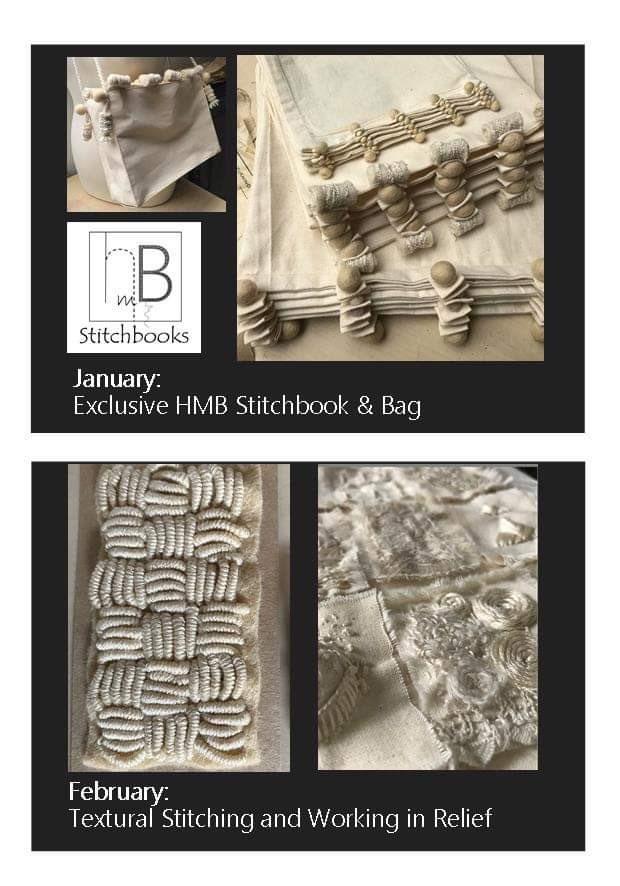
Pleats & Edges
Hearts & Lace
Embroidery on Felted Surfaces
4
Diane Savona
Quilting, Trapunto, Boutis, Stuffing, Embedding, Trapping … ?
‘What’s in a name? That which we call a rose by any other word would smell as sweet.’
Shakespeare had it right I think. I do worry that some of us are intimidated by the name of sewing styes or stitches, and then fears about whether you are ’doing it right’ overtake your enjoyment of the process.
Quilting
Names for techniques are important to identify things during communication between each other create doesn’t really have to have a name ... just sew it if it makes you happy, and don’t worry too much about what it called … you won’t be tested on it later!
This is the process of securing three layers of fabric together, usually by stitching them by hand or machine. Most quilts have the following layers, which form a "quilt sandwich"...
Fabric top layer (also known as a quilt top)
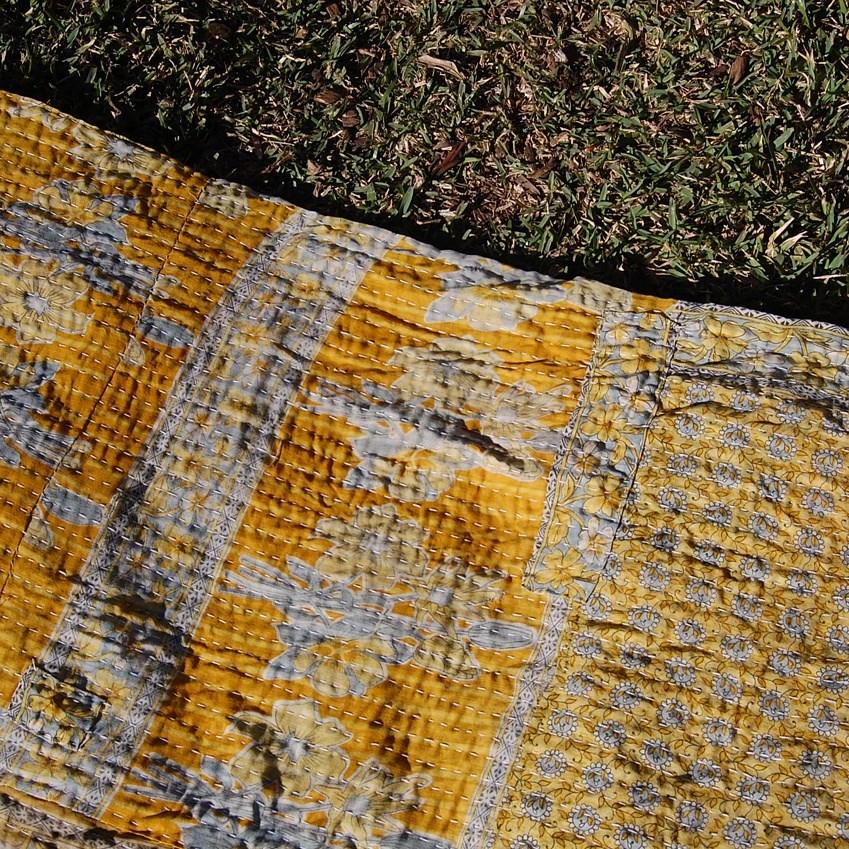
Fabric backing layer
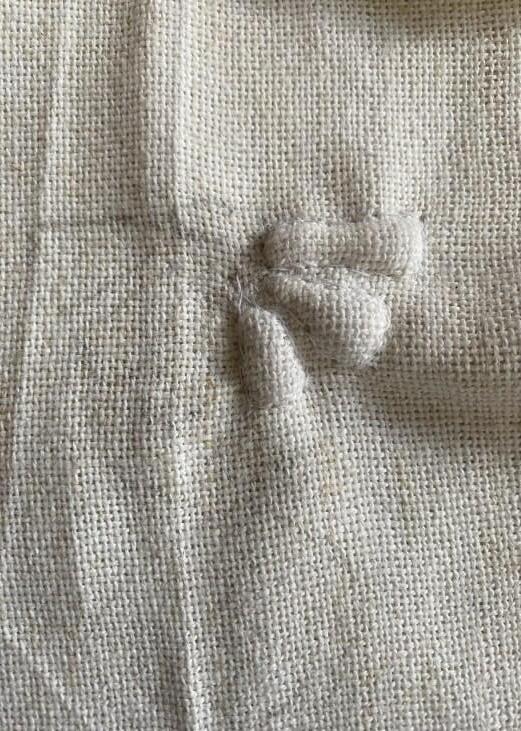
A layer of wadding or batting in the middle.
The pattern of stitches can be simple for beginners or elaborately decorative for a more experienced sewer.
Trapunto
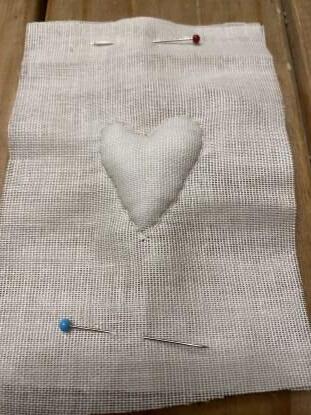
Trapunto is an Italian quilting technique and uses two layers of fabric, with the stuffing only placed in defined areas after all the stitching is complete. Narrow lines are filled with cord while larger areas are filled with cotton or wool and often polyester stuffing these days.
Sometimes you will find a form of Trapunto known as which combines traditional quilting with the addition of extra stuffing to further raise areas of the design.
We will also look at a technique called combines a layer of Traputo quilting on a sheer fabric with a quilted backing of a contrasting colour.
Boutis
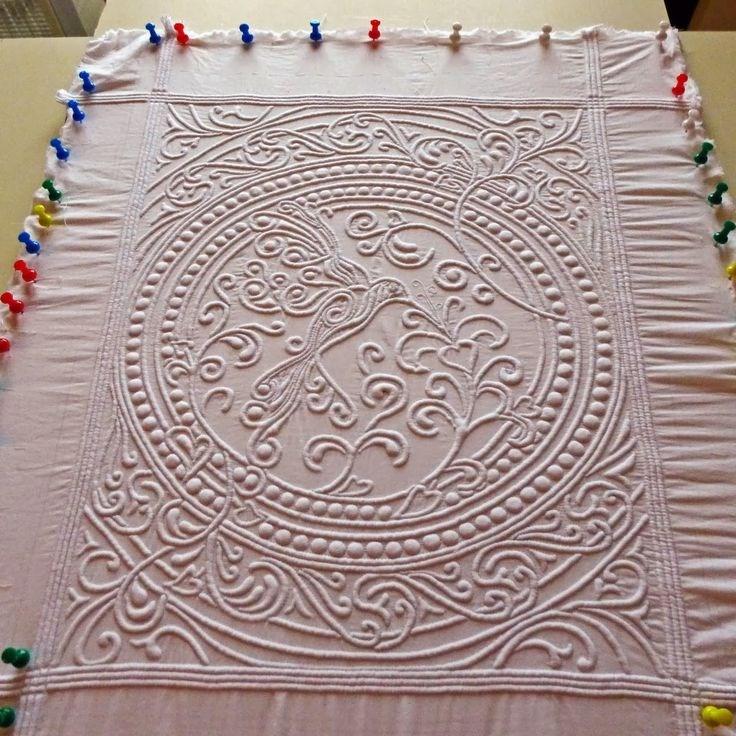
This is the old French version of stuffed quilting. It is always worked in white and all shapes are stuffed with a soft, cotton cord rather than wadding
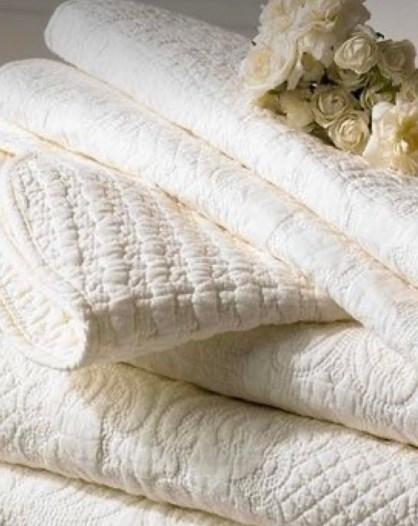
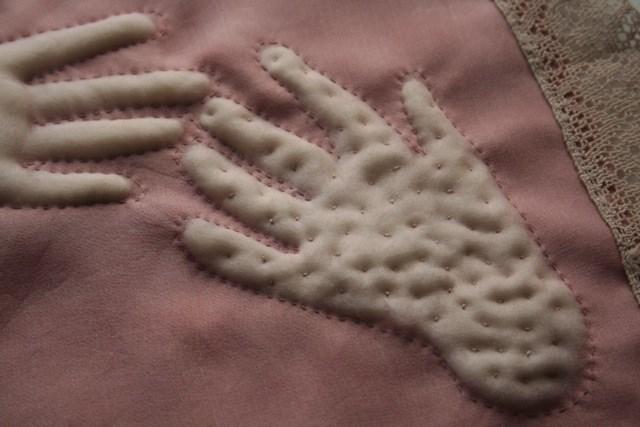
After the stitching is completed, cotton yarn is individually threaded into each channel between the two layers of fabric from the reverse side. It is the cording that gives definition to the patterns and brings life to the design. The play of light and shadow on the motif changes what appears to be flat whitework to a luminous embossed design.. After the cording is completed, the piece is immersed in water and squared up. Boutis is completely reversible and both sides should be of equal quality. There is no visible right or wrong side of the work
 Ruth Singer
Combining Techniques and materials
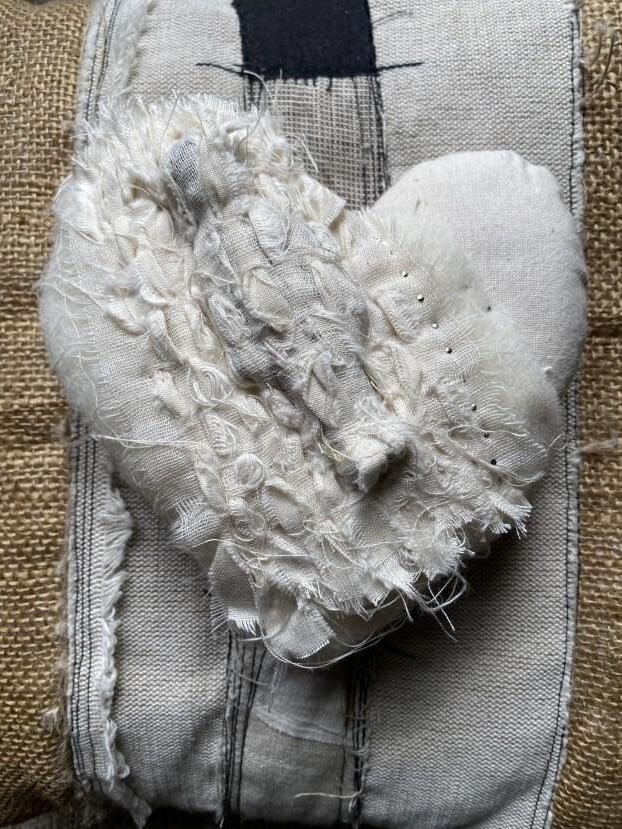
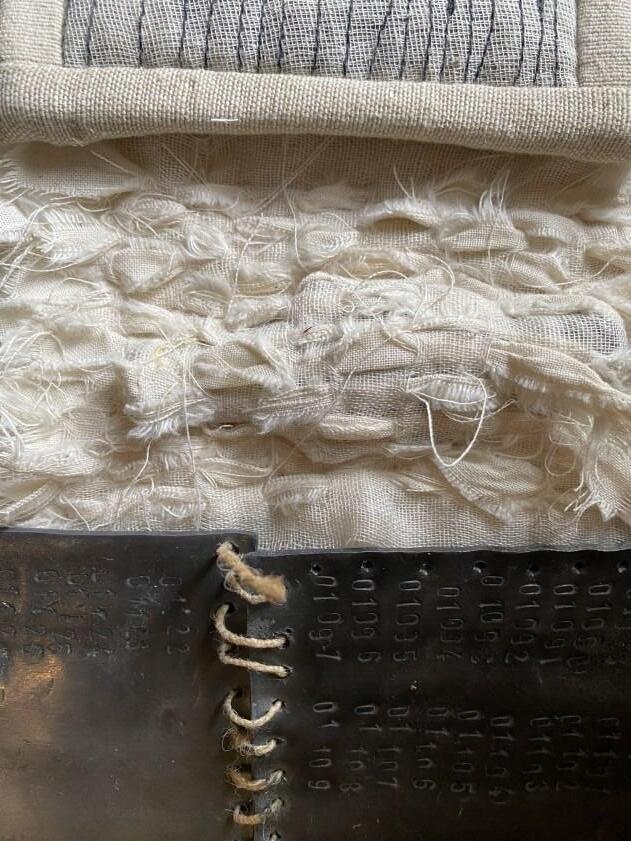

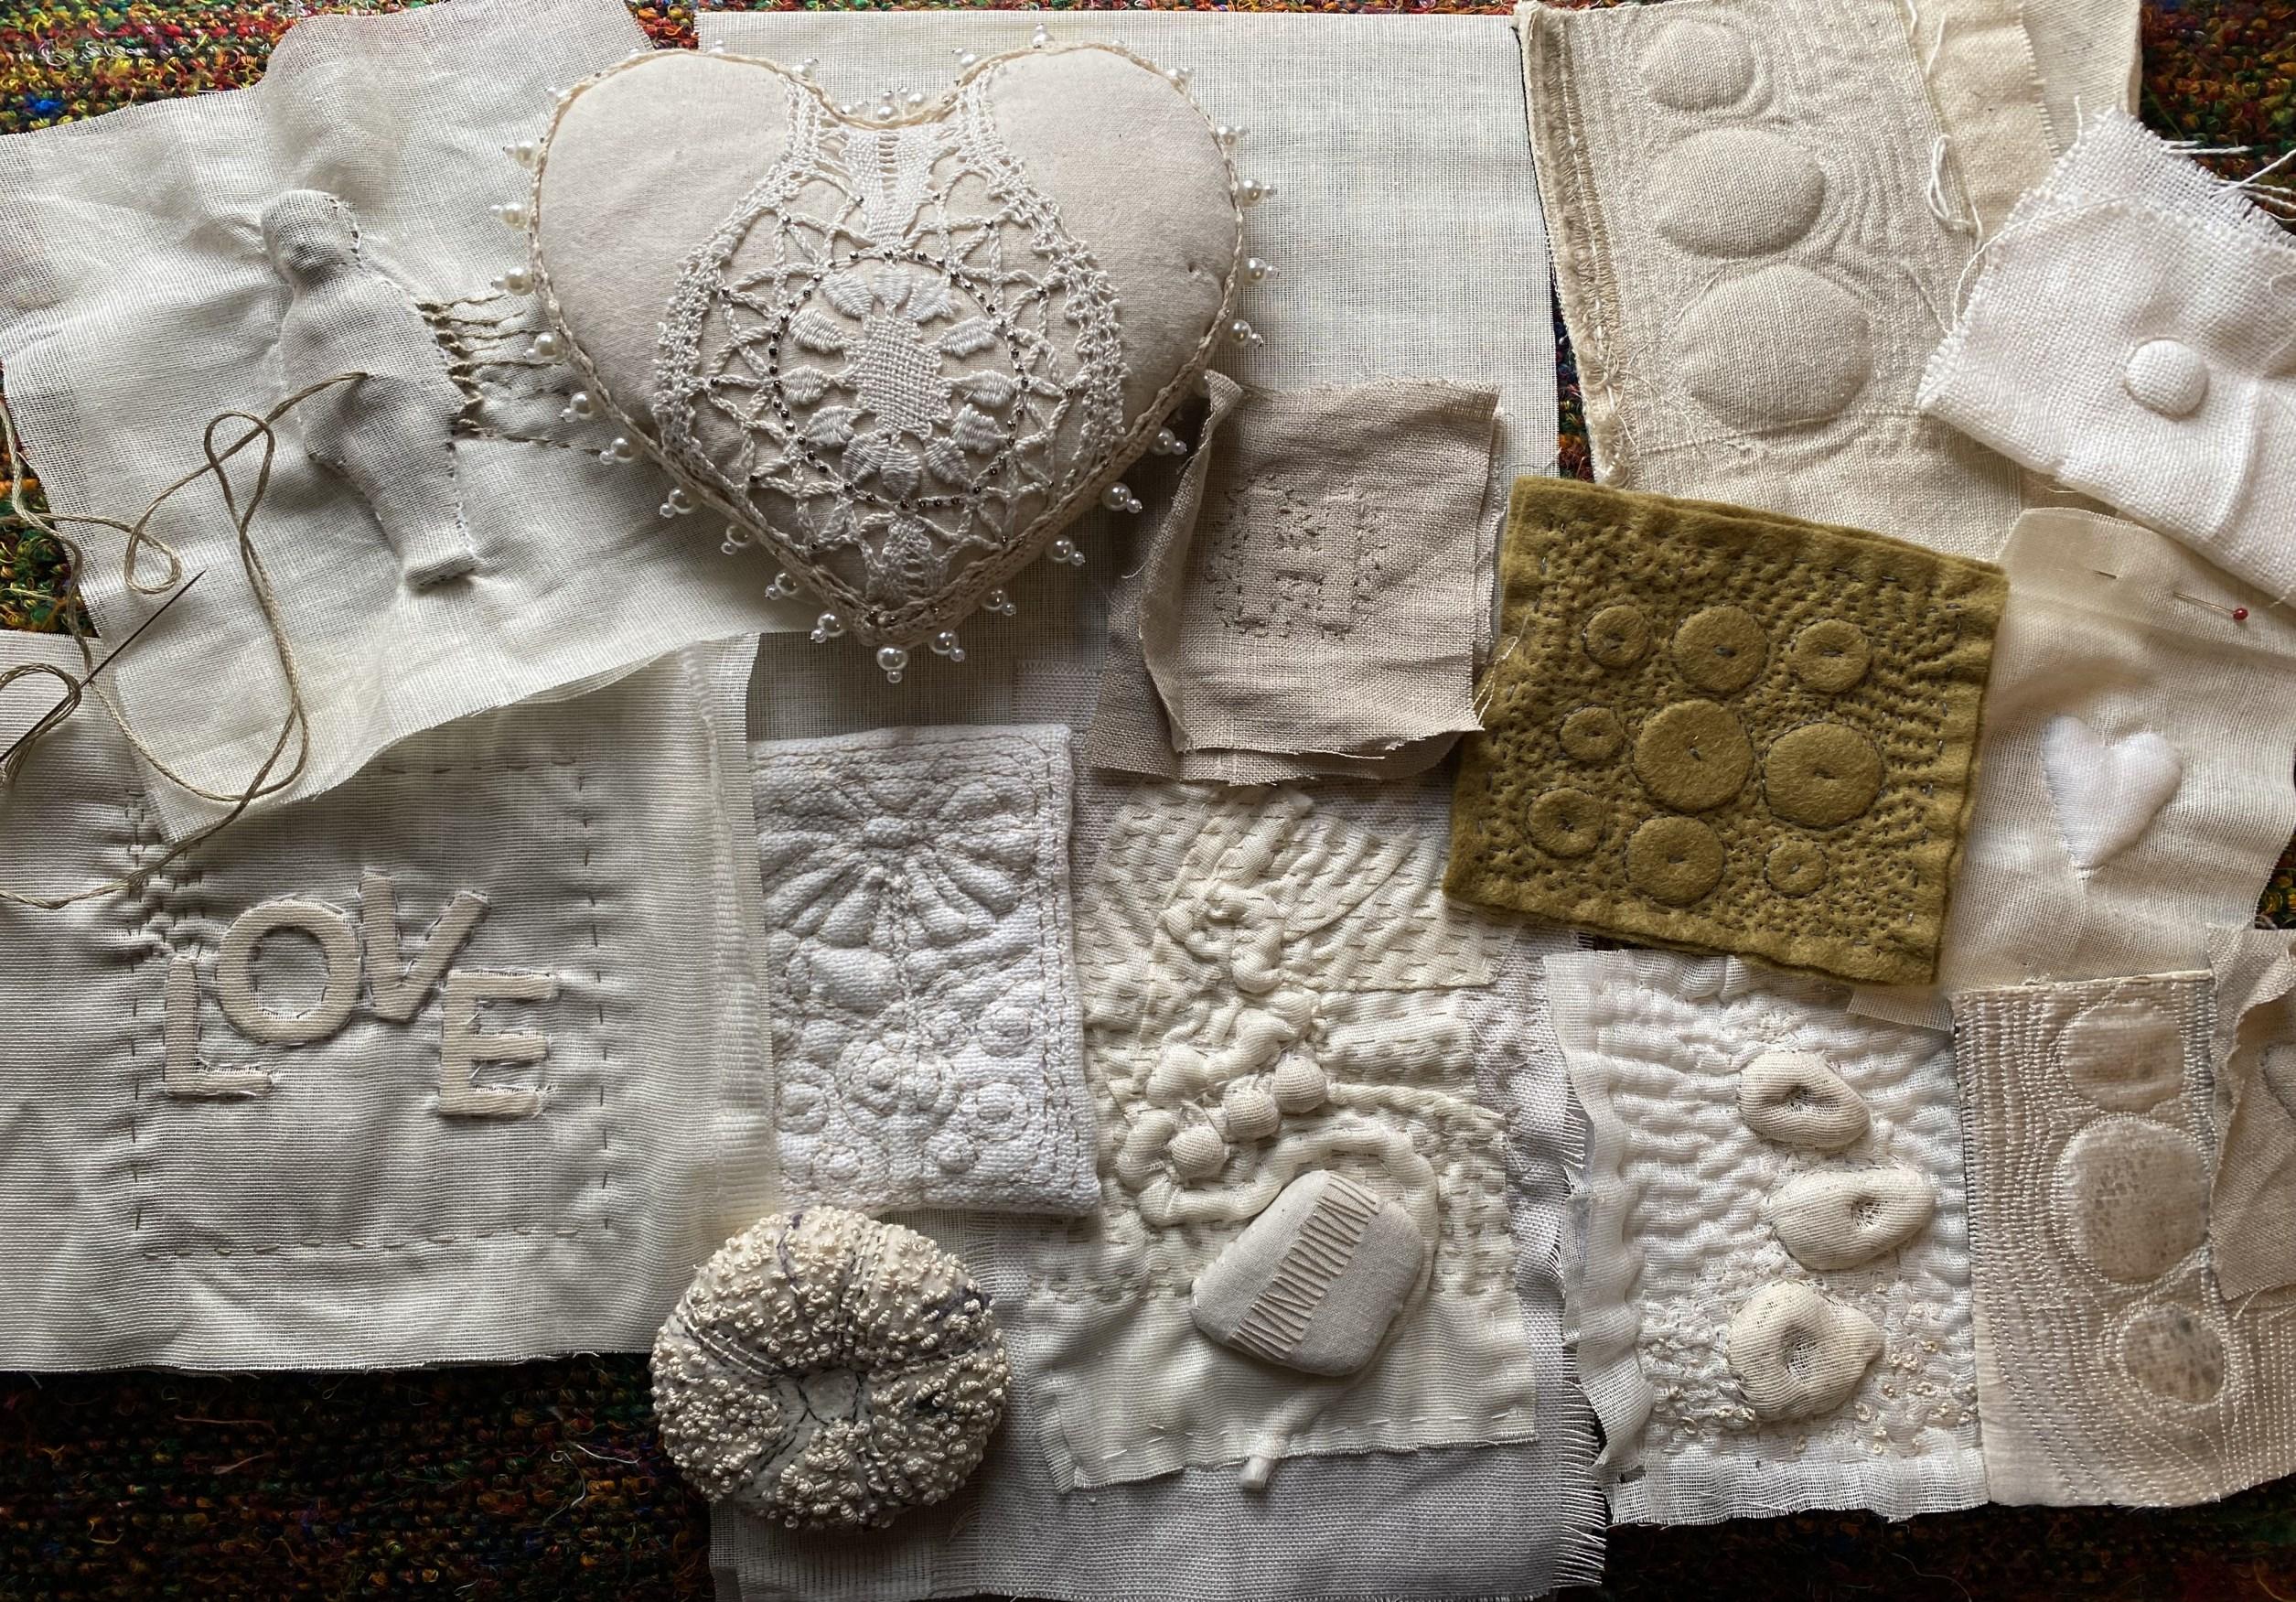
Never be afraid to combine techniques. For me, one of the most exciting ways to work is to place different objects or surfaces together in unexpected ways say ’I wonder what it would look like if I …?’ You can always add more layers and stitch over bits you aren’t happy with, or unpick areas or stitches. Just PLAY. Be quiet, be patient, be open minded, and play with the materials until they tell you what they want to be.

6
WORKSHOP PROJECT
Try starting off very simply, making a few samples so that you can get a feel for which technique inspires you to make a more considered piece for your Stitchbook.
1 Quilting
2 Trapunto
3 Boutis
4 Paper under Sheer Fabric
calico and a piece of wadding or quilt batting and make a sandwich with the calico as bread and the wadding as filling!
Stitch through all three layers at once using a small running stitch or a backstitch. Of course you can do this on a sewing machine, but you will get very different look to the work. I love the look of hand quilting.
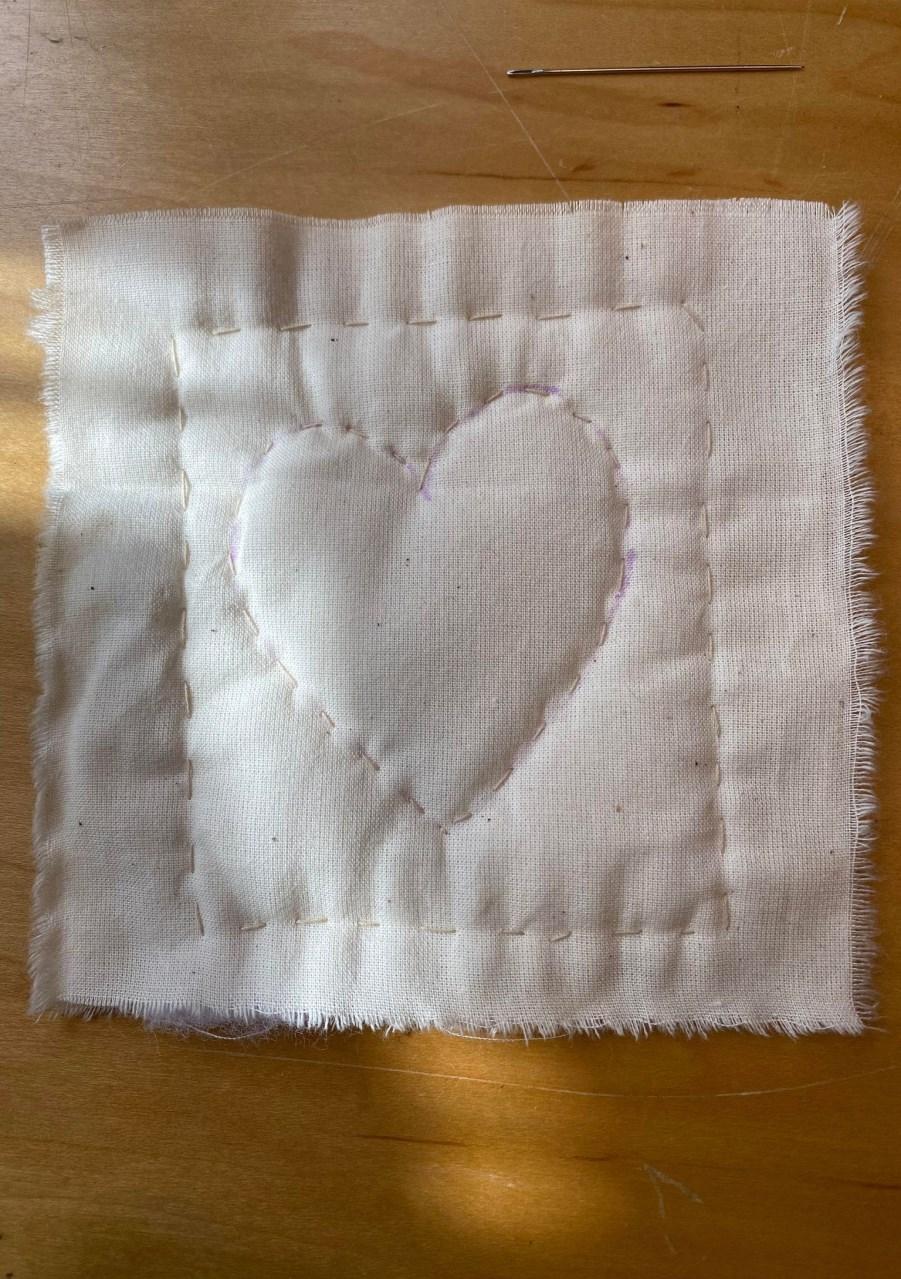
Stitch as much or as little detail into the work as you like. This sort of really basic quilting is one of my favourite ways of adding texture to fabric.
The instructions for this workshop are quite difficult to describe clearly in words. You will find this section much easier to follow along with on the video.
5 Card under Thick Fabric
6 Card under Felt
7 Embedding 3D Forms
8 Shadow Trapunto
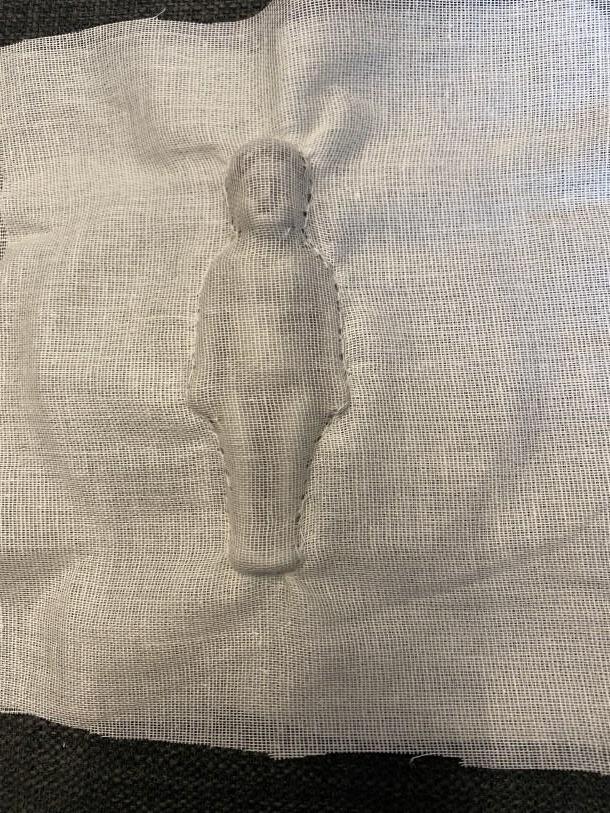
Trace or draw your design onto a piece of fine muslin or other sheer fabric with a loose/open weave. Take another piece of the fabric and put them wrong sides together.
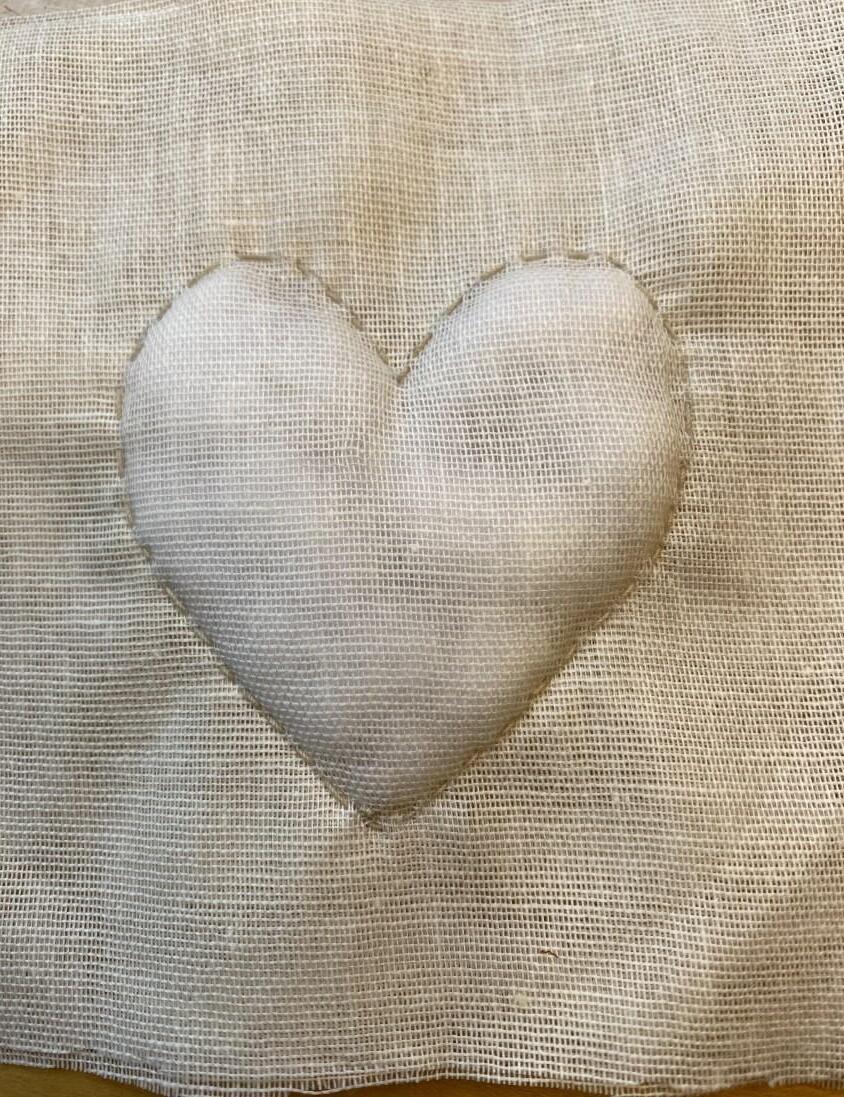
Stitch through both layers using a small running stitch. On the wrong side, carefully, using a blunt needle, wiggle a small hole in the back of one layer of fabric, being careful not to break any of the weft or warp threads.
Using a cuticle stick, or other smooth wooden implement, carefully stuff the shape through the hole with your choice of stuffing.
Use a needle to gently tease the disturbed weft and warp threads back into place.
7
Paper under Sheer Fabric
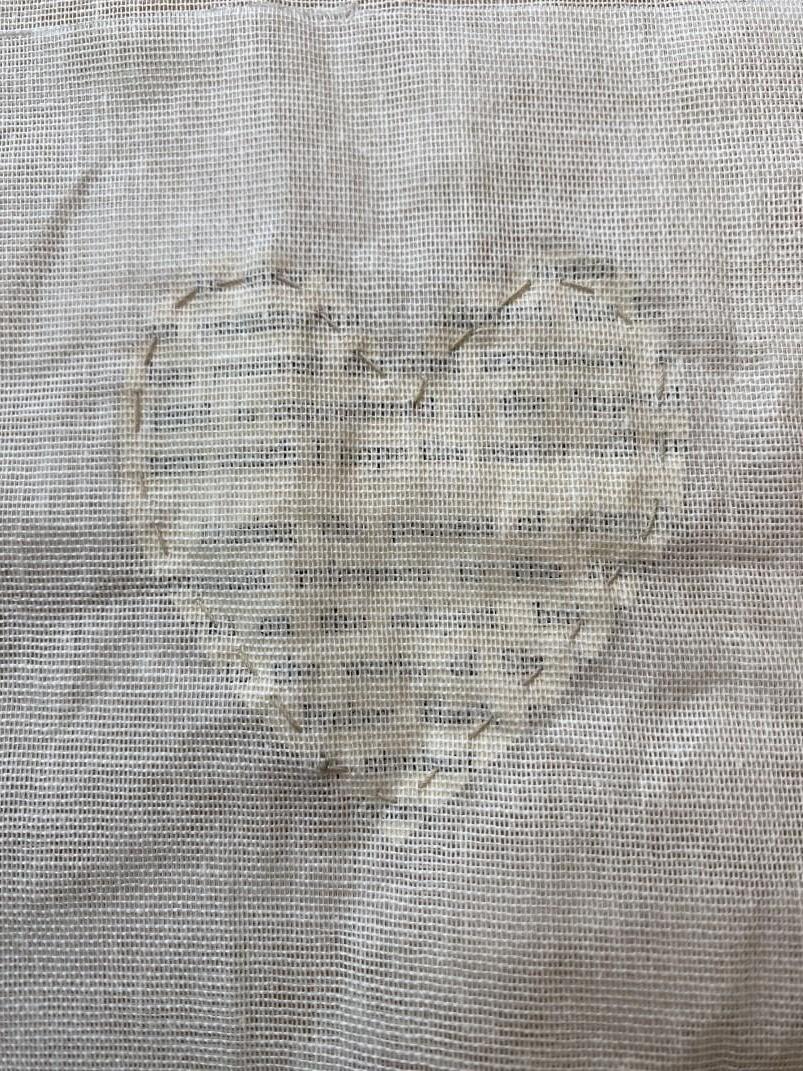
Cut or tear paper into your chosen shapes, and place them between 2 layers of fine muslin or other sheer fabric.
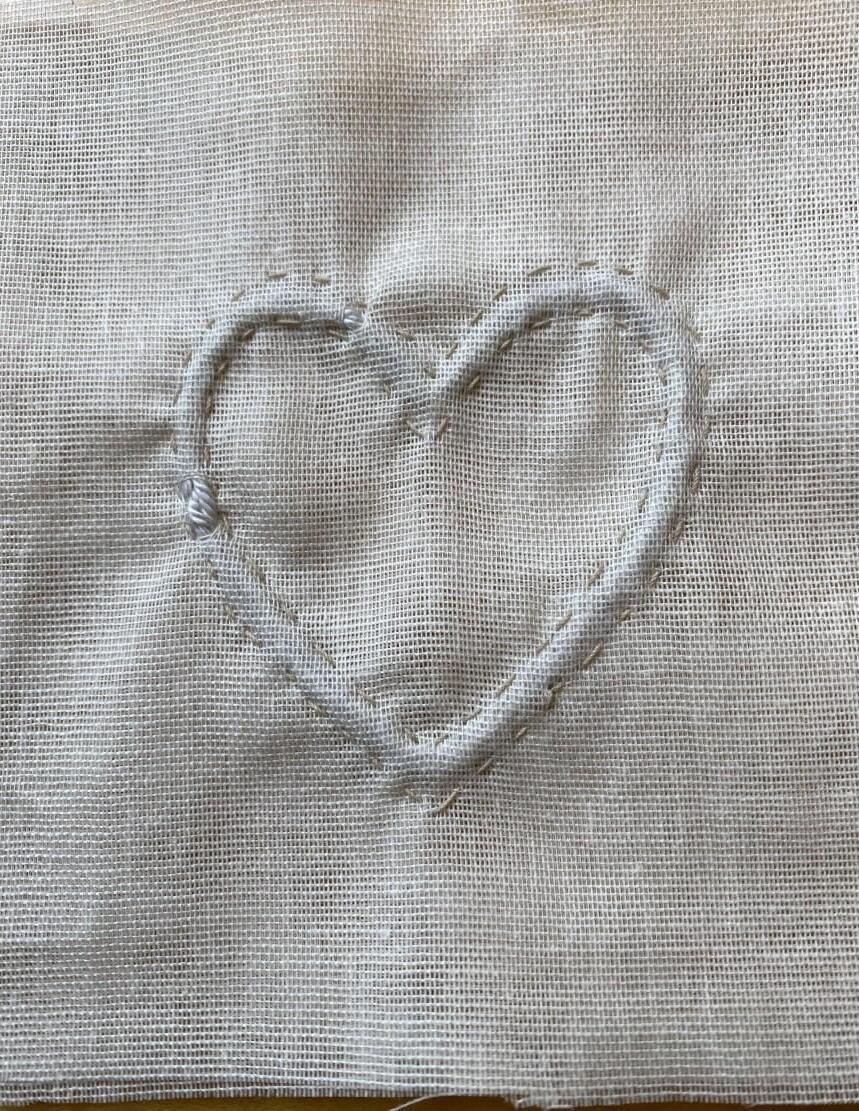
You may find it helpful to put the work into an embroidery hoop, to keep the paper in place while you stitch it. You can choose to stitch around the paper, leaving it in a pocket, or you can stitch right through the paper as well as the two layers of fabric.
You can experiment with different coloured paper or photographs or text. If you decide to use a sewing machine, please be aware that stitching through paper will quickly blunt your needle.
Boutis
Trace or draw your design onto a piece of fine muslin or other sheer fabric with a loose/open weave. Take another piece of the fabric and put them wrong sides together.

Stitch through both layers using a small running stitch. Then make another line of stitching to form a channel . On the wrong side, carefully, using a blunt needle, pass a thick cotton yarn into the channel, being careful to remain between the layers of fabric.
When the channel is filled, snip off the yarn. Use a needle to gently tease the disturbed weft and warp threads back into place.
Card under Thick Fabric
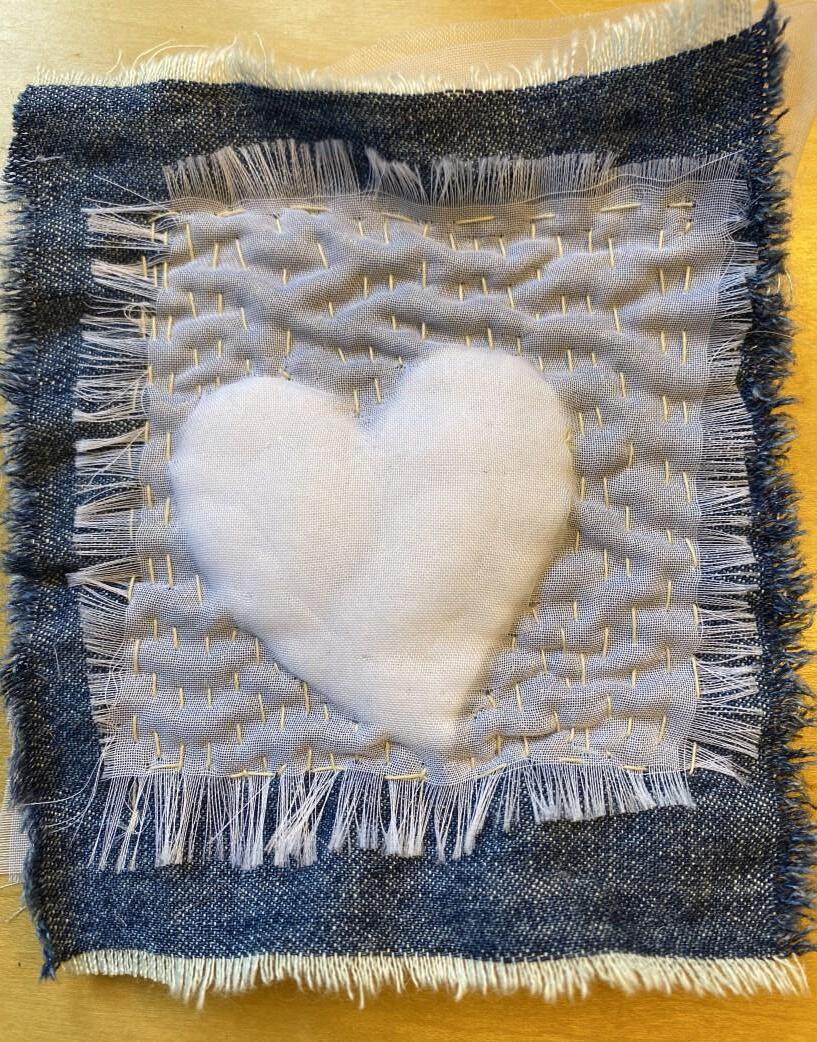
Choose a slightly thicker fabric, such as canvas weight calico, or denim, and cut a shape from a thickish piece of cardboard.
You may find it useful to use an embroidery hoop to hold the shape in place while you stitch. Make stab stitches around the shape, (north, south, east and west) and then fill in the gaps to avoid creases in the fabric.
You will be able to see the form that the card makes within the layers of fabric, rather than actually seeing the surface of the card . You are relying on the shadow play of light on the surface.
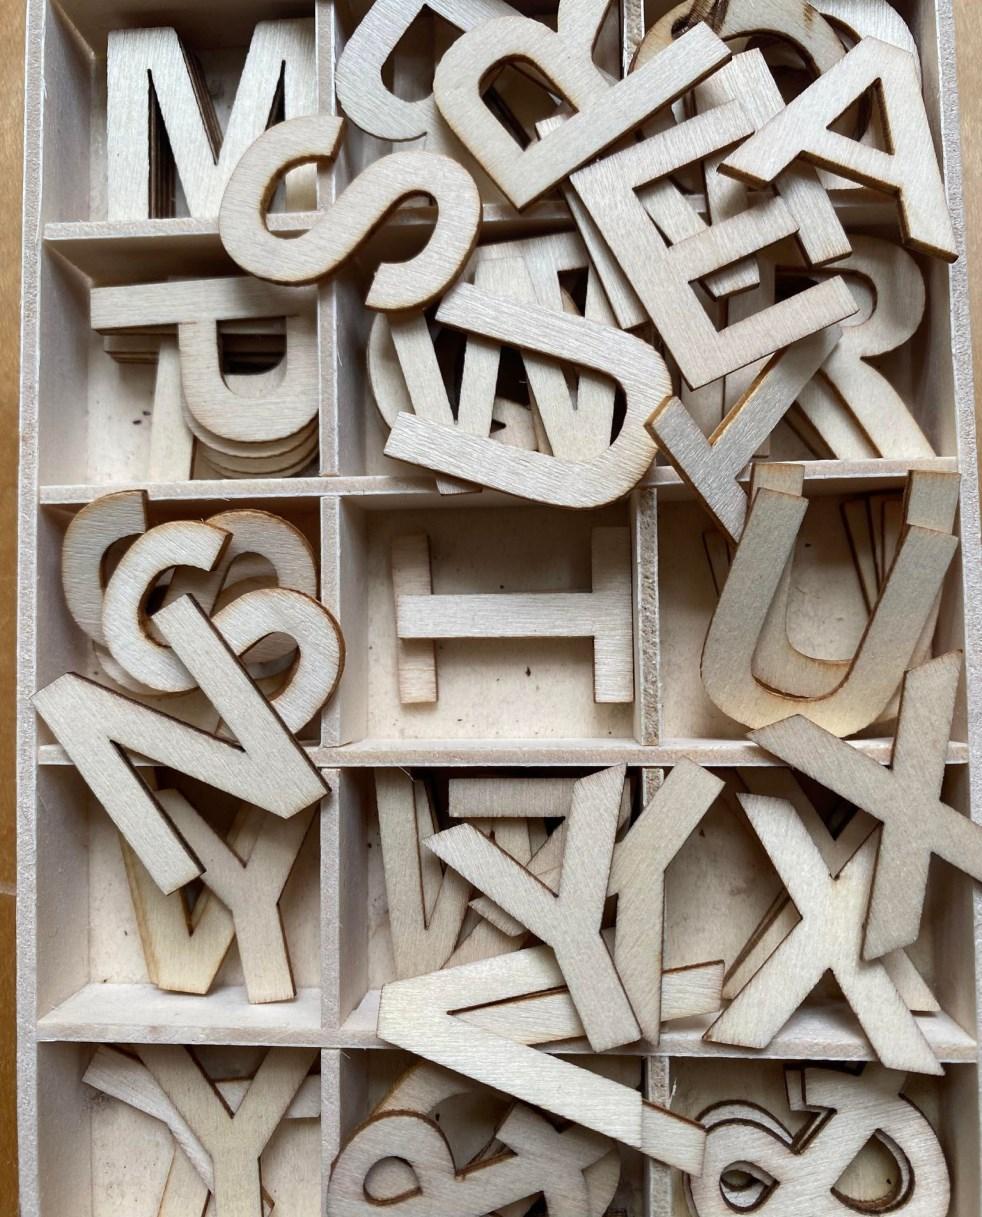
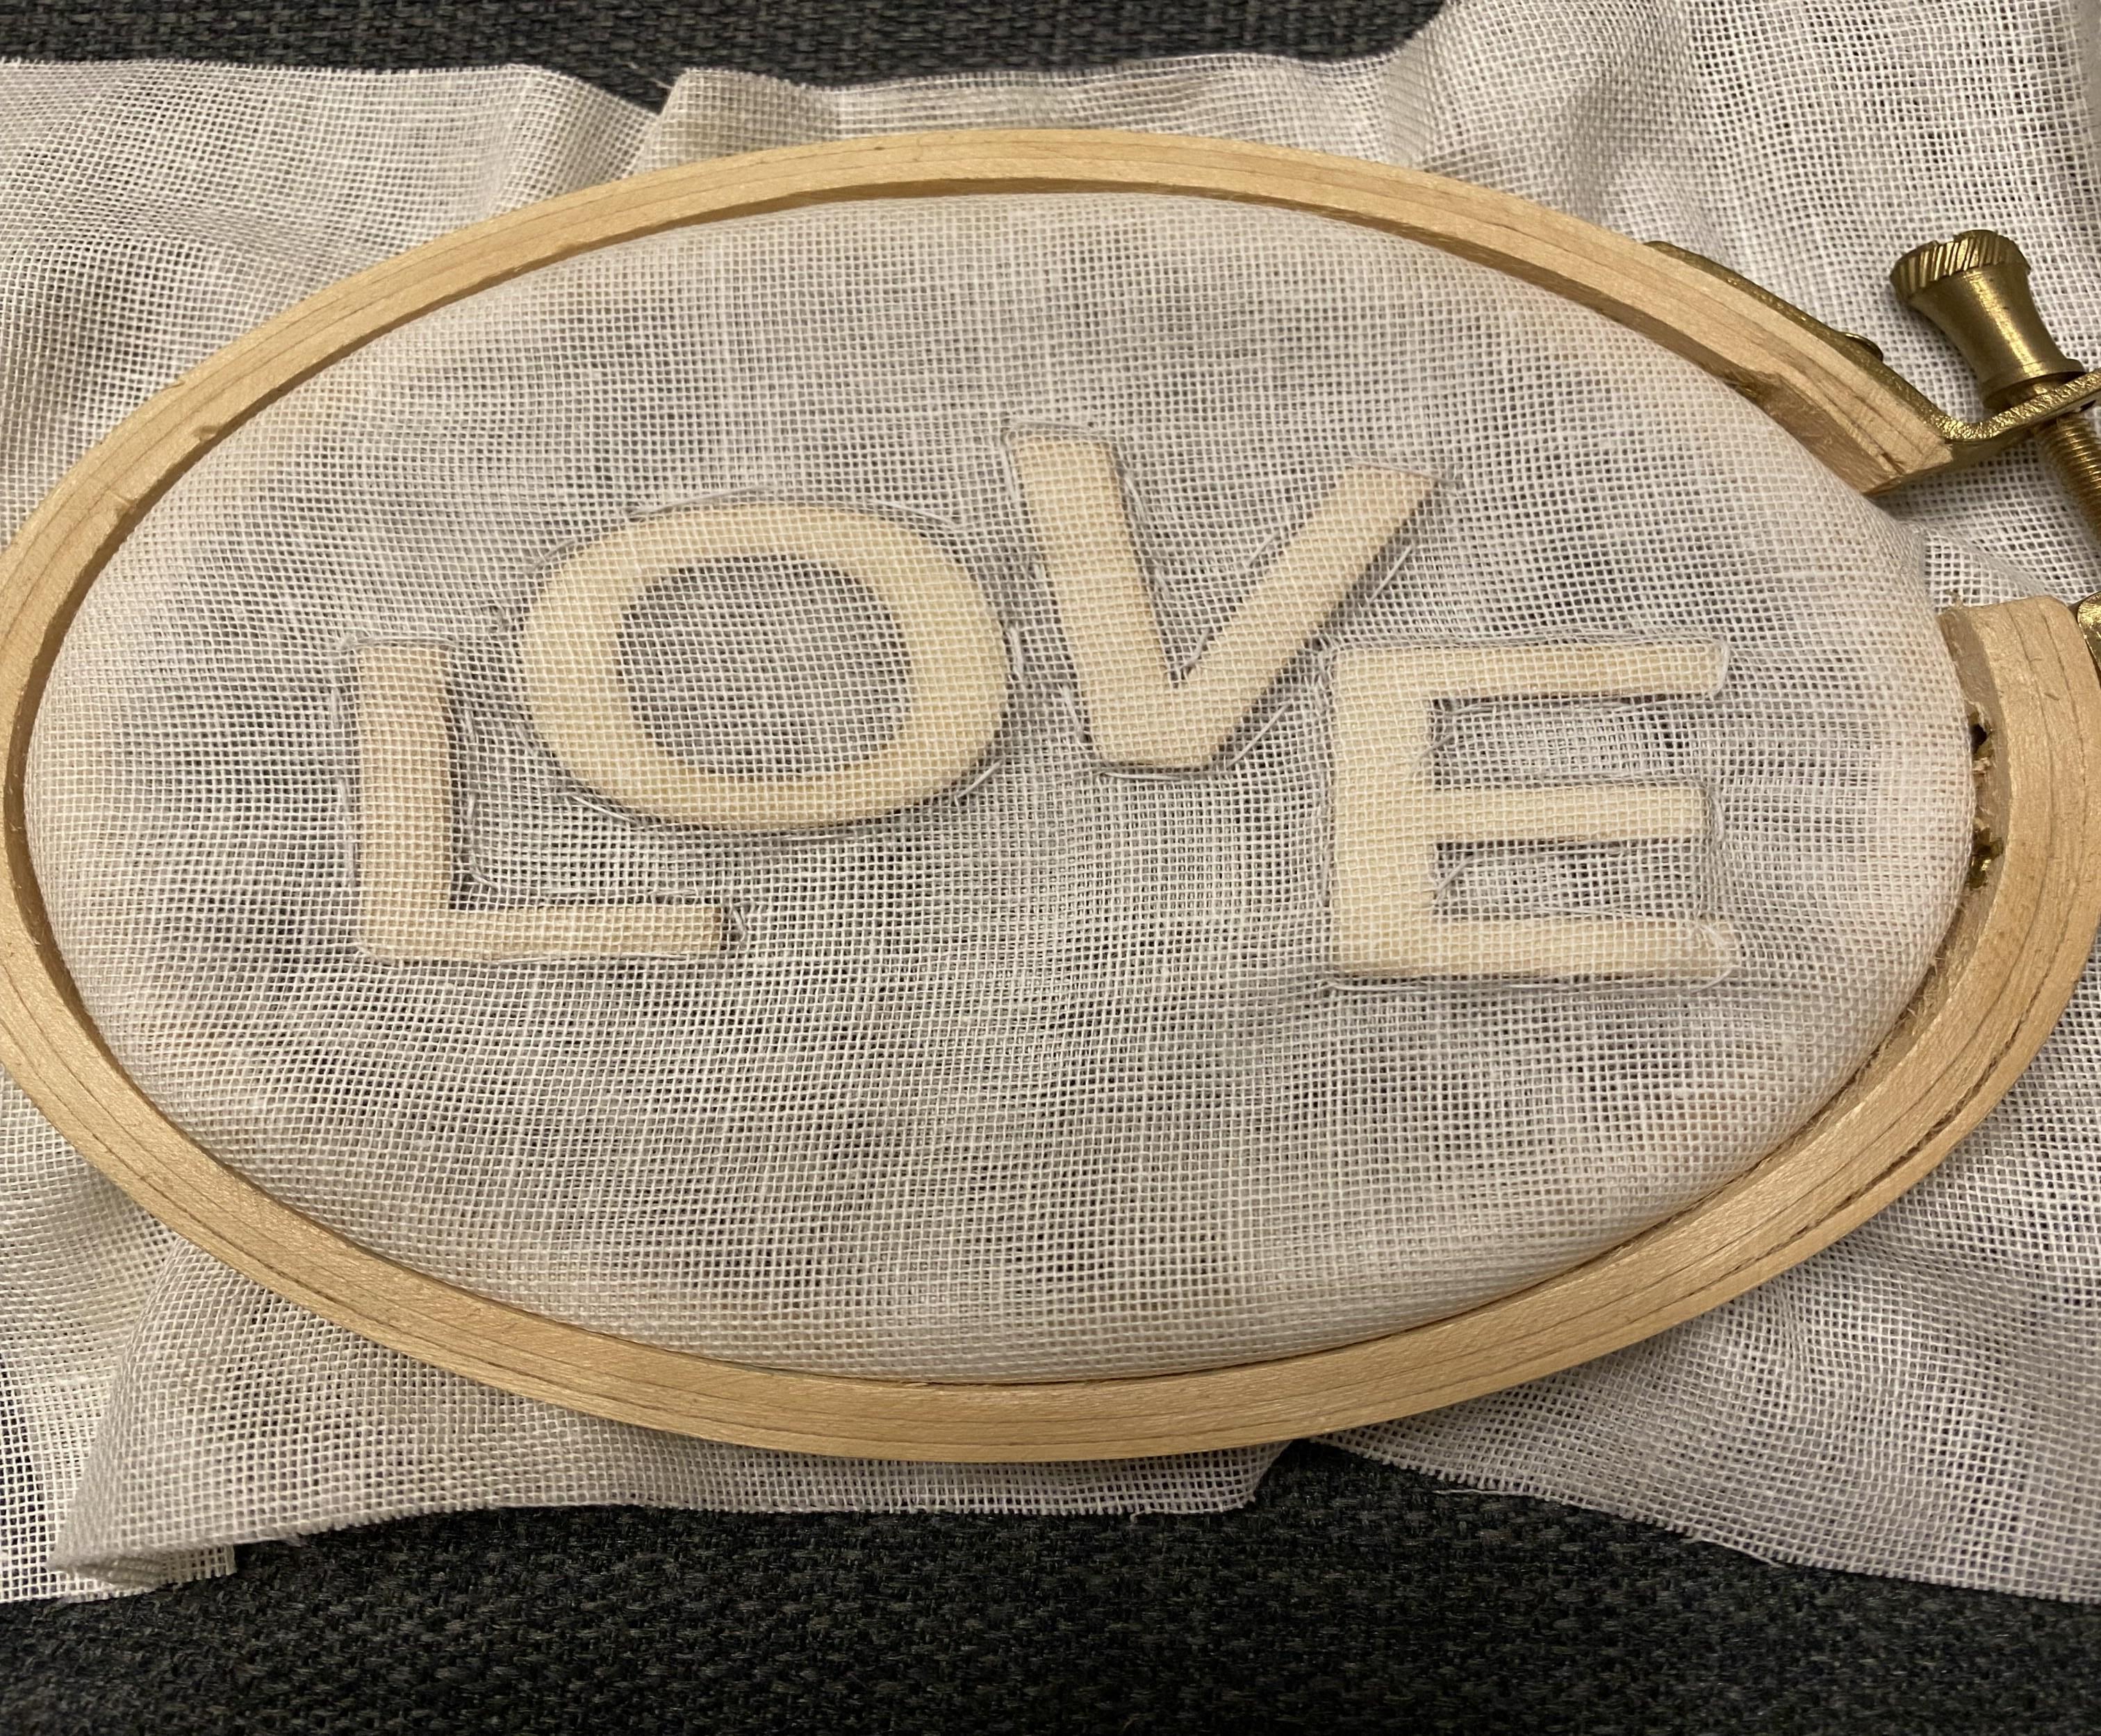
You can also make some great effects using laser-cut thin wooden shapes, stitched between the two layers of fabric.
8
Card/buttons/shapes and Felt

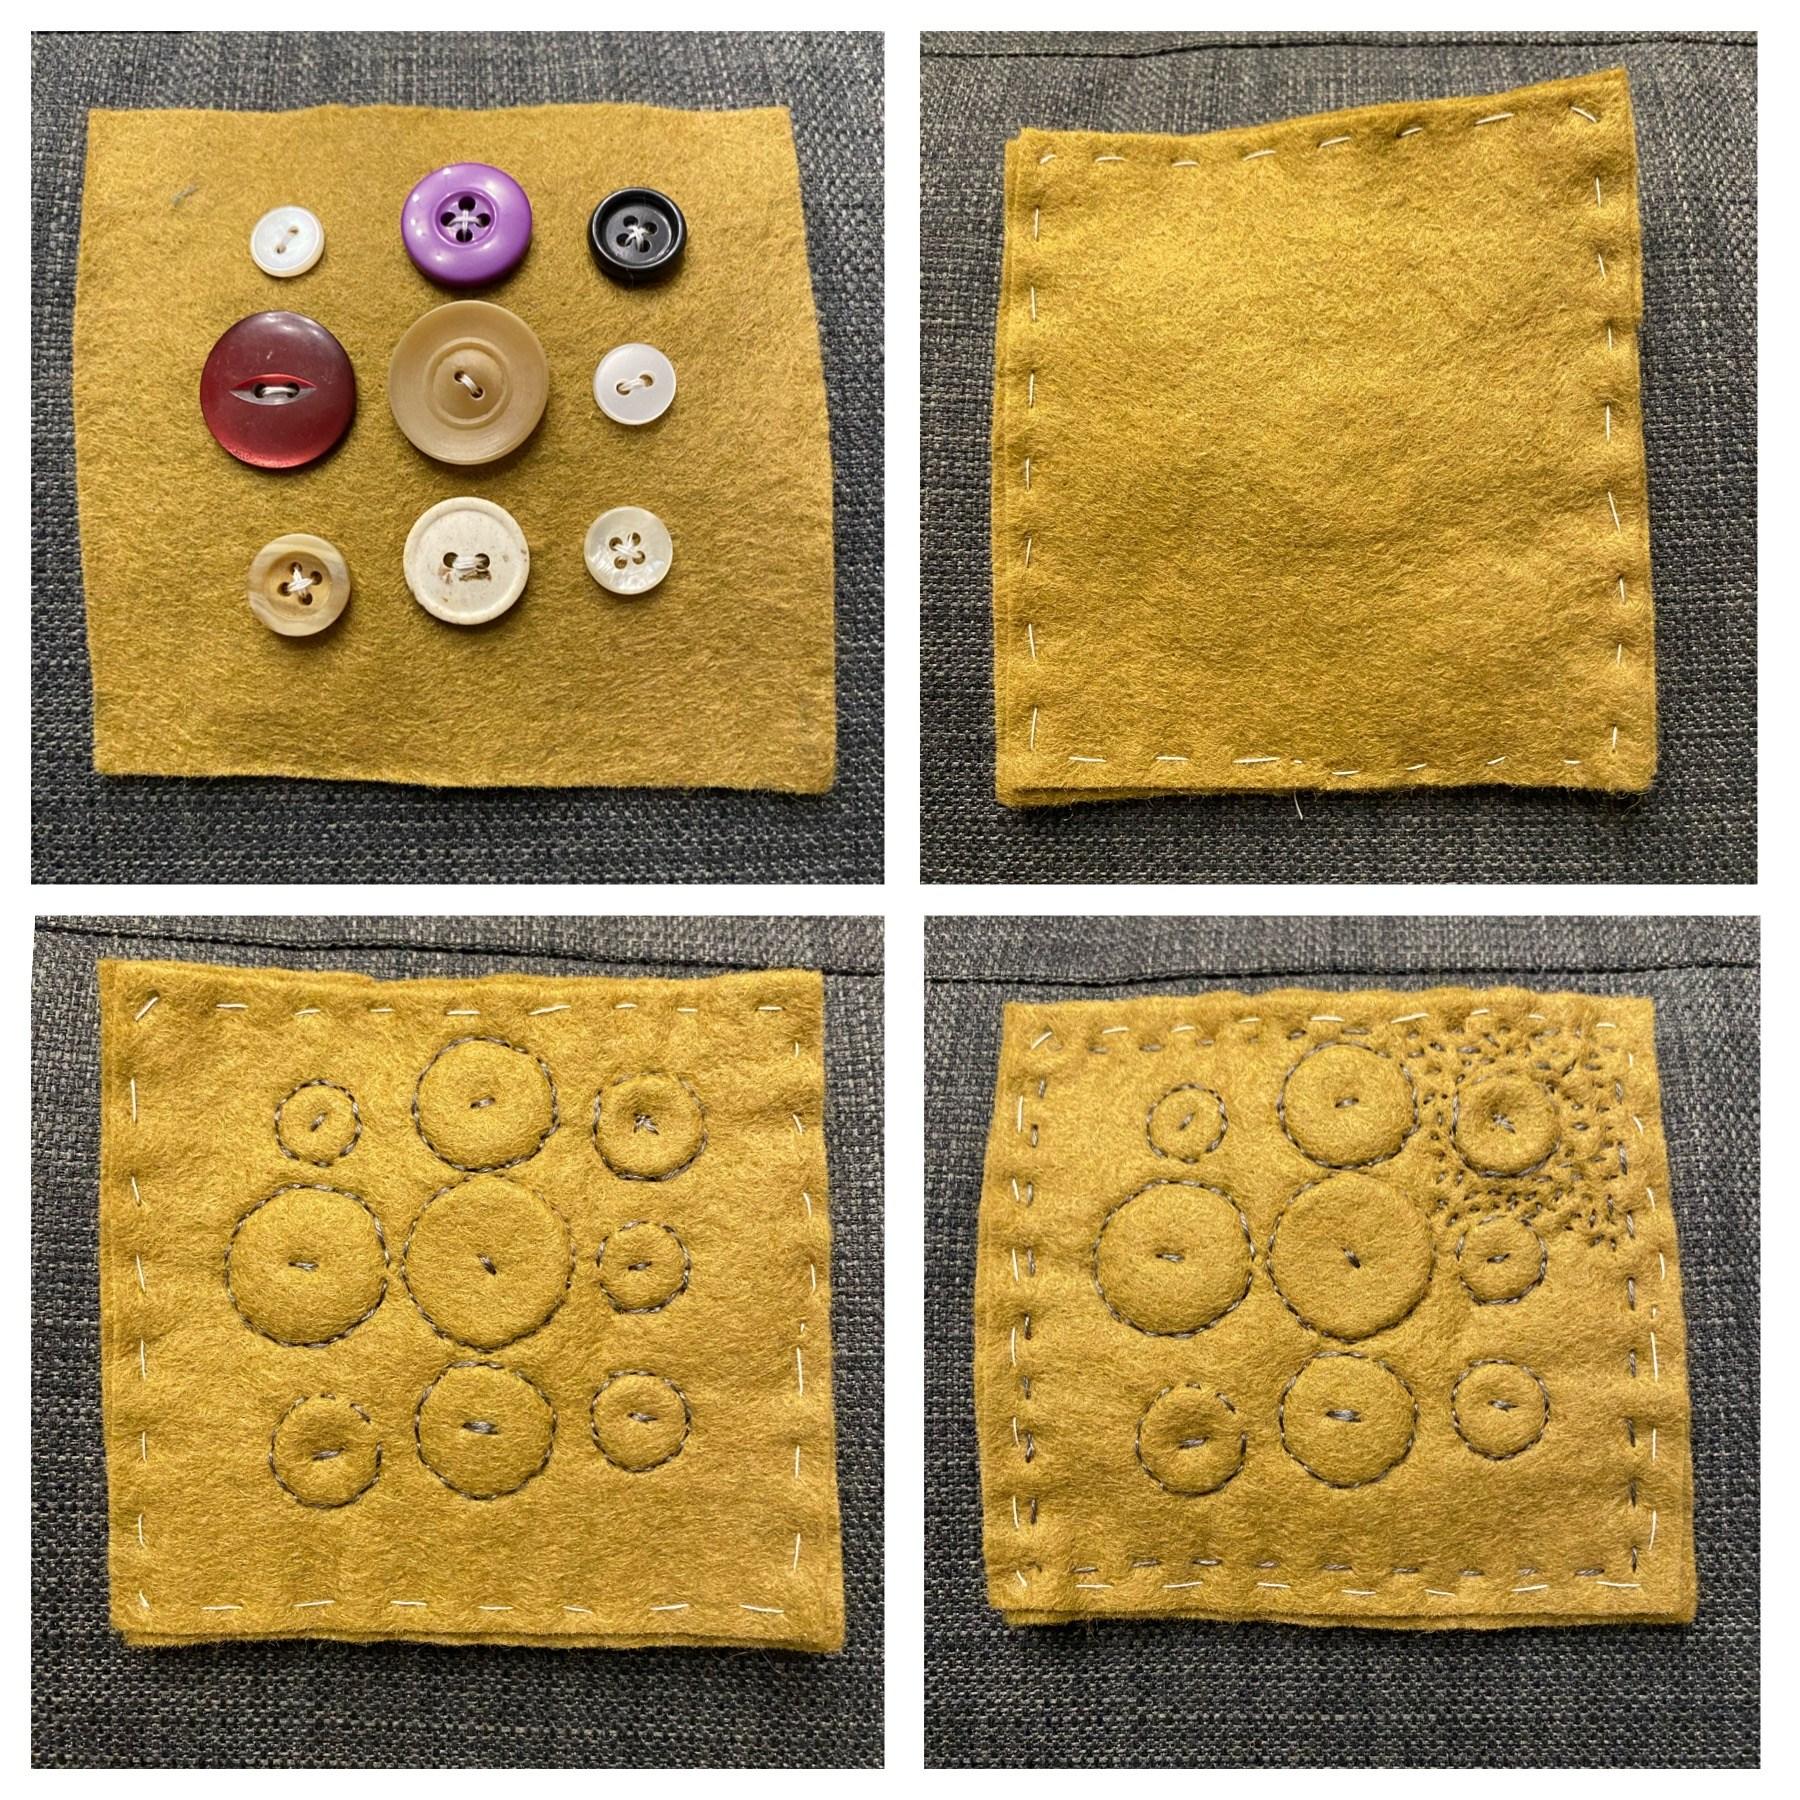
If you use 2 layers of felt to trap fairly flat items, you can really make use of the nature of the felt which will compress under the tension of the thread.
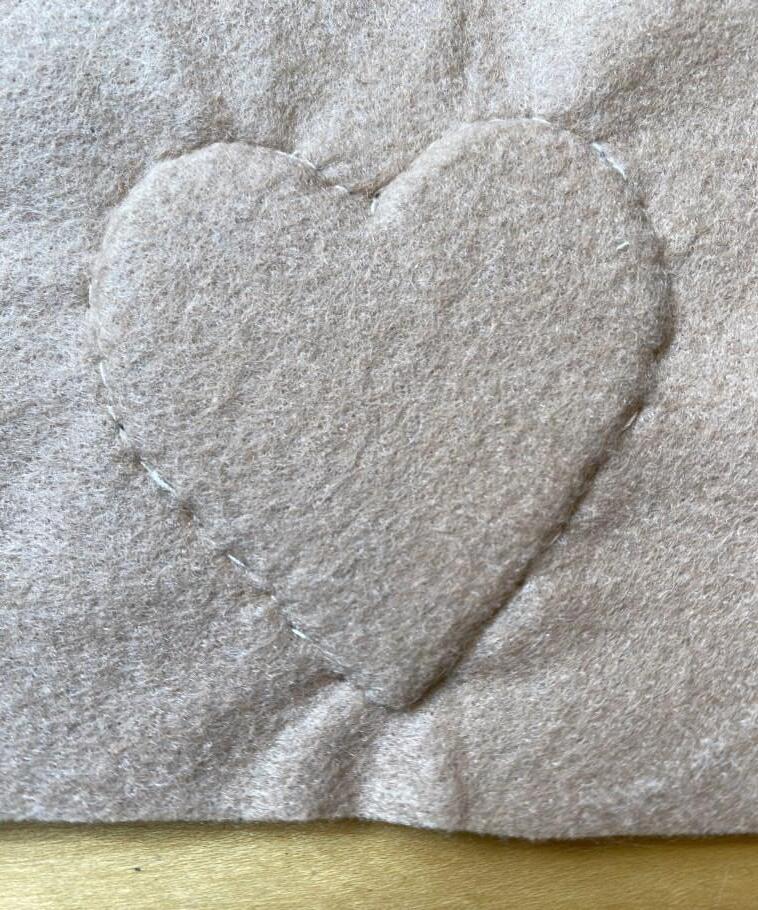
You may find it useful to use an embroidery hoop to hold the shapes in place while you stitch. Make stab stitches around the shape (north, south, east and west) and then fill in the gaps to avoid creases in the
need to use one now in order the hold the object in place as you stitch around it. You will inevitably get some creases or ridges of fabric around the edge of the object (unless you are using a stretchy
You might like to add an extra layer of wadding underneath your item, to allow for a more textured surface when you
Make up a sample of Trapunto, but this time use a see-through fabric. If it is plastic, or non-woven, you might need to cut a small hole in the back in order to stuff the shape.
Lay the see-through trapunto work on top of a coloured or patterned fabric and stitch through all of the layers.

You may choose to lay the trapunto onto another 3 layers of fabric (top colour, wadding and then backing fabric) and then stitch through all 5 layers at a time.
This is a technique which I began to use intuitively as I wanted more layers within my work. If you want to see a more technical approach to this, you can find videos online which will help.
9
EXAMPLES of PROJECTS FOR YOUR STITCHBOOK

Once you have tried a few of the techniques from this workshop, you will probably have found that some suit you better than others. I find that I quite often start with the intention of making a neat, thoughtful piece of slow stitching, but when I begin to interact with the fabric and the stitches, a more intense knotted approach appears, and it tends to suit me better than precision - I guess it depends quite a lot on my mood (!).
Why not try making a piece of work for your stitchbook which includes the layering and stuffing techniques we have looked at. Don’t


necessarily have an outcome in mind. Remember that slow stitching is about recognizing the PROCESS, and accepting the outcome.
On this page are pieces of work which you might find useful as inspiration. The wooden laser-cut letters came from the online store called ’The Works’. You might also take a look at the work of our featured artist, Diane Savona, page 12/13

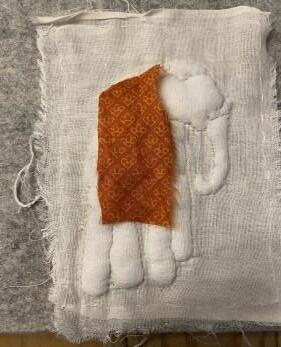
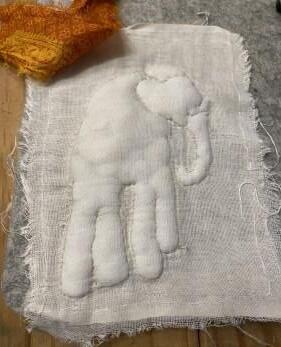
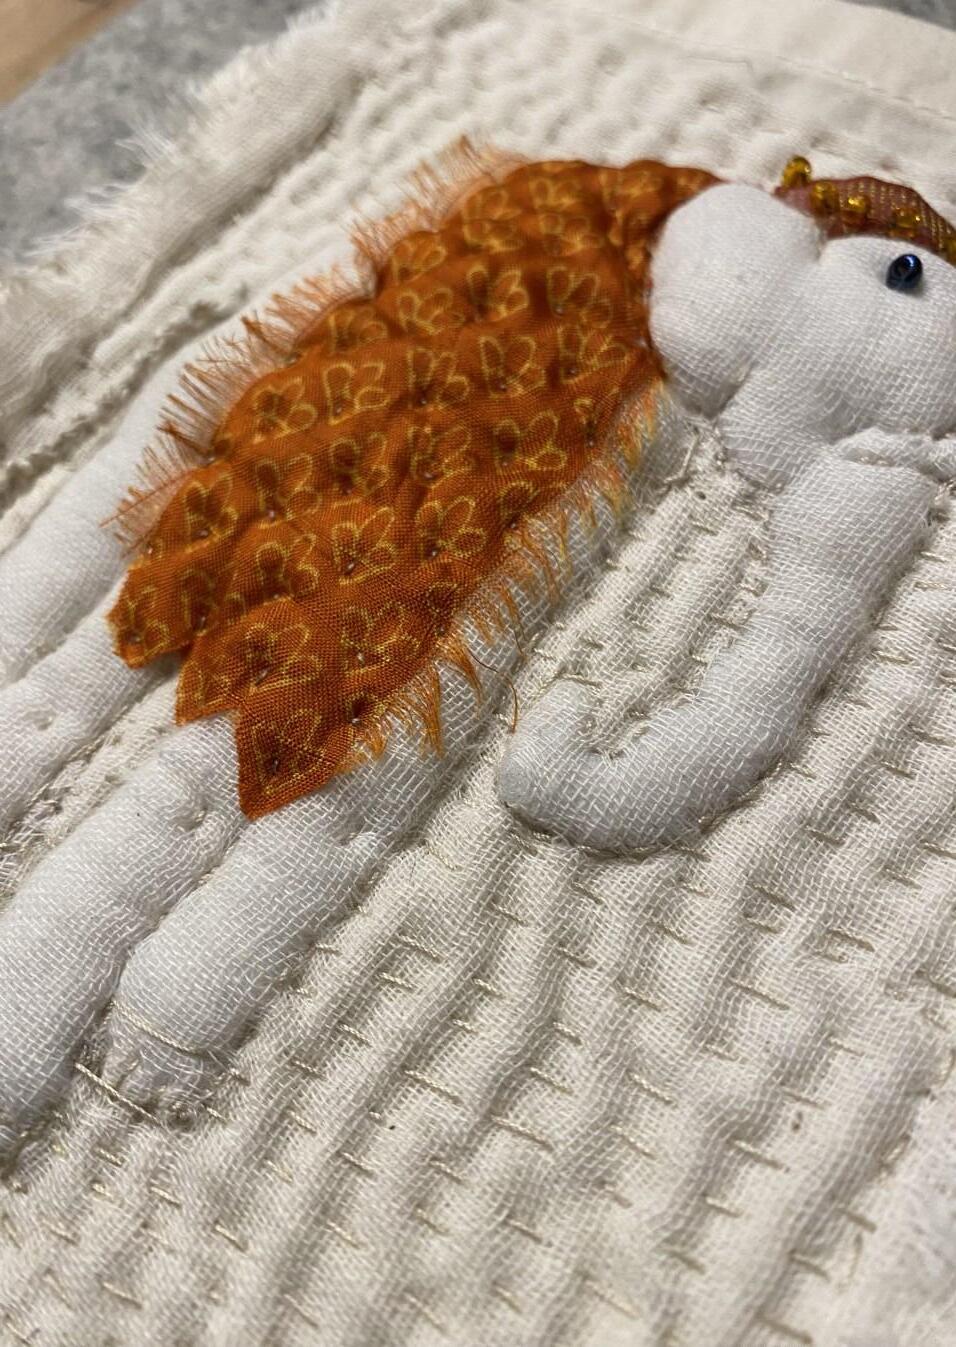
The elephant was made using the Trapunto technique, and I then added extra layers, behind and on top, and quilted through all 5 and 6 layers at the same time.
Don’t forget to look on Pinterest and YouTube for inspiration.
10
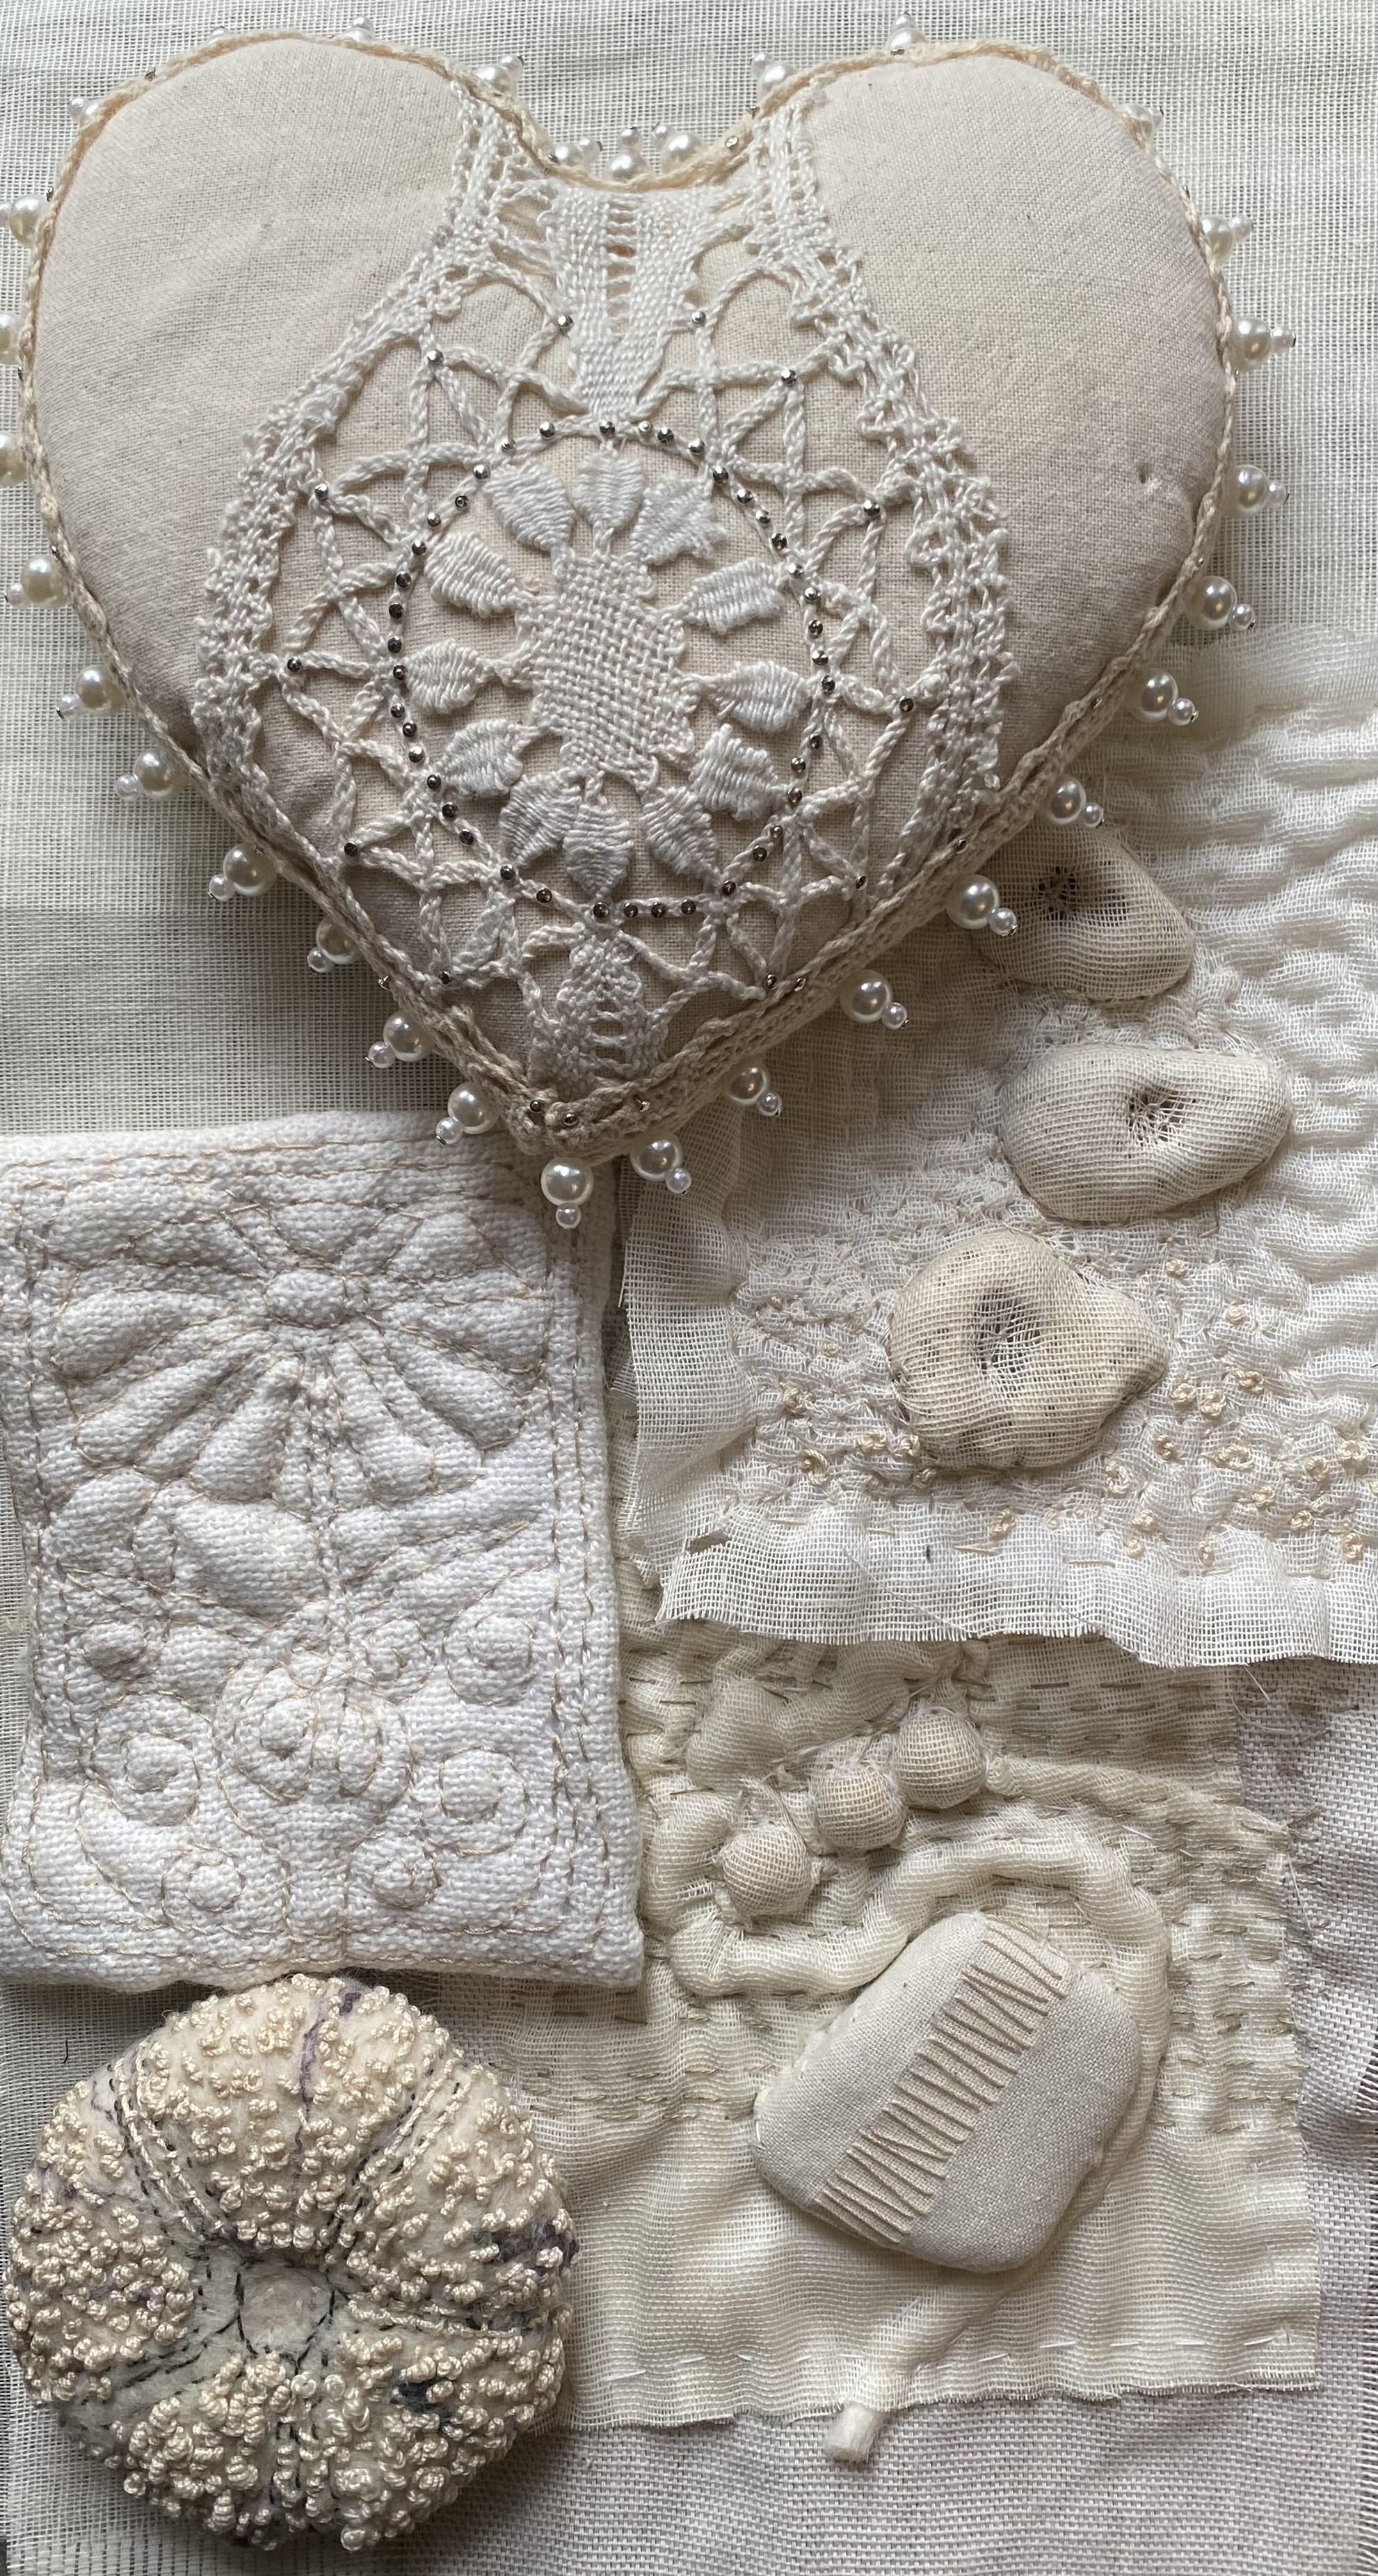
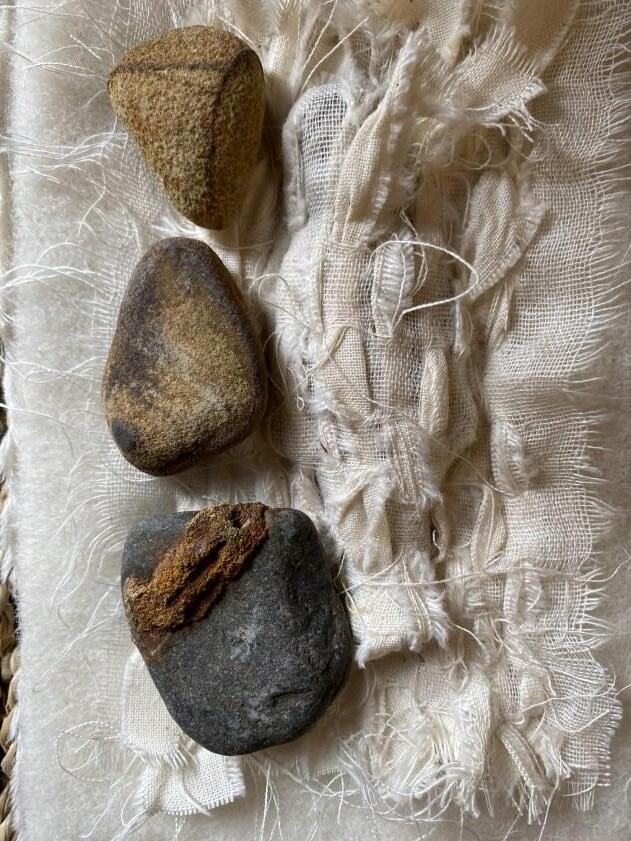
I was particularly pleased with this piece of work, and it is a perfect example of not knowing where the stitching will take you .. if you can, just go with it and see what happens. On the right is a photograph of the work at one of it’s initial stages.

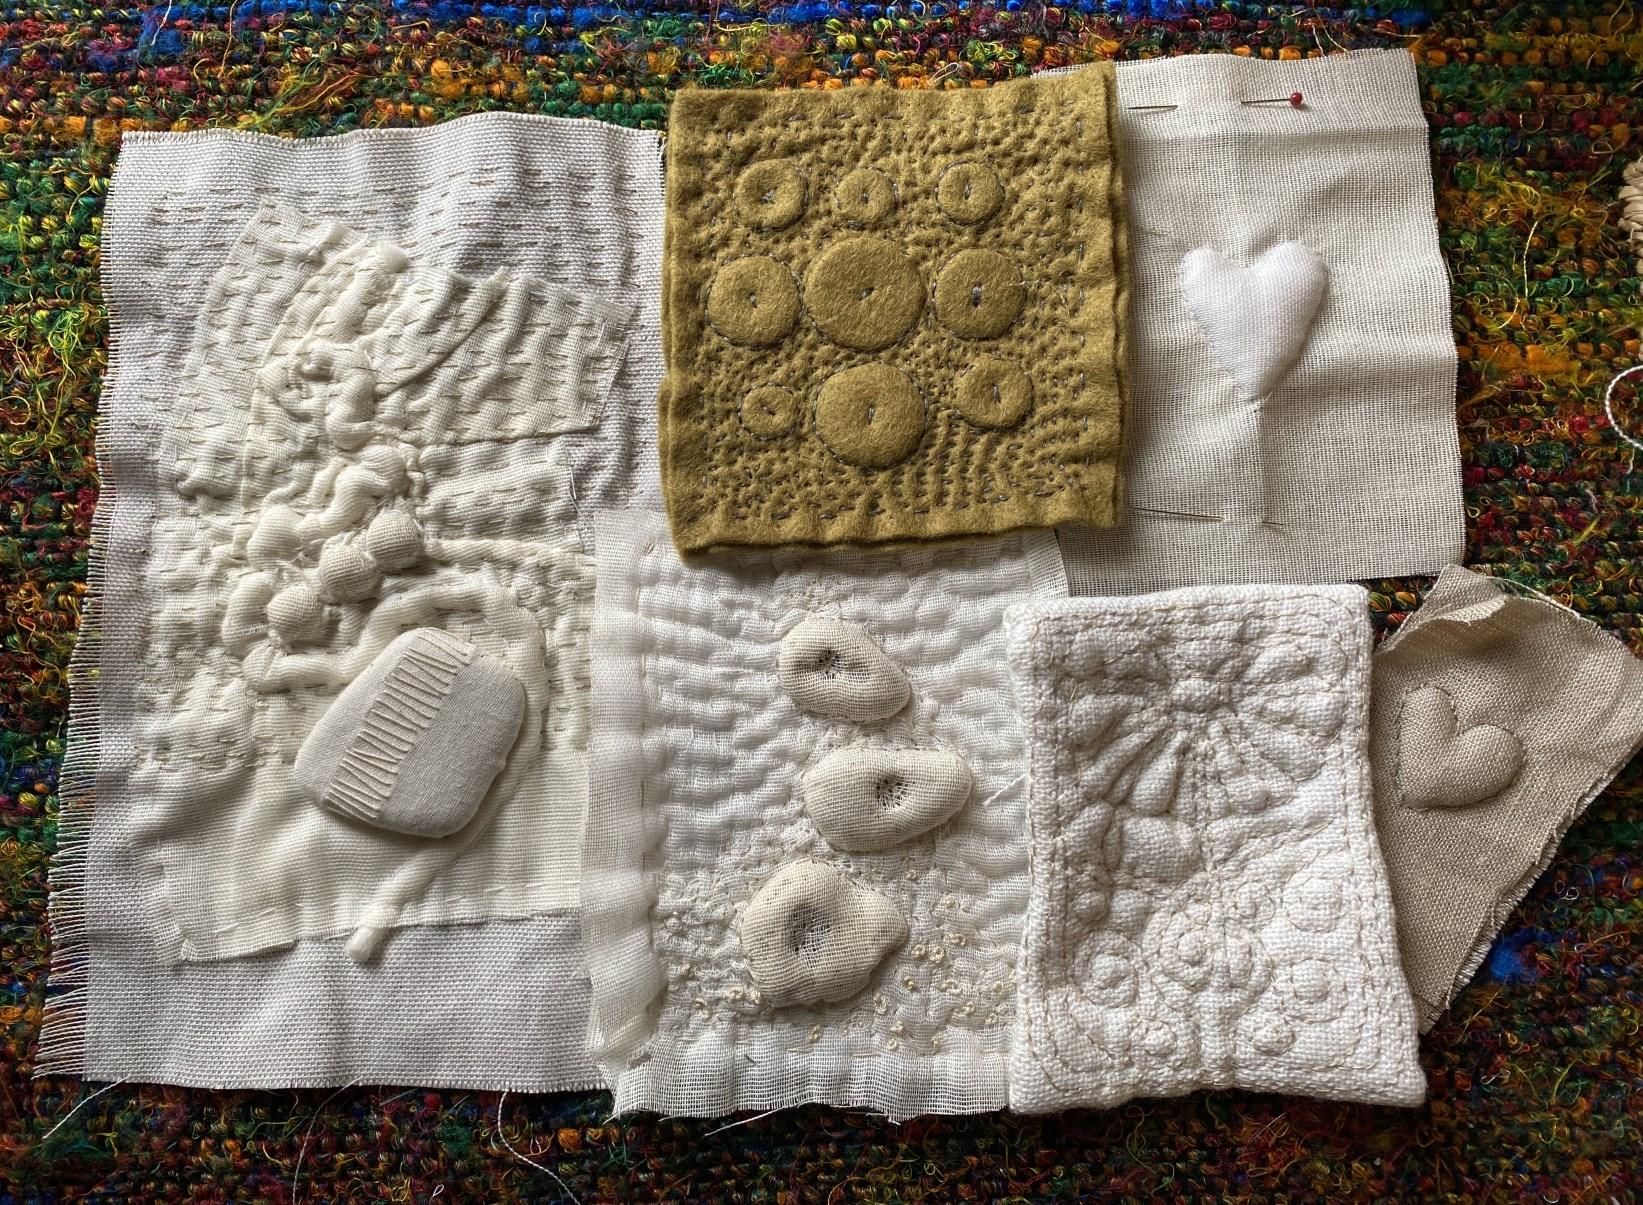
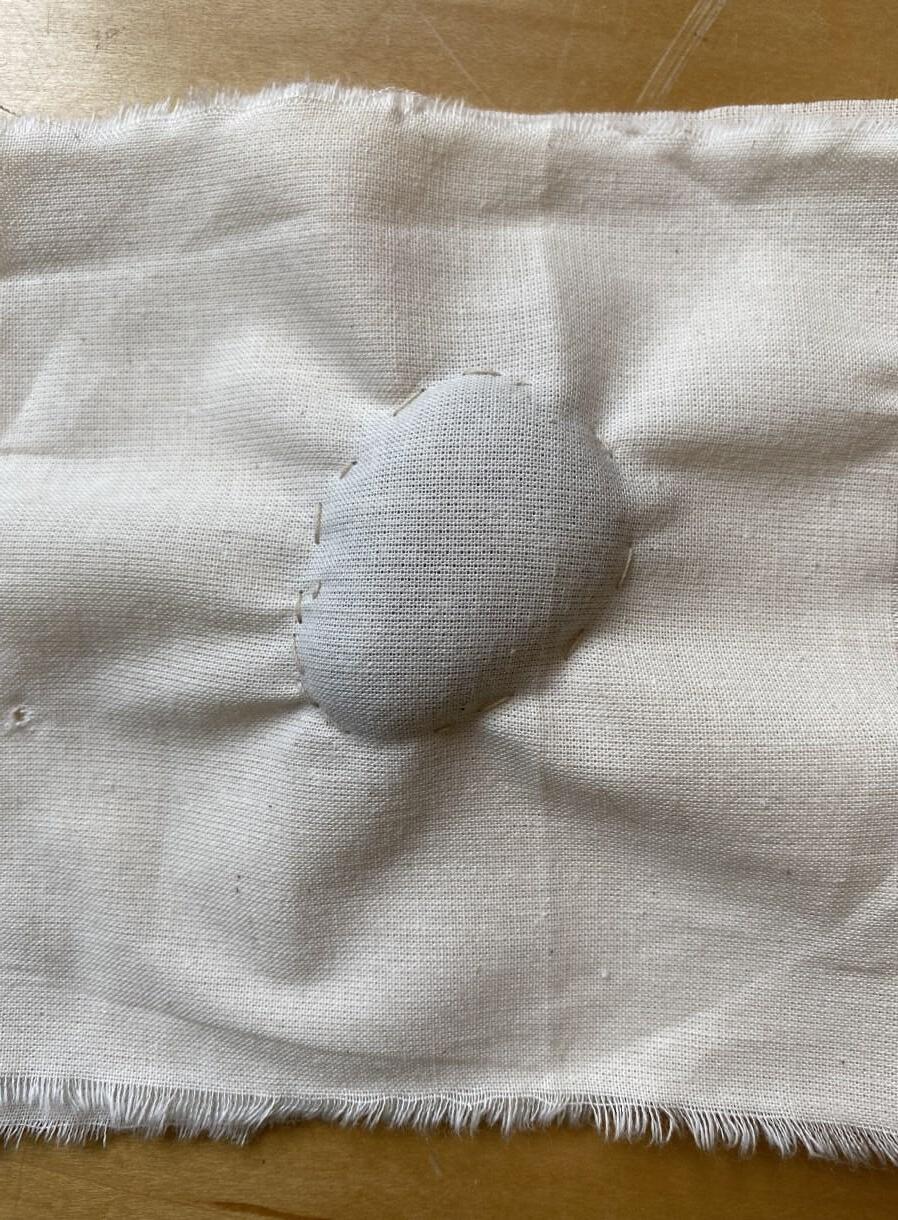
I trapped some wool roving and felt balls within 2 layers of muslin, and then stitched them down onto a piece of calico, using the ubiquitous running stitch. I quite liked the gnarled textures I was making, until I thought of varicose veins! As soon as I’d seen that, I couldn't just leave it as it was, so I added some black seed stitches to emphasize the raised areas. The flat pebble in the photo is one which I had wrapped in calico, and it is just sitting on the surface.
I managed to pull some of the running stitches a little tighter than I had intended, because there was an annoying knot in the thread. I really liked the way the roving and felt balls began to bunch up. I thought that they looked rather like seeds in a pod, or something oyster or shellfish-like from the sea, certainly very organic.
I put the work to one side for a while, and out of the corner of my eye I saw the felt sea urchin which I had made in a felting workshop several years ago, and decided that it had obviously been sitting waiting for this small piece of slow stitching to join it.

I think that it makes a wonderful combination of texture, pattern and colour, and I will carry on thinking about the possibilities it has inspired.
What do you think? Have you got any work which you can show to the group which ended up being a real favorite, even though it was created purely by serendipity and chance.
As Charles Darwin said, ’changes happen by pure chance, and then, if they prove to be beneficial they are perpetuated.’
Send images of ‘trusting your process’ to me with a few words to:
thestitchbook@aol.com
Diane Savona

If you haven't come across Diane Savona’s work before, you are in for a real treat!


I find her totally inspirational. The generosity with which she shares her thoughts, techniques and motivations is very rare and completely admirable.
The best place to start looking at her work is on her own website with blog, videos and gallery. In her own words:
“… most of you know that during this pandemic, my art faltered a bit enough that I was able to clean out my entire studio. Well, the mess is back: scraps everywhere, all horizontal surfaces covered, dishes and laundry piling up. Art is happening! (Picture dancing little emojis here) …”
BEWARE: you may well lose hours of your life here, but crumbs, is it worth it!
www.dianesavonaart.com

12
Hurricane, New Orleans
46”h x 32”w
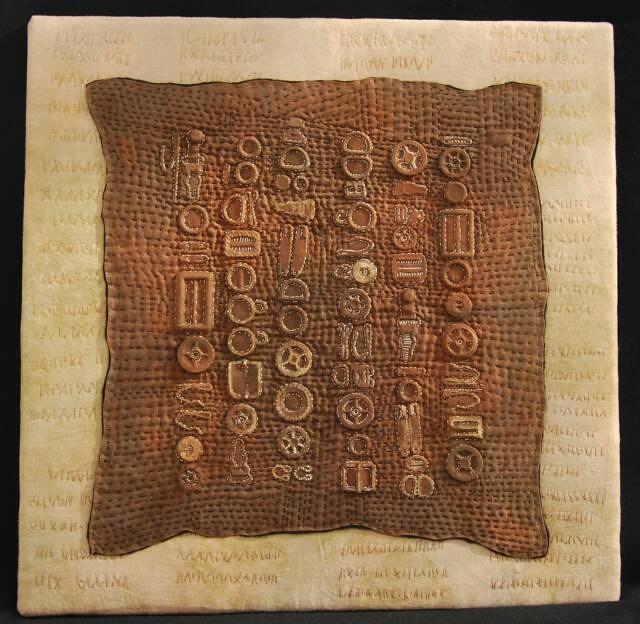
Based on a map of the Chalmette section of New Orleans. There are actual keys embedded under the cloth. Other sections have discharged images of keys and locks.
How do we learn history? Textbooks give us dates and leaders; students memorize facts for the test, but few people have a deep understanding of how our ancestors lived.

As a child I felt that lessons of wars and nations had little bearing on my family history. It was like studying weather patterns, gusting far above, knowing that my peasant grandparents had survived in thatched huts in Poland. What was their story? My art is created with that question in mind.
The objects I use are collected at my equivalent of archaeological digs: garage and estate sales. In my Passaic neighborhood, there are still large numbers of first and second generation immigrants from Eastern Europe. At these sales I hear the language and find the tools of my grandparents. There, I unearth items that were once commonly used in the domestic sphere –pincushions, darning eggs, crochet hooks – but are now almost extinct. I exhume forgotten embroidery and mending, and present them as petrified specimens.
My textile works are art and archaeology. They are the stories of past generations. By deconstructing past artifacts and preserving them in an archaeological presentation, I hope to change viewer perception of our textile heritage.’


Hiroshima 2012 86”h x 38”w
During a month in Hiroshima, I spent many days 'beachcombing' the river edges at low tide. I found ceramic shards, electronic bits...and glass fused by the blast 70 years ago. ( I checked with the museum: it is permissible to take these items). This map shows a section of the city nearest to the blast epicenter, with the rivers forming long black verticals, crossed by connecting white bridges.
13 Extract from www.dianesavonaart.com
NOTICEBOARD
Yesterday I met with some stitching friends and we went to Huddersfield to Thread Republic (Textiles Hub). It is an amazing space offering workshops, stitch socials and sewing machine hire, all about recycling.

Cheap threads , but good quality. People take their unwanted , preloved items for others to make use of .
Their details are as follows www.threadrepuli c.co.uk, tel 07354 765 070 , info@threadrepubli c.co.uk , Textiles Hub, Temporary Contemporary Unit3, The Piazza Centre, Huddersfield, HD1 2RS.
They were selling coffee sacks for £2 , some with amazing designs on, which they collect from coffee shops .
Tricia Hill


MORE INFORMATION on this project can be found in the article on PAGE 16

14
HOLE
FREE BONUS VIDEO on the website
Eyelet holes are normally circular and most often used for broiderie anglaise, worked in white thread on white fabric but they can be a fabulous addition to your slow stitching.


• The circle is drawn onto the fabric and outlined in tiny running stitches.
• The centre of the fabric is then snipped vertically and horizontally.
• The surplus fabric is turned back and a row of closely packed overcast or buttonhole stitches is worked around the circle.

• If you like, the surplus fabric can then be trimmed away on the back of the work.
BOOK REVIEW

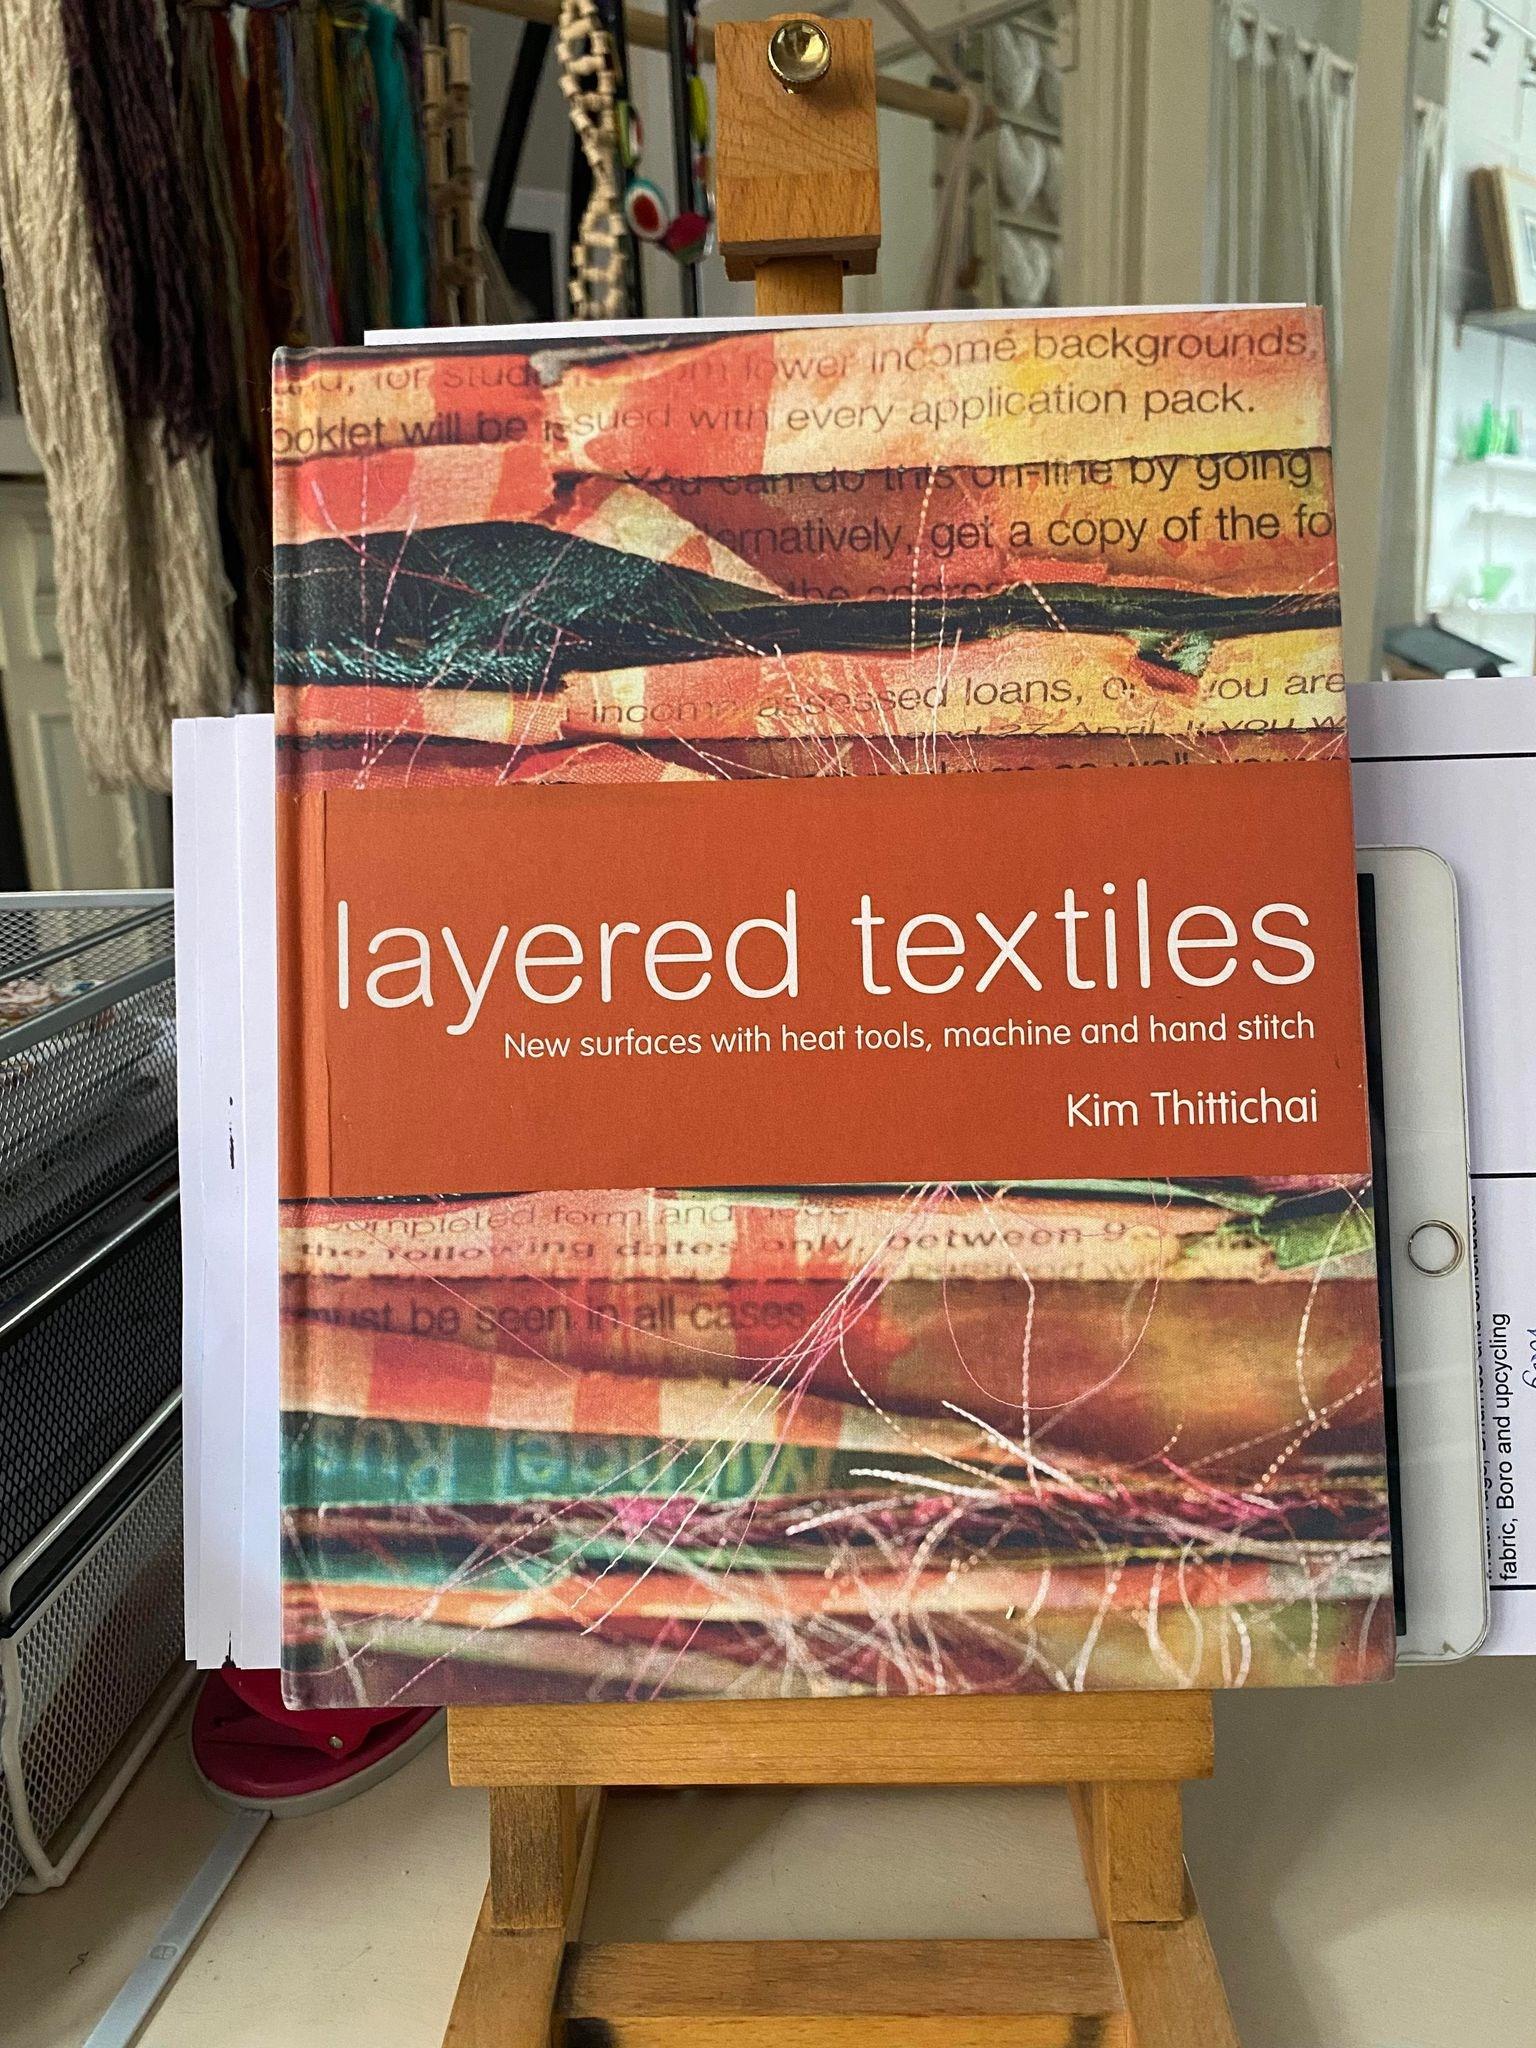
Layered Textiles
by Kim Thittichai
ISBN 978-1-84994-008-5
Batsford
If you want to produce simple but unusual extremely textured surfaces, layering is the way to go!
This beautiful and practical book is an absolute joy! It contains demonstrations by some of the best textile artists working today, in a range of disciplines from quiltmaking, embroidery and needle felting to collage, dyeing, transfer printing and heat techniques.
See page 20 for an article about Kim’s Thittichai’s Workshops, written by one of our membersPhilippa Griffiths.
15
STITCH of the MONTH: EYELET
What’s happened to Janilaine’s Blanket ?

This is a very old, motheaten and tired, woolen blanket. It used to belong to my friend Janilaine, and I am quite sure that she was keeping it with a project in mind, but I’m also sure that she would wholly approve of this I want to turn it into a ‘blanket of slow stitched hearts, crosses, crescents and sunflowers’ which we can raffle, in order to raise funds for https://www.ifrc.org/ international-red-cross-andred-crescent-movement
HEARTS
The meaning of the heart has been influenced by the Untangled Threads’ Sawdust Heart Project. Your heart should be made from scraps of denim, and in the style of a pin cushion with a scar for stuffing, like the Sweetheart Pincushions (but they do not actually need to be stuffed). A link to the instructions and suggested template will be available shortly on the website. The scar should appear on the front of your design.

CROSSES and CRESCENTS
The crosses and/ or crescents should be VERY simple slow stitched panels (no bigger than 6” x 6”) . Made from torn red fabric, slow stitched onto a background of rag textiles (see this month’s workshop) The Red Cross is the name used in countries under nominally Christian sponsorship, while Red Crescent is the name used in Muslim countries.

This project was started back in January/February of last year. We put a deadline of October for submissions, but I have to admit that my focus on the project lapsed a little with all the other things going on in my life at the time .. but I’ve got some great news to share about what is happening to the project now...
At the end of last year one of our members, Marion Morris, got in touch with me about some new initiatives which were happening at Ripon Workhouse Museum, where she is a volunteer, and the possibility of some collaboration in terms of our Keeping a Secret Project, which is still under discussion for exhibition late 2023/ early 2024.
In the meantime, Marion told me that Ripon Museum Trust were thinking of setting up a Slow Stitch for Mindfulness Group. I was struck by the importance of being able to establish the genuine difference between ’process’ and ’outcome’ when talking about slow stitch.

Using our work on Janilaine’s Blanket as an exemplar seemed totally appropriate to demonstrate some of my concerns and observations.

international wishing trees for example.
It quickly becomes apparent that, if the focus of ‘slow stitching is to remain the process of stitching, a decision as to when the concept of outcome is introduced to the group needs to be made. I think that the timing will depend largely on the confidence and ability of the members of the group.
One way of ensuring that slow stitched pieces will ‘fit together’ is to limit the colour range, set a theme, or have everyone work on the same size square, (like we did with the Kimono). To demonstrate this, I removed the hearts from the selection for Janilaine’s blanket, just leaving the squares. However, it quickly became apparent that the physical weight of the squares was not going to be compatible with the strength of the blanket itself. It needed backing or reinforcing in some way.
SUNFLOWERS
Across the world, people are embracing the sunflower to show support for those affected by the conflict in Ukraine.
To Ukrainians, the sunflower has always had a special place in their heart as the national flower of Ukraine. However, since the Russian invasion in February, people around the world have taken up the sunflower as a symbol of support for Ukraine. Your sunflower should ideally be based on slow stitched rag textiles.

At this point I made a bold decision .. I would make a thicker patchworked, quilted backing and attach our squares with buttons.


16
ORIGINAL REQUEST (Feb 2022)
The Patchwork Quilted background


So, the upshot of all this is that the fabric of the original blanket and 7 hearts are still available for us to use in a project (Janilaine’s Blanket Phase 2!). I am now conscious of the fragility of the fabric itself, and will rethink not only process, but also the outcome!
Watch this space!
As well as the original (altered) blanket/quilt, I also made a smaller patchwork quilted background and some pre-cut squares of fabric for the newly formed RIPON WORKHOUSE


Some of the squares pinned into place.
slow stitching group to use for their OPEN AFTERNOON on 13th May. (See noticeboard on page 14). Untangled Threads will be making a special collection for International Red Cross & Red Crescent Movement.
I will be there with Dorothea and Marion to talk generally about slow stitch and setting up a group, and promoting The Stitchbook Collective as well as the new Ripon slow stitch group. It would be wonderful to see you there!

17
MEMBERS PAGES
Please feel free to send ARTICLES for the magazine

PLEASE DON’T BE SHY!!!!
Exhibition reviews, comments, opinions, obsessions etc will all be considered for publishing. I will do all of the formatting and layout. You just need to send words and pictures!
I hope that this will broaden our horizons into looking at some of the associated art/textile activities which our members undertake in addition to the Stitchbook workshops. I also hope that it will give us the opportunity to express ourselves and to offer feedback and discussion about the work of others in the collective. Between us, we have a huge pool of knowledge, information and opinion. Let’s share it!
You don’t need to be asked ….. please email articles (approx. 400-500 words) for consideration to :
thestitchbook@aol.com
or by post to:
Helen Birmingham
5 Belle Vue Parade
Scarborough North Yorkshire YO11 1SU
Star Letter this Month:
DearHelen,
Sogladtobeabletocommunicateoffthe computer.Ifoundyourdetailspre-covidandthen triedtofindyouinScarboroughasIliveinYork. FinallyyoupoppedupatKnit&Stitch,andin spiteofmylowtechskills,Iamhappytobeonthis course.
Iamlovingtheformat,havingapapermagisajoy andthevideosaresoclear,friendlyandinstructive. Ihaveusedtextilesformanyyearstoexpressmy passionsandmadeseveralcorsetsofvarioussizes toexplorewomen’sissues.
Recently,Ihavedevelopedarthritisinmyworking handsoIamslowerbutstillstitchregularlyand thecoursegivesmecommunityofasorttoo. It’shardtofindconnectionwithotherstitchers, lotsarebusyrunningtheirownbusiness.Your courseprovidesawindowintotheworldofother ‘stitchaddicts’andhelpssupportMINDtoo,which isgreat.
So-thankyouforyourpersonalsharingandyour professionalskills,allbeautifullypresented.Iwill probablyneveracquireenoughITskillstoshareon facebook,butIwantedyoutoknowhowmuch youreffortsareappreciated.

Regards
JanMerry
p.s.lovetheseagullstoo!
This is exactly the reason that I wanted The Stitchbook Collective to expand into a printed magazine, alongside the website and facebook page. It’s great to be able to reach members who are either not confident or unwilling/unable to access technology. Thank you so much Jan x
18
Turning Scraps of Fabric into Boho Beads
 by Dorothea Newham
After being inspired by Helen’s recent article encouraging us to repurpose fabric, I decided to search for ideas to use really small scraps and that’s how I came across Boho or Bohemian beads on YouTube.
I just love the variety of results you can get using the tiniest of fabric scraps and by some makers threads, to make from the very simplest to really embellished beads depending on what you have to hand, how ornate you want to go and how you want to use your finished beads. Some ideas are to attach your Stitchbook pages, to sew onto work, embellish clothing, to make jewellery, bag tassels, key-chains, bead lengths for décor, book marks...whatever your imagination comes up with!
So, to make basic beads you only need fabric scraps, paper or a straw and glue. Very simply you start with a roll of paper about the dimension of a straw (or an actual straw), make or cut the length to what you want your finished bead to be, then glue scraps onto your ‘roll’ building up the thickness using any scraps, as you don’t see these, then finish with your favourite fabric scrap.
Points to remember, don’t cover the holes at either end, also you might like to add more fabric to the middle section so the bead tapers at either end (this looks good on longer beads).
To embellish your basic beads you can add a length of bead-wire through the centre of the tube in order to add a hanging loop, beads, sequins, tassels, charms etc. On some tutorials makers also add thin wire with seed beads and wrap around and over the fabric.


I encourage you to have a look on YouTube for ‘Boho bead tutorial’ for a wealth of video instructions and ideas of how to use them...warning...this could become addictive!


Using simple techniques, Helen Birmingham shows you how to create fabulous jewellery that you will love making, and adore wearing! Her unique, eye-catching designs, coupled with her fantastic use of bright, jewel -like colours, makes this book a treasure trove of ideas and inspiration that you will want to plunge into again and again.
This is no longer in print, but you can still find copies of it on ebay and Amazon (used) for pennies!

19
Dorothea Newham
Jill Diaz
Shanna Thompson
Beaded Felt Jewellery by Helen Birmingham Published by Search Press in 2008
Jill Diaz
see BOOK REVIEW on Page 15
I am very lucky to have been good friends with Phillipa Griffiths for over 20 years! She is a member of The Stitchbook Collective and also a close friend of Textile Artist and Author, Kim Thittichai. I have always found Kim’s work hugely inspirational, and Phillipa’s enthusiasm is infectious, so I asked her if she would write a few words about Kim for the magazine.. If you ever get a chance to buy one of Kim’s books or attend one of her workshops JUMP AT IT!. Helen x
KIM THITTICHAI
by Phillipa Griffiths
I’ve always been creative, I can’t paint or draw, but I’m creative in other ways; baking, sewing, costume design, mixed media and card making for example.
2010.
I’m at a craft fair in Brighton when I’m drawn like a magpie to the stand of the most magnificient Kim Thittichai which is full of sparkly samples of gorgeousness.
I knew of Kim’s work through my interest in mixed media and I owned one of her books Experimental Textiles, which I devoured. Her work is a glorious mix of textiles, papers, certain plastics, Bondaweb, heavy interfacings and Vlieseline, which are painted, torn, moulded, melted, stitched, heated and manipulated.
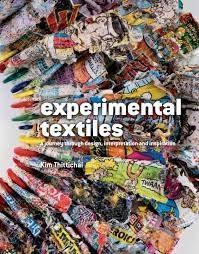
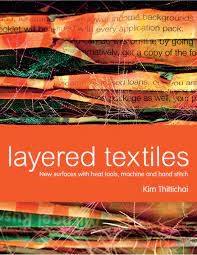

Kim studied at Brighton Polytechnic in the 1970s, taking the Wood, Metal, Ceramics and Plastics degree course. Later she studied creative embroidery. She combined the two to create her own, very unique style. An hour with one of her books or videos awakens and sparks your imagination, leading to rummaging through your craft stash and endless lost hours of wondering ‘what will happen if I do this…’
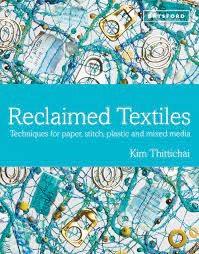
I was a bit of a fan girl, so was initially rather tongue-tied to be talking to her at the show but we were soon chatting away, in fact I offered to give her the sparkly butterfly ring I was wearing in exchange for one of her local day courses!
I was fortunate to attend many of Kim’s 1-3 day courses in Brighton, where, with her expert tuition & guidance, we would be encouraged to expand and develop our mixed media pieces and, most simply put, to ‘play’.


I have a love of combining bright, bold colours, much like you’d see in India and the Caribbean. I recall Kim looking at one of my glitter-tastic samples of bright layered papers and saying “it’s like a circus darling!”
I also experimented with manipulating pieces into hair accessories, with an idea to develop these further. Sadly, like many crafters, it ended up on my craft ‘to do’ list.
On her courses Kim encouraged us all to find our own way and not to merely copy her samples – something which Helen also encourages. They were wonderful days full of freedom to experiment, support & admiration of others in the group and, of course, eat cake.

20
I’ve kept all of my work from Kim’s courses, in fact, writing this article has made me look at them once more and vow to put them at the top of my crafting ‘to do’ list. It’s really got my creative juices flowing once more.
Kim now lives in a remote part of the west coast of Ireland. She still delivers courses and lectures both face to face and via the wonders of the internet.
This year she will have a stand at the Festival of Quilts, which is 3rd – 6th August at the NEC in Birmingham.

She will also be teaching in Australia at the Fibre Forum in Geelong in September.
She is an ambassador for Vlieseline.
Her new Experimental Textiles video library will soon be available by annual subscription on her website.

For further details, please view her website but, be aware, you may be there for several hours!
www.kimthittichai.com
And a word about Helen Birmingham: Having met Helen in her shop That Arty Place in 2003, she kindly took the time and showed great patience in expanding my creativity. As a former Art Teacher she had a great knowledge of many crafts. I have dexterity issues as part of my disability, so Helen & I worked out a) whether I enjoyed the craft and b) whether I could do it.
I feel very privileged to have Helen, first & foremost, as a friend but also as a tutor. She most definitely opened my mind to mixed media and built on my arty farty skills and she continues to inspire me.

21
Journeys
After considering many options I decided to depict a scene of a shipwreck now in land, that I had witnessed on the Skeleton Coast, Namibia……’Journey’s End’!
 by Glennis Walton
Thank you so much for the inspiration which comes with The Stitchbook Collective. The first represents a regular walk round the farm where I live. It’s a pleasure to see the changes over the seasons - what’s growing, what isn’t, and what should be.
My piece depicts the journeys bees make. The sky is a piece of painted fabric from a 2022 Stitchbook project. I also had 2 attempts at adding a path for the bee keeper but found it dominated the embroidery too much.
 by Christine Medcalf
The second incorporates weavingespecially using dodgy home dyed threads which are difficult to use for hand stitching. I hope it evokes the landscape and interesting weather here on the North Yorkshire moors.

 by Eileen Gibson
22
Waste not, want not
by Christine Medcalf
nitially struggling to come up with my own take on the theme ‘Rags or Riches’, I realised that I have been following this ethos each month as my 2023 Stitchbook pieces have been worked on ‘waste’ fabrics destined for landfill! Post Covid, I visited my local SCRAP (Scrap Creative Reuse Arts Project) store and bought (for £6 I think) a colourful fabric sample book, which is proving ideal for creating Stitchbook pages.
Based in Sunnybank Mills, one of many repurposed former textile mills still at the heart of its community, SCRAP overflows with all manner of useful, obscure and irresistible bargains. If you live anywhere near Yorkshire, do visit; May 12th – May 14th the mill is hosting the Threads Textile Festival plus Sunnybank’s archive will be open, so there should be plenty to interest you.
If you are unable to visit SCRAP, similar social enterprises exist throughout the UK, all doing their bit to reduce waste. scrapstuff.co.uk sunnybankmills.co.uk reusefuluk.org

www.sunnybankmills.co.uk/arts/ gallery/threads-textile-festival2023/

A little piece of weaving using silk scraps and some boucle yarn left over from a friend's project. I loved doing the weaving and would like to do more but I will have to find something more durable than a cardboard box!

Another small hessian "page". I have used sari rags, yarn spun from sari rags and green garden string to embroider with.


This is taking me out of my comfort zone and I hope will help to “loosen me up”. I am not a collector as such so just used the buttons in the first task to show my husband and my initials with ribbon used in the centre for H for Haywood.

This month, I did a simplified plan of our local playing fields where we take our dog. It has several football pitches, a cricket pitch, a children’s play area as well as football and cricket pavilions. I used black and white, and red and white cords for Peter and the dog. Also a mother and child with mixed yarn and silver.
by Janet.Haywood
Fran Flanagan
23
RAG RUGGERS
by Angela Webber
First of all can I say how much I am enjoying my projects with The Stitchbook Collective after meeting you at Harrogate Knitting and Stitching Show.

I enjoyed the collections theme and have done two pieces up to now for that and expect to do more because as a crafter of course I collect everything ! I have a plan for ' journeys' but it is only in my head at the moment and some photos that I have taken and using freezer paper (with the help of one of your workshops) have printed on to fabric in readiness.
I only use recycled clothing or remnants in my work as I like it to still be a thrift craft and it is a nice hobby to have when you are on a low income! Then in the magazine I was reminded of the fun of weaving so I am doing small pieces using Helen's idea of using small boxes. For the weaving I used some strips of fabric and some treasured sari yarn that I have not wanted to use till the right project came along.I am embellishing the piece with beads that I made from Fimo and leaving the ends free with couching.
But all that went on hold when I received the third magazine that had my favourite craft Rag Rugging in.
I have been making rugs and wall hangings for many years having first learned to do proddy at Beamish Museum . I was lucky enough then to be shown how to hook rugs in Cumbria. This was before You tube had demonstrations so we had to search out people who could show us different techniques.


Later I was fortunate to attend workshops by the wonderful Heather Ritchie who has unfortunately passed away (her books are amazing), Cilla Cameron who sells hooks and the best hessian and monkscloth. and Amy Oxford who teaches punch needle.
I demonstrated at The Old farmyard in Ripley with my friend Trixie who spun the fleece from the sheep there. We both dressed up to make it look more authentic. I then progressed to running my own weekly workshops on the farm and they became well attended.
We started our own little group on Facebook to keep in touch with each other an suddenly I had friend requests from all over. We can post our work in a similar supportive way as our Stitchbook Members group.
Our Facebook Group is called Rag Ruggers
PLEASE feel free to join us if Helen has encouraged you to give it a try.
24
My 'Journey' piece Lanterns in the Sky, a Journeying Ship, and a Call from the Deep
by Caroline Gowers
I've felt a little apprehensive in sharing this, and have held back a little, as my Journey piece doesn't quite follow March’s workshop - couching different threads to represent journeysbut for me, it is a very poignant representation of my present journey. A couple of years ago, I had to quit my job. A lot of things had happened which unfortunately led to sheer mental exhaustion and a breakdown. Although I received lots of support, and I tried to return to work after sick leave, I realized that this particular journey was coming to an end. Feeling physically, emotionally, and mentally, unable to give anymore to the work, and the organization I had, in the past, felt so passionate about, I simply could not travel further on that path. It was a very difficult decision to make.
The months that followed were equally difficult, filled with anxiety, and a great sense of loss and bereavement. One thing I did know for sure is that I felt a deep need to concentrate more on the creative and artistic, which had lain, not forgotten, but quiet, for some time, with an aim to develop my skills and my own work. Although I have dabbled and have interests in other forms of art - photography, drawing and painting, writing, textiles, needle and thread, have always been what I love to do the most, and one of the things I dearly wish I could've pursued from leaving school. After resigning from my post as a Mental Health Support Worker, there were still hurdles and hoops to jump over and through, but I had also begun my sewing/ stitchery journey by signing up for a City & Guilds sewing skills Fashion course at my local Adult Education centre. I felt the structured classes would benefit me, along with the activities of the course, and well, I loved it! So, I followed this up with a short course for all levels in knitting and embroidery, as an improverthere is always something to learn after all, no matter what 'level' we are on! I then put my name down for a City and Guilds Embroidery and Knitting to begin the following academic year. I’m on my way, or so I thought. In December 2021, it seemed the rug was to be pulled from underneath my feet, again.
Another change in circumstances brought about a house move for me – a positive move, but still an upheaval, and the course I was so looking forward to was cancelled as not enough people had registered their interest. Argh! On the one hand I felt at a loss, I had started out on a different path to develop my creativity in sewing and textiles, moving forward from leaving the type of work I had been involved in, and fulfilling something I had wanted to do when I was younger. On the other hand, I also knew that I would've struggled to manage the coursework and a house move (especially since my 'new' home needed quite a bit of work to get it cleaned up and decorated).
Suffice it to say, the house move and making the place a home for myself, became the priority. My stitchery had to take a back seat for a while once again. A few busy and tiring months passed by before my new home began to feel more settled. Spring was moving into summer, and I desperately wanted to get back to working with needle and thread, but wanted something that I could easily pick up and put down when needed.
I decided to look at embroidery patterns on Etsy. I found some sweet designs that I fell in love with, designed by a lady who lives on the other side of the world in Australia! It never ceases to amaze me how easily we can now connect and share with others who live oceans away. At the same time, closer to home, I was getting to know my new neighbours, and had reconnected with a couple of old friends.
November 2022 arrived – the month of the Knit and Stitch Show in Harrogate, yay! It had been some years since I visited the Knit and Stitch so I was quite excited to be able to attend. Any of you that attended the event on the Thursday must remember the persistent downpour of rain! But nothing was going to put me off!
I arrived at the International Centre, somewhat damp, but it wasn’t long before I spied the Untangled Threads Stitchbook Collective stall/display and made a bee-line for it... 'this is exactly what I've been looking for' I gasped!
After spending some time looking at all the works that were displayed, and having a chat, knowing there and then I would sign up for membership as soon as I could, I jokingly said to my friend who was with me, ‘well that’s it, I’ve found what I’ve been looking for, might as well go back home now’! But of course, we didn’t. And so here I am.
This is my journey at present, and the story behind it. It’s taken me some time to be able to form my journey into words, and fully comprehend the textile piece of work that grew in front of me. I have no idea where it will take me, or what, if anything, will come from it, further down the line. Since having to leave my other work, I doubt myself in many ways. I have good days; I have bad days. But I feel compelled to create, and to do so 'intuitively', to find expression, and hopefully a way through my doubts and feelings of failure at not being able to work at this time, to find my sense of place and connection in the 'world' again.
The fabrics I've used come from an unwanted scarf, some pieces of silvery glittered polycotton, and other 'scraps' I have in my stash, along with a silver sewing thread. The ship motif is my own design which 'appeared' out of a series of pencil 'doodles'. The whole piece developed around the motif as I worked on it. The whale was the final, and unexpected, addition.

After sharing photographs of my Journey piece, and its story, on the Stitchbook Members Facebook page, after holding back and hesitating in sharing my piece, being quite different from the works other members have created following Helen’s March workshop, I have been reminded that it’s not only the process of stitching and creating, playing and experimenting with ideas and textiles, but the sharing of this too, the stories and inspirations within our worked textile pieces, and the comments,‘like’s’, conversations that arise, that somehow have the potential to nudge us forward into taking the next step, having a go at something else, a new technique, or the expression of the same idea but in a different way.
As much as I relish quiet time, becoming lost in the rhythmic nature of slow stitching, it is not always easy working in isolation - one of the reasons I joined the Stitchbook Collective. But on the whole, being part of the collective at this time is proving to be a significant part of my journey in more ways than I could’ve expected.
25
I was delighted to see on back of last Stitch Book that rags were going to feature. I have been playing with them for years having been obsessed with India after 2 visits and a trip to Myanmar before the present troubles

Here are photos of some weaving that will be bonded to silk for a cushion project and a heart cut from another piece . The loose one is the next one to process possibly with kantha stitch on top Having time to play as tonsils removed 3 weeks ago not to be recommended at 70+. Keep up all the inspirational work


 by Pauline Eyre
I have just joined The Stitchbook Collective and I am a novice stitcher. Just completed my first workshop and I am rather chuffed with the result. Inspired by rain coming in to a Hebridean beach.

 by Laura Munro
www.thenewsminute.com/article/ chekutty-dolls-how-kerala-got-its -new-symbol-hope-88236
26
Finally finished my "Journey" piece. Completing it was a journey in itself! It shows the journey of my life and close family beside me. Here was the first difficulty, who to include? The scale was also difficult as I am working on an A5 page, quite small. In August last year I was diagnosed with secondary breast cancer in my bones, a terminal diagnosis. The red line across the piece is this moment. I wanted to show the panic and unravelling I felt at that moment, the support of family, the final moving forward again but in a slightly altered direction. Also the future being unclear. Not just for me but for everyone . A lot to encompass in one small piece. I am reasonably happy with the result, it got a lot more complicated and then simpler and then ..... here it is ...

 by Fran Flanagan
Well, a whole month has gone by and I am no way near finished my journey page. This is the 3rd or 4th go at actually stitching and I don't know how many ideas in my head. Each time I got an idea it then got more and more complicated and I have had to keep reminding myself not to over think the design. So here we are. A personal journey. The background green leaves is for my love of nature. The pieces on top are a journey in themselves as a group of friends and I have started to find out about geli printing. A print maker friend is running a few classes for us to try the process out. Then there will be family time lines, so a way to go yet ...
27
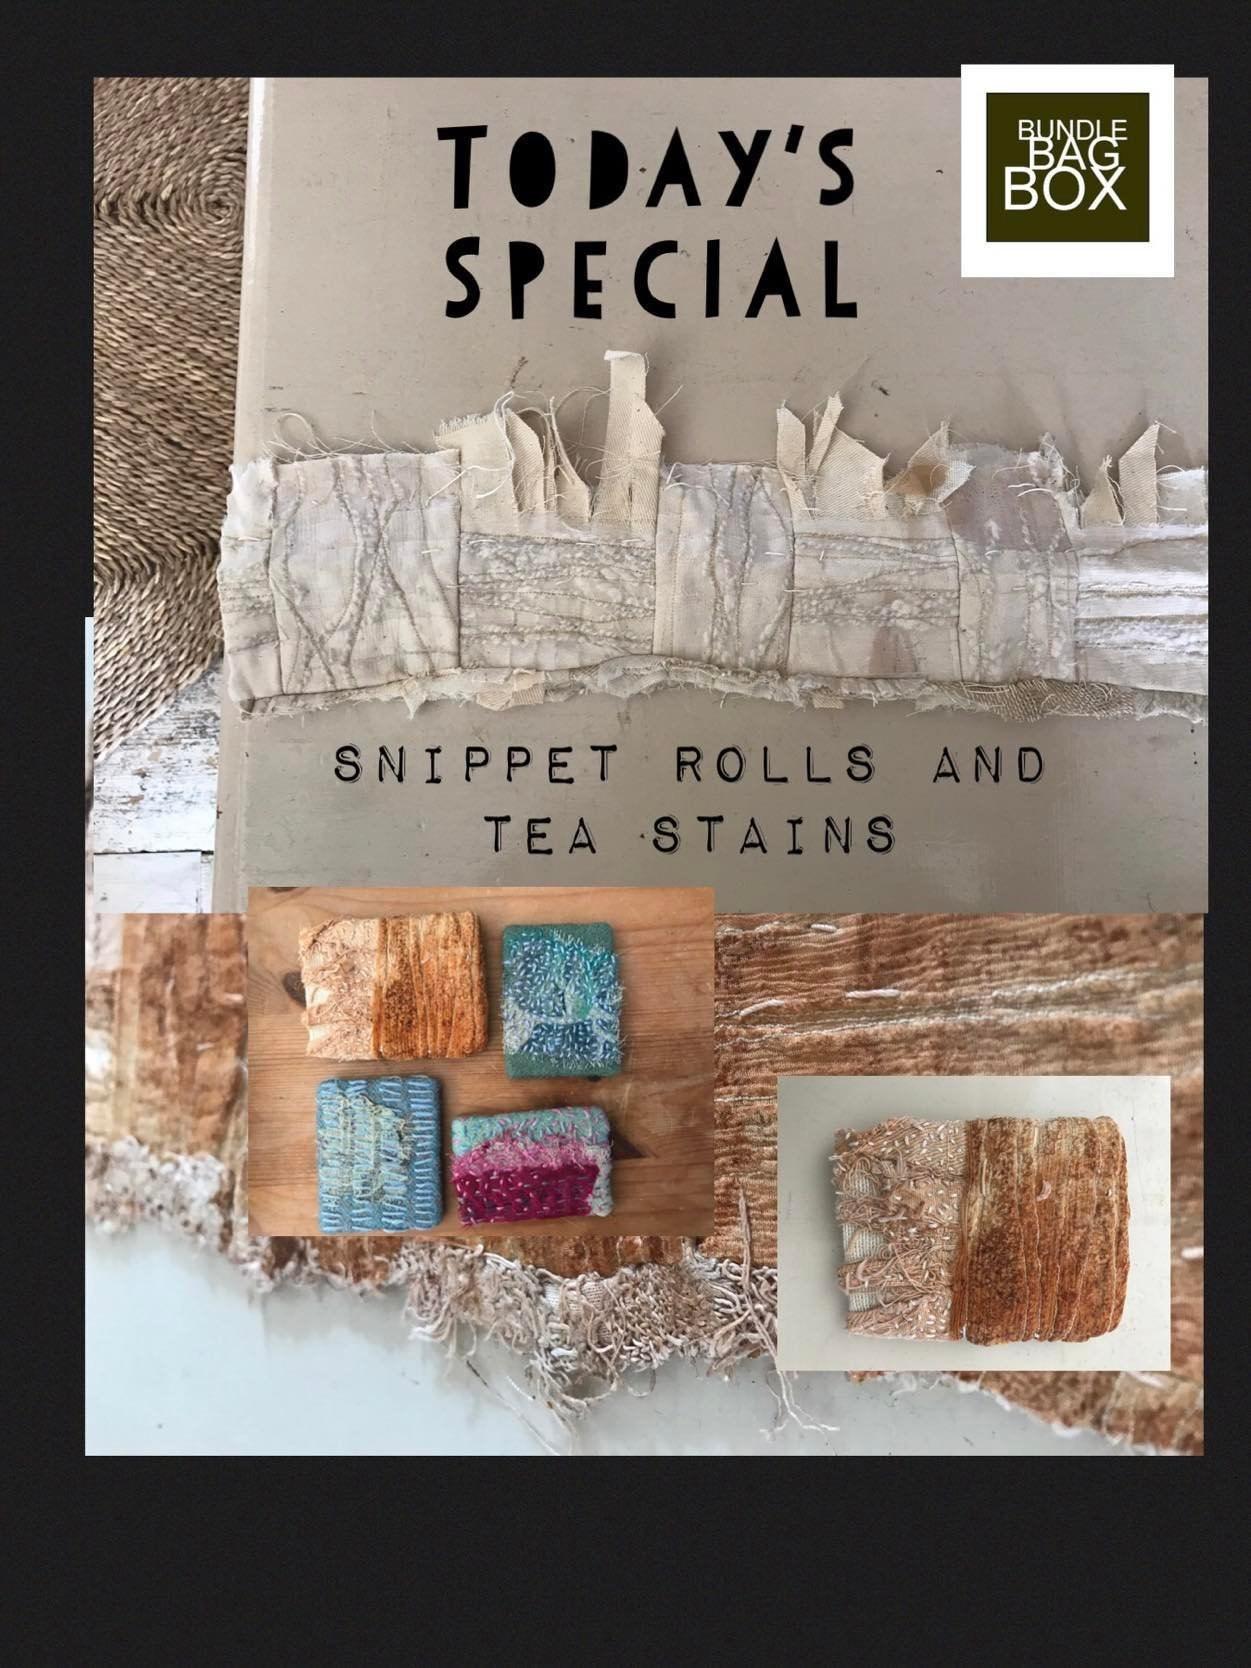
In Issue No 5 we will be looking at SNIPPET ROLLS and TEA STAINS
28


 Ruth Singer


 by Dorothea Newham


 by Glennis Walton
 by Christine Medcalf

 by Eileen Gibson


 by Pauline Eyre


 by Fran Flanagan
