Primary Science of Energy: Investigating Energy Transformations
Primary Science of Energy Investigating Energy Transformations
Teacher demonstrations, background information, and a variety of activities introduce students to forms of energy and how they are transformed. During this unit, students will practice science process skills and engage in guided reading, writing, phonics, and vocabulary building activities.
Grade Level:
Subject Areas: Language Arts Pri Ele Int Sec Primary
Science
NEED Mission Statement
The mission of The NEED Project is to promote an energy conscious and educated society by creating e ective networks of students, educators, business, government and community leaders to design and deliver objective, multi-sided energy education programs.
Permission to Copy
NEED curriculum is available for reproduction by classroom teachers only. NEED curriculum may only be reproduced for use outside the classroom setting when express written permission is obtained in advance from The NEED Project. Permission for use can be obtained by contacting info@need.org.
Energy Data Used in NEED Materials
NEED believes in providing teachers and students with the most recently reported, available, and accurate energy data. Most statistics and data contained within this guide are derived from the U.S. Energy Information Administration. Data is compiled and updated annually where available. Where annual updates are not available, the most current, complete data year available at the time of updates is accessed and printed in NEED materials. To further research energy data, visit the EIA website at www.eia.gov
Teacher Advisory Board
Teacher Advisor y Board
Constance Beatty Kankakee, IL
La’Shree Branch Highland, IN
Jim M. Brown Saratoga Springs, NY
Mark Case Randleman, NC
Lisa Cephas Philadelphia, PA
Nina Corley Galveston, TX
Samantha Danielli Vienna, VA
Robert Lazar Albuquerque, NM
Melissa McDonald Gaithersburg, MD
Paula Miller Philadelphia, PA
Hallie Mills St. Peters, MO
1.800.875.5029
Jennifer MitchellWinterbottom Pottstown, PA
Monette Mottenon Montgomery, AL
Mollie Mukhamedov Port St. Lucie, FL
In support of NEED, the national Teacher Advisory Board (TAB) is dedicated to developing, improving, and promoting standards-based, e ective energy curriculum, training, and outreach. NEED thanks these individuals for their support and collaboration.
Adebisi Babayemi, M.Ed, NBCT Bowie, MD
La’Shree Branch Highland, IN
James M. Brown, NBCT, CEM, BOC Saratoga Springs, NY
Karely Carlos, M.S. Lodi, CA
Mark Case, M.S. Randleman, NC
Lisa Cephas, M.Ed Philadelphia, PA
Nina Corley Galveston, TX
Samantha Danielli, M.Ed Vienna, VA
NEED TAB Emeriti
Jennifer Davis, M.Ed Cincinnati, OH
Michelle Garlick, M.Ed Cary, IL
Nancy Gi ord, M.S. Harwich, MA
Erin Gockel, M.Ed Farmington, NM
Greg Holman Paradise, CA
Melissa King, MLIS Gaithersburg, MD
Paula Miller, M.Ed Philadelphia, PA
Hallie Mills, EdD Sammamish, WA
Shannon Donovan Greene, RI
Cori Nelson Win eld, IL
Michelle Garlick Long Grove, IL
Jennifer Mitchell-Winterbottom, M.Ed, WT Pottstown, PA
Mollie Mukhamedov Port St. Lucie, FL
Cori Nelson
Hinckley, IL
Michelle Gay Daphne, AL
Judy Reeves Lake Charles, LA
Nancy Gi ord Harwich, MA
Matthew Reis, PhD Chía, Colombia
Erin Gockel Farmington, NM
Craig Richard, M.Ed Atkinson, NH
Libby Robertson Chicago, IL
Robert Griegoliet Naperville, IL
Greg Schanne Philadelphia, PA
Eric Havel Oakland, CA
DaNel Hogan Tucson, AZ
Amy Schott, M.Ed, NBCT Raleigh, NC
Don Pruett Jr. Puyallup, WA
Kristin Slota, M.Ed Yardley, PA
Brandon Staton Thomasville, NC
Judy Reeves Lake Charles, LA
Jennifer Trochez Maclean, M.Ed, NBCT Los Angeles, CA
Libby Robertson Chicago, IL
Scott Valenta Win eld, IL
Amy Schott Raleigh, NC
Tom Spencer Chesapeake, VA
Jennifer Trochez MacLean Los Angeles, CA
NEED Teachers eventually must retire from the classroom, but many remain engaged in their communities and with NEED curriculum, training, and outreach activities. NEED thanks these individuals for their continued support and collaboration.
Constance Beatty Kankakee, IL
Melinda Forist Well eet, MA
Barbara Lazar, M.Ed Albuquerque, NM
Greg Holman Paradise, CA
Robert Lazar Alburquerque, NM
Barbara Lazar Albuquerque, NM
Wayne Yonkelowitz Fayetteville, WV
Don Pruett, Jr., M.Ed Puyallup, WA
Wayne Yonkelowitz, M.Ed, NBCT, Milken Educator Fayetteville, WV
NEED gratefully acknowledges Alicia Margul, Reading Specialist for Fort Zumwalt School District in O’Fallon, Missouri, for developing the phonics lessons in the Primary Science of Energy curriculum. NEED also gratefully acknowledges Teacher Advisory Board member, Hallie Mills, PhD, Assistant Principal at Fort Zumwalt School District, from St. Peters, Missouri, for developing the teacher demonstrations in the Primary Science of Energy curriculum.
Science of Energy Kit
1 Set of Science of Energy Guides (P/E/I/S)
1 9-Volt Battery
2 Sets of alligator clips
10 Balloons
1 Battery holder
1 Bi-metal bar
1 Empty bottle (for vinegar)
1 Candle
1 Coated copper wire
1 Compass
1 Container of baking soda
1 Container of calcium chloride
2 Containers of sand (one full, one partially full)
1 Sealed plastic bag of iron oxide
2 Thick copper wires
1 Thin copper wire
1 D Battery
16 Hand warmers
8 Glow sticks
3 15 mL Measuring cups
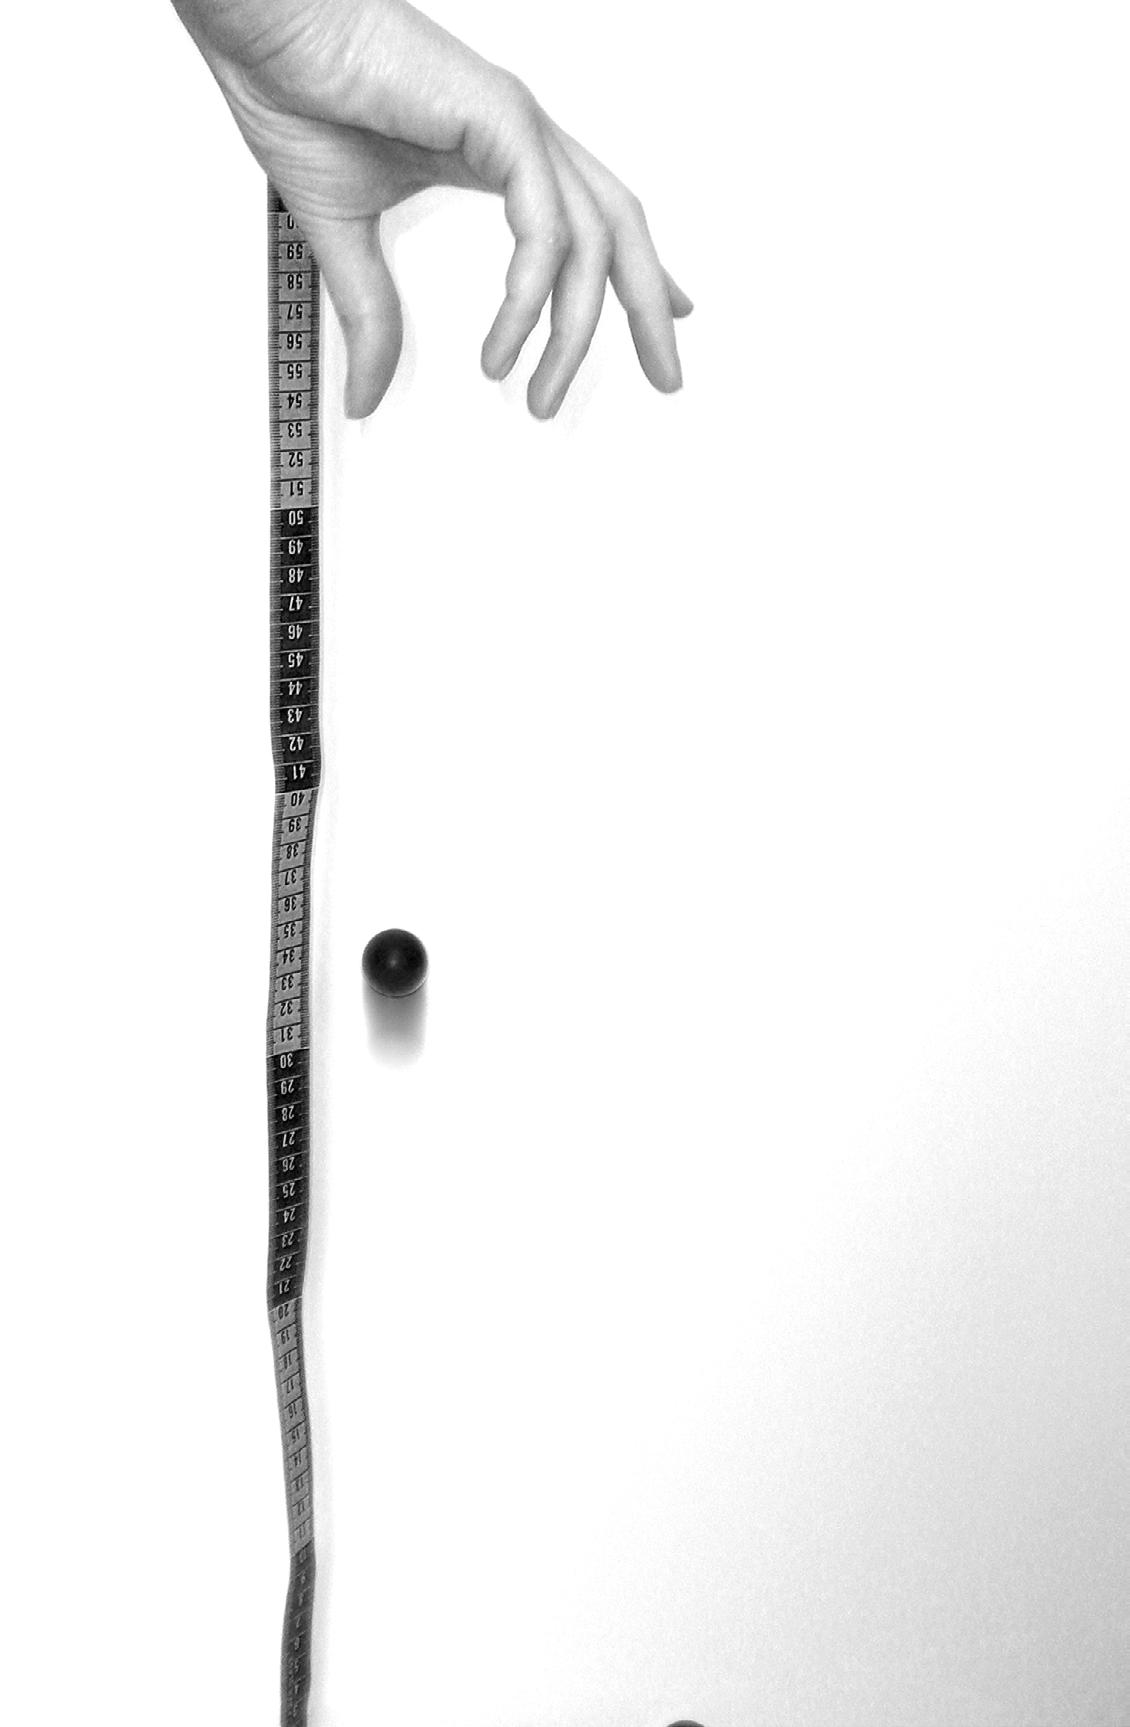
1 Measuring tape
Primary Science of Energy
1 DC microammeter
3 Motors (one disassembled)
1 Hand generated flashlight
6 Plastic bags
1 Radiometer
30 Rubber bands
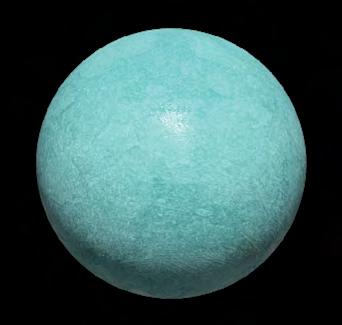
1 Set of happy/sad spheres
1 Solar panel kit
1 Superball
3 Thermometers (metal)
4 Student thermometers (plastic)
1 Tin wire
2 Tongs
1 Toy car
2 Live wires (nitinol)
1 Yo-yo
2 Large nails
2 Small nails
Cover image courtesy of Laurence Diver, contributor to Stock.XCHNG stock photo website.
Standards Correlation Information
Next Generation Science Standards
This guide is an extension of many Next Generation and State Science Standards. The stations in the Primary Science of Energy kit will enhance core K-2 science curriculum you are already using in your classroom. The stations may serve as a phenomenon for students to investigate to jump start your core curriculum, or as an enrichment after teaching traditional K-2 content. Using these lessons in a before/after school science club is another option for extending students’ science learning.
For lessons that correlate more closely to K-2 Next Generation and State Science Standards please refer to the primary guide, What is Energy?, available for free download from www.NEED.org/shop
Common Core State Standards
This guide has been correlated to the Common Core State Standards in both language arts and mathematics. These correlations are broken down by grade level and guide title, and can be downloaded as a spreadsheet from the NEED curriculum correlations website.
Individual State Science Standards
This guide has been correlated to each state’s individual science standards. These correlations are broken down by grade level and guide title, and can be downloaded as a spreadsheet from the NEED website.
Materials
Station Materials in Kit
Building Background Knowledge
Station One
Station Two
Station Three
Measuring tape
Super ball (sphere)
Balloon
Toy car (optional)
Yo-yo (optional)
Container of baking soda
Container of calcium chloride
Empty bottle for vinegar
Empty plastic bags
Thermometers
15 mL Measuring cups
Solar panel with motor, fan, and disks
Station Four
Live wire (nitinol)
Tongs
Station Five
Glow sticks
Station Six
Hand generated flashlight (from teacher demo box)
Additional Materials Needed
6 Large pieces of paper
Markers
Magazines (optional)
Scissors (optional)
Glue (optional)
Anchor chart
Wall
Safety glasses
Meter stick
Balloon air pump (optional)
Various unbreakable spheres for student exploration (optional)
Science of Energy kits and additional consumable materials are available for purchase by calling at www.NEED.org/shop or by calling 1-800-875-5029.
NOTE: There are additional items in the Science of Energy kit that aren’t used at the primary level. You may wish to remove these items from the boxes or use for demonstration purposes.
Teacher Guide
Grade Level
Primary, grades K-2
! Important Safety Notes
All students should wear safety glasses while at any Primary Science of Energy station.
This kit contains latex balloons and rubber bands. Check to see if any of your students have latex allergies. If they do, the balloons and/ or rubber bands should be removed.
Stations Four and Five require hot water. Review safe procedures for handling hot water with students.
The live wire in Station Four may spring out of the cup. Students should not peer directly over the demonstration and should handle the live wire with tongs. Giving the students a clear glass or beaker to use in this demonstration may keep them from wanting to look directly over the cup.
Thermometers in this kit do not contain mercury. These thermometers are made with alcohol spirits and are safe for classroom use. Should they break during the course of this unit, you can dispose of the thermometer and parts as you would anything else in your classroom.
Project or hand out the Lab Safety Rules and review any pertinent procedures with students prior to any investigation.
&Background
The objective for the Primary Science of Energy unit is for students to be introduced to the idea that energy can change from one form to another. While the concept of energy transformations is often found in standards at higher grade levels, K-2 students have the ability to identify energy at work and begin to recognize when change occurs. Through six interactive stations, teacher demonstrations and activities will engage students in the tangible ways that energy transfers, making observations, asking questions, and drawing conclusions.
Each station’s "Teacher Procedure" gives recommendations for questions you can ask students, and recommendations for how students can record their thinking. Some stations also have suggestions for student exploration opportunities after the teacher model.
It is not expected that students will fully master the concepts during this unit, but they should be encouraged to be curious, to ask questions, to make observations, and to be scientists! Using the Primary Science of Energy unit with your students will give them background knowledge that they can draw on when they officially learn about energy transformations again in upper grades, using the same materials if you choose.
Time
There are different options for using the lessons within this guide:
You may choose to teach them sequentially over the course of three weeks.
Each station can also be a stand alone lesson. You might find these lessons useful to use when you have some extra time, on late start/early release days, or before extended school breaks when your core curriculum has been wrapped up for the quarter, semester, or trimester.
Objectives
Each teacher demonstration has its own specific objective. Upon completion of the Primary Science of Energy unit, students will be able to:
explain what energy enables us to do;
understand that energy is found in many forms;
differentiate between potential and kinetic energy;
explain energy transformations; and
trace the energy flow of a system.
2Unit Preparation
Please note, the Primary Science of Energy kit contains additional items used in the other Science of Energy units. Collect only the materials you’ll need to complete your teacher demonstrations from each station box. Familiarize yourself with the equipment and procure any additional materials needed.
Read the content background information, if necessary, so you are familiar with the concepts presented. The content background section goes into greater detail and is presented at a greater depth of knowledge than the material designed to read with your students. It also describes all parts of the kit, including those used for this level and those for the older students, should you want to showcase something not in this unit.
Prepare vocabulary word cards and make copies of student worksheets as needed.
A Vocabulary
With scientific content comes a lot of scientific vocabulary. As students make observations, it is important for students to use their own words to describe their observations. At the same time, as instructors, we want to help students expand their vocabulary, but we want to do this in a way that does not include memorizing definitions.
Encourage students to use scientific vocabulary, but do not expect them to use these words fluently and efficiently yet.
Scientific vocabulary students will encounter during the Primary Science of Energy lessons are listed below. A glossary for these terms can be found on page 89.
kinetic energy light liquid magnet molecule motion photovoltaic physical change potential energy radiant energy reaction
solar panel solid sound temperature thermal energy* titanium transform transformation wire
*PLEASE NOTE: In this unit, the terms thermal energy and heat are used to mean the same thing, as in the National Science Education Standards. However, technically, they are not the same thing. Thermal energy is the sum of the energy of the molecules making up a substance - kinetic and potential. When this thermal energy is transferred from one place or object to another, it is called heat.
NOTE: For more information about energy, see the Primary Energy Infobook available for download from www.NEED.org/shop.
&English Language Arts Extensions
Each station has suggestions for extending and deepening student learning through phonics, reading, and/or writing connections.
For writing, use sentence stems to help your students develop organization and transitions in scientific writing. You can use more or fewer sentence stems to scaffold writing to meet your students’ needs. Encourage students to use the word wall and include scientific vocabulary in their writing.
Scientific writing is a different skill than narrative writing. If it is new for your students, you may choose to focus on guided writing which is highly scaffolded for students. As you write with your students, you can focus on the encoding/writing skills that students are learning during your writing block. For an example of a guided writing lesson during science, you can watch "Writing About Science" found on NEED’s YouTube channel at https://youtu.be/nDTYxkVcmsI absorb alloy chemical energy chemical reaction conductor convert electrical energy electricity gas heat* inflate
A Phonics
Science offers many opportunities for students to expand their vocabulary. With so many unfamiliar words, science also offers the opportunity for students to use their developing phonemic awareness to read new words. Included with each station is a phonics focused lesson designed to help build students’ phonemic awareness and decoding skills. Understanding each of the six syllable types will help students develop skills to decode multisyllable words and incorporate scientific terminology into their sight vocabulary.
Key Phonics Vocabulary Terms:
blend two or three consecutive consonants that each make their own sound (ex. bl-, scr-) digraph two consonants that make one sound (ex. ch, th) etymology the origin of a word and its meaning grapheme the written form of a sound (a letter) morpheme the smallest unit of meaning such as prefixes, suffixes, and root/base words morphology the study of words and their parts phoneme the smallest unit of sound phonemic awareness the ability to recognize and manipulate the individual sounds, or phonemes, that make up a spoken word phonics the relationship between written symbols (graphemes) and sounds (phonemes) phonological awareness the ability to recognize and manipulate the sounds in spoken words prefix a morpheme that comes before a root/base word root/base word a word that cannot be broken down into a smaller meaning schwa a vowel sound that is spoken without any stress, such as the first “a” in “away.” The symbol ә is used to represent this sound. (www.kids.wordsmyth.net)
suffix a morpheme that comes after a root/base word syllable a letter or combination of letters said together, often referred to as the “beats” of spoken language word chains used to build phonemic awareness, often called a word ladder, where one sound is changed at a time to create a new word
Syllable Types:
Syllable Type
Definition
Example
closed syllable one vowel followed by one or more consonants, short vowel sound sun, mix open syllable one vowel followed by no consonants, long vowel sound be, go vowel team two vowel letters side by side, vowel sound can be long or short light, bounce vowel-r one vowel letter followed by the consonant-r, vowel sound is /er/, /or/, /ar/ start, turn silent-e one vowel letter, one consonant, and a final silent-e, long vowel sound time, bike consonant -le one consonant plus the letter l and the vowel letter e, vowel sound is /әl/ flexible, bubble
Multisyllable words will have one or more vowel types. Having students analyze each syllable in a word then helps them decode unfamiliar words. Examples are below:
Word Syllables
Syllable Types
energy en – er – gy closed – vowel r - open
kinetic kin-et-ic closed – closed – closed thermal ther-mal vowel r – closed (schwa) potential po – ten – tial open – closed - suffix bubble bub-ble closed – consonant -le
*NOTE: "/x/," this will indicate the sound associated with a vowel.
Forms of Energy Chants
&Background
Introduce and reinforce potential and kinetic forms of energy vocabulary using simple chants and hand motions. While the Primary Science of Energy demonstrations and discussions won’t cover every form of energy, they’re included here.
Procedures
Choose which chants you’d like to use and practice them. Demonstrate and practice the chants and hand motions with students. Finally, perform the chants and motions as you encounter each form of energy during Primary Science of Energy demonstrations and discussions. Alternatively, assign students to small groups. Give each group one chant to learn. After practicing, each group teaches their chant to the class.
Forms of Energy Chants with Hand Motions
ENERGY: Making change. Doing Work. That’s energy!
Make fists and alternate tapping them on top of each other during “Making change. Doing Work.” Clap sharply three times while chanting “That’s energy.” Repeat.
*POTENTIAL ENERGY: Storing energy, to use later. Potential Energy!
Reach both arms out to your sides and make a large forward sweeping motion until hands meet in front of you during “Storing energy.” Pull both arms in giving yourself a hug during “to use later.” Clap sharply three times while chanting “Potential Energy.” Repeat.
Take a sliding step to the left during “Mo---” and bring right foot next to the left during “tion.” Take a sliding step to the right during “Mo---” and bring left foot next to the right during “tion.” Clap sharply three times while chanting “Kinetic Energy.” Repeat.
Potential Forms of Energy
*CHEMICAL ENERGY: Bonds between a---toms. Chemical Energy!
Link pointer fingers together then release and flip hands so pointer fingers link together in opposite direction during “Bonds between a--toms.” (Draw out the word atoms.) Clap sharply three times while chanting “Chemical Energy.” Repeat.
NUCLEAR ENERGY: Energy stored in an a---tom’s nucleus. Nuclear Energy!
Clasp hands together and hold them near your chest during “Energy stored.” Spin around once during “in an a---tom’s nucleus.”
(Draw out the word atom as you spin.) Clap sharply three times while chanting “Nuclear Energy.” Repeat.
Start with both hands in front of your body and make a pinched pulling apart motion until hands are outstretched during “Stre------tch.” Bring palms back in front of you during “Compre------ss.”
(Draw out the words stretch and compress.) Clap sharply three times while chanting “Elastic Energy.” Repeat.
*Forms of energy addressed in this unit.
GRAVITATIONAL POTENTIAL ENERGY: A rock sits on top of a hill. It’s GPE!
Make a circle shape with both hands during “A rock sits.” Move hands on top or your head during “on top of a hill. It’s” Clap sharply three times while chanting “GPE.” Repeat.
Kinetic Forms of Energy
*RADIANT ENERGY: Light! So bright! Radiant Energy!
Hold left hand up, palm out, in front of left eye during “Light!” Bring right hand up, palm out, in front of right eye during “So bright!” Clap sharply three times while chanting “Radiant Energy.” Repeat.
*THERMAL ENERGY: Is it getting hot in here? Thermal Energy!
Fan your face with your hand during “Is it getting hot in here?” Clap sharply three times while chanting “Thermal Energy.” Repeat.
Use pointer finger of one hand to point across the body during “Moving here.” Use pointer finger of other hand to point the opposite direction during “moving there.” Clap sharply three times while chanting “Motion Energy.” Repeat.
*SOUND ENERGY: Shhhh… I hear something. Sound Energy!
Hold pointer finger in front of lips during “Shhh…” Cup an ear during “I hear something.” Clap sharply three times while chanting “Sound Energy.” Repeat.
*ELECTRICAL ENERGY: Electrons are moving. Electrical Energy!
Both hands start as fists in front of you. Have one fist bump into and slightly move the other, then repeat in opposite direction during “Electrons are moving.” Clap sharply three times while chanting “Electrical Energy.” Repeat.
Content Background Information for Teachers & Aides &
*NOTE: This section includes background information on ALL of the components inside each station box. An asterisk is beside any kit component used and referenced within this unit for primary students. However, the additional information remains, should you wish to demonstrate any additional items from each station box and have questions.
Station One: Potential and Kinetic Energy
Potential energy is stored energy, and kinetic energy is energy in motion. All forms of energy fall into one of those two categories, and can be transformed back and forth endlessly. However, no energy transformation is 100% efficient; some of the energy is always dissipated, usually as thermal energy or sound.
*Happy and Sad Spheres
Kinetic energy can take many forms; so can potential energy. When an object is moving, it has kinetic energy. When an object is elevated, it has gravitational potential energy (GPE). If a rock is placed at the top of a steep hill, it has GPE. When a force is applied to the rock, it will begin to roll downhill. As it moves, the GPE is transformed into kinetic energy. When the rock reaches the bottom of the hill, it will slow down and eventually come to a stop. All of the energy that was stored as GPE will have been transformed to kinetic energy, then dissipated as thermal or sound energy, or in deforming the rock or ground it travels or stops on.
Dropping an object from a position elevated above the floor works similarly to a rock rolling downhill. However, when the object, in this case a sphere, reaches the floor, it bounces. This is because some of the kinetic energy can be stored as elastic energy. The bouncing action is caused by the elastic energy being transformed back into kinetic energy, but this time in the opposite direction. Some materials are very efficient at transforming elastic energy into kinetic energy. The elasticity of an object depends upon the structure of the compounds making the object. Some materials, like a block of ice, will not bounce well. Very elastic compounds, like rubber, will bounce well. The amount of bounce is related to the material’s chemical makeup.
A dropped object will not bounce to the same height as that from which it was dropped. Why is this? It is because some of the energy stored when the object was elevated is dissipated to the object’s surroundings as thermal energy or sound, or deformation of the material. No energy transformation is 100% efficient to do work. Some of the energy transfers into the surroundings and cannot be recovered to do work. If you were to bounce a superball repeatedly, over the course of an extended period of time, the temperature of the superball would increase.
The black spheres, called “happy” and “sad” spheres, look very similar. However, they do not behave the same when dropped from the same height. One bounces much higher than the other, which is why it is nicknamed “happy.” The material in the happy sphere is neoprene rubber. The other sphere does not bounce much, if at all; isn’t that sad? The material in the sad sphere is polynorborene. Even though the size of the spheres is the same, and the densities are almost the same, there is a distinct difference in the elasticity of the two materials. Polynorborene is softer, and is able to absorb and dissipate energy better than neoprene. Therefore, it does not bounce as high as the neoprene sphere. Both spheres stored almost the same amount of GPE; however, what they did with that energy when they hit the surface of the table or floor was different.
Toy Car
The toy car contains a spring, and when the car is depressed and pulled backwards, the spring is compressed, storing elastic energy. Releasing the car allows the spring to transform the elastic energy into kinetic energy, and the car moves. The kinetic energy of a moving object is always being dissipated as thermal energy and sound because of the resistance it encounters. Without additional potential energy being transformed into kinetic energy, eventually all of the kinetic energy is transformed into thermal and sound energy, and the car comes to a stop.
Yo-yo
A yo-yo behaves similarly to a dropped object, and takes the GPE stored by holding it at an elevated position and converts it into kinetic energy. However, the behavior of the yo-yo at the bottom of the string is different than an object bouncing back. As a yo-yo falls and unwinds the string, the yo-yo rotates. The movement of the yo-yo causes it to build momentum, and when it reaches the end of the string, its momentum causes it to continue rotating in its original direction. The result is that the yo-yo rewinds itself up the string, but in the opposite direction. For example, if the string was originally wound clockwise, the rebound would wind the string counter-clockwise on the yo-yo.
As was the case with the spheres, the yo-yo will not rebound all the way to the height from which it was dropped. At the bottom of the string, the rotating yo-yo encounters some friction as it spins within the loop of the string. Some of the kinetic energy is dissipated to the yo-yo’s surroundings as thermal energy and a small amount of sound energy; therefore the yo-yo will not climb the string all the way up to your hand if it is simply released. If you want the yo-yo to return to your hand, you must snap your wrist when you initially release it, and add additional energy beyond the GPE imparted by the yo-yo’s position.
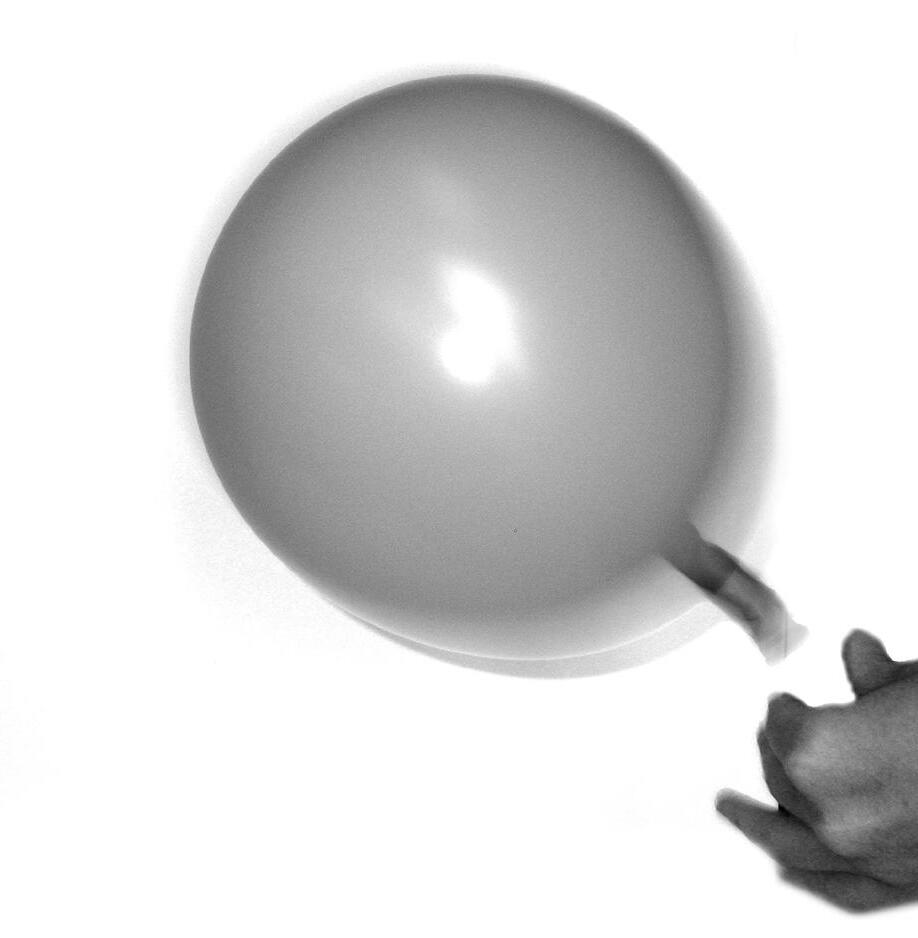
*Balloon
Inflating a balloon pushes compressed air inside, stretching the rubber. When the rubber is stretched, it stores elastic energy, and the balloon pushes back against the air inside the balloon. As long as the balloon stem is held shut, the air inside pushes back with equal pressure against the walls of the balloon. However, when the balloon is released, the elastic energy of the balloon pushes the air out. Because of Newton’s Third Law of Motion, when the air moves out of the balloon, the balloon moves forward in the air. In this way, the balloon transforms elastic energy into kinetic energy.
Station Two: Endothermic and Exothermic Processes
*Baking Soda and Vinegar
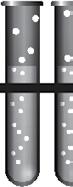
Chemical reactions occur when bonds between atoms are being broken and new bonds are being formed. The result is a new substance or group of substances that were not present before the reaction took place. All chemical reactions involve the transfer of energy. Often the energy transferred is thermal energy, but other forms of energy, like radiant and electrical energy, can be transferred. Some reactions absorb energy and some release it. Station Two contains both kinds of reactions. Endo- means in and thermal means heat. Endothermic reactions absorb energy into the chemical bonds and their surroundings become cooler. Exo- means out, and thermal means heat. The materials that react in an exothermic reaction release energy and their surroundings become warmer. An exothermic reaction releases or emits thermal energy.
The reaction between baking soda and vinegar is endothermic – it absorbs energy and makes the surroundings feel cold. Vinegar contains acetic acid, and baking soda is the common name for sodium bicarbonate. Combining acetic acid and sodium bicarbonate make different chemicals: water, carbon dioxide, and sodium acetate. The chemical reaction is:
CH3COOH + NaHCO3 + Thermal Energy g H2O + CO2 + CH3COONa
In all chemical reactions, energy is required to break bonds, and energy is released when bonds are formed. If the energy required to break bonds is greater than the energy released when new bonds are formed, the reaction will be endothermic. The additional energy needed will be absorbed from the surroundings, causing them to become cooler. The opposite is true of exothermic reactions.
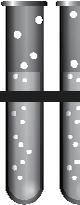
*Calcium Chloride and Water
When calcium chloride comes into contact with ice or water, it dissolves, and the calcium chloride dissociates into calcium ions and chloride ions. Even though dissolving calcium chloride is not a chemical reaction, it still requires energy. The attraction forces between those ions and water molecules releases a greater amount of energy than what was required to dissociate them, leading to an overall exothermic process.
Adding electrons to an atom increases its energy. Removing electrons from an atom requires energy. Thus, when ions form, energy can be released or absorbed. Some ionic compounds form a rigid crystal structure, and energy is needed to maintain that structure. Sometimes a crystal structure is very strong, and breaking it requires energy. However, some crystal structures actually release energy when dissolved. This is the case in calcium chloride. Dissolving calcium chloride causes energy to be released into the water and other parts of the surroundings because its structure is breaking down. Since exothermic processes release thermal energy, the temperature of the solution increased.
A common use for calcium chloride is to melt ice on driveways and sidewalks. You can buy ice melt at your local hardware store to melt the ice on your driveway during the winter.
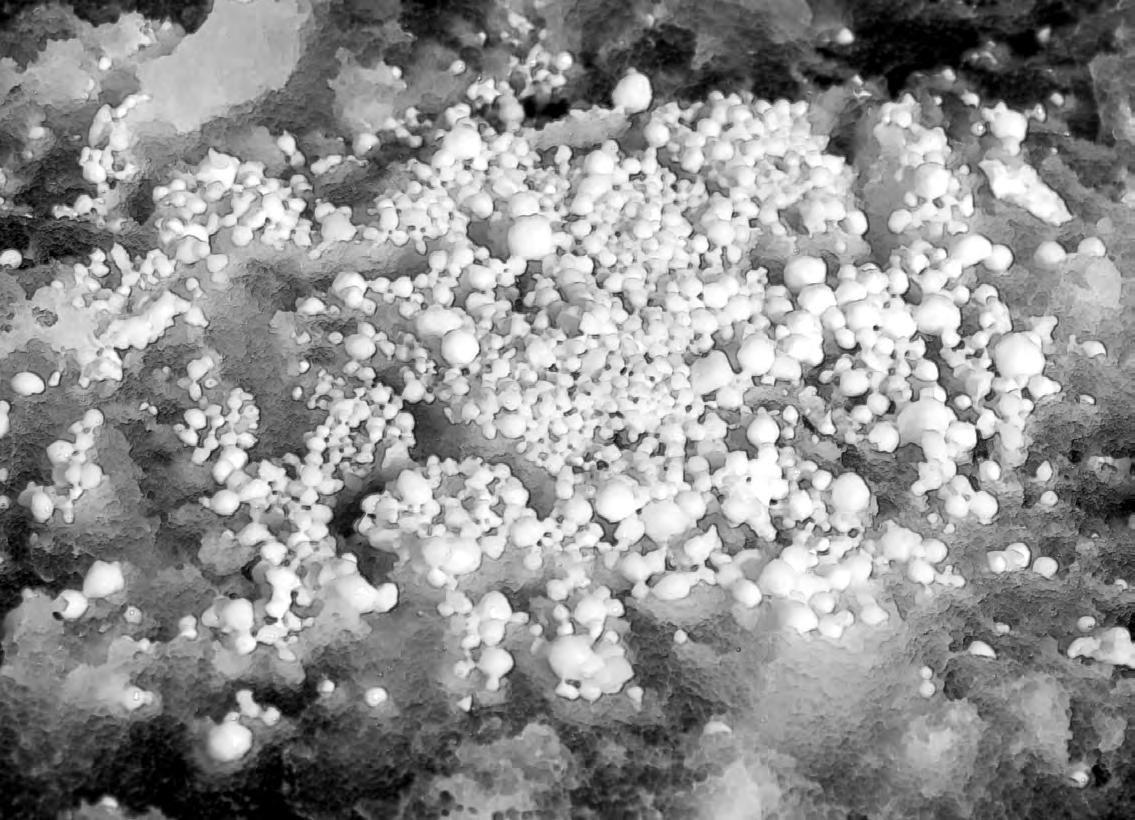
Hand warmers contain powdered iron. They are sealed in plastic to prevent oxygen and water in the air from reaching the iron. The old packet is made of iron filings that had been open for several weeks – it is now iron oxide. When the iron was left in an open plastic bag, oxygen in the air was able to come in contact with the surface area of the iron. The oxygen reacted with the iron to form a new chemical, iron oxide, or rust. The reaction that forms rust is an example of a chemical reaction known as oxidation.
As was the case with baking soda and vinegar, energy was transferred in the reaction of iron with oxygen. However in this case, energy was released. The energy needed to break the bond in oxygen was less than the energy released when rust was formed. Therefore, the reaction was exothermic, and the temperature of the surroundings increased.
The hand warmer contains tiny pieces of iron. If it was one solid piece of iron, such as on a car, it would rust much more slowly, and the thermal energy wouldn’t be as noticeable because less surface area is exposed to oxygen. The total amount of energy released is the same for a large piece of iron and an equal mass of powdered iron, yet it is released much faster with the powdered iron because there is more surface area exposed to oxygen.
Station Three: Radiant Energy Transformations
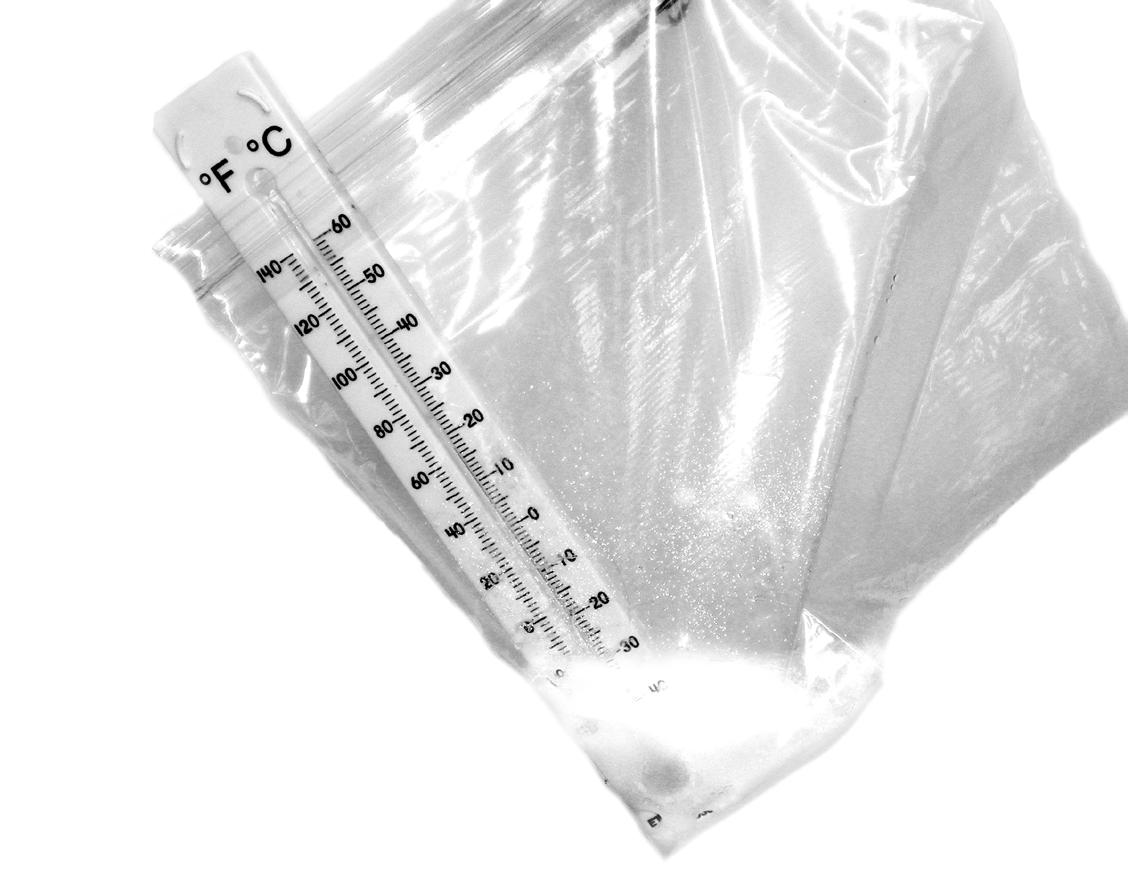
Sunlight and Shade: Radiant Energy into Thermal Energy
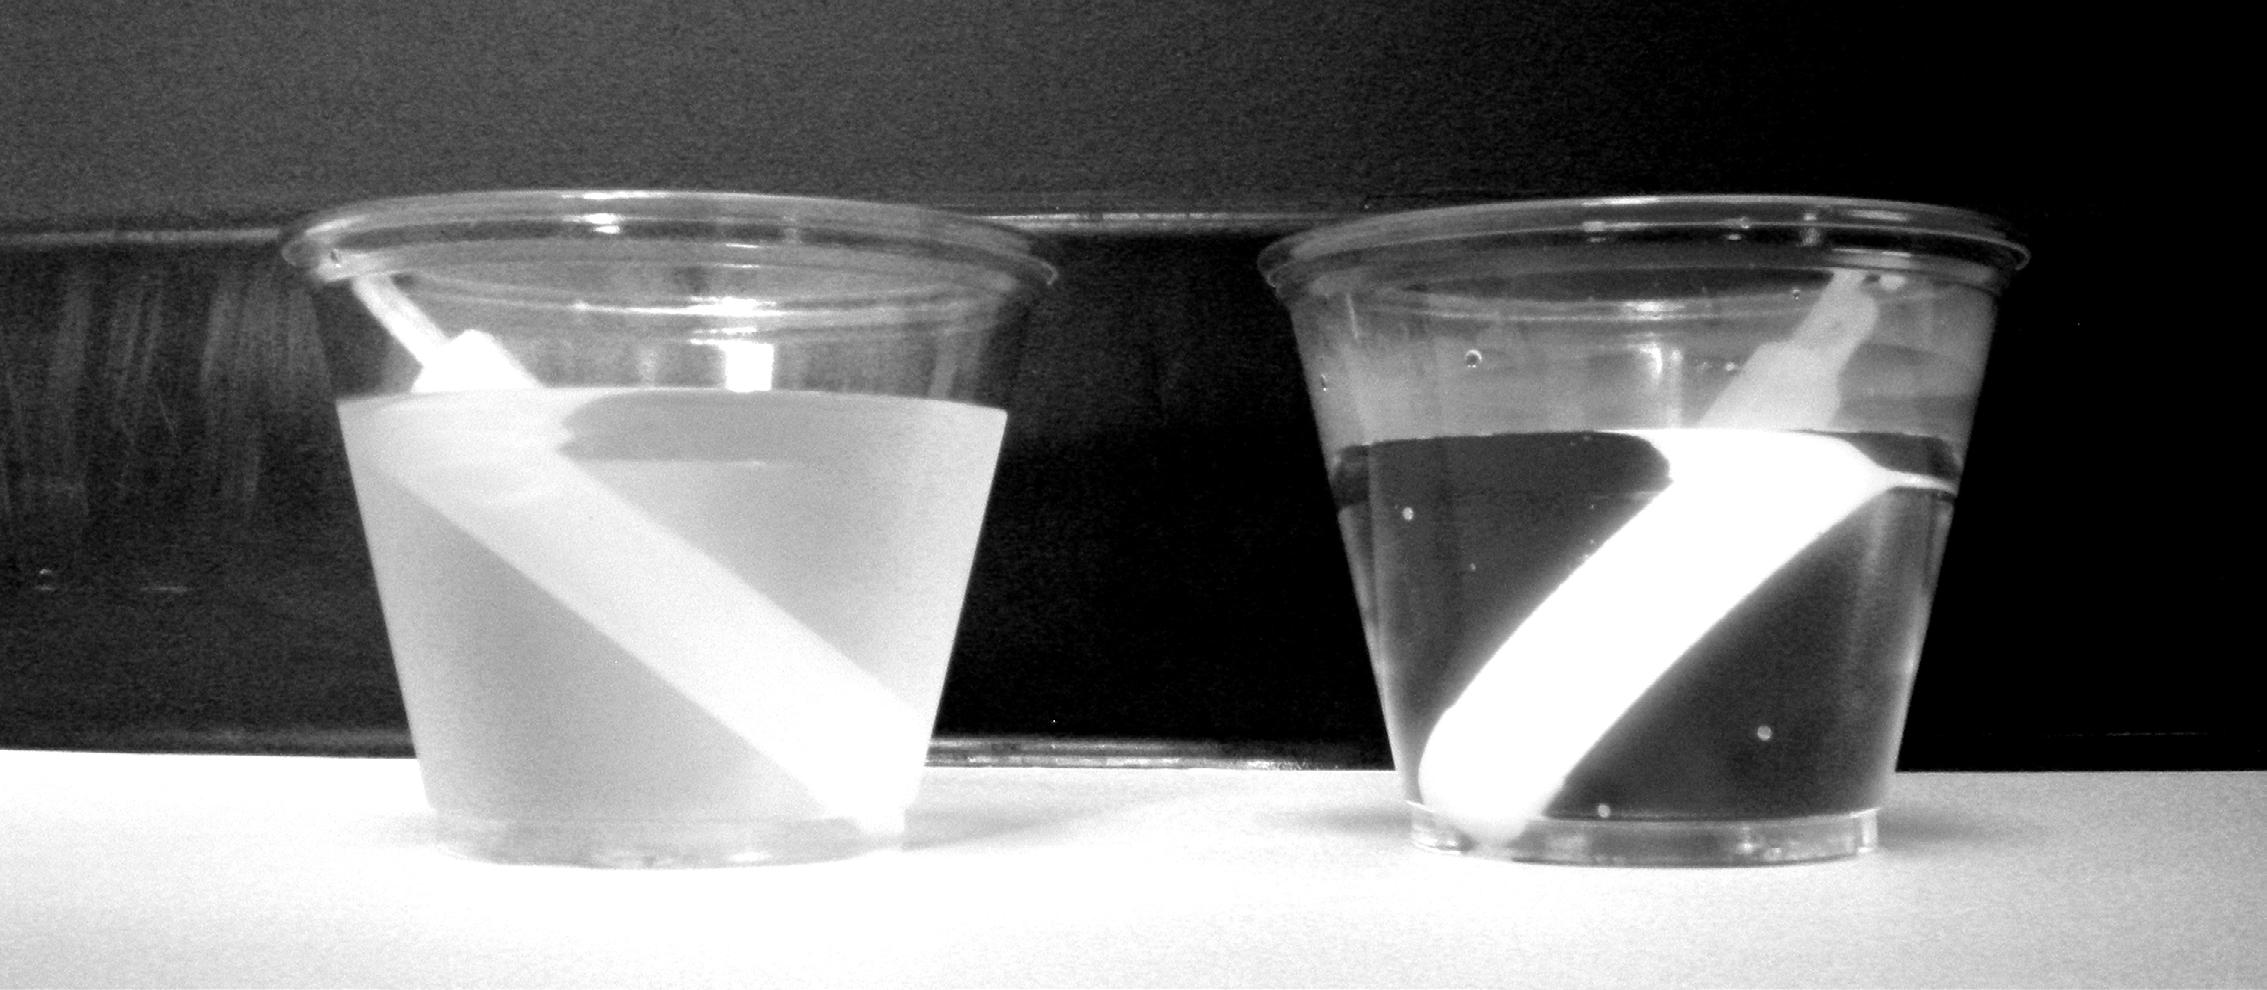
You may have heard the expression, “It was 100 times cooler in the shade.” Why do people say that? Even when the air temperature is the same, it feels hotter when you are in the sun than when you are in the shade. When you are in the sun, the sun’s radiant energy is absorbed by your body and turned into thermal energy, making you feel hotter. In the shade, you only feel the thermal energy from the air molecules striking your body. The thermometer facing the light has a higher temperature because the sun’s radiant energy is adding to the energy from the air around it.
When the thermometers are covered with paper, the one covered with black paper records a higher temperature than the one covered with white paper. Why is this? The sun produces light in all wavelengths – all colors of the rainbow. Objects that appear white to our eyes are actually reflecting all wavelengths of light, and are not absorbing much, if any, of the light striking them. Black objects, on the other hand, are absorbing nearly all of the light reaching them. Objects that appear black to our eyes are reflecting very little light. Because black objects are absorbing more energy, they get hotter than white objects left in the sun. This causes them to transfer more energy to their surroundings. If your car has a light-colored interior, it will feel cooler to sit on the seats on a sunny day than if your car has a very dark-colored interior.
Radiant Energy and Color: Radiant Energy into Motion Energy in the Radiometer
The radiometer is a glass bulb that is sealed with the parts inside. The space inside the bulb has very little air and is almost a vacuum. The vanes inside the radiometer are balanced on a needle point. There are no moving parts or motors that make them spin. Only the absorbed and reflected light entering the radiometer cause it to spin.
But how can light make an object move if energy has no mass? After careful observation, you will see that the vanes of the radiometer are black on one side and white on the other. As you observed with the thermometers, the white sides of the radiometer vanes reflected more energy than the black sides. In fact, the black sides absorbed enough energy to heat the air molecules near them more than the air molecules near the white sides were heated.
When air molecules are heated, their movement increases. Air molecules may be too tiny to see without magnification, but you can see the effect their movement has. When the molecules next to the black vanes got hotter, and moved faster, they bumped into the black sides more than they bumped into the white sides. Also, the reflected energy from the white sides increased the energy available to the air next to the black sides. The bumping of the air molecules was an unbalanced force and pushed the black vanes. You should have observed that the black sides of the vanes were moving away from the light source.
Changing the distance of the radiometer from the light source will affect its behavior. As you move farther from a light source, the intensity of the light is reduced. Moving farther from the light source should have dramatically reduced the speed of the vanes inside the radiometer because the intensity of the light, and therefore the amount of radiant energy that could be transformed to thermal energy, also decreased dramatically.
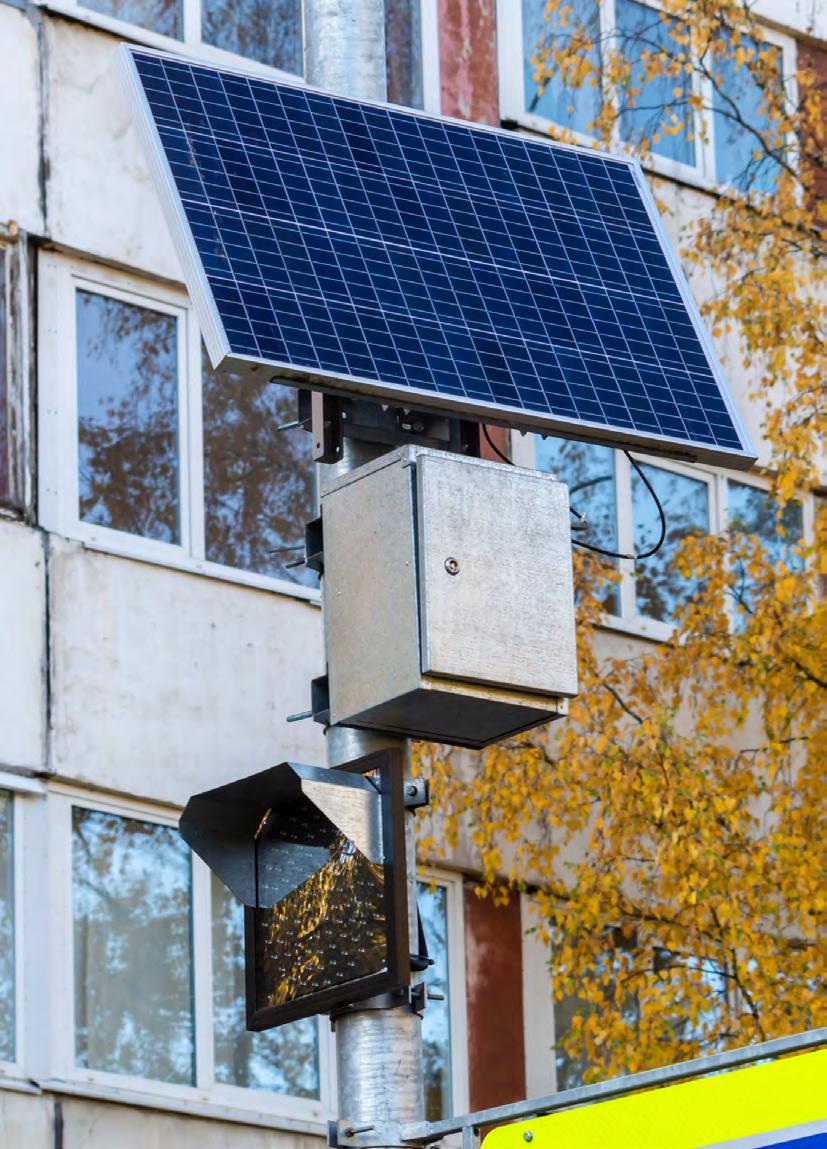
*Solar Panel: Radiant Energy into Electricity
Electricity is simply moving electrons; if light can make the vanes of a radiometer move, it surely can make something as small as an electron move. In fact, this is called the photoelectric effect, and describing this effect is what earned Albert Einstein his Nobel Prize. Light of specific wavelengths can energize electrons in certain substances. Using the photoelectric effect, plants are able to manufacture sugar from a combination of sunlight, water, and carbon dioxide. This is called photosynthesis.
When we use the photoelectric effect, we are causing electrons in one substance to become energized, move through a circuit, and do work. This is done in a photovoltaic cell, and many photovoltaic cells are connected together into a solar panel. This is how radiant energy can be turned into electrical energy.
Tilting the solar panel away from the light source will yield similar results as moving the radiometer farther away from the light. When the panel is tilted, the motor attached to it will slow down. It will also slow down if the solar panel is moved farther away.
When we use solar energy to generate electric power, the distance from the sun is not an important factor. The Earth is 92 million miles from the sun at ground-level. A solar panel is only ten feet up off the ground. This is such a small percentage change in distance from the sun that it does not make any measureable difference in the amount of electricity being produced. That is why installing solar panels at ground level produce about as much electricity as panels installed on the tops of buildings.
However, our location on the Earth, a round surface, makes a dramatic difference in the power generated. The Earth is tilted about 23° on its axis. This tilt is what causes the difference in seasons. The sun is at different angles in the sky during the day during winter and summer. The farther away from the Equator you travel, the greater the difference in the angles.
If you tilt the solar panel farther and farther from the light source, you will see a dramatic decrease in the speed of the motor, indicating a decrease in the power produced. The same is true for solar panels installed outdoors to produce power from sunlight. That is why solar panels are mounted at an angle rather than lying flat; they are installed to face directly toward the sun as often as possible. Some can even be motorized to adjust their angles with the change of the position of the sun in the sky throughout the day, or as the sun changes throughout the seasons.
Solar energy is a clean, renewable natural resource, but photovoltaic (PV) cells are not very efficient. They convert about 20 percent of the radiant energy that strikes them into electricity. The rest is changed into thermal energy or reflected off of the surface. Scientists are continually working on ways to make PV cells more efficient.
Solar Panel Assembly and Connection Instructions
1. Attach the wires from the motor to the connectors on the back of the PV cell by removing the nuts from the connectors, sliding the motor wires onto the posts and replacing and tightening the nuts as shown in the diagram.
2. Attach the fan or disk to the post on the opposite end of the motor.
3. If nothing happens, remove the motor leads from the solar panel and touch them to the ends of a C battery to “jumpstart” the motor, then try again.*
*NOTE: You may need to hold the panel very close to the lamp if working with a halogen incandescent bulb. Use caution and check to be sure the plastic is not melting.
Station Four: Thermal Energy and Motion Energy
Hands and Paper Clips
Just like when you rub your hands together and they get hot, bending a piece of metal back and forth causes the atoms in the metal to rub against each other. The friction involved in this motion releases thermal energy. If you keep bending the paper clip back and forth, eventually it will get hot enough to weaken the metal and the paper clip will break.
The Rubber Band
This activity demonstrated an energy transformation that both released and absorbed energy. When the rubber band is quickly stretched and placed against your forehead, or when allowed to contract, a distinct change in temperature can be noticed. The rubber band feels warm when stretched and cool when contracted. When you stretch the rubber band, the rubber molecules move and release thermal energy, and it feels warmer. Allowing the rubber band to contract causes the rubber molecules to move back into place and they absorb energy, and it feels cooler.
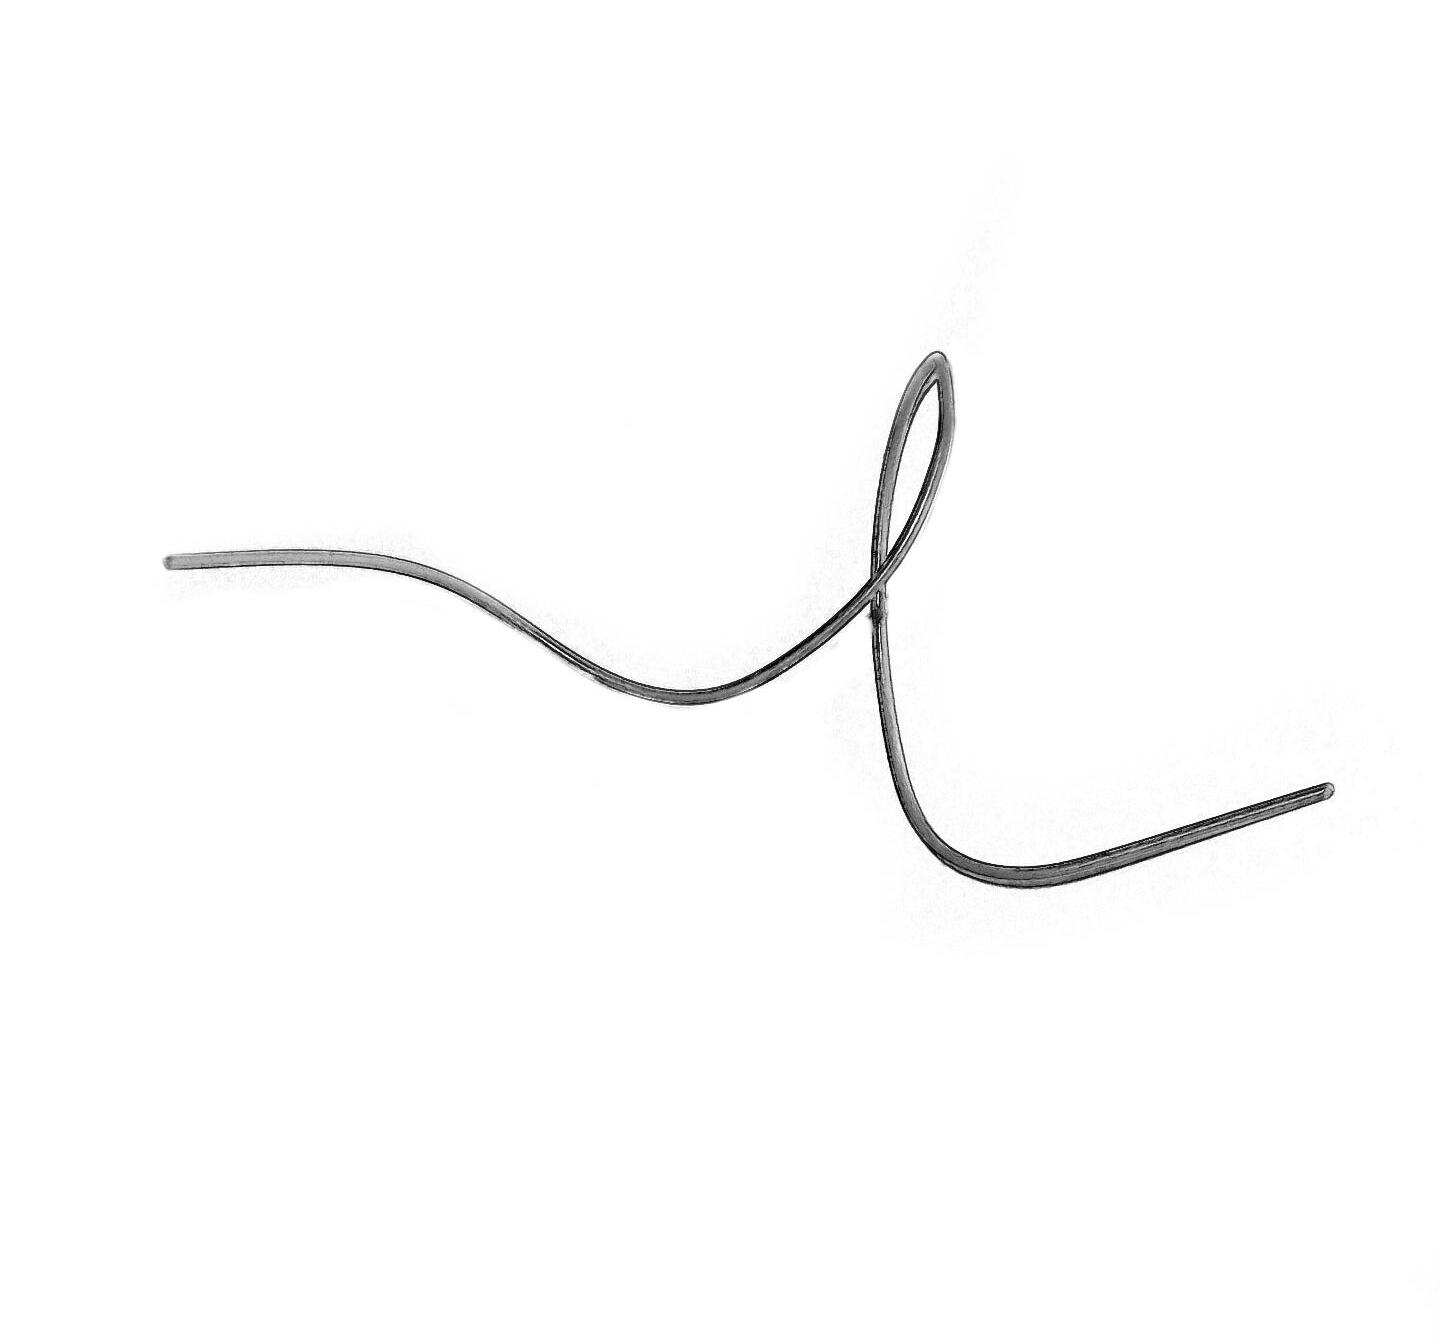
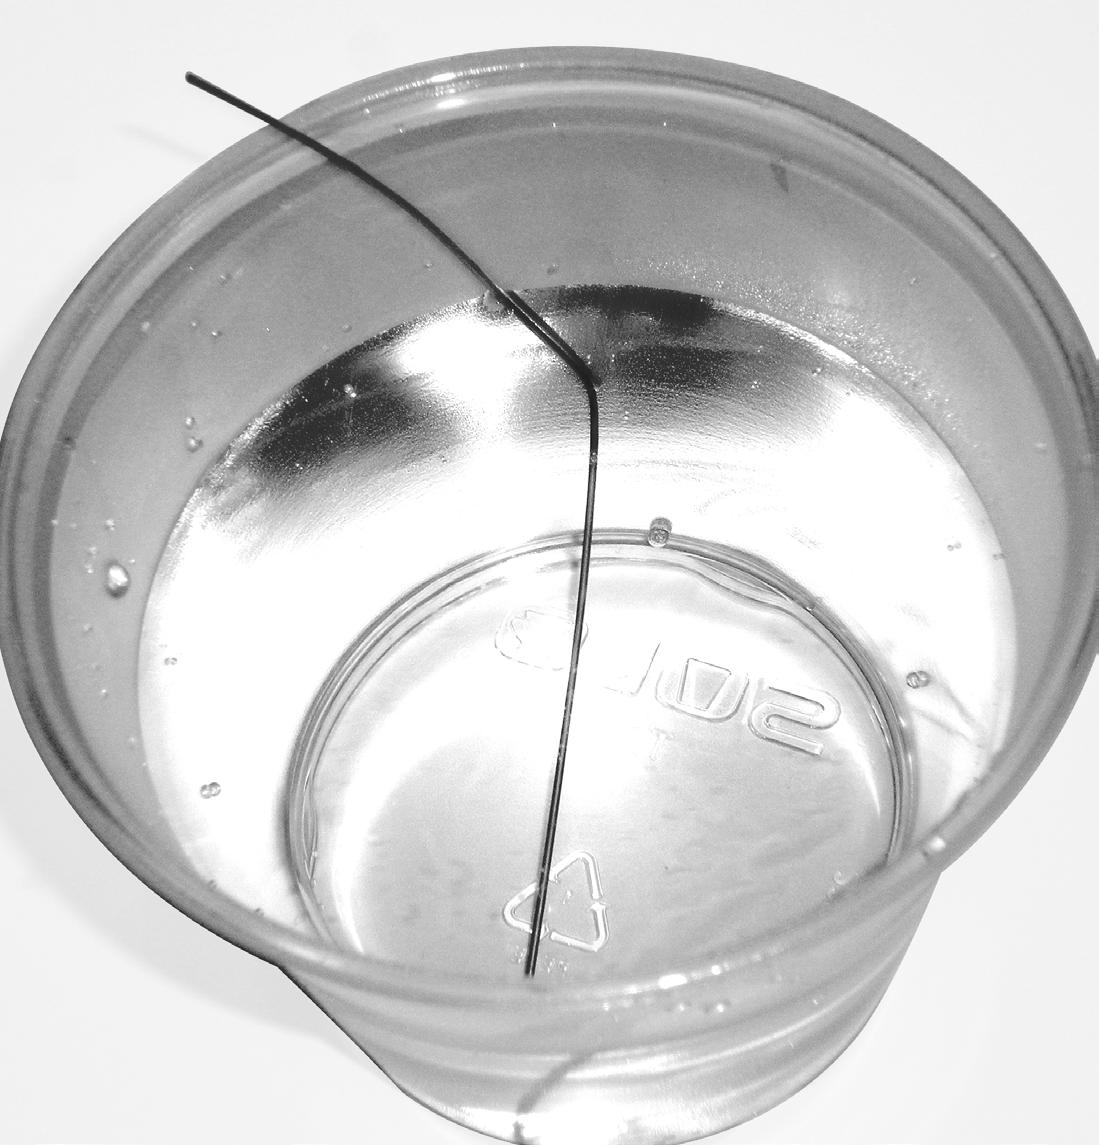
*The Live Wire
The live wire is made of two metals mixed together, called an alloy. Alloys have specific proportions of metals in them. The alloy in the live wire is called nitinol, and it is a mixture of 50% nickel and 50% titanium. Nitinol is special because the wire is set in a certain shape by shaping it, heating it to a specific temperature, and then immediately plunging it in ice water. The arrangements of the metal atoms in the alloy allow it to “remember” its shape, and when it is heated back to the tempering temperature, the wire goes back into its original shape. You could bend the wire into curlicues, circles, wavy shapes, etc., and as long as it could move freely, the wire would straighten itself out when you put it in warm water. As you can imagine, nitinol wire has many uses, including braces on teeth and keeping greenhouses cool. If a greenhouse gets too hot, the nitinol springs a window or vent open, which allows hot air to rise up and out of the greenhouse, decreasing the temperature.
The Bi-Metal Bar
When substances and objects are heated, they expand. You may have noticed the spaces between sections of sidewalk. They are designed that way so that the concrete can expand on hot, sunny days without cracking. Bridges are built with expansion joints that allow the metal and the concrete in the bridge to expand and contract according to temperature, without breaking. All objects expand when they are heated, but they do not expand at the same rate. Gases and liquids expand very quickly when they are heated. Their molecules can move about freely. A thermometer works because the liquid inside expands and contracts according to temperature. Solids do not expand as much as gases and liquids because their molecules cannot move freely. It is sometimes hard to see them expand. The bi-metal bar is a good example of how metals expand when heated. The bi-metal bar is not an alloy or mixture of metals, but rather a sandwich of two pieces of metal – one side is nickel, the other side is stainless steel. These metals expand at different rates.
When the bar is placed in the flame, it bends, and always in the same direction. The stainless steel in the bar expands more quickly than the nickel, so when it is heated, the bar bends. The stainless steel side is the outside of the curve. If the bar is removed from the flame, it straightens itself back out.
When placed in the cup of ice water the bar bent back the other way to its original shape. If you kept the bar in the ice water long enough the bar would bend in the other direction. The stainless steel side also contracts faster when the temperature is lowered, so it is now on the inside of the curve.
Bi-metal strips like this are very useful. They are used in thermostats on furnaces and air conditioners to control the temperature. When the temperature in a room reaches a certain temperature, the bi-metal strip will bend enough to close a circuit and turn on the furnace or air conditioner. Bi-metal strips are also used in holiday lights that twinkle. When the metal gets hot it causes the strip to bend and stops the flow of electricity (breaks the circuit), which turns the light off. As the strip cools it bends back, allowing electricity to flow again, completing the circuit and turning the light on.
Station Five: Chemical Energy
*Glow
Sticks
Glow sticks contain an outer, flexible tube filled with a chemical compound, called an ester, and a dye. Inside the outer tube is a fragile, sealed glass tube with hydrogen peroxide. When the glass is broken, the peroxide and ester react and release energy. The different dye compounds absorb that energy, and then re-release it as different colors of light. This principle works the same way as neon lights – the gases inside the tubes of a neon light absorb electricity and release it as light. When an electron absorbs energy, it then releases that energy in one specific wavelength. The reason for the different colors in neon lights, fireworks, and glow sticks is related to the arrangement of electrons in the different elements. Neon lights actually contain many different gases, giving them the different, vibrant colors. Glow sticks produce different colors because the different dyes inside have varying arrangements of electrons that release energy differently. CONTINUED ON NEXT PAGE
The glow stick is producing light—radiant energy. When you broke the glass, the hydrogen peroxide and ester reacted to form different chemical compounds. The new compounds do not need as much energy to hold their molecules together, so they release the extra energy. The fluorescent dye in the glow stick then becomes energized. When the dye gives up the extra energy and returns to its normal state, it releases the energy it absorbed as the light we see. The reaction between the hydrogen peroxide and the ester is the same regardless of the color of the light stick.
Temperature will affect the rate at which a chemical reaction occurs. Placing the glow stick in ice water draws thermal energy away from the contents in the glow stick and the ester and peroxide molecules slow down. When they slow down, they cannot react as easily, and the chemical reaction slows down. The glow stick becomes more dim. Putting the glow stick in warm water transfers thermal energy inside to the ester and peroxide. Those molecules move faster, and the reaction proceeds at a faster rate, resulting in a brighter glow stick. One common misconception students have about glow sticks is that freezing them will reverse the reaction and “recharge” them. This is not true. Freezing the glow stick merely slows the reaction rate dramatically, such that students can enjoy the glow stick the next day. Typically, a glow stick will last about 2 hours at room temperature, but only about 30 minutes in warm water. Freezing them can extend the life a few hours, but they will not last much longer than a few hours after being removed from the freezer.
The Apple Battery
Your students will call this the “apple battery”. However, it is more accurately referred to as an electrolytic cell, which contains two pieces of two different metals and a non-metallic conductor, called an electrolyte. A battery is actually a series of electrolytic cells in combination, and the apple is just one cell. The electrolyte ions migrate within the battery to balance out the imbalance in charge. This unbalanced charge is created as the circuit is closed and electrons move. In this section we will refer to the apple as an electrolytic cell; you can decide if your students are at the level to understand the distinction, or if calling it a battery will be simpler for them. The concepts are the same.
The apple electrolytic cell investigation uses the chemical energy in the apple to make electricity. Everything we encounter in our daily lives, such as water, oxygen, sugar, and plastic, could be called a chemical. An apple contains a chemical called malic acid. The malic acid in the apple made an electrolytic cell when combined with two different metals. When the zinc nail and copper wire were pushed into the apple and attached to the microammeter, the needle on the meter moved. This meter measures small amounts of electric current and showed that there is an electric current moving through the apple and wire in a circular pattern called a circuit.
As you observed the meter, the needle moved to the right to indicate an electric current. When the zinc and copper were inserted into the apple, they both reacted with the acid, but they did not react the same way.
What is happening in the apple is a chemical reaction. The same factors that affect the rate of any chemical reaction – temperature, concentration, surface area, and catalysts – will affect the rate of reaction in the apple, too. Using larger pieces of metal increases the concentration of the metal available. Inserting the pieces of metal farther into the apple increases the surface area available for the reaction. The reactions occurring in the apple created an imbalance in electrical charge. When the zinc and copper were connected to the meter, the electrons flowed from the zinc nail through the meter to the copper wire in the apple. This flow of electrons registered on the meter. Chemical energy is converted to electrical energy. Because the meter moved to the right, it showed that the charge was flowing. This is the way all electric circuits with batteries work. You may substitute other foods for an apple to complete this activity. Other great examples include potatoes, citrus fruits, pickles, and kiwis.
Station Six: Electrical Energy
Battery and Compass
Station Six introduces students to the relationship between electricity and magnetism.
Electrons don’t just move around the nucleus of an atom; they also spin. Electrons have an electrical charge. Their movement creates tiny magnetic fields. In most materials, electrons exist in pairs where the spinning of each electron in the pair is in opposite directions. The magnetic field generated by one electron is canceled by the magnetic field generated by the other electron in the pair. However, in magnetic materials like nickel, cobalt, and iron, there are unpaired electrons with magnetic fields that are not canceled. Where the magnetic fields line up, tiny magnets are created within the metal.
When the wire was connected to both ends of the battery, a shorter pathway, or short circuit, formed, and electricity flowed quickly and easily through the wire. These moving electrons brought with them magnetic fields. A magnetic field developed around the wire according to the “right hand rule.” If you outstretch your right hand, and your thumb points in the direction of the electric current, the fingers of your right hand will curl around in the direction of the magnetic field.
The relationship between electricity and magnets allows us to transform electrical energy into kinetic energy and make things move. The chemicals in the battery interact to generate an electric current, and, like the apple electrolytic cell in Station 5, transform chemical energy into electrical energy.
*Motors, Batteries, and Shake Flashlight
In this station we had two tiny electric motors. Lots of little toys have motors like these. They make the toys move; they convert electrical energy into motion energy. Inside the disassembled motor, you can see a coil of wire on the shaft with magnets around the coil on the casing of the motor.
In the compass demonstration, electricity flowed through a coil of wire, producing a magnetic field around the wire. When electricity passes through the coils of wire in the motor, magnetic fields are created in each of the three coils. The magnetic fields in the coils interact with the magnetic fields of the permanent magnets on the casing of the motor. The magnetic fields interacting create a pushing and pulling motion that spins the motor. Electrical energy is converted to magnetism and then to motion. Toy motors get their electrical energy from batteries and the chemical energy stored in them, and then the toys move. The tape was attached so you could see the shaft turning.
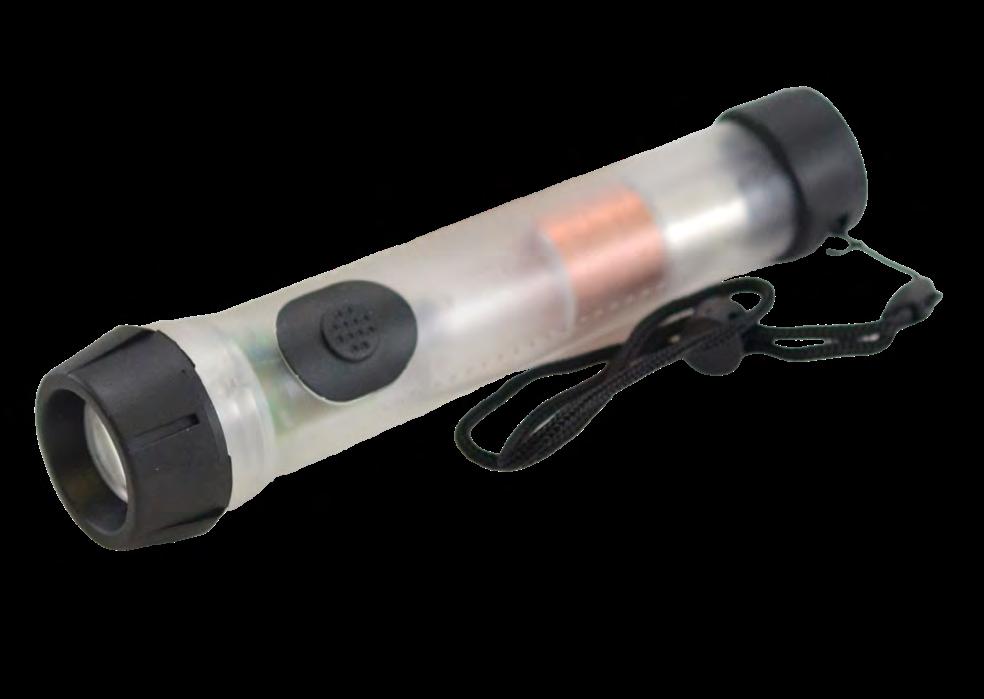
The shake generated flashlight uses a person’s kinetic energy to produce electricity to light the bulb. Inside there is a coil of wire and a magnet. When you used your energy to shake the flashlight, the magnet passed through the coil of wire. Moving the magnet through the coil of wire generated electricity by making the electrons in the wire move. This electricity was stored in the rechargeable battery. When you turned the flashlight on, electricity flowed from the battery to the bulb.
Power plants use the same concept to produce electricity. Many energy sources are used to spin turbines. These turbines rotate coils of copper wire inside magnets to generate electricity. The picture below shows a diagram of a coal power plant. Coal is burned to superheat water to a very high temperature, and high pressure steam spins the turbine. Natural gas power plants work the same way as coal power plants, and nuclear power plants use the thermal energy from the splitting of uranium atoms to generate steam. Wind turbines use the force of the wind and hydropower plants use the force of falling water to turn turbine blades. The turbine in a power plant is connected to the generator shaft with the copper wire coil inside the magnets. Electric current is generated as electrons move through the wires. Electricity is a secondary source of energy; it does not exist in a form that we can readily tap into to do useful work. Electricity generation begins with some other form of energy.
1. Fuel is fed into a furnace, where it is burned to release thermal energy.
2. The burning fuel heats water that is piped into a boiler, creating steam.
3. The steam travels at high pressure through a steam line.
4. The high pressure steam turns a turbine, which spins a shaft.
5. Inside the generator, the shaft spins coils of copper wire inside a ring of magnets. This creates an electric eld, producing electricity.
6. Electricity is sent to a switchyard, where a transformer increases the voltage, allowing it to travel through the electric grid.
Building Background Knowledge
Introducing Forms of Energy
Objective:
Students will understand that energy is found in many forms.
? Question:
What is Energy?
Materials
6 Large pieces of paper
Markers
Magazines (optional)
Scissors (optional)
Glue (optional)
Forms of Energy Chants, page 9
What is Energy? article, pages 18-19
2 Preparation
Make copies of the What is Energy? article as needed.
Prepare a digital copy of the energy chants to display for the class.
Label each of the 6 large pieces of paper with one of the following statements:
Energy is light.
Energy is sound.
Energy is heat.
Energy makes things move.
Energy makes things grow.
Energy runs machines.
Teaching Procedure–Building Background Knowledge
1. Pass out copies or display the article so students can see the text as you read.
A Vocabulary
2. Tell students that you are going to read the text straight through. You want them to listen carefully so that after the text they can tell you what the article was all about.
3. Read the What is Energy? article with your students.
4. Ask students what the article was mostly about. If students respond with the word “energy”, explain that energy is the topic of the article. Ask students to give one sentence that tells what the article was saying about energy. (For example, “Energy makes change and energy can do work.”)
5. Show students the large pieces of paper that you have labeled with the forms of energy statements. Have students read each sentence aloud.
6. Divide students into six small groups. Give one of the pieces of paper to each group. On the paper, have students draw pictures, write words, and/or glue pictures cut from magazines of examples of each form of energy.
7. Give students 5 - 10 minutes to work in their groups and then have groups share their posters with the class.
8. Recite the Forms of Energy Chants with your class.
NOTE: To further explore energy, light, heat, motion, sound, and growth, see the Primary Energy Infobook, pages 6 - 17, which includes guided discussion questions and activity ideas for each topic. Download the infobook from www.NEED.org/shop.
e What is Energy?
Energy makes change. Energy does work. Energy has many forms.
Energy is light.
Energy is sound.
Energy is heat.
Energy makes things move.
Energy makes things grow.
Energy runs machines.
When we see or hear light, heat, motion, sound, or growth, we know energy is at work. It takes energy to make energy.
e What is Energy?
Think about riding your bike. Before you get on the bike, is the bike moving? No. Can it move once you get on and start pedaling? Yes! When the bike is not moving yet, scientists call this potential energy. This means the bike could move if given energy, but it is not moving yet.
Once you start pedaling, the bike is moving – there is motion. Scientists call this kinetic energy. Motion is not the only form of energy when the bike starts moving. If you close your eyes, can you tell if a bike is moving or not? You can probably hear the bike moving, meaning there is also sound energy. After you ride your bike, if you stop and feel the tires, they will feel warmer than when you started. This is because there is heat produced by the friction produced between the road and the tires.
The energy you gave the bike through pedaling, transformed, or changed, into motion, sound, and heat! This is energy at work.
Look around you. What forms of energy do you see, hear, and feel?
You are an energy scientist! As you observe different phenomena ask yourself, what forms of energy do I notice? Did the energy change from another form?
Lab Safety Rules
Eye Safety
Always wear safety glasses when performing experiments.
Fire Safety
Do not heat any substance or piece of equipment unless specifically instructed to do so.
Be careful of loose clothing. Do not reach across or over a flame.
Keep long hair pulled back and secured.
Do not heat any substance in a closed container.
Always use tongs or protective gloves when handling hot objects. Do not touch hot objects with your hands.
Keep all lab equipment, chemicals, papers, and personal effects away from the flame.
Extinguish any flame as soon as you are finished with the experiment and move it away from the immediate work area.
Heat Safety
Always use tongs or protective gloves when handling hot objects and substances.
Keep hot objects away from the edge of the lab table, in a place where no one will accidentally come into contact with them.
Remember that many objects will remain hot for a long time after the heat source is removed or turned off.
Glass Safety
Never use a piece of glass equipment that appears cracked or broken.
Handle glass equipment carefully. If a piece of glassware breaks, do not attempt to clean it up yourself. Inform your teacher.
Glass equipment can become very hot. Use tongs if glassware has been heated.
Clean glass equipment carefully before packing it away.
Chemical Safety
Do not smell, touch, or taste chemicals unless instructed to do so.
Keep chemical containers closed except when using them.
Do not mix chemicals without specific instructions.
Do not shake or heat chemicals without specific instructions.
Dispose of used chemicals as instructed. Do not pour chemicals back into containers without specific instructions to do so from your teacher.
If a chemical accidentally touches your skin, immediately wash the affected area with water and inform your teacher.
Thermometer Safety: Thermometers included in the Science of Energy kit contain alcohol spirits and are safe for classroom use. They do not contain mercury.
Station One Teacher Demonstrations POTENTIAL
AND KINETIC ENERGY
Objective:
Students will be able to explain that potential energy can transform into kinetic energy and sound.
? Question:
What will happen when we drop the super balls?
Materials
Anchor chart
Measuring tape or meter stick
Wall
Super ball
Balloon
Toy car
Yo-Yo
Safety glasses
Various unbreakable spheres for student exploration (optional)
Balloon air pump (optional)
Station One: Sphere Observations worksheet, page 24
Station One: Balloon Observations worksheet, page 25
Station One: What was Happening? article, pages 26-27
Station One: Language Arts Extensions, pages 28-30 (optional)
2 Preparation
Make copies of the observation sheets and What Was Happening? article for each student.
At the top of the anchor chart write the question, “What forms of energy can we observe?”
A Vocabulary
potential energy
kinetic energy
inflate
sound
motion
Leave space to record student responses. Then also draw a meter stick on your anchor chart to mirror the student page.
Teaching Procedure Day 1: Super Ball
1. Find a wall surface to tape the measuring tape/meter stick to.
2. Hold the ball at a height of one meter.
3. Ask students, "Is the ball moving yet?" (No.) Instruct students to record what they see on their observation page.
4. Ask students, “What will happen if I let go of the ball?” Record student answers on your anchor chart. If students only say, “it will fall,” ask them to expand their thinking. “What happens when it falls?” If students say, “it will bounce,” follow up with, “What do you mean it will bounce?”
5. Hold the ball at the top of the meter stick again. Instruct students to draw your hand and sphere at the top of the meter stick. Ask students again if the ball is moving. (No.) Then reflect based on students’ hypothesis that the ball will move, say, “The text mentioned a phrase scientists use to describe something that can move, but isn’t. Do you remember what that phrase is?” Students should respond with “potential energy.” If they do not remember, tell them the phrase. Instruct students to label “potential energy” on their observation sheet by drawing an arrow to the hand and sphere and writing the words potential energy next to the arrow.
6. Drop the ball. Ask students to turn and talk to a neighbor and describe what they saw. It is unlikely that students will mention the sound the ball made when it hit the ground. If not, or even if one person does, tell students to close their eyes. Say to the class, “With your eyes closed, can you tell what happens when I let go of the ball?” Then drop the ball. At this point students should recognize the ball made a sound when it made contact with the floor.
7. On your anchor chart, model how to draw the ball falling, and bouncing. Ask students to describe what was happening and record their words on your anchor chart. For example, if a student uses the word “fall” you can put that next to the ball. If they use the word “bounce” add that to your anchor chart. Students can follow along on their observation page.
Station One Teacher Demonstrations POTENTIAL
AND KINETIC ENERGY
Teaching Procedure Day 2: Reading About Science – Station One – The Sphere: What Was Happening?
TEACHING NOTE: It is suggested that you read the What Was Happening? article the day after your hands-on sphere investigation.
1. Display the anchor chart from the hands-on investigation. Students should also have their own observation pages. Have students use the observations to summarize what happened during the investigation.
2. Explain that you have an article you are going to read aloud. Display the article on the board or give students a copy of the text. Tell students to use their scientific listening ears. If they hear a science word or phrase that helps to explain what happened during the investigation, they should raise their hand and explain what they heard.
3. Read the text aloud. Students should share new science vocabulary and phrases that they hear. You may need to model this for them the first few times. If students have a copy of the article, they can circle or highlight the science words they hear/read.
4. As new vocabulary is introduced in the text, compare the scientific terms to the words students used in their observations. Using a different color marker, add the scientific vocabulary next to the student language on your class anchor chart. Do not cross out the words students used previously, rather layer the science words near their original words. Have students add the scientific words on their observation page as well. For example:
We observed that the ball was falling – it was moving! This is "motion energy". Label motion energy next to "falling" on your worksheet.
Look, the text says that motion energy is also called “kinetic energy”, let’s add those words to our chart also.
We noticed that the ball bounced. Another word for “bounce” is “rebound”. Let’s add that word to our chart as well.
5. Conclude the lesson by reviewing that energy makes changes. The ball went from not moving (potential energy) to moving (kinetic energy).
6. Have students say the kinetic energy (motion) chant from page 9.
Teaching Procedure Day 3: Balloon
Continue modeling the transformation of potential energy to kinetic energy using the other materials in Station One. Begin with modeling the balloon.
1. Prepare a new anchor chart that looks like the Balloon Observations page. Divide the anchor chart into four large quadrants, number the boxes 1 - 4. At the top of the anchor chart write “The Balloon.”
2. Show students a balloon that is not inflated. In the first box, draw the deflated balloon. Label the picture, “balloon.” Have students draw a picture of the deflated balloon, in their first box as you draw on the anchor chart. Ask the students, “Is this balloon moving?” Add the words, “not moving” (or use the students’ language) to your anchor chart.
3. Next, blow up the balloon for the students. Ask students, “What am I doing?” In the second box on the anchor chart draw yourself blowing up the balloon. Ask students, “Does the balloon look the same as it did before? Why?” Use student words to add their observations to your anchor chart. Have students do the same thing on their observation page. Other possible questions:
What happened when air entered the balloon?
What happened to the rubber?
4. When you are done blowing up the balloon, hold the balloon tight, so air does not escape, but do not tie the balloon. Draw a picture of the balloon being held shut in the third box. Have students do the same. Possible guiding questions:
a. “What is inside the balloon?” Add the word “air” inside the balloon on your anchor chart.
b. Hold the balloon as still as possible. You may need to hold it with two hands. Ask students, "Is the balloon moving right now?" Add the words “not moving” (or student language) to your anchor chart. (If students are beginning to use the words potential energy, that is great, use the words on your anchor chart. However, if they are not using these words yet, that is okay.
Station One Teacher Demonstrations
POTENTIAL AND KINETIC ENERGY
5. Tell students the balloon is not moving at the moment, but ask the students, "Can the balloon move? How?" Tell students to watch carefully as they are going to have to try and draw a picture of what happens next. Let go of the balloon. After you retrieve the balloon draw a moving balloon on your anchor chart. Ask students to tell you what happened when you let go of the balloon. Add their observations to the anchor chart.
a. As the balloon went from deflated to inflated, was the balloon moving? (Yes)
b. What was causing the balloon to move? (Air)
c. Was the air moving? (Yes)
d. Where is the air now? (Around the room)
e. If you closed your eyes, would you know that the balloon had started moving? Why or why not? (Yes, there is a sound.) (You may need to blow up the balloon again and have students close their eyes to observe without looking.)
Teaching Procedure Day 4: Reading About Science – Station One – The Balloon: What Was Happening?
1. Display the anchor chart from the hands-on balloon investigation. Students should also have their own observation pages. Have students use the observations to summarize what happened during the investigation.
2. Explain that you have an article you are going to read aloud. Display the article on the board or give students a copy of the text. Tell students to use their scientific listening ears. If they hear a science word or phrase that helps to explain what happened during the investigation, they should raise their hand and explain what they heard.
3. Read the text aloud. Students should share new science vocabulary and phrases that they hear. You may need to model this for them the first few times. If students have a copy of the article, they can circle or highlight the science words they hear/read.
4. As new vocabulary is introduced in the text, compare the scientific terms to the words students used in their observations. Using a different color marker, add the scientific vocabulary next to the student language on your class anchor chart. Do not cross out the words students used previously, rather layer the science words near their original words. Have students add the scientific words on their observation page as well. Scientific words you might add for this investigation:
Box 2 – Kinetic Energy (air moving in balloon, rubber stretching)
Box 3 – Compressed Air, potential energy
Box 4 – Kinetic Energy, sound energy
5. Conclude the lesson by reviewing that energy makes changes. The balloon went from not moving (potential energy) to moving (kinetic energy).
6. Have students say the motion energy chant.
7. If desired, take students through the Station One: English Language Arts Extensions
Have more time? Choose Your Own Teaching Adventure
Toy Car and Yo-Yo
Continue modeling potential to kinetic energy using the toy car and yo-yo. Using similar structures to the sphere and balloon models, demonstrate energy transformations using the toy car and yo-yo. Encourage students to use their new vocabulary (potential energy, kinetic energy, stored energy, sound) as they discuss what they observe. Use the following questions as guides:
a. How does the toy car move?
b. How does the yo-yo move?
Student Explorations
Divide students into small groups and give them a variety of materials where they can explore energy transformations. These materials can include the yo-yo and toy car provided in Station One. You may also bring in other spheres (balls) not used previously, additional toy cars, wind-up toys, even paper airplanes. Give students the opportunity to explore how to make these objects move. Have students record their observations and encourage them to use scientific vocabulary.
Happy/Sad Spheres
The Happy/Sad Spheres do not behave as expected due to the material they are made of. This station also introduces the transfer of thermal energy which causes change in the kinetic energy of these spheres. If you are interested in showing your students this phenomenon, please refer to the Station One Guide in Elementary Science of Energy.
Station One: Super Ball Observations
Name:
Date:
What happens when you drop a ball?
Station One: Balloon Observations
Name:
Date:
Station One: What Was Happening?
POTENTIAL AND KINETIC ENERGY
The Sphere
When an object is moving it has kinetic energy. Objects that can move, but are not moving, have stored energy. Energy that is stored, but is not being used, is called potential energy.
When you hold the ball at the top of the ruler, the ball is not moving, but it could move. It has stored potential energy. When you drop the ball its potential energy changes into kinetic energy as it falls.
When the ball hits the ground, it does not just stop. The ball is stretchy so it rebounds, or bounces again. A lot of energy gets stored in the ball as it stretches. Did you hear the ball when it hit the ground? Some of the kinetic energy transformed into sound energy. A little bit transforms into heat. The ball doesn’t bounce as high because its energy transforms into sound and heat. Finally, all of the ball’s kinetic energy will change into other forms of energy and the ball will sit still on the floor. Motion is energy. Sound is energy.
The Balloon
Station One: What Was Happening?
POTENTIAL AND KINETIC ENERGY
When you blow up a balloon you are using your kinetic energy to push air into the balloon. As your air goes into the balloon the rubber is stretched. Your energy is stored in the stretched rubber. Your air is also squeezed into the small space in the balloon. We call this compressed air.
When you are done blowing up the balloon and hold the end shut the balloon is not moving. It can move, but it is not. Energy is stored in the stretched rubber and in the compressed air. This is potential energy.
When you let go of the balloon it flew around the room! Potential energy was transformed into motion and sound energy. Motion is energy. Sound is energy.
Station One: English Language Arts Extensions
Activity 1: Writing
The following prompts may be used to have students write more formal observations. Depending on the age and ability of your students you may have them reflect on one or more of the questions below.
Choose one object you investigated. Did the object move? What caused it to move? What happened when the object moved? How did the object stop moving?
Possible writing stems: Emerging Writers
Energy is motion. I observed ___________________________________.
Transitional Writers
Using the anchor chart and student observation pages, have students turn and talk to a neighbor and verbally summarize the investigation. As you listen to student conversations encourage them to use scientific vocabulary.
Have students write a sequential summary of the balloon investigation. Use Writing About Science: The Balloon on page 31. Challenge students who are ready to think about a new question they would investigate and add it to their writing.
I wonder what would happen if _________________________________.
Activity 2: Vocabulary Potential and Kinetic
Potential (Energy)
Syllables: po-ten-tial 3 syllables
Origin- Old French- potenciel
Defined as “capable of being or becoming”
Kinetic (Energy)
Syllables: ki-net-ic
Origin- Greek- kinētikos
Defined as “moving, putting in motion”
Source: www.etymonline.com
Activity 3: Syllable Type: Vowel Team
Materials: Syllable Type: Vowel Team Word Cards, page 32
Instructions:
1. Word card: sound
a. Hold up the card with the word “sound.”
b. Point to the vowel letters (ou) and ask:
How many vowel letters? (2)
Syllable type? (vowel team - two vowel letters side-by-side)
Vowel sound? /ow/
Word? (sound)
c. Say: This word has a vowel team. I will place it under the vowel team card.
2. Contrast word card: sod
a. Hold up the card with the word “sod.”
b. Point to the vowel letter (o) and ask:
How many vowel letters? (1)
Syllable type? (closed syllable - one vowel followed by one or more consonants)
Vowel sound? /ŏ/
Word? (sod)
c. Say: This word does not have a vowel team. I will place it under the "no symbol" card.
3. Practice using the additional word cards. Word cards following the skill: ground, bounce, round. Contrast word cards: run, bun, drop
a. Mix the rest of the word cards. Draw and hold up a card.
b. Point to the vowel letter/s and ask:
How many vowel letters?
Syllable type?
Vowel sound?
Word?
c. Have students place the word below the vowel team card or the "no symbol" card.
d. Repeat these steps with each word card.
Activity 4: Vocabulary–Inflate
NOTE: This activity correlates with the Day 3 Balloon demonstration and investiagation.
Materials: My New Vocabulary Word master, page 33
Instructions:
1. For the word "inflate," write each syllable inside the word box.
a. Ask: How many syllables are in the word "inflate"? (2)
Guide students to draw two lines close to the bottom of the box on the top of the master to represent the number of syllables.
b. Ask: First syllable? (in)
On the first syllable line, write the first syllable, “in.”
c. Ask: Second syllable? (flate)
On the second syllable line, write the second syllable, “flate.”
2. Record information for syllables, phonemes, and graphemes.
a. Ask: How many syllables? (2)
b. Ask: How many phonemes, or sounds, in the word? (6)
NOTE: Students may need a reminder that there are six phonemes because the -e at the end is silent.
c. Ask: How many graphemes, or letters, in the word? (7)
3. Record information for prefix, root/affix, and suffix.
a. Explain that inflate is a root/affix. Write inflate in the root/affix box.
b. Explain that inflate means “cause to swell.” Write the meaning in the box directly under the root/affix box.
4. Have students write their own meaning of the vocabulary word.
5. Address synonyms and antonyms.
a. Examples or Synonyms: Have students brainstorm examples of the vocabulary word, tell related words, or draw a picture.
b. Nonexamples or Antonyms: Have students brainstorm words that are the opposite of the vocabulary word or draw a picture.
6. Have students work together to tell how they would use the vocabulary word in a meaningful sentence. Source: www.etymonline.com
Activity 5: Syllable Type: Open Syllable
Materials: Syllable Type: Open Syllable Word Cards on pages 34 - 35
Instructions:
1. Word card: yo
a. Hold up the card with the word “yo” (as in yo-yo).
b. Point to the vowel letter (o) and ask:
How many vowel letters? (1)
Syllable type? (open syllable - one vowel not followed by a consonant)
Vowel sound? /ō/
Word? (yo)
c. Say: This word has an open syllable. I will place this under the open syllable card.
2. Contrast word card: top
a. Hold up the card with the word “top.”
b. Point to the vowel letter (o) and ask:
How many vowel letters? (1)
Syllable type? (closed syllable - one vowel followed by one or more consonants)
Vowel sound? /ŏ/
Word? (top)
c. Say: This word does not have an open syllable. I will place it under the "no symbol" card.
3. Practice using the additional word cards. Word cards following the skill: go, so, no, be, hi, we. Contrast word cards: yes, can, log, dish.
a. Mix the rest of the word cards. Draw and hold up a card.
b. Point to the vowel letter and ask:
How many vowel letters?
Syllable type?
Vowel sound?
Word?
c. Have students place the word below the open syllable card or the "no symbol" card.
d. Repeat these steps with each word card.
ELA Activity 1
Name:
Date:
Writing About Science: The Balloon
Directions: Use your balloon observations to draw four sketches showing the different stages of the balloon investigation. Then, write about the changes and forms of energy you saw in the balloon during the investigation.
Examples or Synonyms
Nonexample or Antonyms
Meanings: • Draw a line for each syllable in the box My new word has... ____ syllables ____ phonemes (sounds) ____ graphemes (letters) My New Vocabulary Word
Use in a meaningful sentence:
This word means:
open syllable
Objective:
Station Two Teacher Demonstrations
CHEMICAL ENERGY TRANSFORMATIONS
Students will be able to describe that a mixture of substances can cause energy transformations.
? Question:
What energy transformations can occur when we mix two substances together?
Materials
Anchor chart
Baking soda
Calcium chloride
Empty bottle for vinegar
Measuring cups
Plastic bags
Thermometer
Vinegar
Water (room temperature)
Timer
Safety glasses
Station Two: Observing Chemical Reactions worksheet, page 39
Station Two: What Was Happening? article, pages 40-41
Station Two: English Language Arts Extensions, pages 42-45 (optional)
2 Preparation
A Vocabulary
chemical energy
kinetic energy
physical change
temperature
thermal energy
transformation
sound
Make two copies of the observation sheet for each student and a copy of What Was Happening? article for each student.
At the top of the anchor chart, write the question, “What energy transformations occur when we mix water and calcium chloride?
Leave space to record student responses.
Teaching Procedure Day 1: Water and Calcium Chloride
1. Pass out one copy of the observations sheet to each student and explain to students that they will record observations on this page.
2. Explain to students that today you are going to investigate chemical reactions. A chemical is a substance that makes up matter –everything. Everything has chemicals in it and some scientists study how chemical elements behave. Today, students will be chemical scientists called chemists.
3. Pour 10 mL of water into an empty plastic bag. Remind students that water is a liquid. Tip the bag so the water pools in one corner. Have students feel the bag with the water inside and ask them to describe the temperature.
4. On your anchor chart, draw the bag with water inside. Label “water” on the chart. Ask students to draw on their observations sheets.
5. Place a thermometer in the bag. Make sure the bulb of the thermometer is covered by the water. Record the water temperature on the anchor chart. Ask students to record it on their sheet.
6. Tell students that you are going to add a type of salt, called calcium chloride, to the bag. This is not the same type of salt we put on food! Tell students to carefully observe what happens when you add calcium chloride to the water.
7. After adding the calcium chloride, tell students that you are going to let them feel the bag again – but ask them not to shout out what they notice, hold that thinking in their head!
8. After all students have felt the bag, ask students to share what they noticed. Did anything change? If so, what changed? Students will likely say temperature right away. Use the thermometer to read the new temperature and record it on the anchor chart. On your anchor chart, sketch what the bag looks like now with the calcium chloride added to the water. Record any other observations the students have. Ask them to draw and record on their observation sheet.
Teaching Procedure Day 2: Vinegar and Baking Soda
1. Pass out the second observation sheet to each student. Explain that they will record observations on this page.
2. Using the anchor chart, review with students the investigation from the previous day. Tell students that they are once again chemists, and they will investigate another chemical reaction today. Provide them with a second observation sheet.
3. At the top of the anchor chart, write the question, “What energy transformations occur when we mix vinegar and baking soda?”
4. Pour 10 mL of vinegar into an empty plastic bag. Tell students that vinegar is a liquid. It does not have a shape of its own. Tip the bag so the vinegar pools in one corner. Have students feel the bag with the vinegar inside. Ask them to describe the temperature.
5. On your anchor chart, draw the bag with vinegar inside. Label "vinegar" on the chart. Ask students to draw or record on their sheets.
6. Place a thermometer in the bag. Make sure the bulb of the thermometer is in the vinegar.
7. Record the temperature of the vinegar. Leave the thermometer in the bag.
8. Tell students that you are going to add baking soda to the bag of vinegar. Ask what they think will happen when you add the baking soda to the vinegar. As students share their predictions, encourage them to explain their thinking by asking, “Why do you think that?”
9. Remind students to carefully observe what happens when you add baking soda to the vinegar. They should be ready to describe their observations and draw what happened on their sheet.
10. Carefully pour 10 cm3 of baking soda into the bag and gently mix. NOTE: Milliliter (mL) is a liquid measurement and cubic centimeters (cm3) is a dry measurement. 1 mL = 1 cm3
11. Have students feel the bag with the new baking soda and vinegar solution. Tell them not to say out loud what they notice; hold that thought until you ask for their responses. After everyone has felt the bag, ask students, “What do you notice? Did anything change when we added the baking soda to the vinegar? Did anyone notice anything else besides the bubbles and temperature change? Did you hear anything?” (There were bubbles, the solution feels colder, there was a fizzing sound.)
12. Record students’ thoughts on the anchor chart, along with the new temperature of the solution. Have students record their thinking on their observation sheets.
13. As you label "bubbles", ask students, “Are the bubbles the same as the liquid we started with?” (No, they are different.) Explain that inside the bubbles there was a gas that was created when the baking soda was added to the vinegar. Using a different colored marker, add the word “gas” by bubbles on the anchor chart.
14. Discuss the results of the investigation with the students. Say, “We started with two different liquids, that were both room temperature. Did the same changes occur when we added new substances to them?” (Students should summarize results.) Tell students that these energy transformations involve chemical energy and thermal (heat) energy. Sometimes chemical reactions cause an increase in temperature, and sometimes chemical reactions can cause temperatures to decrease. Scientists have big words to describe these reactions. When a chemical reaction causes the temperature to increase, they call it an exothermic reaction – which means heat goes out, so it feels hotter. When a chemical reaction causes the temperature to decrease, they call it an endothermic reaction – which means the heat goes in, so the substance feels cooler.
Teaching Procedure Day 3: Reading About Science – Station Two: What Was Happening?
1. Display the anchor chart from the hands-on investigation, students should also have their own observation sheets. Have students use the observations to summarize what happened during the investigation.
2. Explain that you have an article you are going to read aloud. Display the article on the board, or give students a copy of the text. Tell students to use their scientific listening ears. If they hear a science word or phrase that helps to explain what happened during the investigation, they should raise their hand and explain what they heard.
3. Read the text aloud. Students should share new science vocabulary and phrases that they hear. You may need to model this for them the first few times. If students have a copy of the article, they can circle or highlight the science words they hear/read.
4. As new vocabulary is introduced in the text, compare the scientific terms to the words students used in their observations. Using a different color marker, add the scientific vocabulary next to the student language on your class anchor chart. Do not cross out the words students used previously, rather layer the science words near their original words. Have students add the scientific words on their observation page as well. Scientific words you might add for this investigation:
chemical energy
gas
thermal energy
5. Conclude the lesson by reviewing that energy makes changes. Mixing two substances caused a change to occur. Energy was released.
6. Have students say the thermal energy chant.
7. If desired, take students through the Station Two: English Language Arts Extensions.
Have more time? Choose Your Own Teaching Adventure
If you have more time, and your students are enjoying the investigations with thermal energy, you can continue with the hand warmer investigation. Please refer to Station Two in the Elementary Science of Energy guide for more information on this investigation.
Station Two: What Was Happening?
CHEMICAL ENERGY TRANSFORMATIONS
The whole world is made of solids, liquids, and gases. The chair you sit in is solid. It holds you up and does not change shape on its own. Water is a liquid. Liquids change shape to fill whatever container they are in. The air you breathe has oxygen and carbon dioxide, both are gases. Gases are everywhere. They are often invisible.
Water and Calcium Chloride
In this investigation you started with water inside of a bag. Water is a liquid. When you felt the water in the bag, how did you describe the temperature? The temperature of the water was room temperature. When you added calcium chloride to the water it did not create any bubbles. The calcium chloride and water looked different, but they just mixed together and nothing new was made. It was a physical change.
After you mixed the calcium chloride and the water, how did the bag feel? It felt hot! When calcium chloride is mixed into water it releases heat energy. We call this an exothermic reaction. “Exo” is a Greek prefix which means out. This is an exothermic reaction because heat moves out of the substance to warm your hands.
When you mixed water and calcium chloride there was a change. Because there was a temperature change, we know there was energy at work! Heat is energy.
Calcium Chloride
Station Two: What Was Happening?
CHEMICAL ENERGY TRANSFORMATIONS
Vinegar and Baking Soda
In this investigation you started with vinegar inside of a bag. Vinegar is a liquid. When you felt the vinegar in the bag, how did you describe the temperature? The temperature of the vinegar was the same as the rest of the room and the air in the room. We call this, “room temperature.” Remember, that energy can make change. Baking soda is a solid. When you added baking soda to the vinegar did you notice changes?
An endothermic reaction occurred when you combined vinegar and baking soda.
You saw bubbles form in the bag. They were moving and making sounds. The bubbles were a gas that was made when you added baking soda to the vinegar. Motion is energy. Sound is energy. When you felt the bag the temperature of the substance was different – it was cold! When you mix substances and the temperature gets colder, it is called an endothermic reaction. It feels colder because heat moves from your hand into the contents of the bag. Heat is energy.
The gas and the temperature change are signs that a chemical reaction took place as you mixed the substances together. Because there were changes, we know that energy was at work! Sound and heat are energy.
Station Two: English Language Arts Extensions
Activity 1: Word Morphology
Materials: Word Morphology “THERM” worksheet, page 46
Instructions:
1. Give students the Word Morphology “THERM” worksheet.
2. Explain that the word "morphology" is a really big word that means words contain smaller meaningful parts. We are going to use the morphemes in the chart to create words.
3. Go over the words and meanings in the chart. Explain that some morphemes are prefixes (word parts that come at the beginning of a root word) and some are suffixes (word parts that come after the root word). There is only one root word that we are going to focus on right now and that is THERM.
4. Explain that they will use the root word THERM to create words. Do one example together.
Say: I am going to use the root word THERM plus the suffix AL. The new word is THERMAL.
Say: Now I am going to look at the meaning of my root word and the meaning of my suffix to tell the meaning of the new word. I see that THERM means heat and the suffix –AL means of, related to. So thermal would mean 'related to heat'.
Say: With your partner, try to create one more new word using our root word THERM.
5. Discuss. What words did you create and what are their meanings?
Activity 2: Writing
The following prompts may be used to have students write more formal observations. What example of heat energy did we observe today?
Possible writing stems:
Emerging Writers
Energy is heat. When we mixed two substances I observed ________________.
Transitional Writers
(Some students may only write about one reaction, they can choose their favorite. Other students may be ready to write about both chemical reactions.)
We investigated chemical reactions. First, we started with ________________. I observed the __________ was _____________. Then we added _________________. I observed ______________________________________.
Next we started with ______________________. I observed the ___________ was __________. Then, we added _____________________.
This time I observed ________________________________. Both of these investigations are examples of ___________________ and _________________.
Challenge students who are ready to think about a new question they would investigate and add it to their writing. I wonder what would happen if _________________________________.
Activity 3: Vocabulary–Transformation
Materials: My New Vocabulary Word master, page 33
Instructions:
1. Write each syllable of the word "transformation" inside the word box.
a. Ask: How many syllables are in the word "transformation"? (4)
Guide students to draw four lines close to the bottom of the box on the top of the master to represent the number of syllables.
b. Ask: First syllable? (trans)
On the first syllable line, write the first syllable, “trans.”
c. Ask: Second syllable? (for)
On the second syllable line, write the second syllable, “for.”
d. Ask: Third syllable? (ma)
On the third syllable line, write the third syllable, “ma.”
e. Ask: Fourth syllable? (tion)
On the fourth syllable line, write the fourth syllable, “tion.”
2. Record information for syllables, phonemes, and graphemes.
a. Ask: How many syllables? (4)
b. Ask: How many phonemes, or sounds, in the word? (13)
c. Ask: How many graphemes, or letters, in the word? (14)
3. Record information for prefix, root/affix, and suffix.
a. Ask: What is a morpheme? (The smallest meaningful unit of a word.)
b. Ask: How many morphemes are there in the word transformation? (3)
c. When we break apart the word transformation, we notice there is the root word, “form.” Write “form” in the root/affix box.
Explain that “form” means “the shape or structure of something.” Write the meaning in the box directly under the root/affix.
Before the root word, there is the prefix, “trans-.” Write “trans-” in the prefix box.
d. Explain that “trans-” means “to change or alter.” Write the meaning in the box directly under the prefix.
After the word, there is a suffix, “-ation.” Write “-ation” in the suffix box.
e. Explain that “-ation” means “the action or process of doing something.” Write the meaning in the box directly under the suffix.
If we put together the prefix, root word, and the suffix, the meaning of transformation is, “the act or process of changing the shape or structure of something.”
4. Have students write their own meaning of the vocabulary word.
5. Address synonyms and antonyms.
a. Examples or Synonyms: Have students brainstorm examples of the vocabulary word, tell related words, or draw a picture.
b. Nonexamples or Antonyms: Have students brainstorm words that are the opposite of the vocabulary word or draw a picture.
6. Have students work together to tell how they would use the vocabulary word in a meaningful sentence.
Source: www.etymonline.com
Activity 4: Phonological Awareness
1. Review the syllable types we’ve learned so far:
Closed Syllable - one vowel followed by one or more consonants (short vowel)
Open Syllable - one vowel not followed by a consonant (long vowel)
Vowel Team - two vowels side by side
2. Teacher (T) to Students (S): Say, bag
S: bag
T: Delete the /g/. New Word?
S: (bā)
T: Real word or nonsense?
S: nonsense
3. Teacher (T) to Students (S): Say, not
S: not
T: Delete the /t/. New word?
S: (nō)
T: Real word or nonsense?
S: real
4. Teacher (T) to Students (S): Say, tip
S: tip
T: Delete the /p/. New word?
S: (tī)
T: Real word or nonsense?
S: nonsense
5. Teacher (T) to Students (S): Say, mix
S: mix.
T: Delete the /x/. New word?
S: (mī)
T: Real word or nonsense?
S: nonsense
Activity 5: Syllable Type: Silent-e Syllable
Materials:
Highlighters
Copies of the Silent-e Syllable worksheet, page 49
Syllable type? (silent-e - one vowel letter followed by a consonant and silent-e)
Vowel sound? /ī/
Word? (time)
c. Say: This word has a silent-e syllable. I will place this under the silent-e syllable card.
2. Contrast word card: Tim
a. Hold up the card with the word “Tim.”
b. Point to the vowel letter (i) and ask:
Silent-e or not silent-e? (not silent-e)
Syllable type? (closed syllable - one vowel followed by one or more consonants)
Vowel sound? /ĭ/
Word? (Tim)
c. Say: This word does not have a silent-e. I will place it under the "no symbol" card.
3. Practice using the additional word cards. Word cards following the skill: made, side, ride, same, like, shape, bake, bike, scribe. Contrast word cards: mad, Sid, rid, Sam, lick, back, not
a. Mix the rest of the word cards. Draw and hold up a card.
b. Point to the vowel letter/s and ask:
Silent-e or not silent-e?
Syllable type?
Vowel sound?
Word?
c. Have students place the word below the silent-e syllable card or the "no symbol" card.
d. Repeat these steps with each word card.
4. Give each student a Silent-e Syllable Type worksheet and a highlighter.
a. Read the paragraph and highlight all the words that have a silent-e syllable. (Note: silent-e syllable words are underlined in the passage below.)
Once you start pedaling, the bike is moving – there is motion. Scientists call this kinetic energy. But motion is not the only form of energy when the bike starts moving! If you close your eyes, can you tell if a bike is moving or not? You can probably hear the bike moving, meaning there is also sound energy! After you ride your bike, if you stop and feel the tires, they will feel warmer than when you started. This is because there is heat produced by the friction produced between the road and the tires.
b. Explain that the word “produced” is a multisyllable word where the second syllable follows the silent-e syllable type.
c. Read the underlined/highlighted words.
Activity 6: Syllable Shuffle
Instructions:
1. To play Syllable Shuffle, we’ll count how many syllables are in each word I say. Words that have two or fewer syllables go to the left side of the room. Words that have three or more syllables go to the right side of the room.
2. Remind students that syllables are how many “beats” are in each word. Each syllable contains a vowel sound.
3. Let’s practice a word.
Say: water
Let’s say the syllables in this word together. (wa*ter)
How many syllables? (2)
Students move to the left side of the room.
4. Let’s practice another word.
Say: energy
Let’s say the syllables in this word together. (en*er*gy)
How many syllables? (3)
Students move to the right side of the room.
5. Continue playing Syllable Shuffle using the following words: chemical, scientist, chloride, salt, observe, calcium, plastic, investigate, reaction, substance, thermometer, notice, temperature, vinegar, soda, endothermic, heat, exothermic, colder, reaction.
ELA Activity 1
Word Morphology “THERM”
PREFIX ROOT WORD SUFFIX MEANING
in, inside -al of, related to -ic of, related to
New Word Meaning
Cut out the word parts and move around to create new words. Write the new word and meaning in the chart above.
time Tim made side ride same
CONTINUED ON NEXT PAGE
Name:
Date:
Silent-e Syllable Type
In the paragraph below, highlight words with the silent-e syllable type.
Once you start pedaling, the bike is moving – there is motion. Scientists call this kinetic energy. But motion is not the only form of energy when the bike starts moving! If you close your eyes can you tell if a bike is moving or not? You can probably hear the bike moving, meaning there is also sound energy! After you ride your bike, if you stop and feel the tires, they will feel warmer than when you started. This is because there is heat produced by the friction between the road and the tires.
Objective:
Station Three Teacher Demonstrations
Students will be able to describe that solar energy can be transformed into electricity, which can transform into motion.
Station Three: Transporting Electricity diagram, page 52
Station Three: Solar Panel Observations worksheet, page 53
Station Three: What Was Happening? article, page 54
Station Three: English Language Arts Extensions, pages 55 - 57 (optional)
2 Preparation
Make copies of the Solar Panel Observations page and Station Three: What Was Happening? article for each student. Make a copy of the diagram to project.
Look ahead and choose a sunny day for this activity. Or, find an incandescent or halogen bulb you can use as a light source.
Practice assembling the solar panel, connecting the motor to the back of the panel. Add the fan blades to the post on the motor.
Take the system apart before beginning the lesson.
At the top of the anchor chart, write the question, “What can a solar panel do with solar energy?”
Leave space to record student responses.
Teaching Procedure Day 1: Solar Panel, Motor, and Fan
1. Pass out the observation sheet and explain that students will record their thoughts on this page.
2. Show students a fan that is not plugged into the wall. Ask students, “How can we get this fan to work?”
a. Guide students to needing to plug the fan into the wall and turn it on.
A Vocabulary
absorb
conductor
electrical energy
kinetic energy
photovoltaic
radiant energy
solar panel
transform
b. If needed, ask students why they need to plug the fan into the wall. Explain that electricity is needed to power the fan. Electricity is generated at large power plants. If possible, have a picture of the power plant that supplies electricity to your location and tell students which energy source is used to generate your electricity.
c. Show students the Transporting Electricity diagram. Explain that electricity travels from the power plant to the school through wires. It then travels through smaller wires into our schools and buildings to give us the electricity we need to power our devices and machines.
d. Tell students that there are multiple ways to generate electricity, it doesn’t always have to be at a large power plant.
3. Without the radiant energy light source, show students the solar panel. If you have a document camera available, you can put the panel under the document camera and project the panel for all students to see. Draw a diagram on an anchor chart and have students make observations about what they notice on their observation page. Record student thinking on your anchor chart. Have students follow along on their observation page.
4. Connect the motor to the solar panel. Add this to the diagram on the anchor chart and have students include it on their observation page. Explain that a motor is a machine that converts, or transforms, electrical energy into kinetic energy. Attach the fan blades to the motor. Add this to the diagram as well. The panel, the wires, the motor, and the fan blades all make up a system. Ask students, “Are the fan blades attached to the motor currently moving?” Explain that the blades are not moving which means there is no electrical energy moving through the system.
5. Tell students, "We need an energy source to start the electricity flowing through the system". If students need prompting, point to the word “solar panel” on the board or chart paper. What do students know about the word “solar?” The root word of “solar” is “sol” which means “sun.” What happens if the solar panel is put into the sun? (If you are using artificial light, tell students that you are using a light bulb to represent the sun.)
6. Bring the solar panel outside and have students observe what happens. What do they see? What do they hear?
7. Explain to students that inside of the solar panel are different elements. When radiant energy hits the panel, the electrons of the different elements begin moving – moving electrons are electricity! The electricity flows from the panel to the motor, which turns the blades, producing motion and sound.
Teaching Procedure Day 2: Reading About Science – Station Three: What Was Happening?
1. Display the anchor chart from the hands-on investigation. Students should also have their own observation sheet. Have students use the observations to summarize what happened during the investigation.
2. Explain that you have an article you are going to read aloud. Display the article on the board or give students a copy of the text. Tell students to use their scientific listening ears. If they hear a science word or phrase that helps to explain what happened during the investigation, they should raise their hand and explain what they heard.
3. Read the text aloud. Students should share new science vocabulary and phrases that they hear. You may need to model this for them the first few times. If students have a copy of the article, they can circle or highlight the science words they hear/read.
4. As new vocabulary is introduced in the text, compare the scientific terms to the words students used in their observations. Using a different color marker, add the scientific vocabulary next to the student language on your class anchor chart. Do not cross out the words students used previously, rather layer the science words near their original words. Have students add the scientific words on their observation page as well. Scientific words you might add for this investigation:
solar energy
radiant energy
electricity
kinetic energy
sound
5. Conclude the lesson by reviewing that energy makes changes. Radiant energy (sunlight) hitting the solar panel caused a change to occur – electricity was made! The electricity caused a change, too – it made the fan move!
6. Have students say the radient energy and electrical energy chants.
7. If desired, take students through the Station Three: English Language Arts Extensions.
Have more time? Choose Your Own Teaching Adventure
If you have more time, and your students are enjoying investigating radiant energy, you can continue by investigating how direct sunlight affects the temperature of an object, or how color affects radiant energy transformation. Please refer to Station Three in the Elementary Science of Energy guide for information on these investigations.
ower plant generates electricity T ransformer steps up voltage for transmission
ransmission lines carry electricity long distances Neighborhood t ransformer on pole steps down voltage before entering house
Step-down transformer reduces voltage (substation)
Station Three: What Was Happening?
RADIANT ENERGY TRANSFORMATIONS
Solar Panels Make Electricity
Everything in the world is made of very, very, small parts called atoms. The center of an atom is called the nucleus. Around the nucleus are electrons. Electrons can easily move through certain materials, called conductors. Electrons moving through a conductor are called electricity. Humans have discovered ways to generate electricity to run machines.
One way humans can make electrons move is by using solar panels. When sunlight, which scientists call radiant energy, hits the solar panel it makes electrons full of energy. The energized electrons move, and this is electricity. The electricity traveled through the wires, made of a conductor, to the motor. The motor changed the electricity to motion and the fan turned. Light is energy. Motion is energy.
As you can see in Figure 2, the electrons moved from where there were in Figure 1.
Nucleus
Elec tron
Figure 1
Figure 2
Solar panels make electricity to power a traffic signal.
Image Credit: Semiglass/Adobe Stock
Station Three: English Language Arts Extensions
Activity 1: Vocabulary Solar
Materials: My New Vocabulary Word master, page 33
Instructions:
1. Write each syllable for "solar" inside the word box.
a. Ask: How many syllables are in the word "solar"? (2)
Guide students to draw two lines close to the bottom of the box on the top of the master to represent the number of syllables.
b. Ask: First syllable? (so)
On the first syllable line, write the first syllable, “so.”
c. Ask: Second syllable? (lar)
On the second syllable line, write the second syllable, “lar.”
2. Record information for syllables, phonemes, and graphemes.
a. Ask: How many syllables? (2)
b. Ask: How many phonemes, or sounds, in the word? (4)
NOTE: Students may need a reminder that there are 4 phonemes because of the vowel-r syllable type
c. Ask: How many graphemes, or letters, in the word? (5)
3. Record information for prefix, root/affix, and suffix.
a. Explain that “sol” is a root/affix. Write “sol” in the root/affix box.
b. Explain that “sol” means “sun.” Write the meaning in the box directly under the root/affix.
After the root word, there is a suffix, “-ar.” Write “-ar” in the suffix box.
c. Explain that “-ar” means “of or relating to.” Write the meaning in the box directly under the suffix.
If we put together the root word and the suffix, the meaning of solar is, “of or relating to the sun.”
4. Have students write their own meaning of the vocabulary word.
5. Address synonyms and antonyms.
a. Examples or Synonyms: Have students brainstorm examples of the vocabulary word, tell related words, or draw a picture.
b. Nonexamples or Antonyms: Have students brainstorm words that are the opposite of the vocabulary word or draw a picture.
6. Have students work together to tell how they would use the word solar in a meaningful sentence. K-2 students may need to brainstorm phrases they’ve heard using the word solar, such as solar eclipse, solar system, solar wind, solar panel, solar battery, etc.
Followed by the letter r or not followed by the letter r? (vowel-r)
Syllable type? (vowel-r - one vowel letter followed by the consonant r)
Vowel sound? /ar/
Word? (start)
c. Say: This word has a vowel-r syllable. I will place this under the vowel-r syllable card.
d. Vowel-r words also say /er/ and /or/.
2. Contrast word card: light
a. Hold up the card with the word “light.”
b. Point to the vowel letter (igh) and ask:
Vowel-r or not vowel-r? (not vowel-r)
Syllable type? (vowel team)
Vowel sound? /ĭ/
Word?(light)
c. Say: This word does not have a vowel-r syllable. I will place it under the "no symbol" card.
3. Practice using the additional word cards. Word cards following the skill: turns, form, storm, car, chart, her. Contrast word cards: post, back, can, see.
a. Mix the rest of the word cards. Draw and hold up a card.
b. Point to the vowel letter and ask:
Vowel-r or not vowel-r?
Syllable type?
Vowel sound?
Word?
c. Have students place the word below the vowel-r syllable card or the "no symbol" card.
d. Repeat these steps with each word card.
Activity 3: Multisyllable Words
Materials:
White board
Red dry-erase marker
Multisyllable Word Cards, page 60
Instructions:
1. You may notice that some words contain more than one syllable type. Let’s take a look at some words with more than one syllable.
2. Write down the word solar.
To determine how many syllables are in this word, underline your vowels using a red dry-erase marker. Remember each syllable must have at least one vowel. Solar
To find my syllable, I will begin by dividing the word to the left of the letter "l". sō / lar
The first syllable has a vowel and no other consonants; therefore, it is an open syllable. The second syllable has a vowel-r. So, the word solar has open and vowel-r syllables.
3. Let’s try another example. Write the word transform
Underline the vowels: transform
Since there are two vowels, I know this word has two syllables. Let's find the first syllables. I notice there are three consonants between the vowels, "nsf." Let’s see if any of the letters are blends (2-3 consonants that each make their own sound) or digraphs (2 consonants that make one sound). The letters "n" and "s" can blend together, so the syllable goes between the "s" and "f." trans / form
The first syllable has one vowel followed by one or more consonants, which is a closed syllable. The second syllable has a vowel followed by the consonant "r", so it is a vowel-r syllable. We can say the word transform has closed and vowel-r syllables.
4. Here’s a challenging word: energy.
Underline the vowels: energy (Note: y used at the end of a word is considered a vowel. One syllable word "y" says /ī/; two or more syllable word y says /ē/.)
Since there are three vowels, I know this word has three syllables. To find the first syllable, I will first see if I divide the word to the left of the "n". I would read the first syllable as /ē/ nergy. That doesn’t sound right, so let’s try to divide the syllable after the "n". It would be /ĕn/ ergy. That sounds right. So, the first syllable is closed (one vowel followed by one or more consonants).
For the second syllable, I see the vowel "e" followed by the letter "r", so this syllable is vowel-r.
The last syllable is /jē/. This syllable has one vowel not followed by a consonant, so it would be open.
So, the word energy has three syllables: closed, vowel-r, open (en / er / gy)
Other multisyllable words to syllabicate: convert, panel, sunlight, kinetic, connect
Activity 4: Writing
Possible writing stems:
Emerging Writers Light is energy. I observed ___________________________________.
Transitional Writers
Today we investigated radiant energy transformations. We used a _________________ and connected it to_________________________ ____. When we were inside I observed ____________________. When we took the solar panel outside I observed __________________. Radiant energy transformed into ________________.
ELA Activity 2: Vowel-r Syllable Word Cards
start turns form storm car chart
ELA Activity 2: Vowel-r Syllable Word Cards
solar transform energy convert panel
Objective:
Station Four Teacher Demonstrations
THERMAL ENERGY AND MOTION ENERGY
Students will be able to explain that thermal energy can transform into motion energy.
? Question:
What happens to nitinol wire when it is placed in hot water?
Materials
Anchor chart
Nitinol wire (Live wire)
Clear beaker or cup (heat safe)
Hot water (not boiling)
Tongs
Safety glasses
Document camera (optional)
Station Four: Live Wire Observations worksheet, page 63
Station Four: What Was Happening? article, page 64
Station Four: Writing About the Live Wire, page 69
Station Four: English Language Arts Extensions, pages 65 - 66 (optional)
2 Preparation
A Vocabulary
absorb
alloy
kinetic energy
potential energy
reaction
thermal energy
titanium
Make copies of the Live Wire Observations page, Station Four: What Was Happening? article, and the Writing About the Live Wire page for each student.
At the top of the anchor chart, write the question, “What happens to nitinol wire when it is placed in hot water?”
Leave space to record student responses.
Have a source of hot water, and a clear glass container.
If you have a document camera, this is a good investigation to do under the camera and project so all students can safely see.
Teaching Procedure Day 1: Live Wire
1. Pass out the observations sheet to the students and explain that they will use this sheet to record their observations.
2. Show students the piece of nitinol wire in its straight form. Have students draw and label the wire in the first box labeled, “Original Shape” on their observation page.
3. Explain to students that the wire is flexible and can be twisted into a new shape. Twist the wire into a different shape, but do not tie the wire in a knot. Have students draw the new shape in their second box. Ask students, “Now that the wire is in a new shape, is it moving? Do you think the shape of the wire will change?”
4. Pick up the wire by one end using the tongs. While holding the wire with the tongs, dip the nitinol wire into the hot water. Ask students, “What did they notice? What do they wonder?” Have students record their observation on their observation page. Record their responses on the anchor chart.
5. Continue twisting and placing the wire in hot water as desired. Discuss the energy transformations with students by asking the following questions:
a. What caused the wire to change shape initially? (A person’s own kinetic energy)
b. Where did my (or the person who changed the shape of the wire) energy come from? (Food)
c. Where did the food get its energy from? (Plant based food – sun. Meat products – animals ate plants which had energy from the sun)
d. After the wire was twisted, did it immediately change back to its original shape? (No)
e. Could the wire change shape again? (Yes) What form of energy does an object have when the object can change, but isn’t at the moment? (Potential energy)
f. What caused the wire to change? (Thermal energy from the water)
6. Have students write about their observations using the Writing About the Live Wire worksheet.
Teaching Procedure Day 2: Reading About Science – Station Four: What Was Happening?
1. Display the anchor chart from the hands-on investigation. Students should also have their own observation pages. Have students use the observations to summarize what happened during the investigation.
2. Explain that you have an article you are going to read aloud. Display the article on the board or give students a copy of the text. Tell students to use their scientific listening ears. If they hear a science word or phrase that helps to explain what happened during the investigation, they should raise their hand and explain what they heard.
3. Read the text aloud. Students should share new science vocabulary and phrases that they hear. You may need to model this for them the first few times. If students have a copy of the article, they can circle or highlight the science words they hear/read.
4. As new vocabulary is introduced in the text, compare the scientific terms to the words students used in their observations. Using a different color marker, add the scientific vocabulary next to the student language on your class anchor chart. Do not cross out the words students used previously, rather layer the science words near their original words. Have students add the scientific words on their observation page as well. Scientific words you might add for this investigation:
Kinetic energy
Potential energy
Thermal energy
5. Conclude the lesson by reviewing that energy makes changes. Dipping the twisted wire into hot water caused a change to occur - the wire changed shape! The wire went from not moving (potential energy) to moving (kinetic energy).
6. Have students say the thermal energy and motion energy chants.
7. If desired, take students through the Station Four: English Language Arts Extensions.
Have more time? Choose Your Own Teaching Adventure
If you have more time, and your students are enjoying investigating thermal energy and motion, you can continue by investigating energy transformations that take place when you rub your hands together, bend paper clips, or stretch and release a rubber band. You can also investigate how thermal energy affects a bi-metal bar. Please refer to Station Four in the Elementary Science of Energy guide for information on these investigations.
Station Four: Live Wire Observations
Name:
Date:
Live Wire Observations
Station Four: What Was Happening?
THERMAL ENERGY AND MOTION ENERGY
Live Wire
The wire in this investigation is made of two different kinds of metals. This new material is called nitinol. Nitinol is special because it can “remember” its shape. In this investigation, your muscles used motion energy to bend the wire into a new shape. Your kinetic energy was stored as potential energy in the wire. When you put the wire into hot water, the wire remembered it used to be straight. The water’s heat, or thermal energy, transformed the potential energy into . It went from the shape you made back into a straight line. The shape changed so we know that energy was at work! Heat is energy. Motion is energy.
Thermal energy causes change, moving the wire straight again.
Potential energy is stored in the twisted Nitinol wire.
Station Four: English Language Arts Extensions
Activity 1: Phonemic Awareness
1. Say: absorb
Students repeat.
Ask: What is the first vowel sound in the word absorb? /ă/
2. Say: alloy
Students repeat.
Ask: What is the first vowel sound in the word alloy? /ă/
3. Say: kinetic
Students repeat.
Ask: What is the first vowel sound in the word kinetic? /ĭ/
4. Say: potential
Students repeat.
Ask: What is the first vowel sound in the word potential? /ō/
5. Say: reaction
Students repeat.
Ask: What is the first vowel sound in the word reaction? /ē/
6. Say: thermal
Students repeat.
Ask: What is the first vowel sound in the word thermal? /er/
7. Say: titanium
Students repeat.
Ask: What is the first vowel sound in the word titanium? /ī/
Activity 2: Vocabulary Reaction
Materials: My New Vocabulary Word master, page 33
Instructions:
1. Write each syllable inside the word box.
a. Ask: How many syllables are in the word reaction? (3)
Guide students to draw three lines close to the bottom of the box to represent the number of syllables.
b. Ask: First syllable? (re)
On the first syllable line, write the first syllable, “re.”
c. Ask: Second syllable? (act)
On the second syllable line, write the second syllable, “act.”
d. Ask: Third syllable? (ion)
On the third syllable line, write the third syllable, “ion.”
2. Record information for syllables, phonemes, and graphemes.
a. Ask: How many syllables? (3)
b. Ask: How many phonemes, or sounds, in the word? (7) (/r/ /ē/ /ă/ /k/ /sh/ /ә/ /n/)
c. Ask: How many graphemes, or letters, in the word? (8) (r-e-a-c-t-i-o-n)
3. Record information for prefix, root/affix, and suffix.
a. Explain that “action” is a root/affix. Write “action” in the root/affix box.
b. Explain that “action” means “to do” or “perform.” Write the meaning in the box directly under the root/affix.
Before the root word, there is a prefix, “re-.” Write “re-” in the prefix box.
c. Explain that “re-” means “back,” “again,” or “anew.” Write the meaning in the box directly under the prefix.
If we put together the prefix and the root word, the meaning of reaction is, “the act or process or reacting.”
4. Have students write their own meaning of the vocabulary word.
5. Address synonyms and antonyms.
a. Examples or Synonyms: Have students brainstorm examples of the vocabulary word, tell related words, or draw a picture. For example, react.
b. Nonexamples or Antonyms: Have students brainstorm words that are the opposite of the vocabulary word or draw a picture. For example, question.
6. Have students work together to tell how they would use the word reaction in a meaningful sentence. Have students think about the experiments performed in previous lessons, such as when baking soda and vinegar were combined and the bag felt colder and there was foam inside the bag.
Materials: Consonant -le Word Cards, pages 67 - 68
Instructions:
1. Remind students the consonant -le syllable type is always (at least) two syllables.
2. Word card: flexible
a. Hold up the card with the word “flexible.”
b. Ask:
Is there a consonant -le at the end of the word? (yes)
Is the first syllable open or closed? (closed)
What is the first syllable? (flex)
What is the second syllable? / ĭ /
What is the last syllable? (-ble)
Word? (flexible)
c. Say: This word has a consonant -le syllable. I will place this under the consonant -le syllable card.
3. Contrast word card: cabin
a. Hold up the card with the word “cabin.”
b. Ask: Is there a consonant -le at the end of the word? (no)
c. Say: This word does not have a consonant -le syllable. I will place it under the "no symbol" card.
4. Practice using the additional word cards. Word cards following the skill: handle, bubble, pickle, noodle, maple, staple, crackle. Contrast word cards: local, label, original, thermal, contest, notice, nitinol.
a. Mix the rest of the word cards. Draw and hold up a card.
b. Ask: Is there a consonant -le at the end of the word?
c. Have students place the word below the consonant -le syllable card or the "no symbol" card.
d. Repeat these steps with each word card.
Activity 4: Writing
Have students write about their Live Wire observations using the Writing About the Live Wire worksheet on page 69.
Possible writing stems: Emerging Writers
Heat is energy. I observed ___________________________________. Heat made ___________ change.
Transitional Writers
Today we investigated thermal energy transformations. We had a straight nitinol wire and changed the shape into __________________ . We placed the wire in ____________________. The water’s heat caused the wire to _____________________.
flexible handle
Name:
Date:
Writing About the Live Wire
Directions: Draw your observations in the boxes below. Then write about what happened using the sentence starters.
Objective:
Station Five: Teacher Demonstrations CHEMICAL ENERGY
Students will be able to describe how chemical energy can transfer to radiant energy and that thermal energy can also affect radiant energy.
? Questions:
How do glow sticks work?
What causes the light to change?
Materials
3 Glow sticks of the same color (one will remain unbroken)
1 Cup of hot water (not boiling)
1 Cup of cold water
Anchor chart
Neon highlighter
Markers
Safety glasses
Colored pencils/crayons (optional)
Document camera (optional)
Station Five: Glow Stick Observations worksheet, pages 73-74
Station Five: What Was Happening? article, page 75
Station Five: English Language Arts Extensions, pages 76-77
2 Preparation
A Vocabulary
chemical energy
chemical reaction
convert
molecule
radiant energy
reaction
thermal energy
liquid
Make copies of the Glow Stick Observations pages and Station Five: What Was Happening? article for each student.
At the top of the anchor chart, write the question, “What happens to a glow stick when it is placed in hot water?”
Replicate the drawings found on the Glow Stick Observations pages. Throughout the lesson you will record student responses here.
Prepare a cup of hot water.
Prepare a cup of ice water.
Teaching Procedure Day 1: Glow Sticks
1. Pass an unbroken glow stick around the class, or show one using a document camera. Have students look at the glow stick closely. What do they see?
a. What is inside of the glow stick?
b. Is the glow stick currently glowing?
c. Is there only liquid inside the glow stick?
d. After students notice the smaller tube, ask if the tube is empty or is something else in there.
e. As students share what they see, draw on your chart paper. Ask students what labels they can add. Use student language.
2. Pass out the observation pages, and have students draw the details they see in number one. Have students use labels and words to describe what they see as well.
3. Ask students what will happen if you bend the glow stick. Tell students to watch extra carefully as you bend the glow stick. If possible, do this under the document camera so all students can see what happens as it is projected.
4. Have students turn and talk to a partner to describe what they saw. Under the document camera, break the second glow stick as students observe again. Then have students record their observations in number two on their observation page.
5. Ask students, "What do you think made the glow stick start glowing?"
6. Explain that the glow stick is filled with two different liquids. In the outer tube there is a liquid with fluorescent dye. Inside of the smaller tube is a liquid called hydrogen peroxide. These liquids are made of different chemicals.
7. On your anchor chart, use a neon highlighter to draw small circles to represent fluorescent dye. Inside the tube use a solid marker to draw circles to represent the hydrogen peroxide. Explain that the chemicals are too small to see with our own eyes, but they are there and constantly moving. As needed, remind students that everything in the world is made up of chemicals. A chemical is any natural element, or a mixture of elements.
8. Continue explaining that when the liquids combine, the glow stick starts glowing. This is called a chemical reaction. In a chemical reaction, chemical energy is released and can produce light called radiant energy. Using a different color (than the other labels) add in the scientific vocabulary (chemical, fluorescent dye, hydrogen peroxide, chemical energy, radiant energy) next to student vocabulary.
9. Get the cup of hot water. Ask students what they think will happen if they put the glow stick in hot water. Why do they think that will happen? Have students respond using the sentence frame, “I predict the glow stick will _____ because ______.” Write this sentence frame on the board for students to refer to.
10. Place the glow stick in the hot water. Have students share what they see happening. Record their responses on the chart paper and have students record their observations on their observations page in diagram three.
11. Get the cup of cold water. Ask students what they think will happen if you put a glow stick in the cold water. Will it have the same reaction as the hot water? Let students share their thinking again using the sentence frame, “I predict the glow stick will ___ because ____.”
12. Place the glow stick in the cold water. Have students share what they see is happening. Record their responses on the chart paper and have students record their observations on their observations page in number four.
13. Explain that heat, or thermal energy, from the water was absorbed (taken in) by the glow stick. This made the chemicals in the glow stick move around faster, producing more light. When the glow stick was placed in the cold water, the chemicals had less energy to move around. The chemical reaction slowed down. This made the light not as bright.
14. Using the anchor chart and student pages, review today’s investigation.
a. Was the glow stick glowing at first? (No.) Could the glow stick glow? (Yes.) This is potential energy. The glow stick could glow, but wasn’t, so it had potential energy. The energy was stored in the chemicals.
b. When the chemical energy was released, it made light. Chemical energy can transform into light energy.
c. The hot water made the glow stick glow brighter. Light is energy. Heat is energy.
Teaching Procedure Day 2: Reading About Science – Station Five: What Was Happening?
1. Display the anchor chart from the hands-on investigation. Students should also have their own observation pages. Have students use the observations to summarize what happened during the investigation.
2. Explain that you have an article you are going to read aloud. Display the article on the board or give students a copy of the text. Tell students to use their scientific listening ears. If they hear a science word or phrase that helps to explain what happened during the investigation, they should raise their hand and explain what they heard.
3. Read the text aloud. Students should share new science vocabulary and phrases that they hear. You may need to model this for them the first few times. If students have a copy of the article, they can circle or highlight the science words they hear/read.
4. As new vocabulary is introduced in the text, compare the scientific terms to the words students used in their observations. Using a different color marker, add the scientific vocabulary next to the student language on your class anchor chart. Do not cross out the words students used previously, rather layer the science words near their original words. Have students add the scientific words on their observation page as well. Scientific words you might add for this investigation:
Liquid
Mix
Light
Chemical energy
5. Conclude the lesson by reviewing that energy makes changes. Mixing two substances caused a change to occur – the liquid started glowing!
6. Recite the radiant energy chant.
7. If desired, take students through the Station Five: English Language Arts Extensions.
Have more time? Choose Your Own Teaching Adventure
If you have more time, and your students are enjoying investigating chemical energy, you can continue by investigating how an apple will produce electricity with different metals. Please refer to Station Five in the Elementary Science of Energy guide for information on this investigation.
Station Five: Glow Stick Observations
Name:
Date:
Glow Stick Observations
1. Look closely at the unbroken glow stick. Add in details and use labels to describe what you see.
2. What happens when the glow stick is bent? What changed? Add in the details and use labels to describe what you see now.
Station Five: Glow Stick Observations
Name: Date:
Glow Stick Observations
3. What happens when you put the glow stick in hot water?
4. What happens when you put the glow stick in cold water?
Glow Sticks
Station Five: What Was Happening?
Inside of the glow stick is a liquid. Did you notice that there was also a small tube inside of the glow stick? This tube was filled with a different liquid. Each liquid is made of different substances. Nothing is happening in the glow stick yet, but there is potential energy in the chemicals that make up the liquid.
When you bend the glow stick, the tube inside breaks. The kinetic energy from your muscles moving mixed the liquids. The substances in the two liquids mix and start glowing. There is light! Energy was released by the chemicals in the liquid. Light was made. Potential energy transformed into light energy.
When you put a glow stick into cold water, the light was not as bright. The lower temperature of the cold water slowed down the atoms in the liquid. They released light slower than before.
When you put the glow stick in hot water, the higher temperature of the hot water made the atoms in the liquid move faster. They released light faster than before and the light got brighter. Light is energy. Heat is energy.
The glow stick in the hot water (right) glows brighter than the glow stick in the cold water (left) because the higher temperature increases the speed of the chemical reaction.
Station Five: English Language Arts Extensions
Activity 1: Phonological Awareness
Instructions:
1. Teacher (T) to Student (S): Say, glow
S: glow
T: Change /g/ to /s/. New word?
S: slow
2. Teacher (T) to Student (S): Say, tube
S: tube
T: Change /ū/ to /ŭ/. New word?
S: tub
3. Teacher (T) to Student (S): Say, light
S: light
T: Change /ī/ to /ŏ/. New word?
S: lot
4. Teacher (T) to Student (S): Say, lot
S: lot
T: Change /l/ to /h/. New word?
S: hot
Activity 2: Syllables and Vowel Sounds
Instructions:
1. Remind students that syllables are how many “beats” or “claps” are in each word. Each syllable contains a vowel sound.
2. For each word, ask students how many syllables they hear in the word and have them identify the vowel sound they hear in the first syllable.
3. Example: glow
How many syllables, or “beats,” are in the word glow?
Clap the beats in the word. (1)
What is the vowel sound in the first syllable? /ō/
4. Example: chemical
How many syllables, or “beats,” are in the word chemical?
Clap the beats in the word. (3)
What is the vowel sound in the first syllable? /ĕ/
Have students refer to their Glow Stick Observations pages to write a summary of the investigation. Use scaffolded sentence frames to help students organize their writing.
Emerging Writer
Today we observed glow sticks. First, the glow sticks were ________________________________. Then we broke them. When we broke them _____________________________.
OR, Next Step
Today we observed glow sticks. First, the glow sticks were ________________________________. Then we broke them. When we broke them _____________________________ because ______________________.
Transitional Writers
Today we observed ________________________. The first glow stick we observed was not broken. I noticed _________________ ________________________________. When the glow stick was bent, I saw ____________________________. This happened because ________________________. When we placed the glow stick in hot water, the light got _______________________. When we placed the glow stick in cold water, the light _____________________________________. I wonder what would happen if ___________________________.
Station Six: Teacher Demonstrations
ELECTRICAL ENERGY
Objective:
Students will be able to trace energy transformations back to the sun.
Station Six: Shake Flashlight Observations worksheet, page 80
Station Six: Energy Flow Cards, page 81
Station Six: Energy Flow Sequence, page 82
Station Six: What Was Happening? article, page 83
Station Six: English Language Arts Extensions, pages 84 - 86
2 Preparation
A Vocabulary
electricity
kinetic energy
potential energy transform magnet
wire light
A few days prior to this lesson turn the shake flashlight “on” so the battery drains and the light does not turn on.
Make copies of the observations worksheet, energy flow cards, sequence worksheet, and Station Six: What Was Happening? article for each student.
At the top of the anchor chart, write the question, “How is light produced in a shake flashlight?” Sketch the shake flashlight to resemble the one on the Station Six: Shake Flashlight Observations page. Leave space to record student responses.
Research the power plant which supplies your location’s electricity and have a picture of the plant available to share.
Teaching Procedure Day 1: Shake Flashlight
1. Point to the lights in your classroom. Ask, “Does anyone know what powers the lights in our classroom so they turn on?” Students might say that you have to turn the switch on. Ask students, "What happens when we turn on the switch?"
2. If available, share the Transporting Electricity diagram on a document camera. Explain that lights need electricity. Electricity for our homes and schools comes from a power plant which produces a large amount of electricity which travels by wires to our schools and homes. If you prepared an image of a local power plant, show it and explain how it generates electricity.
3. Show students a regular flashlight. Explain to students that there are no wires connecting the flashlight to the power plant. Ask if anyone knows what serves as the power source in the flashlight. If no one says batteries, or even if they do, take the batteries out. Explain that there is chemical energy inside of the batteries. When you turn the flashlight on, it allows the energy to flow from the batteries to the light bulb so the light turns on.
4. Pass out the observations sheets.
5. Show students the shake flashlight. Ask students what they notice about this flashlight. (No large batteries, something moves inside.) Add details to the shake flashlight drawing on your anchor chart, and ask students to do the same on their sheets.
6. Explain to students that this is a special flashlight. Often, people keep flashlights like this in an emergency kit because they do not require batteries to work. Point out the coils of wire and the magnets. Explain that when the magnet passes back and forth under the wires, it is generating electricity on a very small scale that will power the flashlight. This is called a shake flashlight. Pass the flashlight around the room letting each student shake the flashlight for 10 shakes. Then turn the flashlight on.
7. Discuss the energy transformations with students using the following prompts:
a. In order for there to be light energy – what had to happen? (The wires and magnet had to move)
b. What caused the wires and magnets to move? (Kids shaking it)
c. Motion is energy! So you had energy to shake the flashlight. Where did you get your energy from? (Food)
d. Ask a student what they ate for breakfast/lunch.
e. Ask students where the food got its energy from. Students may not know this right away. You may need to explain that cereal, for example, is made from grains, which is a plant. The plant uses the sun’s energy to grow. We get our energy from food, which gets its energy from the sun.
8. Pass out the energy flow cards and sequence worksheet. You can have students work in pairs or independently. Have students cut out the pictures and glue them into the proper box to show the energy transformations that caused the flashlight to turn on.
Teaching Procedure Day 2: Reading About Science – Station Six: What Was Happening?
1. Display the anchor chart from the hands-on investigation. Students should also have their own observation pages. Have students use the observations to summarize what happened during the investigation.
2. Explain that you have an article you are going to read aloud. Display the article on the board or give students a copy of the text. Tell students to use their scientific listening ears. If they hear a science word or phrase that helps to explain what happened during the investigation, they should raise their hand and explain what they heard.
3. Read the text aloud. Students should share new science vocabulary and phrases that they hear. You may need to model this for them the first few times. If students have a copy of the article, they can circle or highlight the science words they hear/read
4. As new vocabulary is introduced in the text, compare the scientific terms to the words students used in their observations. Using a different color marker, add the scientific vocabulary next to the student language on your class anchor chart. Do not cross out the words students used previously, rather layer the science words near their original words. Have students add the scientific words on their observation page as well. Scientific words you might add for this investigation:
coil
wire
magnet
motion
electricity
light energy
5. Conclude the lesson by reviewing that energy makes changes. The flashlight was off and now it is on. Shaking the flashlight caused a change to occur – the light is shining!
6. Have students say the motion energy, electrical energy, and radiant energy chants.
7. If desired, take students through the Station Six: English Language Arts Extensions.
Have more time? Choose Your Own Teaching Adventure
If you have more time, and your students are enjoying investigating the flow of energy through systems, you can continue exploring how energy flows through the food chain. Please refer to the guide, What is Energy?, available from www.need.org/shop, for information on these activities.
Station Six: Shake Flashlight Observations
Name:
Date:
Station Six: Energy Flow Cards
Station Six: Energy Flow Sequence
Name:
Date:
Station Six: What was Happening?
Energy Flows
Humans discovered ways to move electrons to generate electricity. When you move magnets near a coil of wire that is connected in a loop, the electrons move. Electricity is moving electrons. Your muscles used motion energy to shake the flashlight. This moved a magnet back and forth through a coil of wire. Electrons in the wire started moving. The electricity was used to power the light! Motion is energy. Light is energy.
Where did you get the energy to shake the flashlight? You get your energy from the food you eat. Plants get their energy from the sun. It is stored in the plant as chemical energy until you eat it. Light energy transformed into chemical energy in the plant. You ate the plant. Chemical energy transformed into motion energy in your muscles. Motion energy transformed into light energy in the flashlight.
Eating food gives us energy. Shake flashlight.
Station Six: English Language Arts Extentions
Activity 1: Morphology
Materials: Morphology Word Cards, page 85.
Instructions:
1. In this activity, add prefixes or suffixes to base words, to change the meaning of words. Explain that many words contain meaningful parts that we can add or delete from a root word. These are called morphemes.
2. Example word: connect
Write connect on the board. The meaning of this word is “to join together; link.”
If I add the prefix “re-“ to the word connect, it forms a new word, reconnect. The prefix “re-” means “again.” So, the meaning of the new word, reconnect, is “to connect together again.”
If I add the suffix “–ion” to the word connect, it forms a new word, connection. The suffix “-ion” means “a process or result.” So, the meaning of the new word, connection, is “the process or result of connecting.”
If we change the suffix “–ion” to “–ing,” the meaning would also change. Connecting means “the action of connecting.”
Ask students: Can you think of another word that uses the root word connect? (disconnect, disconnected, connectable, connected, connecter, connects)
3. Root word: form
Have students cut out the Morphology Word Cards.
Students should have the root word, form, in front of them (or work in pairs).
Form means “the shape or structure of something.”
Let’s add the prefix “trans-“ to this word. Where does a prefix go...before or after the word? (before)
So, our new word is transform
What does the prefix “trans-“ mean? (to change or alter)
What does transform mean? (to change or alter the shape or structure of something)
Let’s think about science, what is something that can transform? One example is a glow stick. It can transform when we bend it.
We can add the suffix “–ion” to the word transform. What does “–ion” mean when we add it to a word? (a process or result)
What does the new word, transformation, mean? (the result of a change in the form of something)
Let’s now change the suffix, “ –ion,” to “–able.” What does the suffix “–able” mean? (able to do something)
What does the new word, transformable mean? (to be able to change the form of something)
4. Guide students to use one of the additional root words (move, light, locate) to create a new word with one of the prefixes or suffixes discussed. For example: remove, relight, relocate, location, relocation, moveable, etc.
What do the new words mean?
Also check for nonsense words created and discuss that. What do you think the nonsense word means based on the prefix/suffix? For example, a student says that "lightion" means a process of lighting. Teacher response: Great thinking. This is a nonsense word, but I like how you were able to tell the meaning of this nonsense word using your knowledge of the suffix “–ion.”
Activity 2: Writing
Materials: I Have Energy, page 86
1. Discuss these two questions with students:
Where do you get your energy from?
What do you do with all that energy?
2. Give each student an I Have Energy writing page.
3. Have students draw a picture of themselves doing their favorite activity.
4. Students can write where they get their energy from (for example, their favorite food) and then write about a favorite activity they like to do.
ELA
Root Word: the shape or structure of something
Prefix: to change or alter
Suffix: a process or result
Suffix: able to do something
Prefix: again
Root Word
Unit Assessment and Evaluations
Assessment Activity: Forms of Energy
Materials: Energy at the Basketball Game, page 88.
Instructions:
1. Give each student an Energy at the Basketball Game page.
2. Say: The PE teacher is having a class play basketball. Label all of the different energy forms in the picture.
3. Answer Key: Labels could include kinetic energy from the ball bouncing, or potential energy with the ball in a student’s hand. Radiant energy from the sun. Sound energy from the students talking. Sound energy from shoes squeaking. Kinetic energy of students moving. Motion energy of hair swinging.
Evaluation
Provide feedback by completing the evaluation form on page 91 and returning it to NEED.
Assessment Activity: Energy at the Basketball Game
Name:
Date:
Instructions: Label the energy forms in the picture.
A Vocabulary
chemical
elastic
electrical
energy
gravitational potential
kinetic
motion
potential
radiant
sound
thermal
Glossary a c b
absorb take in or hold
alloy
a substance made by mixing two or more metals, or a substance made by mixing metal/s with a nonmetal
chemical energy the energy stored in substances; the energy held in the atomic bonds that hold atoms to each other chemical reaction a change or process in which new substances are formed conductor a material that transfers energy through it well, often metal convert to change the physical or chemical properties of a substance electrical energy the energy of moving electrons; a secondary source of energy electricity the energy of moving electrons
gas a substance with no definite volume or shape
heat* energy that flows from one object to another because of a difference in temperature inflate to cause to expand with air or gas kinetic energy the energy of motion
light form of energy that makes it possible to see things
liquid a substance with a definite volume, but not a definite shape; a liquid takes the shape of the container in which it is placed magnet an object that can attract certain types of metal, and can attract or repel other magnets molecule composed of two or more atoms that are chemically bonded to each other and act as a single particle; the smallest part of a substance that has all of the properties of that substance motion change in position, movement
photovoltaic meaning energy from light; a device that uses light to create electricity physical change a change in the physical properties of a substance, usually reversible potential energy energy that is stored in an object based upon its position radiant energy electromagnetic energy that travels in waves such as light, x-rays, and microwaves reaction a response that is produced by the action of another object or force solar panel a group of solar cells
solid a substance that has definite volume and shape sound form of energy created by vibrations, or sound waves temperature the measure of the average kinetic energy of particles in a substance thermal energy* the sum of energy of the molecules making up a substance; for this unit, it is used to mean heat titanium a silvery-gray, metallic element that is lightweight and strong; number 81 on the periodic table of elements
transform to change the structure, shape, or composition of a substance, or to change energy from one form to another
transformation the act of changing the structure, shape, or composition of an object, or one form of energy into another wire flexible strand of metal
*PLEASE NOTE: In this unit, the terms thermal energy and heat are used to mean the same thing, as in the National Science Education Standards. However, technically, they are not the same thing. Thermal energy is the sum of the energy of the molecules making up a substance - kinetic and potential. When this thermal energy is transferred from one place or object to another, it is called heat.
Youth AWards Program for Energy Achievement
NEED’s annual Youth Awards Program for Energy Achievement rewards students for their e orts in energy outreach and student leadership.
The Youth Awards Program is great for all schools—new to energy education, or veteran. Projects and outreach completed for the program provide opportunity for enrichment and engagement, as well as an opportunity for your students, classroom, and school to shine. Youth Awards projects can be completed by afterschool/out-of-school time programs, community groups, and even families!
What’s involved?
Students and teachers set goals and objectives and keep a record of their activities. Students create a digital project to submit for judging. In April, digital projects are uploaded to the online submission site.
Check out:
For more information and project submission details, we invite you to visit https://youthawards.need.org. Be sure to explore the site to view past winning projects and garner inspiration!
Youth Energy Conference & Awards
The NEED Youth Energy Conference and Awards gives students more opportunities to learn about energy and to explore energy in STEM (science, technology, engineering, and math).
The annual June conference has students from across the country working in groups on an Energy Challenge designed to stretch their minds and energy knowledge. The conference culminates with the Youth Awards Ceremony recognizing student work throughout the year and during the conference.
For More Info: www.need.org/youthenergyconference
Primary Science of Energy Evaluation Form
1. Did you conduct the entire unit?
2. Were the instructions clear and easy to follow?
3. Did the activities meet your academic objectives?
4. Were the activities age appropriate?
5. Were the allotted times sufficient to conduct the activities?
6. Were the activities easy to use?
Yes
Yes
Yes
Yes
Yes
Yes
7. Was the preparation required acceptable for the activities? Yes
8. Were the students interested and motivated?
9. Was the energy knowledge content age appropriate?
10. Would you teach this unit again?
Yes
Yes
Yes
No
No
No
No
No
No
No
No
No
No Please explain any ‘no’ statement below How would you rate the unit
How would your students rate the unit
What would make the unit more useful to you?
Other Comments:
AES
AES Clean Energy Development
American Electric Power Foundation
Appalachian Voices
Arizona Sustainability Alliance
Atlantic City Electric
Avangrid
Baltimore Gas & Electric
Berkshire Gas - Avangrid
BP America Inc
Bob Moran Charitable Giving Fund
Cape Light Compact–Massachusetts
Celanese Foundation
Central Alabama Electric Cooperative
CITGO
The City of Cuyahoga Falls
Clean Virginia
CLEAResult
ComEd
Con uence
ConocoPhillips
Constellation
Delmarva Power
Department of Education and Early Childhood
Development - Government of New Brunswick, Canada
Dominion Energy, Inc.
Dominion Energy Charitable Foundation
DonorsChoose
East Baton Rouge Parish Schools
East Kentucky Power Cooperative
EcoCentricNow
EDP Renewables
EduCon Educational Consulting
Elmo Foundation
Enel Green Power North America
EnergizeCT
ENGIE
Entergy
Equinix
Eversource
Exelon
Exelon Foundation
Foundation for Environmental Education
FPL
Generac
Georgia Power
Gerald Harrington, Geologist
Government of Thailand–Energy Ministry
Greater New Orleans STEM
GREEN Charter Schools
Green Power EMC
Guilford County Schools–North Carolina
Honeywell
National Sponsors and Partners
Illinois Clean Energy Community Foundation
Illinois International Brotherhood of Electrical
Workers Renewable Energy Fund
Independent Petroleum Association of New Mexico
Interstate Natural Gas Association of America Foundation
Intuit
Iowa Governor’s STEM Advisory Council -
Scale Up
Iowa Lakes Community College
Iowa State University
Iron Mountain Data Centers
Kansas Corporation Energy Commission
Kansas Energy Program – K-State Engineering
Extension
Katy Independent School District
Kentucky Environmental Education Council
Kentucky O ce of Energy Policy
Kentucky Power–An AEP Company
Liberty Utilities
Llano Land and Exploration
Louisiana State Energy O ce
Louisiana State University – Agricultural Center
LUMA
Marshall University
Mass Save
Mercedes Benz USA
Minneapolis Public Schools
Mississippi Development Authority–Energy Division
Motus Experiential
National Fuel
National Grid
National Hydropower Association
National Ocean Industries Association
National Renewable Energy Laboratory
NC Green Power
Nebraskans for Solar
NextEra Energy Resources
Nicor Gas
NCi – Northeast Construction
North Shore Gas
O shore Technology Conference
Ohio Energy Project
Oklahoma Gas and Electric Energy Corporation
Omaha Public Power District
Ormat
Paci c Gas and Electric Company
PECO
Peoples Gas
Pepco
Performance Services, Inc.
Permian Basin Petroleum Museum
Phillips 66
PowerSouth Energy Cooperative
PPG
Prince George’s County O ce of Human
Resource Management (MD)
Prince George’s County O ce of Sustainable Energy (MD)
Providence Public Schools
Public Service of Oklahoma - AEP
Quarto Publishing Group
The Rapha Foundation
Renewable Energy Alaska Project
Rhoades Energy
Rhode Island O ce of Energy Resources
Salal Foundation/Salal Credit Union
Salt River Project
Salt River Rural Electric Cooperative
Schneider Electric
C.T. Seaver Trust
Secure Solar Futures, LLC
Shell USA, Inc.
SMUD
Society of Petroleum Engineers
South Carolina Energy O ce
Southern Company Gas
Snohomish County PUD
SunTribe Solar
TXU Energy
United Way of Greater Philadelphia and Southern New Jersey