

STEM EXPLORATION
Playful Experiments, Powerful Ideas
Activity Book

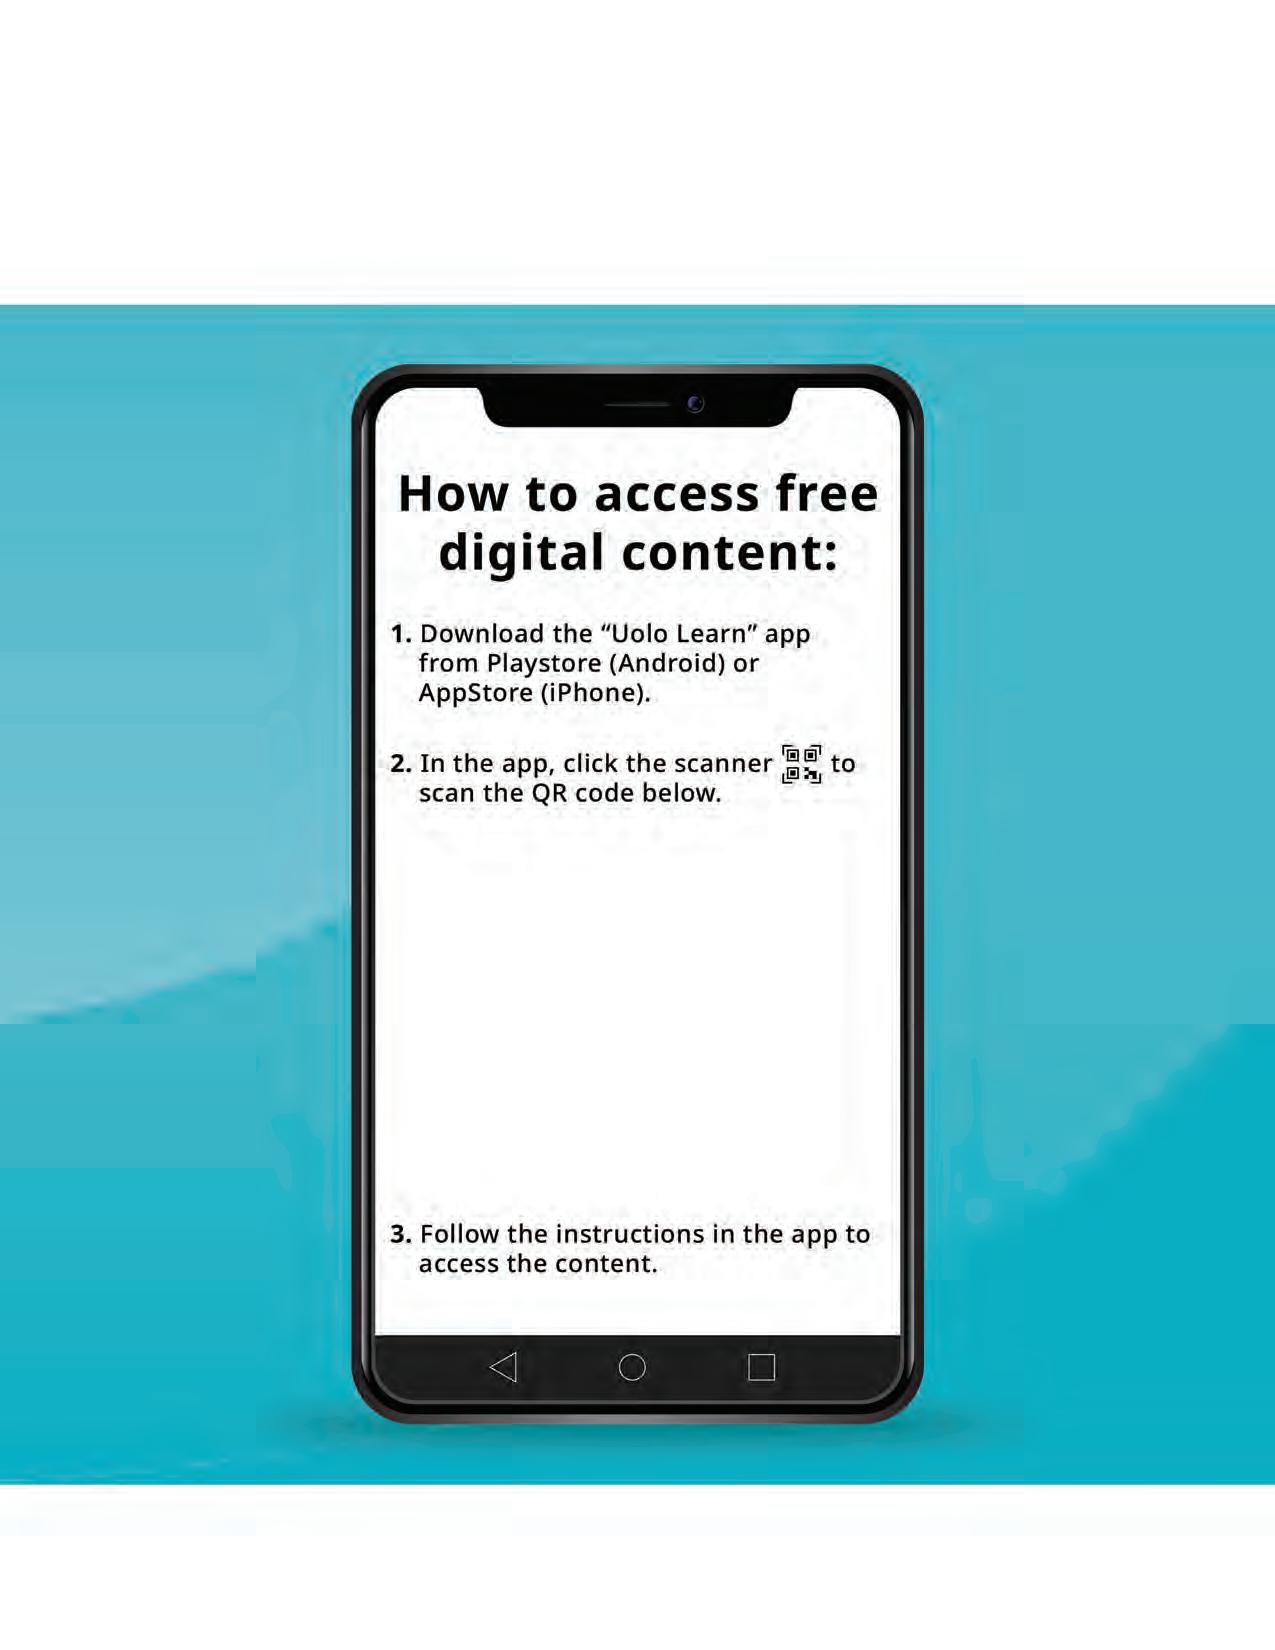
Get access to animated learning videos, interactive quizzes, projects and more — all on the Uolo Learn app!
STEM EXPLORATION
Activity Book

Acknowledgements
Academic Authors: Binny Singhal, Diksha Sharma
Design & Production: Satish, Mangal Singh Rana, Wajahat Khan, Sneha Sharma, Vishesh Agarwal
Project Lead: Bhavna Tripathi
VP, Learning: Abhishek Bhatnagar
All products and brand names used in this book are trademarks, registered trademarks or trade names of their respective owners.
© Uolo EdTech Private Limited
First edition 2026
This book is sold subject to the condition that it shall not by way of trade or otherwise, be lent, resold, hired out, or otherwise circulated without the publisher’s prior written consent in any form of binding or cover other than that in which it is published and without a similar condition including this condition being imposed on the subsequent purchaser and without limiting the rights under copyright reserved above, no part of this publication may be reproduced, stored in or introduced into a retrieval system, or transmitted in any form or by any means, electronic, mechanical, photocopying, recording or otherwise, without the prior written permission of both the copyright owner and the above-mentioned publisher of this book.
Book Title: STEM Exploration 5
ISBN: 978-93-49697-04-1
Published by Uolo EdTech Private Limited
Corporate Office Address:
91Springboard, 3rd Floor
145, Sector 44, Gurugram, Haryana 122003
CIN: U74999DL2017PTC322986
Printed by: Printpro Solutions
Illustrations and images: www.shutterstock.com, www.stock.adobe.com and www.freepik.com
All suggested use of the internet should be under adult supervision.
Preface
In today’s dynamic world, nurturing curiosity, critical thinking and creativity in learners is essential for preparing them to be the innovators and problem-solvers of tomorrow. STEAM education—integrating Science, Technology, Engineering, Arts and Mathematics—offers a holistic and experiential approach to support this endeavour. By encouraging learners to ask questions, make predictions and experiment, STEAM transforms learning into a joyful process of exploration and discovery while building essential life skills such as problem-solving, analytical thinking and collaboration.
At Uolo, we recognise the transformative potential of STEAM learning. The Uolo STEM Exploration series is based on the vision of the National Education Policy (NEP) 2020 and the National Curriculum Framework (NCF) 2022–23 , reflecting the shift from rote memorisation to experiential, multidisciplinary and competency-based learning. By making learning joyful, discovery-driven and rooted in real-life contexts, the series encourages inquisitiveness, creativity and the spirit of teamwork to enable learners to explore scientific and mathematical concepts in visual and creative ways. Through interdisciplinary connections, the use of accessible materials and a focus on real-world applications, it ensures that the learning remains inclusive, meaningful and lasting.
In line with global perspectives, STEAM is recognised as a pathway to nurture innovation and adaptability while contributing to the United Nations Sustainable Development Goals (SDGs). The STEM Exploration series embraces this global mission, ensuring that learners are prepared to contribute to a sustainable and equitable future.
The STEM Exploration series features age-appropriate, visually engaging and well-structured activities that integrate one or more disciplines of Science, Technology, Engineering, Arts and Mathematics. The book has been thoughtfully designed to spark curiosity and foster inquiry-driven learning through hands-on experiences that connect core concepts with the real world. Each activity inspires learners to observe, test and reflect, giving them the ability to think critically and apply their learning to every day situations.
To further enrich the learning experience, the series comes with digital content, provided free of cost, to ensure a seamless and holistic learning experience for learners. This content is accessible through QR codes, offering live demonstrations of activities for visual and self-paced learning. Together, these components nurture a dynamic learning journey that connects knowledge with skills, preparing children to innovate and thrive.
Uolo is accredited by STEM.org, one of the world’s leading STEM education research and credentialing organisations. This recognition validates the quality, authenticity and impact of our educational offerings. The content has been reviewed and approved by STEM.org’s rigorous standards, underscoring our commitment to delivering globally benchmarked educational resources.
By integrating artistic expression with scientific exploration, the STEM Exploration series nurtures learners to be inquisitive, confident and competent—ready to question, innovate and contribute meaningfully as global citizens.
We extend our warmest wishes to educators, parents and learners as they embark on this journey of discovery and innovation. Together, let us make learning an adventure that sparks imagination and inspires lifelong curiosity.
Key features of the book
Hands-on and Inquiry-Based Learning
The STEM Exploration series sparks curiosity through hands-on, inquiry-led activities that align with the NEP 2020. Children observe, question, explore and solve, thereby, building scientific temper, creativity and problem-solving skills.

STEAM Alignment
The activities in the book integrate Science, Technology, Engineering, Arts and Mathematics, encouraging interdisciplinary connections.
Visually Engaging and Fun
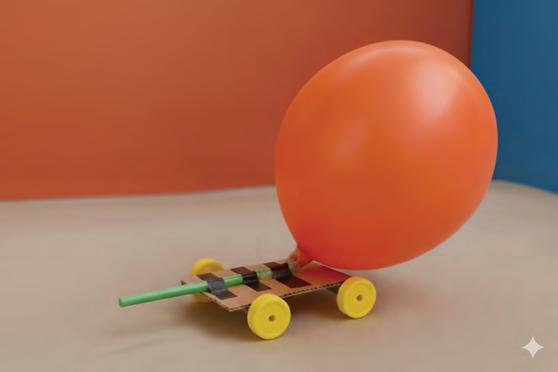
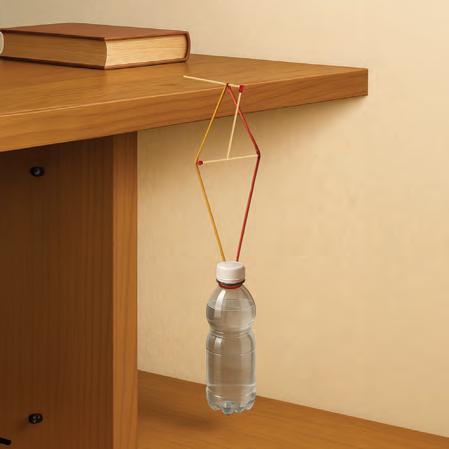
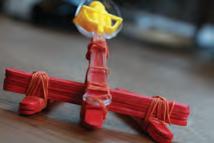
The book features vivid colours and lively illustrations to engage learners. A real-life image is provided at the end of each activity, helping learners connect concepts with practical outcomes.
Easy-to-Access Resources
All experiments are safe, age-appropriate and use low-cost and easily available materials, with clear step-by-step instructions for easy execution.

Critical and Creative Thinking
The activities encourage ‘learning by doing’. The Science Behind It section includes simplified explanations of the underlying principle while the Find Out More section offers extension activities for deeper exploration.

Real-World Connections
Experiments and worksheets connect learning to daily life and local contexts, making it practical and meaningful. The Real-Life Connect highlights direct applications of the concepts, showing learners how classroom concepts are relevant in the world around them.

Digitally Powered and Application-Based
Each activity is followed by a fun, application-based worksheet that helps learners revise and reinforce the key concepts. QR codes provide experiment videos for better clarity and self-paced learning.

Framework
to integrate the domains of STEAM — Science, Technology,
Each activity in this book is thoughtfully
Arts and Mathematics. The table illustrates how activities align with one or more STEAM areas, ensuring that learning is interdisciplinary, engaging and competency-driven, in line with the NEP 2020 and NCF 2022 –23.
Smart ScIentIfIc TIps Before You ExperIment


Gather Your Materials First
Before you begin, collect everything you need for the experiment. Having your materials ready saves time and keeps the process smooth.
Ask Questions Often
Good scientists are curious. Don’t just follow the steps stop and ask ‘Why did this happen?’ or ‘How does this work?’ The more questions you ask, the deeper your understanding will be.
Take Your Questions Further
Use each experiment as a starting point. If something surprises you, try it again with a change. New questions lead to new experiments, and that’s how real discoveries happen!
Failure Is Part of Science
Not every experiment works the first time, and that’s okay. Instead of feeling discouraged, think about what might have gone wrong and what you can adjust. Failure often teaches you more than success.
Make a Journal
Maintain a journal for all your experiments. Record observations, results, sketches and reflections. Journalling helps organise your thoughts, track progress over time and sparks ideas for future experiments.
Have Fun and Stay Curious
Science and experimentation is all about enjoying the process of discovery. Even small results can be exciting if you pay attention. Look for the ‘Aha!’ moments and celebrate them.


Walkthrough of Key Elements


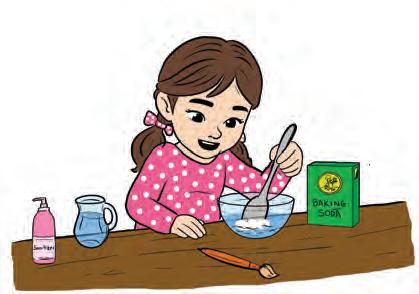


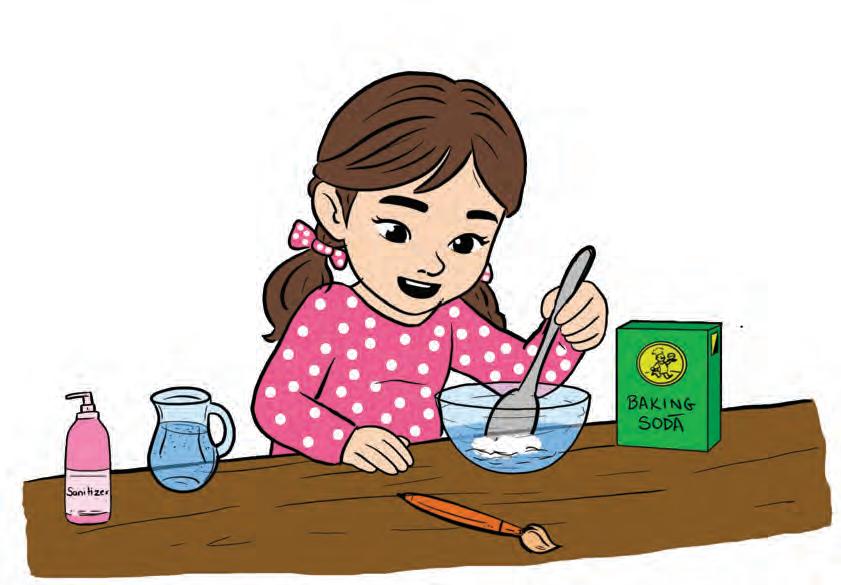



InvIsIble Ink Messages
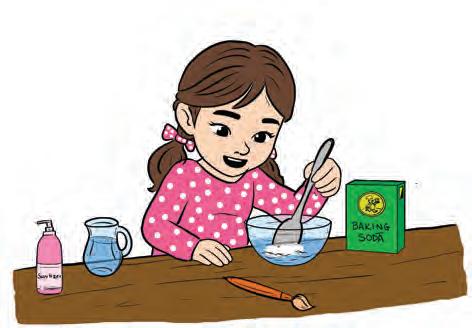
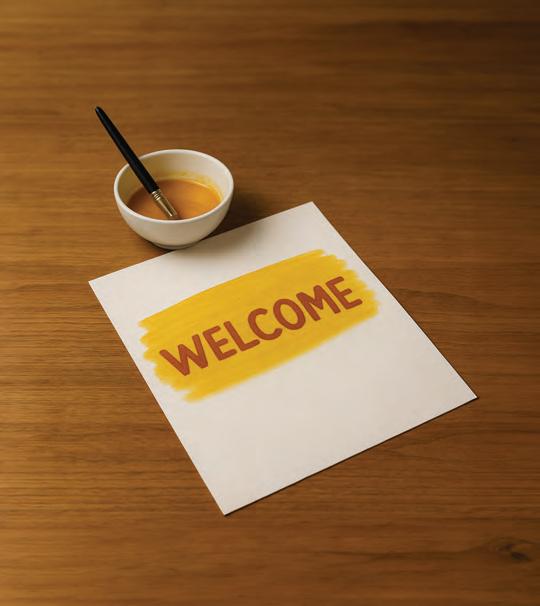
In this activity, we will see how turmeric changes colour when mixed with baking soda to make a hidden message appear.
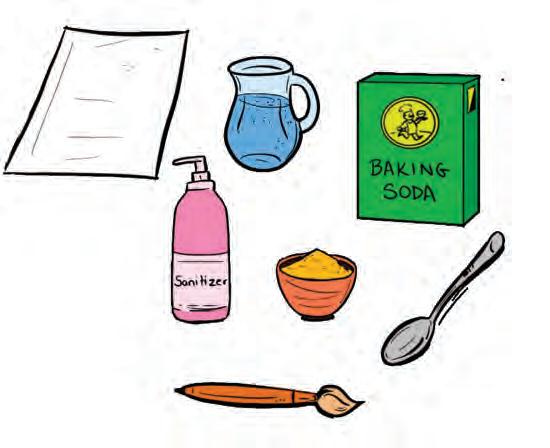
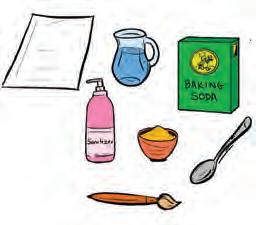
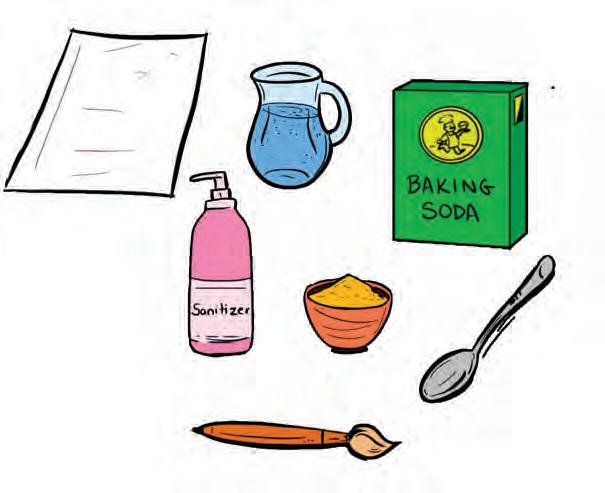
What We Need
• Sanitizer
• Baking soda
• Turmeric
• 1 paintbrush
• 1 white sheet
• 1 spoon
• Water

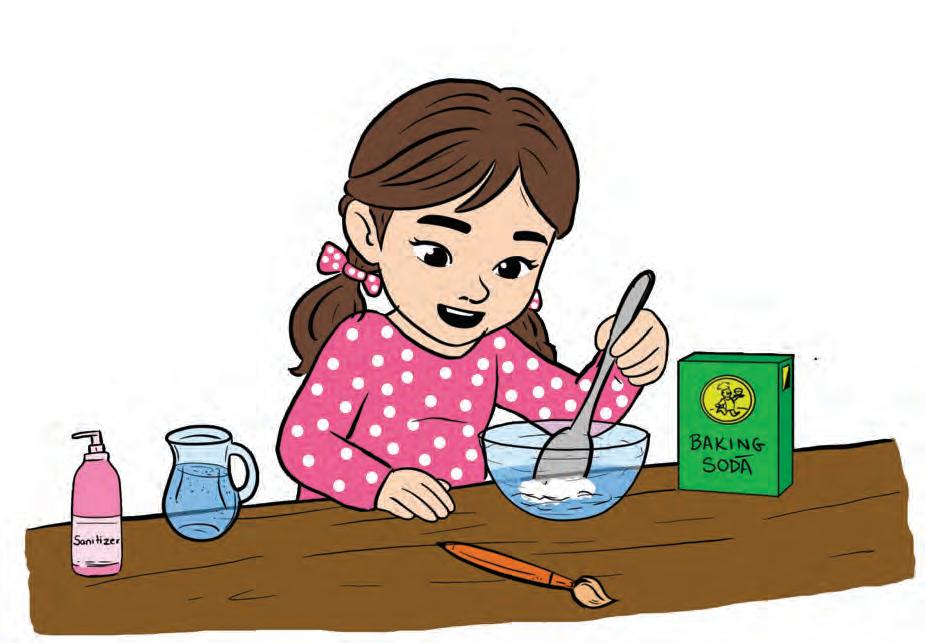
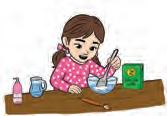
1. Mix 1 spoon of baking soda with a little water in a bowl.
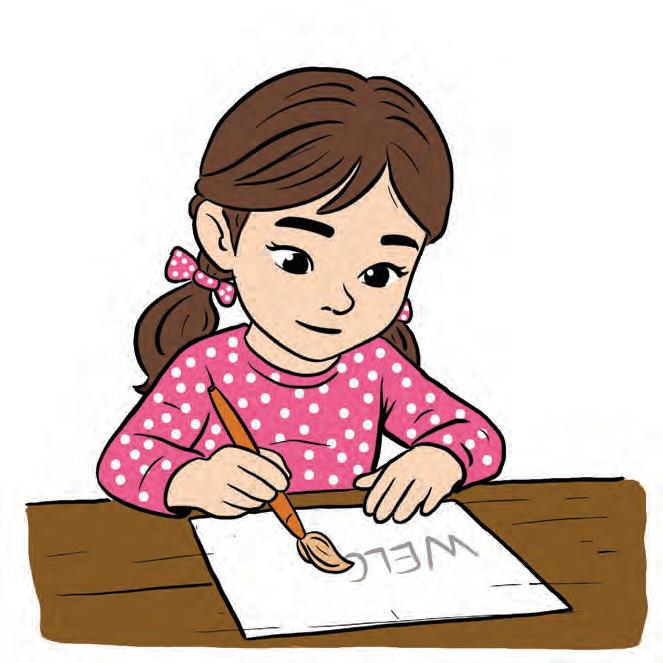
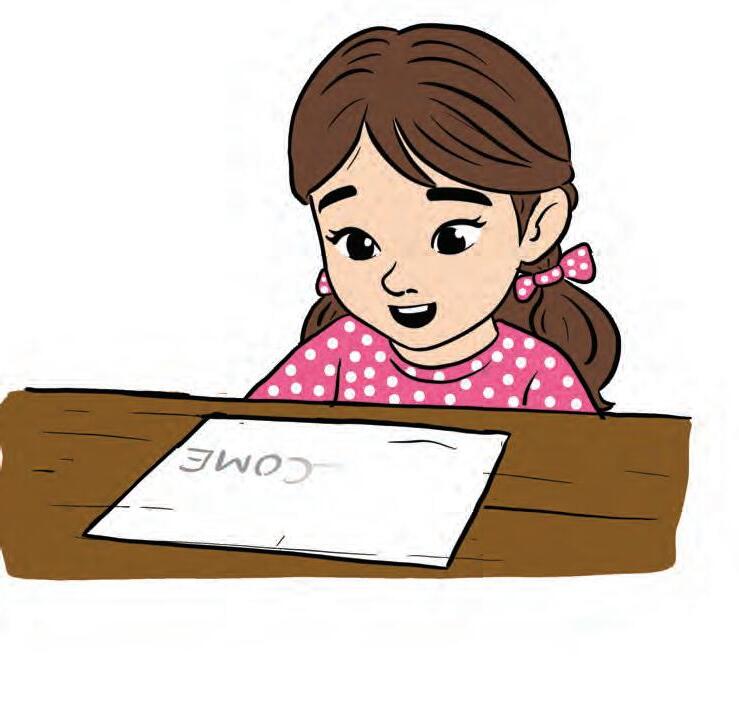
Dip the brush into the paste and write ‘WELCOME’ on the white
3. Let the paper dry. Watch as the message
bowl to make a paste.
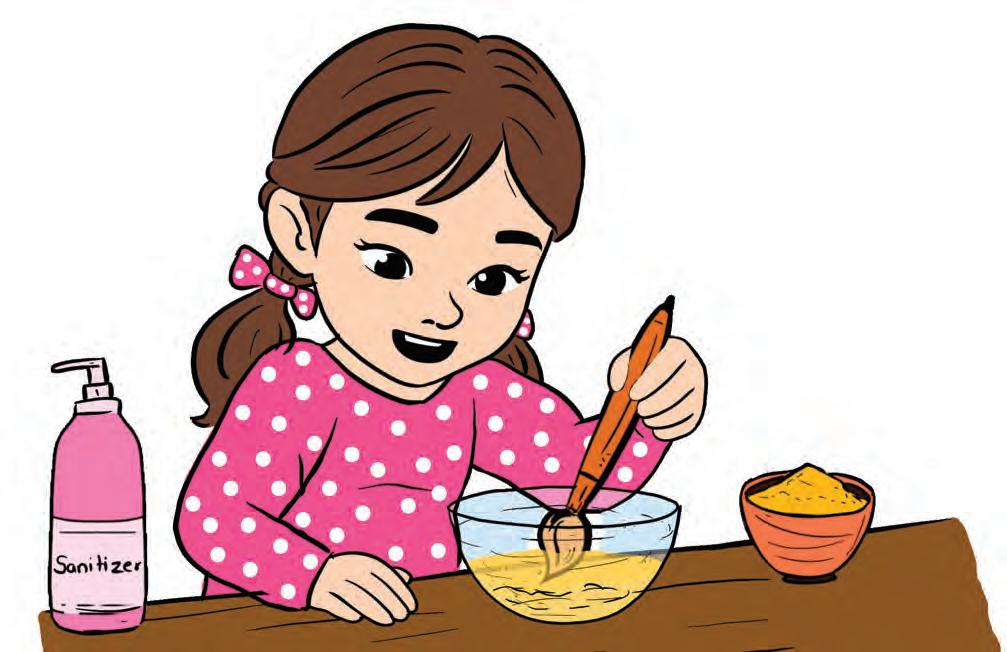
Use only a small amount of sanitizer. Watch Out

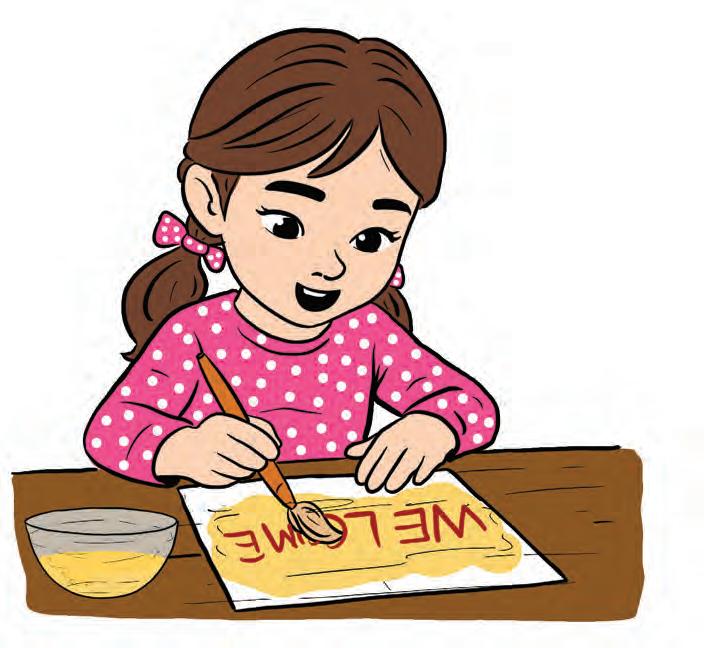
Gently spread the paint over the paper and watch your secret message appear.
Real-lIfe Connect

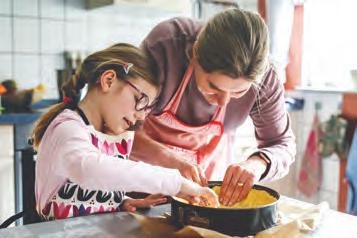
When you wash a turmeric stain with soap, it turns slightly reddish before it fades away.
Activity in Action
SCIENCE BEHIND IT...
Turmeric contains a natural pigment called curcumin, which changes colour when it mixes with certain substances like baking soda or soap. The yellow colour turns reddish-orange, revealing the hidden message. The sanitizer helps the colour spread and show up quickly.
Find Out More!
Hide an object and write secret clues using baking soda paste. Your friend can reveal the clues with turmeric to find the hidden object.
CHECK YOUR LEARNING!
1.
Unscramble the letters to form meaningful words.
A. A yellow spice used as an indicator.
MUITRERC: _____________
B. A pigm ent in turmeric that changes colour.
CU RINMUC: ______________
C. It is u sed to write the hidden message.
KABNIG ODSA: _____________
D. It helps the colour spread and appear faster.
INZTSRIAE: ____________
2.
Nancy was helping her mother in the kitchen and accidentally dropped some turmeric powder on her white apron. To remove the stain, she washed it with soap.
Answer the questions below based on above reading.
A. What change in colour did Nancy observe?
(a) Yellow to reddish-orange
(b) Re ddish-orange to yellow
(c) Yellow to green
B. What would happen if she washed the turmeric spot using plain water instead of soap?
(a) It would turn red.
(b) It would disappear.
(c) It would stay yellow.
C. Which of the following works similar to the soap used in this experiment?
(a) Sanitizer
(b) Turmeric
(c) Baking soda

MagIc Ice LIft
In this activity, we will use a simple science trick to lift ice cubes using a string.
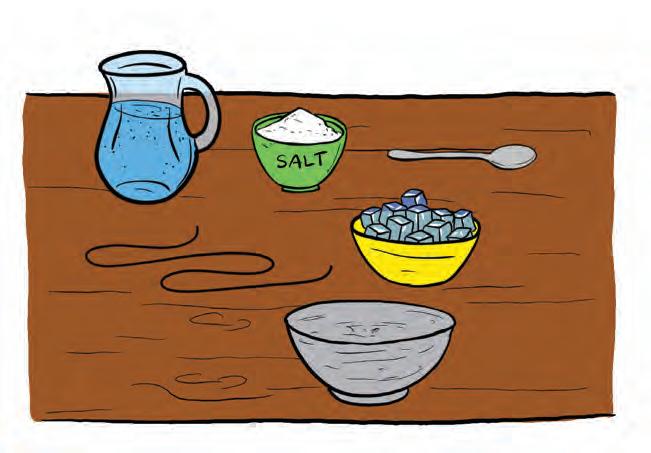
What We Need
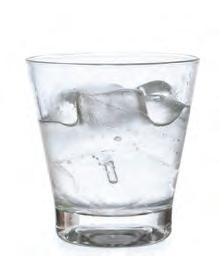
• Ice cubes
• 1–2 teaspoons of salt
• Cotton/woollen string
• 1 bowl (medium size)
• 1 spoon
• Water
Let’s Begin

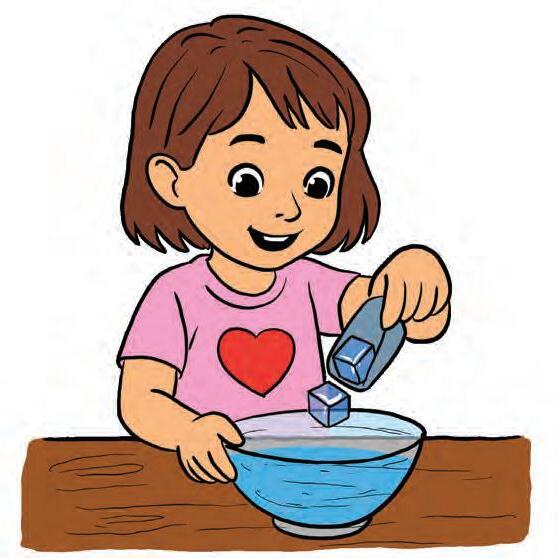
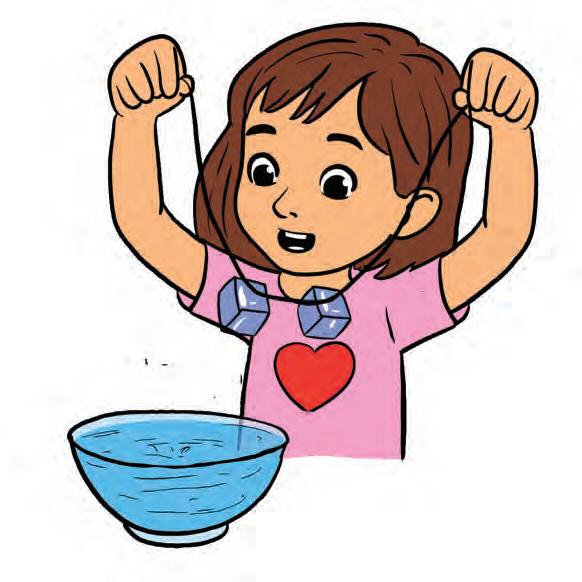
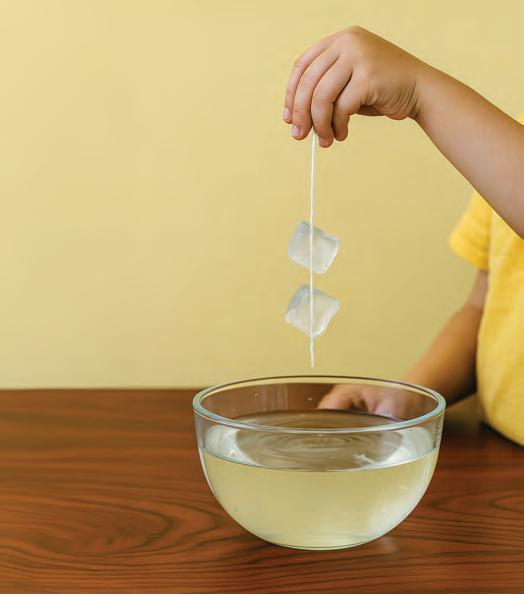
1. Fill the bowl halfway with water and gently drop in a few ice cubes.
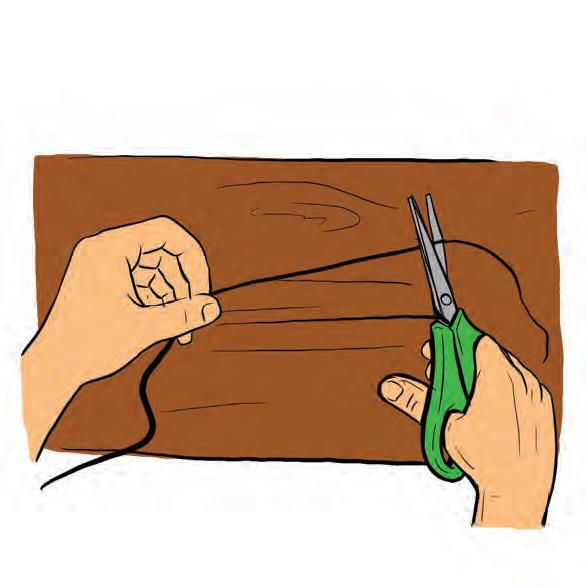
2. Cut a piece of string about 15–20 cm long with an adult’s help.
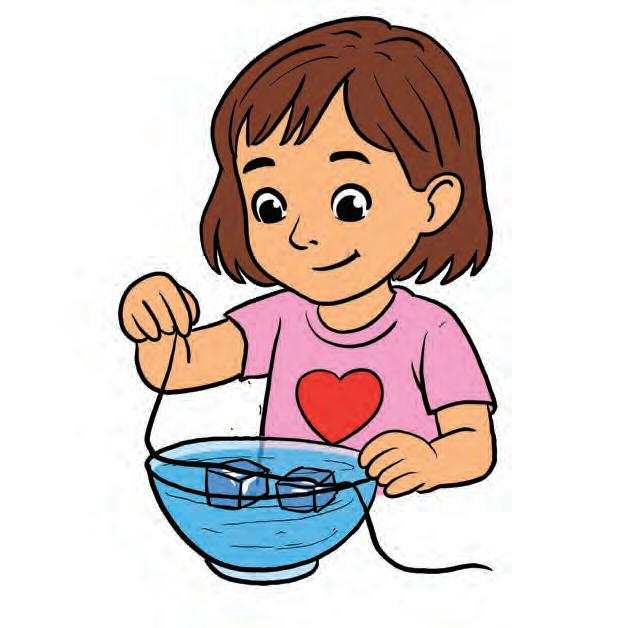
3. Lay the string across the top of the ice cubes so it touches them.
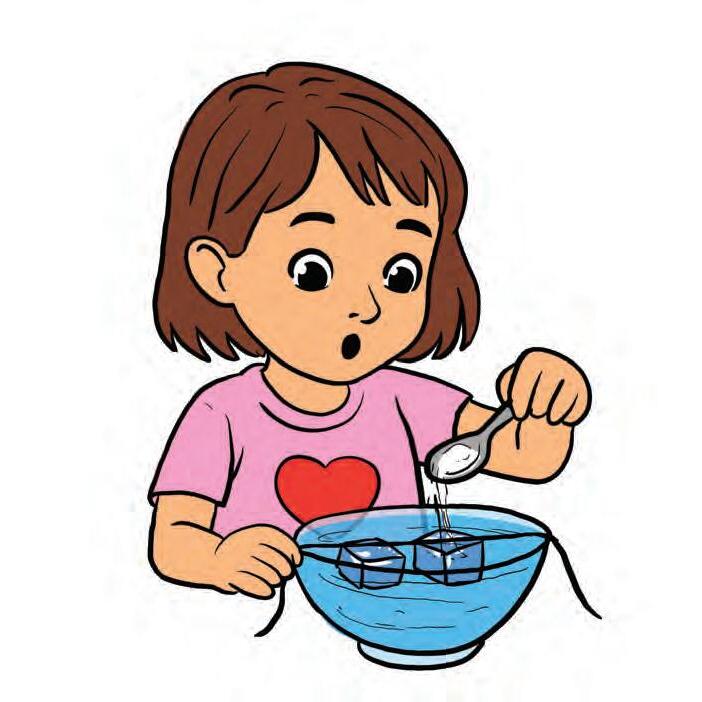
4. Sprinkle a little salt on the part of the string touching the ice.
Do not use too much salt or the ice may melt too quickly. Watch out
5. Wait for about 1–2 minutes without moving the string or the bowl. Then, gently lift both ends of the string.
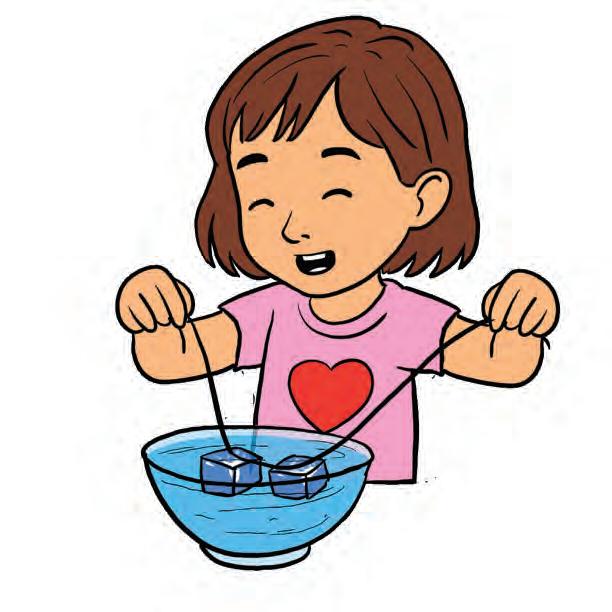

6. Watch as the ice cubes stick to the string and lift up.
SCIENCE BEHIND IT...
When salt is sprinkled on the ice cubes, a thin layer of ice melts around the string. Soon after, the cold water refreezes and traps the string inside the ice. That’s why the ice cubes lift up when you pull the string.

Real-lIfe Connect
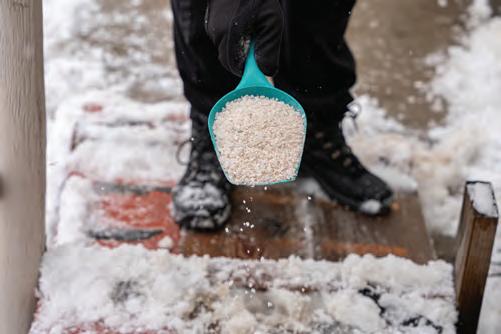
In cold regions, salt is spread on icy roads to melt the ice and make the roads safe for driving.
Find Out More!
Activity in Action
Sprinkle different amounts of salt on the ice cubes. Observe which amount lifts the ice cube the fastest.
CHECK YOUR LEARNING!
1. Think and write.
I am white and cold, I melt when I am old. But sprinkle me with salty rain, And I will vanish down the drain! What am I?
2. Fill in the Blanks.
A. Salt helps the string to (stick/slip) to the ice cubes.
B. The string gets trapped because the melted ice (freezes/ heats) again.
C. Too much salt can make the ice melt (slowly/completely) and not refreeze properly.
D. Ice is a form of water (solid/liquid).
E. We lift the ice by gently pulling the (middle/ends) of the string.
F. We should wait for about ________ (1–2/10–15) minutes before pulling the string.
3. State True/False.
We put salt on snow because it helps melt the ice and makes the ground less slippery, so people and vehicles can move safely.

Water FIlter
In this activity, we will make a simple water filter to clean dirty water.
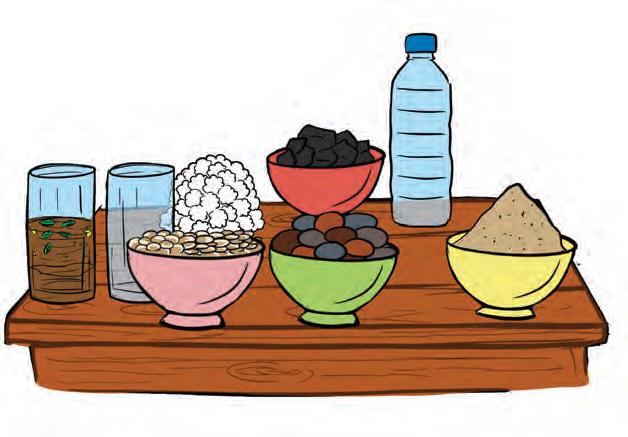
What We Need
1 bottle
Cotton Sand
Charcoal
Stones of different sizes
Dirty water

Let’s Begin
Cut the plastic bottle in half with an adult's help. 1.
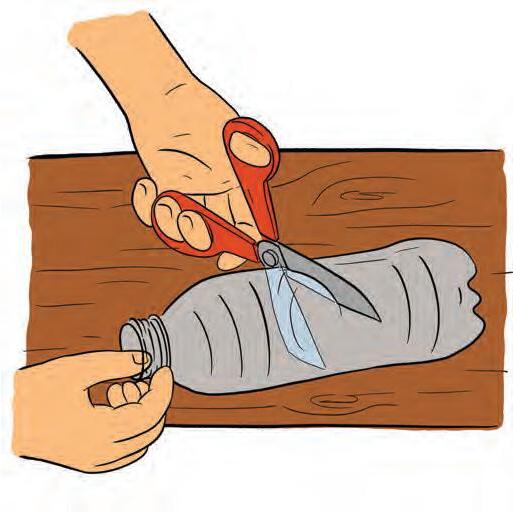
2.
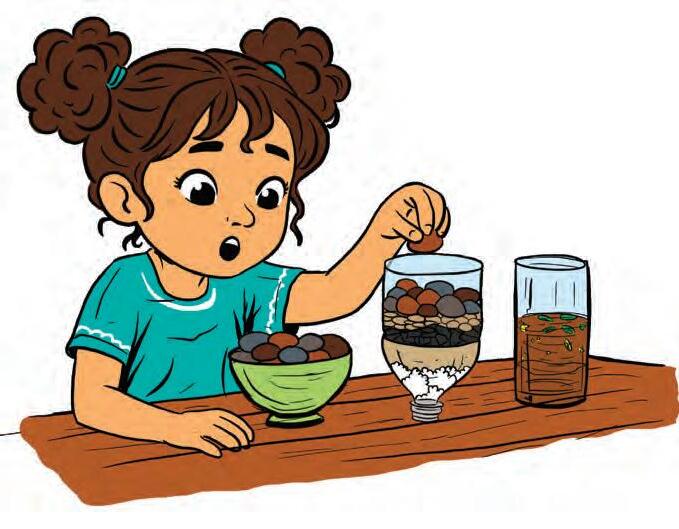
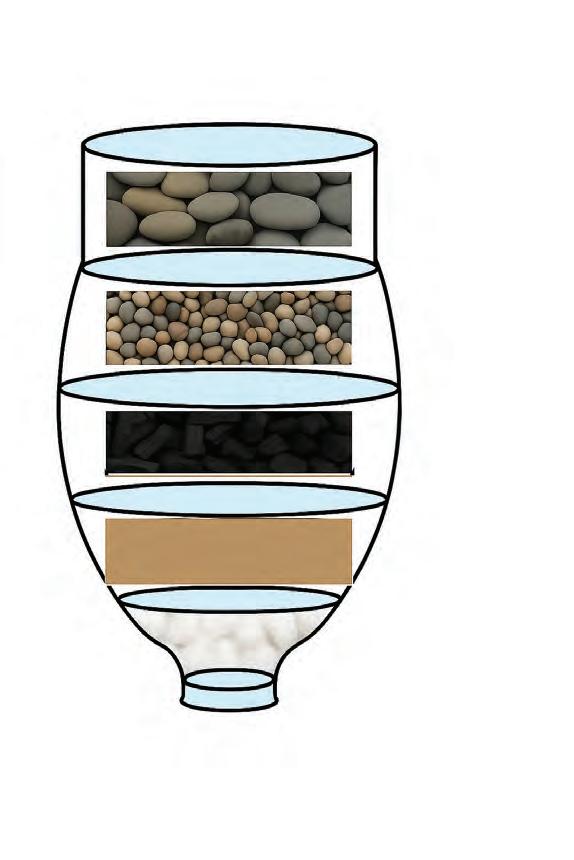
Turn the top half upside down, place cotton at the base and gently pour sand on top.
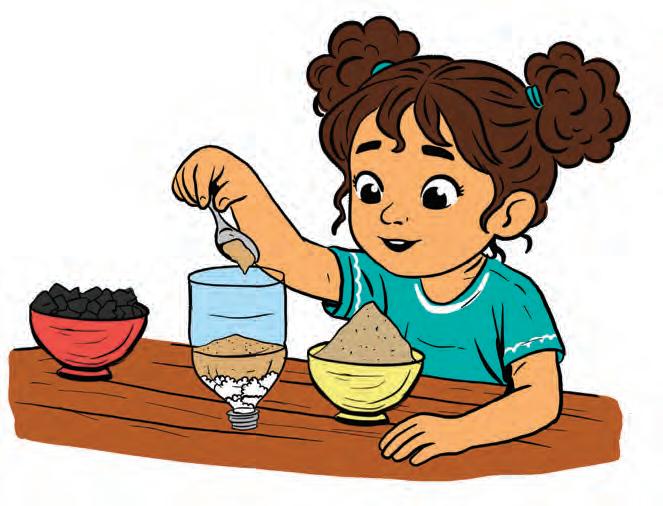
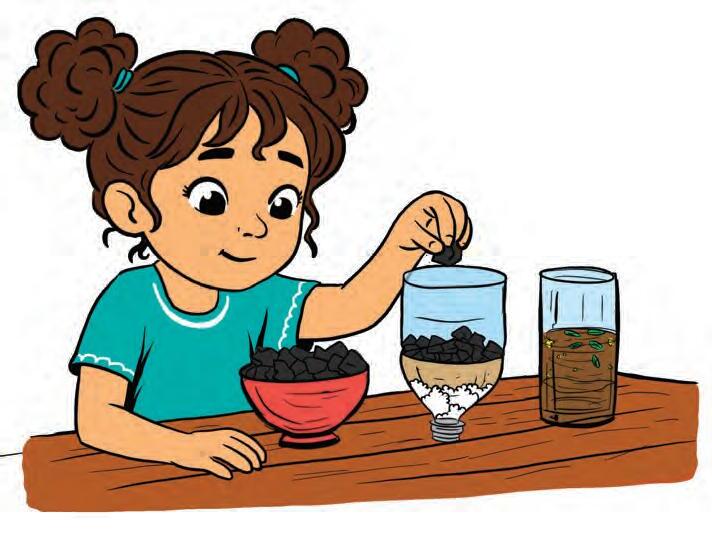
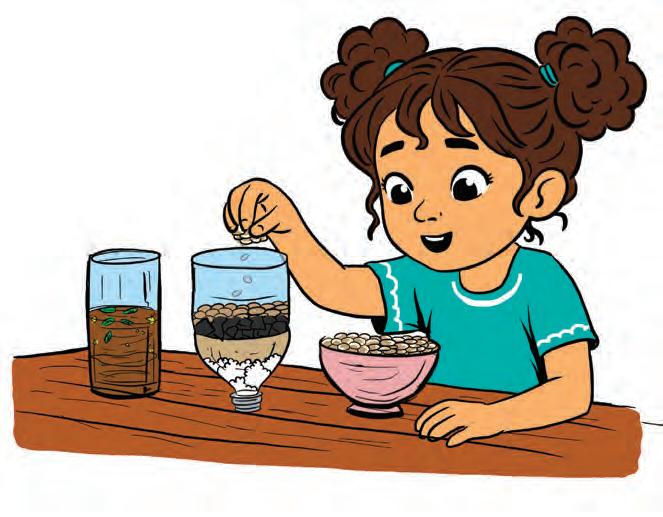
Add a layer of charcoal on top of the sand. 3.
Then place bigger 5.
6.
4.
Add a layer of pebbles over the charcoal.
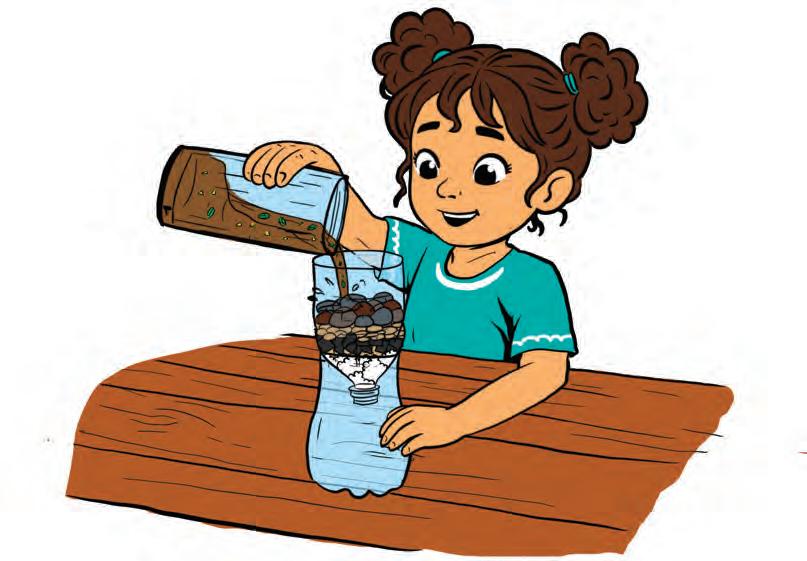
Place the top half of the bottle on the bottom half and slowly pour dirty water into the filter.
The filtered water looks clean but may still have invisible germs. Do not drink it. Watch out

7.

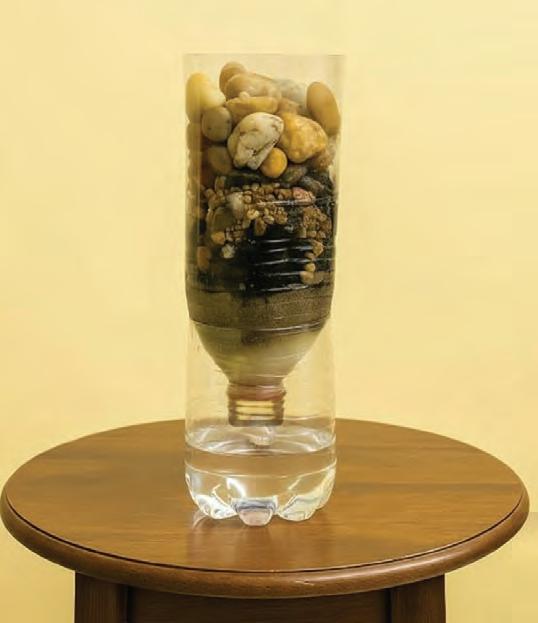
Watch clean water drip down into the bottom half.

Large water treatment plants use layers of sand, charcoal, gravel and other materials to remove dirt from river water before it is cleaned further and sent to our homes.
Activity in Action
ScIence BehInd It...
A water filter has different layers to clean dirty water. The pebbles and gravel stop bigger bits of dirt, sand traps the smaller particles, charcoal absorbs the impurities and removes any bad smell and cotton filters the finest dirt. This process is called filtration and it makes the water clean.
Find Out More!
Change the order of the layers in your water filter, pour in dirty water and see how it affects the filtration.
Check your learnIng!
1. Unscramble the letters to form meaningful words.
RTAWE ETRILF ADNS OTNCTO
2. Label each layer of the water filter in the given picture.
3. State True/False.
Filtration removes both dirt and harmful germs.
Pebbles and gravel help to trap the smallest dirt particles.
Clean-looking water is always safe for drinking.
The process of cleaning dirty water using layers of materials is called filtration.


LIft and Stack Cup Challenge
In this activity, we will use a rubber band and strings to lift and stack cups without touching them.
What We Need
• 6 paper cups
• 1 rubber band
• 4 pieces of string/ thread
Let’s Begin
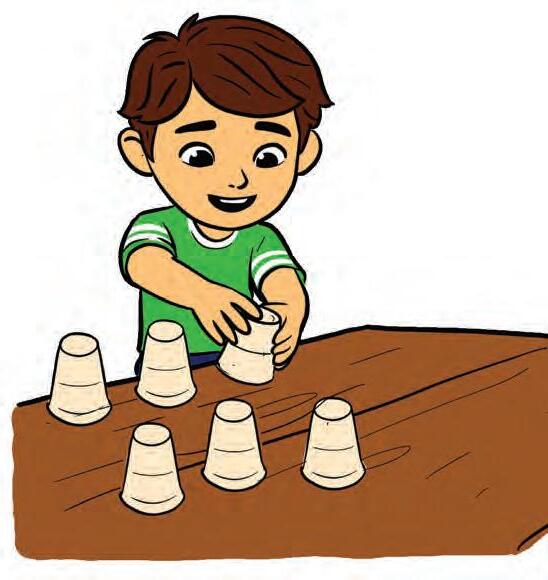
1. Place 6 paper cups upside down on one side of the table.
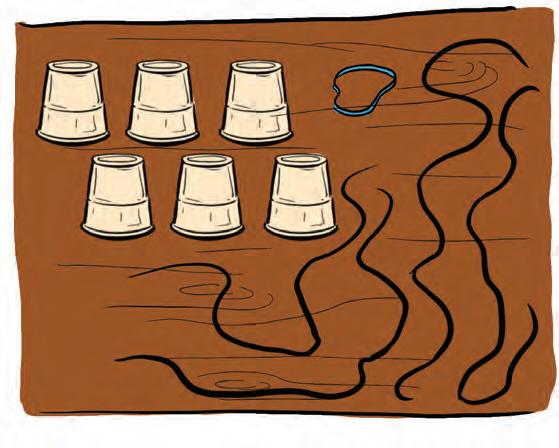
2. Take 4 pieces of string about 30-40 cm long and tie them evenly around a rubber band.
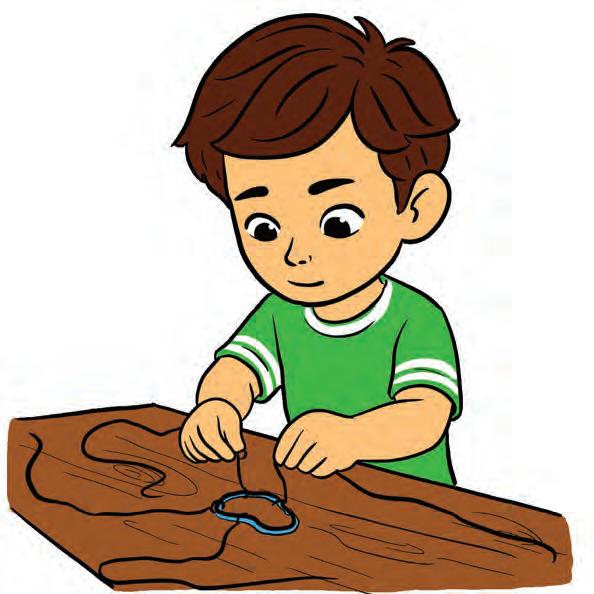
3. Four children stand around the table each holding one string.
Do not pull the strings too hard – the rubber band may break. Watch out
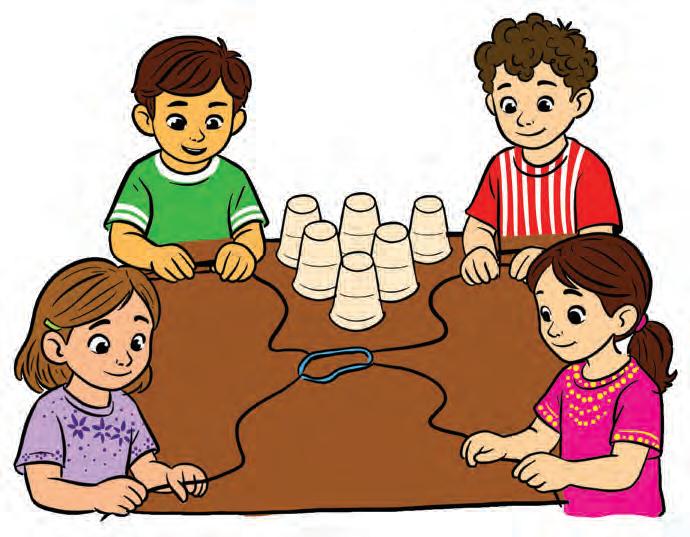
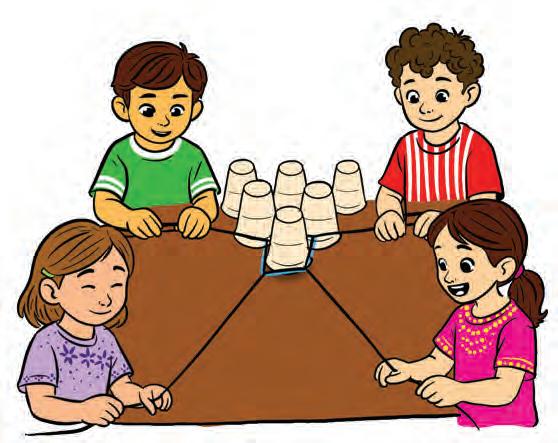
4. Pull the strings to stretch the rubber band around a cup. Gently lift the cup together.
5. Move the cup to the empty side of the table. Carefully lower it by loosening the strings.
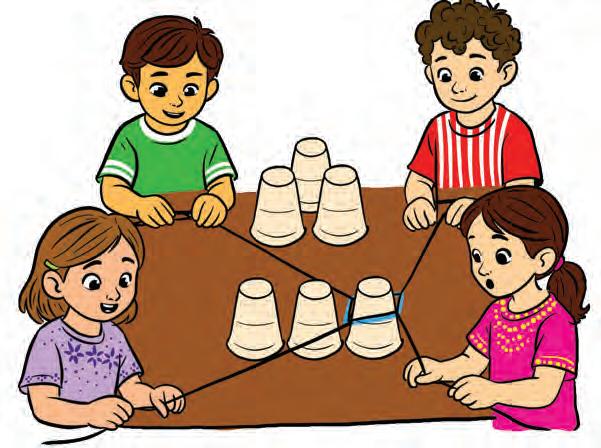
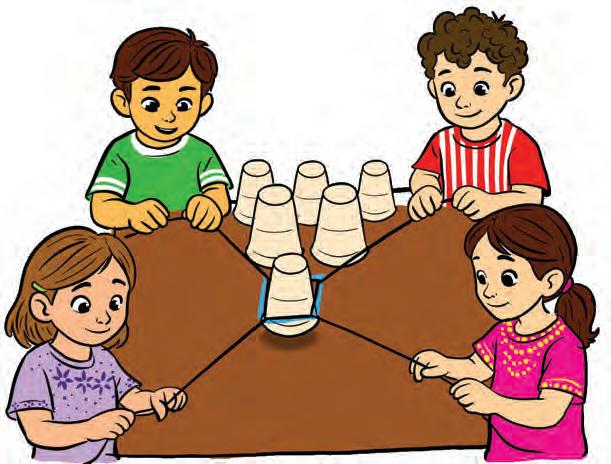
6. Repeat the steps above to place 3 cups in a row as the base layer.

7. Place 2 cups on the base layer to form the middle layer.
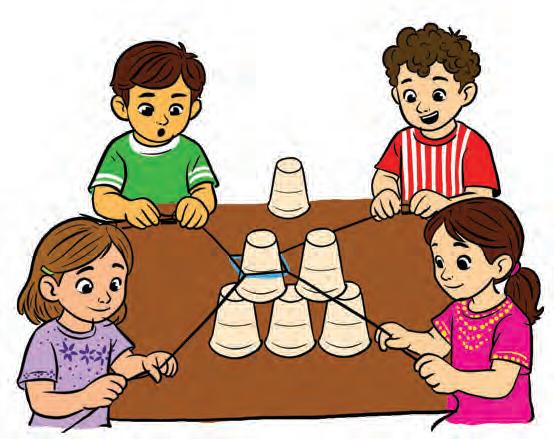
8. Place the last cup on top to complete the tower.
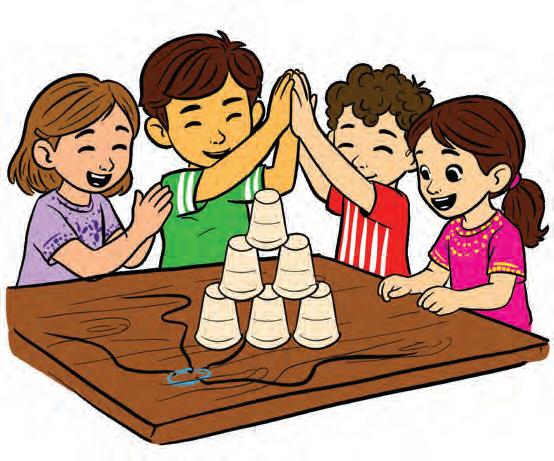
Activity in Action
SCIENCE BEHIND IT...
When the strings are pulled, the rubber band stretches and holds the cup firmly. The cup can be lifted and placed correctly only if everyone pulls together with equal force, keeping it balanced. This activity shows how force, balance and teamwork can help us build a tall and stable tower.
Find Out More!
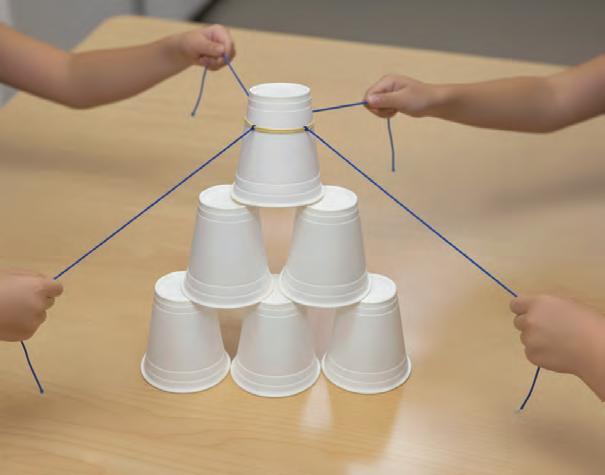
Try building a taller tower by adding more cups. See how many cups you can stack without them falling.
CHECK YOUR LEARNING!
1. Tick ( ) the correct answer.
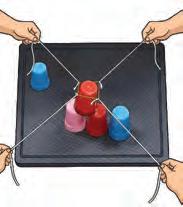
A. Four friends, Neha, Meera, Riya and Kabir are lifting a cup using a rubber band and strings. Kabir pulls harder than the others and the cup tilts. Because of this, they lose the challenge. Answer the questions below.
(a) Why did the cup tilt and the team lose the challenge?
i. The rubber band was too short.
ii. On e person pulled harder than the others.
(b) Ho w could the cup have been lifted safely?
i. If everyone had pulled together with equal strength.
ii. If everyone had pulled together with different strength.
(c) What is the lifting tool made of?
i. A r ubber band and strings
ii. A r ubber band and cups
(d) In your opinion, why is teamwork important in this activity?
2. State True or False.
A. Stacking plates requires balance to keep them from falling.
B. Building a sandcastle does not need a stable base to stand.
C. Ar ranging books evenly on a shelf prevents them from toppling over.
D. Engineers use balance and stability when building bridges and towers.



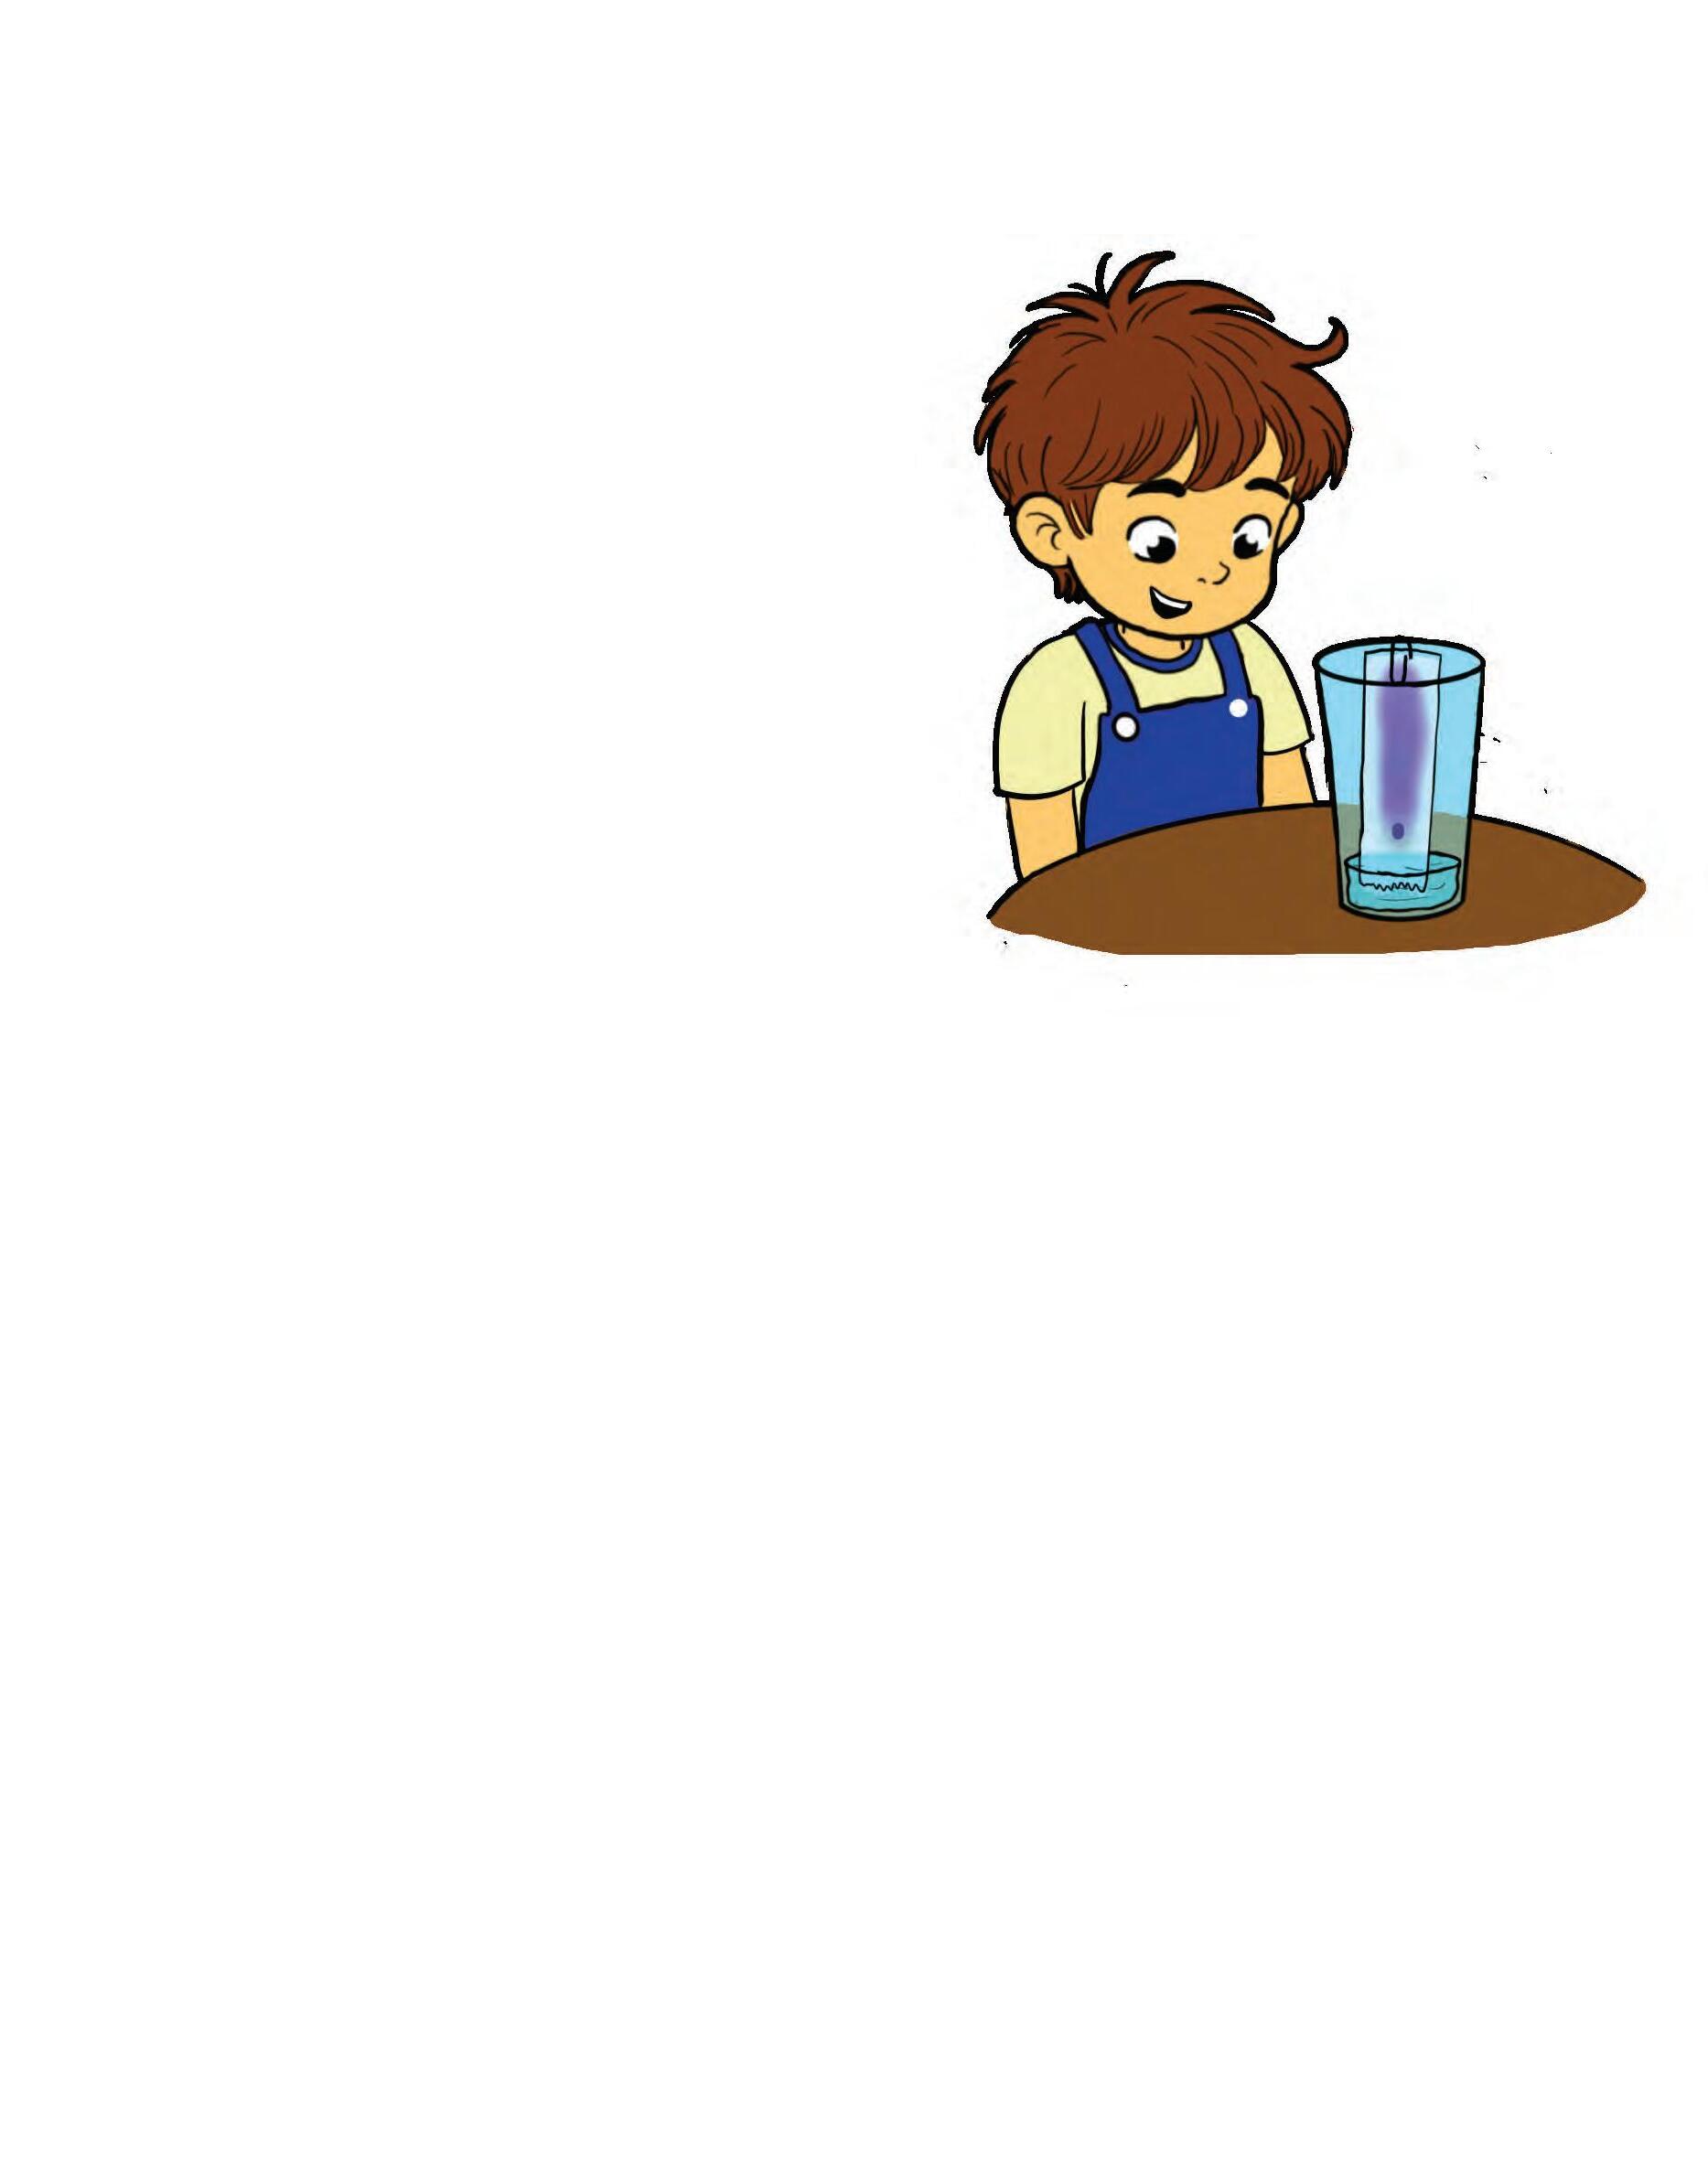
ClImbIng Water
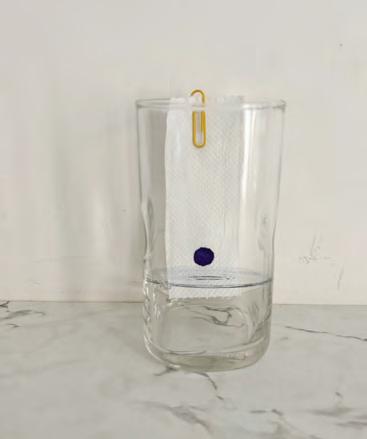
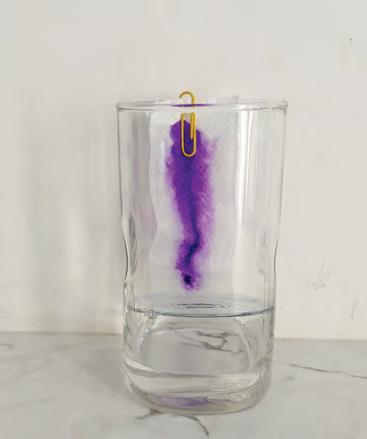
In this activity, we will watch how water climbs up a paper towel against gravity.

What We Need
Water
Paper towel
A glass
A pair of scissors
A marker
A paper clip

Let’s Begin
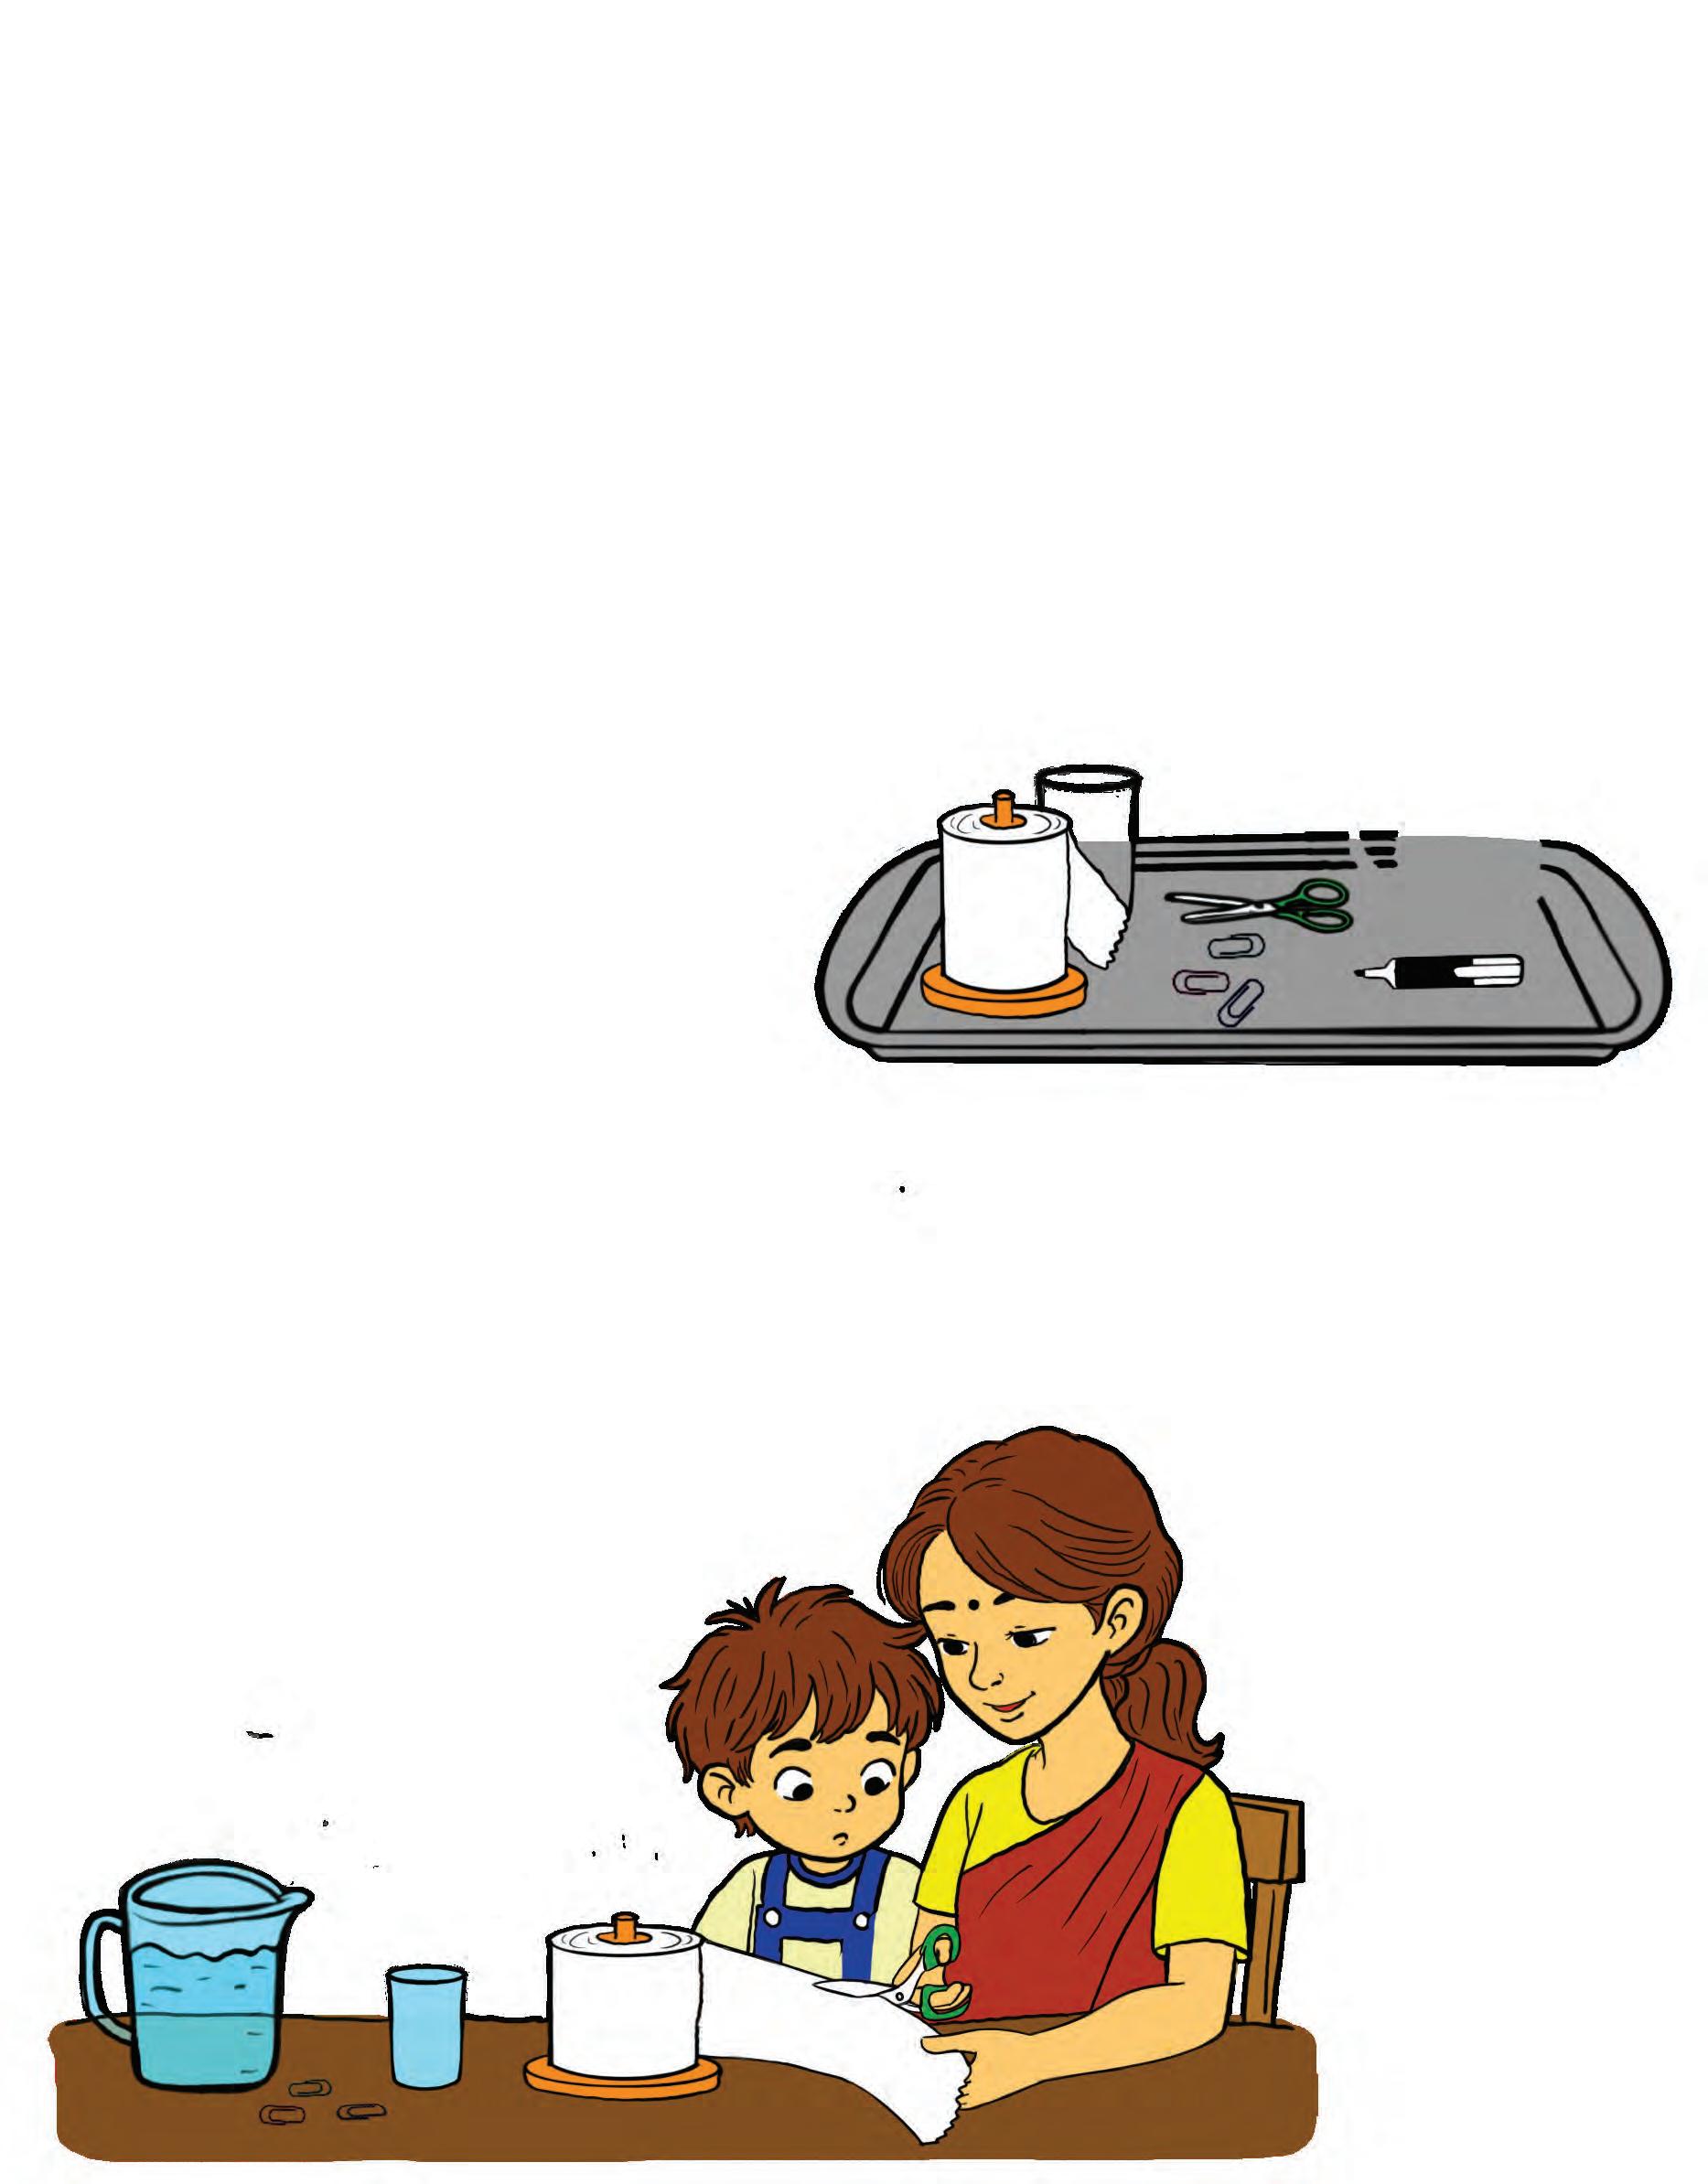
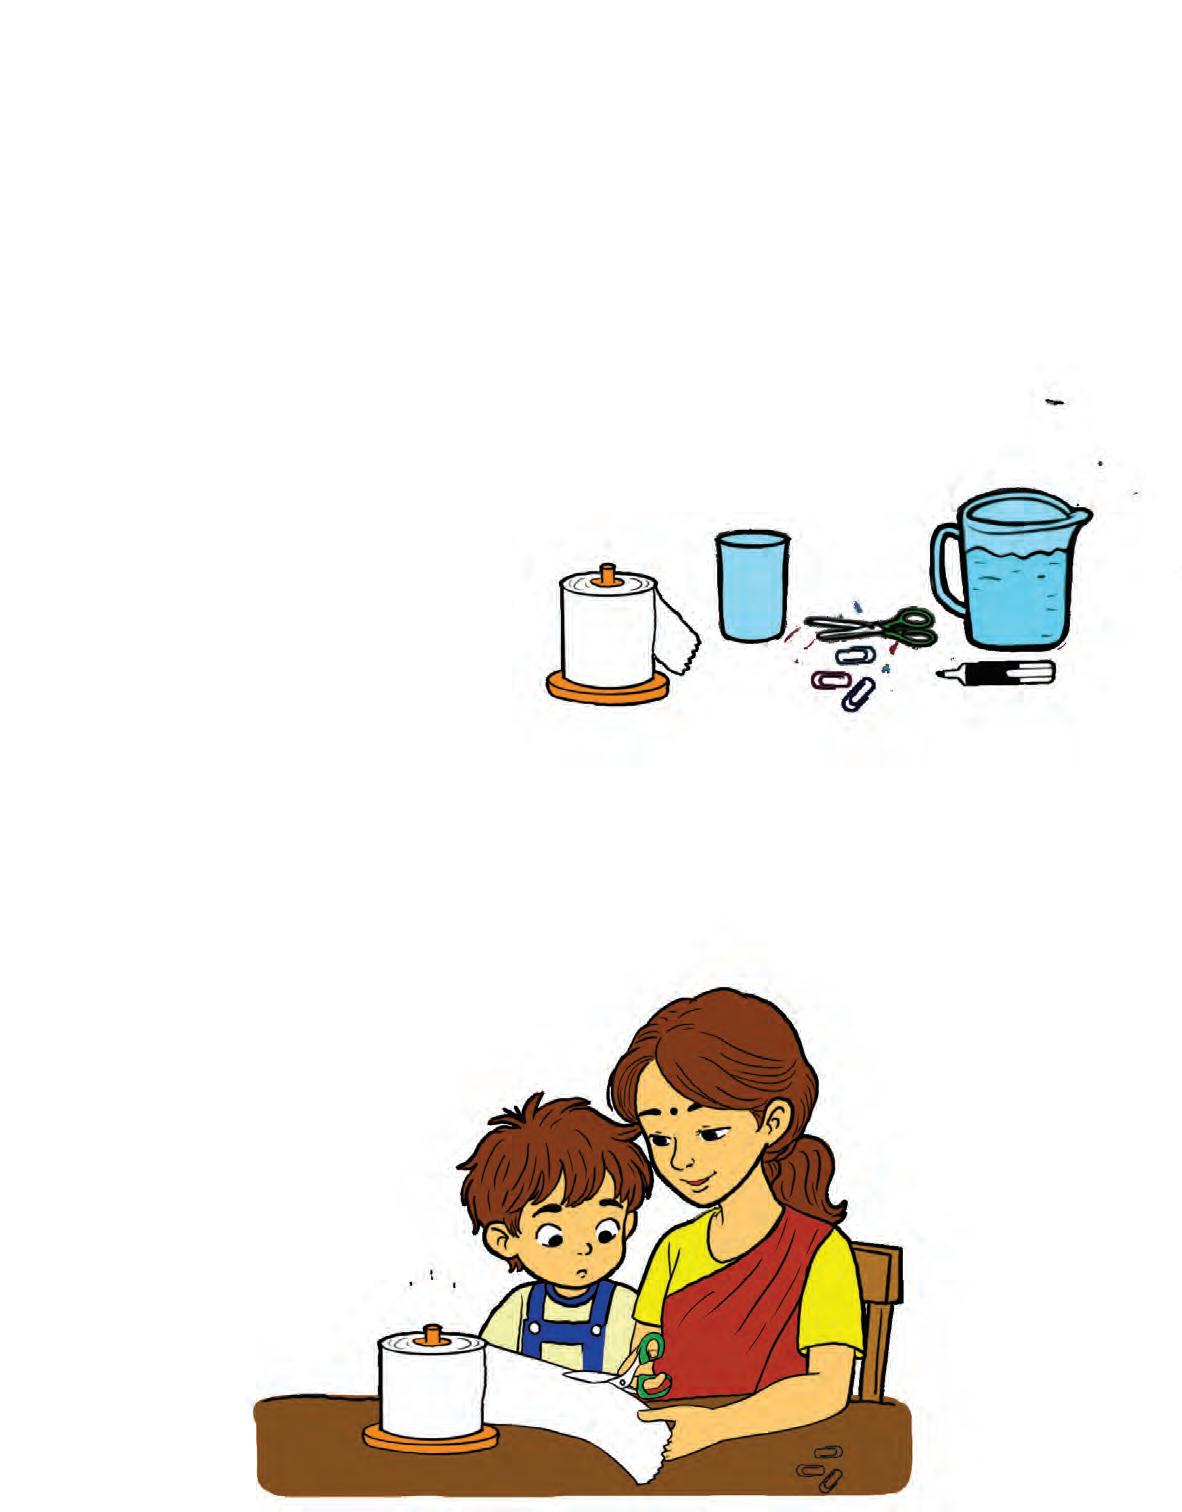
Cut a strip of paper towel about 10 cm long. 1.
Make a small coloured dot 2.
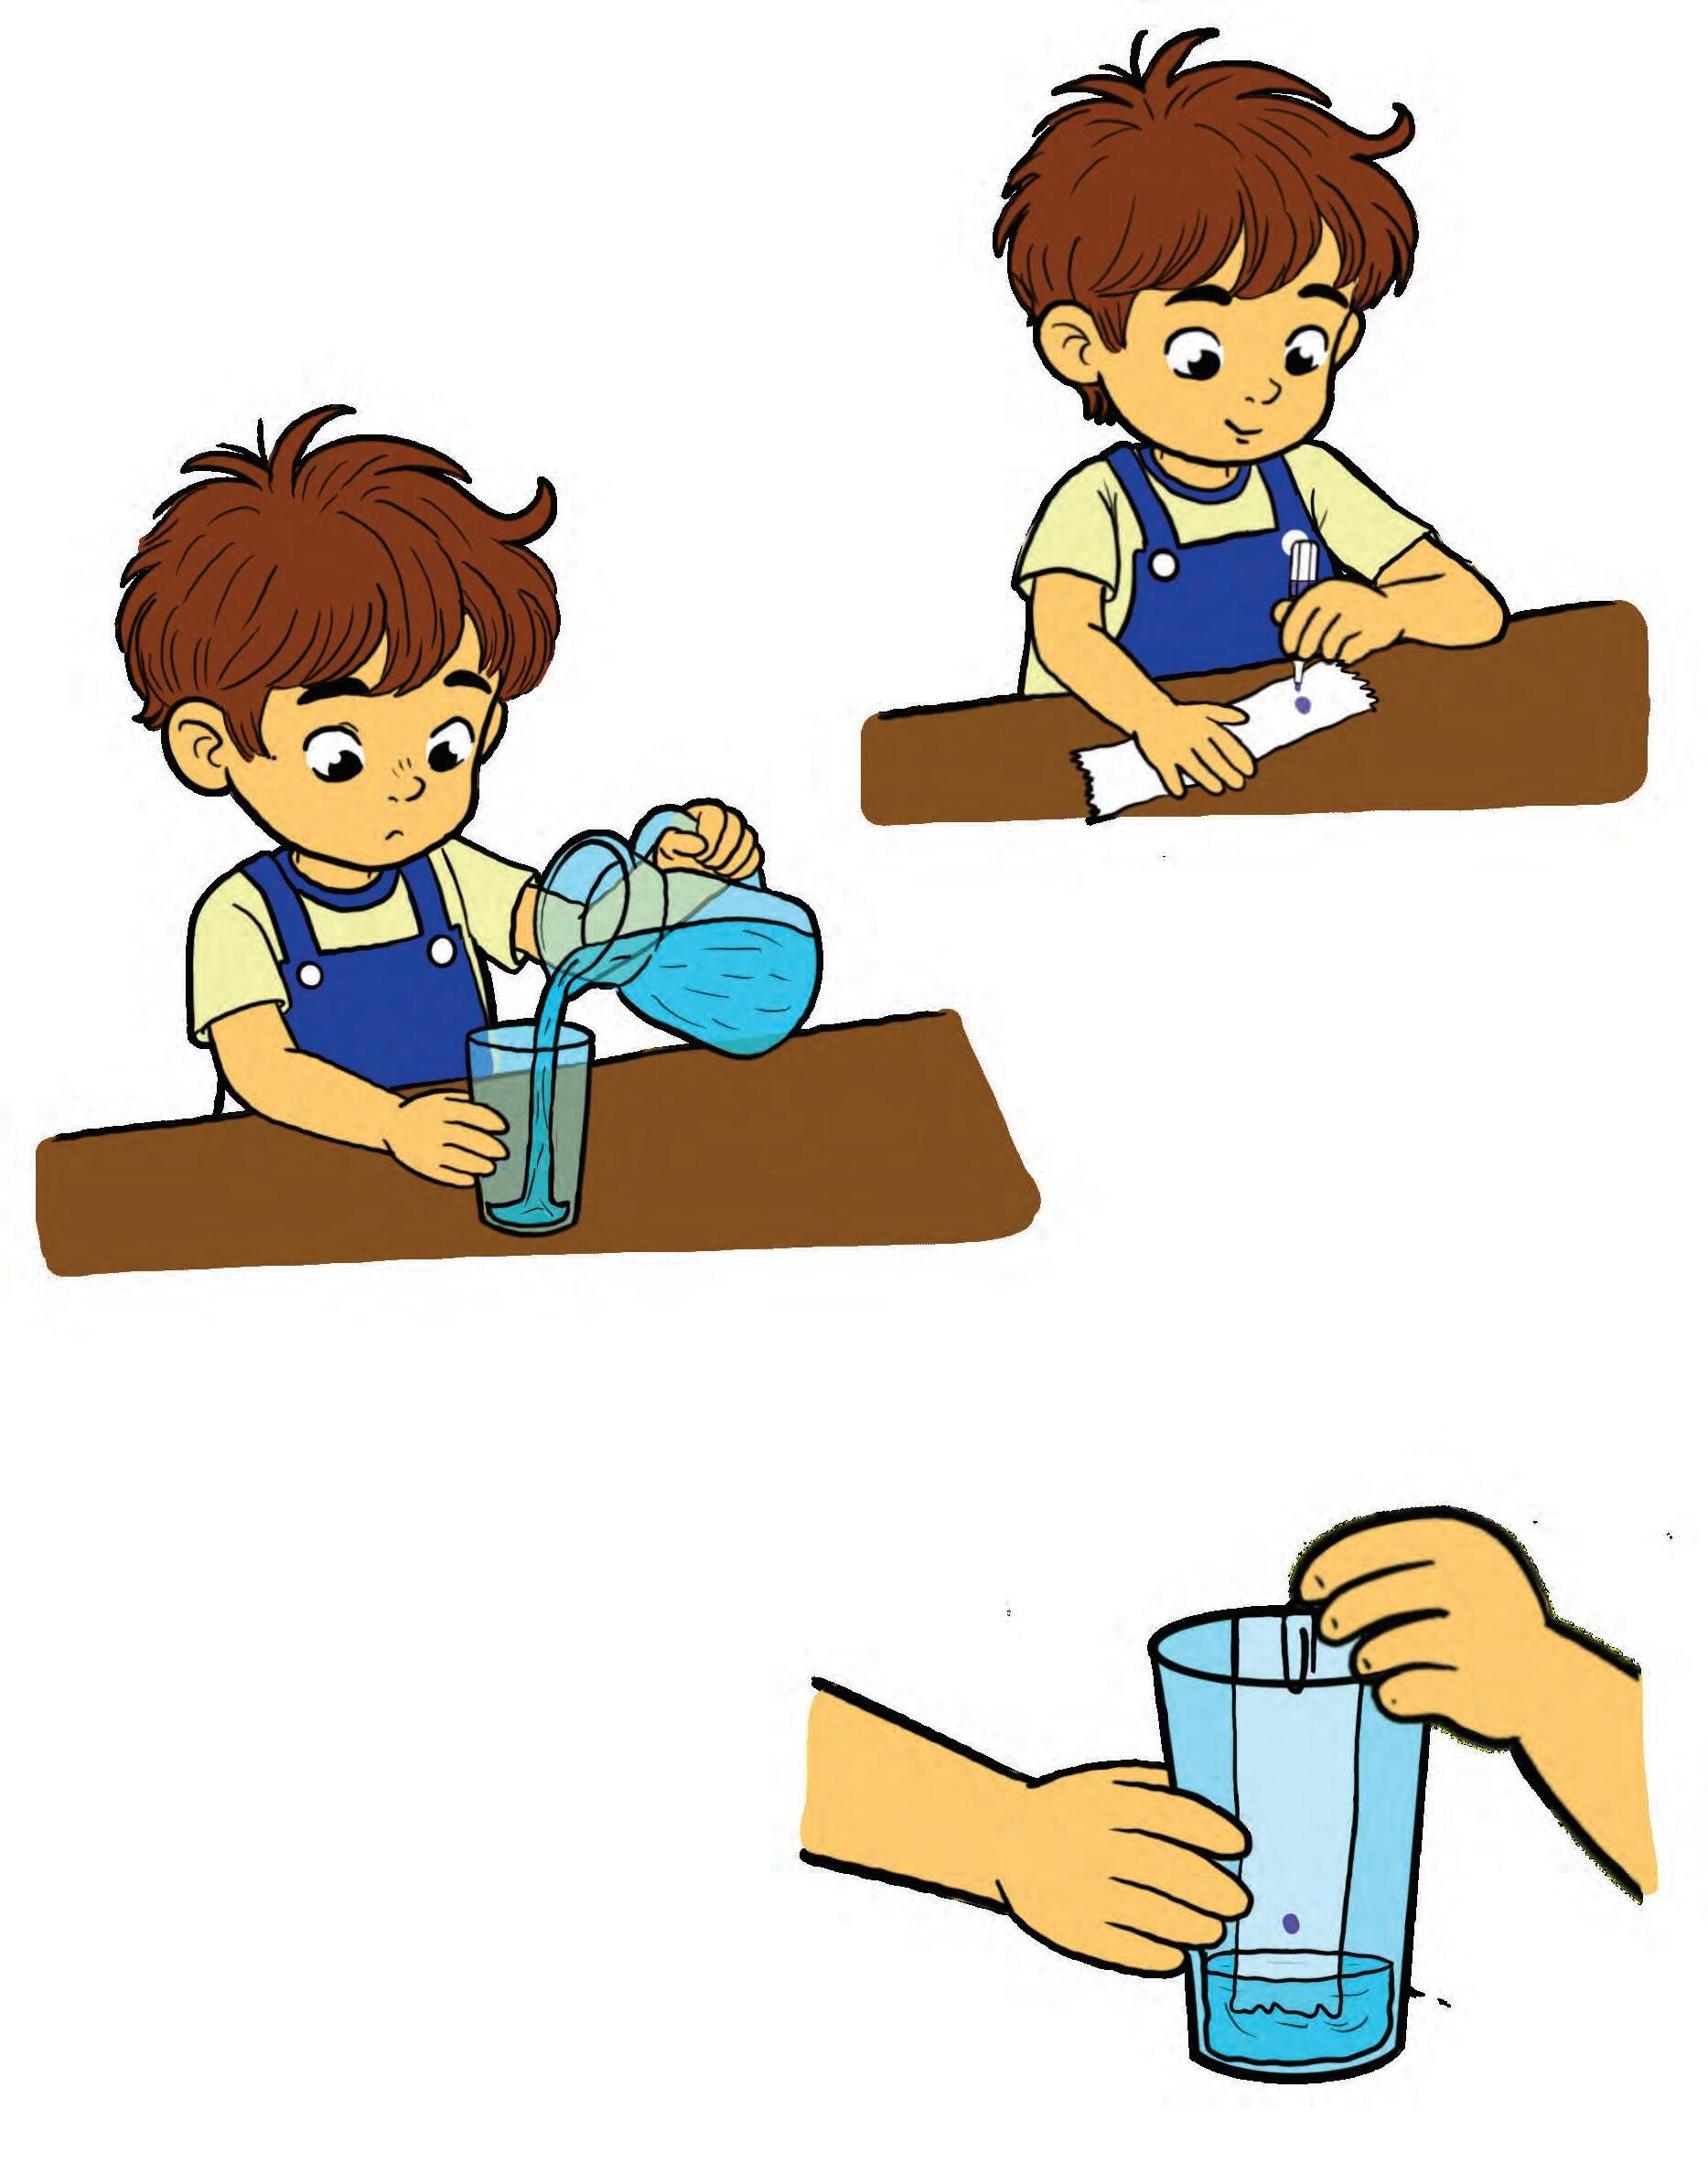
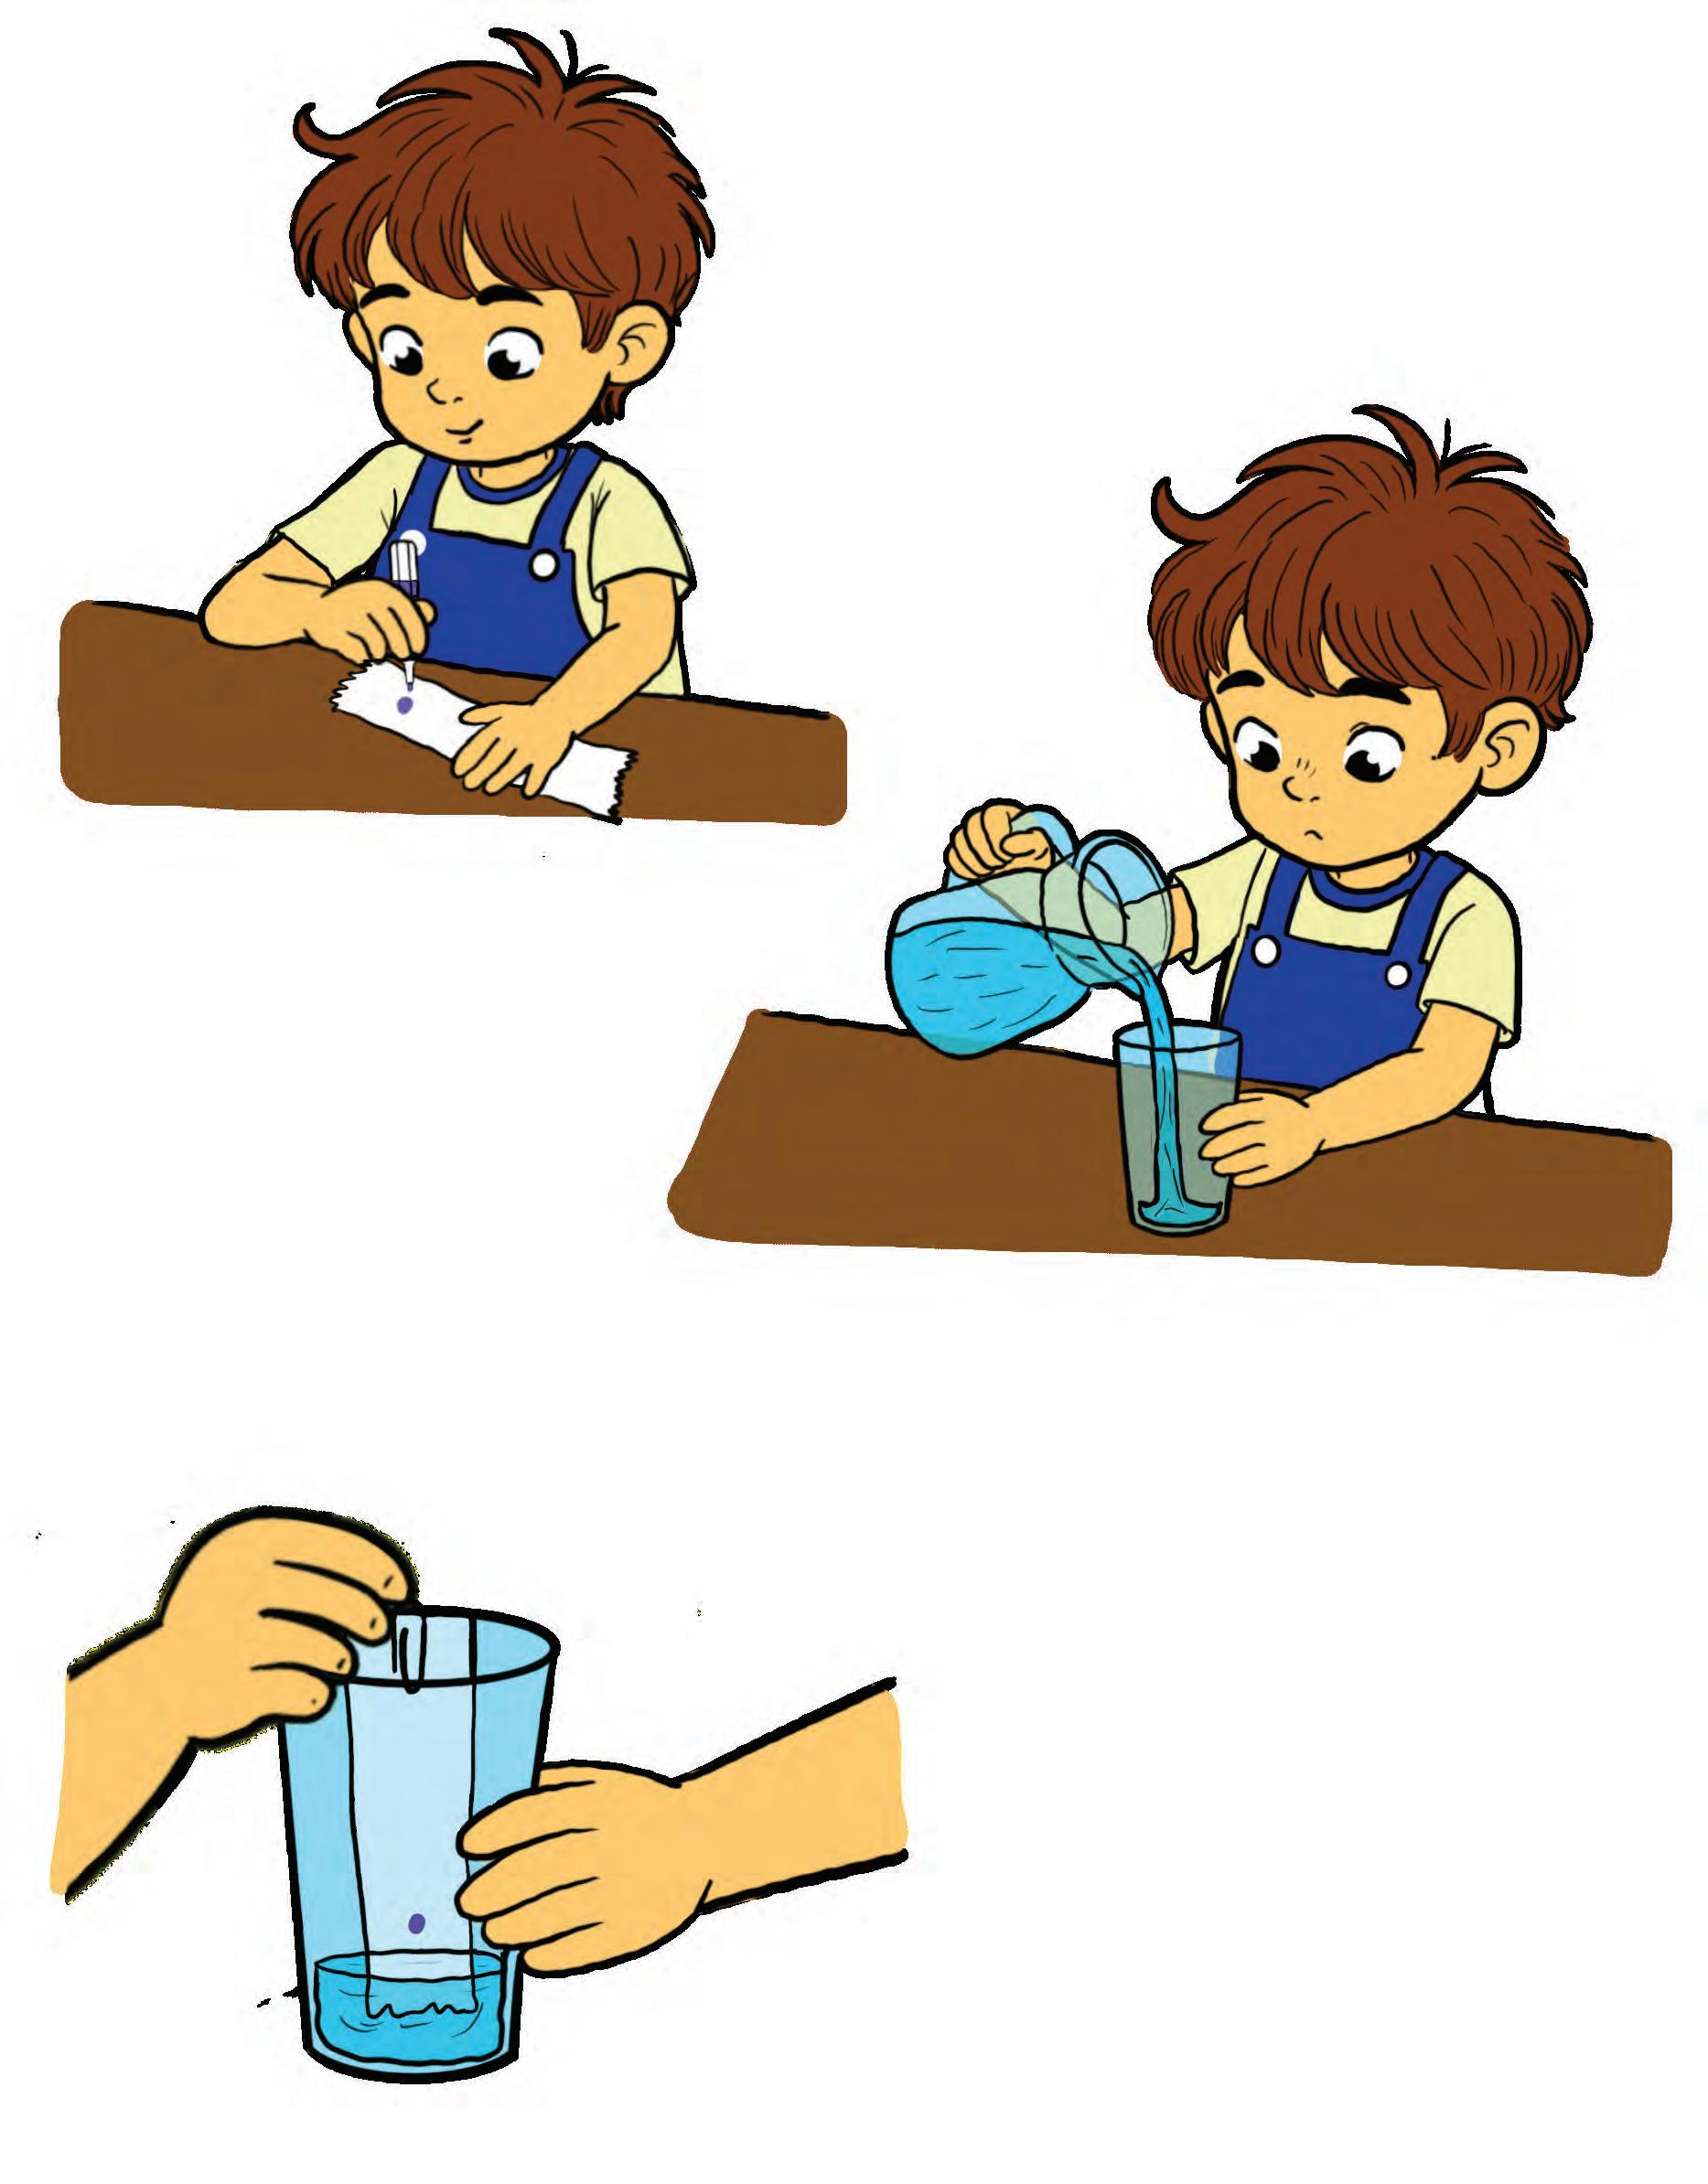


ScIence BehInd It...
A paper towel has tiny spaces in its fibres. When water touches the towel, it moves into these spaces because of the attraction between the water molecules and the fibres. The water molecules also stick to each other and move upward through these tiny spaces. This process is called capillary action and it makes the water rise against gravity, carrying the colours along.
Check your learnIng!
1. Tick ( ) the correct answer.
A.
During the water movement activity, one student used warm water and another used cold water. In which setup did the water move faster?
The one with cold water (a) (b)
The one with warm water
B. The sheet was too dirty for water to pass through. The sheet was too thick for water to pass through. (a) (b)
Poonam tried the experiment using a thick drawing sheet instead of a paper towel. She noticed that the water didn’t move up at all. Why do you think that happened?
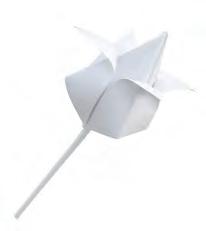
2. Help the paper towel flower find its way to the coloured water so it can soak it up and turn bright.


Water SprInkler
In this activity, we will make a water sprinkler and explore how air pressure can move liquids.
• A balloon
• A bottle
• Water What We Need
Let’s Begin
1. Ask an adult to make a few small holes in the bottle cap.

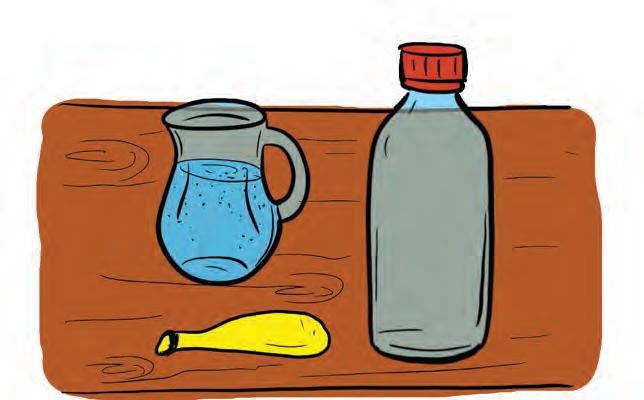
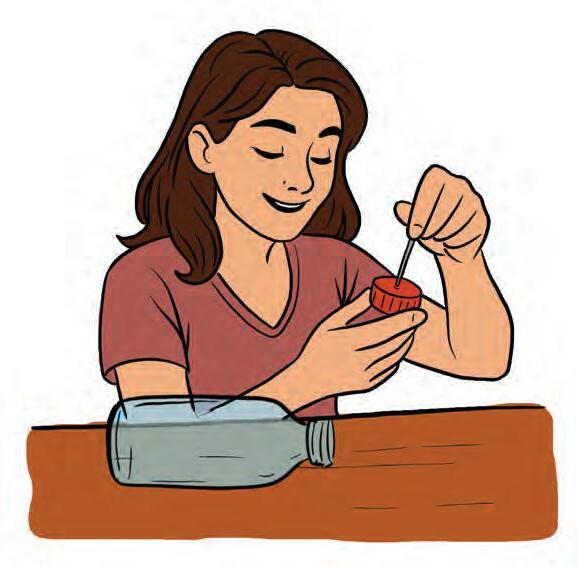
2. With an adult’s help, make a hole in the side of the bottle.
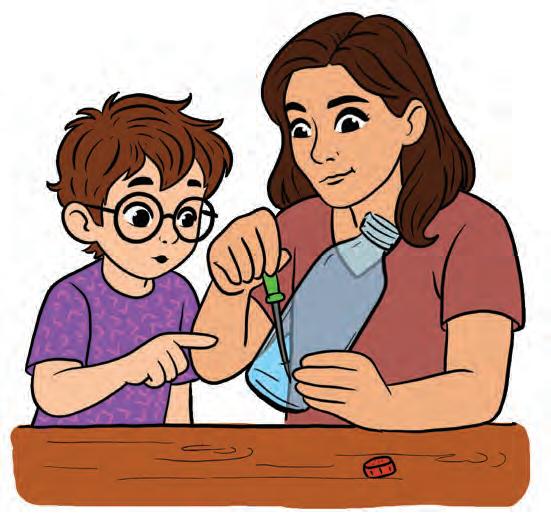
3. Insert a balloon inside the bottle and stretch its mouth over the bottle opening.
4. Blow air into the balloon while keeping the side hole open.
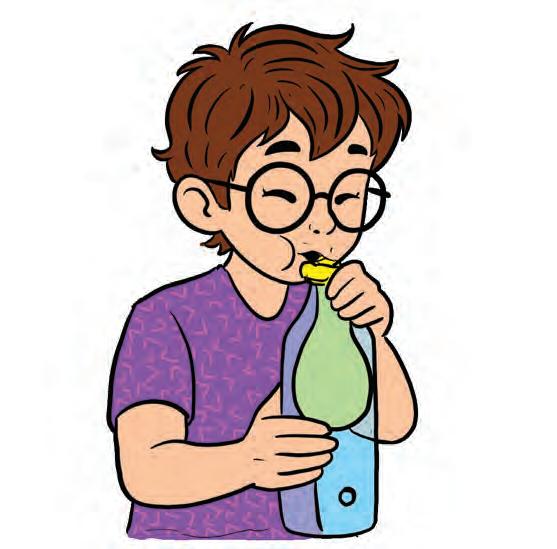
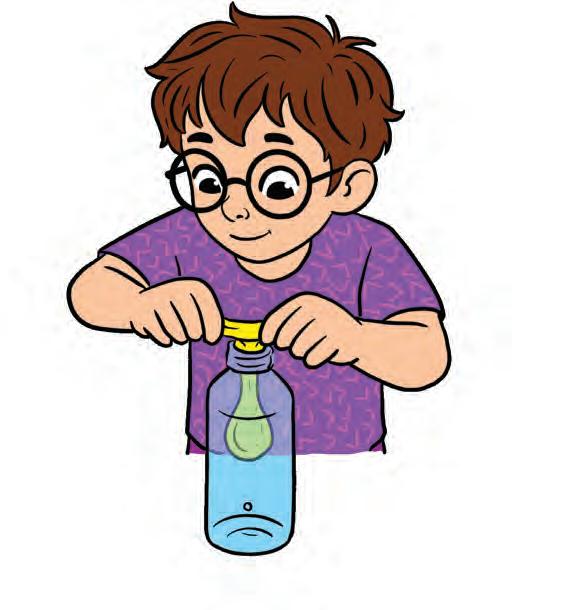
5. Cover the side hole with your finger and fill the balloon with water.
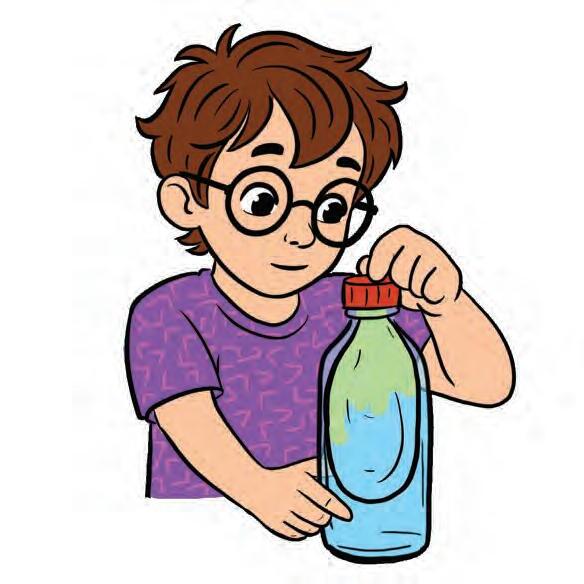

Cover the side hole quickly after inflating the balloon otherwise the air will escape. Watch out
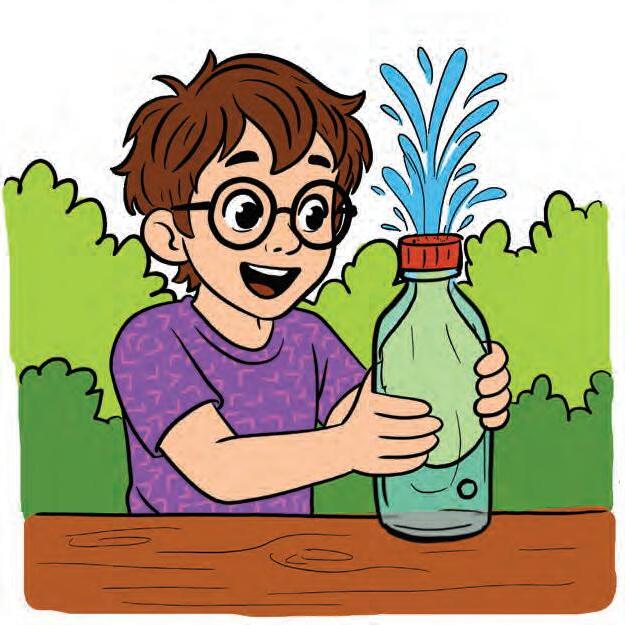
Tightly close the bottle cap.

SCIENCE BEHIND IT...
Air takes up space and exerts a force on things. This force is called air pressure. When the bottle is closed, there isn’t enough air inside to push the water out. When the side hole is opened, air comes in and pushes on the water. This push forces the water out through the small holes in the cap spraying water like a mini water sprinkler.
Remove your finger from the side hole and watch the water spray out like a sprinkler.

When the pump of a perfume bottle is pressed, air pressure increases and pushes the perfume out as a fine mist.
Activity in Action
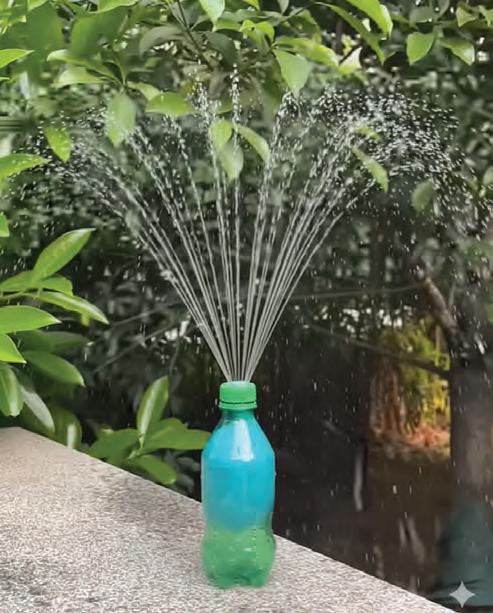
Make holes of different sizes in the bottle setup and see how the water stream changes. Find Out More!
CHECK YOUR LEARNING!
1. Tick ( ) the correct answer.
A. Which setup can work as a water sprinkler?
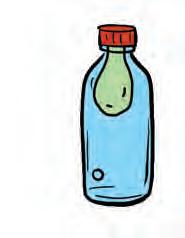
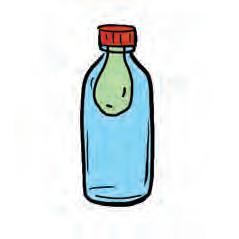
B. What pushes the water out of the bottle?
(a) Air pressure
(b) Water pressure
C. Why do we make small holes in the bottle cap?
(b) To let the water spray out
(c) To let the air escape
2.
Fill in the blanks using the words given in the box. pressure space gas dropper push
A. Air is a type of that we cannot see.
B. Air takes up .
C. When air is trapped in a closed space, it creates .
D. The pressure from air can liquids.
E. A pushes liquid out by air pressure.
3. State True or False.
When you press the pump of a handwash bottle, air pressure pushes the liquid soap out of the nozzle.

Balloon-Powered Car
In this activity, we will make a toy car that uses the power of air to move forward.
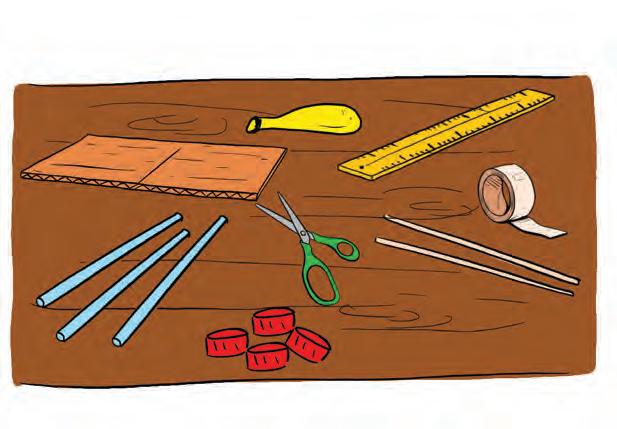
What We Need
• A ruler
• A tape
• A pair of scissors
• A piece of cardboard
• A balloon
• 3 straws
• 2 wooden skewers or sticks
• 4 plastic bottle caps of the same size

Let’s Begin
1. Cut two straws, each 8 cm long. Tape one straw on each short side of the (12 cm × 8 cm) cardboard piece.
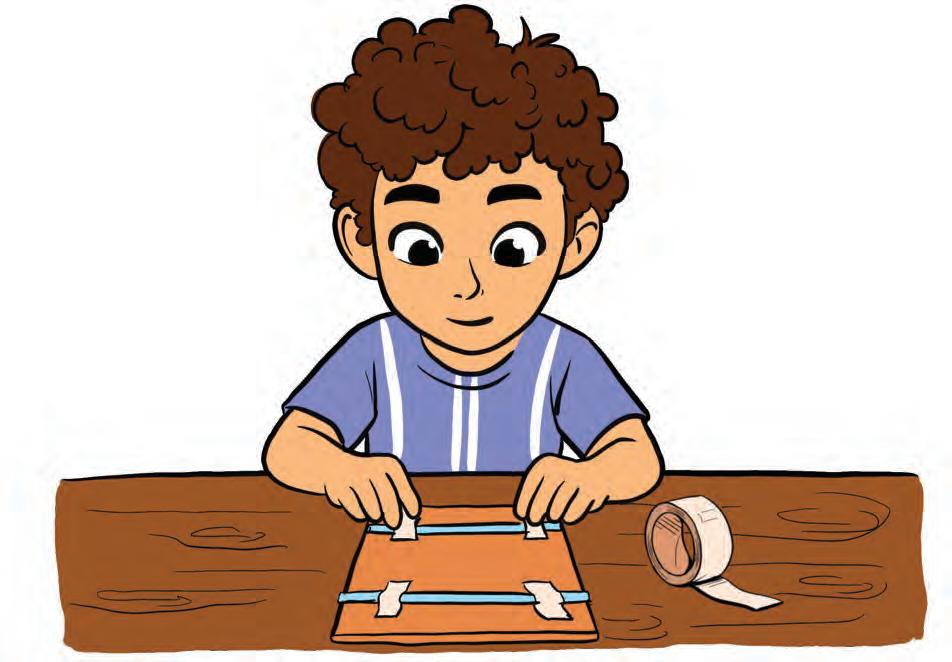
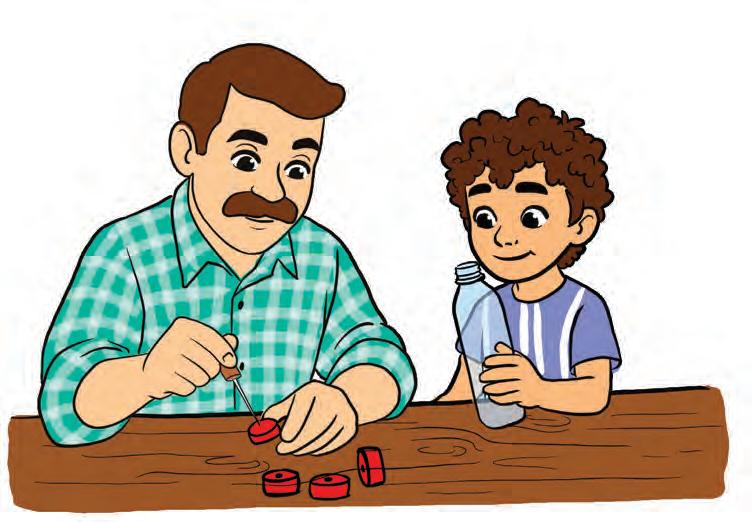
2. Take four bottle caps and make a hole in the centre of each one.
Watch out
Ask an adult to poke holes in the bottle caps.
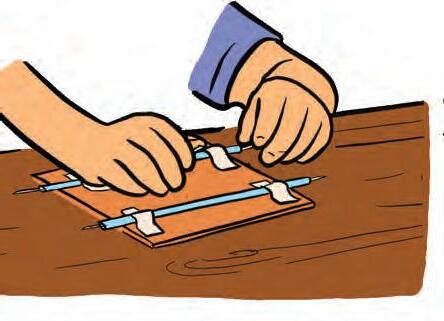
3. Cut two wooden skewers to 10 cm, push them through the straws and attach bottle caps as wheels.
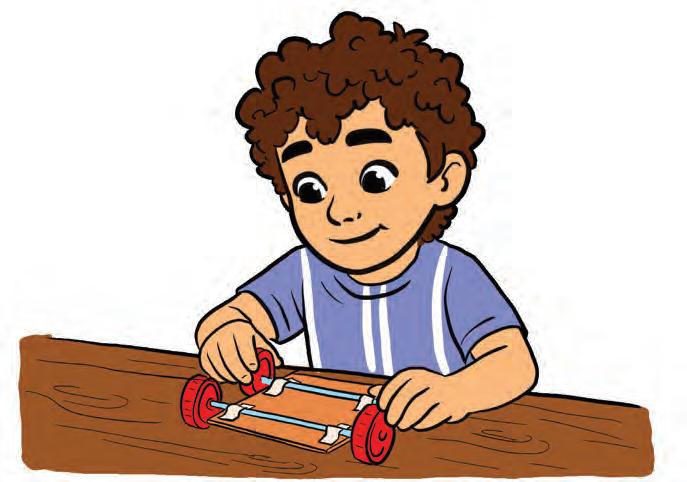
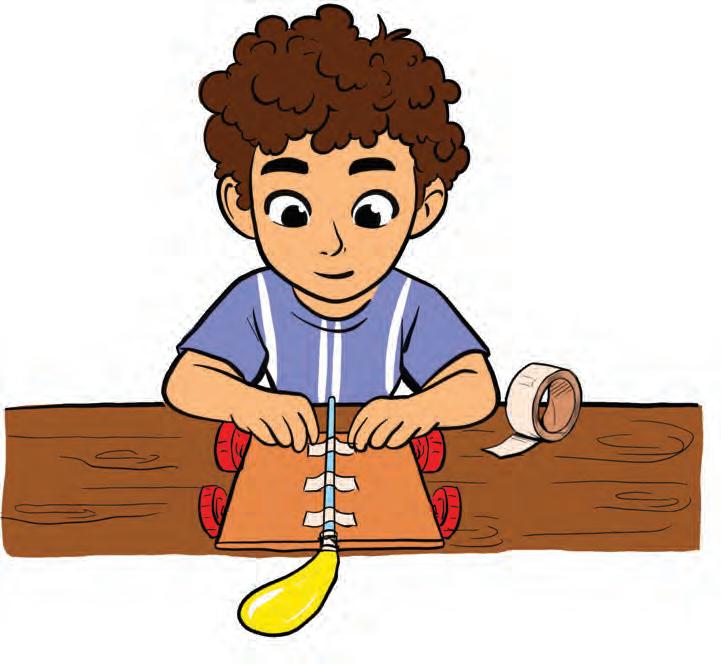
Insert a straw into a balloon and tape it tightly.Attach it on top of the cardboard with tape.

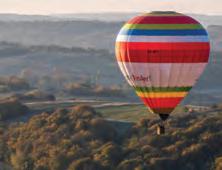
A rocket moves forward by pushing out hot gases. Real-lIfe Connect


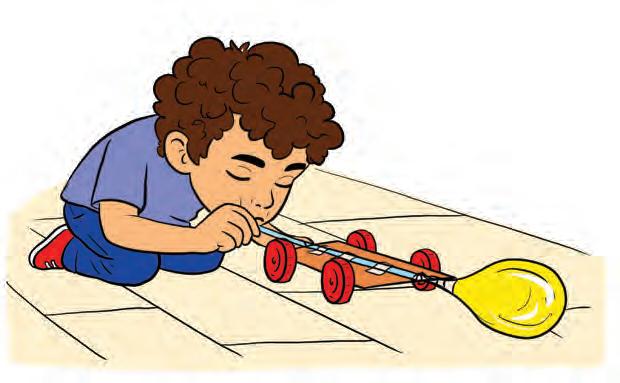
Inflate the balloon through the straw and cover the straw end with your finger.
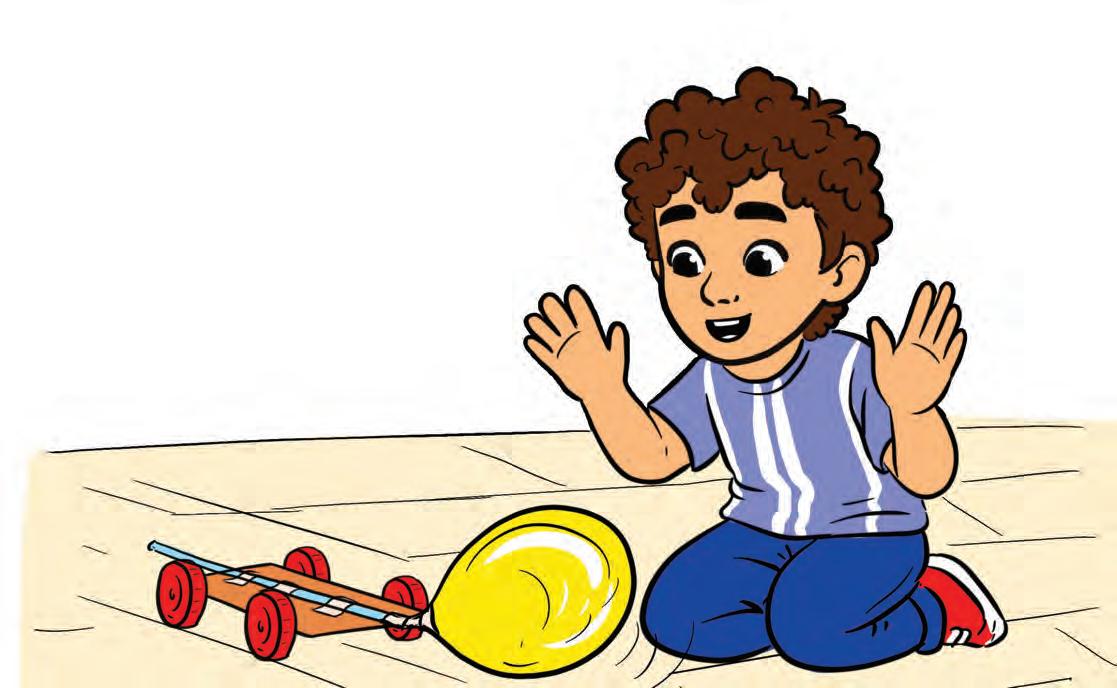
6. Place the car on the floor and watch it move by itself.
Activity in Action
SCIENCE BEHIND IT...
When you blow up the balloon and let it go, the air rushes out. This moving air gives a strong push that makes the car move ahead.
Try using a bigger balloon. Does it make the car go farther? Find out More!
CHECK YOUR LEARNING!
1.
Unscramble the letters to form words using the hints below.
A. You blow into me to fill me with air.
LONOBAL:
B. I help the car move by rolling on the floor.
HLEWES:
2. Tick ( ) the objects that use the force of wind to move.


3.
Tick ( )the correct answer.
Aarav made a balloon-powered car for his science project. He blew up the balloon and let it go. The car moved really fast at first, then it got slower and slower and finally stopped.
A. What made the car move ahead?
(a) Air
(b) Lig ht
B. Why did the car stop moving?
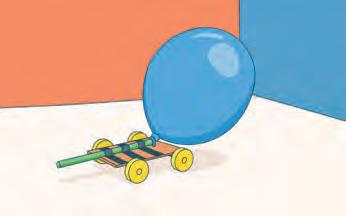
(a) The balloon ran out of air to push the car forward.
(b) The car got too heavy as it moved along the floor.

Make Your Own Parachute
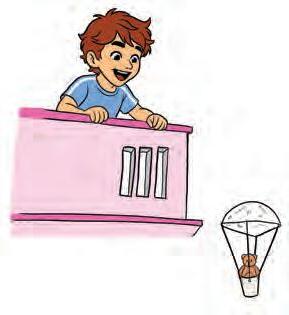
In this fun activity, we will make a mini parachute that helps a toy land safely on the ground.
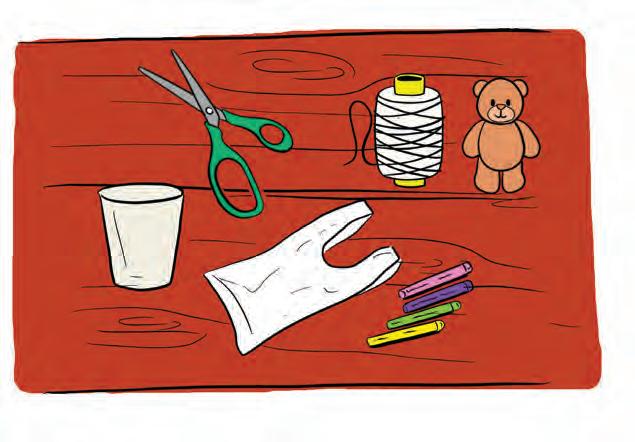
What We Need
• A pair of scissors
• A roll of string
• A cup
• A plastic grocery bag
• Small items like a toy, eraser or crayon

Let’s Begin
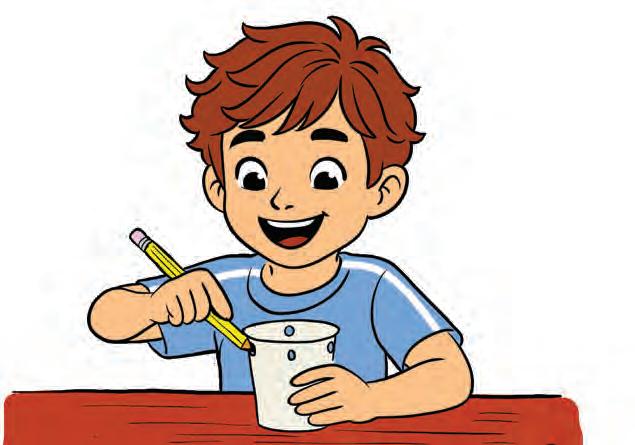
1. Take a cup and make 4 holes near its rim, keeping equal spaces between them.
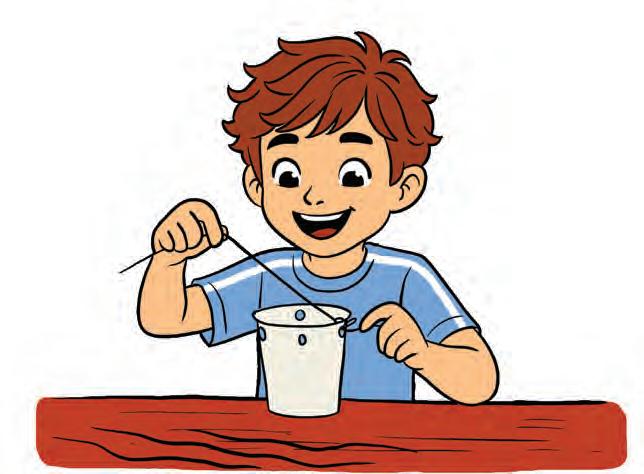
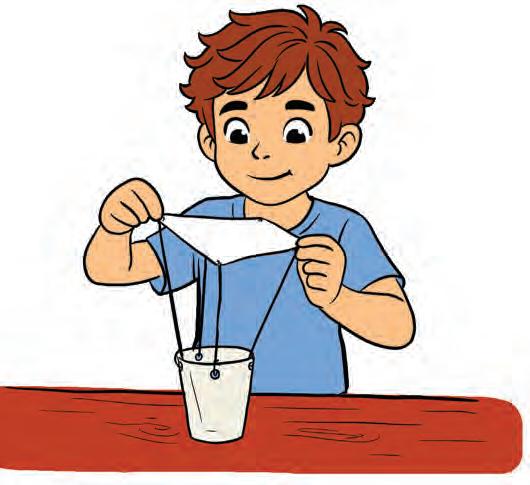
2. Cut 4 pieces of string, each about 30 cm long. Tie one string to each hole of the cup.
3. Take a plastic bag and cut it into a big square.

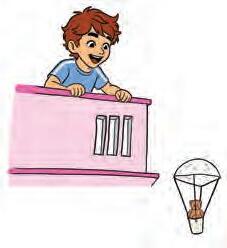
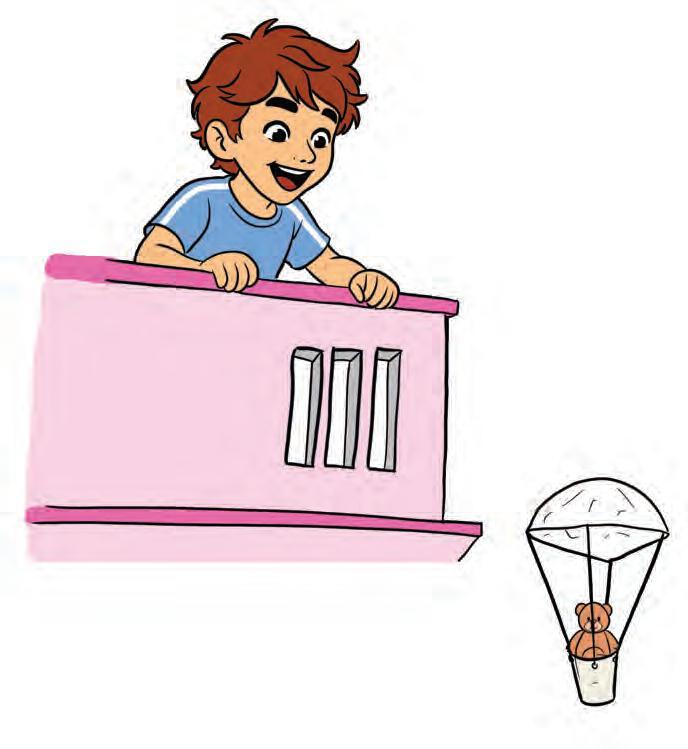
5. Add a small toy or eraser in the cup and drop the parachute from a safe height.
4. Make 4 holes, one at each corner of the square and tie each corner to a string from the cup.
Watch out
Do not climb on chairs, tables or other unsafe places when dropping the parachute.

During floods, earthquakes or wars, rescue workers and soldiers use parachutes to deliver food and medicines to people in places where vehicles cannot reach.

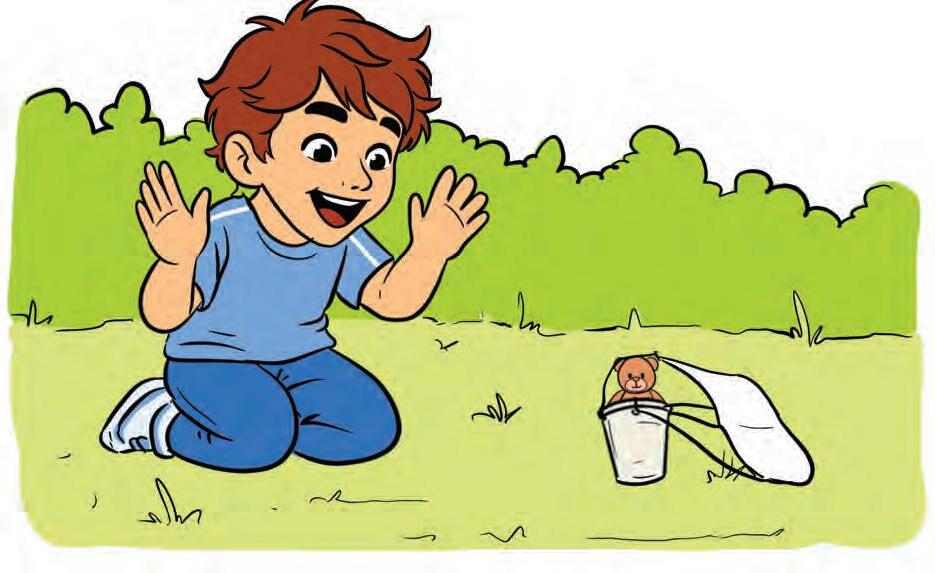
Observe how long it takes for the parachute to reach the ground.
SCIENCE BEHIND IT...
When you drop the parachute, gravity pulls the cup downward. However, as air gets trapped under the wide plastic sheet, it creates an upward push called air resistance. This force slows the fall, allowing the cup to land gently and safely.
Find Out More!
Activity in Action
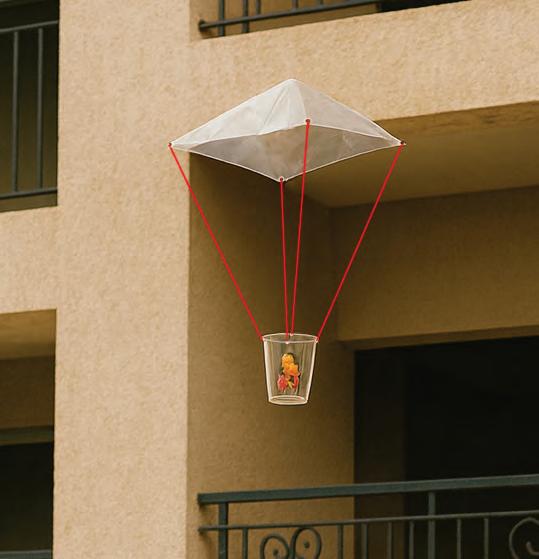
Try adding or removing small items from the cup to change its weight. Observe if the parachute lands faster or slower each time.
Check your learnIng!
1. Tick ( ) the correct answer.
A. Who uses parachutes to drop food and supplies in hard-to-reach places?
(a) Soldier s and rescue workers
(b)Firefighters
B. If you make the parachute bigger, what will most likely happen?
(a) It will fall faster.
(b) It will fall slower.
C. What force pulls the parachute down toward the ground?
(a) Air re sistance
(b) Gravity
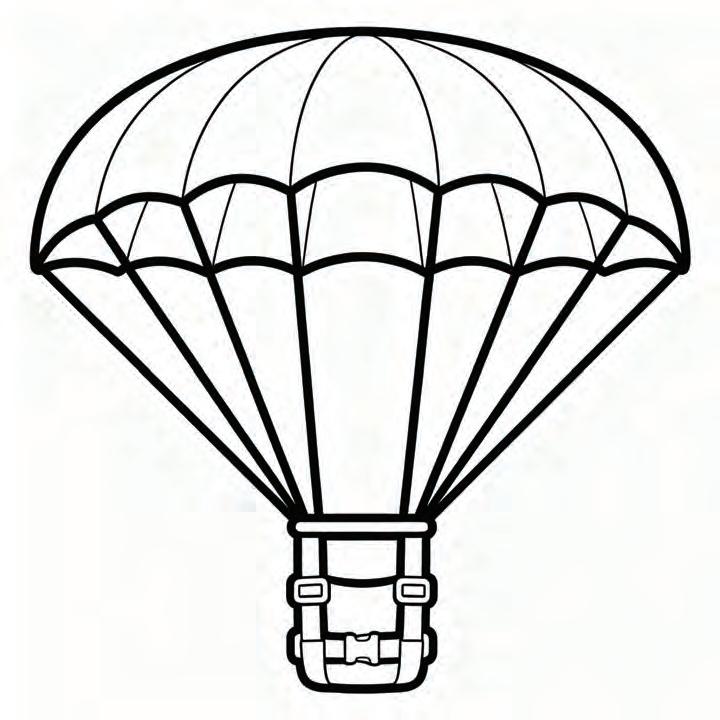
2. Colour the parachute.

Hold wIth a MatchstIck
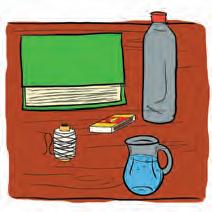
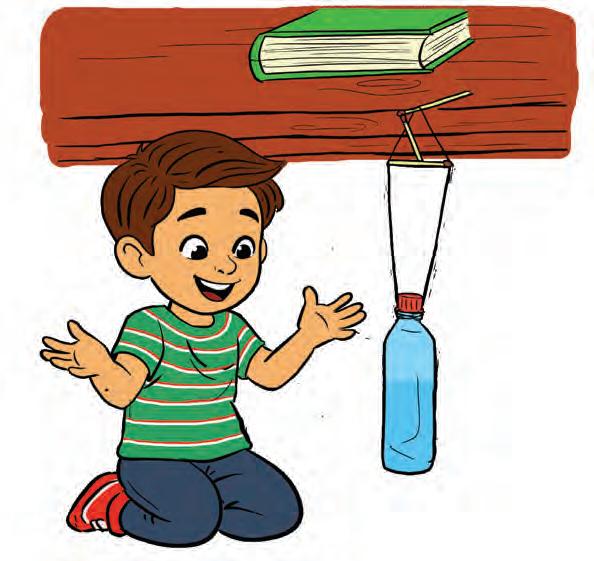
In this activity, we will use matchsticks and string to form a strong support setup that keeps a heavy bottle balanced.

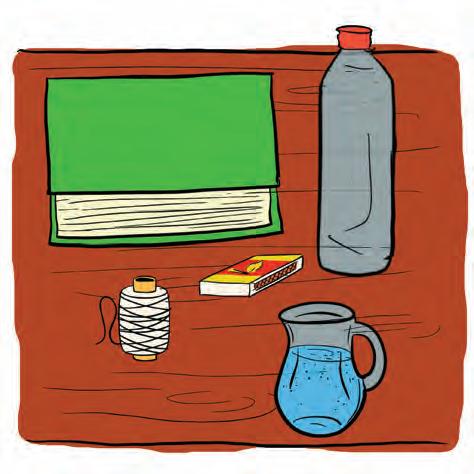
What We Need
• 1 matchbox
• 1 bottle
• 1 heavy book or box
• A piece of thread/string
• Water
Let’s Begin

1. Fill the bottle three quarters full of water.
Do not use a glass bottle. Watch out
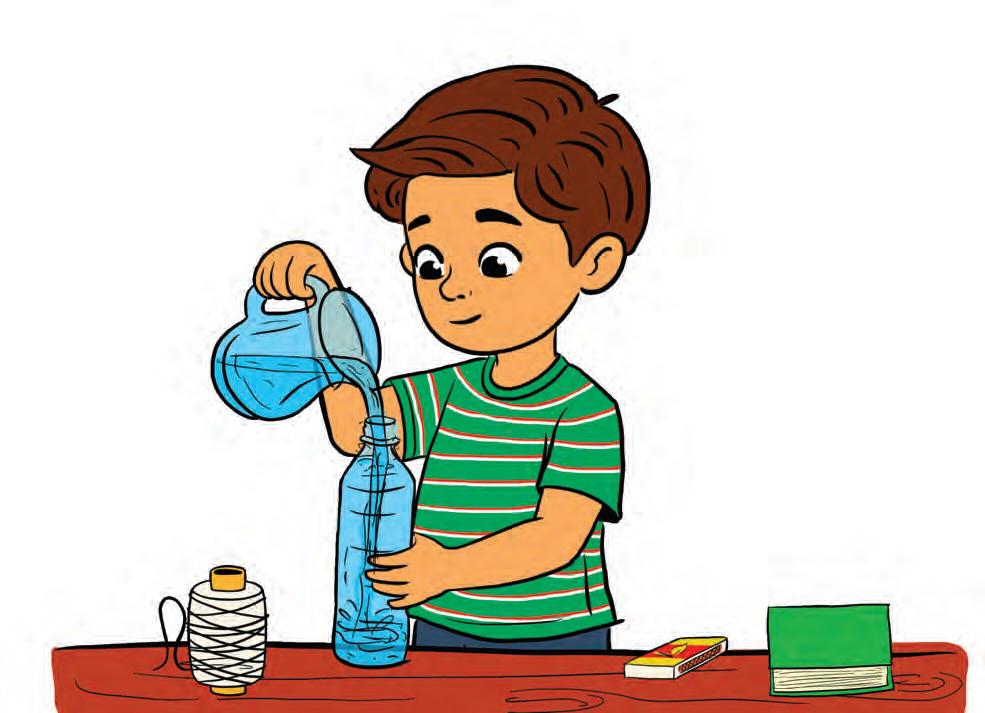
2. Make a loop with the string and tie it around the neck of the bottle.
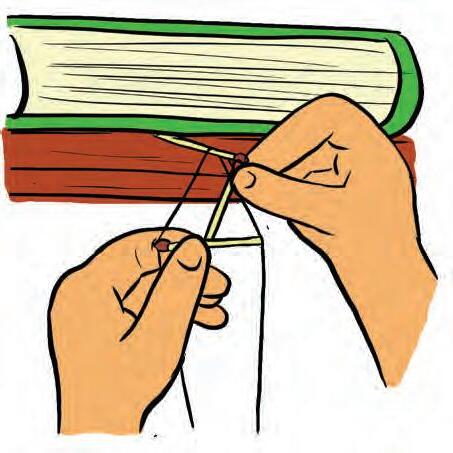
3. Place one matchstick under a heavy book or box at the edge of the table, leaving half of it sticking out.
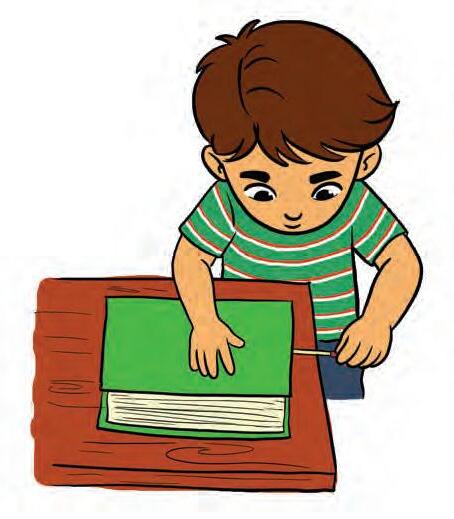
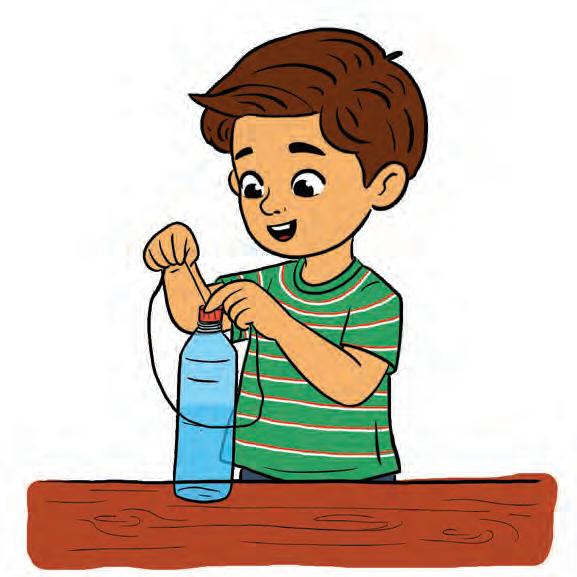
4. Loop the string over the matchstick touching the edge so that the bottle
5. Place another matchstick horizontally between the two sides of the string near the first matchstick.
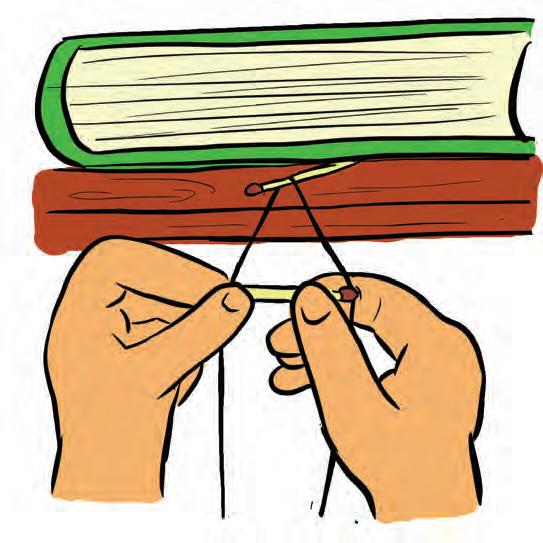
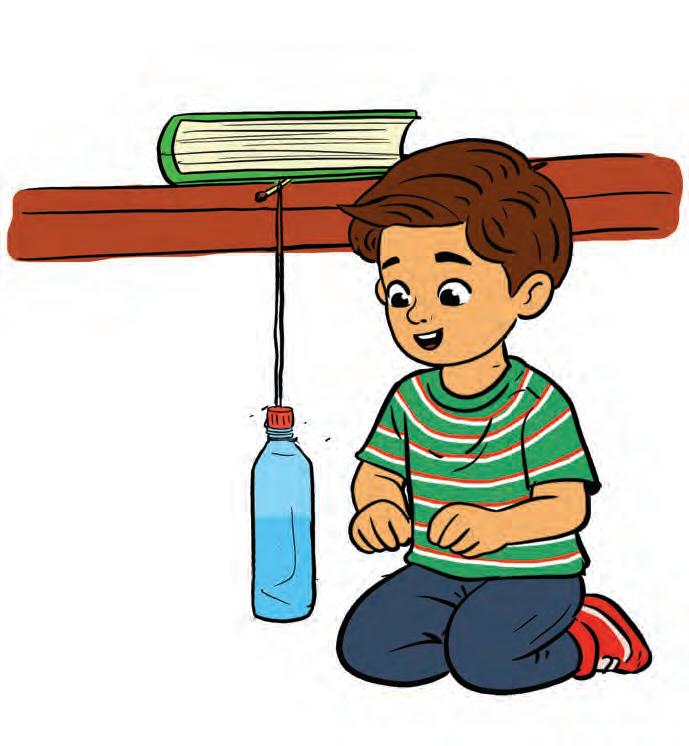

6. Place a third matchstick vertically joining the horizontal stick to the tip of the first matchstick. This makes a small triangular frame.
7. Slowly remove the weight (book) from the first matchstick. Watch as the matchstick tripod supports the hanging bottle without falling.
Activity in Action
SCIENCE BEHIND IT...
When the bottle hangs, gravity pulls it down. The three matchsticks form a triangular frame that spreads the weight evenly and balances the pull of gravity. This strong and stable shape keeps the bottle balanced and prevents it from falling down.
Find Out More!
Try bottles of different sizes and see which one balances better. Design other stable structures to keep the bottles balanced.
CHECK YOUR LEARNING!
1. Tick ( ) the correct answer.
A. Which shape makes the matchstick structure strong and stable?
(a) Square
(b) Triangle
B. What will happen if you remove one of the matchsticks from the triangular frame?
(a) The bottle will stay balanced.
(b) The bottle will fall down.
C. Which force pulls the bottle downward in this activity?
(a) Air pressure
(b) Gravity
D. Which bottle is safe to use for this activity?
(a) Glass bottle
(b) Plastic bottle
E. The matchstick tripod holds the bottle because it spreads the _______ evenly.
(a) weight
(b) colour
2. State True/False.
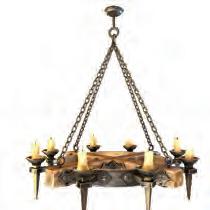
A. The chandelier does not need chains to hang.
B. Tripod cameras are stable because their weight is spread evenly on three legs.



Self-WaterIng Bottle Planter
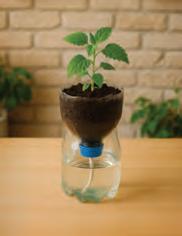
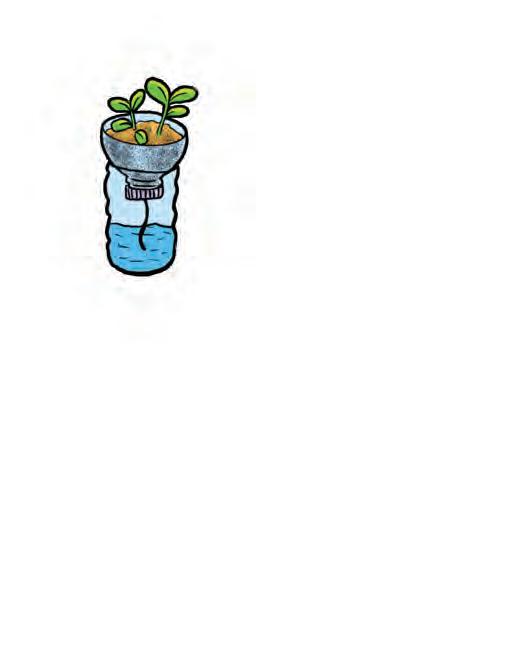
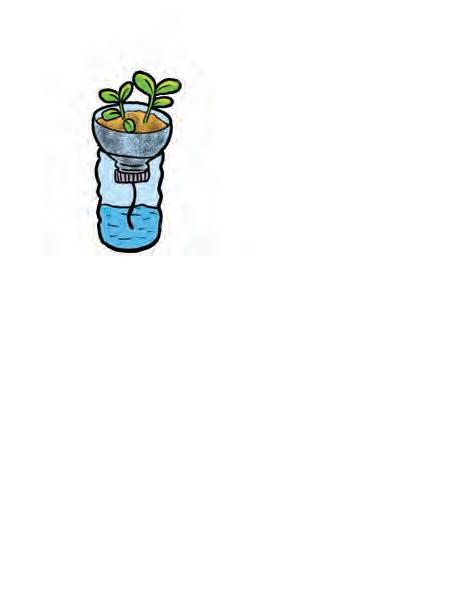
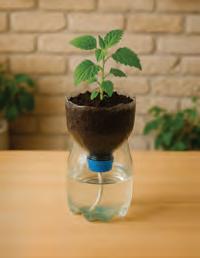
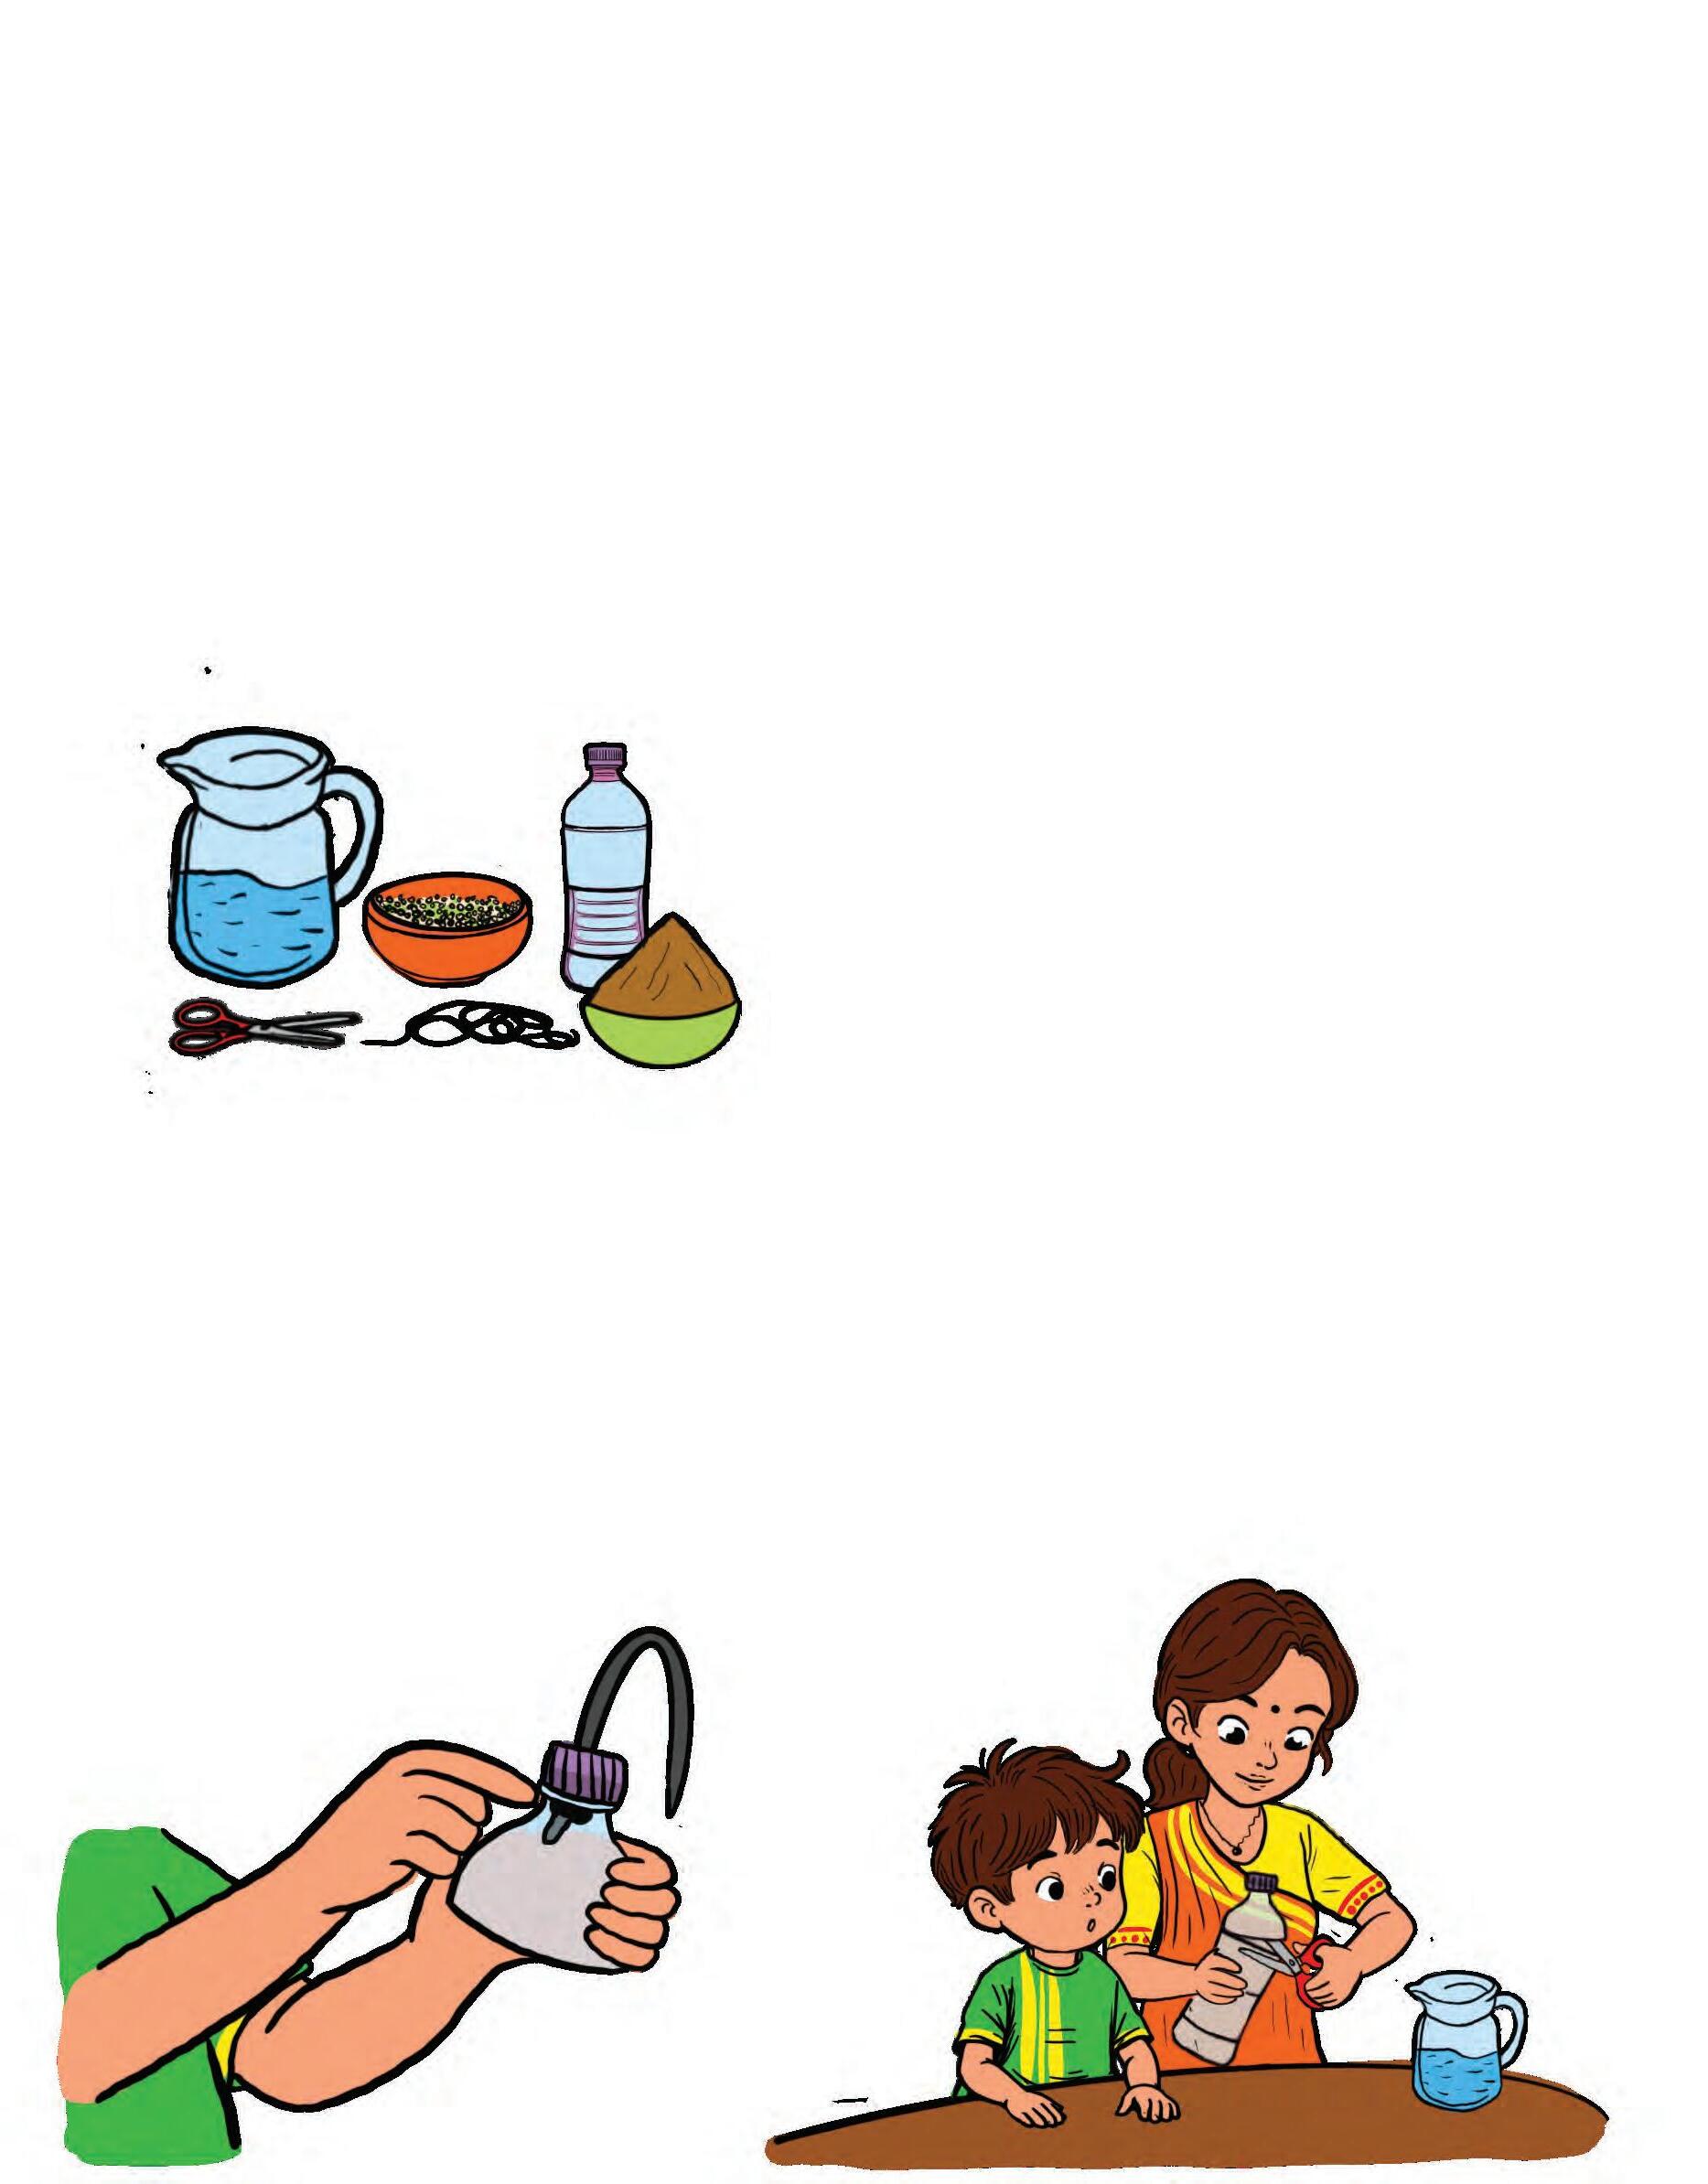
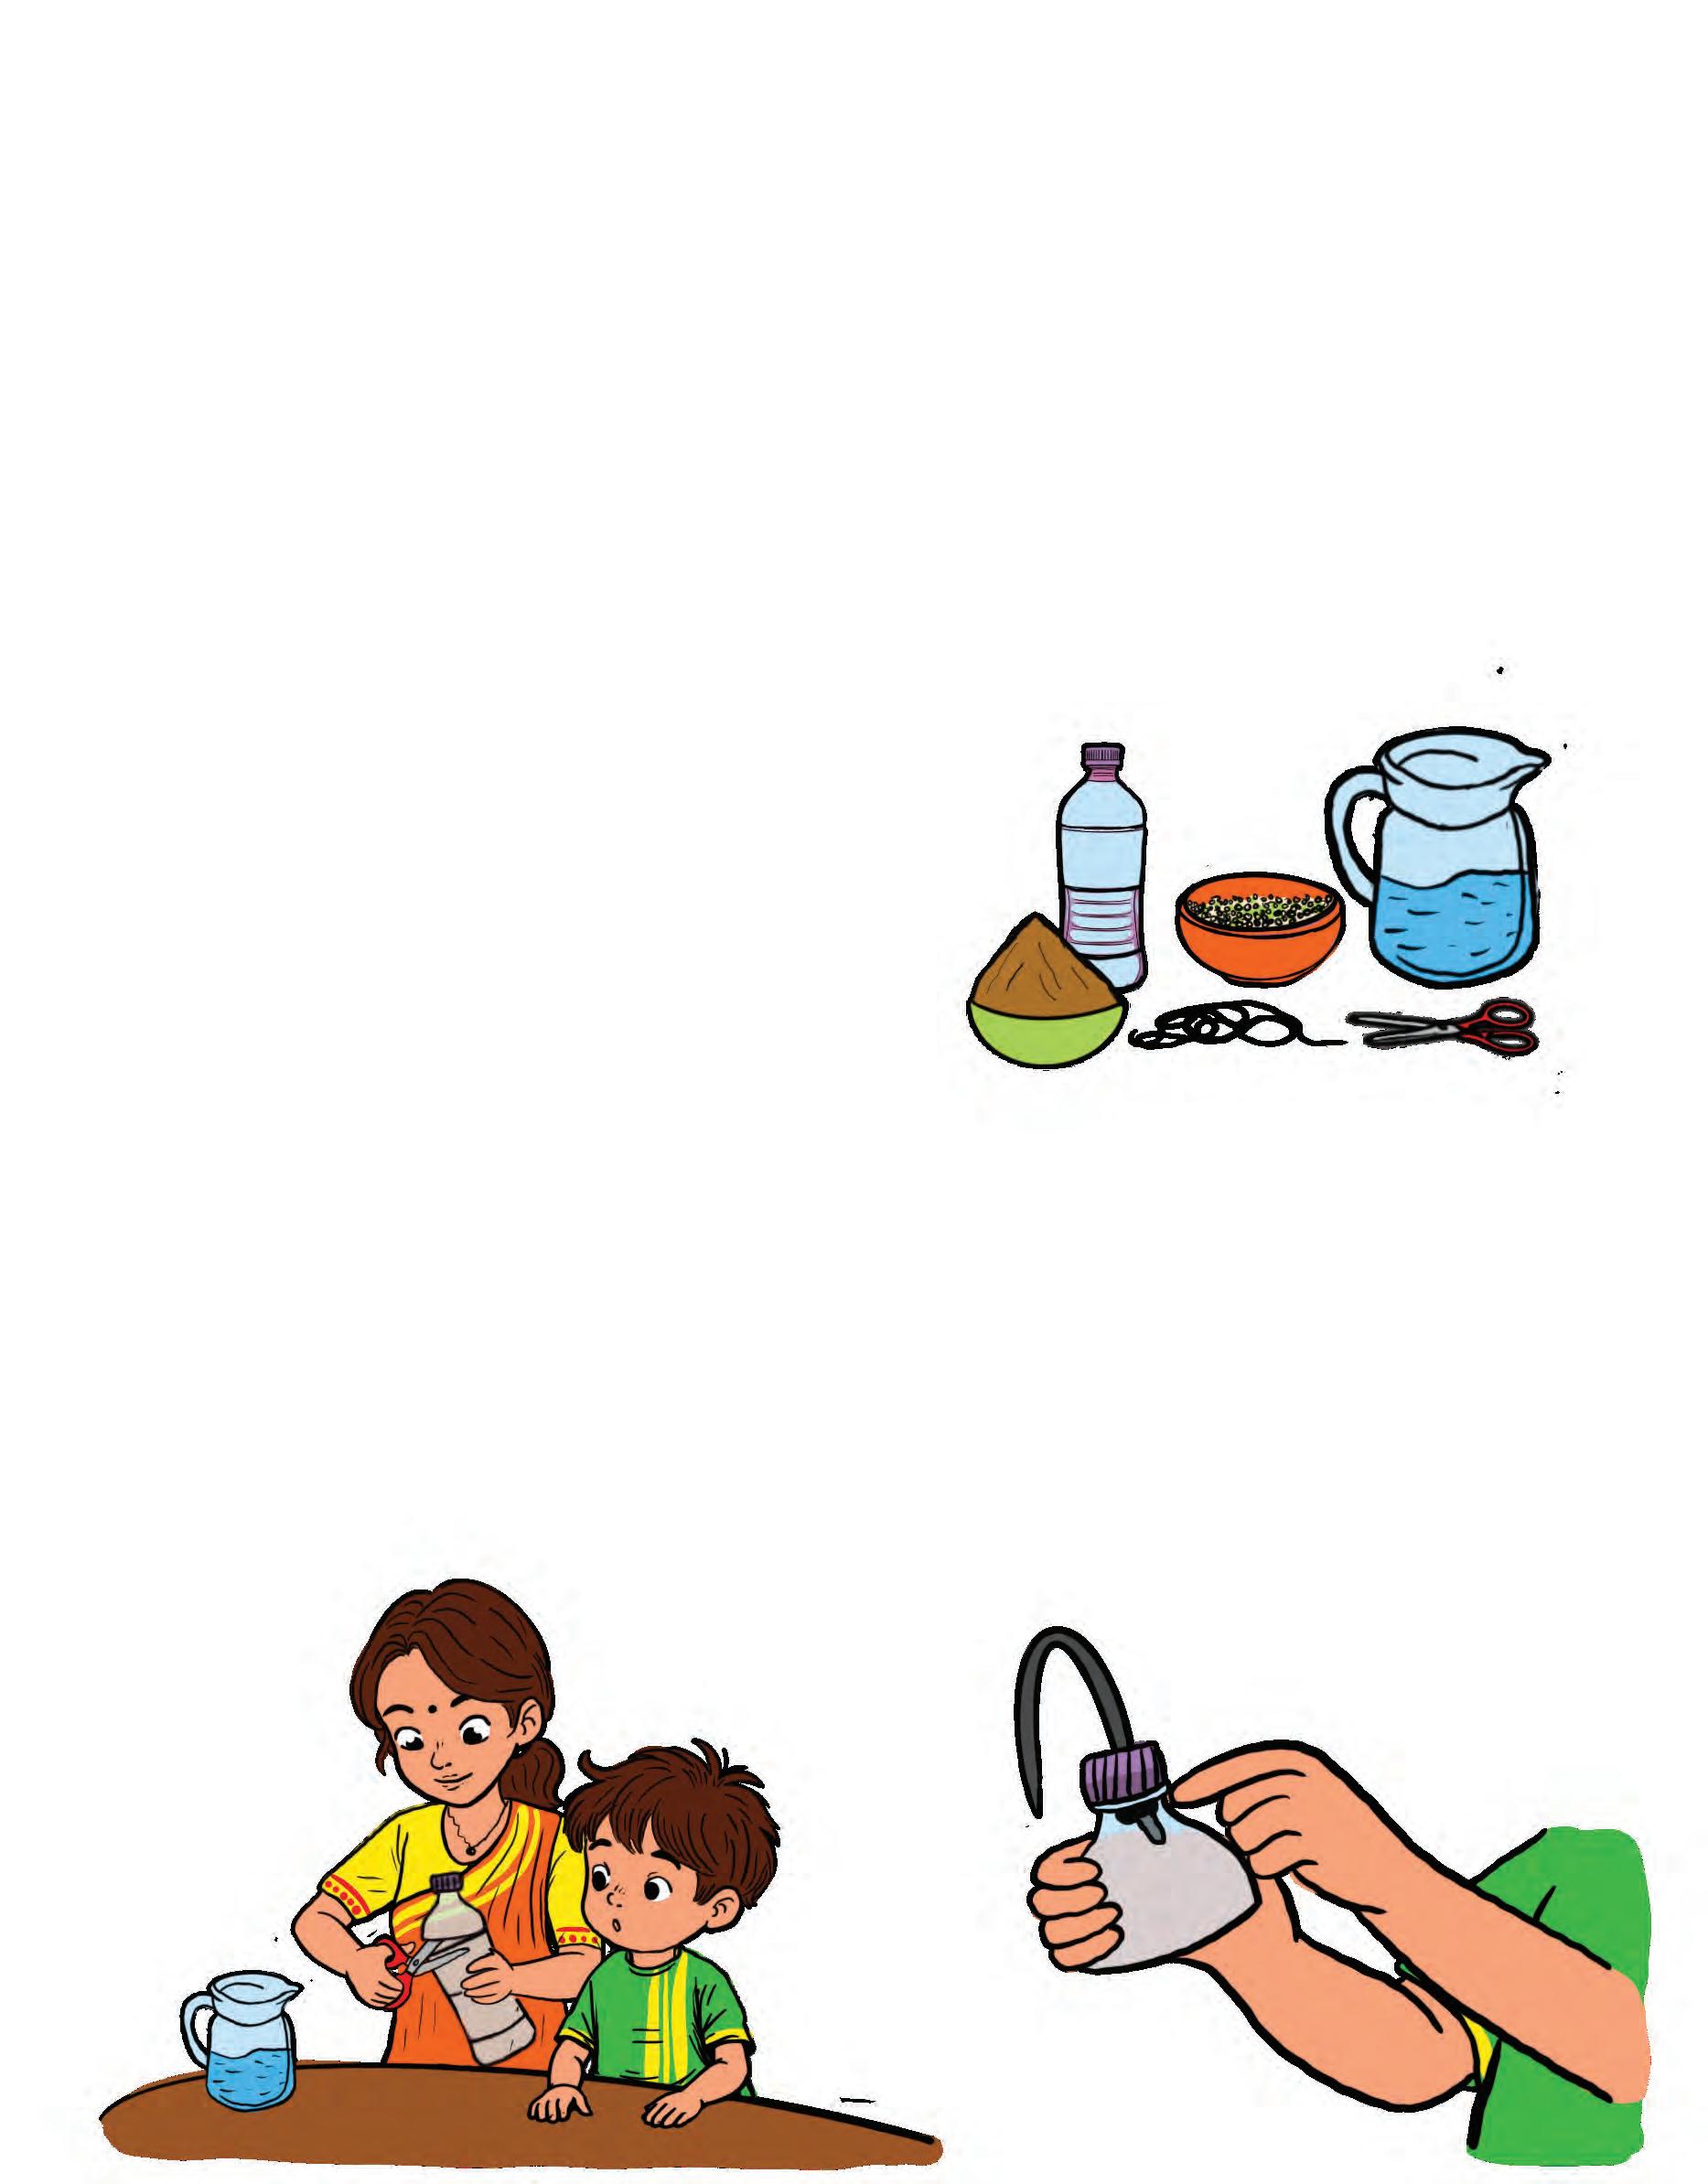
In this activity, we will reuse a plastic bottle to make a self-watering planter.
What We Need
A pair of scissors
A plastic bottle
A piece of thick string
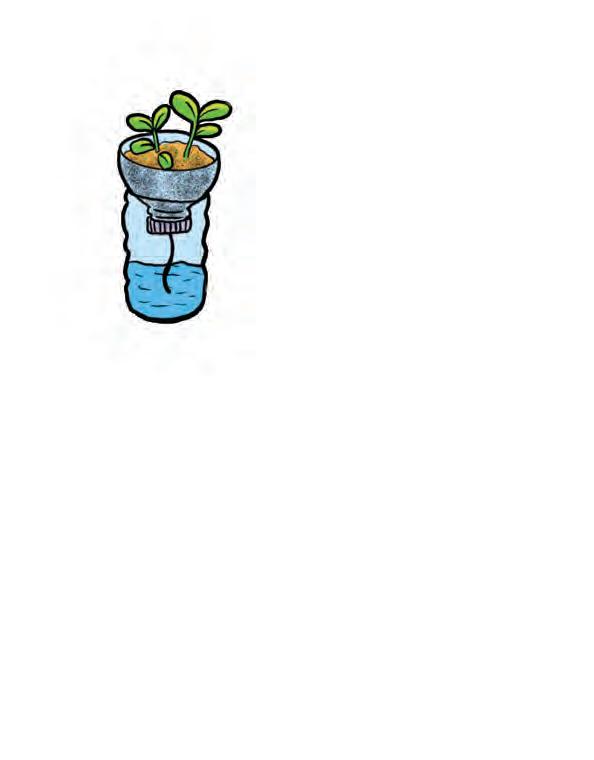
Seeds (coriander or fenugreek) Cut a bottle about two-thirds from the
Make a hole in the cap and pass the string through it. Tie a knot inside, leaving some string on both sides, and tightly close the cap. 2.
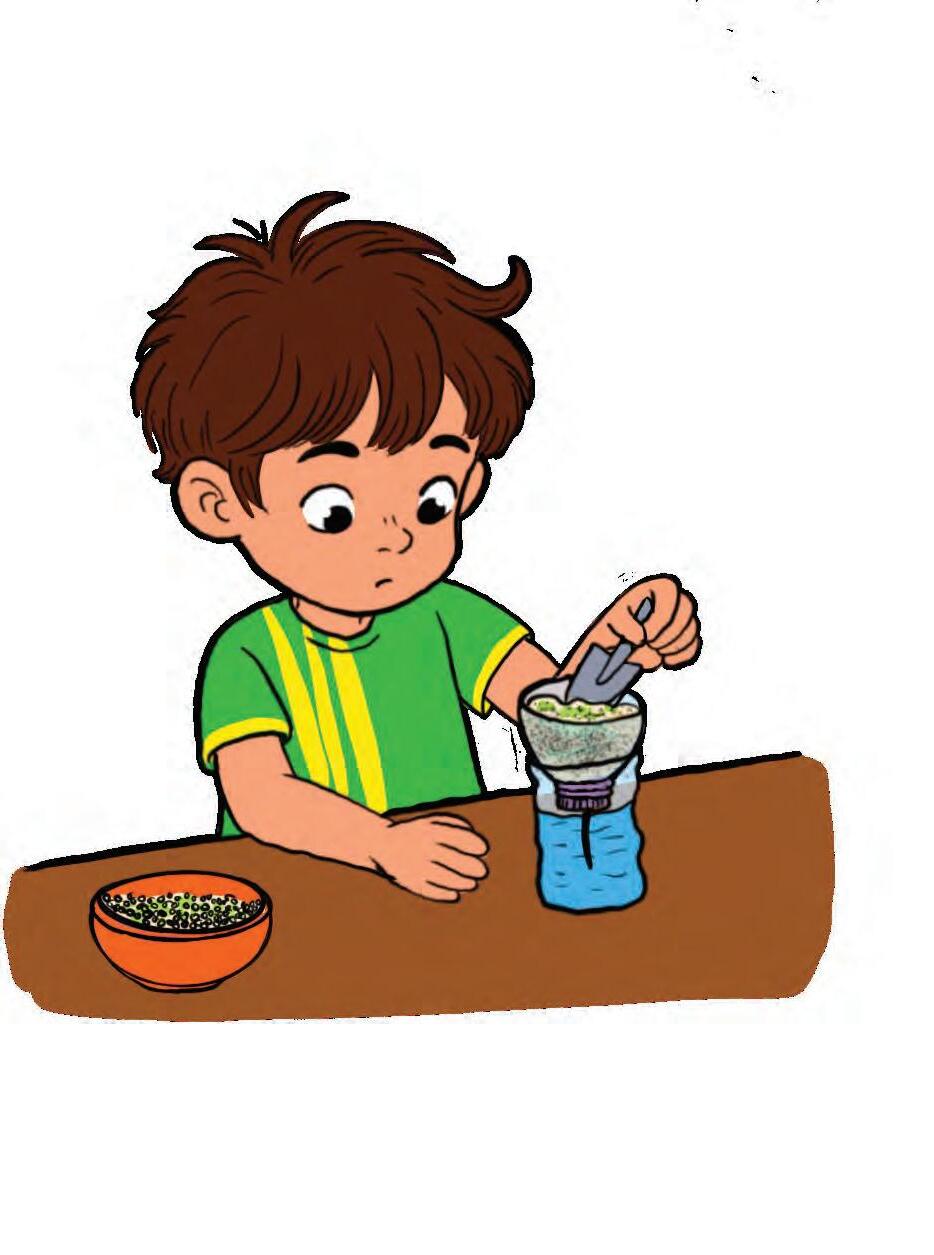
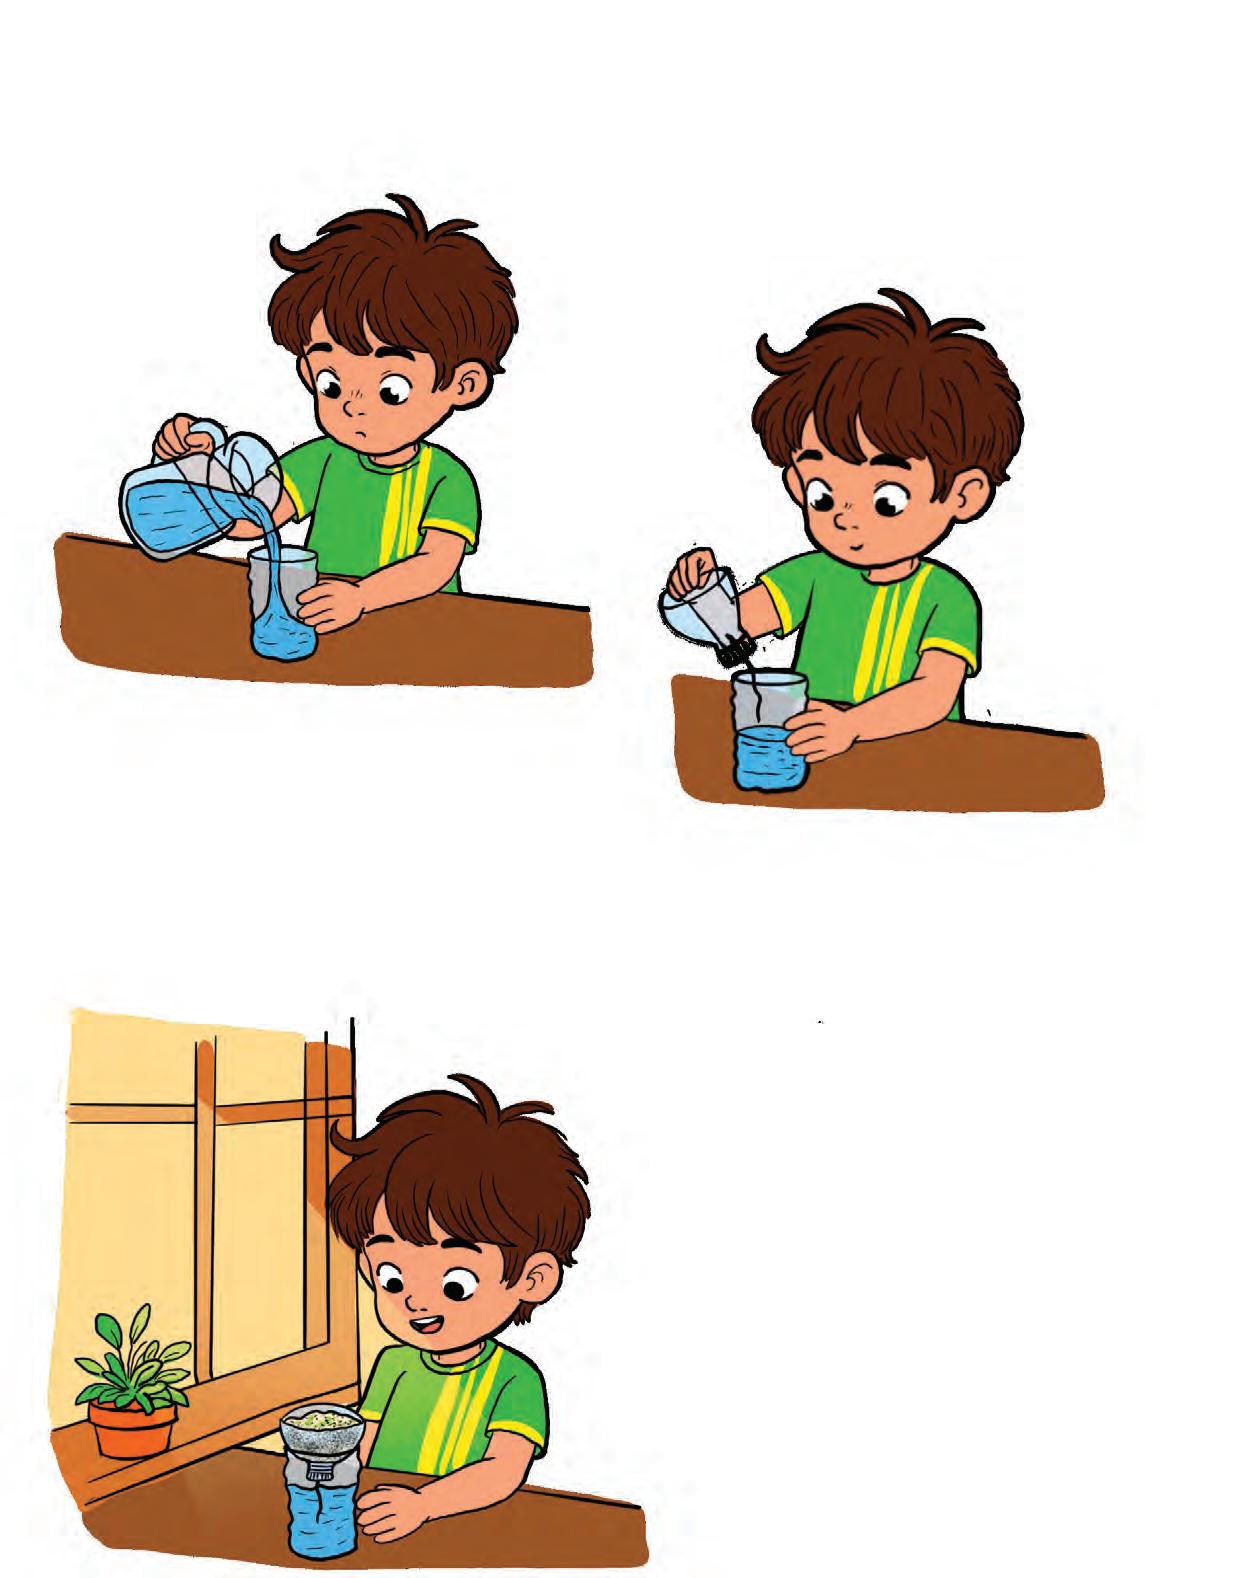
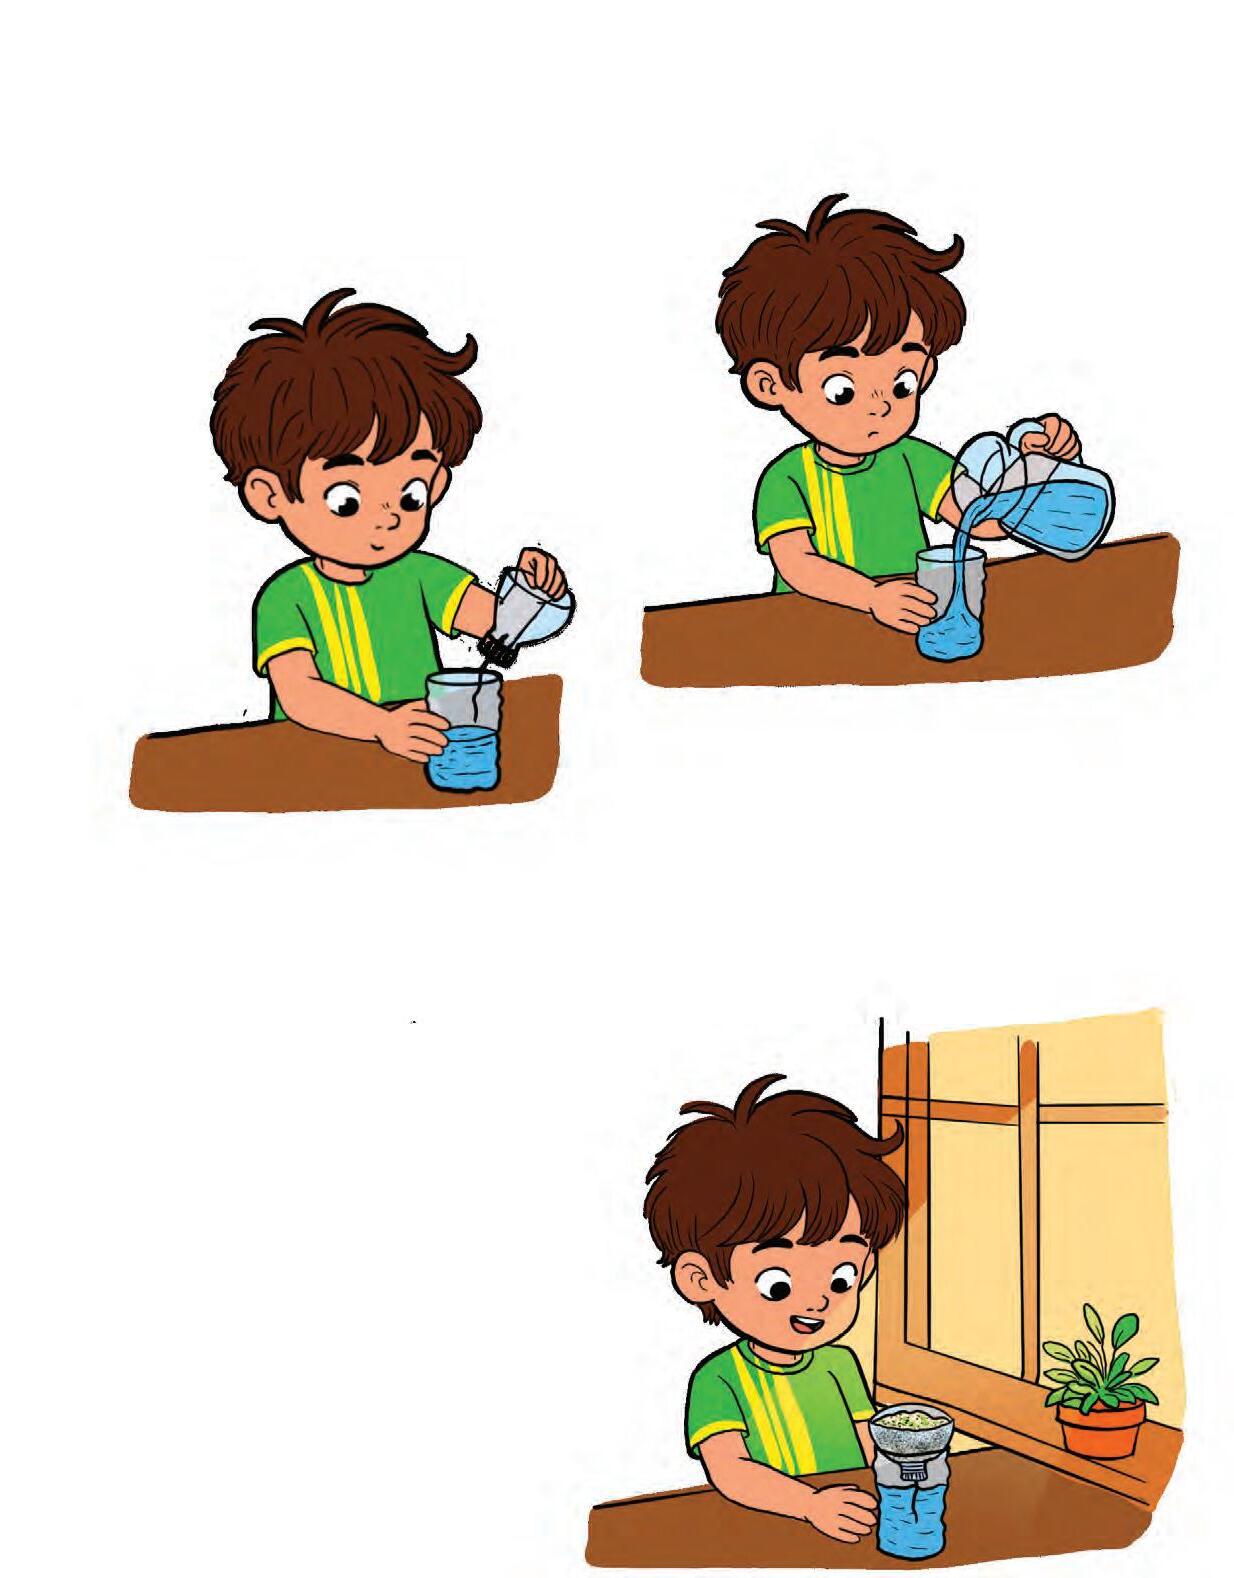


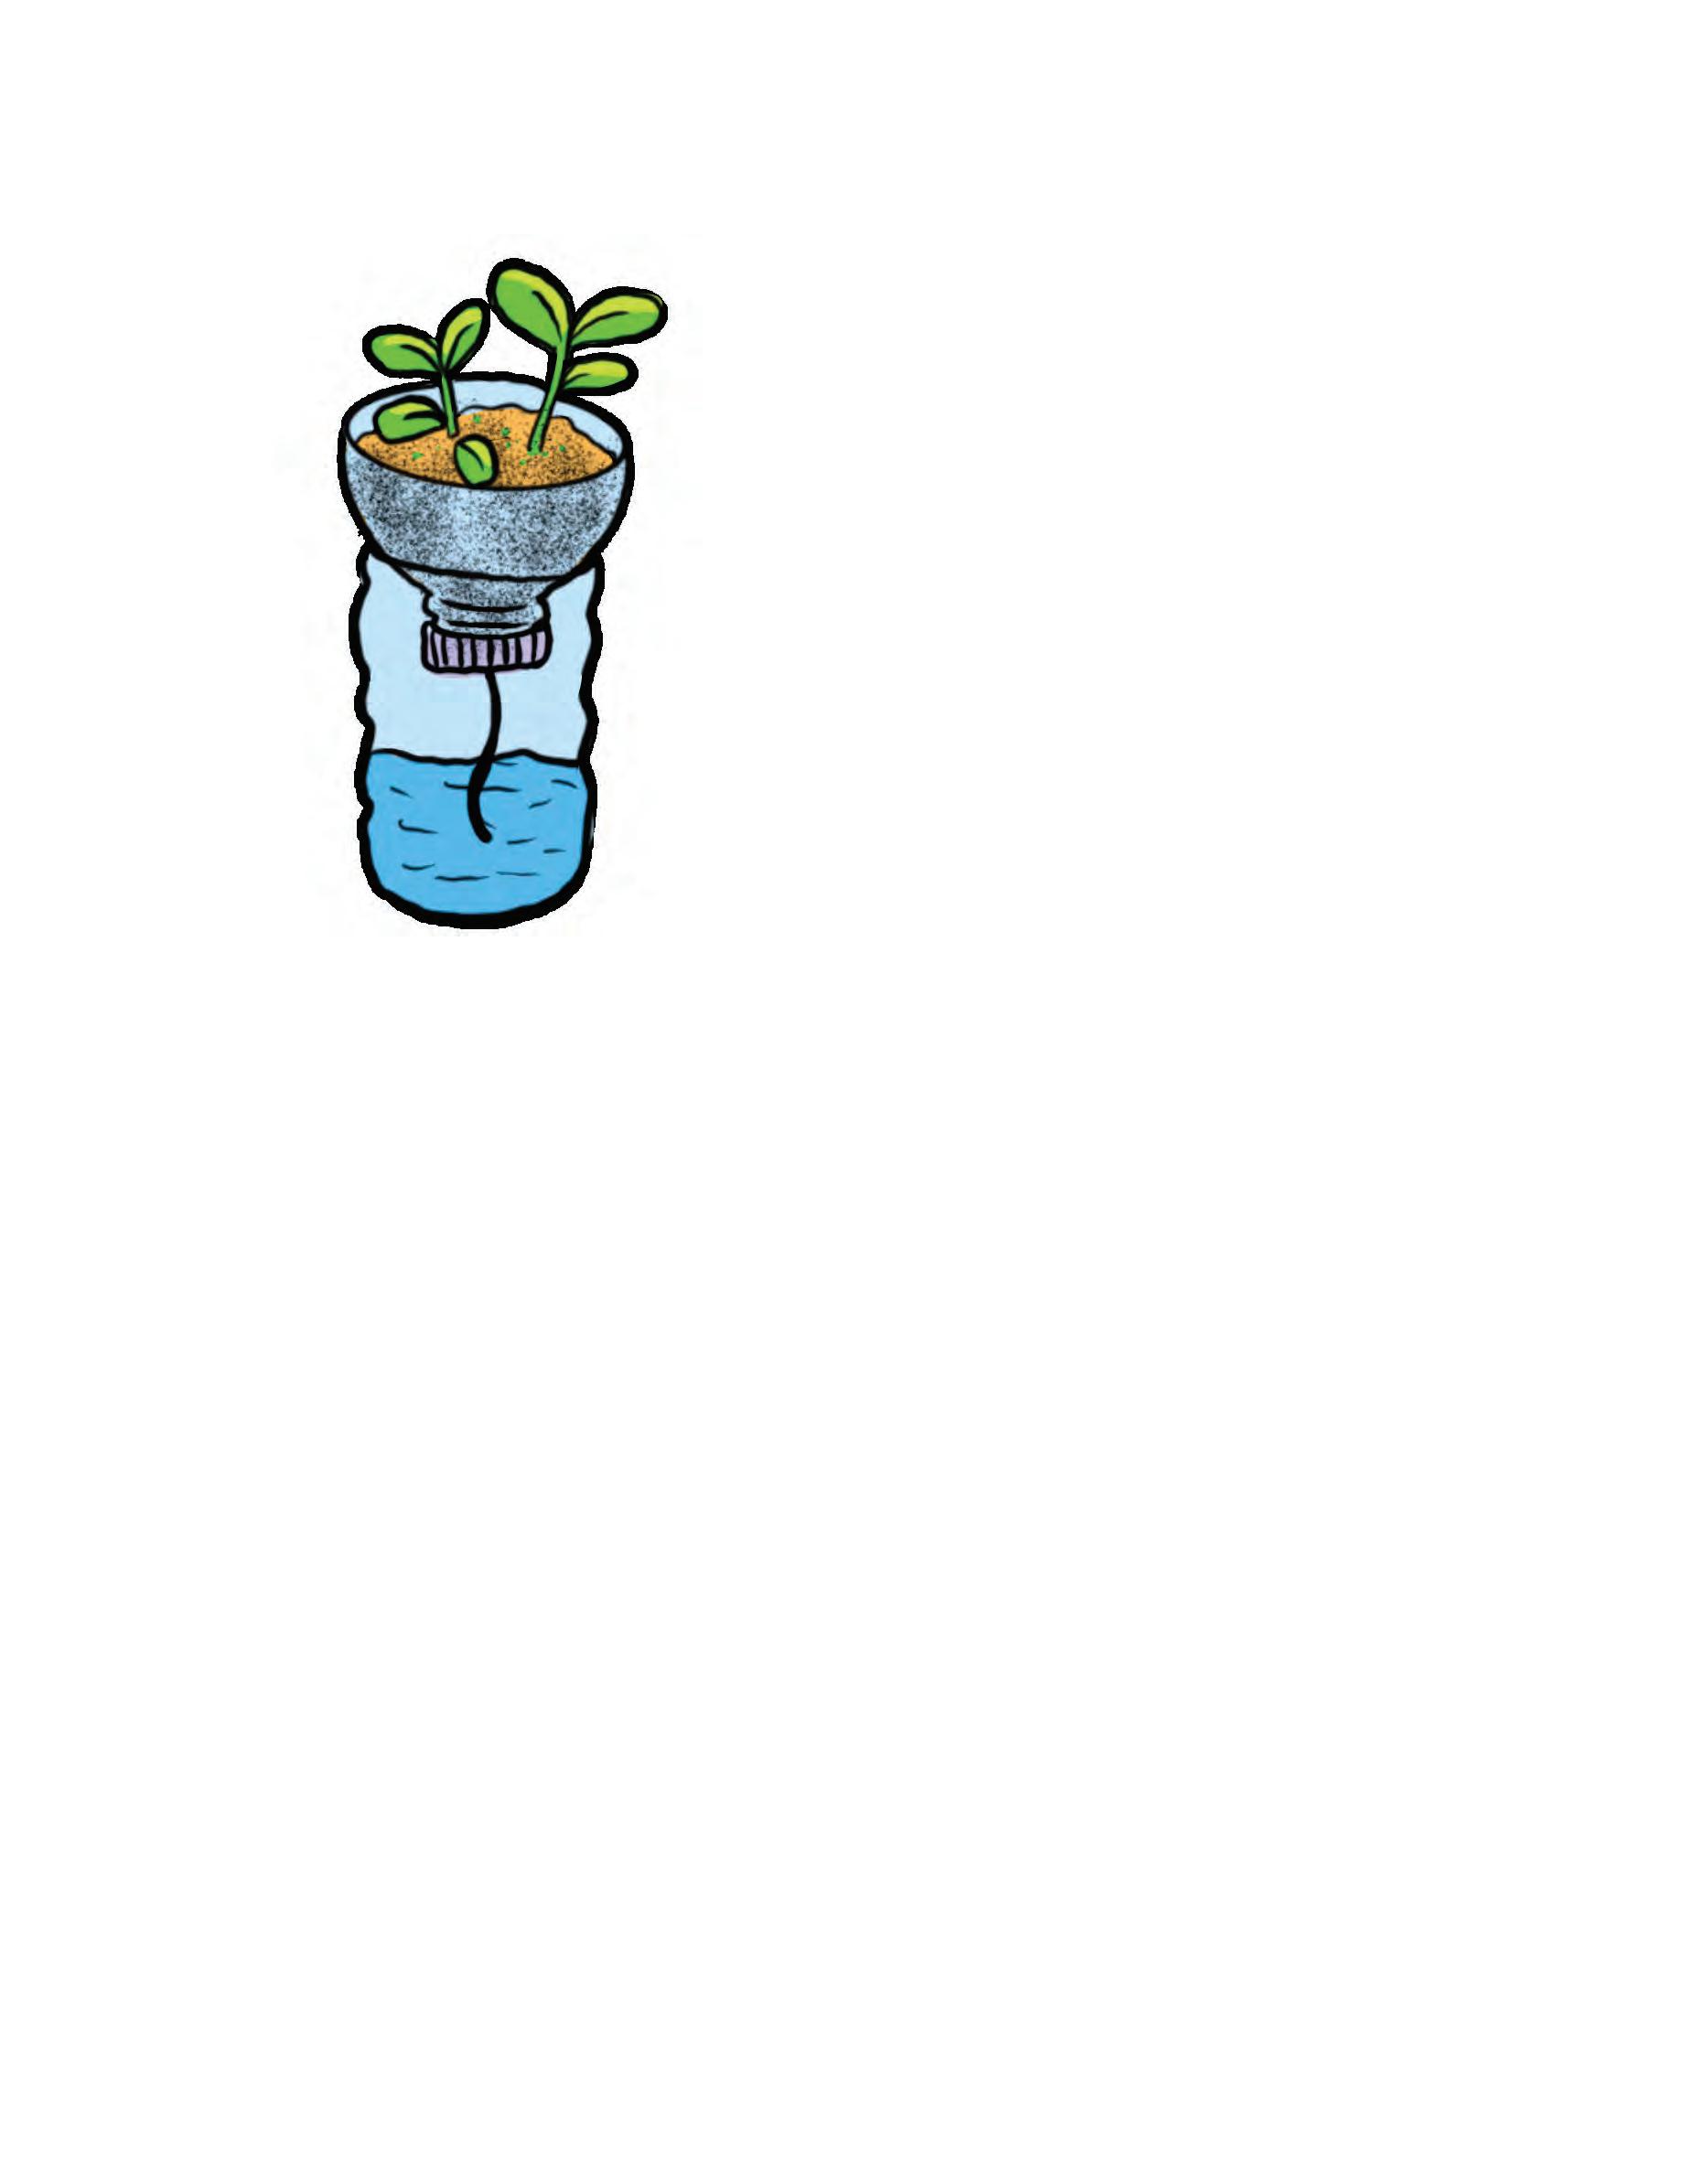
Notice how the seeds sprout in about a week. Refill the bottom part when the water level goes down to keep your plants healthy. 7.
SCIENCE BEHIND IT...
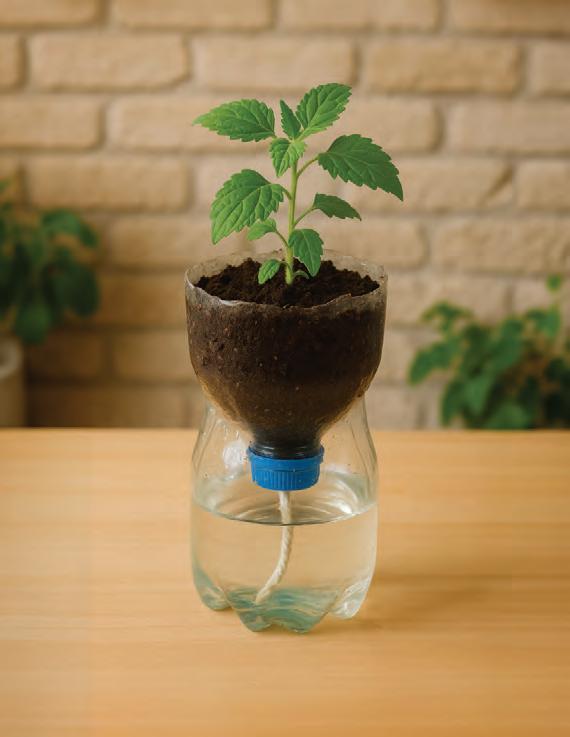
The string acts like a water carrier. It slowly pulls water up into the soil through a process called capillary action. This helps keep the soil moist even when you don’t water it every day. The roots take in water from the damp soil, helping the plant grow healthy and strong.
Find Out More!
Make your own mini garden by planting different kinds of seeds in self-watering planters.
Check your learnIng!
1. Tick ( ) the correct answer.
Anaya is going out of town with her family for 5 days. She made self-watering bottle planters to take care of her plants.
A. (a) (b)
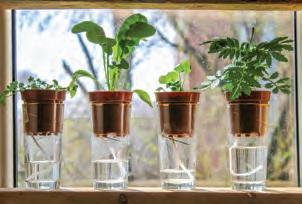
What will happen to plants after few days without care?
The plants will stay healthy. The plants will die.
B. (a) (b)
How will the plants get water?
The string pulls water upward into the soil through capillary action. The roots store water for several days and use it slowly.
C. (a) (b)
What should Ananya do to maintain the bottle planter for long-term use?
Refill the bottom part of the bottle when the water level goes down. Keep adding more soil every week to cover the roots.
2. Write the correct step number above each picture to show the life cycle of a plant.
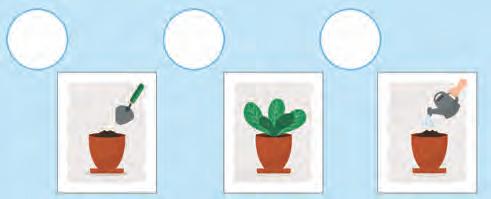
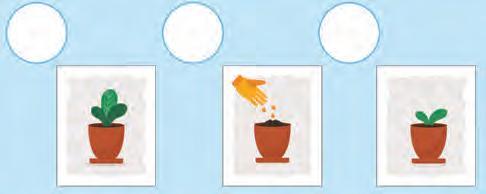

3. Label the parts of a plant using the words given in the box. Flower

Stem Leaf Roots Fruit
Cooling air creates low pressure and causes water to rise

Candle In a glass
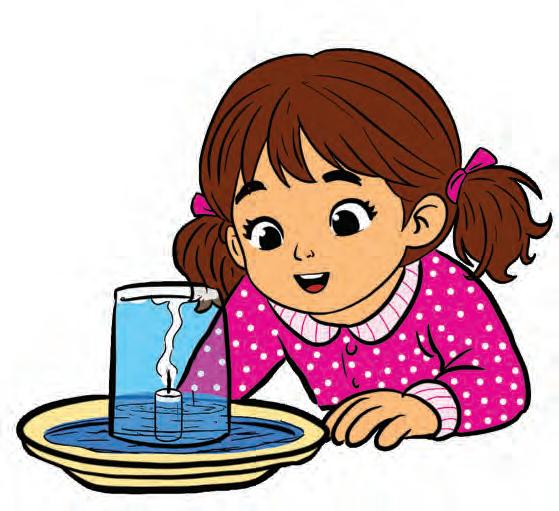
In this activity, we will understand how cooling air inside the glass creates a pull that makes water rise when the flame goes out.
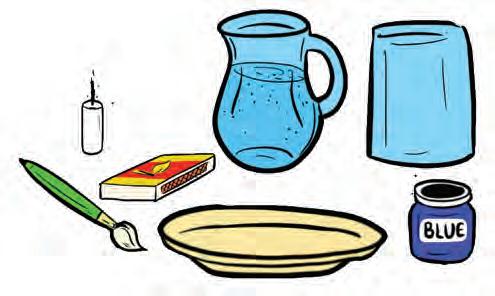
What We Need
• A candle
• A matchstick
• A glass
• A plate
• A paintbrush
• Watercolour
• Water
Let’s Begin
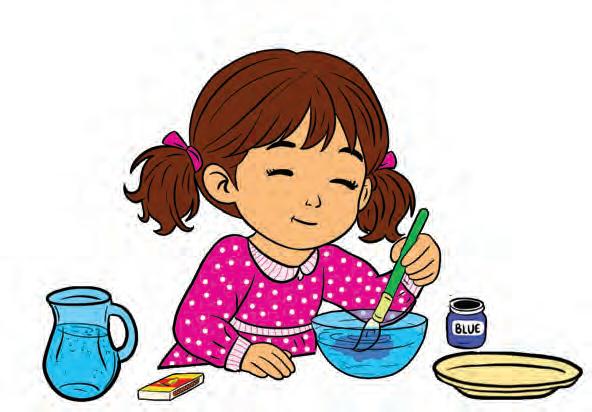
1. Take a bowl of water and add some water colour to it.
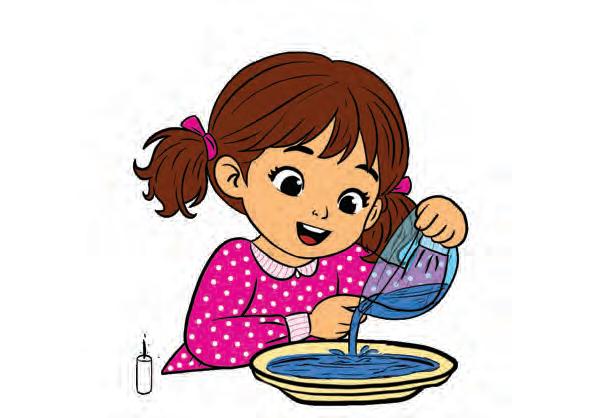
2. Pour the coloured water into the plate.
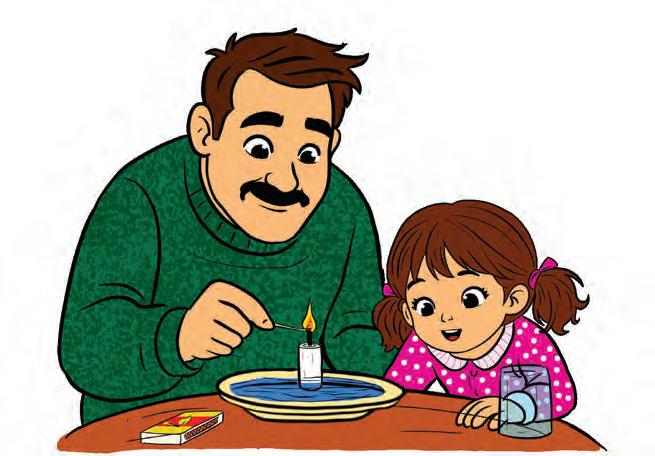
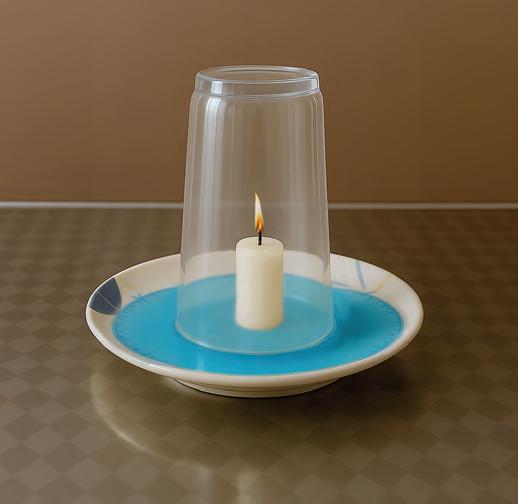
3. Place a small candle in the center of the plate and light it carefully.
WATCH OUT
Ask an adult to help you light the candle. Keep your hands away from the flame.
4. Gently place the glass upside down over the burning candle.
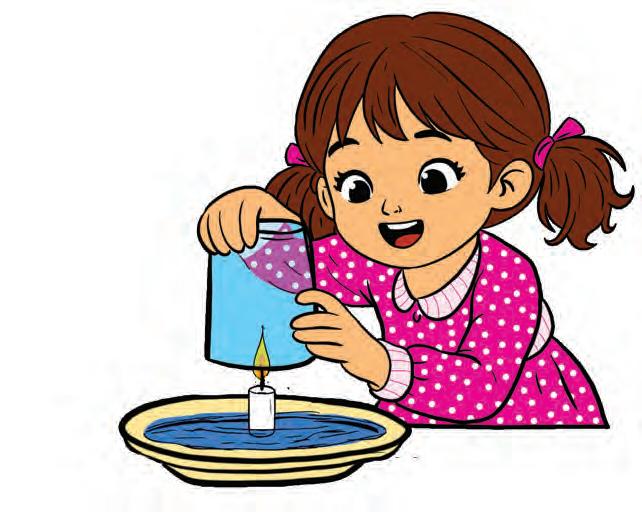
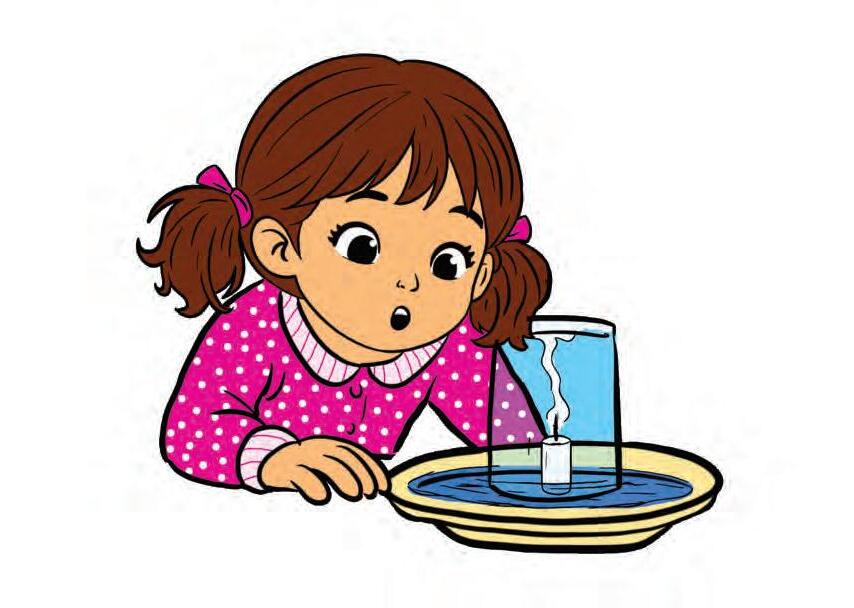
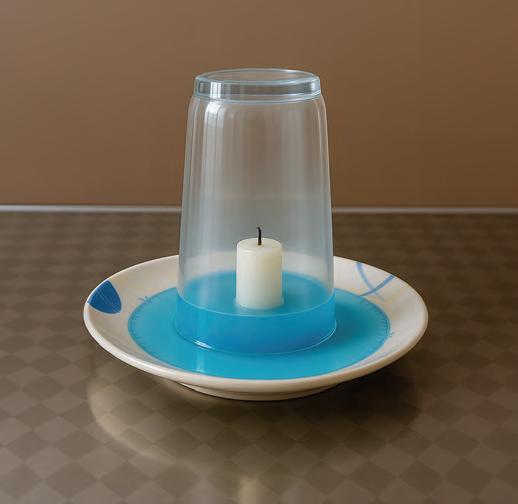
Watch closely. After a few seconds, the flame will go out.

6. You will see the water start to rise inside the glass after the
ACtivity in Action
Try
SCIENCE BEHIND IT...
When the candle burns, it uses up the air (oxygen) inside the glass. Once the oxygen is used up, the flame goes out. The air inside the glass then cools down and takes up less space, creating low pressure. This lower pressure pulls the water up into the glass.
CHECK YOUR LEARNING!
1. Think and write.
I ’m all around but cannot be seen,
I help a flame stay bright and keen.
When I run out, the fire dies,
An d water in the glass will rise!
What am I?
2. Lo ok at the picture and tick ( ) the correct answer.


A. What happens to the candle flame after the glass is placed over it?
(a) It burns brighter.
(b) It goes out after some time.
B. What change do you see in the water level inside the glass?
(a) It rises up
(b) It goes down.
C. Why does the water level rise inside the glass after the candle goes out?
(a) The air inside cools down and creates low pressure.
(b) The air inside heats up and creates high pressure.
D. If the glass has a hole, the water level inside will rise the same way.
(a) True
(b) False


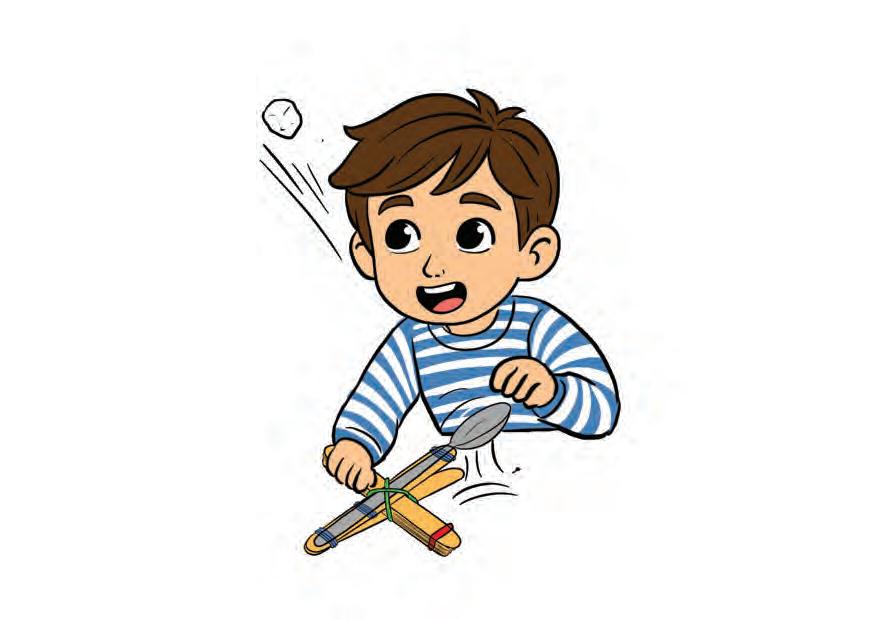
SPOON CATAPULT
In this activity, we will make a mini catapult to learn how stored energy can launch an object.
What We Need
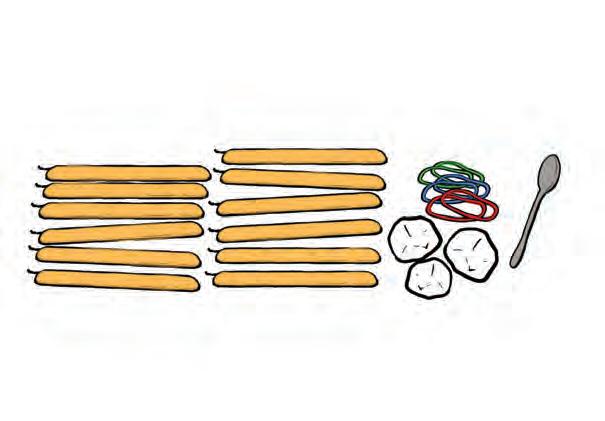
12 craft sticks
7 rubber bands
1 spoon
Cotton balls or paper balls
Let’s Begin
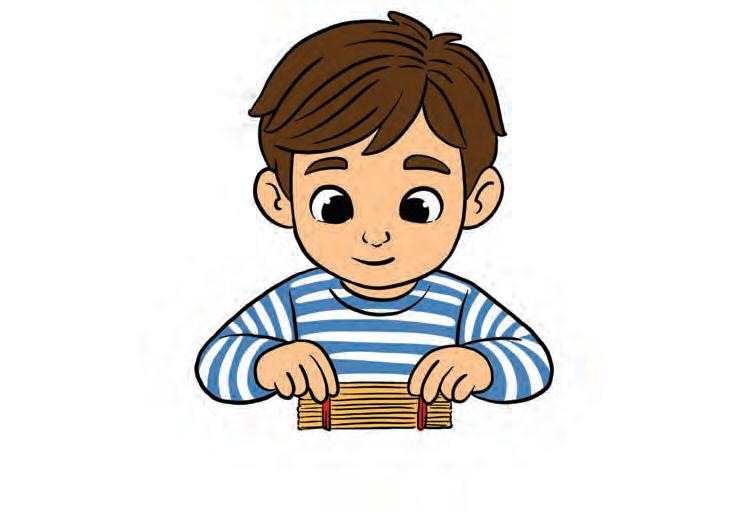
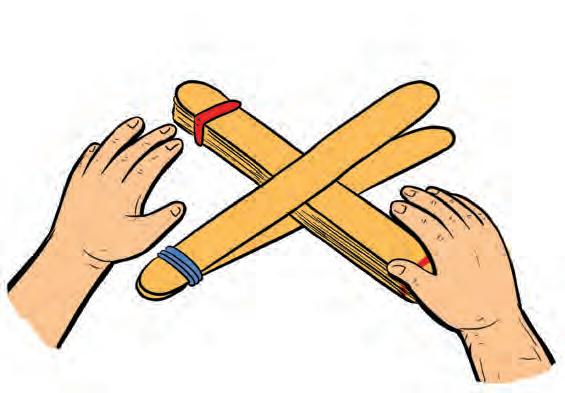
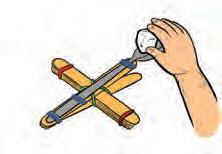
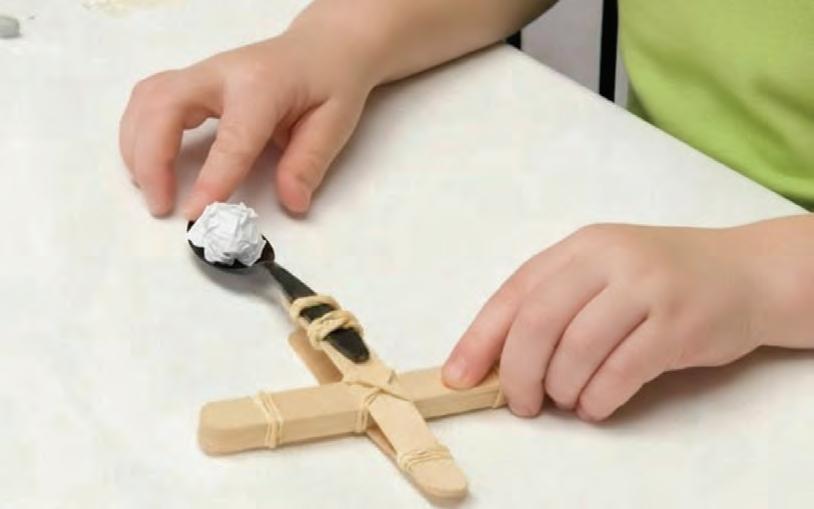
Take 2 sticks, tie one end with a rubber band and slide the 10-stick bundle between the open ends. 2. Stack 10 craft sticks and wrap rubber bands around both ends. 1.
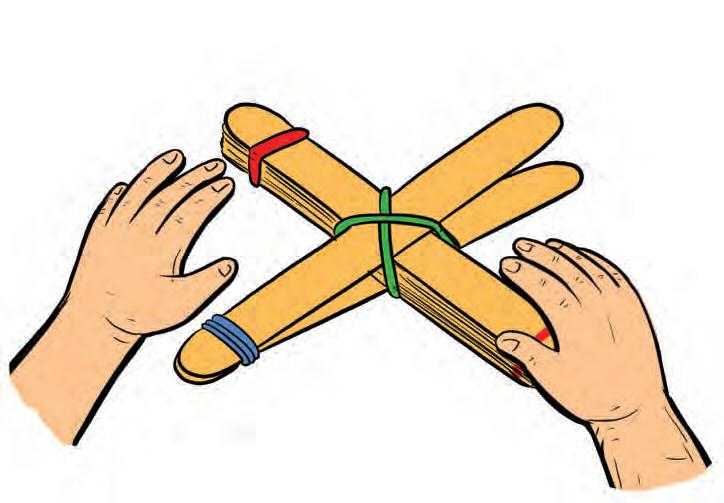
Wrap two rubber bands like an ‘X’ around the bundle between the sticks to hold it tight. 3.
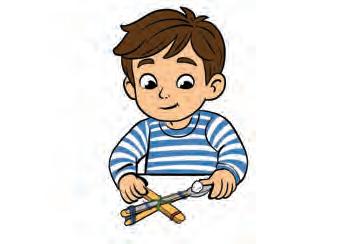
Tie a spoon to the top stick with 2 rubber bands and place a small cotton or paper ball on it. 4.
Watch out
Point the catapult away from people and launch soft objects only.
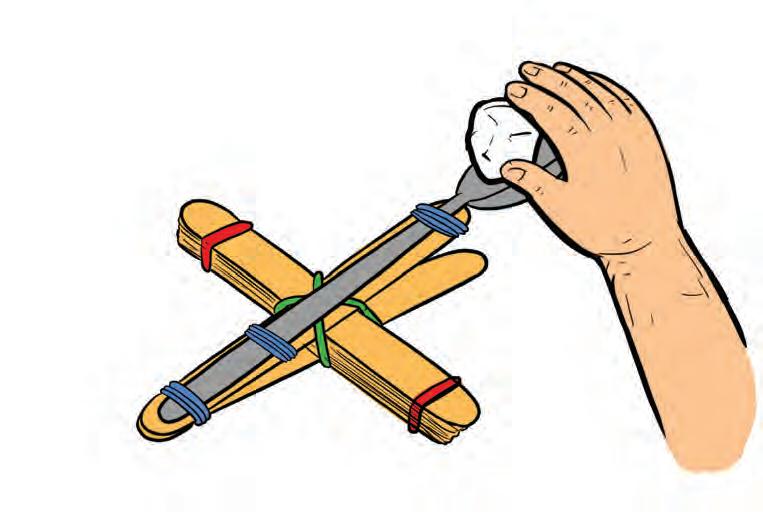
Hold the bundle of sticks with one hand and pull the spoon down with the other.
DId You Know?
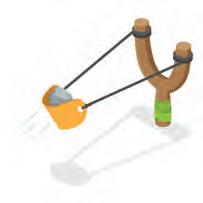
A slingshot shooting a stone or a bow launching an arrow both use stored energy that is released to make an object move forward.


Then, release the spoon and watch 6.
Activity in Action
ScIence BehInd It...
When you press the spoon down, the spoon and rubber bands bend and stretch, storing elastic potential energy (energy due to shape or position). When you release the spoon, this stored energy changes into kinetic energy (energy of motion), making the ball fly forward. This shows how energy changes from one form to another.
Find Out More!
Place a cup or a small box as a target. Count how many times you can land the ball inside.
Check your learnIng!
1. Think and write.
I wait in a rubber band, stretched and still, I zoom with a rolling ball down the hill. One is waiting, the other’s in flight, Name these two energies — can you get it right?

2. Put a ( ) in the correct box — True or False. True False
3.
A. B. C. When the spoon bends, it stores elastic potential energy.
Kinetic energy is the energy an object has due to motion.
The harder you press the spoon, the farther the ball can go.
Tick ( ) the correct answer.
A. What will happen if the rubber band on the catapult is too loose?
The object will bounce higher. The object will not go very far. (a) (b)
B. When you pull back a slingshot and let go, what makes the stone fly forward?
The stretched band’s stored energy makes it move. The stone moves because of air blowing on it. (a) (b)

PerspectIve IllusIon
In this activity, we will see how two things of the same size can look different when placed against a special background.

What We Need
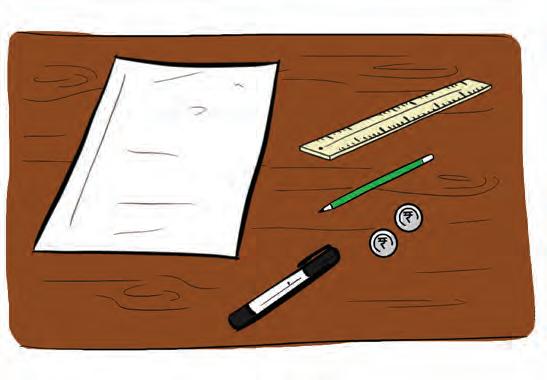
• A-4 white sheet
• A ruler
• A pencil
• A black marker/sketch pen
• Two identical objects (coins or crayons)

Let’s Begin
1. Draw a 9 cm × 9 cm square on the left side of the sheet.
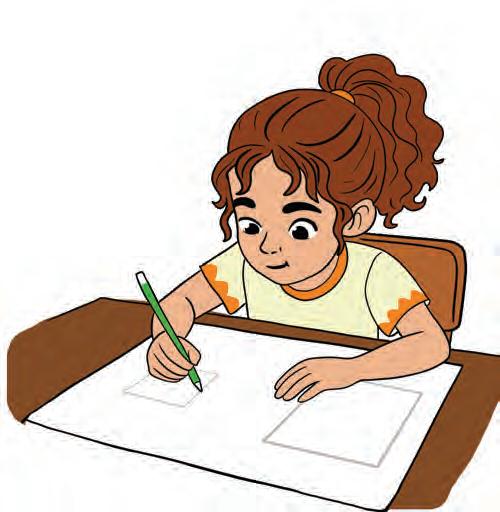

2. Draw a 3 cm × 3 cm square on the right side, in line with the middle of the big square.
3. Divide both squares into 3 equal parts across and down to make a grid.
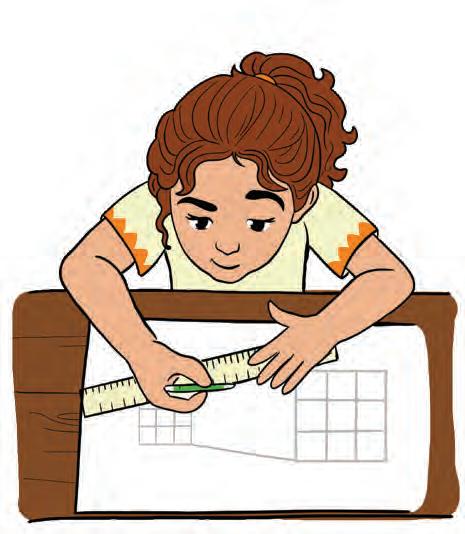
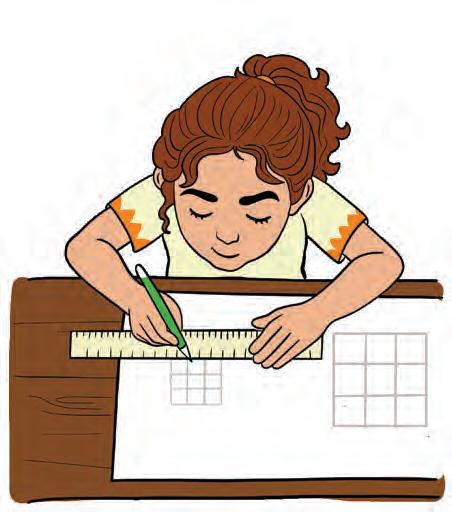
4. Draw lines from the top and bottom corners of the big square to the top and bottom corners of the small square.
5. Connect the matching grid lines of the two squares. Add a few vertical lines between them.
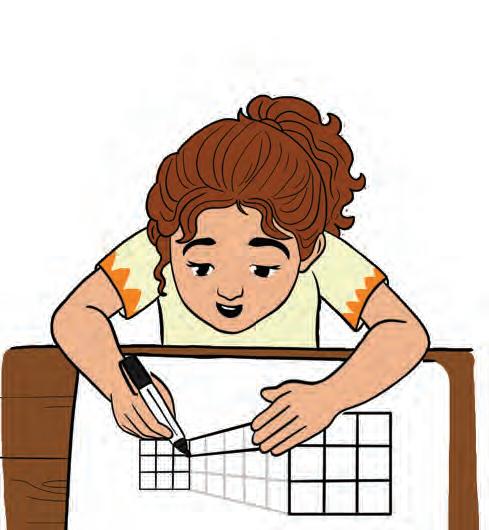
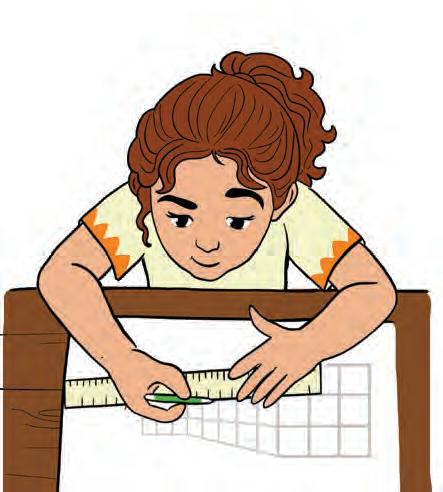
6. Once your drawing is complete, carefully trace over all the lines with a black marker.

7. Place one identical object (roughly around 3 cm) in the middle of the big square and the other in the middle of the small square.
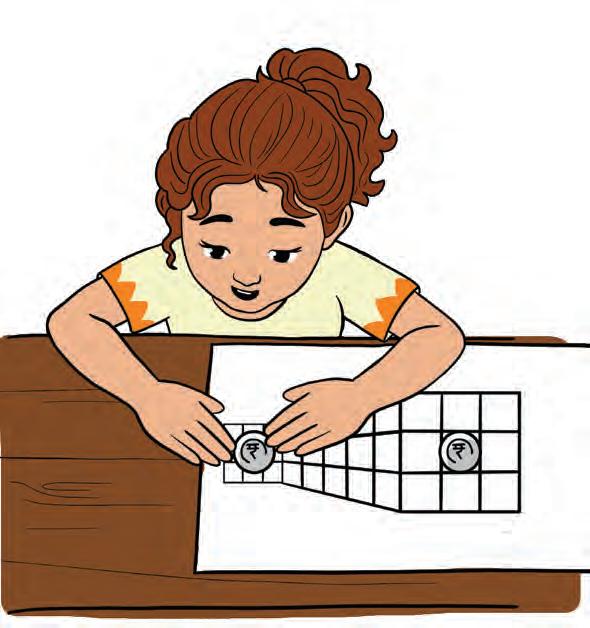
Watch out
Look straight down at your drawing, not at an angle, to see the illusion clearly.

Real-lIfe Connect
Buildings, trains or trees look smaller when they are far away, even though they are the same size as closer ones.
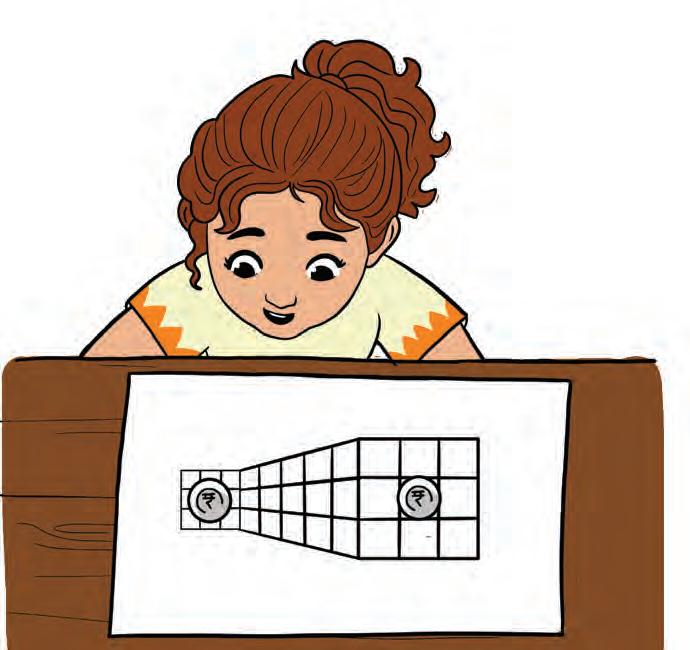
8. Do the objects look the same size? Swap them and check again.
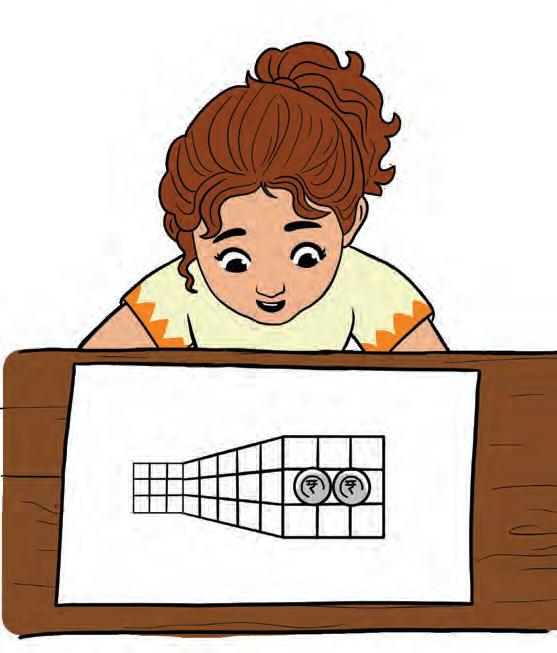
Activity in Action
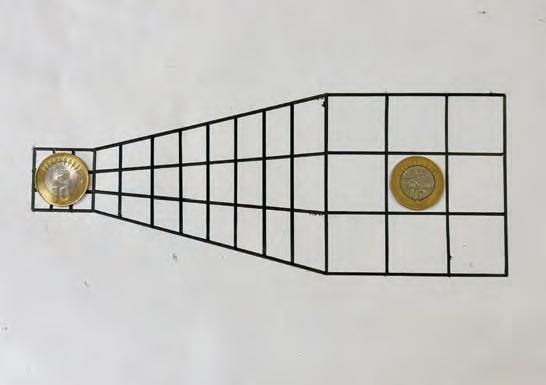
SCIENCE BEHIND IT...
Our eyes and brain decide how big an object looks by noticing its shape and the space around it. When an object is on a small square, it has less space around it, so it looks bigger. When the same object is on a large square, it has more space around it, so it looks smaller— even though both objects are the same size. This is how a perspective illusion changes what we see.
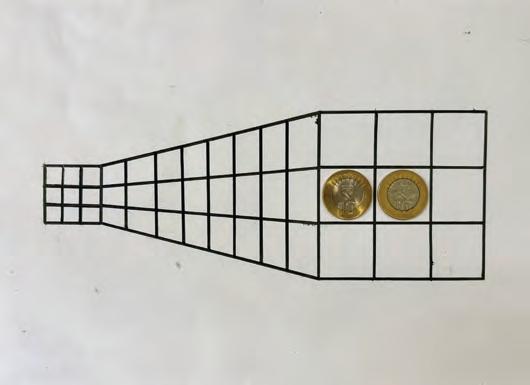
Try using objects of different sizes and trick your friends by creating fun illusion drawings. Find

CHECK YOUR LEARNING!
1.
2.
Tick ( ) the correct answer.
Two friends were standing near a railway track. They saw two stones—one was near them and the other was far away. The friends wondered whether the two stones were the same size or if one was bigger. Answer the questions below.
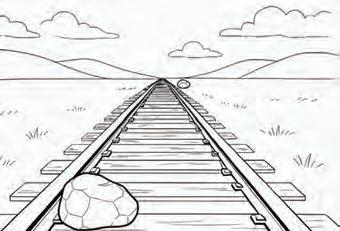
A. Why did the two friends get confused about the size of the stones?
(a) Be cause both the stones looked exactly the same.
(b) Be cause the stones seemed to be different sizes.
B. Which stone looked smaller?
(a) The far stone because it was actually smaller.
(b) The far stone because of perspective illusion.
C. The railway tracks look as if they meet far away. Do they really meet?
(a) Yes (b) No
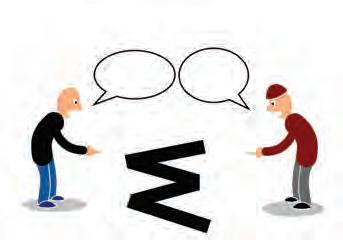
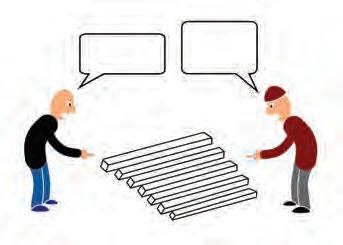
Lo ok carefully at each picture. Write what each person sees from their side inside the bubbles.
Hint: Each person sees the picture differently depending on where they are standing.


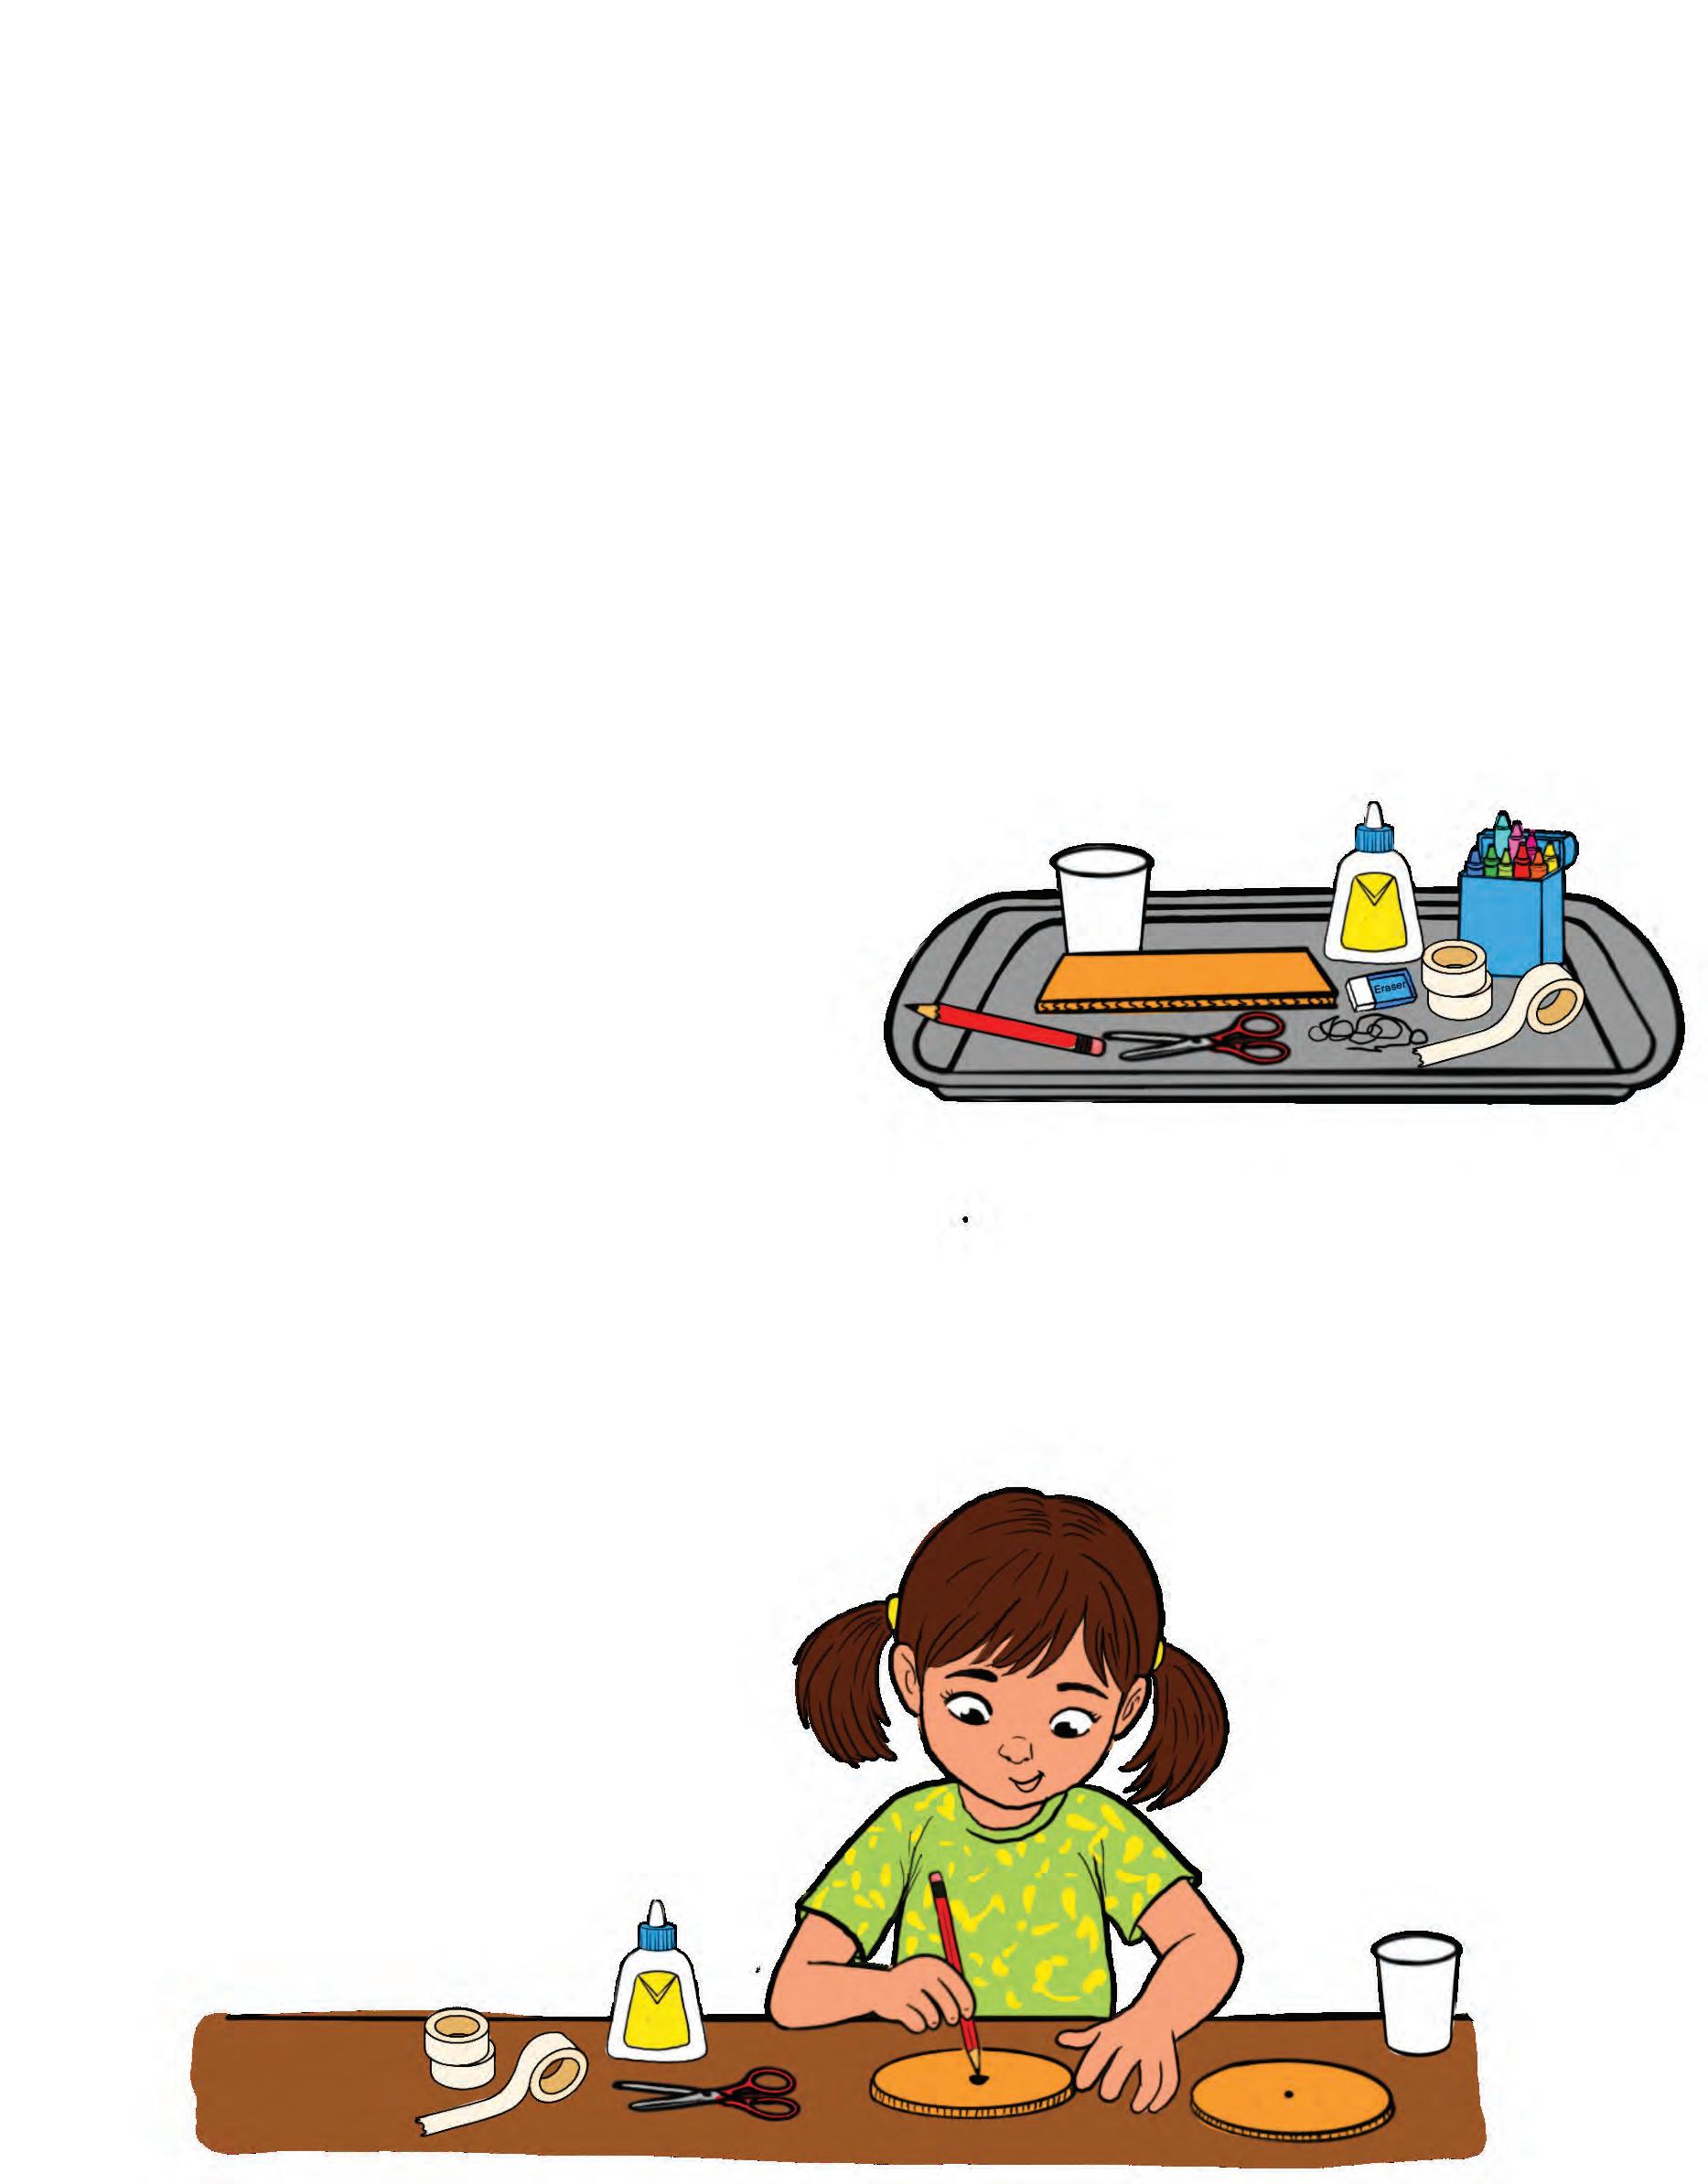

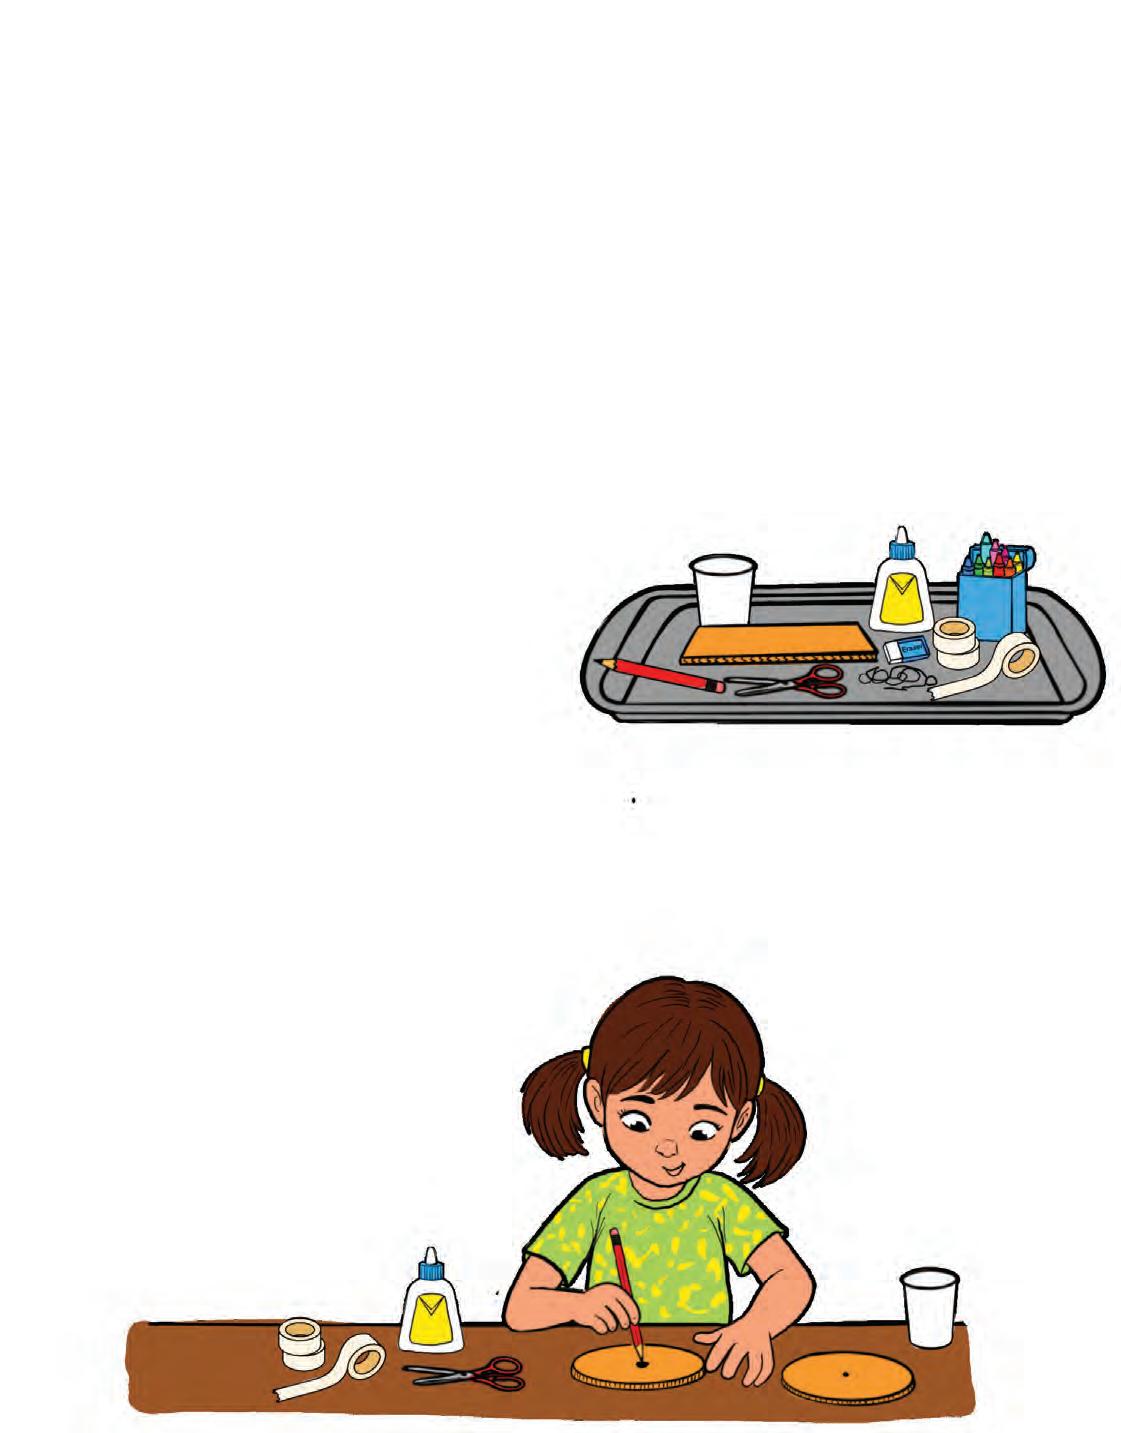





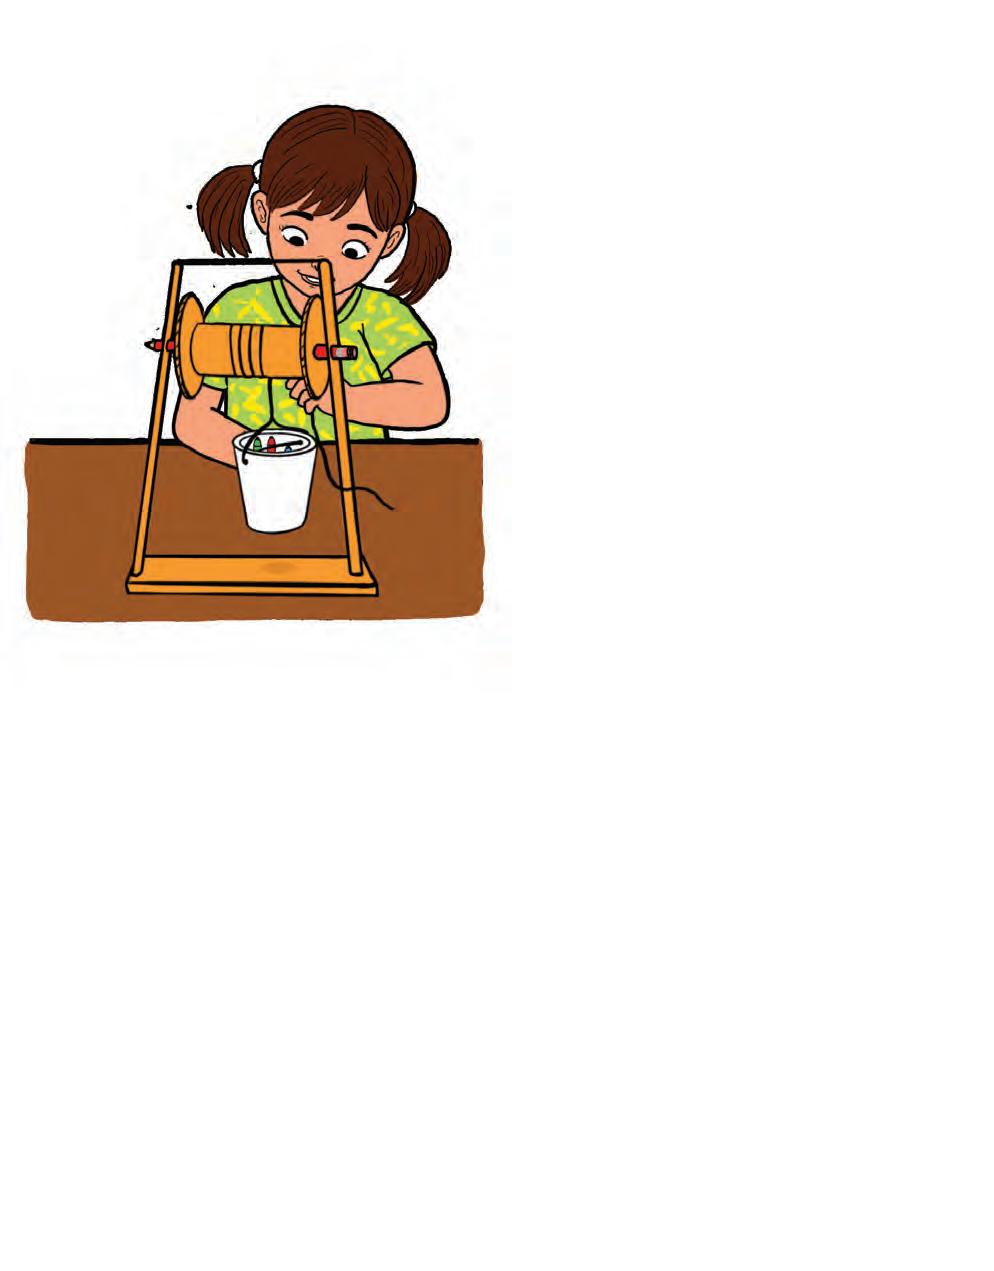
Put an eraser or crayon in the cup. Hold the free end of the string and 9.
Watch out
Find Out More!
Do not overload the cup with objects.
Real-lIfe Connect
Pulleys help us lift things easily like raising flags, drawing water from wells or lifting heavy loads with cranes.
Activity in Action
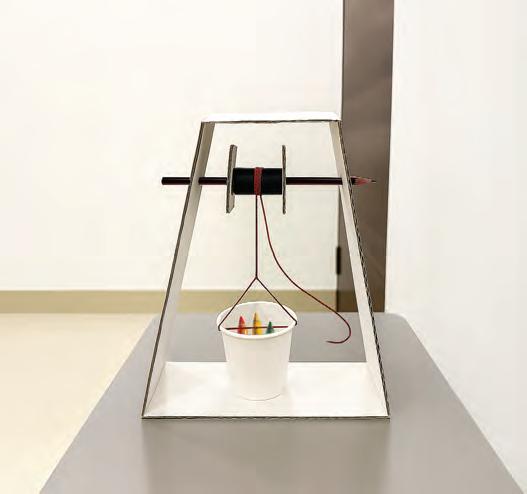
Make a simple system with two pulleys and try lifting the same load. See if it gets easier to lift the load.
Check your learnIng!
1. Look at the pulley diagram. Draw arrows to show the direction in which the rope is being pulled and the direction in which the load moves.
2.
On Independence Day, Meera raised the flag by pulling the rope attached to a pulley at the top of the flagpole. Why is a pulley used to raise the flag during assembly?
It makes hoisting the flag easier. It makes hoisting the flag harder.
3.
Rahul tried to pull a bucket of water straight up from the well. It felt very heavy. Riya, on the other hand, used a pulley to pull up the same bucket of water. She found it much easier. Rahul was amazed to see this.
A. Rahul finds it harder to pull up the bucket as he has to pull against .
B. How did the pulley help Riya? It changed the direction of the force. It reduced the distance of lifting. (a) (b) gravity friction (a) (b)


FIreworks In a Jar
In this activity, we will create fireworks in a jar and see colourful trails spread through the water.
What We Need
• 1 jar or glass
• 1 bowl
• 1 fork
• 1 spoon
• 2-3 liquid food colours
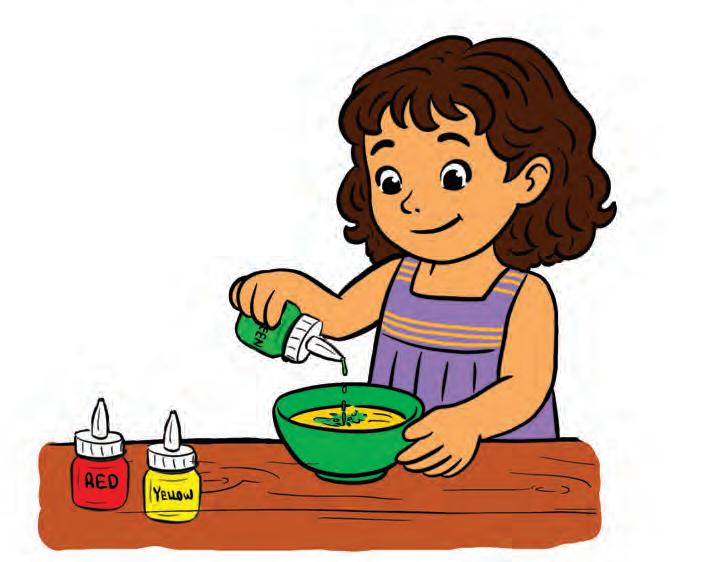
• Lukewarm water
• Vegetable oil
Let’s Begin
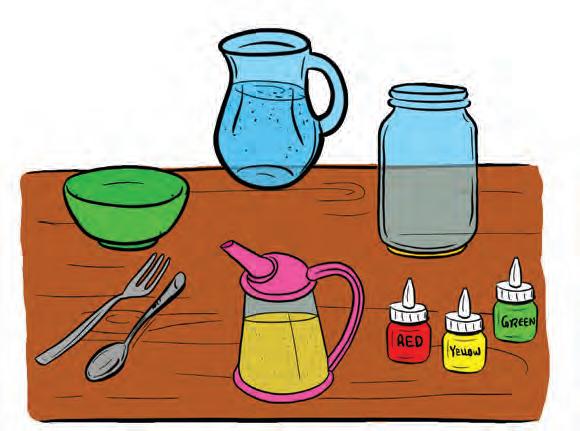
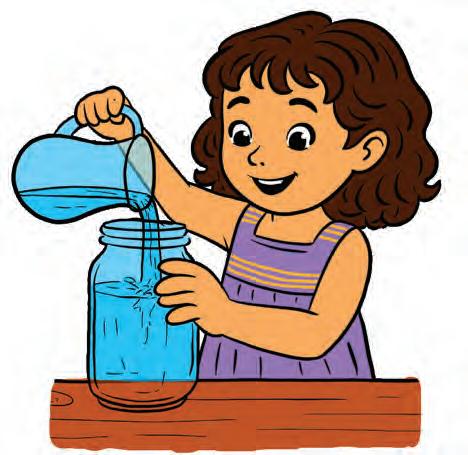
1. Fill a jar about three-quarters full with lukewarm water.
2. Pour 4 tablespoons of vegetable oil into a small bowl.
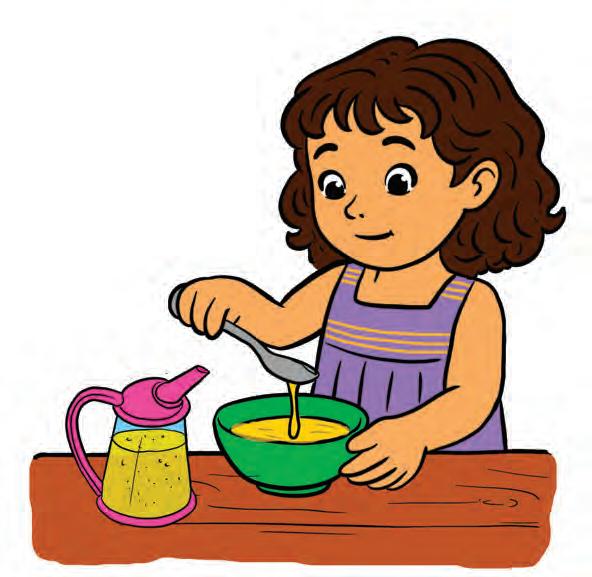
3. Add 3-4 drops of each food colour to the oil.
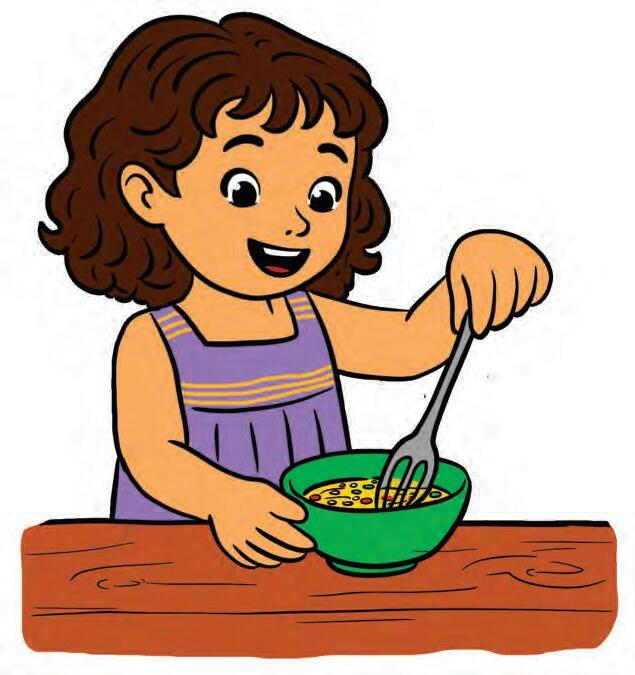
5.
Stir gently so the drops break into tiny colourful beads.
Slowly pour the oil and colour mixture into the jar.
Pour the oil slowly so it does not spill or splash. Watch out
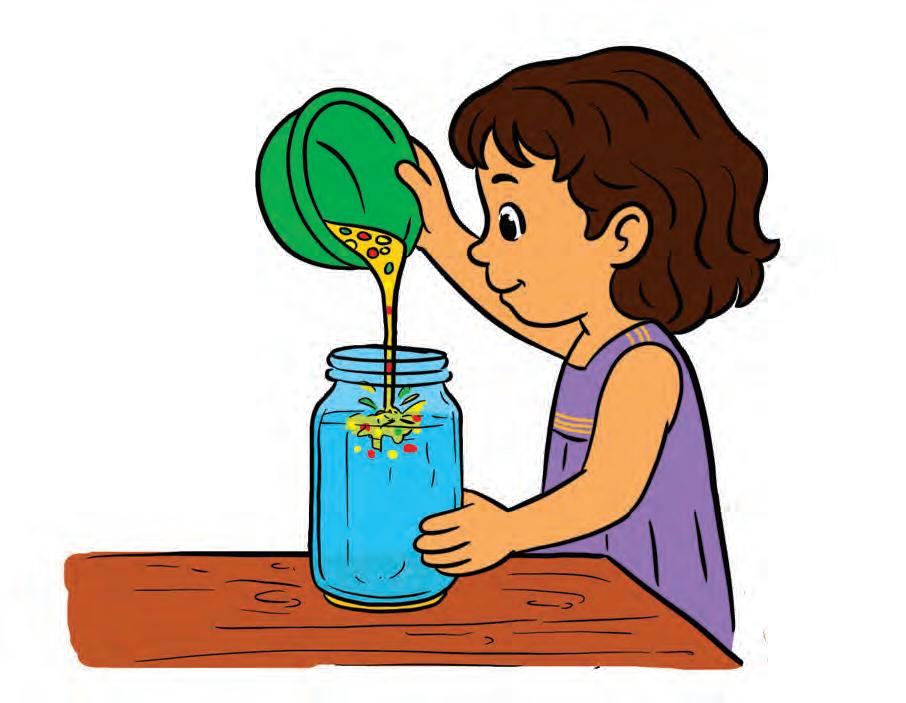

6. Watch the colour drops sink through the oil and spread out like fireworks in water.

SCIENCE BEHIND IT...

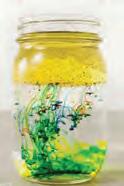
Oil and water do not mix because oil is lighter than water, so it floats on top and forms a separate layer. Food colouring cannot dissolve in oil, so it stays as tiny drops inside the oil. When these coloured drops reach the water, they dissolve because food colouring can mix with water. This makes the colours spread out in streaks, creating patterns that look like fireworks.
ind Out More!
Activity in Action
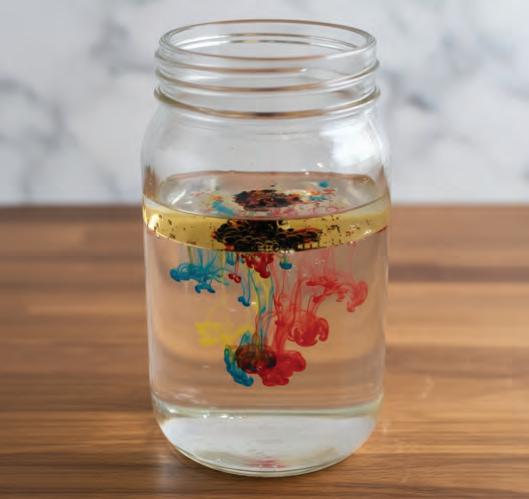
Add a few drops of dish soap to see how it breaks the oil-water layer and makes the colours mix faster.
CHECK YOUR LEARNING!
1.
2.
Sia tried the ‘fireworks in a jar’ activity. She added oil with food colours to water and watched them sink like fireworks. When she added a drop of dish soap, the colours swirled even faster. Answer the questions below.
A. Why does oil float on water?
(a) Be cause oil is lighter than water so it stays on top.
(b) Be cause oil spreads faster than water.
B. Why do the food colouring drops make tiny beads in the oil layer?
(a) Be cause oil is sticky and holds the drops together.
(b) Be cause food colour does not mix with oil.
C. What makes the food colouring spread out when it reaches the water?
(a) It can mix with the water.
(b) It can cannot mix in water.
D. Ho w does adding dish soap change the way the colours move?
(a) It breaks the oil layer and makes the colours swirl faster.
(b) It breaks the oil layer and makes the colours swirl slower.
Fill in the blanks.
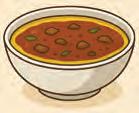
A. Oil stays on top of curry because it is _________ than water (lighter/heavier).
B. So ap helps _________ oil from dishes when washing (remove/stick).
C. _________ rises to the top of buttermilk because it is lighter (Butter/Water).


expands when hot and contracts when cold
MagIc InflatIng Balloon
In this activity, we will explore how air expands when heated and contracts when cooled.
What We Need
• 1 plastic bottle
• 1 balloon
• 1 bowl of hot water
• 1 bowl of cold water
Let’s Begin
1. Stretch the balloon over the mouth of an empty bottle.

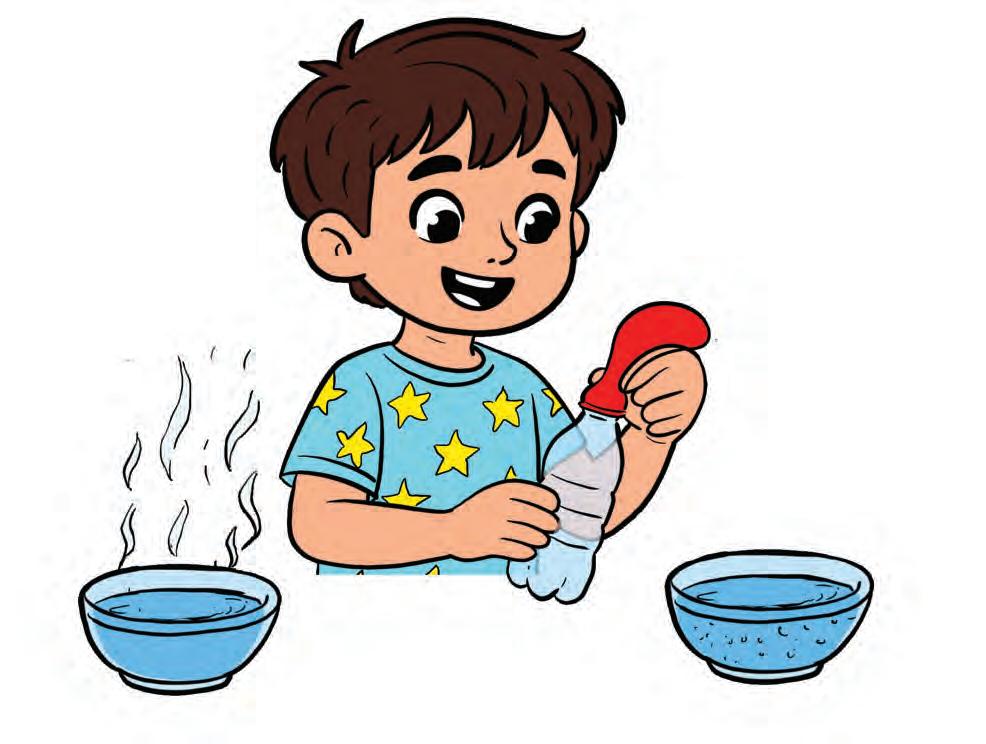
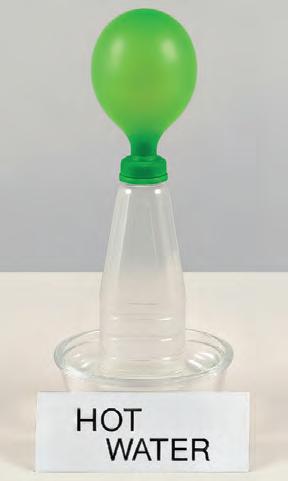
2. Carefully place the bottle in the hot water.
Never touch hot water directly. Watch out
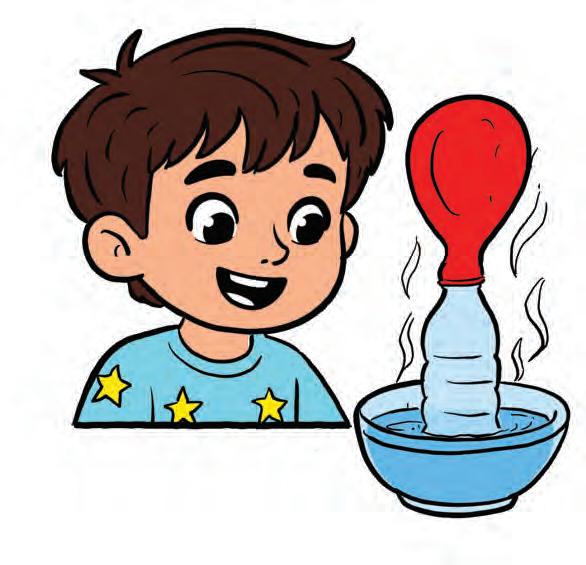
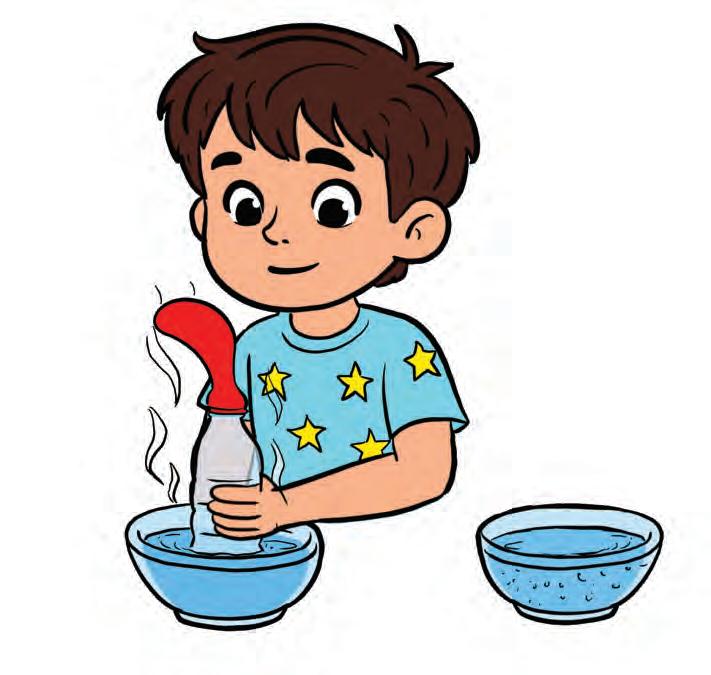
3. Watch the balloon inflate.
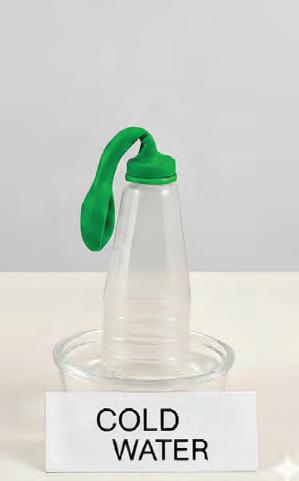
4. Remove the bottle from hot water and place it in the cold water.
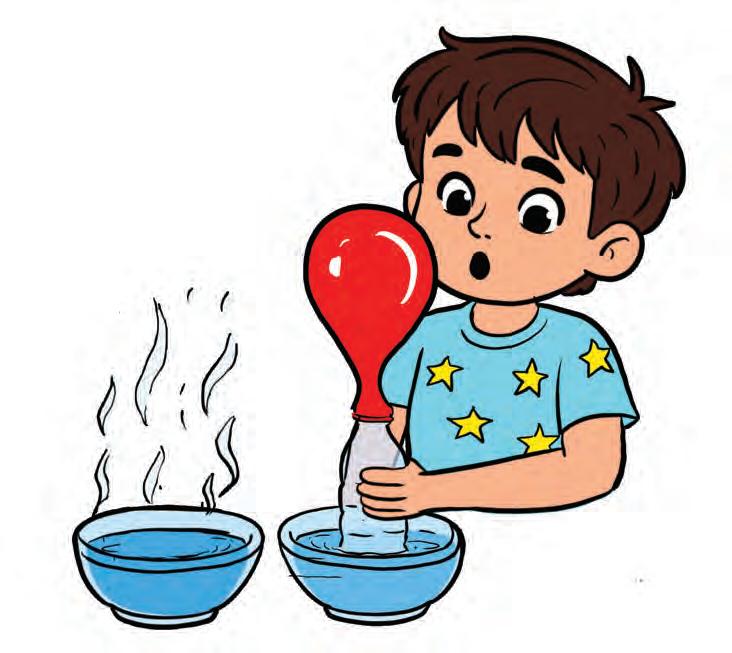

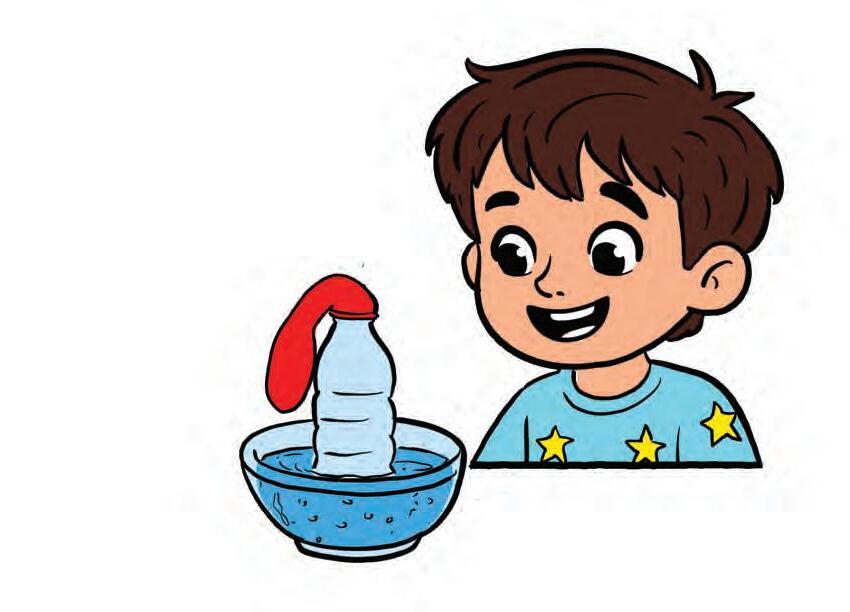
5. Watch the balloon deflate in cold water.
SCIENCE BEHIND IT...
Air is made of tiny particles that move. In hot water, the particles move faster and spread out, so the balloon inflates. In cold water, the particles move slowly and come closer, so the balloon shrinks. This shows that air expands when heated and contracts when cooled.
Activity in Action
Find Out More!
Take a bowl of water with ice cubes and put the bottle in it. See how the balloon changes as compared to hot or normal water.
CHECK YOUR LEARNING!
1.
Lo ok at the experiment setup and tick ( ) the correct answer for the given questions below.
A. What happens to the balloon in the hot water?
(a) It inflates (fills up).
(b) It deflates.
B. What made the balloon inflate?
(a) The air inside the bottle contracted when heated.
(b) The air inside the bottle expanded when heated.
C. When air gets hot, what happens to its particles?
(a) They move slower and take less space.
(b) They move faster and take more space.
2. Fill in the blanks.
A. Hot air balloons rise because hot air is __________ (lighter/heavier) than cold air.
B. A spray can says ‘Do not keep in sunlight’ because the air inside can ________ (expand/contract).
C. Steam shows that the water is _________ (hot/cold).
3. State True/False.
Hot air inside chimneys rises, helping smoke move upward.


FractIon Flowers
In this activity, we will learn about fractions and create a beautiful flower collage.
What We Need
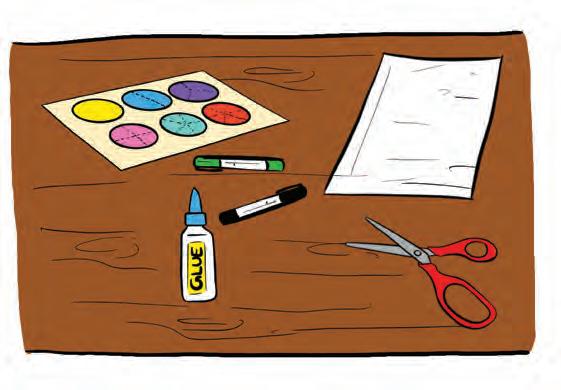
• Pre-printed dotted fraction circles sheet
• A white sheet
• A sketch pen (green)
• A pair of scissors
• A black pen
• Glue
Let’s Begin
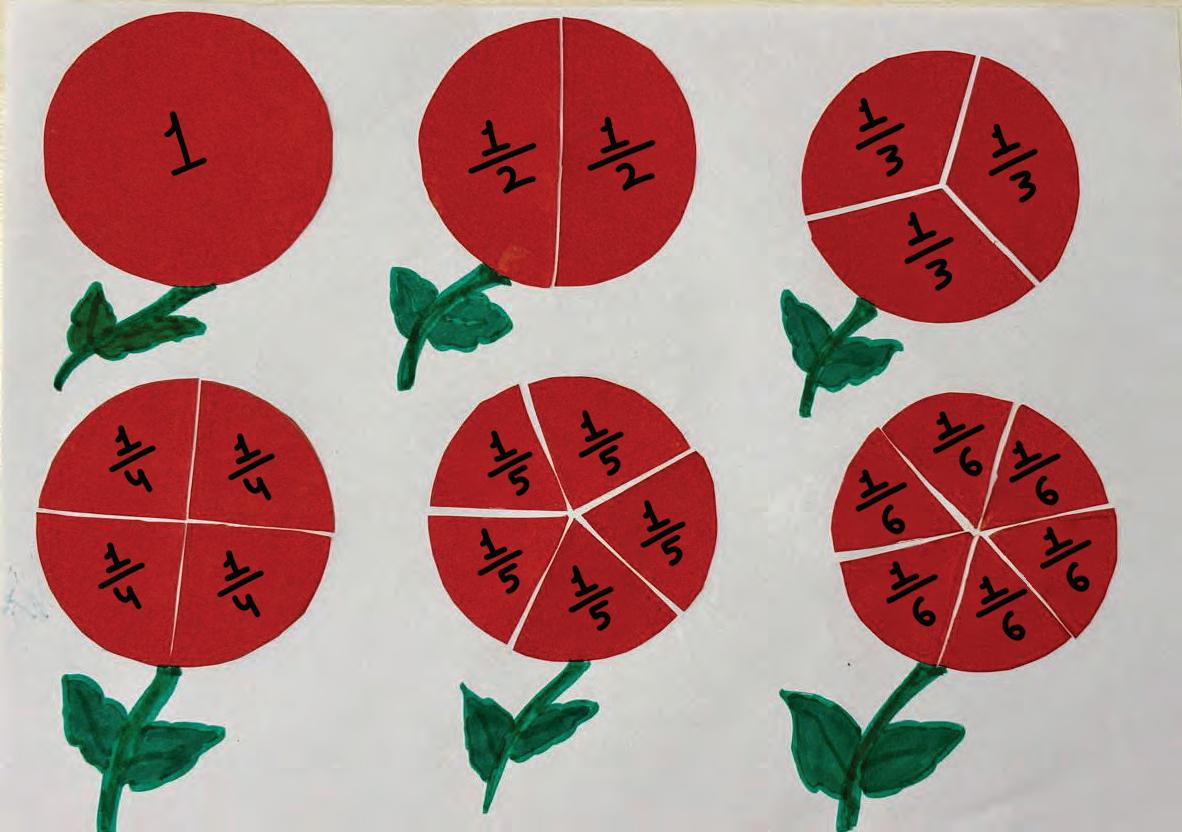
1. Cut out all the circles from the activity sheet.

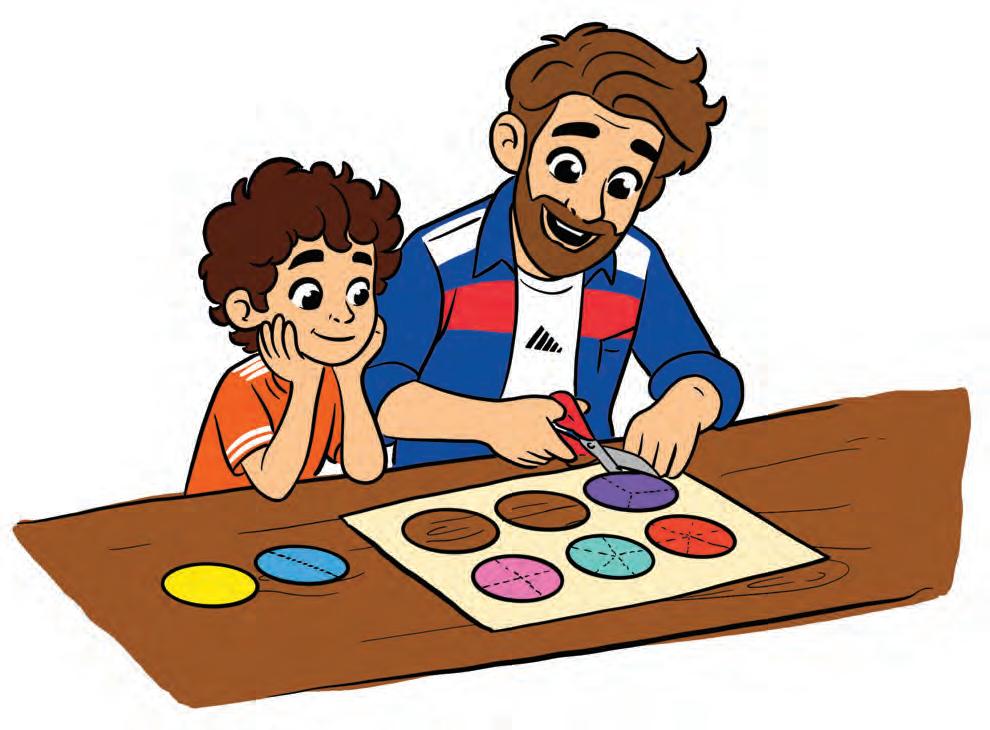
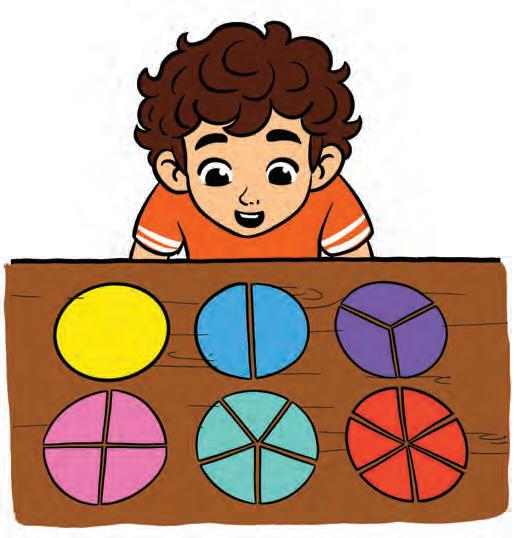
2. With an adult’s help cut along the dotted lines to make different parts:
Whole: 1 complete circle
Halves: Circle cut into 2 equal parts
Thirds: Circle cut into 3 equal parts
Quarters: Circle cut into 4 equal parts
Fifths: Circle cut into 5 equal parts
Sixths: Circle cut into 6 equal parts
3. Paste the pieces on the sheet and write the fraction on each part.
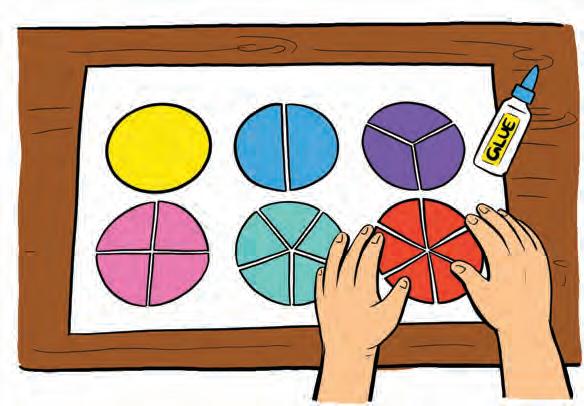
4. Draw a stem and leaves under each circle to turn them into fraction flowers.
Make sure to label each fraction correctly. Watch out
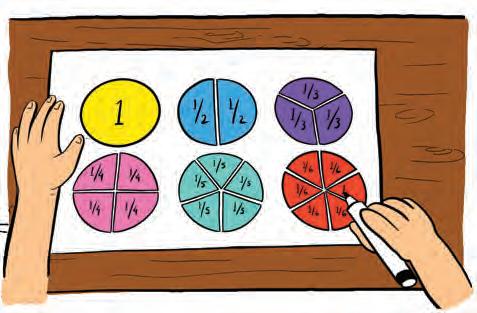
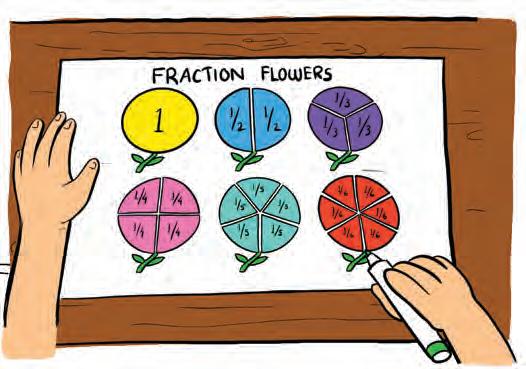

5. Observe that each part is an equal section of the whole circle.
A circle can be divided into equal parts, each showing a fraction of the whole.
Activity in Action
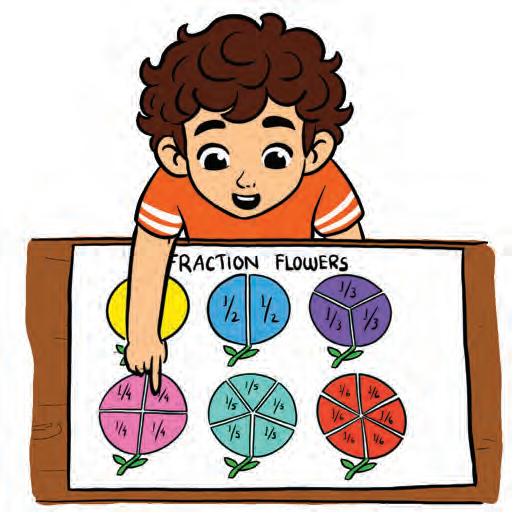
Compare your fraction flowers with real flowers and see which fractions the petals show. Find Out More!
1. Write the fraction of juice in each jar. One jar has been done for you.
2. Circle the correct fraction.
3. Colour the shape to show the correct fraction.

S Objects like to stay still or keep moving until a force acts on them
MagIc CoIn Drop
In this activity, we will understand that objects resist a change in their state of rest or motion unless acted upon by a force.
What We Need
• A glass
• A coin
• A thick paper/card
• Water
Let’s Begin
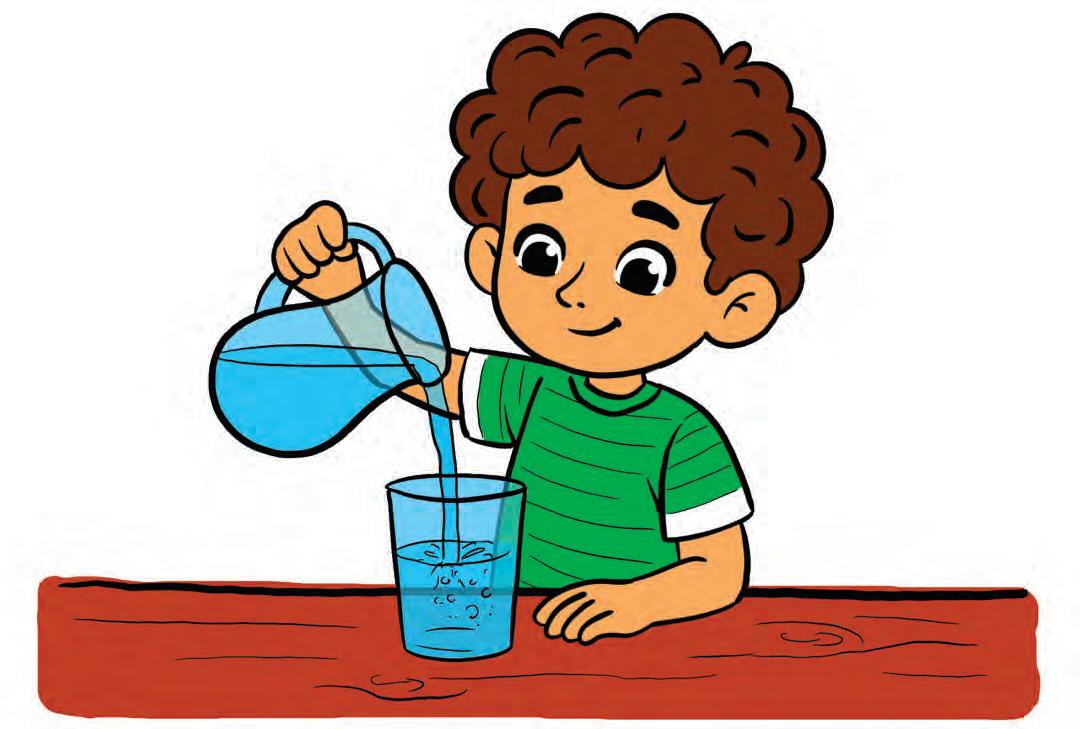
1. Fill a glass halfway with water.
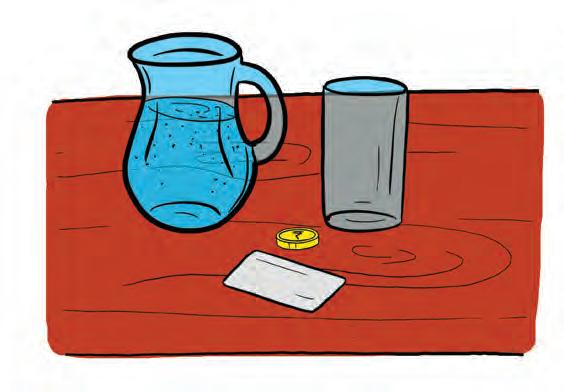
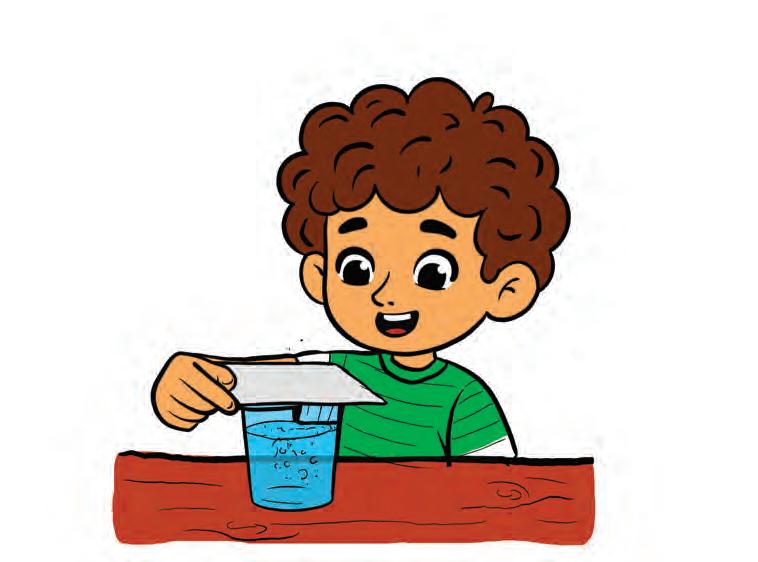
Place the card on top of the glass.
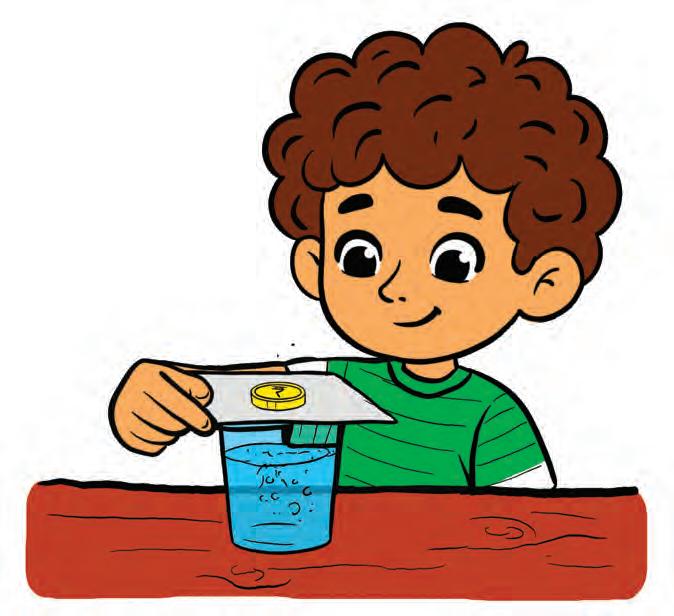
3. Put a coin in the centre of the card.
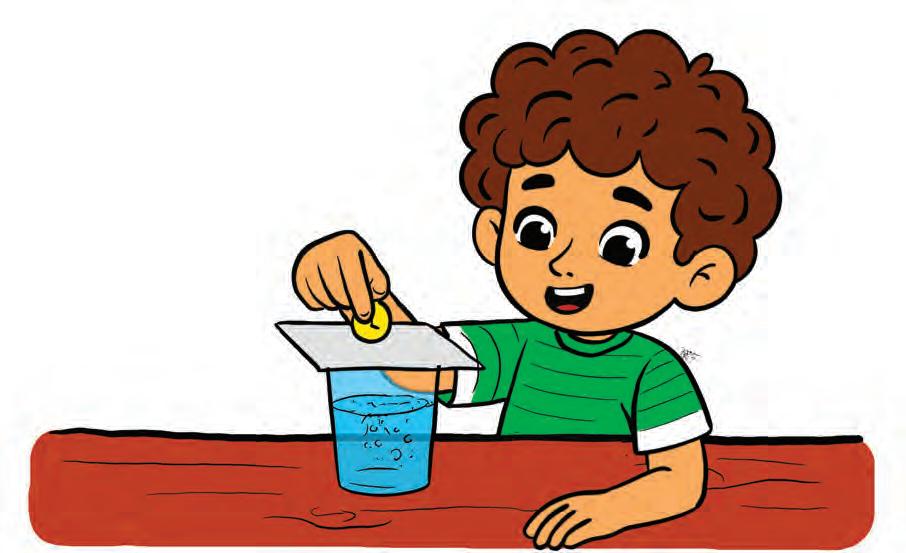
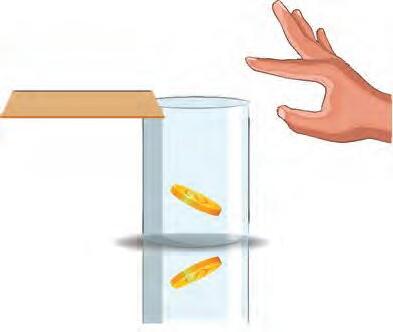
4. Pull the card out with one hand.
Pull the card fast and straight. Watch out

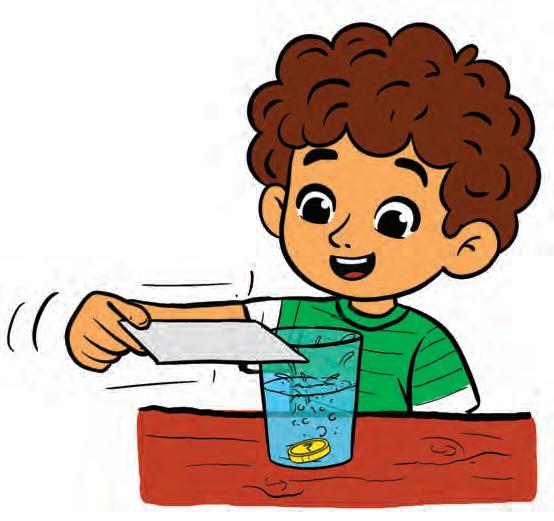
5. Watch the coin fall into the glass
Activity in Action
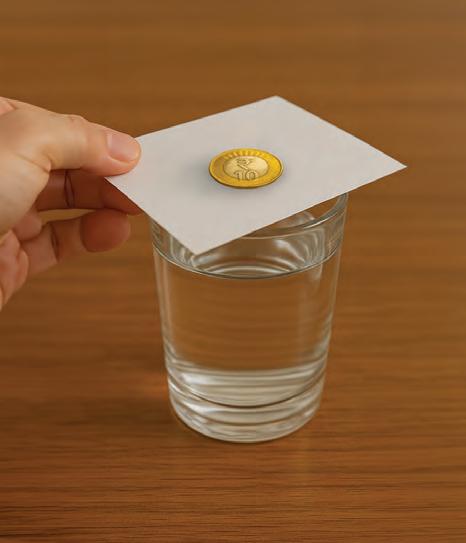
SCIENCE BEHIND IT...
When we pull the card quickly, the coin does not move with it and stays still for a moment as it wants to remain at rest. Then gravity pulls it down into the glass. This shows that things stay the same until a force makes them move or stop moving.
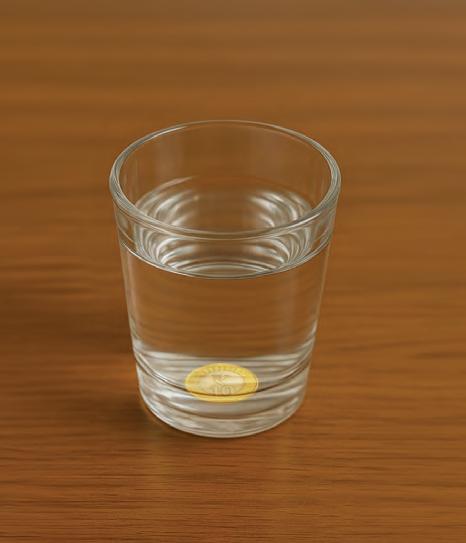
Try stacking two coins on the card and see what happens when you pull out the card quickly. Find Out More!
CHECK YOUR LEARNING!
1.
Ravi saw a car moving along the road with a wooden crate placed on its roof. As the car moved smoothly, the crate stayed in its place. Suddenly, the car stopped when it hit a rock and Ravi noticed something interesting.
Answer the questions below on the basis of the above reading.
A. What happens to the crate when the car stops suddenly?
(a) It mo ves backward.
(b) It mo ves forward.
B. Why do you think this happened?
(a) Be cause the crate kept moving when the car stopped.
(b) Be cause the crate was pulled by the rock.
C. How could we stop the crate from falling?
(a) Tie the crate with ropes.
(b) Use a box to cover the crate.
2. Draw arrows showing:
A. The direction in which the force is applied
B. The direction in which the coin falls


DIsappearIng colours
In this activity, we will see how light bends and makes colours disappear from a certain angle.
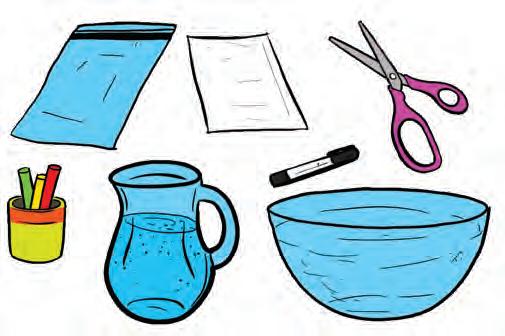
What We Need
• 1 zip-lock bag
• 1 white sheet
• A black permanent marker
• A pair of scissors
• A glass bowl
• Sketch pens
• Water
Let’s Begin
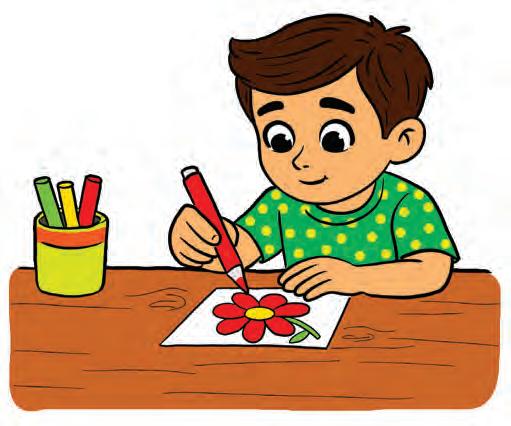
1. Cut a rectangle from the white sheet that can fit inside the zip-lock bag.
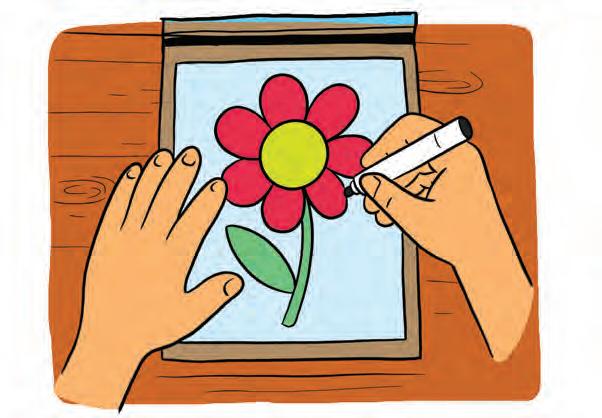
2. Use sketch pens to make an easy design like a flower or star.
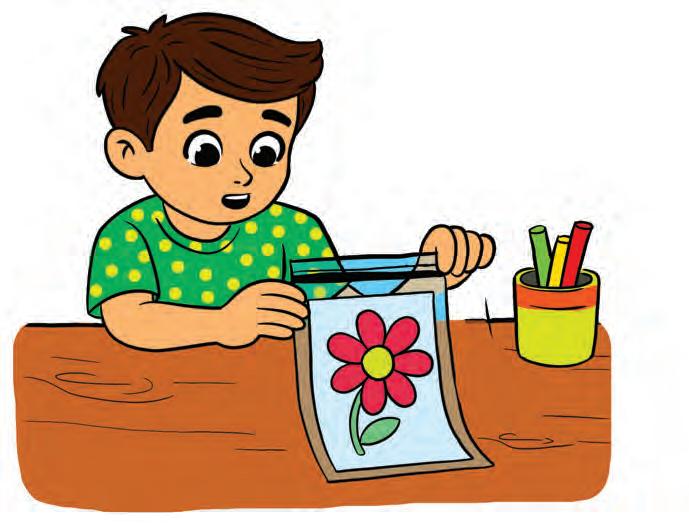
3. Place the sheet inside the bag, press out the air and seal it tightly.
4. Use a black permanent marker to trace the design on the outside of the bag.
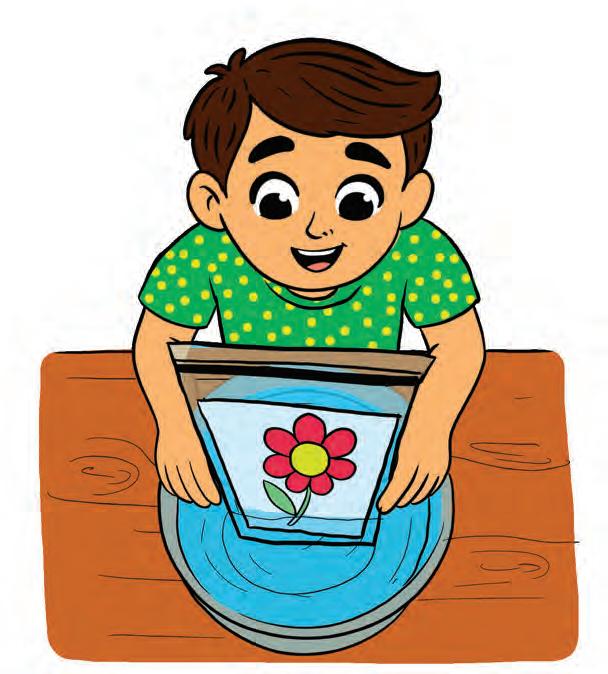
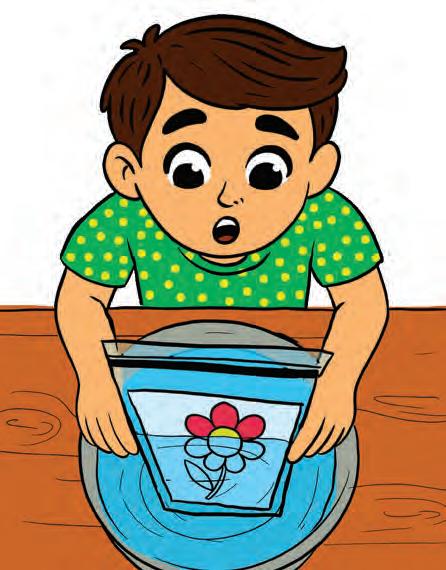
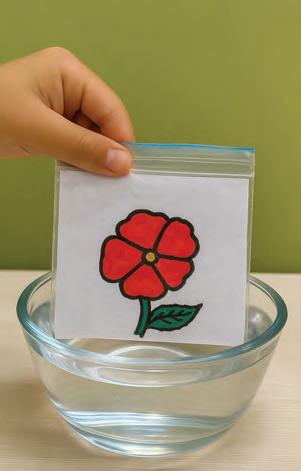
5. Slowly lower the bag into the bowl of water.
Watch out
Do not bend or twist the bag while it is in water.

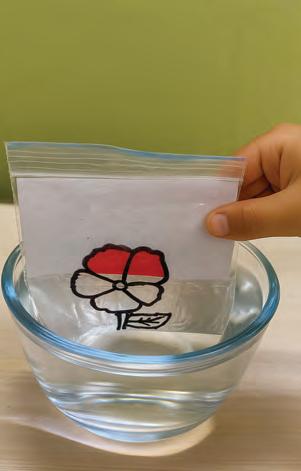
6. Now, look from the top and watch the colours disappear.
SCIENCE BEHIND IT...
When light shines on the coloured sheet inside the bag, it passes through plastic, water and air. Each time it moves from one material to another, it bends, causing most of the coloured light to miss our eyes, making the colours disappear when viewed from the top. The black outlines are on the outside of the bag. Light from them passes only through water and air, so it bends less, making them clearly visible.
Activity in Action
Real-lIfe Connect

A straw looks broken in a glass of water because light bends when it passes from water to air.
Try looking from the side—does it make a difference? Can you see the colours reappear or even look brighter? Find Out More!
CHECK YOUR LEARNING!
1. Tick ( ) the correct answer.
A. Why do the colours on the sheet disappear from the top view?
(a) Be cause the light rays bend too much.
(b) Be cause water makes the colours fade.
B. Why do then black outlines stay visible even in water?
(a) They are on the outside of the bag, so the light bends less.
(b) They are on the outside of the bag, so the light bends more.
C. What did we learn from this activity?
(a) Lig ht bends when it passes from one material to another.
(b) Light changes colour when it passes from one material to another.
2. Rahu l made a colourful design on paper and placed it inside a zip-lock bag. He sealed the bag and lowered it slowly into a glass of water. When Rahul looks at his design from the top view, what will he see?
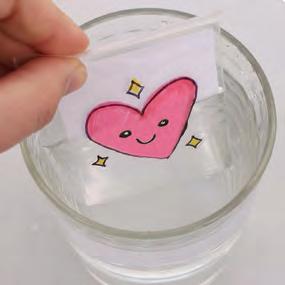
3. State True or False.
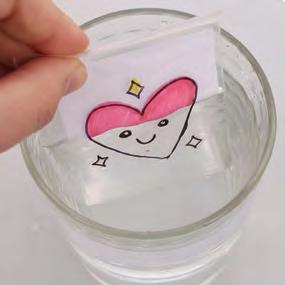
A straw looks broken in a glass of water because light bends when it passes from water to air.


Make Your Own Solar Oven
In this activity, we will make a solar oven and learn how sunlight can be trapped and used as energy to cook.
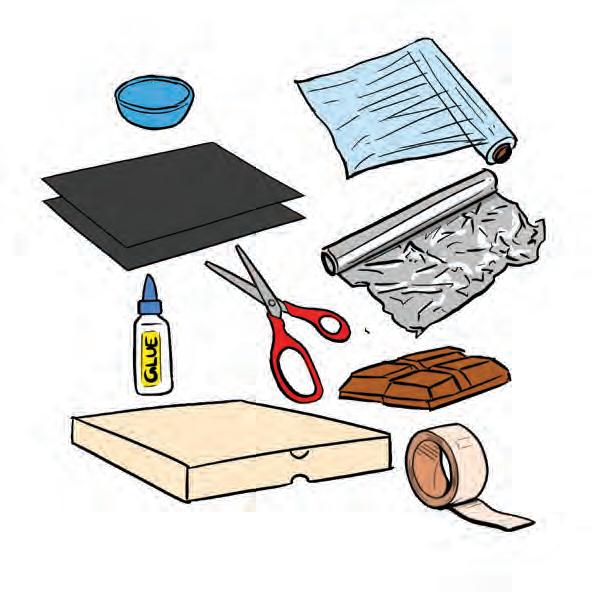
What We Need
• 1 small cardboard/ pizza box
• 1 chocolate
• 2 black sheets
• Plastic wrap
• Aluminum foil
• A pair of scissors
• A small bowl
• Glue stick
• Tape
Let’s Begin
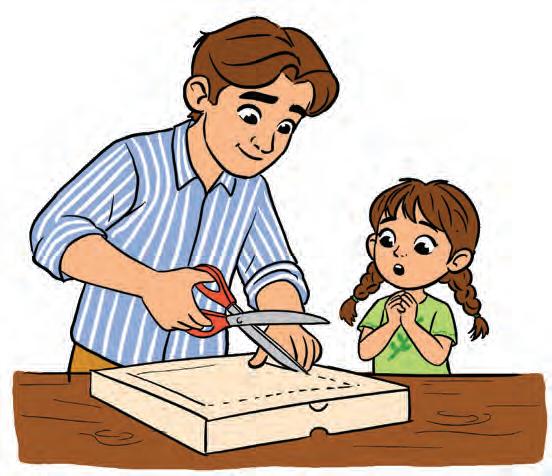
1. Take a cardboard box and cut out a flap on the top, leaving about 1 inch of the sides.
2. Cover the inside of the flap with aluminium foil.
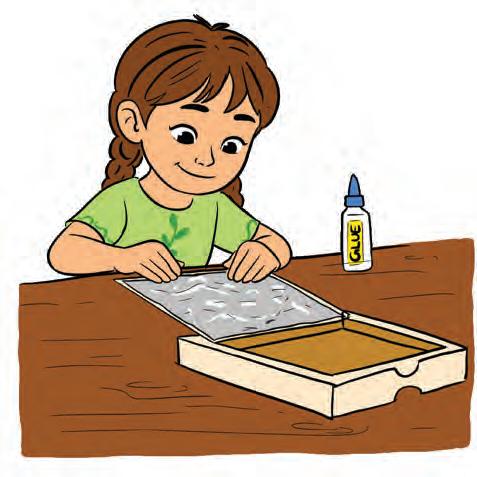
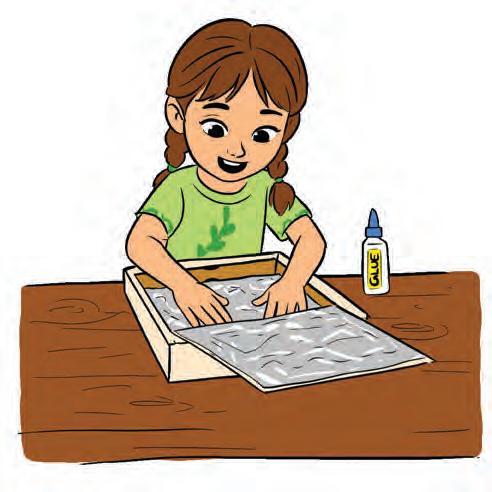
3. Line the bottom of the box with aluminum foil, then paste a black sheet on it.

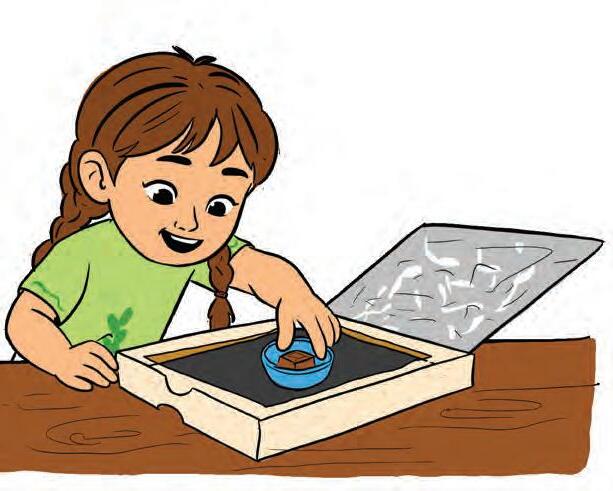

Now, put a piece of chocolate inside.
5. Tape plastic wrap over the opening of the box under the flap.
Real-lIfe Connect
Solar panels on rooftops capture energy from the sun and use it to produce electricity, which can power lights, fans, and other appliances in our homes.
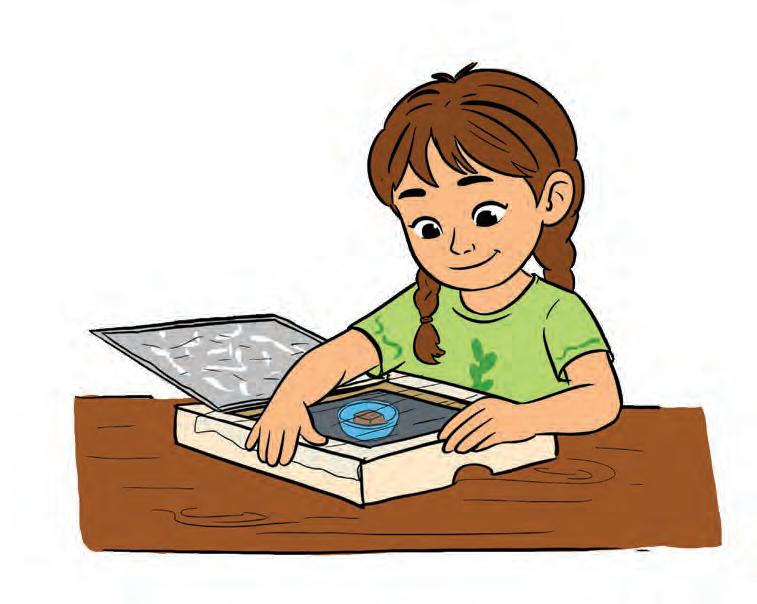

Keep the foil flap firm so it reflects sunlight properly. Watch out
SCIENCE BEHIND IT...
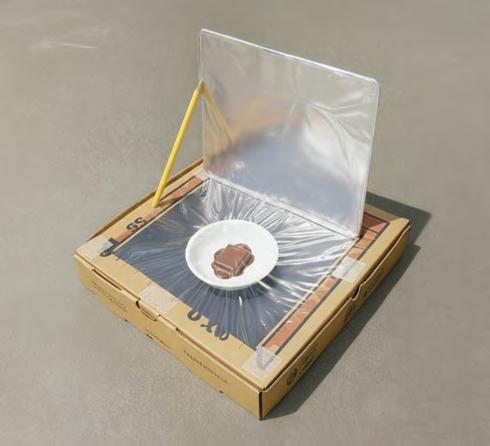
The solar oven uses the Sun’s energy to melt or warm food. Aluminum foil reflects sunlight into the box, the black paper absorbs the heat, and the plastic wrap traps it inside, making the box hot enough to melt the chocolate.
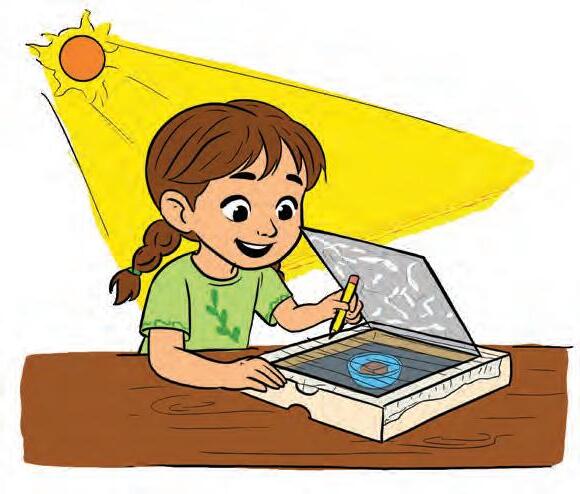
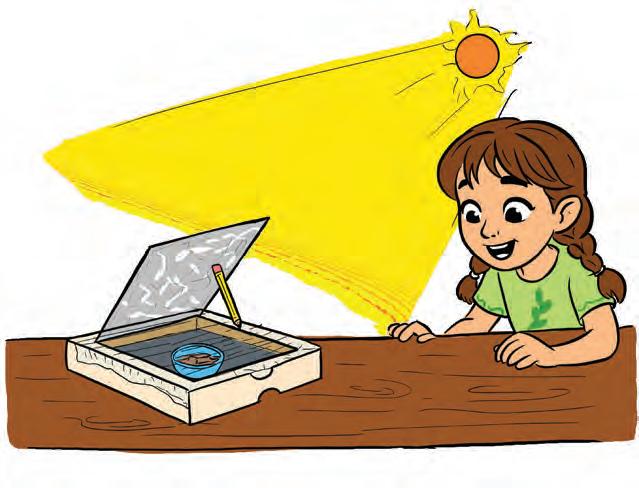
Take your solar oven outside. Tilt the flap so it faces the Sun and hold it open with a pencil or a stick.
7. Leave the oven in the sunlight for sometime. Watch the chocolate slowly melt as the oven gets warm.
Activity in Action
Try melting different foods like cheese or butter. Record which one melts faster and why. Find Out More!
1. Match the following.
Column A
(a) Aluminum foil
Column B
i. Main source of energy
(b) Black paper ii. Traps heat inside the oven
(c) Plastic wrap iii. Reflects sunlight into the oven
(d) Su n iv. Absorbs heat inside the oven
2. If you use white sheet instead of black one at the bottom of the solar oven, what will happen to the heating process?
(a) The oven will heat up faster because white reflects sunlight.
(b) The oven will heat up slower because white reflects sunlight instead of absorbing it.
3. Fill in the blanks.
(a) A solar oven uses __________ energy to heat food (solar/wind).
(b) Solar ovens work best on __________ days (sunny/rainy).
(c) Usin g solar ovens helps reduce __________ (pollution/noise) in the environment.
4. Help Mohit reach the solar cooker to melt his chocolate.


About the Book
STEM Exploration is thoughtfully designed to make learning a joyful journey of discovery through hands-on activities and real-world applications. Aligned with the NEP 2020 and the NCF 2022–23, it promotes experiential, multidisciplinary, and competency-based learning. By integrating Science, Technology, Engineering, Art and Mathematics (STEAM), it supports holistic development, builds essential 21st-century skills and empowers learners to contribute to a sustainable and equitable future in line with the UN Sustainable Development Goals (SDGs).
Key Features
• STEAM Alignment: Activities integrate Science, Technology, Engineering, Arts and Mathematics encouraging interdisciplinary connections
• Hands-on and Inquiry-Based Learning: Activities spark curiosity through exploration, observation and experimentation, helping learners develop scientific temper, creativity and problem-solving skills
• Digitally Powered: QR codes link to experiment videos for visual and self-paced learning
• Easy-to-Access Resources: Use of safe, low-cost and accessible materials with clear instructions for easy execution
• Real-World Connections: Activities and worksheets link concepts to daily life and local contexts ensuring meaningful and practical relevance
About Uolo
Uolo partners with K-12 schools to provide technology-enabled learning programs. We believe that pedagogy and technology must come together to deliver scalable learning experiences that generate measurable outcomes. Uolo is trusted by over 15,000+ schools across India, Southeast Asia and the Middle East.
ISBN 978-93-49697-04-1


