
Academic Authors: Jatinder Kaur, Ayushi Jain
Book Production: Rakesh Kumar Singh
Project Lead: Jatinder Kaur
VP, Learning: Abhishek Bhatnagar
All products and brand names used in this book are trademarks, registered trademarks or trade names of their respective owners.
© Uolo EdTech Private Limited
First published 2025
This book is sold subject to the condition that it shall not by way of trade or otherwise, be lent, resold, hired out, or otherwise circulated without the publisher’s prior written consent in any form of binding or cover other than that in which it is published and without a similar condition including this condition being imposed on the subsequent purchaser and without limiting the rights under copyright reserved above, no part of this publication may be reproduced, stored in or introduced into a retrieval system, or transmitted in any form or by any means, electronic, mechanical, photocopying, recording or otherwise, without the prior written permission of both the copyright owner and the above-mentioned publisher of this book.
Book Title: Hexa ICSE Computer Science Teacher Manual 5
ISBN: 978-81-985754-8-7
Published by Uolo EdTech Private Limited
Corporate Office Address:
85, Sector 44, Gurugram, Haryana 122003
CIN: U74999DL2017PTC322986
Illustrations and images: www.shutterstock.com, www.stock.adobe.com and www.freepik.com
All suggested use of the internet should be under adult supervision.
In today’s rapidly evolving digital landscape, computer science has become an essential field of study, shaping the world around us in countless ways. From the smartphones in our pockets to the vast networks that connect people across the globe, computer science drives innovation and progress in nearly every aspect of modern life. In today’s fast-paced digital world, understanding the basics of computer science is as important as learning to read, write, or solve maths problems.
Recognising this imperative, the National Education Policy (NEP) 2020 has strongly recommended the integration of coding skills, computational thinking, critical analysis, and problem-solving abilities into the curriculum.
Inspired by these insights, Uolo has introduced a comprehensive program, Hexa, for grades 1 to 8, to empower young minds with the knowledge and skills they need to thrive in the digital age. From the basics of how computers function to the tools that shape our digital landscape, this series opens the door to a world of endless possibilities.
We believe that learning computer science should be an engaging and accessible experience for all children. This series takes a project-based approach, allowing students to learn by way of concurrently applying acquired knowledge and skills. As they progress through the course, they will build strong foundations in computational thinking, coding basics, and digital literacy. Our program focuses on three key areas:
1. Computer Science Fundamentals: Core concepts are introduced step by step, ensuring a solid grasp of how computers function, and how information is processed and stored.
2. Latest Computer Tools: Various computer tools relevant to today’s world are included, equipping students with the confidence to thrive in the digital age.
3. Introduction to Coding: The series offers an introductory look into coding, preparing students for more advanced learning in the future.
To support teachers in delivering effective and engaging lessons, we offer a thoughtfully designed Teacher Manual to enhance the teaching and learning experience. Rather than prescribing teaching methods, the manual provides examples and demonstrates how and why teachers can apply these examples in their classes.
Each chapter in this manual is structured to provide a comprehensive lesson plan. The chapters are divided into multiple sessions, each following the Warm up, Engage, Build, and Sum up (WEBS) strategy.
• The Warm up phase sets the stage for learning by connecting to prior knowledge and building curiosity.
• The Engage phase captures the students’ attention and motivates them to participate actively.
• In the Build phase, questions from various sections are discussed to build the understanding of the students.
• Finally, the Sum up phase reinforces learning through easy-to-recall activities and questions.
Time duration for each section has been suggested based on the requirements of the students. Additionally, an answer key for every chapter is provided to assist teachers in assessing their students’ understanding and guiding their learning effectively.
We hope this Teacher Manual empowers educators to implement the curriculum effectively, support diverse student learning, and create interactive, engaging environments tailored to their students’ needs and interests.
History of Computers
Generations of Computers Characteristics and Limitations of Computers
Software
Types of Software
Internet and Its Uses
Requirements and Ways to Connect to the Internet
Services on the Internet
Internet Threats and Netiquette 4 Advanced Formatting Tools in Google Docs
Fonts and Text Alignment
Line and Paragraph Spacing and Hyperlinks
Indenting Text and Using Tab Stops
Drawing Tools and Adding Shapes Adding Text Boxes and Images
Basics of Google Slides, Themes, and Layout
Tables and Charts in Google Slides
Diagrams and Master Slide
Introduction to Coding
Creating a Project and Components of Scratch
Deleting a Sprite and Ways to Add a Sprite Ways to Add a Backdrop and a Costume to a Sprite
Events Blocks
Loops
and Sensing Blocks-I
Conditional and Sensing Blocks-II

This chapter is divided into the following sessions
1. History of Computers
2. Generations of Computers
3. Characteristics and Limitations of Computers
At the end of the session, the students will be able to:
● explain why computers are important.
● describe examples of some early computers.
Keywords
● Abacus: Abacus is one of the earliest counting device.
● ENIAC: ENIAC was one of the first programmable, general-purpose electronic digital computer.
Ask the students about some early counting methods or devices.
Explain to the students that just like humans are evolving, computers are also evolving day by day.
Discuss some early computers with the students.
Group discussion
Conclude the concepts
Assign homework
● Ask the students about some early counting methods and devices.
● Relate the concept that computers are also used for counting and for various types of complex calculations.
● Now, build the concept that, just like the early counting devices, like Abacus and Napier’s Bones, computers are also used to perform counting and mathematical operations.
Explain the following concepts:
Explain why computers are important.
Describe examples of some early computers.
Discuss with the students that computers have become an integral part of our lives. They help us in almost every sphere of life these days. We cannot even imagine a world without computers, as given on page 1.
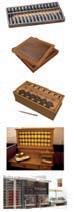
Explain to the students about some early computers, like Abacus, Napier’s Bones, Pascaline, Stepped Reckoner or Leibniz Wheel, Difference Engine and Analytical Engine, Tabulating Machine, Differential Analyzer, Mark I, ENIAC, and UNIVAC, as given from pages 1 to 3.
● Read aloud the questions provided in the Do It Yourself 1A section Question 1 and encourage the students to solve the questions. Instruct the students to write the answers in their books.
Correct Response:
● Conduct a group discussion in the class among students on the topic ‘Early Computers’ Possible Responses: Abacus, Napier’s Bones, Pascaline, Stepped Reckoner or Leibniz Wheel, Difference Engine and Analytical Engine, Tabulating Machine, Differential Analyzer, Mark I, ENIAC, and UNIVAC.
● Conclude the session by summarising that the computers have become an integral part of our lives. Early computers were not like the computers that we see today. They are evolving year by year. Name some of the early counting devices and computers, like Abacus, Napier’s Bones, Pascaline, Stepped Reckoner or Leibniz Wheel, Difference Engine and Analytical Engine, Tabulating Machine, Differential Analyzer, Mark I, ENIAC, and UNIVAC.
● Assign the following questions from the Chapter Checkup given at the end of the chapter as homework.
A. Fill in the Blanks: Questions 1 and 2
B. Tick the Correct Option: Question 4
C. Who Am I?: Questions 1, 3, 4, and 5
D. Write T for True and F for False: Questions 1 and 2
E. Answer the Following: Questions 1 and 2
F. Apply Your Learning: Questions 1, 2, and 3
At the end of the session, the students will be able to:
● discuss the computers of the first generation.
● describe the second generation of computers.
● explain the third generation of computers.
● discuss the computers of the fourth generation.
● explain the fifth generation of computers.
Keywords
● Generations of computers: Generations are various stages of advancement in computer technology.
● Integrated Circuits (ICs): ICs are circuits of many electronic components together on a silicon chip.
● Microprocessor: Microprocessor is a chip containing about 1,00,000 electronic components.
Ask the students about the advancements in the living styles and foods of their earlier family members, such as grandparents, parents, and themselves.
Discuss all generations of computers with the students. Group discussion Conclude the concepts
Assign homework
5 mins
Ask the students about advancements in the living styles and foods of their earlier family members, such as grandparents, parents, and themselves.
● Build the concept that, just like we have parental generations, computers also have generations. Tell them that we are currently in the fifth generation of computers. Also, discuss with them about the different generations of computers and their features.
Explain the following concepts:
Discuss the computers of the first generation.
Describe the second generation of computers.
Explain the third generation of computers.
Discuss the computers of the fourth generation.
Explain the fifth generation of computers.
Explain to the students that the computers developed in the first generation used vacuum tubes, which consisted of thin filaments. They were huge in size, had less memory, and were very costly. They required a lot of maintenance and were programmed using the complex machine language or the assembly language. The popular first generation computers include ENIAC and UNIVAC, as given on page 3.
Discuss with the students that the computers of the second generation were relatively smaller because they used tiny transistors. They are faster and cheaper. They stored information using magnetic core memory, used punched cards for input, and were programmed using the assembly languages. The famous computers from this time were the CDC 3600 and IBM 7090, as given on pages 3 and 4.
Describe that the computers of the third generation used Integrated Circuits (ICs), which reduced the size of the computers. Integrated circuits are circuits of many electronic components together on a chip. They used core memory, which was faster and more reliable. Keyboards and friendlier interfaces were introduced for the users. These computers were programmed using languages, like Common Business-Oriented Language (COBOL), Formula Translation (FORTRAN), and Beginner’s All-purpose Symbolic Instruction Code (BASIC). Popular third generation computers were IBM’s System/360 and DEC’s PDP-11, as given on page 4.
Explain to the students that the computers of the fourth generation used integrated circuits with VLSI, which stands for Very Large Scale Integration. This chip is also known as a Microprocessor. They used faster and more reliable Random Access Memory (RAM), keyboards and mouses, and programmed using languages like C, Pascal, and FORTRAN. Popular computers from this era include the IBM PC, HP 9000 Series, and DEC 10, as given on pages 4 and 5.
Discuss with the students that the computers of the fifth generation use Artificial Intelligence (AI) and Machine Learning (ML) as their main technologies and have advanced memory to store large amounts of data. Advanced input and output methods, like voice recognition, gesture control, augmented reality, virtual reality, and brain-computer interfaces, are used and these computers are programmed using languages like R, Python, and Julia, as given on page 5.
● Read aloud the questions provided in the Do It Yourself 1A section Question 2 and encourage the students to solve the questions. Instruct the students to match the correct answers in their book.
Correct Response:
First Generation Computers Integrated Circuits (SSI, MSI)
Second Generation Computers Integrated Circuits (VLSI)
Third Generation Computers Artificial Intelligence
Fourth Generation Computers Transistors
Fifth Generation Computers Vacuum Tubes
5 mins
● Conduct a group discussion in the class among students on the topic ‘Input and output methods in the fifth generation of computers’.
Possible Response: Input and output methods include voice recognition, gesture control, augmented reality, virtual reality, and brain-computer interfaces.
3 mins
Sum Up
● Conclude the session by summarising that, based on the time period and the advancements in the technology, computers are broadly classified into five generations: first generation, second generation, third generation, fourth generation, and fifth generation. Different devices, like vacuum tubes, transistors, integrated circuits, and microprocessors, are used in different generations.
● Assign the following questions from the Chapter Checkup given at the end of the chapter as homework.
A. Fill in the Blanks: Questions 3, 4, and 5
B. Tick the Correct Option: Questions 1, 2, and 3
C. Who Am I?: Question 2
D. Write T for True and F for False: Question 3
E. Answer the Following: Question 3
F. Apply Your Learning: Question 4
At the end of the session, the students will be able to:
● explain various characteristics of computers.
● discuss the limitations of computers.
Keywords
● Storage: It is the memory of a computer in which it stores pictures, documents, videos, and more.
● Multitasking: Working of a computer on various tasks at the same time is called multitasking.
Ask the students about their characteristics. Discuss about different characteristics and limitations of computers.
Group discussion Conclude the concepts Assign homework
● Ask the students about their characteristics.
● Build the concept that, just like you have characteristics like curiosity, adaptability, creativity, and intelligence, computers also have characteristics like speed, accuracy, storage, multitasking, being automatic, and used in communication.
● Also, tell them that computers are incredibly powerful and versatile machines, but they also have several limitations, like they cannot think like humans, need maintenance, and lack emotional intelligence.
Explain the following concepts:
Explain various characteristics of computers.
Discuss the limitations of computers.
Discuss with students about the different characteristics of computers, like they are superfast at doing things, being accurate, have a huge memory, do things on their own, multitasking, being automatic, and used in communication, as given on page 7.
Explain about the different limitations of computers, like they cannot think like humans, need maintenance, and lack emotional intelligence, as given on pages 7 and 8.
● Read aloud the question provided in the Do It Yourself 1B section and encourage the students to solve the question. Instruct the students to write the answers in their book.
Correct Responses: 1. T 2. F 3. T 4. F
Build
7 mins
● Conduct a group discussion in the class among students based on the topic, “What tasks can be done using a computer?” given in the Discuss section, as mentioned on page 8.
Possible Response: Computers are used for communication, playing games, listening to music, doing calculations, reading books, etc.
3 mins
Sum Up
● Conclude the session by summarising that the computers have characteristics, like speed, accuracy, storage, multitasking, automatic, and communication. It also has some limitations, like a computer cannot think itself, it needs maintenance, and it lacks emotional intelligence.
● Assign the following questions from the Chapter Checkup given at the end of the chapter as homework.
B. Tick the Correct Option: Question 5
D. Write T for True and F for False: Questions 4 and 5
E. Answer the Following: Questions 4 and 5
F. Apply Your Learning: Question 5
This chapter is divided into the following sessions 1. Software 2. Types of Software
At the end of the session, the students will be able to:
● define software.
● define system software.
● discuss operating system.
● discuss utility software.
● discuss language processor.
Keywords
● Software: Software is a set of programs that are installed and run on computer hardware that help users interact with the computer.
● System software: System software is responsible for managing and controlling the overall functioning of a computer system. This software provides essential services and functionalities to allow the application software to run efficiently.
● Operating system: An operating system is the initial system software that loads into computer memory when you turn on a computer. An operating system acts as an interface between a user and a computer system.
● Utility software: It is a type of system software that provides essential tools and functionalities to maintain, optimise, or troubleshoot a computer system.
● Language processor: A language processor is used for translating high-level programming languages, which are human-readable and easier for programmers to work with, into machine language.
Ask the students what is the first thing that comes to their mind when they hear the word ‘software’.
Also ask them how they think software is different from hardware.
Describe software to the students. Explain to the students about system software.
Also, explain the three types of system software: operating system, utility software, and language processor.
● Ask the students what is the first thing that comes to their mind when they hear the word ‘software’.
● Also ask them how they think software is different from hardware.
● Tell the students that software is an intangible part of a computer, which means that it cannot be touched. Whereas, hardware can be touched.
Explain the following concepts:
Define software. Tell the students that software is a set of programs that are installed and run on computer hardware that help users interact with the computer, as given on page 12.
Define system software.
Discuss operating system.
Discuss utility software.
Discuss language processor.
Tell the students that system software is responsible for managing and controlling the overall functioning of a computer system, as given on page 12.
Tell the students that an operating system is the initial system software that loads into computer memory when you turn on a computer. Also explain the functions of an operating system, as given on page 13.
Tell the students that utility software is a type of system software that provides essential tools and functionalities to maintain, optimise, or troubleshoot a computer system. Also, tell them about some common examples of utility software, like file manager, disk management, backup utility, and compression, as given on pages 13 and 14.
Tell the students that a language processor is used for translating high-level programming languages into machine language. Also explain to them the three types of language translators: assembler, interpreter, and compiler, as given on page 14.
● Read aloud the questions provided in the Do It Yourself 2A section and encourage the students to solve the questions. Instruct the students to write the answers in their books.
Do It Yourself 2A
Correct Responses:
1. T
2. F 3. F
● Ask the students to give the answer to the question “Name any one utility software that you commonly use.’’ asked in the Think and Tell section on page 14.
Possible Responses: antivirus software/disk cleanup/backup and recovery software/file compression software.
● Conduct a group discussion in the class on the topic ‘How do you use software in your daily life, particularly on devices like smartphones?’
Possible Responses: I use my smartphone to communicate with my friends and family through messaging apps, like WhatsApp and social media apps, like Instagram.
● Conclude the session by summarising that software is a set of programs that are installed and run on computer hardware that help users to interact with the computer. System software is responsible for managing and controlling the overall functioning of a computer system. There are three types of system software: operating system, utility software, and language processor.
● Assign the following questions from the Chapter Checkup given at the end of the chapter as homework.
A. Fill in the Blanks: Questions 1, 3, 4, and 5
B. Tick the Correct Option: Questions 2, 3, 4, and 5
C. Write T for True and F for False: Questions 1, 3, and 4
D. Answer the Following: Questions 1, 2, 3, and 5
E. Apply Your Learning: Questions 2 and 4
At the end of the session, the students will be able to:
● explain application software.
● discuss the general purpose application software.
● discuss the special purpose application software.
Keywords
● Application software: Application software is a type of computer software designed to perform specific tasks, such as word processing, creating presentations, web browsing, email communication, doing calculations, and editing images.
● General purpose application software: Such software is made to carry out several jobs and activities on a computer.
● Special purpose application software: Such software performs specific, narrowly defined tasks, or functions.
Ask the students if they can think of any other examples of software that they use in their day-today lives.
Elaborate to the students about application software. Also explain the two types of application software: general purpose application software and special purpose application software.
Think and Tell Conclude the concepts Assign homework
5 mins
Warm Up
● Ask the students if they can think of any examples of software that they use in their day-to-day lives.
● Tell the students that they use Microsoft Word, Microsoft Excel, Paint, etc., in their day-to-day lives.
Explain the following concepts:
Explain application software.
Discuss the general purpose application software.
Discuss the special purpose application software.
Tell the students that an application software is a type of computer software designed to perform specific tasks, such as word processing, web browsing, email communication, doing calculations, etc., as given on page 15.
Tell the students that general purpose application software is made to carry out several jobs and activities on a computer. Also explain the types of general purpose application software, such as word processing software, spreadsheet software, presentation software, graphics software, and multimedia software, as given on pages 15 and 16.
Tell the students that special purpose application software performs specific, narrowly defined tasks or functions, as given on page 16.
● Read aloud the questions provided in the Do It Yourself 2B section and encourage the students to solve the questions. Instruct the students to write the answers in their books.
Do It Yourself 2B
Correct Responses:
1 Match the following.
a Multimedia software
b Spreadsheet software
c Presentation software
d Graphics software
Microsoft PowerPoint
Paint
Google Sheets
Windows Media Player
7 mins
● Ask the students to give the answer to the question “What is the difference between system software and application software?” asked in the Think and Tell section on page 16.
1 Software is a set of programs that are installed and executed on computer hardware, facilitating user interaction with the computer.
Correct Response:
2 System software is responsible for managing and controlling the overall functioning of a computer system. This software provides essential services and functionalities to allow application software to run efficiently.
3 Types of system software include operating system, utility software, and language processor.
4 When you turn on a computer, the operating system is the initial program that loads into its memory, setting the stage for all other operations.
System software is responsible for managing and controlling the overall functioning of a computer system. Application software is designed to perform specific tasks.
There are three types of system software: operating system, utility software, and language processor.
5 Utility software is a type of system software that provides essential tools and functionalities to maintain, optimise, or troubleshoot a computer system.
There are two types of application software: general purpose application software and special purpose application software.
6 A language processor is used for translating high-level programming languages, which are human-readable and easier for programmers to work with, into machine language.
7 Application software is a type of computer software designed to perform specific tasks, such as word processing, creating presentations, web browsing, email communication, doing calculations, editing images, and more.
8 There are two types of application software: General-purpose application software and special-purpose application software.
9 Word processors, spreadsheets, and presentation software are a few examples of generalpurpose application software.
● Conclude the session by summarising that application software is a type of computer software designed to perform specific tasks, such as word processing, creating presentations, web browsing, email communication, doing calculations, and editing images. There are two types of application software: general purpose application software and special purpose application software.
● Assign the following questions from the Chapter Checkup given at the end of the chapter as homework.
A. Fill in the Blanks: Question 2
B. Tick the Correct Option: Question 1
C. Write T for True and F for False: Questions 2 and 5
D. Answer the Following: Question 4
E. Apply Your Learning: Questions 1 and 3
This chapter is divided into the following sessions
1. Internet and Its Uses
2. Requirements and Ways to Connect to the Internet
3. Services on the Internet
4. Internet Threats and Netiquette
At the end of the session, the students will be able to:
● explain what the internet is.
● describe the uses of the internet.
Keywords
● Internet: It is a huge network of millions of computers connected worldwide.
● Online communication: It is a way to talk to your friends using the internet, see their pictures and videos, and share a lot of data with them.
Ask the students how people are socially connected with each other.
Explain to the students what the internet is.
Also, explain its uses. Group
5 mins
Warm Up
● Ask the students how people are socially connected with each other to form a social network.
● Now, develop the concept that, similar to people, computers are also connected with each other to form the internet.
Explain the following concepts:
15 mins
Explain what the internet is. Explain to the students that the internet is a huge network of millions of computers connected worldwide, as given on page 20.
Describe the uses of the internet.
a phone, send and receive lot of other information. Have is possible?
the internet.
phone, send and receive of other information. Have is possible? internet. millions of computers connected and the sharing of information.
Explain to the students the uses of the internet, such as online shopping, cashless payment, online learning, online communication, etc., as given on pages 20 and 21.
millions of computers connected and the sharing of information.
a phone, send and receive lot of other information. Have is possible? the internet. millions of computers connected and the sharing of information.
● Read aloud the questions provided in the Do It Yourself 2A section and encourage the students to solve the questions. Instruct the students to match and write the answers in their book.
the internet are:
foundations were laid in the 1960s with the creation of ARPANET Projects Agency Network).
toys, clothes, and many the comfort of your home. and Myntra make it easy to
internet are: toys, clothes, and many comfort of your home. Myntra make it easy to foundations were laid in the 1960s with the creation of ARPANET Agency Network).
the internet are: toys, clothes, and many the comfort of your home. and Myntra make it easy to foundations were laid in the 1960s with the creation of ARPANET Projects Agency Network).
Correct Responses:
use apps like Paytm, Google to pay for things online. cashless payments, are
apps like Paytm, Google pay for things online. cashless payments, are
use apps like Paytm, Google to pay for things online. cashless payments, are
allows you to discover new world, making it possible to topics anytime and anywhere.
allows you to discover new world, making it possible to topics anytime and anywhere.
allows you to discover new world, making it possible to topics anytime and anywhere.
12/4/2023 11:29:32 AM
12/4/2023 11:29:32 AM
● Conduct a group discussion in the class among the students on the topic ‘Internet for Entertainment’.
Correct Response: The internet provides many ways to have fun and be entertained. You can watch videos, play games, and listen to your favourite songs online. There are apps, like Netflix, Hotstar, and YouTube, that let you stream various kinds of videos.
● Conclude the session by summarising that the internet is a huge network of millions of computers connected worldwide. There are various uses of the internet, such as online shopping, cashless payment, online learning, online communication, etc.
● Assign the following questions from the Chapter Checkup given at the end of the chapter as homework.
E. Answer the Following: Question 1
At the end of the session, the students will be able to:
● describe the requirements for connecting to the internet.
● discuss the different ways to connect to the internet.
Keywords
● Web browser: It is an application that allows you to visit websites on the internet.
● Modem: It is a device that carries out the processes of both modulating and demodulating electrical signals.
● Broadband connection: It is the wired connection which uses copper or fibre optic cables to transmit data.
Ask the students, “How do you think we connect to the internet?”.
Discuss with the students the different requirements and ways to connect to the internet.
Group discussion
Think and Tell
Conclude the concepts Assign homework
5 mins
Warm Up
● Ask the students: How do you think we connect to the internet and what do we need for that?
● Now, build the concept by telling them that there are different things required to connect to the internet, like an Internet Service Provider (ISP), a device that can access the internet, a modem, a network cable, and a web browser.
Explain the following concepts:
Describe the requirements for connecting to the internet.
Discuss the different ways to connect to the internet.
Tell the students about the things needed to connect to the internet, such as the Internet Service Provider (ISP), modem, network cable, etc., as given on pages 22 and 23.
Tell the students about the ways to connect to the internet, such as wired connection, wireless connection, cellular connection, etc., as given on pages 23 and 24.
words, related to the internet, from the word grid.

● Read aloud the questions provided in the Do It Yourself 2B section and encourage the students to solve the questions. Instruct the students to write the answers in their book. Correct Responses:
2. The requirements to connect to the internet are Internet Service Provider (ISP), a device that can access the internet, a modem, a network cable, and a web browser.
● Ask the students to answer the question “What are the ways to connect to the internet?” asked in the Think and Tell section, as given on page 24.
Correct Response: Wired connection, wireless connection, cellular connection, satellite, and dial-up
● Conduct a group discussion in the class among students on the topic ‘WiFi: The modern way to connect to the internet‘.
Possible Response: Wireless connections use radio waves to transmit data between devices and a router. This method is highly convenient, as it eliminates the need for physical cables. Wi-Fi is one of the most commonly used wireless connections.
● Conclude the session by summarising that an ISP is a company that provides you with access to the internet, often for a fee. A modem is a device that carries out the processes of both modulating and demodulating electrical signals. Wi-Fi is one of the most commonly used wireless connections.
● Assign the following questions from the Chapter Checkup given at the end of the chapter as homework.
A. Fill in the Blanks: Questions 1 and 2
B. Tick the Correct Option: Question 1
C. Who Am I?: Questions 1 and 3
D. Write T for True and F for False: Question 2
At the end of the session, the students will be able to:
● describe about browsing the internet.
● describe different services of the internet.
Keywords
● E-commerce: It is a platform for buying and selling of products and services online.
● Email: Email stands for Electronic Mail. It allows users to send and receive messages, files, audio, links, images, etc., over the internet.
Ask the students if they have ever used any service on the internet. Explain the concept of browsing the internet and internet services to the students.
Group discussion Conclude the concepts Assign homework
● Ask the students if they have ever used any service on the internet.
● Now, set the context by explaining the meaning of browsing the internet.
Explain the following concepts:
Learning Outcomes
Describe about browsing the internet.
Describe different services of the internet.
Explanation
Explain to the students that browsing the internet refers to using a web browser to search for and access information on the World Wide Web (WWW), which is a part of the internet, as given on page 25.
Explain to the students the wide range of services and applications the internet offers, as given on pages 25 and 26.
Complete the following words: a
● Read aloud the questions provided in the Do It Yourself 2C section and encourage the students to solve the questions. Instruct the students to write and match the answers in their book.
b
c
Correct Responses:
d
Match the
7 mins
Build
● Conduct a group discussion in the class among the students on the topic ‘Online Streaming Platforms’.
Possible Responses: YouTube, Amazon Prime, Netflix, Hotstar Sum Up
3 mins
● Conclude the session by summarising that browsing the internet refers to using a web browser to search for and access information on the World Wide Web (WWW), which is a part of the internet. Internet services refer to the various applications, resources, and functionalities available to users on the internet.
● Assign the following questions from the Chapter Checkup given at the end of the chapter as homework.
A. Fill in the Blanks: Question 3
B. Tick the Correct Option: Questions 2 and 4
C. Who Am I?: Questions 2 and 4
D. Write T for True and F for False: Question 3
E. Answer the Following: Question 2
F. Apply Your Learning: Questions 1, 3, and 4
At the end of the session, the students will be able to:
● describe a range of threats and risks on the internet.
● describe different netiquette.
● Malware: Malware refers to any software designed to harm, exploit, or compromise computer systems, networks, or users’ privacy.
● Netiquette: It refers to a set of guidelines and rules for polite and respectful behaviour when communicating online.
Ask the students what they do when they see a pop-up on the computer screen regarding an advertisement while accessing the internet. Explain to the students about the different threats and risks on the internet. Also, tell them about the netiquette they must follow.
5 mins
Warm Up
● Ask the students what they do when they see a pop-up on the computer screen regarding an advertisement while accessing the internet.
● Now, build the concept by explaining that the internet has brought so many benefits and opportunities, but it also comes with a range of threats and risks.
Explain the following concepts:
Describe a range of threats and risks on the internet.
Explain to the students the various threats and risks one may face while using the internet, such as malware, phishing, cyberbullying, privacy invasion, etc., as given on pages 28 and 29.
Describe different netiquette. Explain to the students that netiquette refers to a set of guidelines and rules for polite and respectful behaviour when communicating online. Also, tell them about some important netiquette for internet users, as given on pages 29 and 30.
● Read aloud the questions provided in the Do It Yourself 2D section and encourage the students to solve the questions. Instruct the students to write the answers in their book.
Correct Responses:
1. a. CYBERBULLYING b. PHISHING c. RANSOMWARE d. WORMS e. TROJAN HORSE
2. a. Cyberbullying b. Virus c. Trojan Horse
Build
7 mins
● Conduct a group discussion in the class among the students on the topic ‘Activities that invade the privacy of an online user’.
Possible Response: Entering someone’s private information, watching what they do online without their permission, sharing their personal data without asking, etc., are all activities that invade the privacy of an online user.
3 mins
Sum Up
● Conclude the session by summarising that some of the risks on the internet are malware, phishing, cyberbullying, privacy invasion, etc. Netiquette refers to a set of guidelines and rules for polite and respectful behaviour when communicating online. Some of the netiquette principles are not sharing personal information, respecting other people’s privacy, being careful when posting something, etc.
● Assign the following questions from the Chapter Checkup given at the end of the chapter as homework.
A. Fill in the Blanks: Questions 4 and 5
B. Tick the Correct Option: Questions 3 and 5
C. Who Am I?: Question 5
D. Write T for True and F for False: Questions 1, 4, and 5
E. Answer the Following: Questions 3, 4, and 5
F. Apply Your Learning: Questions 2 and 5
This chapter is divided into the following sessions
1. Fonts and Text Alignment
2. Line and Paragraph Spacing and Hyperlinks
3. Indenting Text and Using Tab Stops
At the end of the session, the students will be able to:
● add new fonts.
● align text.
Keywords
● Fonts: Fonts help to improve the readability of the text and make the document visually appealing.
● Text alignment: Text alignment refers to the positioning of the text according to the edges of the pages.
Ask the students how they would prefer to write in their notebooks, with a neat and clean handwriting or a messy one.
Introduce fonts and their different types to the students. Introduce text alignment and types of alignment. Group discussion
Conclude the concepts Assign homework
5 mins
Warm Up
● Ask the students how they would prefer to write in their notebooks, with a neat and clean handwriting or a messy one.
● Now, relate this concept to the fonts used in Google Docs and explain more about them.
Engage
Explain the following concepts:
Learning Outcomes
15 mins
Explanation
Add new fonts. Explain to the students that Google Docs comes with various types of fonts, which help to improve the readability of the text and make the document visually appealing. Describe the steps to add new fonts to the students, as given on pages 34 to 36.
Align text. Explain to them that alignment refers to the positioning of the text according to the edges of the pages. Discuss the four alignment options, like left, right, center, and justify, as given on pages 36 and 37.
● Read aloud the question provided below and encourage the students to solve it. Instruct the students to write the answers in their notebook.
1. How can you open the Fonts dialog box in Google Docs to add more fonts?
Correct Responses:
Click on the ‘More fonts’ option in the Font drop-down menu. A Fonts dialog box with many available fonts appears on the screen.
2. Which text alignment option places the selected text at an equal distance from both the left and right margins?
a. Left align
b. Center align
c. Right align
d. Justify
Correct Response:
b. Center align
Build
7 mins
● Conduct a group discussion in the class based on the topic provided below. Discuss why it is important to choose different fonts and use various text alignments when creating documents in Google Docs.
The importance of choosing different fonts and using various text alignments:
a. Readability and Clarity: Different fonts can significantly affect how easy it is for someone to read and understand the text.
b. Purpose of the Document: The purpose of the document often dictates the choice of font and alignment.
c. Audience Engagement: Different fonts and alignments can make a document more engaging for the audience.
d. Emphasising Information: By using different fonts and text alignments, students can highlight or emphasise certain parts of their documents.
3 mins
● Conclude the session by summarising that choosing different fonts and text alignments in Google Docs helps make the documents clear and interesting for readers. These choices can highlight important parts of the document and make it more fun and appropriate for the audience, whether it’s a school project or an invitation. Also, summarise the steps to do so.
● Assign the following questions from the Chapter Checkup given at the end of the chapter as homework.
A. Fill in the Blanks: Question 3
B. Tick the Correct Option: Question 4
C. Who Am I?: Questions 1 and 3
D. Write T for True and F for False: Question 4
E. Answer the Following: Question 5
F. Apply Your Learning: Questions 3 and 4
At the end of the session, the students will be able to:
● apply formatting for line and paragraph spacing.
● insert a hyperlink in Google Docs.
Keywords
● Line spacing: Line spacing is the vertical space between the lines of text in a document.
● Paragraph spacing: Paragraph spacing is the vertical spacing between paragraphs in a document.
● Hyperlink: A hyperlink is a link to a web address.
Ask the students if they have ever noticed how some texts are easier to read and look nicer because of the space between lines and paragraphs.
Also, ask them if they have ever wondered how clicking on a word or picture on the internet leads to a new page with additional information.
Explain line spacing and paragraph spacing to the students.
Describe a hyperlink and the steps to insert it in the document.
Group discussion
Conclude the concepts
Assign homework
5 mins
● Ask the students if they have ever noticed how some texts are easier to read and look nicer because of the space between lines and paragraphs.
● Also, ask them if they have ever wondered how clicking on a word or picture on the internet leads to a new page with additional information.
● Build the concept of line spacing and relate it to line and paragraph spacing. Also, introduce the students to the topic of hyperlinks.
Explain the following concepts:
Apply formatting for line and paragraph spacing.
Insert a hyperlink in Google Docs.
Explain to the students that line spacing is the vertical space between the lines of text in a document, and paragraph spacing is the vertical spacing between paragraphs, as given on pages 37 to 40. Also, describe the steps to format line spacing and paragraph spacing.
Explain to the students that hyperlinks are used for navigating the internet and for navigating documents. They can link to another document or another website, a picture, or even a print dialog. Also, describe the steps to insert a hyperlink in the document, as given on pages 40 and 41.
● Read aloud the question provided below and encourage the students to solve it. Instruct the students to write the answers in their notebook.
1. How can you add space before a paragraph in Google Docs?
a. By pressing the Enter key multiple times.
b. By changing the font size.
c. By selecting the Add space before paragraph option from the Line & paragraph spacing button.
d. By inserting a hyperlink.
Correct Response:
c. By selecting the Add space before paragraph option from the Line & paragraph spacing button.
2. What is a hyperlink?
a. A special font style in Google Docs.
b. A type of text alignment.
c. A link to a web address that you can click.
d. A way to make text bold and italic.
Correct Response:
c. A link to a web address that you can click.
Build
● Conduct a group discussion in the class based on the topic provided below.
7 mins
Discuss how you can make your newsletter more readable and engaging for your classmates.
Possible Responses:
We can format line spacing for readability.
We can format the paragraph spacing to organise the content.
We can insert hyperlinks to enhance engagement.
● Conclude the session by summarising that formatting lines and paragraph spacing makes our documents easy to read and look neat. Also, conclude that if you want to add a web address to your Google Docs, you can add it as a hyperlink for someone to click on it.
● Assign the following questions from the Chapter Checkup given at the end of the chapter as homework.
A. Fill in the Blanks: Questions 1 and 2
B. Tick the Correct Option: Question 2
C. Who Am I?: Questions 2 and 5
D. Write T for True and F for False: Questions 1 and 3
E. Answer the Following: Questions 1 and 4
F. Apply Your Learning: Questions 1 and 2
At the end of the session, the students will be able to:
● apply indentation to the text.
● use tab stops.
Keywords
● Indenting text: Indenting text is the process of setting the beginning of a line of text slightly to the right of the left margin.
● Tab stops: Tab stops allows us to determine where words are located better. With every press of the Tab key, the insertion point automatically moves 0.5 inches to the right.
Ask the students from where they begin each paragraph while writing an article in their notebooks.
Explain the concept of indenting text to the students.
Describe how to use the tab stops in a document.
Group discussion Conclude the concepts Assign homework
● Ask the students from where they begin each paragraph while writing an article in their notebooks.
● Build the concept of indenting text and explain the types of indents.
Explain the following concepts: Learning Outcomes
Apply indentation to the text.
Explain to the students that indentation is the process of setting the beginning of a line of text slightly to the right of the left margin. It helps structure the content of a document to make it easier for readers to identify paragraphs, as given on pages 41 to 45.
Use tab stops. Explain that tab stops allows you to determine where words are located better. With every press of the Tab key, the insertion point automatically moves 0.5 inches to the right. Also explain the types of tab stops and the steps to add tab stops, as given on pages 45 to 47.
● Read aloud the question provided in the Do It Yourself 4A section and encourage the students to solve it. Instruct the students to write the answers in their notebooks.
Correct Responses:
The reference paragraph is given below. The asked formatting is applied to the text.
● Ask the students to answer the question “What is the major difference between the left tab stop and the right tab stop?” asked in the Think and Tell section on page 45.
Possible Responses:
The major difference between the left tab stop and the right tab stop is that the left tab stop aligns text to the left at the tab stop, whereas the right tab stop aligns text to the right at the tab stop.
● Ask the students to give the answer to the question “What are the various formatting tools available in Google Docs?” asked in the Think and Tell section, given on page 47.
Possible Responses: The various formatting tools available in Google Docs are:
1. Text Formatting: Font Style, Font Size, Bold, Italic, Underline, Text Colour, and Highlight.
2. Paragraph Formatting: Alignment, Line Spacing, Bullets and Numbering, and Indentation.
3. Inserting Elements: Images, Links, Tables, Drawings, and Charts.
● Conclude the session by summarising that indentation helps structure the content of a document to make it easier for readers to identify paragraphs. Also, conclude that using tab stops in Google Docs allows you to determine where words are located better.
● Assign the following questions from the Chapter Checkup given at the end of the chapter as homework.
A. Fill in the Blanks: Questions 4 and 5
B. Tick the Correct Option: Questions 1, 3, and 5
C. Who Am I?: Question 4
D. Write T for True and F for False: Questions 2 and 5
E. Answer the Following: Questions 2 and 3
This chapter is divided into the following sessions
1. Drawing Tools and Adding Shapes
2. Adding Text Boxes and Images
At the end of the session, the students will be able to:
● use Google Docs drawing tool.
● add shapes in a document.
Keywords
● Google Docs: It includes a simple drawing tool that you can use to create and insert basic shapes, text, and images in your documents.
● Drawing: It is a virtual board that allows users to create flowcharts, diagrams, concept maps, visual storyboards, and original art.
WEBS at a Glance
Ask the students if they have created a drawing using shapes in Paint. And if they can name any other drawing tool where they can do the same.
Explain the steps to use the drawing tool in Google Docs.
Explain the steps to add shapes and text to shapes in the Google Docs document. Also, tell them how to format shapes. Group
Conclude the concepts
Assign homework
● Ask the students if they have created a drawing using shapes in Paint. And if they can name any other drawing tool where they can do the same.
● Tell the students that Google Docs includes a simple drawing tool that you can use to create and insert basic shapes, text, and images in your documents.
Engage
Explain the following concepts:
Learning Outcomes
Use Google Docs drawing tool.
Add shapes in a document.
Explanation
Explain to the students how to use the Google Docs drawing tool, as given on pages 51 and 52.
Elaborate to the students the steps to add shapes and text to shapes. Also, discuss the uses of shapes and how can these shapes be formatted in the Google Docs, as given on pages 52 to 56.
Ask the following questions to the students to check their understanding.
● Which drawing tool is used to draw a line and a shape in the Google Docs?”
Correct Responses:
1. Select line drop-down
2. Shape tool
● State True or False: You can format shapes in a variety of ways.
Correct Response: True
● Conduct a group discussion in the class among the students based on the topic ‘Uses of shapes’. Correct Response: Shapes are used to create diagrams, flowcharts, venn diagrams, call outs, and timelines.
● Conclude the session by summarising that Google Docs includes a simple drawing tool that you can use to create and insert basic shapes, text, and images in your documents. You can add shapes, text to shapes, and format shapes in your document.
● Assign the following questions from the Chapter Checkup given at the end of the chapter as homework.
A. Fill in the Blanks: Questions 1, 2, 4, and 5
B. Tick the Correct Option: Questions 1 and 3
C. Write T for True and F for False: Questions 1 and 5
D. Answer the Following: Questions 1 and 3
E. Apply Your Learning: Questions 1, 2, and 3
At the end of the session, the students will be able to:
● add text boxes in Google Docs.
● insert images in Google Docs.
● change order of the objects.
Keywords
● Text box: It is a container that can be used to hold the text.
● Image: The image tool can be used to insert an image into the drawing canvas.
● Object: Object such as text box and shapes are a great way to add visual interest to the Google Docs document.
Ask the students whether they believe that adding text boxes makes the drawings look better. Explain to the students how to add a Text box to Google Docs and format it. Tell the students the steps to insert the images in the Drawing canvas. Describe the steps to change the order of the objects in the Google Docs.
Think and Tell Conclude the concepts Assign homework
5 mins
● Ask the students whether they believe that adding text boxes makes the drawings look better and improve the communication in the Google Docs.
● Tell the students that text boxes provide additional information about a topic, add captions to images, etc., improving the communication in the Google Docs.
Explain the following concepts:
Add text boxes in Google Docs.
Insert images in Google Docs.
Change order of the objects.
Tell the students that a text box is a container that can be used to hold a text. Explain the uses of a Text box with steps to add it to the Google Docs. Also, discuss the various formatting options, such as Border color, Fill color, Border dash, and Border weight, as given on pages 56 and 57.
Elaborate to the students the way to use the Image Tool to insert an image by choosing it from one of the methods such as Upload, by URL, Google Drive, and Search, as given on pages 58 and 59.
Tell the students that objects such as text boxes and shapes are a great way to add visual interest to your Google Docs documents. Tell them the steps to change the order of the objects, as given on pages 59 to 61.
Ask the following questions to the students to check their understanding.
● What are the different options/tabs to insert images?
Correct Responses: Upload, by URL, Google Drive and Search
● What is the use of text boxes?
Correct Responses: Text boxes are used to:
i. Add definitions to key terms.
ii. Provide additional information about a topic.
iii. Create sidebars with activities or quizzes.
iv. Add captions to images or diagrams.
v. Create callouts to highlight important information. Build
7 mins
● Conduct a group discussion in the class among the students based on the topic “What did you learn about changing the order of shapes and text boxes in Google Drawings? How did rearranging them help you make your artwork more appealing?” asked in the Think and Tell section on page 61.
Correct Response: The order of shapes and text boxes is changed in Google Docs in case they overlap with each other. Changing the order of the objects enhances the look of the document. Various options are available to change the order of the objects, such as Bring to Front, Bring Forward, Send Backward, and Send to Back.
● Conclude the session by summarising that a text box is a container that can be used to hold text. You can format it in a variety of ways, such as changing the Border colour, Fill colour, Border weight, and Border dash. Also, summarise the steps to insert an image in the drawing canvas. If you have multiple text boxes or shapes overlapping, you can change the order in which they appear.
● Assign the following questions from the Chapter Checkup given at the end of the chapter as homework.
A. Fill in the Blanks: Question 3
B. Tick the Correct Option: Questions 2, 4, and 5
C. Write T for True and F for False: Questions 2, 3, and 4
D. Answer the Following: Questions 2, 4, and 5
This chapter is divided into the following sessions
1. Basics of Google Slides, Themes, and Layout
2. Tables and Charts in Google Slides
3. Diagrams and Master Slide
At the end of the session, the students will be able to:
● explain the purpose and impact of presentations.
● build a presentation from scratch and define its key components.
● apply and modify themes in the presentation.
● describe layouts and learn how to choose and apply them.
Keywords
● Presentation: Presentation is a way to share information, ideas, or stories using a combination of pictures, text, and sometimes even audio or video.
● Themes: Themes are like special designs for your slides. They make the presentation look colourful and interesting, just like wearing different clothes for different occasions.
● Layouts: Layouts determine how your content, such as titles, text, and images, is organised on the slide.
Ask the students what comes to their minds when they hear the word ‘presentation’?
How do they think different colours and images can impact a presentation?
Explain about presentations and how to create them.
Describe the steps needed to apply themes and modify it. Elaborate the steps to apply layouts.
Group discussion Think and Tell Conclude the concepts
Assign homework
5 mins
Warm Up
● Ask the students what comes to their minds when they hear the word ‘presentation’?
● How do they think different colours and images can impact a presentation?
● Now build the concept that a well-designed presentation can make information easier to understand and more engaging for the audience.
Explain the following concepts:
Explain the purpose and impact of presentations.
Build a presentation from scratch and define its key components.
Apply and modify themes in the presentation.
Describe layouts and learn how to choose and apply them.
15 mins
Describe that a presentation is a way to share information, ideas, or stories using a combination of pictures, text, and sometimes even audio or video to the students, as given on page 64.
Discuss how to create a presentation and the key components of a presentation such as presentation title, menu bar, toolbar, etc, as given on pages 64 and 65.
Discuss with them that themes are like special designs for your slides. They make the presentation look colourful and interesting, just like wearing different clothes for different occasions and how we can apply and modify it in our presentation, as given on pages 66 and 67.
Explain to the students that layouts determine how your content, such as titles, text, and images, is organised on the slide and how we can choose and apply it in our presentation, as given on pages 68 and 69.
● Read aloud the question provided in the Do It Yourself 6A section and encourage the students to solve the questions. Instruct the students to write the answers in their book.
Correct Responses:
1. Choose the correct answers.
a. (i) Presentation title b. (iv) Slide workspace c. (ii) Toolbar
2. Match the following.
Theme
It is used to change the background of the slides.
Layout It is like a special design for your slide.
Slide → Change background It is an online presentation-making app.
Google Slides It determines how your content is organised on the slide.
● Conduct a group discussion in the class among students based on the topic “How do you think presentations can help your teacher during a class?” provided in the Discuss section, as mentioned on page 64.
Possible Responses:
1. Presentations help the teacher show us pictures and videos to make learning more fun.
2. They can explain things better with slides and make it easier for us to understand.
3. Sometimes, presentations make the lesson more exciting and easier to remember.
● Ask the students to give the answer to the question, “If you were making a presentation on a forest, which colour theme would you choose?” asked in the Think and Tell section, as given on page 66.
Possible Response: Green
Sum Up
3 mins
● Conclude the session by summarising that the presentation is a way to share information with your classmates or teacher using slides or visual aids. It has various components, which include the presentation title, menu bar, tool bar, slide workspace, slide navigation pane, speaker notes and slideshow button. Themes help in making presentation look more attractive, interesting and appealing. The layout helps to organise data in your presentation.
● Assign the following questions from the Chapter Checkup given at the end of the chapter as homework.
A. Fill in the Blanks: Questions 1, 2, and 3
B. Tick the Correct Option: Questions 1, 2, and 3
C. Who Am I?: Questions 1 and 2
D. Write T for True and F for False: Questions 1 and 2
E. Answer the Following: Questions 1, 2, 3, and 4
F. Apply Your Learning: Questions 1 and 3
At the end of the session, the students will be able to:
● use tables for arranging data.
● use charts for presenting data visually.
Keywords
● Tables: Tables are used to organise information neatly and in an easy-to-understand manner. Tables helps to put information in rows and columns.
● Charts: Charts are graphics or visual representations that are used to display and compare data easily.
Ask students to think of a time when they used a table to organise their homework or chores. How did it help them?
Imagine you’re making a presentation about a fun trip you took. How could you use the charts to show the exciting parts of your adventure to your classmates?
Explain about tables, charts and discuss how to insert them into the presentation.
Group discussion Conclude the concepts
● Ask students to think of a time when they used a table to organise their homework or chores. How did it help them?
● Imagine you’re making a presentation about a fun trip you took. How could you use the charts to show the exciting parts of your adventure to your classmates?
● Now, build the concept that tables and charts play an important role in sharing information in a presentation.
Explain the following concepts:
Use tables for arranging data.
Use charts for presenting data visually.
Describe tables are used to organise information neatly and in an easy-to-understand manner. Tables help to put information in rows and columns, as given on pages 70 and 71.
Describe charts are graphics or visual representations that are used to display and compare data easily to the students, as given on pages 71 to 74.
● Read aloud the questions provided in the Do It Yourself 6B section and encourage the students to solve the questions. Instruct the students to write the answers in their book.
Correct Responses:
a. Table
b. Charts
c. Vertical
Build
7 mins
● Conduct a group discussion in the class among students on the topic ‘How can tables be utilised to organise information?’
Possible Response: Tables help to organise information neatly, like creating a chart to show our classmates’ favourite hobbies. We can list hobbies in rows and use columns for details, making it easy to compare and understand. This way, everyone can see and share their interests in a clear and organised way.
3 mins
● Conclude the session by summarising tables, used to arrange the data in rows and columns which makes it easy to understand. Charts are used to visually represent the data by which audience can easily grasp what the presenter wants to convey.
● Assign the following questions from the Chapter Checkup given at the end of the chapter as homework.
A. Fill in the Blanks: Question 4
B. Tick the Correct Option: Questions 4 and 5
C. Who Am I?: Questions 3 and 5
D. Write T for True and F for False: Question 3
E. Answer the Following: Question 5
F. Apply Your Learning: Question 2
At the end of the session, the students will be able to:
● use diagrams in a presentation.
● incorporate Slide Master in a presentation.
● change the order of slides.
Keywords
● Diagram: Diagrams are colourful pictures that help you show how things are connected, explain processes, or display information in a clear and organised way.
● Master Slide: The Master Slide is like a main slide, which allows you to change the appearance of your entire presentation all at once.
Have you ever seen a colourful picture that helped you understand a game’s rules or how something works?
Explain about diagrams and how to insert them into the presentation.
Elaborate about the Master Slide and how to use the Master Slide.
● Have you ever seen a colourful picture that helped you understand a game’s rules or how something works? Share that picture or describe it!
● Now build the concept that diagrams are colourful pictures that help you show how things are connected, explain processes, or display information in a clear and organised way.
15 mins
Engage
Explain the following concepts:
Learning Outcomes
Use diagrams in a presentation.
Explanation
Describe diagrams are colourful pictures that help you show how things are connected, explain processes, or display information in a clear and organised way to the students, as given on pages 74 and 75.
Incorporate Slide Master in a presentation.
Discuss master slide is like a main slide, which allows you to change the appearance of your entire presentation all at once and how to use it, as given on pages 76 and 77.
Change the order of slides. Explain to the students changing the order of the slides means to rearrange the slides in a desired order, as given on page 78.
● Read aloud the question provided in the Do It Yourself 6B section and encourage the students to solve the questions. Instruct the students to write the answers in their book.
Correct Responses: Do It Yourself 6B
1. d. Master Slide
2. a. 2 b. 1 c. 4 d. 3
Build
7 mins
● Conduct a group discussion in the class among students on the topic ‘How diagrams and symbols help in learning?’.
Possible Responses: Diagrams and symbols make learning easier by providing visual representations and simplifying information. Symbols act like a secret code, aiding memory in subjects like math. Additionally, these visual elements make learning more engaging and enjoyable, turning it into a fun puzzle or game.
3 mins
● Conclude the session by summarising diagrams, which are colourful pictures that help you show how things are connected, explain processes, or display information in a clear and organised way. Slide Master allows you to control the appearance and layout of multiple slides consistently. Changing the order of the slides means rearranging the slides in a desired order.
● Assign the following questions from the Chapter Checkup given at the end of the chapter as homework.
A. Fill in the Blanks: Question 5
C. Who Am I?: Question 4
D. Write T for True and F for False: Questions 4 and 5
F. Apply Your Learning: Questions 4 and 5
This chapter is divided into the following sessions
1. Introduction to Coding
2. Creating a Project and Components of Scratch
At the end of the session, the students will be able to:
● explain what coding is.
● describe block-based coding.
● explain about Scratch 3.0.
Keywords
● Coding: Coding is a way of giving instructions to tell a computer what to do.
● Block-based coding: It is a computer language where we use colourful coding blocks to make computers do a task.
● Scratch 3.0: Scratch 3.0 is a free and simple platform where we use colourful blocks to create our own games, stories, and art.
Ask the students to describe how they give instructions to someone to do something stepby-step. Explain to them what coding is; tell them about block-based coding; and introduce them to Scratch 3.0.
Attempt the given activity.
Conclude the concepts
Assign homework
● Ask the students to describe how they give instructions to someone to do something step-by-step.
● Then relate the concept to how coding is a way of giving instructions to a computer in a specific language.
15 mins
Explain the following concepts:
Explain what coding is. Tell the students that coding is a way of giving instructions to tell a computer what to do, as given on page 82.
Describe block-based coding. Tell the students that block-based coding is the language in which we use colourful code blocks to tell computers what to do, as given on page 83.
Explain about Scratch 3.0. Introduce students to Scratch 3.0. Tell them it is a free and simple platform that lets you create your own games, stories, and art, as given on page 83.
Ask the following additional questions to the students to check their understanding.
● If coding is like giving instructions, what might happen if we miss a step or give the wrong one in Scratch?
Possible Response:
If we miss a step or give a wrong one in Scratch, then the sprite might not do what we want, or the program might not work correctly.
7 mins
Build
● Conduct a group discussion in the class on the topic “Why do you think block-based coding like Scratch is a good way to start learning programming?”
Possible Response:
Block-based coding helps beginners understand coding logic without worrying about spelling or syntax errors, using colourful blocks that are easy to drag and connect.
Sum Up 3 mins
● Conclude the session by summarising that coding is a language used to give step-by-step instructions to computers. Block-based coding, such as Scratch 3.0, employs colourful coding blocks to create games and perform tasks. It’s a free and user-friendly platform that allows individuals to express their creativity by designing games, stories, and art through visual programming.
● Assign the following from the Chapter Checkup given at the end of the chapter as homework.
A. Fill in the Blanks: Question 1
E. Answer the Following: Questions 1 and 2
F. Apply Your Learning: Question 1
At the end of the session, the students will be able to:
● create a project in Scratch.
● identify and define the components of the Scratch window.
Keywords
● Sprite: A sprite can be a character or an object in a Scratch project.
● Stage: A script is a set of blocks that are placed on top of each other to make a sprite do something.
Warm Up
Ask the students to describe what they see and do when they open a drawing or game app for the first time.
Engage
Explain to the students how to create a project in Scratch and the various components of the Scratch window.
Build Sum Up
Attempt the given activity.
Conclude the concepts
Assign homework
Warm Up
● Ask the students to describe what they see and do when they open a drawing or game app for the first time.
● Then relate the concept to how Scratch also has a special window with tools and parts to help us create projects easily.
Engage
Explain the following concepts:
Learning Outcomes
Explanation
Create a project in Scratch. Demonstrate to the students how to create a project in Scratch, as given on pages 83 and 84.
Identify and define the components of the Scratch window.
Introduce the students to the various components of the Scratch window, such as Menu bar, Tabs, Blocks panel, Blocks palette, Coding area, Backdrop, etc., as given on pages 84 and 85.
● Read aloud the questions provided in the Do It Yourself 7A section and encourage the students to solve the questions. Instruct the students to write the answers in their book.
Correct Responses:
a. Sprite
b. Sprites pane
c. Block panel
d. Script area
e. Block palette
● Provide the name of the component based on its function/characteristics:
A. Where the sprite performs and animations play
B. Where coding blocks are found, sorted by category
C. Where the selected sprite is listed and managed
D. Where you drag and snap code blocks to build scripts
E. Options for switching between coding, drawing, and sound editing
F. Menu bar for saving, tutorials, and other tools
Correct Responses:
A: Stage
B: Blocks Palette
C: Sprite List
D: Code Area
E: Tabs
F: Toolbar
● Conclude the session by summarising how to create a project in Scratch. The Scratch editor holds all the components needed to create and run a Scratch project. Some of these components are Menu bar, Tabs, Blocks panel, Blocks palette, Coding area, Backdrop, etc. Revise these components with the students.
● Assign the following from the Chapter Checkup given at the end of the chapter as homework.
A. Fill in the Blanks: Questions 2, 3, 4, and 5
B. Tick the Correct Option: Questions 1, 2, 3, 4, and 5
C. Who Am I?: Question 1
D. Write T for True and F for False: Questions 1, 2, 3, 4, and 5
E. Answer the Following: Questions 3, 4, and 5
F. Apply Your Learning: Questions 2, 3, 4, and 5
This chapter is divided into the following sessions
1. Deleting a Sprite and Ways to Add a Sprite
2. Ways to Add a Backdrop and a Costume to a Sprite
3. Project
At the end of the session, the students will be able to:
● explain what a sprite is.
● explain what a costume is.
● delete a sprite.
● add a sprite.
Keywords
● Sprite: A character or an object on the stage.
● Costume: It is the appearance of a sprite.
● Sprites library: A collection of ready-to-use sprite images.
Ask the students to imagine setting up a stage for a school play with backgrounds and costumes. Explain to the students what a sprite is; tell them about the costume; show them how to delete a sprite; demonstrate them how to add a sprite; also tell them how to add a backdrop.
Attempt the given activity.
Conclude the concepts
Assign homework
Warm Up
● Ask the students to name their favourite cartoon characters and describe how those characters might change outfits or poses.
● Then relate the concept to sprites and costumes in Scratch, where characters can be added, removed, or made to look different.
Explain the following concepts:
Explain what a sprite is.
Explain what a costume is.
Tell the students that a sprite is a character or an object on the stage in Scratch, as given on page 90.
Tell the students that a costume is an appearance of a sprite that you can change to make the sprite look as if it is moving, changing, or doing many things in your project, as given on page 90.
Delete a sprite. Demonstrate to the students the steps to delete a sprite, as given on page 91.
Add a sprite. Discuss about the different ways to add a sprite. Demonstrate to the students the steps to add a sprite, as given on pages 92 to 95.
Ask the following additional question to the students to check their understanding.
● Why do you think Scratch allows sprites to have multiple costumes instead of making a new sprite every time something changes?
Correct Response:
Scratch allows sprites to have multiple costumes. This means we don’t need to make a new sprite every time something changes.
Costumes help show different actions or changes, like walking or talking. This keeps the project simple and organised.
● Create a simple Scratch project. Delete the default Cat sprite, add a new sprite of your choice, change its size, and check the Costumes tab to observe the different costumes of the sprite. Sum Up
● Conclude the session by summarising that sprites are characters that can move, talk, and do things on the stage in a project. Also, explain the students the steps to delete and add a sprite on the stage.
● Assign the following questions from the Chapter Checkup given at the end of the chapter as homework.
A. Fill in the Blanks: Questions 1, 2, and 3
B. Tick the Correct Option: Questions 1 and 5
C. Who Am I?: Question 2
D. Write T for True and F for False: Questions 1 and 2
E. Answer the Following: Questions 1, 3, and 5
F. Apply Your Learning: Questions 2 and 5
At the end of the session, the students will be able to:
● add a backdrop.
● add a costume to a sprite.
● duplicate the costume of a sprite.
Keywords
● Backdrops: These are the backgrounds used to set the stage for a project.
Ask the students to imagine setting up a stage for a school play with backgrounds and costumes.
Explain to the students how to add a backdrop; demonstrate them how to add a costume to a sprite; also tell them how to duplicate the costume of a sprite. Attempt the given activity.
Action Plan
Conclude the concepts Assign homework
Warm Up
● Ask the students to imagine setting up a stage for a school play with backgrounds and costumes.
● Then relate the concept to how we can add backdrops and costumes in Scratch to create scenes and bring characters to life.
Engage
Explain the following concepts:
Learning Outcomes
Explanation
Add a backdrop. Demonstrate to the students the steps to add a backdrop, as given on pages 95 and 96.
Add a costume to a sprite. Show to the students the steps to add a costume to a sprite, as given on pages 97 and 98.
Duplicate costume of a sprite.
Demonstrate to the students the steps to duplicate the costume of a sprite, as given on pages 99 and 100.
● Read aloud the questions provided in the Do It Yourself 8A and Do It Yourself 8B sections and encourage the students to solve them. Instruct the students to write the answers in their book.
Do It Yourself 8A
Correct Responses:
1. Do It Yourself 2A
1 Match the following.

2. c Do It Yourself 8B
2 Which of the following is the default sprite in a Scratch project?
Correct Responses:
Build
14 mins
Just like the way we can add sprites and backgrounds, we can also add costumes to a sprite. Steps to add a costume to a sprite:
● Create a Scratch project on the theme “City Life”. Delete the default Cat sprite. Change the backdrop to a city backdrop. Add the sprites related to your theme in your project.
1 Select a sprite.
2 Click the Costumes tab.
3 On the left, you will see the Costumes Pane.
4 At the bottom of the Costumes Pane, we have the option to add costumes to a sprite.
Sum Up
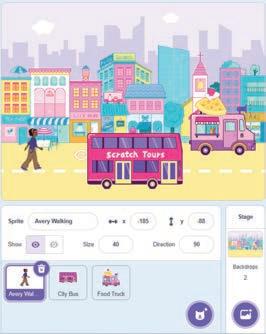
3 mins
● Conclude the session by summarising that backdrops are backgrounds that we use to set the stage for our projects. Also, summarise the steps to add a costume of a sprite and duplicate the costume of a sprite.
● Assign the following questions from the Chapter Checkup given at the end of the chapter as homework.
A. Fill in the Blanks: Questions 4 and 5
B. Tick the Correct Option: Questions 2, 3, and 4
C. Who Am I?: Questions 1, 3, 4, and 5
D. Write T for True and F for False: Questions 3, 4, and 5
E. Answer the Following: Questions 2 and 4
F. Apply Your Learning: Questions 1, 3, and 4
At the end of the session, the students will be able to:
● create a project.
Warm Up Engage Build Sum Up
Ask the students to recall a simple story or idea they have imagined or acted out before. Demonstrate to the students how to add sprites and backdrop. Also demonstrate them how to add a costume to a sprite.
Attempt the given activity.
Conclude the concepts
Assign homework
Warm Up
● Ask the students to recall a simple story or idea they have imagined or acted out before.
● Then relate the concept to how they can turn that idea into a fun project using Scratch.
Engage
Explain the following concept:
Learning Outcome
5 mins
7 mins
Explanation
Create a project. Discuss a project challenge with the students. Tell them how to add the apple, farmer, and the basket sprites on the stage. Also tell them how to upload Apple Farm backdrop. To make a farmer move on the stage with a basket and catch the falling apples, add and duplicate a costume to the apple sprite.
● Ask the following additional questions to the students to check their understanding.
● Why do you think Scratch uses blocks to help us make a project instead of writing lines of code like professional programmers?
● Scratch uses blocks to help us make a project instead of writing lines of code because blocks are easier to understand, less confusing, and help beginners focus on the idea instead of worrying about spelling or symbols.
15 mins
● Create a project in Scratch on the topic "Save Marine Life". Delete the default Cat sprite, add a few new sprites related to underwater marine life, and give a nice backdrop for your underwater scene.

3 mins
● Conclude the session by summarising that you can add sprites from the Sprites Library of Scratch or from your device. A costume is the appearance of a sprite. You can change the sprite’s costume to make it look like it is moving, changing, or doing many things in your project. You can also draw or edit your own sprite as per your need.
This chapter is divided into the following sessions
1. Events Blocks 2. Loops 3. Project
At the end of the session, the students will be able to:
● explain what an event is.
● explain what Events blocks do.
● create a script to make an Apple sprite appear randomly.
● explain what Motion blocks do.
Keywords
● Event: They tell us when an action will happen.
● Action: An action happens when an event occurs.
● Events blocks: They tell the computer when to run a script.
● Motion blocks: They control the movement of the sprite on the stage.
Ask the students to describe what happens when they ring a doorbell or press a TV remote. Explain to them what an event is; tell them about various Events blocks and their uses; tell them about various Motion blocks and their uses; Also, tell them how to make an Apple sprite appear randomly.
Attempt the given activity.
Conclude the concepts
Assign homework
● Ask the students to describe what happens when they ring a doorbell or press a TV remote.
● Then relate the concept to how Events in Scratch work—something happens when you trigger an action.
Explain the following concepts:
Explain what an event is.
Explain what Events blocks do.
Create a script to make an Apple sprite appear randomly.
Explain what Motion blocks do.
Tell the students that an event tells us when an action will happen, as given on page 105.
Tell the students that Events blocks tell the computer when to run a script. Also tell them about some of the Events blocks and their uses, as given on pages 105 and 106.
2 Which block is used to make the ball bounce back when it touches
Tell the students that the go to random position block from the Motion block category makes a sprite go to a random location on the stage. Demonstrate how to make an Apple sprite appear randomly, by using blocks from the Events and Motion category, as given on pages 106 and 107.
Tell the students that Motion blocks control the movement of the sprite on the stage. Also, tell them that a sprite’s X position is its location on the X (horizontal) axis of the stage, and the Y position is where the sprite is on the Y (vertical) axis of the stage. Tell them the uses of some of the Motion blocks, as given on pages 107 and 108.
● Read aloud the questions provided in the Do It Yourself 3A section and encourage the students to solve them. Instruct the students to write the answers in their book.
Do It Yourself 3A
Correct Responses:
1 Match the following.


Moves a sprite ahead by a specified number of steps.
Runs the attached script when the green flag is clicked.
Moves the sprite to any random position.
2 Which block is used to make the ball bounce back when it touches the edge?
● Create a Scratch project where a Butterfly sprite appears randomly on the screen. You can select any backdrop of your choice for your project.
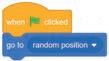
3 mins
● Conclude the session by summarising that an event tells us when an action will happen. The Events blocks tell the computer when to run a script, and the Motion blocks control the movement of the sprite on the stage.
● Assign the following questions from the Chapter Checkup given at the end of the chapter as homework.
A. Fill in the Blanks: Questions 1, 2, 4, and 5
B. Tick the Correct Option: Questions 1, 3, and 5
D. Write T for True and F for False: Questions 1, 4, and 5
E. Answer the Following: Questions 2 and 3
F. Apply Your Learning: Questions 4 and 5
At the end of the session, the students will be able to:
● explain what a loop is.
● explain what Control blocks do.
● make a sprite fall.
● move a sprite.
● duplicate a script.
● fix the rotation style for a sprite.
● duplicate the script of a sprite to another sprite.
Keywords
● Loop: It means doing something over and over again.
● Control blocks: They are used to control the flow of scripts based on a criteria.
Ask the students have you ever played skipping.
Explain to the students what a loop is; tell them about various Control blocks and their uses; demonstrate to them how to write a script to make a sprite fall, move a sprite, duplicate a script, fix the rotation style for a sprite, and duplicate the script of a sprite to another sprite.
● Ask the students have you ever played skipping?
● Now, build the concept by telling them skipping is an example of loop.
Explain the following concepts:
Explain what a loop is. Tell the students that loop means doing something over and over again, as given on page 110.
1 Select the correct code to make the sprite move in the right direction.
Explain what Control blocks do. Tell the students that the Control blocks are used to control the flow of scripts based on criteria. Tell them the uses of some of the Control blocks, as given on page 110.
Make a sprite fall. Describe the steps to make a sprite fall, as given on pages 110 and 111.
Move a sprite. Describe the steps to move a sprite, as given on pages 111 and 112.
Duplicate a script. Describe the steps to duplicate a script, as given on pages 112 and 113.
Fix the rotation style for a sprite. Describe the steps to fix the rotation style for a sprite, as given on page 113.
Duplicate the script of a sprite to another sprite.
Describe the steps to duplicate the script of a sprite to another sprite, as given on pages 113 to 115.
● Read aloud the questions provided in the Do It Yourself 9B section and encourage the students to solve them. Instruct the students to write the answers in their book.
Correct Responses:
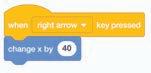

● Conduct a group discussion in the class among students on the topic ‘Real-life examples of Loops’. Possible Responses: Jumping rope, Playing with a Yo-Yo, Building with blocks, Dancing
● Conclude the session by summarising that loops means doing something over and over again. The Control blocks are used to control the flow of scripts based on a criteria and these blocks appear in orange colour. Examples of the Control blocks are repeat(), forever, and wait() seconds.
● Assign the following questions from the Chapter Checkup given at the end of the chapter as homework.
A. Fill in the Blanks: Question 3
B. Tick the Correct Option: Questions 2 and 4
C. Who Am I?: Question 1
D. Write T for True and F for False: Questions 2 and 3
E. Answer the Following: Questions 1, 4, and 5
F. Apply Your Learning: Questions 1, 2, and 3
At the end of the session, the students will be able to:
● create a project.
Ask the students to describe something they do over and over again, like brushing their teeth or walking step by step.
Demonstrate to the students how to create a project using the blocks from the Events, Motion, and Control category.
Attempt the given activity.
Conclude the concepts
● Ask the students to describe something they do over and over again, like brushing their teeth or walking step by step.
● Then relate the concept to how loops help us repeat actions in Scratch using Control blocks.
8 mins
Engage
Explain the following concept:
Learning Outcome
Explanation
Create a project. Discuss a project challenge with the students. Tell them how to use the Events, Motion, and Control blocks to create a project. To make an apple sprite appear randomly and start falling, make a farmer and basket sprites move to the left and right. Make the apple sprite disappear if the falling apple touches the basket, but if the falling apple touches the ground, the apple should break.
Ask the following additional question to the students to check their understanding.
● Why do you think using a loop is better than repeating the same block many times?
Correct Response:
● Loops are better because they make the code shorter, easier to read, and faster to change if we need to repeat an action many times.
● Create a Scratch project to show a falling star from the sky.

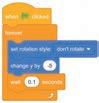
● Conclude the session by summarising that the Events blocks tell the computer when to run a script and the Motion blocks control the movement of the sprite on the stage. The Control blocks are used to control the flow of scripts based on a criteria.
This chapter is divided into the following sessions
At the end of the session, the students will be able to:
● define conditional bocks.
● describe sensing blocks.
● make a sprite disappear on touching another sprite.
Keywords
● Conditional blocks: These are the blocks that help a computer make decisions depending on the condition it checks.
● Sensing blocks: These are the blocks that detect other sprites, colour on the stage, keypress, mouse click, and user input.
Ask the students if they have played any block based games.
Explain the students what conditional and sensing blocks are. Also tell them how to make a sprite disappear on touching another sprite.
the concepts
Assign homework
● Ask the students if they have played any block based games.
● Now, build the concept by describing them about conditional blocks.
Explain the following concepts:
Learning Outcomes
Define conditional bocks.
Describe sensing blocks.
Make a sprite disappear on touching another sprite.
Explanation
Explain to students that conditional blocks are the blocks that help a computer make decisions depending on the condition it checks, as given on pages 123 and 124.
Explain to students that sensing blocks are the blocks that detect other sprites, they also detect the colour on the stage, keypress, mouse click, and the user input, as given on page 124.
Demonstrate the steps to the students on how to make a sprite disappear and then come back from a random place, as given on pages 124 to 126.
● Define conditional blocks.
Possible Response: Conditional blocks are the blocks that help a computer make decisions depending on the condition it checks.
● Name any one sensing block.
Possible Response: touching color
● Conduct a group discussion in the class among students on the topic ‘Sensing blocks’.
Possible Responses: Sensing blocks are the blocks that detect other sprites, colours on stage, keypress, mouse click, and user input.
● Conclude the session by summarising that conditional blocks are the blocks that help a computer make decisions depending on the condition it checks, and sensing blocks are the blocks that detect other sprites, they also detect the colour on the stage, keypress, mouse click, and the user input. Also, discuss the steps on how to make a sprite disappear on touching another sprite.
● Assign the following questions from the Chapter Checkup given at the end of the chapter as homework.
A. Fill in the Blanks: Questions 1, 2, 3, and 4
B. Tick the Correct Option: Questions 1 and 3
D. Write T for True and F for False: Questions 1, 2, 3, 4, and 5
E. Answer the Following: Questions 1, 2, 3, 4, and 5
F. Apply Your Learning: Question 2
At the end of the session, the students will be able to:
● make a sprite disappear on touching a colour.
● change the costume of a sprite.
Ask the students to think of what happens in games when a character touches fire or water and disappears. Explain the students about how to make a sprite disappear on touching a colour and how to change the costume of a sprite. Attempt the given activity.
Conclude the concepts
Assign homework
Ask the students to think of what happens in games when a character touches fire or water and disappears.
Then relate the concept to how Scratch can use colour sensing to create similar effects in a project.
Engage
Explain the following concepts:
Make a sprite disappear on touching a colour.
Change the costume of a sprite.
15 mins
Demonstrate the steps to the students on how to make a sprite disappear on touching a colour, as given on pages 126 to 128.
Demonstrate the steps to the students on how to change the costume of a sprite, as given on pages 128 and 129.
Ask the following additional question to the students to check their understanding.
● If a sprite disappears when touching a colour, what could you change in the game to make it more interesting for the player?
Possible Response:
● We could change its costume instead of just disappearing or make it say something before hiding, to make the game more fun and interactive.
● Read aloud the questions provided in the Do It Yourself 10A section and encourage students to solve them. Instruct them to write the answers in their book.
Correct Responses:

Build
7 mins
● Create a Scratch project where you can make a sprite (like a character) change costume when it touches a specific coloured object (like a magic door), and disappear after entering it.

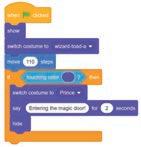
3 mins
● Conclude the session by summarising the steps to make a sprite disappear on touching a colour. Also, discuss the steps to change the costume of a sprite.
● Assign the following questions from the Chapter Checkup given at the end of the chapter as homework.
B. Tick the Correct Option: Questions 2, 4, and 5
C. Who Am I?: Question 1
F. Apply Your Learning: Questions 1, 3, 4, and 5
Chapter Checkup
A. Fill in the Blanks.
1. Abacus 2. ENIAC 3. Vacuum Tubes 4. Integrated Circuits 5. Artificial Intelligence
B. Tick () the Correct Option.
1. a. Magnetic core memory 2. b. Third generation 3. a. Python 4. a. Charles Babbage 5. d. Multitasking
C. Who Am I?
1. Charles Babbage 2. First generation 3. Pascaline 4. Leibniz 5. ENIAC
D. Write T for True and F for False.
1. T 2. T 3. T 4. T 5. F
E. Answer the Following.
1. The abacus is one of the earliest counting devices. It was a wooden frame divided into two parts. Both the parts have rods on which the beads move and are used for basic mathematical calculations.
2. Pascaline is the first mechanical and automatic calculator. It is also called the Arithmetic Machine or Adding Machine. It was invented between 1642 and 1644 by Blaise Pascal, a French mathematician and philosopher. It can perform only addition and subtraction.
3. Fifth generation computers use Artificial Intelligence (AI) and Machine Learning (ML) as their main technologies.
4. Characteristics of computers are speed, accuracy, storage, automatic operation, multitasking, and communication.
5. Some of the key limitations of computers are:
a. Computers cannot think like humans.
b. Maintenance cost
c. Lack of emotional intelligence
F. Apply Your Learning.
1. Abacus and Pascaline 2. Napier’s Bones 3. Charles Babbage, Abacus 4. Memory 5. Multitasking
Chapter-2 Software and Its Types
Chapter Checkup
A. Fill in the Blanks.
1. System 2. Spreadsheet 3. assembler 4. Compression 5. operating system
B. Tick () the Correct Option.
1. c. Microsoft Excel 2. a. Compiler 3. c. Backup 4. b. Operating System 5. a. Utility Software
C. Write T for True and F for False.
1. T 2. T 3. T 4. F 5. F
D. Answer the Following.
1. The two functions of operating system are:
● An operating system manages everything on the computer. This program makes sure that all the games, apps, programs, applications, and files work together.
● It allocates and deallocates memory space to running processes, ensuring efficient use of RAM.
Interpreters work sequentially, reading one line of source code of a high-level programming language at a time to convert it into machine code or an intermediate code.
If an interpreter finds a mistake, it stops, and when you fix the mistake, it moves on to the next part of the program, repeating the same process.
A compiler takes the entire source code of a high-level programming language and translates it into machine code or an intermediate code in a single step.
A compiler generates the object code for the program along with the list of errors. The code cannot be executed until these errors are fixed.
3. Backup software is used to create duplicates of important files and data stored on a computer. These duplicate copies, known as backups, are typically stored in secure locations, such as cloud storage or external hard drives. Backup is created to safeguard your data against potential loss resulting from hardware failures, human errors, or other unforeseen circumstances.
4. Application software is a type of computer software designed to perform specific tasks, such as word processing, creating presentations, web browsing, email communication, doing calculations, and editing images. There are two types of application software: general purpose application software and special purpose application software. Some examples of application software are Google Docs, Google Sheets, Google Slides, library management system, hotel management system, etc.
5. Computers can only understand and execute programs written in machine language, which consists of binary code made up of strings of 0’s and 1’s. A language processor is used for translating high-level programming languages, which are human-readable and easier for programmers to work with, into machine language. Without language processors, programmers would have to build applications directly in the machine code, which is difficult and prone to mistakes.
E. Apply Your Learning.
1. Surbhi can use the Microsoft PowerPoint to give a presentation in the school auditorium.
2. The reason behind slow file transfer speed can be the size of the file. He can resolve slow file transfer by compressing files, thereby decreasing the number of bits and bytes required to represent information in a file.
3. Swati should use spreadsheet software, such as Microsoft Excel, Google Sheets, etc. to perform calculations and analyse data using graphs and charts.
4. Maira can backup her data on cloud storage or external hard drives to avoid hardware failure in the future.
Chapter Checkup
A. Fill in the Blanks.
1. ISP 2. modem 3. WWW 4. Ransomware 5. shouting
B. Tick () the Correct Option.
1. d. Internet Service Provider
2. c. Various applications, resources, and functionalities available on the internet to users.
3. c. Trojan Horse
4. c. YouTube
5. c. Cyberbullying
C. Who Am I?
1. Network cable 2. File sharing 3. Wireless 4. Social media 5. Worm
D. Write T for True and F for False.
1. F 2. T 3. T 4. F 5. T
E. Answer the Following.
1. The internet is a huge network of millions of computers connected worldwide. It allows communication and sharing of information.
2. Internet services refer to the various applications, resources, and functionalities available to users on the internet. We use internet services for communication, information access, entertainment, education, commerce, work, and socialising.
3. Privacy invasion means doing things that break the rules and make people feel uncomfortable or unsafe when they use the internet. This can include accessing someone’s private information, watching what they do online without their permission, or sharing their personal data without asking.
4. We should never give our full name, address, phone number, or any other personal details online.
5. Cyberbullying happens when people use social media platforms to be mean and hurtful to others. This can make people feel sad and scared.
F. Apply Your Learning.
1. Shree can use online shopping.
2. Raj should be more careful before posting pictures, videos, or messages.
3. Archi can use maps and navigation services to look at the directions.
4. Aanchal is using a search engine to search for the information.
5. Typing in capital letters is considered as shouting while chatting online.
Chapter Checkup
A. Fill in the Blanks.
1. line & paragraph spacing 2. hyperlink 3. Alignment 4. Left indent 5. Tab
B. Tick () the Correct Option.
1. c. Three 2. d. Triple 3. a. Easy to read 4. d. All of the above 5. a. Three
C. Who Am I?
1. Right Align 2. Hyperlink 3. Left Align 4. Center Tab Stop 5. Line Spacing
D. Write T for True and F for False.
1. F 2. T 3. T 4. T 5. F
E. Answer the Following.
1. A hyperlink is a link to a web address.
2. Left Tab Stop—Left aligns text at the tab stop. Center Tab Stop—Centres text at the tab stop. Right Tab Stop—Right aligns text at the tap stop.
3. Indentation is used to structure the content of a document to make it easier for readers to identify paragraphs.
4. Line spacing is the vertical space between the lines of a text in a document.
5. Center Align—It places the selected text at an equal distance from both the left and right margins. Justify—It distributes the selected text evenly between the left and the right margins.
F. Apply Your Learning.
1. To add a hyperlink in the Google Docs, she needs to:
● Select the text for which you want to make a hyperlink.
● Click the Insert menu, and then select the Link option.
● The text you selected will now be a hyperlink.
2. I will suggest using line and paragraph spacing.
3. Nancy should apply the Justify alignment to the document.
4. Agniv can apply the proper text alignment and indentation to make his document visually appealing.
Chapter Checkup
A. Fill in the Blanks.
1. Drawing 2. resizing 3. text box 4. shapes 5. Save and Close
B. Tick () the Correct Option.
1. c. Creating visual content like diagrams and charts
2. b. Text box
3. a. Click Insert > Drawing > New
4. d. Insert
5. b. Hide behind
C. Write T for True and F for False.
1. F 2. T 3. T 4. F 5. F
D. Answer the Following.
1. The drawing tool is used to create and insert basic shapes, texts and images in your document. It is used to create flowcharts, diagrams, concept maps, visual storyboards, original art, etc.
2. Steps to add a text box to the Google Docs:
i. Select Insert ➔ Drawing ➔ New.
ii. In the Drawing toolbar, click the Text box icon.
iii. Click and drag the icon in the document to create a new text box.
3. The purpose of the shape tool is to create diagrams and other visual aids. Steps to add text to a shape:
i. Double-click the shape in the Drawing dialog box. A text box appears.
ii. Type your text in the text box.
iii. When you stop typing, click outside the text box. The text is added to the shape.
4. Two tools of the drawing toolbar that can be used to format a text box are Border color and Fill color.
5. The ‘By URL’ method helps to insert an image by copying the link or the URL of an image and pasting the URL in the bar. If the URL is correct, you will see an image preview. You can then click the Select button to insert the image in the drawing canvas.
E. Apply Your Learning.
1. The tool on the drawing toolbar that Amita can use to create callouts is the Shape tool.
2. Vansh can use the Google Docs online platform as a drawing tool to draw a diagram for his school project.
3. Shaurya can use the Fill color option to fill colour in the shapes.
Chapter Checkup
A. Fill in the Blanks.
1. Menu 2. Themes 3. Layout 4. Columns 5. Master
B. Tick () the Correct Option.
1. c. Speaker notes. 2. a. To change the design of the presentation. 3. b. Slide. 4. b. Displaying information neatly in rows and columns. 5. a. Bar Chart.
C. Who Am I?
1. Presenter Mode 2. Themes Pane 3. Insert menu 4. Diagrams 5. Line Chart
D. Write T for True and F for False.
1. F 2. F 3. F 4. F 5. F
E. Answer the Following.
1. Three Presentation applications are: Canva, Power Point, Google Slides.
2. It is a place where you can see thumbnails or miniature images of all the slides of your presentation.
3. Themes are like special design layouts for your slides. They make the presentation look colourful and interesting, just like wearing different clothes for different occasions whereas layouts determine how your content, such as titles, text, and images are organised on your slide.
4. The edit theme option is present in the Slide menu.
5. A pie chart represents data using ‘Slices’ of a whole circle. The size of each ‘slice’ shows how much value that specific ‘slice’ holds.
F. Apply Your Learning.
1. To make her presentation on her favourite book look good, Shaina can use features like different themes, background colours, fonts and add relevant images or icons.
2. Himank should use the “Table” feature in the Google Slides to organise the information about animals’ names, habitats and diets in rows and columns.
3. Vamika can use the “Presenter Mode” in the Google Slides to showcase pictures of various sports in fullscreen mode during her school’s annual sports day.
4. Komal should use the “Master Slide” or “Slide Master” option to ensure that a specific image, such as a planet, appears consistently on all the slides in her presentation on the solar system.
5. Saharsh can use the “Slide Sorter” feature in the Google Slides to change the order in which the slides were arranged for his presentation on famous monuments around the world.
Chapter Checkup
A. Fill in the Blanks.
1. Coding 2. Blocks Palette 3. Stage 4. Sprites Pane 5. Stop
B. Tick () the Correct Option.
1. d. All of these 2. a. Open the Sound editor 3. a. Coding Area 4. b. run the script
5. d. All of these
C. Who Am I?
Sprites Pane
Backdrop Pane
Component
Purpose
Holds nine categories of blocks
Shows backdrops and sprites in action
Blocks Panel Shows the details of sprites
Blocks Palette Adds backgrounds
Stage Holds all blocks of each block category
D. Write T for True and F for False.
1. F 2. T 3. F 4. T 5. T
E. Answer the Following.
1. Block-based coding is a computer language where we use colourful coding blocks to make computers do a task.
2. Scratch 3.0 is a free and simple platform where we use colourful blocks to create our own games, stories, and arts.
3. The Code tab has different code blocks and the Coding Area, where we can drag and join the blocks to make the sprite move and do things.
4. The Add Extensions button provides additional blocks that can be integrated into the Scratch editor’s block palette, expanding its functionality.
5. The green flag is the Go button. You can click on it to run the script. The red button is the Stop button. You can click on it to stop the script from running.
F. Apply Your Learning.
1. She can start with block-based coding like Scratch 3.0. It is a free and simple platform where we use colourful blocks to create our own games, stories, and art.
2. Sprite
3. Blocks Panel
4. Change costumes
5. Backdrop
Chapter Checkup
A. Fill in the Blanks.
1. Sprite 2. Sprite Library 3. Costume 4. Upload Backdrop 5. Choose a Costume
B. Tick () the Correct Option.
1. c. Upload Sprite 2. c. Costumes 3. c. Duplicate 4. c. 5. c. Add sprite
C. Who Am I?

1. Backdrop 2. Delete 3. Duplicate 4. Costume 5. Upload Backdrop
D. Write T for True and F for False.
1. T 2. F 3. F 4. T 5. T
E. Answer the Following.
1. In Scratch, sprite is a character that can act. Ways to add a sprite to a project are:
● Choose a Sprite
● Paint
● Surprise
● Upload Sprite
2. Backdrop Pane is used to add background to our project.
3. Cat sprite is the default sprite in Scratch. Before adding the sprites to our project, we need to remove the Cat sprite. Steps to remove the Cat sprite are:
● Select the thumbnail of the Cat sprite from the Sprite List.
● Delete icon will appear.
● Click the delete icon to delete the sprite.
4. A costume is the appearance of a sprite.
Steps to add costume to a sprite:
● Select a sprite.
● Click the Costumes tab.
● On the left, you will see the Costumes Pane.
● At the bottom of the Costumes Pane, we have the option to add costumes to a sprite.
5. Steps to duplicate costume of a Sprite:
● Select the sprite in the Sprites List.
● Click the Costumes tab.
● Right-click the sprite in the Costumes Pane
● Click the duplicate option.
F. Apply Your Learning.
1. a. Delete b. Backdrop Pane
2. Steps to make copies of a sprite:
● Select the sprite.
● Click the Costumes tab.
● Right-click the sprite in the Costumes Pane.
● Click the duplicate option.
3. ● Upload Backdrop
● Paint
● Choose a Backdrop
4. Costumes tab
5. Steps to upload a sprite:
● Click the Upload Sprite option. An Open dialog box appears.
● Look for the picture of the sprite in the Downloads folder and select it.
● Click the Open button.
● Set the Size of the sprite.
● Repeat steps 1 to 4 to upload and resize the other two sprites.
Chapter Checkup
A. Fill in the Blanks.
1. go to random position
2. rotation
3. repeat
4. blue
5. Event
B. Tick () the Correct Option.
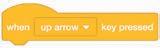


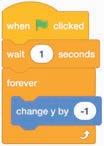


D. Write T for True and F for False.
1. T 2. T 3. F 4. T 5. T
E. Answer the Following.
Moves the sprite to forward or backwards with a positive or negative value, respectively.
Moves the sprite to upwards or downwards with a positive or negative value, respectively.
Pauses the script for specified seconds.
1. In Scratch, the repeat blocks help us to control the actions of a sprite as many number of times as we want.
2. a. “change x by 100” moves the sprite forward by 100 steps.
b. “change y by -100” moves the sprite downwards by 100 steps.
3. In Scratch, Events blocks tell the computer when to run a script.
4. The sprite will move forward by 10 steps on pressing the spacebar key.
5. Repeat: A loop that repeats for the specified number of times.
Forever: Runs the given set of blocks forever until the Stop button is pressed.
F. Apply Your Learning.
1.

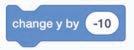
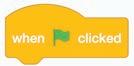
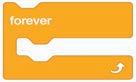
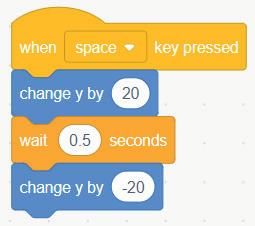
3. The sprite will move upwards by 2 steps.
4. Here, the rotation style of the sprite is incorrectly set to “all around”. The rotation style of the sprite must be set to “left-right”.
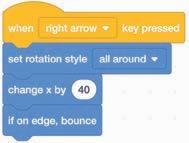
5. The Penguin sprites are moving along x-axis because they are going right.
Chapter Checkup
A. Fill in the Blanks.
1. condition 2. if…then, if…then…else 3. sprites 4. blue
B. Tick () the Correct Option.
1. b. Sensing blocks
2. c. It should disappear
3. d.

4. d. It changes costume
5. c. To change its appearance


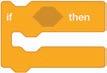

D. Write T for True and F for False.
1. T 2. T 3. T 4. F 5. T
E. Answer the Following.
Activates the blocks below it when a sprite touches the specified colour.
Checks the condition and if the condition is true, the blocks inside it will be activated.
Shows the input box at the bottom of the screen to receive an answer from the user.
Activates the blocks below it when a sprite touches the specified object.
1. In Scratch, Sensing blocks are blocks that are used to detect when two characters touch each other. They are important as they detect other sprites, colours on stage, key press, mouse click, and user input.
2. Conditional blocks are blocks that help a computer make decisions depending on the condition it checks. In Scratch, we have two conditional blocks: if…then and if…then…else
3. We can use Sensing blocks in Scratch to make a character react.
4. The answer block stores the answer that was entered in the input box.
5. This block checks the condition and then lets the blocks inside the if block perform the operation. Otherwise, the blocks inside the else block will perform the operation.
F. Apply Your Learning.
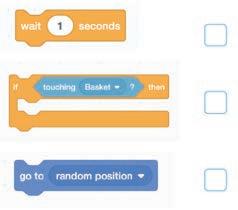
2. This block checks the if then block, if it is raining outside then you need to take your umbrella.
3. When the sprite will touch the given colour, the go to random position block will activate and it will make the sprite go to a random position that can be anywhere on the stage.
4. The switch costume to block will change the costume of Balloon 1 to Balloon 2 when the green flag is clicked. Since balloon 2 costume is yellow in colour, the balloon’s appearance will change from blue to yellow.
5. The “switch costume to” block will change the costume of the sprite to “watermelon-c” when it touches the given colour.
A. Fill in the Blanks.
1. Pascaline 2. Web browser 3. Operating System 4. Paragraph
B. Tick () the Correct Option.
1. d. Napier’s Bones 2. b. Cellular 3. b. Software 4. c. Alignment
C. Write T for True and F for False.
1. F 2. T 3. F 4. F
D. Answer the Following Questions.
1. Bring Forward option moves the text box or shape one level forward in the order of objects. Whereas, send backward option moves the text box or shape one level backward in the order of objects.
2. A virus is a small program designed to damage your computer by gaining access to it. A virus can copy your personal data or slow down your computer. Whereas, a computer worm is a stand-alone malware computer program that replicates itself in order to spread to other computers.
3. General-purpose application software is made to carry out several jobs and activities on a computer. This software can be used for many tasks and is not restricted to a single one. Word processors, spreadsheets, and presentation software are a few examples of general-purpose application software.
4. Indentation is the process of setting the beginning of a line of text slightly to the right of the left margin. You can also move a complete paragraph to a specific position using indentation options. Indentation helps structure the content of a document to make it easier for readers to identify paragraphs.
E. Apply Your Learning.
1. Arushi is using voice command, which is possible in the Fifth Generation of computers.
2. Neetu’s mother can use these apps to watch films:
YouTube
Netflix
Amazon Prime Video
Disney+ Hotstar
3. Lovey can insert images in Google Docs by clicking on Insert in the menu bar, then selecting Image, and choosing from options like Upload from computer, Search the web, or Drive.
A. Fill in the Blanks.
1. Themes 2. Green Flag/Go 3. Action 4. Sensing
B. Tick () the Correct Option.
1. b. Layouts 2. a. Coding area 3. c. Motion 4. b. Costume
C. Write T for True and F for False.
1. T 2. F 3. T 4. T
D. Answer the Following Questions.
1. The Master Slide is like the main slide. It allows you to change the appearance of your entire presentation all at once.
2. The Sprites Pane is below the stage. It shows all the details of sprites, like their name, location, and size. You can use it to add, upload, edit, or delete sprites.
3. Conditional blocks are blocks that help a computer make decisions depending on the condition it checks.
4. Sensing blocks are used to detect when two characters touch each other.
E. Apply Your Learning.
1. The Block Panel has nine colour-coded block categories to help us create scripts. These are Motion, Looks, Sound, Events, Control, Sensing, Operators, Variables, and My Blocks. Whereas, the Blocks Palette is the area where we can see all the blocks for each block category.
2. Raj should use the “Upload Backdrop” option to add a backdrop saved on his computer to his Scratch project.
Uolo has introduced a comprehensive program, Hexa, for Grades 1 to 8, aimed at empowering young minds with essential knowledge and skills for the digital age.
To support the effective implementation of Hexa in classrooms, this Teacher Manual has been thoughtfully designed. It provides structured lesson plans for each chapter, guiding teachers through both classroom instruction and computer lab activities. Every lesson follows Uolo’s research-based WEBS framework, which simplifies teaching methodologies and enhances lesson delivery, making learning more engaging and impactful for students.
• Sharp Lesson Planning: Each lesson plan focuses on specific sub-learning outcomes within a chapter and are designed for delivery within the stipulated class or lab time.
• Real-life and Application-based Questions: Additional questions that link Computer Science to real-life contexts and assist teachers to develop learners' conceptual understanding and application skills.
• Support and Detailed Solutions: In-depth solutions for in-class and post-class activities to reinforce learning.
Uolo partners with K-12 schools to bring technology-based learning programs. We believe pedagogy and technology must come together to deliver scalable learning experiences that generate measurable outcomes. Uolo is trusted by over 15,000+ schools across India, South East Asia, and the Middle East.
ISBN 978-81-985754-8-7