2 minute read
Exporting and Post Production

by TD Garden

Welcome to the final stage of the process to create a stunning Lumion architectural visualization. The final step is exporting the 3D scene built in Lumion to a format that can be easily shared with the whole world. As seen in the previous two chapters, there are two ways you can present your work: by using a still image or by creating an animation.
However, how can you export these formats? What is the best way to do it? And can you enhance the look of the final output? To help you with these final steps, this chapter was prepared to tackle some of the best techniques and the following list gives you a fair idea of what we will be covering:
Advertisement
• Optimizing before rendering
• Different file format options
• Using the Movie mode to produce still images
• Rendering with the Movie mode
• Exporting movies versus clips
• Rendering an image sequence
• What are render passes
• How to use render passes–SkyAlpha, Material ID, SpecularReflection, and Depthmap
• Using the Lumion viewer
Where do we start? Well, let's start by taking a good look at how you can decrease the render time, in particular when exporting movies.
Optimizing before rendering
Now that you know how to render a movie and a still image, it is time to export your scene. Exporting a still image may take a couple seconds but when working with movies you may start to worry and in some situations, panic. The reason for this is because you don't have one still image to render; you have 15000 frames (a 10 minute movie with 25fps), and if each frame takes 1 minute to render that means you need 250 hours to render 10 minutes.
First of all, keep in mind that the graphics card makes all the difference, and there is nothing in this world that will make the render go faster. However, you can help by making smart choices. Let's start with the first:
• Global Illumination effect: This effect takes a toll on the render time. Personally, I have seen render times cut by half when this effect is removed. The solution for not using this effect is a good use of the fill light and you will probably need a couple of these lights with a low intensity in your scene.
• Lights: Do you really need your lights to have the Accuracy option selected? Do you think you could use Speed instead? Changing this simple option can make a big impact on the time render, in particular if you have several lights present.
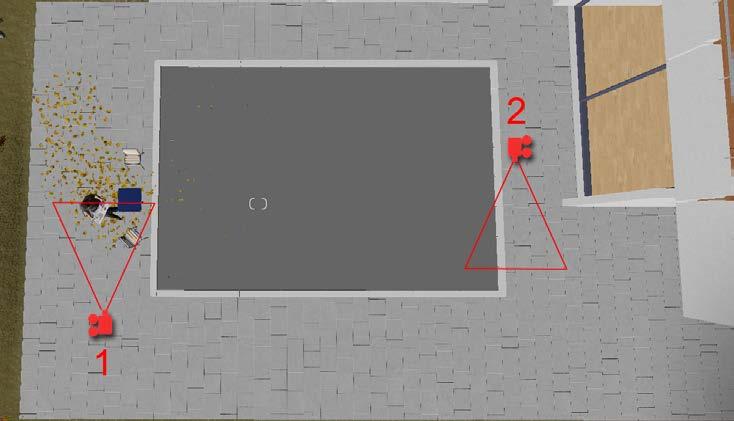
• Reflection effect: This is perhaps the second primary effect that makes the scene really, really slow. Each reflection plane mirrors the entire scene and if you have more than one maybe you should consider using the reflection control ball.
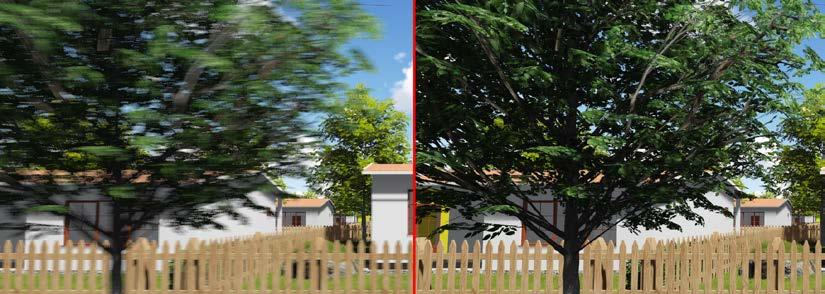
• Shadow and Clouds quality: Starting with the Shadow effect, see if the HQ Soft Shadow makes a big difference in the final quality, and perhaps you will have to reduce the Final Render Sun Shadow Detail from Super to High or even to Normal. Regarding the Clouds effect, you may want to turn off the HQ clouds in movie render option.
And some final advice, always restart Lumion before rendering a movie. Next, we will see what is available to export the scene you have built in Lumion.