6 minute read
Animation Techniques in Lumion

by TD Garden
The true power of Lumion lies in its ability to produce videos easily. You may notice that there aren't any tools in the Build mode to create animations, even when you place some 3D animated models on your scene. All the magic happens inside the Movie mode, where you can find the tools to bring your scene to life.
However, in spite of all the aid Lumion provides to create animations, you still need to learn the best practices for creating animations inside Lumion and importing your own animations. With this in mind, the following list of topics will be covered in this chapter:
Advertisement
• Planning your scene
• Tips to export animations
• Using a storyboard
• A quick overview of Lumion's Movie mode
• How to import and control animations
• The Move effect
• The Advanced move effect
• The Mass move effect
With all of these topics in mind, let's start with the most important stage before animation, which is planning.
Planning your scene
You probably noticed that, over and over, the subject of planning is brought up before we start any actual work. The reason is that planning is the most important stage before you start actually doing anything.
The same is true when working with animations and there are a few important aspects that need your consideration in order for you to easily create a video.
Tips to export animations
Starting with animations you import, you need to keep in mind the following list when planning and creating animations using Maya, Blender, or any other 3D software:
• It is only possible to import animations made with the move, scale, and rotate parameters. This means that is not possible to import Vertex, Morph, or Bone animations in Lumion.
• When creating an animation, you need to set your frame rate to 25 frames per second or PAL.
• Export the object with the animation using the FBX file format.
• You can export the animation with the COLLADA file format, but the interpolation between the key frames will be linear.
Keeping these guidelines in mind will help create animations that can be used in Lumion and helps to avoid some issues, such as converting an animation from 30fps to 25fps. However, what about creating animations in Lumion? What points would be good to keep in mind?
Using a simple storyboard
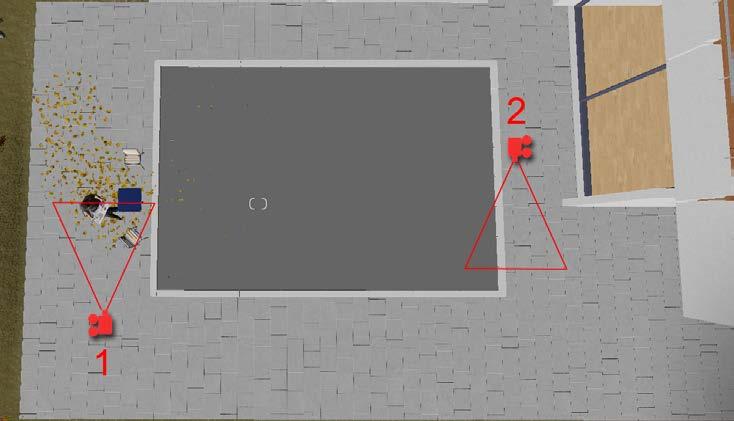
What is a storyboard? It is a graphic representation of the camera path through the scene. A storyboard for a small project doesn't need to be something very complex. But what is the point of using a storyboard? In the beginning, it may sound like an extra step but, in reality, the storyboard can help you with the following:
• Being on the same page with your client: It is really easy to create misconceptions and after all the hard work, the client may simply say: "This is not what I had in mind". On the other hand, it can help to share the vision you have for the video.
• Saving time and money: With a storyboard, you can plan what you need, when you need, and how things will be laid out.
Although a storyboard can be something very simple, the truth is that the more information you, add the easier it will be while creating the animation. You can add things like where the cameras will be, what you will be filming, how the elements are composed within the frame, and in some situations, you can even define the mood and colors to be used. Consider how something that will perhaps take a couple of hours can save you days of trial and error.
This chapter is dedicated to animations in Lumion and not to camera animation. That is something we will cover later in this book. For now, let's see where we can create these animations.
A quick overview of Lumion's Movie mode
With your experience using Lumion, knowing where the Movie mode is located certainly is not a difficult task. In Lumion, a movie or video is divided into smaller sections called clips. The following screenshot gives you a good idea of how to create a clip in Lumion:
Animation Techniques in Lumion
The clips you create are the base for the animations you are filming, and you will notice this when creating and tweaking the animations. Of course, it is possible to change the clip's length but it is always a good idea to have the length established from the beginning.
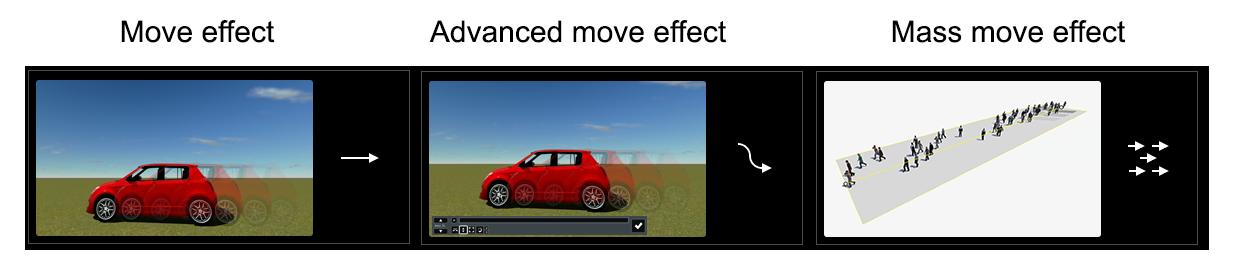
What effects are needed in order to create animations in Lumion? In the Movie effect library there is a tab called Objects, where you can find these effects.
We are going to cover all three of these effects in this chapter but before we jump to that section, let's see how to import animations in Lumion and control them using clips.
How to import animations
An animation is attached to the 3D model that you export. Let's consider that you want to animate a car going from point A to point B in 30 seconds. Keeping in mind what you learned in the section Tips to export animations, you exported the 3D model using an FBX file format. So far so good, but now you need to import that into Lumion. How? The same way you import another 3D model, with the difference that you need to tick the Import animations box (as shown in the following screenshot) so that Lumion imports the animation.
Nonetheless, after placing the 3D model you can see that the model keeps moving in a loop, which can be annoying when you have multiple imported animations. In the Build mode, there is nothing you can do to stop this loop from happening, but you can place all the imported animations inside a layer and then hide that layer. But how can you control an imported animation if they keep playing in a loop?
Controlling imported animations
As mentioned, there is nothing we can do while working in Build mode, but don't panic because it is possible to control or at least use an imported animation.
A word of caution: the process, although not complex, involves good planning and use of layers to hide and show animations.
In order to work with imported animations, there is one essential question you need to answer: how long is the animation?
This is information you really need. Why? Let's say the imported animation is in total 8 seconds or 200 frames. It is imperative that the clip you create is only 8 seconds long. Why? Because if the clip isn't 8 seconds long and the object is still on frame, you will see the 3D model going back to the original position and repeating the same animation.
Simple animations with the Move effect
The video you produce depends on what the client wants but, usually, the movie you create will be something simple with some tracking shots of a few seconds.
It will make your life easier if you create short clips instead of having massive clips. It's a more flexible approach and makes editing the movie a lot easier.
Animation Techniques in Lumion
What are a few things you need to animate? People walking or swimming and definitely some cars moving around. When you need to animate a 3D model going from point A to point B in a straight line, the best tool to use is the Move effect. How does it work and what is the best way to use this effect? The principle behind the Move effect is very simple, as you can see from the following screenshot:
After adding this effect to the clip in question, you need to specify where the start and end positions are. However, there are a few things to keep in mind:

• You have to use the Move effect to animate all the objects in the scene. There isn't any option to apply the Move effect to individual 3D models.
• When defining a new path for another 3D model, don't forget to always press the Start Position button first. This will help to keep consistency during the workflow and will help to understand in which location all the 3D models start their path.
• If the path is too short, once the 3D model reaches the end of it, it will turn back and start walking. Play the animation more than once to make sure the path is long enough.
• Do a render with a low resolution. You will always find mistakes even after checking everything on the viewport.
As you can see, the Move effect is great and perfect for simple animations. However, if you need to animate a person walking around the corner, the Move effect is not suitable. You need the Advanced move effect.