
Design at Sunshine
Separating Sunshine From
The Rest
Since 2020, we’ve used design and engineering to set ourselves apart from other garden centres; showcasing our communityforwardness and welcoming nature by using exciting and slick design to help guide our customers through the shop and create an inviting environment. Previous designers have included:
Thomas Black Isobel Slater
Irene Liakhovenko
Software we use
Mixture of Adobe Creative Suite and others
A lot of the work is produced on the Adobe Creative Suite, as well as a couple of other web-based software. For a lot of the physical work, we use Photoshop as it’s pretty accessible for both beginners and more experienced designers. However, it’s encouraged to give Illustrator and InDesign a try as you can achieve more interesting and typographically exciting outcomes.
Photoshop
Multipurpose software allowing for illustration and typographic work, as well as editing photographs. Files and objects placed in a .psd document are rasterised (info turned into pixels) so the quality, if not adjusted, can end up grainy
Difficulty: Easy to pick up with ability to learn more from tutorials
Physical Work
InDesign
A publishing software suitable for creating readable documents and publications that can be distributed digitally and physically. Ideal for typographic designs and creating layouts.
Difficulty: Medium; some time needed to effectively use
Digital Work

Mailjet
A cloud-based email delivery and tracking system which allows users to send marketing emails and transactional emails. Easy to pick up with drag-and-drop user interface.
Difficulty: Easy to pick up with ability to learn more from tutorials

Illustrator
Difficulty: Medium-hard; worth looking through tutorials

Issuu
The company’s software converts PDFs into customizable digital publications that can be shared via links or embedded into websites. Simple drag-and-drop mechanism with ability to link pages to external sources.
Difficulty: Easy to pick up with ability to learn more from tutorials
A designing software that specialises in typographic work and illustrations. Unlike Photoshop, Illustrator uses Vectors (Info turned into mathematic shapes) so you can scale objects and type without losing quality. Ideal for artworking. Wordpress a web content management system. It was originally created as a tool to publish blogs but has evolved to support publishing other web content, including more traditional websites Used at Sunshine for the official website and to upload the newsletter onto the app.
Difficulty: Easy to pick up with ability to learn more from tutorials
Sunshine Typography
Readable and friendly
Founders Grotesk was influenced by classic grotesques from the early twentieth century.
Typography can be used for creative flare surrounding infrequent campaigns and seasonal display but Founders Grotesk to be used for pricing, wayfinding and all reacurring POS and formal publication.
Founders Grotesk Bold Titles and Headings
Prices, consistent sign and rounded without pennies (.00) unless stated otherwise
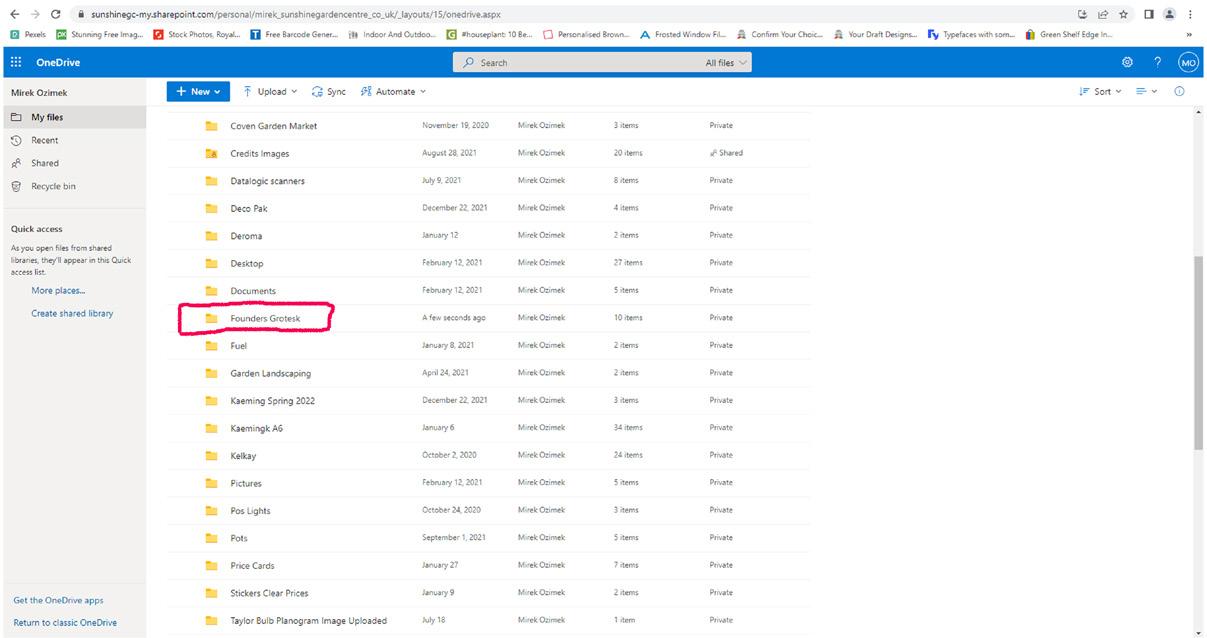
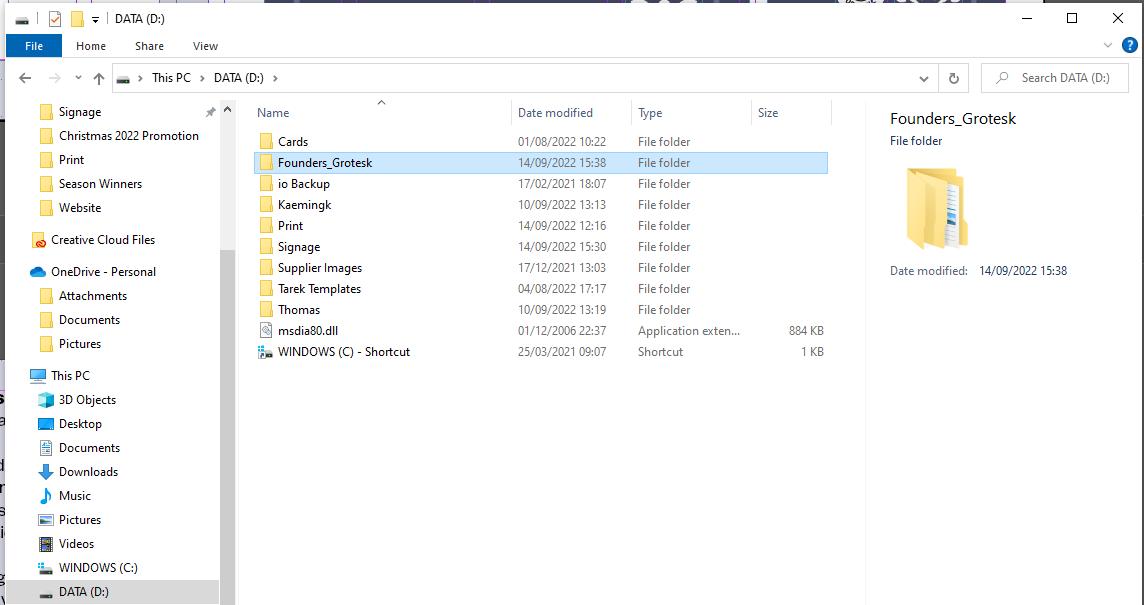
Founders Grotesk Regular Body Copy Founders Grotesk can be found on Mirek’s OneDrive and in media D Drive
Fence
C78 M70 Y37 K21
Plants
New in this week
Generic Nursery point-of-sale (POS)
Sharp border corners, no rounding which is sometimes auto added in Photoshop
Equal spacing of border from edge
Left justified text
All text except Title in white
Grey
M51 Y24 K2
Sunshine Logo
Sunshine emblem to sit bottom right always. (Top right exclusively if products will obscure the emblem)
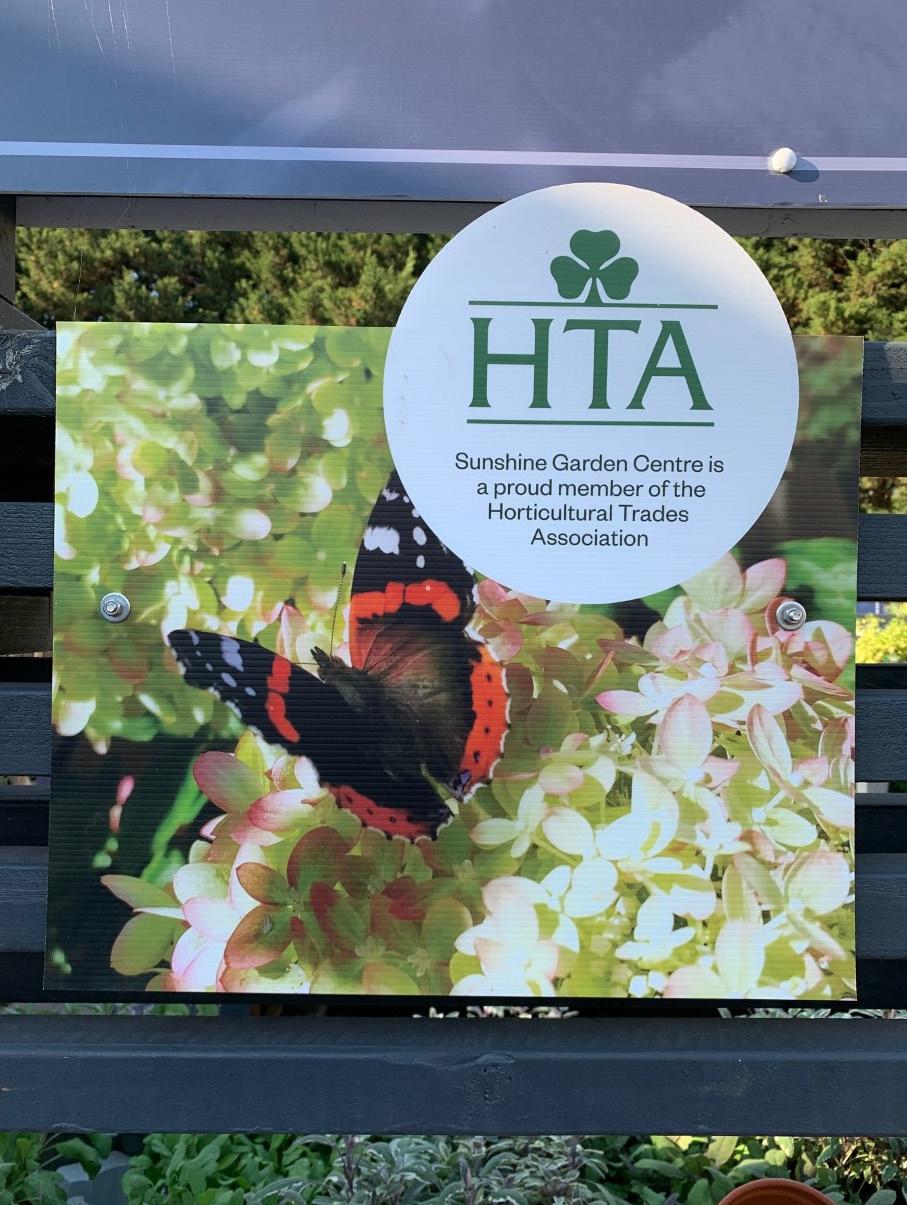
Extra logos to sit left of Sunshine emblem

C0 M44 Y100 K0
Garden
#474c6a
Pot
#737998
C60
Morning Sun
#ffa00a

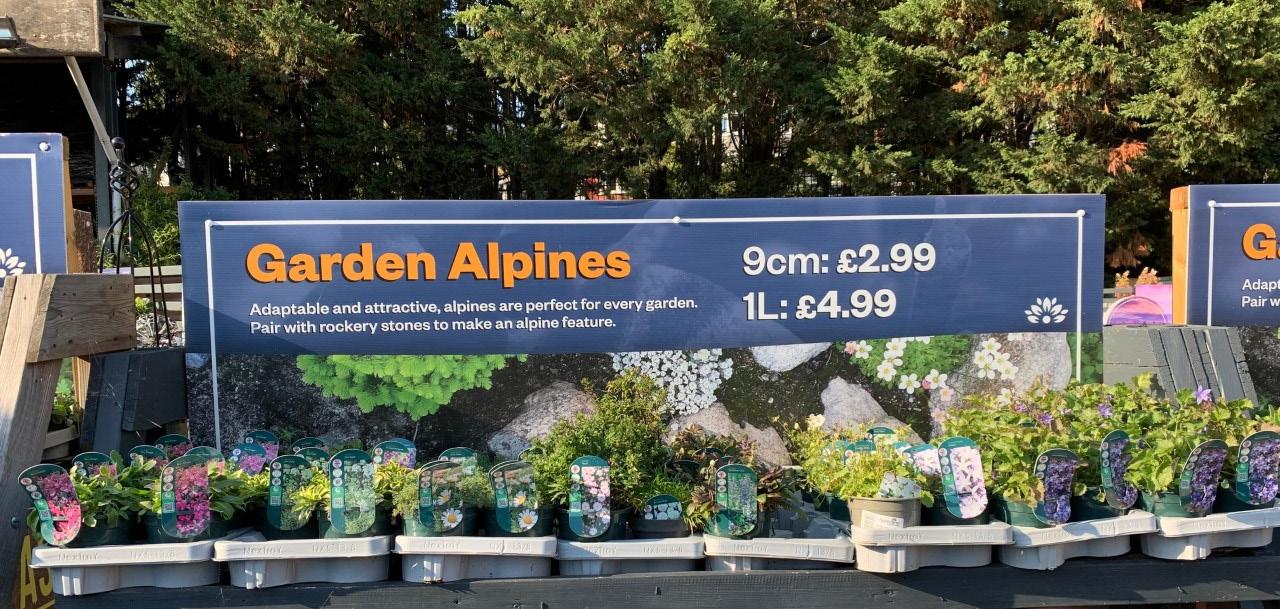
Plant Area POS
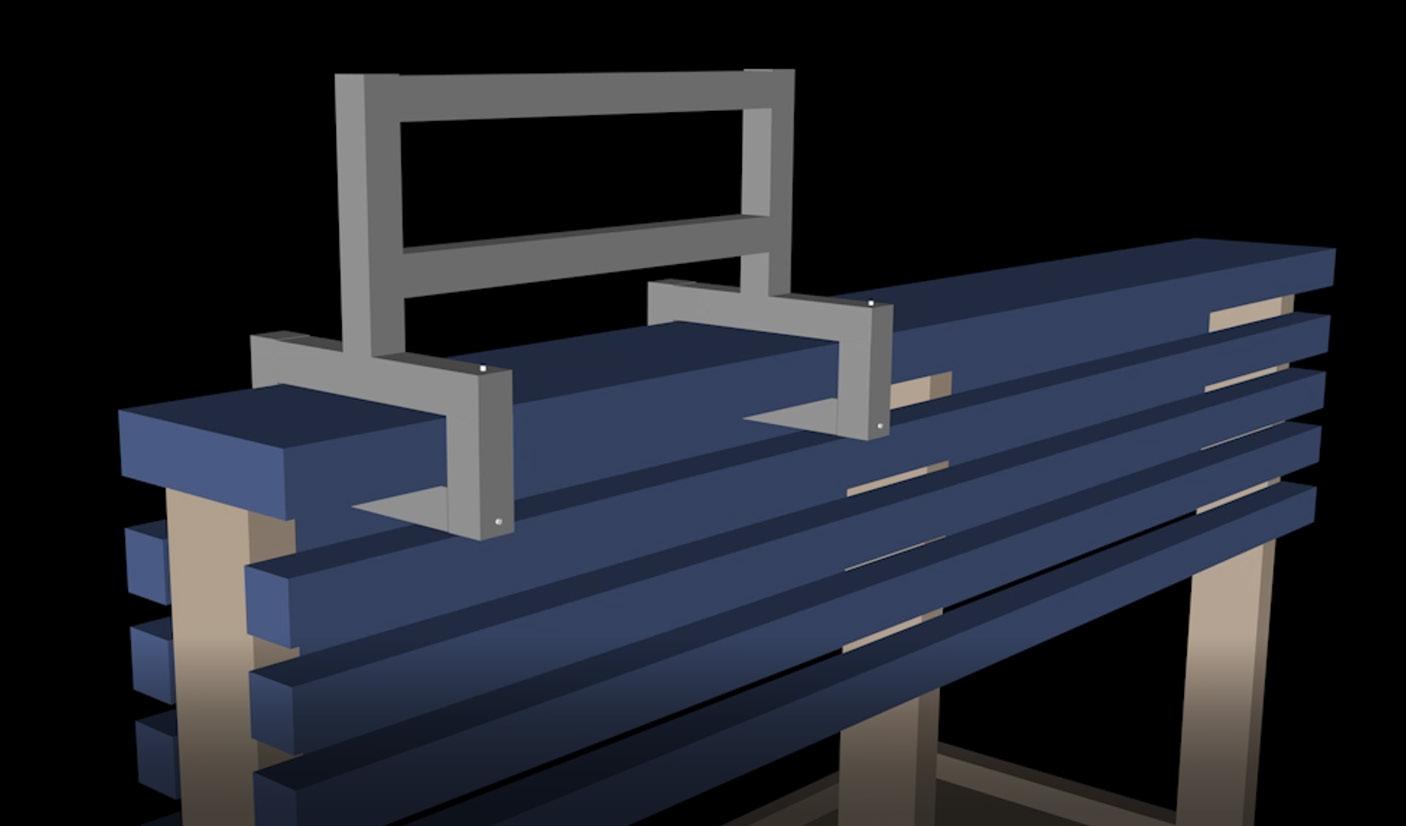
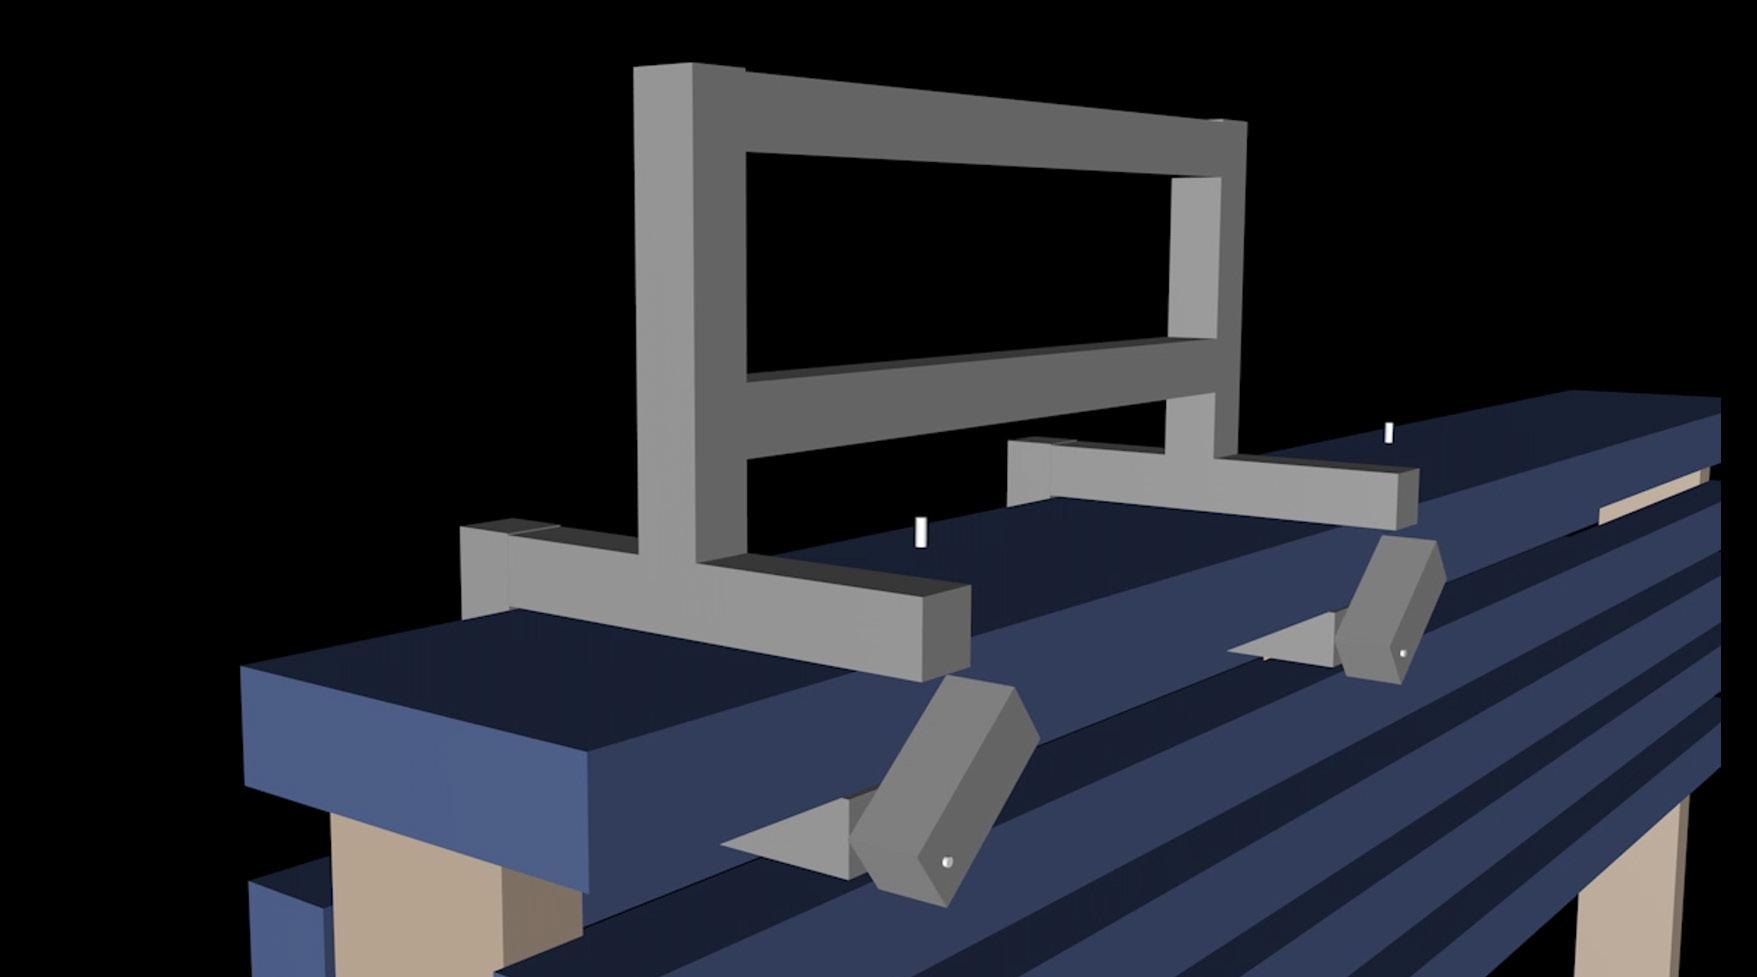
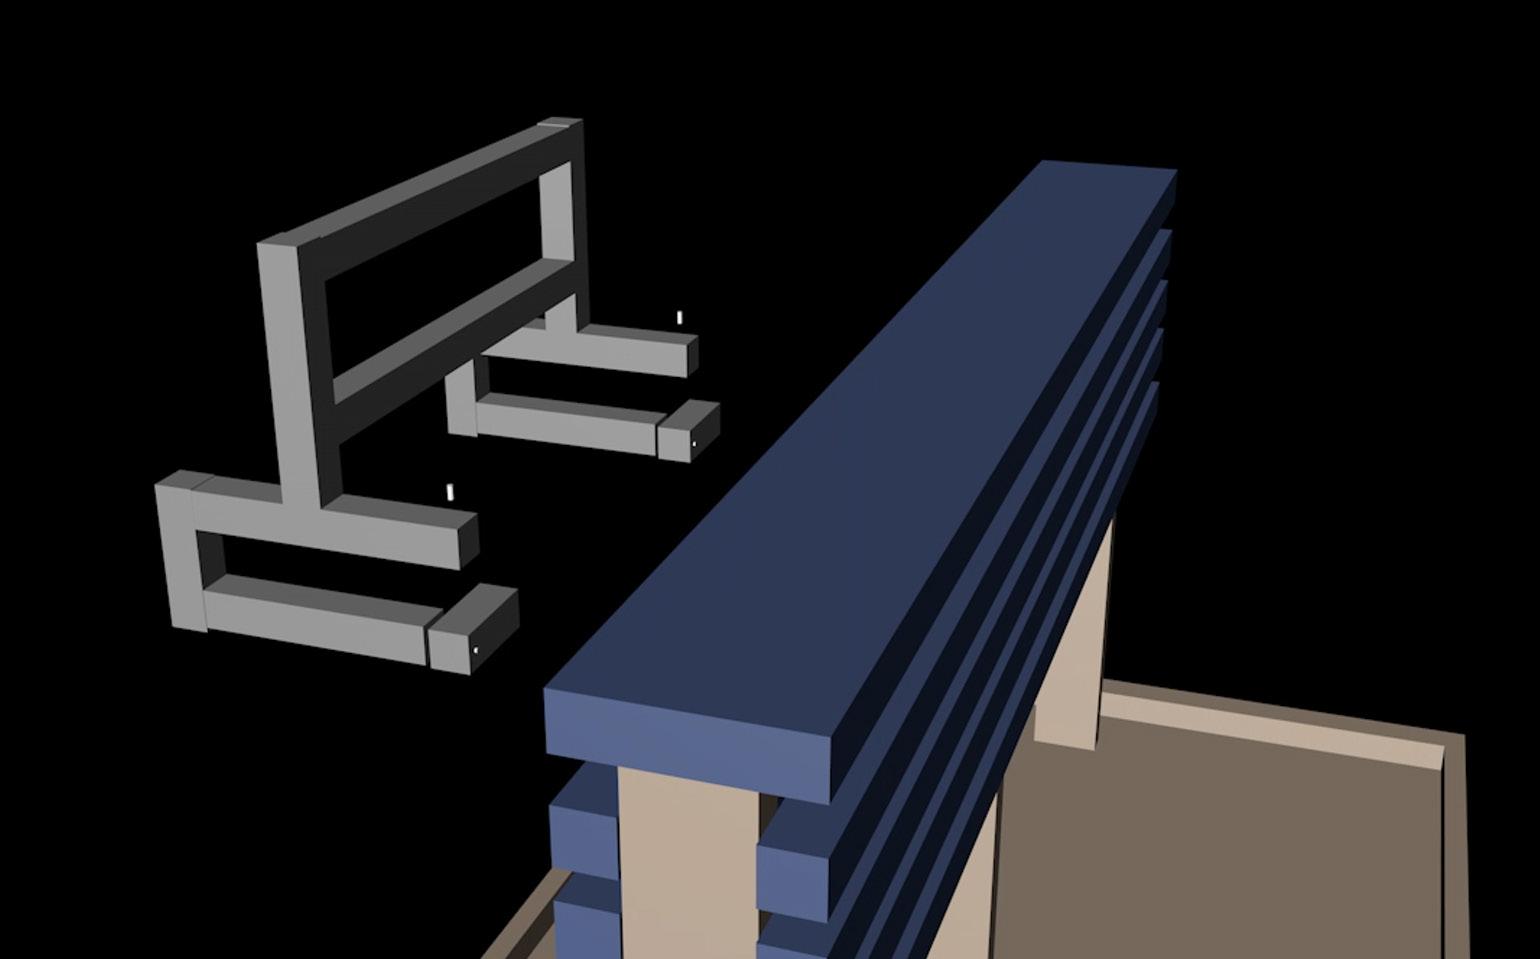
New Style Benches
Staple Free
The new benches mirror the grey colour scheme of the signage to help build consistency outside. The metal hooks make attaching POS easy and versatile. Staples, glue or nails never to be used on these beds.
the Sunshine Library
There are a number of ways to adjust the colour of an object.
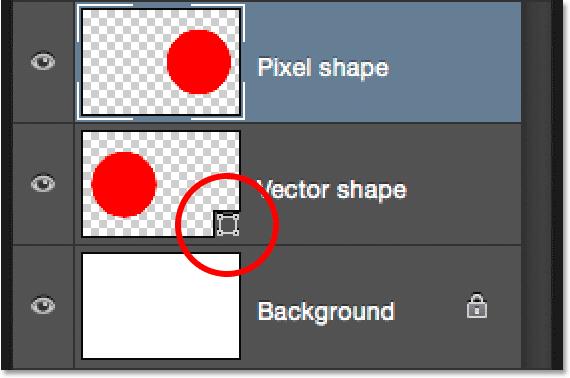
Pixel shapes are flat. Photoshop treats them in the same way it treats images. This is also referred to as rasterised.
Vector shapes are treated as shapes. Photoshop understands it is drawn by edges and corners making it editable. The layer will display the icon above if it is a vector shape.
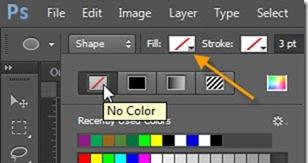
Vector shapes can be coloured using the Direct Selection Tool (a). With the shape selected (a) will bring up a panel at the top providing fill and stroke options.
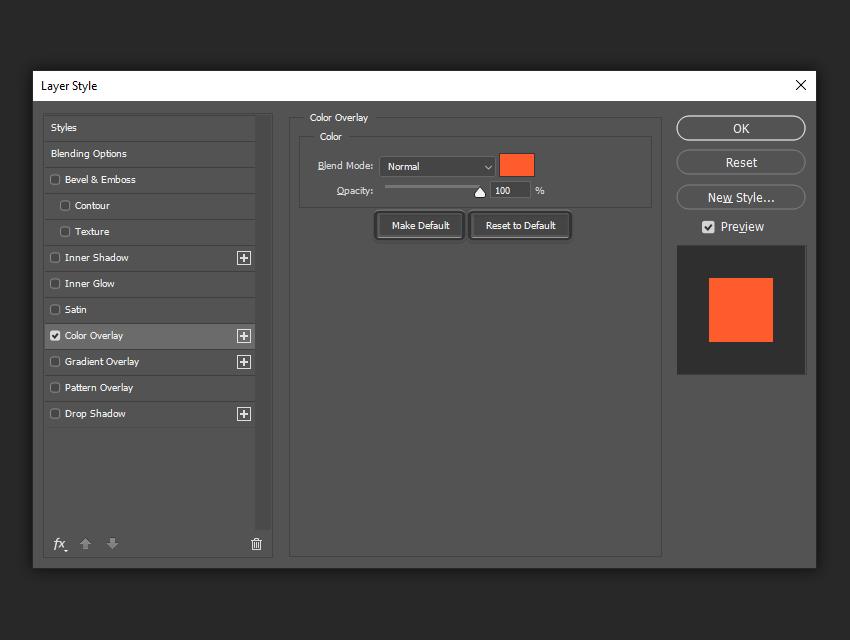
Pixel shapes require a Colour Overlay. This will fill the whole area of the shape with a single colour. Double click on the layer and select colour overlay. This is used to colour the Sunshine emblem for eg.

The eyedropper tool (i) is used to source a colour from an image or if it is used in the design. It stores the colour in the bottom of the tool menu on the left which can then be used for colour overlay or referencing. (x) swaps the foreground and background colour in the tool menu.

There is a Sunshine colour folder containing the most used colours including Black and White and the three brand guideline colours.
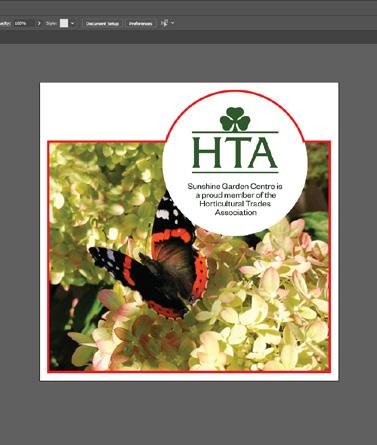
Clipping Masks
Images fit to shape
Clipping masks are used to crop a larger image to specific shape but maintaining layers in case of a need to change the image or size.
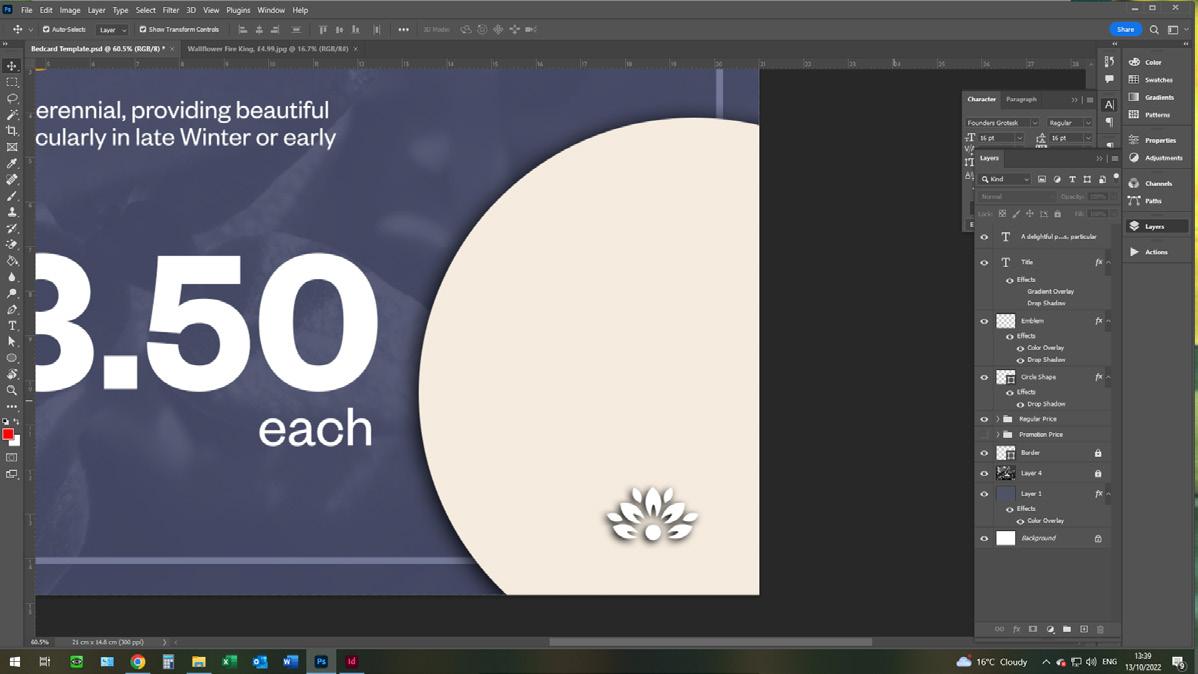
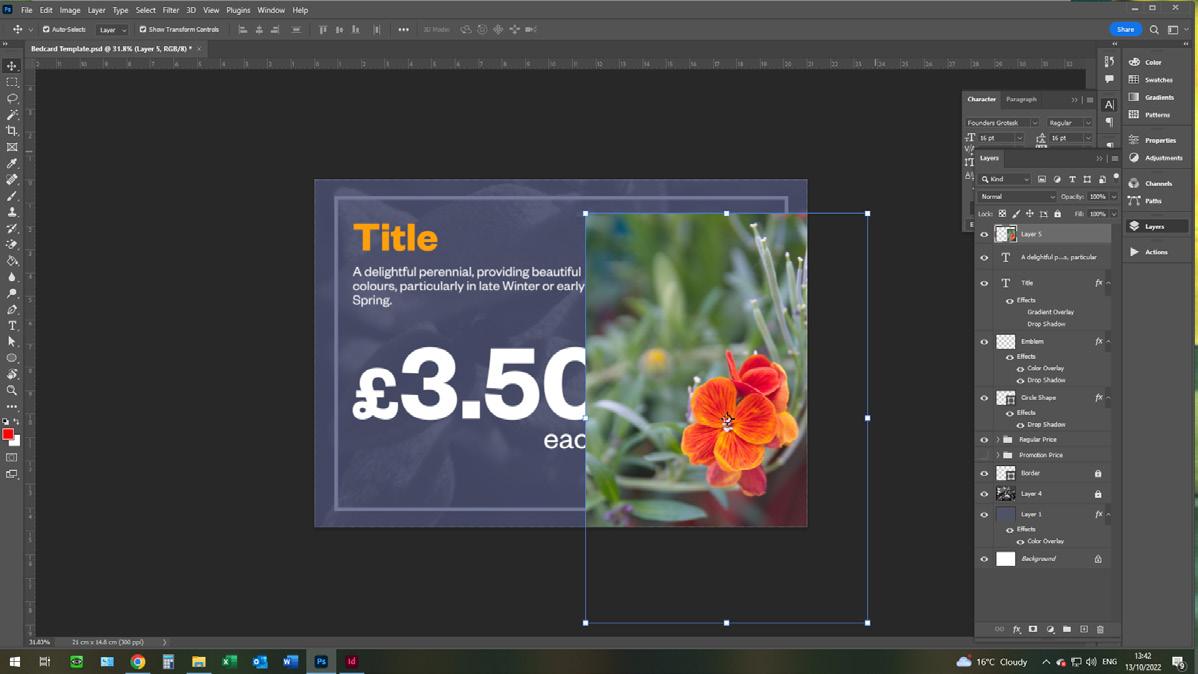
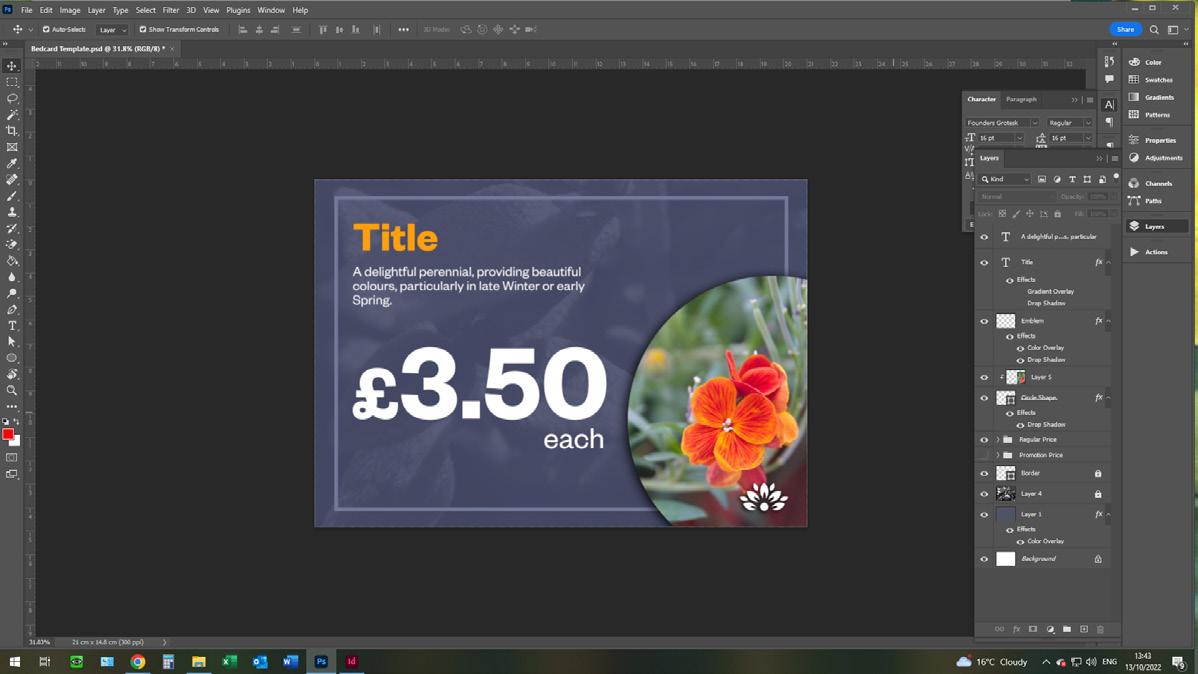
1. Create the shape you wish to fill e.g. a circle using the Ellipse Tool (u). In some cases it will already be present in a template
2. Drag and scale your image over the circle.
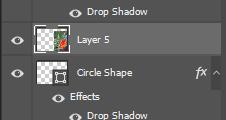
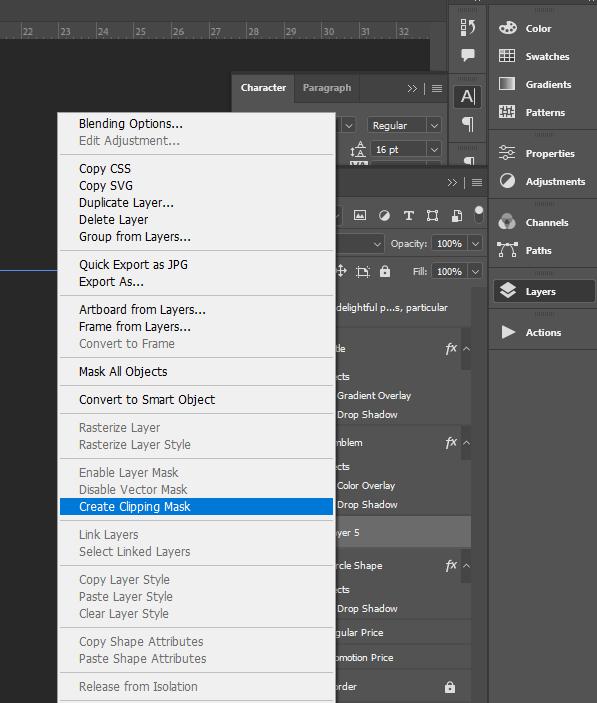
3. Make sure the image layer is directly above the circle in the layers panel. Right click on the image layer (the light grey bit of the layer) and select ‘create clipping mask’
4. The image should drop within the shape. The image can be dragged around inside the shape. It can also be released by right clicking again or dragging the image layer a few layers up.
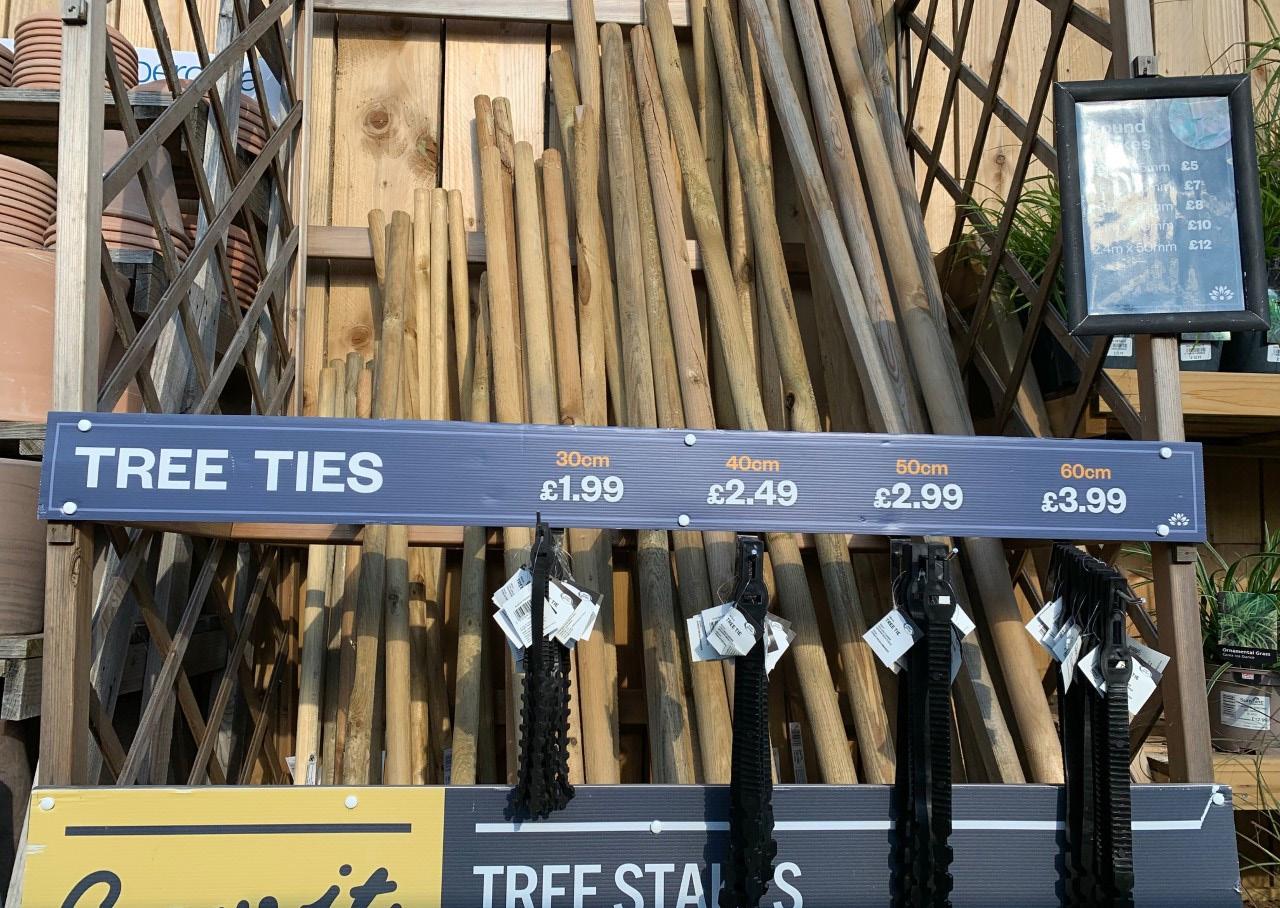
Headers
Titles and pricing
Headers are the secondary funnel to whole area titles, after Bedding customers are then introduced to Heather or Pots of Colour
Sometimes used as a simple title with information, sometimes priced using coherent overlays meaning the headers are protected from price change.


Signage < Nursery < Banners
187 x 45 to fit on old style beds
187 x 45 to fit on old style beds
50 x 18 header overlays
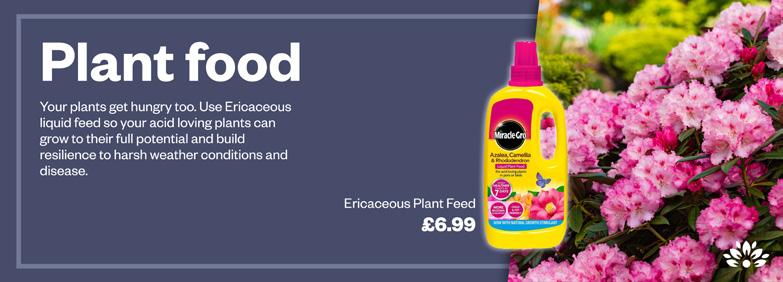
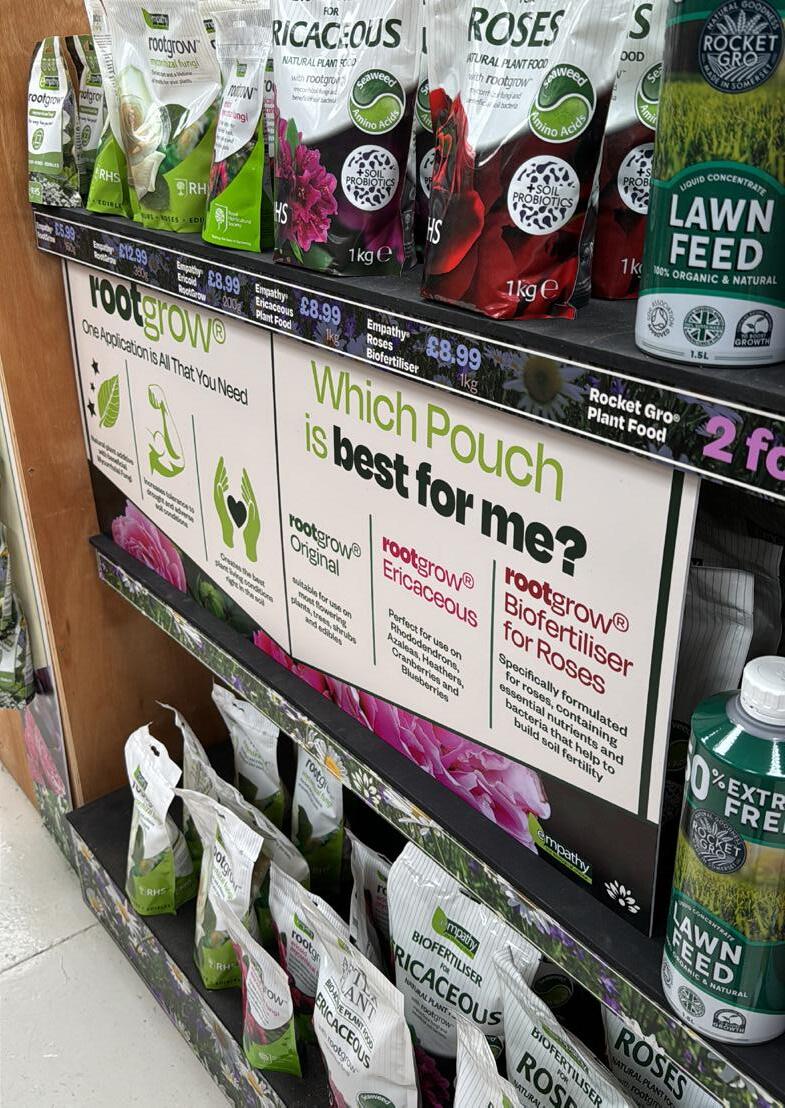
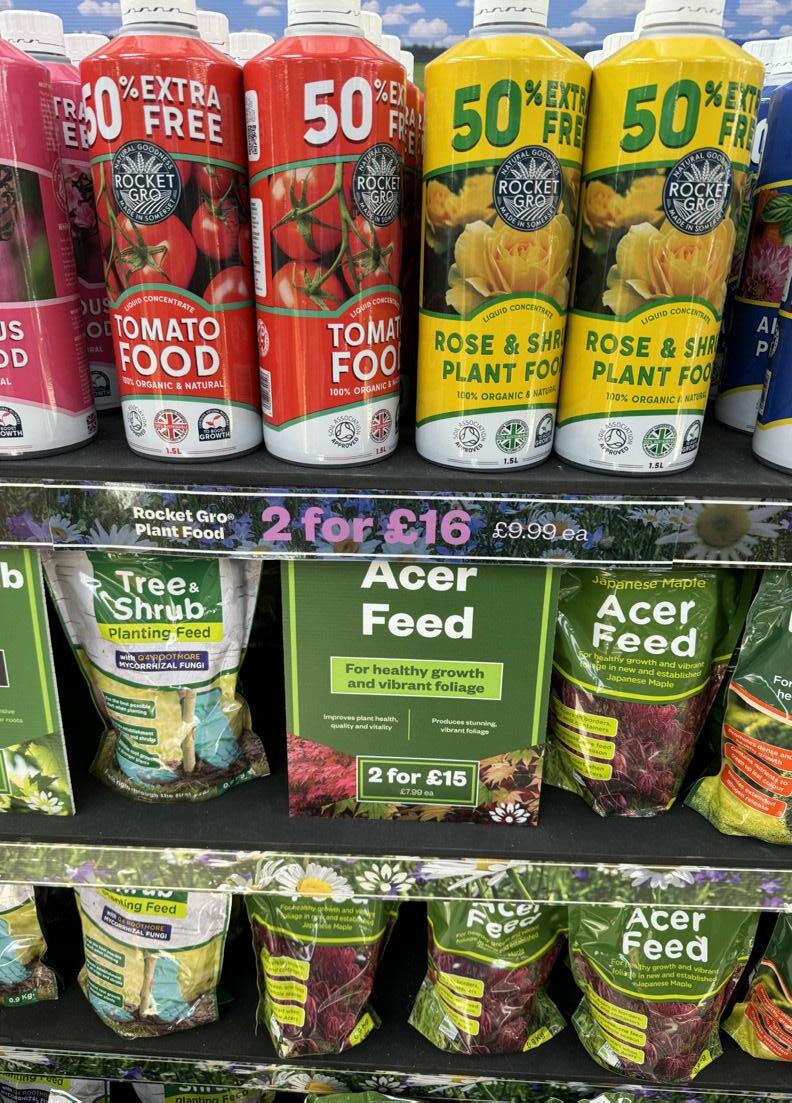
Backers
Wooden display stands
Backers sit behind products on a 3 tier wooden display stand. Most display plant food and depict simple image and text, acting as a background.

Signage < Nursery < Backers

65 x 50 to fit on old wooden display stands
8 x 8 price overlay
65cm
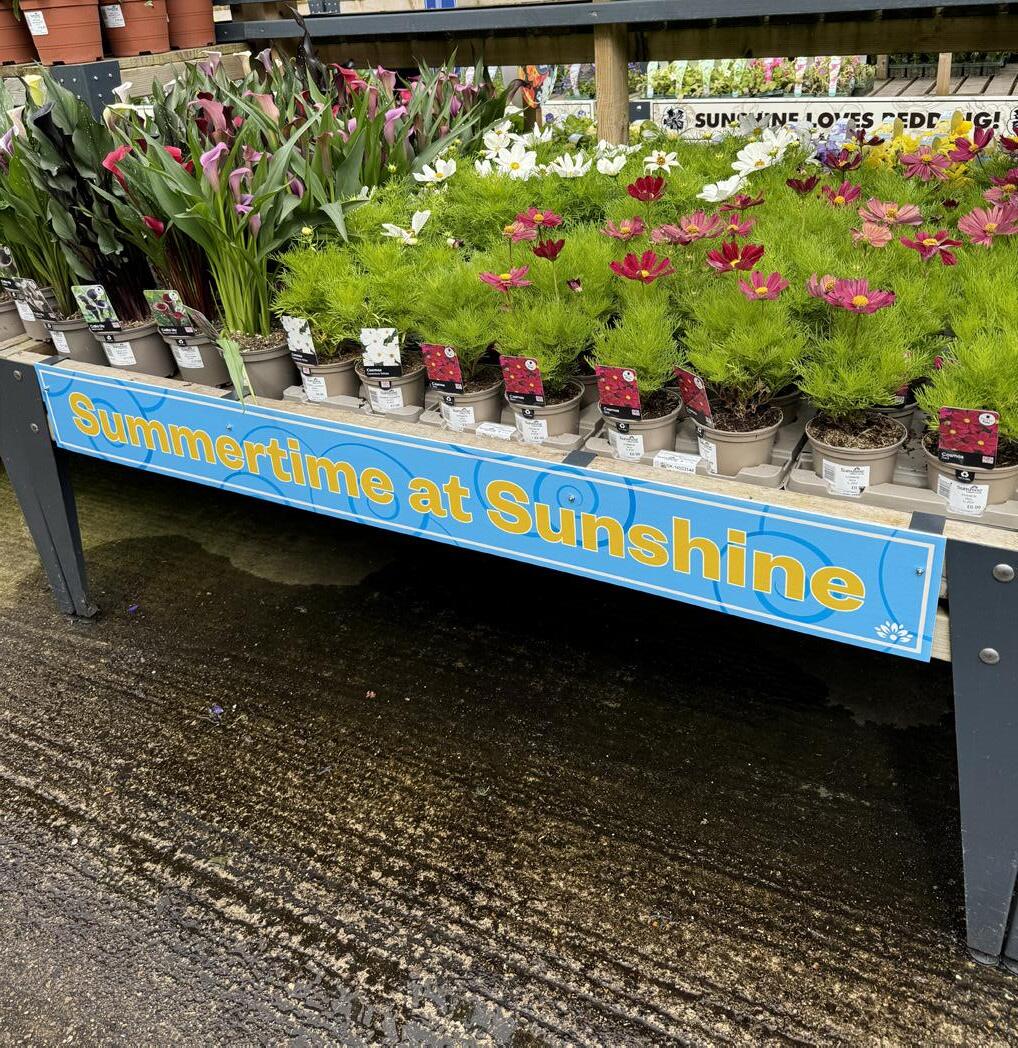
Enders
Lower bench faces
Enders are used on the lower face of the bench to title an area or provide general centre information

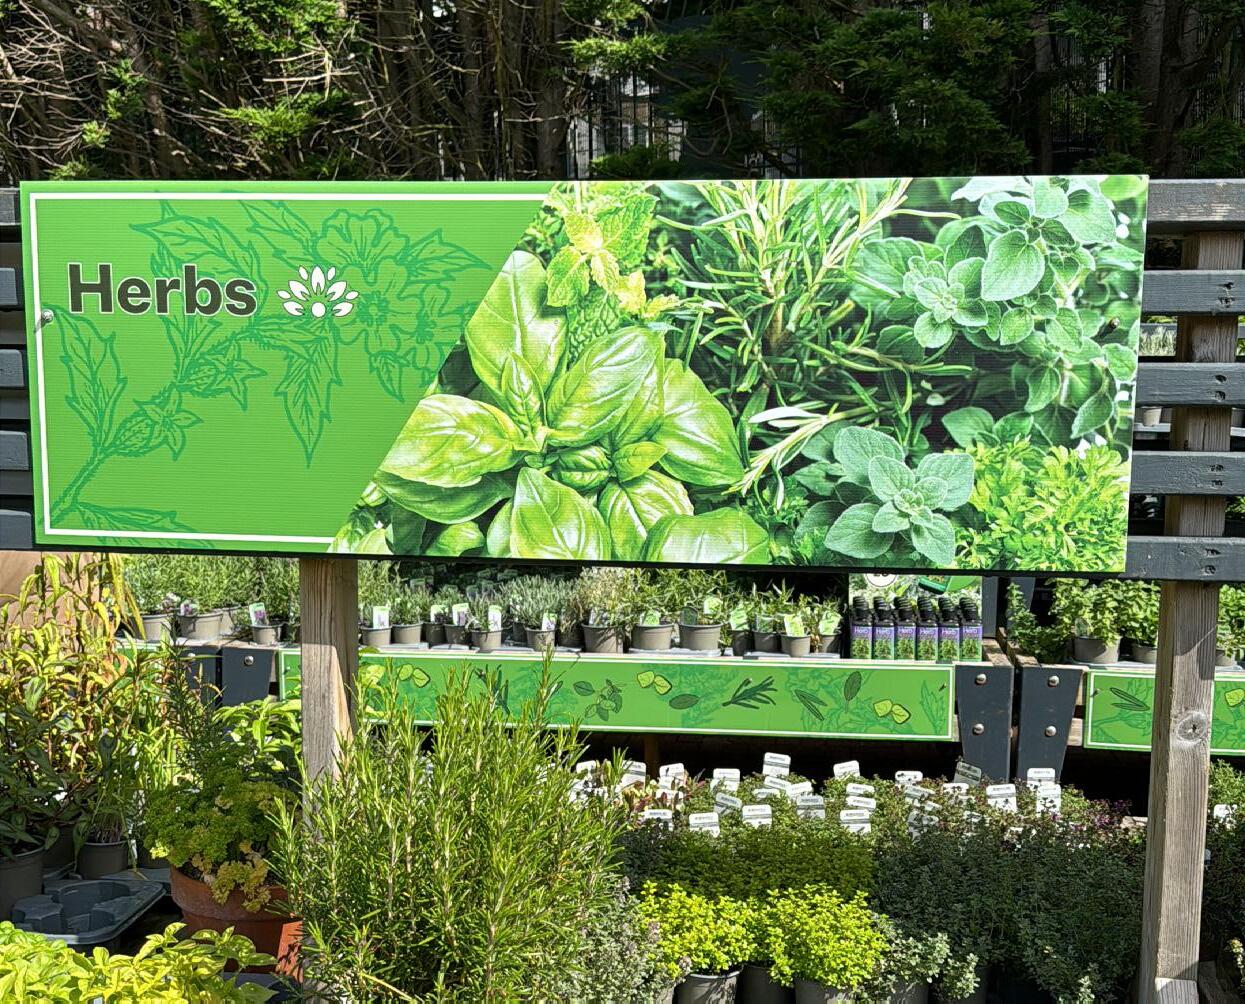
Themed Sections
Several sections of the plant area use their own colour and design system to distinguish and landmark themselves from other parts of the plant area.
Any POS created for the section, from plant food to promotions, should match the colour system of the section.
As with other POS, the same design rules of the logo and the border apply.
Custom Cut
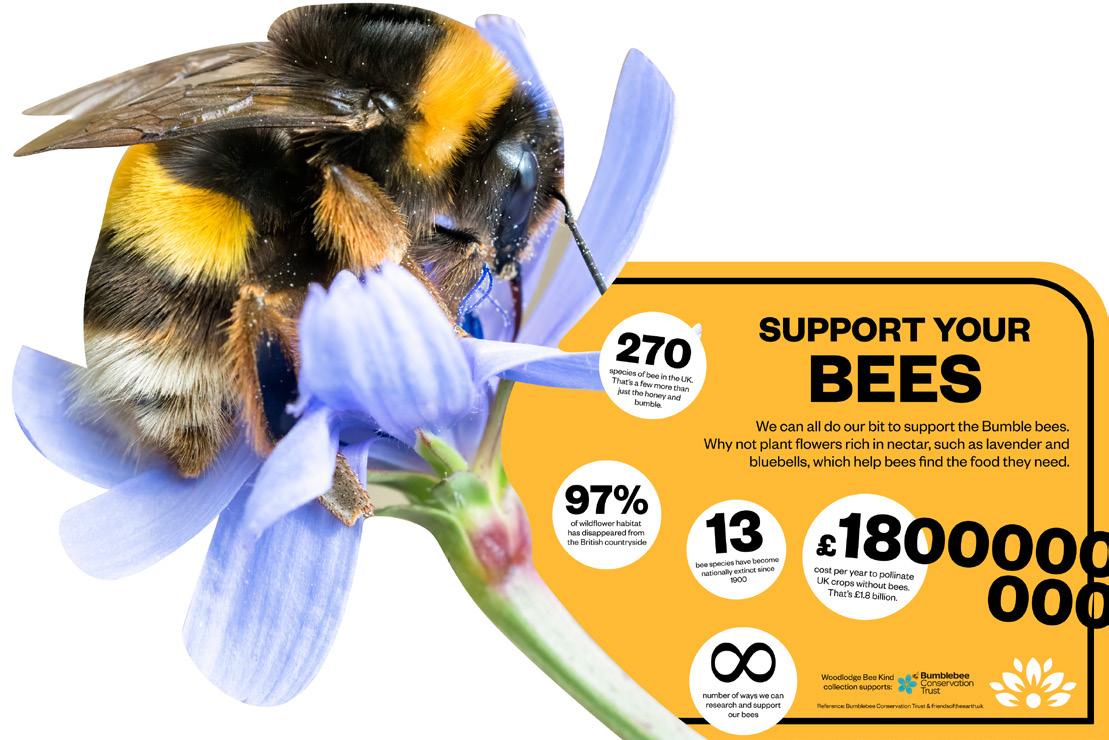
Some POS is used for specific campaigns, seasonal narrative or to showcase and promote an interesting or new product. Woodlodge provide an easy custom cut service allowing ultimate freedom to create bespoke signage.
Open full size artwork in Illustrator


Thin magenta line around artwork, include at least 5mm bleed
Layer Cut and Design, save as Illustrator file

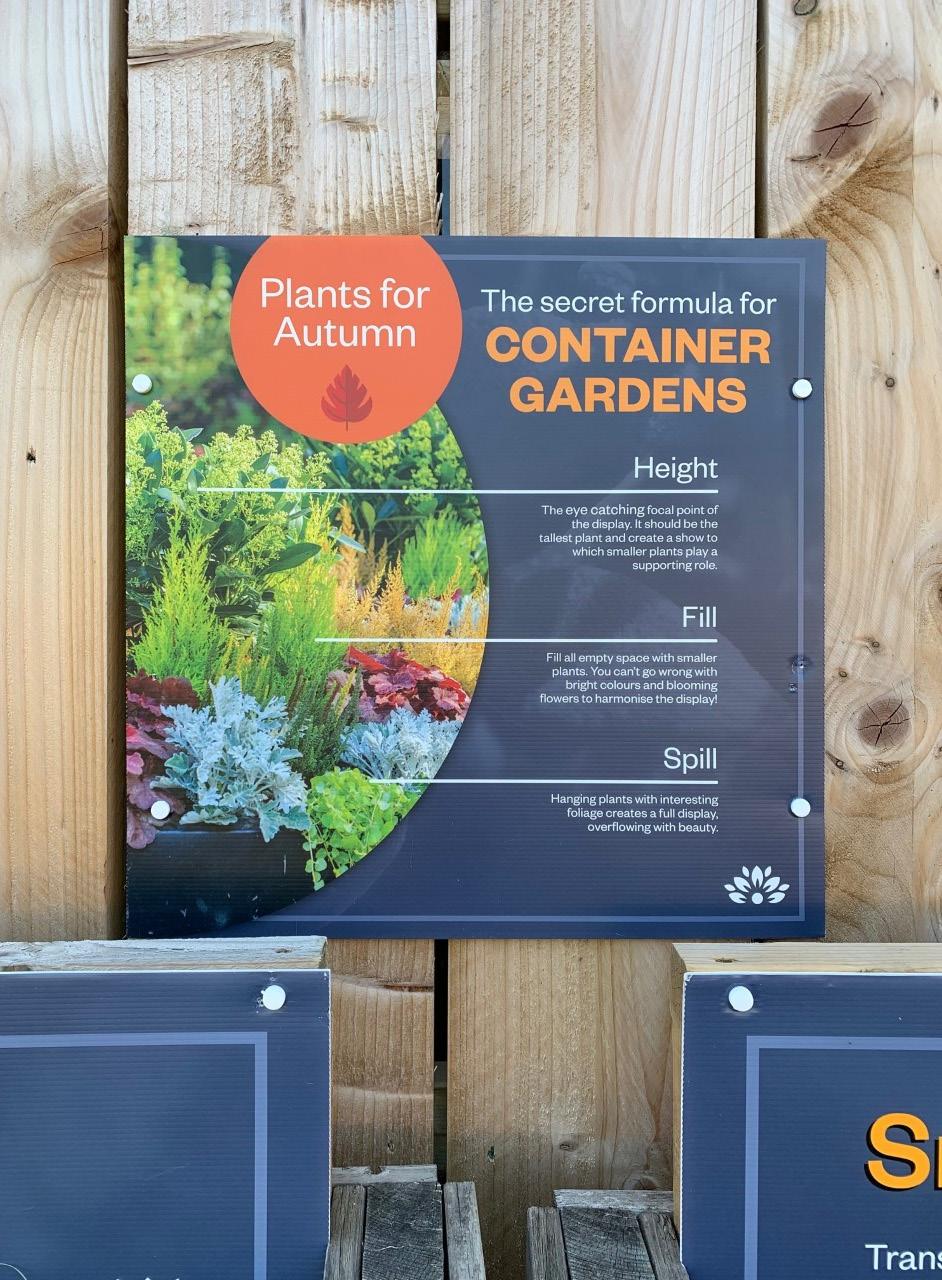
Bespoke
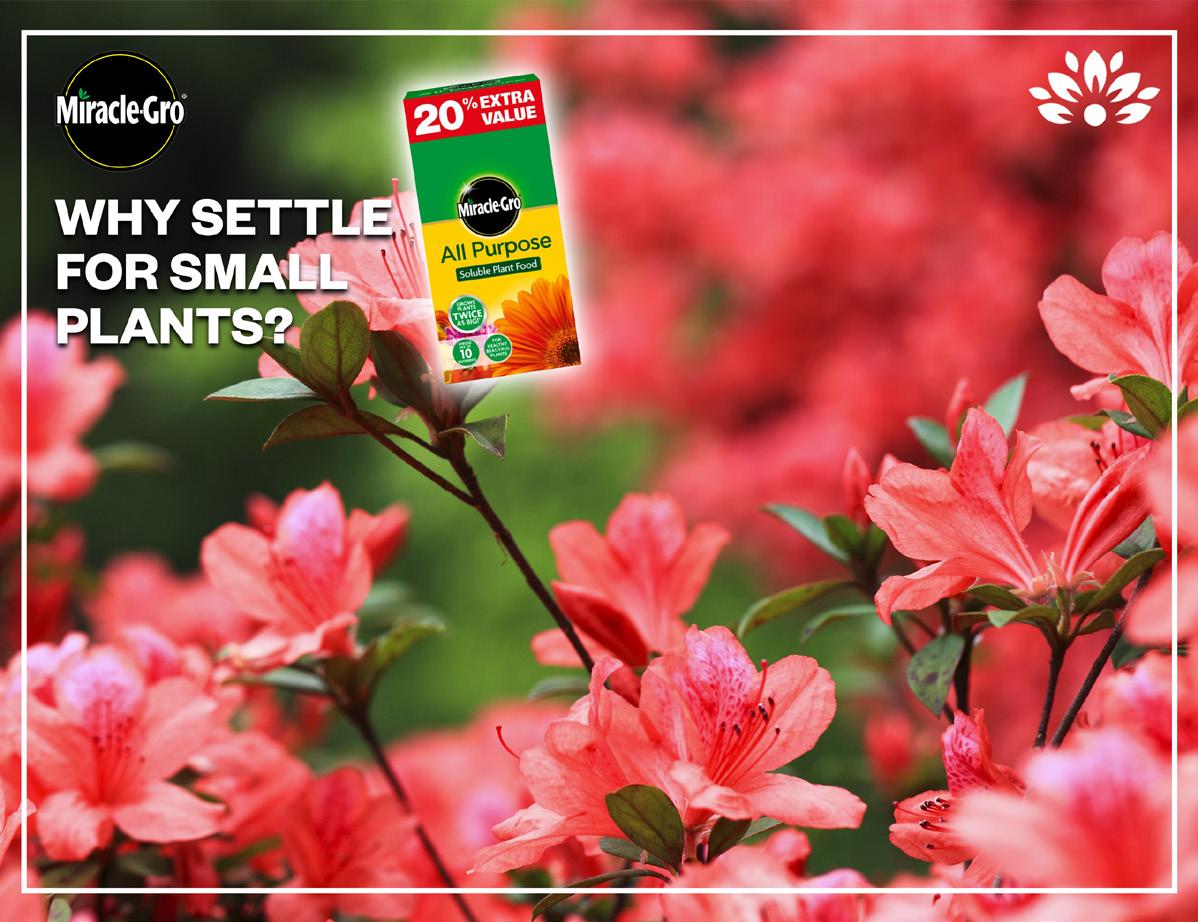
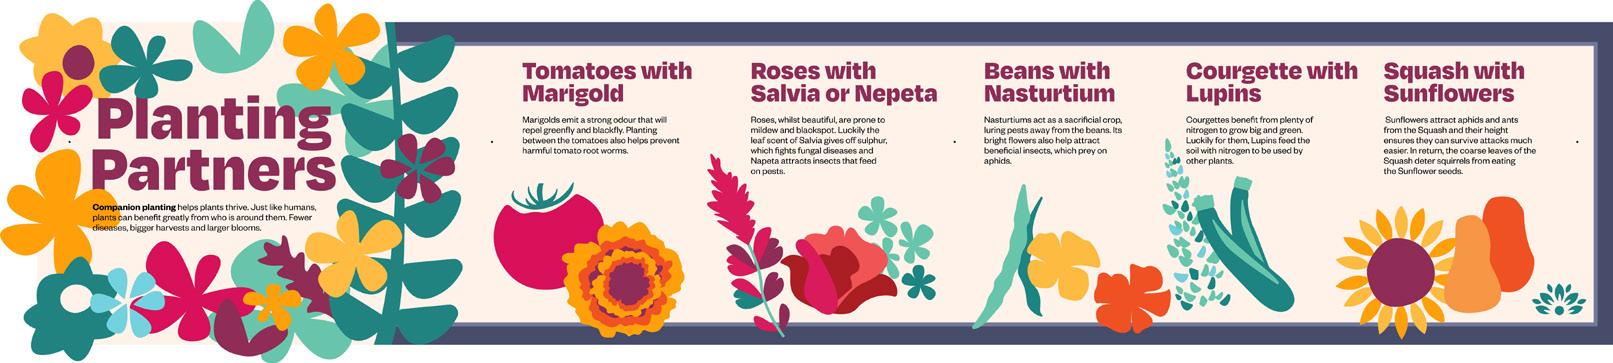
Pushing brand guidelines can help create more diverse POS for varied experience and special focus.
The border and badge should always be present and in position but colour, type and illustration can be used to create specific meaning
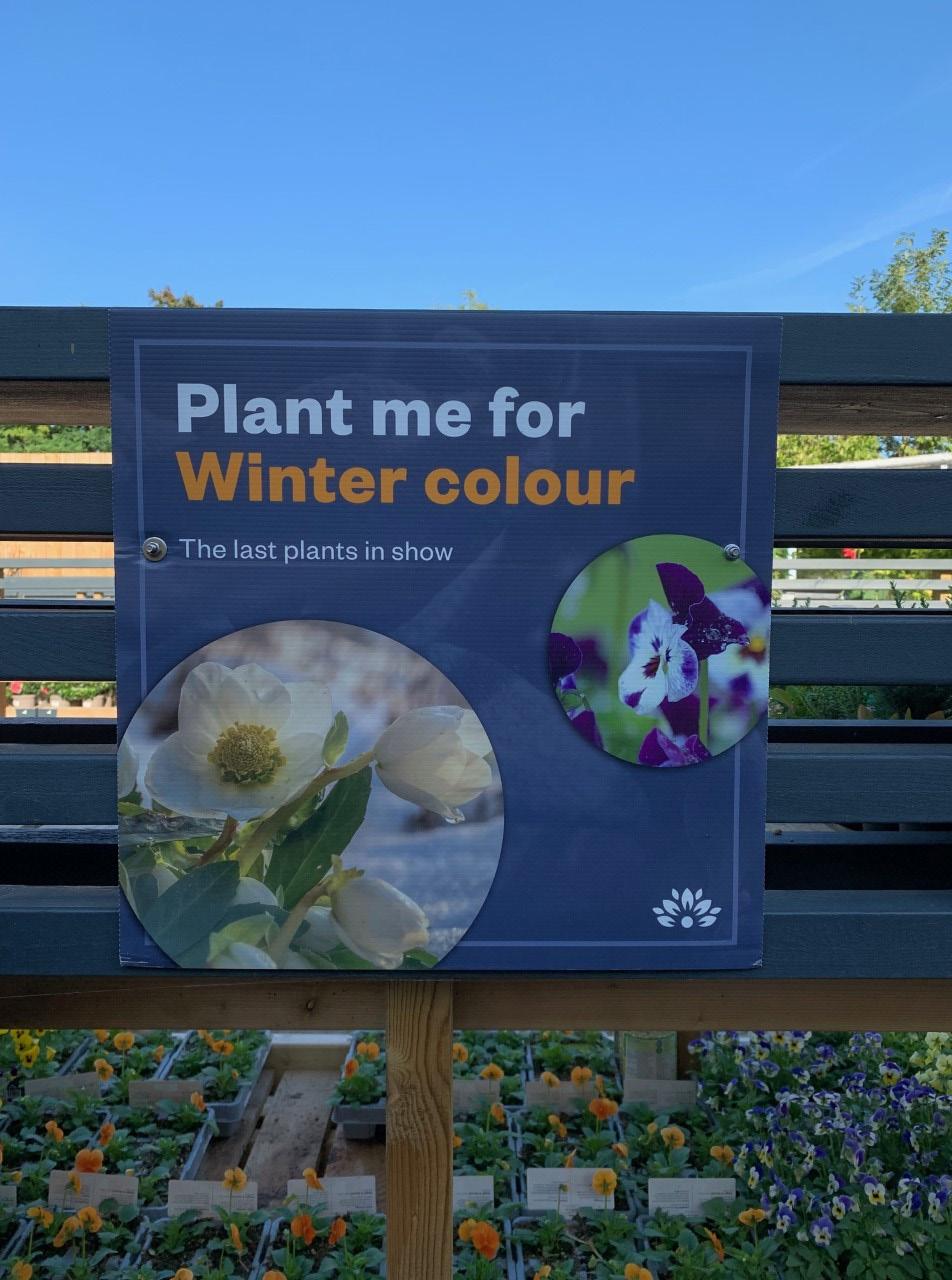
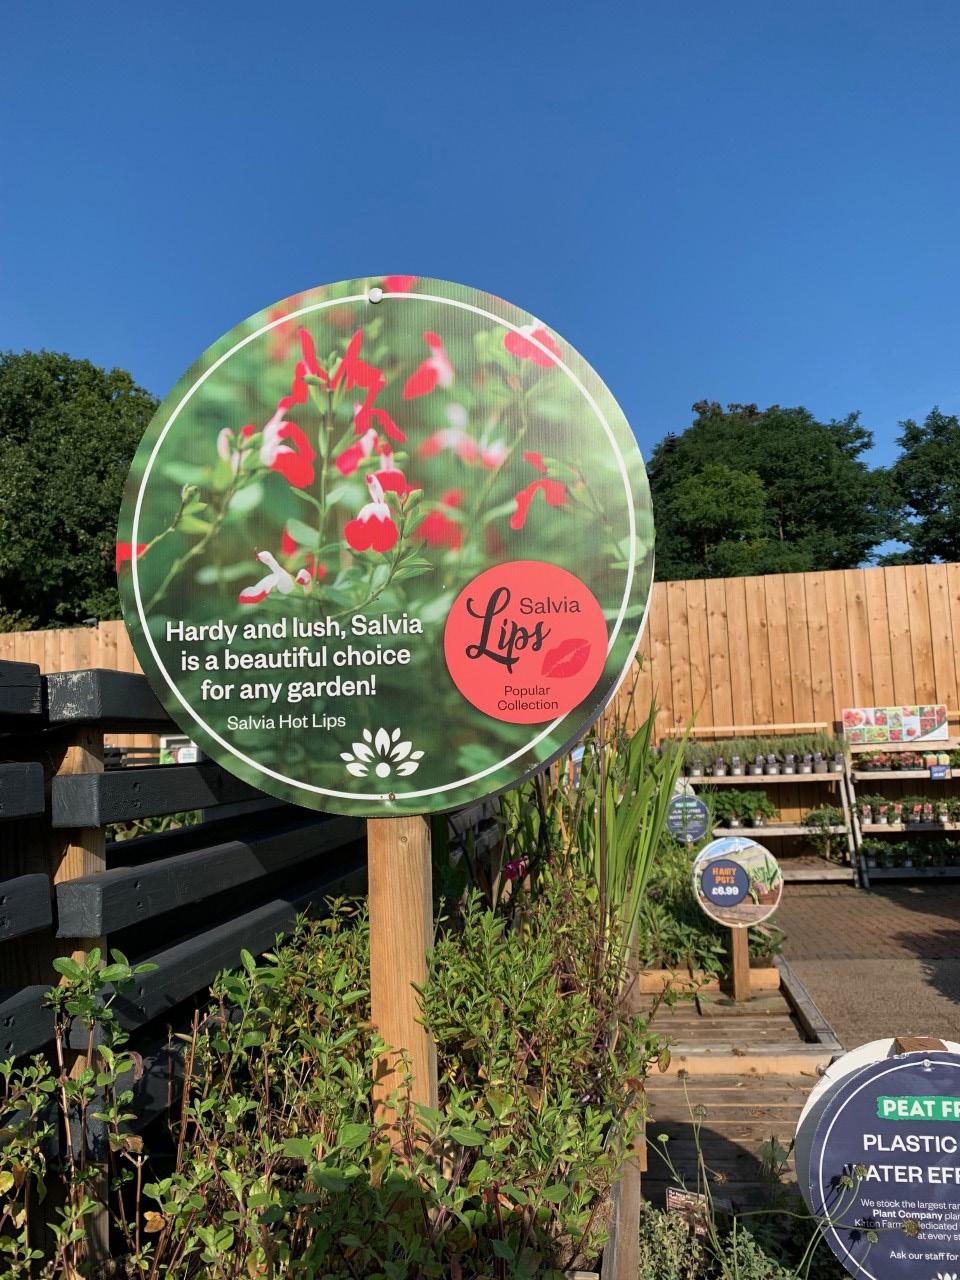
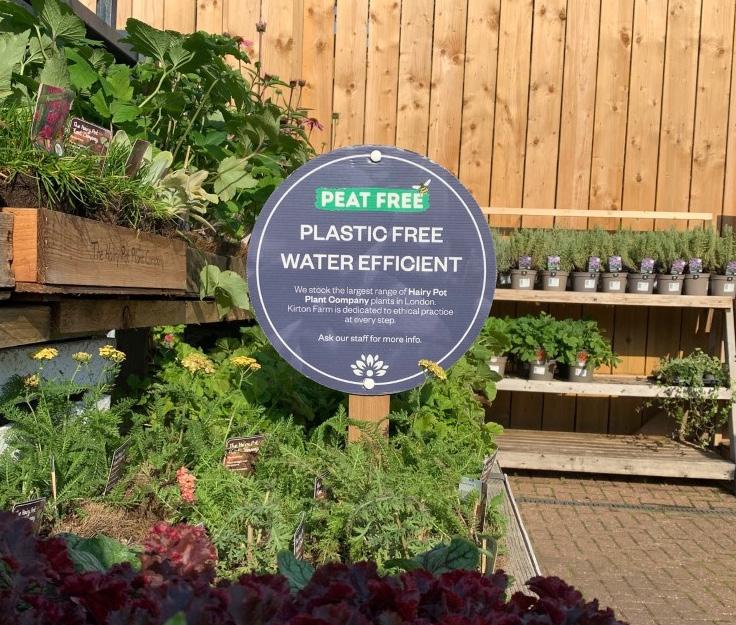
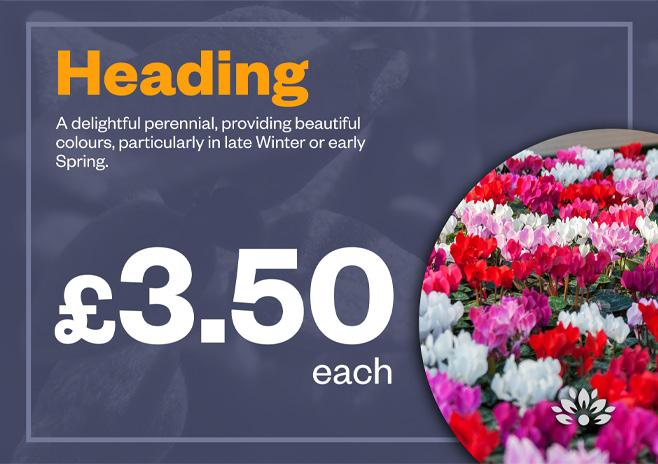
50cm Inspiration Circles
Lollipop free standing
As a solution, the circles were developed for maximum portability.
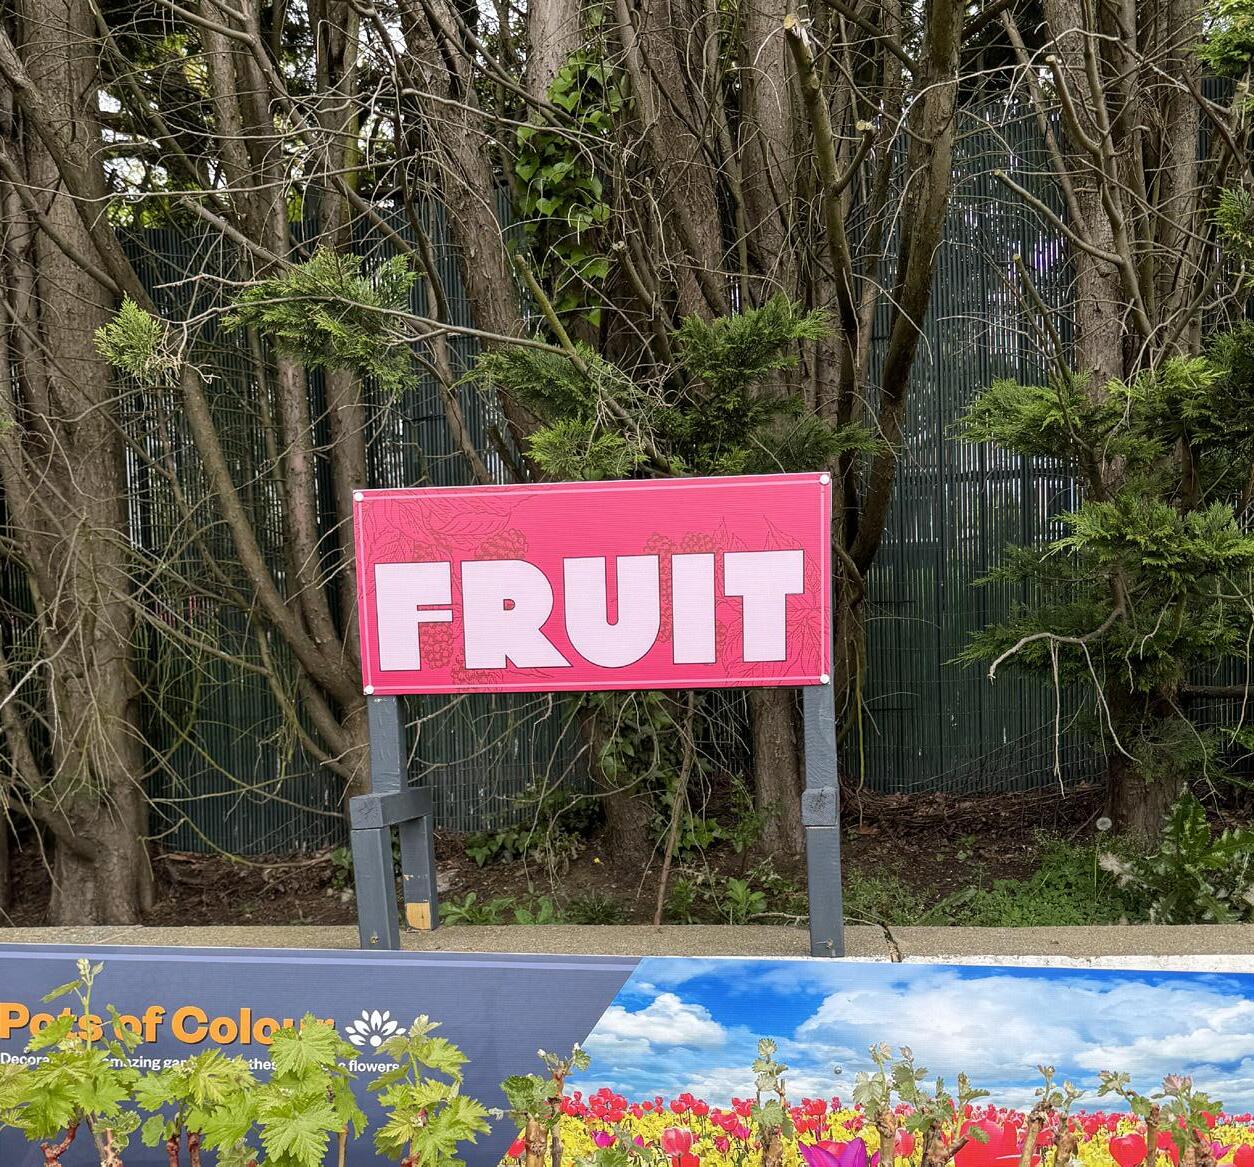
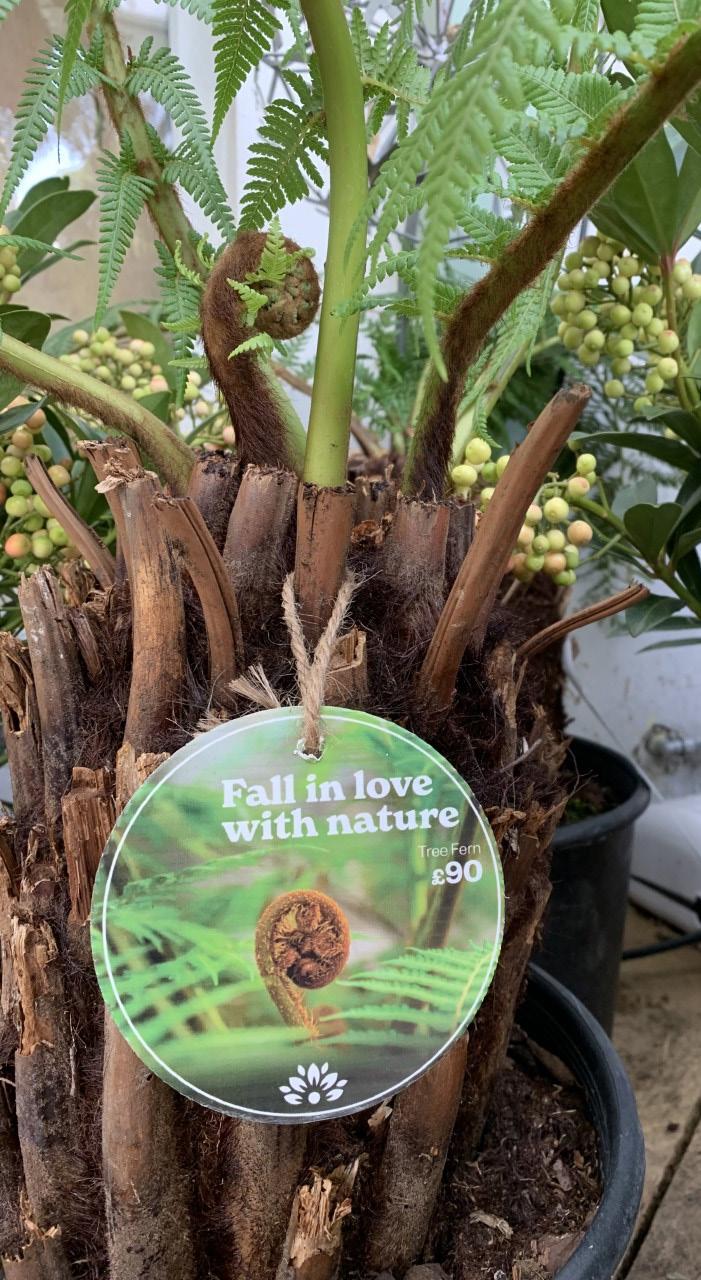
Inspiration circles use an attractive image of the plant, with special focus on flowering or fruits to demonstrate the plant in bloom, with a short caption.
While most plants show greenery all year, the circles are about selling the promise of beauty once in season


Signage < Nursery < Circles
Circle: 50cm

Post: 90cm
Base: 30x30cm

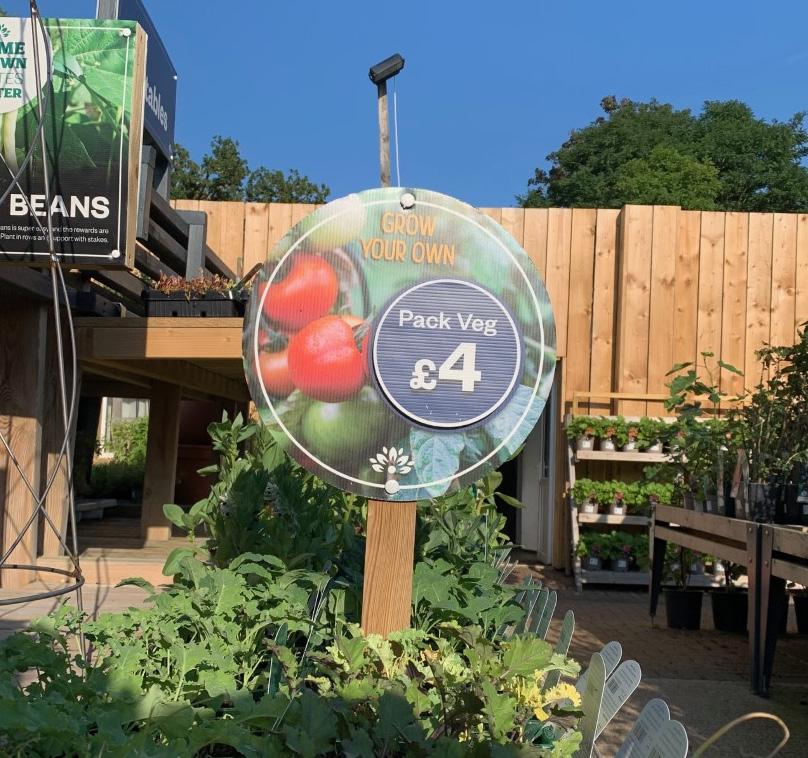
30cm Price Circles
Lollypop free standing
The 30cm price circles use a generic backdrop to depict vegetables, flowers or a specific plant with an overlay price. They are commonly used for box bedding where vast quantites of the same product can be priced with one sign


Overlay: 14cm
Circle: 30cm
Signage < Nursery < Circles
Post: 55cm
Base: 30x30cm
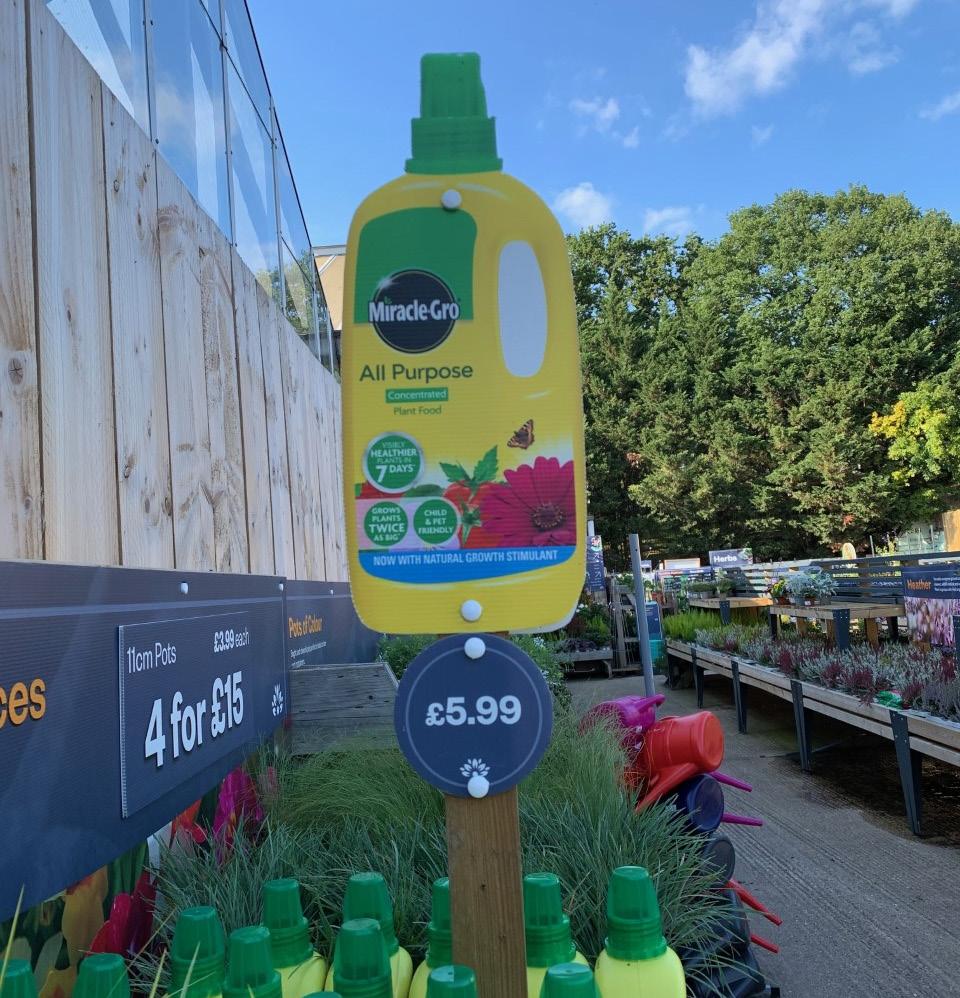
Lollipop free standing
The 30cm price circles use a generic backdrop to depict vegetables, flowers or a specific plant with an overlay price. They are commonly used for box bedding where vast quantites of the same product can be priced with one sign


Bottle Cut: w14cm, h variable
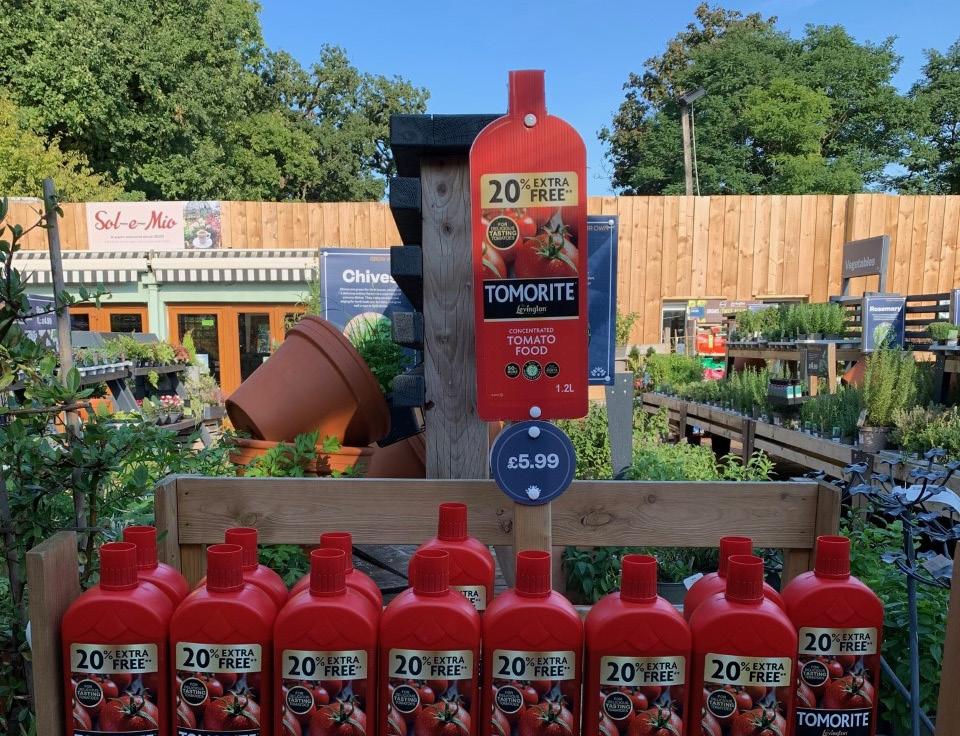
Signage < Nursery < Plant FoodBus Stops
Base: 30x30cm Post: 75cm Price: 10cm
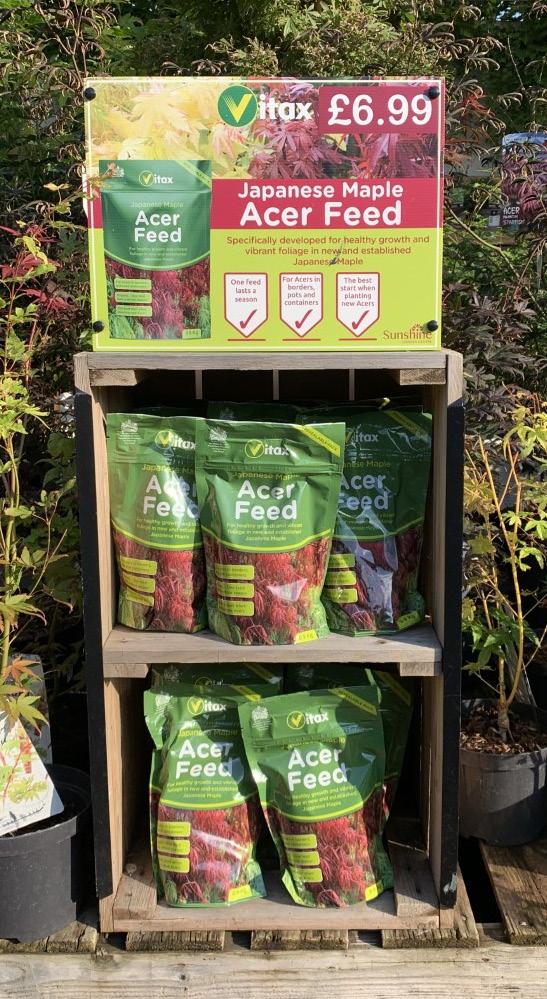
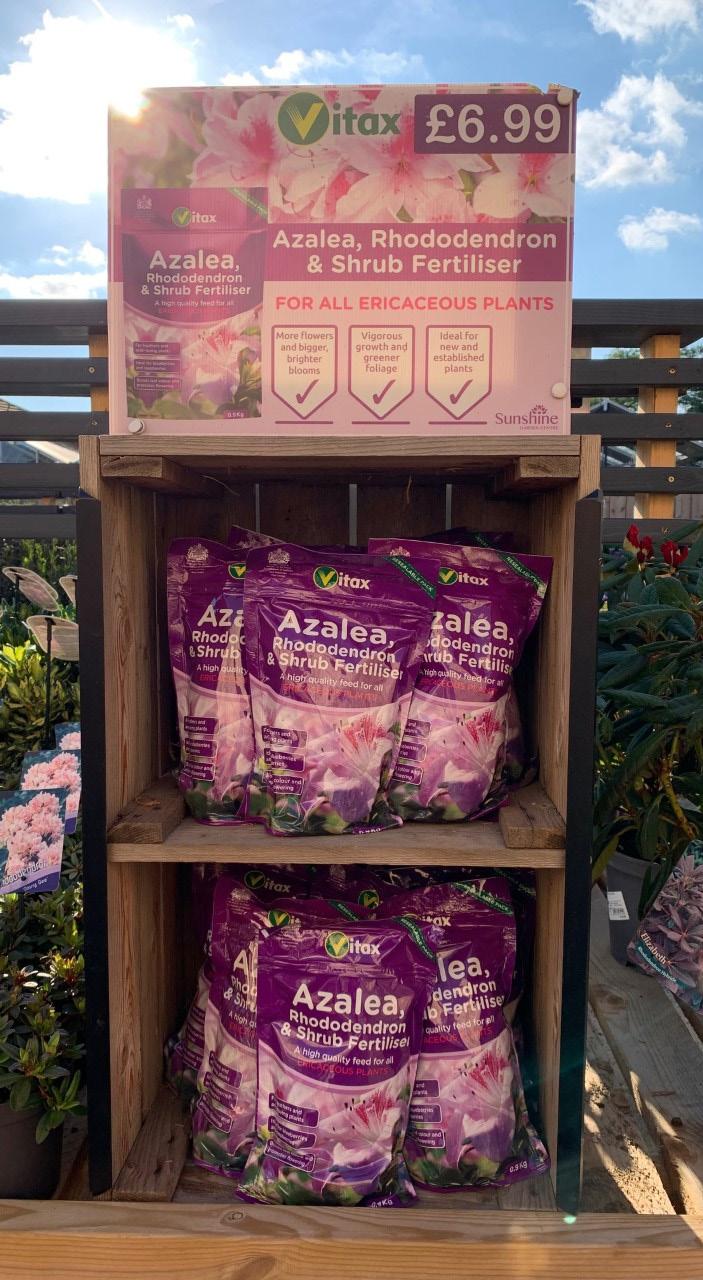
Vitax crates
One Vitax recommended design to advertise the range of Vitax feeds. Added to top of the crate with a simple frame
Signage < Shop < Vitax
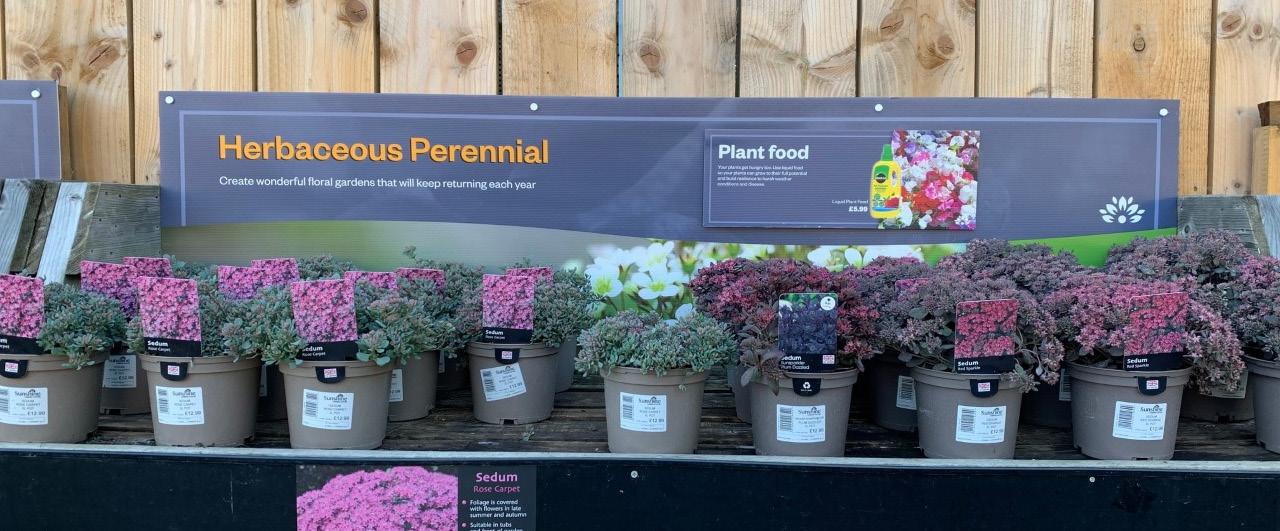
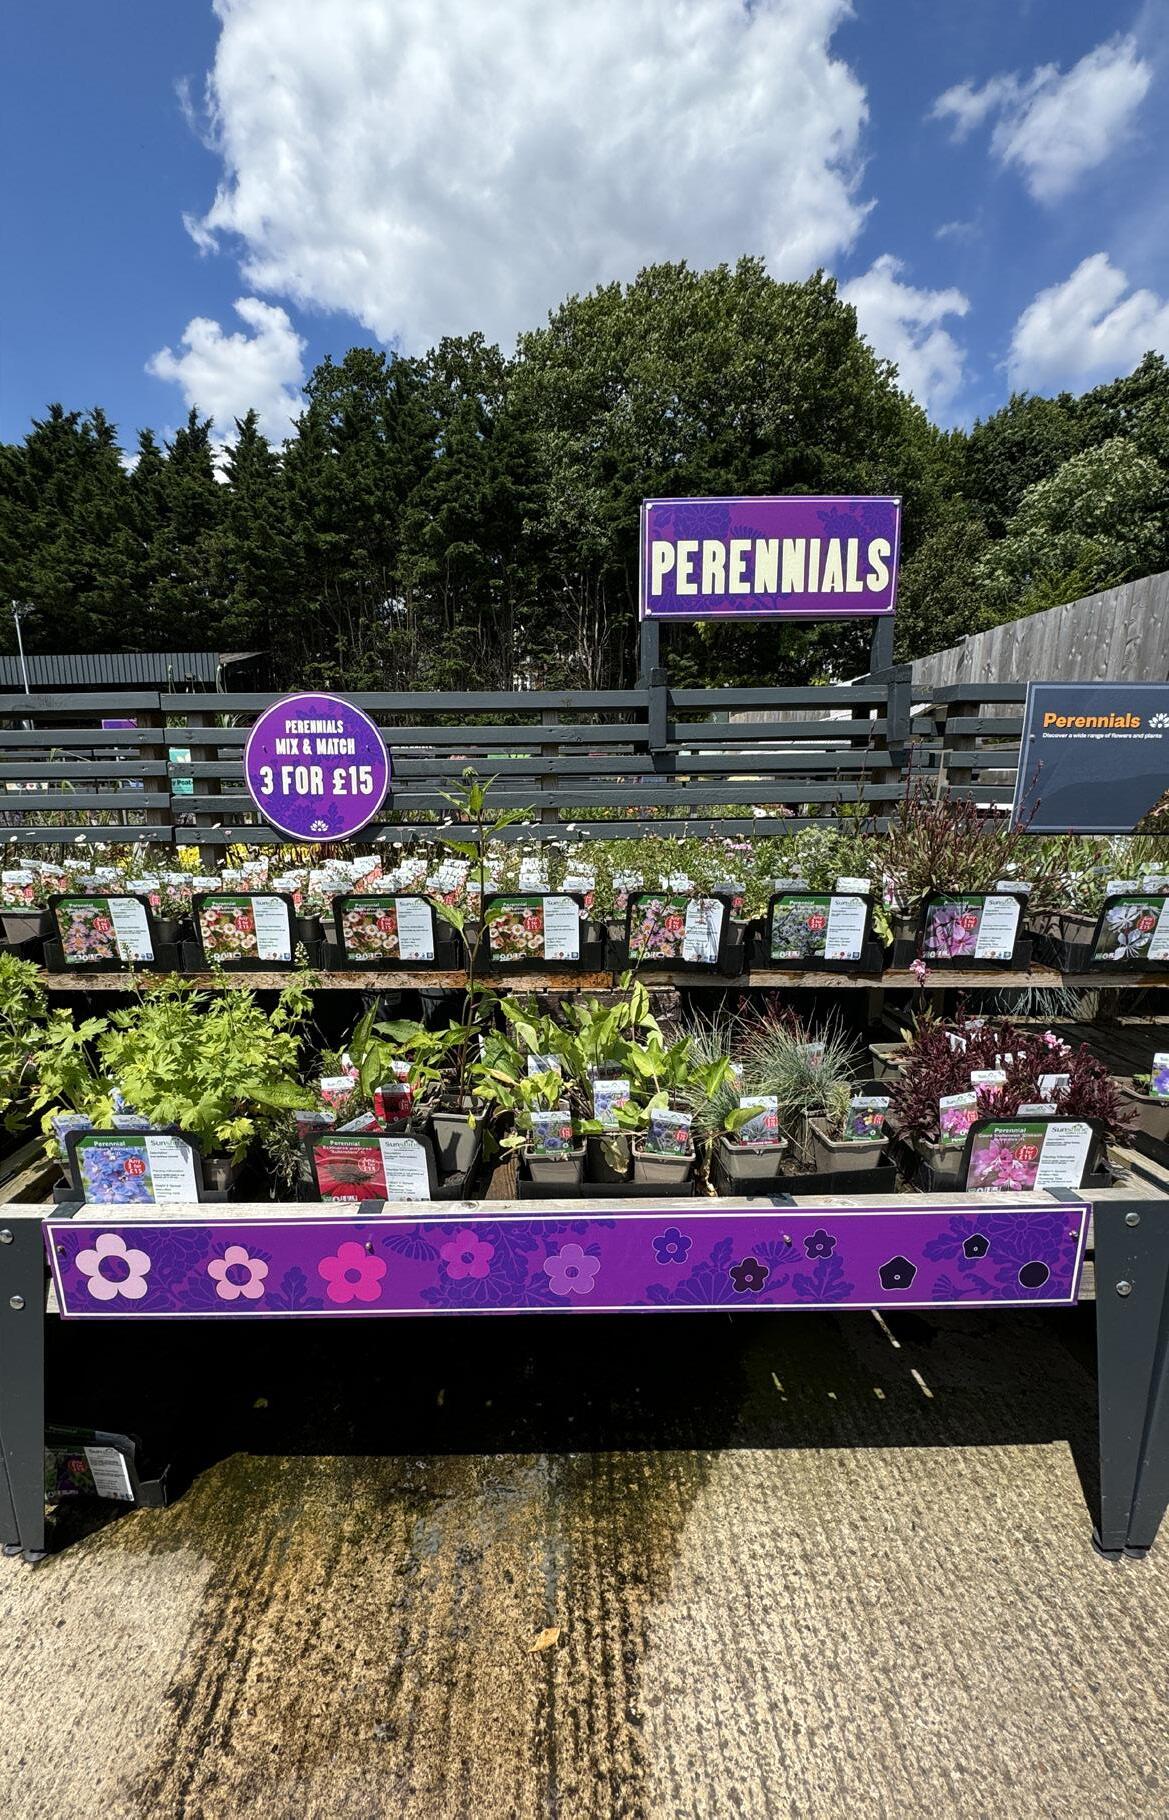
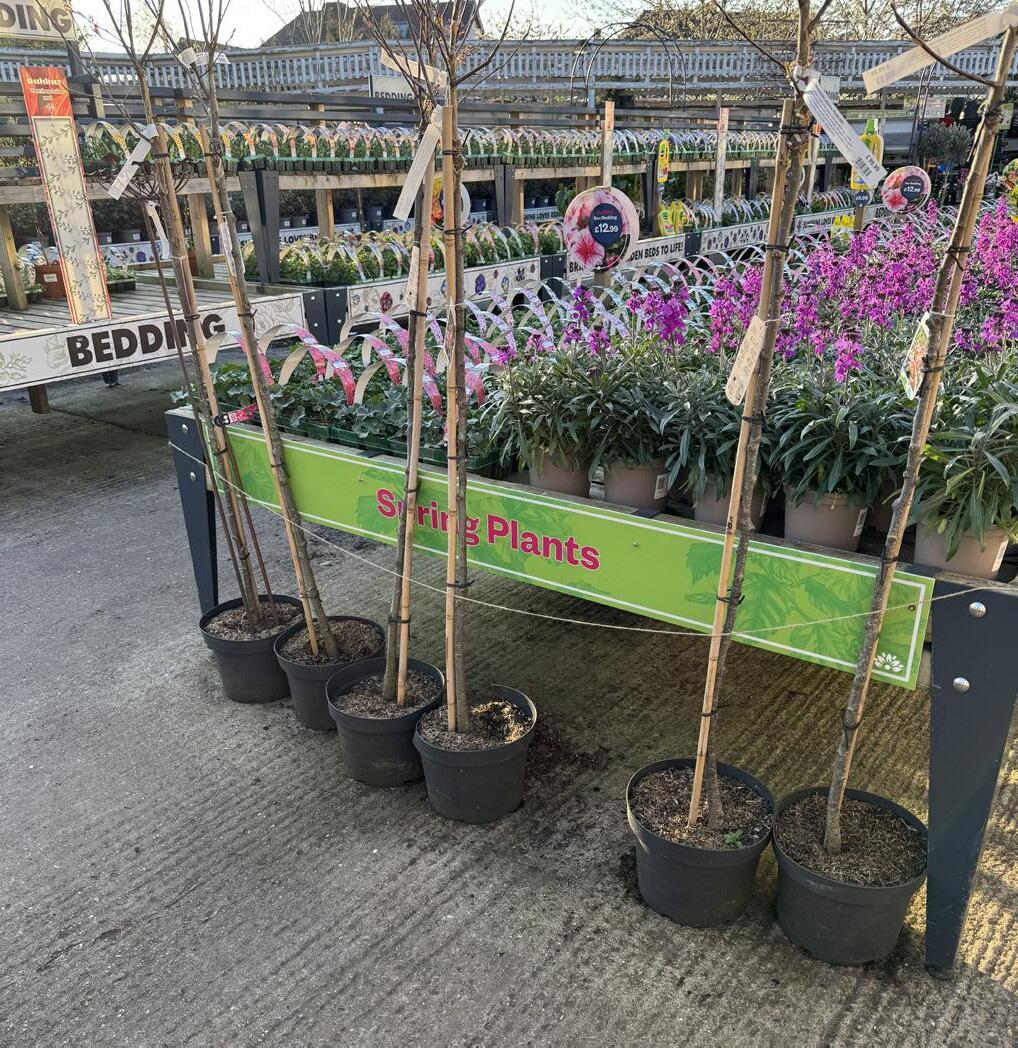
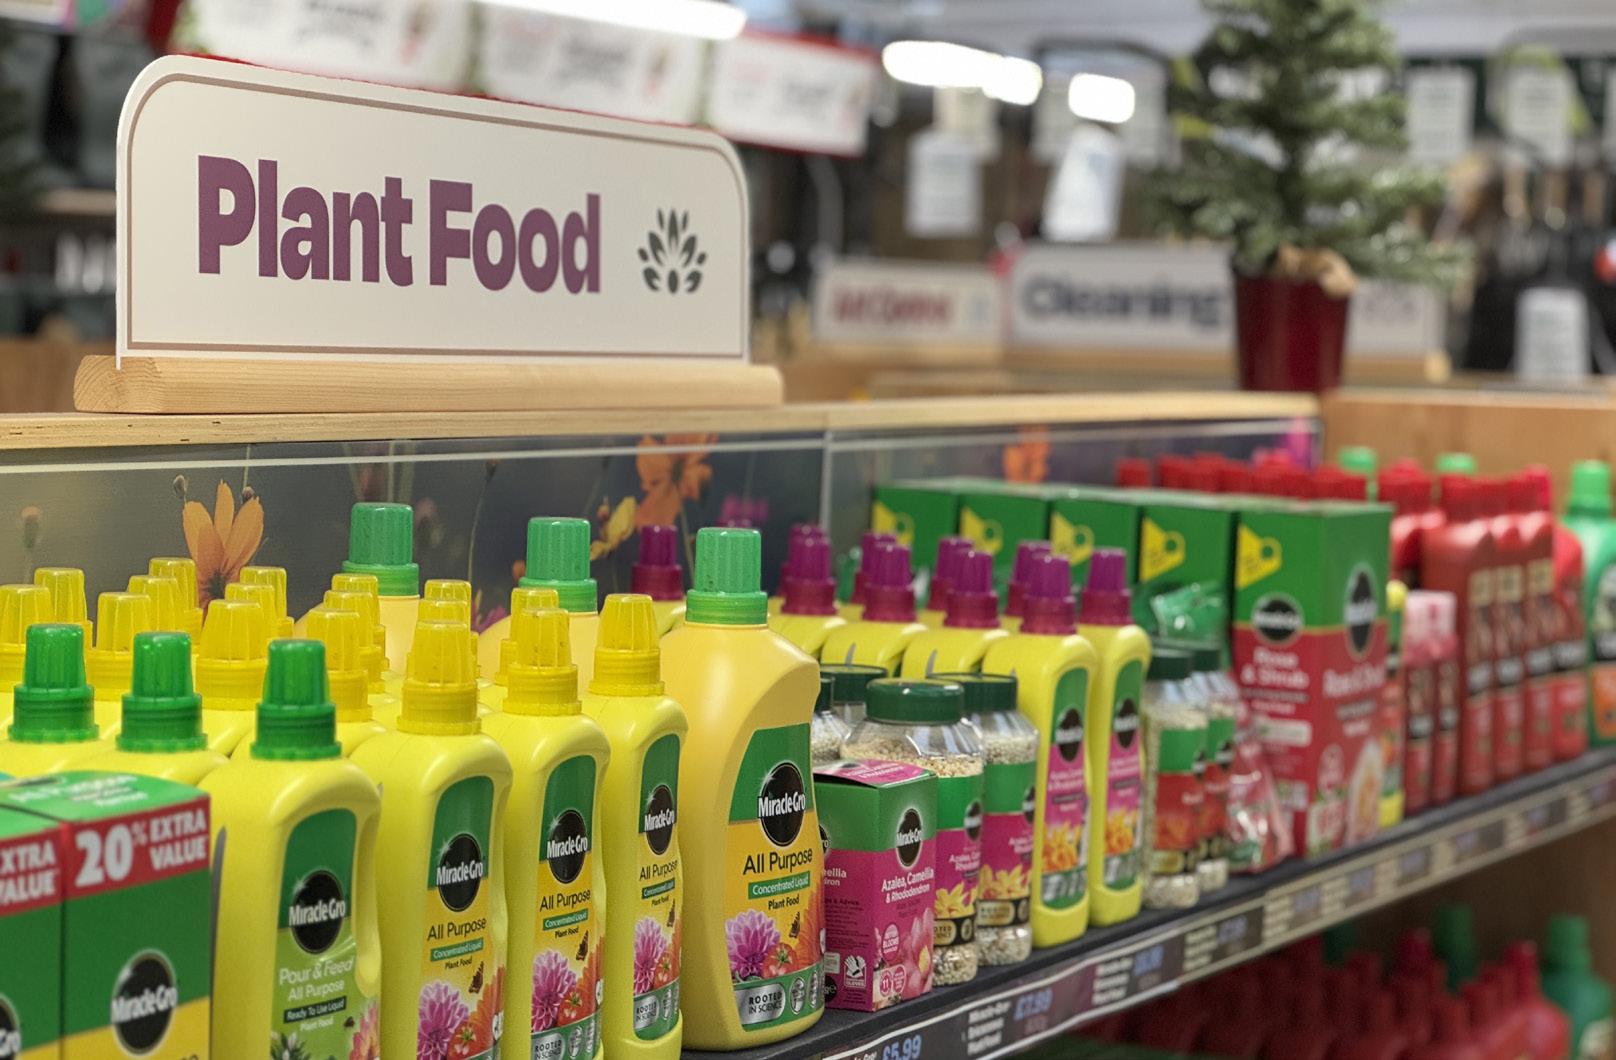
Above Bed Headers
Purpose built frames
The consitency of the new benches gives a smart and satisfying shopping experience.
The height across the centre is therefore also consistent making above bench headers stand out and indicate the position of key categories
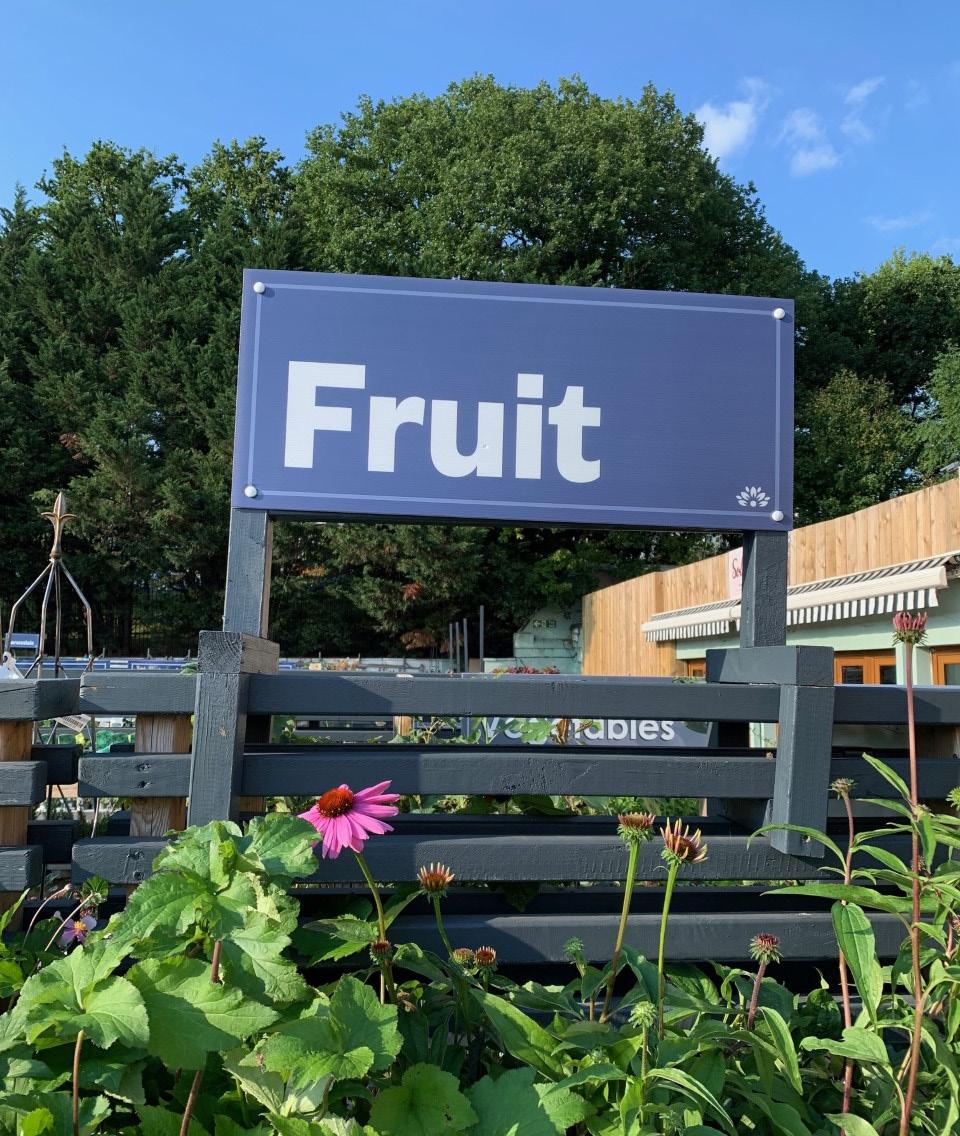
Signage < Nursery < Above Bed Headers

70cm
30cm
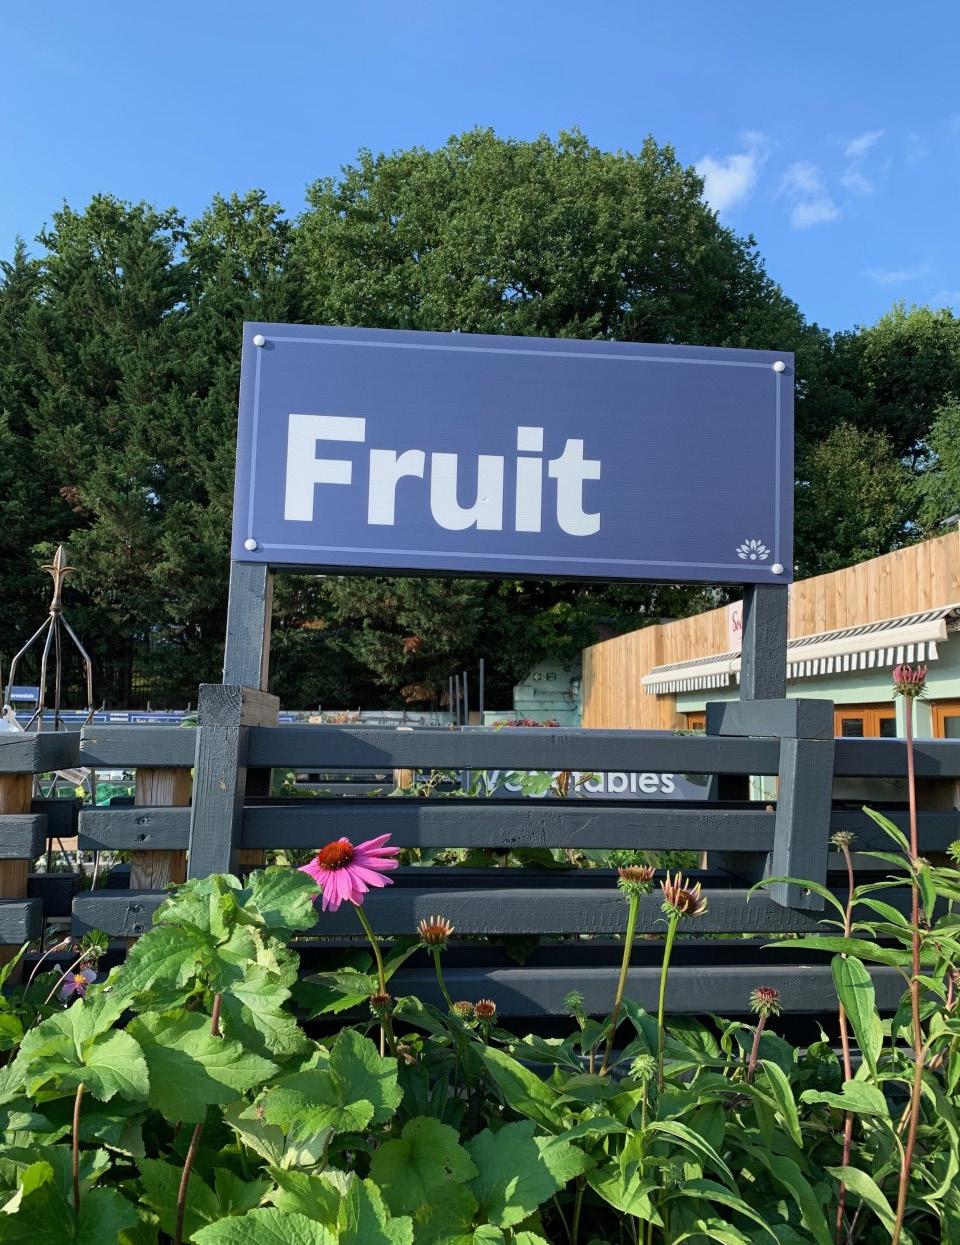
Post: 4.5cm wide
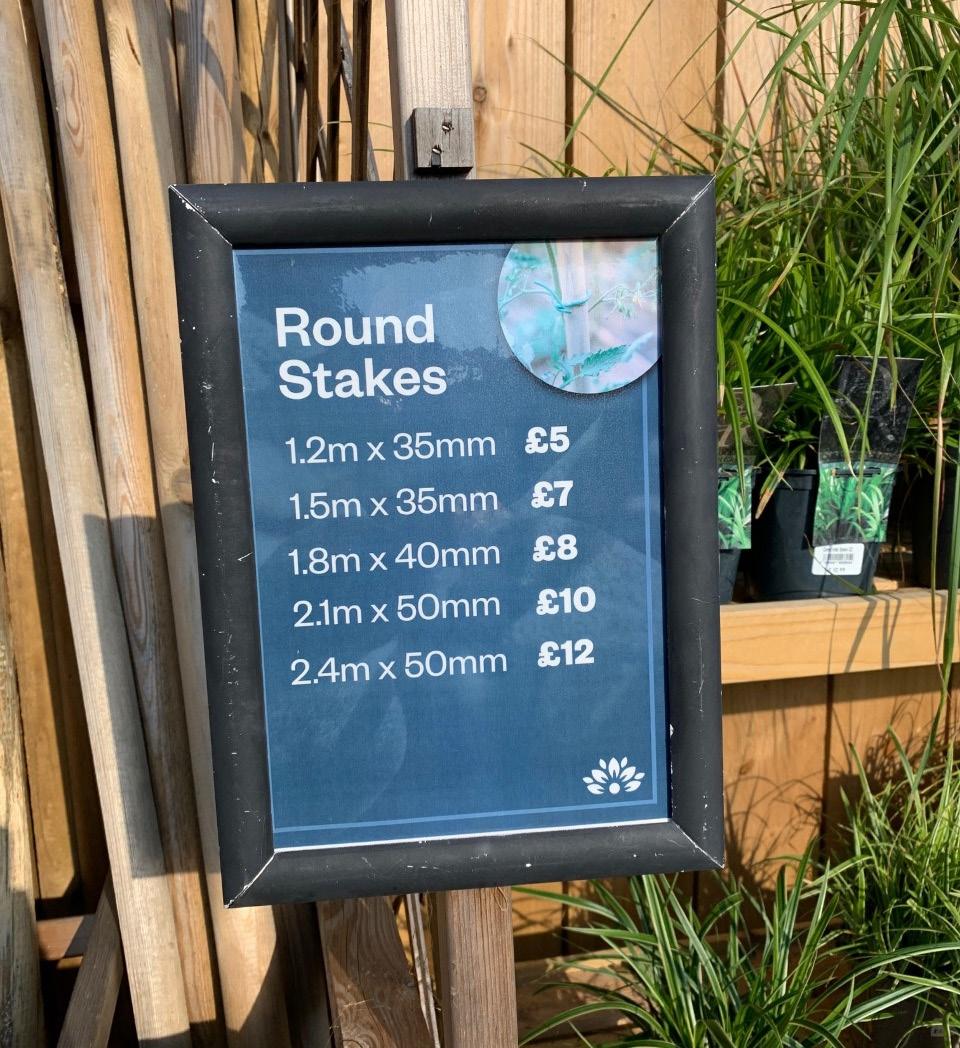
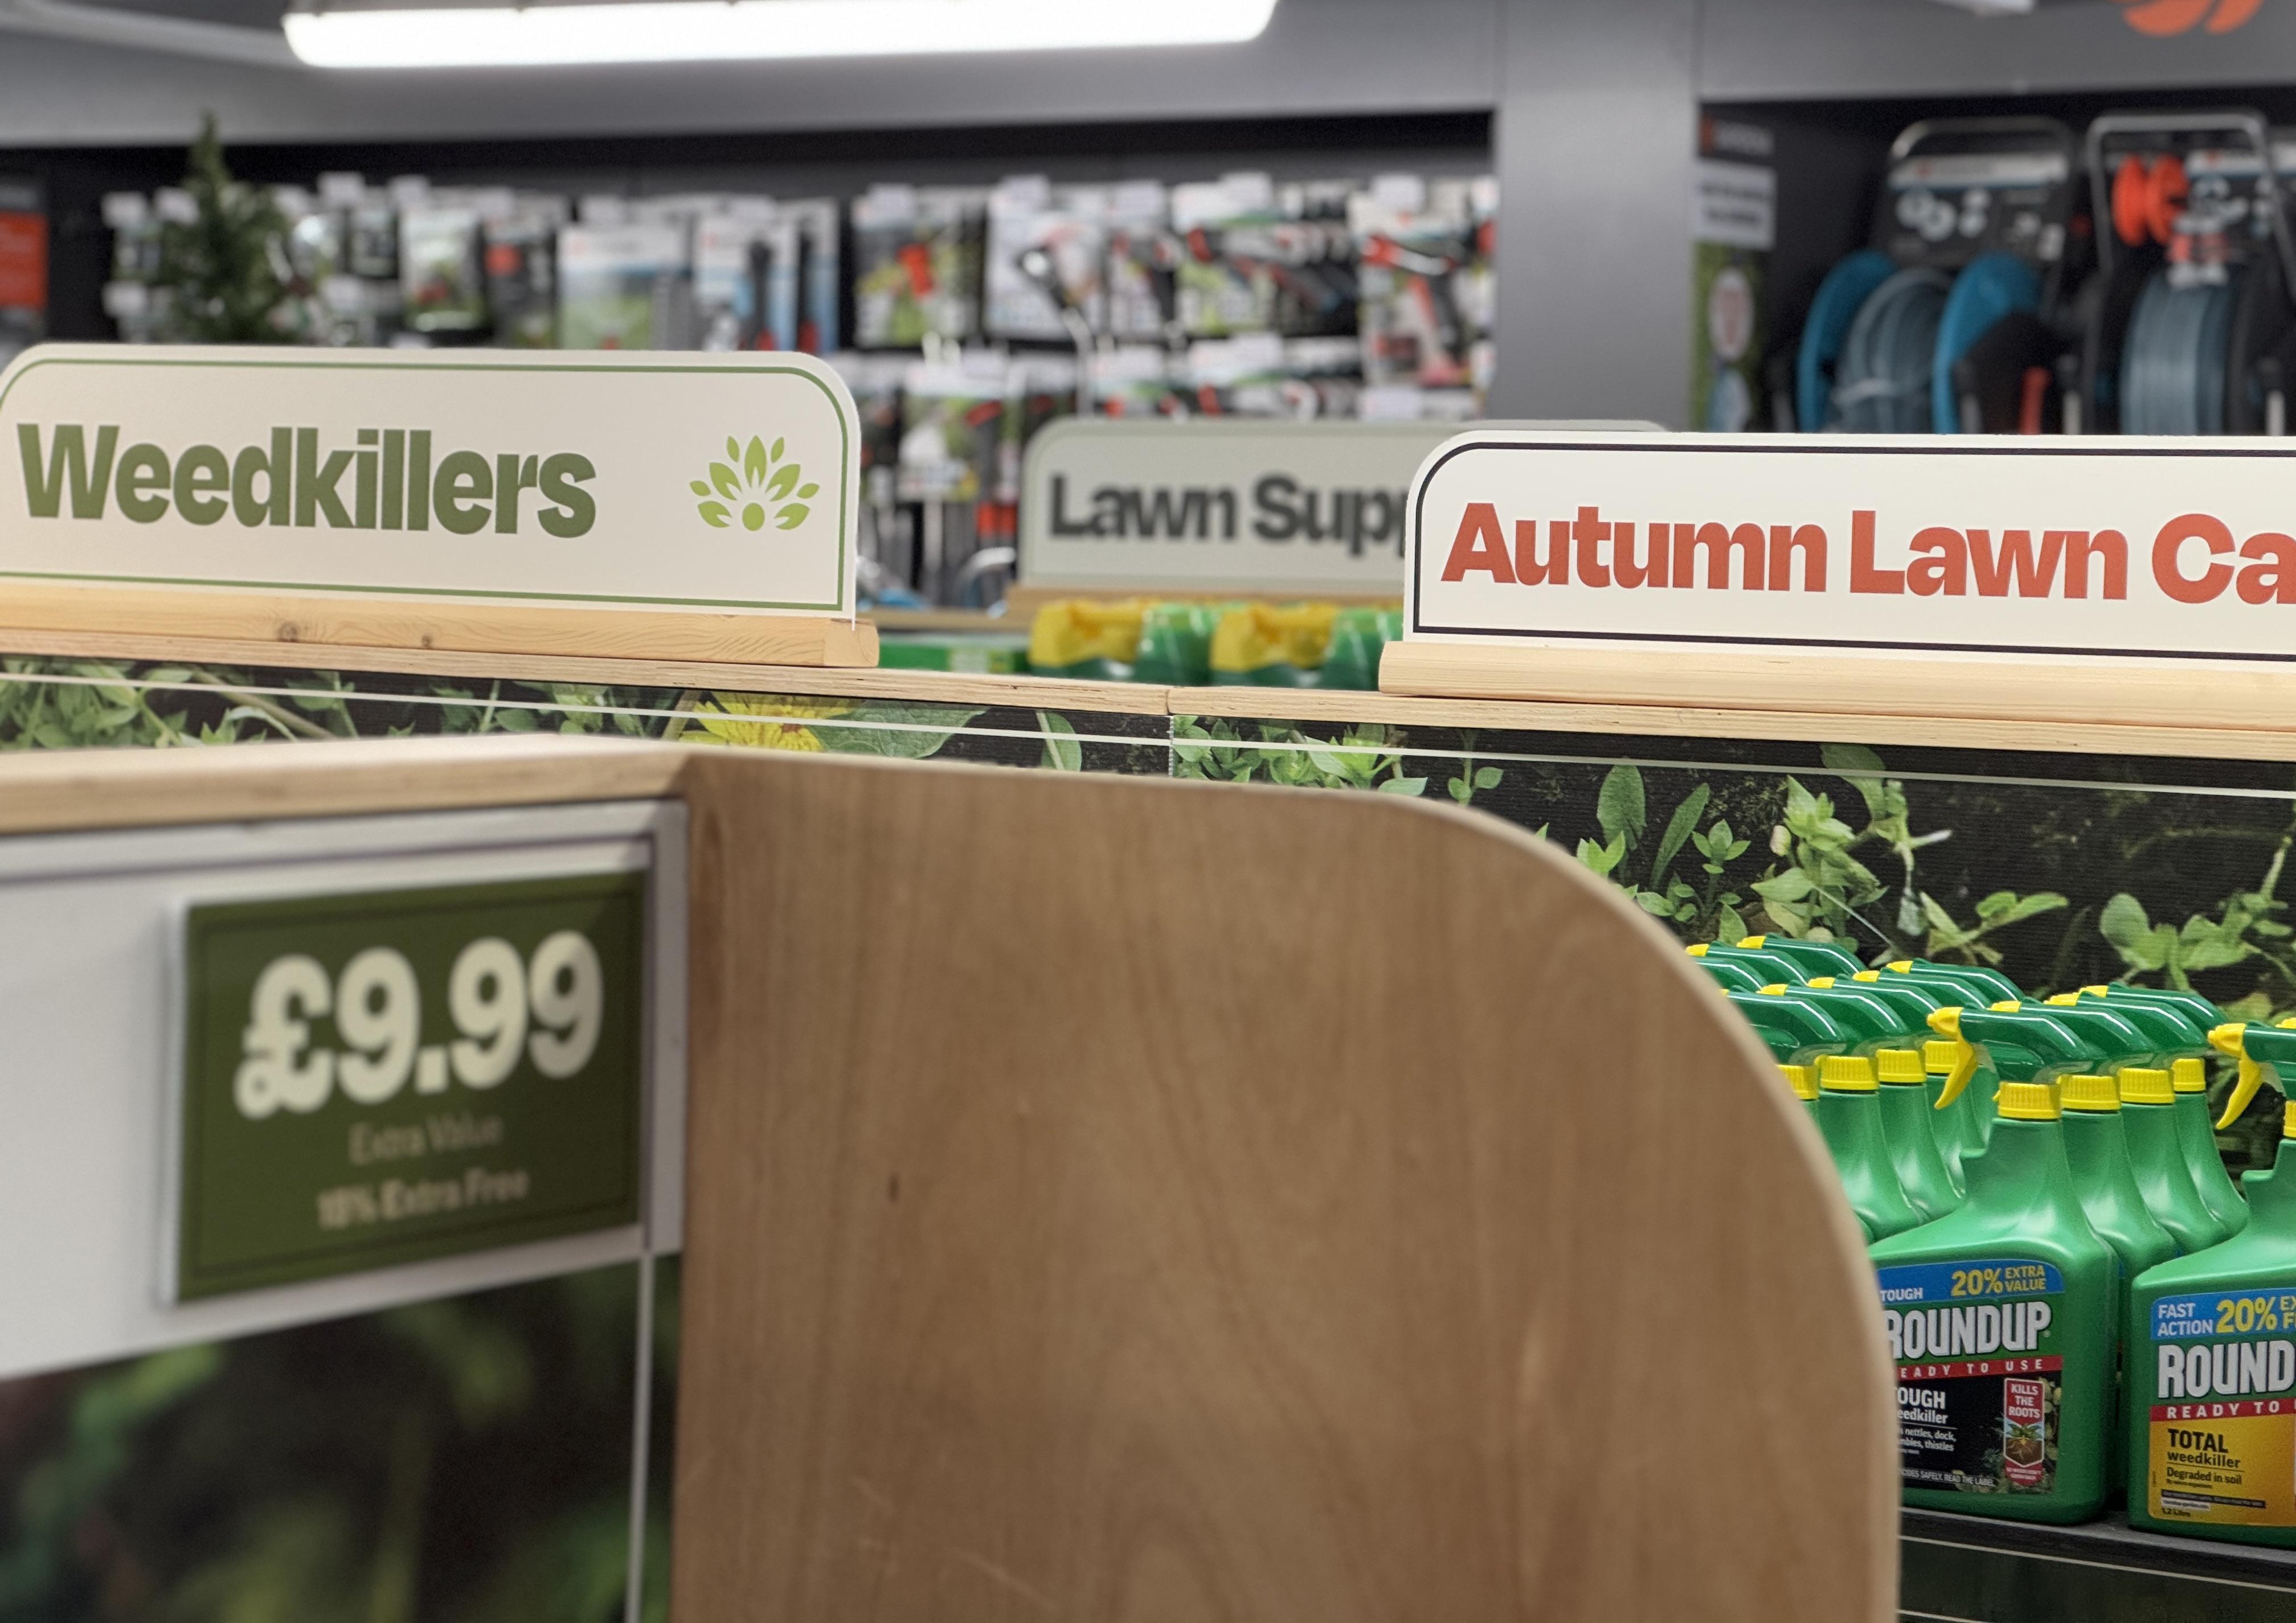
Temporary Pricing
General pricing in brand
The brand guidelines on colour, type and border & badge can be used to create temporary or generic pricing for various situations.
Signage can be printed in house up to A3 but must be laminated to be used outside.
Prices increase in value from left to right and up to down
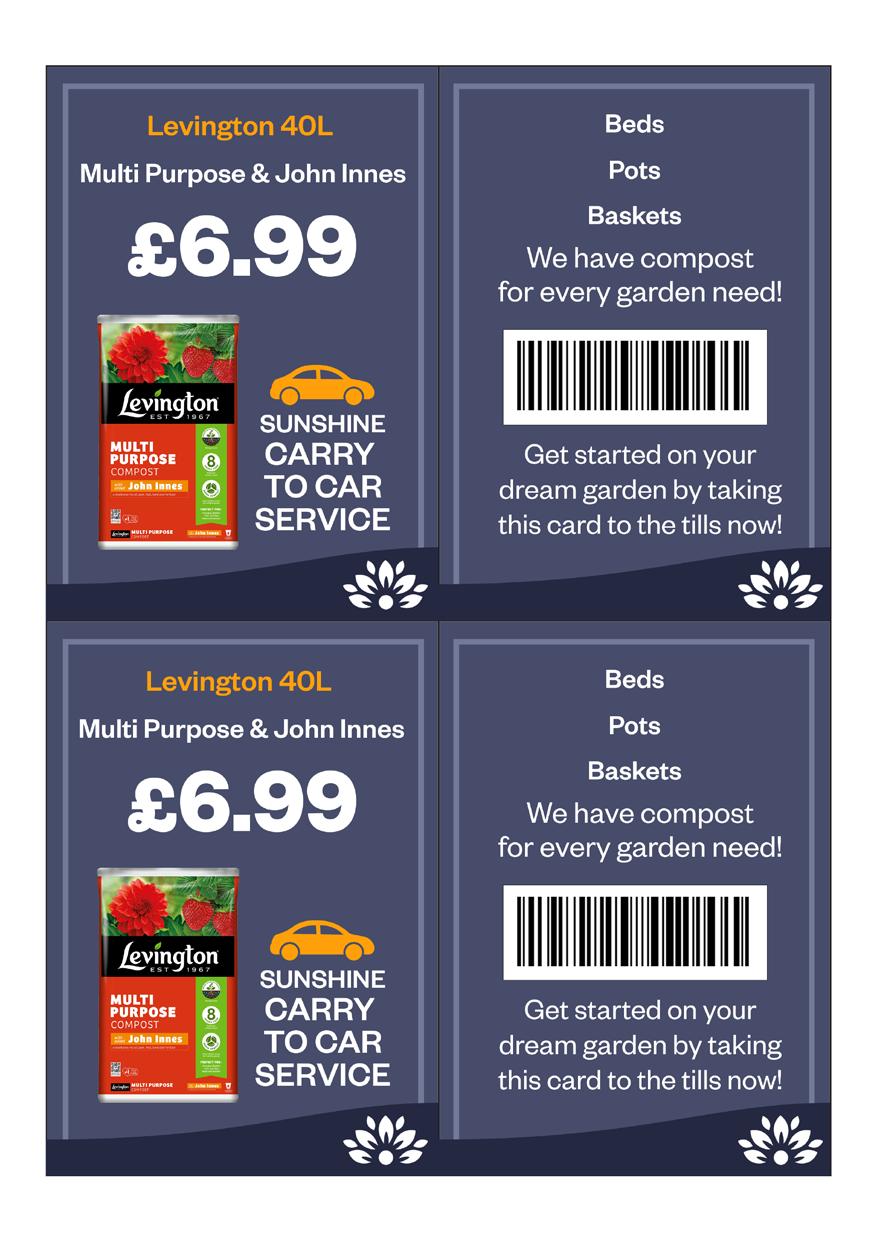
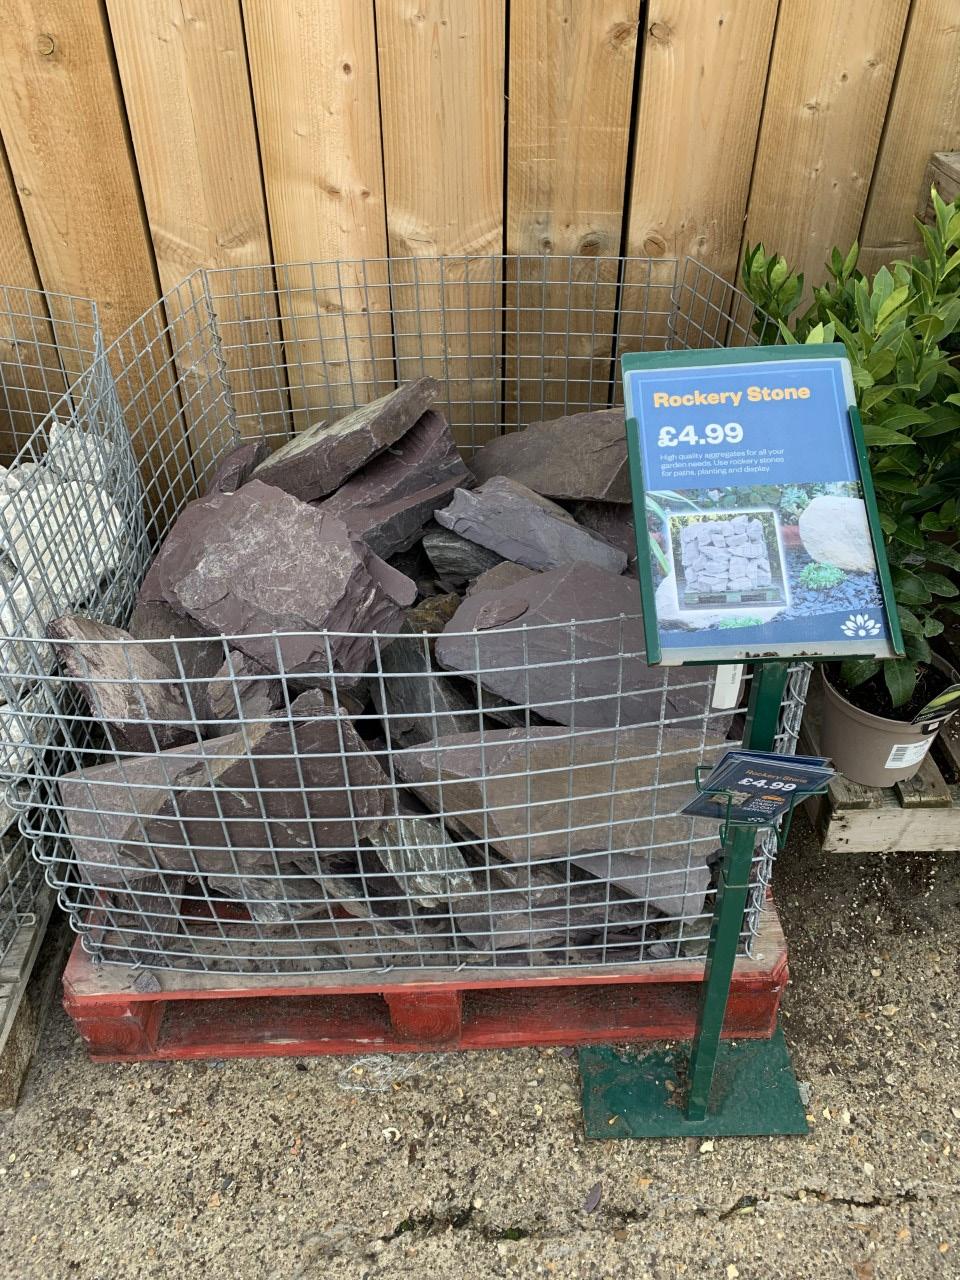
Sunshine sells a wide range of compost. Customers are able to shop using a card system meaning an A4 poster and card is the minimum for all compost lines The same system is used for a number of ranges e.g Kelkay aggregates and Calor Gas
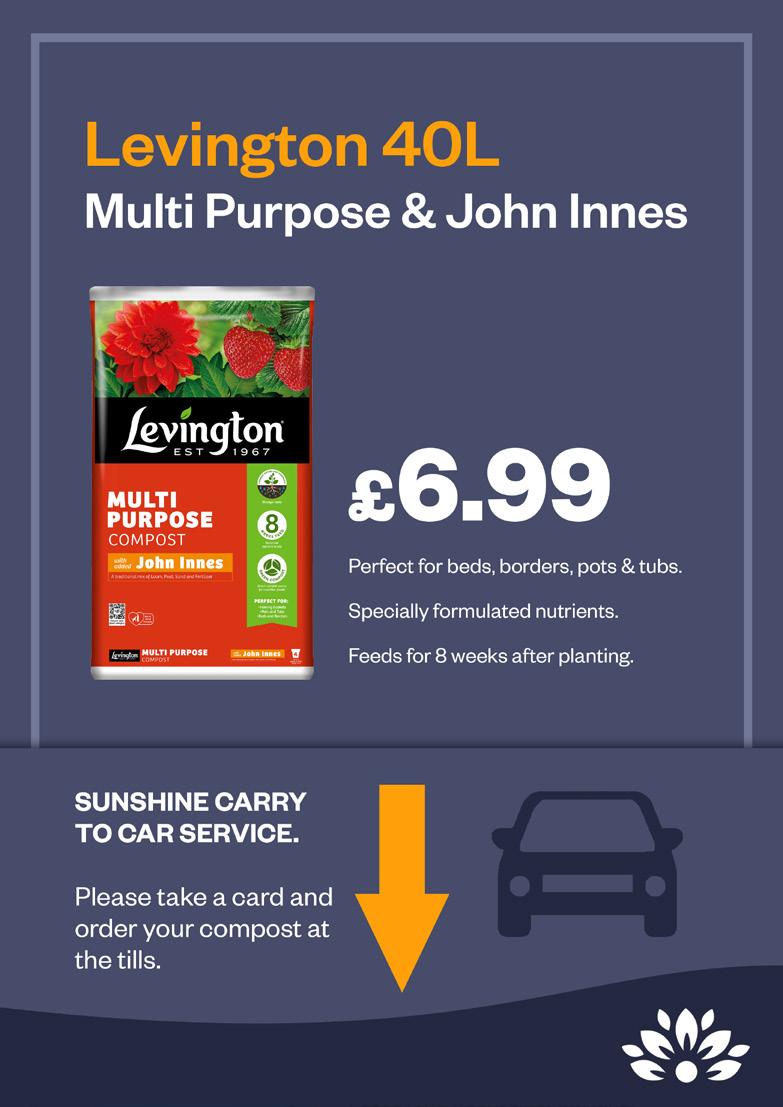
Signage < Compost < Cards
Backup in One Drive
Making the files
Useful photoshop info
Text should be editable using the text tool ( ) and only need small amounts of change such as title and price. The compost info on the stand can be taken from the packet or online

The white background of a compost image can be removed with the magic eraser
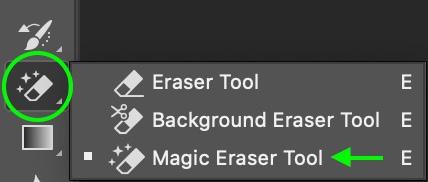
hold down over the eraser icon on the left and select magic eraser. Then click the white background. If too much or too little is removed you can change the threshold at the top
Paste a barcode into the file, I use barcode.tec-it.com/en It will have the numbers on it. Choose the marquee tool and drag a rectangle over what you want removed. Then press delete to leave the barcode lines

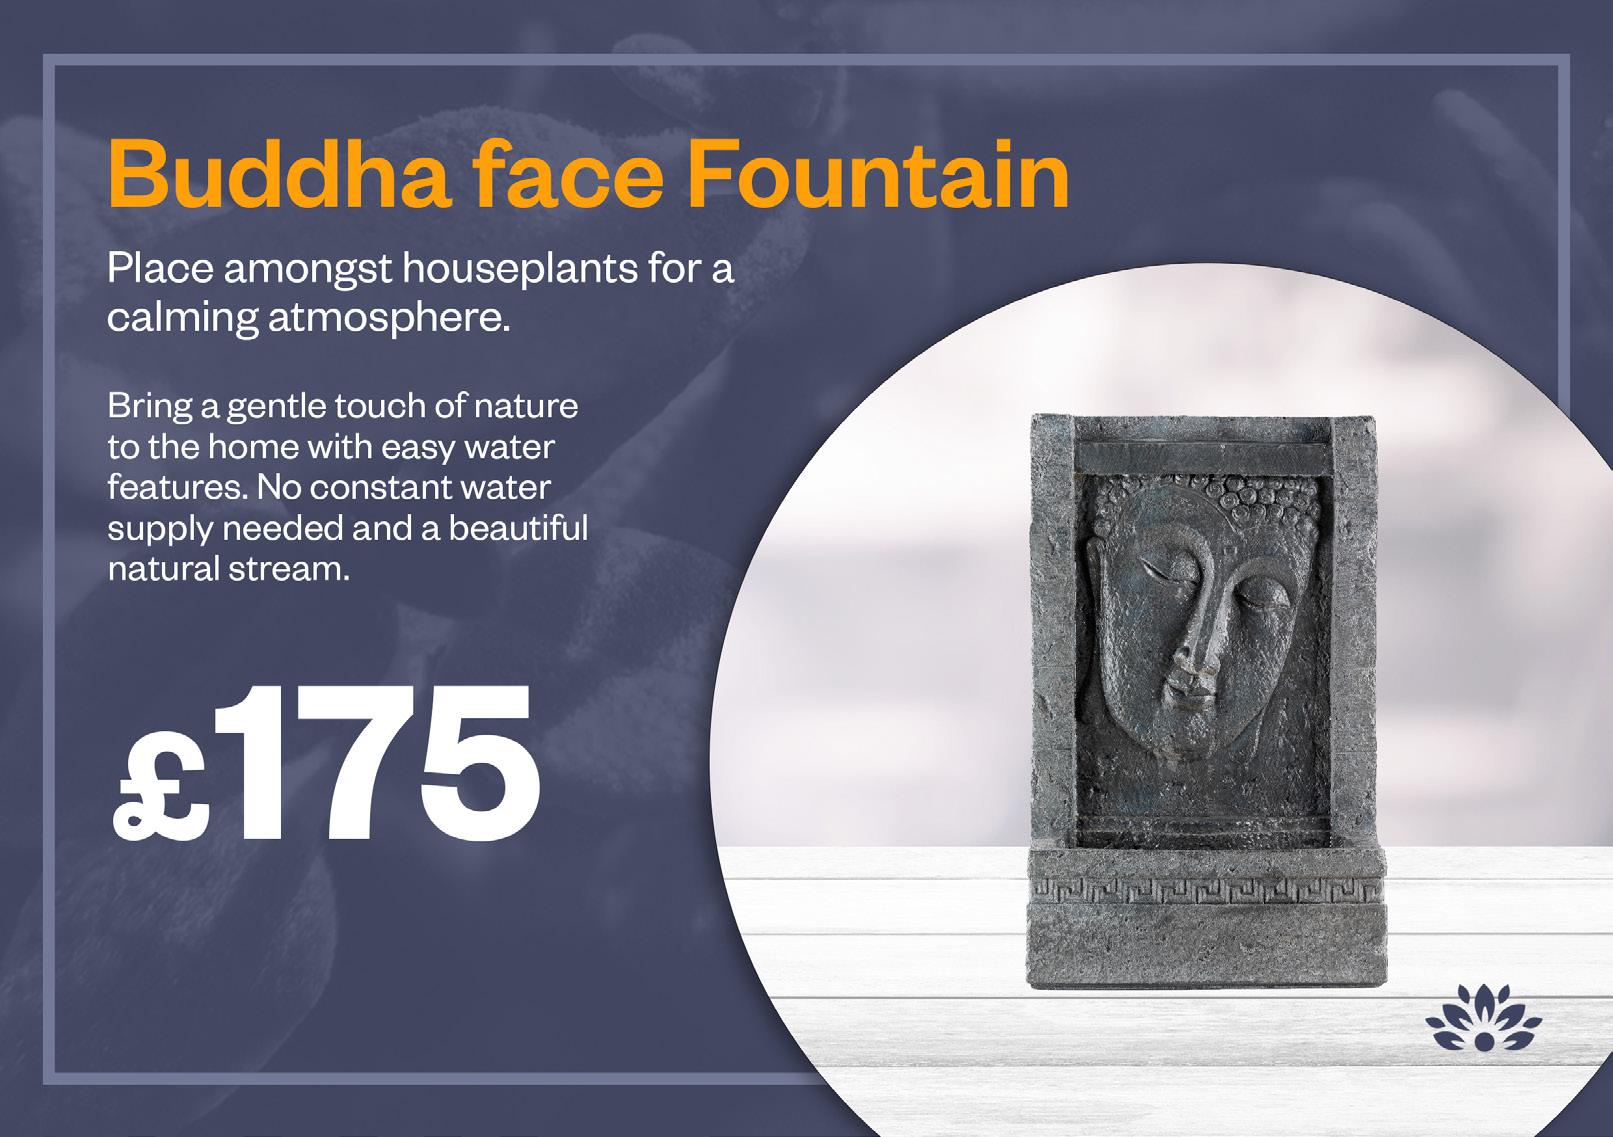
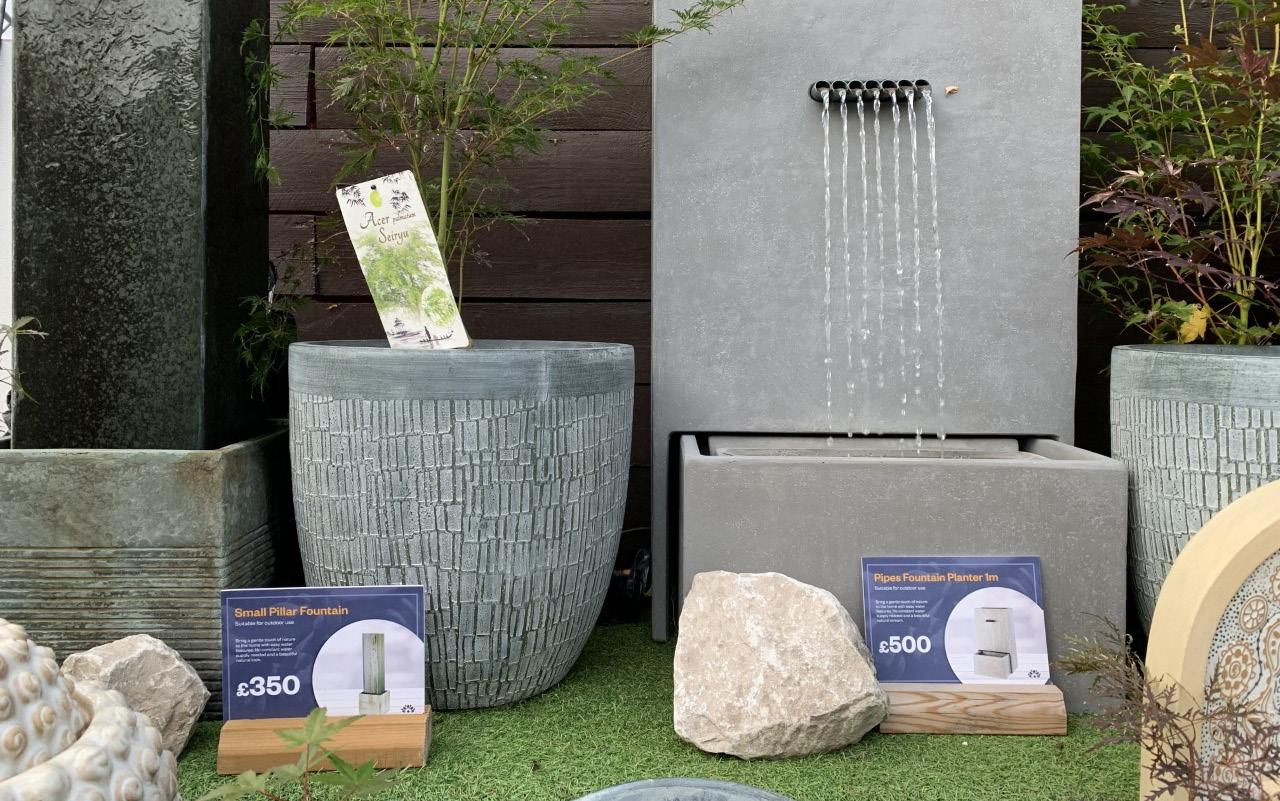
Fountains
A5 price signs are used for the fountains following the consistent outside price template. The designs should be printed on 3mm foamex and be free standing in a timber block or attached to the fountain
The white background of a compost image can be removed with the magic eraser
hold down over the eraser icon on the left and select magic eraser. Then click the white background. If too much or too little is removed you can change the threshold at the top
Signage < Leisure < Kaemingk < Water Fountains
High price disk tags
Tie to plant
Originally designed for tree ferns the disk tags can be used for any high price large plants if the prices and content remain generic.
As a solution they are portable and cheap but provide a more luxuriouis feeling for higher priced plants.
A similar concept is used at Christmas time for generic hanging prices


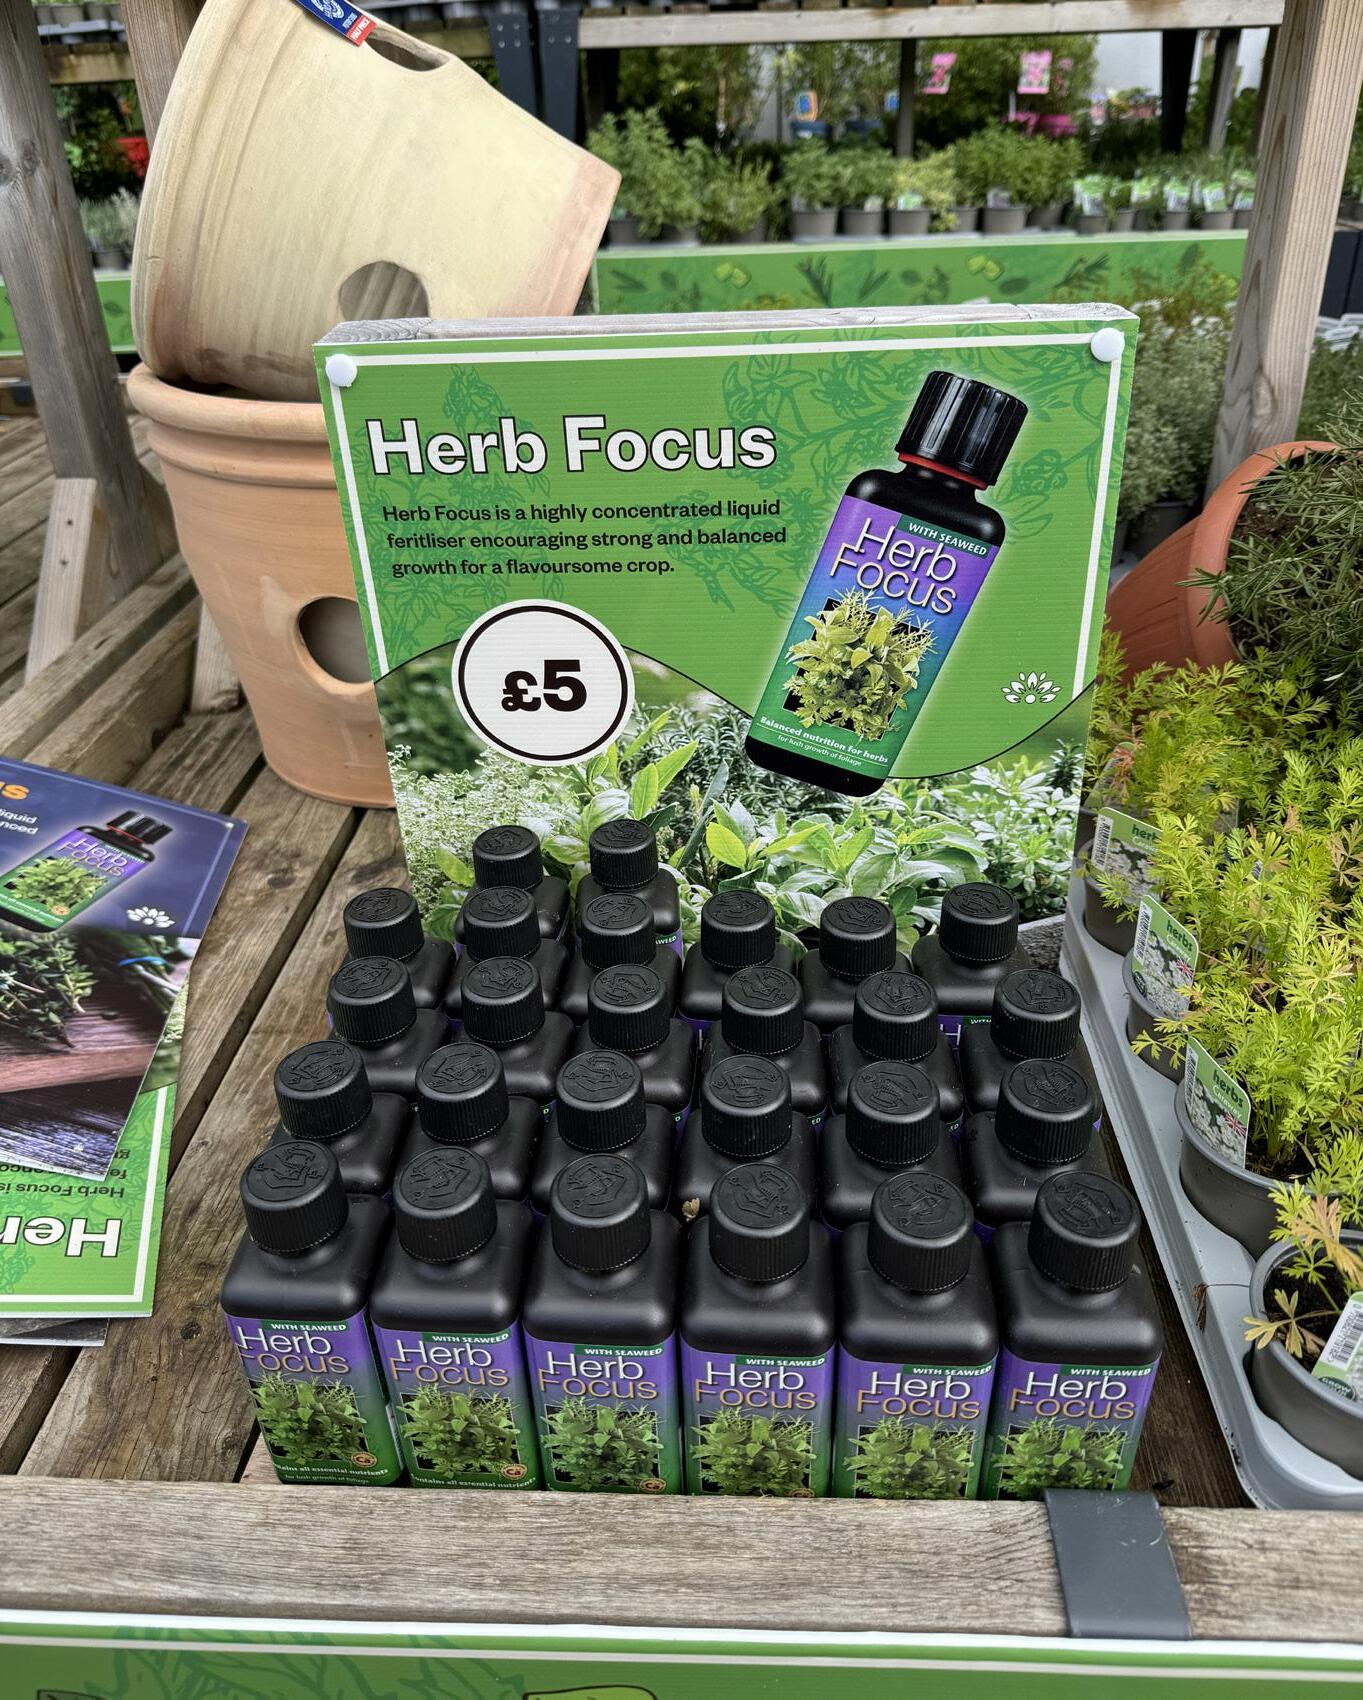
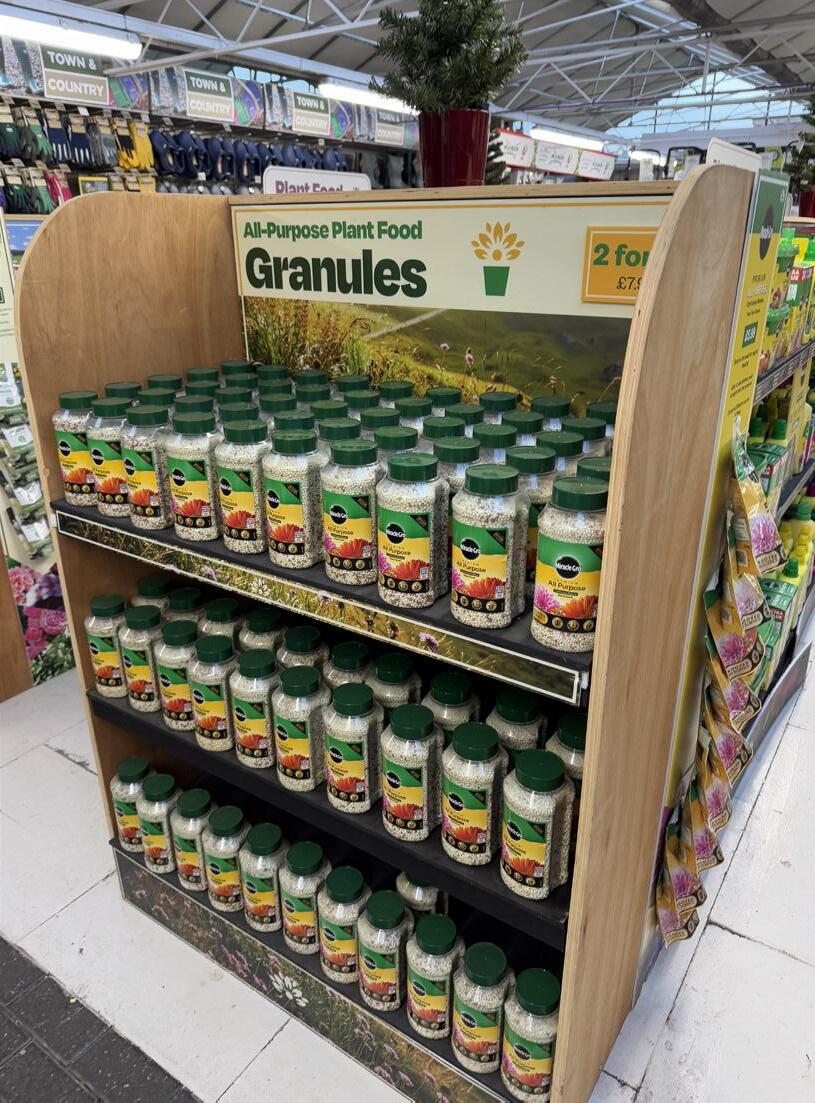
Backers
Plant Food Focus Bottles
Size: 360x390mm
These fit onto wooden frames that fit rows of Focus Feed bottles in front of the POS. A paper overlay is used to price these in case the price changes. This way the backer does not need replacing if the price changes.
The Focus range includes:
• Herb
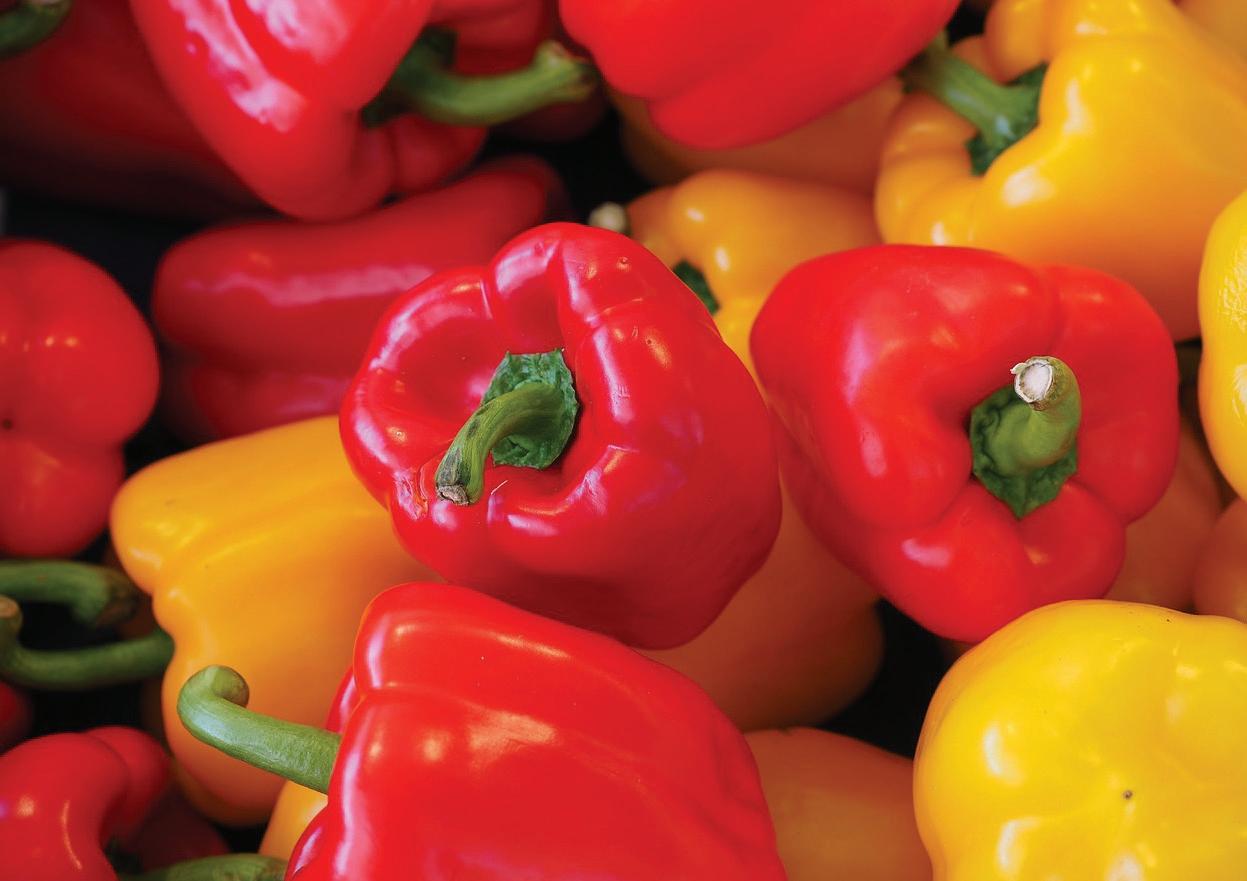
• Chilli and Pepper
• Palm
• Olive
• Cactus
There are also ranges such as:
• Houseplant
• Orchid
These products do not utilise these backers as they are sold inside


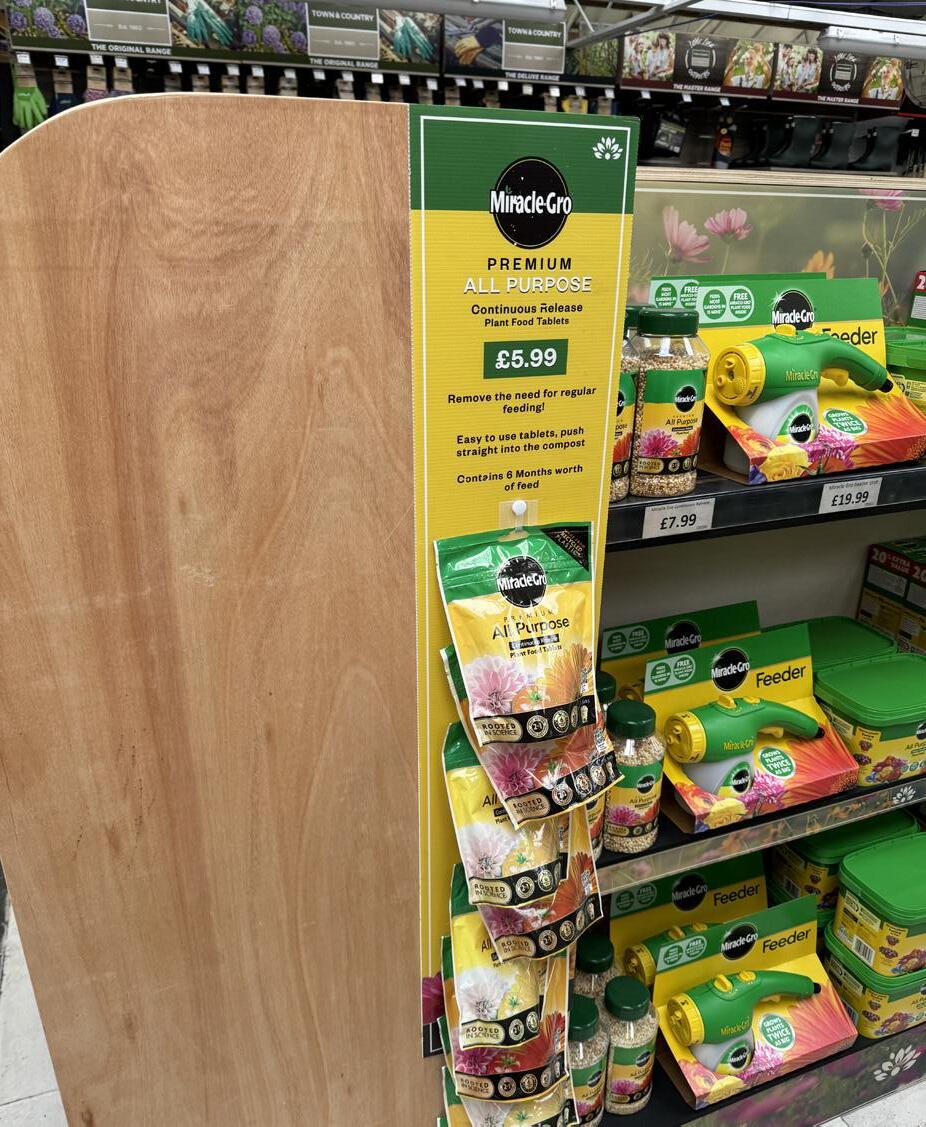
Backers
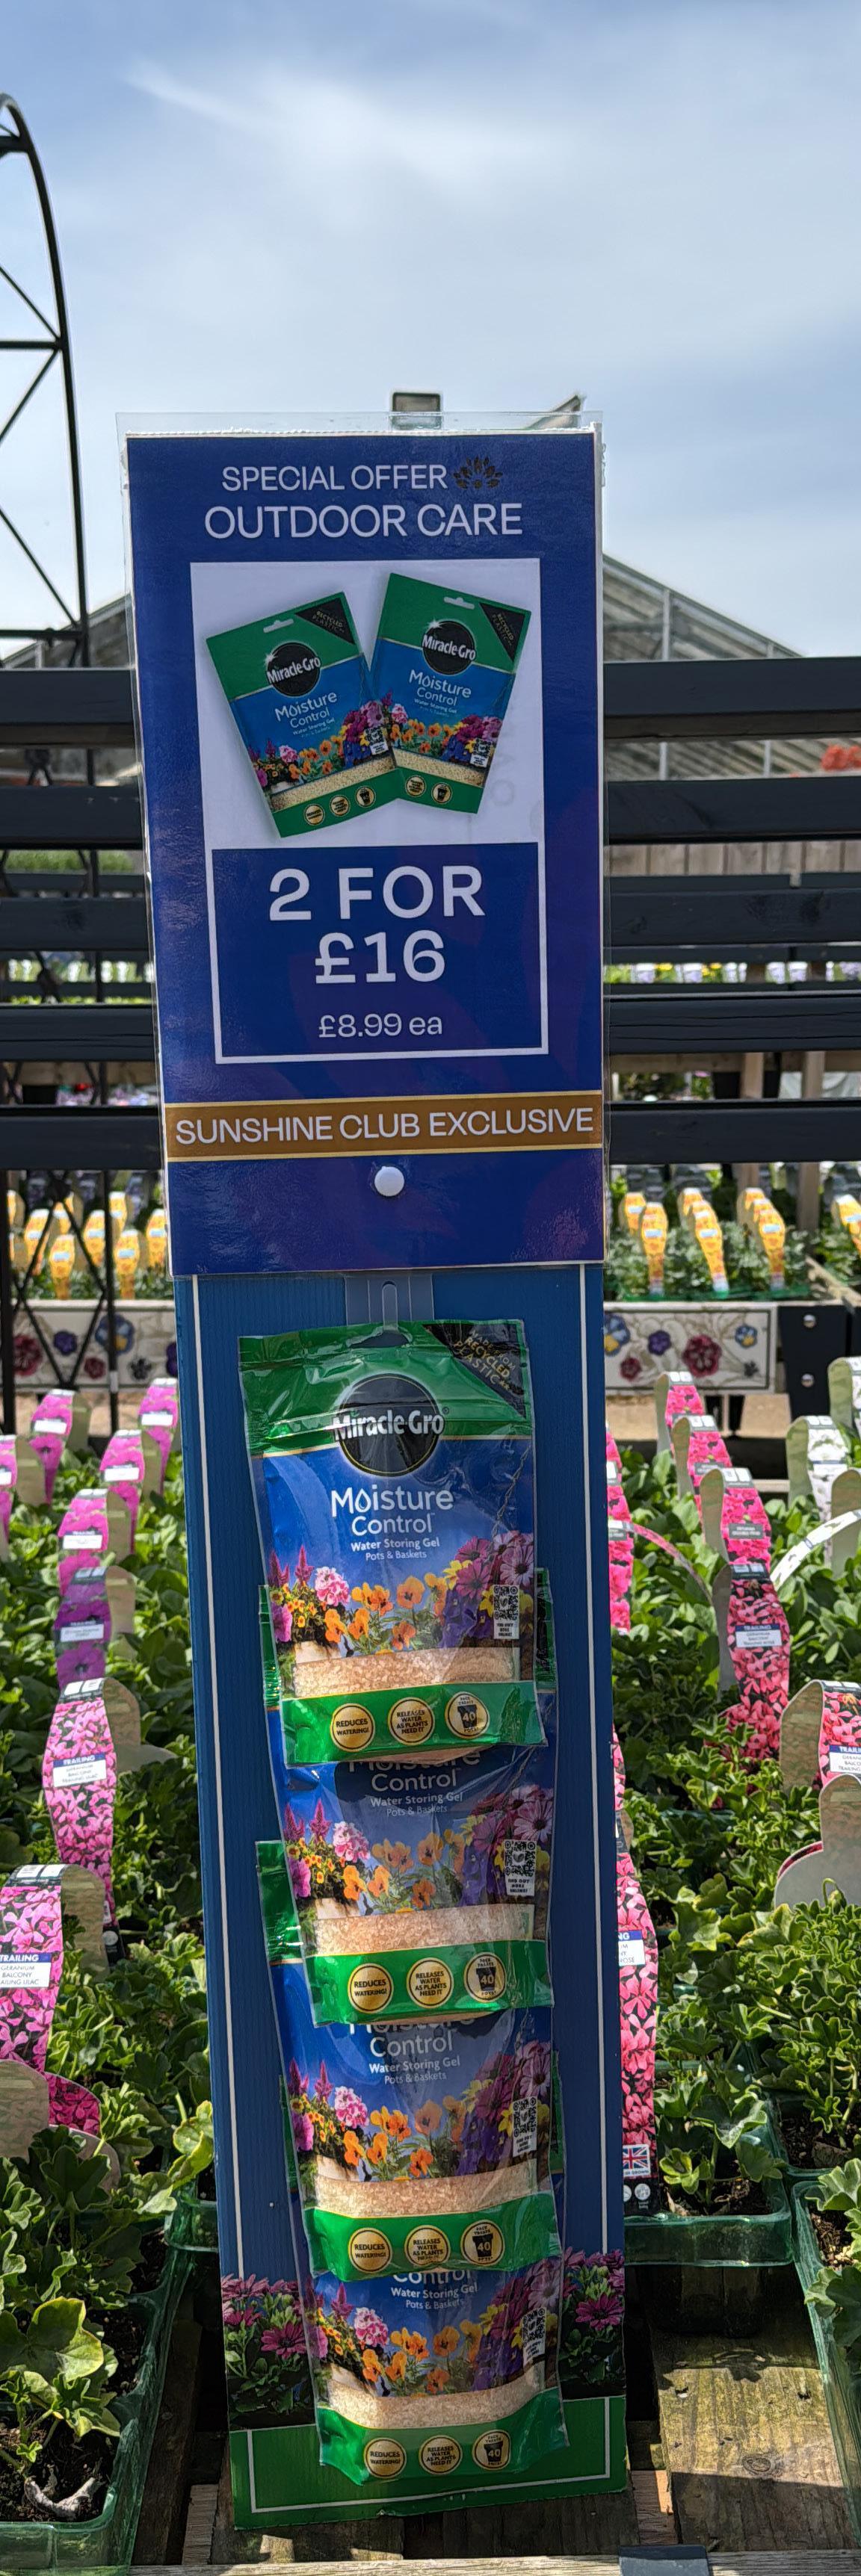
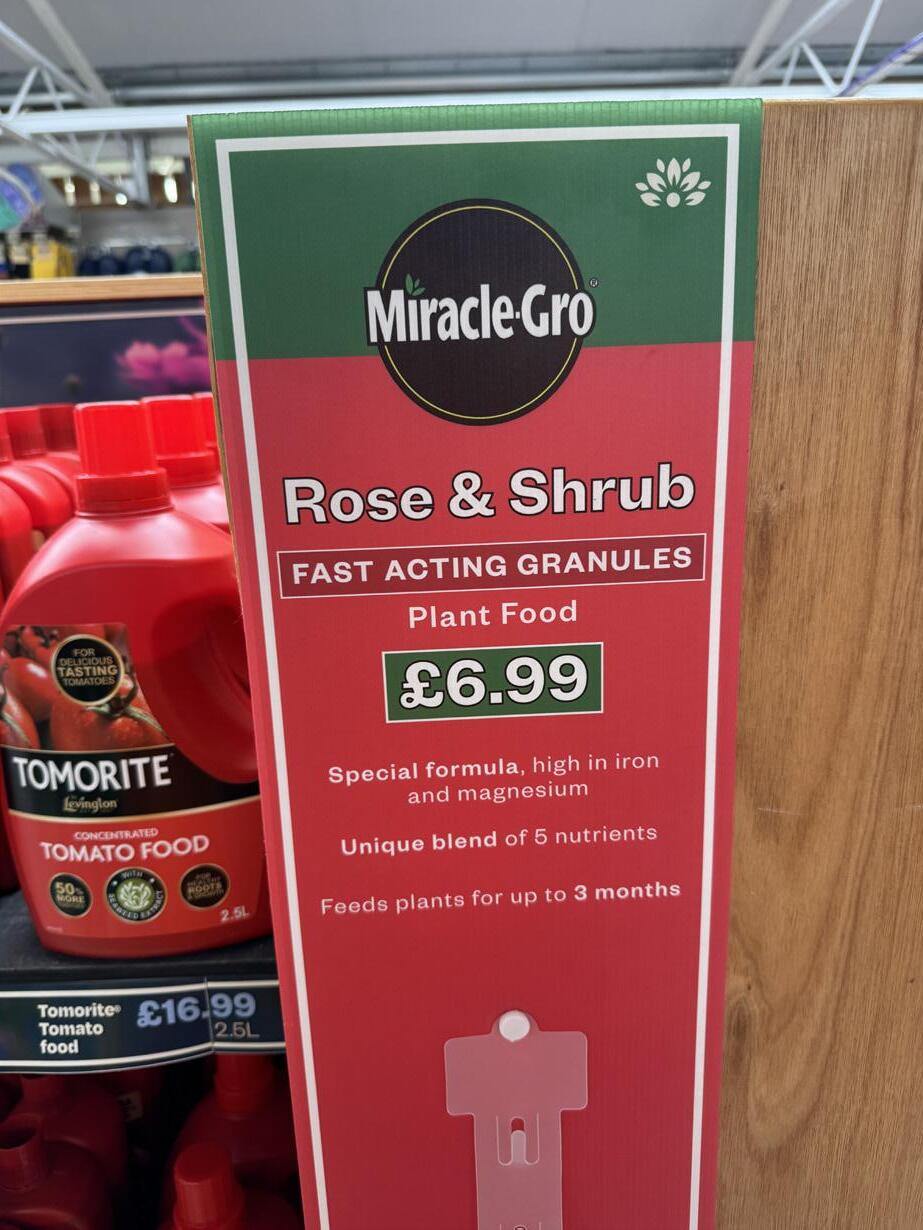
Euro Strip Towers
Sizes
these have a few different sizes:
• 20x100cm
• 25x100cm
• 20x146.5cm (Top of the Shop only)
These are used for:
• Miracle Gro Tablets
• Moisture Control
• Rose & Shrub
• Gardening Tools
• Gardena
• Pest Control
• Slug Gone
• Aqua Gel
• Spring Bulbs (Seasonal)


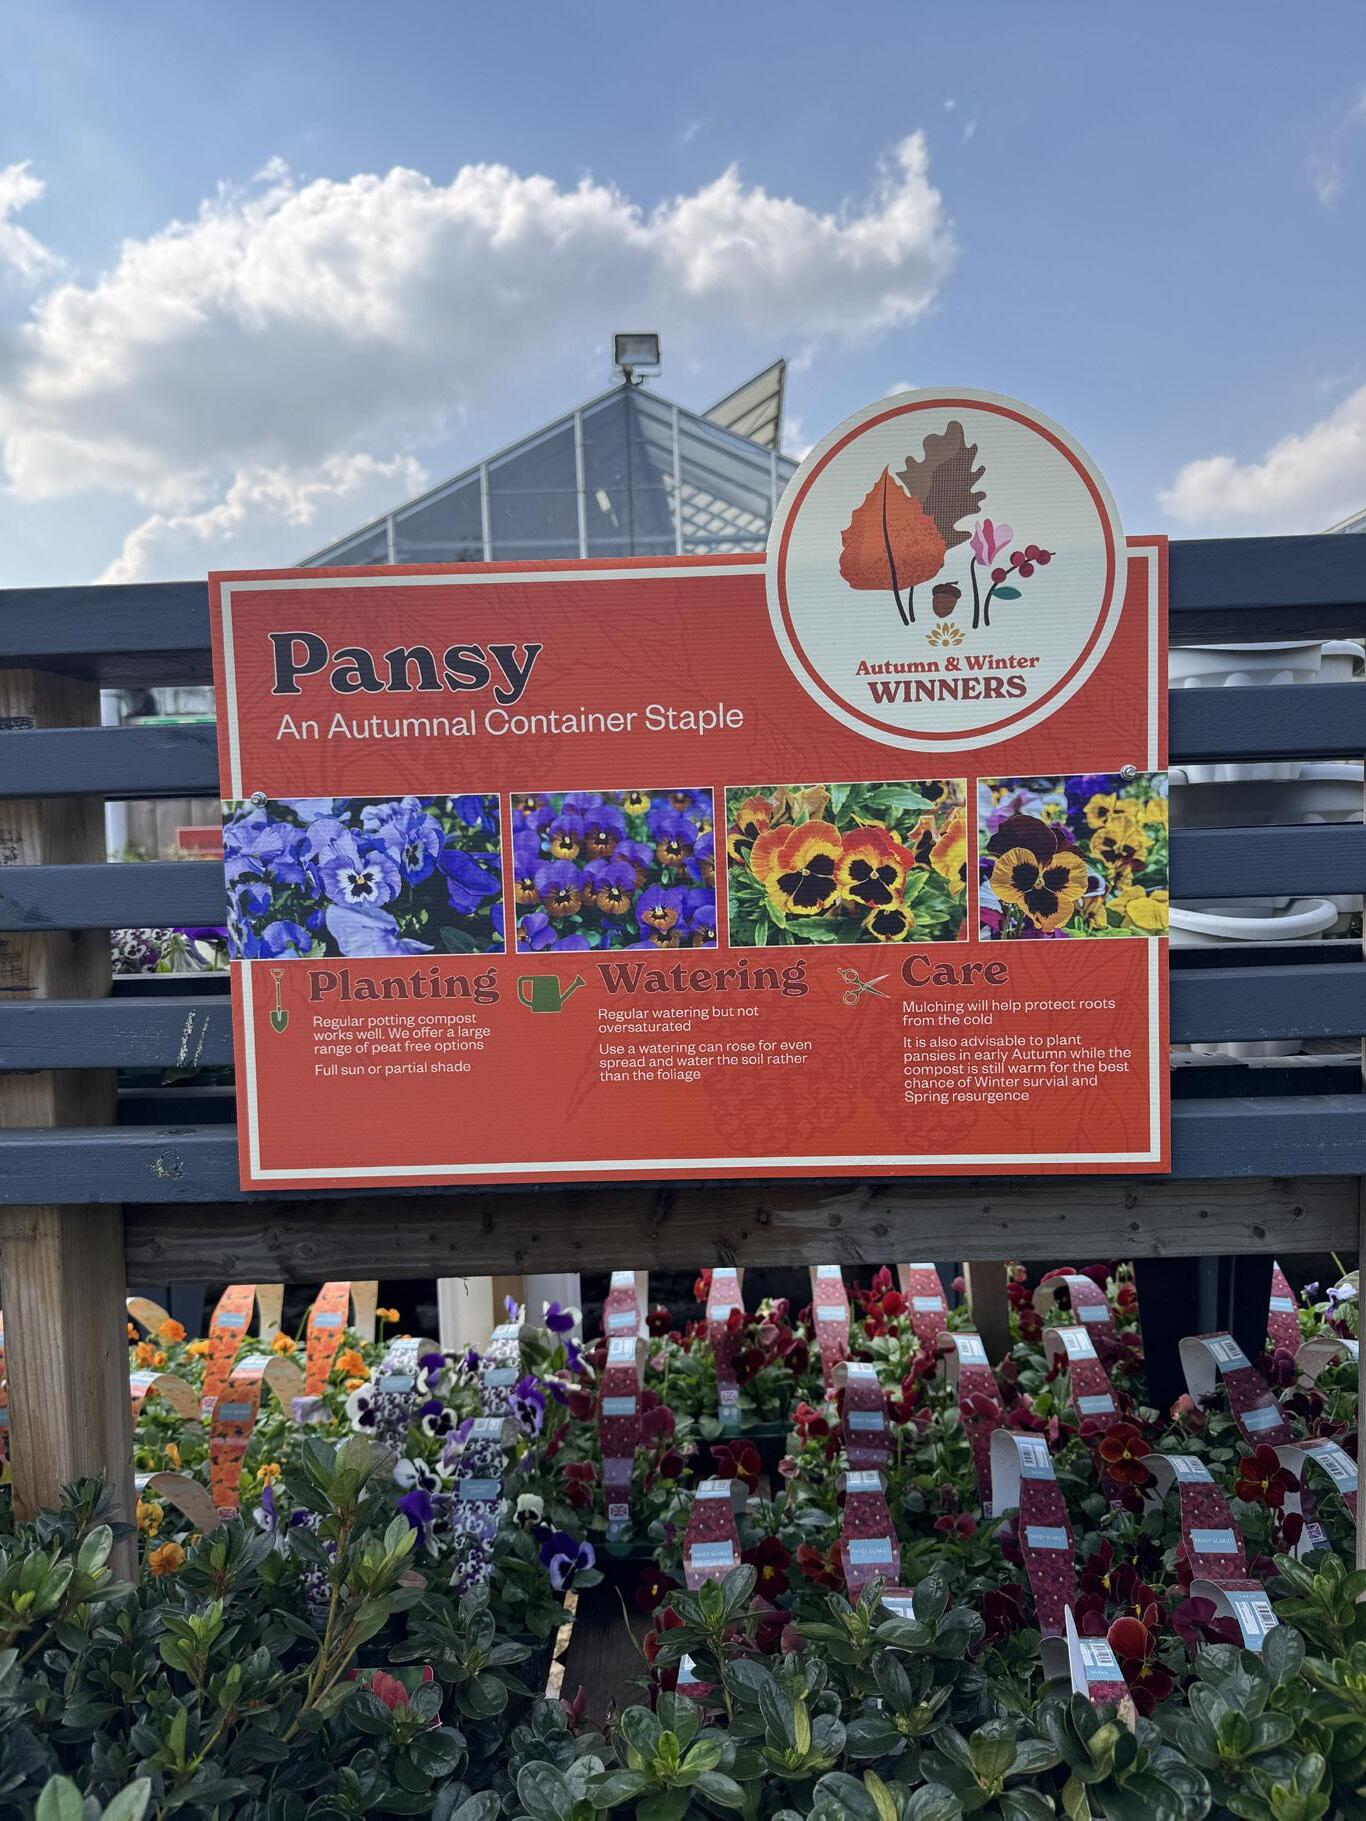
Sections
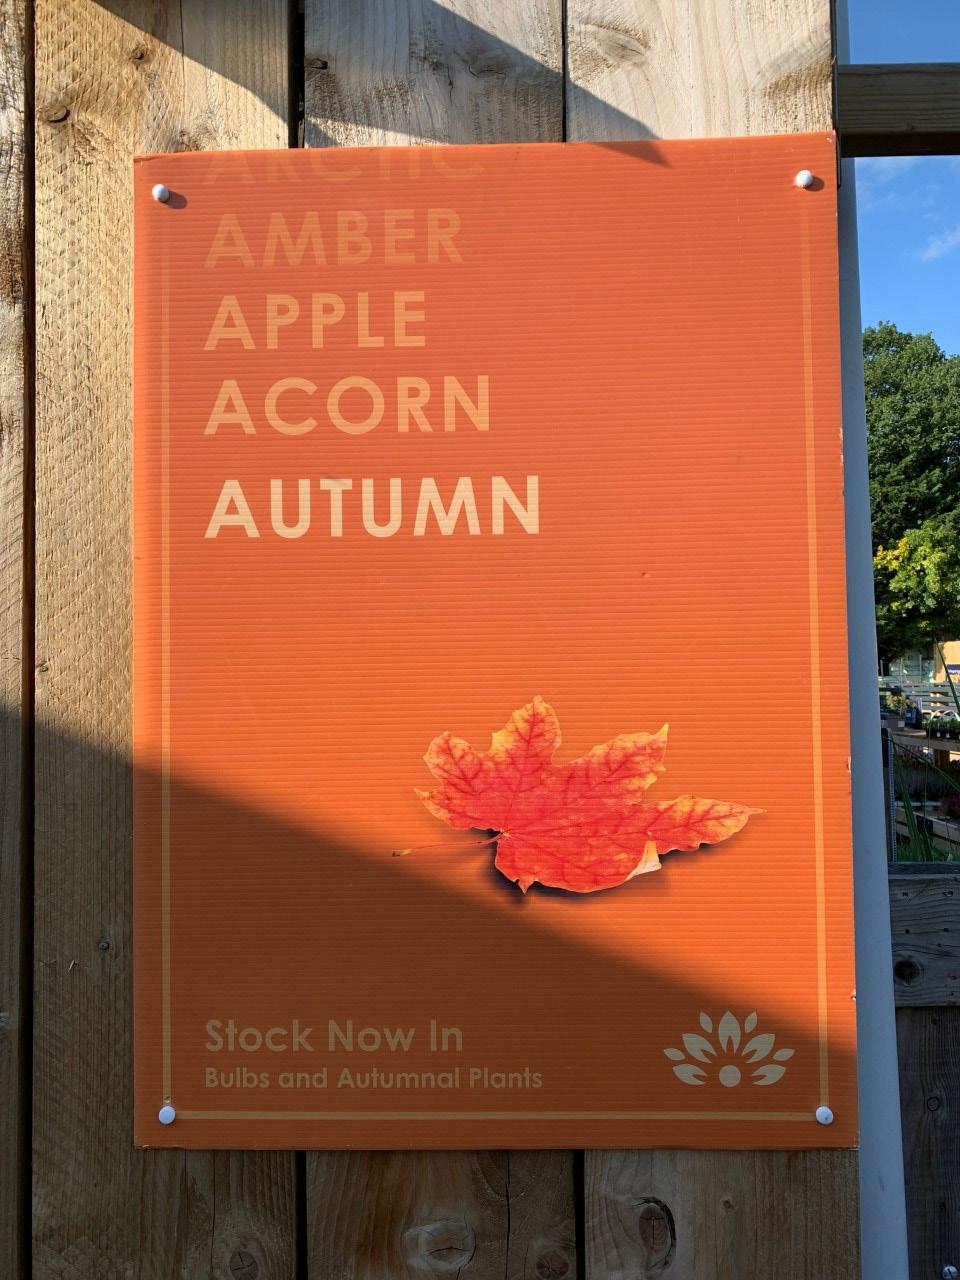
Seasonal
POS can be used as informative pieces for customers about certain seasonal plants and groups of plants and shrubs that require specific growing conditions
This can include:
• When to grow
• How to grow
• Where to grow
• Which plants require heat or more water
Shop Floor POS
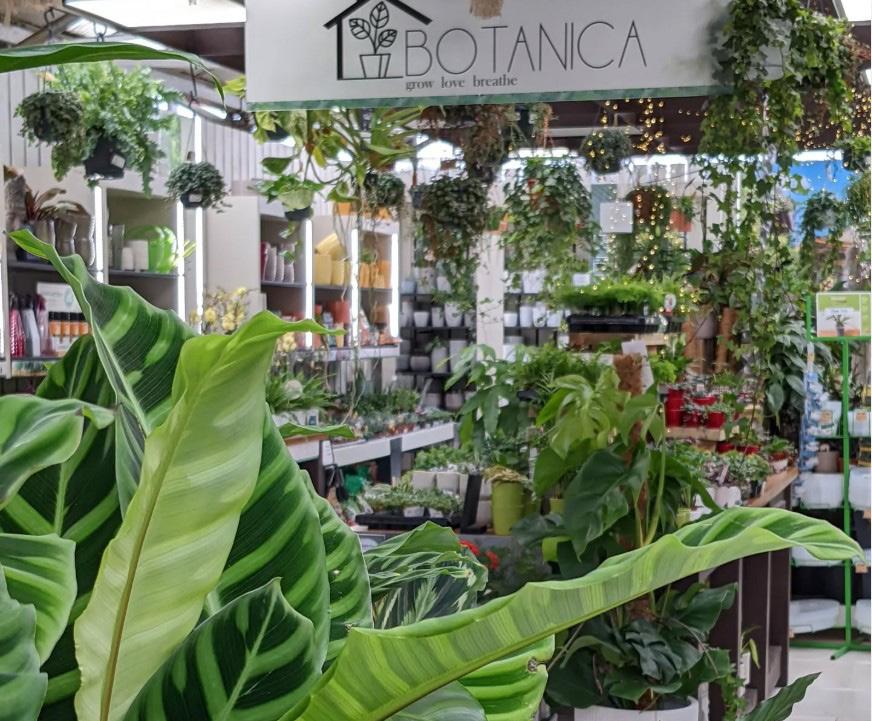
Botanica
Seasonal
Botanica uses POS in the form of banners for prices above and below shelves
The new design incorporates the branding and colours of the products being sold
This branding includes the Focus Range:
• Houseplant focus
• Cactus focus
• Orchid focus
This adds more colour and removes the need for temporary laminate price labels (which often fall off and aren’t seen by customers)
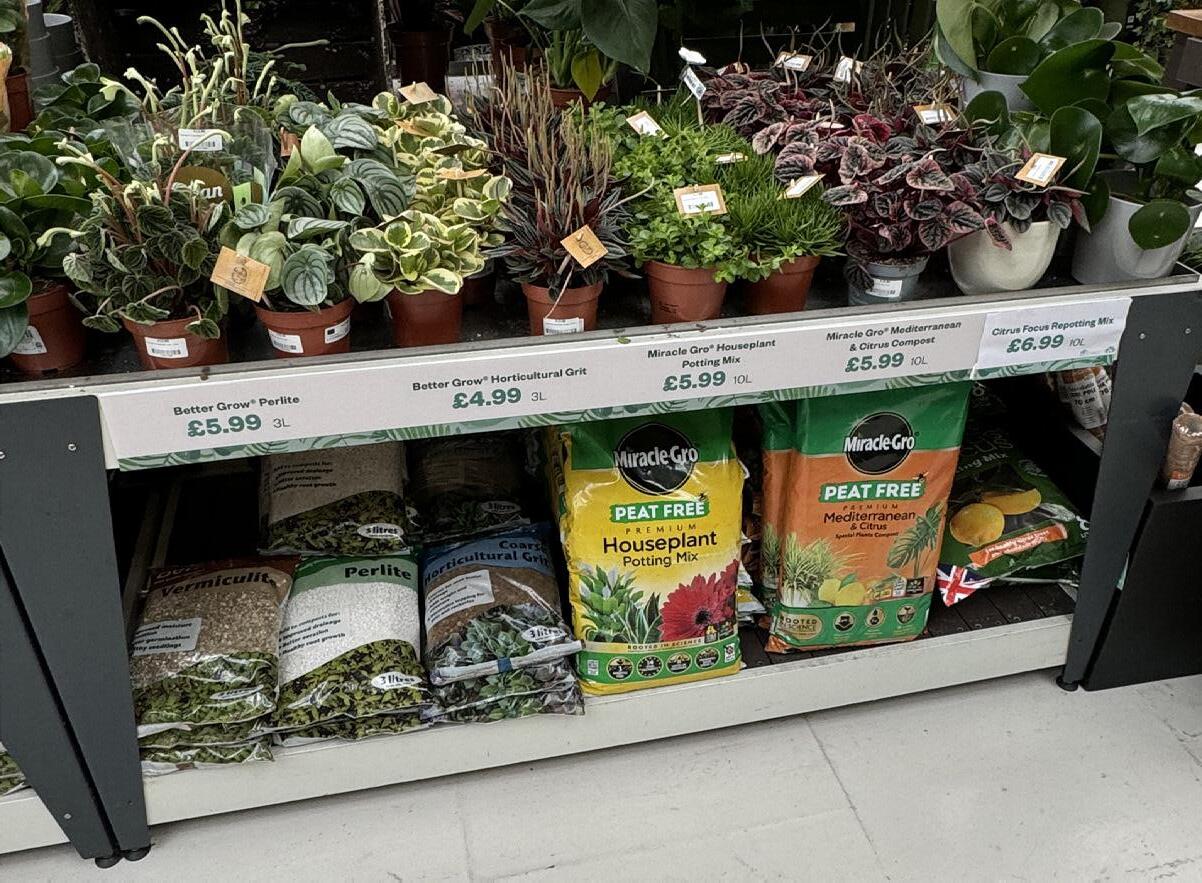
These banners have 3 different sizes for each shelf:
Top Shelf
91x6cm
For smaller products
Second Shelf
130x10cm For compost prices

All Permanent and Temporary POS should feature the Botanica logo
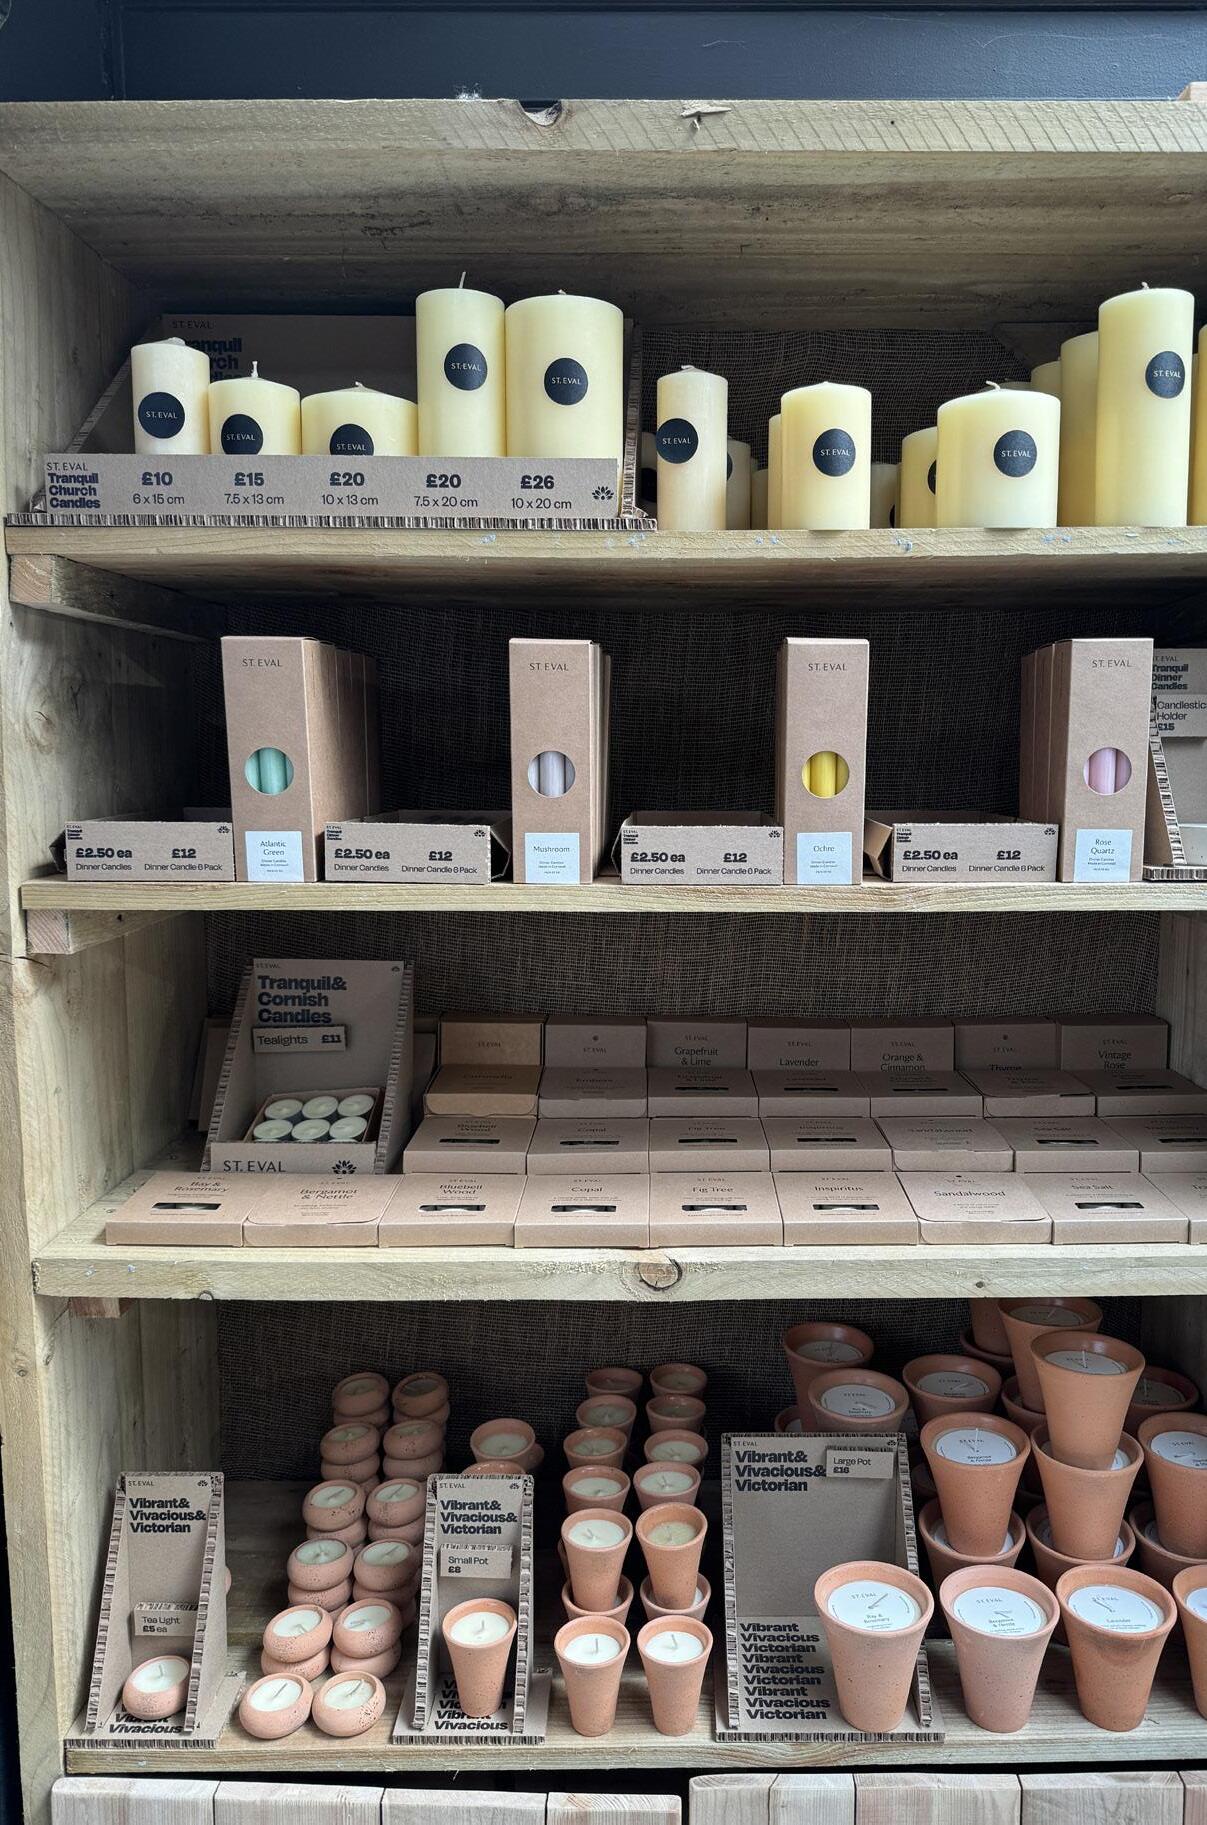
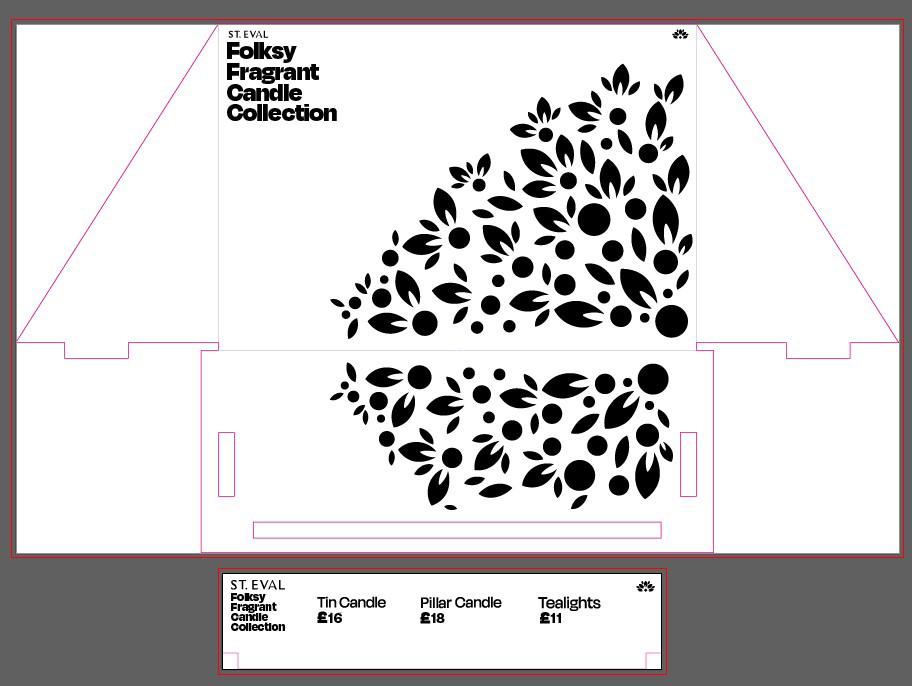
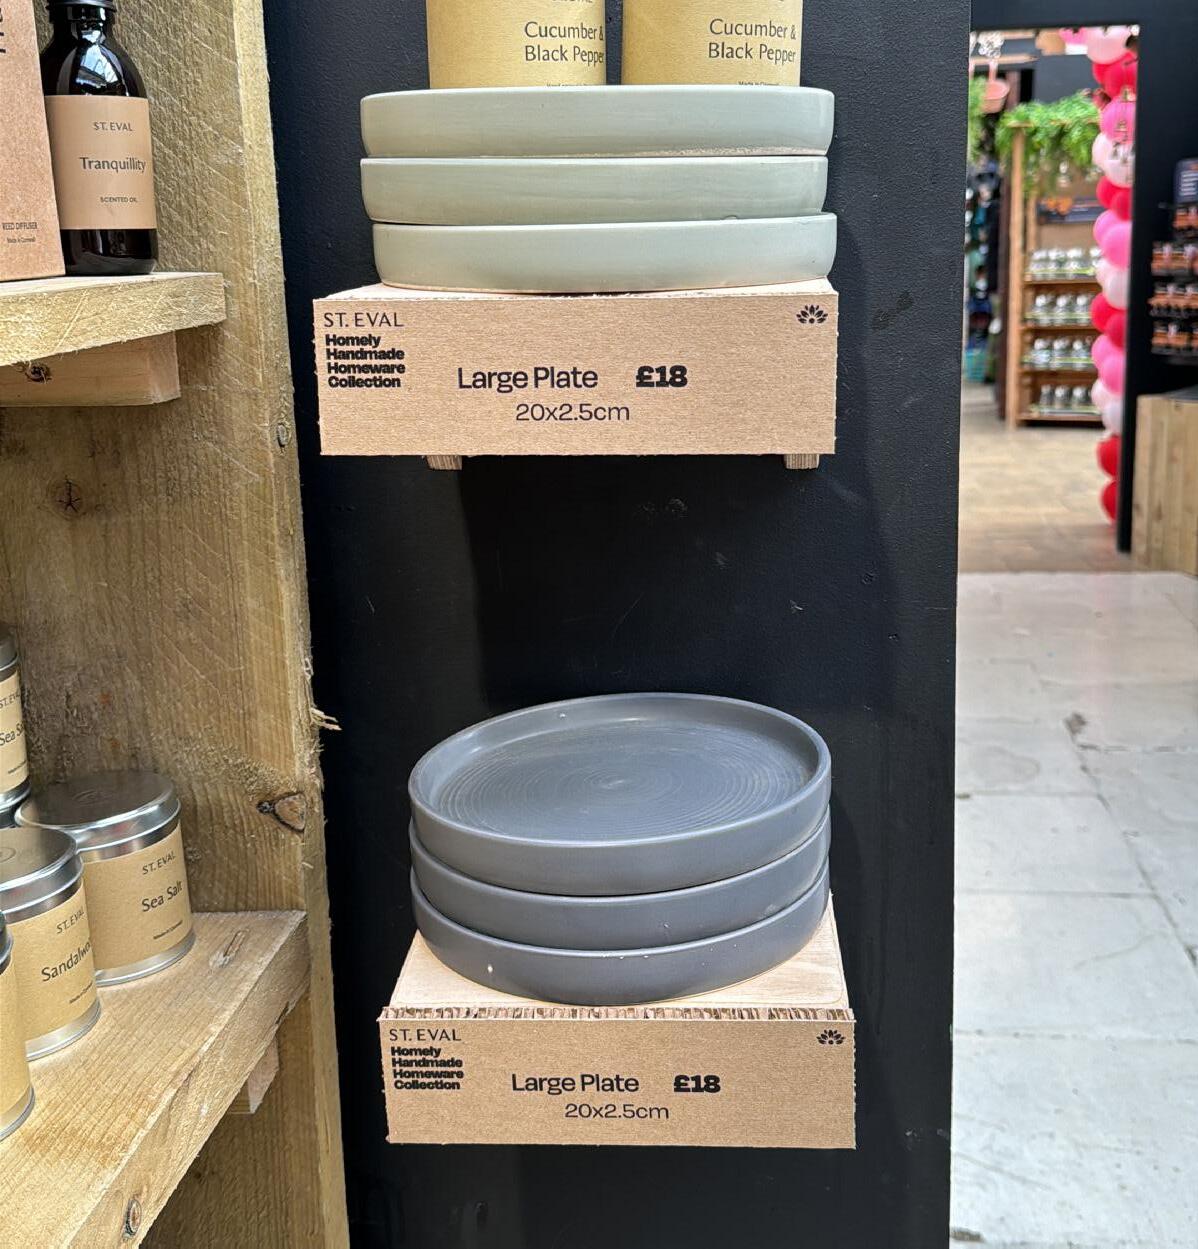
St Eval Stands use the material Kraftboard and are created using Adobe Illustrator
Each product uses separate stands and a price overlay
St Eval Banners also use Kraftboard and are used for products that cannot stand upright or are too big to fit in a stand.
The Stands are designed and sent for printing as flat designs.
When sending these designs to be printed, they can be sent as .ai files rather than PDFs
Banners use St Eval Branding and Sunshine Branding but do not use borders
Developed over the course of 2024-25, the new Top of the Shop identity is designed as an easily navigable space to handle large amounts of products.
Each aisle features the following POS:
• A backer on the first shelf with infill backers on the lower shelves
• A Flag to landmark sections
• Strips to display the prices on the first shelf that align to the placement of each product, with decorative strips on the lower shelves
• A Kickstand on the bottom shelf
The only POS that will need changing and updating will be the strip on the first level.
Anatomy of the POS
Developed over the course of 2024-25, the new Top of the Shop identity is designed as an easily navigable space to handle large amounts of products.
Each aisle features the following POS:
• A backer on the first shelf with infill backers on the lower shelves
• A Flag to landmark sections
• Strips to display the prices on the first shelf, with decorative strips on the lower shelves
• A Kickstand on the bottom shelf
The only POS that will need changing and updating will be the strip on the first level.
Top of Shop Front Shelf

Anatomy of the POS
Developed over the course of 2024-25, the new Top of the Shop identity is designed as an easily navigable space to handle large amounts of products.
Each aisle features the following POS:
• A backer on the first shelf with infill backers on the lower shelves
• A Flag to landmark sections
• Strips to display the prices on the first shelf, with decorative strips on the lower shelves
• A Kickstand on the bottom shelf
The only POS that will need changing and updating will be the strip on the first level.
Top of Shop Aisle Standard
Anatomy of the POS
Developed over the course of 2024-25, the new Top of the Shop identity is designed as an easily navigable space to handle large amounts of products.
Each aisle features the following POS:
• A backer on the first shelf with infill backers on the lower shelves
• A Flag to landmark sections
• Strips to display the prices on the first shelf, with decorative strips on the lower shelves
• A Kickstand on the bottom shelf
The only POS that will need changing and updating will be the strip on the first level.
Top of Shop Aisle Middle
Top of The Shop
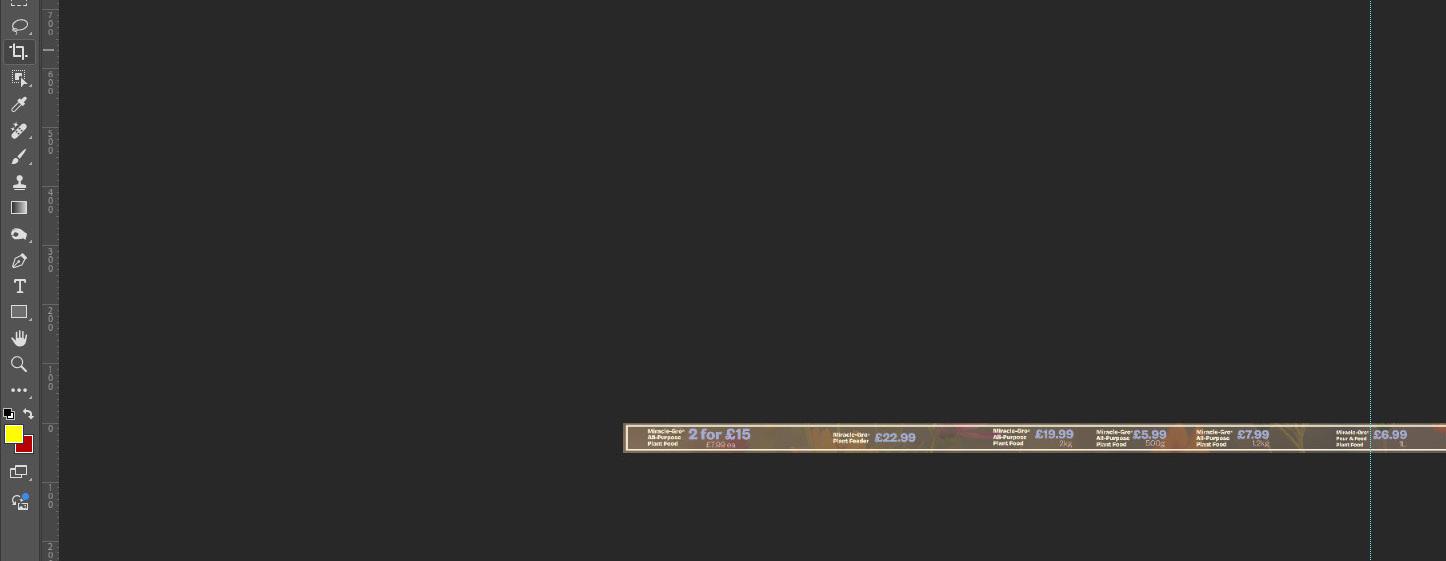
Changing the prices easily
With the first shelf strip, there are a couple of things that you need to consider when you adjust the price tags:
• How many rows of the same product
• The new prices
• Making sure the prices are centred
In order to make sure we don’t waste printing, it’s best practice to mock up the new strip before you send it off.
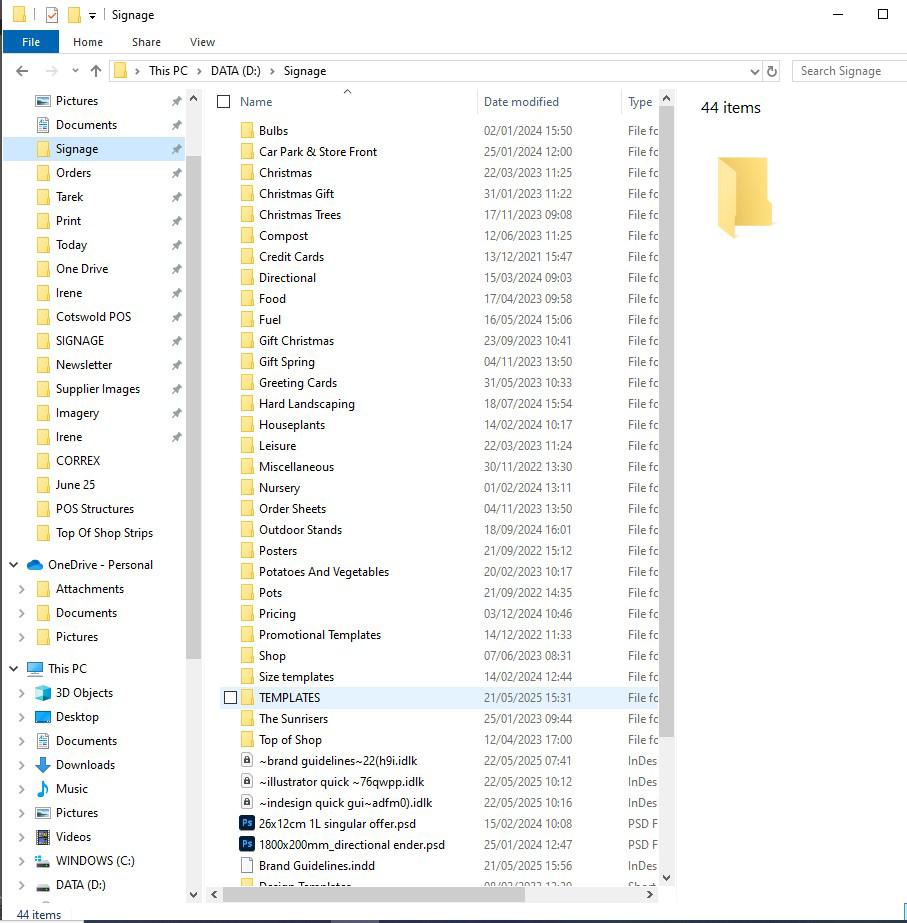
DATA > Signage > TEMPLATES
Before you open any documents, take a retractable ruler and a piece of paper, ideally with the products featured on the shelf. From there, measure the space each product takes up on the shop floor. If there are some small gaps between products, try and take the gaps into account so that you don’t end up with a significant gap on either end.
DATA > Signage > TEMPLATES > Shop floor
DATA
> Signage > TEMPLATES
> Shop floor > Top of Shop Strips
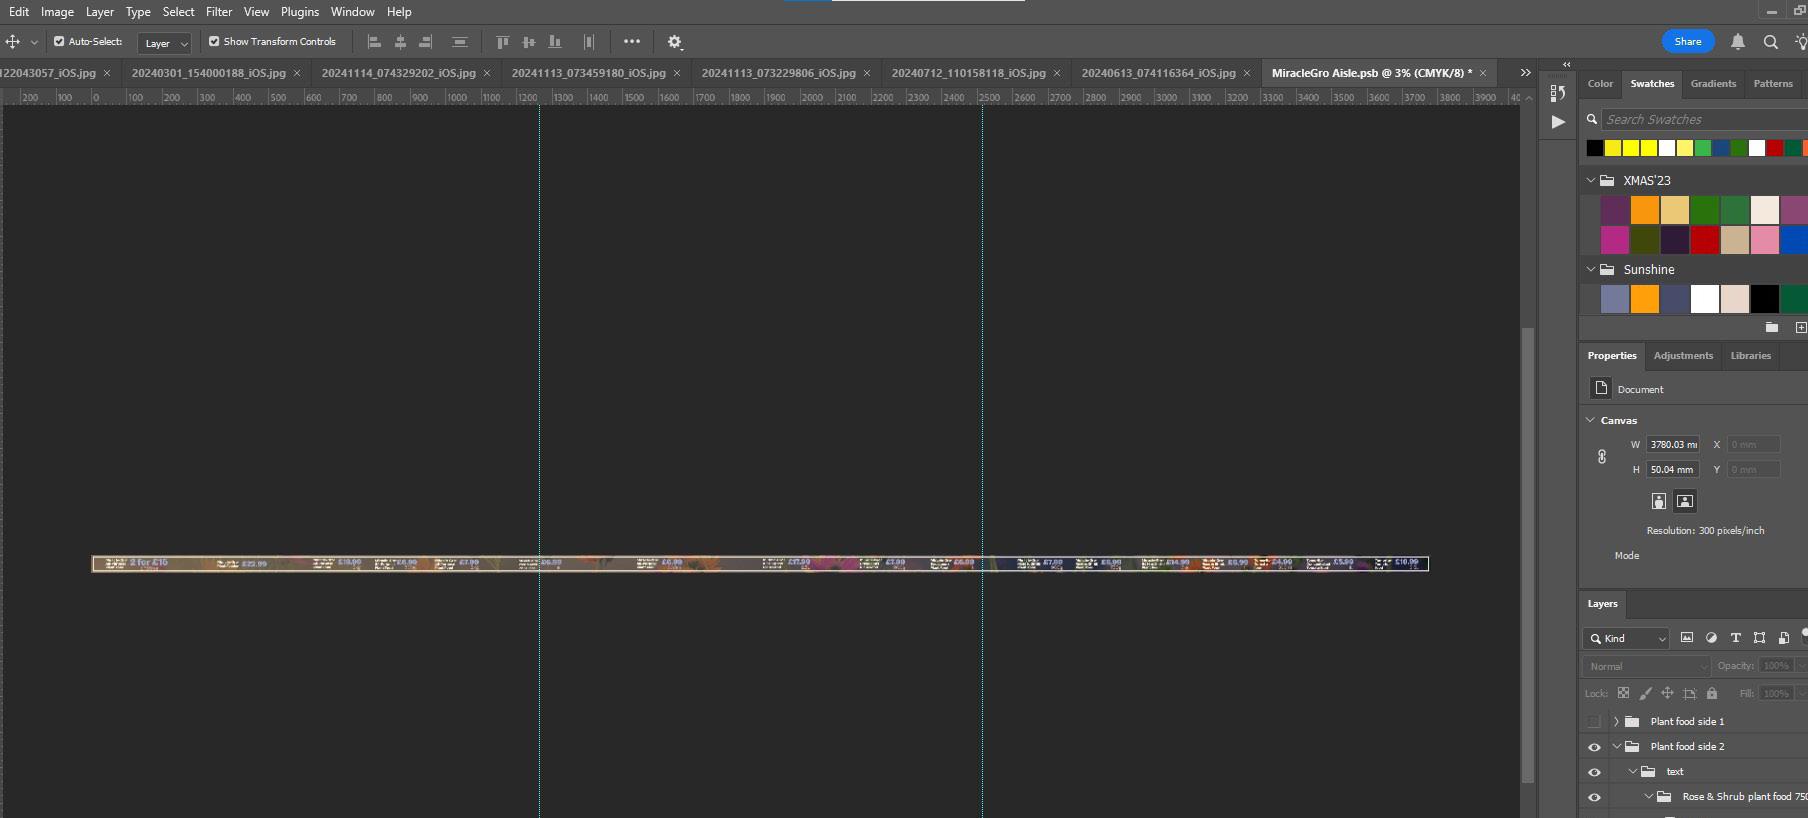
These will open as .psb files and contain all 3 strips together so that the background flows together
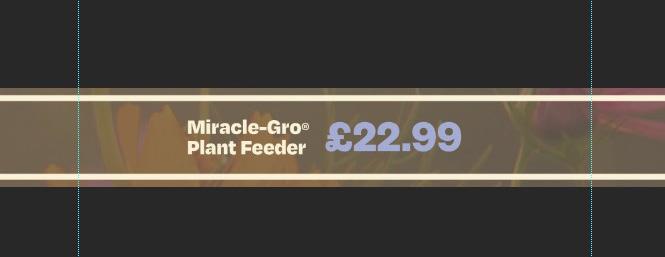
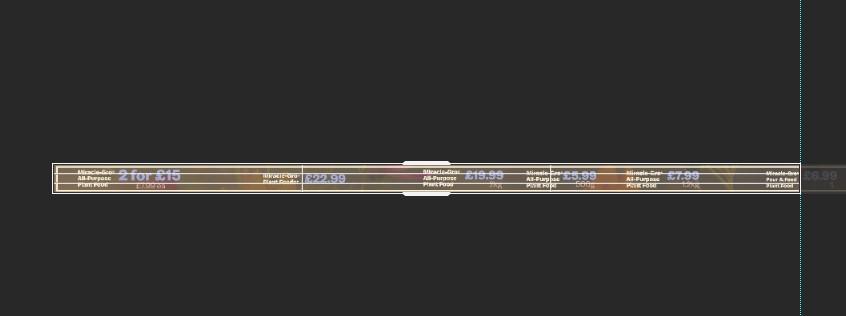
Click and drag a ruler guide from the left hand side (toggle your ruler on using CTRL R) and place two guides to measure the space that your pricetag sits between. Use your arrow keys to precisely move the text to where you estimate the centre is.
Top of The Shop
Mocking up your strip
In order to be able to test out your strip on the shop floor, you will need to cut it up into printable chunks in order to be able to print it out in-house. We’ve devised a javascript file that allows us to divide up any file width-wise, meaning that you could test out any super large-scale POS inhouse (assuming that the height of your POS doesn’t exceed A3 dimensions!)
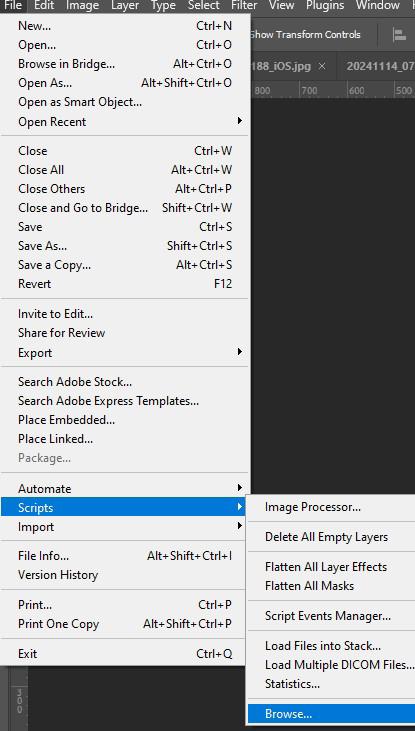
File > Scripts > Browse...
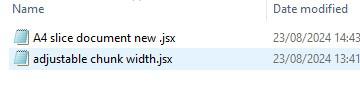
Look for “Adjustable Chunk Width Script.jsx” and launch it
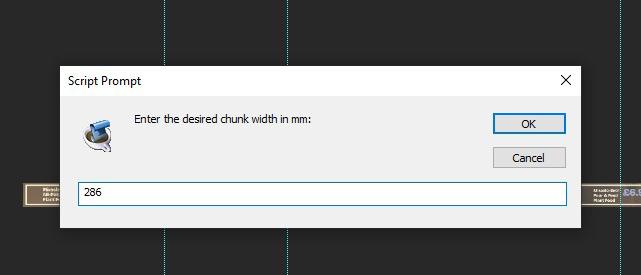
When prompted, type in the width you want to divide your strip into (n.b: In order to make sure your POS isn’t scaled down or cut up due to the automatic margins the printer adds on, I’d recommend taking 11mm off your desired width). Click OK and the script will automatically start.
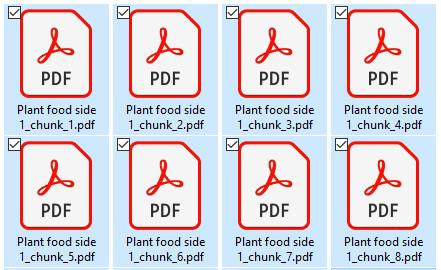
You should end up with multiple files with a “_chunk N_” suffix. Combine these files and print them out. From there, you can put up your strips and see what needs changing or adjusting. Repeat the previous steps until happy.
Top of The Shop
Changing the prices easily
When you’re happy with the position of the pricetags and you’ve mocked it up, you can send it off to print. While you can print off large scale POS externally, the .psb file is too big to print off in one long strip. In order to be able to send it off to print, you just need to split the strip into 2-3 sections.
Open the same .psb file in the same place. Using a ruler guide, divide up the big strip into 2-3 printable strips. (remember, the max. print size is 2400mm x 1200mm)
Using the Crop tool, change the canvas size to your new printable length. Once you hit enter, you will have gotten your individual strip that you can send off.

Flatten your image so that you can reduce the size of the document. After that, Ctrl Alt S to ‘Save As’ (this means that you will still retain your working document after you save) and then export your file to your destination. Remember to make a note of the new size of your strip in the file name. Repeat the process until all your strips have been divided up and saved as individual files.
Shop Floor
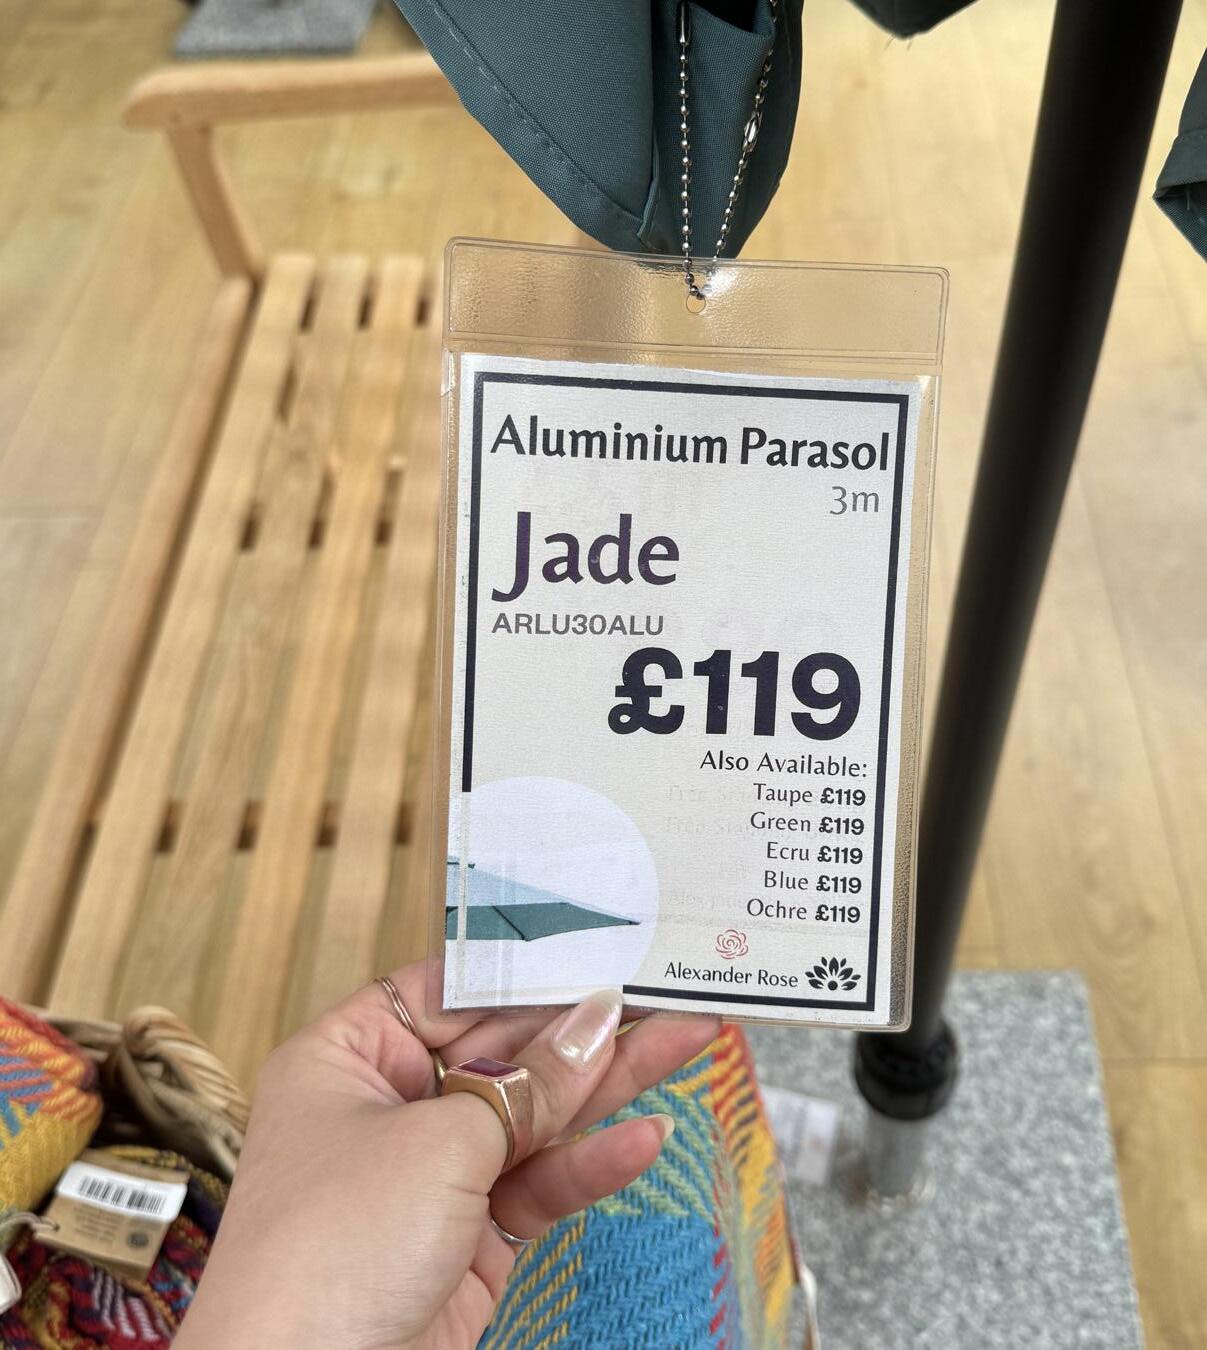
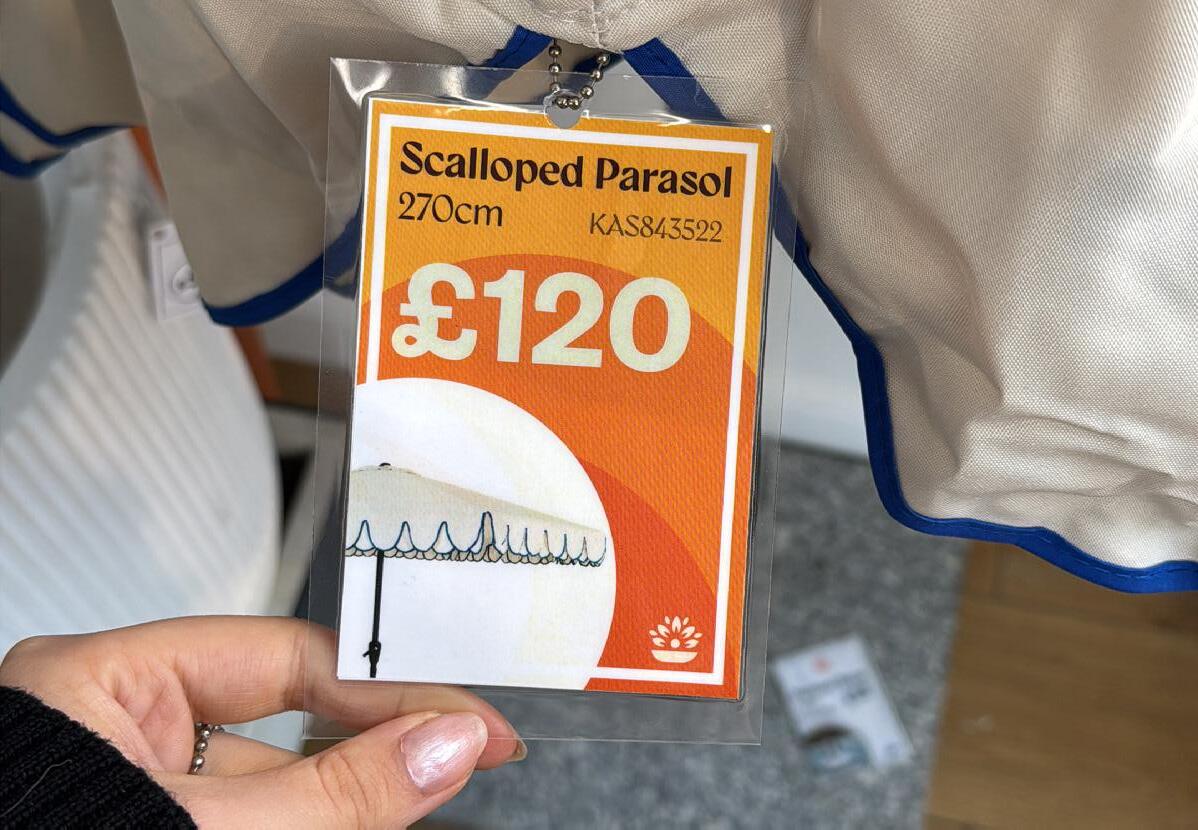
Paper Double-sided labels
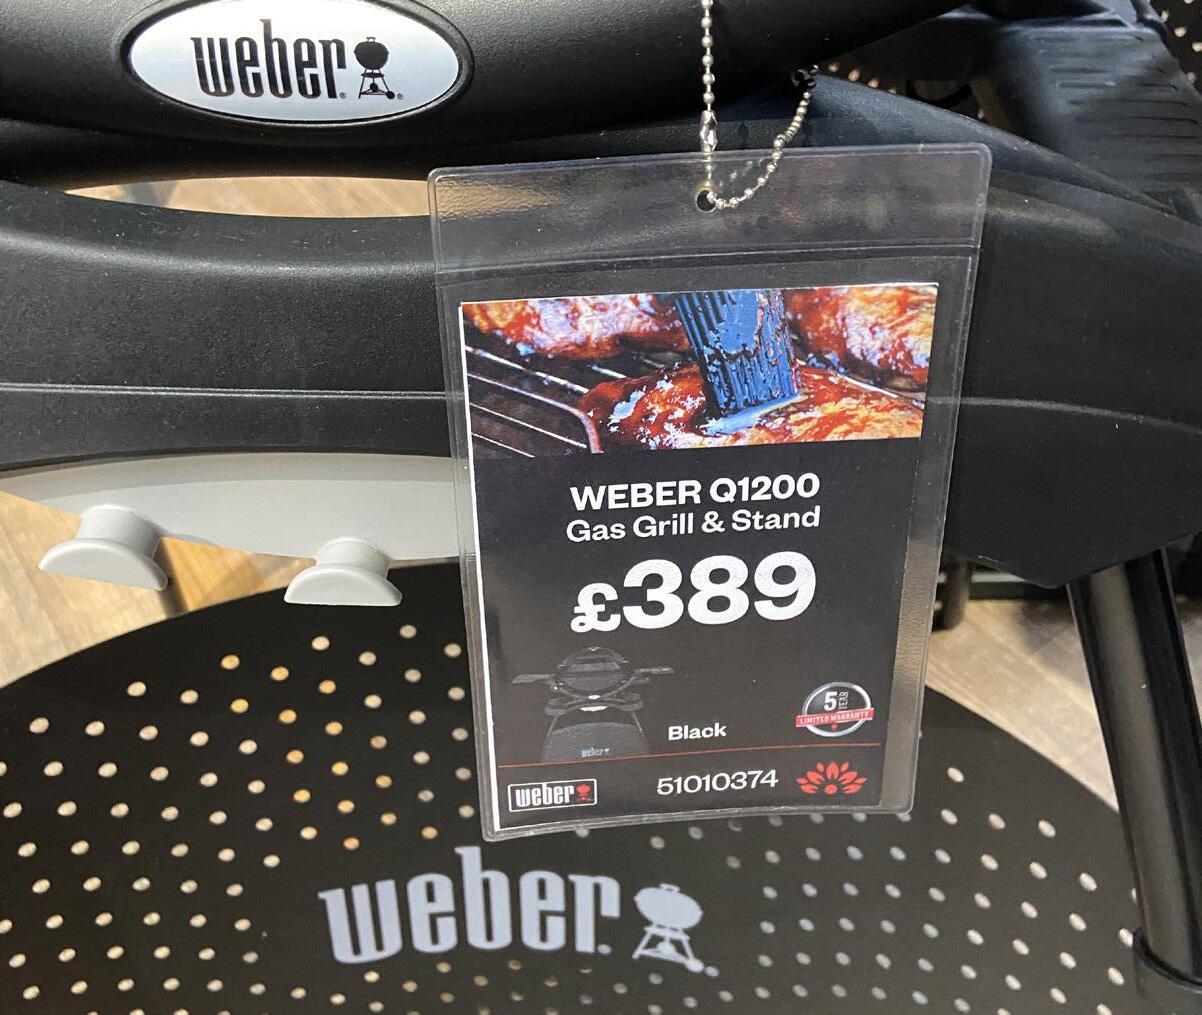
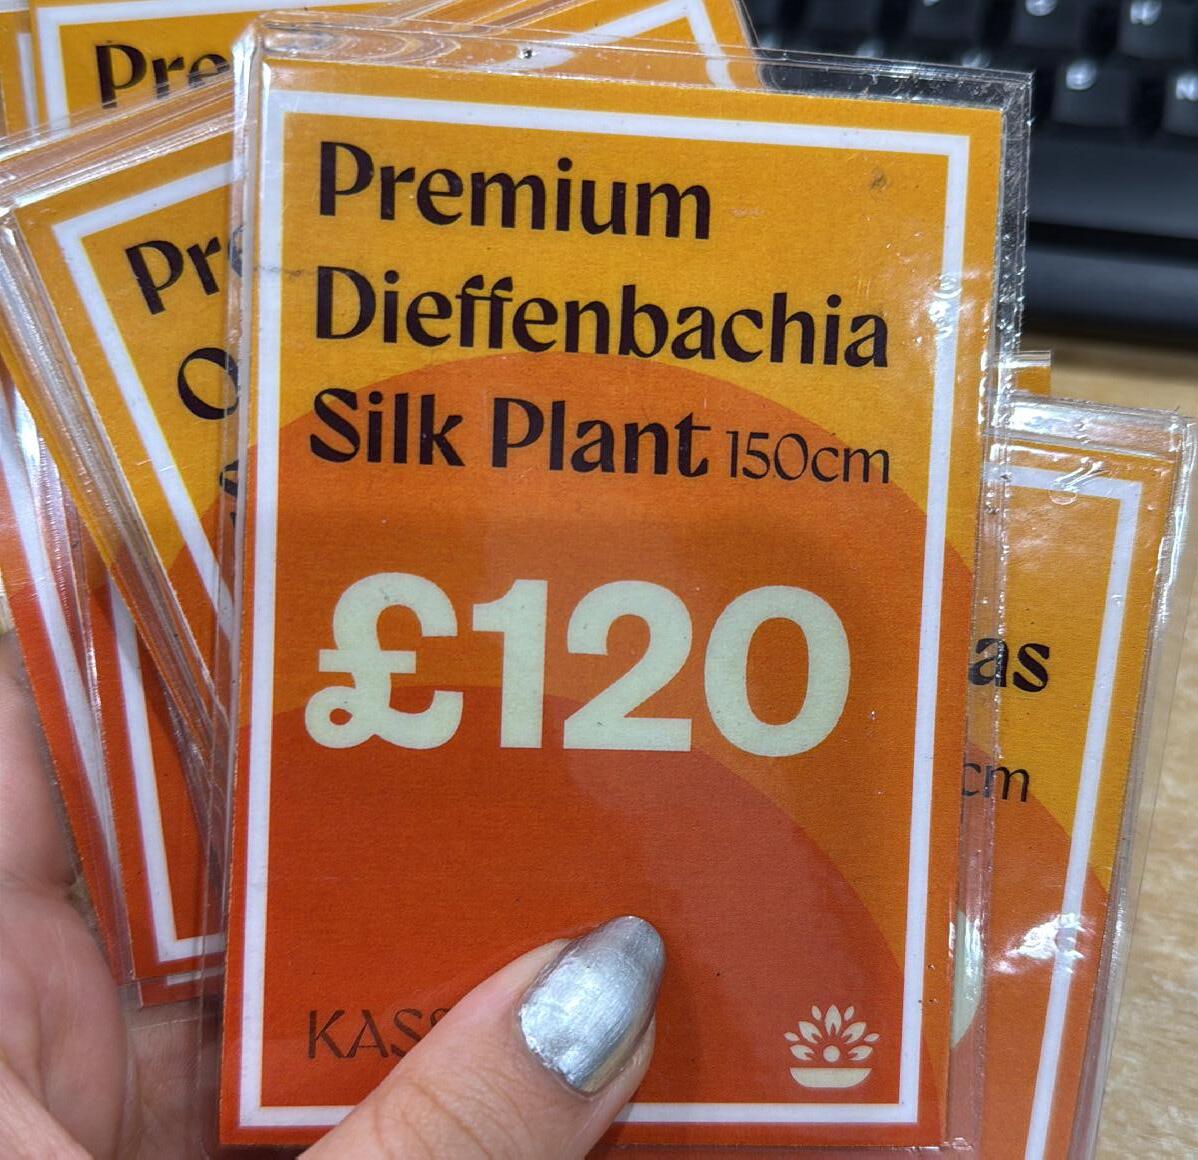
Certain products like furniture often uses price labels that are printed in house and then laminated.
This is because stock levels can change quickly or prices can change. These templates are made on Photoshop as A5, A6, A7 or A8 depending on the size needed, and then folded once printed.
These are used for garden furniture such as:
• Mirrors
• Artificial plants
• Parasols
• Weber BBQs
Templates can be found in Signage > Templates > Shop floor
Looking for software help? Tap the icons to read through tutorials for:
If you have any more questions, look on the Adobe forums for help!