
3 minute read
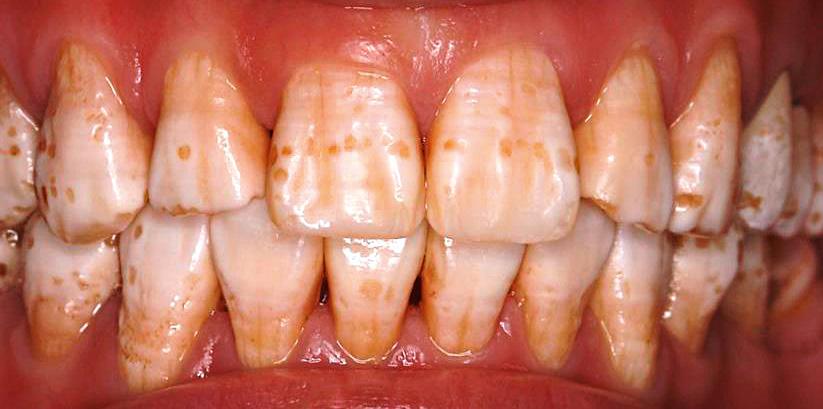
A noninvasive approach to treating white enamel lesions

CASE 2. 9
A noninvasive approach to treating white enamel lesions.
Advertisement
Dr. Alexander Aresdahl
Whether a patient has brown spots, white spots or both, I always recommend teeth whitening for 2-4 weeks before Icon smooth surface is used. In a few cases, when the brown spots are superficial, a white polishing stone can be used to remove brown staining before initiating treatment. Transillumination: A good way to determine if a white spot is treatable or not with Icon is to use a light curing LED. Illuminate the enamel by placing the LED tip on the palatal side of the tooth structure and see if the white spot is translucent or completely opaque. If the white spot is opaque then the treatment is less likely to be successful and may need substance removal and composite treatment.
• Fig. 1: Start by applying an optragate to get the patients lips out of the way. Then take a white polishing stone and gently polish the enamel surface for a few seconds to get rid of the superficial biofilm on the enamel surface. • Fig. 2: Apply liquid rubber dam or classical endodontic rubber dam with ligatures to protect the gingiva.


• Fig. 3: Blast the white spots with white aluminiumoxide. This will enable better access to the body of the lesion. Blasting of the white lesions should only be done for 2-3 seconds and only once, with the blasting tip positioned approximately 1 cm from the enamel. After completion of this stage the white lesion should give away a matte appearance.

• Fig. 4: Apply Icon-Etch over the white lesions and rub it gently for a few seconds with a dry tip until the etch loses its glide and gives away a foamy appearance. Let the Icon-Etch rest on the surface for 2 minutes and then rinse it off with water for at least 30 seconds.

• Fig. 6: When the white lesion has responded well to Icon-Dry it is time to use the Icon-Infiltrant. Take your chair attached lamp away from the patient’s teeth and apply Icon-Infiltrant on a dry enamel surface. Use rich amounts. Let it then infiltrate the surface for 3 minutes. Carefully air-dry the surface followed by flossing then light cure for 40 seconds. Repeat the process a second time, but with only 1 minute infiltration time.

• Fig. 8: Final result. • Fig. 5: After careful rinse of the tooth surface, dry with oil-free and water-free air. Then wet the white lesion with Icon-Dry. What you want to see is either a complete temporary masking/disappearance of the white lesion when wetted or a fluctuation in the white color of the lesion when wetted with Icon-Dry. This indicates that the lesion is now accessible for the Icon-Infiltrant.


• Fig. 7: After the Icon-Infiltration process the enamel surface will present a matte appearance. To get a shiny and smooth surface use 3M polishing discs. Start with a light orange disc on a dry surface and carefully polish away any unevenness. Moreover, rinse the surface with water, air blast and finish the polishing process by using a yellow disc.
Key Learnings
• Make sure to rub the Icon-Etch properly onto the enamel. • Transillumination analysis pretreatment is a very good clinical indicator of whether you will need to remove tooth substance and use composite in addition to your treatment or if you can use Icon alone. • For optimal aesthetics use polishing discs to polish the matte surface after the treatment.


