Website Instructions

Page 1


Website Instructions

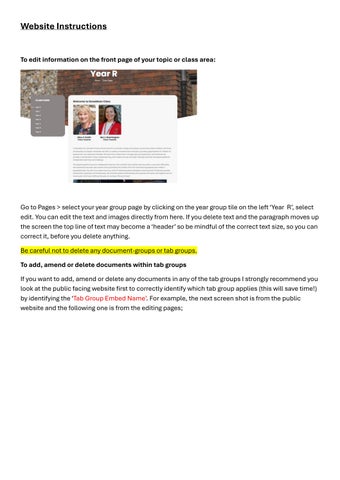
To edit information on the front page of your topic or class area:

Go to Pages > select your year group page by clicking on the year group tile on the left ‘Year R’, select edit. You can edit the text and images directly from here. If you delete text and the paragraph moves up the screen the top line of text may become a ‘header’ so be mindful of the correct text size, so you can correct it, before you delete anything.

Be careful not to delete any document-groups or tab groups.

To add, amend or delete documents within tab groups

If you want to add, amend or delete any documents in any of the tab groups I strongly recommend you look at the public facing website first to correctly identify which tab group applies (this will save time!) by identifying the ‘Tab Group Embed Name’. For example, the next screen shot is from the public website and the following one is from the editing pages;

Staff image

Year 1 Documents tab group Embed Group Name (meet the teacher, National curriculum). If you want to amend something in here, this is the tab group name you are looking for

This is the tab group English, Maths, Topic maps etc Embed Group Name

Remember we are not creating or deleting tab groups but adding or editing documents within them. To add or edit a document in the bottom tab group, such as adding a topic map. Use the instructions above to correctly identify where the item is (the Embed Group Name). In this case, this is tabgroup:year1. Go to embed codes >Tab Groups > and look for the embed code name down the centre of the list that opens:

Click on the heading on the left to open the editable page items.

Selecting the title on the left here will also take you to the editable are, but you will need to select edit at the top

The blue pencil will enable you to directly edit any information directly under the tab. For example, under the English Tab the following information can be edited. There are MORE embed codes in here, for example ’documentgroup:year-1-2-spellings’

Clicking on the Topic Maps blue pencil takes you to the following page and this tells you that this is populated by another Embed Code

If you find that this is how the page has been constructed, you will need to go back to Embed Codes and find the Document Group Embed Code Name which in this case is: document-group:year-1topic-maps There are a lot more document groups, so I would recommend you use the ‘filter’ function typing ‘topic’ (or any other identifiable word in the embed code name) in the group name box and click on filter.

This is the area you need to click on to see the documents already there.

In document groups, the blue pencil ONLY enables you to edit the document group – you should not need to enter here!

Click on Add Document.

Obviously, that was a very-long winded way around initially, but I wanted to show how to understand the construction of a page. This will help if you edit other areas of the site.

Now that you know that the Topic Maps are actually in their own document Embed Code, in future, to upload a new topic map, you can go directly to this document group embed code and add the document in there (Embed Codes > Document Groups > Year ** Topic Maps > Add document).

Blogging

Title – This will appear as the public blog title

Image – upload your image

Content – this is the published content

Embed codes – use this if you have a number of images (you will need to create a gallery first!)

Create a Gallery

Click on photo gallery

Create Gallery

Name – this is the public gallery name

Description – this is the public description

Show on Main Gallery page – exactly what it says

Once you click Save, you have created your Gallery ‘page’ and you will now need to add images to the embed code created when you saved. Upload the images you want, you can add multiples at a time Once the images are uploaded you can reorder them using the arrows and give each image a title (if you want). Currently this gallery has just been created – it does not exist on any pages. To put it on a particular page (in this example I am adding it to science) go to Pages > Science . blue ‘edit’ pencil

Now click on Embed codes > Gallery > choose your gallery embed code, usually the most recent will be at the top of the list

Hover over the embed code and click to copy

Scroll down on the page to find the area you want the gallery to appear and ‘paste’ (control V)

To create a flip book

Follow the similar process above, remember it takes a short while to create the flip book. When it has been created select ‘Get Code’. This is the ‘Embed Code’ General top tips

Save or download all your documents into one place (I have a Website Folder) or into your downloads first.

Save documents as PDFs – before you upload them

If you have a lot of written information, it is better to create this on a word document first and save it under a meaningful title (such as Y1 English front Page info). This makes it much quicker to edit in future and ensures you have a ‘hard’ copy of your information.

There are tutorials on every page which are very short!

Turn static files into dynamic content formats.

Create a flipbook
Issuu converts static files into: digital portfolios, online yearbooks, online catalogs, digital photo albums and more. Sign up and create your flipbook.