HOW TO BUILD A RAINWATER TANK

Step-by-step directions to construct a 3,500-liter ferro-cement rainwater harvesting system in one week


Step-by-step directions to construct a 3,500-liter ferro-cement rainwater harvesting system in one week
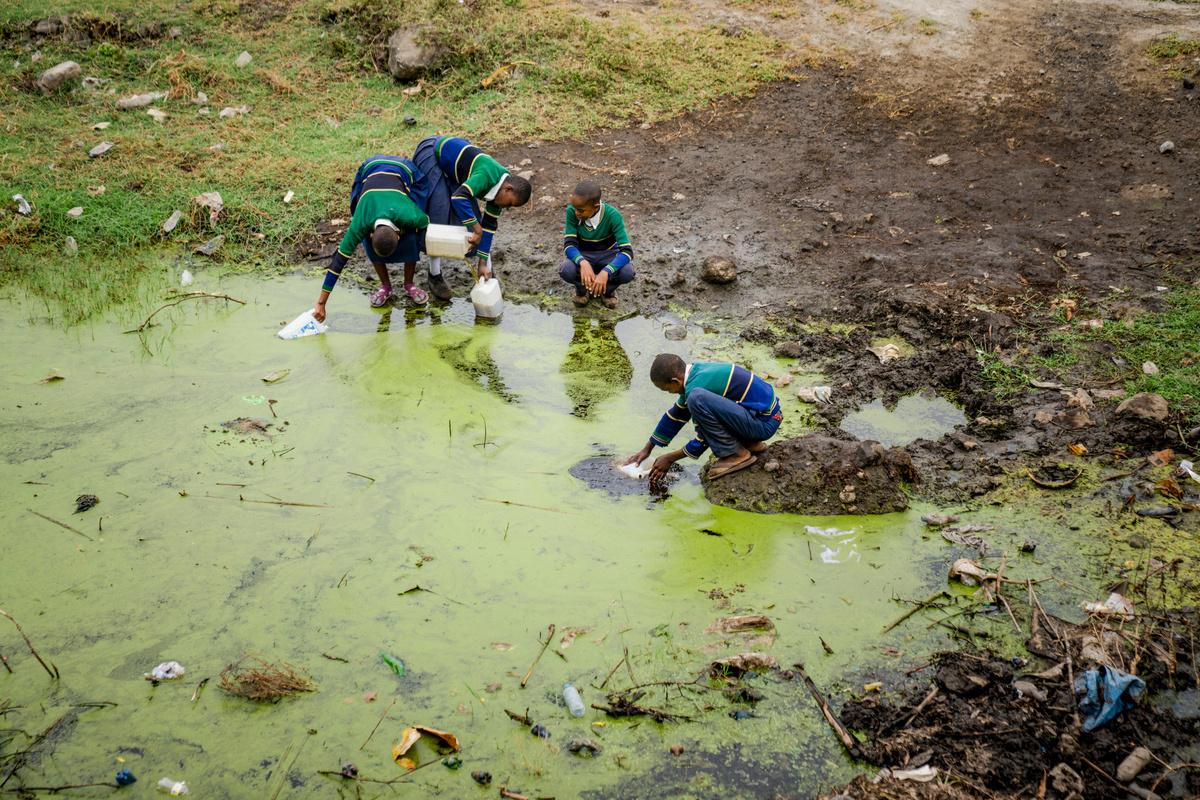
Save the Rain began in 2005 with one tank, one family, and one idea. Water is life. Access to it should be universal – but it’s not. Collecting rainwater is the simplest way to solve that All we need to do is catch it
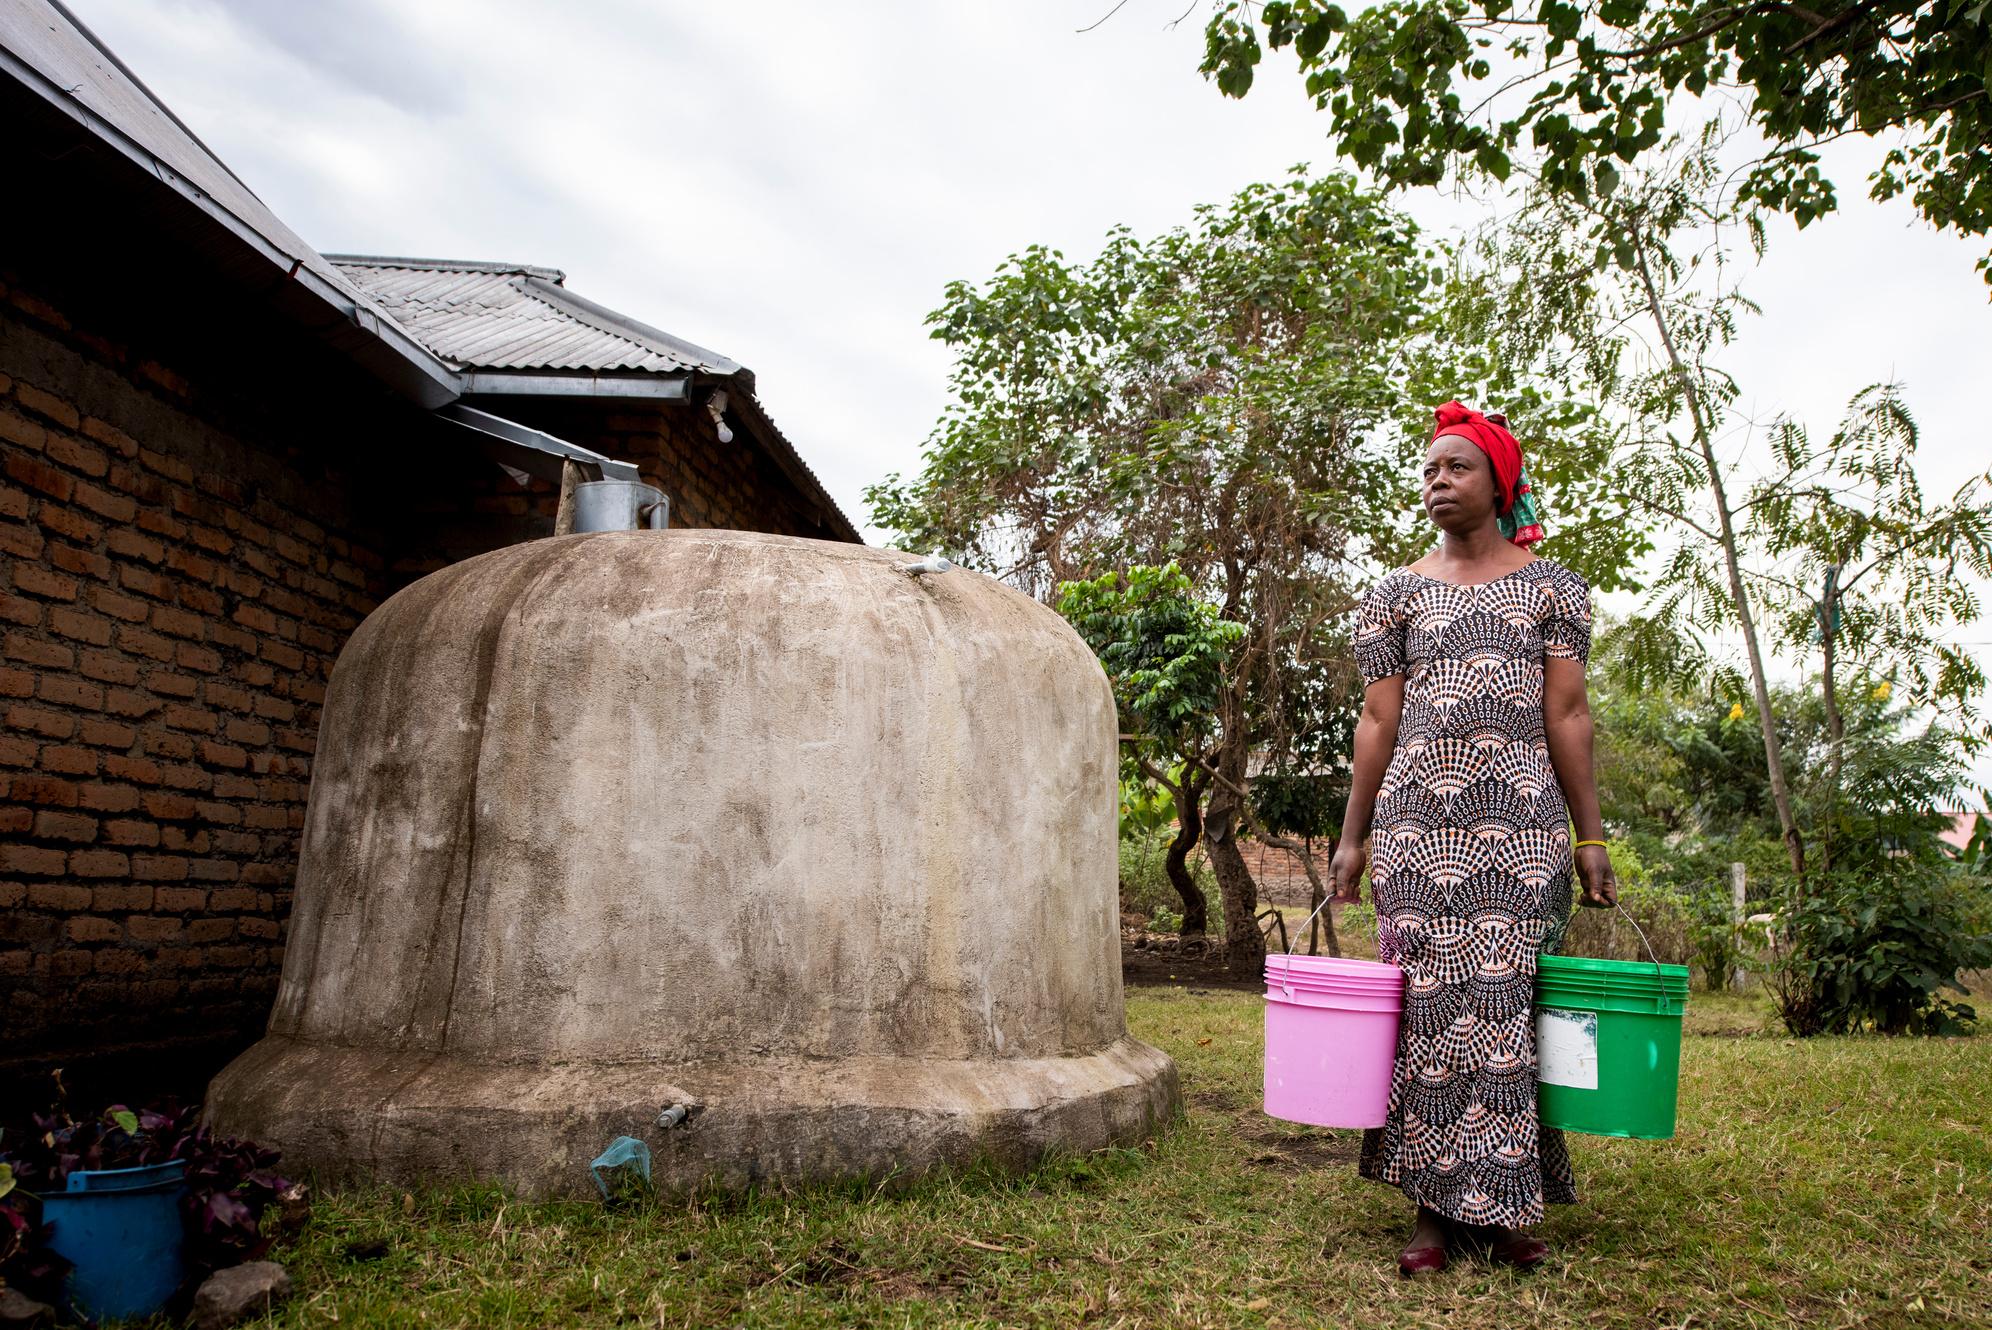
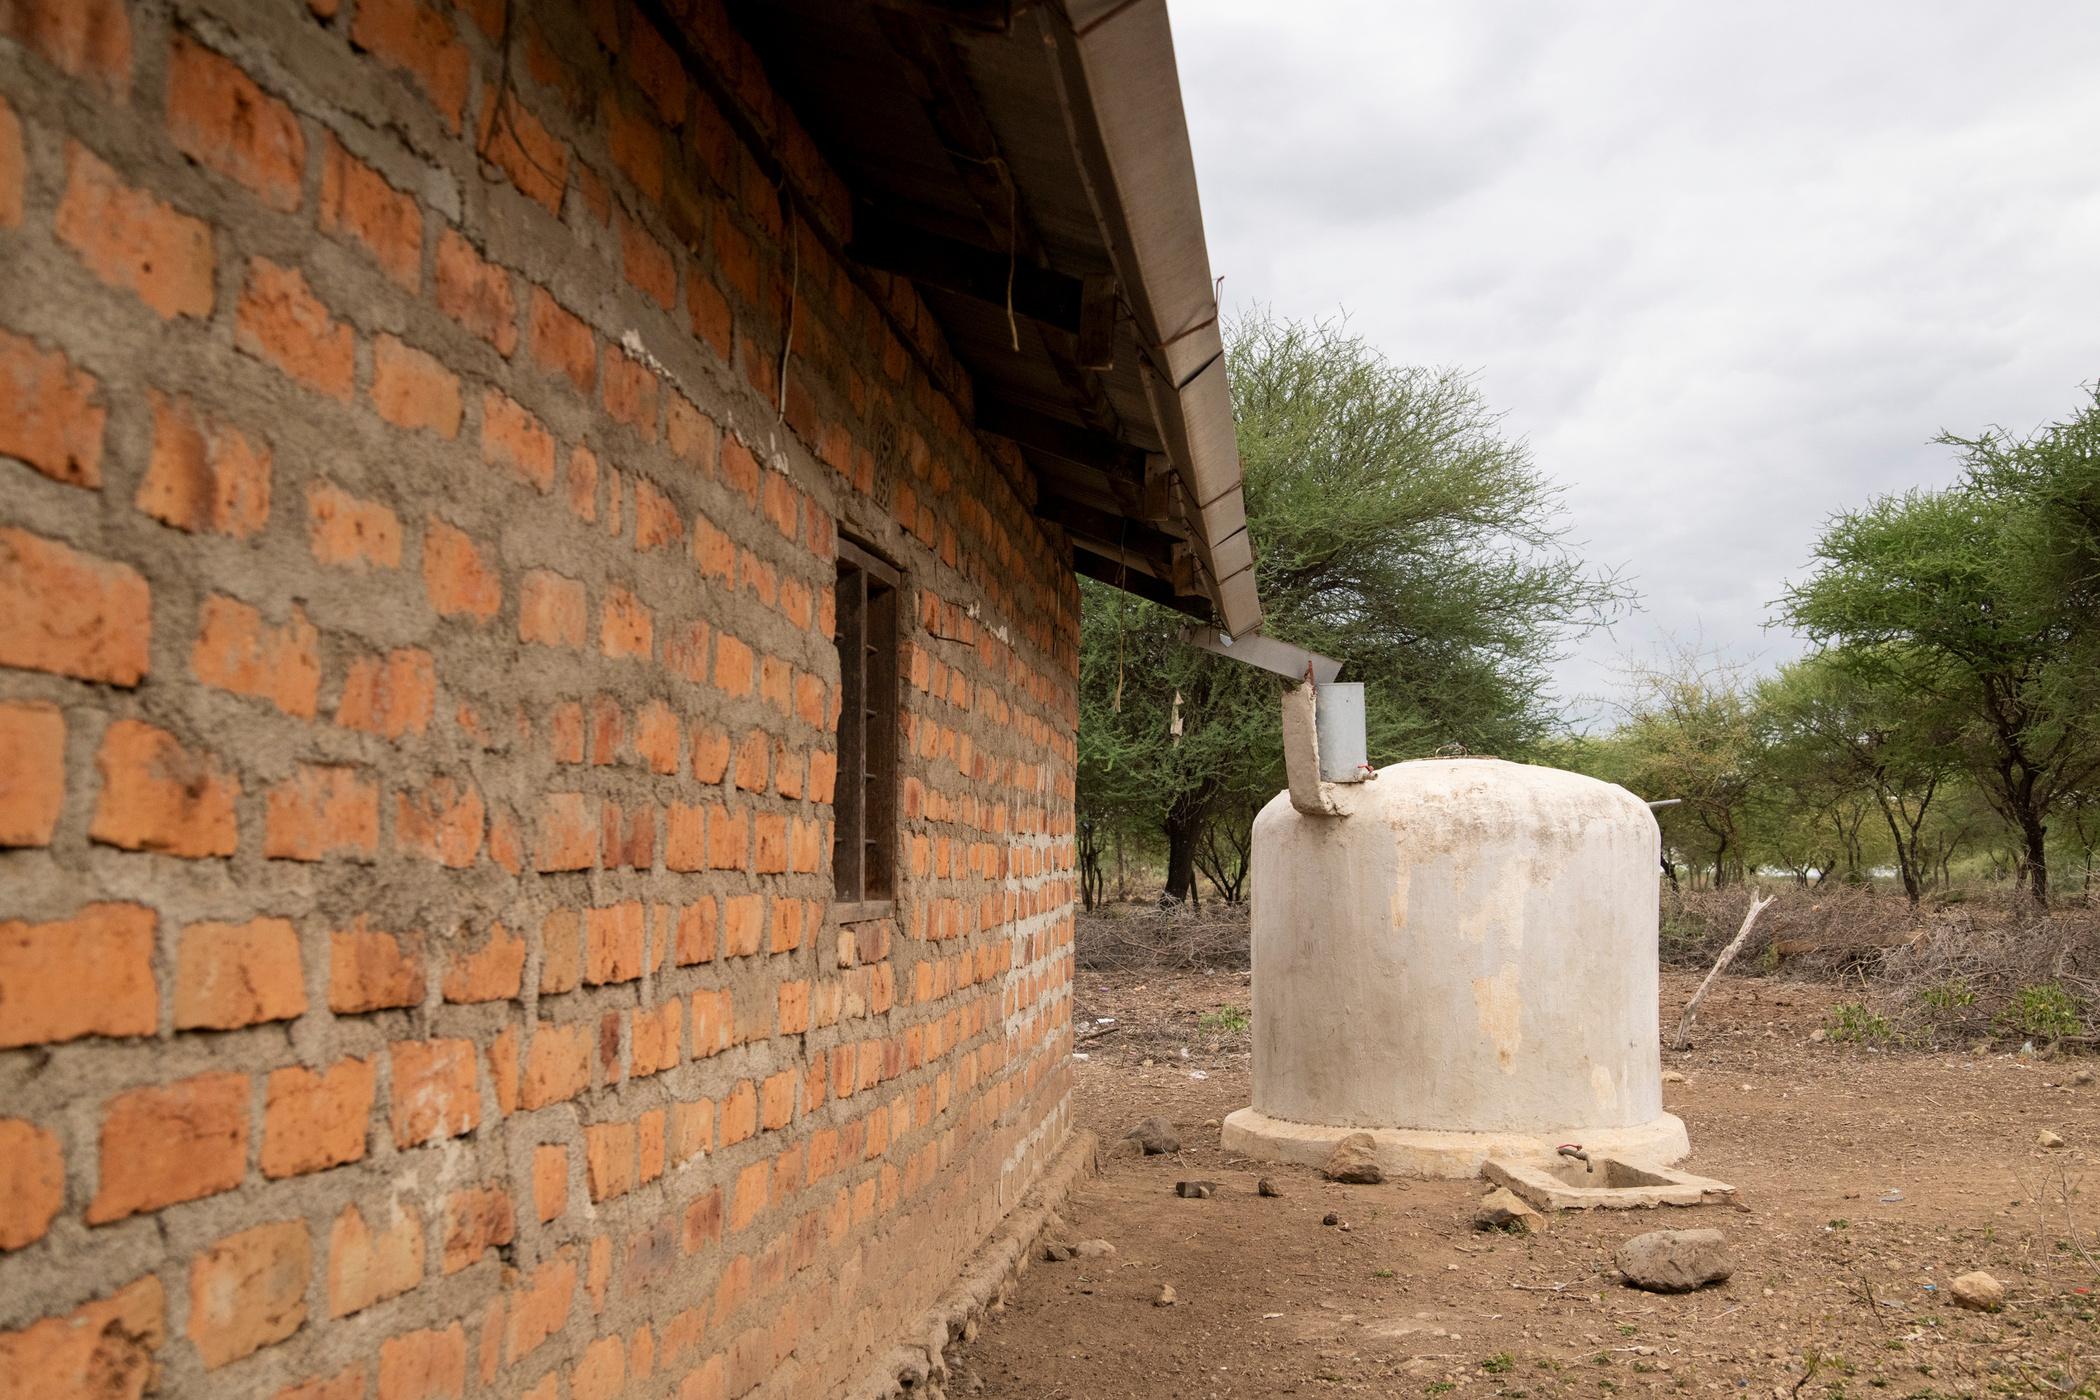
We build rainwater harvesting systems on homes and primary schools. Our domestic collection tanks have a 3,500-liter capacity, which provides sufficient, safe, clean water for a family of eight in developing countries between rainy seasons. Our school systems are up to 200,000-liter in size and provide for the entire community

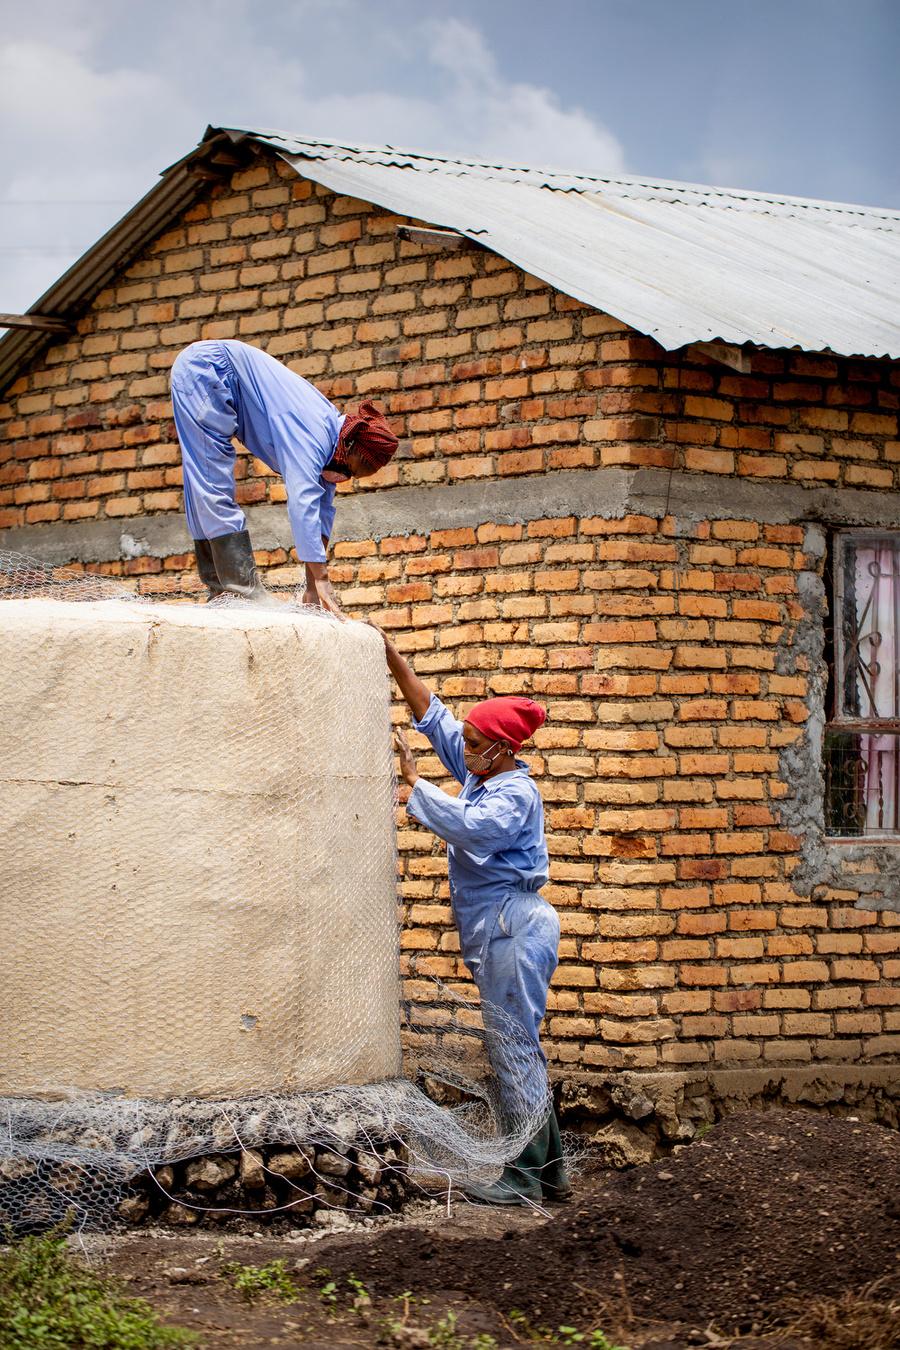
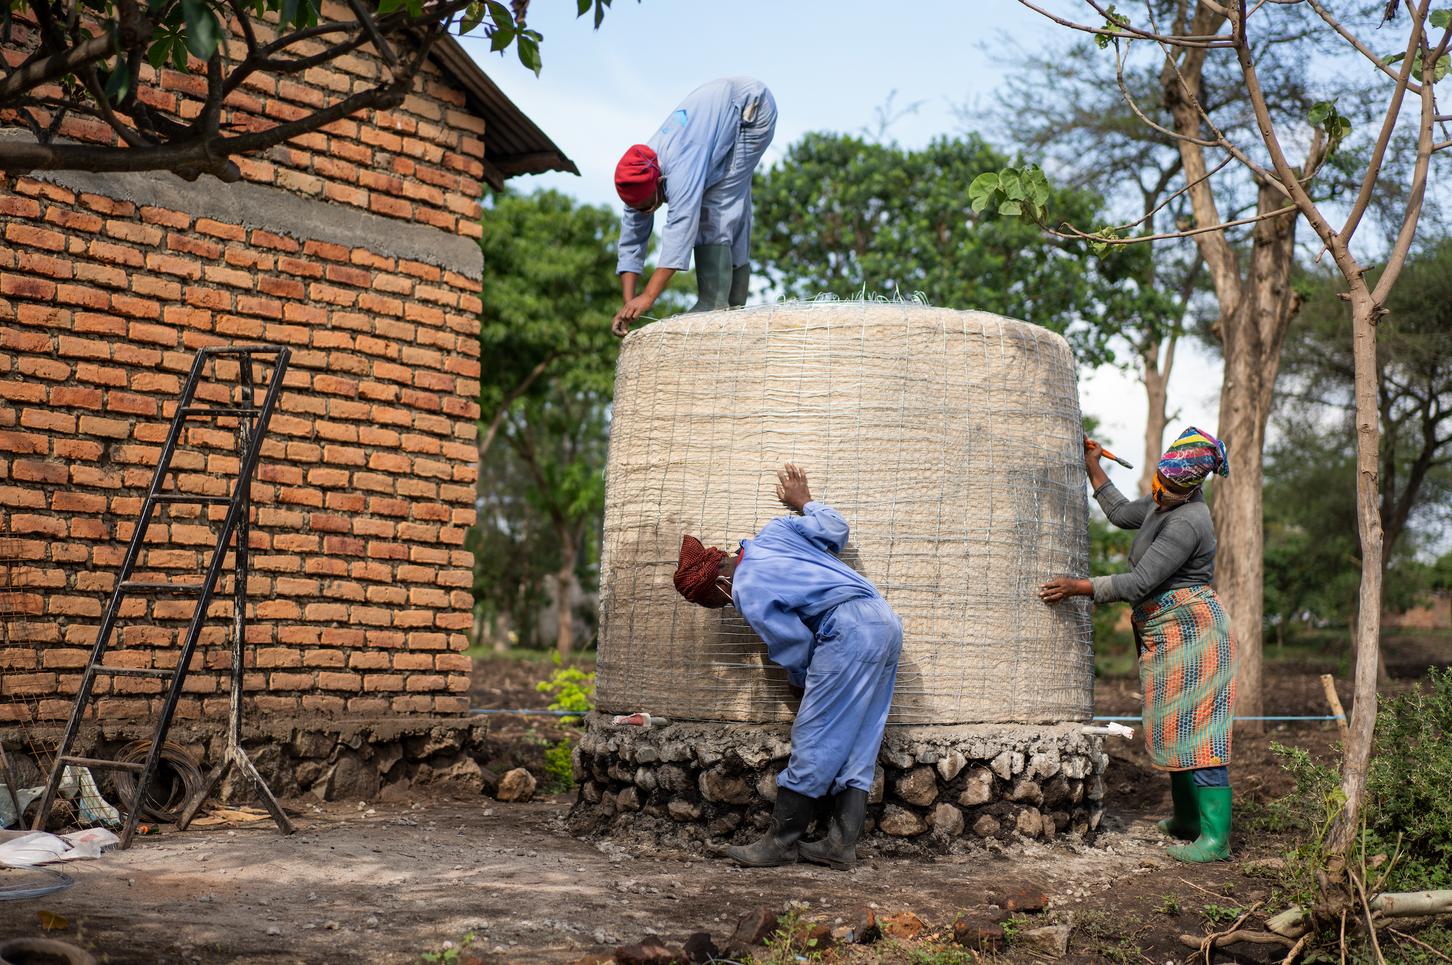
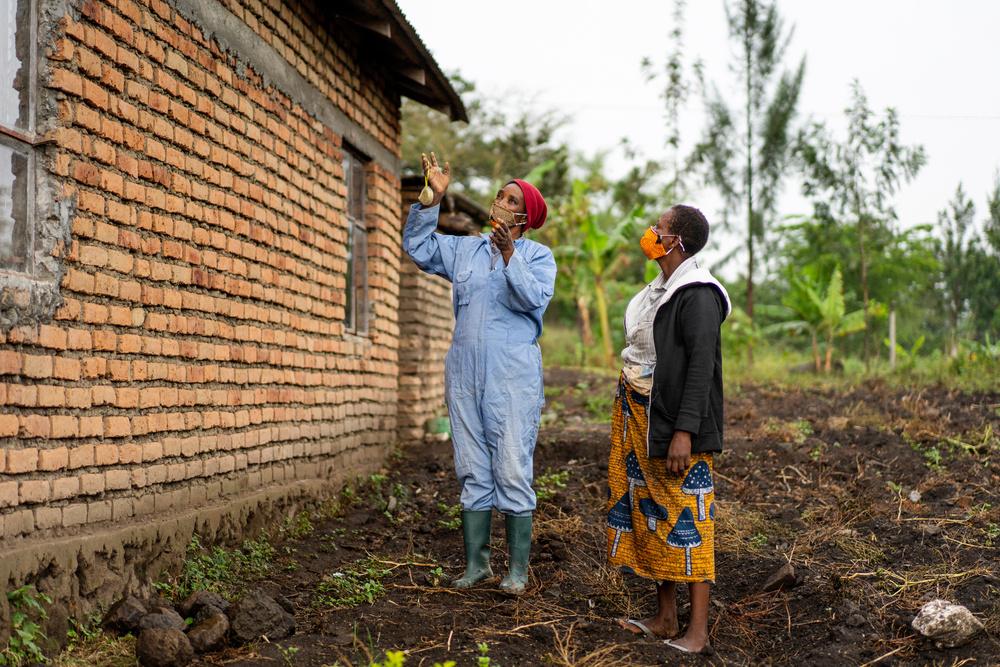
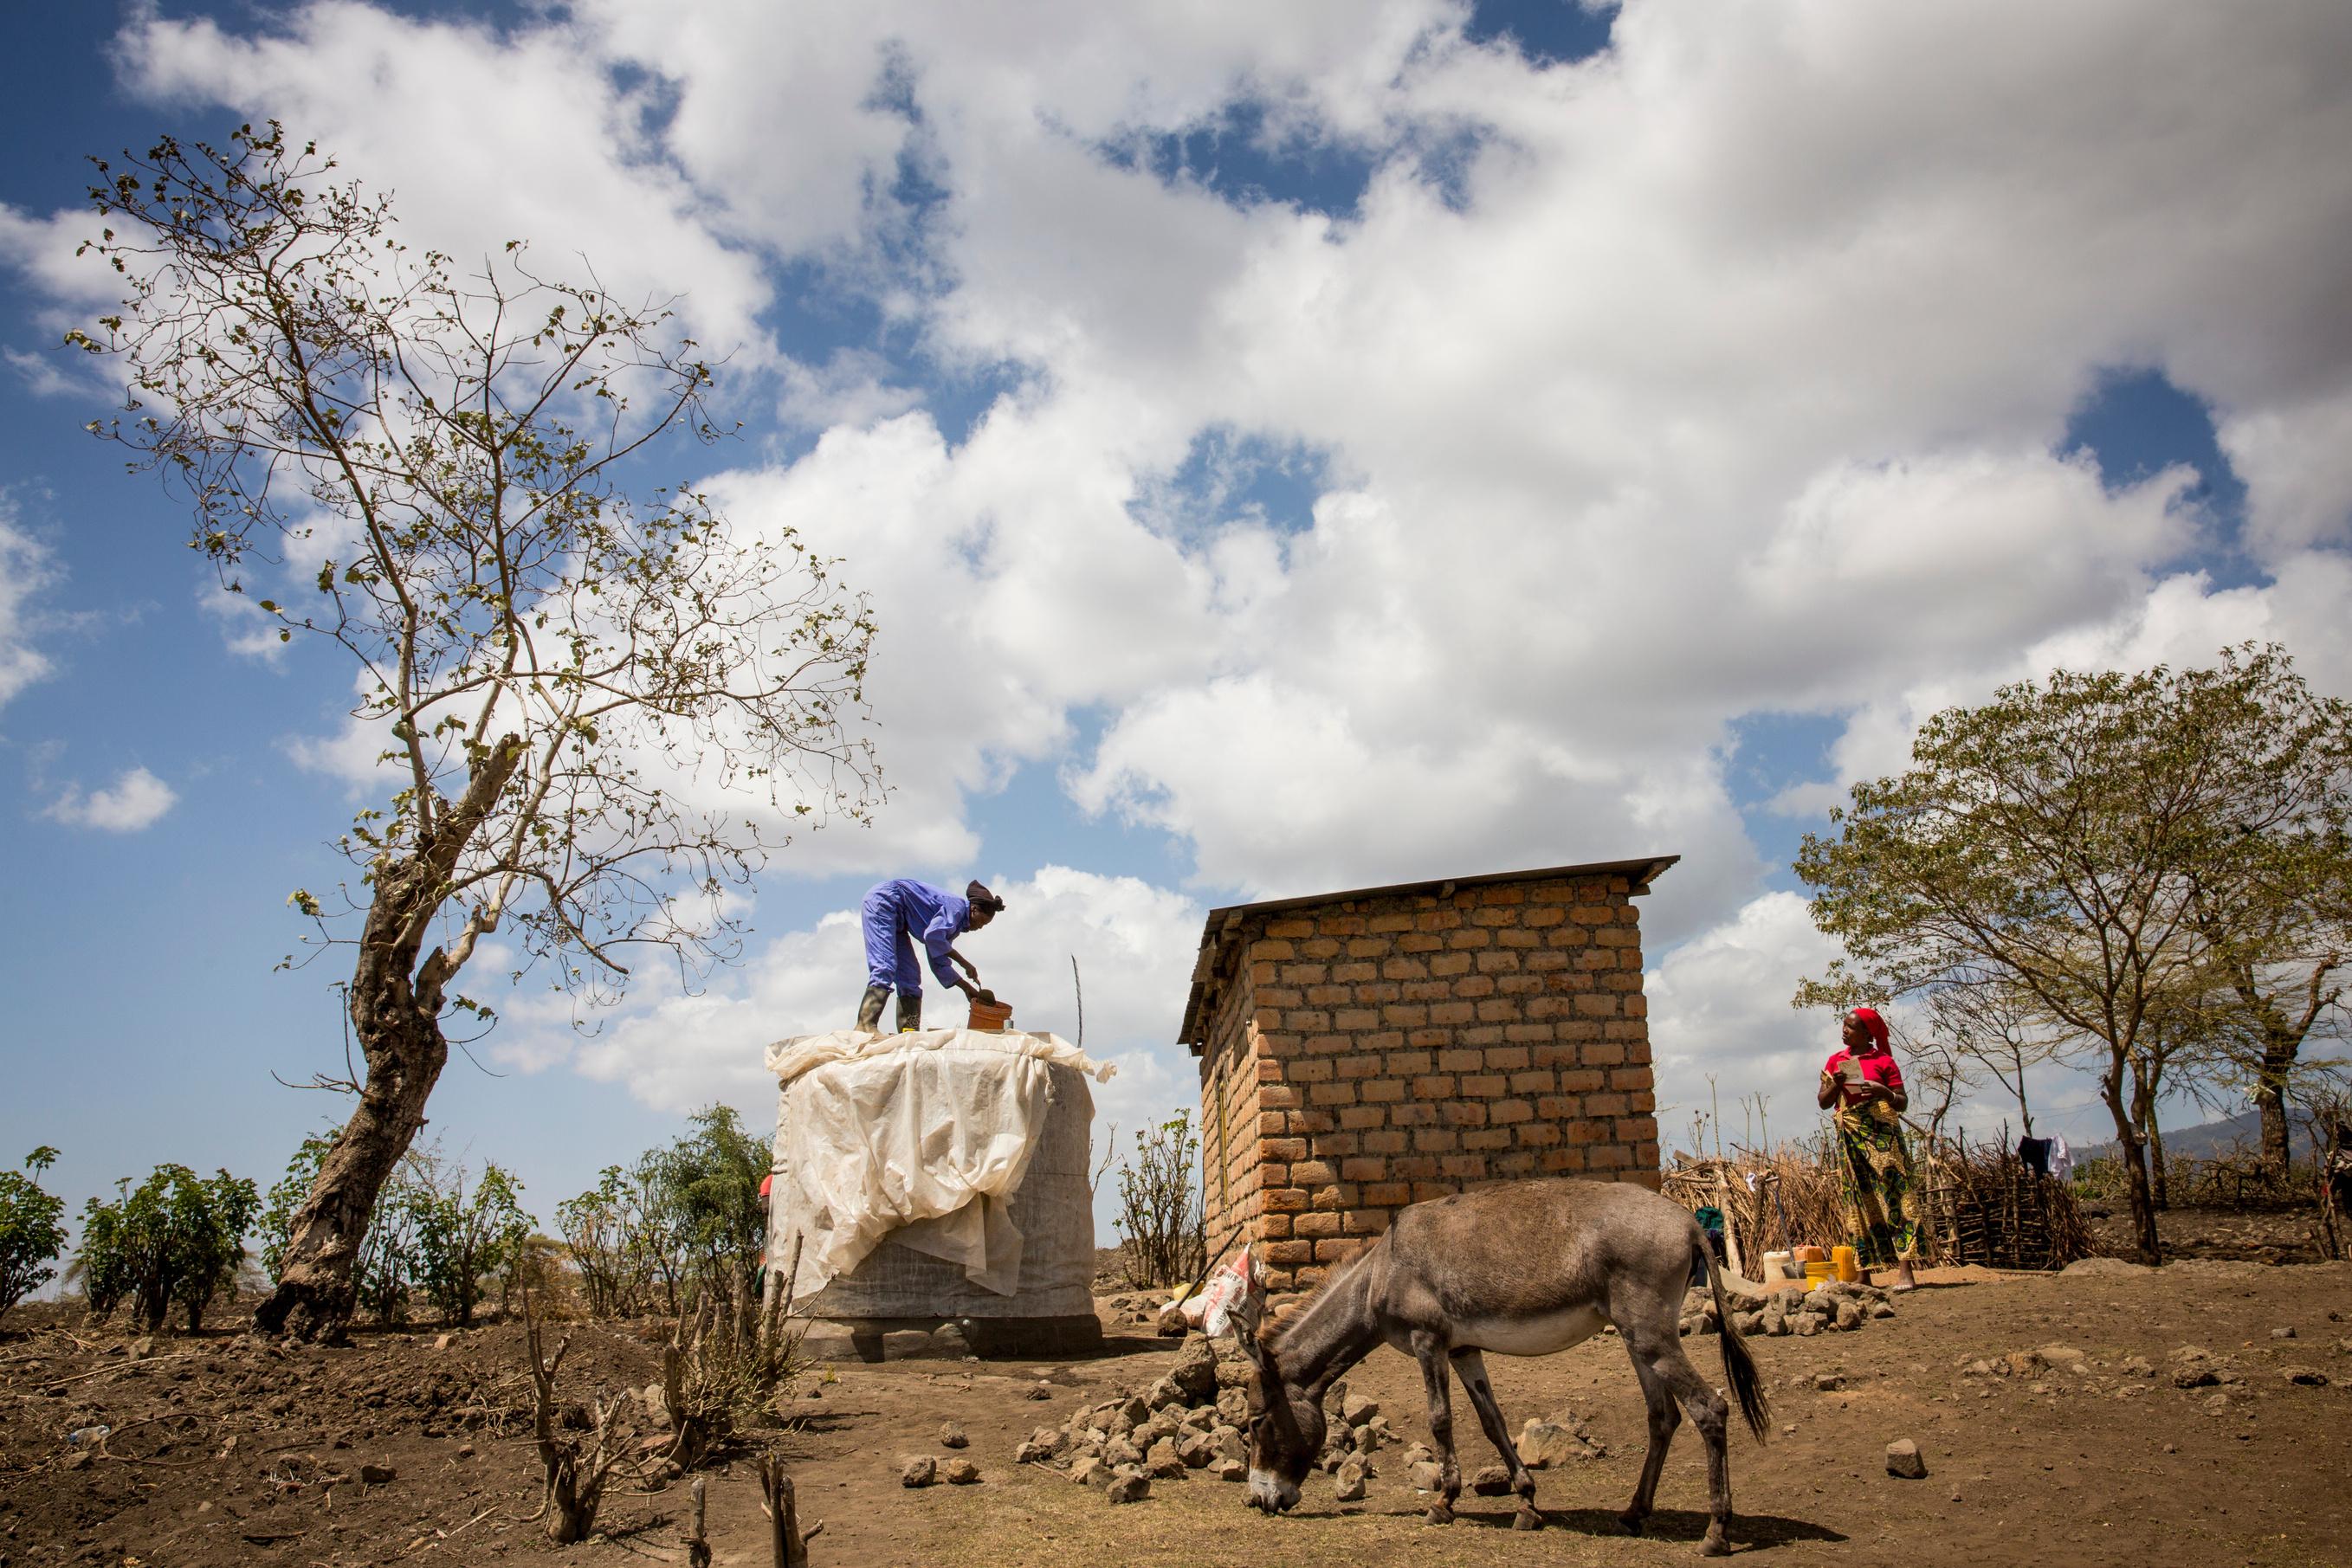
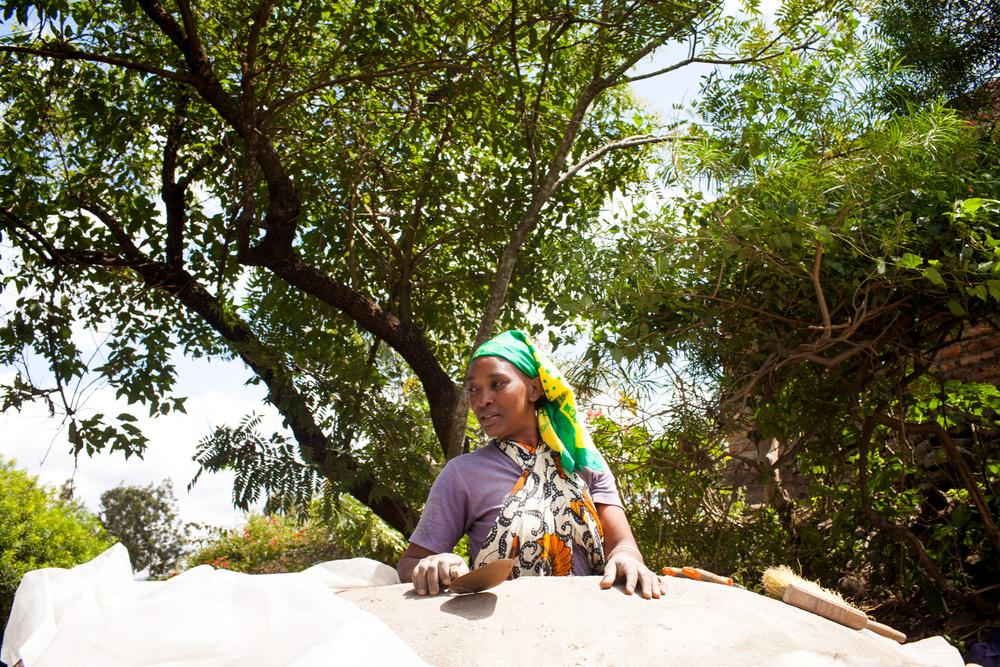
The Women’s Water Initiative is our team of female builders, who once qualified as recipients of tanks, and now build tanks for other women Three women construct a system in one week The tanks are made entirely from local materials and do not require electricity, pumping, or filtration. And they’re built to last. With a lifespan of 200 years, they’re made for multi-generational impact
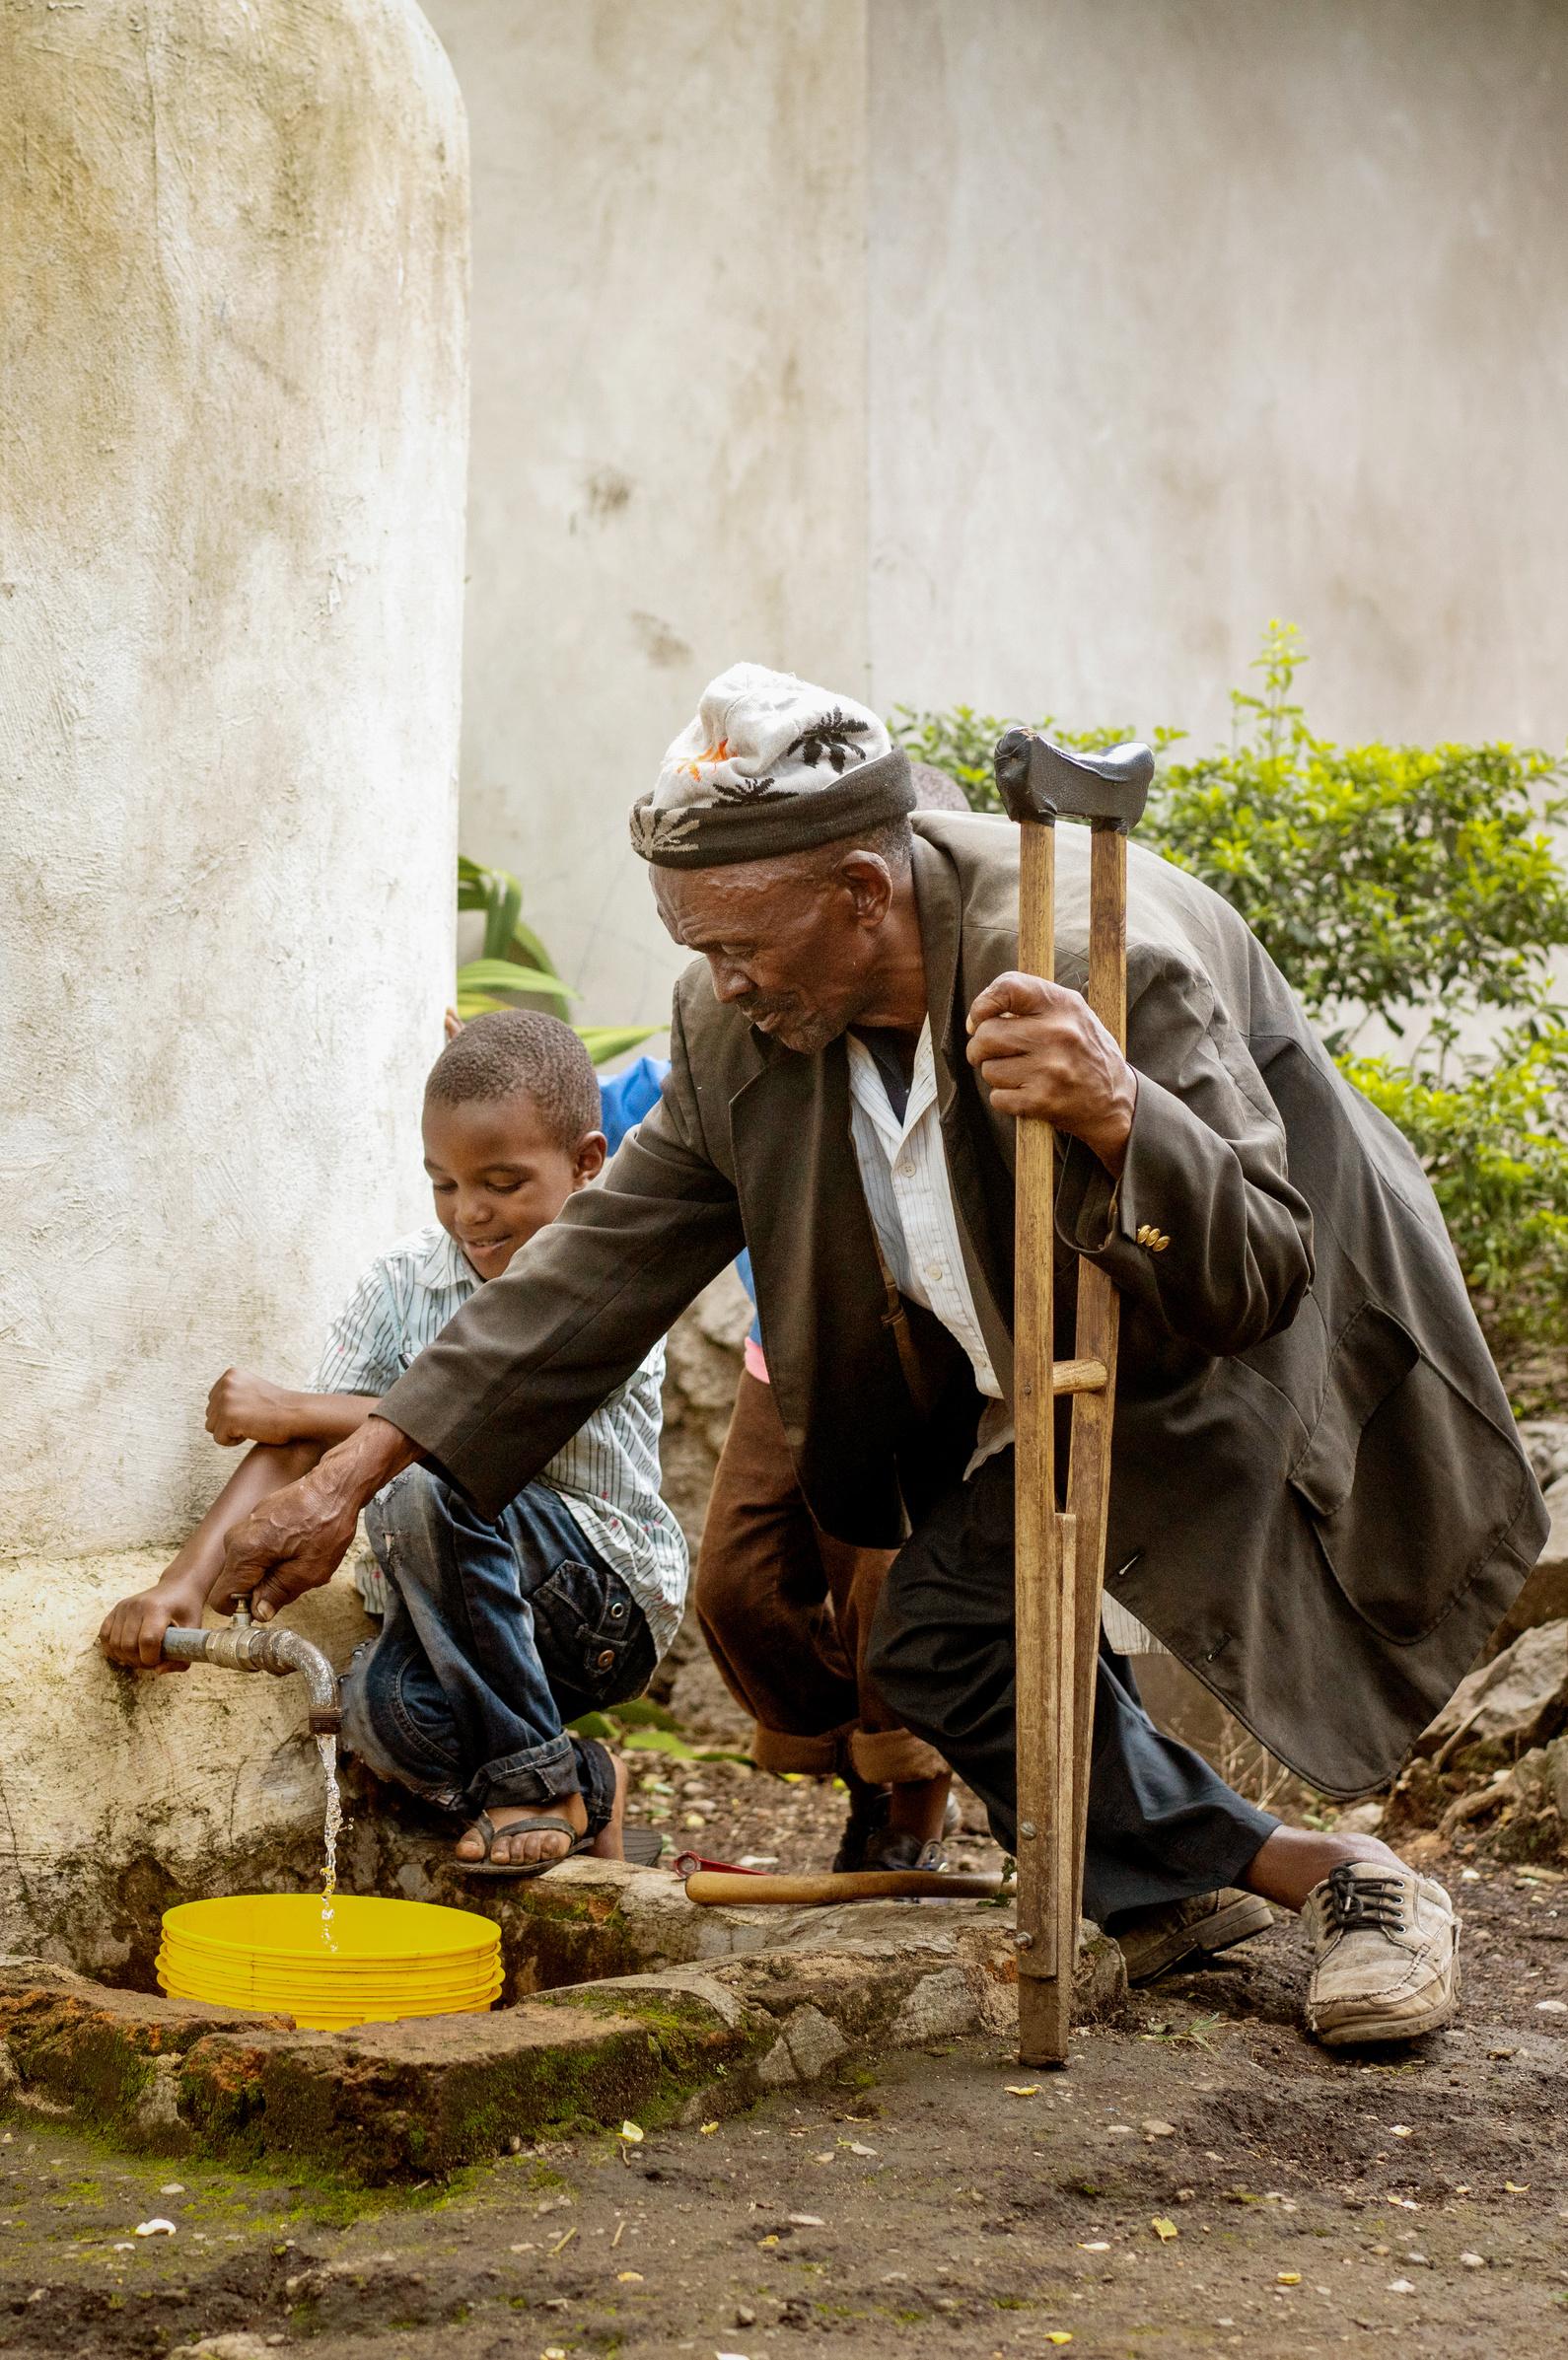
Access to consistent, clean water breaks the cycle of gender inequality. Girls no longer need to spend their days searching for water It also alleviates poverty, improves education and health, and creates possibilities for women


Thousands of tanks, hundreds of thousands of people impacted, and still the same idea.
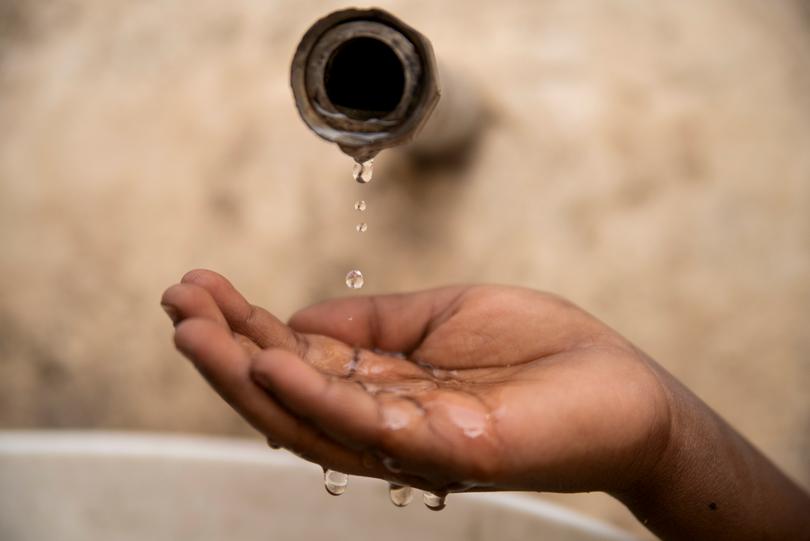
Water is life, and access should be universal
Instead of drilling wells, we construct rainwater harvesting systems. This is an affordable and sustainable way to create consistent access to clean water and right to a family's doorstep. Our rainwater collection systems are not dependent on electricity, pumping or western additives. They are engineered to US standards and built to last for generations The labor and materials to construct the residential systems cost $500 in East Africa.
Many other water organizations benchmark three years of functionality as a success We see that as a failure. Everything we make can be repaired, and nothing is disposable. The first tank we built in 2005 still provides clean water to our founding family daily And every tank since that inaugural construction consistently functions successfully.
We revisit and review our projects every year. We also test water four times a year. Our success lies in our committed partnerships and community relationships
We work with underserved communities in harsh and drought-stricken environments. Our systems can be installed in rural areas and made from the most basic materials They can be as simple as a small swale to prevent flooding or as integrated as a 200,000-liter system connected to a primary school
Our systems supply families and communities with clean water for drinking, sanitation and agriculture. And they eliminate the need for women to ever have to walk for water again
1,485 LITERS OF WATER
12 CEMENT BAGS (50KG)
55 SAND (20L BUCKETS)
10 GRAVEL (20L BUCKETS)
2 LIME BAGS (25KG)
2 KG WATERPROOF CEMENT
450 1 FT X 1FT (30CM X 30CM) STONES
1 SAND SIEVE
1 STICK
1 BUCKET (20L)
1 BUCKET (10L)
1 SHOVEL
1 HOE
1 MASON TROWEL
1 WOODEN TROWEL
1 WOODEN FLOAT
350 CM STRING
1 TAPE MEASURE
1 LADDER
1 WIRE BUSH
2 THREAD SEAL TAPE
1 PLIERS
1 PLUMBER’S WRENCH
1 WIRE CUTTERS
1 SPIRIT LEVEL
1 HAMMER
1 CHISEL
1 SISAL PAINTBRUSH (4IN / 10CM)
10 WELDMESH (1PC = 8FT X 4FT / 2.4M X 1.2M)
20 CHICKEN WIRE (1 ROLL = 2M X 25M, ¾IN / 1 9CM AND HEAVY GAUGE)
6 KG BINDING WIRE (2 5MM)
66 M GALVANIZED WIRE (3 5MM)
15 KG PLASTIC SHEETING (1000 GAUGE)
5 WOODEN POLES (7 6CM X 5CM X 150CM)
5 WOODEN PLANKS (7.6CM X 5CM X 76CM)
1 KG NAILS (3IN / 7.6CM)
1 KG NAILS (4IN / 10CM)
0 5 KG BOLT & NUT (10MM)
4 GALVANIZED PLAIN SHEETS 26 GAUGE (3FT X 10FT / 91CM X 304CM)
7 FLAT BAR (20MM X 3MM) X 63 5CM
1 GALVANIZED IRON ELBOW JOINT (¾IN / 1 9CM)
1 GALVANIZED IRON SOCKET (¾IN / 1.9CM)
1 GALVANIZED IRON NIPPLE (¾IN / 1.9CM)
2 GALVANIZED IRON PLUG (¾IN / 1 9CM)
1 GALVANIZED IRON BEND (¾IN / 1 9CM)
2 GATE BALL VALVE (¾IN / 1 9CM)
1 GALVANIZED IRON PIPE (¾IN / 1 9CM) 3M
1 GALVANIZED IRON PIPE (2IN / 5CM) 15CM
1 FLUSH DIVERTER 10CM X 10 CM MOSQUITO WIRE FILTER
38 CM ROUND BAR (10MM)


400 LITERS OF WATER
1 5 BAGS OF CEMENT (50KG BAGS)
9 SAND (20L BUCKETS)
9 GRAVEL (20L BUCKETS)
2-3 HANDFULS OF LIME
450 1 FTX 1FT (30CM X 30CM) STONES
1 SAND SIEVE
1 STICK
1 BUCKET (20L)
1 SHOVEL
1 HOE
1 WOODEN TROWEL
1 METER OF STRING
1 TAPE MEASURE
1 WIRE BUSH
1 ROLL OF THREAD SEAL TAPE
1 PLIER
1 PLUMBER’S WRENCH
1 WIRE CUTTERS
4 5 PIECES OF WELDMESH (8FT X 4FT / 2 4M X 1 2M)
9 75 METERS OF CHICKEN WIRE (1 ROLL = 2M X 25M)
2.5 KG OF BINDING WIRE (2.5MM)
66 METERS OF GALVANIZED WIRE (3.5MM)
15 KG OF PLASTIC SHEETING (1000 GAUGE)
1 GALVANIZED IRON ELBOW JOINT (¾IN / 1 9CM)
76CM + 76CM + 10CM
GALVANIZED IRON PIPE (¾IN / 1 9CM)
1 SURVEY THE HOME SITE AND IDENTIFY THE WATER TANK INSTALLATION AREA. ASSESS THE DIRECTION AND SLOPE.
Water always runs downhill The system must be installed so that any overflowing water drains away from the house System should be positioned to allow rain to flow from the roof into the tank
If the roof is not level, try to determine the direction of the roof’s slope: this is where the water will flow

2 ONCE YOU HAVE ESTABLISHED WHERE THE SYSTEM WILL BE LOCATED, MEASURE A 3FT (91.5CM) DROP FROM THE CORNER OF THE ROOF AND MARK THIS POINT ON THE WALL OF THE HOUSE. THIS WILL BE THE TOP OF THE TANK.
3 MEASURE 160CM (5.25 FT) DOWN FROM THIS POINT. THE TANK WILL BE 160CM (5.25 FT) IN HEIGHT, EXCLUDING ITS FOUNDATIONS.
If you have measured 160cm (5 25 ft) and there is still space to go before you reach the ground, this remaining space will become part of the foundation
If you reach the ground before the 160cm (5 25 ft) mark, you will have to dig into the earth to set the foundation and to accommodate the full height of the tank
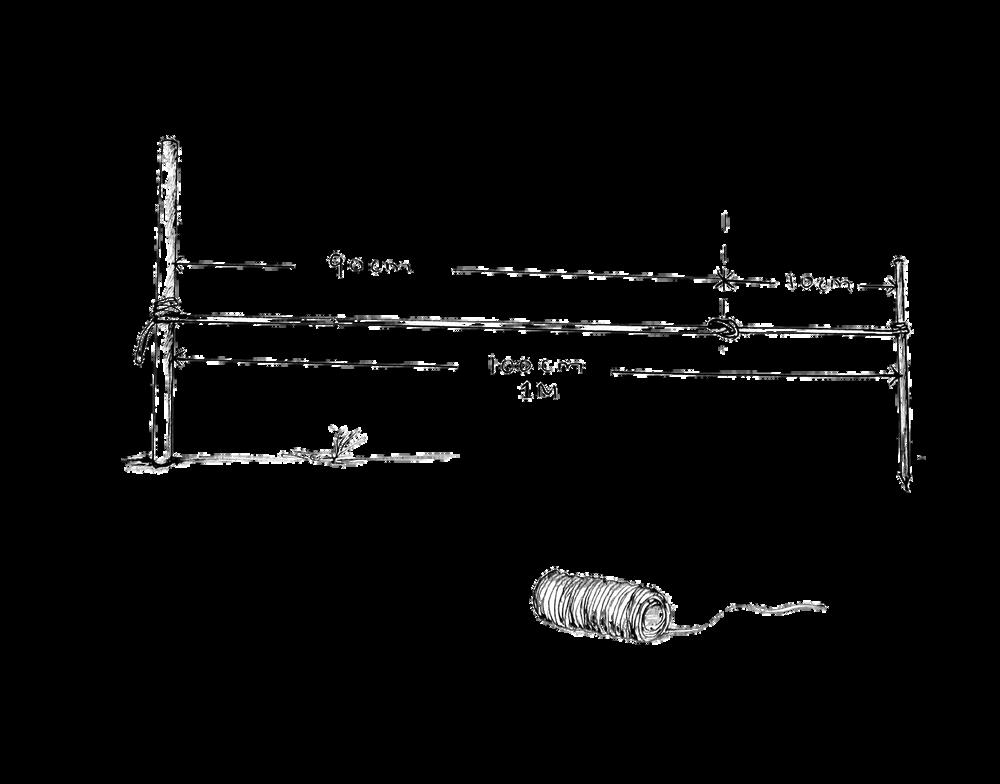
4. THE TANK WILL BE LOCATED 1 M (3.28 FT) FROM THE WALL OF THE HOUSE. MEASURE 1M FROM THE BASE OF THE WALL AND MARK THE POINT WHERE THE EDGE OF THE TANK WILL BE.
Cut a piece of string 1m in length and tie one end around the stick. Use the other end to draw a circle around the stick: this marks the tank’s circumference. Mark this circumference using lime or ash.
6. NOW, YOU WILL DIG THE FOUNDATION. WITHIN THE CIRCLE, DIG TO A DEPTH OF 2FT (61CM). THE FOUNDATION SHOULD BE 200CM WIDE. USE A TAPE MEASURE TO ENSURE THE DEPTH AND DIAMETER ARE BOTH CORRECT.
If necessary, dig to the 160cm mark and then dig 2ft (61cm) below that to ensure adequate space for the foundation and the full height of the tank.
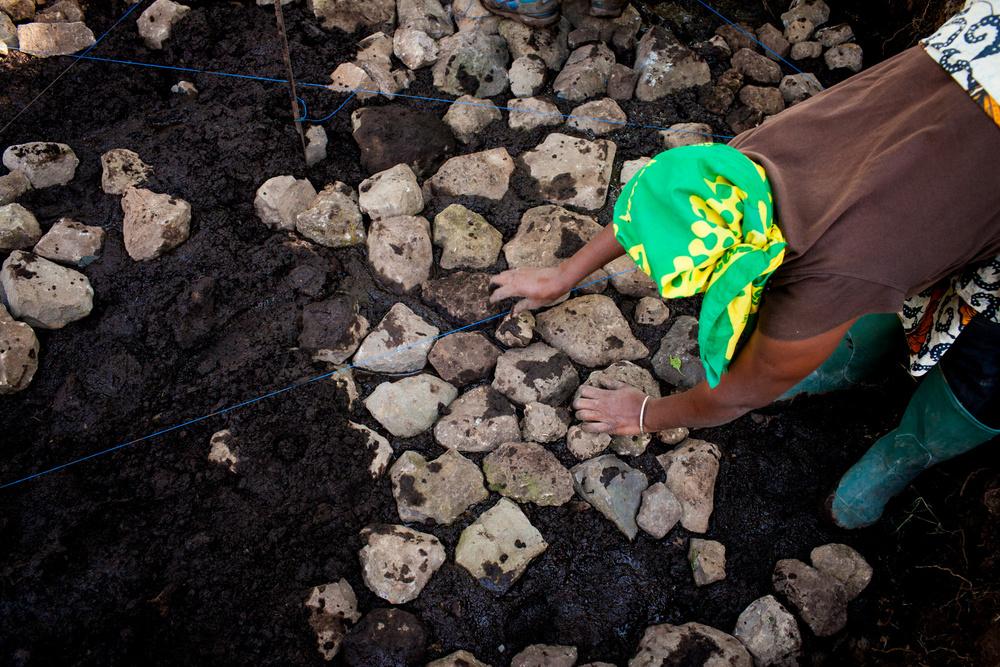
7. CHOOSE STONES WITH A FLAT SURFACE AND ARRANGE THEM IN A LAYER IN THE FOUNDATION, SPLASHING THEM WITH WATER.
Mix the excavated soil with water to make a thick mud, and after each layer of stones, fill the gaps with the mud to strengthen the foundation.
Continue layering stones and mud until the foundation reaches the height of 2ft (61cm) above ground level, so the foundation is a total of 4.4ft (122cm). If necessary, keep going until you reach the start of the 160cm measurement.
Fill the gaps between the stones with smaller stones to create as solid a surface as possible.
8. NOW, YOU WILL MIX THE CONCRETE FOR THE FOUNDATION. YOU WILL NEED CEMENT, SAND, AND GRAVEL.
Use a 20 liter bucket for the measurements. Measure 3 buckets of cement, 6 buckets of sand and 6 buckets of gravel.
Sieve the sand to remove organic debris such as leaves and sticks; if these are not removed, they may cause the tank to leak
Mix the cement, sand, and gravel with water to form a thick concrete
Cover the mud and stone surface with a layer of concrete two inches thick Compact and smooth the concrete with a square wooden trowel Ensure the foundation is 200cm wide
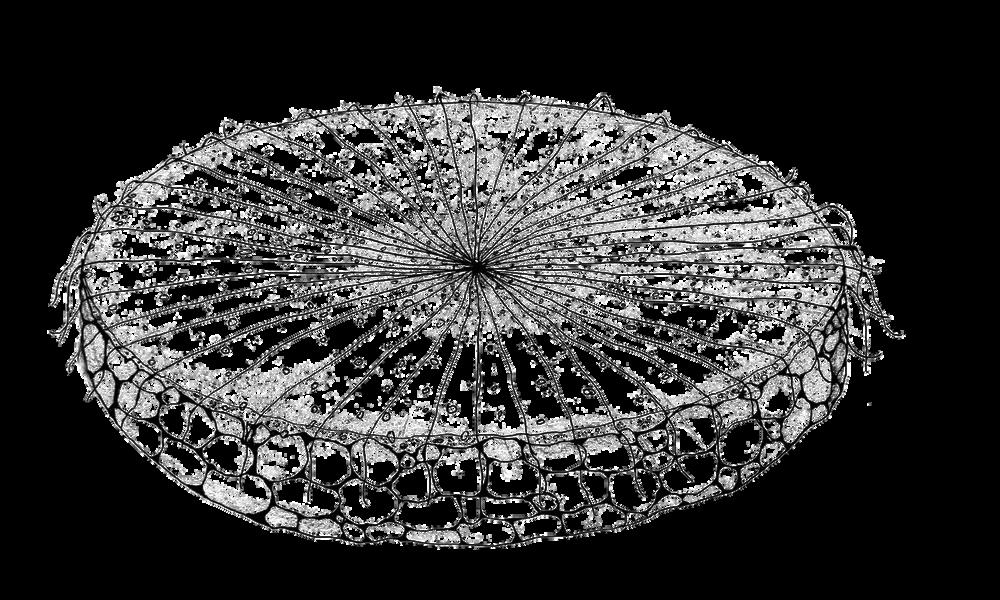
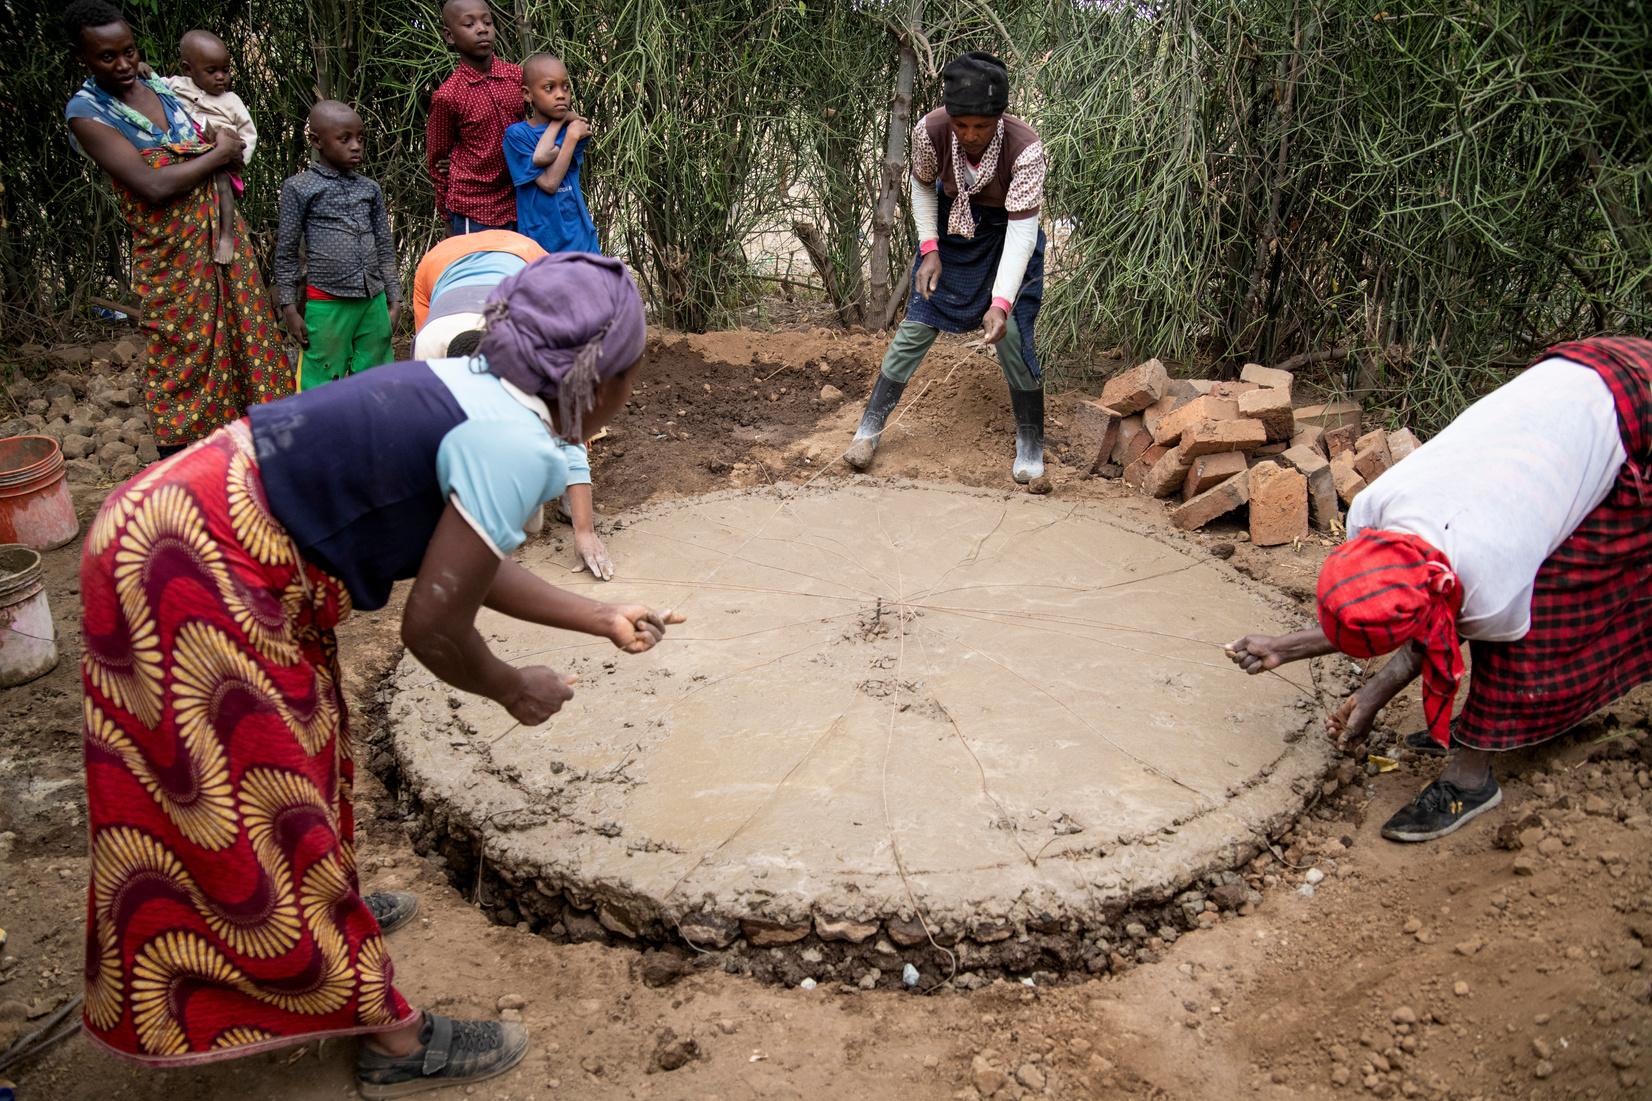
9. CUT 22 PIECES OF 2.5 MM GALVANIZED WIRE, EACH 250 CM LONG. SPACE THEM EVENLY ACROSS THE FOUNDATION, WITH THE CENTER OF EACH PIECE OF WIRE CROSSING THE CENTER OF THE FOUNDATION.
Both ends of each wire will protrude equally beyond the foundation’s edges. These ends will later be attached to the weldmesh walls of the tank.
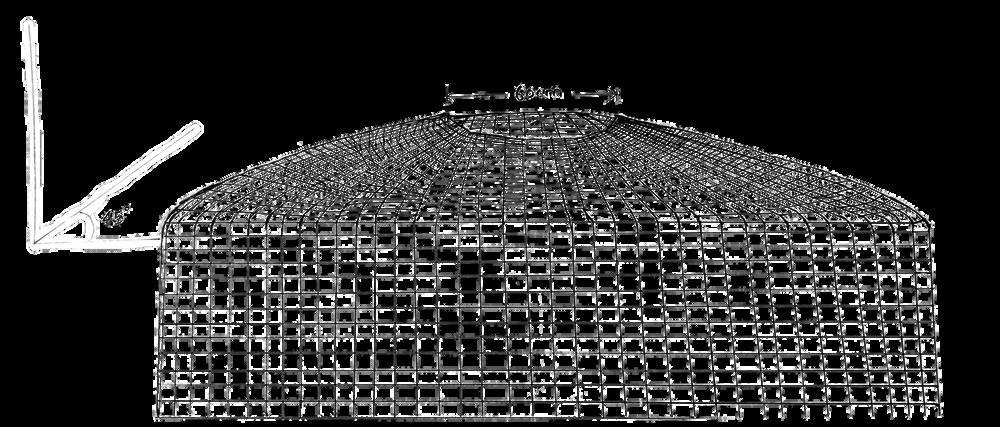
10. TAKE 2 PIECES OF WELDMESH, EACH MEASURING 8FT (244CM) IN LENGTH AND 4FT (122CM) IN WIDTH.
Cut 15cm lengths of binding wire to use as fasteners. Join the two weldmesh pieces to create a 16ft (488cm) length. Make an overlap of 5in (13cm) and fasten it with the binding wire You will now roll the length of the weldmesh into a cylinder
The weldmesh cylinder is 16ft (488cm) in circumference: choose a point to start, and use wire-cutters to cut downward 1ft (30cm) From here, measure 1 5ft (46cm) across, and cut downward 1ft (30cm) Keep going for the full circumference of the circle Each segment you have cut will be 1ft (30cm) high and 1 5ft (46cm) wide The segments you have cut fold inward and overlap to form the base of the cylinder Use binding wire to fasten these pieces together
11 REINFORCE THIS CYLINDER WITH 4 LAYERS OF CHICKEN WIRE.
Take a roll of chicken wire measuring 6ft (183cm) in height and cut pieces 50cm long Cut 15cm pieces of binding wire
Add the 2 layers of chicken wire to the inside and outside of the weldmesh cylinder Fasten all layers together using the binding wire
12 PLACE THE ENTIRE STRUCTURE ON TOP OF THE FOUNDATION, WITH THE WELDMESH BASE AT THE BOTTOM.
The galvanized wire ends are still protruding from the tank's base: bend these upward and weave them through the openings in the chicken wire and weldmesh, as though you are sewing
13 POUR A 2IN (5CM) LAYER OF CONCRETE OVER THE BASE.
Use a 20-liter bucket for the measurements Measure 1 bucket of cement, 3 buckets of sand and 3 buckets of gravel
Sieve the sand to remove organic debris such as leaves and sticks; if these are not removed, they may cause the tank to leak
Mix the cement, sand, and gravel with water to form a thick concrete Compact and smooth the concrete with a square wooden trowel
14. NOW, YOU ARE READY TO INSTALL THE CLEAN WATER PIPE AND THE WASHOUT PIPE BEFORE THE CONCRETE DRIES.
The clean water pipe is the access point for the water in the tank. It should be positioned close to the kitchen or in a position that ensures ease of access from the house.
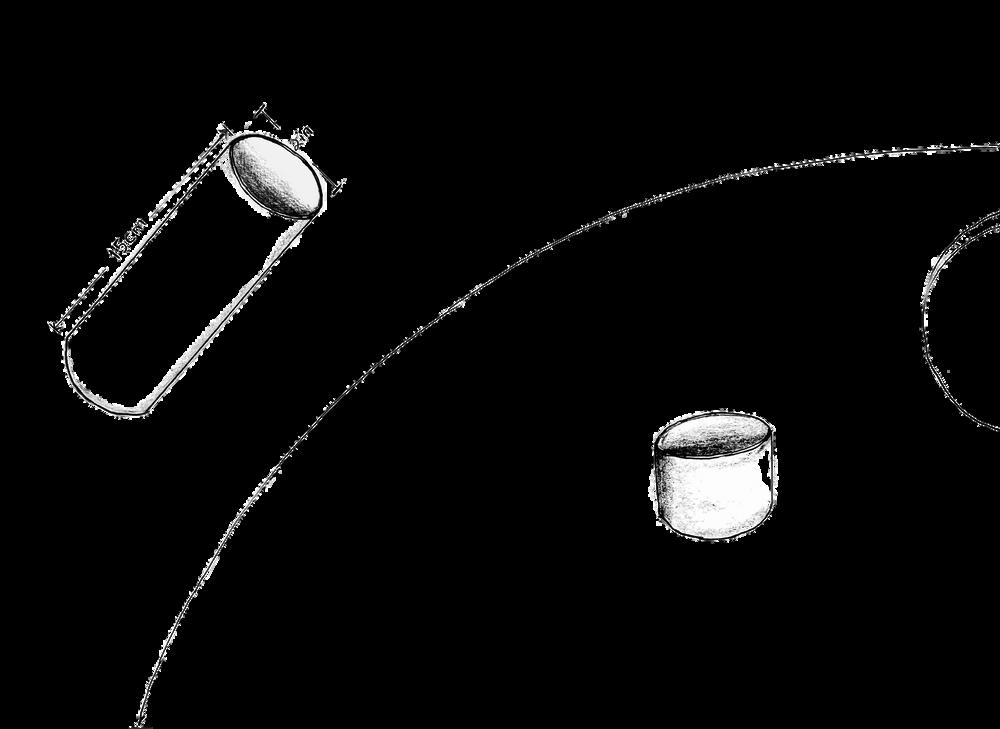
To make the clean water pipe: connect a ¾in (1.9cm) galvanized pipe that measures 2.5ft (76cm) to a ¾in (1.9cm) galvanized pipe that is 4in (10cm) long.
Use a wire brush to clean the pipe threads. Cover the threads in thread seal tape to prevent leakage. Then join the pipes using a ¾in (1.9cm) galvanized iron elbow joint.
The 4in (10cm) pipe goes inside the tank, facing upwards (vertically). This will prevent the tank from ever being drained completely. Dirt and debris will settle at the bottom of the tank, so by only accessing water above this point, and the family will be ensured clean water. In the second concrete layer, make a small trench for the clean water pipe. 6in (15cm) of the pipe must protrude from the tank. Make a slurry of 2 mason trowels of cement mixed with 0.5ls of water to seal the pipe in place.
The washout pipe is used for cleaning the tank. Unlike the clean water pipe, this pipe will access the water (plus dirt and debris) at the bottom of the tank. This pipe is a ¾in (1.9cm) galvanized pipe measuring 2.5ft (76cm) long.
This pipe can be situated at 45 degrees from the clean water pipe, though if the tank has been dug to below ground level, it will be easier to position the pipes next to each other to avoid having to dig two chambers beneath the taps.
Use the wire brush to clean the threads and thread tape to seal them Make a trench in the wet cement and seal the pipe with a cement slurry of 2 mason trowels mixed with 0 5l of water, as you have done with the clean water pipe It should protrude 6in (15cm) from the foundation
15 COVER THE STRUCTURE WITH PLASTIC SHEETING TO ALLOW IT TO DRY SLOWLY. DRYING TOO QUICKLY WILL CAUSE CRACKS IN THE CEMENT.
200 LITERS OF WATER
4 CEMENT (20L BUCKETS)
2 SAND (20L BUCKETS)
1 LIME (10L BUCKETS)
1 SAND SIEVE
1 BUCKET (20L)
1 BUCKET (10L)
1 SHOVEL
1 MASON TROWEL
1 WOODEN TROWEL
1 WOODEN FLOAT
1 TAPE MEASURE
1 LADDER
1 PLIER
1 WIRE CUTTERS
0 5 KG NAILS (3IN / 7 6CM)
0 5 KG NAILS (4IN / 10CM)
1 HAMMER
5 PIECES OF WELDMESH (8FT X 4FT / 2.4M X 1.2M)
9.75 M OF CHICKEN WIRE (1 ROLL = 2M X 25M)
2.5 KG OF BINDING WIRE (2.5MM)
5 WOODEN POLES (7 6CM X 5CM X 150CM)
5 WOODEN PLANKS (7 6CM X 5CM X 76CM)
1 BEGIN BY MAKING ANOTHER WELDMESH CYLINDER. TAKE 2 PIECES OF WELDMESH, EACH MEASURING 8FT (244CM) IN LENGTH AND 4FT (122CM) IN WIDTH.
Cut 15cm (5 9 in) lengths of binding wire to use as fasteners
Join the two weldmesh pieces to create a 16ft (488 cm) length Make an overlap of 4in (10 cm) and fasten it with the binding wire
Place this cylinder on top of the one you made yesterday to create the top half of the tank Make an overlap of 5 inches and fasten the two cylinders with binding wire
The weldmesh cylinder is 16ft (188 cm) in circumference: choose a point to start, and use wire-cutters to cut downward 1ft (30 cm) From here, measure 1 5ft (46 cm) across, and cut downward 1ft (30 cm) Keep going for the full circumference of the circle Each segment you have cut will be 1ft (30 cm) high and 1 5ft (46 cm) wide
The segments you have cut will fold inward and overlap to form the top of the cylinder Use these overlapping pieces to create a dome by folding them at 45 degrees rather than 90 degrees This should leave a hole in the top of the cylinder measuring 60cm (2 ft) in diameter Fasten these in place with binding wire
2 Now, you need to make 5 wooden supports that will ensure the shape of the tank is maintained while you are working on it.
The vertical post should measure 150cm (59 in ), and the T-shape should measure 2 5ft (76cm) Arrange them along the perimeter inside of the tank so that they support the structure’s shape
3 Wrap the whole structure in two layers of chicken wire outside and two layers inside.
Don’t forget to cover over the top Use binding wire fasteners measuring 15cm (5 9 in) spaced 4in (10cm) apart to fasten all the layers tightly together
4 MAKE A MANHOLE IN THE TOP OF THE TANK.
Use a plastic basin to measure the size of the hole: later, you will use this same basin as the mold for making the concrete lid for the tank Use wire cutters to cut the hole
5 YOU WILL NEED TO MAKE A SLURRY TO BIND THE WIRE STRUCTURE TO THE FOUNDATION BEFORE PLASTERING THE WALLS.
Mix 1 shovelful of cement with 2 liters of water to a porridge-like consistency and climb into the tank Apply the slurry to the edges of the circle Don’t apply it to the floor; this comes on Day Five
Apply a layer of slurry to the outside of the tank where the foundation meets the walls
6 NOW, YOU ARE READY TO BEGIN PLASTERING INSIDE THE TANK.
You will need 4 20-liter buckets of cement, 2 20-liter buckets of sand, and 1 10-liter bucket of lime
Sieve the sand to remove all organic debris that could cause leakages in the tank Mix the plaster thoroughly
Apply the plaster to the inside walls using a wooden trowel, starting at the bottom and working up
This task must be completed in one day to avoid cold joints in the wall
Cover the tank with plastic sheeting to allow it to dry slowly
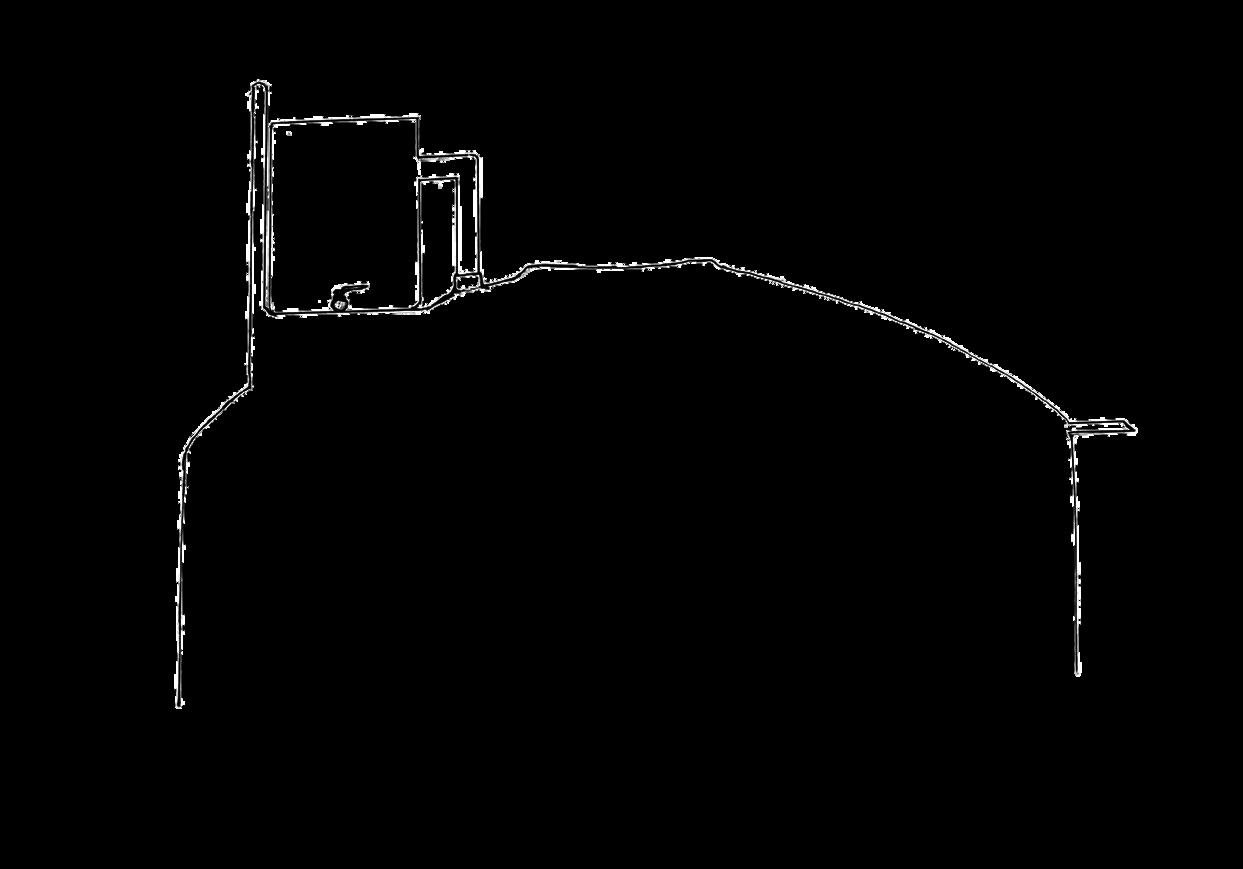
7 NOW, YOU CAN WORK ON THE WELDMESH BRACE THAT WILL SUPPORT THE GUTTERS WHEN IT RAINS HEAVILY. IT WILL ALSO SUPPORT THE FLUSH DIVERTER, A METAL SIEVE THAT FILTERS THE WATER AS IT COMES OUT OF THE GUTTERING AND INTO THE TANK.
Make a weldmesh brace that will rest on the tank's surface and support the gutter during heavy rain Cut a 2 5ft (76cm) length of weldmesh that is 6in (15cm) wide From the corner of the roof where the gutters will end, measure 18in (46cm) from the wall of the tank toward the center to determine the location of the brace Attach this brace to the chicken wire on top of the tank using binding wire fasteners

8 COVER THE TANK IN PLASTIC SHEETING TO ALLOW IT TO DRY SLOWLY.

200 LITERS OF WATER
5 5 CEMENT (20L BUCKETS)
15 SAND (20L BUCKETS)
1 SAND SIEVE
1 BUCKET (20L)
1 BUCKET (10L)
1 SHOVEL
1 MASON TROWEL
1 WOODEN TROWEL
1 WOODEN FLOAT
1 TAPE MEASURE
1 LADDER
1 HAMMER
1 CHISEL
TODAY IS FOCUSED ON PLASTERING THE OUTSIDE OF THE TANK.
1 MIX A SLURRY OF 3 SHOVELFULS OF CEMENT AND 4 LITERS OF WATER INTO A PORRIDGE-LIKE CONSISTENCY.
Apply this to the outside of the tank This will help the plaster layer adhere to the tank
2 TO MAKE THE PLASTER, YOU WILL NEED 5 (20 LITER) BUCKETS OF CEMENT, 15 (20 LITER) BUCKETS OF SAND, AND 120 LITERS OF WATER.
Sieve the sand to remove all organic debris, then mix the cement Apply a 2 cm (0 78 in) thick coat of plaster to the outside of the tank, using a wooden float to smooth it Ensure you complete this in one day to avoid cold joints in the wall
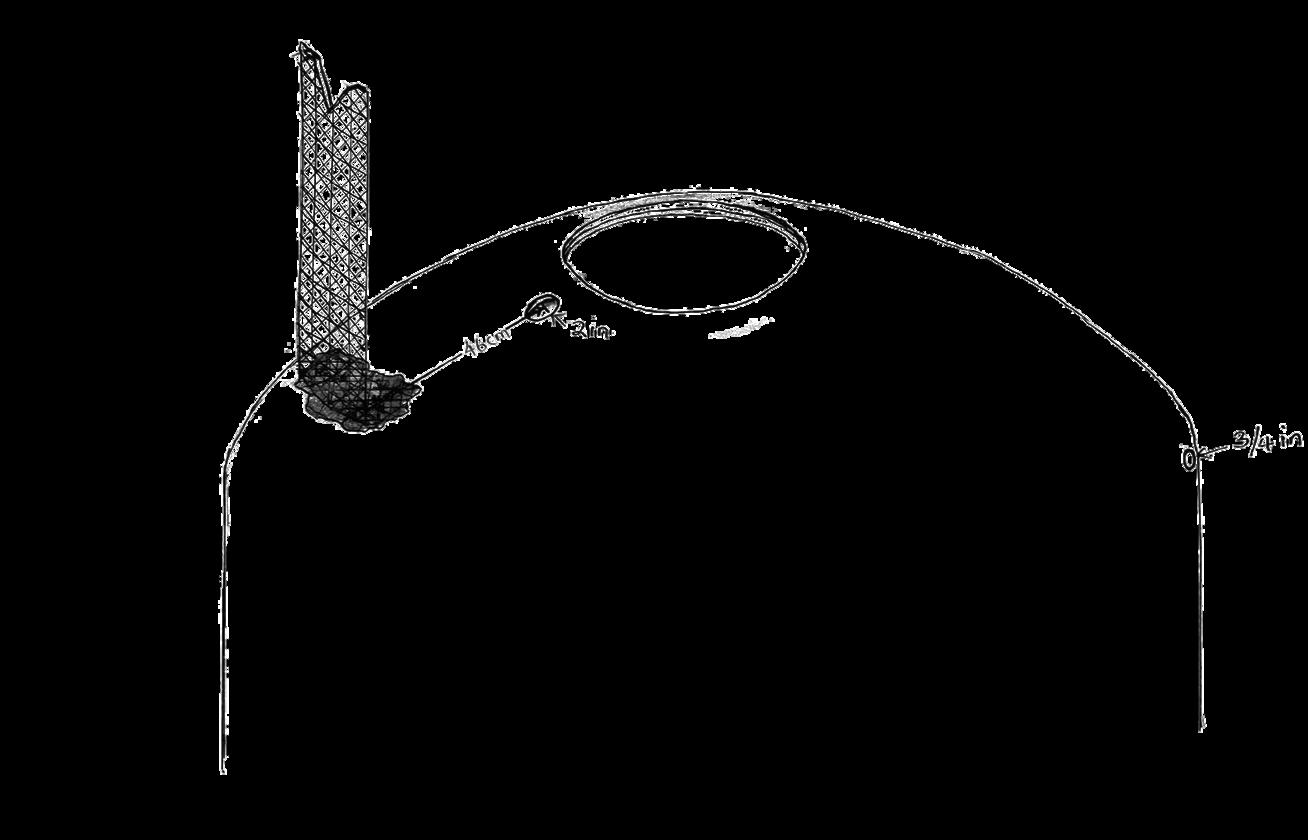
3 BEFORE THE CEMENT DRIES, MAKE THE NECESSARY HOLES FOR THE INLET PIPE AND THE OVERFLOW PIPE. THESE PIPES WILL BE INSTALLED ON DAY FIVE.
The inlet pipe is where the water will flow into the tank from the gutters (via the flush diverter) Measure 18in (46 cm) from the brace toward the manhole and make a 2in (5 cm) hole for the inlet pipe
The overflow pipe allows excess water to flow out of the tank when it is full but still raining It should point away from the house and is located at the top of the tank’s wall at the point where the dome begins Make a ¾in (1 9 cm) hole for this
4 COVER THE TANK IN PLASTIC SHEETING AND ALLOW IT TO CURE.
40 LITERS OF WATER
1.
ONCE IN THE MORNING AND ONCE IN THE EVENING Wet the outside of the tank, splashing water on the drying cement to ensure that it dries slowly enough to not cause any cracks. Use 20 liters each time.
2. COVER IT WITH PLASTIC SHEETING AFTER EACH WETTING
200 LITERS OF WATER
10 CEMENT (20L BUCKETS)
20 5 SAND (20L BUCKETS)
1 GRAVEL (SHOVELFUL)
1.5 LIME (10L BUCKETS)
2 KG WATERPROOF CEMENT
1 SAND SIEVE
1 BUCKET (20L)
1 BUCKET (10L)
1 SHOVEL
1 MASON TROWEL
1 WOODEN TROWEL
1 WOODEN FLOAT
1 TAPE MEASURE
1 LADDER
1 PLIER
1 WIRE CUTTER
1 SISAL PAINTBRUSH (4IN / 10CM)
10CM X 10 CM OF WELDMESH (8FT X 4FT / 2.4M X 1.2M)
15 CM OF BINDING WIRE (2.5MM)
30 CM OF GALVANIZED IRON PIPE (¾IN / 1.9CM)
15 CM OF GALVANIZED IRON PIPE (2IN / 5CM)
38 CM OF ROUND BAR (10MM)
1 INSTALL THE INLET PIPE TO CONDUCT THE WATER COMING FROM THE FILTER INTO THE TANK.
Make a slurry of 1kg of cement mixed with water
Cut a 2in (5cm) pipe to the length of 6in (15cm) and place it where the filter outlet is hanging Place the flush diverter on
2 INSTALL THE OVERFLOW PIPE.
Cut a ¾in (1 9cm) pipe to the length of 1ft (30cm) and place it in the hole you made for it on Day Two on the top corner of the tank Plaster around the pipe to secure its position
Make a dry plaster of 2 (20 liter) buckets of cement, 5 (20 liter) buckets of sand and 5l of lime (use half a 10 liter bucket to measure this). Add 10 liters of water. Mix this inside the tank and spread it across the floor to make a level layer. Create a smooth upward curve where the floor meets the walls.
Make a slurry of 3 shovelfuls of cement mixed with 4 liters of water and brush this on the inside walls to make the plaster layer adhere.
Now make the plaster. You will need 5 (20 liter) buckets of cement, 1 kg waterproof cement, 15 (20 liter) buckets of sand, and 1 (10 liter) bucket of lime, mixed with 20 liters of water. Sieve the sand to remove any debris and mix thoroughly.
Smooth layers of plaster onto the inside of the tank using a wooden trowel.
 3. CLIMB INTO THE TANK AND REMOVE THE WOODEN T-SHAPED SUPPORTS.
4. NOW, YOU WILL BE PLASTERING THE INSIDE OF THE TANK.
3. CLIMB INTO THE TANK AND REMOVE THE WOODEN T-SHAPED SUPPORTS.
4. NOW, YOU WILL BE PLASTERING THE INSIDE OF THE TANK.
5. NOW, YOU ARE READY TO WORK ON THE TANK'S FLOOR.
Mix 2 (20 liter) buckets of cement with 1kg of waterproof cement and 20 liters of water. Apply this to the floor of the tank using a steel trowel. Then apply it to the inside walls of the tank.
Dip a 4in (10cm) sisal brush into water and brush the walls to smooth the plaster.
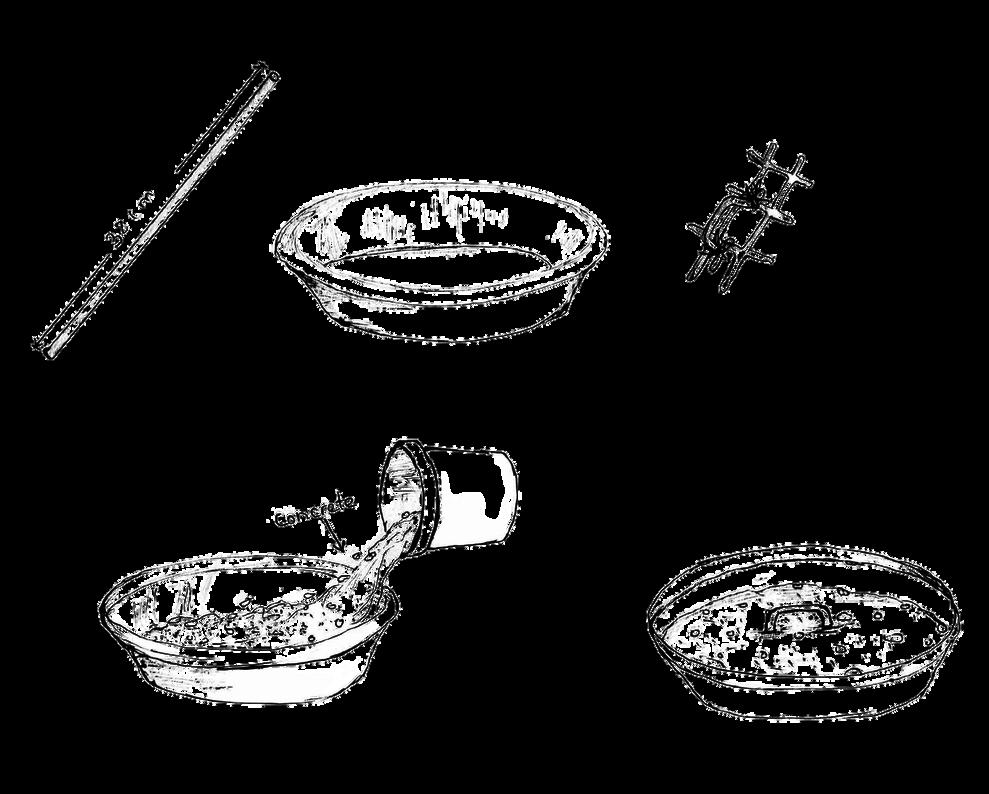
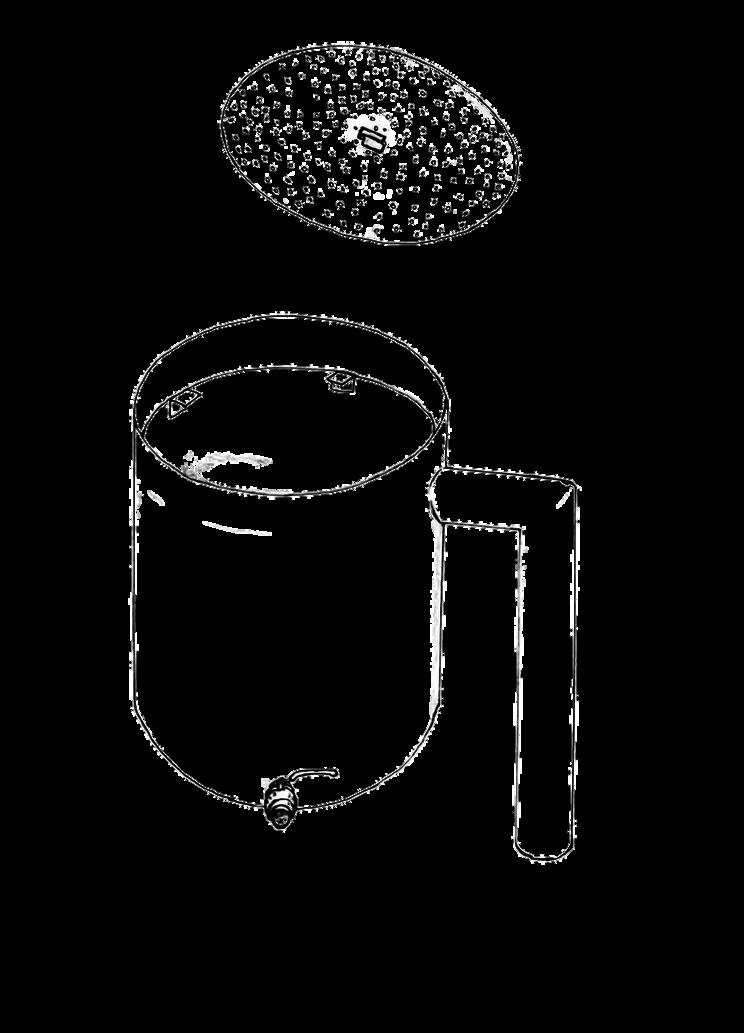
6. THE FINAL TASK OF THE DAY IS TO MAKE THE MANHOLE COVER.
Begin by making the handle. Take a 38cm piece of round bar and bend it to a U-shape. Take a piece of weldmesh the size of the basin’s interior and attach the upside-down U of the handle to this weldmesh, using binding wire and pliers to fasten them tightly together. Make a concrete mix of 1 5 shovelfuls of cement, 2 shovelfuls of sand, and 1 shovelful of gravel Combine with water to make a thick concrete
Place the weldmesh and handle in the basin, and fill the basin with concrete, using a trowel to smooth the top Place it in a cool dark room to dry
7 COVER THE TANK WITH PLASTIC SHEETING TO ALLOW IT TO DRY SLOWLY.
45 LITERS OF WATER
3 5 CEMENT (10 LITER BUCKET)
2 SAND (10 LITER BUCKET)
1 GRAVEL (SHOVELFUL)
1.25 LIME (SHOVELFUL)
1 SAND SIEVE
1 BUCKET (20L)
1 BUCKET (10L)
1 SHOVEL
1 HOE
1 MASON TROWEL
1 WOODEN TROWEL
1 WOODEN FLOAT
1 PLASTIC BASIN
1 TAPE MEASURE
1 LADDER
1 PLIER
1 WIRE CUTTERS
1 SPIRIT LEVEL
15 CM OF BINDING WIRE (2.5MM)
10 CM X 10 CM MOSQUITO WIRE FILTER
1. M THE AREA WHERE YOU WILL COLLECT WATER BENEATH THE CLEAN WATER PIPE’S TAP.
Dig enough space beneath and around the tap to comfortably fit a bucket beneath the tap.
Compact the earth and mix 1 shovelful of cement, 1 shovelful of gravel, 3 shovelfuls of sand, and water. Use this to plaster the chamber.
2. A SUCCESSFUL TANK DOES NOT LET ANY SUNLIGHT IN. IF THERE ARE ANY GAPS, IT WILL BE NECESSARY TO COVER THEM WITH A MOSQUITO WIRE FILTER TO PREVENT INSECTS AND VERMIN FROM ENTERING THE TANK
Cover the overflow pip mosquito wire filter, ho with binding wire.
The manhole should be that is adequately cov cover you made yester the basin to measure. At the manhole, bend face inward.

Place the basin on top check for size, and use ensure it is sitting flat.
Mix a slurry of 1kg of ce of water, and apply it the manhole.
Mix plaster with 1 shovelful of cement, 3 shovelfuls of sand, and 0.25 shovelful of lime. Use this to plaster over the wires and to finish off the manhole, so its edges are smooth and round.
Use the basin and spirit level again to ensure that the basin sits flat.

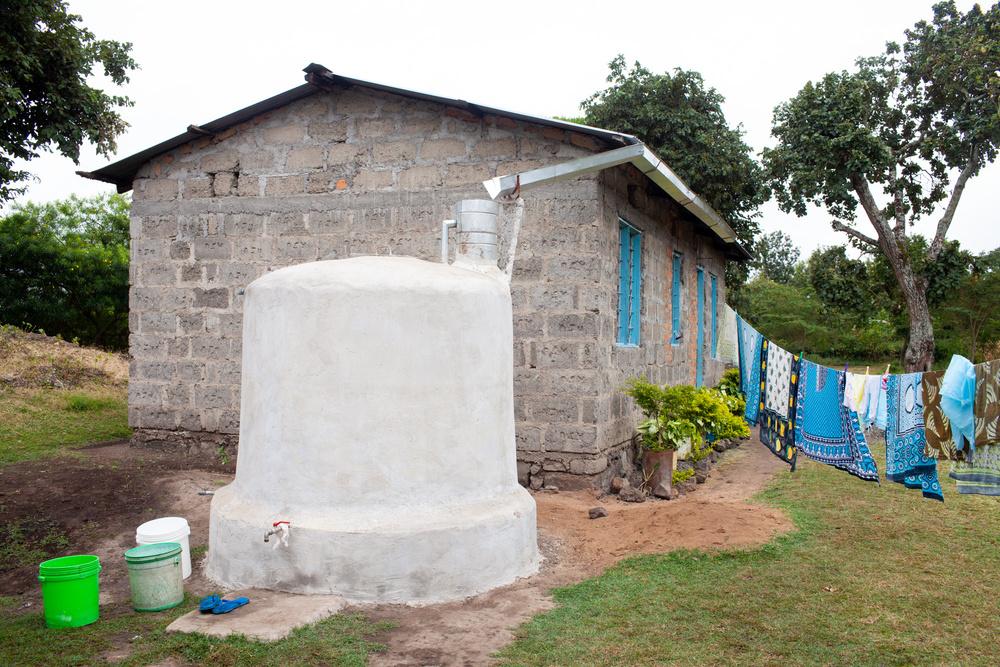
3. PAINT THE TANK WHITE, WHICH MINIMIZES THE HEAT IT WILL ABSORB.
Mix 1 shovelful of cement with 1 shovelful of lime and 4 liters of water. Paint the mixture onto the entire exterior of the tank.
4. THE SLOWER THE TANK DRIES, THE STRONGER IT WILL BE
400 LITERS OF WATER
250 CM OF STRING
1 CEMENT (SHOVELFUL)
3 SAND (SHOVELFUL)
1 SHOVEL
1 SAND SIEVE
1 BUCKET (20L)
1 BUCKET (10L)
1 MASON TROWEL
1 WOODEN TROWEL
1 TAPE MEASURE
1 LADDER
1 HAMMER
1 WIRE CUTTERS
1 PLIER
1 PLUMBER'S WRENCH
76CM X 30CM OF CHICKEN WIRE (1 ROLL = 2M X 25M)
1 METER OF BINDING WIRE (2 5MM)
0 5 KG OF NAILS (3IN / 7 6CM)
0.5 KG OF NAILS (4IN / 10CM)
0.5KG OR BOLT & NUT (10MM)
4 GALVANIZED PLAIN SHEETS OF 26 GAUGE (3FT X 10FT / 91CM X 304CM)
7 FLAT BAR (20MM X 3MM) X 63 5CM
1 GALVANIZED IRON SOCKET (¾IN / 1 9CM)
1 GALVANIZED IRON NIPPLE (¾IN / 1 9CM)
2 GALVANIZED IRON PLUG (¾IN / 1.9CM)
1 GALVANIZED IRON BEND (¾IN / 1.9CM)
1 GATE BALL VALVE (¾IN / 1.9CM)
1 FLUSH DIVERTER
1 WIRE BUSH
1 THREAD SEAL TAPE
and tighten it with a plumber s wrench. Because the top of the tank is a dome shape, it is necessary to make a support structure for the flush diverter. Make a cement mix from 1 shovelful of cement, 3 shovelfuls of sand, and 4 liters of water, and create a flat seat for the bottom of the flush diverter to sit on. Make a flat surface between the inlet pipe and the brace; the flush diverter will sit on this. Once it has dried, you can install the flush diverter by joining it to the inlet pipe.
You made a weldmesh brace for the gutters on Day Two. Now, cover the weldmesh with a single layer of chicken wire and fasten them together with the binding wire.
The top of this brace contains a U-shaped clamp that will support the gutter as it spills water into the flush diverter. Plaster over the weldmesh and chicken wire of the brace so that it becomes a solid structure
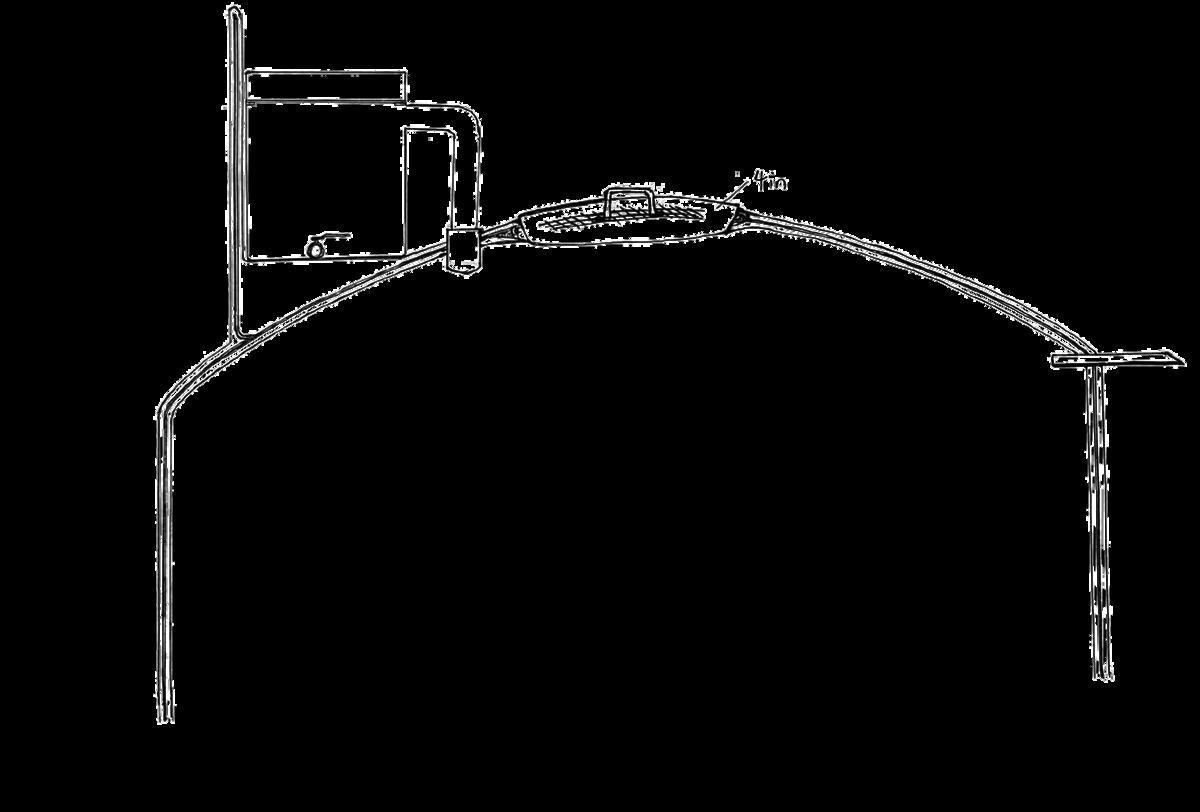
2 NOW, YOU CAN INSTALL THE GUTTERS.
It is necessary for the gutters to drop by 1 cm per ft (30cm) to enable the water to flow into the tank Using a spirit level or piece of string, establish where on the fascia board the gutters will go
Tie the string to both ends of the fascia board to ensure the slope is observed
The gutters are 2 5ft (76cm) long galvanized sheets Join 3 of these sheets together using screws, ensuring they are tightly fastened and overlapping to prevent leaking
Secure the clamps to the fascia board using nails Place the gutters onto the clamps and attach them tightly together with binding wire
Cut the fourth piece of gutter, so it is the correct length between the rest of the guttering and the flush diverter
Pour some water into the gutters to test the slope to see if water flows into the tank
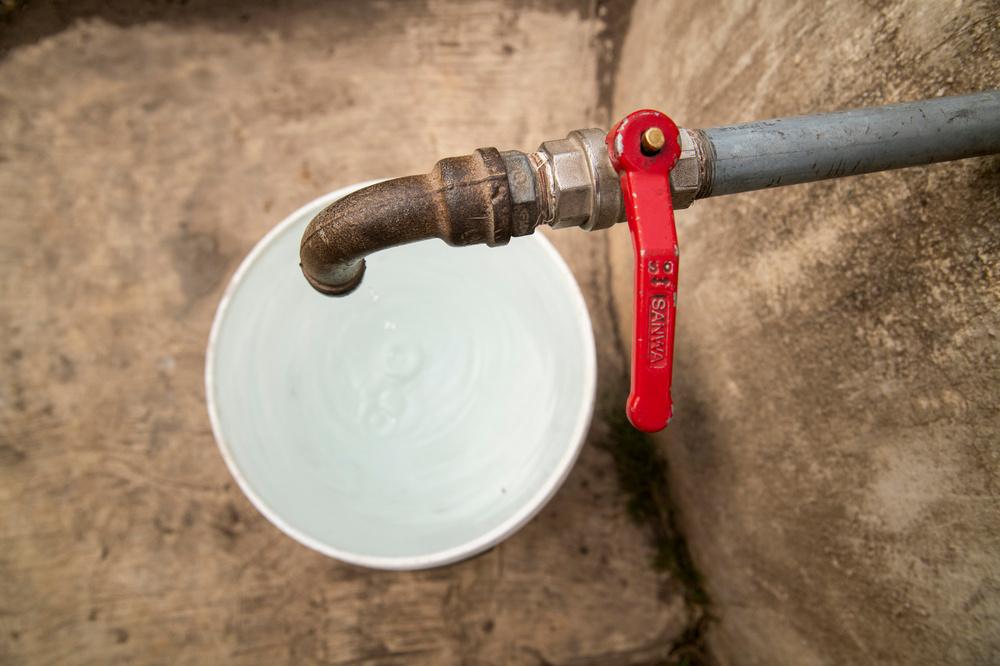
3 FINISH THE CLEAN WATER TAP STATION AND THE WASHOUT PIPE.
Install the valve and plug for the washout Using thread seal tape, attach the ¾ inch ball valve, nipple and bend to the clean water tap that serves as the tap station Tighten the connections using a plumber’s wrench
Cover the washout pipe with a ¾in (1 9cm) socket and plug and tighten the connection with a pipe wrench
4 CLEAN THE INSIDE OF THE TANK, FLUSH THE DIRTY WATER OUT.
Pour an inch of clean water into the tank, leaving it to cure
5 COVER THE MANHOLE WITH THE MANHOLE COVER AND COVER THE ENTIRE TANK WITH PLASTIC SHEETING.
Continue wetting and covering the tank twice per day for 3 weeks
The information provided by Save the Rain, and by The Women’s Water Initiative (“we”) in this Guide is for general informational purposes only All information in this Guide is provided in good faith, however we make no representation, guarantee or warranty of any kind, express or implied, regarding the accuracy, adequacy, validity, reliability, suitability, availability or completeness of any information as it may relate to any particular use, location, site, or construction project We shall not be liable for any damages or losses arising from use, misuse, or reliance on any of the information or procedures that are described in this Guide.

CONTACT US AT INFO@SAVETHERAIN.ORG
LEARN MORE AT SAVETHERAIN.ORG
FOLLOW US ON SOCIAL MEDIA @SAVE _ THE _ RAIN AND SIGN UP FOR OUR NEWSLETTER, THE RIPPLE, FOR INSPIRATION DELIVERED STRAIGHT TO YOUR INBOX.