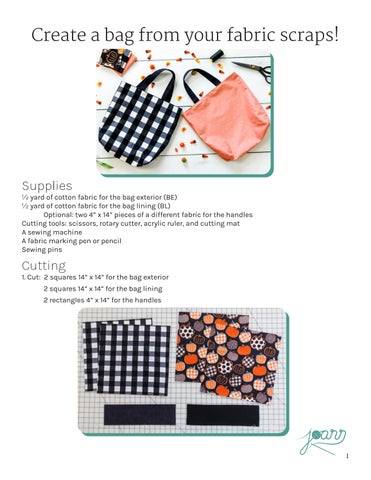
Create a bag from your fabric scraps!

Supplies
1/2 yard of cotton fabric for the bag exterior (BE)
1/2 yard of cotton fabric for the bag lining (BL)
Optional: two 4” x 14” pieces of a different fabric for the handles
Cutting tools: scissors, rotary cutter, acrylic ruler, and cutting mat
A sewing machine
A fabric marking pen or pencil
Sewing pins
Cutting
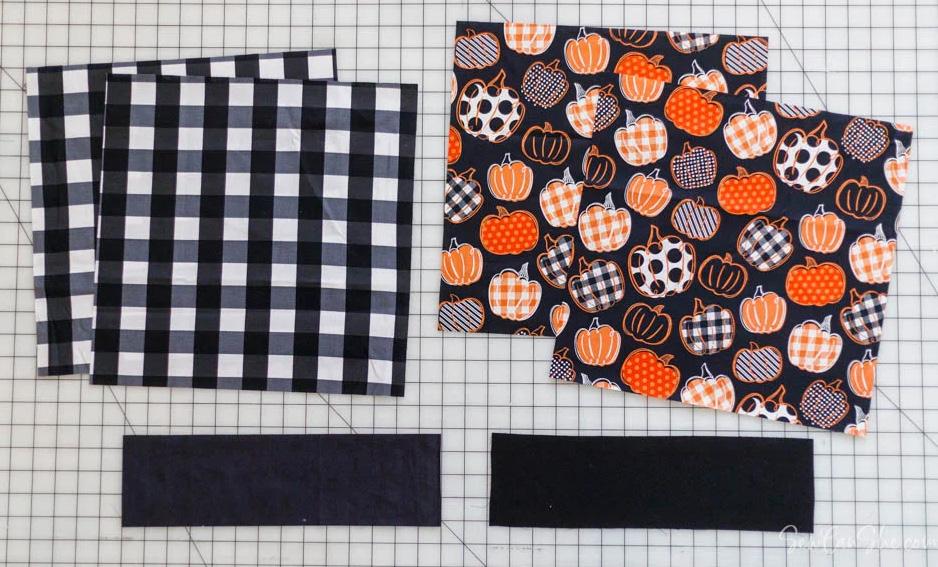
1. Cut: 2 squares 14” x 14” for the bag exterior
2 squares 14” x 14” for the bag lining
2 rectangles 4” x 14” for the handles

2. Place your two lining squares right sides together and your two exterior squares right sides together.

3. Use a pencil and a small ruler to mark a 1 1/2” square at the bottom corner of one of the sets of squares. Cut out the 1 1/2” square through both layers.
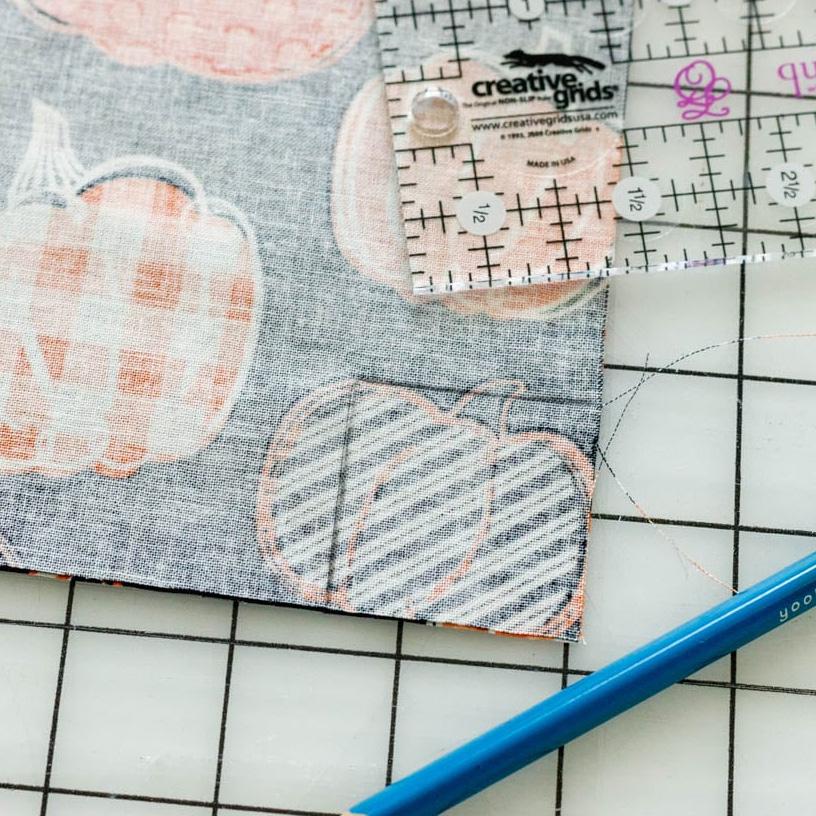
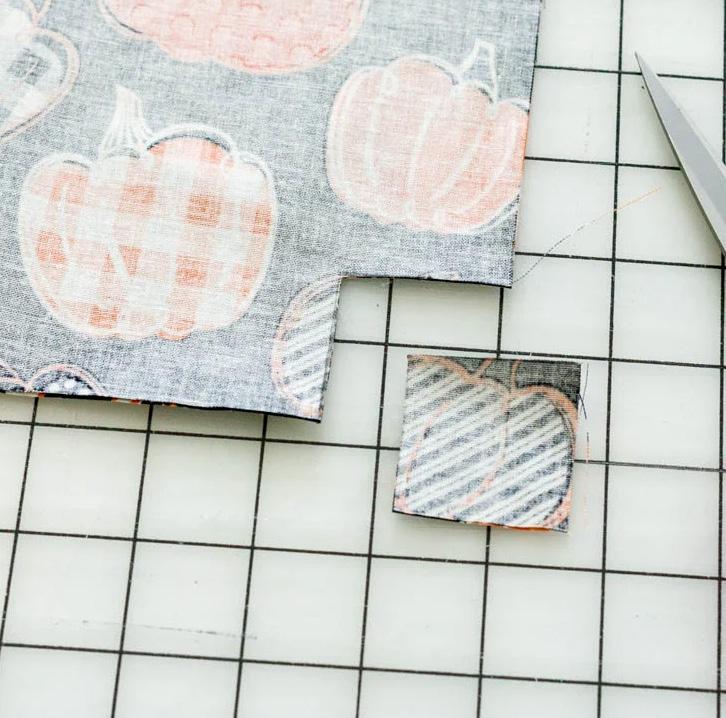
Repeat to cut a 1 1/2” square from the bottom of both exterior pieces and both lining pieces.
4. Pin the exterior pieces together along the side edges and the bottom edge. Pin the lining pieces together the same way.
You’ll sew these together after making the handles.

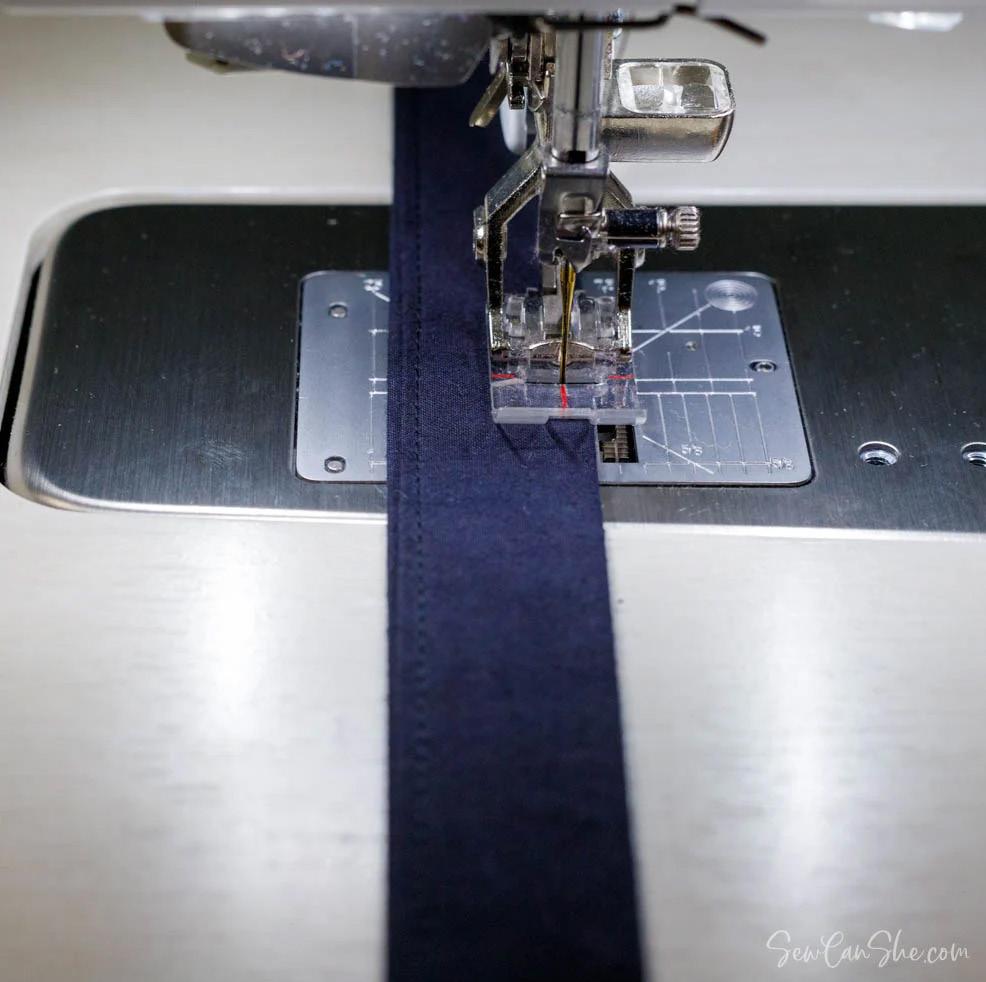
1. Fold both 4” x 14” strips of fabric in half lengthwise (wrong sides together) and press. Open and fold the long raw edges to the center and press again. Fold in half and press again to make two 1” x 14” strips.
2. Top stitch along both long edges of the strips, about 1/8” from the sides.
Set the handles aside for now. Make the handles

Sew the bag pieces together
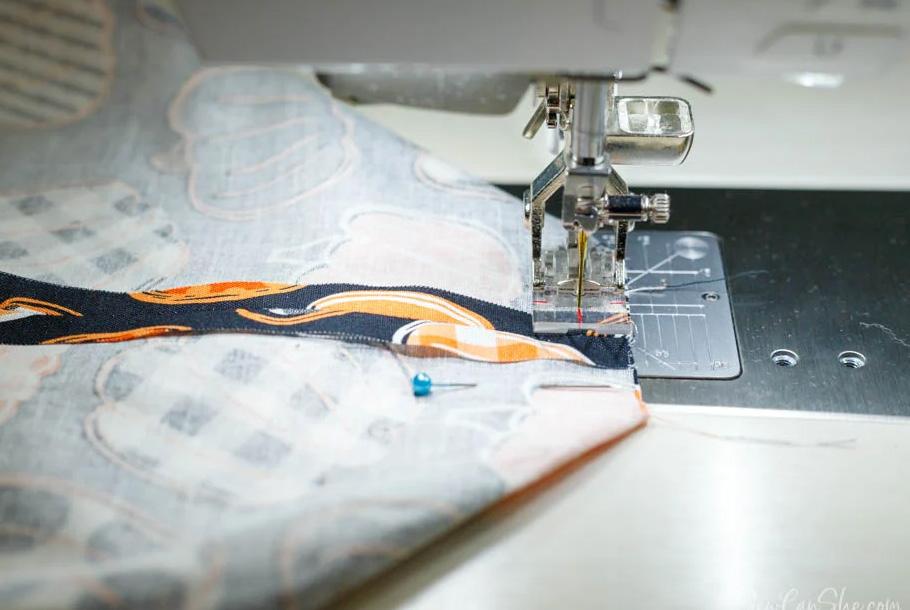
Seam allowances are 3/8” unless otherwise noted.
Tip: The side edge of most regular sewing machine feet is 3/8” from the needle. Beginners will find this pattern easy to sew a straight seam by keeping the raw edges along the edge of the foot.

1. Sew the exterior pieces together along the side edges and the bottom edge with a 3/8” seam allowance. Press the seam open.
2. Sew the lining pieces together the same way, except leave a 4” opening along the bottom edge for turning. Press the seams open.

3. With the bag exterior still inside out, flatten the corner opening so the cut-out makes a straight line. The side seam should be lined up with the bottom seam. Pin the edges together.
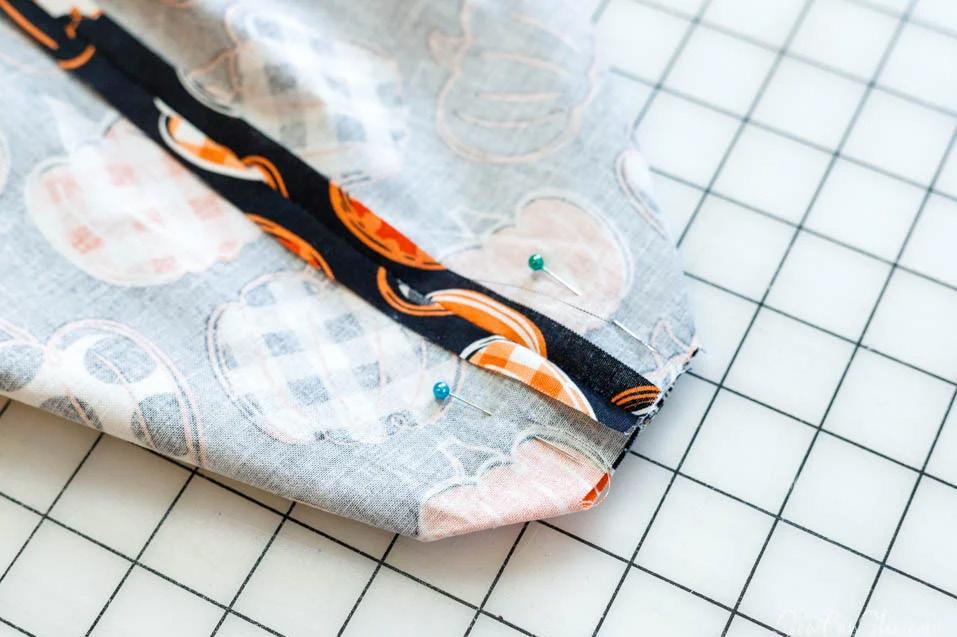
4. Sew across the corner. Repeat to sew the opposite corner. Then sew both corners of the bag lining the same way.