1. Usage
This product is used for various component parts of the belt surface sanding and polishing machines. Suitable for wooden structures, particleboard, fiberboard, thin wood veneer, artificial marble, etc. sanding. Polyester paint finish on soft surfaces. Wide belt sander is an efficient, highly automated sanding equipment, widely used in large-format plywood, solid wood furniture parts and sanding process, it can be done thick sanding and surface finishing sanding. This product is mainly consists of frame, feeding device, lifting devices, electrical pneumatic control devices, vacuum devices and other components.
2. Main structure
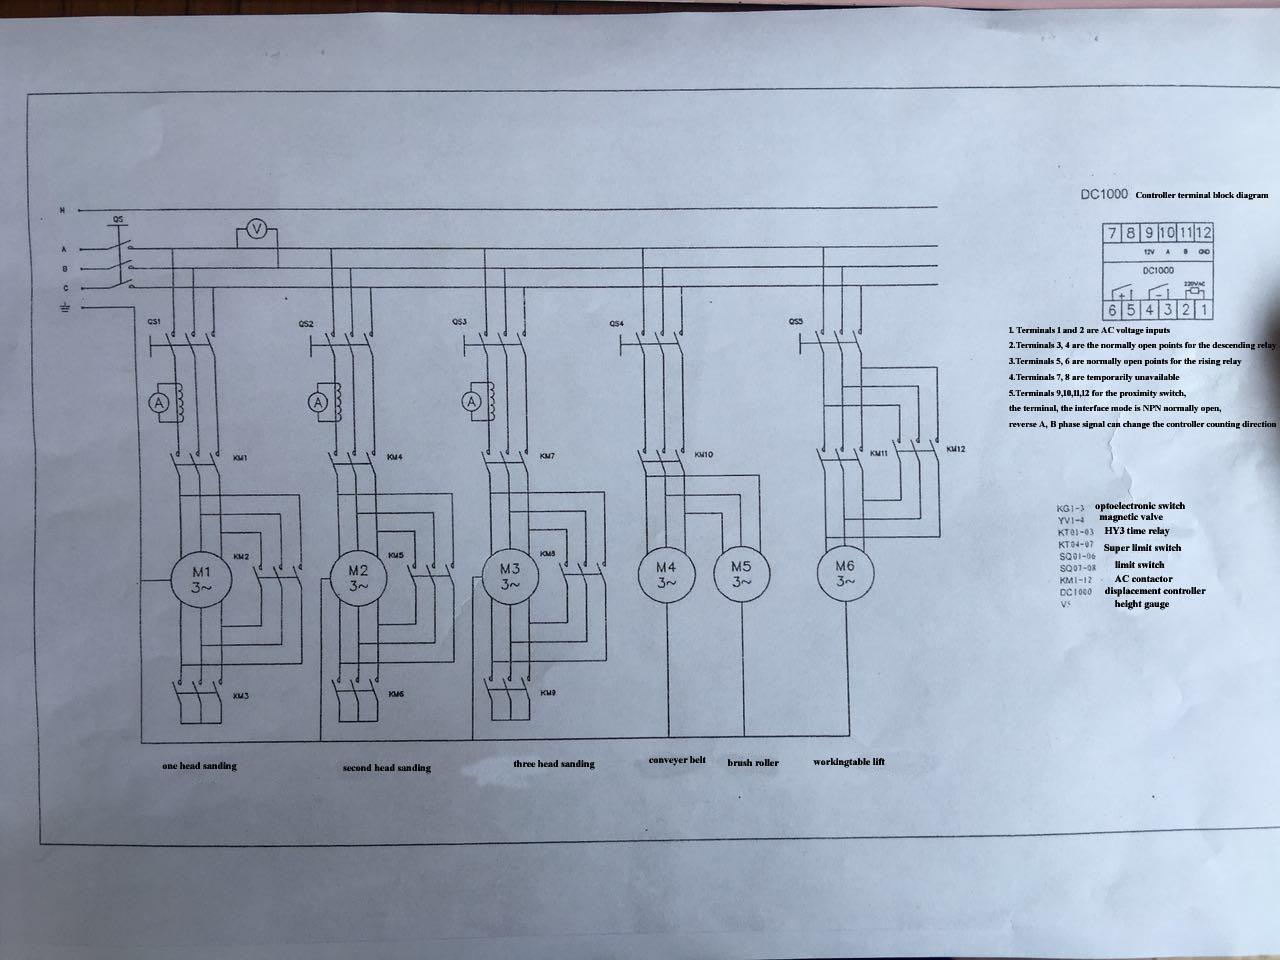
This machine series, a single sand, two sand, three sand and primer various models to choose from. The machine absorbing foreign advanced technology design, mechanical, electrical, optical and pneumatic control components work. The machine composed mainly of sand cut parts (fixed thick roll, sanding pad, tensioner roller, cloth roller, belt, etc.), transport parts (conveyor belt, table), transmission parts, pneumatic systems, electrical control and vacuuming devices, optoelectronics, inverter and so on. Sanding parts are the main working parts of the machine, according to several different kinds of forms processing of raw materials; sanding machine is mainly determined by the thickness of the roller, driven roller, tensioner roller, non-woven roll, through the main drive motor and belt drive roller and thickness rotary drive belt for telling. When the tensioner roller will take time to work up the belt holder, lifted up tight power shutdown, tensioner roller support for the lifting movement in the cylinder piston rod rise: belt tensioner, belt slack when dropped by manual control valve (NRK valve) control. Under the sanding pad at work sanding increases the contact surface plays a role, it is at work sanding pad pressure to the belt oblique axial displacement of the control shaft of iron, its slope is also connected to the pressure plate sanding pad, to produce the pressure on the pad surface of the cutting board pressure. The first roll of thick sand cut certain pressure, using worm, worm promote bearings to achieve, and the second set the size of a thick roll Sanding match.
Due to the movement in the sanding belt perimeter joints at both ends of the error, but in a fixed position on the conduct likely to cause the machined surface sanding uneven, in order to ensure the normal cutting and product quality, the corrective swing device fitted up on tight roll. Reciprocating cylinder rod affects roller, belt position at any time to adjust and constantly changing position. Reciprocating cylinder rod from the belt to the right photoelectric switch control, and be controlled by solenoid valve to complete.
In front of the set with two thick rolls of pressure plus spring rolls as a guide when feeding, and its produce a certain pressure to ensure product quality and safety.
Rubber conveyor belt feeding mechanism and transmission components. Conveyor belt is supported by around two rollers. Before adjusting screw driven roller through the belt tensioner force, equipped with roller conveyor to the left adjusting device, controlled by the machine to automatically adjust the valve. When the conveyor belt deviation, push lever to move the platen touches machine control valve, so that the cylinder moves, the roller end introduced to offset the other direction, so that the conveyor belt is always running in the correct position to ensure normal delivery of
the workpiece. In active roller conveyor drive bit (the feed roller) right side, connected by a dedicated reducer, its speed can be hand wheel speed (boot speed). Rear roller conveyor equipped with a cleaning brush (optional accessory), brush Fenxie fan sucked by vacuum to ensure product surfaces clean and beautiful.
Table lifting mechanism is composed of a small worm reducer controlled lifting movement by the wheel while turning the screw to achieve a smooth rise and fall table, lift measuring rod test bench at the edge of the table, and through panel represented on the digital display, to display a minimum of 0.1 mm.
Machine is equipped with suction device (user must bring their own vacuum fan), point by ministries vacuuming wood dust discharge machine, in order to maintain continuous production safety situation is strictly prohibited without vacuuming work boot. Operations can be carried out through various control buttons on the front panel.
For safety, the machine is equipped with the following safety devices
1 emergency manual stop button mounted on the front of the machine, you can press the stop in case of emergency.
2 bench lift position limit. Table lifting highest and lowest points have limit switches, limit excessive movements in order to maintain the conveyor belt from damage. (Professionals need to adjust)
3 belt deviation limit switches. When the belt once midnight rolls deviation occurs, the touch switch to parking, transport bed down automatically to protect the belt and rollers from damage, prevent the emergence of a groove planks.
3. Installation and adjustment
1.Body installation
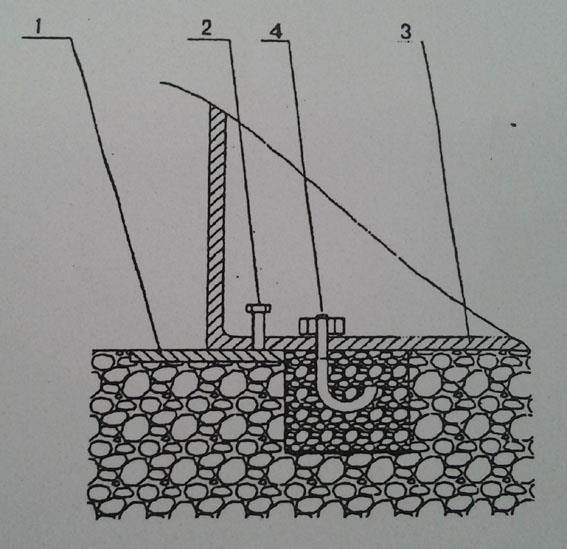
Use the top of the machine to lift lifting holes, in order to maintain a balance machine, wire rope must be of sufficient length and the same length as the machine ground hard, the machine can be directly placed on the four 100 * 200 20mm thick iron plate, with the adjusting screw to adjust the machine vertical and horizontal level, the level of degree (0.05mm) when measured by a level height adjustment screws put to the plane on the machine frame, the machine to be fixed at the four corners of the same. Such as: the ground is loose easily withstand pressure machine. You need to pour the cement foundation (see figure below). After adjustment of the machine for the first time a week, you should re-examine whether changes in the level of machine precision, check the adjustment, check once every three months to ensure the machining accuracy.
2. Connect power to the machine should pay attention to:
(1) supply voltage, frequency requirement is consistent with the machine.
(2) shall be determined according to the cable cross-sectional size of the total power of the machine.
(3) must be grounded.
(4) Check the motor rotation is correct.
(5) work, forbidden to open the electrical box

(6) door.
3. Connect compressed air to take over, with a diameter of not less than 12mm, the working pressure to maintain 0.6 ~ 0.8MPa, vacuuming seamless pipe connections good wind, no less than the average wind speed at the interface 25-30m / s.
4. Sander belt installation:
(1) to check the belt should be no wrinkles, no taper, no drum-shaped.
(2) Close the suction device fan.
(3) Close the pneumatic valves, tensioner roller decline.
(4) Open the location fastening handles, lock sets out into the belt cover.
(5) onto the locking sleeve, tighten the handle, adjust the belt is located in the middle of the roller position.
(6) to open the pneumatic valve tensioner roller rises, the belt tensioner.
5. Body adjustment
(1) Processing plate thickness and cutting the amount of correction
According to the amount of processing sanding plate thickness and size of the table to adjust the height and adjusting the amount and thickness of the roll, sanding pad. Bench press lift switch on the panel, the panel digital display and spacing conveyor belt of. Turn the hammer tables, sanding pad produces move up and down to adjust the amount of sanding. Hammer table pointer indicates a grid of 0.1mm, the hand wheel clockwise sanding pad decline, contrary to rise. Main steel roller by worm, worm push to move up and down the roller bearing to increase or decrease the amount of sanding.
(2) Adjust the belt on
When running belt, each belt may produce different traverse speed (Note: silver belt fitting errors), it must observe the functioning of the belt every time you start the machine, they should replace each belt especially when attention. Start sand frame, loosen swing fixed handle, rotate the adjustment handle, is the middle belt roller ran in normal operation. Control theory belt: the belt block - photoelectric switch - electrical - delay relay - solenoid valves - change the position of the swing cylinder to control the belt running.
(3) Feeding speed option
The cutting size and the amount of the surface quality requirements, select the appropriate feed rate is very important. Method for continuously variable rotation of the hand wheel (Note: In the operation of the machine must be adjusted), the conveying speed can be changed, to achieve a reasonable rate of feed.
(4) Working plate form adjustment
Workbench with tools such as transport flatness changes after long-term work, it will detect gage (dial indicator) is placed on the machine to adjust the plane of lifting screw (Note eliminate thread gap), then the same methods to measure other place (total measured machine corners), so that the table values match (0.03mm) is qualified.
Note: partial sand, non-adjustment screw lift.
6. Tensioner force adjustment
(1) conveyor belt tension adjustment: Screw the adjustment screw on both sides of the driven roller, can be on the belt tensioner force adjustment, attention should
not be too much tension, so as not to cause deformation of the conveyor belt.
(2) adjusting the working pressure of the brush roller: Loosen the screws fixing the brush roller means at each end of the vertical movement of the brush roller to the right, the bolt will be strong.
(3) the main motor belt tension adjustment: Loosen the screw motor mounting plate, screwing up the belt tensioner bolt so tightly degree should be suitable to allow bending under the pressure of 20mm belt.
(4) Table lifting chain tension adjustment: through long tension sprocket bolts to the top tight so; chain taut, so not too much should be appropriate to prevent the chain breaking or bending the chain wheel.
4. Operating
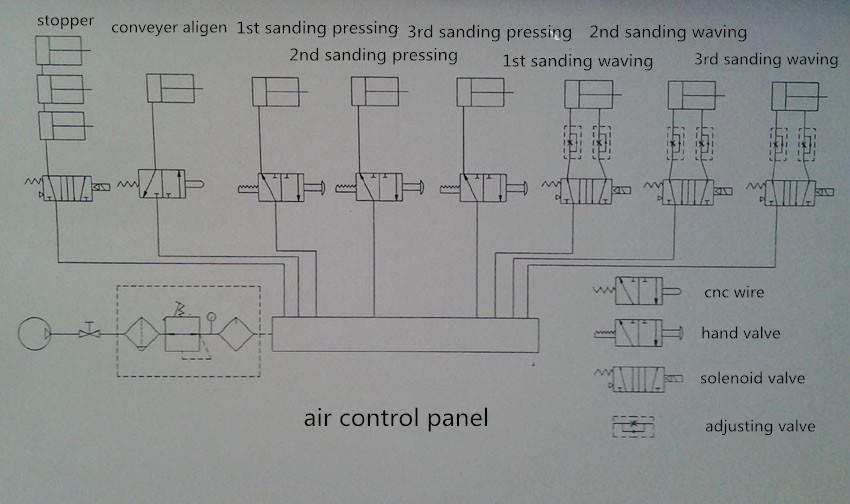
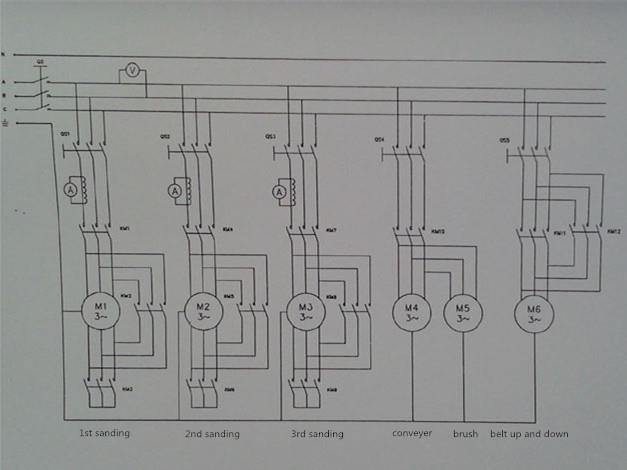
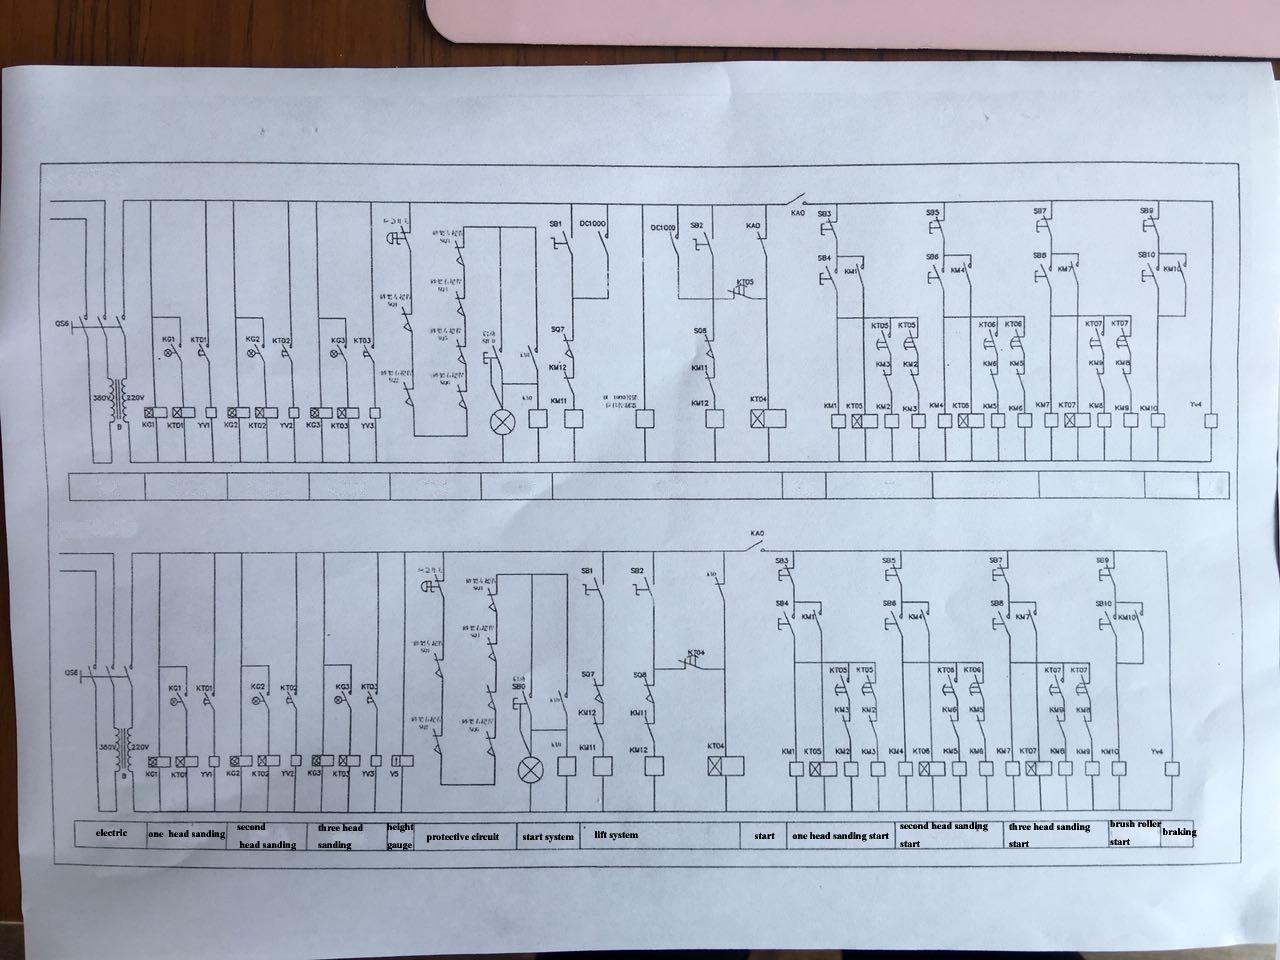
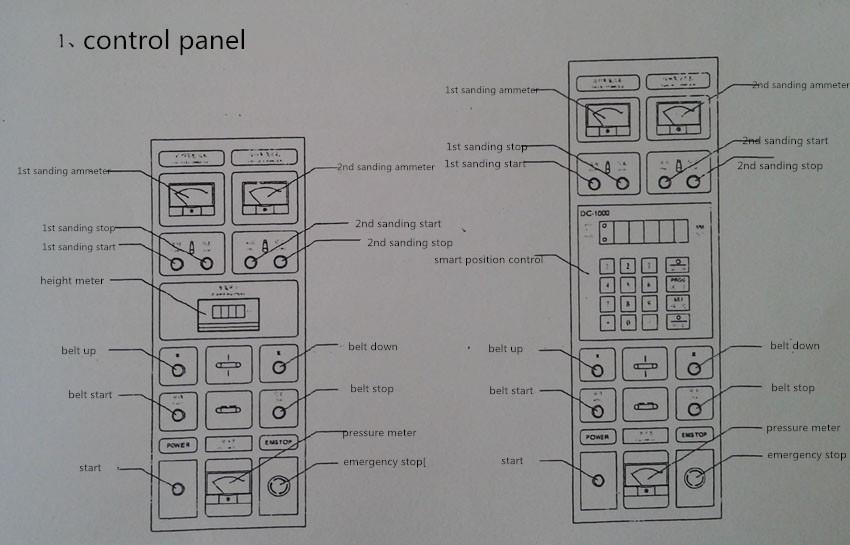
1. Operating panel(see the drawing)
2. Operating method
Before operating, first check to make sure no foreign table, and then start vacuuming the fan, while starting air aspirated, then press always start switch, front and rear rack switch startup sand (sand frame around the motor using Y / △ start, conversion time by time relay setting Note: setting by professionals), start transporting bed switch. In the process, you should always pay attention to the current indicated value, whether the sand frame for each process of cutting the amount of size should be checked with the appropriate cutting surface is uniform, such as uneven around the roller should be adjusted or sanding pad level degrees.
5. Maintenance and Repairment
1.Regular maintenance of the machine tool in accordance with the following requirements
1)After working:
(1) with filtered compressed air purification thoroughly clean the entire machine, with particular attention to the inner surface of the belt and should not leave the bench surface dust-free to reduce sanding like precision;
(2) to clean the machine is to be actuated suction device;
2)after every 40 hours of work:
(1) Check the air filter, remove the filter condensate.
(2) Check the compressed air lubricator, lubricant injection feet (high-speed oil);
(3) Check the lower graphite cloth sanding pad, replace if necessary;
(4) Check the sanding pad holder screw is loose, tighten if loose immediately, otherwise it will cause damage to the machine.
3) After every 200 hours of operation:
(1) Check the lower part of the sanding pad felt ruler, amend or replace if necessary;
(2) with grease lubricated chains and check up tightness;
(3) the degree of tension and wear Check V-belts;
(4) Oil filling hole machine guns to each injection grease;
(5) Check the high speed parts of the fastening screw is loose.
4)After every 300 hours of operation
(1) apart and clean air filter, replace the special oil stepless transmission (ud-3), play an open hole, such as oil discharged after rejoining the new oil in order to show the hole as the standard.
(2) Check the conveyor belt tensioner degrees;
(3) Check the machine vertical and horizontal level degrees;
(4) Check the flatness of the surface of the table;
(5) the degree of wear of ceramic tube overtravel switch checked in close contact with the belt on, necessarily be replaced.
5) The following parts of the lubrication options:
(1) class roller bearings and high speed grease;
(2) conveyor roller bearing calcium-based grease;
(3) infinitely variable speed conveyor machine plus special lubricants ud-3;
(4) lifting gear reducer oil hyperbolic.
2. machine repairment
After a long time working, you should follow these steps for the relevant parts of machine tools to make the necessary adjustments and maintenance. 。
1) belt grinding (60 # belt):
(1) adjusting the flatness table;
(2) Confirm the conveyor surface and the work bench surface free of dust and other objects;
(3) adjusting the adjustable steel rod and sanding pad above the fixed roll thick 2mm;
(4) Start the motor belt, conveyor gear, start cleaning device;
(5) rises table (first start lifting gear, manual feed close) until lightly touch the conveyor belt until the belt grinding each no larger than 0.1 mm, in order to avoid overheating the conveyor belt deformation (for multiple feed);
(6) conveyor belt grinding is completed, the thickness of the indicator dying;
(7) Carefully remove the debris on the machine, particularly the inner surface of the belt and the surface of the work table debris cleaned;
2) Replace the sanding pad graphite cloth
(1) The sanding pad is placed on the plate;
(2) Remove the sanding pad on both sides of the bolt, remove the old graphite cloth;
(3) to flatten the graphite cloth with a new bolt in the sanding pad;
(4) connect the trachea to adjust the pressure of 0.1-0.2bar;
(5) with a flat foot graphite cloth surface flatness inspection, adjustment loosen the bolts on one side, until leveling;
4) sanding machine does not start
(1) is not reset by pressing the emergency stop button;
(2) belt suppress deviation limit switches; loosen the belt tensioner cutting, so that the middle belt, tensioner belt;
(3) belt deviation limit switch is damaged, replace;
5)the feed end of bomb material
(1) Whether spring on the two pressure rollers (1) Check the previous damage, to be replaced;
(2) sheet metal thickness is too large and Adjustment inconsistent;
(3) Adjust the limit is too high;
6) delivery bed down automatically, is sanding machine automatically protected. Decrease the distance by the time relay adjustment, usually set at 0-2 seconds (Note: by professional setting).
(1) Press the emergency stop button;
(2) When the belt pressure deviation limit switches;
6.The basic parameters
Workpiece widest dimension: 1300 mm
Belt dimensions (length X width): 1330x2200 mm
Contact roller diameter :
one sand shelf: 240 mm Belt speed and power: 6-30 m / s 37 kw
Two sand shelf: 210 mm Belt speed and power: 6-30 m / s 22 kw
Three sand shelf: mm Belt speed and power: m / s kw
Conveyor speed and power: 6-30 m/s 4 kw
Lifting gear Power: 0.37 kw
Compressed air system pressure: 0.6-0.8Mpa
Vacuum tubes wind speed: 25-30 m / s
Overall dimensions: 2700x2100x2100 mm
7. Spare parts
1) a sand belt rack model ( ) qty
Two sand belt rack model ( ) qty
Three sand belt rack model () qty
2) the brush roller belt type ( ) 1
3) a sand shelf front bearing ( ) a sand frame rear bearing ( )
Two sand frame front bearing ( ) after two planes bearing sand ( )
Three sand frame front bearing ( ) three sand frame rear bearing ( )
4) up tight roller bearing ( )
5) under the tensioner roller bearing ( )
8. Warranty
Item
Warranty
Remarks
Bearing 3 months due to lack of oil damage
Gas cylinders 3 months due to lack of oil, except for man-made damage
Conveyor 1 year
man-made damage, loose bolts, sanding pad falling damage, serious uneven plate, belt wear and tear excepted
Roller 1 year man-made damage, except sanding pad falling damage
Solenoid valve 3 months
due to lack of oil, voltage instability burn except Motor year due to voltage instability, phase except burn
Motor 1 year due to voltage instability, phase except burn
Electrical parts 3 months due to voltage instability, dust, phase except burn
Reducer 1 year
Sanding quality analysis
sanding problems
due to man-made damage, oil, voltage instability, lack of phase burned except
Cause Analysis
Measures to be taken Horizontal


will be thick roll damage
(S-type connector)
reduce the amount of sanding or lower conveyor speed
Clean the inner belt surface
the sanding roller surface
reduce the amount of sanding
adjust the pressure roller
Replace the conveyor gear
remove the metal plate, belt replacement
replacement will be thick roll
Belt Use
Belt correct use
When using as much as possible to reduce the tension of the belt; various wide belt, the cloth or paper either group, the tension belt usually 3-4Bar / KG, is sufficient. Reduce belt tension will have the following advantages:
1.Reduce belt issue discount
2.The heat generated by the belt to reduce friction when the roller shaft and / sanding between the pads,
3.thereby reducing the sanding
4.Reduce the heat, making the belt's life can be extended (belt clip easily at low temperatures compared crumbs)
5.Sanding pad and bearing) wide belt sander longer life
6.When sanding pad sander, sanding good flexibility so that the quality is also increasing. For paint and paste veneer Pew as a significant
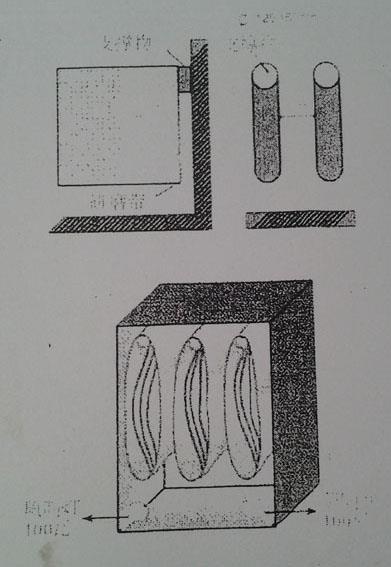
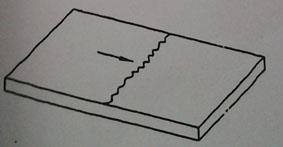
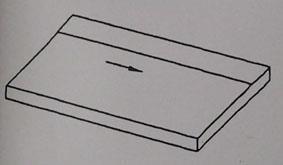
Simple way to test belt tension
1.The belt is placed in the appropriate position
2.Start belt tension
3.Central belt by hand. (As shown) is not easy if the upper part of the downward movement of the roller shaft, which means that the tape tension is too tight.
4.Adjust the tension adjuster reduced to 0Bar, then you can see the upper part of the lower roll axis. This step allows you to confirm the adjustment is correct.
5.Operating pressure to increase between 3-4 Bar
6.Repeat three Step
7.When the hand moves down easily by the middle belt, roller, the belt tension is correct.
8.Start the machine
9.Check belt swing. If he can not smooth swing, adjust the swing function
10.Sanding test and inspection in order to confirm the normal operation of the machine.

NOTE: If the belt is still folded, then the belt tension is too strong. Pleasefurther reducethe belt tension