
PIVOT PRO VEHICLE HITCH RACK
USER MANUAL

PRODUCT DETAILS
Finally, the solution to transporting those burly QuietKat eBikes (or any bike really). The all new, QuietKat catered, but most bike friendly Pivot Pro hitch rack!
The Pivot Pro rack is the premium solution to hauling heavy eBikes on the back of your car. Incorporating a patented pivoting mechanism about the hitch to easily load and unload without the need for extra ramps or lifts.
*If max hitch center height is exceeded, loading bike is more challenging, but not impossible.
Note: It is up to the customer to ensure that they are complying with the tongue weight specifications for their vehicle.

GET STARTED

WARNINGS
WARNING: Improper attachment or misuse of this rack may be hazardous and may result in damage to your bicycles, vehicle, or vehicles driving behind you as a result of colliding with or trying to avoid the fallen bicycles and rack. Read and understand the following warnings and instructions carefully.
Check with the hitch receiver manufacturer to ensure that the tongue weight is not exceeded, and the hitch is correctly sized to accommodate the rack. Do not use hitch extenders or adapters in conjunction with the rack.
Make sure the rack is in the level (about the hitch) position, the pivot release pin is engaged, the rack is NOT in the trunk access position, the stow safety pin is inserted, and the hitch tensioner pin is tight before every journey.
Do not exceed the rated capacity for the rack.
Ensure the wheel arms are snugly secured into the tires of the bikes and that the tires have at least 20psi. You should push with greater than 50lbs of force horizontally into each arm to secure the wheels.
Do not use any other hitch tensioner pin than one supplied by QuietKat specifically for this rack
Bikes and/or the rack can block the license plate and taillights. Adjust accordingly.
Ensure that the wheel size adjustment is correctly adjusted to the tire size being carried and the adjustment bolt is tight. The pin at the end of the arm should be no less than 60degrees from vertical. Check periodically to ensure that all fasteners are clean, secure and free from corrosion. Certain chemicals can damage the rack and/or your bike. It’s good practice to remove the rack before entering a car wash and to not use harsh chemicals or solvents to clean the rack. Please be careful of all potential pinch points during assembly, or any movement of the rack position. Remove all accessories which are not bolted on to the bikes before driving.
User must secure bicycle to carrier with additional security cable (not included). Read the enclosed owner’s manual for proper installation and use of this carrier. Do not use this carrier on fifth wheels, RVs, or trailers.
QuietKat cannot be held liable for bike or rack theft, or damage to the vehicle, rack, or bicycles. Though technically possible, it is not recommended to tilt eBikes into the trunk access position. This feature is intended for use with lighter bikes.
This rack was designed to work with most vehicles, though some vehicles will have to make accommodations to avoid damage to the vehicle, the rack, and/or the bikes.
FAQS
Q: Can I add a second add on tray to make 3 total bike trays?
Q: What if my hitch is higher than the hitch center height?
A: No, the rack is designed for heavy eBikes and the rack, and most tongue weights are not rated for more that 2 eBikes
A: If your hitch is too high, the tray will not contact the ground. You will need to “wheelie” the front tire to hit the actual tray.
Q: Can I hold bikes other than QuietKat eBikes on the Pivot Pro?
Q: Does the rack collapse for storage?
A: Yes, though the bike rack was designed for QuietKats. Please ensure both weight, wheelbase, and tire size compatibility before use.
A: The rack can be separated into a single and an add on tray, but the tray does not collapse further


STEP 1
STEP 2 ASSEMBLY & INSTALLATION ASSEMBLY & INSTALLATION
Insert the 2 M10 bolts through the tray and metal insert and tighten the M10 locknuts with washer on the bottom side of the tray to 55Nm.
Insert single rack into the hitch receiver and line up one of the threaded holes with the hole in the side of the hitch receiver.
Note: based on your hitch/bumper configuration, you may need to select a closer or farther threaded hole on the rack. Make sure there is proper clearance between the handlebar end and the vehicle. It may be necessary to pad the bar end to prevent vehicle damage.
Insert the hitch pin on the right side of the hitch receiver and tighten the hitch pin using a 19mm wrench to 40Nm.


Insert the lock through the hole in the end of the hitch pin to secure to the vehicle.
STEP 3
STEP 1 ASSEMBLY & INSTALLATION LOADING BIKE

Purchase of the Add-On Tray is optional. Remove end caps from the single rack so the Add-On can insert into the Single Rack body.
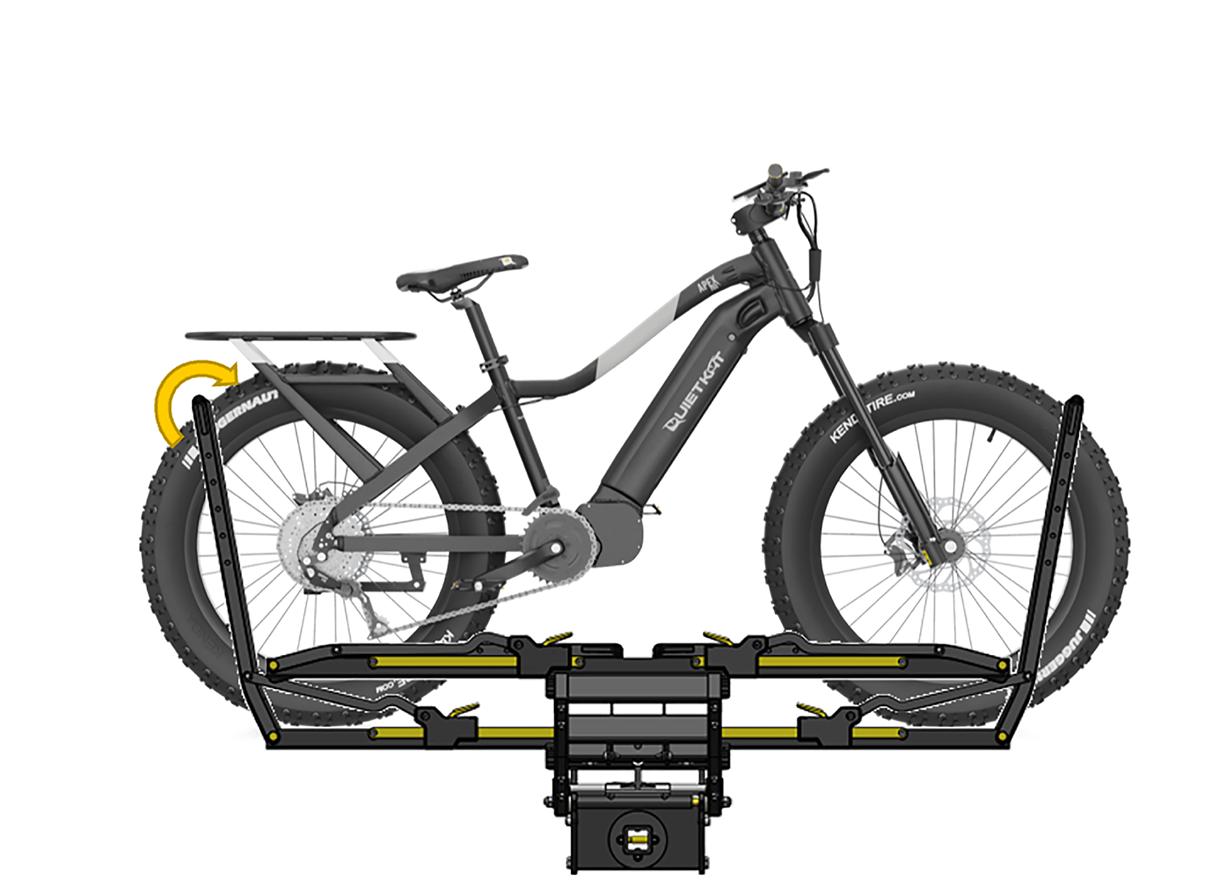
Twist Pivot Release Handle 90 degrees, and tilt rack to one side.
Return the Pivot Release Handle to original position.
Loosen and remove the M10 bolts at the end of the Add-On Tray. Insert the Add-On Tray legs into the single rack. Insert and tighten the M10 bolts using the 8mm hex tool to 40Nm.

Press down on the Ratchet Release Tab and lower Wheel Arm until it contacts the ground.

STEP 2 STEP 3 LOADING BIKE LOADING BIKE
Roll bike up the L shaped arm or wheelie front wheel onto the tray and capture front tire with front Wheel Arm.

Continue pushing forward until the weight of bike angles rack to flat position where pivot teeth engage.
Note: Using the brakes will help with this process.
Note: an extra Wheel Size Adjustment bolt can be inserted to serve as a “rung” to roll the bike up.
Once the front wheel is captured, lift up on the rear wheel side of tray as necessary to level the rack.
Clamp rear tire in opposing wheel arm. Note you may need to disengage the ratchet mechanism if the arm goes over center.

STEP 4 STEP 1 LOADING BIKE UNLOADING BIKE
Repeat tilting to opposite side for loading of the 2nd bike.
Loosen the rear arm so it touches, but does not compress the rear tire.

Note: The 2nd bike will face the opposite direction as the first bike.

Lower the front wheel arm on the bike which is farthest away from the vehicle.
Note: You may have to stagger the bikes or lower the saddles slightly to avoid handlebar/saddle interference.
Note: If the pivot release handle is difficult to twist, gently lift up on the left and right side of one of the trays to ensure the weight is balance over the hitch centerline.
With one hand on the bike(s), twist the Pivot Release Handle 90 degrees.

STEP 2 STEP 3 UNLOADING BIKE UNLOADING BIKE
Pull both brakes and push forward on the bike. The weight of the bike should pivot the ramp down. Continue to use the brakes to control the speed as the bike rolls forward off the rack.

Pivot the rack back to center and repeat steps 1 and 2 to unload the 2nd bike.
Twist the Pivot Release Handle back to the locked position.
Pivot the rack back to horizontal for storage and transport.

STEP 1
STEP 2 STOWING STOWING
Remove the stow safety pin and fold all Wheel Arms flat to the trays.
Pull the Stow Release Handle towards the rear of the vehicle and push upwards on the rack until the stow release bar audibly engages in the vertical position.


Note: Wiggle the rack to ensure that the release bar is fully seated.
Re-insert the Stow Safety Pin.

STEP 1
STEP 2 TRUNK ACCESS TRUNK ACCESS
Release the Stow Safety Pin. Gently lift up on the rack to release the pressure on the stow release bar. Pull the Stow Release Handle towards you and slowly lower the bikes until you hit a stop.
Note: It is not recommended to access the trunk with bikes over 60lbs loaded on the rack.
To return to horizontal position, pull the Stow Release Handle and lift the rack up until the stow release bar audibly engages.


Re-insert the Stow Safety Pin.


