

“We often use BalconySeal® as our waterproofing solution. It’s easy to install and it works!”
Contractor, Bristol PURE
“We often use BalconySeal® as our waterproofing solution. It’s easy to install and it works!”
BalconySeal® is a revolutionary product which provides water drainage and waterproofing on any exterior POSIglaze, POSIone or POSI-Lite base installation.
Whether you’re retrofitting balustrade to an existing balcony or installing to a new build, careful consideration should be taken to prevent water ingress into the fabric of the building. Typically, this will happen for two reasons; firstly, if no appropriate water drainage solution is in place and secondly, if the balustrade channel fixing points have not been properly sealed. If water is allowed to pool on a flat roof, it will find the easiest infiltration points to drain through, such as a bolt hole, causing potentially costly and damaging water ingress issues.
Most balconies and flat roofs are built with a slight pitch to encourage rainwater to drain towards the edge of the roof. In these cases, the balustrade installer needs to allow for drainage points under the channel, to avoid water pooling around the edge of it.
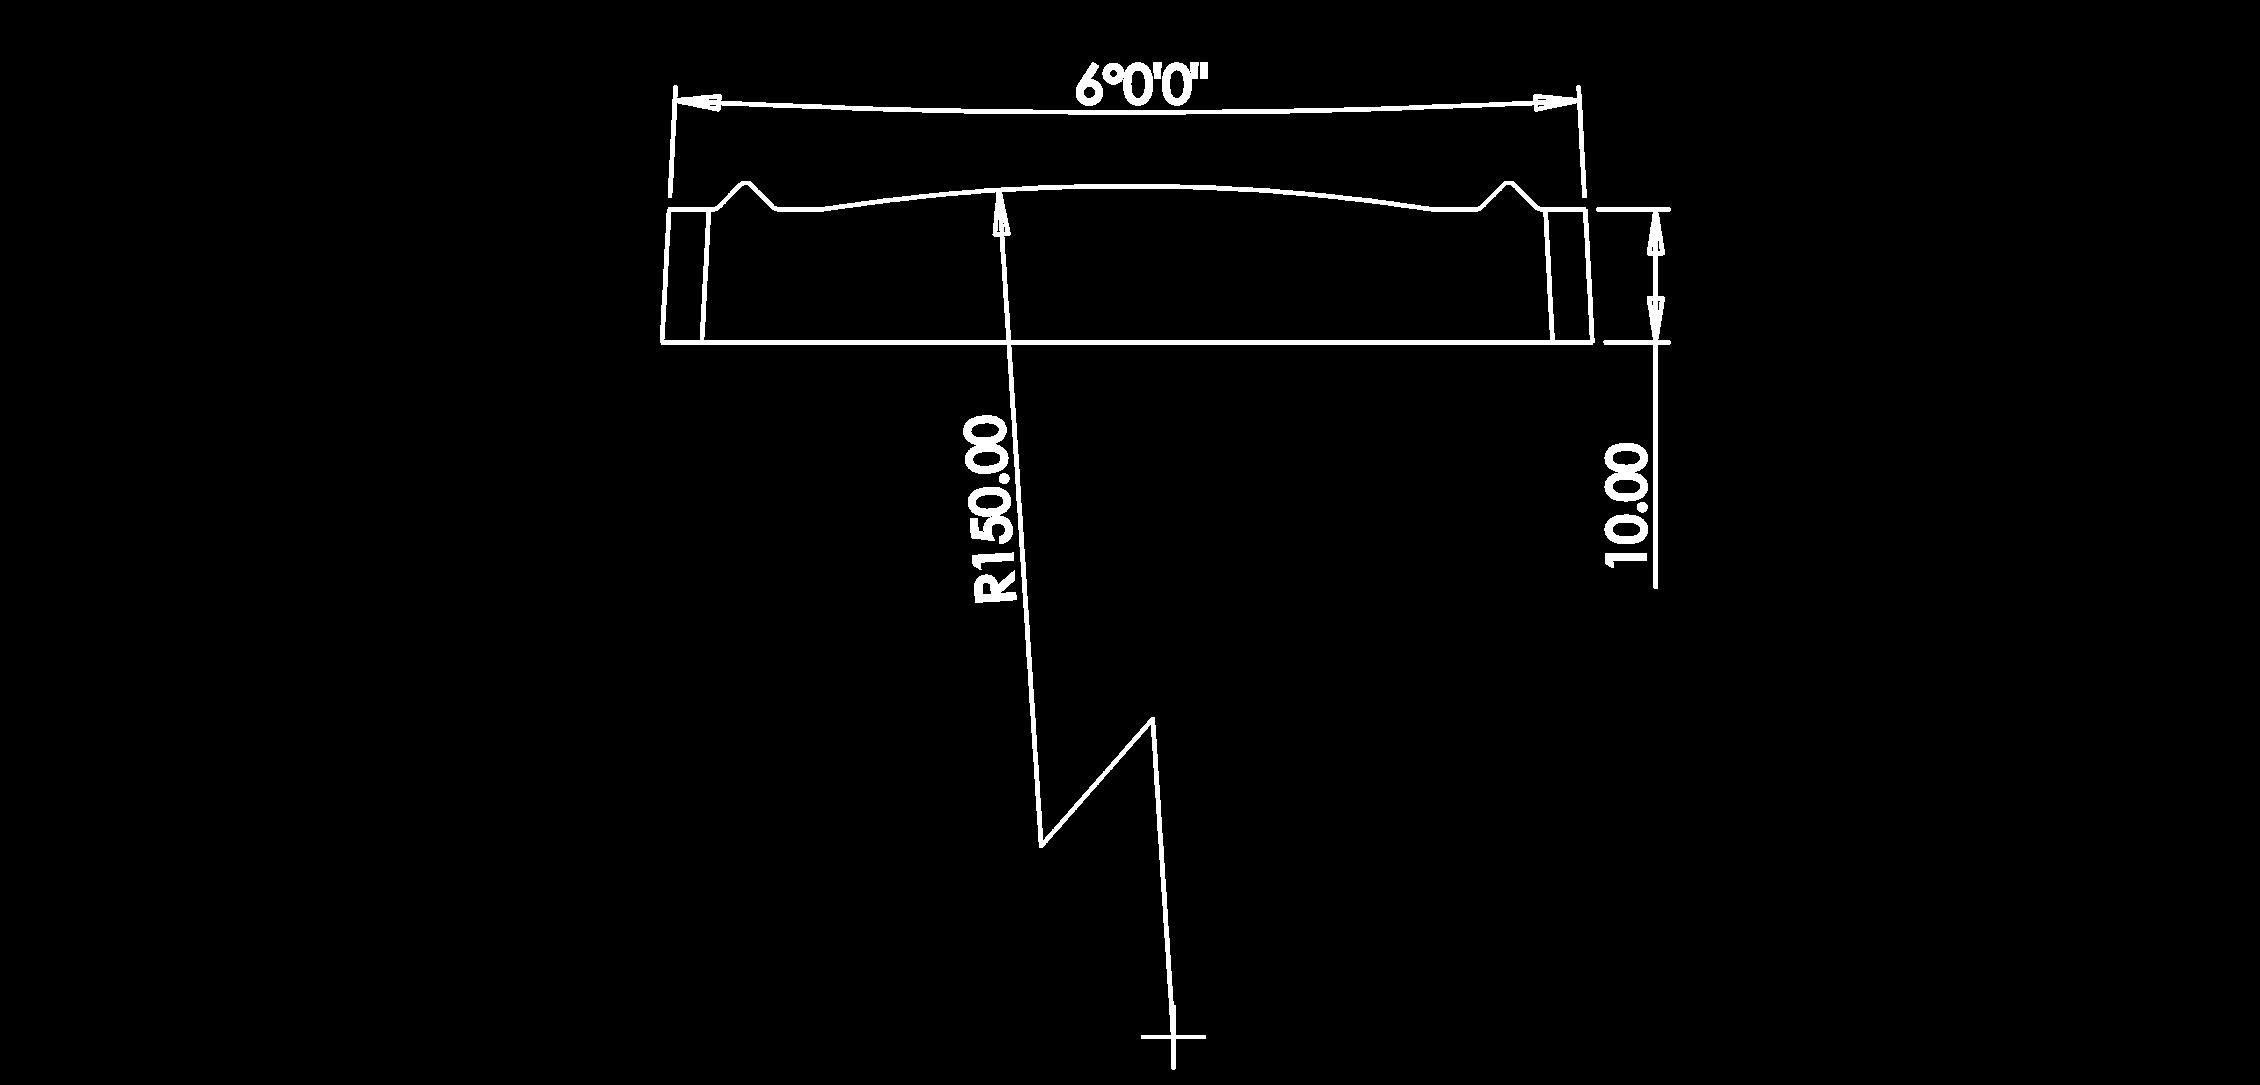
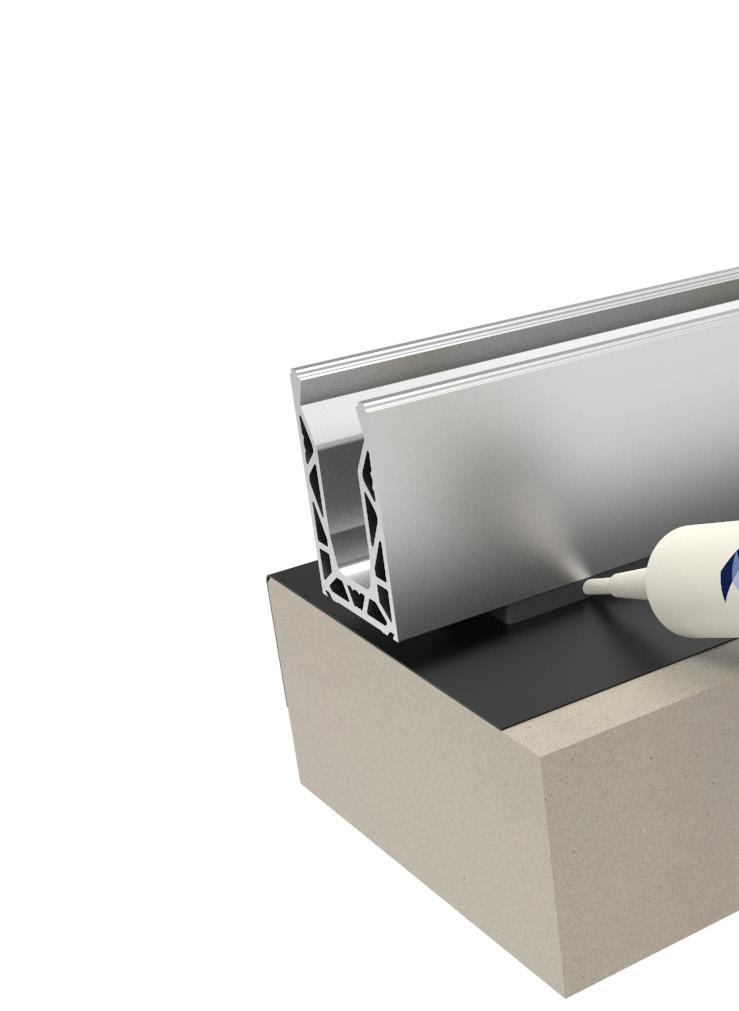
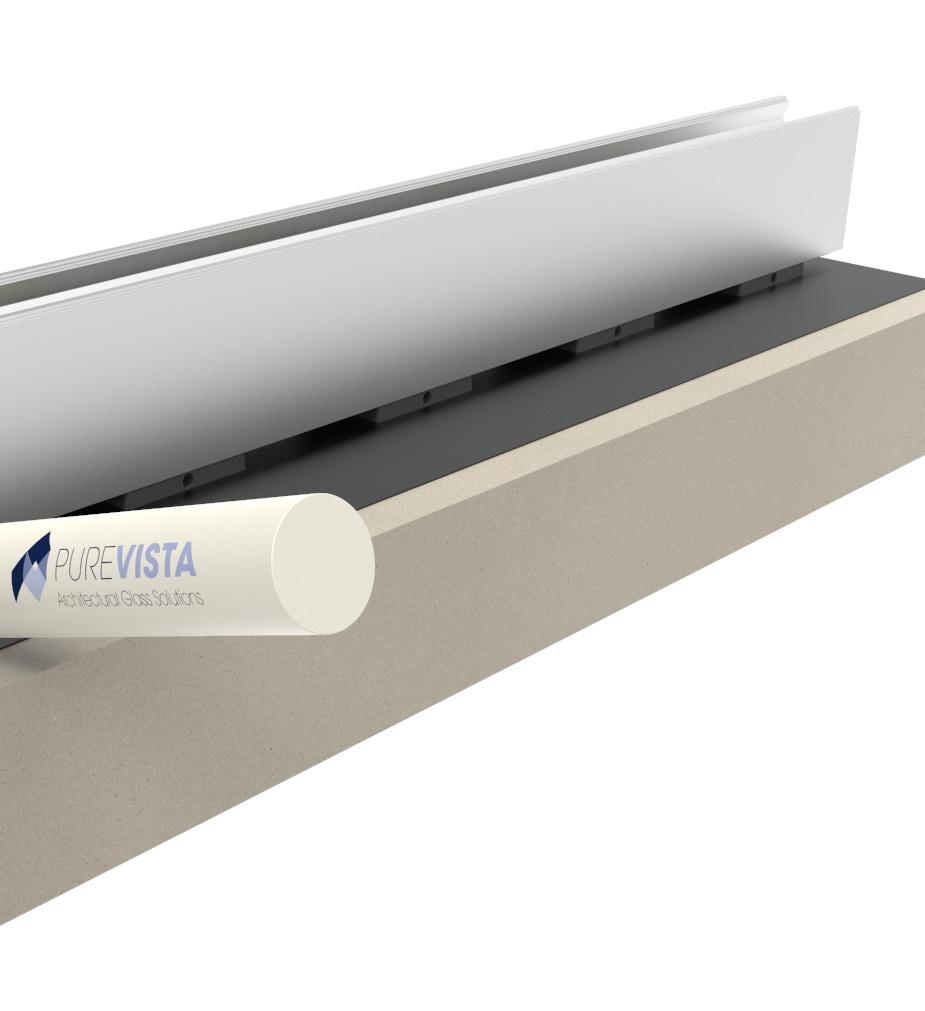
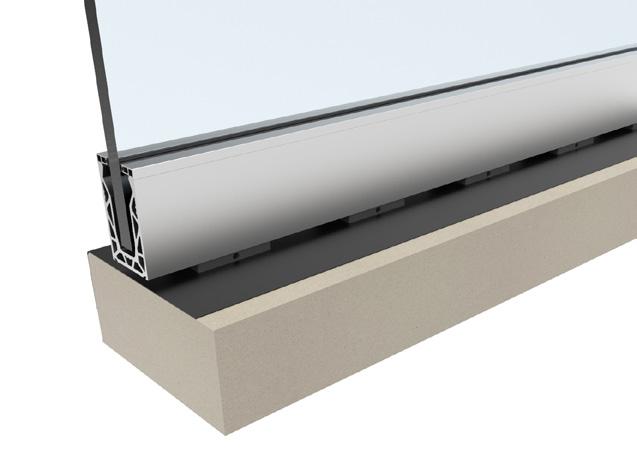
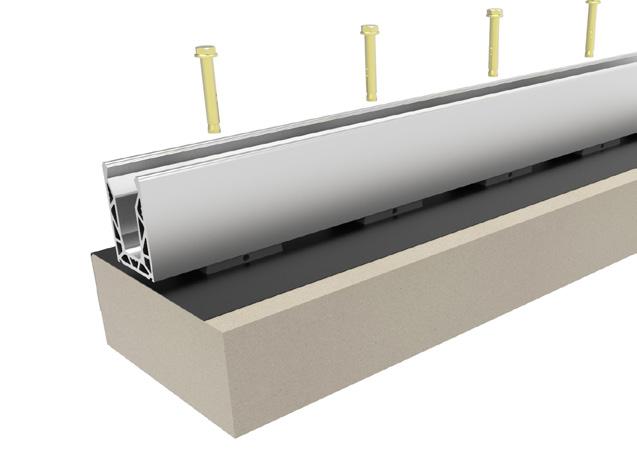
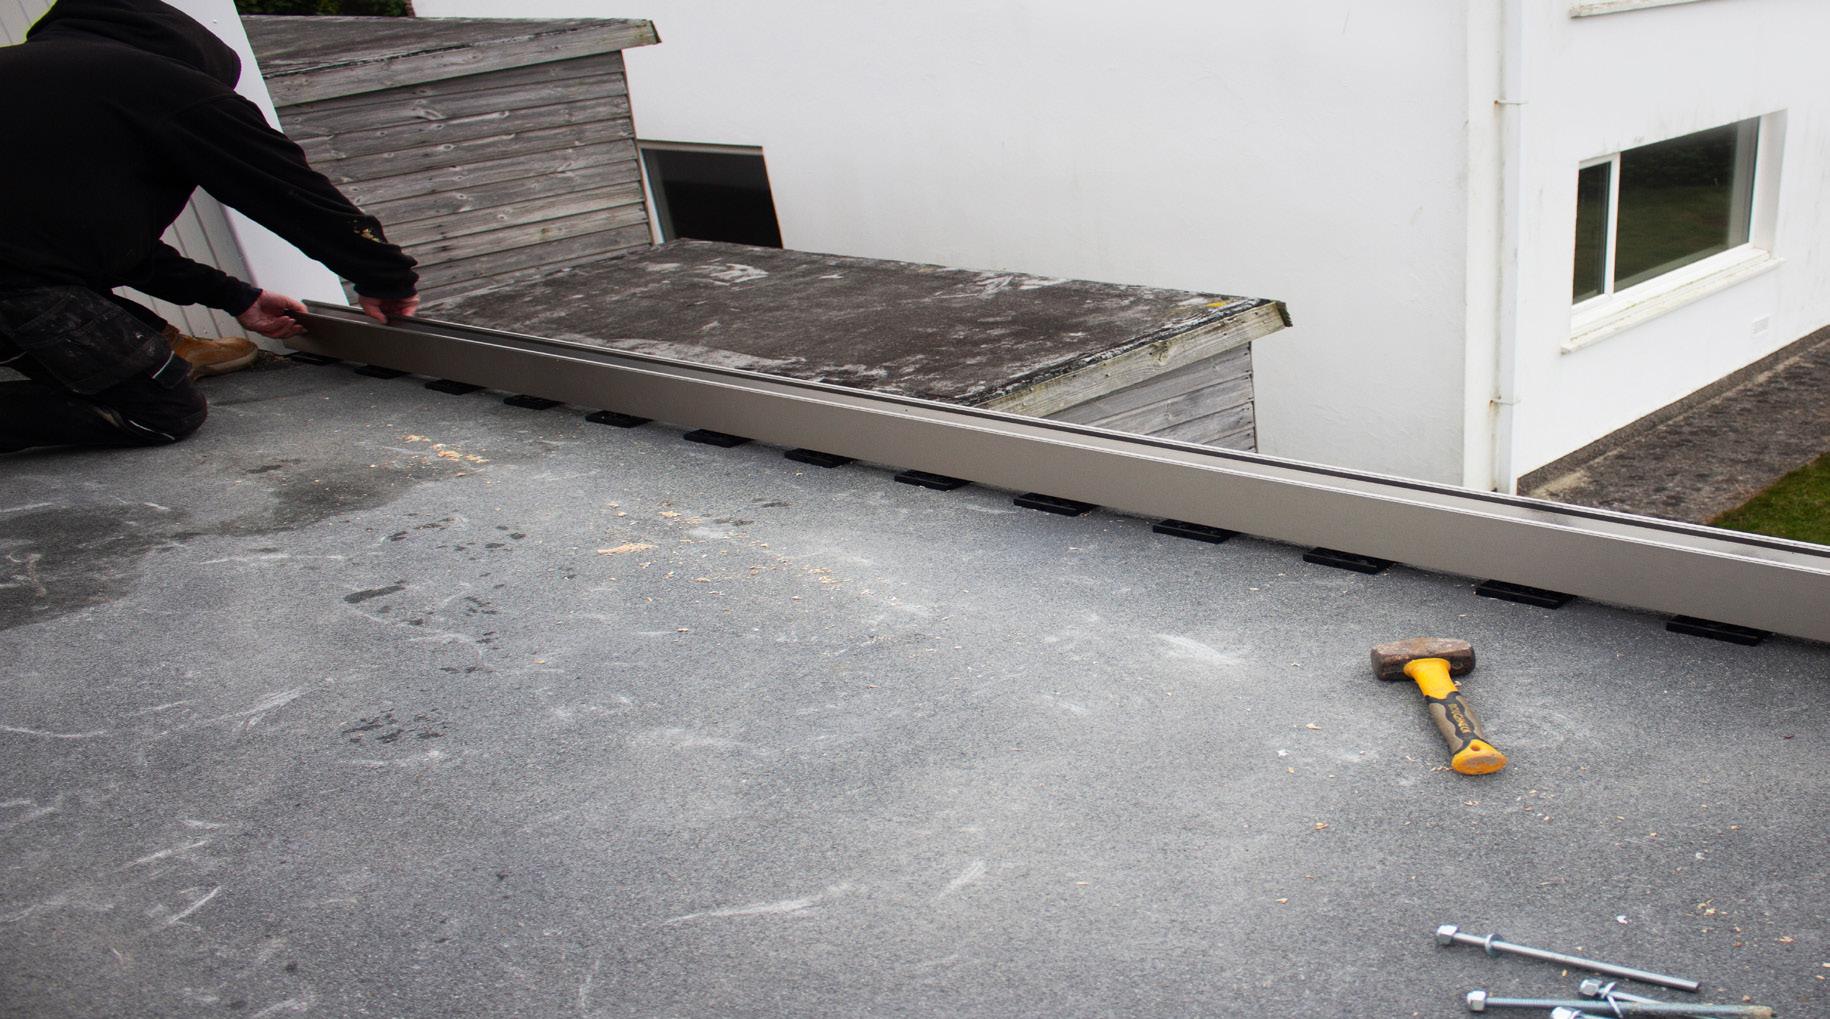
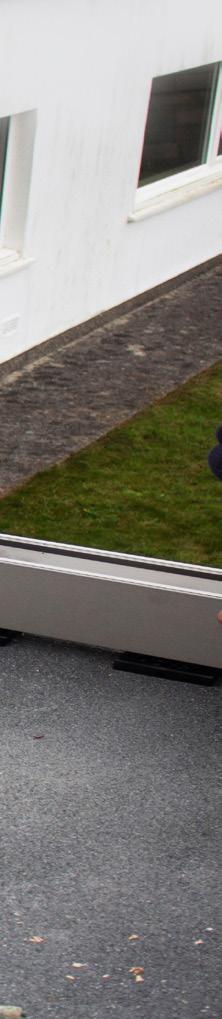
The BalconySeal® system works by subtly raising the channel a few millimeters
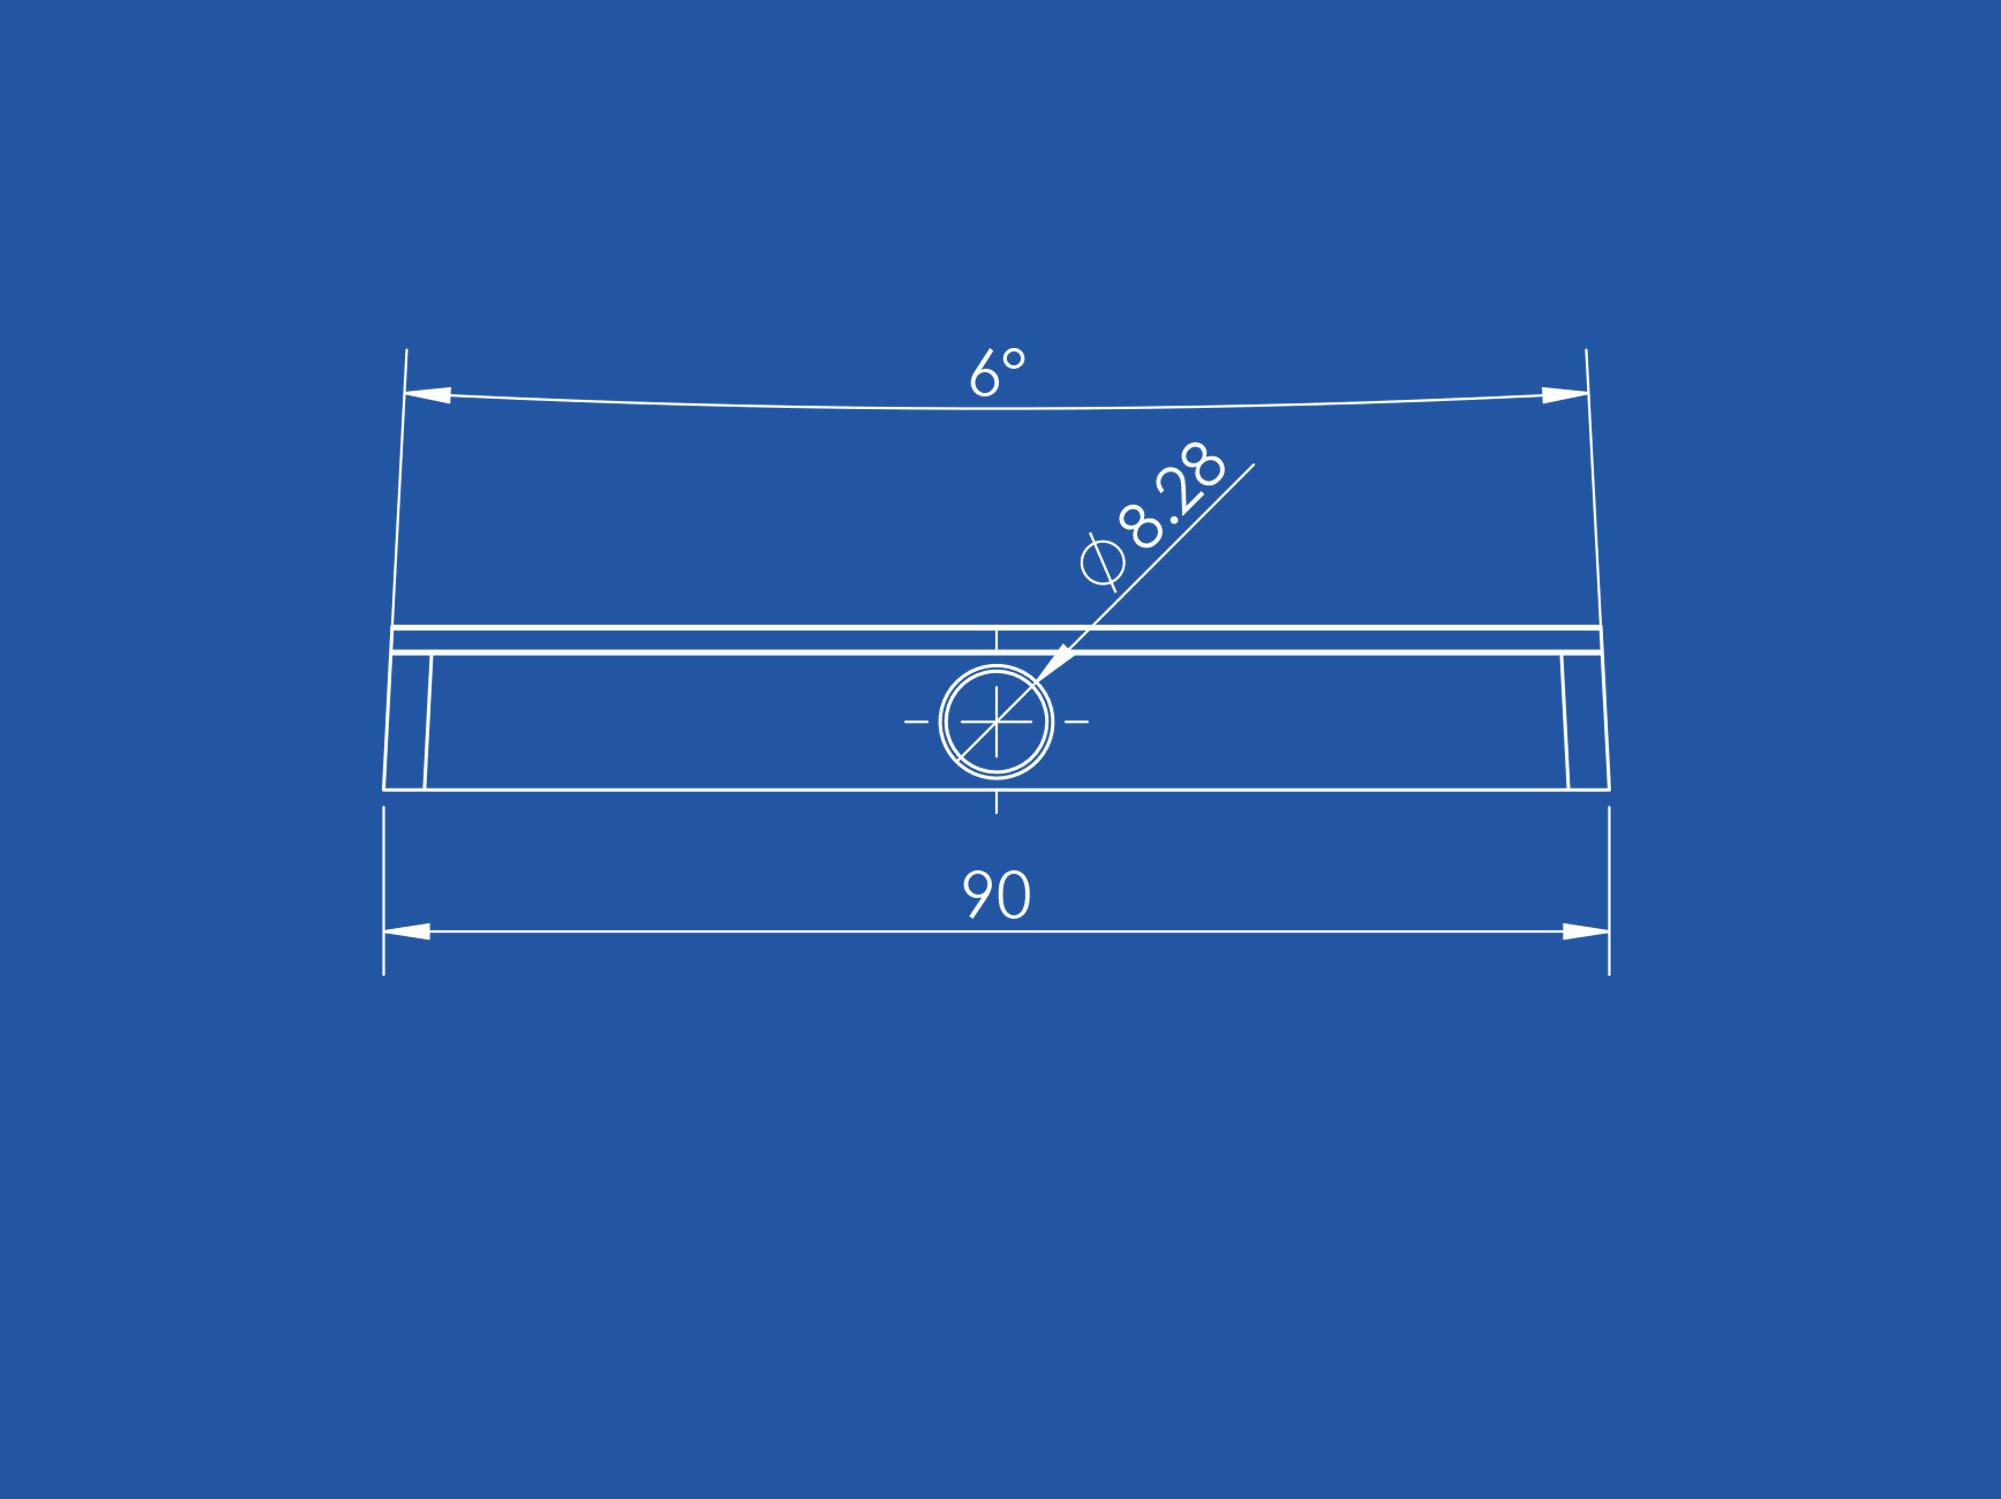
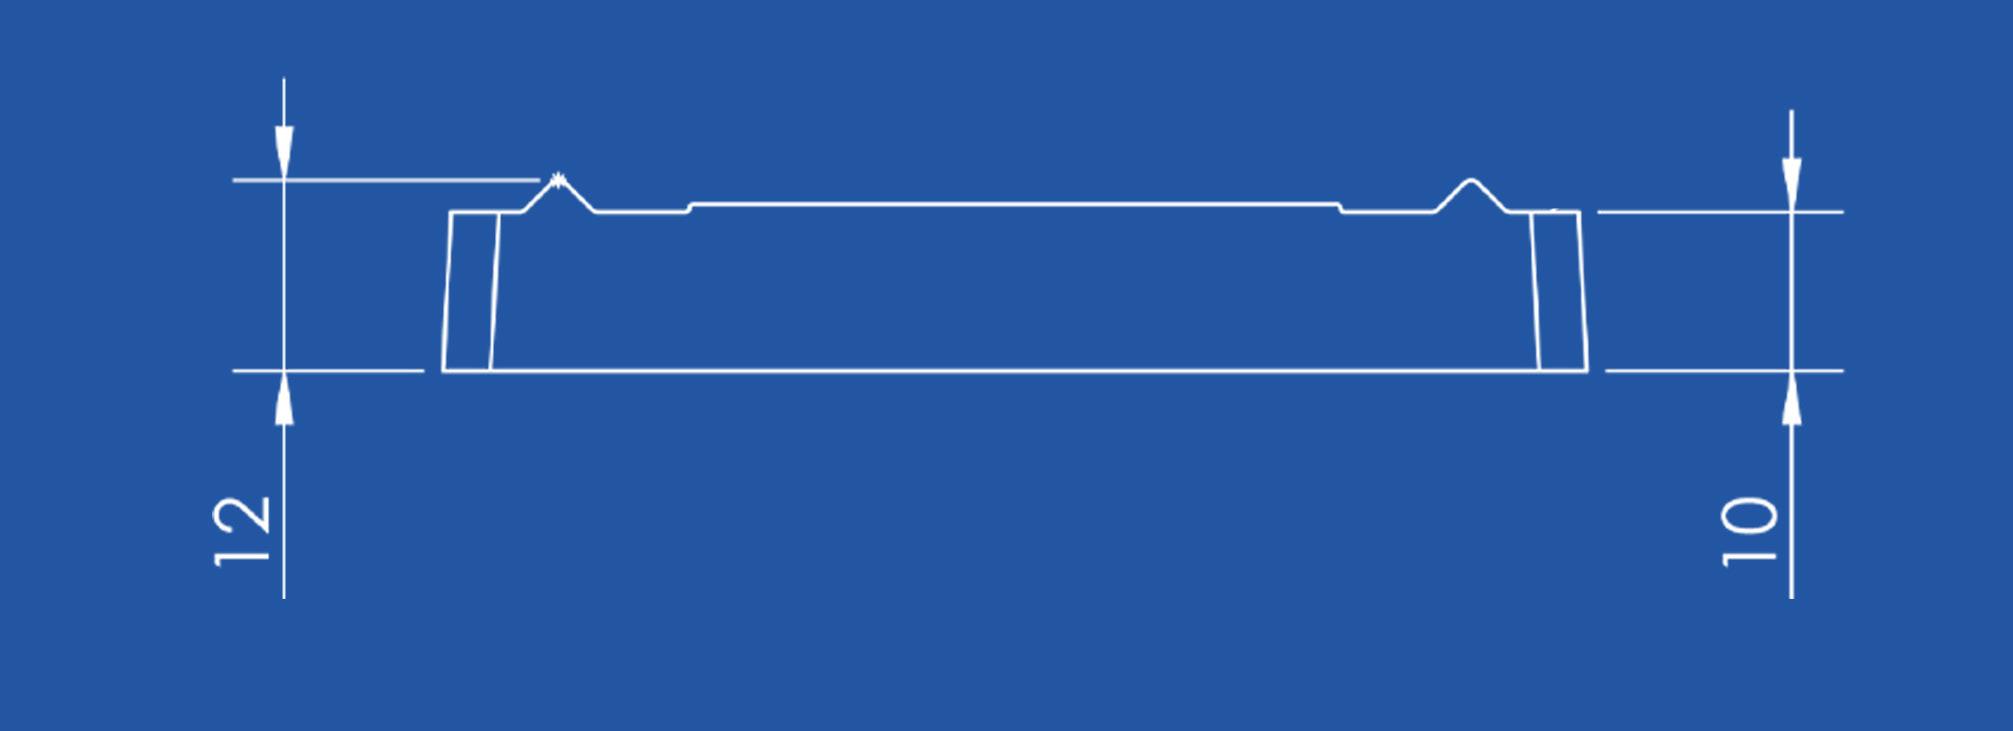
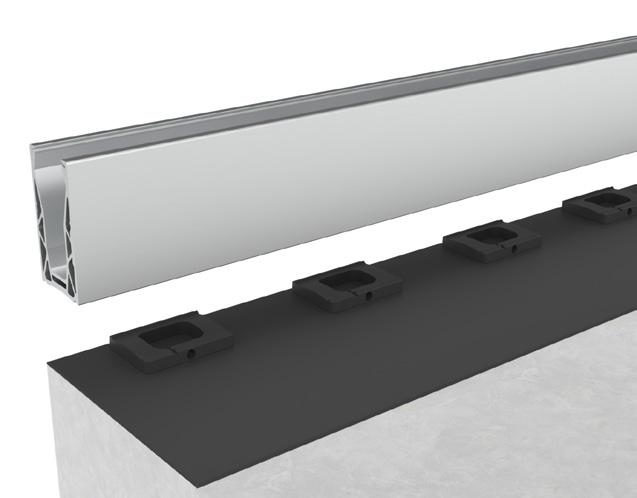
above the substrate on drain blocks. Notches on the top side of the drain blocks locate into the rebates of the POSIglaze, POSIone or POSI-Lite base channel, locking it into position before the system is bolt-fixed to the substrate through each block. The gaps between the drain blocks are your water drainage channels. The drain blocks are subsequently filled with sealant to create a fully waterproofed balustrade installation. The system works best when a single or duel ply waterproof membrane such as EPDM or TPO is applied to the surface.
Like all Pure Vista products the BalconySeal® system has been designed to be fast and easy to use, save time and effectively cost on site during installation.
The BalconySeal® system has been designed to solve a problem at a low cost. We understand that your glass balcony is an expensive addition to your home and we don’t want to add additional expenses!
The patented design works with Pure Vista products only. Specially created to defend your property from water damage when balustrade is installed.
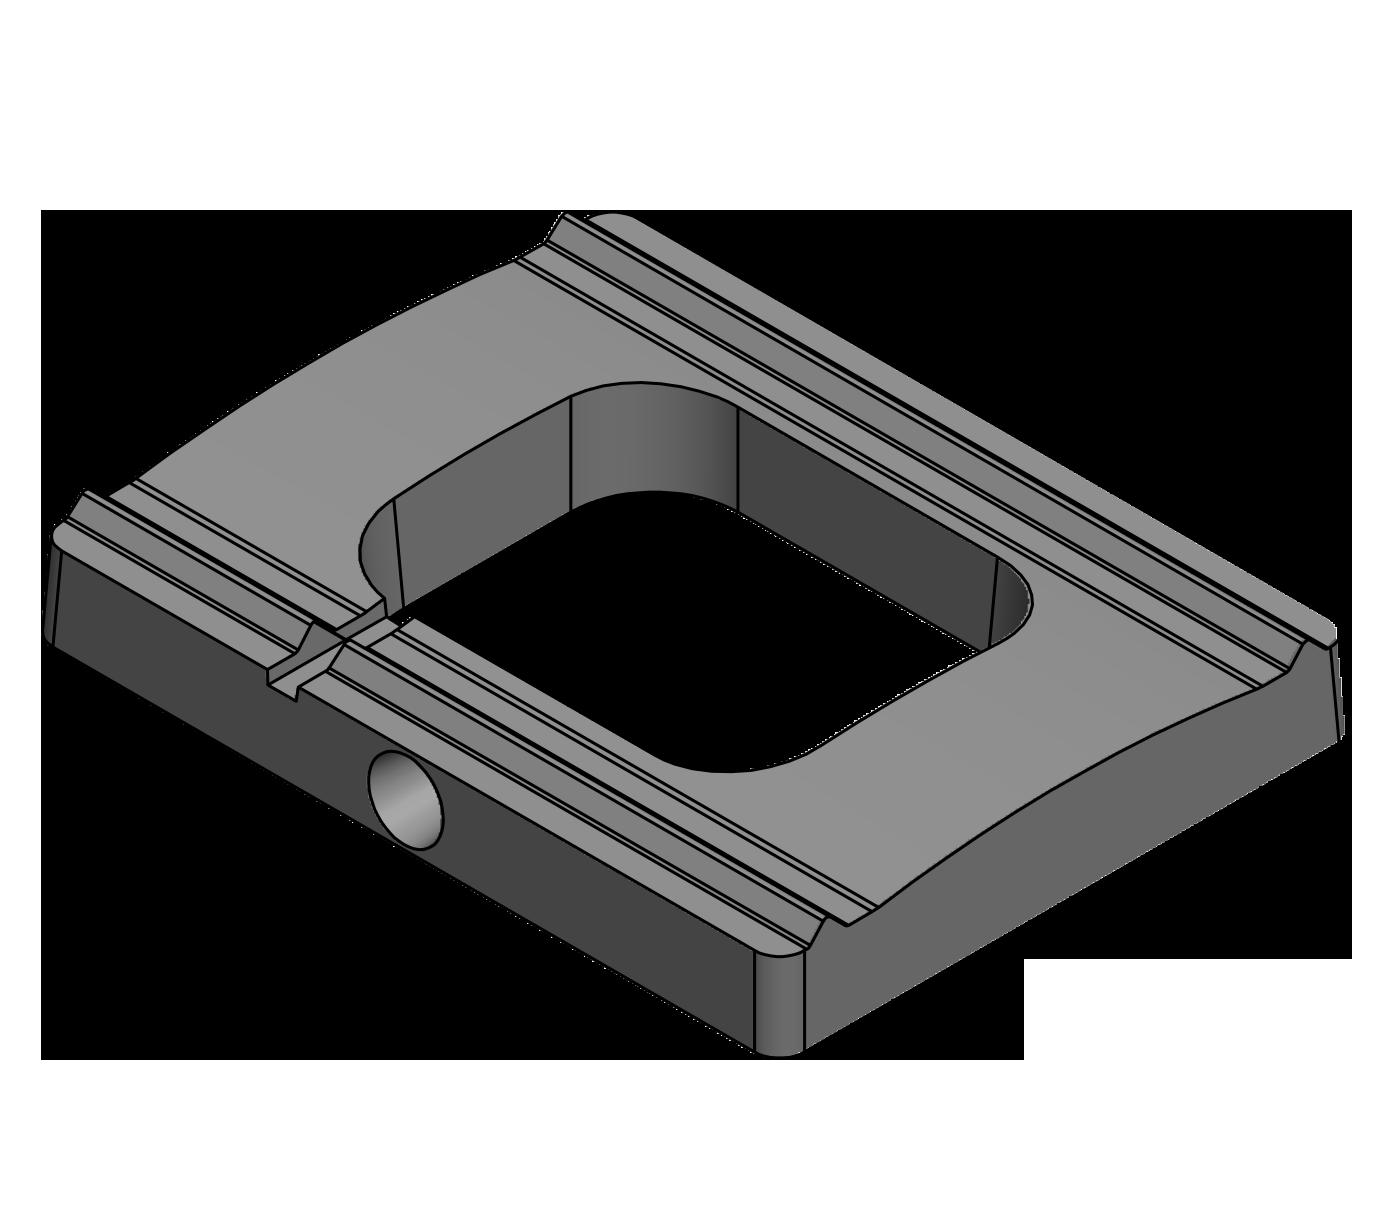
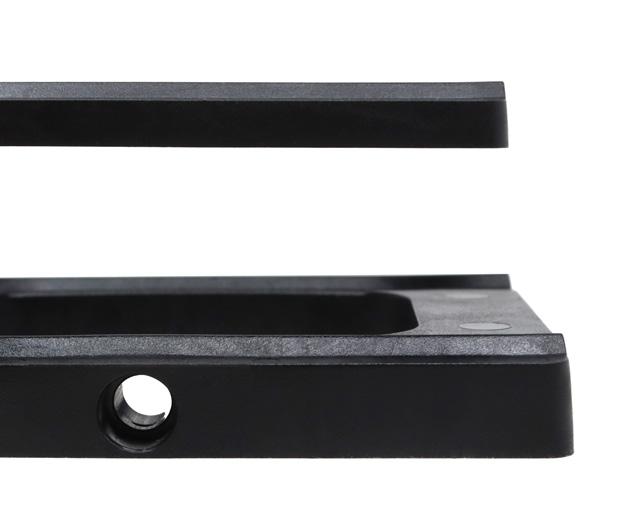
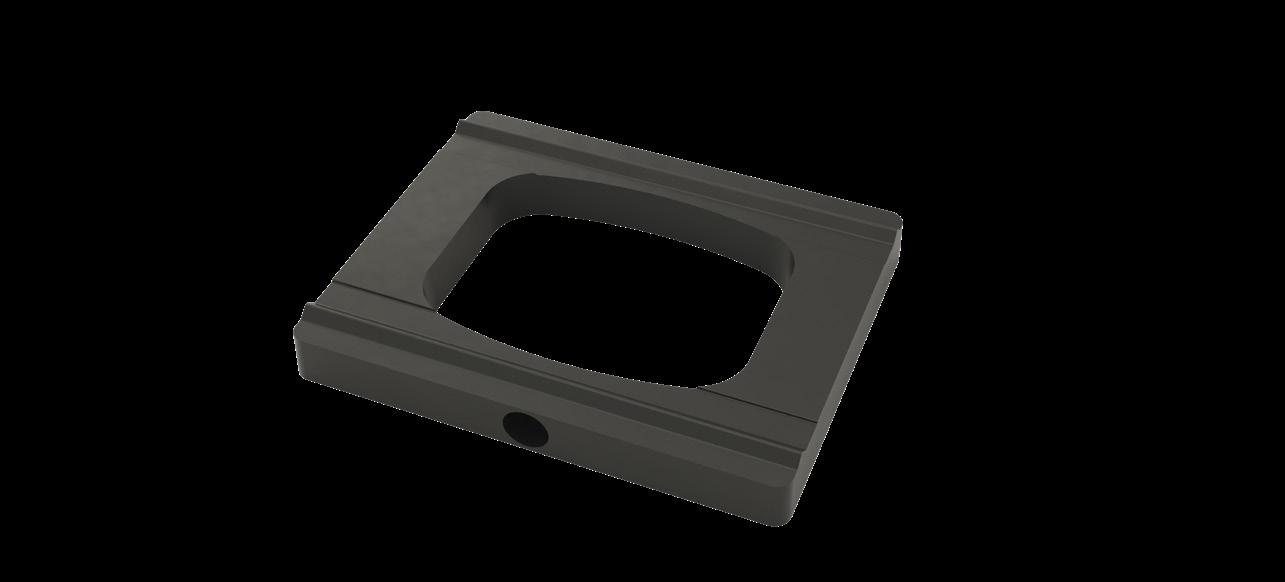
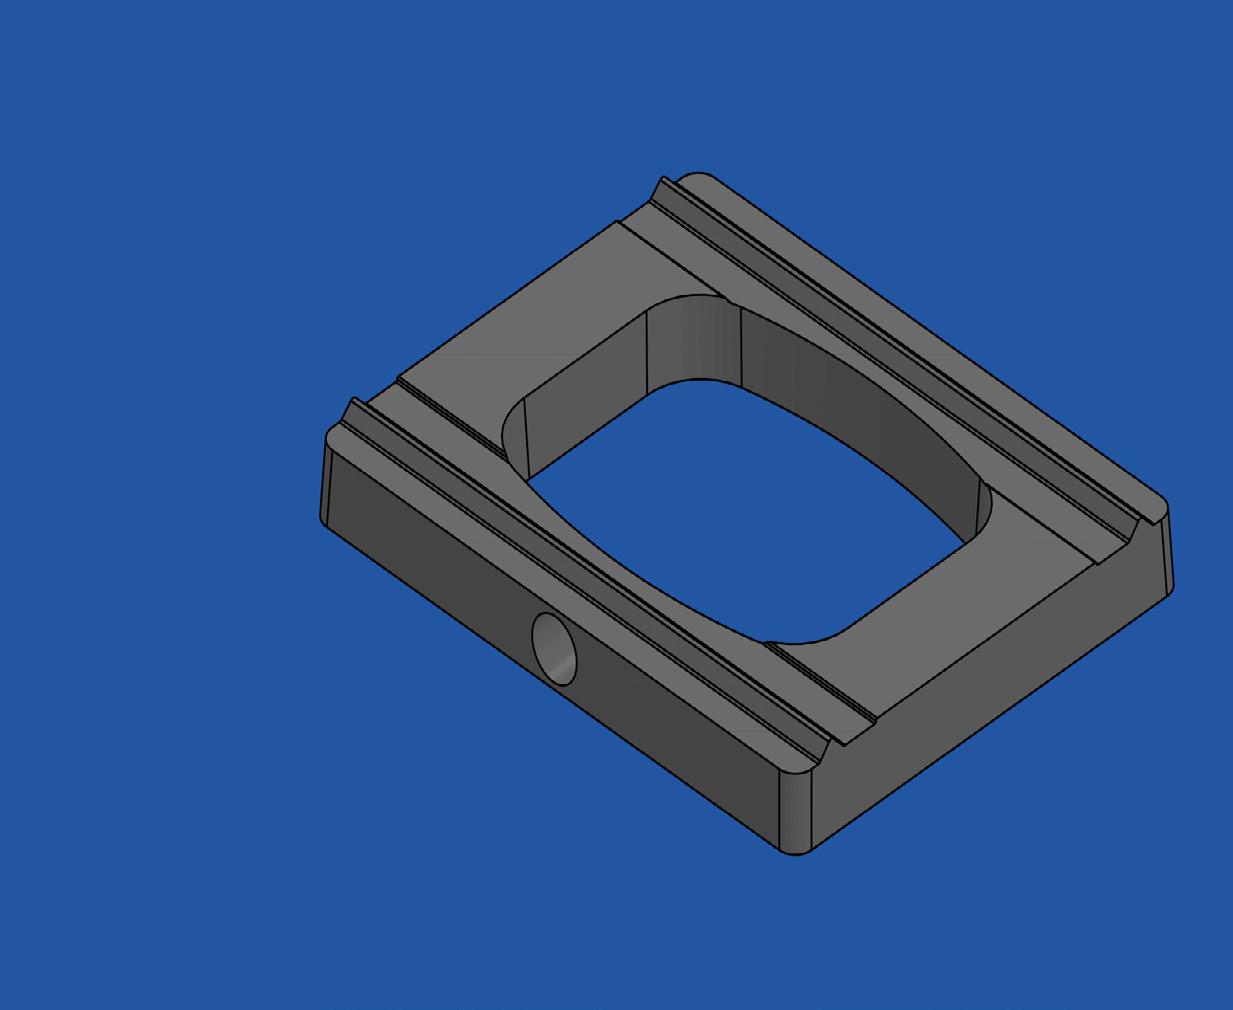
The BalconySeal® drain block is made of plastic that is strong and will stand the test of time. The plastic is the same as used in aircraft bearings and does not get affected by the elements.
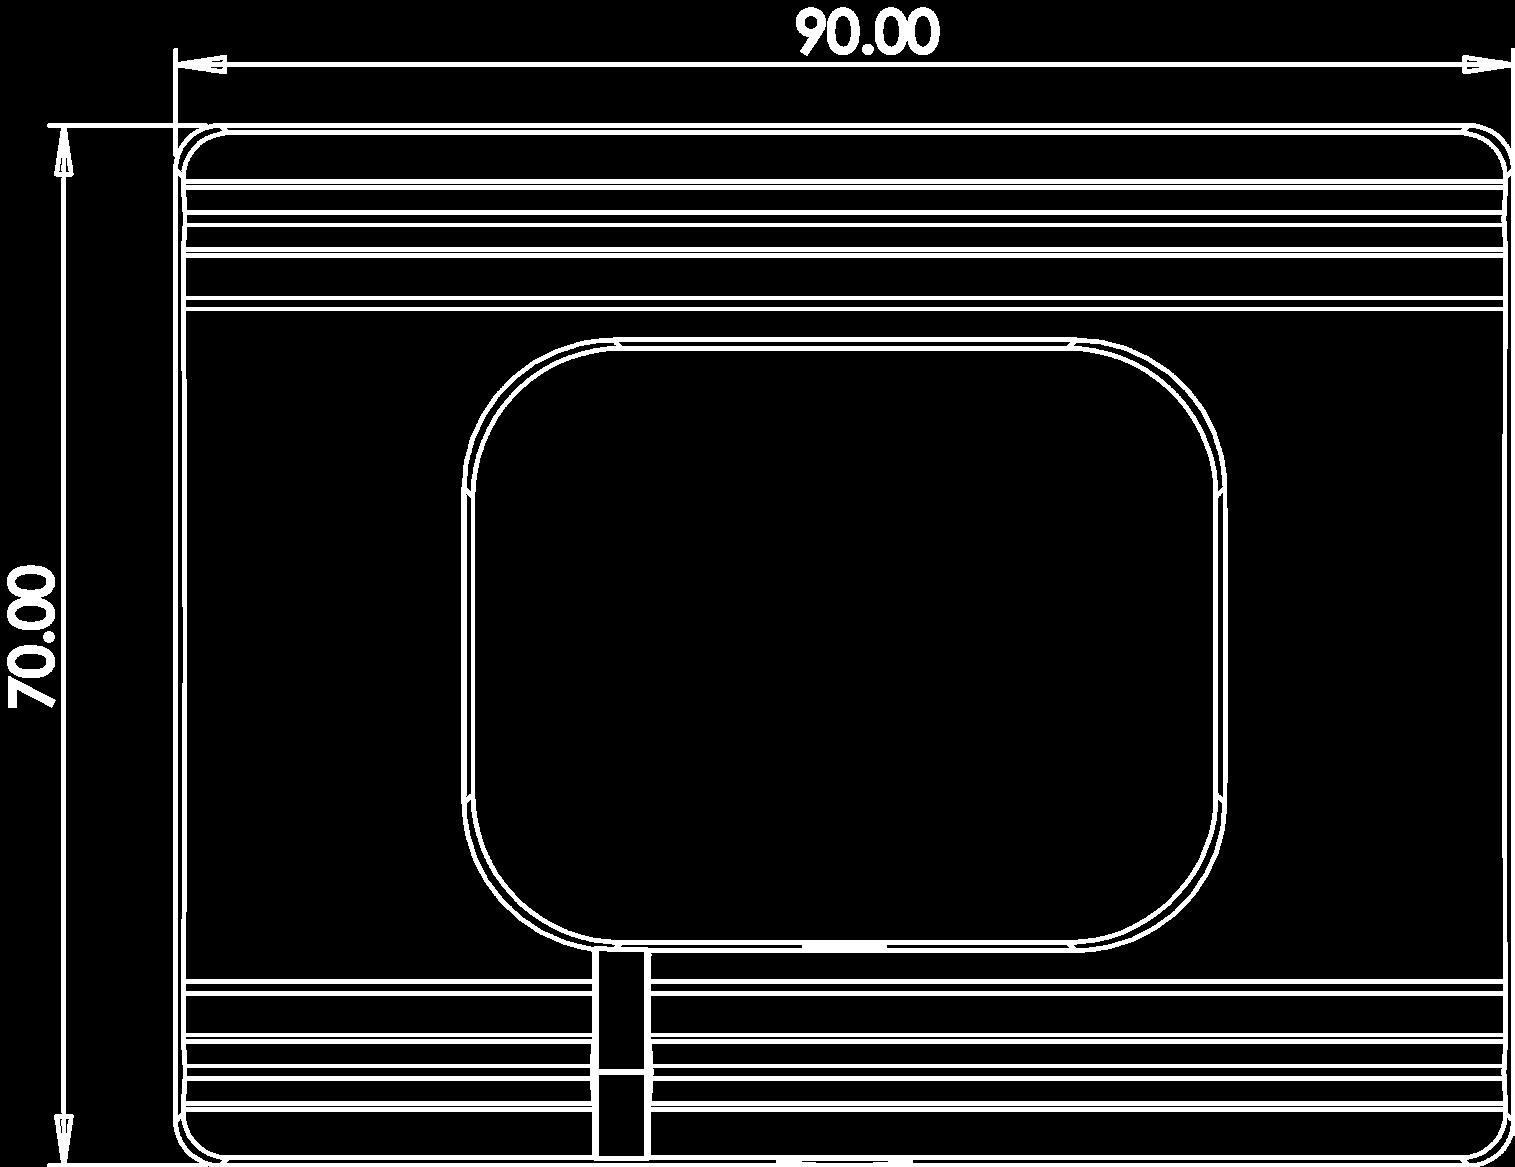
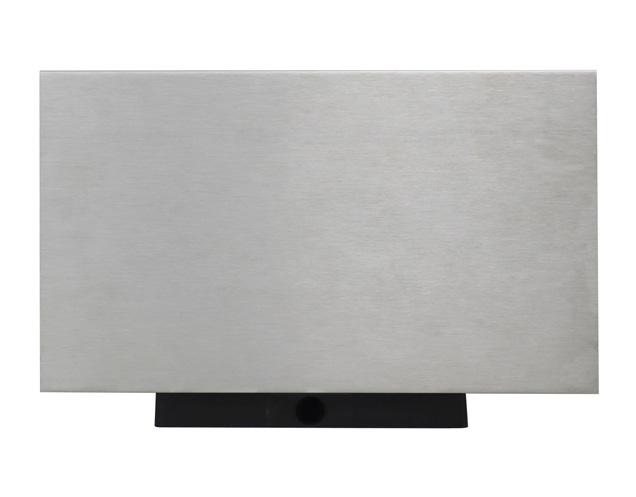
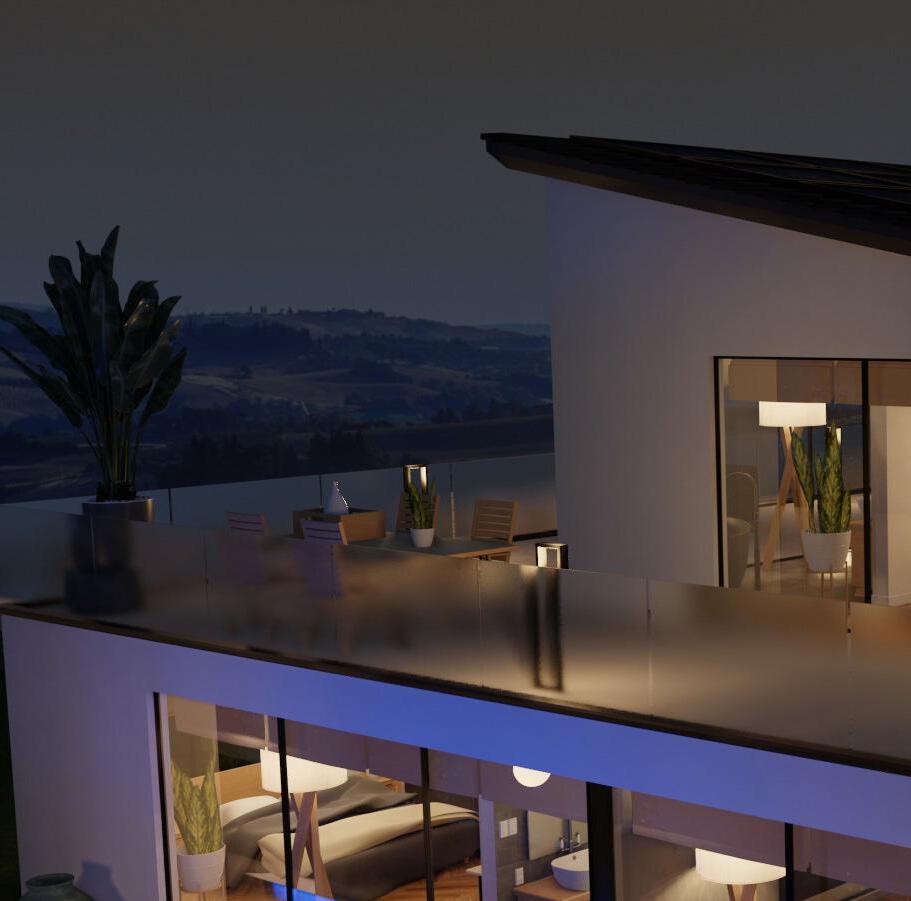
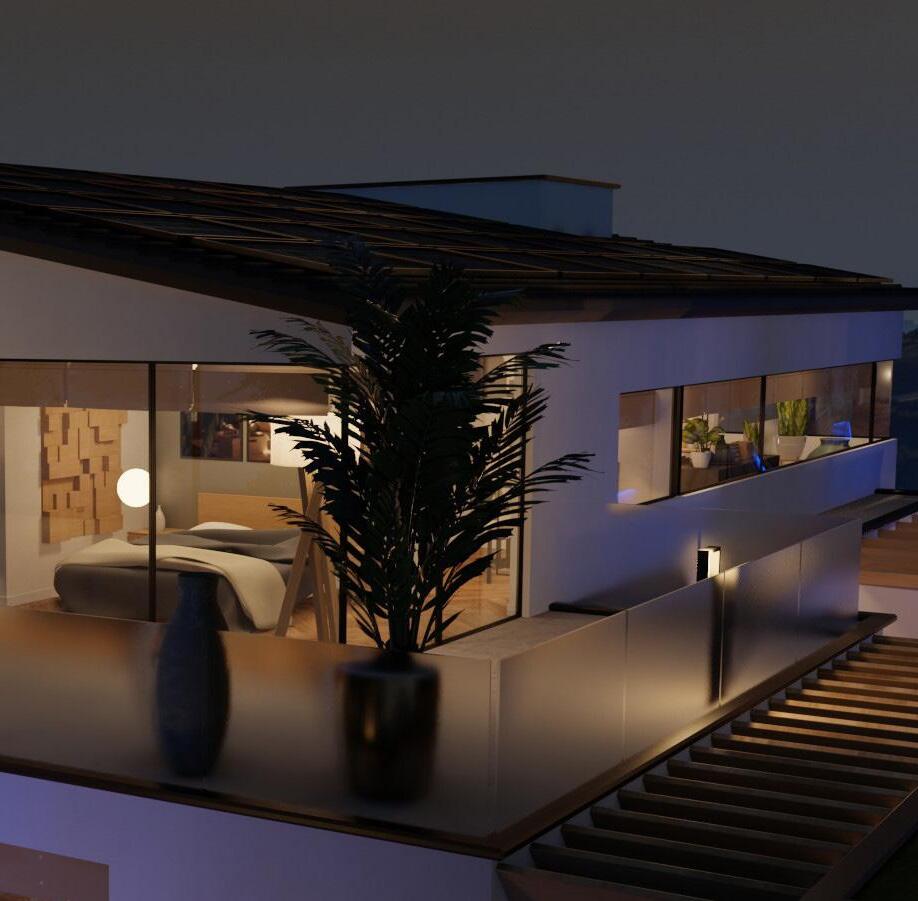
Positioned neatly under the channel, the drain block blends into the design without affecting the final look.
The BalconySeal® system is designed to work with the POSIglaze, POSIone or POSI-Lite base drilled channel systems.


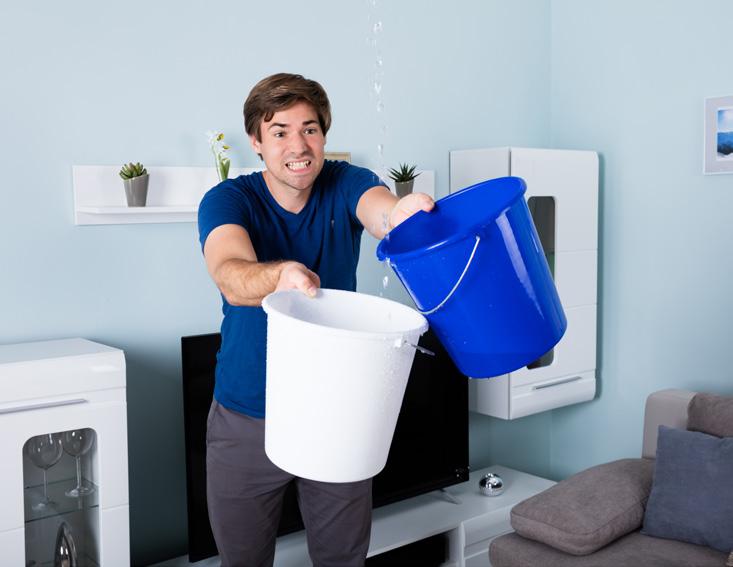
Water ingress is when water makes its way into the fabric of a building, be that through the roof from a missing tile for example, cracked wall render, poorly fitted windows or in places where the building has been modified and not properly resealed. Whatever the cause, the consequences can be severe and often worsen if left untreated. Signs that you have a water ingress problem in your home include damp patches appearing on walls or ceilings, mould growth and dripping or leaking water. The earlier these signs are addressed, the easier they tend to be to repair but of course the best way to keep your home safe from water ingress is to take appropriate measures to protect against it in the first place.
Flat roofs are a particularly susceptible to weakness in respect to water ingress because they are far more prone to water pooling than pitched roofs. Ideally, your flat roof will be slightly pitched to allow for water runoff and so long as the roof has rainwater outlets, is properly maintained and kept clear of debris, you shouldn’t experience water pooling. In a perfect world, drainage of a balcony will have been drawn up and implemented
prior to the installation of a balustrade. However, we know this isn’t always the case and can cause issues for installers. If water pooling does begin to occur on your flat roof, the water will find the weakest point of waterproofing to permeate, which could be through joins or fixings, flushing or damaged membrane. Once you have water ingression through one of these infiltration points, water damage begins to occur and the situation can escalate rapidly, causing damp patches internally, mould or leakages.
In order to prevent water ingress, the are two main things to consider when installing a new flat roof or balcony on a property; firstly, how and where will the water drain off the roof and secondly how to ensure that all the potential water infiltration points are properly sealed. Water drainage can be achieved with a slight pitch on the roof carrying rainwater towards defined outlets such as drainage channels under your balustrade. If rainwater can flow off the flat roof, water infiltration points are less likely to develop. Then for every corner, join, seam and bolt hole there needs to be a robust waterproofing solution applied; depending on location this can be achieved with the use of
appropriate sealant, butyl tape or bituminous paint.
The installation of a balustrade system on top of a flat roof inevitably creates potential weak points for water infiltration. To mitigate this, Pure Vista have created BALCONYseal®, a revolutionary product that provides a solution to both water drainage and waterproofing on a balcony. Currently this product is available for use with Pure Vista’s POSIglaze, POSIone and POSI-Lite balustrade systems. It comprises of drain blocks that sit underneath the balustrade channel. Notches on the top side of the drain blocks locate into the rebates of the channel, locking it into position before the system is bolt-fixed to the substrate through each drain block. The gaps between the drain blocks are your water drainage channels. The drain blocks are subsequently filled with sealant to create a fully waterproofed balustrade installation.


These step by step instructions guide you through the POSIglaze installation process, using BalconySeal®.
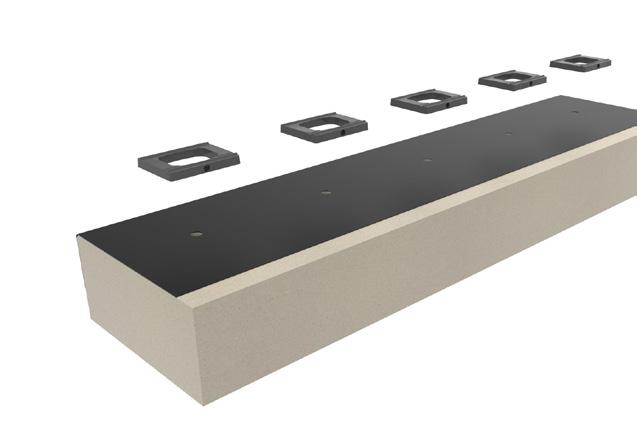
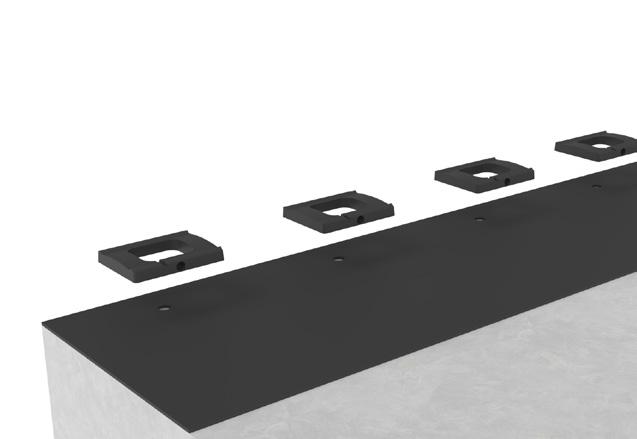
1. POSITION DRAIN BLOCKS
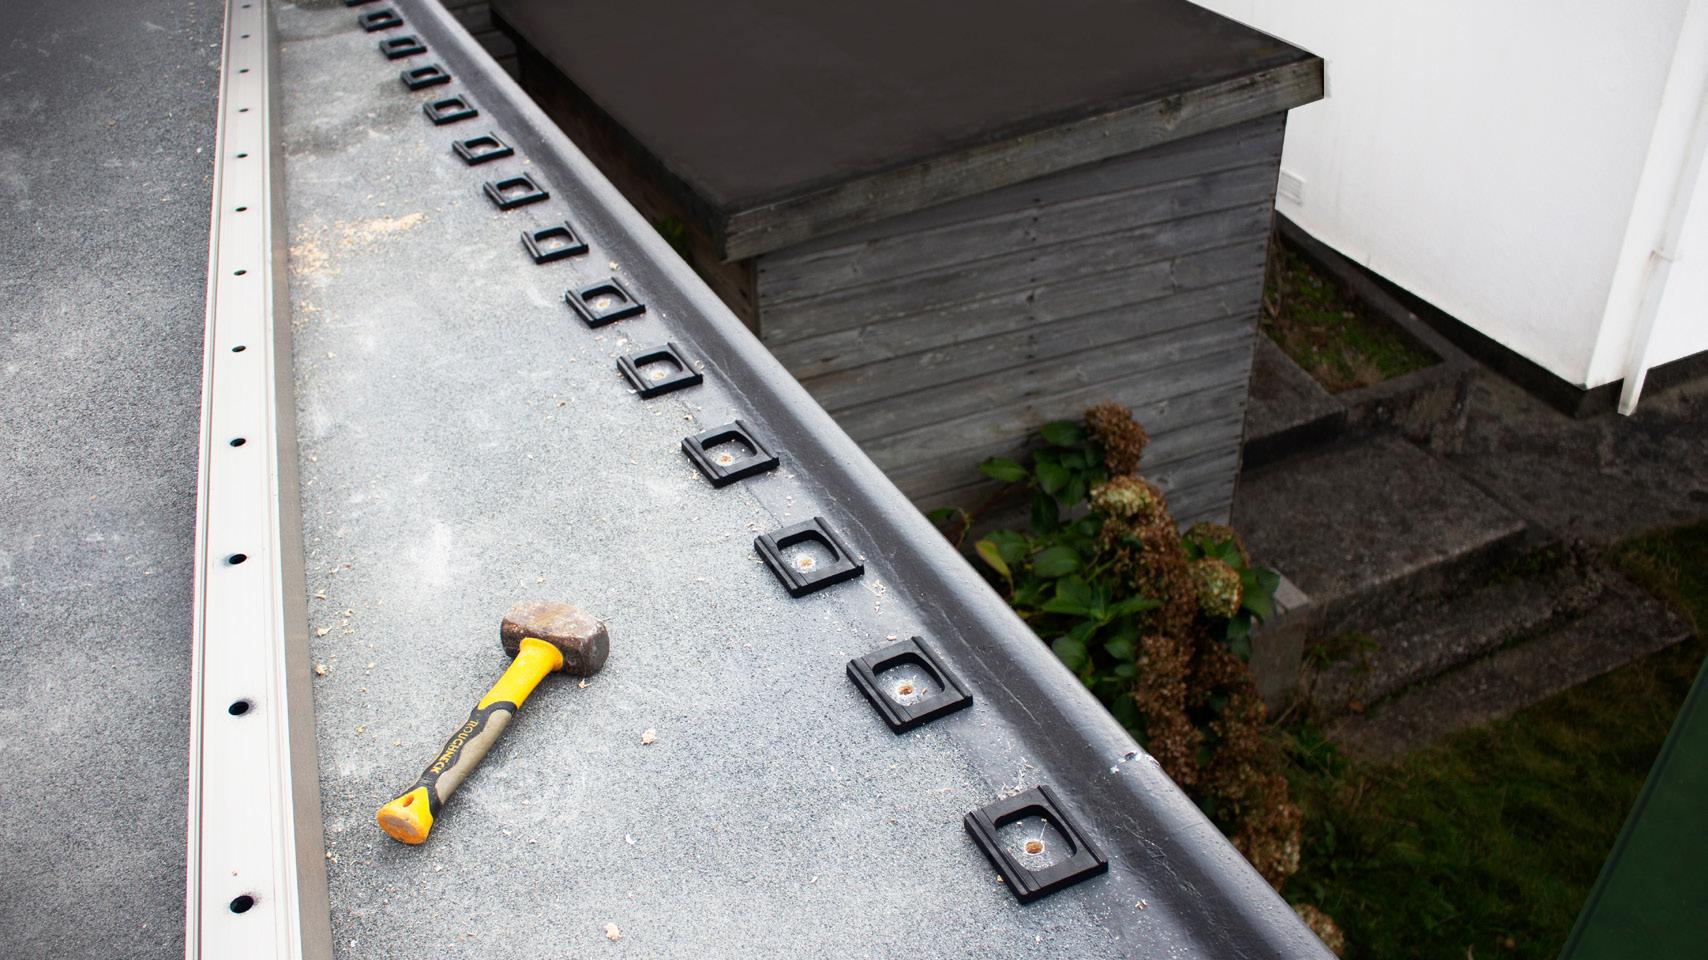
Lay the channel into it’s final position, mark the drill holes and then remove the channel. Drill bolt holes into your substrate starting at 100mm from the first edge and then at 200mm intervals thereafter. Place a drain block over each hole.
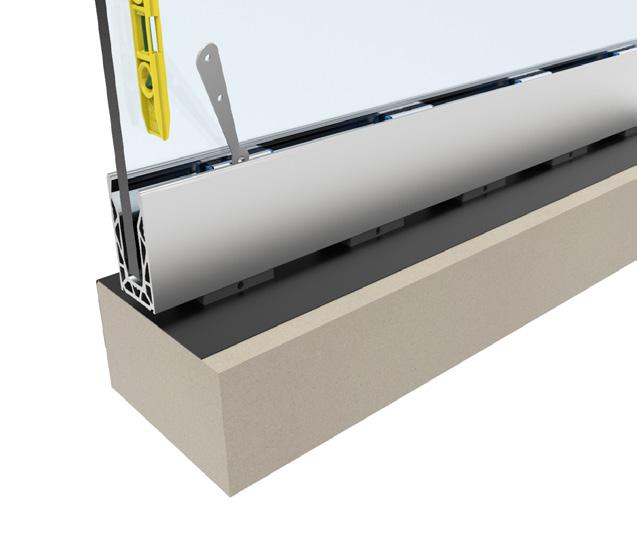
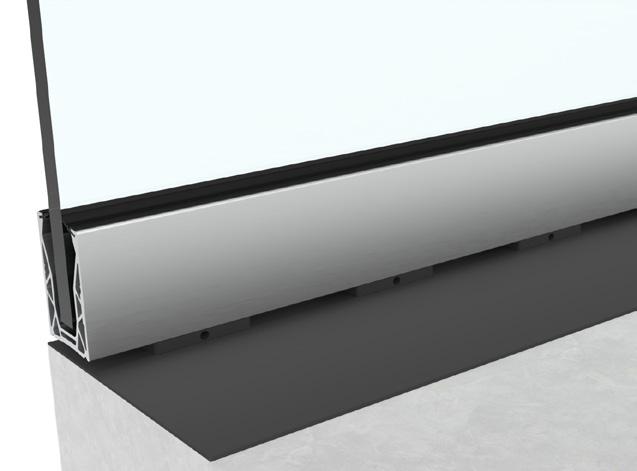
2. ALIGN THE CHANNEL
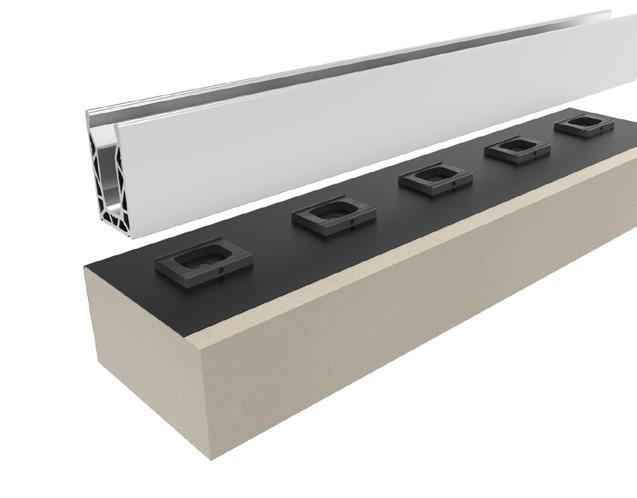
with your drilled holes. Make sure the grooves are positioned within the channel. Shim kits are available for un-even installations.
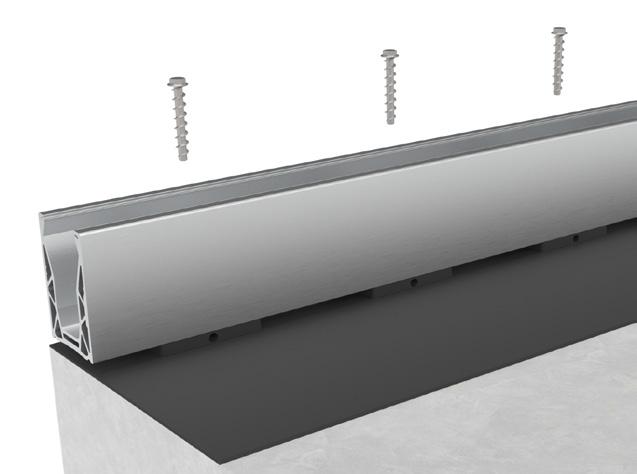
3. FIT THE BOLTS
Fix in place with an appropriate screw or bolt.
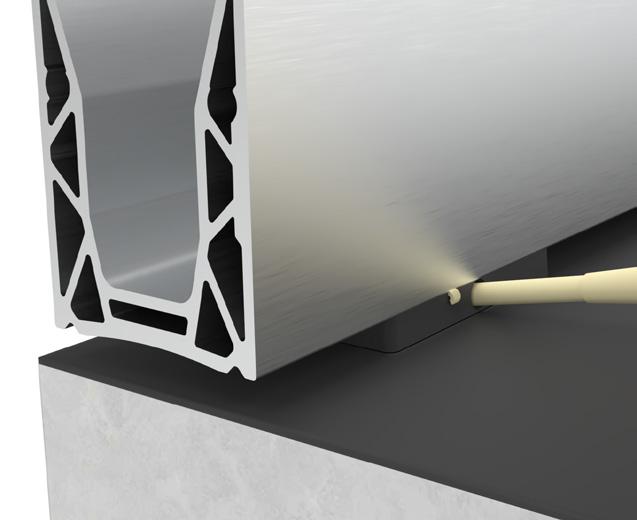
4. RESIN
Please ensure the ground is dry before you use the resin.
Finish the installation by aligning the glass using the adjustment system and fitting the top bead, gasket and end caps. 3. 1. 2. 6. 4. 5.
Lay the channel on top aligning the channel holes
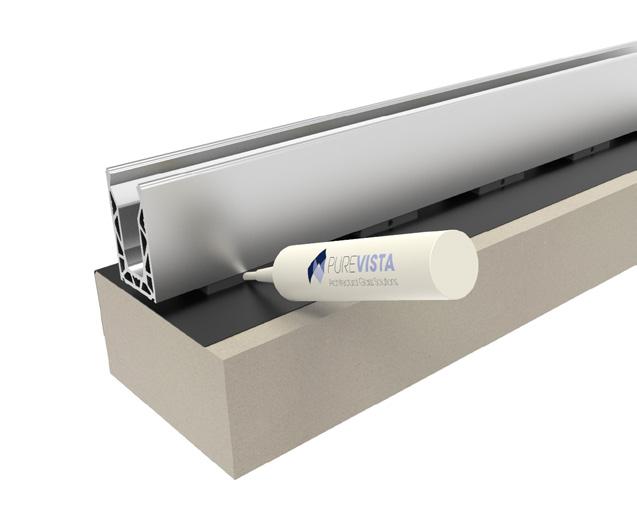
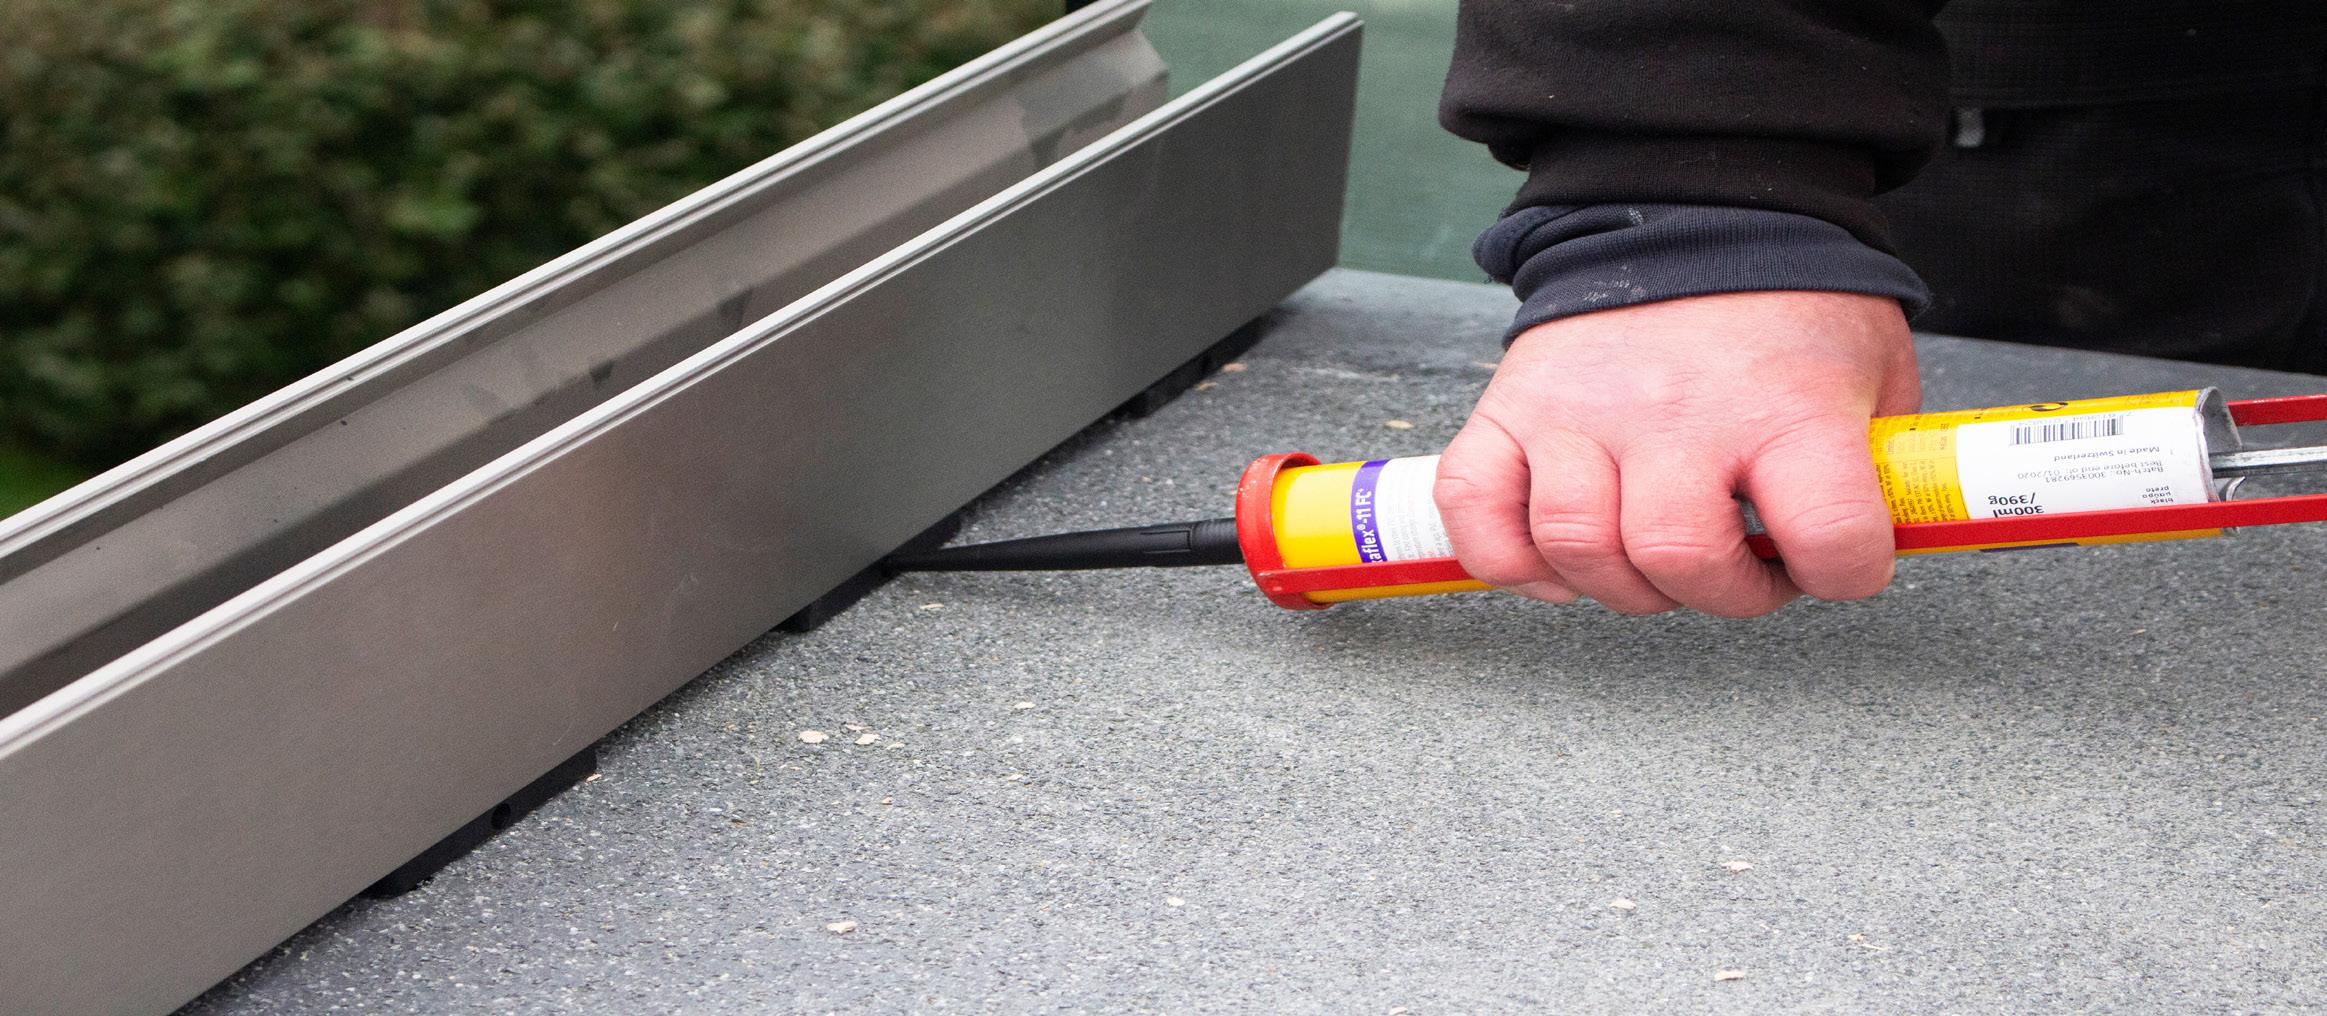
Pump the resin into the drain blocks, one at a time. When the resin appears around the bolt head, use a gloved finger to remove excess.
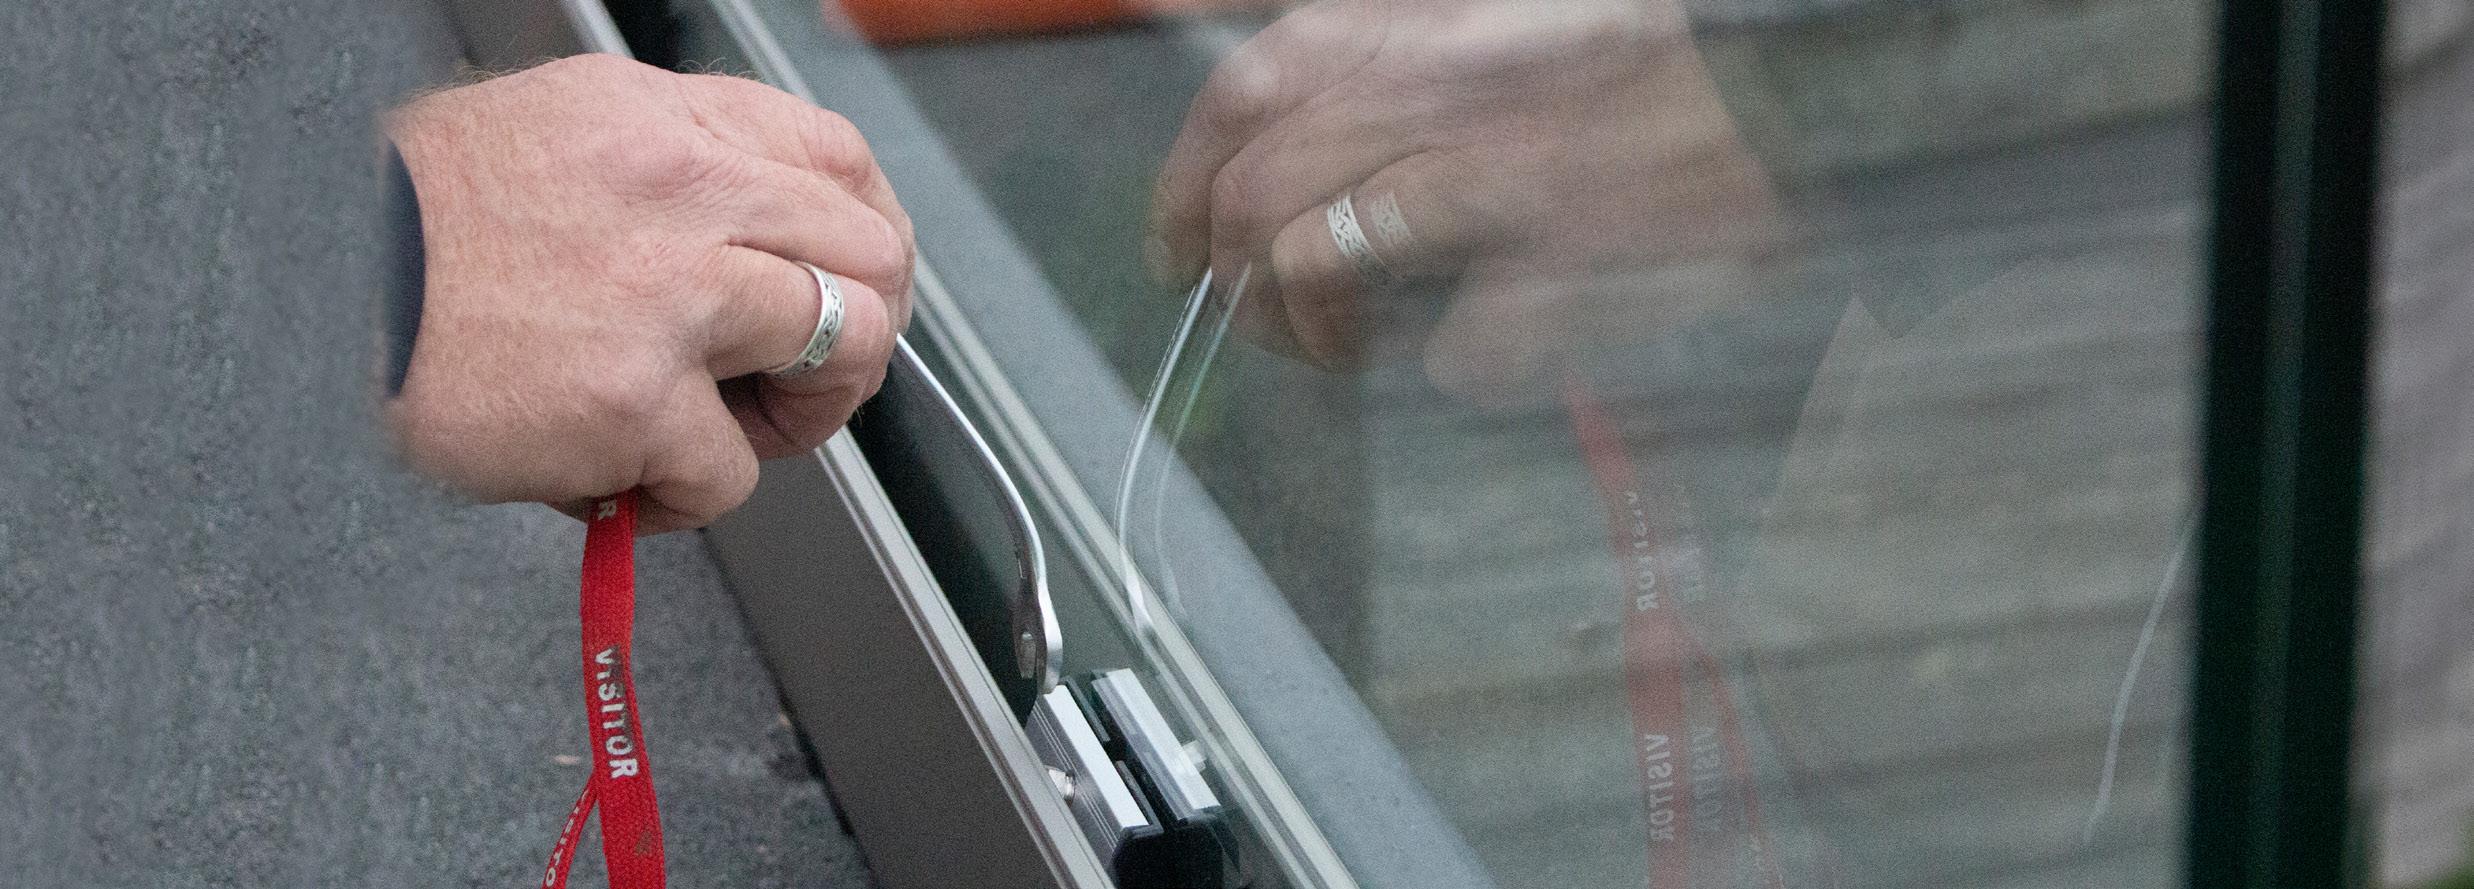
5. FIT THE GLASS
Slide the aluminium bars curved side down into the recess at the top of each clamp, on both sides of the glass. Loosely screw the bolts into the bars.
After placing the clamps onto the glass, continue to fit the panels into the channel as usual.
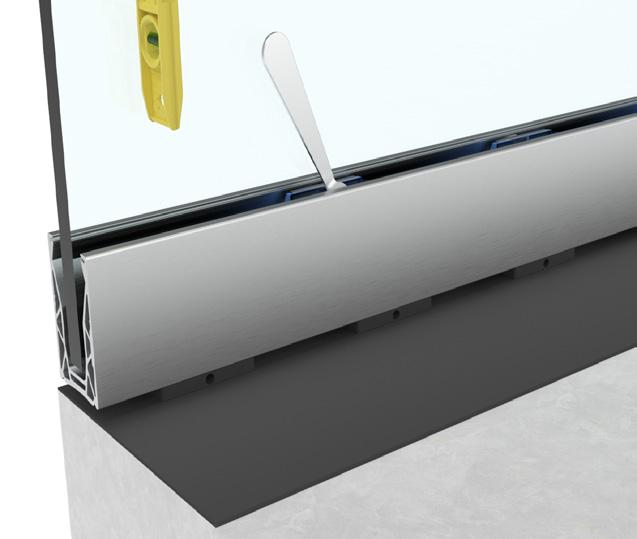
6. ALIGN THE GLASS


These step by step instructions guide you through the POSI -Lite installation process, using BalconySeal®.
1. POSITION DRAIN BLOCKS
Lay the channel into it’s final position, mark the drill holes and then remove the channel. Drill bolt holes into your substrate starting at 100mm from the first edge and then at 200mm intervals thereafter. Place a drain block over each hole. Make sure that the filling port is facing you on the inside of the installation
2. ALIGN THE CHANNEL
Next, place the channel on top of the drain blocks. Make sure the grooves are aligned and the channel is sitting correctly on each drain block.
3. FIT THE BOLTS
Fix in place with an appropriate screw or bolt.
4. SEALANT
Please ensure the ground is dry before you use the sealant.
Finish the installation by aligning the glass using the adjustment system and fitting the top bead, gasket and end caps. Now the sealant has hardened, trim away the excess sealant. 3. 1. 2. 6. 4. 5.
Pump the sealant into the drain blocks, one at a time. Continue to fill until sealant exits the vent channel. Leave
excess sealant to cure before cleaning to avoid spreading the sealant.
5. FIT THE GLASS
Slide the aluminium bars curved side down into the recess at the top of each clamp, on both sides of the glass. Loosely screw the bolts into the bars.
6. ALIGN THE GLASS
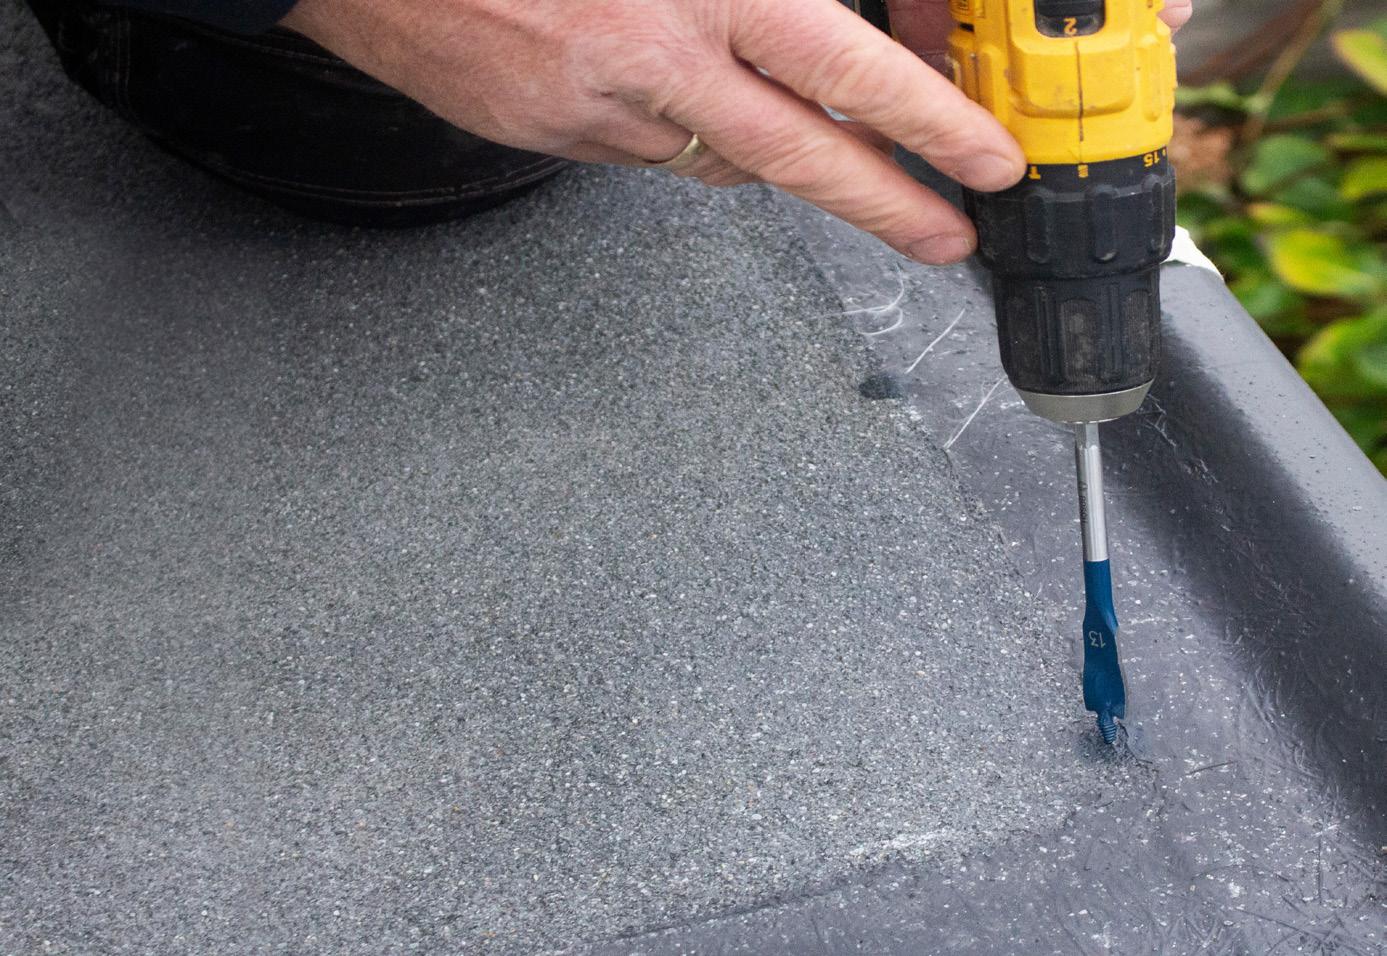

1. The installer has marked where the holes will be, to ensure accuracy in the rest of the fit, before drilling the holes.
2. The drain blocks are positioned over the drilled holes.
3. Next, the POSIglaze channel can be positioned on top of the drain blocks and the bolts can be fitted. If you’re fitting to an un-even surface there are shim kits available.
4. Resin is now pumped into the drain block from the side.
5. Finish the installation by fitting and adjusting the glass as normal.
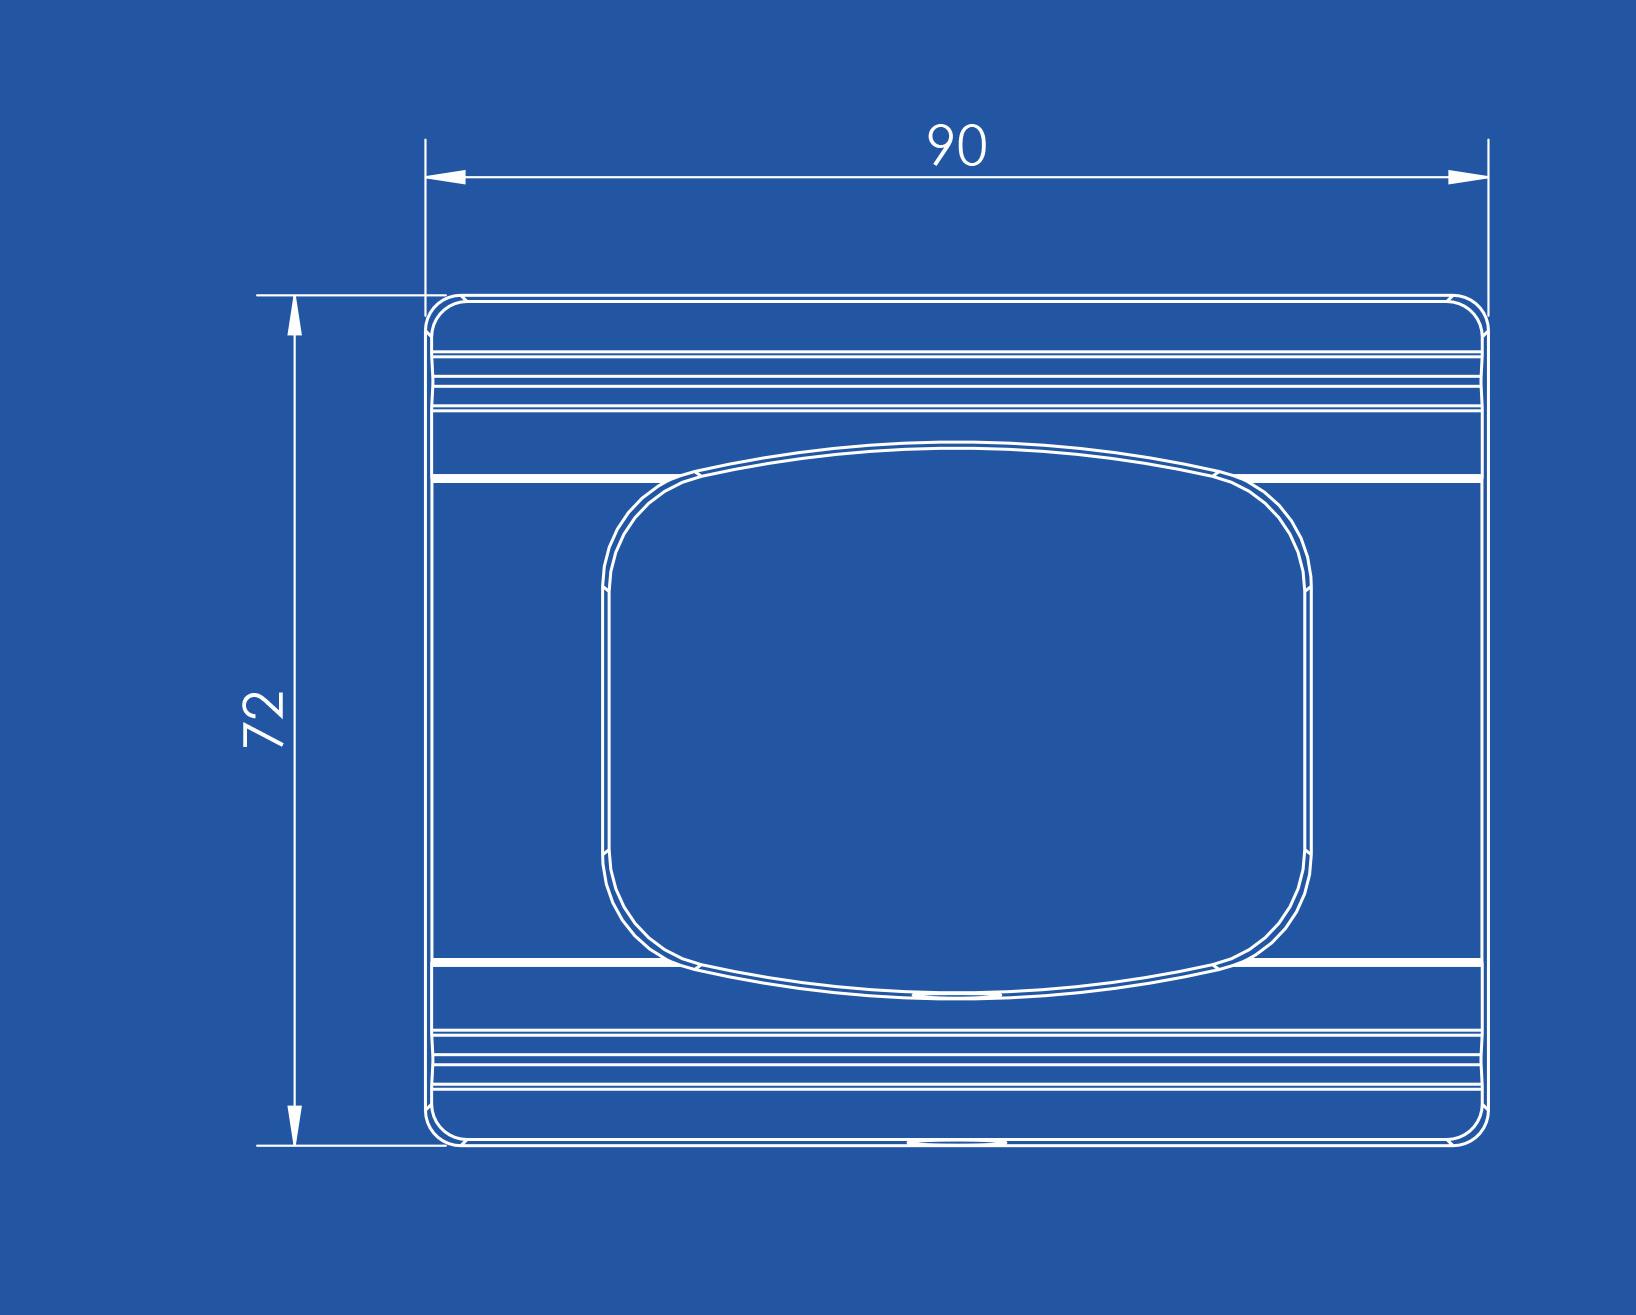
TECHNICAL INFORMATION
POSIglaze/ POSIone
PUREVISTA //