
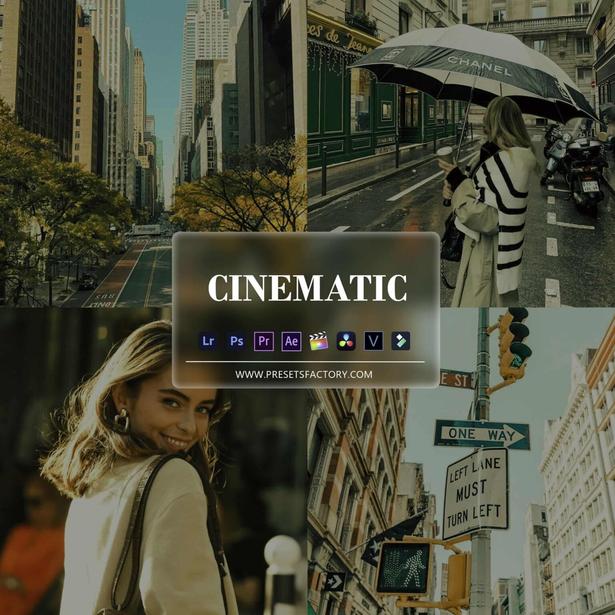
TRANSFORM YOUR PHOTOS WITH CINEMATIC LIGHTROOM PRESETS: A STEP-BY-STEP TUTORIAL
Are you tired of your photos looking dull and lifeless? Do you want to add that cinematic flare to your images? Look no further! In this step-by-step tutorial, we will guide you on how to transform your photos using cinematic Lightroom presets. Prepare to take your photography to a whole new level!
Step 1: Choose the Right Cinematic Lightroom Preset

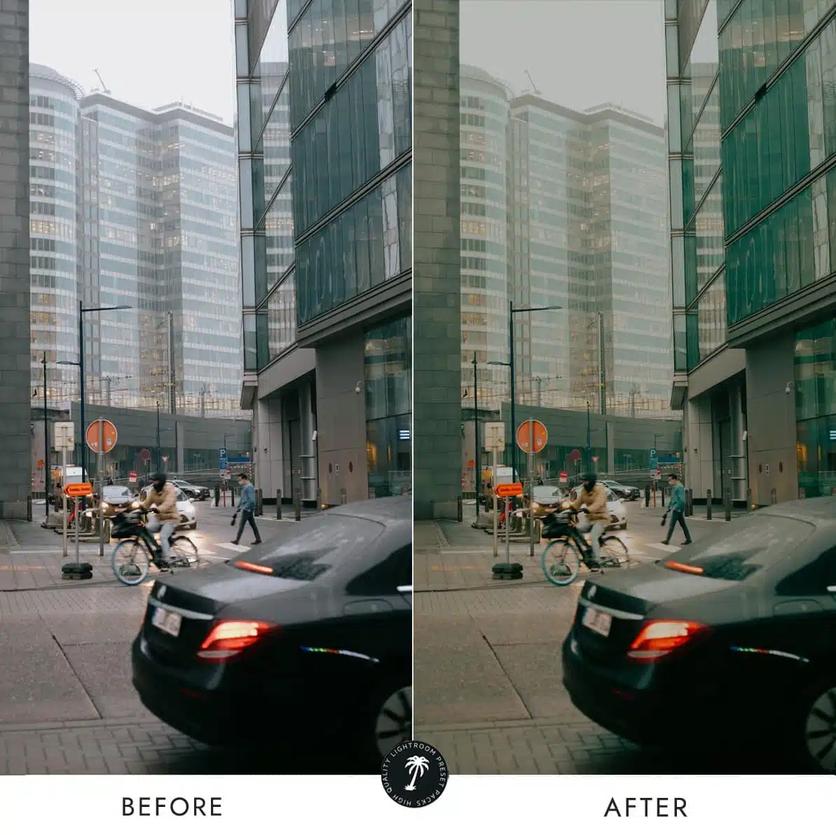
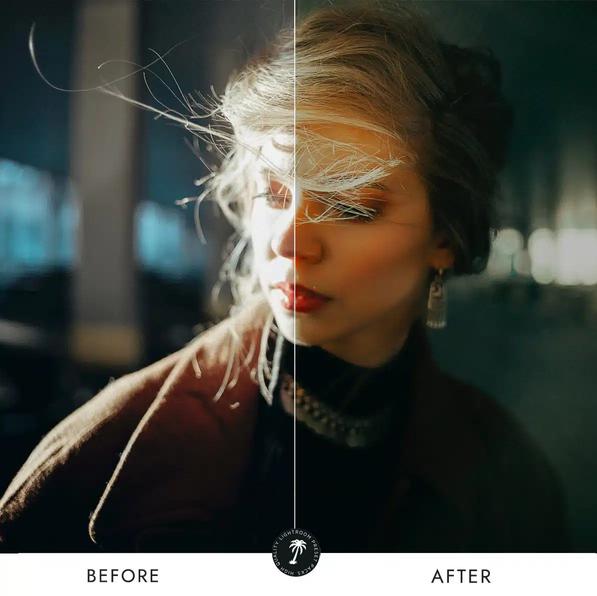
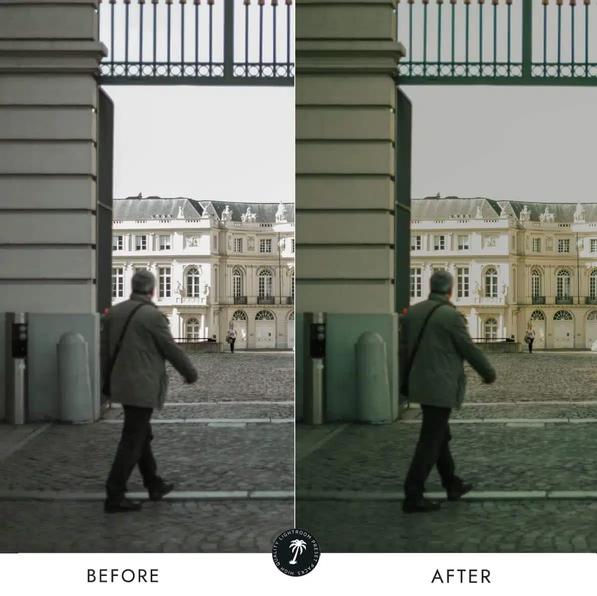
Before we jump into the editing process, it's essential to find the perfect cinematic Lightroom preset for your photos There are numerous options available online, but be sure to choose one that aligns with your artistic vision. Look for presets that offer the desired mood, colors, and overall atmosphere you want to achieve Cinematic lightroom presets often bring out dramatic tones, rich colors, and strong contrasts, making your photos truly stand out.
Step 2: Import Your Photos into Lightroom

Once you have selected the ideal cinematic Lightroom preset, it's time to import your photos. Launch Adobe Lightroom, create a new catalog if required, and import the images you wish to edit. Simply drag and drop them into the software, and they will appear in the Library module

Step 3: Apply the Cinematic Lightroom Preset
Locate the Develop module within Lightroom and navigate to the Presets panel on the left-hand side. Click the "+" icon to create a new preset folder or use an existing one specifically for cinematic presets. Right-click within the preset panel, select "Import" and choose the cinematic Lightroom preset you downloaded. Once imported, you can apply it to your images by clicking on the preset name Voila! Your photos will now instantly take on that cinematic look you desire. C I N E M A T I C L I G H T R O O M P R E S E T S
CONCLUSION
In conclusion, cinematic Lightroom presets have the power to elevate your photography game and add that professional touch to your images. By following this step-by-step tutorial, you can effortlessly transform your photos into stunning masterpieces. So, grab your camera, unleash your creative vision, and get ready to immerse yourself in the mesmerizing world of cinematic photography!
Step 4: Fine-Tune the Settings
While cinematic Lightroom presets can work wonders on your photos, you might want to adjust a few settings to fully personalize the final result. Tweaking the exposure, contrast, highlights, and shadows can enhance specific elements within your image Experiment with the temperature and tint sliders, especially if you want to achieve a specific color palette Don't be afraid to play around with these settings until you achieve the desired look

Step 5: Save and Export Your Cinematic Masterpieces
Once you are satisfied with your edits, it's time to save and export your photos. Click on the "File" tab and choose "Export " Select the desired file format, resolution, and destination folder for your images Lightroom offers various options to suit your needs, but for the best quality, save your photos as high-resolution JPEG or TIFF files.
Step 6: Share and amaze your audience!
Now that you have transformed your photos using cinematic Lightroom presets, it's time to showcase your newfound creative prowess Share your images on social media platforms, photography communities, or even consider printing them to display your work in physical form. Embrace the positive feedback from your audience as they marvel at the extraordinary cinematic vibe you've injected into your pictures