
LIGHTROOM PRESETS INSTANTLY TRANSFORM YOUR PHOTOS IN ONE CLICK! www.presetsfactory.com
KODAK
Presets Factory offers a wide selection of top-notch kodak lightroom presets, allowing you to unleash your creative side. Easily enhance your images and achieve remarkable results with a few simple clicks. Discover the secrets to professional-looking images today by browsing our selection of Lightroom presets.
First, make sure you've downloaded and unzipped the Kodak Lightroom presets package on your computer.
Open Adobe Lightroom.
In the Develop module, find the Presets panel on the left-hand side of the screen.
Right-click on "User Presets" (or create a new folder for your Kodak presets if you prefer) and select "Import."
Locate the folder where you saved the Kodak presets, select all of them, and click "Import."

Now that the presets are imported, go to the Library module and select the photo you want to edit.
Switch to the Develop module.
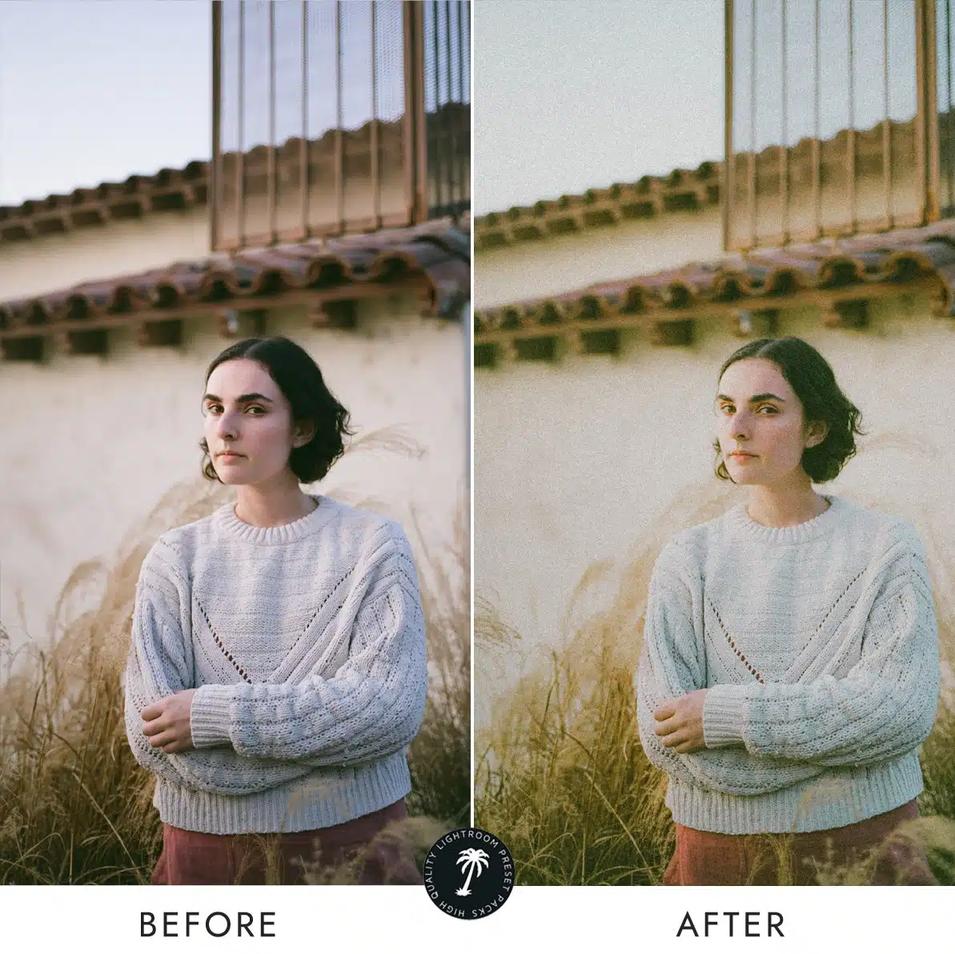
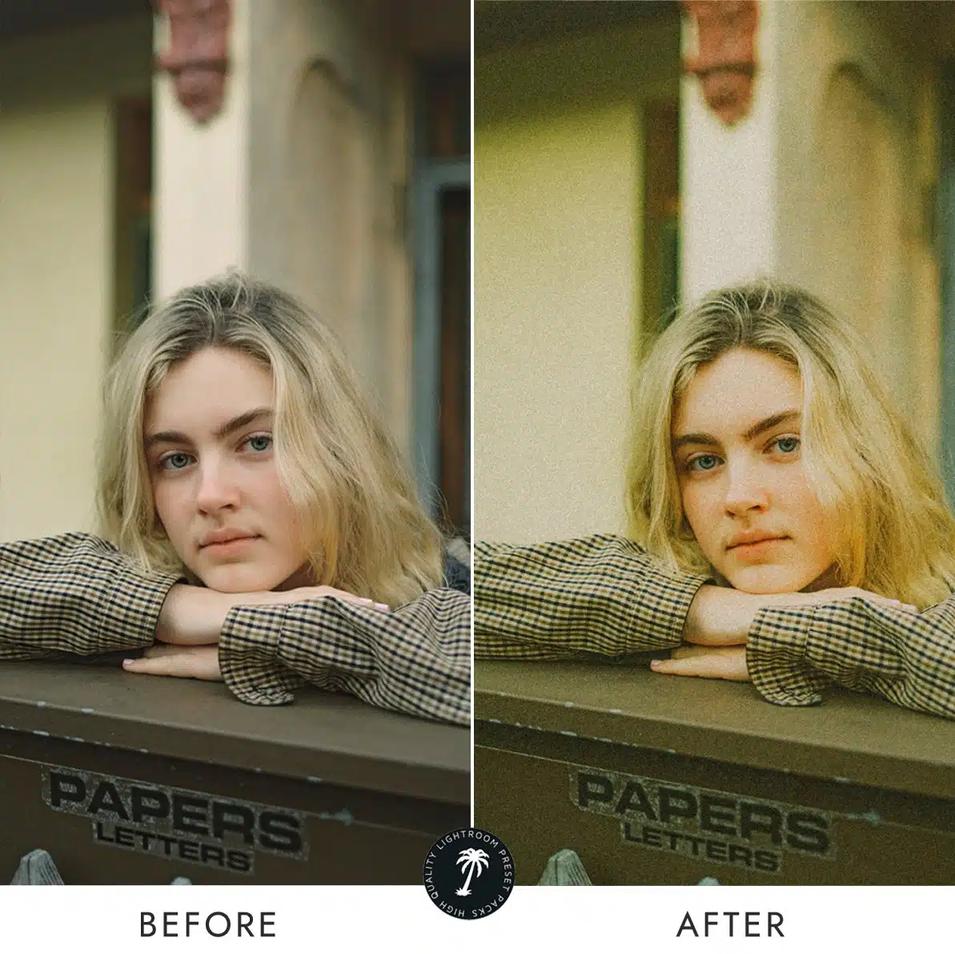
In the Presets panel, you'll see the Kodak presets you imported. Click on one to apply it to your photo. You can hover over each preset to see a preview of how it will affect your image. You can experiment with different presets to see which one best suits your photo or the desired effect you want to achieve.
After applying the preset, you can further adjust the settings to fine-tune the look of your photo. The preset might not be perfect for every image, so tweaking settings like exposure, contrast, and saturation can help you achieve the desired result.
Once you're satisfied with the edits, make sure to save your edited photo. Lightroom won't overwrite your original; it will create a new edited version.

support@presetsfactory.com
www.presetsfactory.com
146 avenue. Charles de Gaulle, 92200, Neuilly sur Seine, FR