


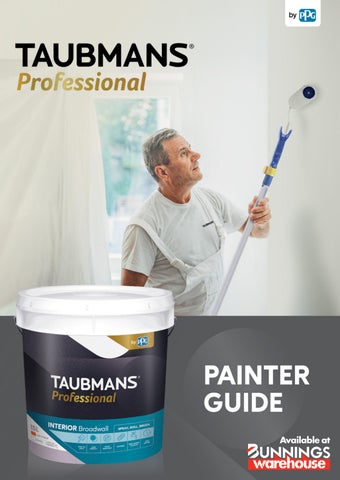


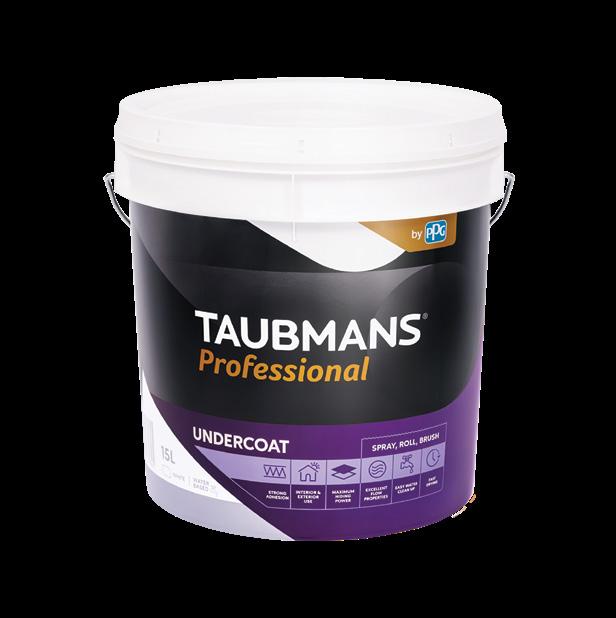
Description
• A high-density, water-based all-purpose sealer
• Undercoat with outstanding hiding, filling, and sanding properties
• Taubmans Professional Undercoat is rapid drying with fast recoat for water and oil-based finishes
Uses
• New / repainted interior and exterior surfaces as an undercoat / sealer
• Interior surfaces as an undercoat directly over bare timber or as a sealer for wallboards


Description
• Taubmans Professional Ceiling is specifically designed to give a dead flat finish which hides surface imperfections and also minimises banding on new plasterboard
• It is easy to apply with minimum splatter and has high opacity
• Has anti-mould protection to help keep ceilings looking newer for longer
Uses
• Interior & exterior sheltered ceilings
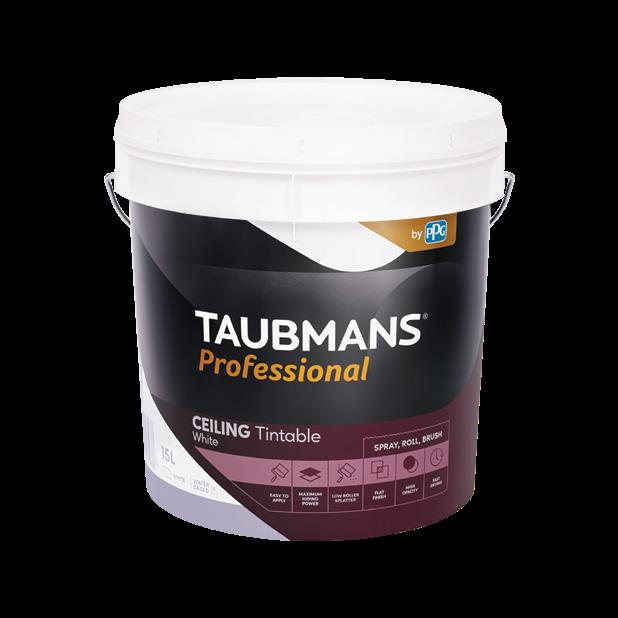
CEILING
Elusive White (Pre-tinted)
White (Tintable)
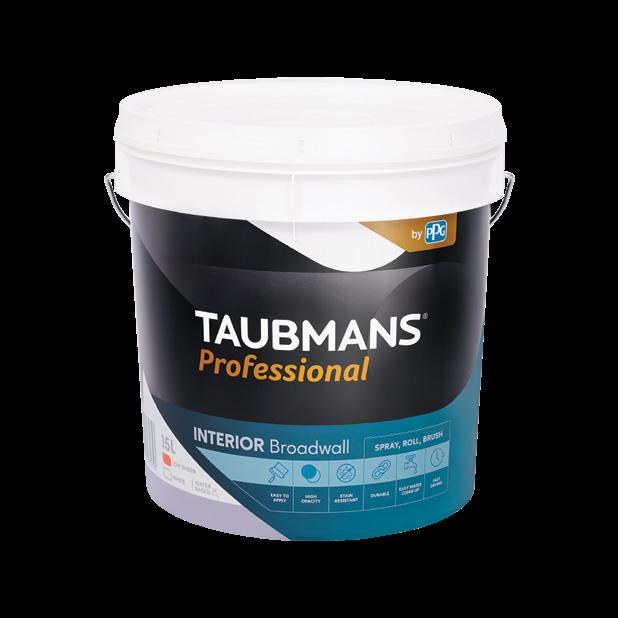
INTERIOR BROADWALL MATT
Description
• Taubmans Professional Interior Matt is a premium water-based paint, specially designed for the professional painter to deliver excellent coverage, washability, and a professional finish
• helps prevent the growth of mould and mildew to keep walls looking newer for longer
Uses
• Matt is ideal for all interior walls

INTERIOR BROADWALL LOW SHEEN
Description
• Taubmans Professional Interior Low Sheen is a premium water-based paint, specially designed for the professional painter to deliver excellent coverage, washability, and a professional finish
• Helps prevent the growth of mould and mildew to keep walls looking newer for longer
Uses
• Low Sheen is ideal on all interior walls
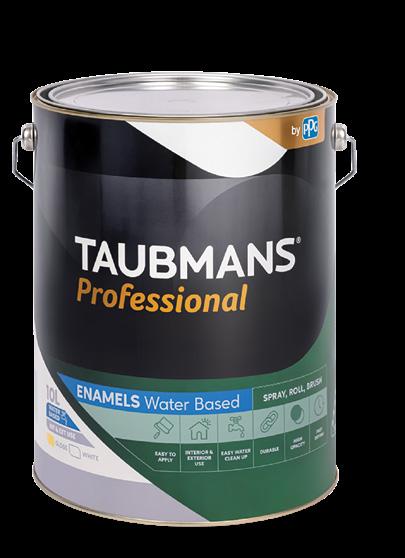
BASED GLOSS ENAMEL
Description
• Taubmans Professional Water Based Enamel is a high-quality, easy-to-apply, and quick-drying formula specially designed to protect doors, trims, skirting boards, and windows
• Designed to protect the paint surface from hand sweat and grease
• A non-yellowing formula
Uses
• Ideal for all interior and exterior doors and trims
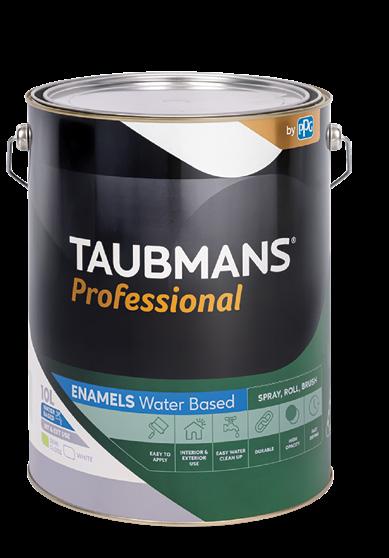
Description
• Taubmans Professional Water Based Enamel is a high-quality, easy-to-apply, and quickdrying formula specially designed to protect doors, trims, skirting boards, and windows
• Designed to protect the paint surface from hand sweat and grease
• A non-yellowing formula
Uses
• Ideal for all interior and exterior doors and trims
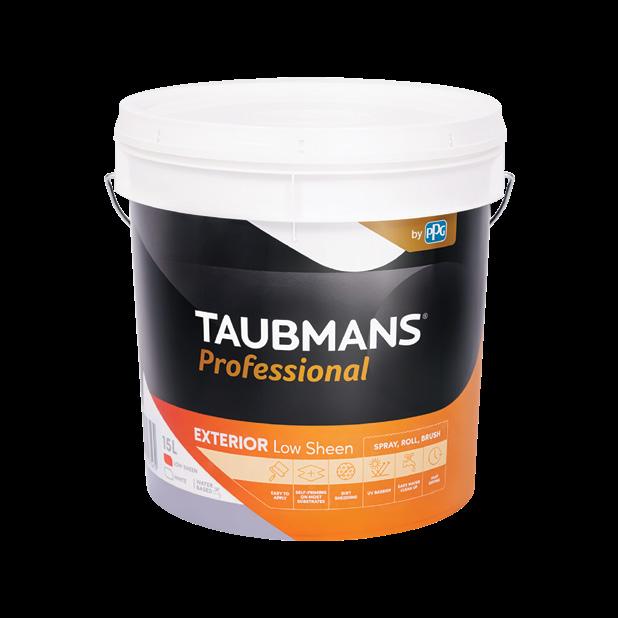
Description
• Taubmans Professional Exterior Low Sheen is a premium water-based, self-priming paint, specially developed for the professional painter to provide a luxurious application feel
• It delivers excellent UV protection, coverage, washability, and a professional finish
• Suitable for potable water collection
Uses
• Low Sheen is ideal for exterior walls, trims, outdoor furniture, pergolas, and roofs
EXTERIOR SEMI GLOSS
Description
• Taubmans Professional Exterior Semi Gloss is a premium water-based, self-priming paint, specially developed for the professional painter to provide a luxurious application feel
• It delivers excellent UV protection, coverage, washability, and a professional finish
• Suitable for potable water collection
Uses
• Semi gloss is ideal for weatherboards, trims, and roofs


Make sure that all surfaces you’re painting are clean, dry, and free of surface contamination. Surfaces should be dusted and / or wiped clean prior to painting.
Fill surface defects like gaps, cracks, or holes with a suitable filler, putty, or sealant.
Minor colour variation may occur between the containers when several containers of paint are tinted to the one specified colour. To ensure perfect colour consistency, pour all containers of tinted paint of the same finish into a separate container or “boxed” prior to mixing and application.
To box paint, pour all cans of the same colour and finish into a larger container and stir to combine for a single, uniform colour.
In a circular lifting motion, stir all paint for five minutes before use. You can use a broad, flat paddle or a commercially available manual paint mixer. Remix paint regularly to ensure colour consistency.
When working inside with paint, good ventilation is essential to ensure consistency in application and drying. Keep windows and doors open to allow suitable ventilation whilst painting.
Brushing & Rolling
1. No more gaps / filling / sanding where required
2. Prep coat – Walls and ceilings
3. Ceilings – Two coats
4. Walls –Two coats
5. Prep coat – Doors and trims
6. Gloss work – Doors and trims (excluding skirting boards)
7. Gloss work – Skirting boards
8. Hang doors
Spraying
1. No more gaps / filling / sanding where required
2. Prep coat - Doors and woodwork (windows if correctly masked up)
3. Prep coat – Walls and ceilings (spray and back roll)
4. Ceilings and cornices – Two coats (spray and back roll both)
5. Gloss work – Doors and trims (excluding skirting boards)
6. Finish Coat – Walls (brush and roller only)
7. Gloss work – Skirting boards
8. Hang doors
Note: Finishing the schedule with the skirting boards eliminates the overspray from spraying and / or rolling and delivers sharper lines cut in against the woodwork.
1. Sand any uneven plaster set joints or excess plaster from cornices.
2. Dust and wipe surfaces with a damp cloth.
3. Box Professional Ceiling Paint together ensuring colour consistency and uniformity.
4. Pour 1 litre of the boxed ceiling paint into a touch up can (see section on touch up cans), clearly marking the can label with the product, colour, and surface painted.
5. Apply the first coat of paint by brush to the cornices and cut in the broad area of the ceiling. Do not allow the areas cut in to dry before the commencement of rolling to avoid picture framing.
6. Roll the broad area of the ceilings using a 12mm nap roller applying the paint at a spread rate of approximately 3 times the width of the roller. Maintain a wet edge and uniformity in the stippled pattern.
7. Allow the paint to dry as per the PPG specification (generally 2 hours at 25°C). Drying will be slower in cold or humid conditions, in the absence of ventilation, or where heavy film builds are applied.
8. Prior to applying the second coat, view the area painted for defects and improve by lightly sanding surfaces to remove any foreign particles, dust, and wipe down.
9. Apply the second coat of Professional ceiling paint by brush and roller again following the process in steps 5 and 6.
10. Confirm correct application by viewing the surface. The surface should have consistent coverage of both colour and stippled finish, with no evident misses.
Note: Taubmans recommends the use of good quality roller sleeves and brushes.
Ceilings – Taubmans Professional Ceiling Paint: Airless Spray
1. Sand any uneven plaster set joints or excess plaster from cornices.
2. Dust and wipe surfaces with a damp cloth.
3. Ensure any surface / fixture not to be painted are covered with drop sheets, masking film and /or masking tape to protect from overspray.
4. Paint can be thinned 5-10% to achieve acceptable amotisation.
5. Box Taubmans Professional Ceiling Paint together ensuring colour consistency and uniformity.
6. Pour 1 litre of the boxed ceiling paint into a touch up can (see section on touch up cans), clearly marking the can label with the product, colour, and surface painted.
7. Wear appropriate Personal Protective Equipment (PPE) to protect from overspray on the skin and inhalation of amotised paint – safety glasses, respirator, coveralls, etc.
8. Apply the paint in a tradesman-like manner using a 517 spray tip. The paint is to be applied at a spray width of 225mm with the ideal spraying distance of the gun 30cm from the surface. Spray the paint onto the surface from corner to corner ensuring consistency in coverage.
9. Taubmans recommends that the area sprayed be back rolled with a 14mm nap roller in order to achieve a stippled effect.
10. Allow the paint to dry as per the manufacturers’ specification (generally 2 hours at 25°C). Drying will be slower in cold or humid conditions, in the absence of ventilation, or where heavy film builds are applied.
11. Prior to applying the second coat, view the area painted for defects and make good. Lightly sand surfaces to remove any foreign particles, dust, and wipe down.
12. Apply the second coat with the spray gun.
13. Back roll the wet spray film using a 14mm roller to achieve the desired stippled effect.
Note: The applicator is to check spray tips prior to use for wear and tear. New spray tips have an oval orifice. As the orifice wears it becomes circular, which applies a higher volume of paint in a smaller spray width. A worn tip will result in fingers or tails on the edge of the spray pattern. If these are evident, the tip is to be replaced.
Professional
Colour: For three-coat system specifications, Taubmans Professional Undercoat is to be applied in WHITE only.
1. Sand any uneven plaster set joints or other surface irregularities.
2. Dust and wipe surfaces with a damp cloth.
3. Box Taubmans Professional Undercoat together ensuring colour consistency and uniformity.
4. Cut in the corners, under the cornice lines, and around the trims of the broad wall area. Do not allow the areas cut in to dry before the commencement of rolling to avoid picture framing.
5. Roll the broad area of the walls using a 14mm nap roller applying the paint at a spread rate of approximately 3 times the width of the roller. Maintain a wet edge and uniformity in the stippled pattern.
6. Allow the paint to dry as per the Taubmans specification (generally 2 hours at 25°C). Drying will be slower in cold or humid conditions, in the absence of ventilation, or where heavy film builds are applied.
7. Confirm correct application by viewing the surface. The surface should have consistent coverage of both colour and stippled finish, with no evident misses.
1. Sand any uneven plaster set joints or excess plaster from cornices.
2. Dust and wipe surfaces with a damp cloth.
3. Ensure any surfaces / fixtures not to be painted are covered with drop sheets, masking film and /or masking tape to protect from overspray.
4. Paint can be thinned 5-10% to achieve acceptable amotisation.
5. Box Taubmans Professional Undercoat together ensuring colour consistency and uniformity.
6. Wear appropriate Personal Protective Equipment (PPE) to protect from overspray on the skin and inhalation of amotised paint – safety glasses, respirator, coveralls, etc.
7. Apply the paint in a tradesman-like manner using a 517 spray tip. The paint is to be applied at a spray width of 225mm with the ideal spraying distance of the gun 30 cm from the surface. Spray the paint onto the surface from corner to corner ensuring consistency in coverage.
8. Taubmans recommends that the area sprayed be back rolled with a 12mm nap roller in order to achieve a stippled effect.
9. Allow the paint to dry as per the PPG specification (generally 2 hours at 25°C). Drying will be slower in cold or humid conditions, in the absence of ventilation, or where heavy film builds are applied.
10. Confirm correct application by viewing the surface. The surface should have consistent coverage of both colour and stippled finish, with no evident misses.
• Prior to the application of the finish coat on the walls, any noted defects on the surface are to be corrected using a ready mixed patching compound. Cornice cement is NOT recommended to be used by the paint manufacturer.
• Lightly sand surfaces to remove any irregularities or foreign particles.
• Any patching with ready mixed patching compound is to be undercoated with Taubmans Professional Undercoat and allowed to dry prior to the application of the finish coat.
1. Box Taubmans Professional Low Sheen together ensuring colour consistency and uniformity.
2. Prior to the application of the finish coat, the wall area directly below the cornice is to be painted with Taubmans Professional Low Sheen and allowed to dry as per the PPG specification. This will assist in eliminating colour variation that can occur due to the porosity of the ceiling finish used on the cornices.
3. Apply the finish coat of Taubmans Professional Low Sheen. A wet edge must be kept for the cutting in by brush and rolling of the paint. Paint is to be applied using a 12mm synthetic roller using a technique of back rolling to deliver uniformity of the stippled pattern and consistency in coverage.
4. Confirm correct application by viewing the surface. The surface should have consistent coverage of both colour and stippled finish, with no evidence of misses.
1. Fill nail holes with an acrylic putty. Linseed oil putty must not be used to eliminate bleed through or stain.
2. Allow the acrylic putty to dry as per the manufacturers’ specifications.
3. Sand any filler flush with the surface.
4. Apply one coat of Taubmans Professional Undercoat and allow to dry as per manufacturers’ specifications.
5. Sand smooth the undercoated surface prior to the application of the top coat and remove any sanding dust.
6. As per the coating specification, apply one coat of Taubmans Professional Water Based Enamel Gloss or Semi Gloss in the colour specified.
1. Prime the bare edges of the door with Taubmans Professional Undercoat and allow to dry as per manufacturers’ specification.
2. Apply one coat of Taubmans Professional Undercoat to the front and rear face of the door and allow to dry to the manufacturers’ specification.
3. Sand smooth the undercoated surfaces prior to the application of the top coat and remove any sanding dust.
4. Apply one coat of Taubmans Professional Water Based Enamel Gloss or Semi Gloss in the colour specified.
External Eaves – Taubmans Professional Exterior Low Sheen and Semi Gloss
1. Fill nail holes with an acrylic putty and allow to dry as per manufacturers’ specification.
2. Sand filler smooth and remove any sanding dust.
3. Dust down entire eaves surface area to ensure complete removal of sand, dirt, or dust following brick cleaning.
4. Apply a coat of Taubmans Professional Exterior Low Sheen or Semi Gloss by brush and roller, maintaining a wet edge whilst painting.
5. Allow paint to dry as per PPG specification.
6. Apply final coat of Taubmans Professional Exterior Low Sheen or Semi Gloss by brush and roller maintaining a wet edge whilst painting.
7. Confirm correct application by viewing the surface. The surface should have consistent coverage of both colour and stippled finish, with no evidence of misses.
The staining or discoloration of a coat of paint by some surface contaminant ingredient of the coating or the surface beneath or in some instances by atmospheric pollutants.
Also recognised as:
• Bled
• Discolour
• Discoloured
• Stain
• Stained
• Staining
• Streaky
Causes:
• Bitumen-based coatings will bleed through most solvent-based coatings
• Surfaces that were contaminated by nicotine
• Some red pigments used in paints and wallpapers can also discolour subsequently applied coats of paint
• The defect is naturally more noticeable on lighter colours, but will, in severe cases, affect darker colours
Prevention:
• Thorough cleaning of the surface to remove material that can promote ‘bleeding’.
• Apply a sealing coat prior to painting. Over bitumen or similar materials, a sealing primer is often effective (trials may be necessary to establish the number of sealing coats required).
• Over wallpaper or paints containing ‘bleeding’ pigments, a relatively quick drying all-purpose primer may be effective.
• When trying any remedy, it is advisable to do so on a small unobtrusive area.
Remedy:
• When a finish has discoloured and complete removal of the paint coatings back to the original surface is neither practical nor desirable, then a sealing coat or stain block type product will usually be necessary before re-finishing.
• On some occasions particularly with gloss finishes, the work can be reinstated by applying a further coat of the finishing material after allowing the existing gloss to harden for one or two weeks.
• Where staining has occurred in a waterbased paint coating, more often than not, a stain block or sealing primer will be required.
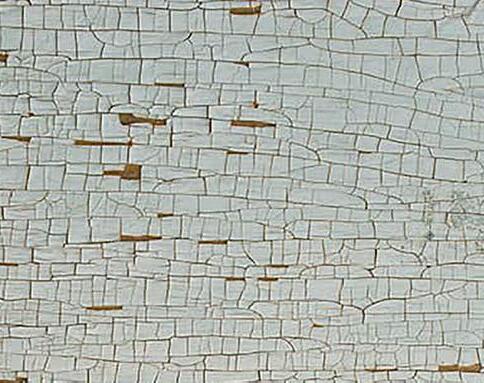
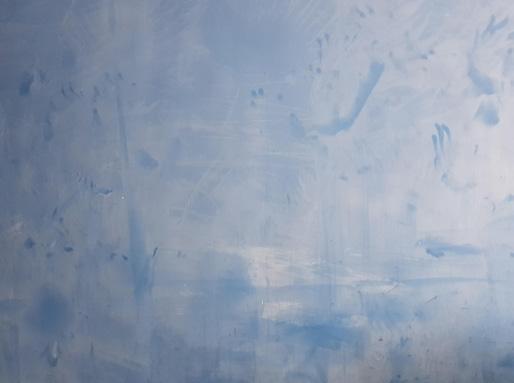
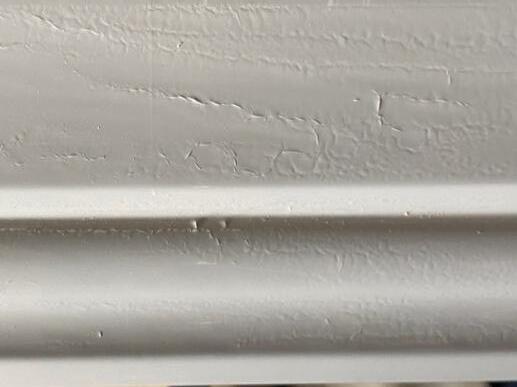
The paint coating takes on the appearance of a crocodile skin.
Also recognised as:
• Crazing
• Cracking
• Splitting
• Shrivelling
Causes:
• Painting over a coat of paint that was not completely dry
• Applying the primer or undercoat too heavily
• Applying a quick-drying finishing paint coating over a slow-drying coating
• Applying a water-based paint over a not completely cured paint
Prevention:
• Ensure that all components are designed for use with one another.
• Deferring the application of each coat until the one beneath has properly dried.
• Leave more than sufficient time between coats.
Remedy:
• When slight cracking has occurred it should be possible to rub down the surface and re-coat.
• Where the defect is severe, the surface must be thoroughly rubbed down or completely removed.
Where the paint remains tacky, soft, or wet for an excessive length of time.
Also recognised as:
• Cheesiness
• Cheesy
• Drying
• Not dry
• Scrapes off
• Soft
• Tack
• Tacky
• Wet
Causes:
• Application in unsuitable weather conditions (frost, low temperature, fog, rain, excessive humidity, etc.)
• Application over a contaminant such as bitumen, wax polish, dirt, oil, or grease
• Application over a previous coat that was not allowed to harden sufficiently
• The use of unsuitable thinners
• The use of thinners in incorrect proportions
Prevention:
• Paint in reasonable conditions.
• Paint in a clean atmosphere.
• Paint surfaces which are clean and dry.
• Paint without using unsuitable thinners.
Remedy:
• Where a paint film remains wet after a prolonged period, the only solution is to remove the defective coat, clean the surface thoroughly, and repeat the process.
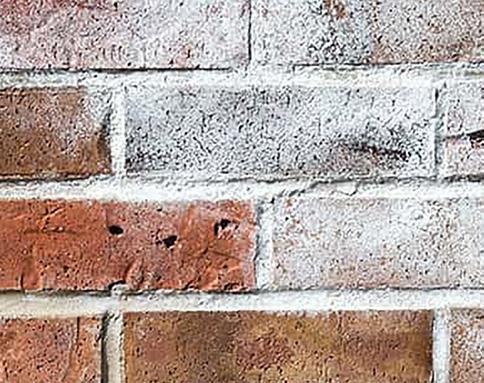
A salty deposit which forms on the surface of brick, plaster, or cement usually where moisture during drying transports salts to the surface.
Also recognised as:
• Crystal
• White
• Salt
• Salty
Causes:
• The presence of efflorescence indicates that moisture has passed or is continuing to pass out from the surface.
Prevention:
• It is unwise to apply paint to areas affected by efflorescence.
• Salt deposits should be removed by dry dusting. If they do not recur within 14 days, then it is safe to paint. If the salts return, the surface must be dusted again then left for a longer drying period.
• For old surfaces, the source of moisture must be isolated and eradicated.
Remedy:
• The deposits can be removed by wiping with a clean dry cloth. A wet cloth will dissolve the deposit.
• Where the paint film has been disrupted by efflorescence, the whole area must be rubbed down / stripped completely, cleaned, and left until efflorescence stops. It should then be safe to redecorate.
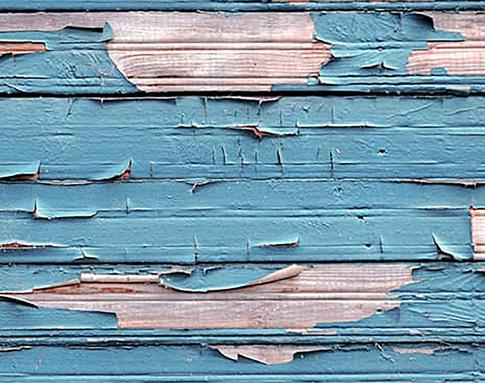
Where the paint lifts or peels from a surface, very often from a split or joint in the film, or over untreated resinous knots in timber. Closely related to blistering.
Also recognised as:
• Blistering
• Bubbling
• Flakes
• Flaking
• Lifting
• Peeling
Causes:
• Moisture behind the paint film causing a loss of adhesion
• Powdery or chalking existing paint
• Wet, dirty, or greasy surfaces
• Surface expansion and shrinkage, which impose undue stresses on the paint
• Applying the paint on a surface which has been subjected to several previous coatings
• Poor preparation / application technique
Prevention:
• Ensure that the surface was thoroughly prepared and was both clean and dry prior to painting.
• Remove old paint that is powdery or chalking heavily.
• Where these are impractical, the surface can be prepared by rubbing down and applying a sealer formulated for powdery or porous surfaces.
• Treat resinous knots with a knotting solution prior to painting.
Remedy:
• Severely flaking paint systems must be removed and the surface allowed to dry before further painting. If moisture is gaining access due to a building defect or design fault, then this must be rectified.
• Isolated flakes can be removed by rubbing down the edges and reapplying the paint (and also the primer and undercoat if these were affected).
This is where patches of uneven sheen level appear. Tends to be more common with gloss and satin finish products although most paints can also be affected.
Also recognised as:
• Gaps
• Patches
• Patchy
• Shades
• Shading
• Shiny
• Streaks
• Streaky
• Uneven sheen
Causes:
• Painting over areas that are dry or have begun to dry (loss of ‘wet edge’) e.g. overlapping fresh paint with paint that has already begun to set.
• A high room temperature and swift air circulation also affects the wet edge time and can induce this effect
• It is possible that areas have been ‘missed’ particularly if working under poor lighting or using an undercoat that is too close to the finish colour
• Touching up on areas of dried paint
Prevention:
• Apply even coats of paint. Perhaps by using larger brushes, the painter can cover more area in less time and prevent the loss of ‘wet edge’.
• Control the temperature and air circulation to prevent premature drying.
• Careful application - avoid the need to ‘go back and touch up’ areas. (Advice: Work in good light but work away from the light. Choose an undercoat, which is not too close to the finish colour).
• Ensure, wherever possible, that material from same batches are used to touch up.
Remedy:
• Where flashing has occurred, an additional wet coat applied under good drying conditions will usually remedy the problem.
Also known as matting / blooming
Also recognised as:
• Blooming
• Matt
• Matting
• Sheen
Causes:
• Apply paint in or prior to unsuitable weather (frost, fog, high humidity). Cold and humid conditions can detrimentally affect the finish of gloss paints, causing them to dry flat (a cloudy white film on the surface)
• Surface contamination in the form of grease or wax
• Apply the paint over a porous surface or undercoat
Prevention:
• Paint in suitable conditions.
• Apply the paint to clean, dry surfaces.
• Deal with a porous surface through a suitable primer/sealer.
• Painting on late afternoons during autumn and winter should be avoided.
Remedy:
• Rubbing down and re-coating should provide a satisfactory solution where the paint system is relatively new.
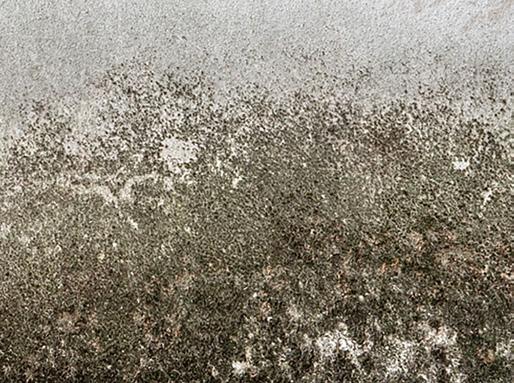
Internally some rooms, particularly bathrooms and kitchens, may suffer from mould. External walls may also become infected.
Also recognised as:
• Green, black or white discoloration
Causes:
• The cause of mould is usually airborne spores or dormant spores on a surface, which germinate when conditions are right, but sometimes the mould can be present within the substrate
• Poor air circulation can be a contributing factor
• Condensation
• Lack of ventilation
Prevention:
• Ensure the room is well ventilated at all times.
• Use kitchen and bathroom paint. This is acrylic based and is more resistant to steam and condensation than normal emulsion, which can absorb steam, etc.
• Use anti-mould coatings.
Remedy:
• If the mould wipes off, it is a surface contaminant. The best method of treatment is the use of a recognised fungicidal wash like Flood Mould Action, in accordance with manufacturer’s instructions. Allow to dry, then apply the solution a second time to ensure all spores are completely eradicated. Wash off thoroughly and brush down with a stiff brush. Heavily affected areas may require treating twice.
The actual coverage of a tin of paint does not meet the customer expectation.
Also recognised as:
• Opacity
• Poor coverage
• Porosity
Causes:
• Over spreading
• The profile of the surface
• The porosity of the surface
• This is highlighted by the second coat having a significantly better spread rate because the first coat seals the surface
Prevention:
• Use a primer to seal porous surfaces prior to painting.
• Apply a base coat colour.
Remedy:
• More paint is needed.

The formation of minute holes in the paint film, usually caused by small bubbles in coating which burst leaving small craters, or holes which do not integrate before the paint dries.
Also recognised as:
• Holes
• Pin holes
• Speckles
Causes:
• Over vigorous brushing or rolling during application
• Applying paint to hot surfaces
• Solvent trapped between coats (e.g. when one coat follows the previous coat too quickly)
• These holes can cause other problems by allowing atmospheric pollutants and moisture into the paint coating and sometimes to the underlying surface
• Incorrect blending of solvents
Prevention:
• Careful, smooth application
• Allowing sufficient drying times between coats
Remedy:
• If the holes only penetrate the topcoat, this can be rubbed down and over-coated.
• If the holes penetrate several coats of paint, the whole system should be rubbed down / stripped and re-applied.
• Ensure correct blending of solvents.
The actual coverage of a tin of paint does not meet the customer expectation.
Also recognised as:
• Powder
• Colour fading
Causes:
• Ultraviolet rays from the sun interacting with the paint’s exposed pigments will over time potentially cause chalking.
• The more intense the ultraviolet rays, the more severe the reaction of potential chalking will be.
• As dark colours absorb more heat and ultraviolet rays from the sun, darker colours are more prone to chalking than lighter colours.
• If the paint is applied at the incorrect film build, notably thinner or more uneven than required, the risk of chalking is more prevalent
• The salt and moisture present in coastal environments will increase the risk of chalking
• Using products that are not specified for exterior use
Prevention:
• Ensuring you are using exterior specific and ultraviolet ray resistant products
• Choosing lighter colours instead of darker colours
• Correctly maintaining your paint maintenance schedule
Remedy:
• Chalking paint must be washed or removed to remedy the powdery substance before being repainted

This is where the colour of white or light coloured enamel paint takes on a yellow appearance, different to the originally desired colour. This is common with oilbased enamel products and is a product issue that impacts the whole industry.
Causes:
• Natural ageing of oil-based enamels
• The use of household cleaners with high levels of ammonia
• Being situated within poorly lit areas, sch as sliding door cavities or behind cupboards
• Heat from stoves, heaters etc. will speed up the yellowing process
Prevention:
• Utilising a water-based enamel as an alternative
• Avoid painting during periods of poor drying conditions, such as high humidity or very low temperatures
• For two weeks after application, ventilation and natural light should be maximised and applying water-based paint in the vicinity of new oil-based paint should be avoided
Remedy:
• Repainting with a water-based product
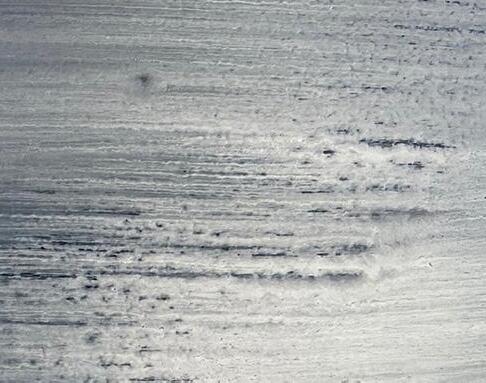
When the paint coating shrivels, wrinkles, or appears to ‘roll up’ under the brush. Generally associated with solvent-based products such as gloss paints.
Also recognised as:
• Shrivelling
• Rolling up
Causes:
• Application in cold or damp conditions, which may slow drying times
• Applying the paint too thickly or unevenly
• Applying paint to an area, which has started to dry, produces an excessively thick coat, which can lead to shriveling, curtaining or crazing
• Applying the paint when it is subjected to fast drying conditions (hot sun and a drying wind)
• Applying gloss over an undercoat which has not fully dried
Prevention:
• ‘Picking up’ wet edges before the paint has begun to set
• Careful, even application
• Avoiding fast drying conditions
• Ensuring undercoats or primers are fully dry before applying finish or gloss coats
Remedy:
• Where the defect has occurred, the coating must be allowed to harden thoroughly before it is sanded down and re-coated.
• In severe cases, affected coatings should be completely removed.
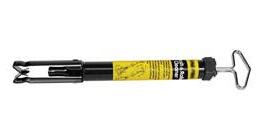
The use of premium tools will ensure you achieve the best finish on all surfaces.
The use of a high-quality roller of the correct nap for the application will deliver the best possible finish. Highquality rollers are more durable, hold more paint, apply the paint more evenly, and are easier to wash.
Taubmans recommends the use of synthetic rollers for ceilings and walls to achieve a uniform, softly stippled finish.
Taubmans recommends the use of short pile microfibre rollers for the application of gloss finishes to doors. The microfibre delivers speed of application and a smooth finish that provides ease of touch up where required.
To prepare a roller for use, run the dry roller through your hands to remove any loose lint, fibres, and dust. The roller can then be washed with the appropriate paint solvent (water or mineral turpentine) to remove any remaining fibres. Spin excess moisture from the roller and then it is ready for use.

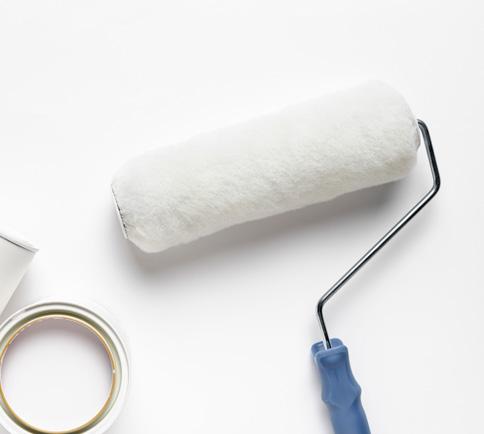
Clean rollers with water for wall and ceiling paints, mineral turpentine for oil-based door and trim finishes. Finally, wash in warm, soapy water, rinse, and allow to dry standing upright in a dry, dust-free area.
If rollers show signs of wear, discard them as they will hinder effective pick up and release of the paint and affect the paint finish.
A premium-quality brush makes paint application smoother, provides a better, more consistent finish, and will last longer than budget brushware.
Taubmans recommends the use of synthetic filament brushes, as these are good for use with all paints and best for use with water-based paints.
To prepare a brush for painting, flick the bristles through your fingers and shake the brush to remove any dust and loose bristles. Wash the brush in warm, soapy water.
Leave the brush to soak in water for a few minutes before commencing painting. This allows the bristles to absorb some water and condition it to accept paint and improve flow off the brush.
Dip the brush into the paint approximately half the length of the bristles. Remove excess by gently tapping the side of the paint pot. Do not wipe the brush on the rim of the paint pot as you will remove too much of the paint loaded onto the brush.
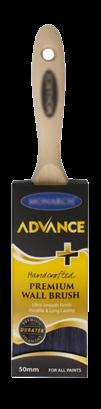
Paint with the tips of the bristles, not the sides.
After painting, remove any remaining paint from the brush by brushing it onto newspaper. Rinse in the appropriate solvent for the paint used.
Wash the brush thoroughly in warm, soapy water. Rinse well and shake or spin out excess water.
Wrap the bristles in paper or return the brush to its storage pack. Store the brush flat or hang it from the hole in the handle.
Do not pour leftover paint down the drain. Unwanted paint should be brushed out on newspaper, allowed to dry and then disposed of via domestic waste collections. Empty paint containers should be left open in a well ventilated area to dry out. When dry, recycle steel containers via steel can recycling programs.

Paintback is a national waste paint collection scheme that was launched in May 2016 that provides a costeffective service for trade painters to clear away left over paint. It aims to reduce large volumes of waste paint and packaging going to landfill.
A levy of 15 cents per litre (plus GST) is applied to the price of paint through trade and retail outlets.
Paintback has established and is adding to collection sites across Australia where painters can drop off unwanted paint and packaging at no charge. Locations can be found on the Paintback website.
Paintback accepts a maximum of 100 litres per visit, stowed in containers of not more than 20 litres in size.
More information can be found on www.paintback.com.au
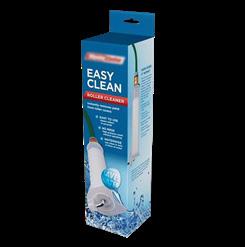
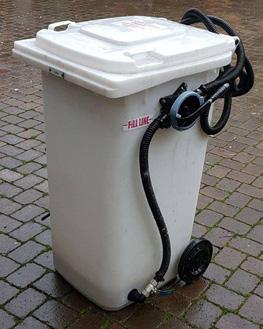
Taubmans recommends the use of brush and roller spinners, hose connected roller cleaners and paint washout bins to efficiently clean painting tools used with water based-paints in an environmentally responsible manner.
Brushes, rollers, and trays should be cleaned in a bucket and the wastewater poured into and treated in a paint washout bin. Should a washout bin not be available, the wastewater is to be disposed of aligned to local council requirements.
Brushes and rollers used for the application of solventbased enamels are to be washed in mineral turpentine and the solvent wash retained and disposed of, aligned to local council requirements.
Equipment wash up must remain within the project site and not enter drains, footpaths, or roadways.
Brush and roller wastewater must not be allowed to enter drains. Penalties apply.
WATER-BASED PAINTS:
Keep out of reach of children. Keep lids on containers when not in use.
If swallowed
DO NOT induce vomiting. Always seek medical advice.
Skin contact
Wash skin thoroughly with soap and water. Always seek medical advice.
Eye contact
Flush eyes with plenty of water while keeping eyelids open. Always seek medical advice.
SOLVENT-BASED PAINTS:
Keep out of reach of children. Keep lids on containers when not in use.
Flammable
Solvent-based paints are flammable. Keep away from heat and eliminate any source of ignition.
If swallowed
DO NOT induce vomiting. Drink a glass of water and seek medical advice.
Skin contact
Remove contaminated clothing and wash skin thoroughly with soap and water. Seek medical advice if irritation persists.
Eye contact
Flush out immediately with water and seek medical advice.
Ventilation
Ensure adequate ventilation during use and while drying. Avoid prolonged breathing of vapour.
Call 1800 883 254 for 24-hour medical emergency.