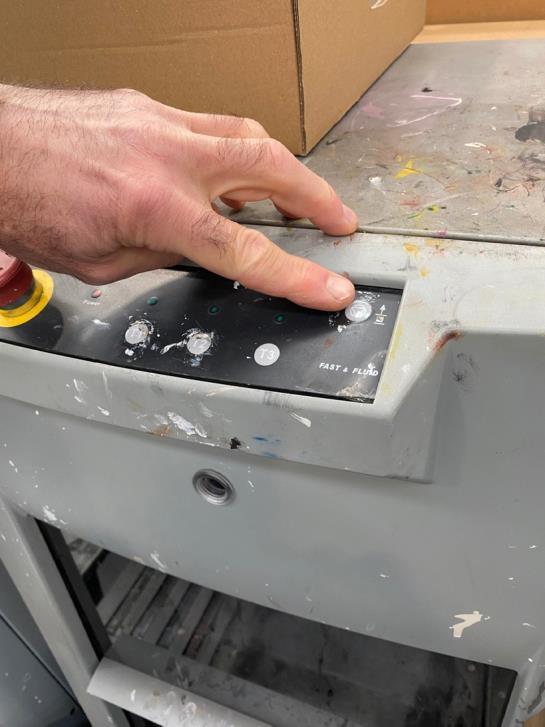
30 How to Tint Colour & Colour Match using the Auto Tint Machine
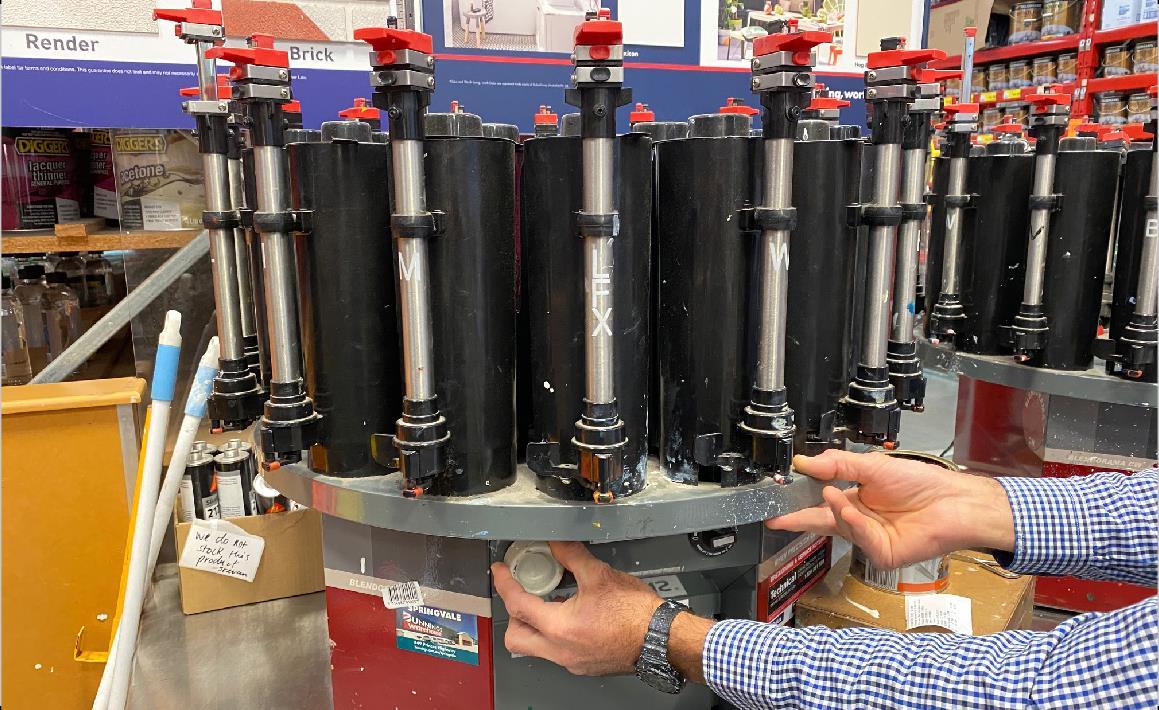
Manual tint machine instructions
Manual tint machine instructions
Step 1
Prepare label and can, ensuring the correct base has been chosen.
Step 2
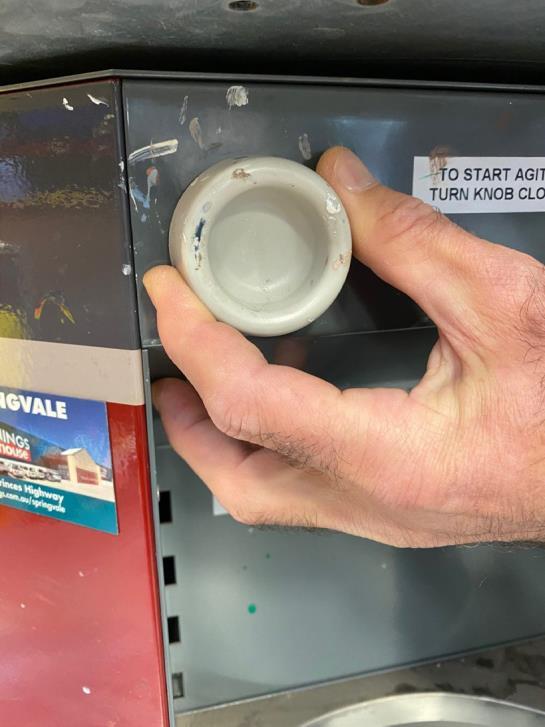
Pull down lock handle and rotate carousal to the required tint canister to be dispensed.
Manual tint machine instructions
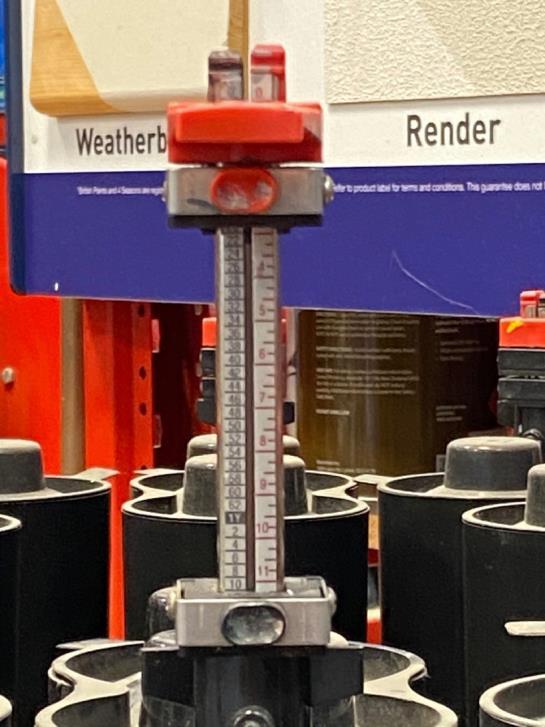
Step 3
Set gauge to tint formula. For more information refer to ‘Setting the gauge’.
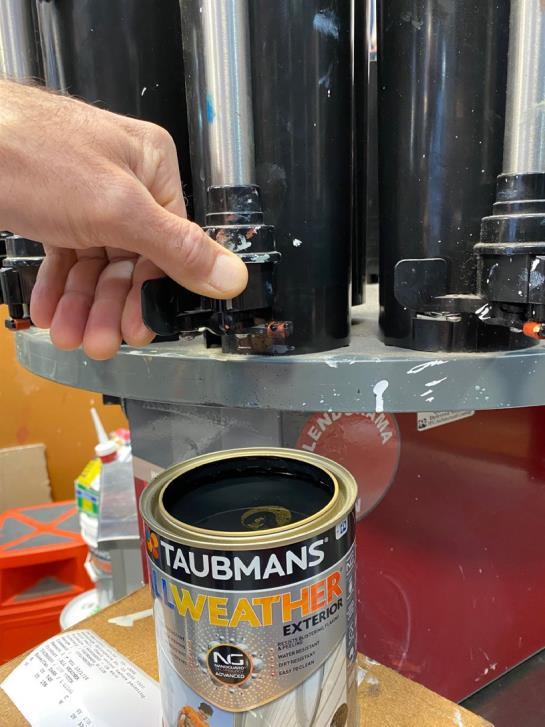
Step 4
To prime the pump, lift red handle up down up twice, ensuring it is left in the top position.
Manual tint machine instructions
Step 5
To dispense, open arm fully.
Step 6
Pull red handle down completely until dispensing stops. Close arm.
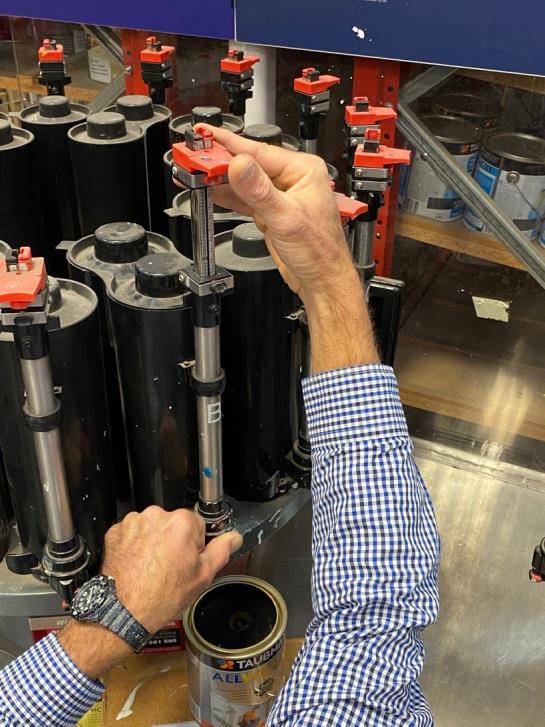
Manual tint machine instructions
Step 7
Repeat step 2 to 6 until dispense complete.
Step 8
Once dispensing is complete, make sure all gauges are returned to bottom position in preparation for next person to use machine.
Manual tint machine instructions
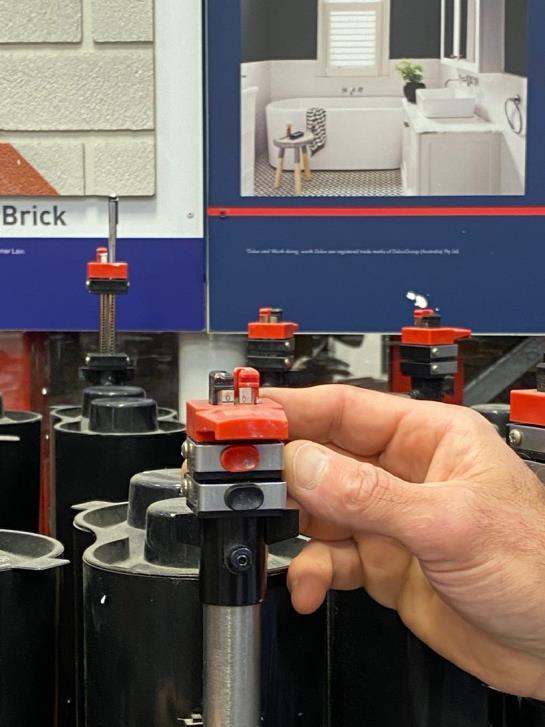
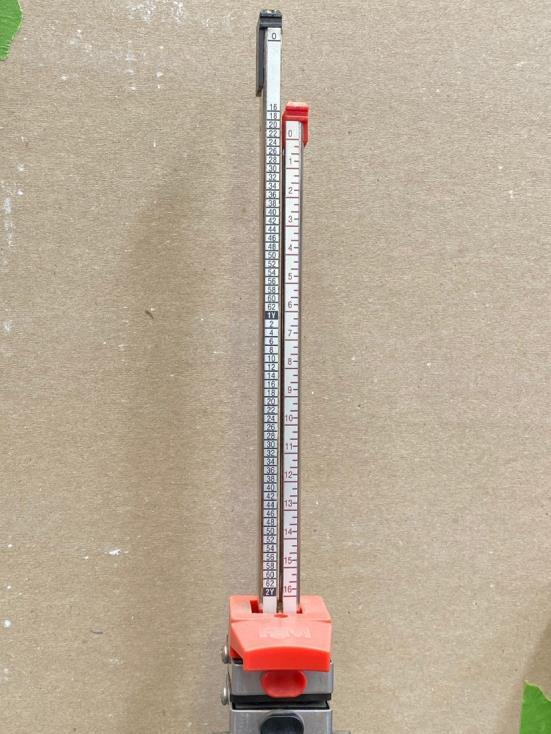
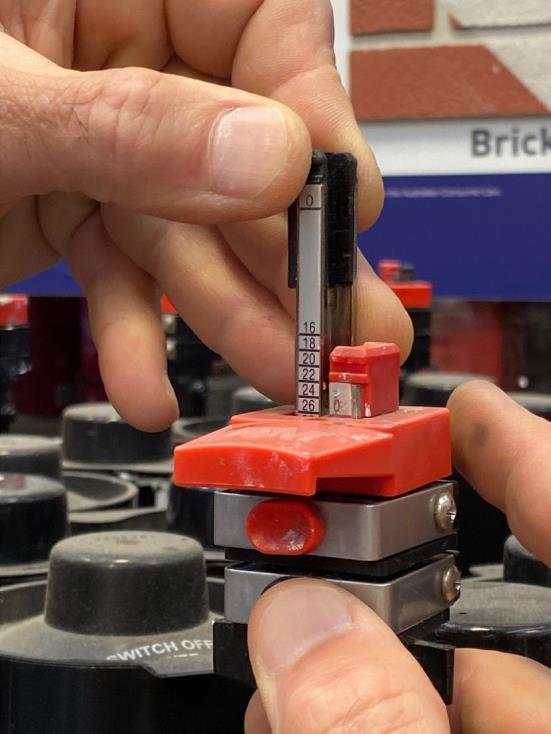
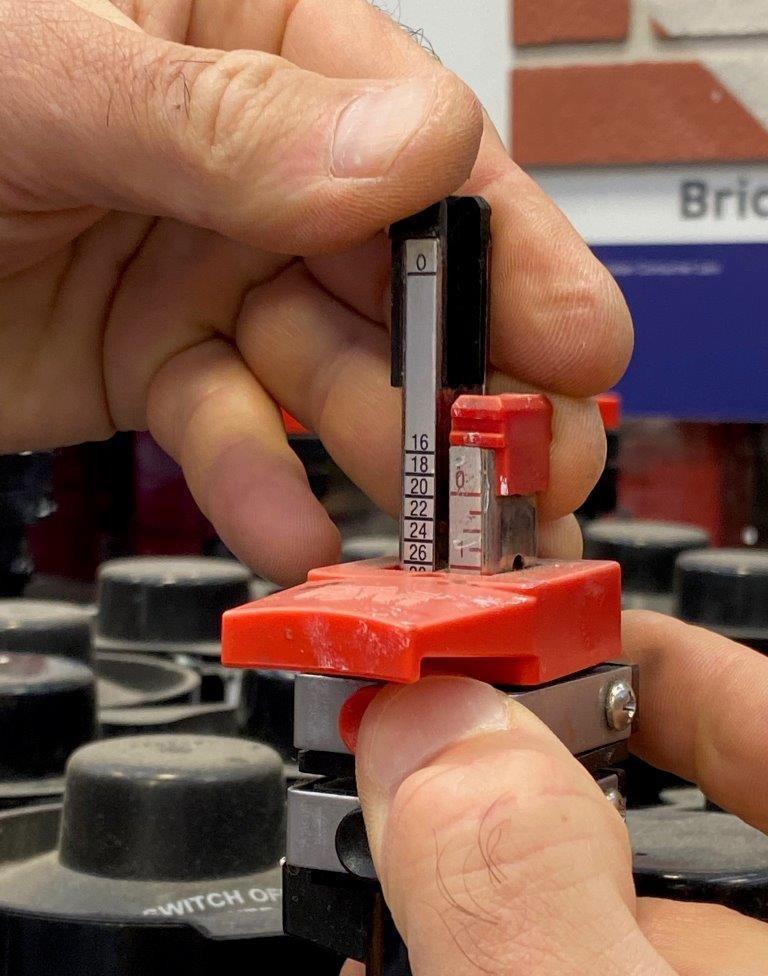
Setting the gauge
Each tint canister has two dispensing gauges.
The black gauge can dispense from 16N to 2Y in steps of two.
The red gauge can dispense from .25N to 16N in steps of .25.
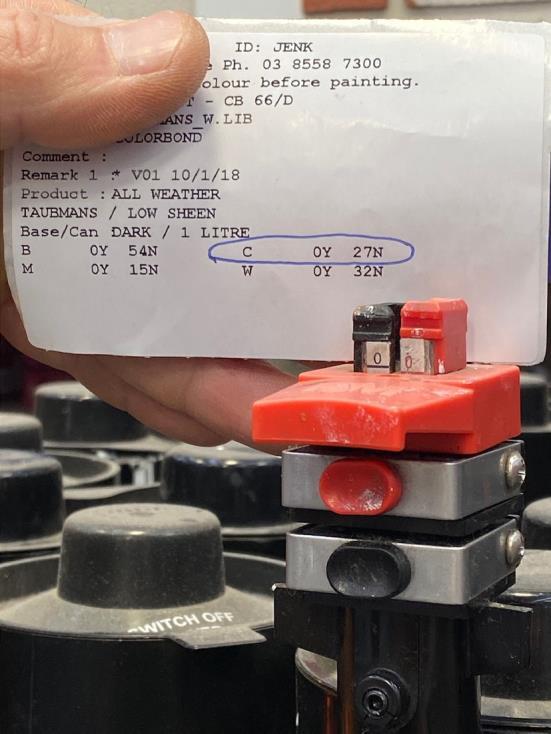
Example of formula
C 0Y 27N is dispensed by a combination of:
Black gauge 26N + Red gauge 1N = 27N
Manual tint machine instructions
Push black button and lift black gauge to 26. Release black button.
The black gauge can dispense from 16N to 2Y in steps of two.
Push red button and lift to 1N. Release red button.
The red gauge can dispense from .25N to 16N in steps of .25.
Total set for dispense is now 27N.
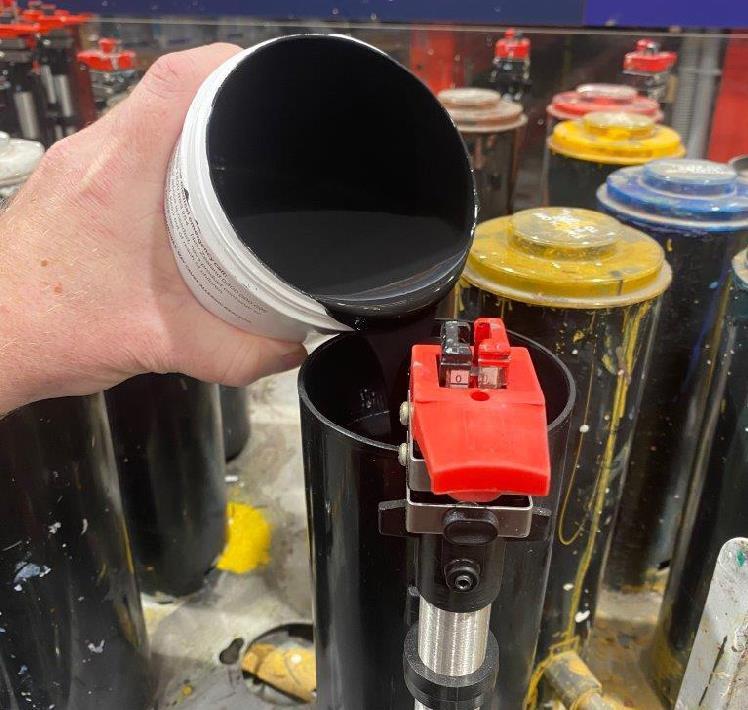
Manual tint machine maintenance
Manual tint machine maintenance
Step 1
Fill canisters.
• Stir colourant for 2 minutes before filling canister.
• Double check correct colourant is going into correct canister.
• Do not fill up to the top of the canister. Leave a 2cm gap.
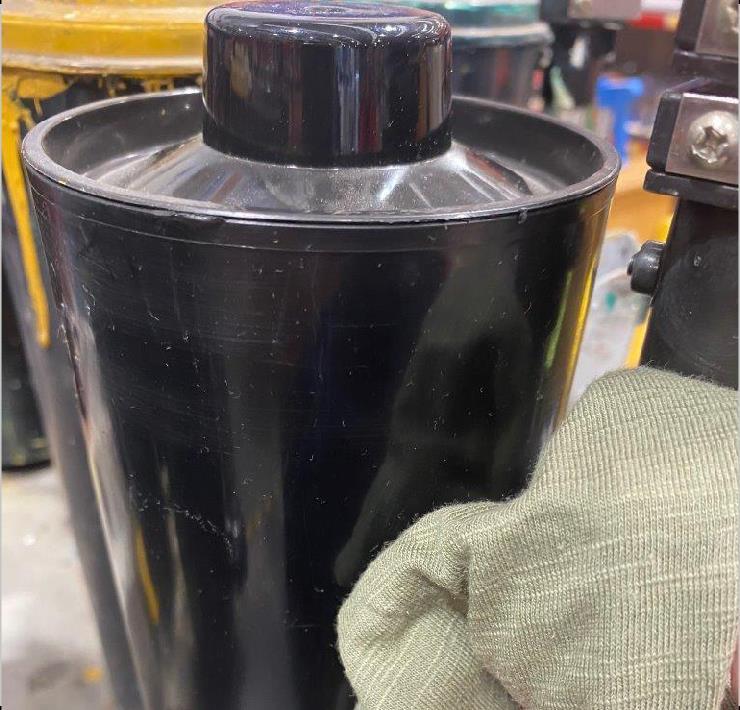
Step 2
Wipe down stand, canisters and pumps with moistened cloth.
Step 3
Check and clean nozzle outlets for dried colourants.
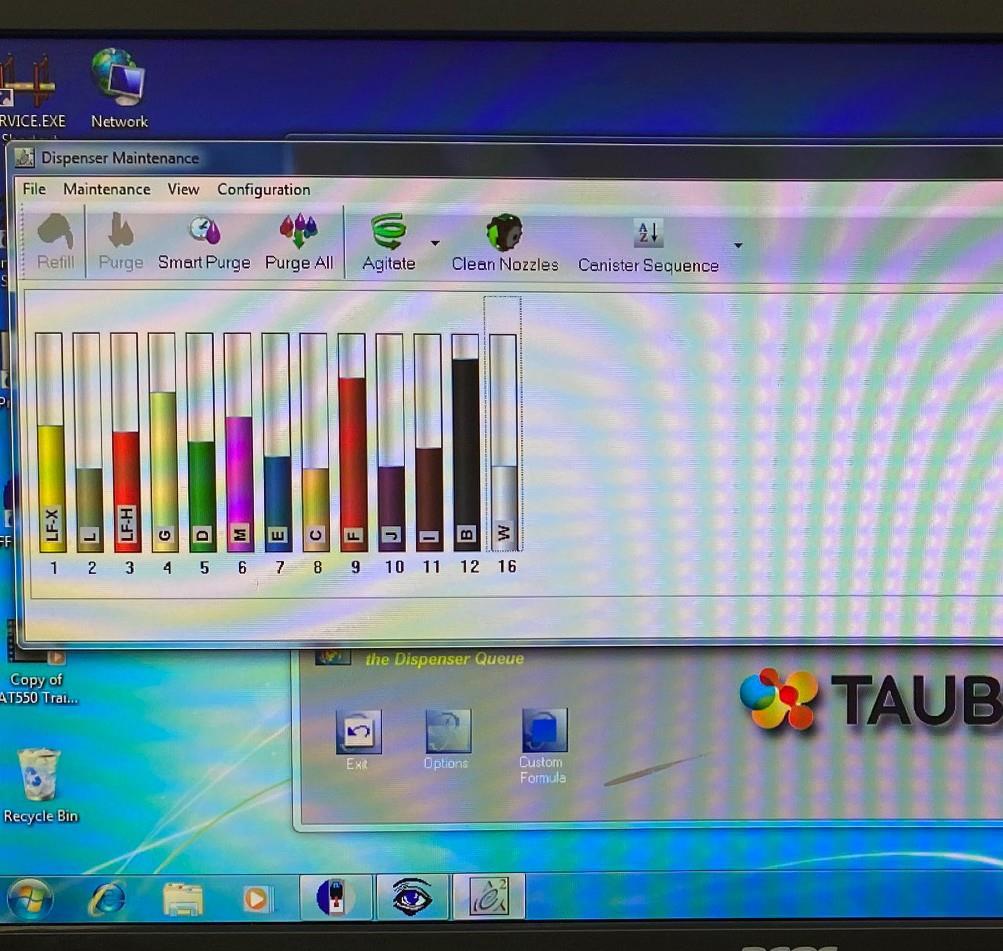
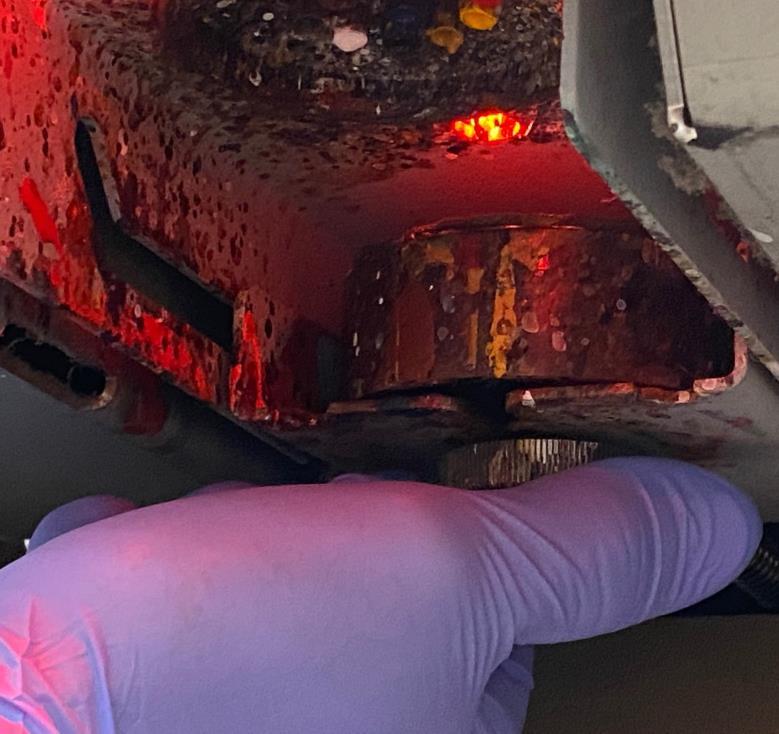
Automatic tint machine maintenance instructions
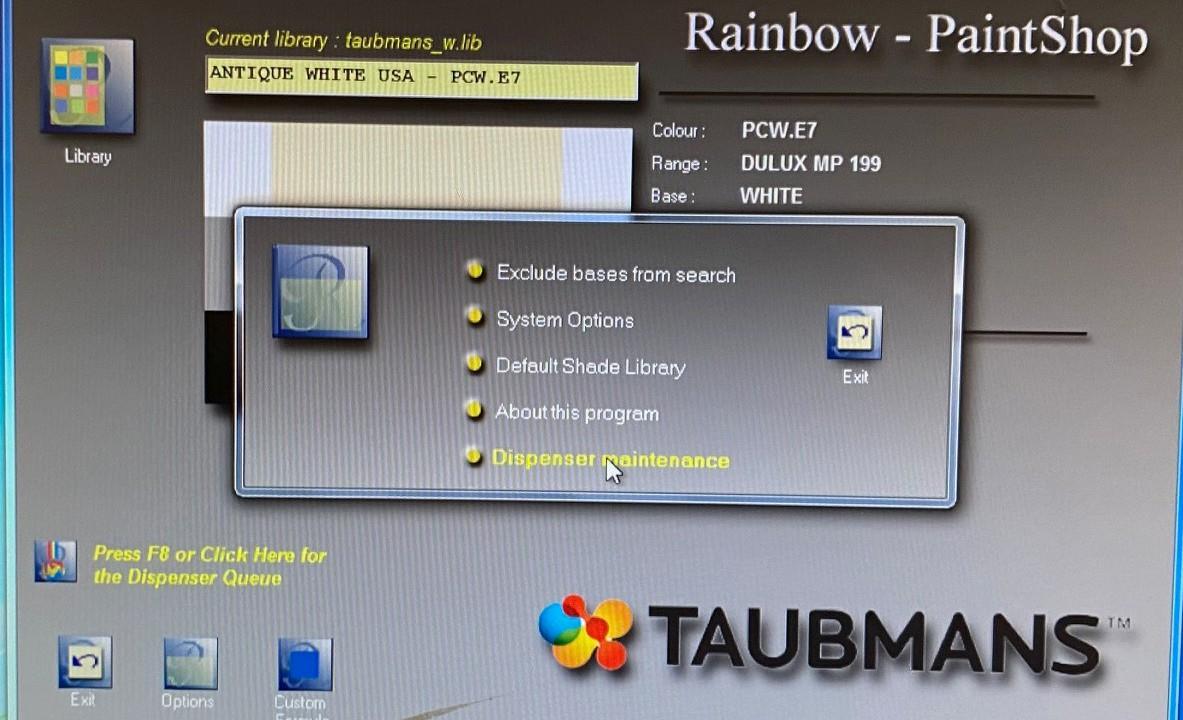
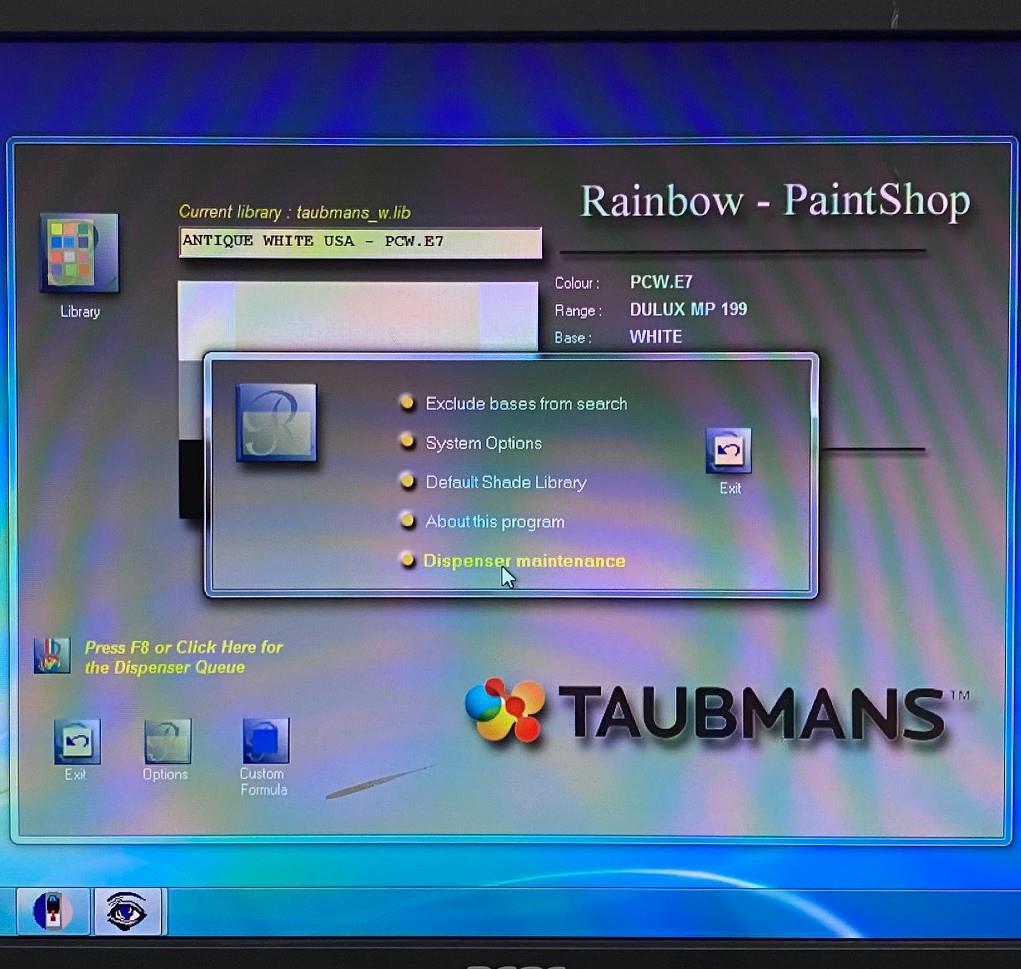
Automatic tint machine instructions
Step 1
Select ‘Options’.
Step 2
Select ‘Dispenser maintenance’.
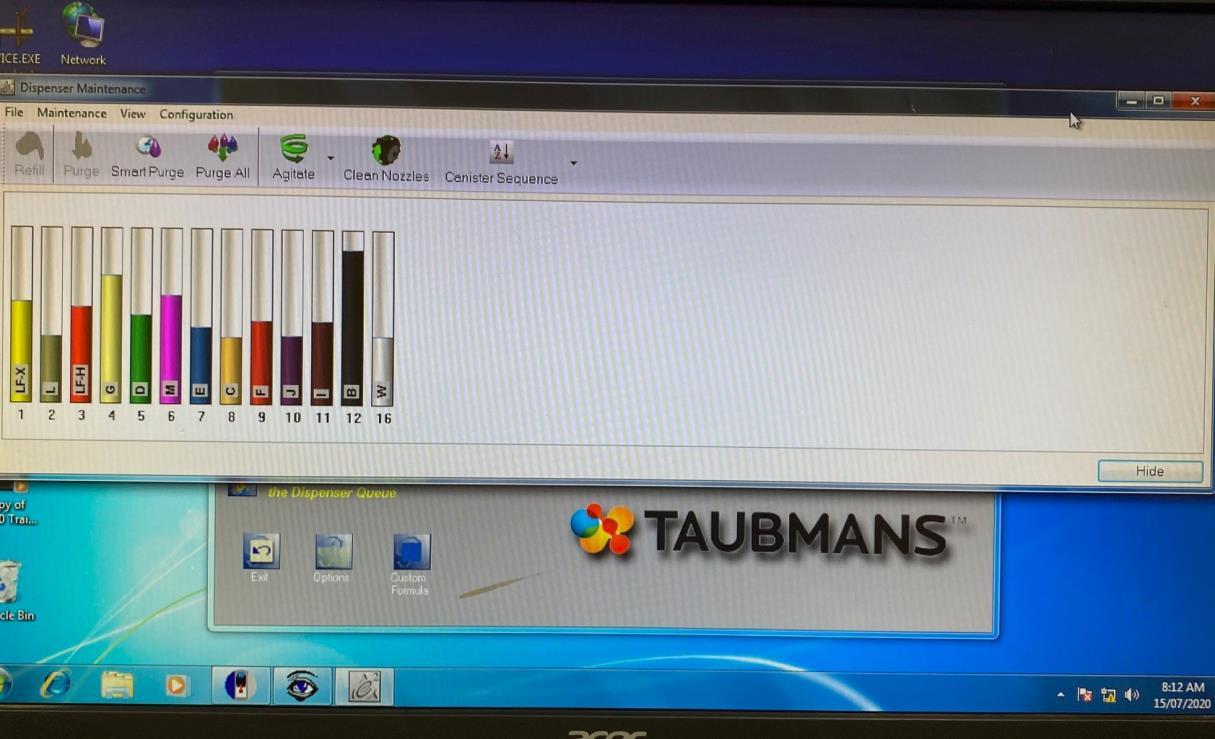
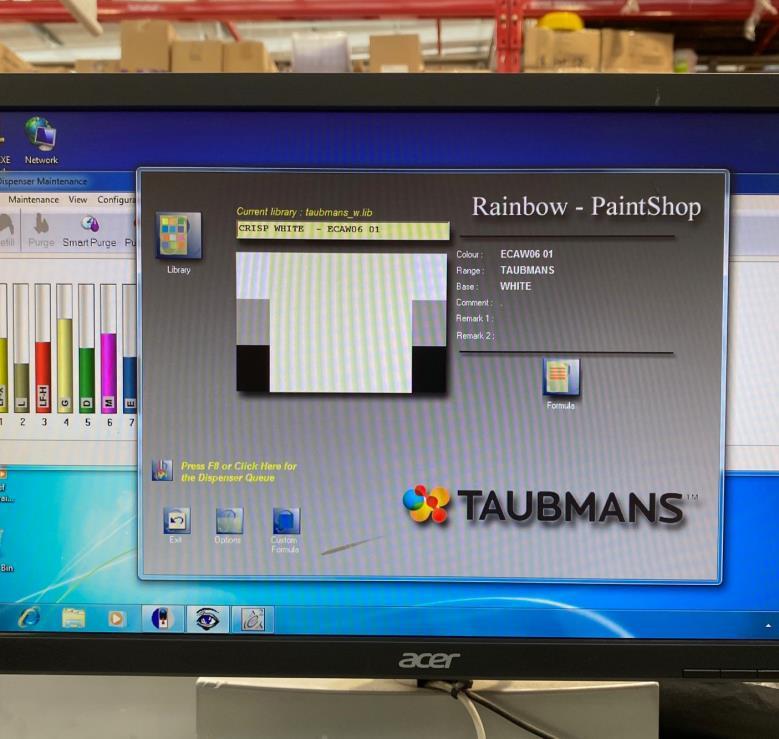
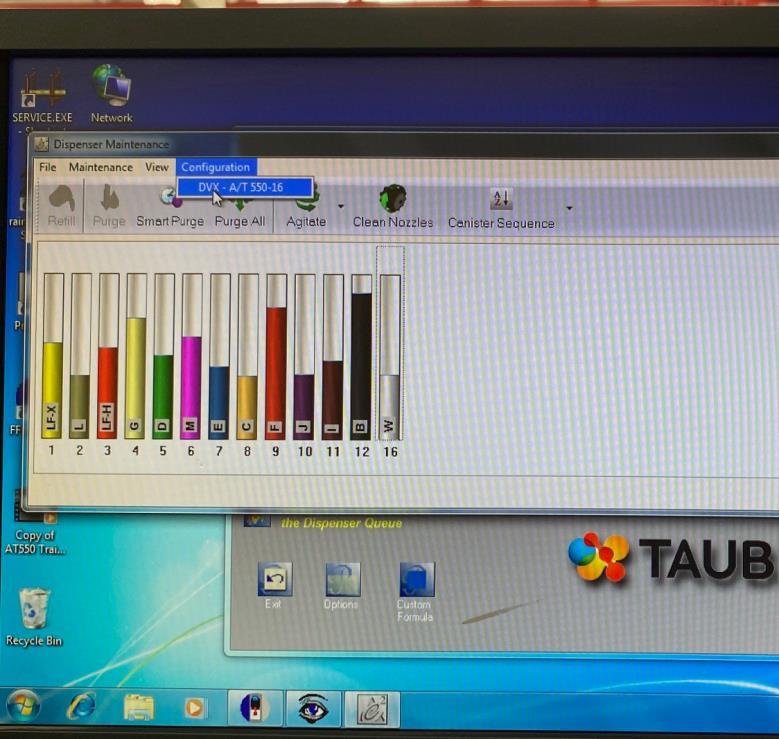
Automatic tint machine instructions
Step 3
Select ‘Dispenser maintenance’ window to bring to the front.
Step 4
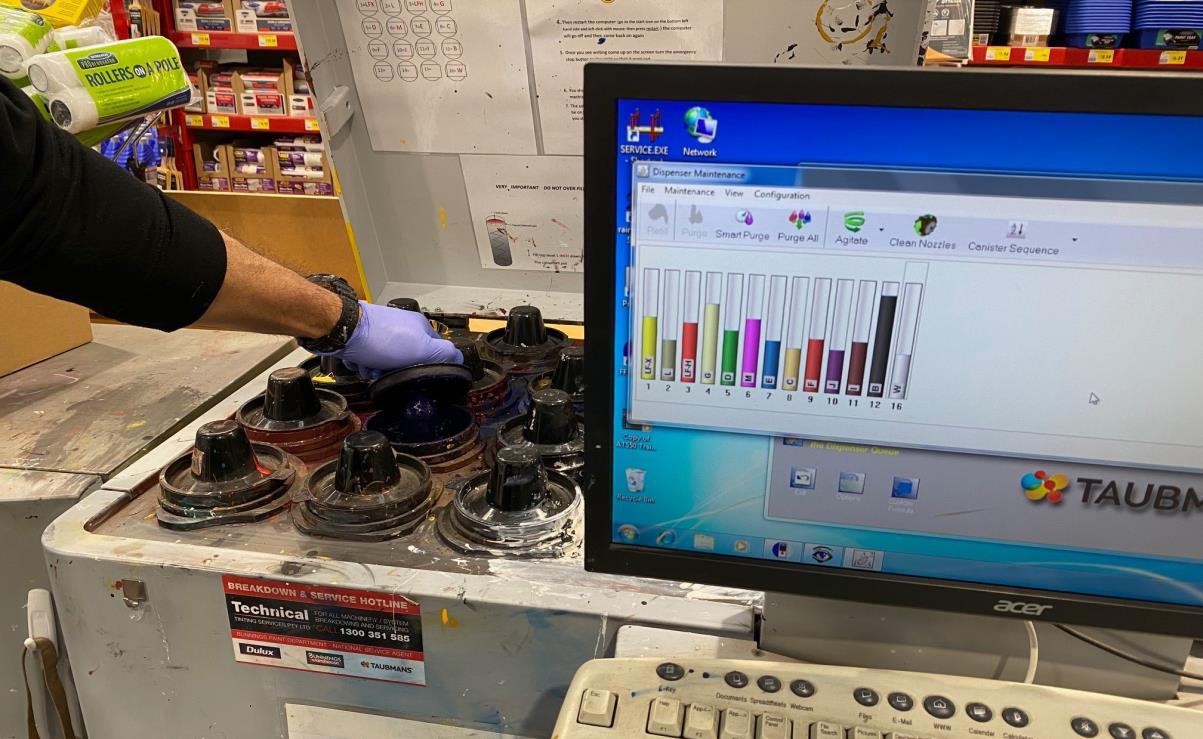
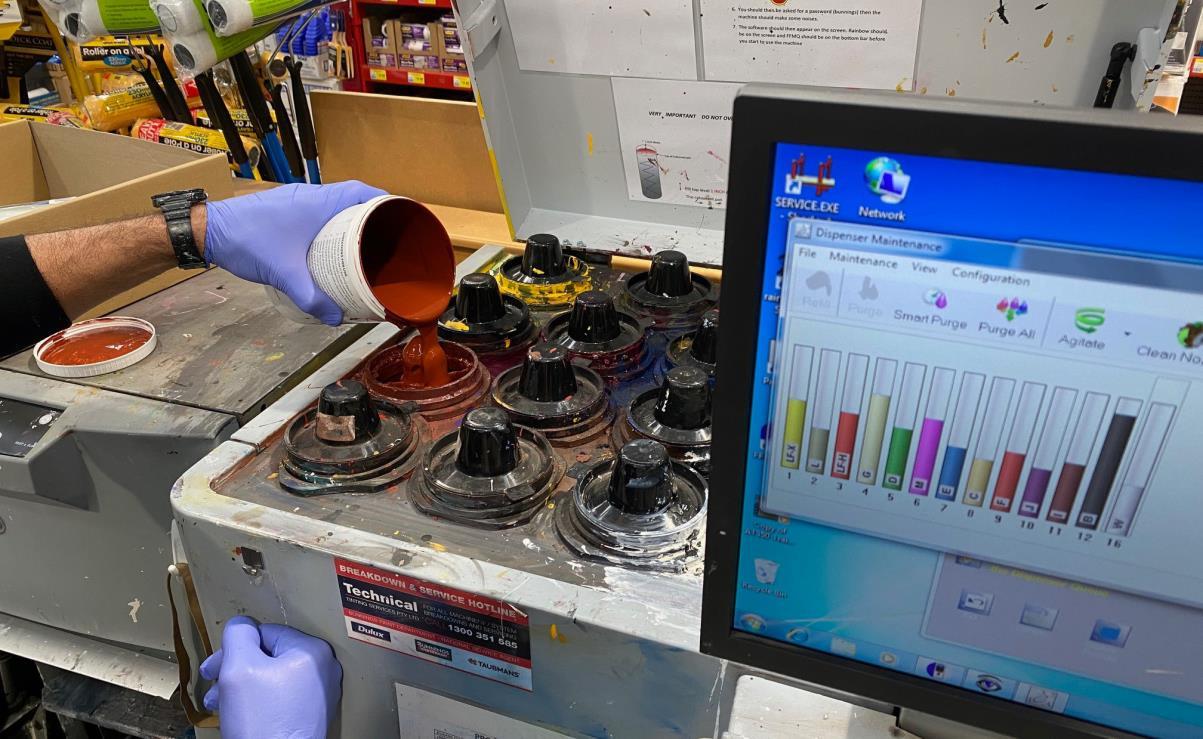
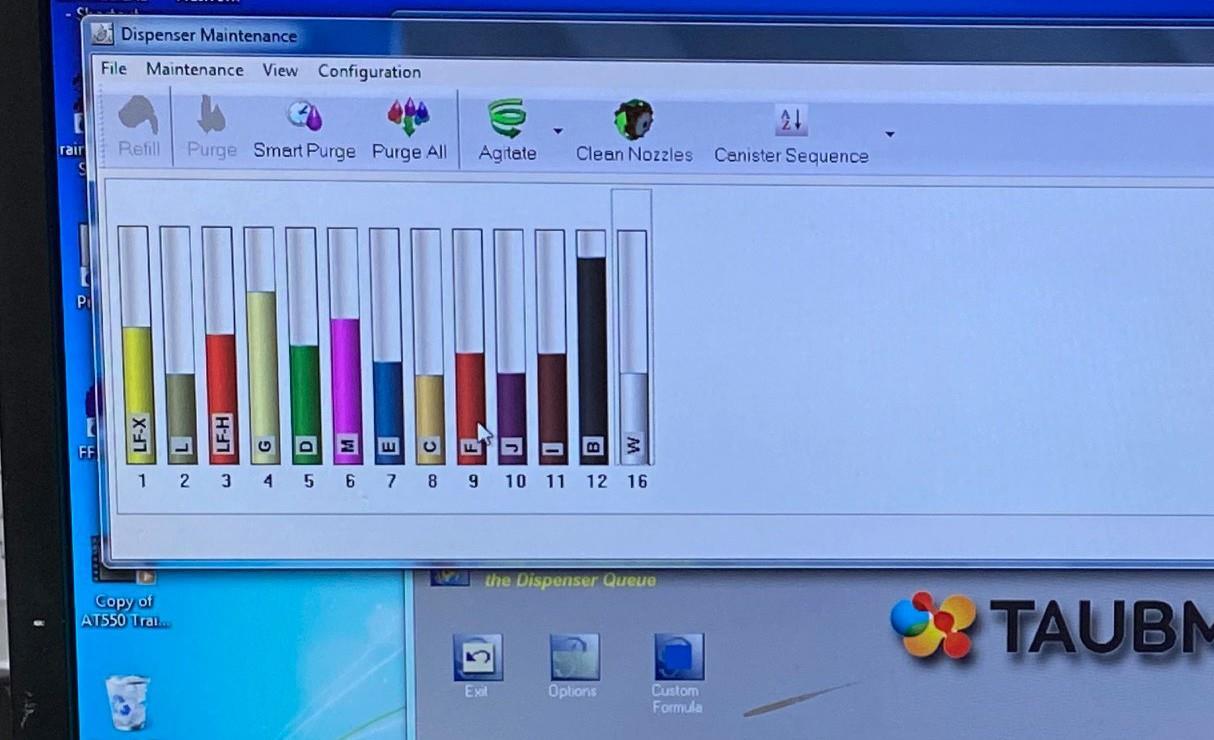
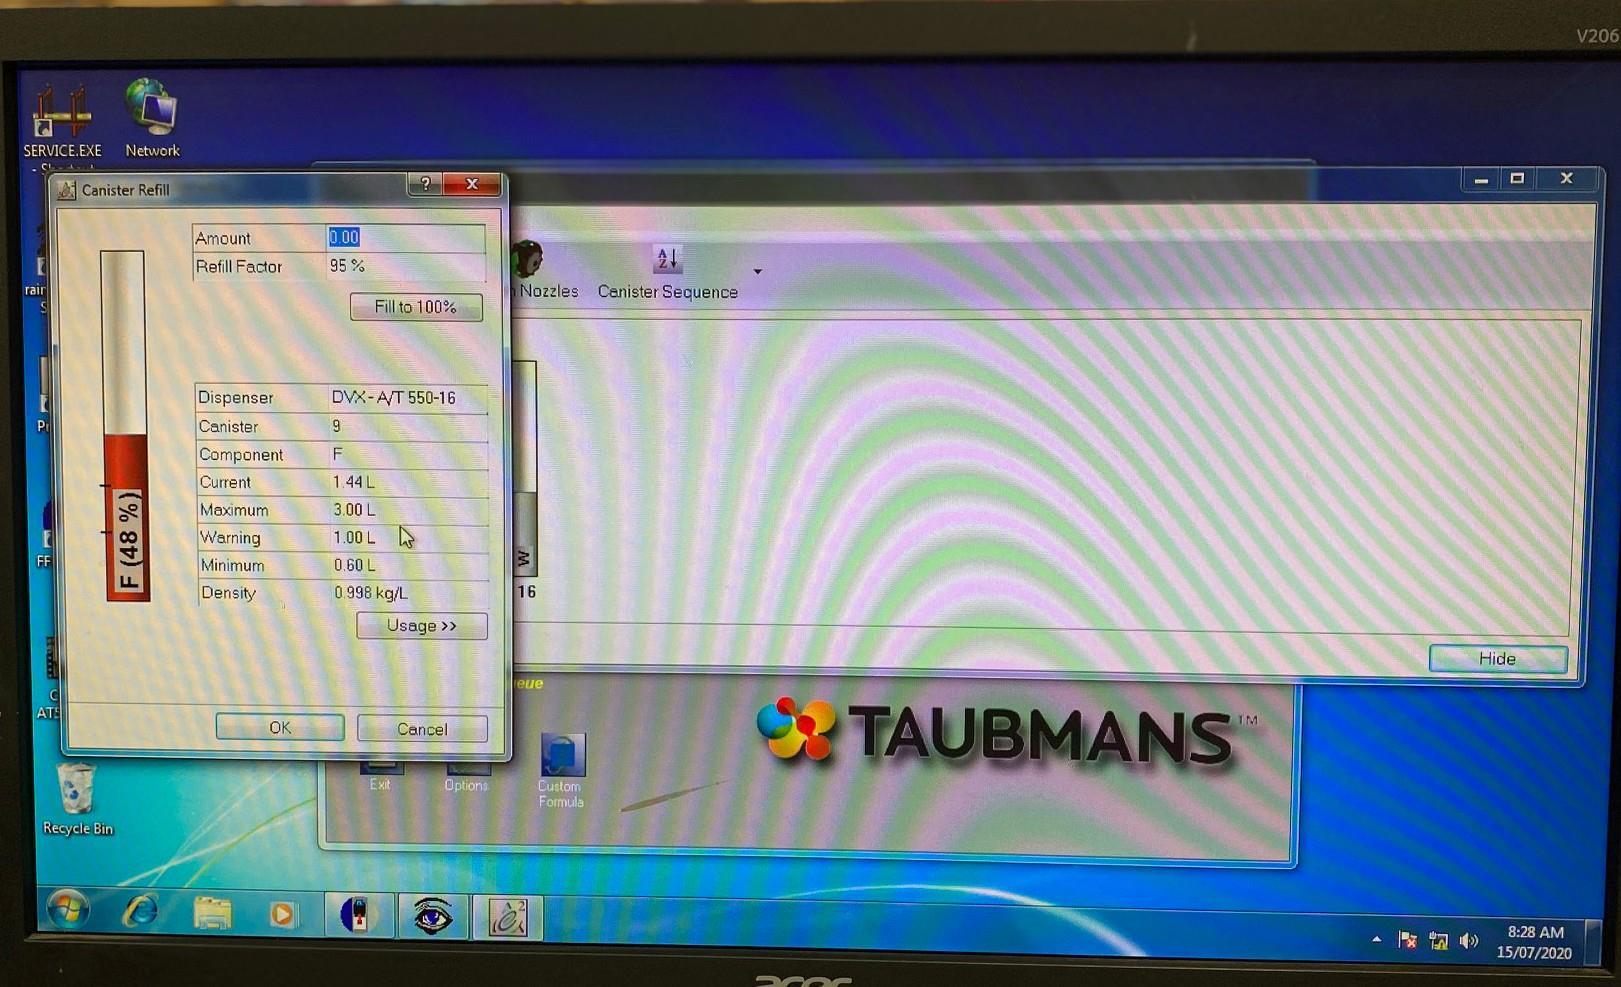
Check tint levels in canisters. Anything under half full should be filled.
Automatic tint machine instructions
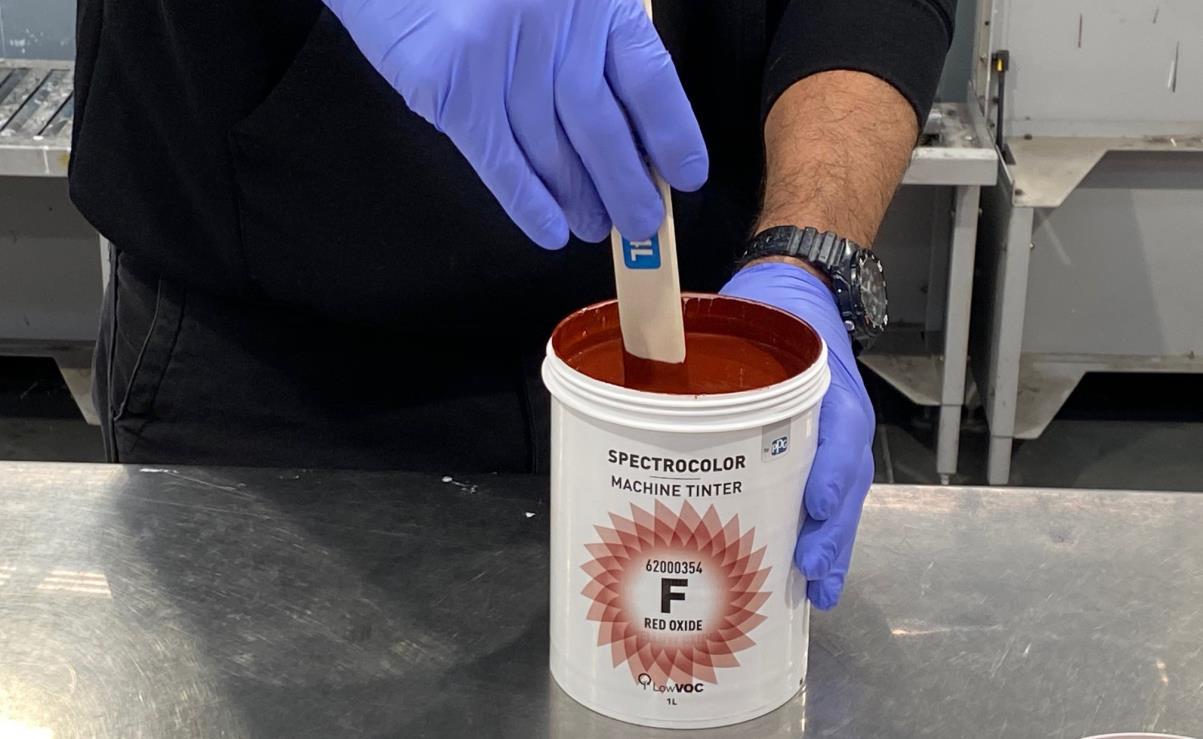
Stir tint before filling canister.
Fill up to 25mm from the top.
Step 5
Step 6
Automatic tint machine instructions
Step 7
Select ‘Tint’ and add.
Step 8
1. Enter amount added e.g. 1litre then select ‘OK’.
2. Repeat for all and then push exit.
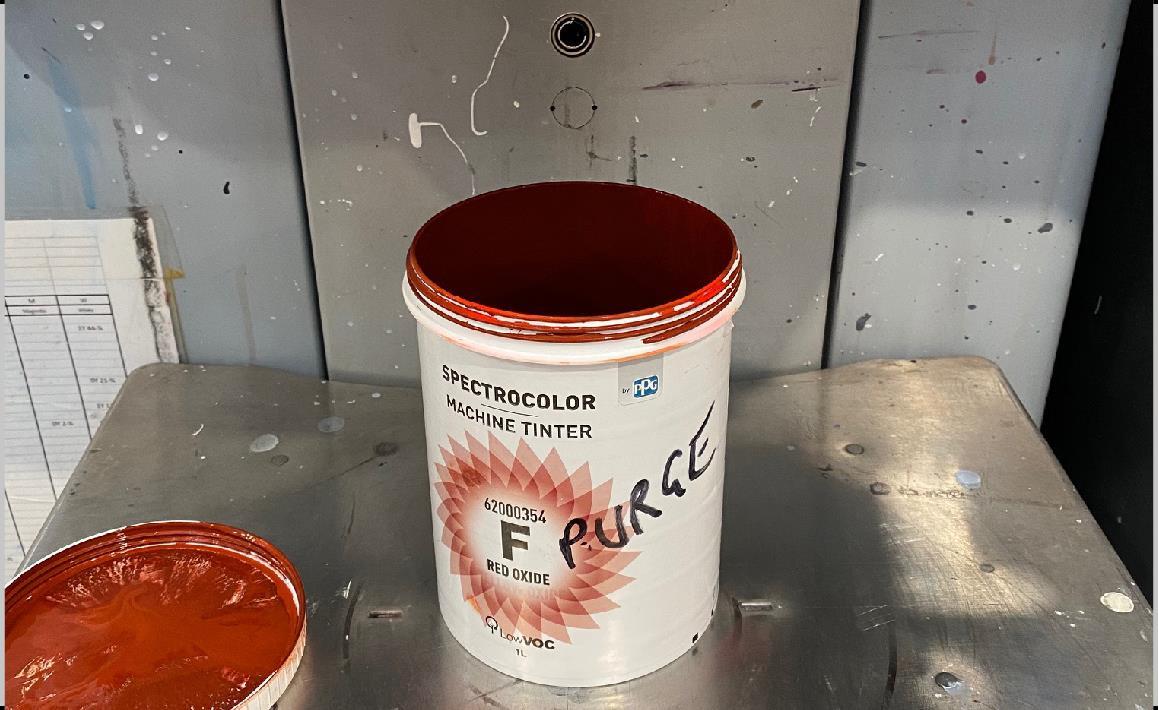
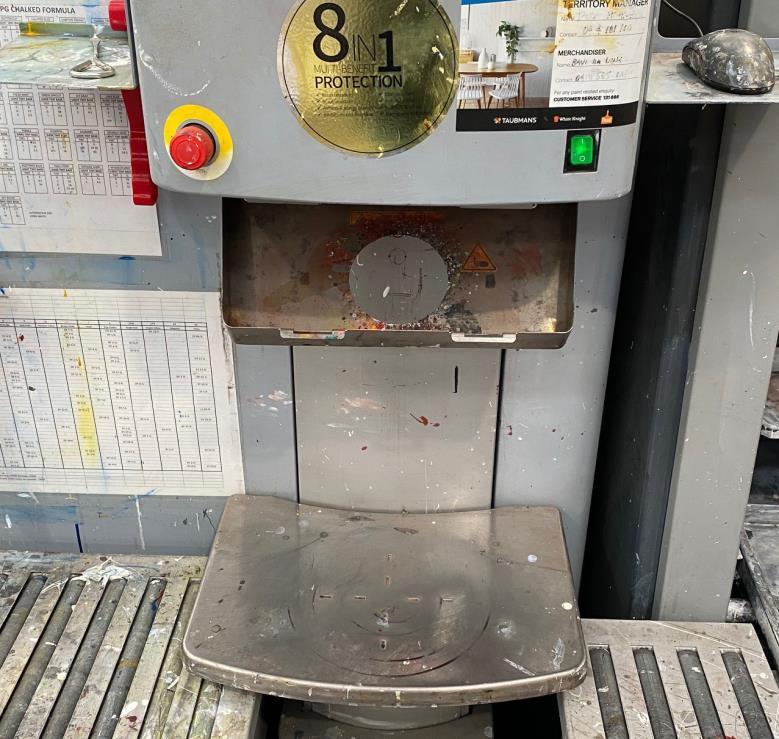
Purging Sponge clean
Automatic tint machine maintenance: Purging
Step 1
Place purge pot onto platform.
Step 2 Select Options.
Automatic tint machine maintenance: Purging
Step 3
Select Dispenser Maintenance.
Step 4
1. Select Dispenser Maintenance screen to bring to front.
2. Select Purge all.
Step 5
Check tint is dispensing. Once complete remove purge pot. Finish
Automatic tint machine maintenance: Sponge clean
Step 1
Select Options.
Step 2
Select Dispense maintenance.
Step 3
Select Dispense maintenance window to bring to front.
Automatic tint machine maintenance: Sponge clean
Step 5
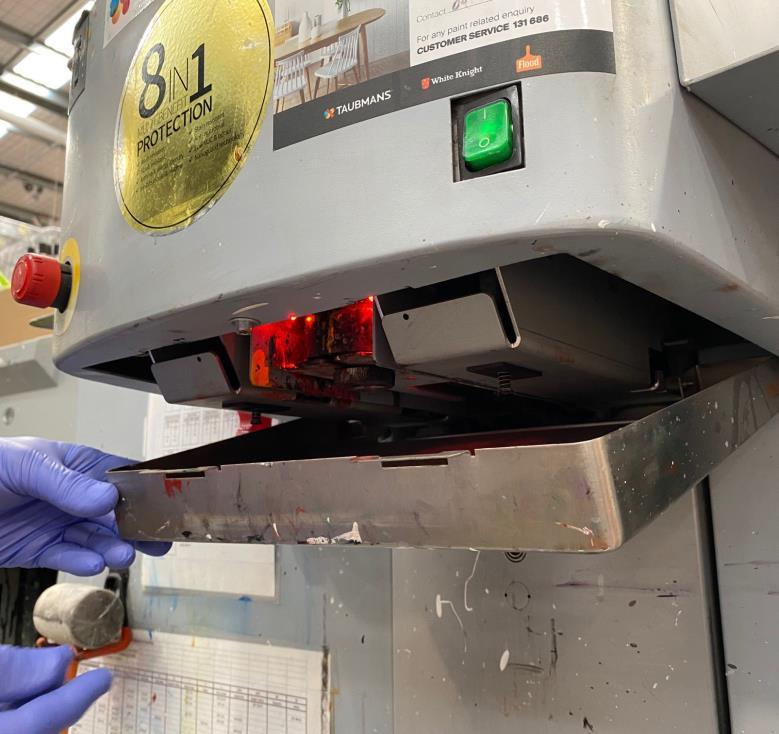
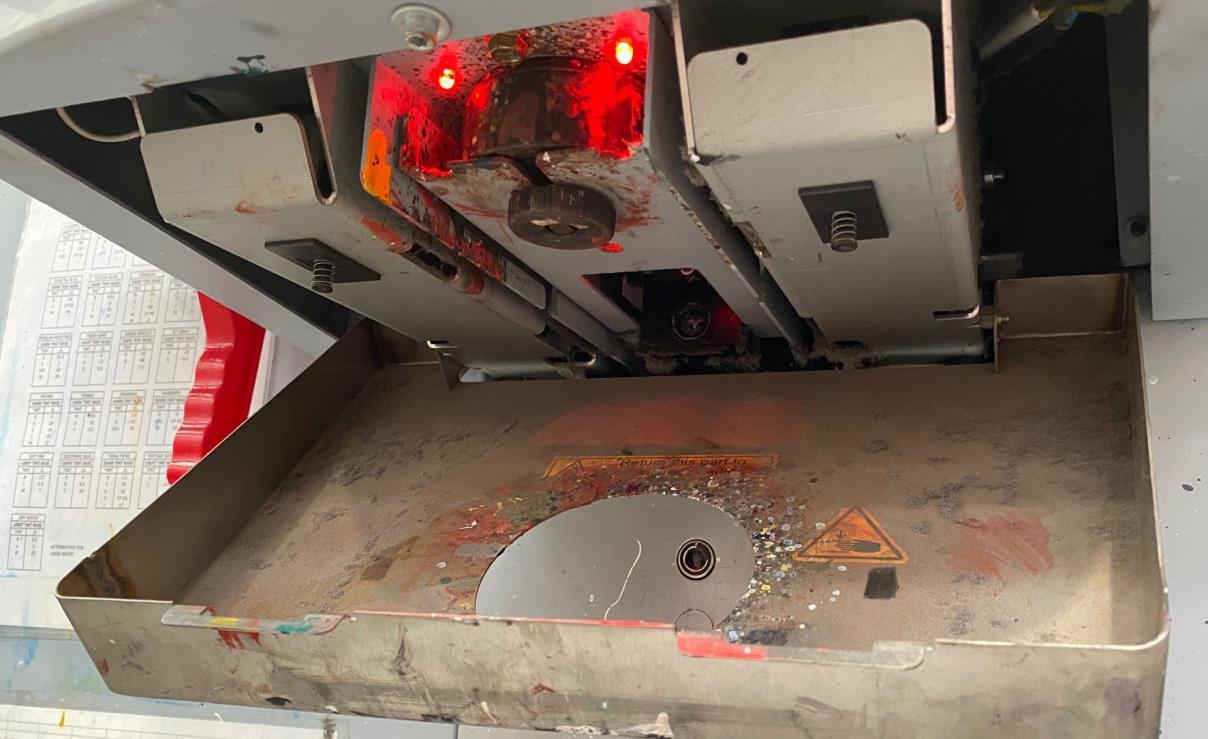
Drop platform to bottom.
Step 6
Pull cover plate forward and drop down front.
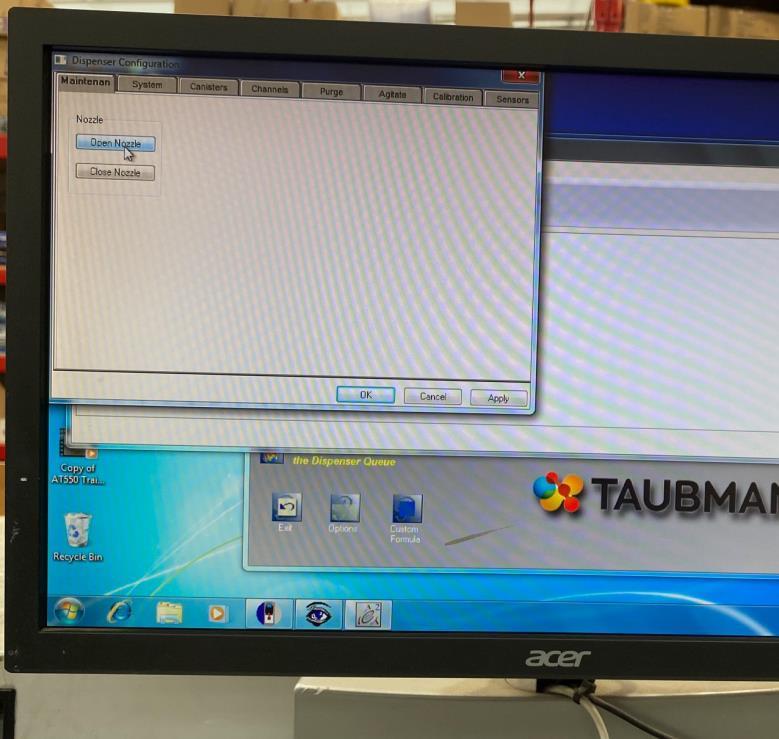
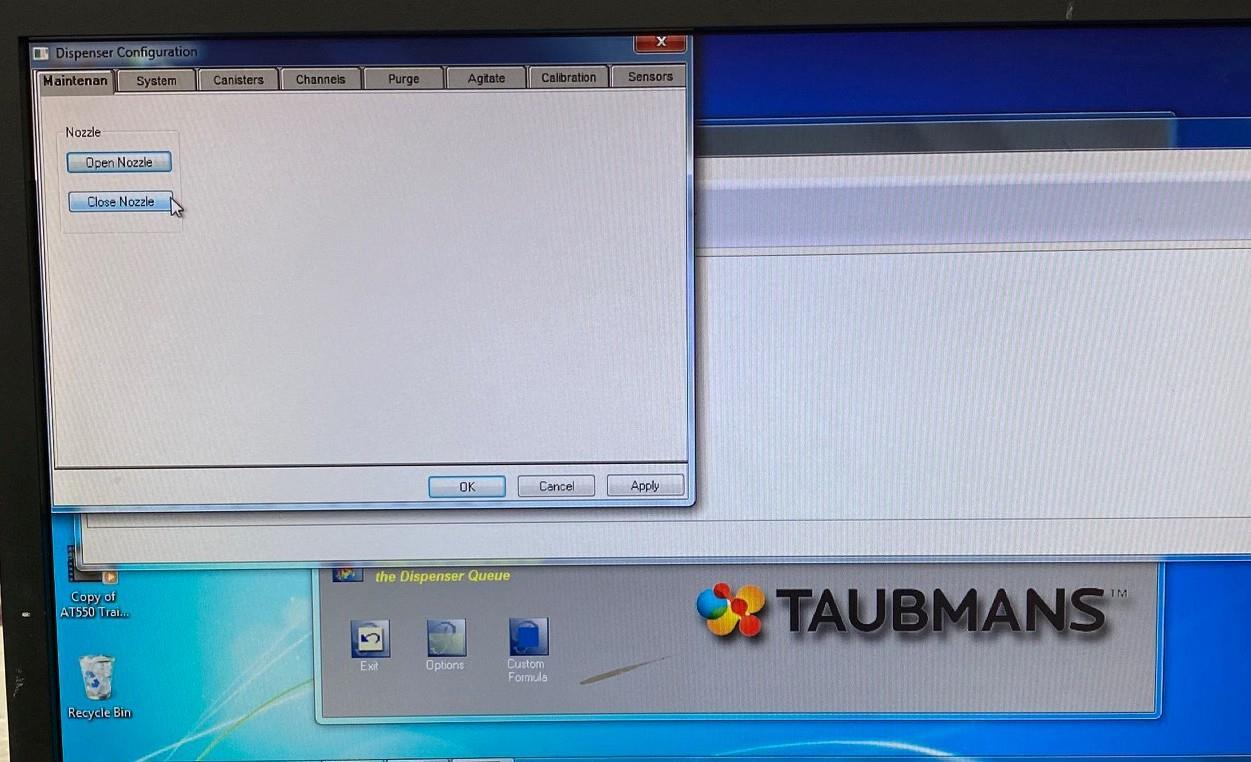
Select Configuration.
Select Machine details.
Automatic tint machine maintenance: Sponge clean
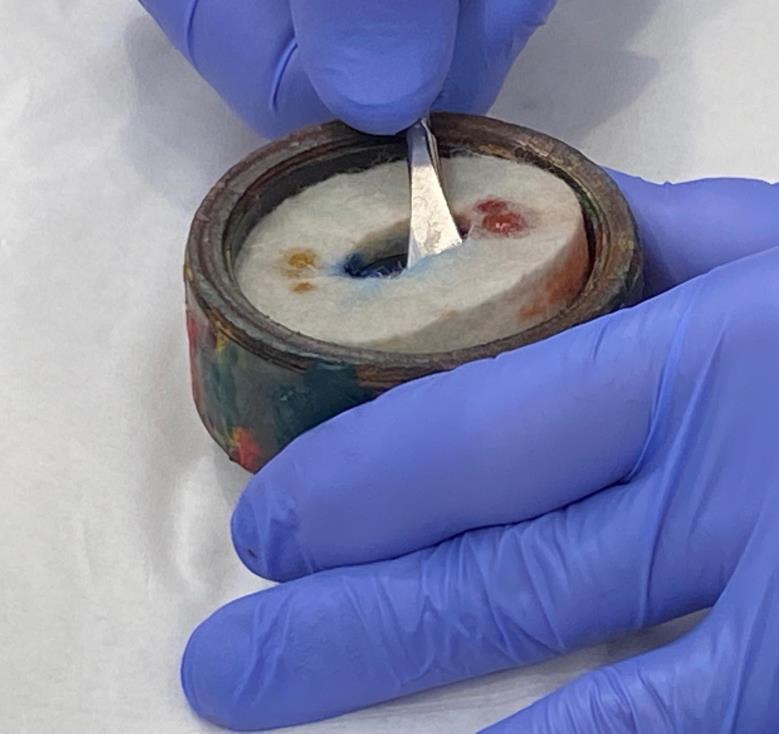
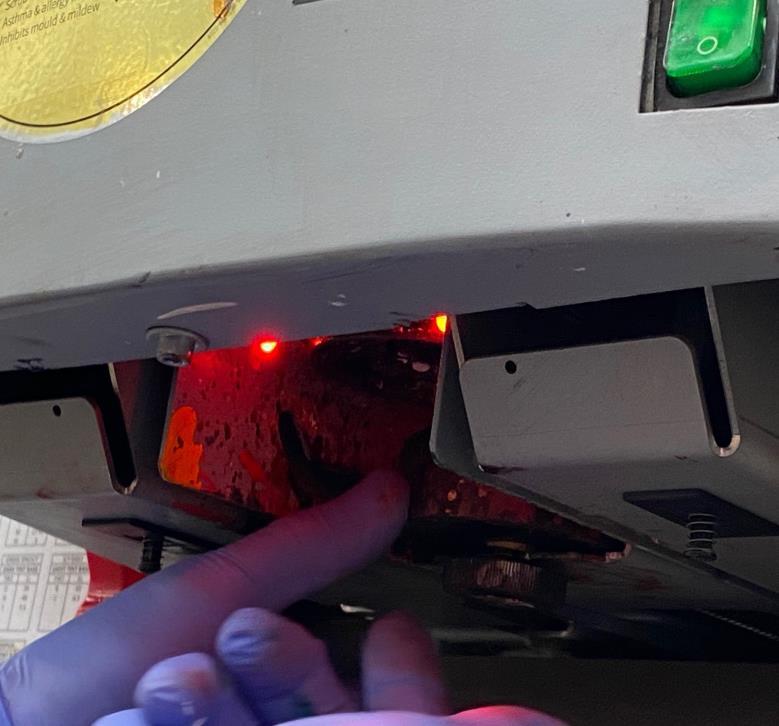
Step 7
Select Open nozzle.
Unscrew sponge holder and pull out.
Step 9 Remove sponge.
Step 8
Automatic tint machine maintenance: Sponge clean
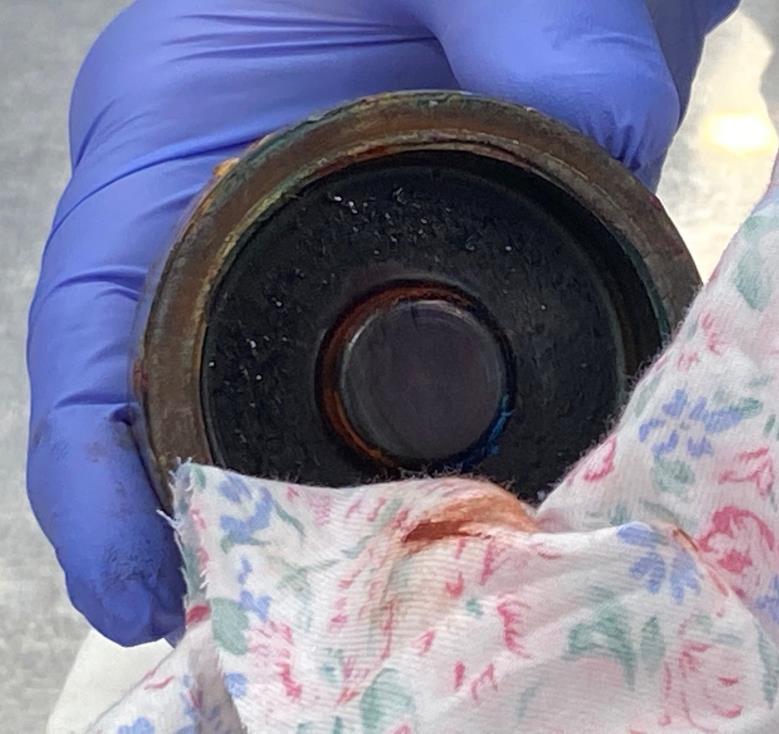
Step 10
Clean holder.
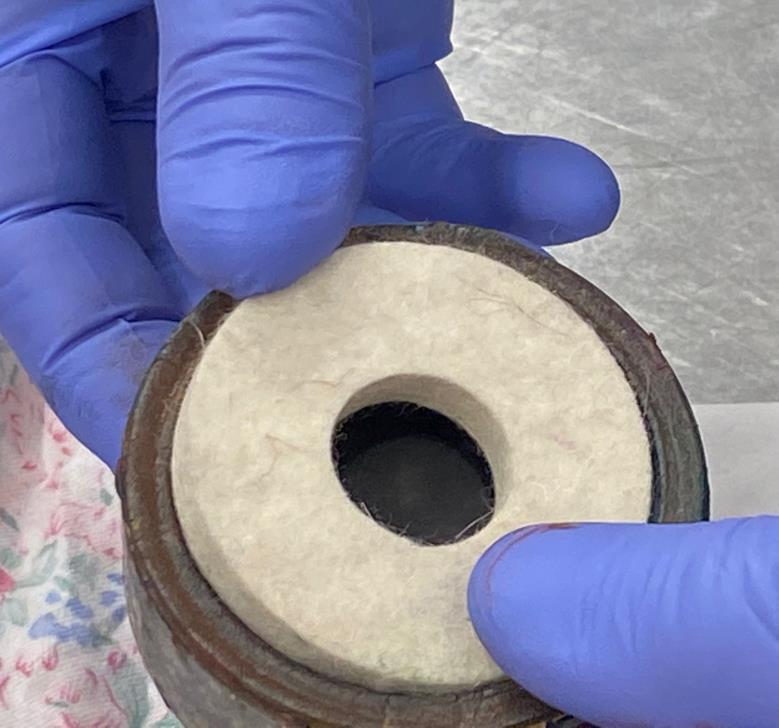
Step 11
Insert new sponge.
Step 12
Insert sponge holder and tighten.
Automatic tint machine maintenance: Sponge clean
Step 13
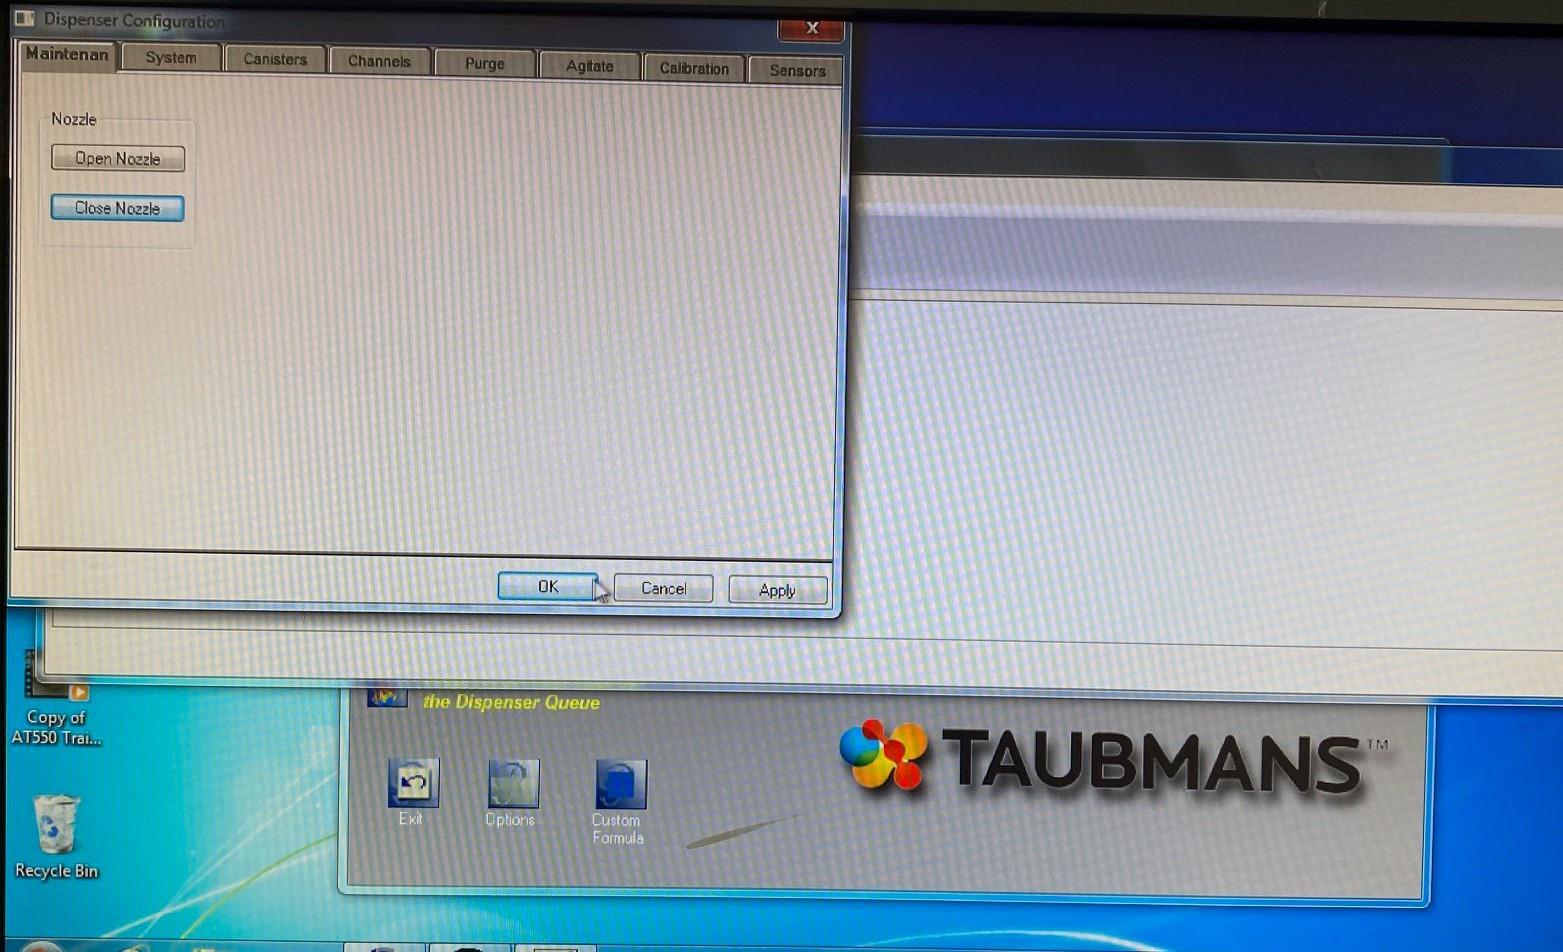
Select Close nozzle.
Step 14
Once nozzle has closed successfully select OK.
Automatic tint machine maintenance: Sponge clean
Step 15
Close cover plate.
Step 16
Select OK.
Paint mixer instructions
Paint mixer instructions
Step 1
Press and hold clamping button until can clamp has opened fully.
2
Open door by lifting handle.
Step
Paint mixer instructions
Step 3
Pull out can tray until it stops.
Step 4
Place can in the middle of tray and secure handle to can using the rubber band located on front of mixer.
Note Pictured unit is suitable for paint cans between 1L and 10L. Plastic paint pails need a protective spacer placed on top of the pail to stop damage to the pail when mixing. Spacers stored on the top of the mixers.
Paint mixer instructions
Push middle button to start mixing.
Note if can shakes loose press red emergency stop button.
Step 5
1.Push tray in until tray slots into place.
2. Close door.
Step 6
Refer to bottom note
Paint mixer instructions
Step 7
Once mixer stops, push and hold clamp button until can clamp has fully opened.
1.Open door and pull out can tray.
2. Remove rubber band.
Step 8
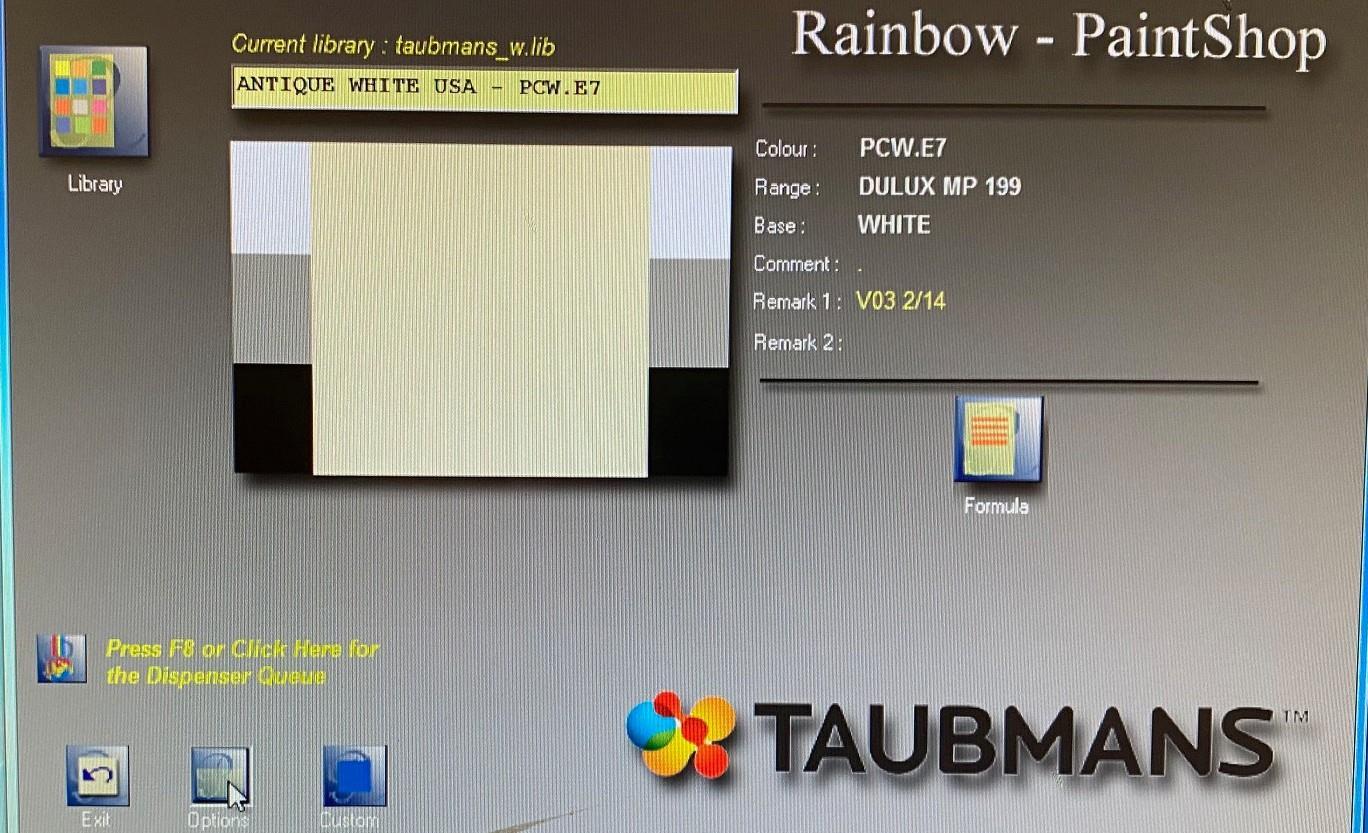
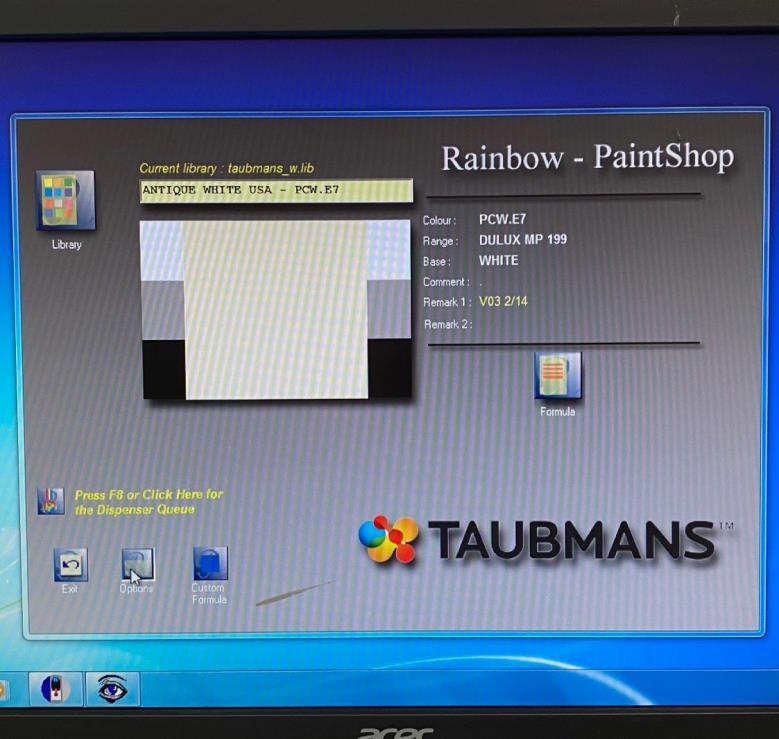
How to Tint & Colour Match using the Auto Tint Machine
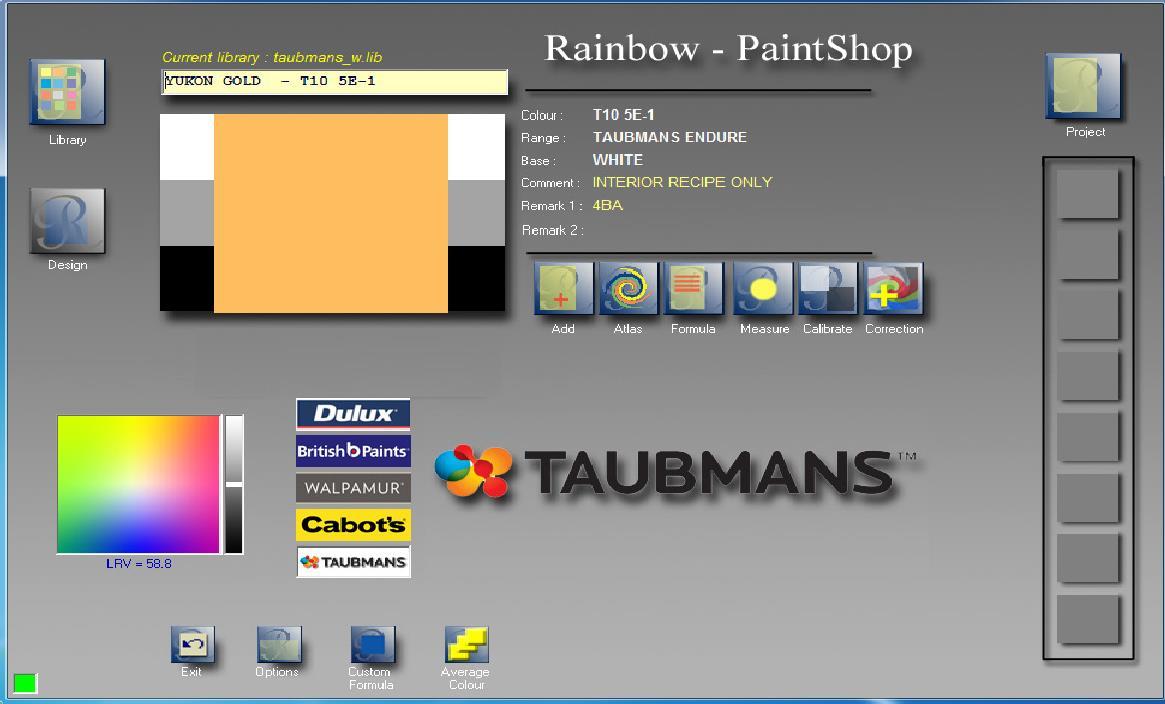
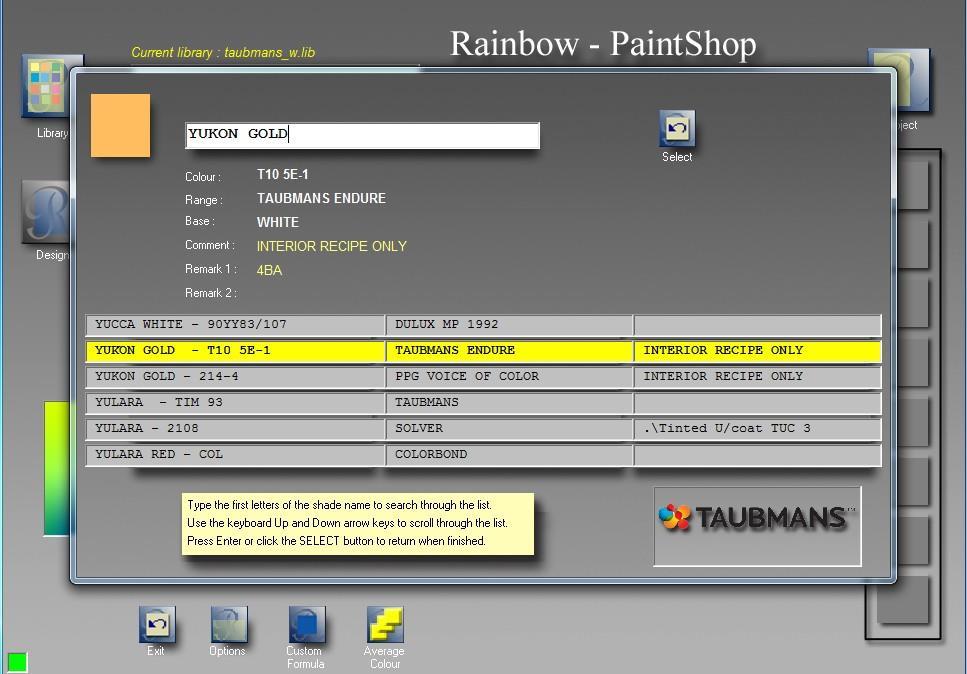
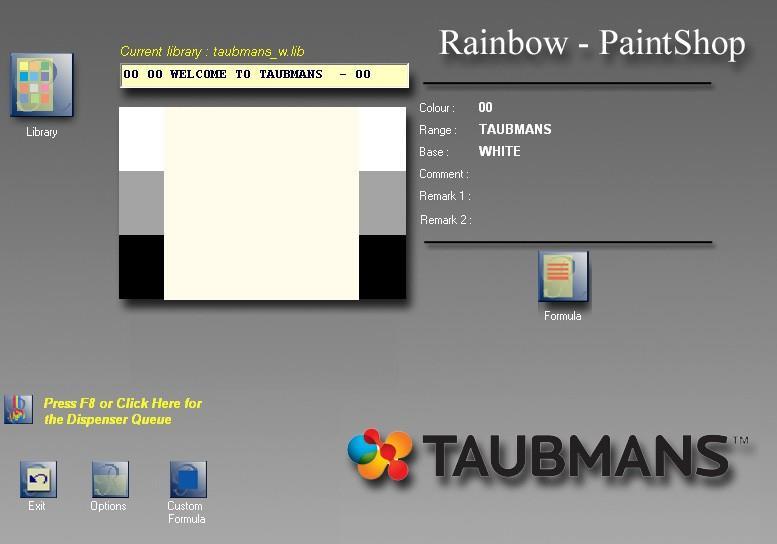
1. Click on brand of paint you will be tinting to (Taubmans for Taubmans and White Knight products)
2. Type over colour name to insert new name
3. As the colour name is entered the library will automatically bring up colour names. If there is more than one colour with that name you will have to scroll up and down to choose the correct name (the selected colour is in yellow)
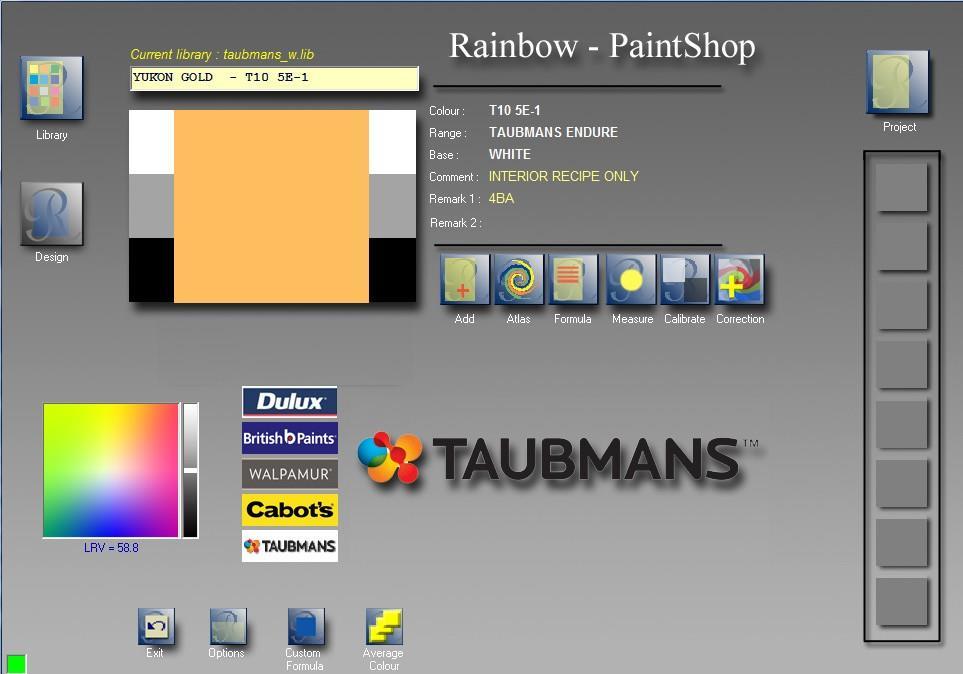
4. Once you have found the correct colour press select
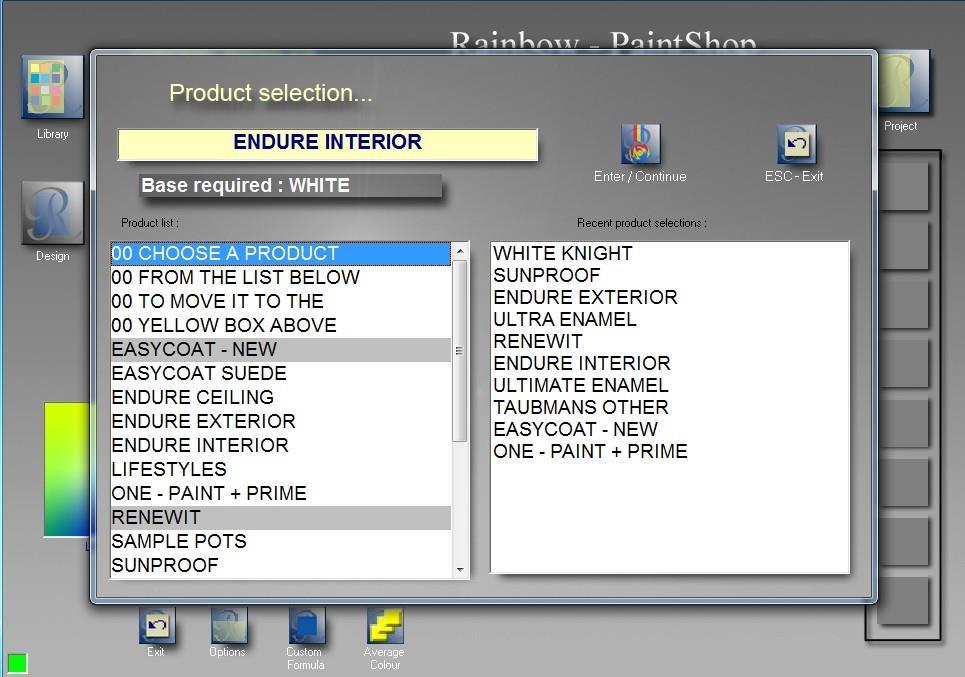
5. Click on formula
6. Scroll and select the product you will be tinting into
7. Then click on enter
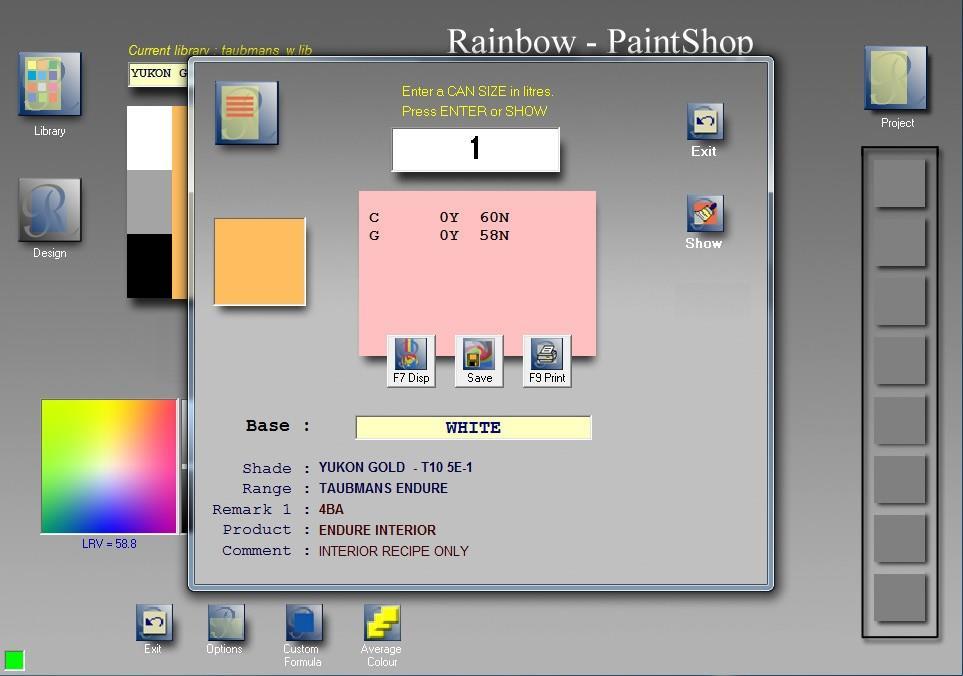
Adjust can size as required and click enter. Check you have the correct paint can base
Select F9 print 10. Click dispense
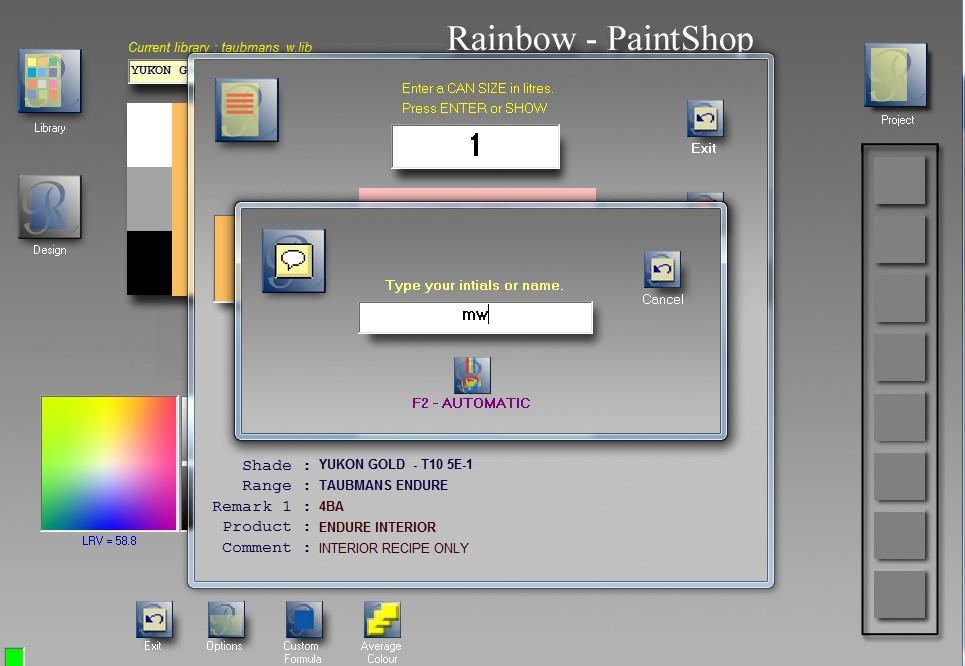
11. Enter your initials and click auto
12.Select and enter can quantity then press enter
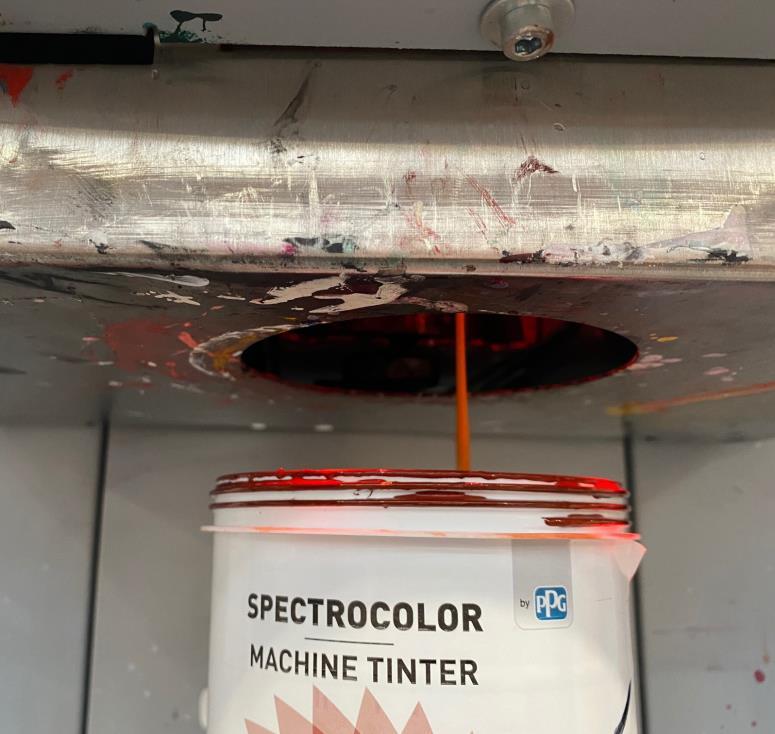
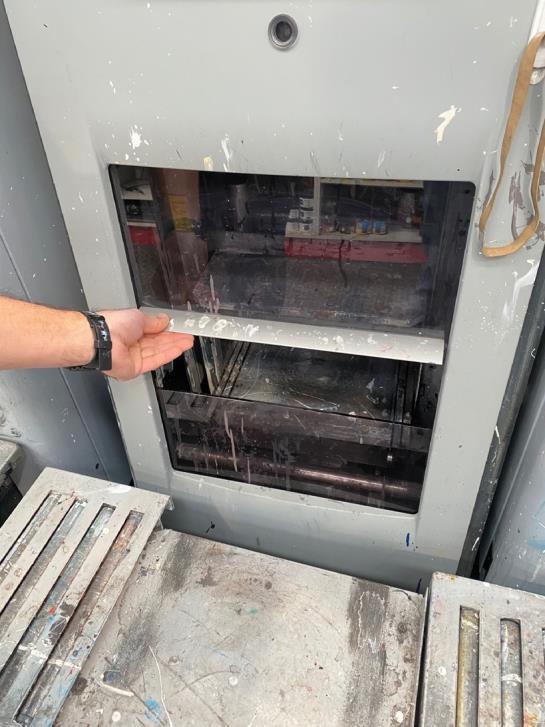
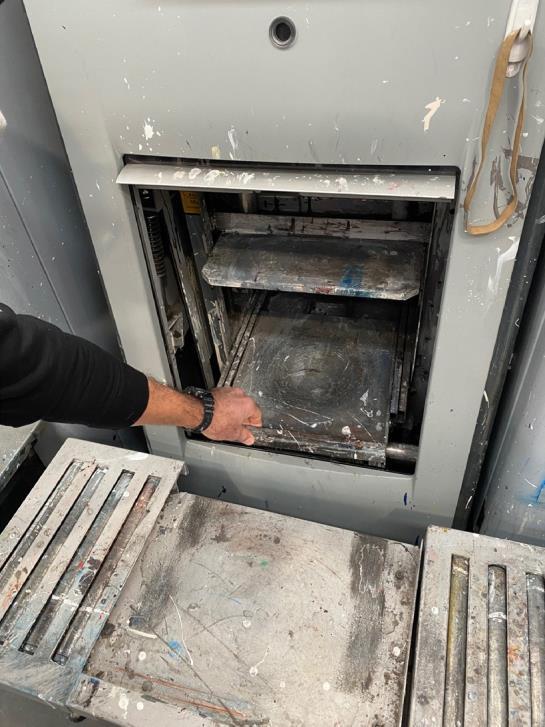
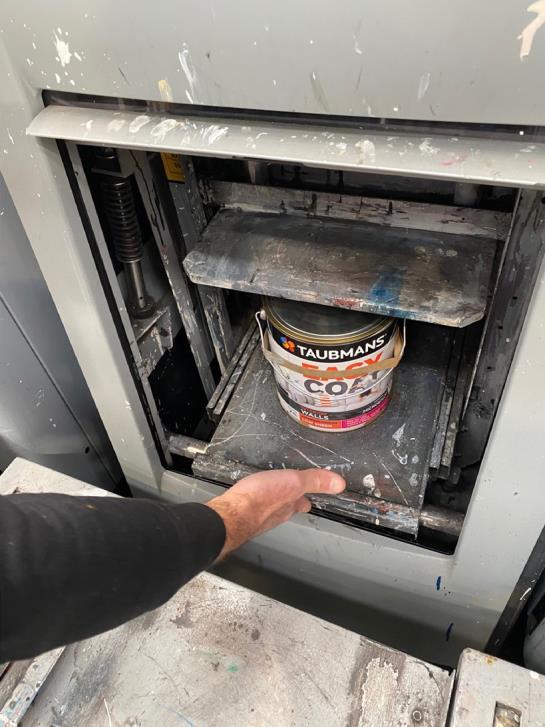
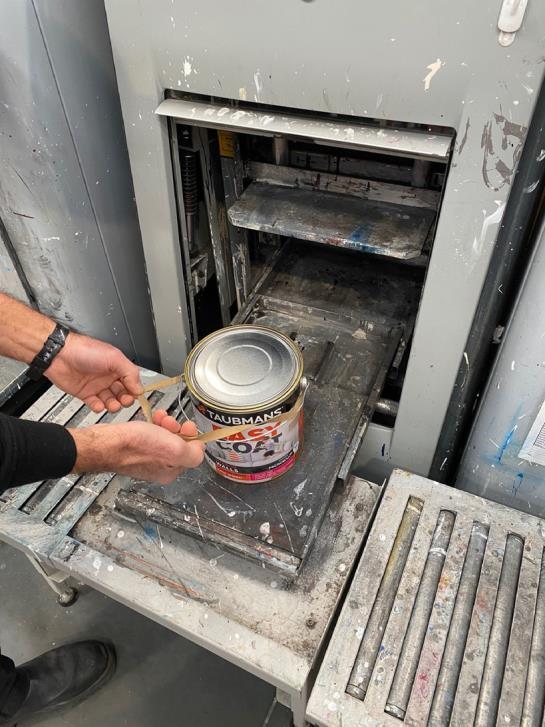
13.Go to auto dispenser (tint machine)
14. Adjust height on can table to fit can under dispenser
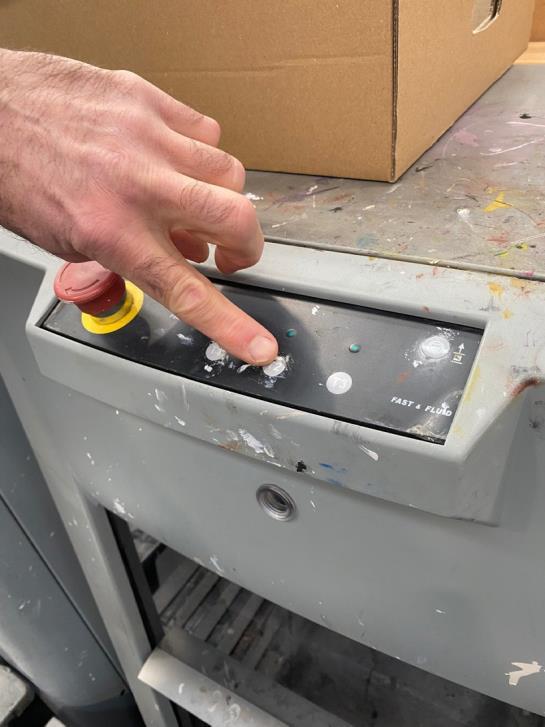
15. Hold down the button on left hand side of the dispenser while pushing either the up or down button on the right side of the machine
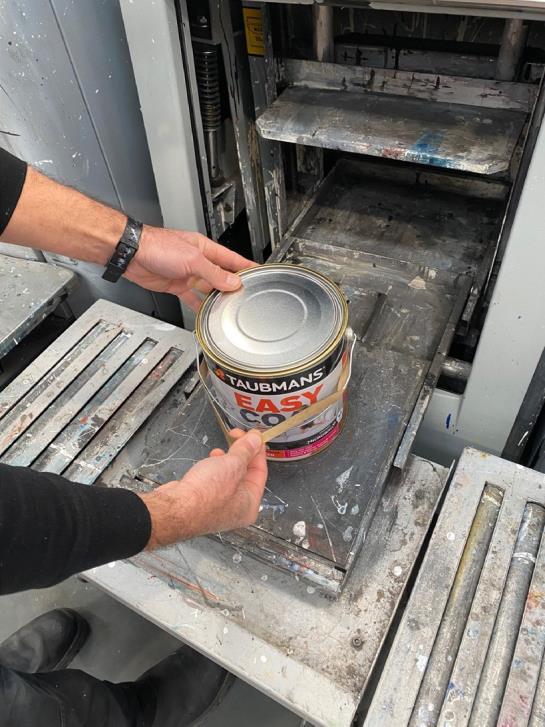
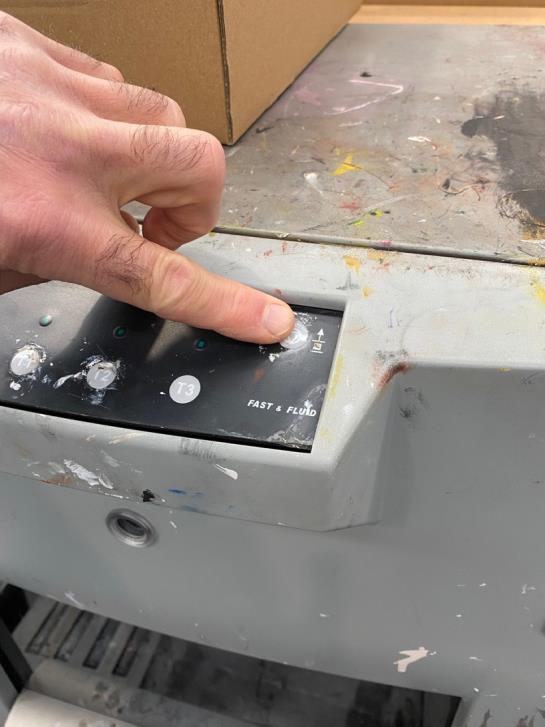
16. Lower the table to fit opened can on to table Align can under dispensing nozzle
17.Once can is on dispenser, lift can table until it automatically stops
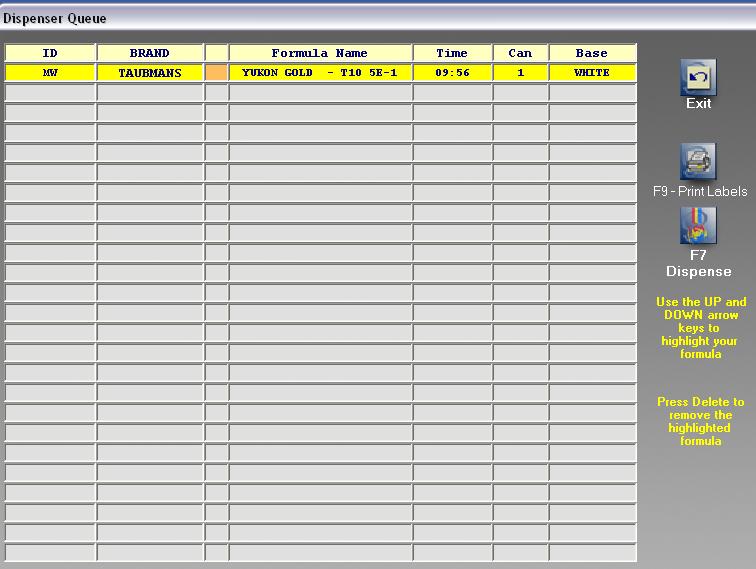
18. Click on auto dispenser queue
19. If there is more than one colour listed click on the one you require
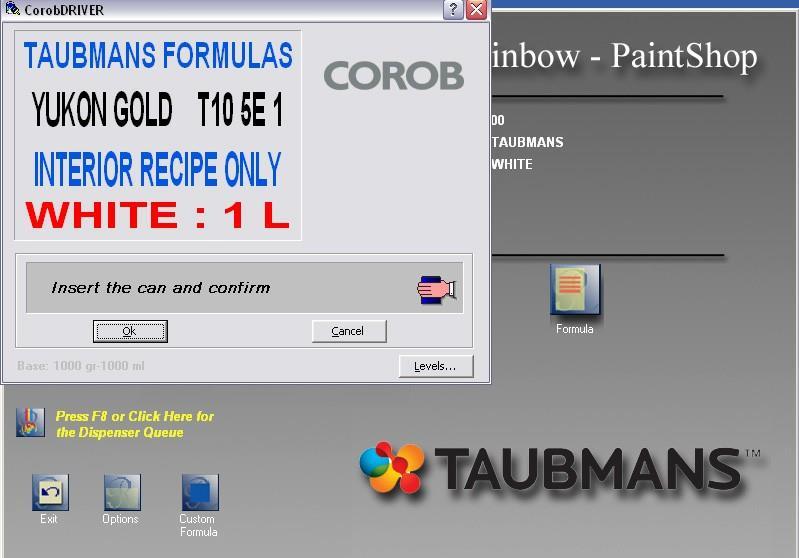
20. Once colour is highlighted in yellow click on F7 dispense or click on icon
21. Click OK or dispense
22. Once complete light grey Taubmans Formula screen should disappear. Tinting of paint complete (On Dromont machine the cancel button may need to be pressed to exit
Tinting finished
Colour Matching
1. Click on brand of paint you will be tinting into (Taubmans for Taubmans and White Knight products)
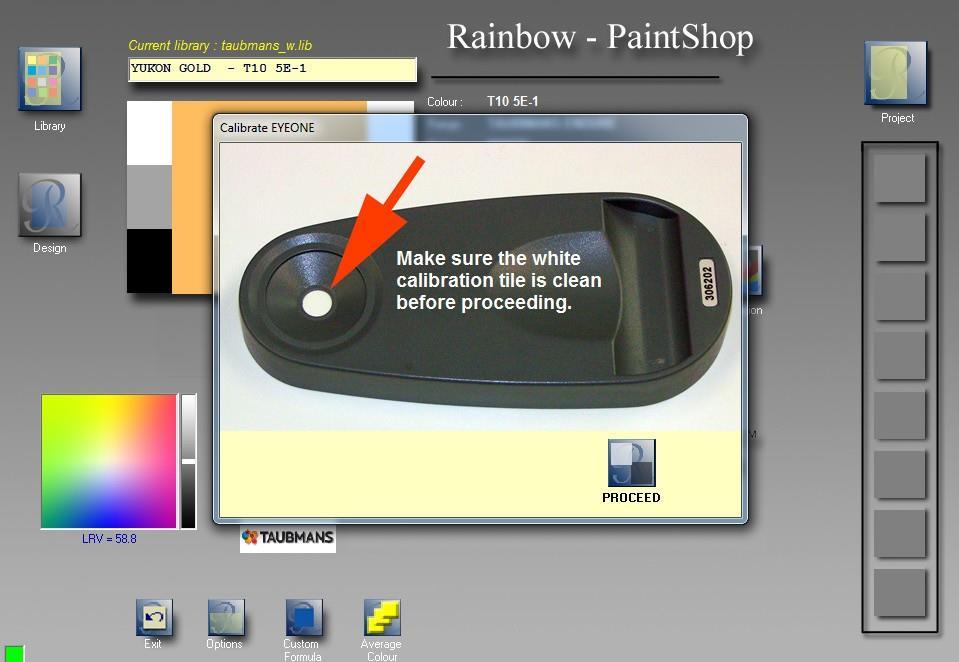
2. Click on calibrate
3. Make sure calibration tile is clean on cradle
Place spectro on cradle
Press either continue or proceed
Press calibrate or button on side of spectro
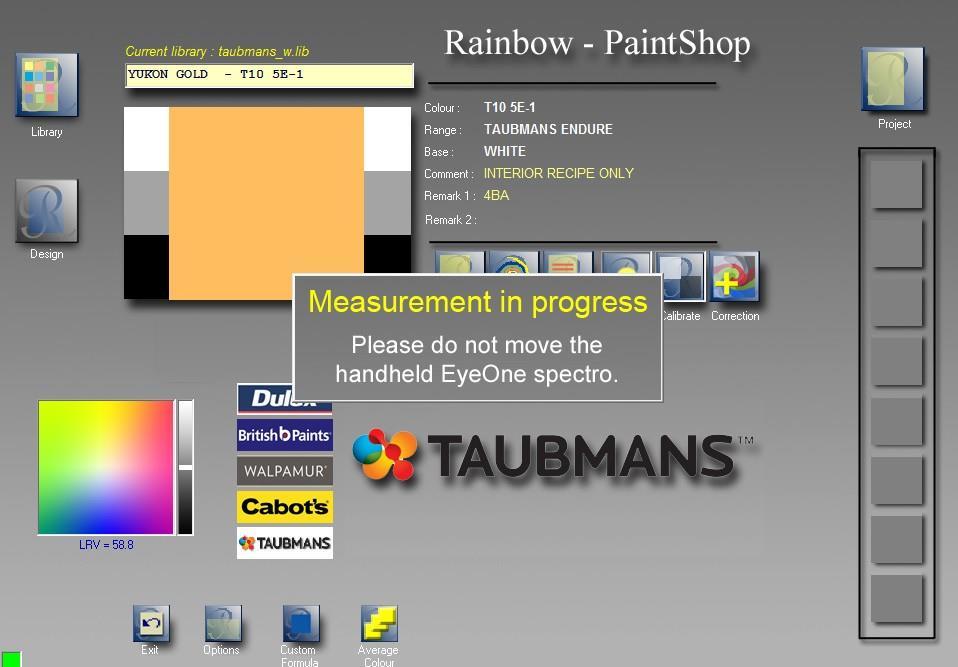
5. Calibration should only take about 3 seconds
6. Once spectro is calibrated place on sample and either click on measure or press button on side of spectro
Sample must not be transparent and should be of a solid colour at least the size of a 20 cent coin
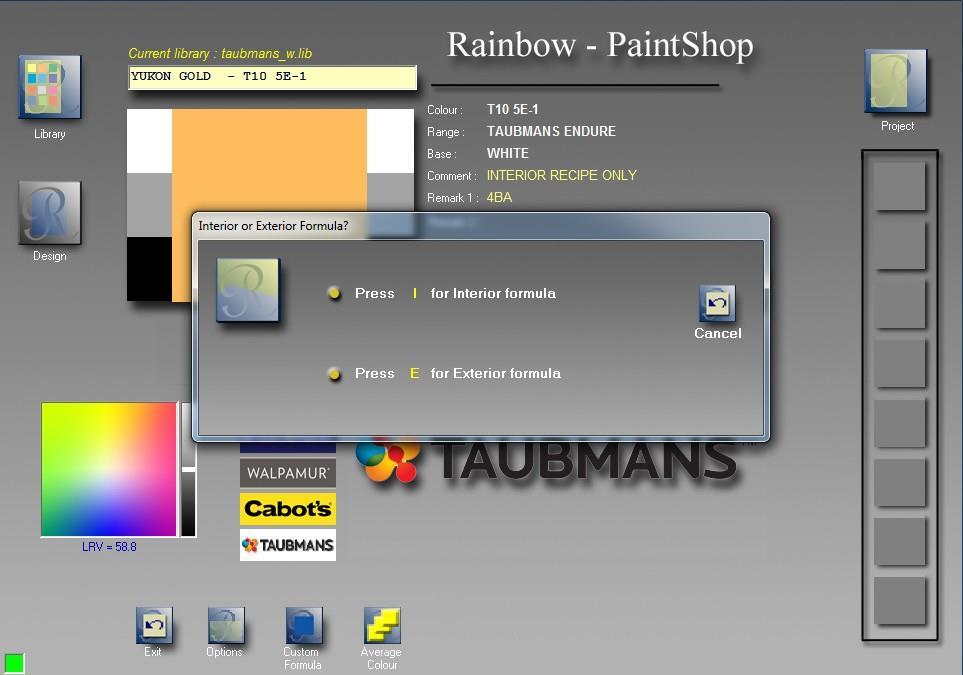
7. Click on either I or E and push enter to confirm if customer is painting either Interior or Exterior
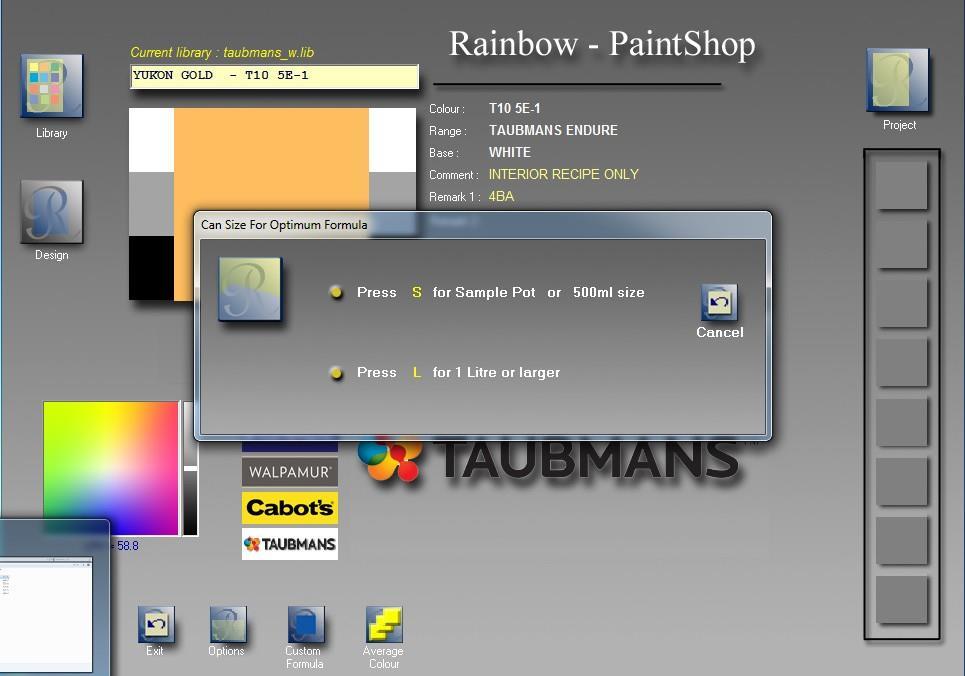
8. Press either S or L and enter to confirm if the customer wants either a Sample pot size or an amount one litre or larger
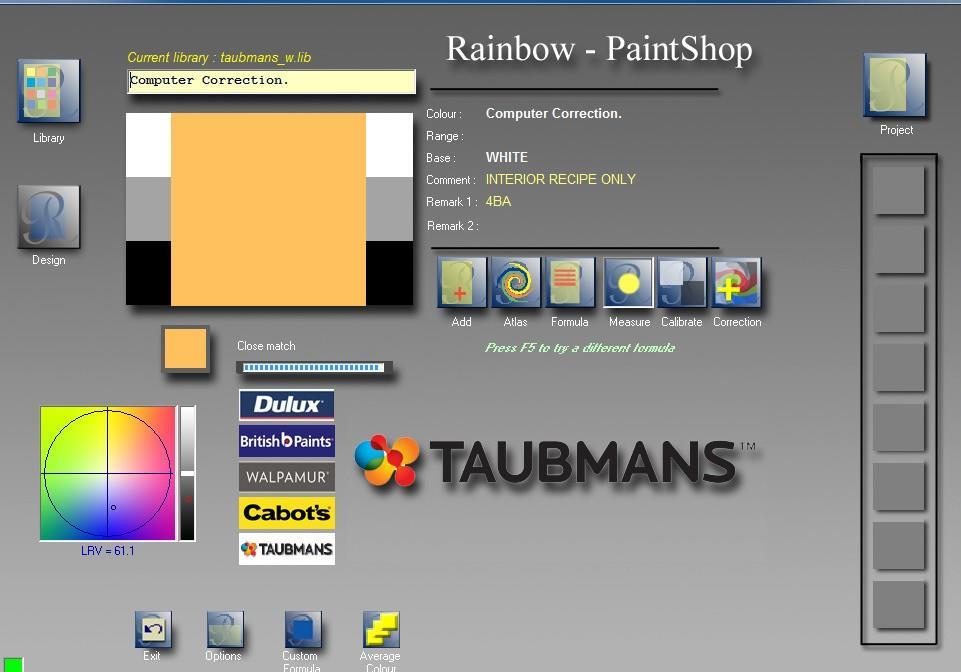
Now that the parameters have been put into the system, the computer should now have matched the colour
9. Check colour match bar is on screen
10. Click on formula and follow instructions as if you had entered a colour name into the system