Rules & Diagrams
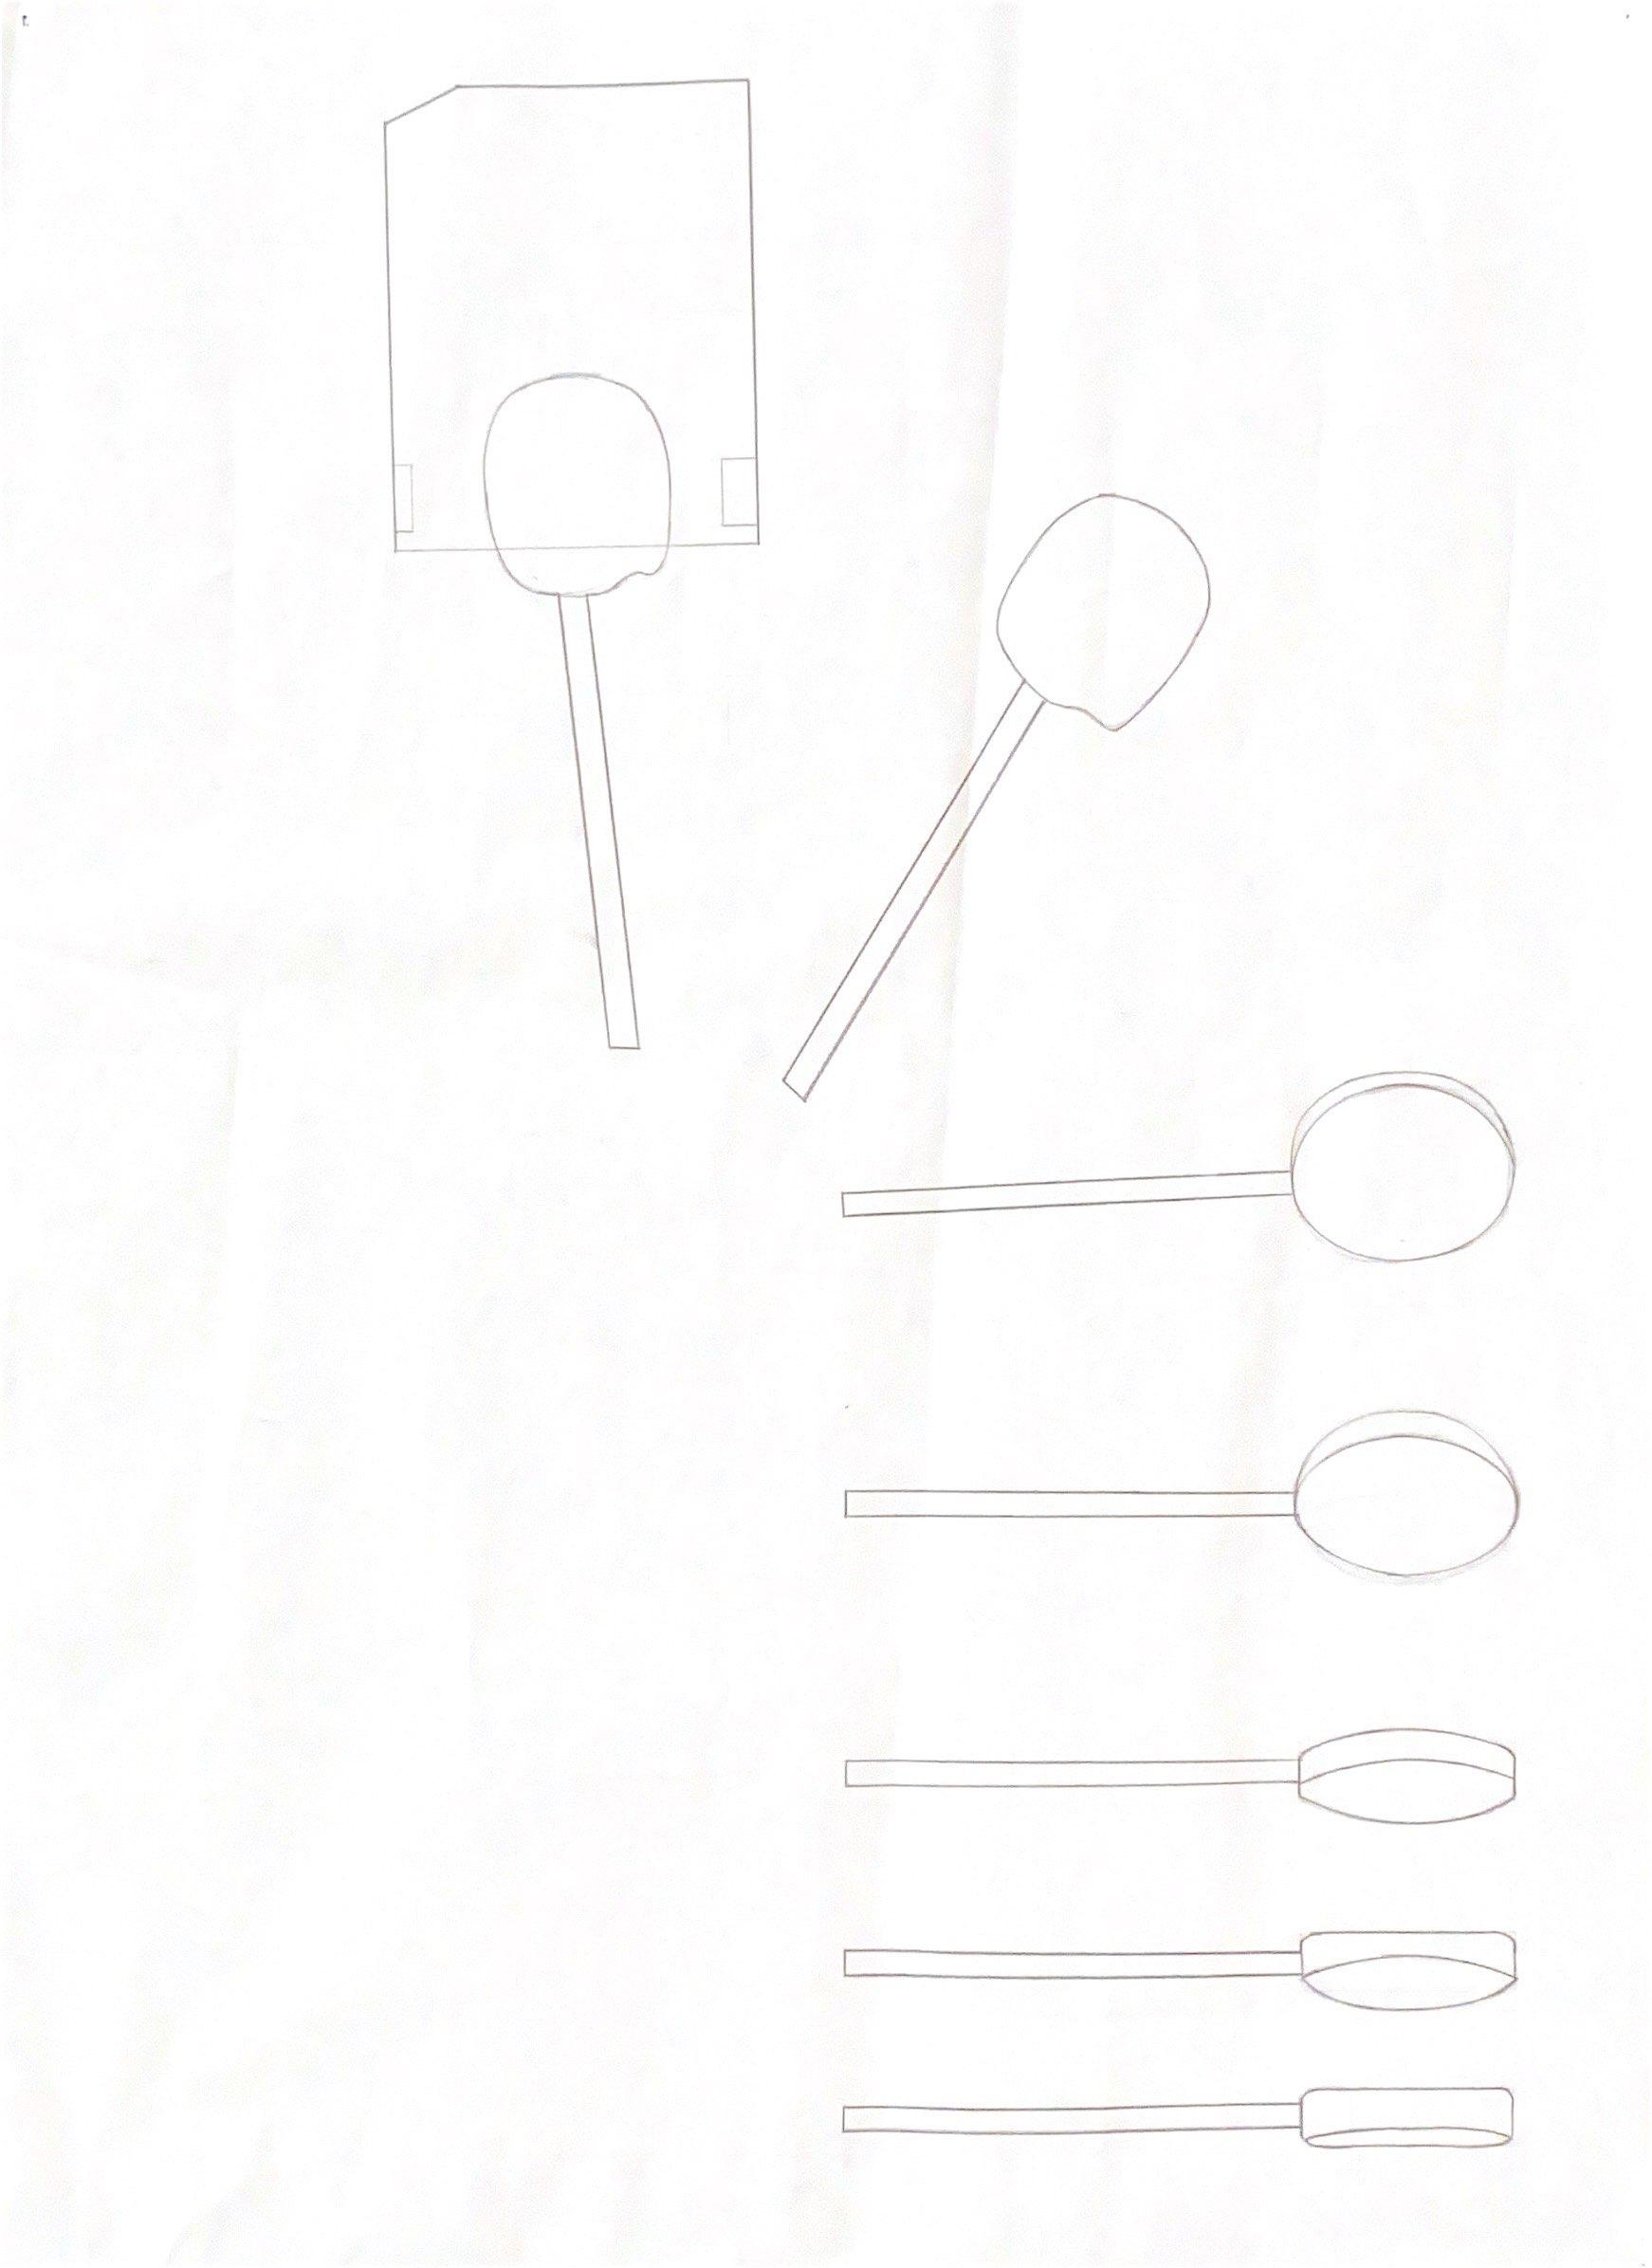
1. On the sheet of paper, draw reference grids of 3x3 (thirds: 1/3) and 4x4 (fourths: 1/4). Draw a line going from a quarter away from the left side on the bottom edge of the page to the top right corner. Mark a point in the middle of that line as centre.
2. To draw the first shape, draw a circle with diameter equal to one third of the length of the edge of the page, on the middle of the line.
3. For the second shape, draw a square that has sides the same length as the diameter of the circle. Place the bottom left corner of the square on the centre with the horizontal sides parallel to the top and bottom edge of the page.
4. The second square will be half the size of the other and its top right corner will be placed where the border of the circle and the cross-sectional line meet. The horizontal sides of the square should be parallel to the top and bottom edges of the page.
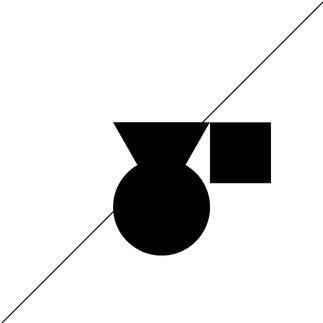
1. On the sheet of paper, draw reference grids of 3x3 (thirds: 1/3) and 4x4 (fourths: 1/4). Draw a line from the top left corner to the bottom right corner. Mark a point in the middle of that line as centre.
2. An equilateral triangle is centred on the middle of the line with sides measuring half the length of the line pointing downwards.
3. The centre of a circle is the bottom corner of the triangle, and its diameter is equal to the length of the sides of the triangle.
4. The right top corner of the triangle is right next to the top left corner of the square which sides are equal to the radius of the circle. Meaning it covers the entire fourth square grid on the second row for the quarter grid.
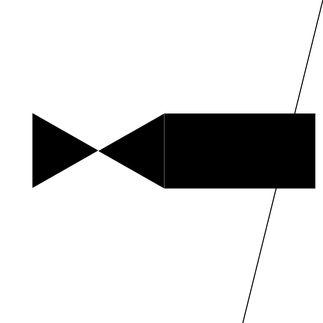
1. On the sheet of paper, draw reference grids of 3x3 (thirds: 1/3) and 4x4 (fourths: 1/4). Draw a line from a quarter away from the left side on the bottom edge of the page all the way up to the top left corner. Mark a point in the middle of that line as centre.
2. Centre a vertical rectangle in the middle of the line, the long sides equal in length to one quarter of the length of the page’s edge. The short sides are half that length.
3. Draw an equilateral triangle’s sides with equal length to the long sides of the rectangle, place it with a corner touching the centre of the right border of the rectangle.
4. On the vertical side of the triangle, draw a circle so that the borders touch. The diameter of the circle is the same as the length of the sides of the triangle.
1. On the sheet of paper, draw reference grids of 3x3 (thirds: 1/3) and 4x4 (fourths: 1/4). Draw a line from the top right corner of the page to the bottom of the page at a distance of ¼ from the right edge. Mark a point in the middle of that line as centre.
2. Draw a rectangle with vertical sides equal to ¼ the length of the page and horizontal sides with double that length. The rectangle should be longer horizontally, its top right corner should align with the cross-sectional line, and it should be centred with the middle horizontal line.

3. Draw two equilateral triangles with sides equal in length to the short sides of the rectangle. The first triangle should have one side parallel to the rectangle’s vertical side and bordering it.
4. The second triangle has one corner touching the rectangle’s top left corner and is laying on top of the rectangle in order to have an upwards triangle.
8 8
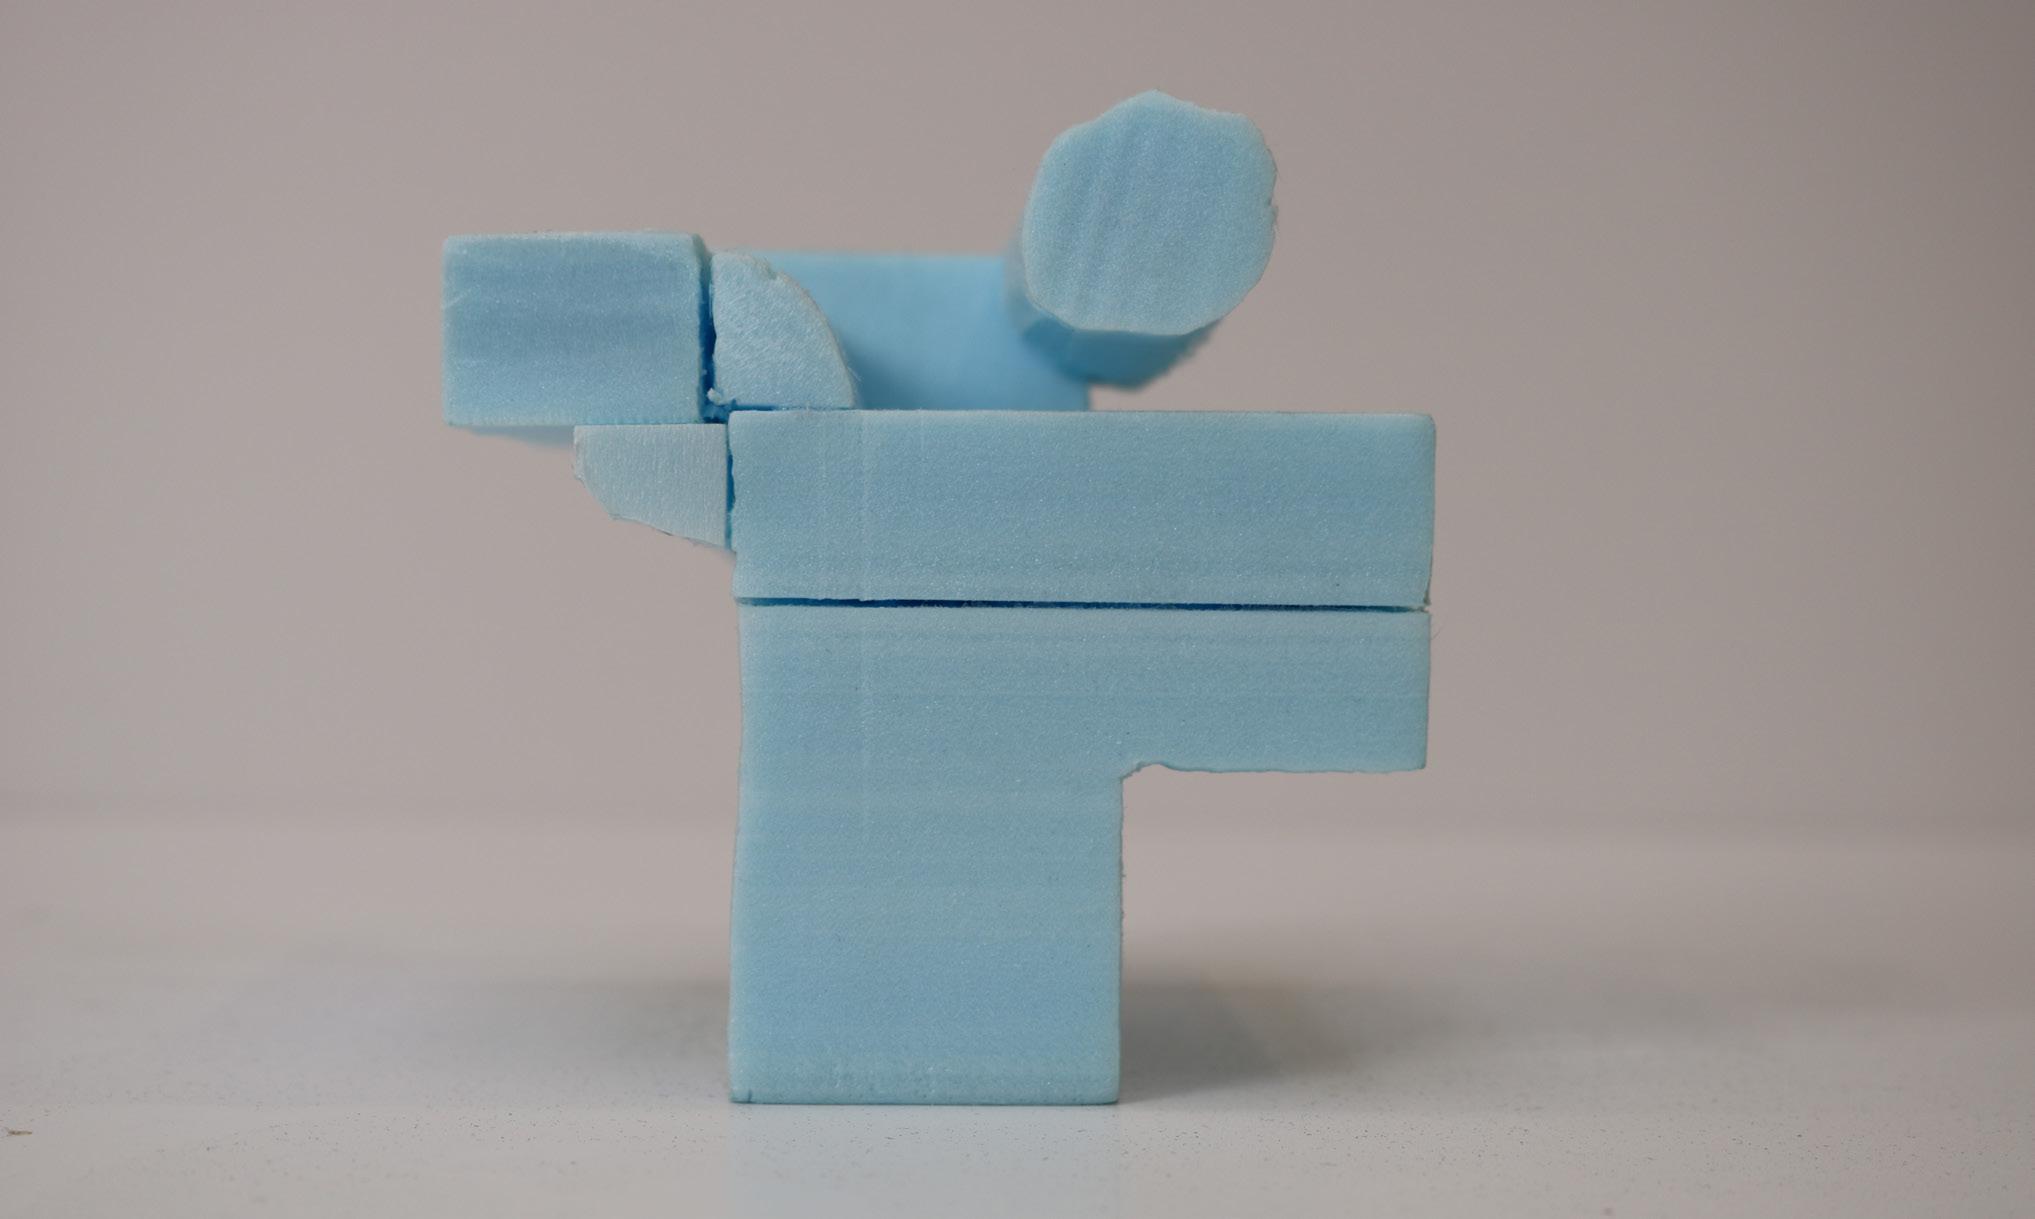
Figure 1
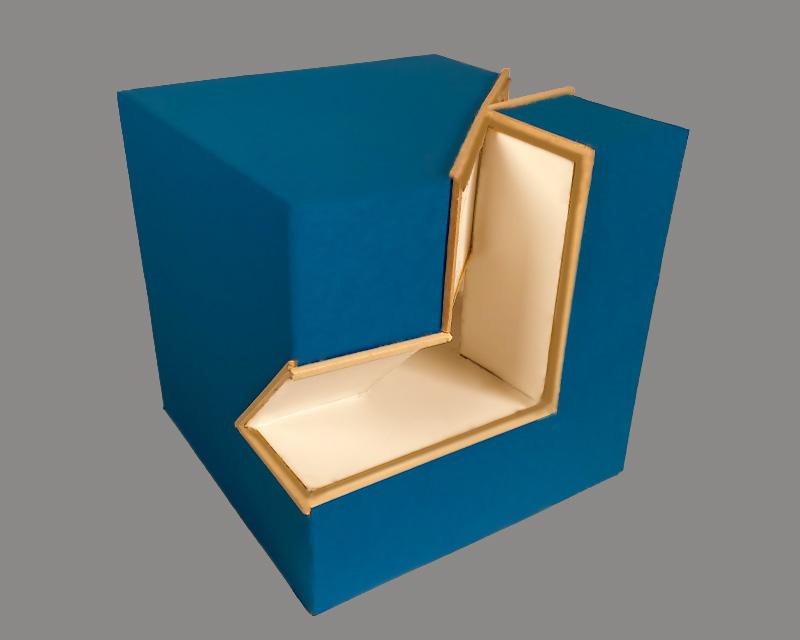
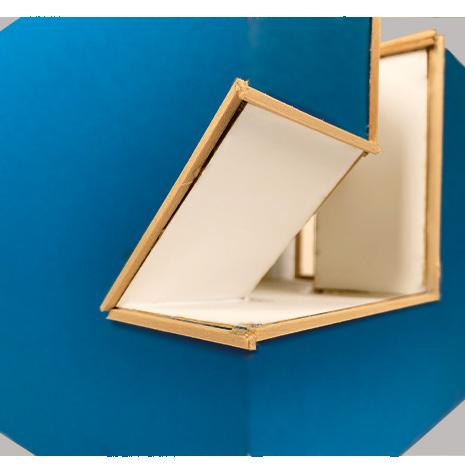
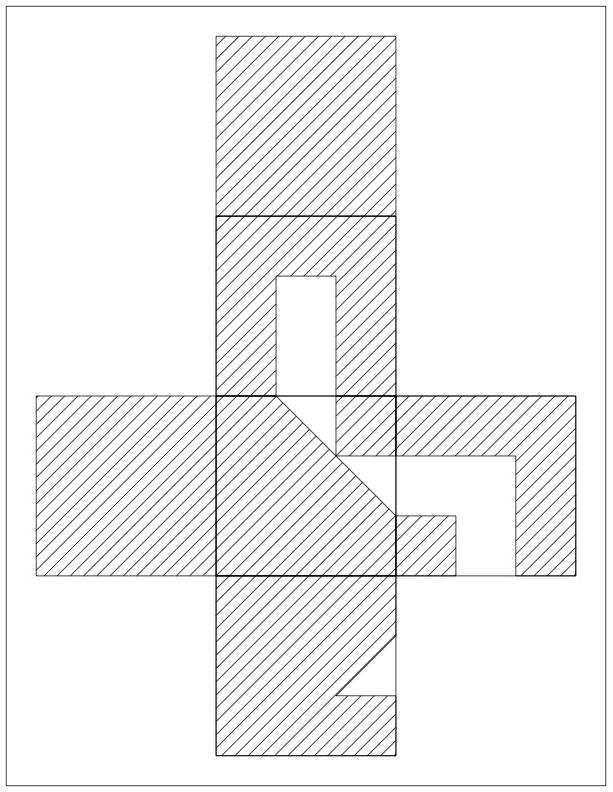
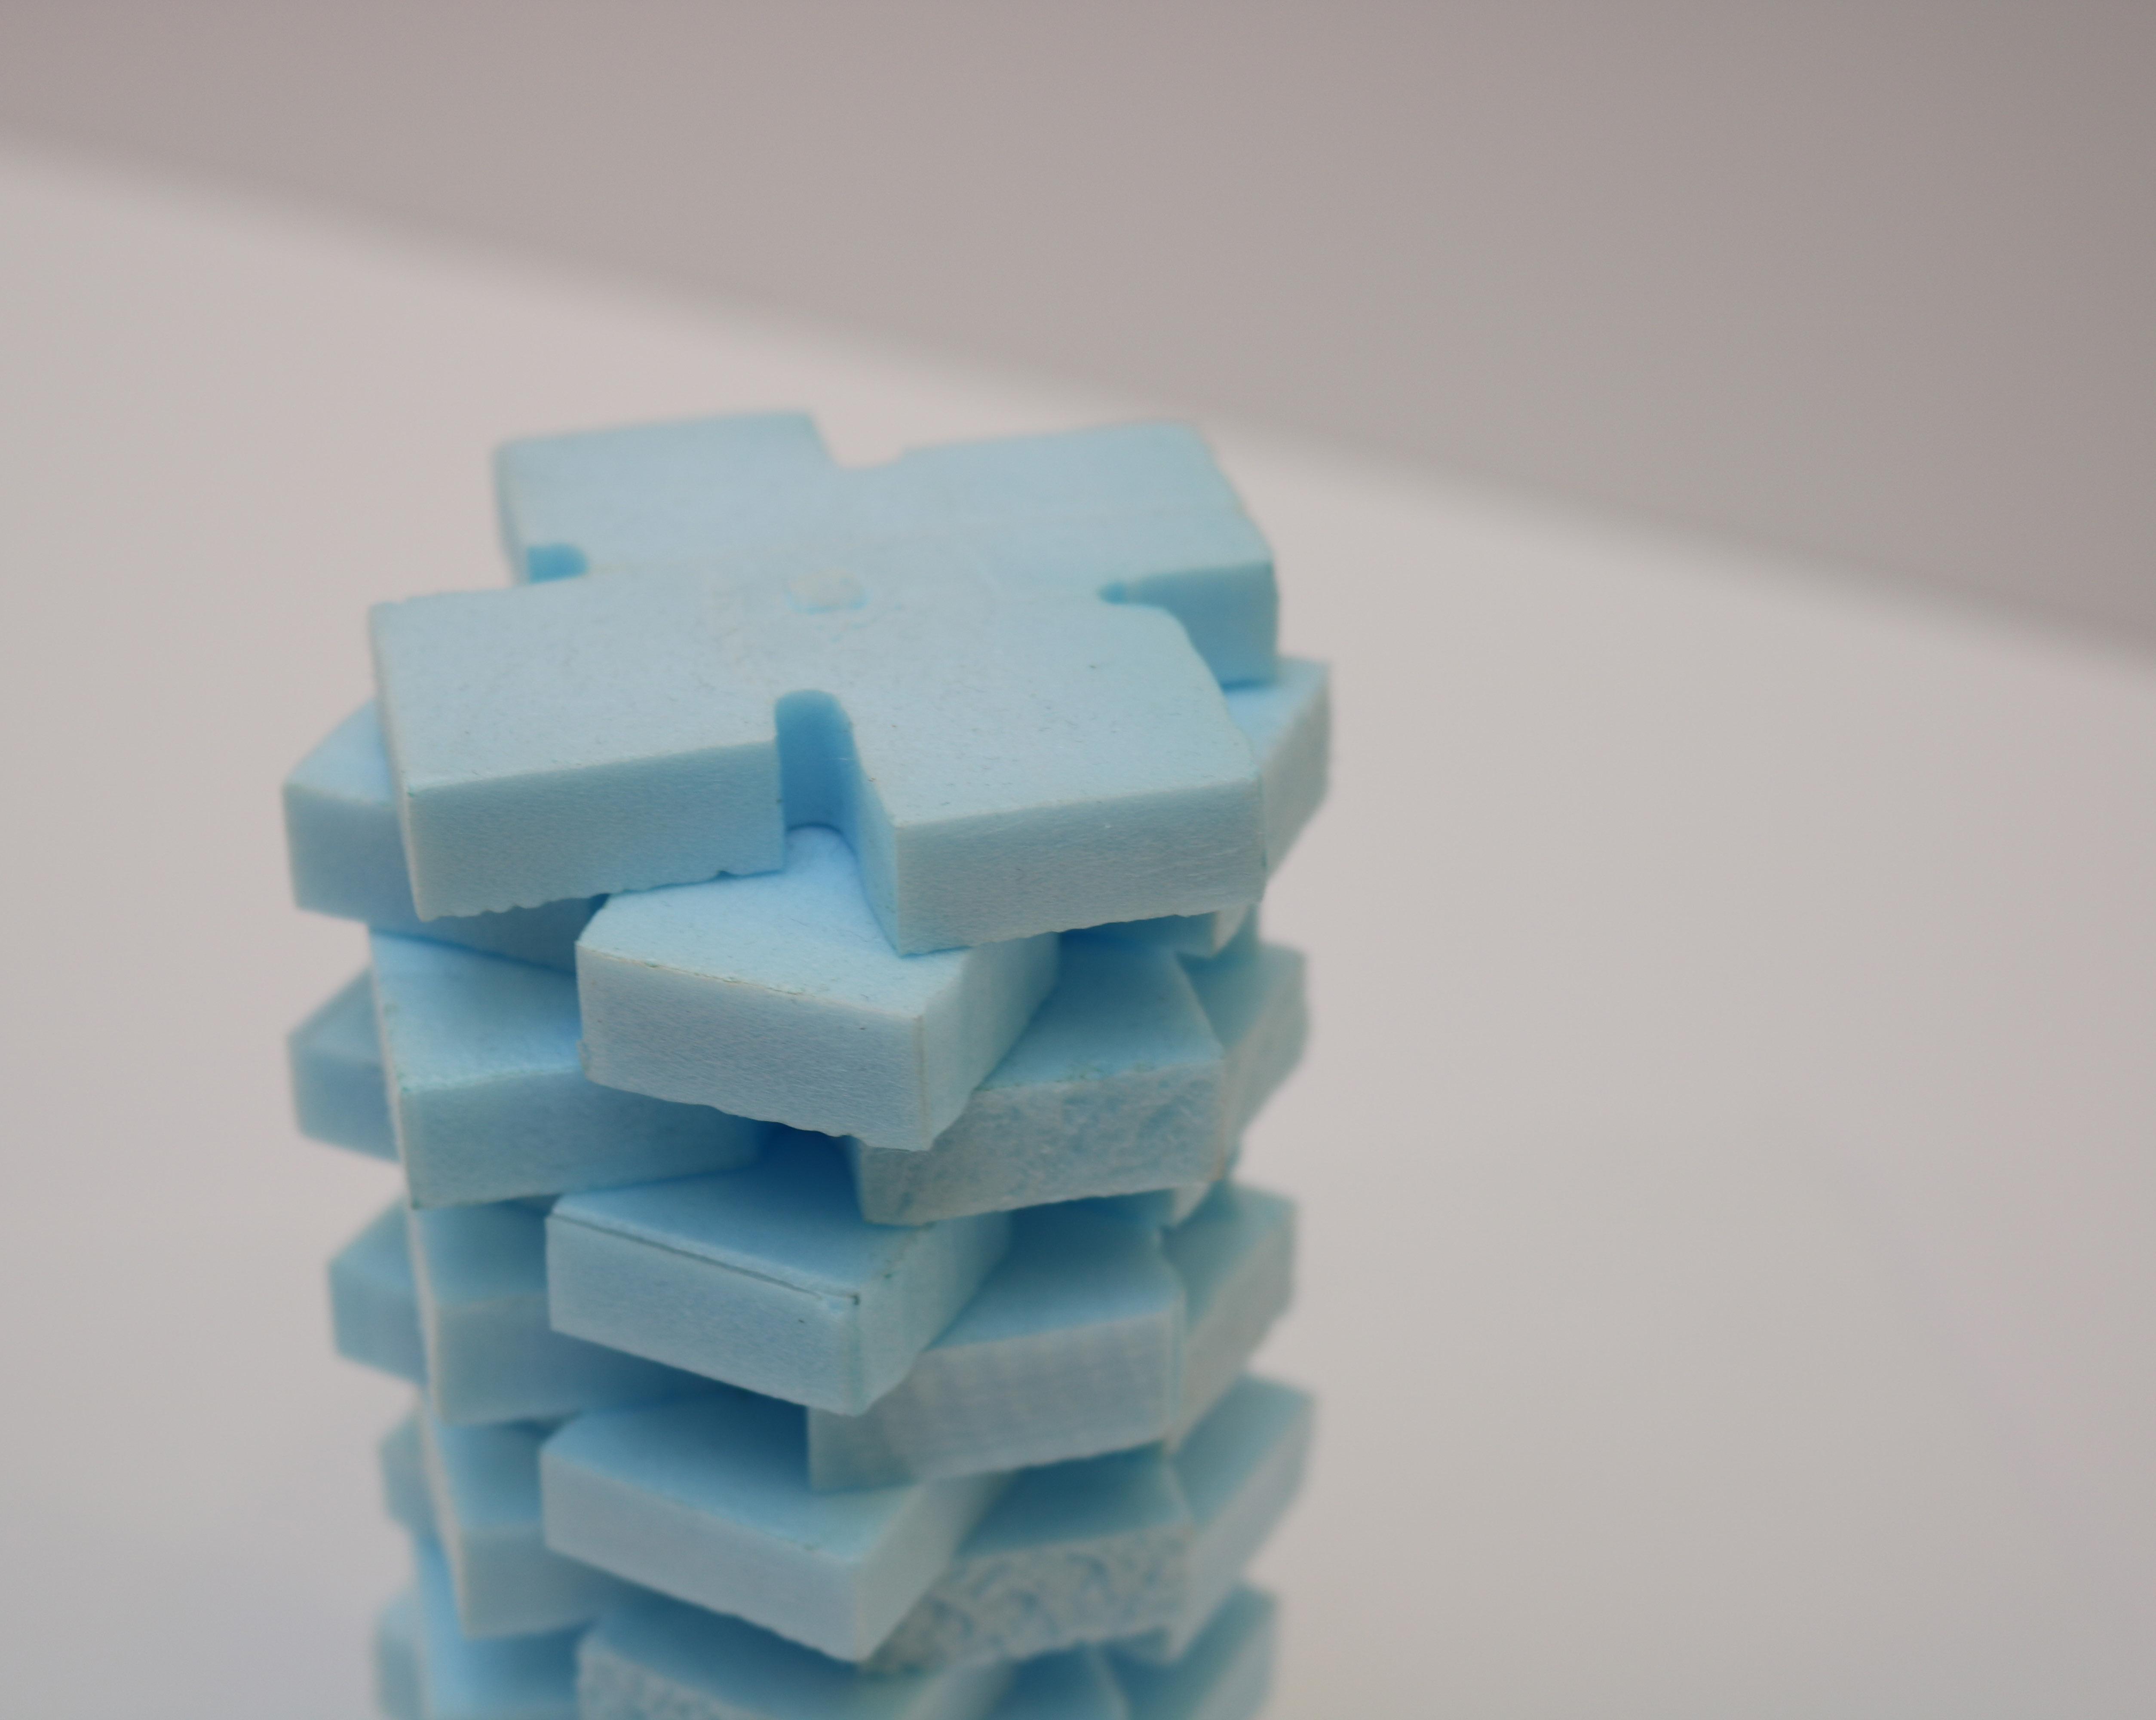
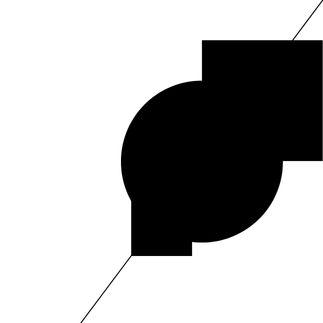
1. “EXTRUDE” the outline of Figure 1 backwards by 20 units.

2. “OFFSET” inwards by 0.5 and “EXTRUDE” it backwards by 20 units.
3. “CAP” the front and back of Figure 1 and then “BOOLEAN DIFFERENCE” the centre.
4. “COPY” Figure 1 and “ROTATE” it 180o from the front. Then align the top edge of the new figure, Figure 2, to the bottom edge of the Figure 1.
5. Make another figure, Figure 3, “COPY” Figure 1 and “ROTATE” it 180o on the front edge. Align the bottom left corner of Figure 3 with the bottom right corner of Figure 1.
6. “COPY” Figure 3 on the right and “ROTATE” it 180o on the front edge to create Figure 4, align its highest edge with the lowest edge of Figure 3.
10 10
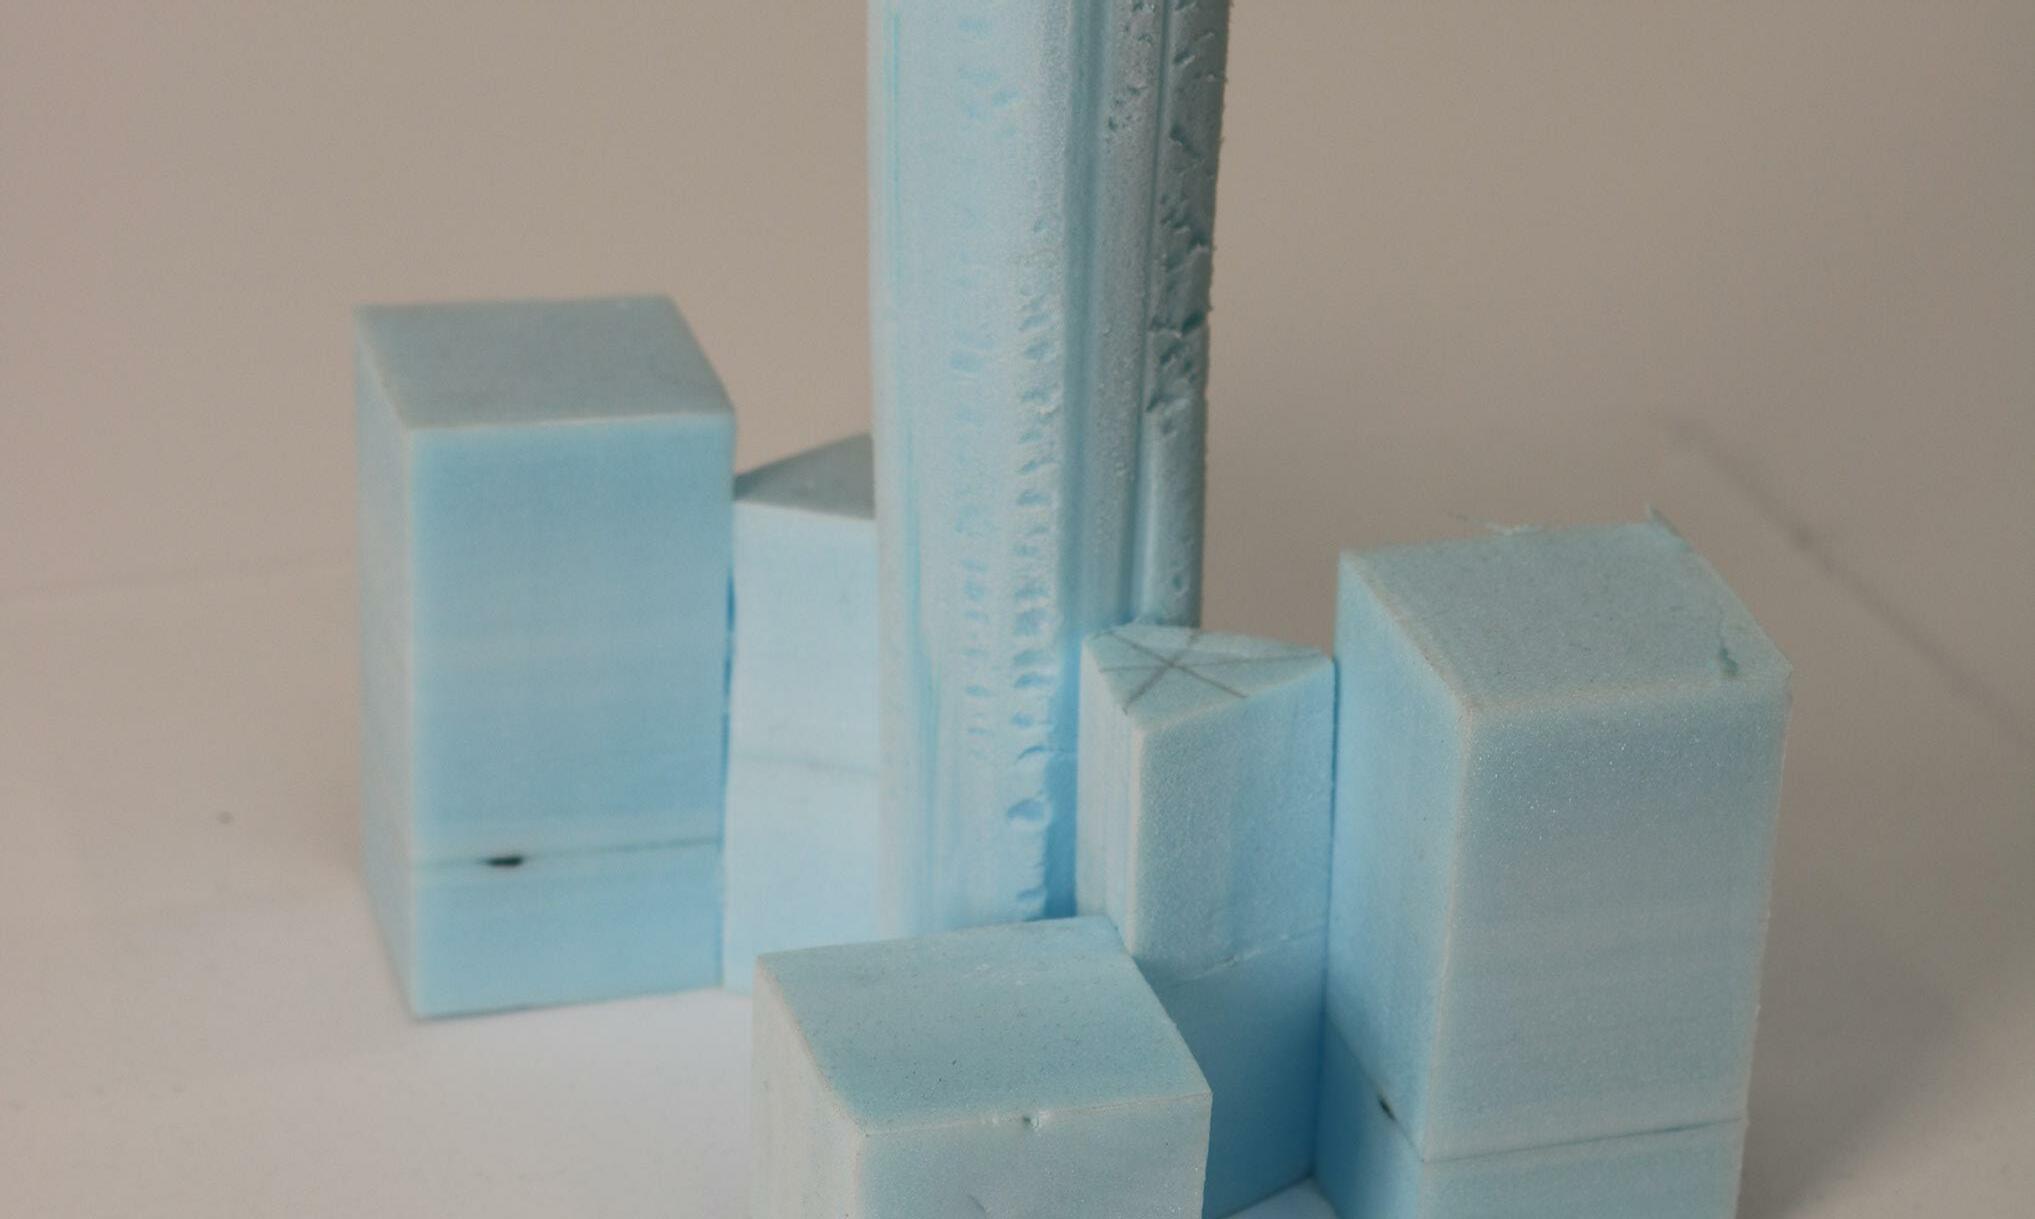
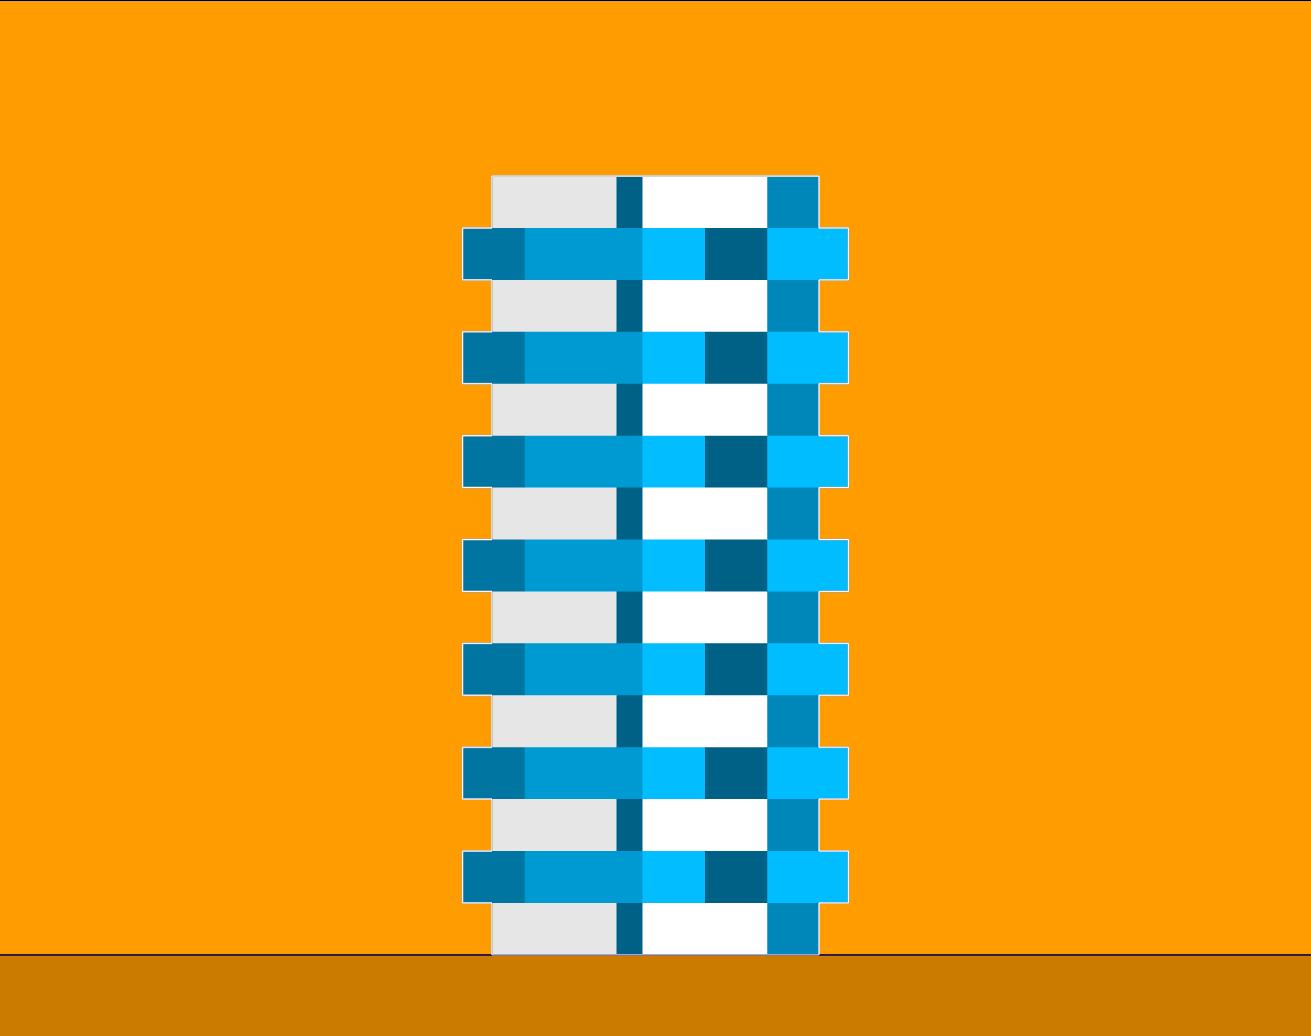
1. “EXTRUDE” Figure 1 by 1 unit.
2. “COPY” Figure 1 and rotate it 45o clockwise to create figure 2, then place it centred on top of Figure 1. Repeat this seven times.
3. “GROUP” the 8 figures and copy them. Place the new group of figures on top with the centre on the left edge of the bottom figure. Keep on doing this until the figure reaches the desired height.

11 11
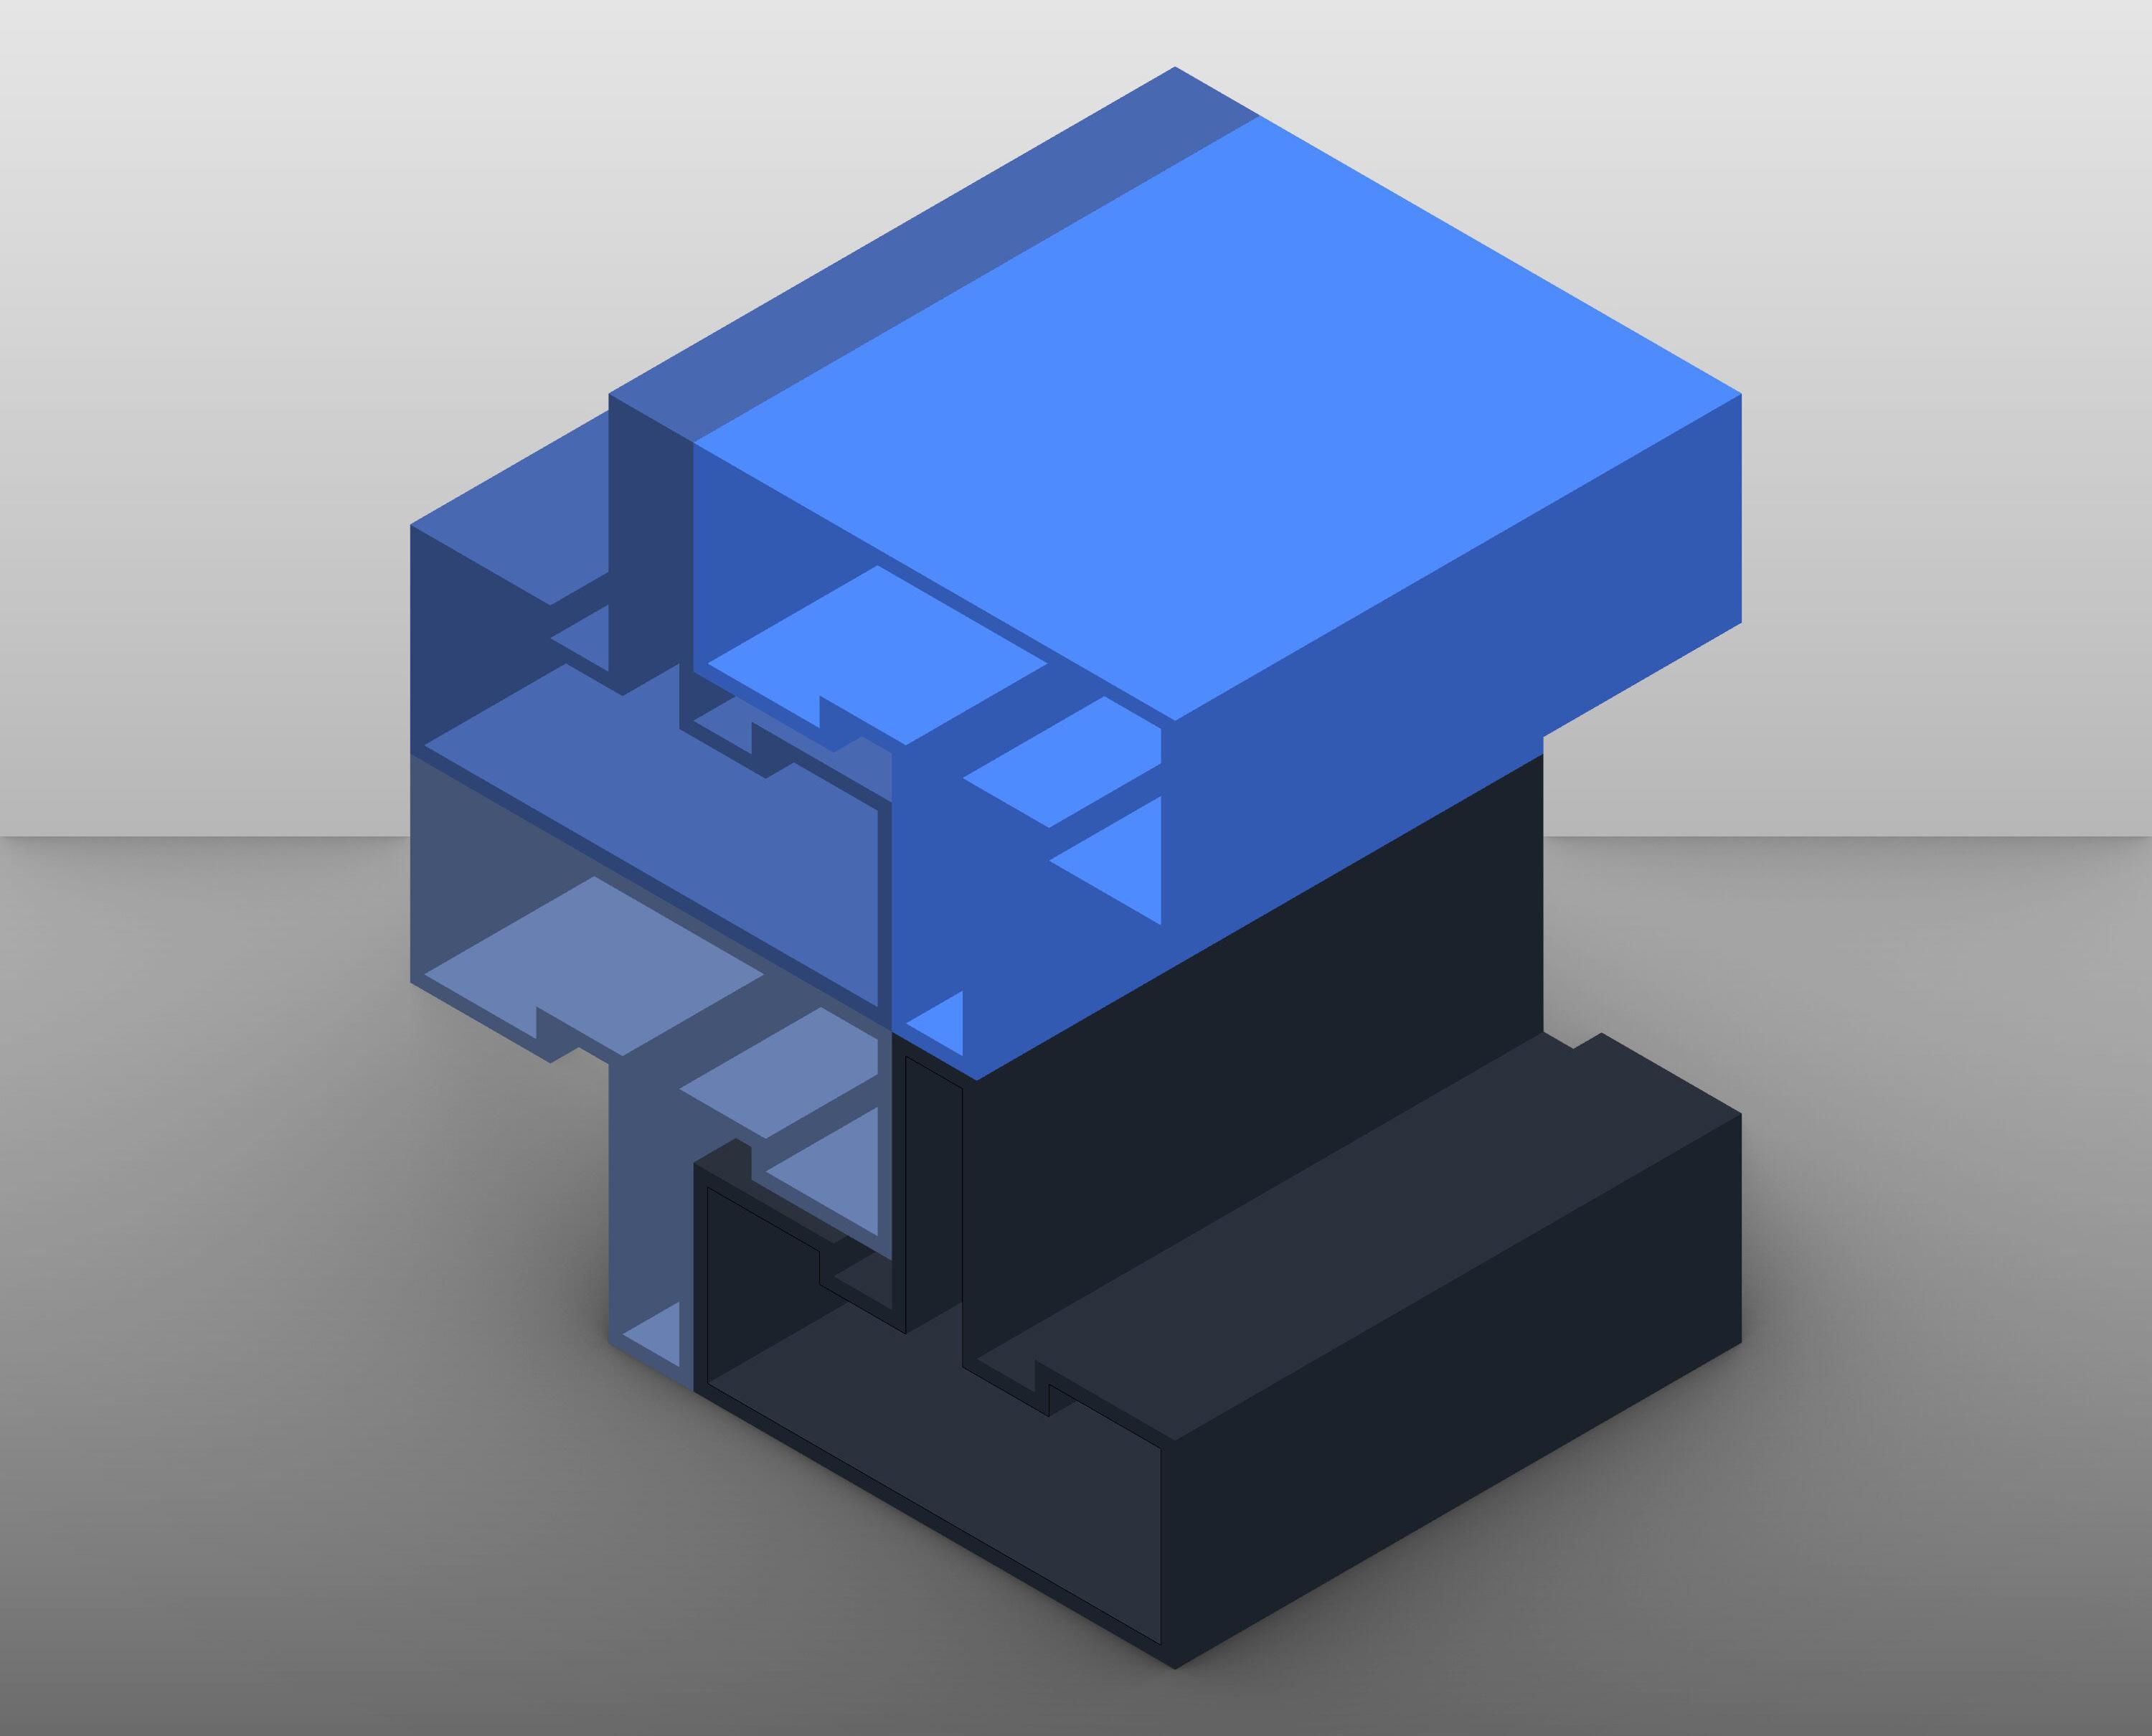
Figure 2
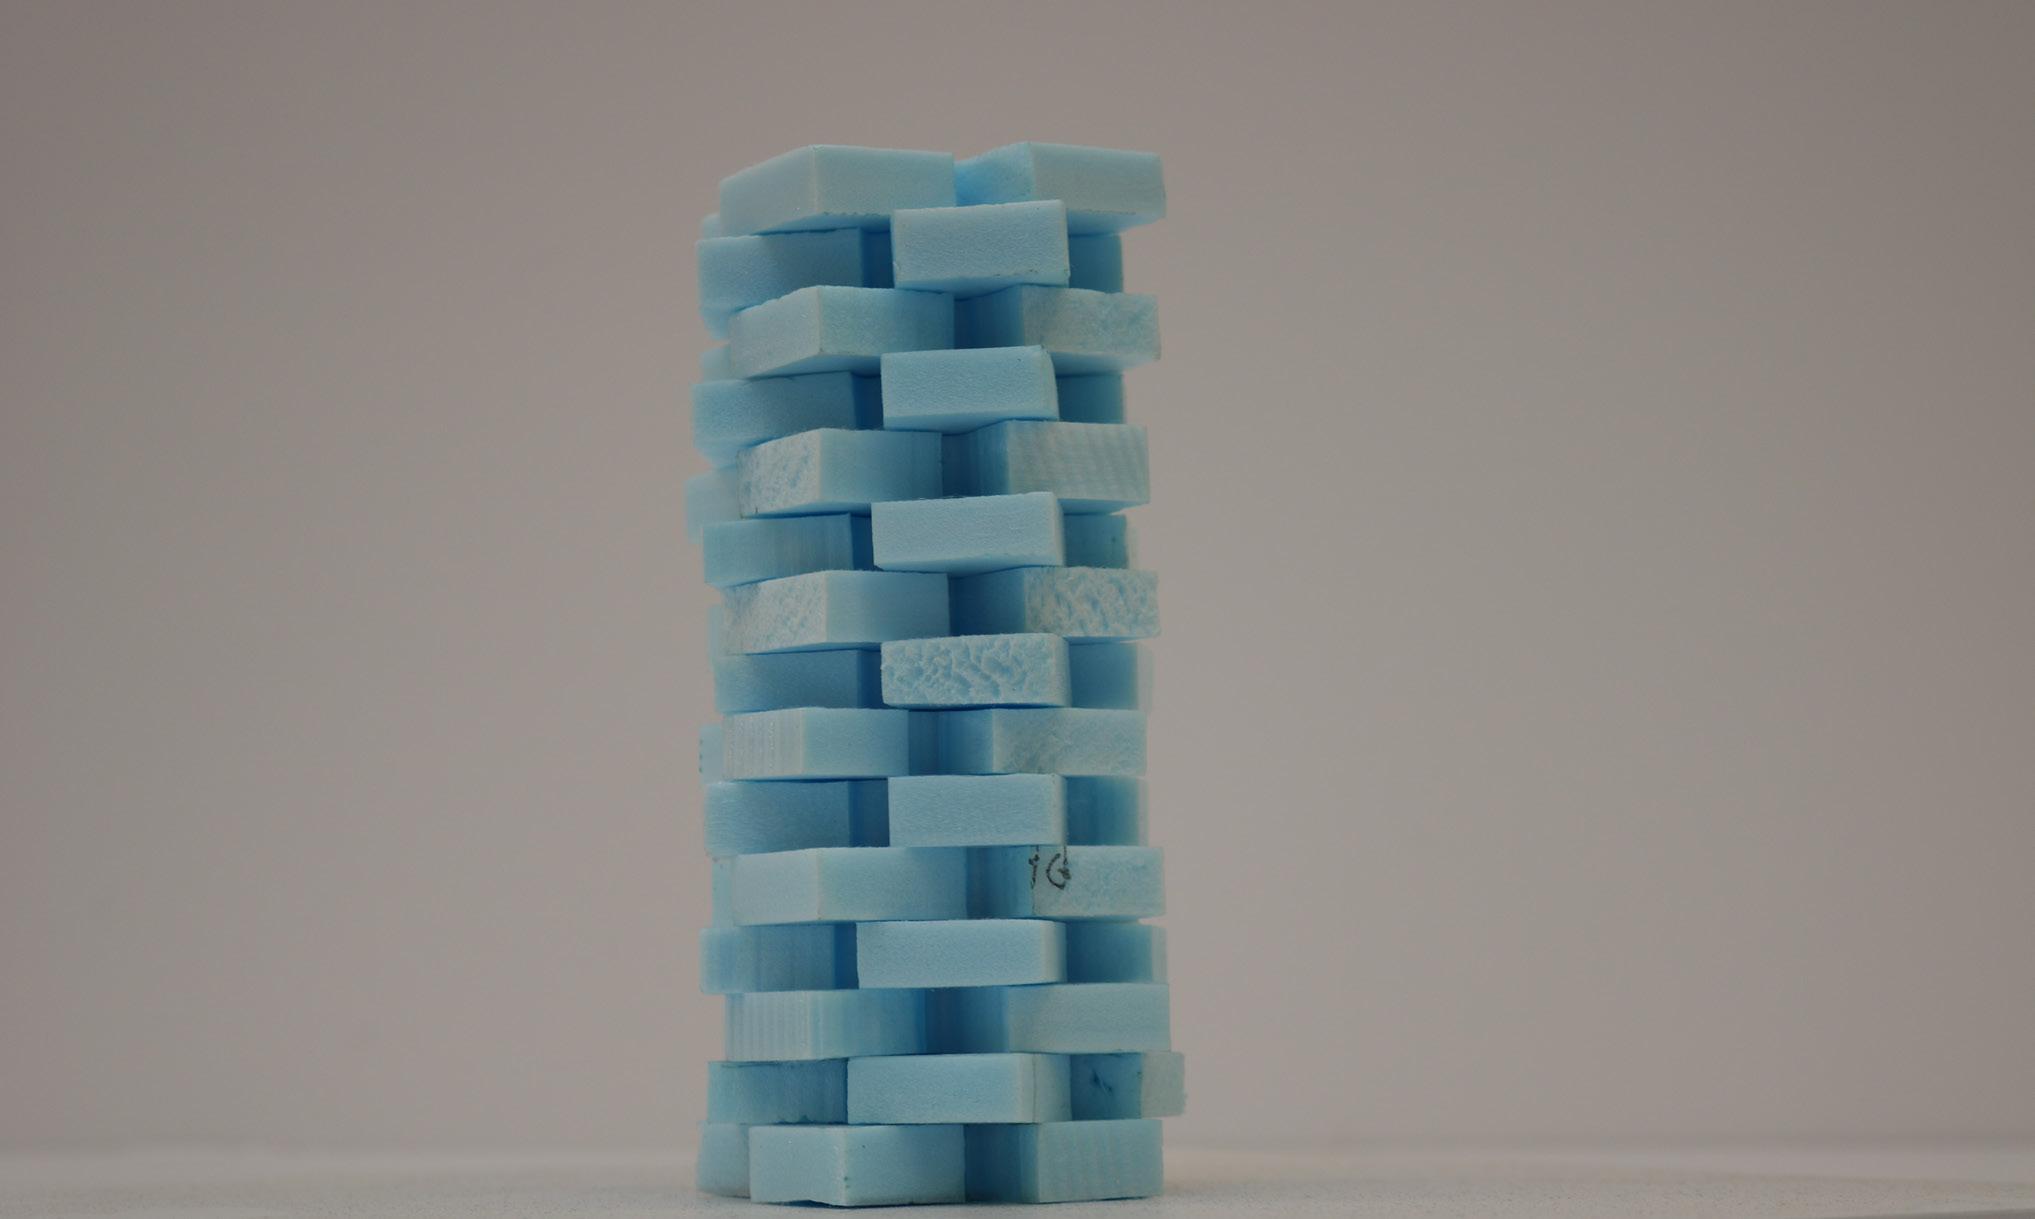
1. “EXTRUDE” Figure 1 by 1 unit backwards.
2. “OFFSET” Figure 1 inwards by 0.25 and “CAP” both figures.
3. “BOOLEAN DIFFERENCE” Figure 2 from Figure 1.
4. “COPY” the modified Figure 1 and “SCALE” that copy by 0.9. Align Figure 2’s front bottom edge to Figure 1’s back bottom edge in the centre. Repeat this process until 0.1.
5. “ROTATE” the 10 figures as a “GROUP” from the top view by 180o.
6. “COPY” the 10 figures and rotate them 90o on the right view.
12 12
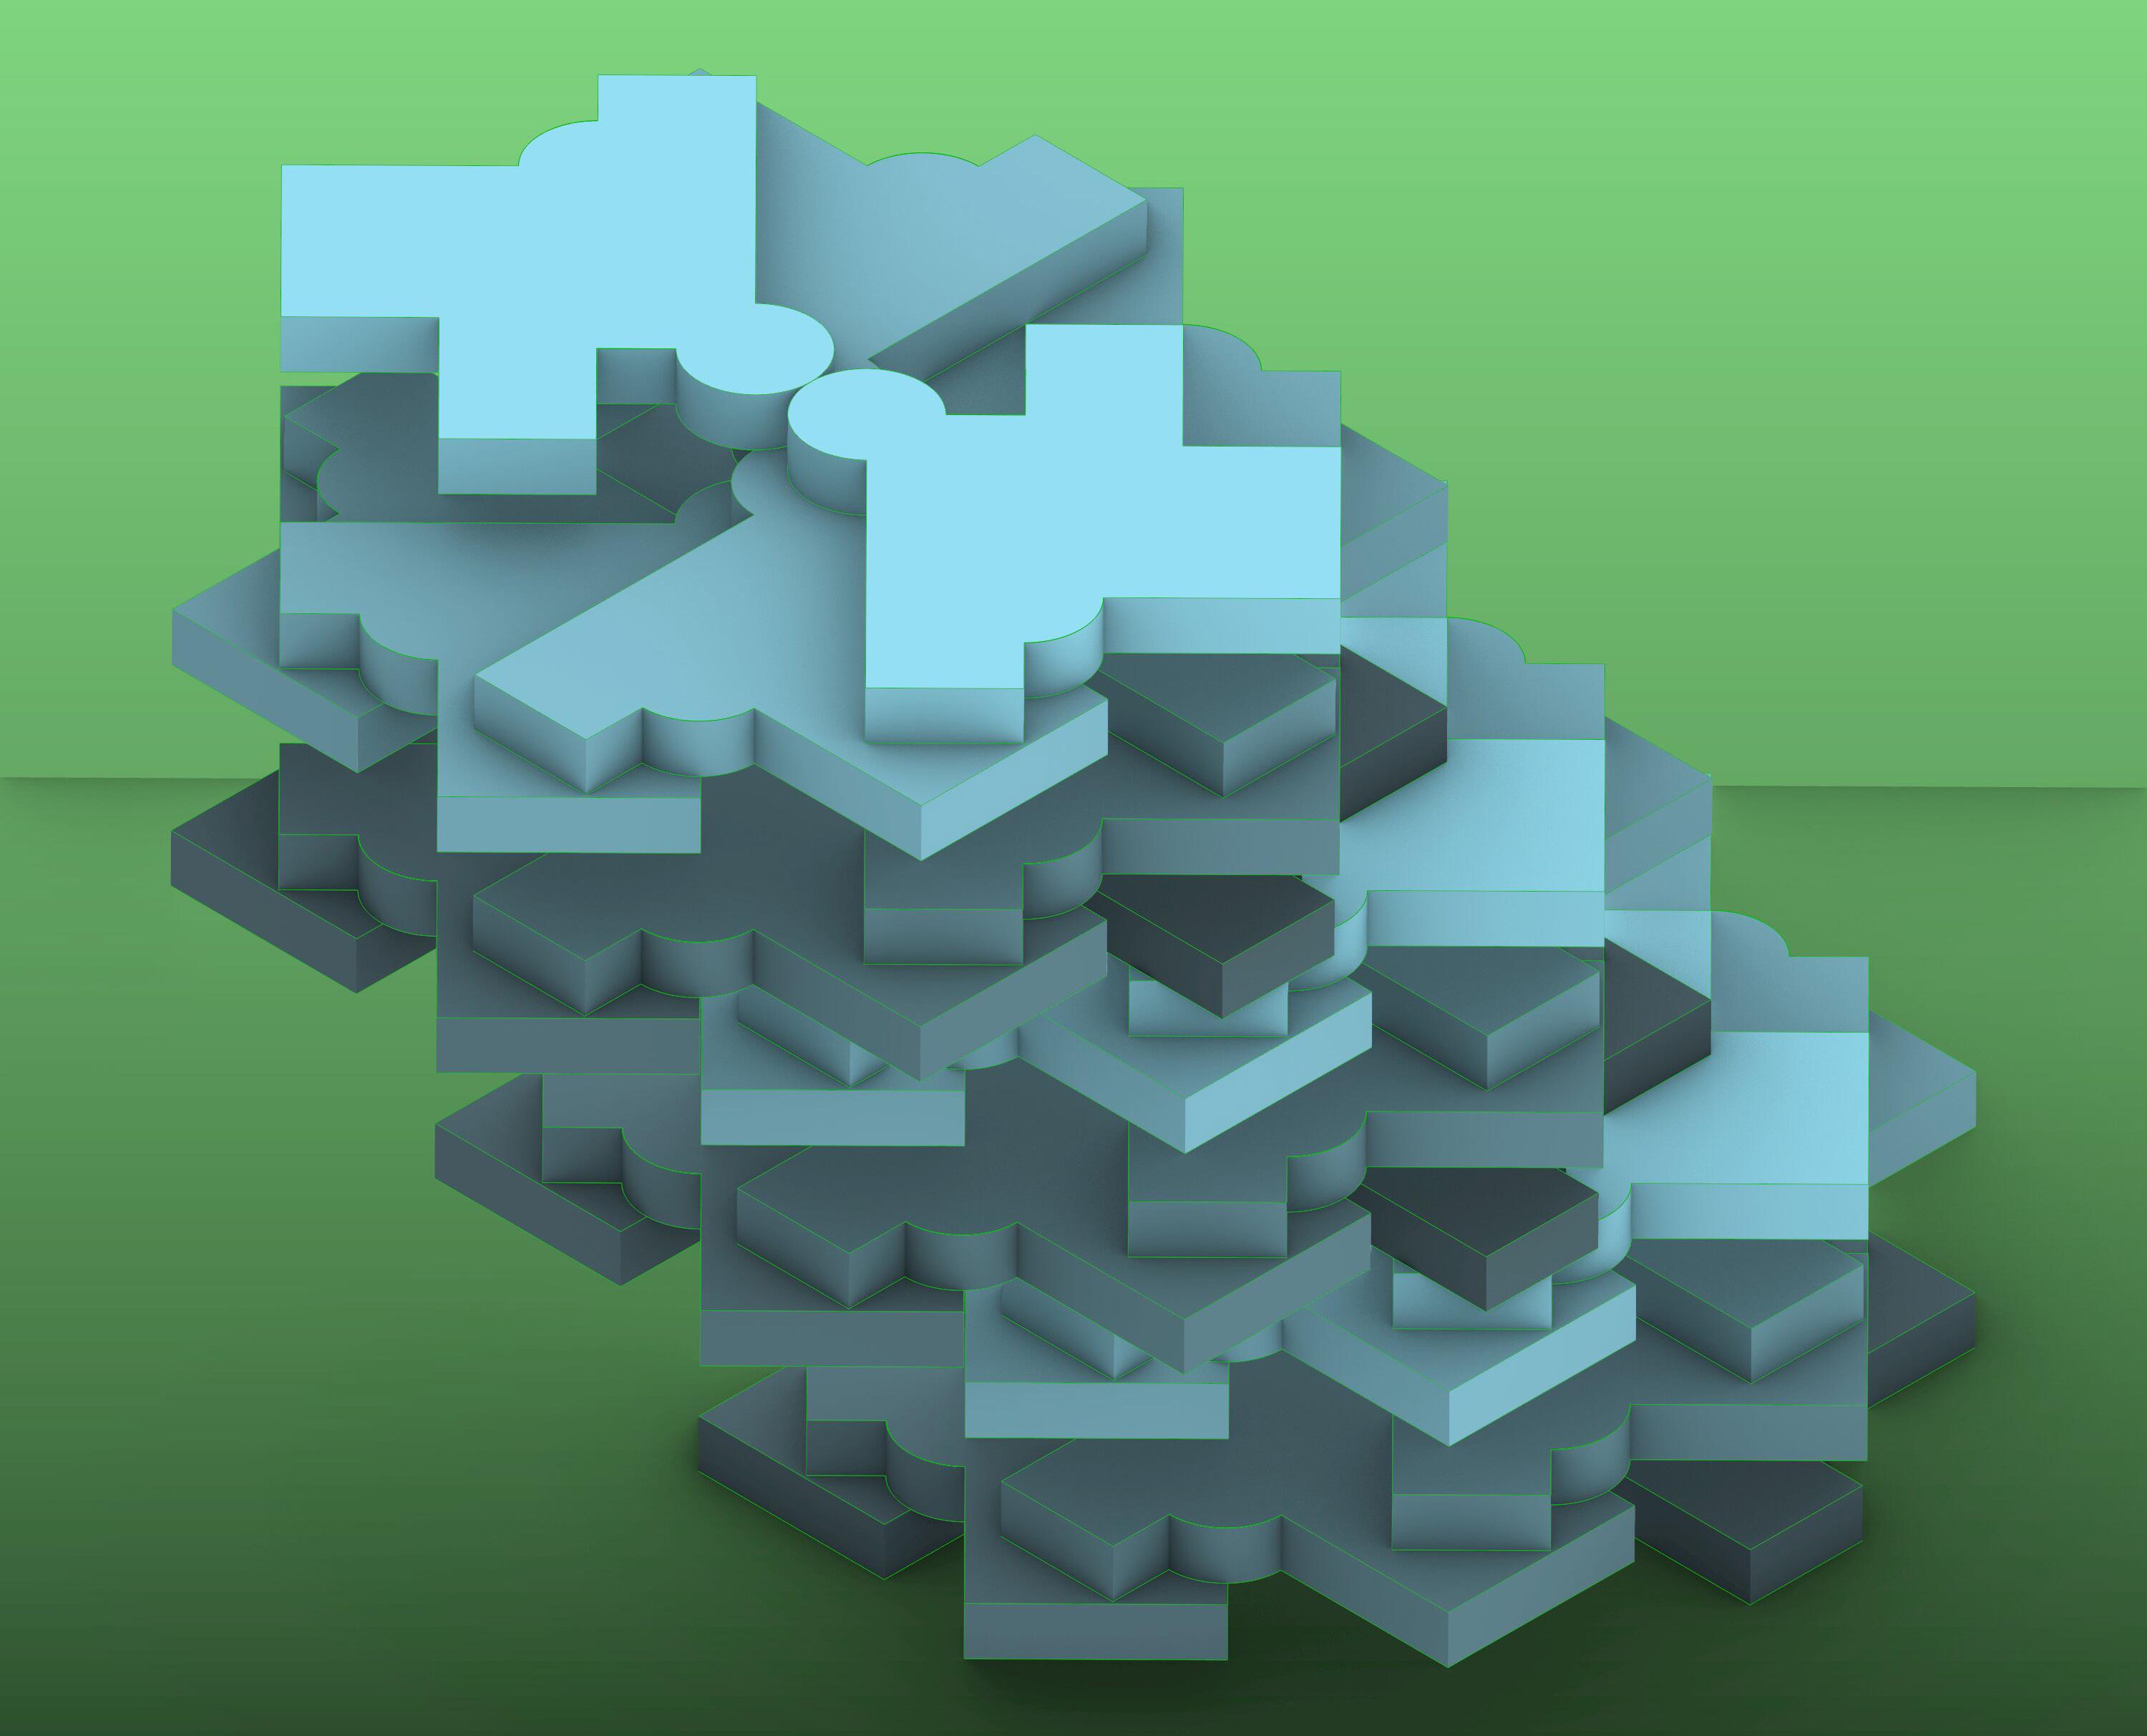
Figure 3
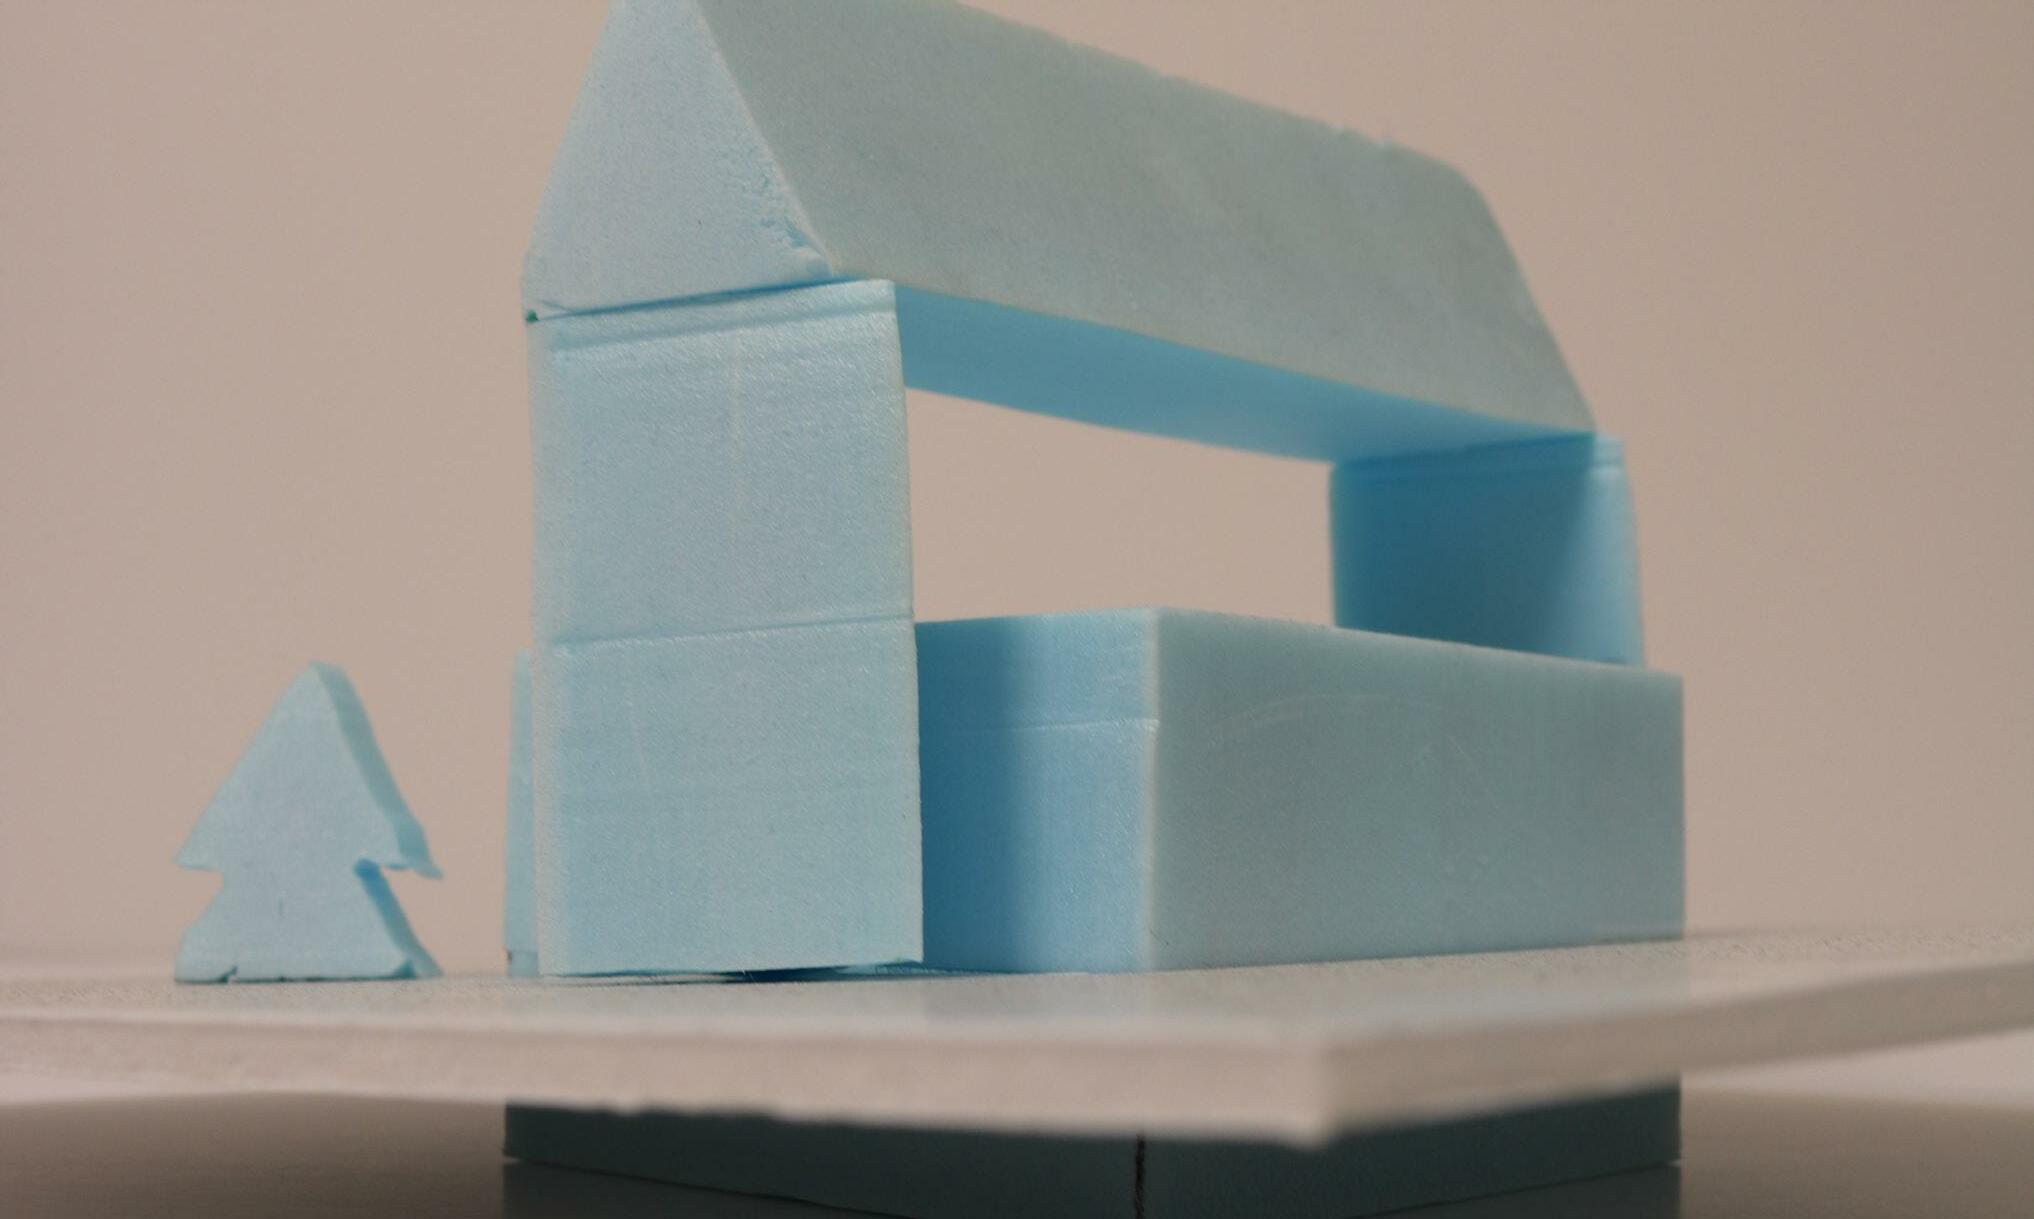
1. “EXTRUDE” the outline of the figure backwards by 1 unit.
2. “COPY” the 3D figure and “ROTATE” it 90o anticlockwise. Align the right edge on the left edge of the first figure.
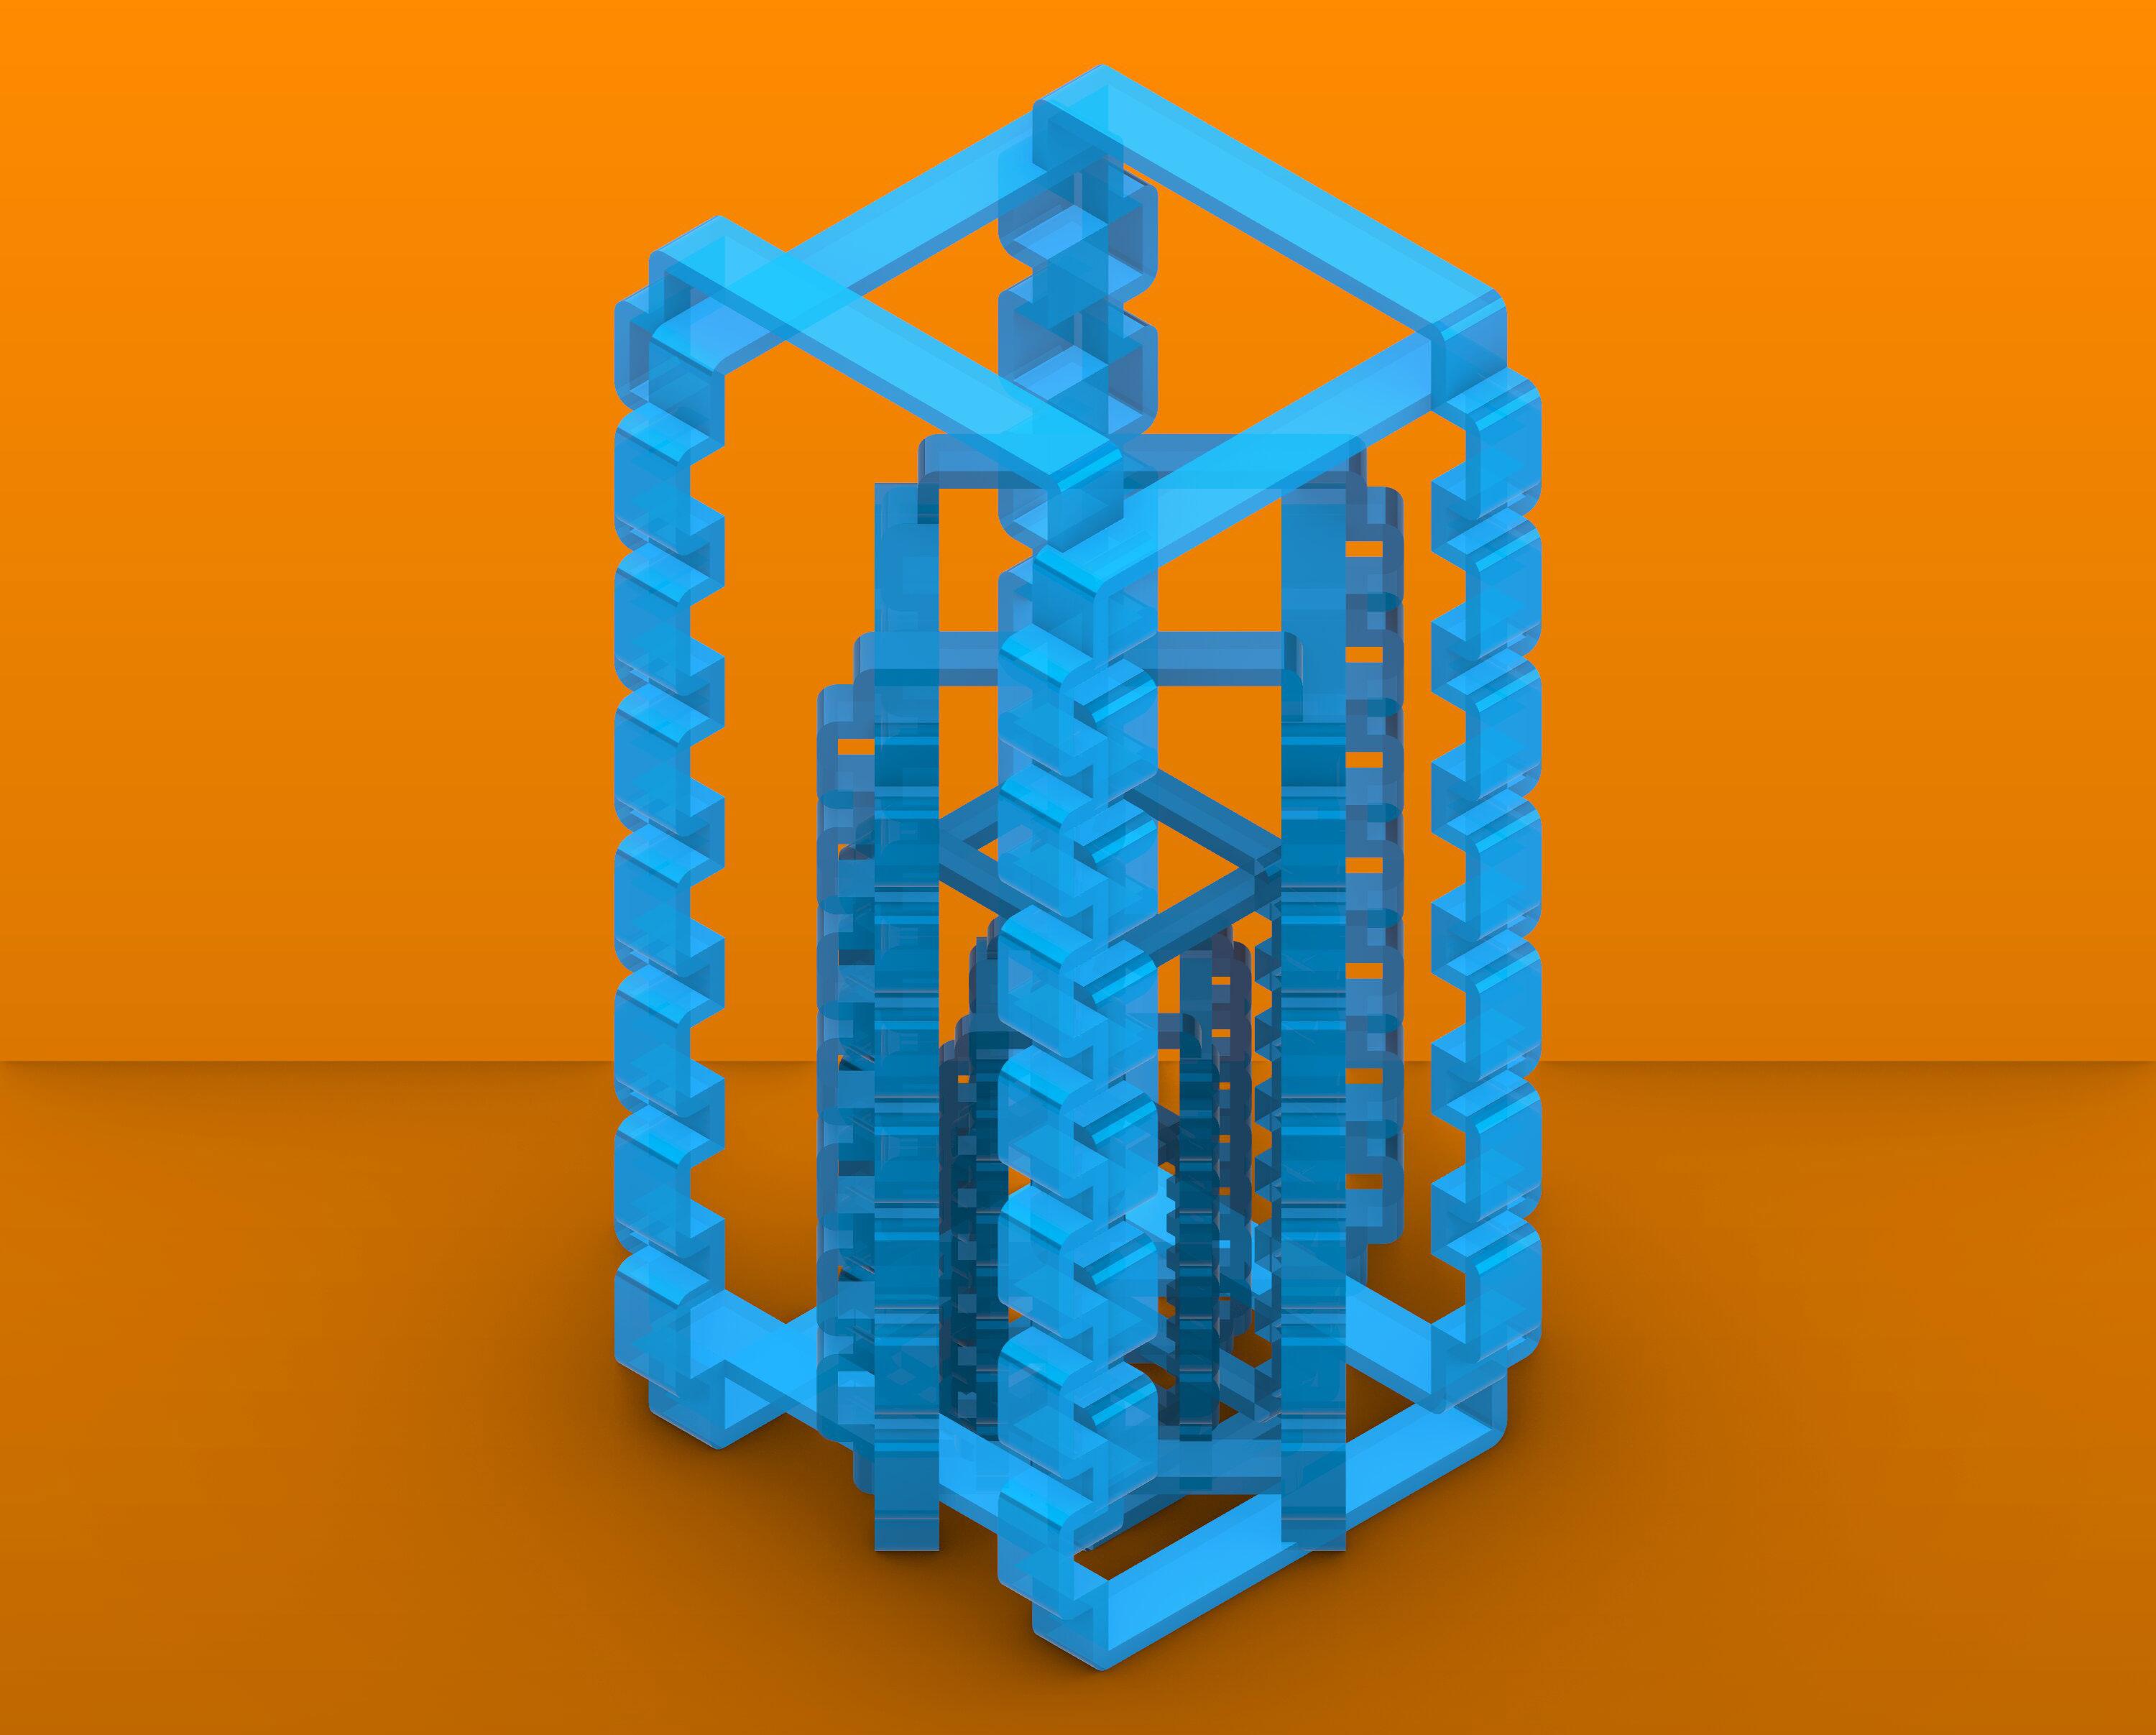
3. “COPY” the figures together and “ROTATE” it 180o clockwise. Align the left edge of the new dual figure on the right edge of the second figure. Now, “GROUP” the whole figure.
4. “COPY” the grouped figure and “ROTATE” it 45o clockwise and factor it by 1.5. Do this until there are 5 figures total.
13 13
Figure 4
Sections
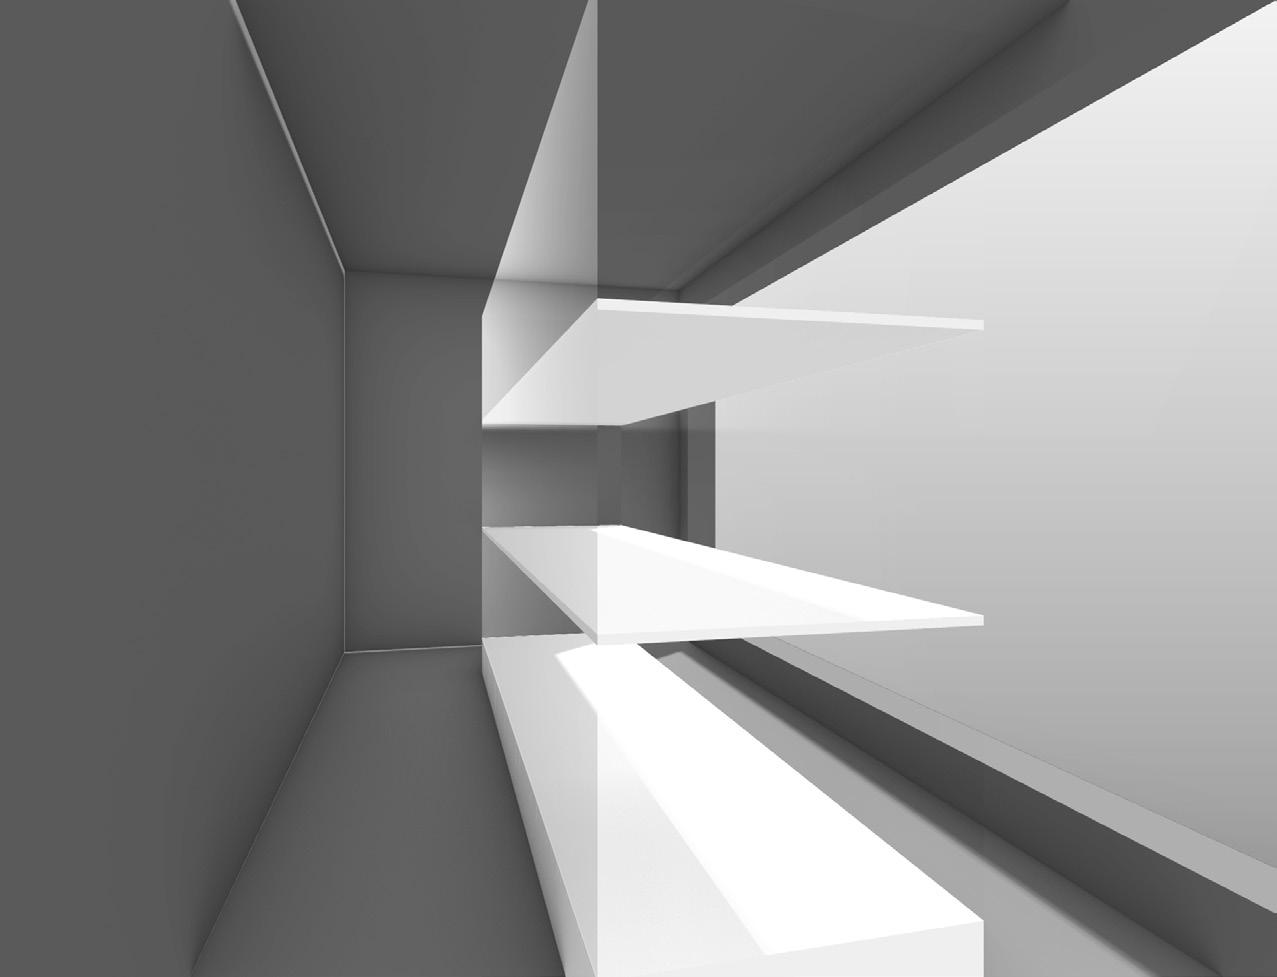
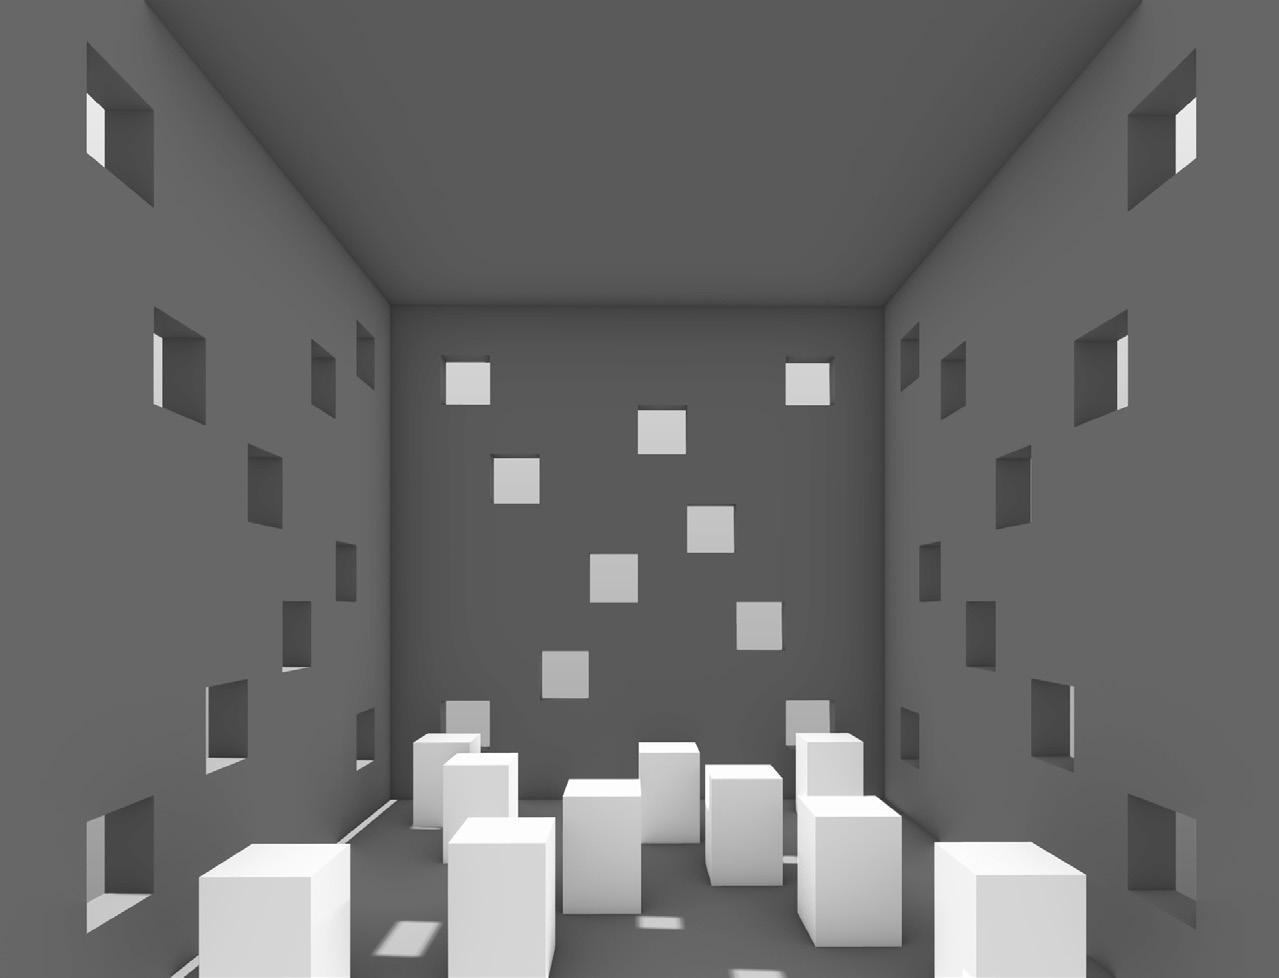
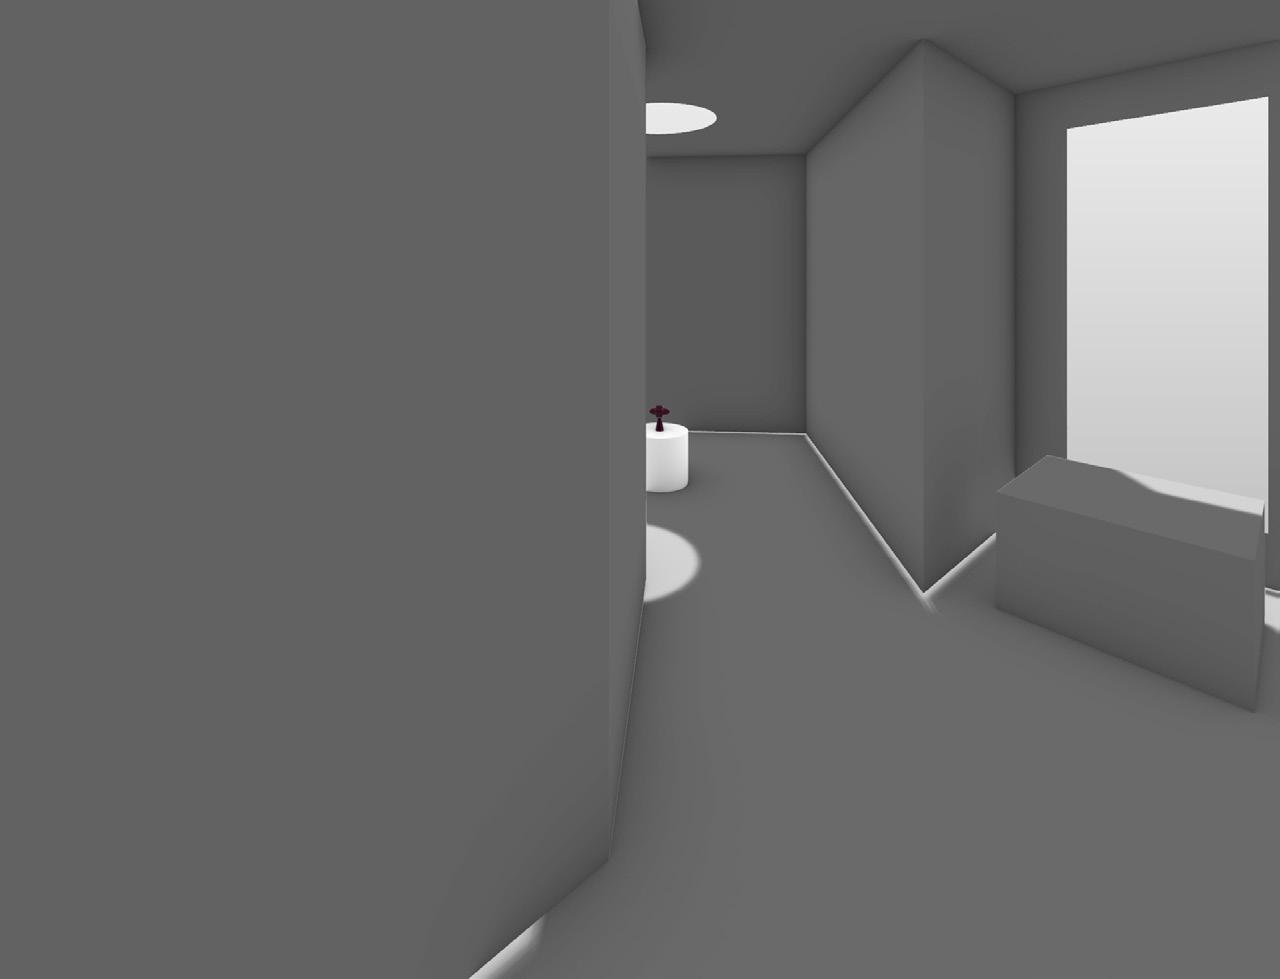
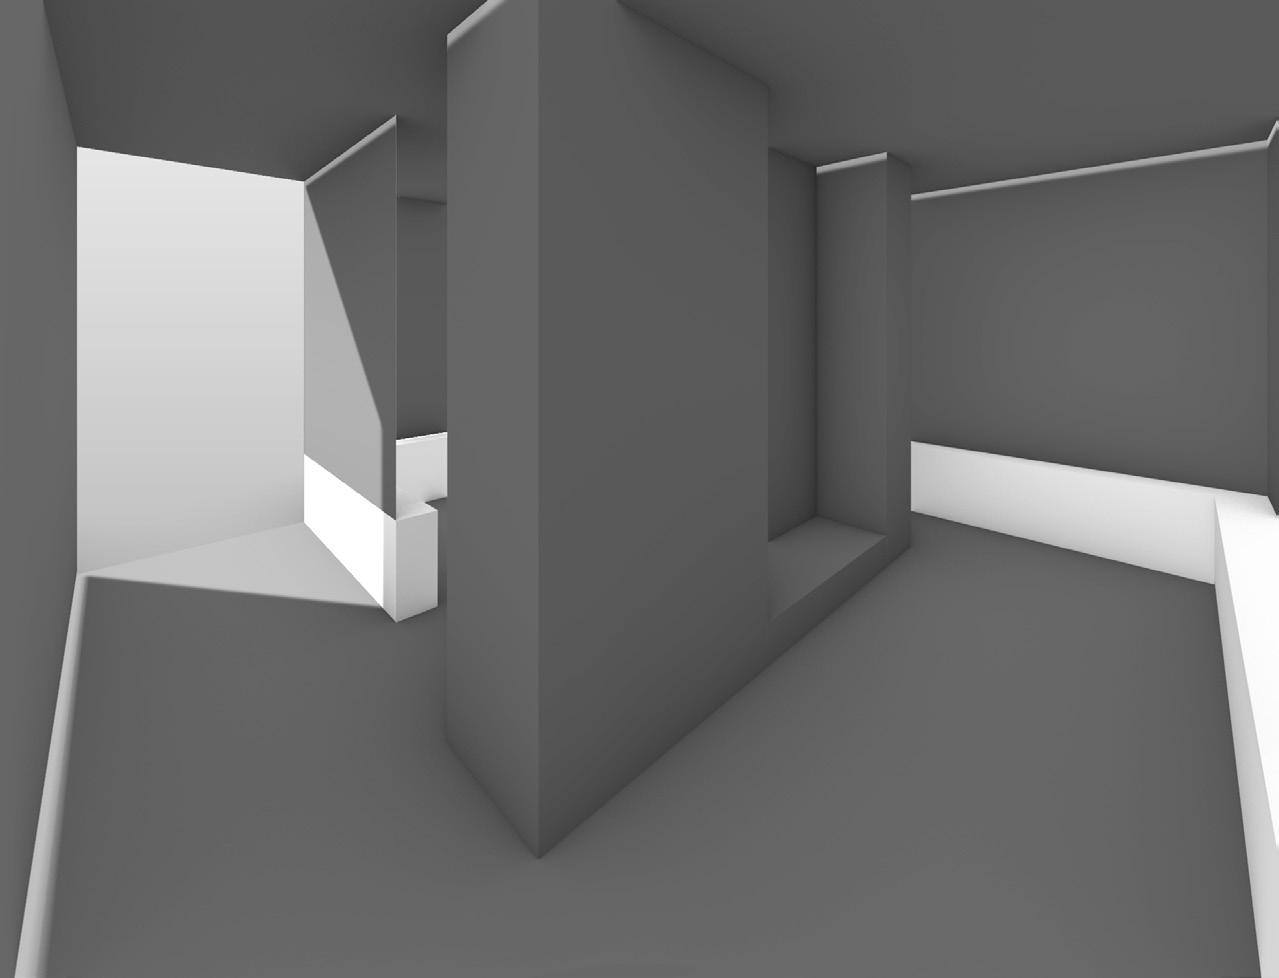
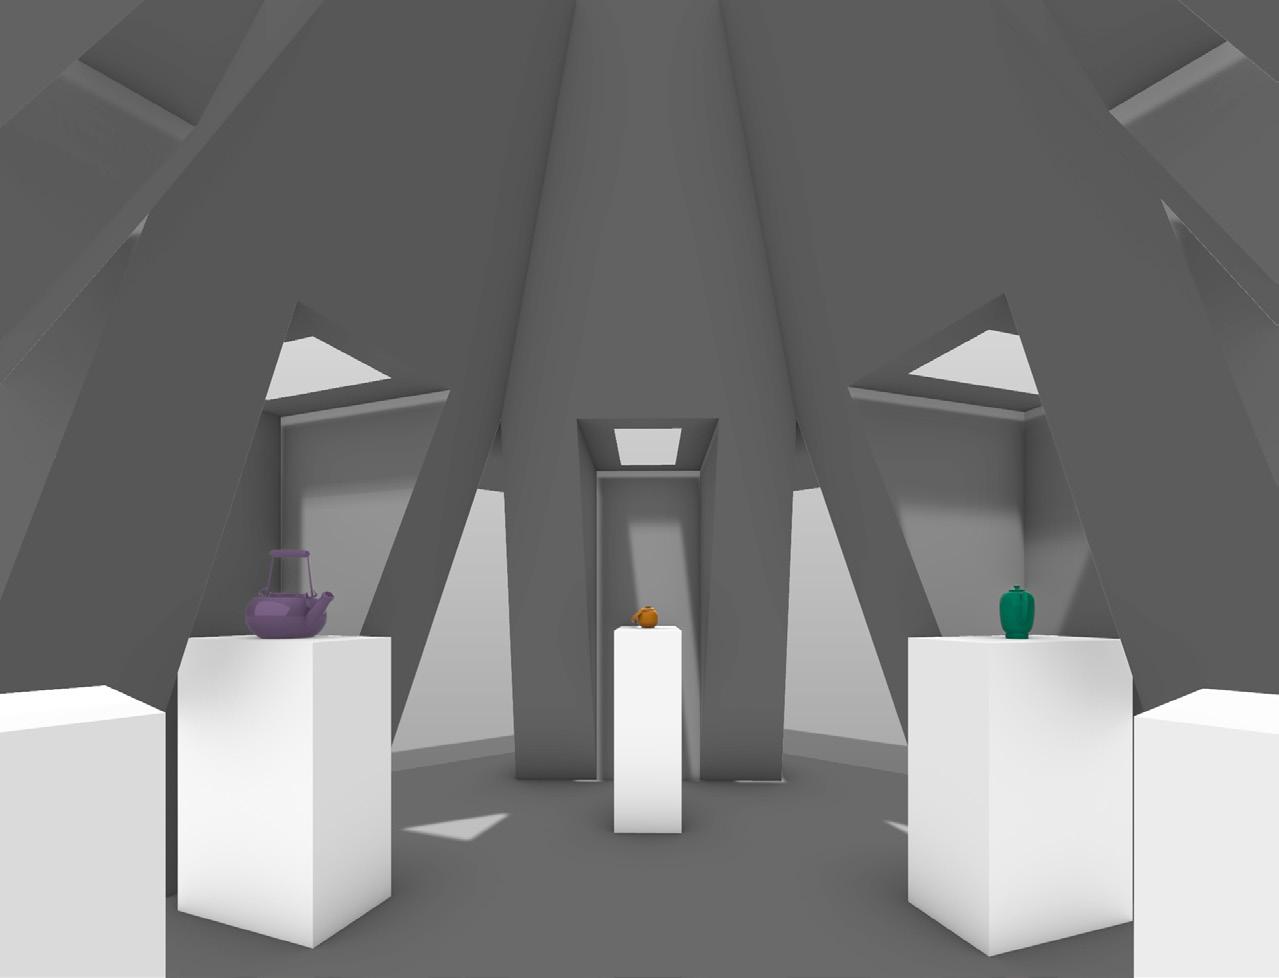
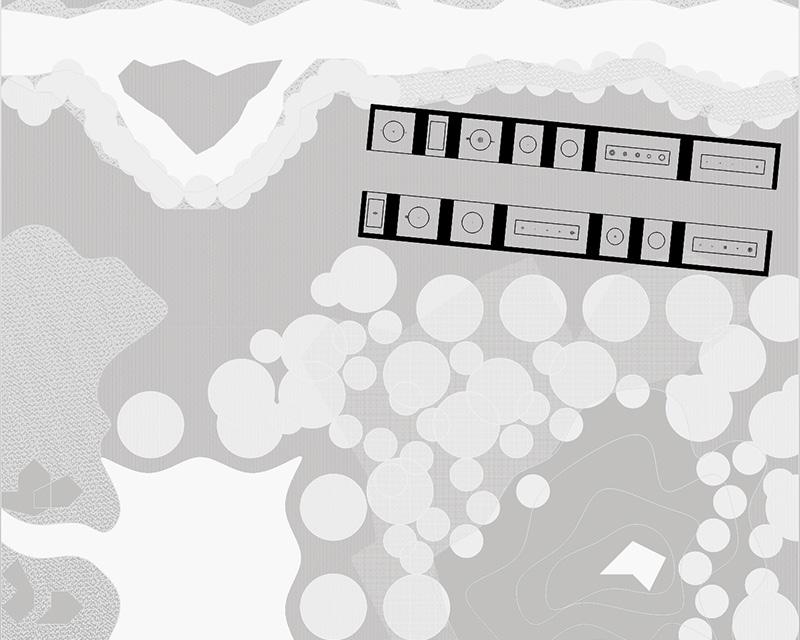
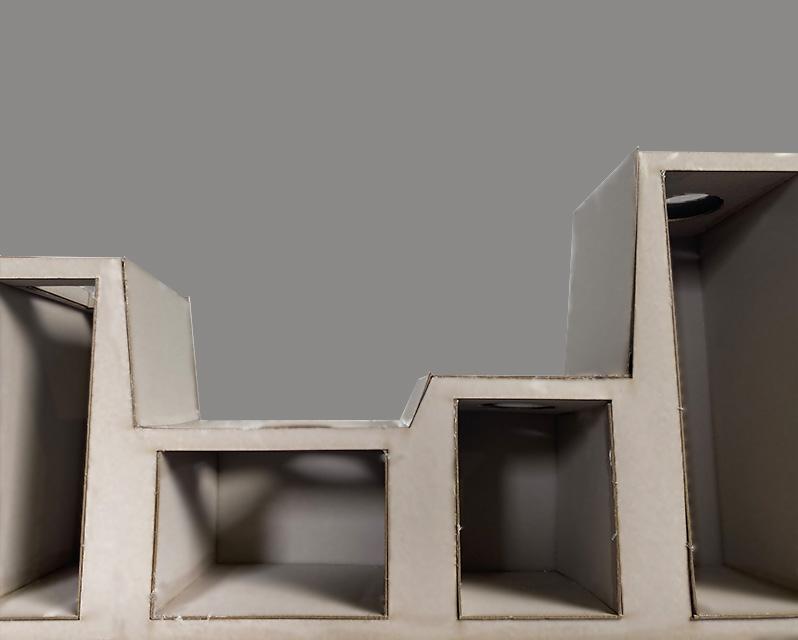
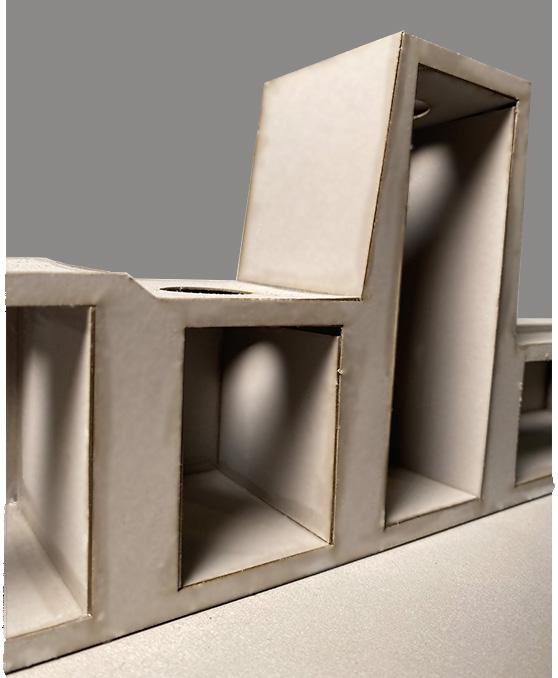
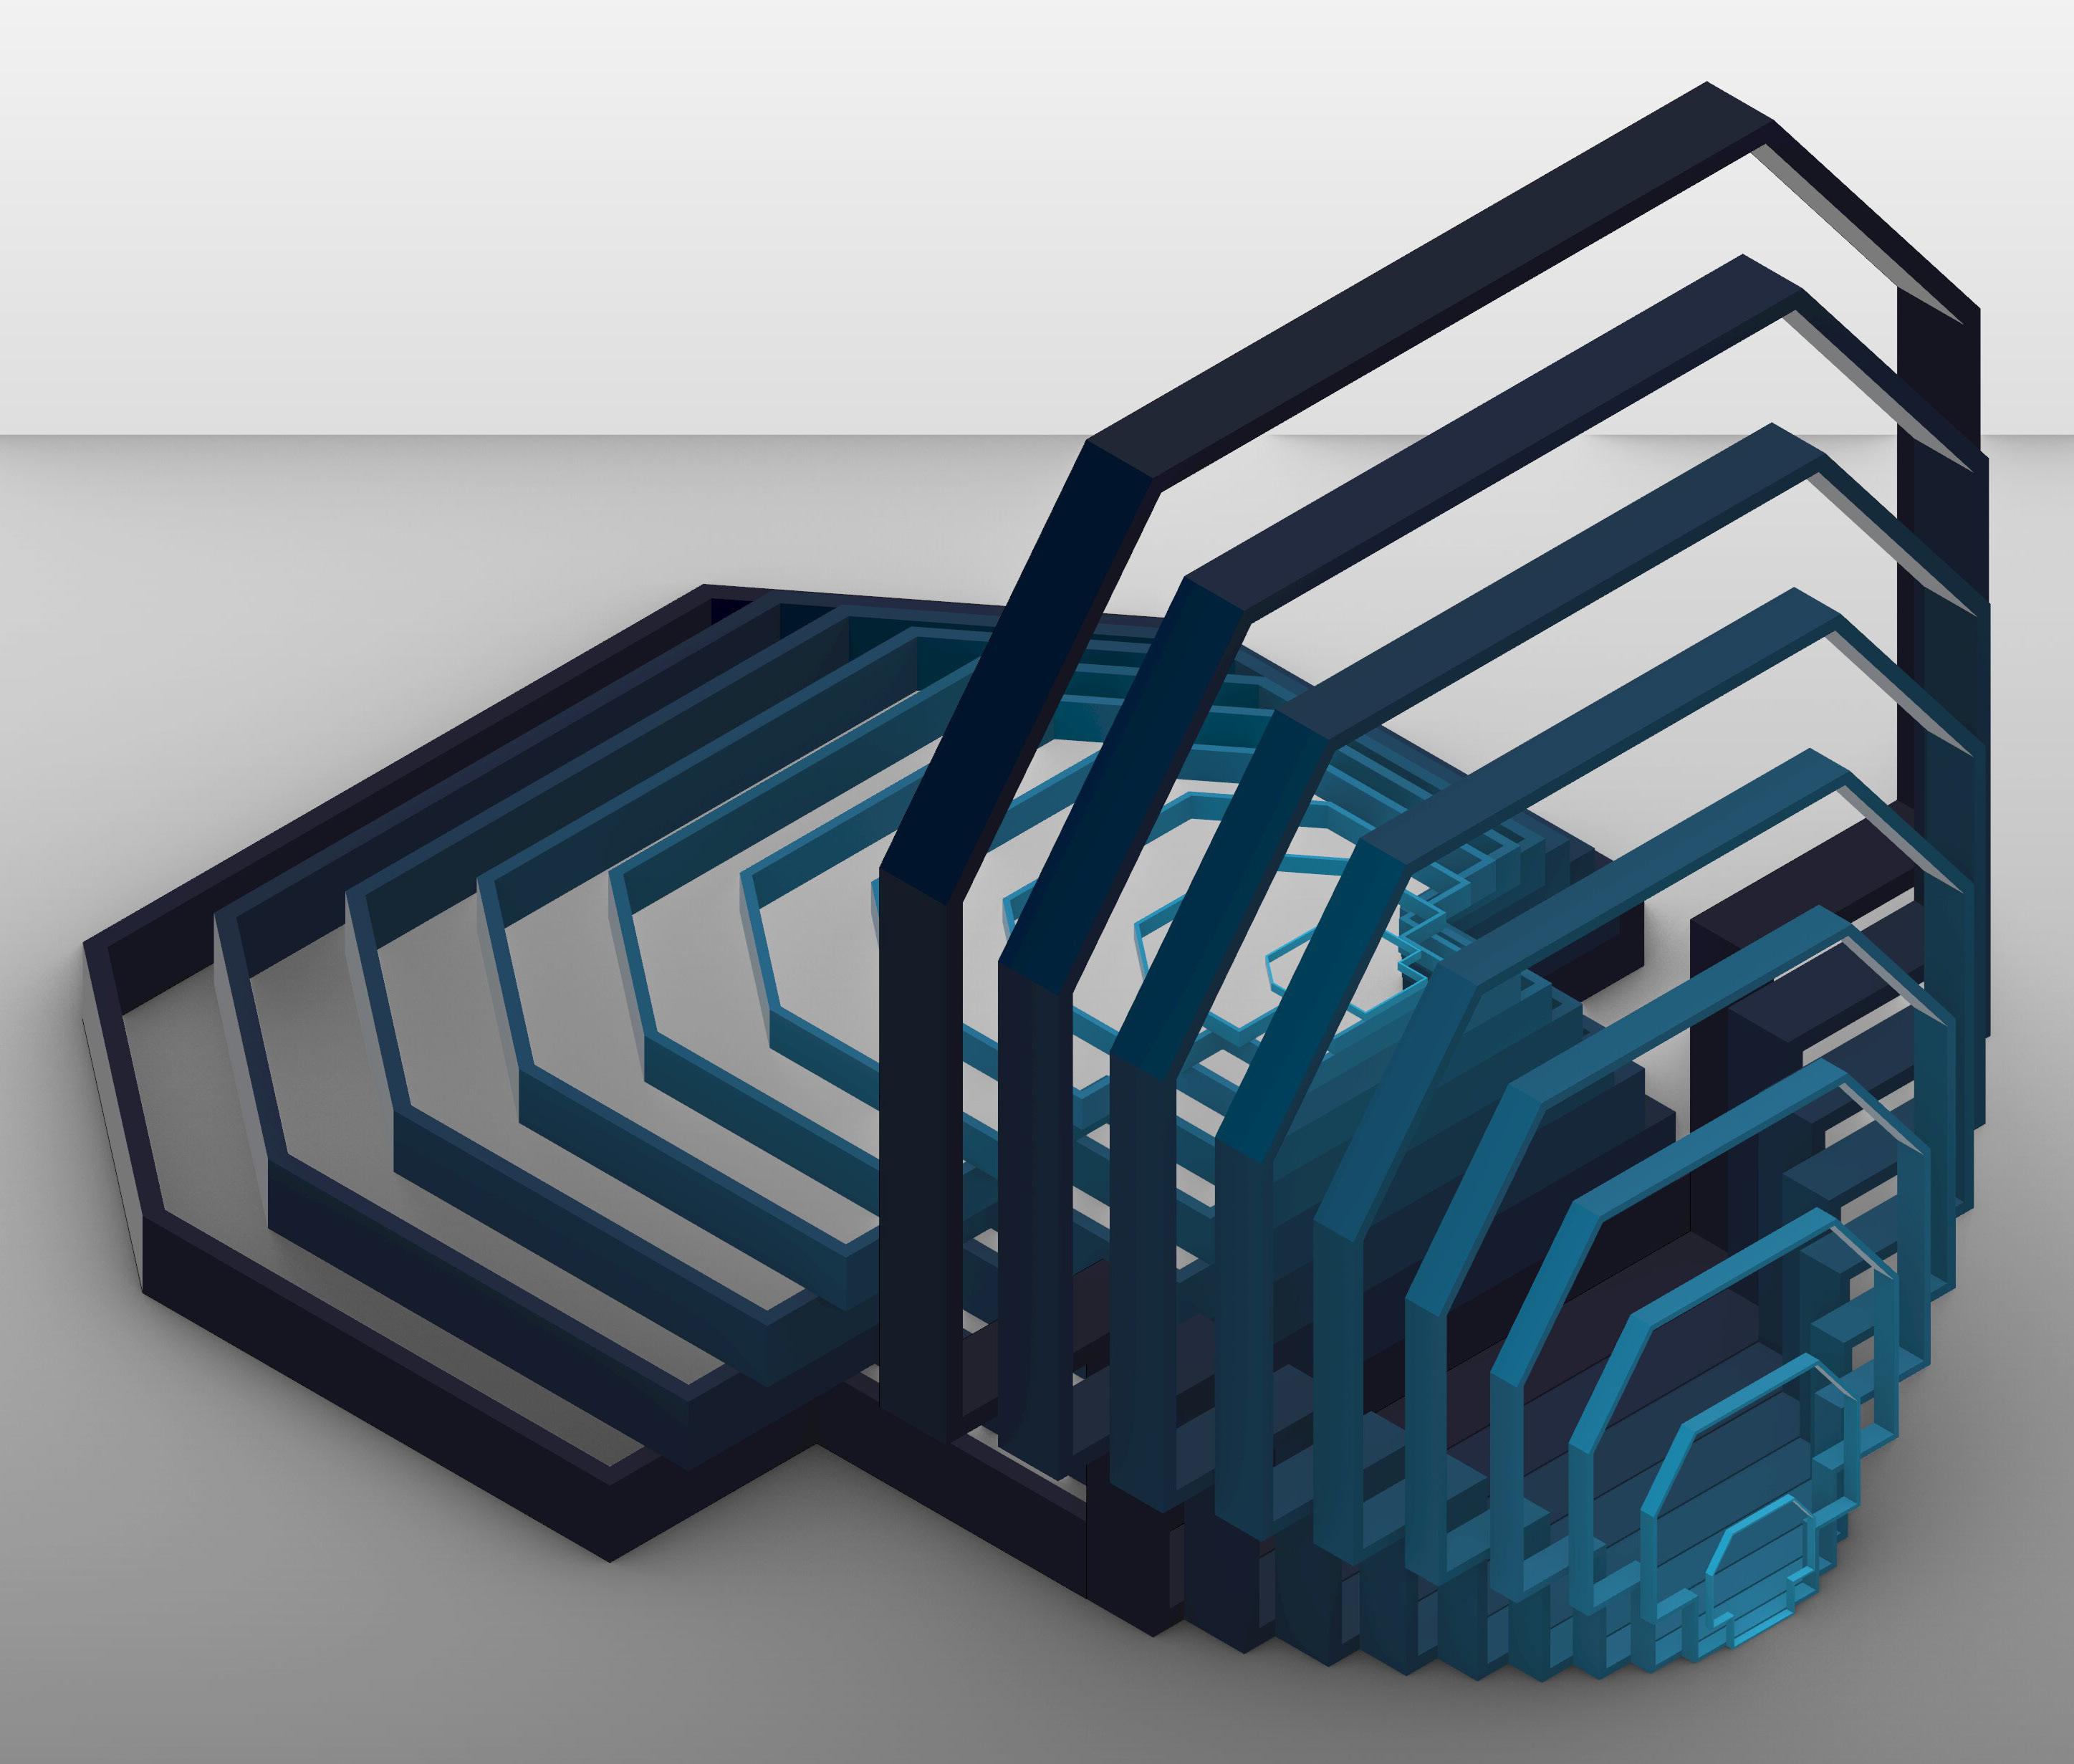
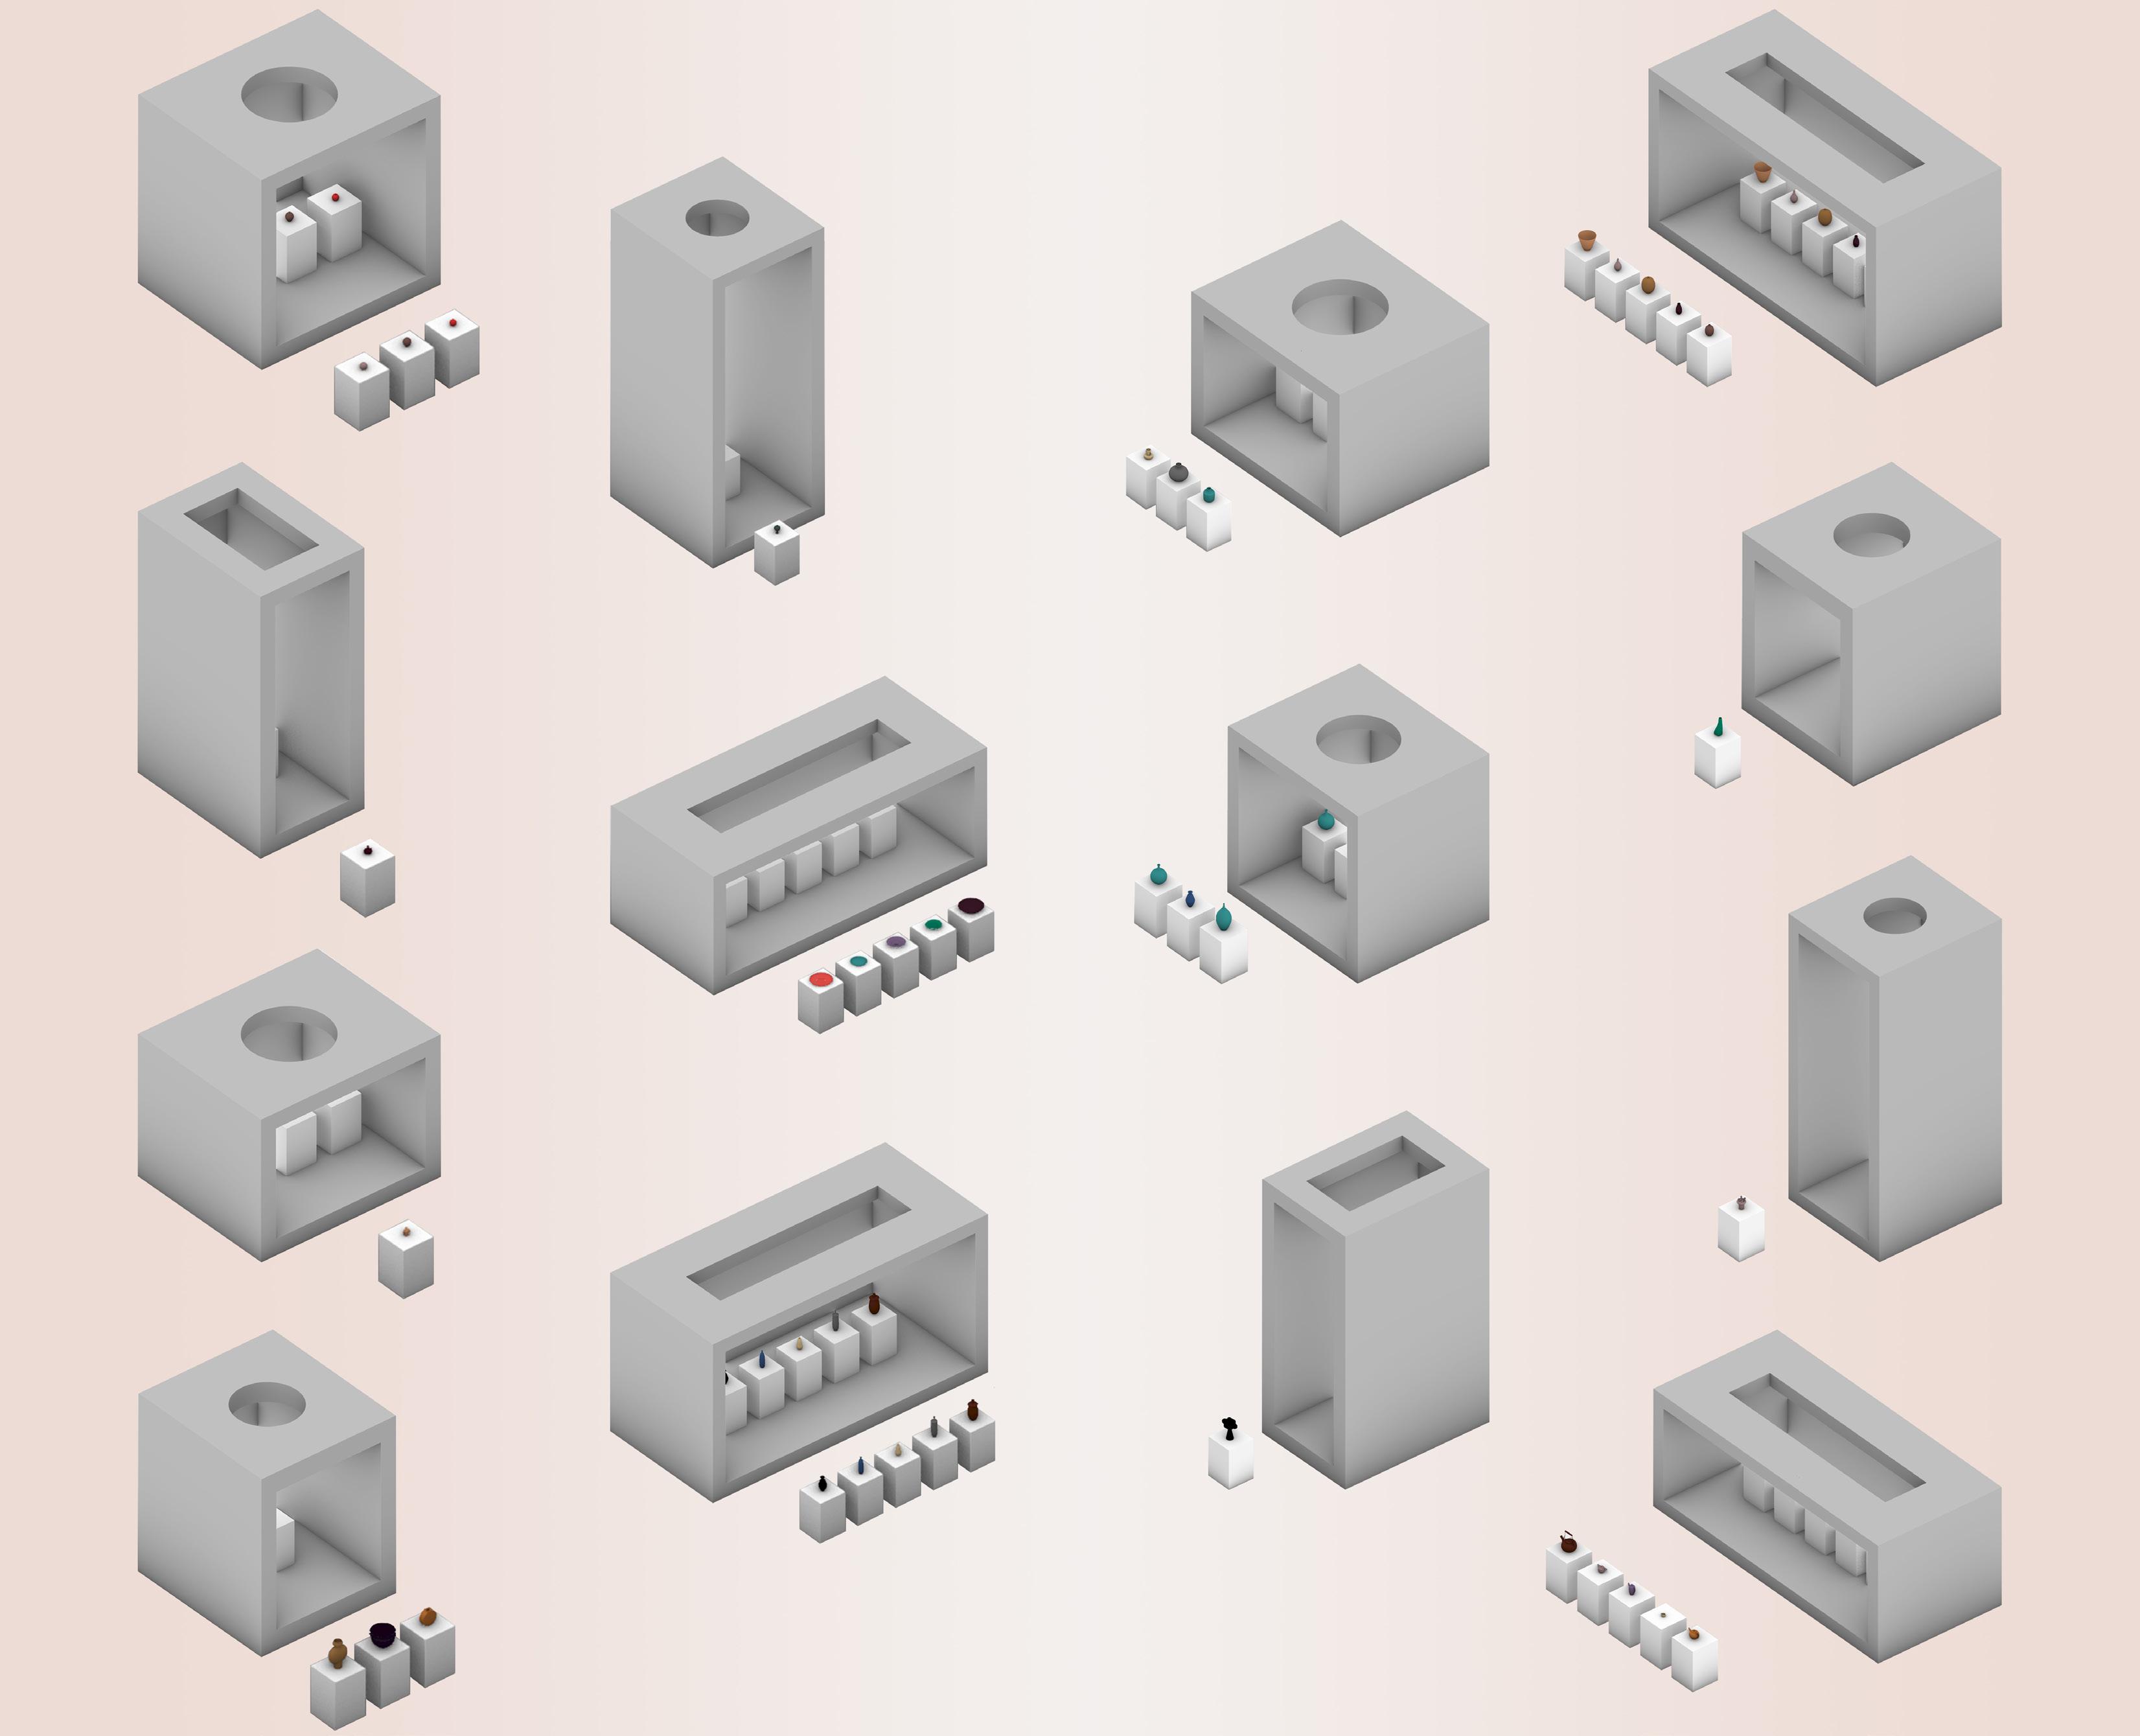
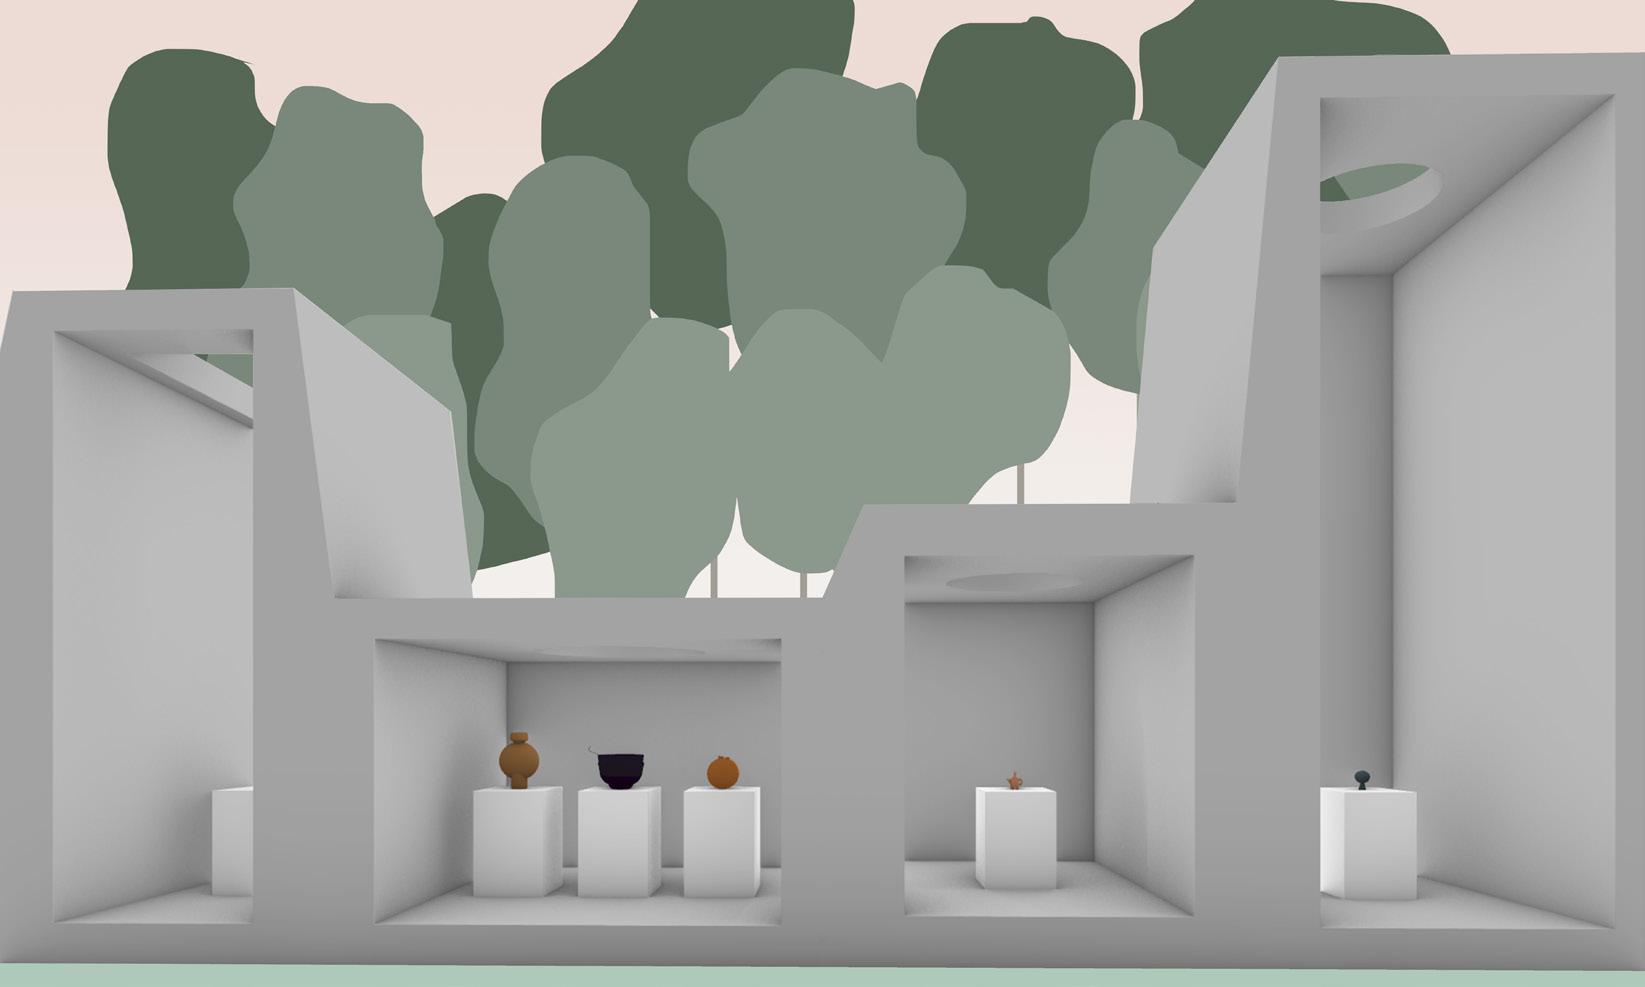
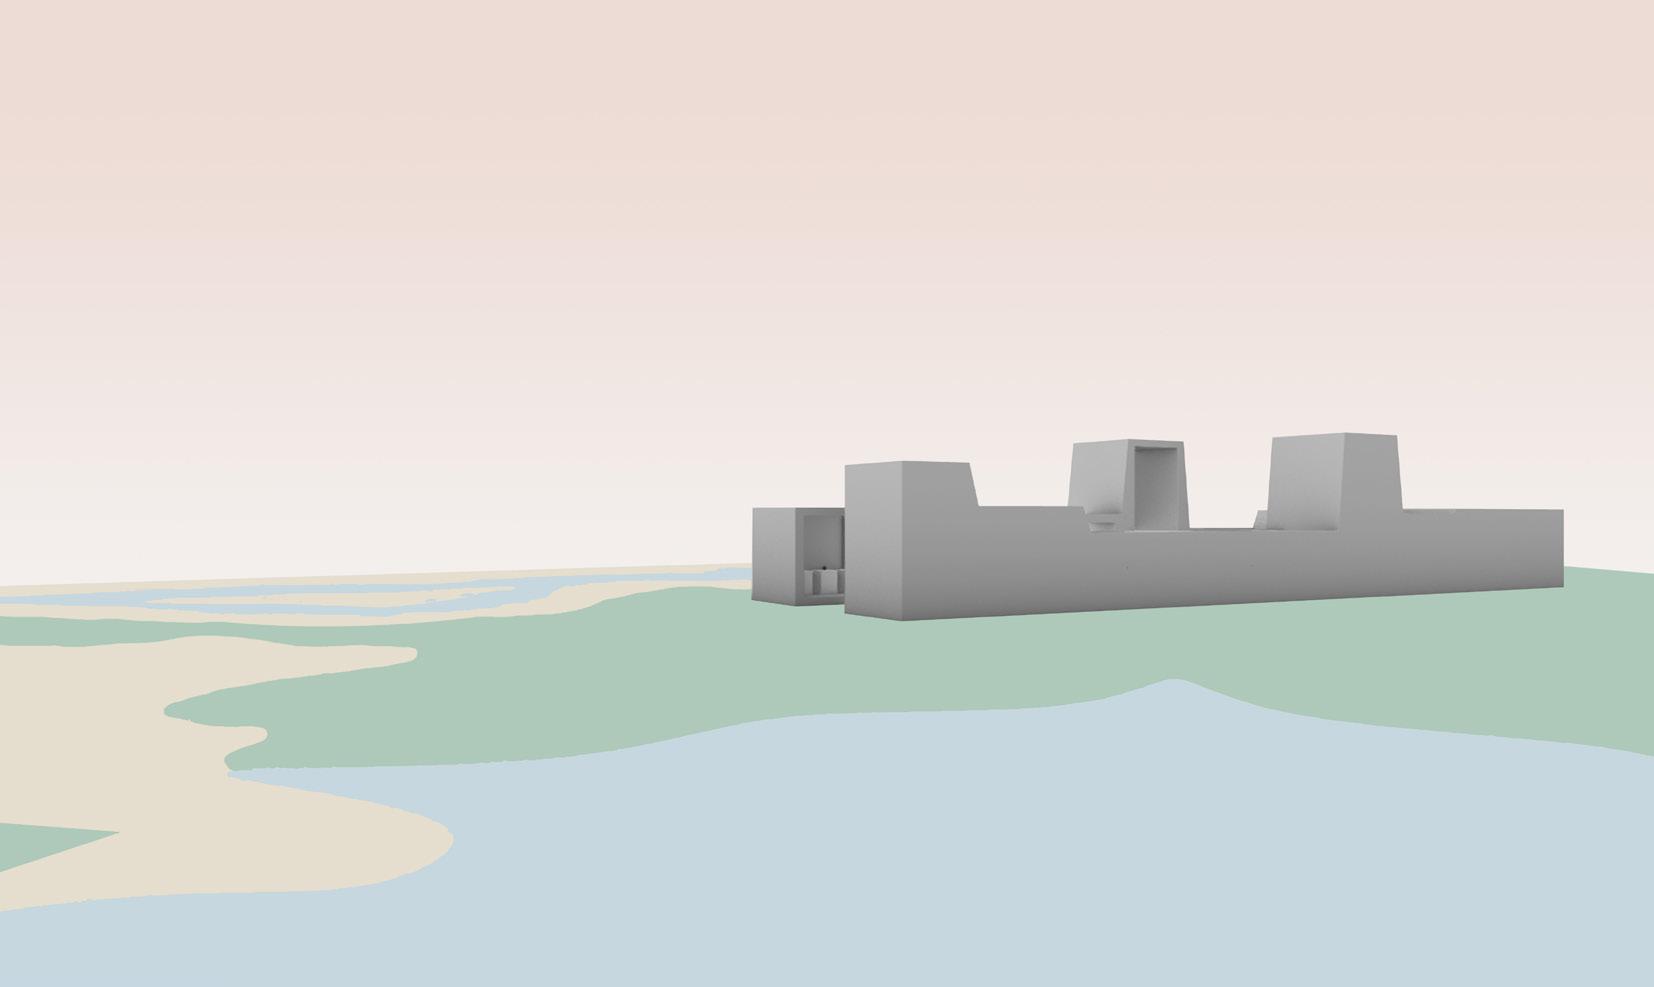
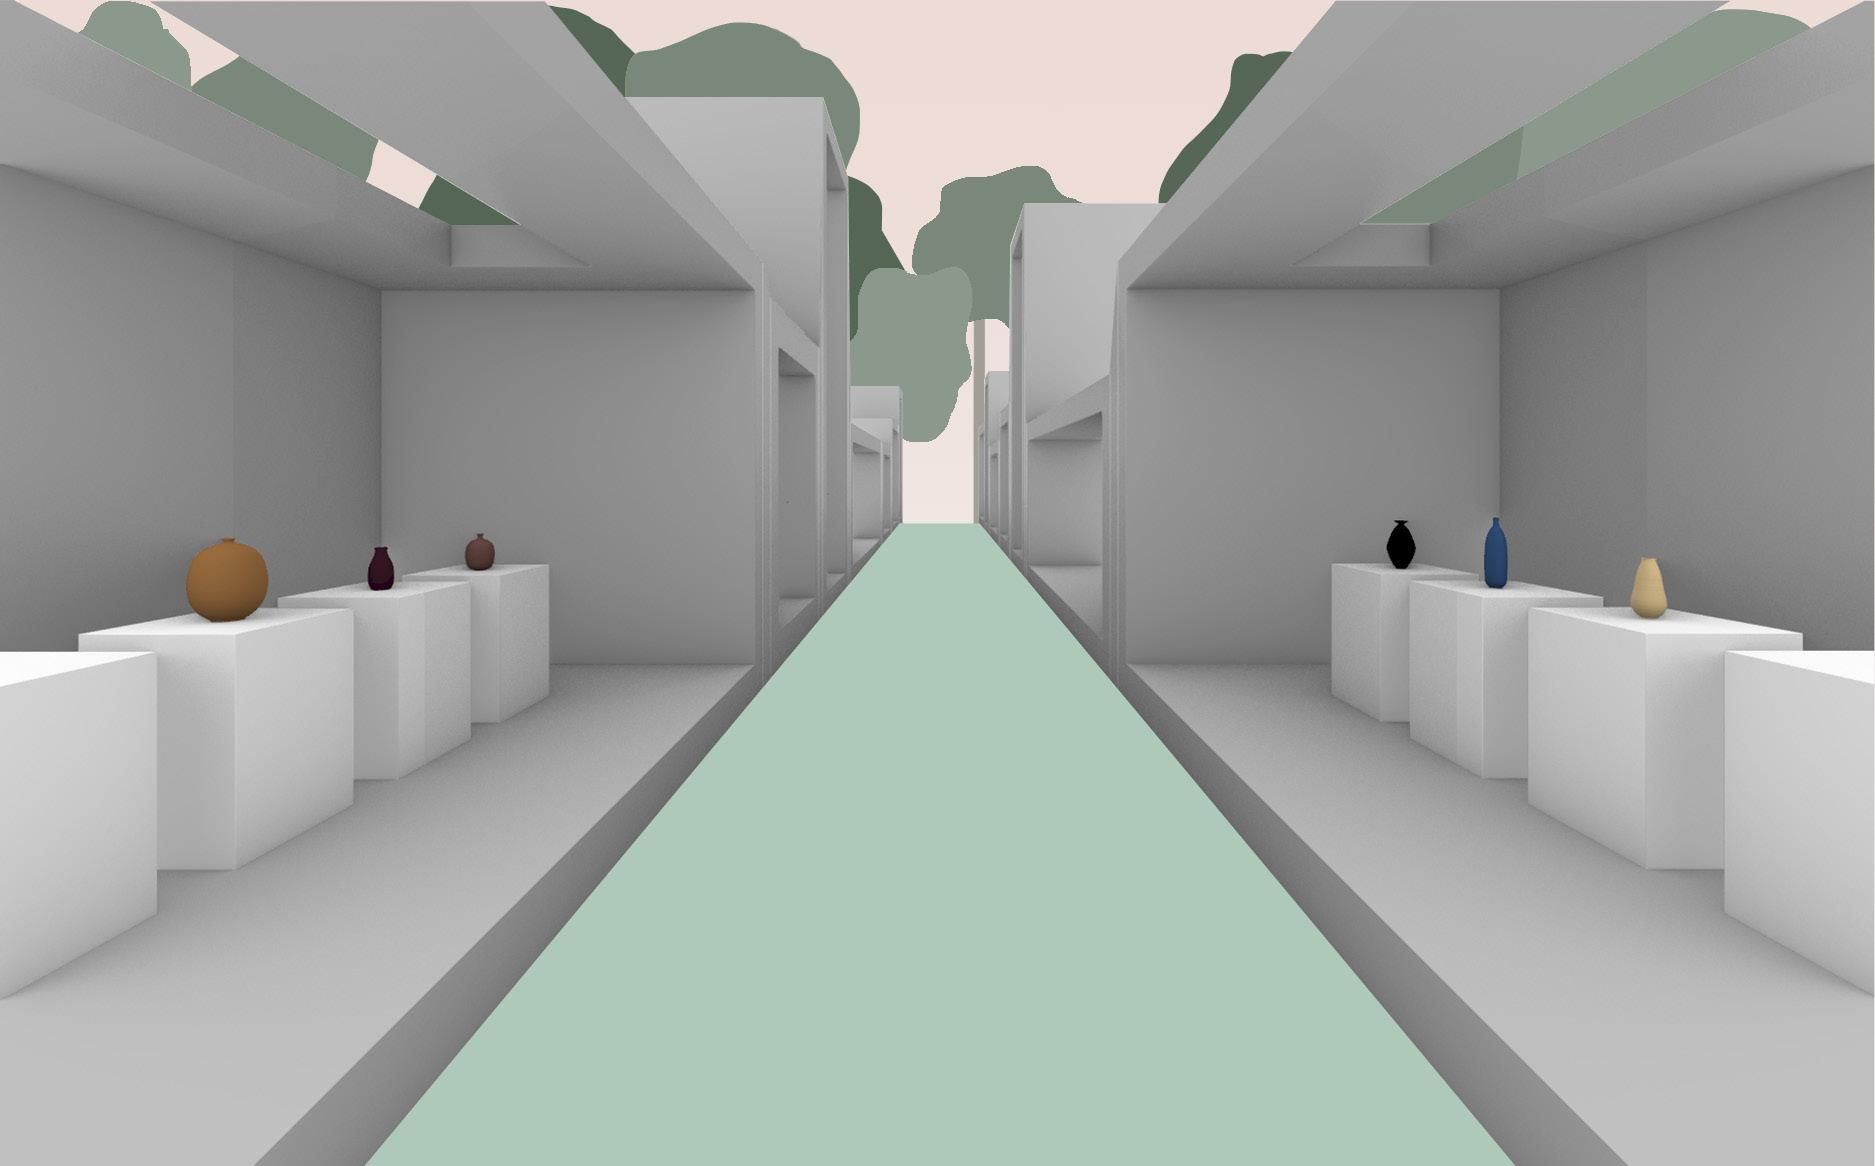
These section drawings highlight the importance of skylights in this pavilion. All the rooms have either a circle or rectangle skylight to allow light to shine on the 36 ceramics. The pavilion is split into fourteen rooms: four rooms of 5 objects, four rooms of 3 objects, and six rooms with one object where two rooms have a rectangular skylight and the other four have a circular skylight. The rooms vary in height and width but they all have the same depth so that the guests can compare the rooms differences to one similarity.
17 17
Plan
Horizontal Section
Vertical Section
18 18
View
Digital Drawings Hallway View Far
Room View Axonometric Drawing
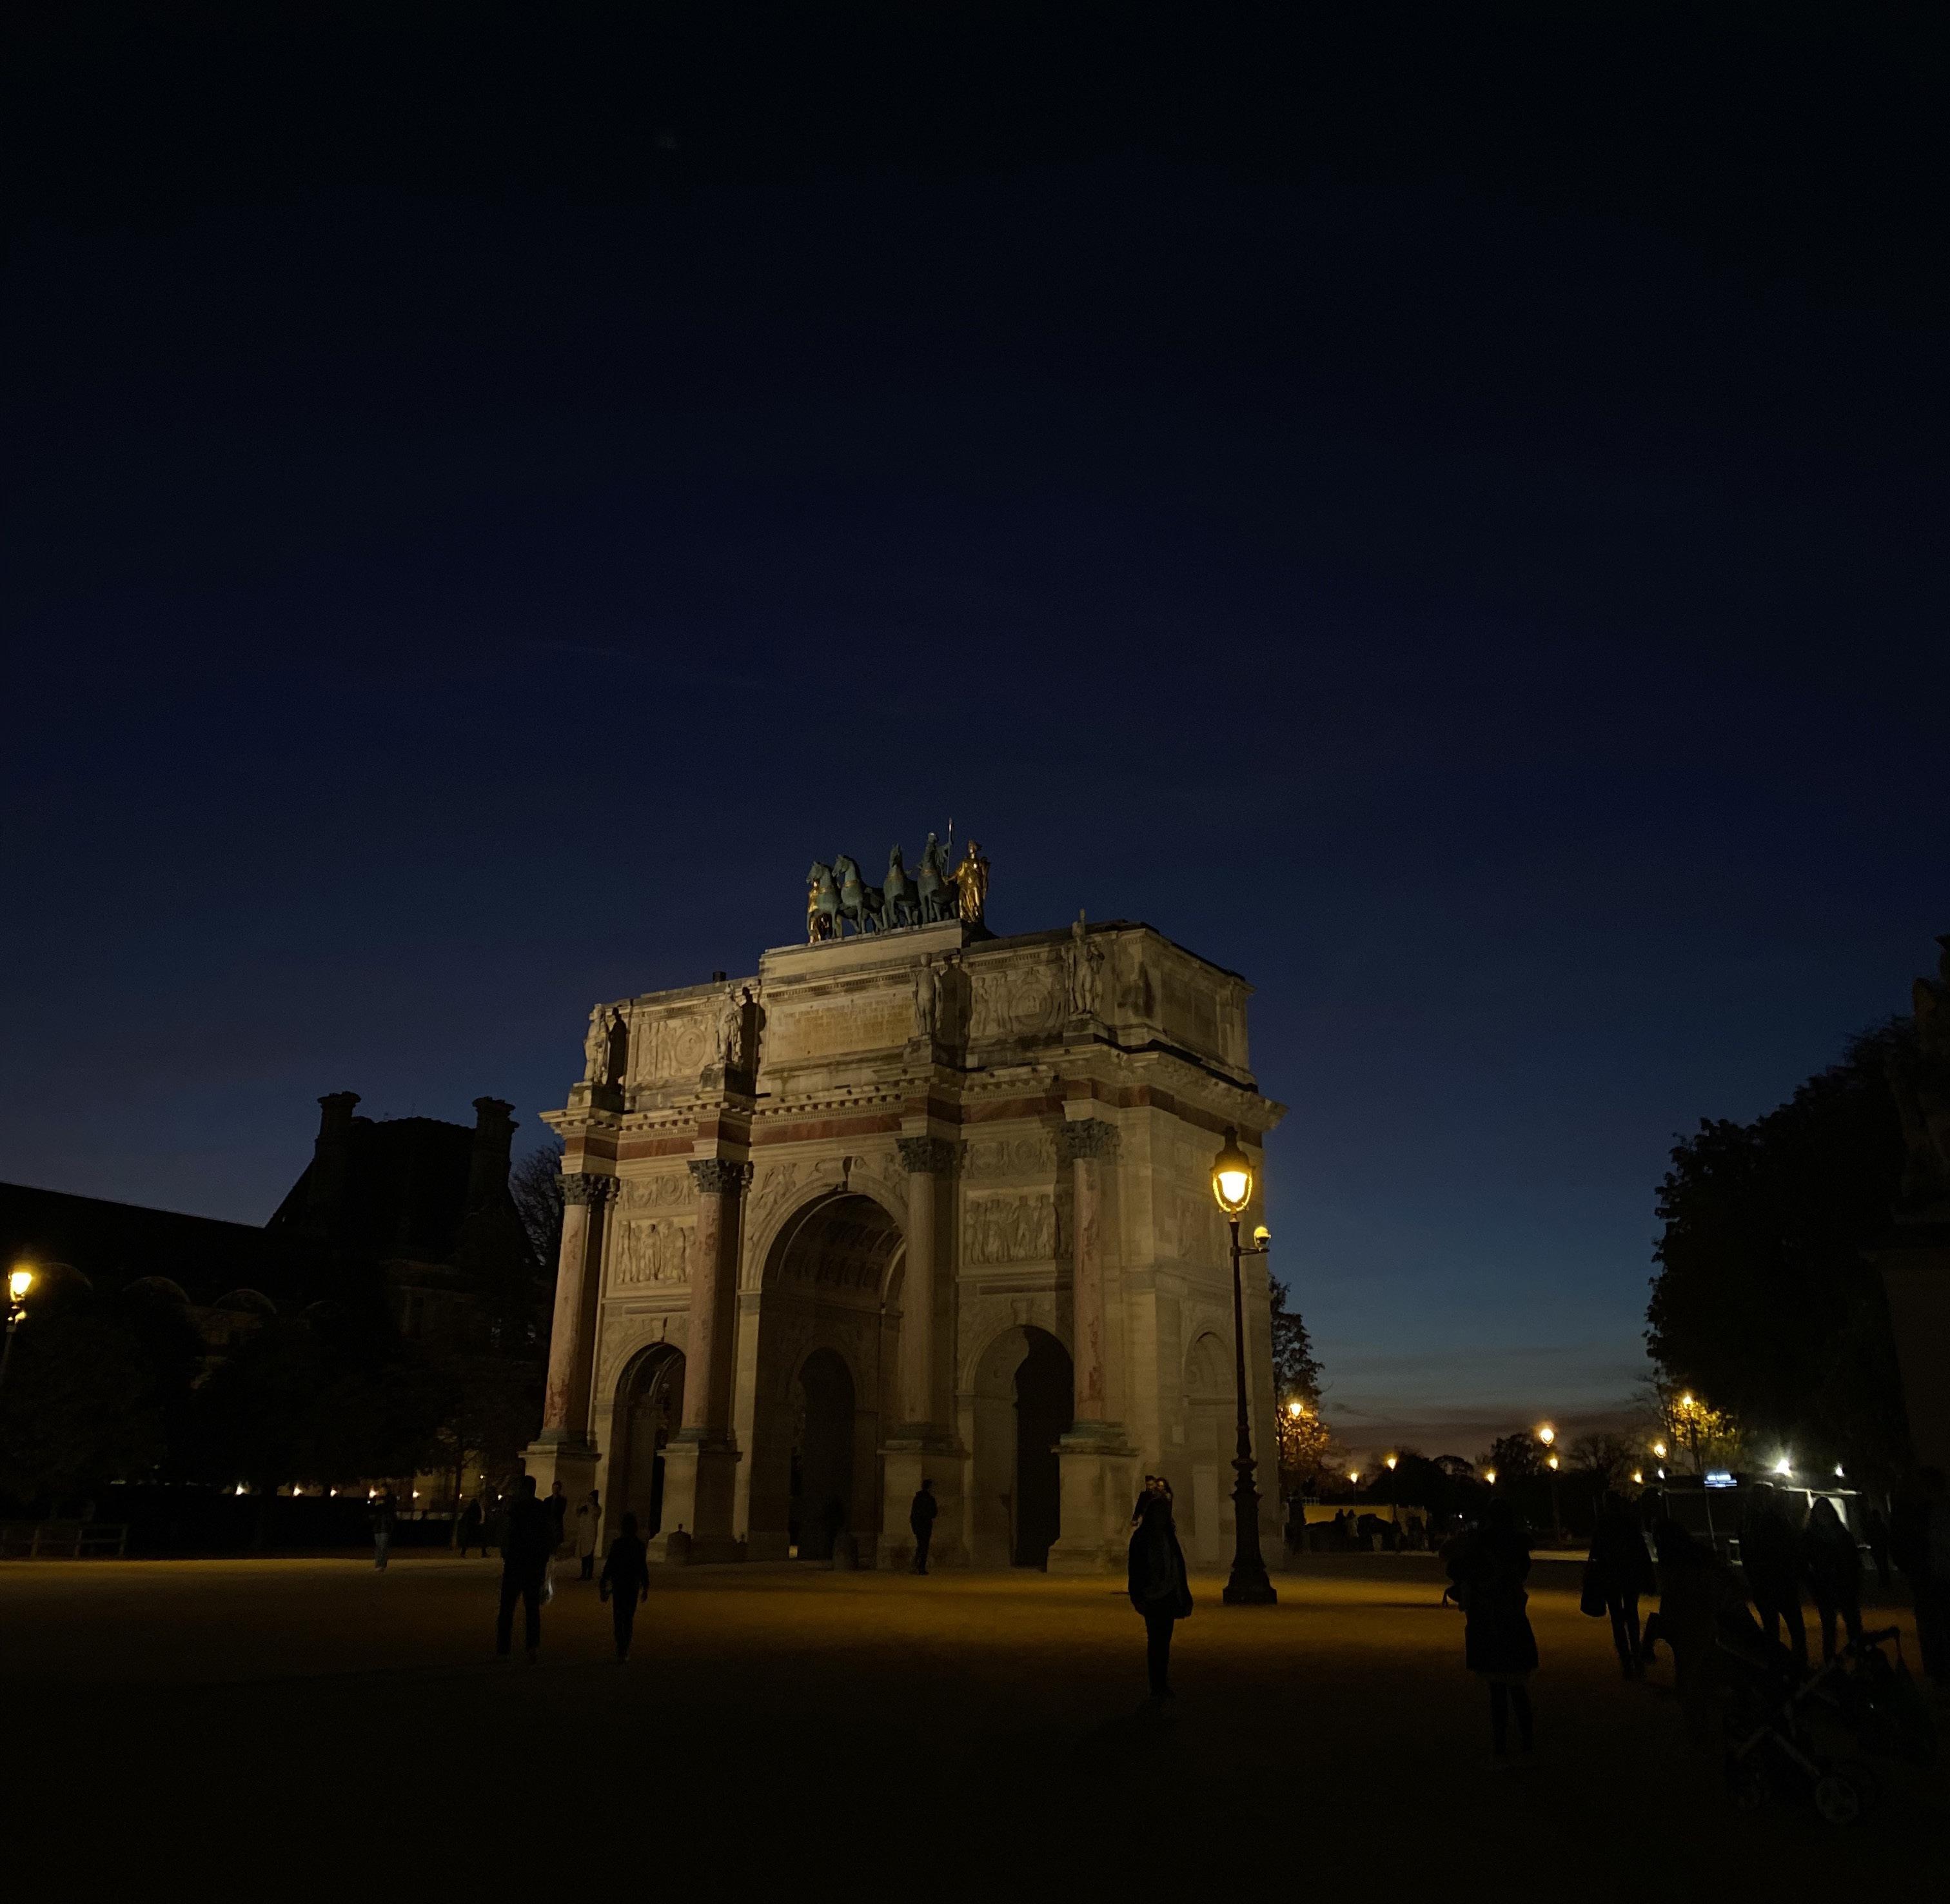 Paloma Valderrama Paloma.B.ValderramaCampos@gmail.com