


**Please inspect thoroughly before installation to ensure that the product has not been damaged and is correct. No claims for damage or incorrect items will be recognised after installation.**
IMPORTANT: PLEASE READ PRIOR TO INSTALLATION
• Take Care While Transporting and Handling Goods.
• This product should be installed by a qualified, licensed Tradesperson.
• Please inspect thoroughly before installation to ensure that the product has not been damaged and is correct. No claims for damage or incorrect items will be recognised after installation.
START HERE
Prior to opening any packaging, check that the items you have received match the items on your invoice. If goods are incorrect, faulty, damaged or differ to what you should have received
Please DO NOT proceed with installation and contact your retailer immediately.
Claims for damages and incorrect items delivered will not be processed if the items have been installed or attempted to have been installed.
Please note: All Otti vanities must be installed with tiles behind them. Any vanities which have been “tiled in” will be void of warranty.
All Otti vanities must be installed a minimum of 400mm away from designated wet areas and heating units.
Do not expose furniture to shower spray.
It is important that your bathroom is adequatley ventilated to eliminate moisture build up. High humidity will lead to permanent dampness and mould resulting in a deterioration of the materials in your bathroom.
Refer to ottiaustralia.com.au for more positioning and clearance guides
300mm (minimum clearance)
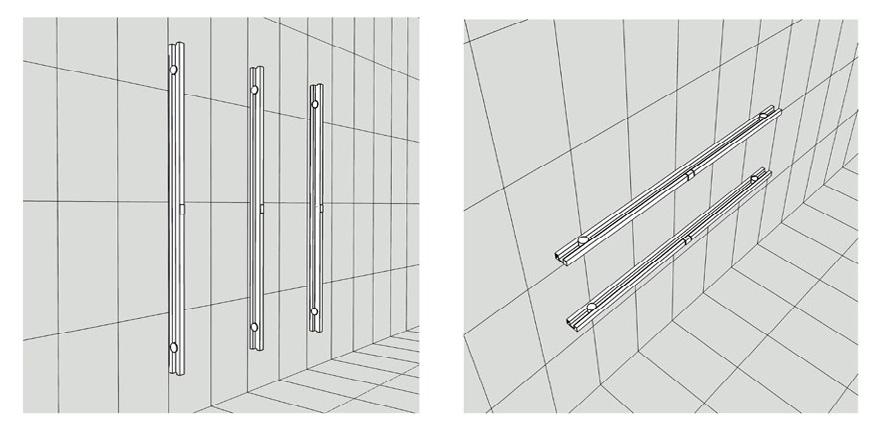
Should your wall be a sheeted wall, hung your bathroom furniture and wall hung basins to supporting nogs fitted between the studs inside your wall, as detailed. This will give a solid wall backing to attach the vanity to. If necessary fix additional support nogs at desired height for cabinet and basin fixing. Ensure total width of support nog exceeds vanity width.
It is mandatory that the vanity to be secured to the stud and noggins which is behind your plaster board and tiling.
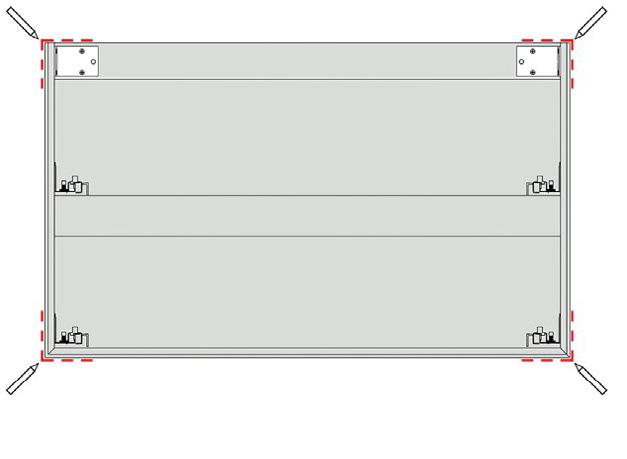
Before starting, check that your wall is plumb and flat. To ensure doors and drawers operate smoothly if wall is out of alignment use packers to level vanity so it sits level, avoiding the cabinet from twisting out of alignment and not function correctly.
Ensure the wall is tiled behind the cabinet and clearance allowed for doors and drawers to open (filler panel required where cabinet is going hard against a wall).
It is recommended that vanities are installed 300mm away from any wet area such as baths, spas and showers.
Ensure your tiled wall is not bowed or warped in either direction. Installation onto a bowed or twisted wall may result in any or all of the following occurring:
a. Cracks in joinery
b. Drawer misalignments
c. Hardware not performing correctly
If it is not possible to make the wall or floor plumb and straight you must pack the vanity out so that it does not follow the out of aligned wall.
Floor standing vanities must sit on a level floor or be packed so they sit level and true.
The Doors &Drawers
After installation every cabinet you will need some adjustment as the doors and drawers move during transport and installation. The cabinet MUST be level before adjustments are made. It is the responsibility of the installer to ensure these adjustments are done correctly. No warranty claims will be considered until this adjustment process is completed. Refer to the instructions below.
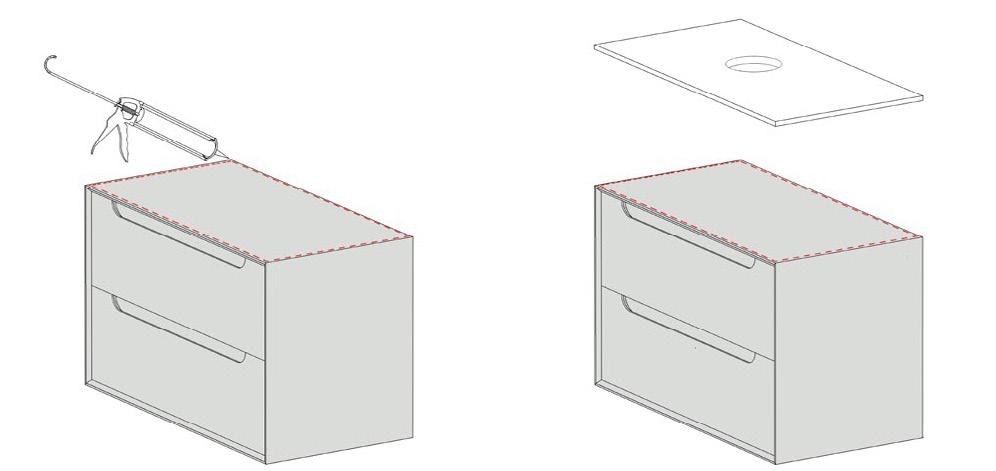
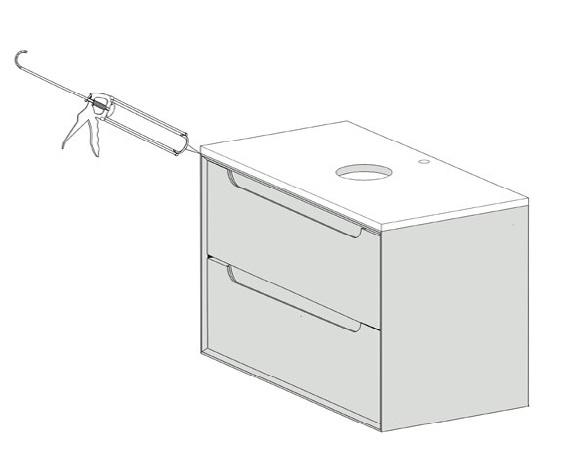
For vanities, Add the top to the cabinet and align all sides, use a thin bead of non-acidic silicone on all four edges. Also seal all cabinet edges against floor and wall to prevent water penetration. DO NOT Overtighten the wastes to the basins as it can lead to stress and damage to the basin or top. We recommend that the wastes be tightened by hand only, and then silicone sealed.

If you have a problem - and have carefully checked all the steps above to ensure it has been done right - give us a call. We’ll be glad to help. To make it easy for us, please email some photos of the problem and of the job detail label to service@ottiaustralia.com.au including photos of the levels as shown in Step 1 and Step 2 above.
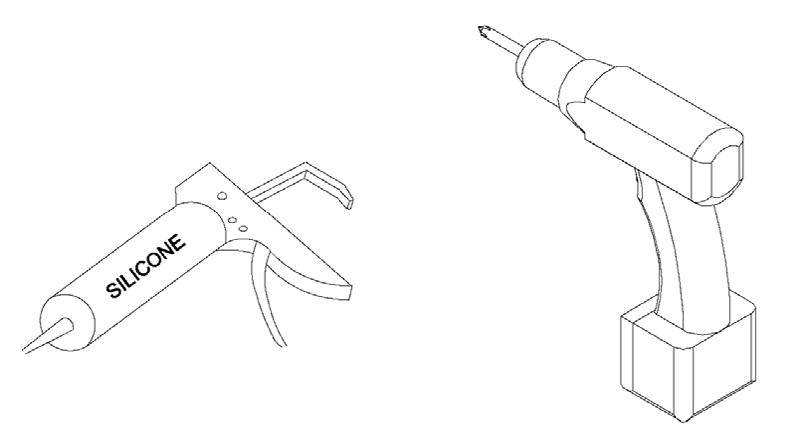
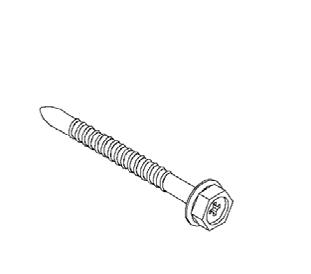
REQUIRED TOOLS FOR INSTALLATION PARTS INCLUDED

Use Temporary Supports to use whilst installing Vanity such as a sturdy crate or a box
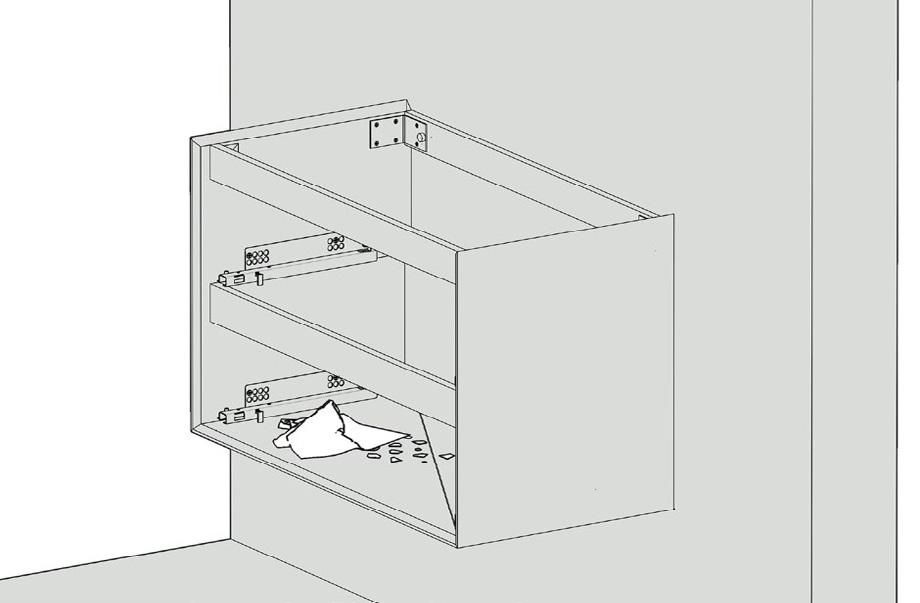
Remove all drawers by following the provided otti Installation to prevent dirt and dust build up.

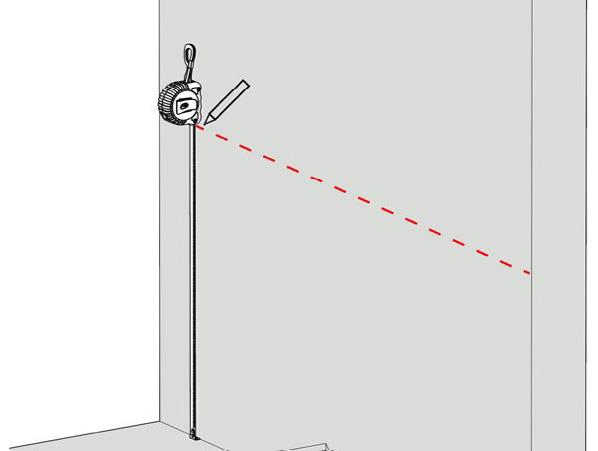
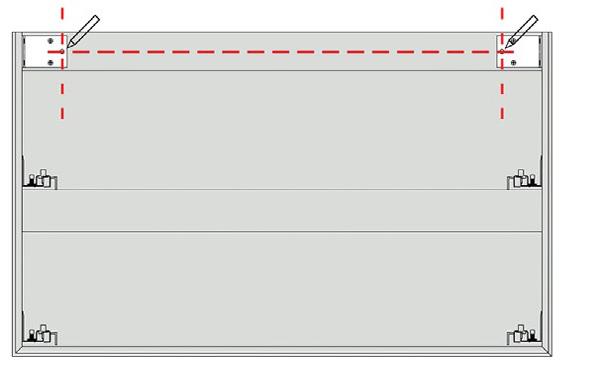
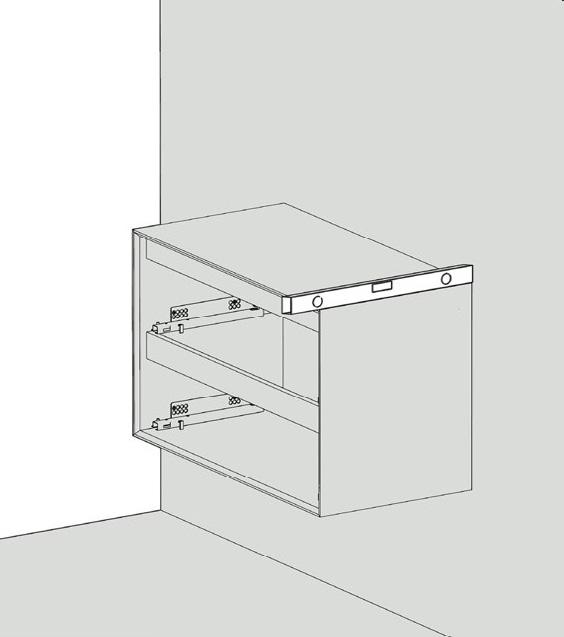
After completing the “Prior to Installation Checklist” on page 2, mark the position of the top of the vanity. Don’t forget to factor in the top/basin thickness to get the correct height. Note: Vanity must attach to a minimum of two support beams, mark these positions. Measure correct plumbing loctions and drill holes for plumbing in the back panel and/or base of the cabinet with an appropriate sized hole saw. Pre-drill screw locations for fastening to wall.

Temporary Supports to use whilst installing Vanity such as a sturdy crate or a box
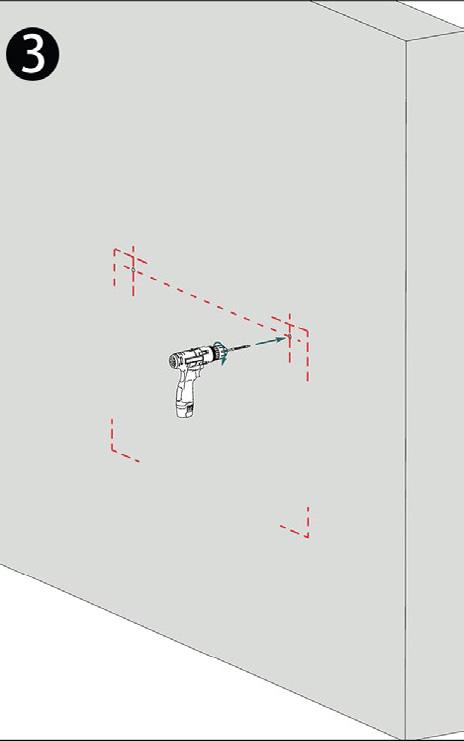
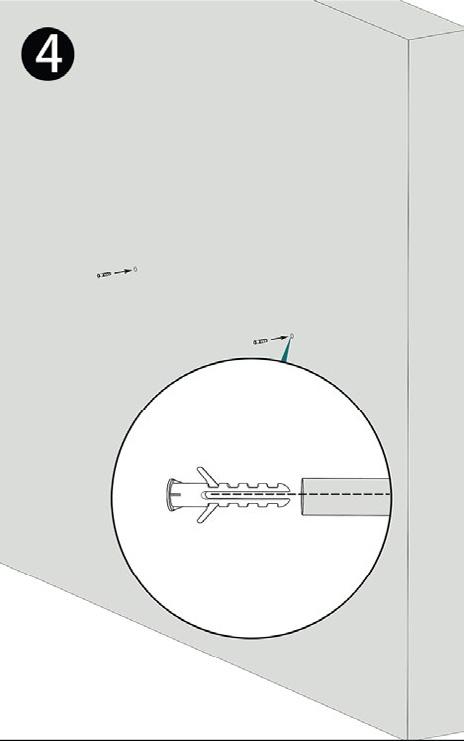
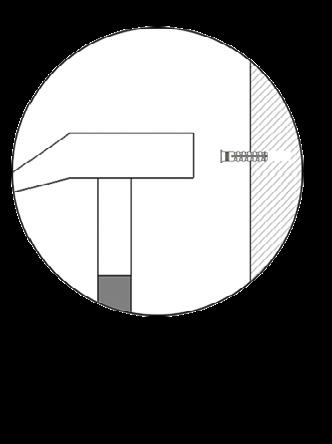
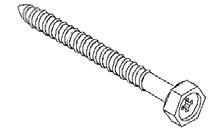
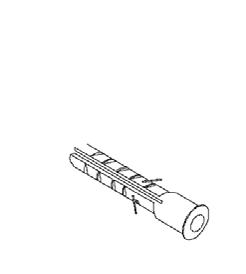
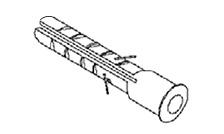
Drill holes for mounting screws provided, ensure these are drilled into supporting wall (through masonary, brick wall or noggins to support the cabinet load). Hammer in plugs into the drill holes.
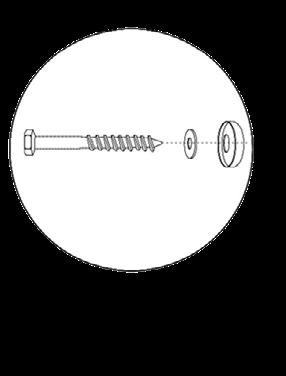
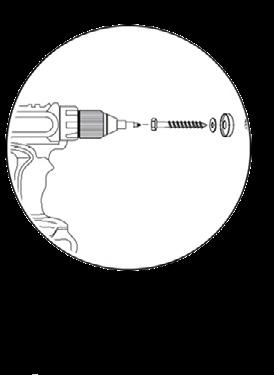
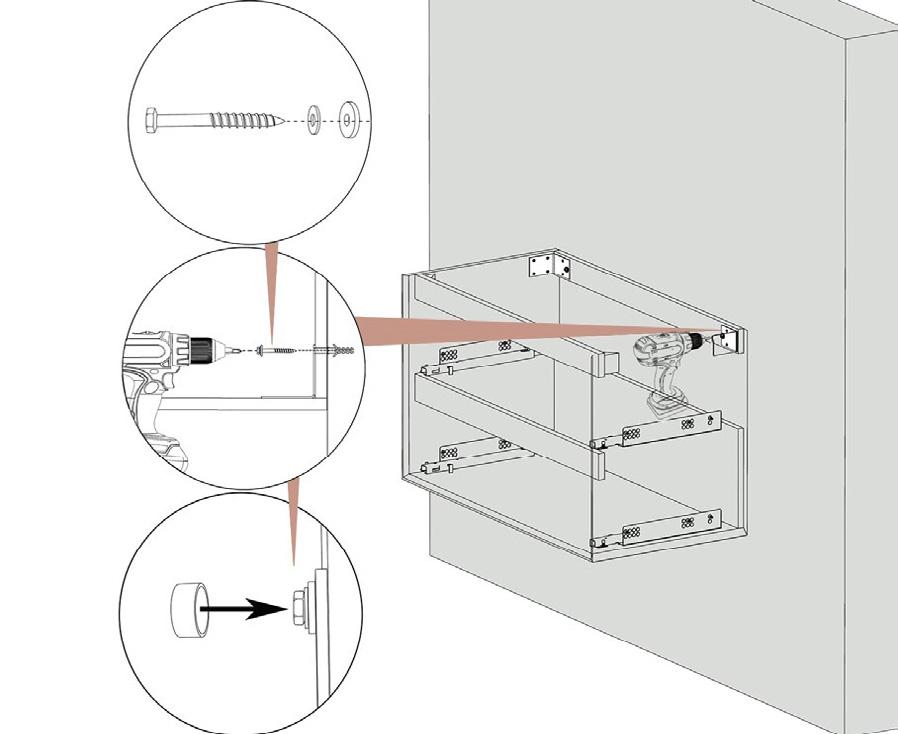

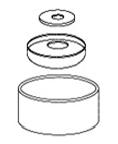
Assemble screws, rings, and parts for mounting. Mount cabinet to wall and install all scews and rings. Ensure all fixing points are secure and tightly screwed in. Add caps to conceal screws.
- Wipe off excess silicone at the time of silicone application.
- Wipe out all dust and offcuts from drilling and cutting from inside the vanity, Dont forget to clean runners and hinges, before reinstalling doors and drawers.
Ensure a bead of antifungal, non- acidic silicone is applied to the top edges of both the front and either side panel of the cabinet prior to the installation of the top.
- Wipe off excess silicone at the time of silicone application.
- Upon installation of a separate top install a bead of silicone between the rear of the top and the wall.
- Remove excess silicone at the time of installation.
- Vanities with a pre fixed top also require silicon to be applied as detailed above.
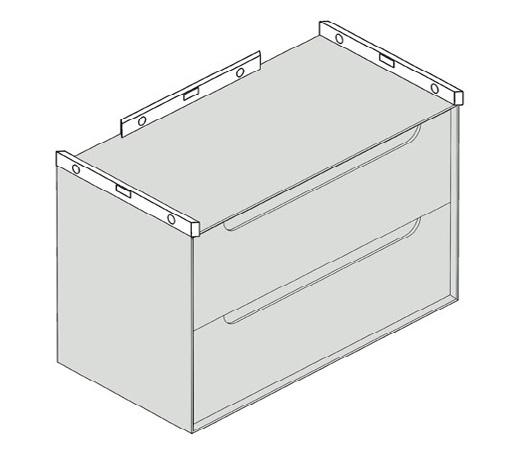
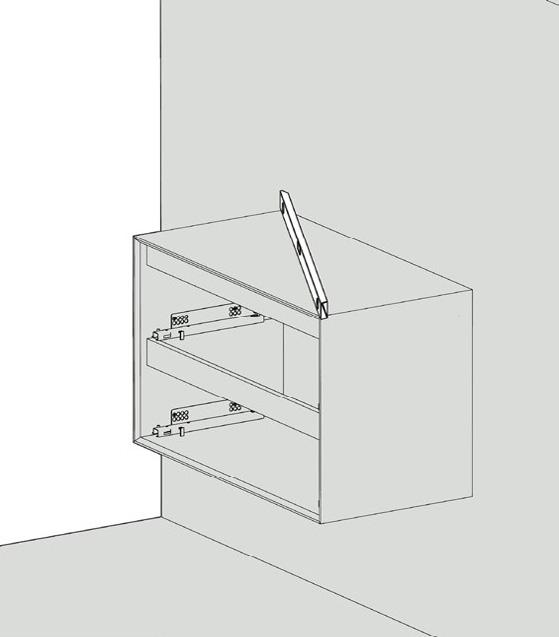
NOTE - If you have purchased a floor mounted vanity and elect to install it minus the floor mounted kick panel it will be necessary to obtain and install L shaped brackets. These brackets are to be installed in the top left and right corner of the vanity back to provide support to the side walls.
INSTALLATION STEPS:
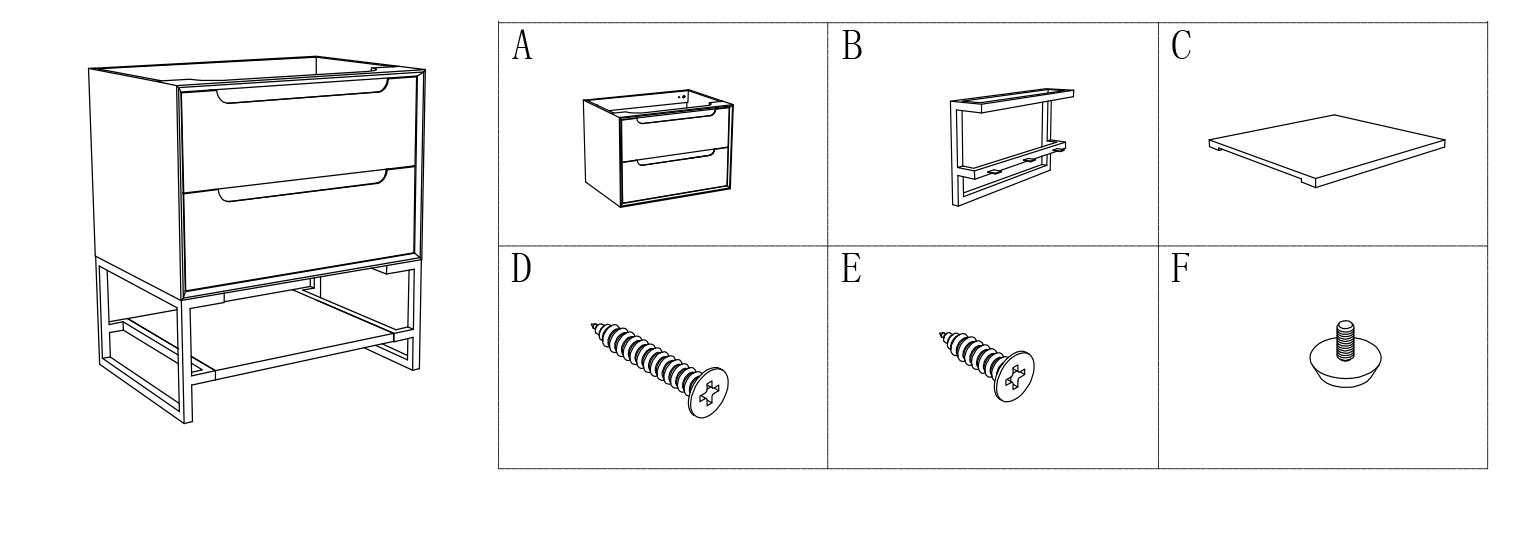
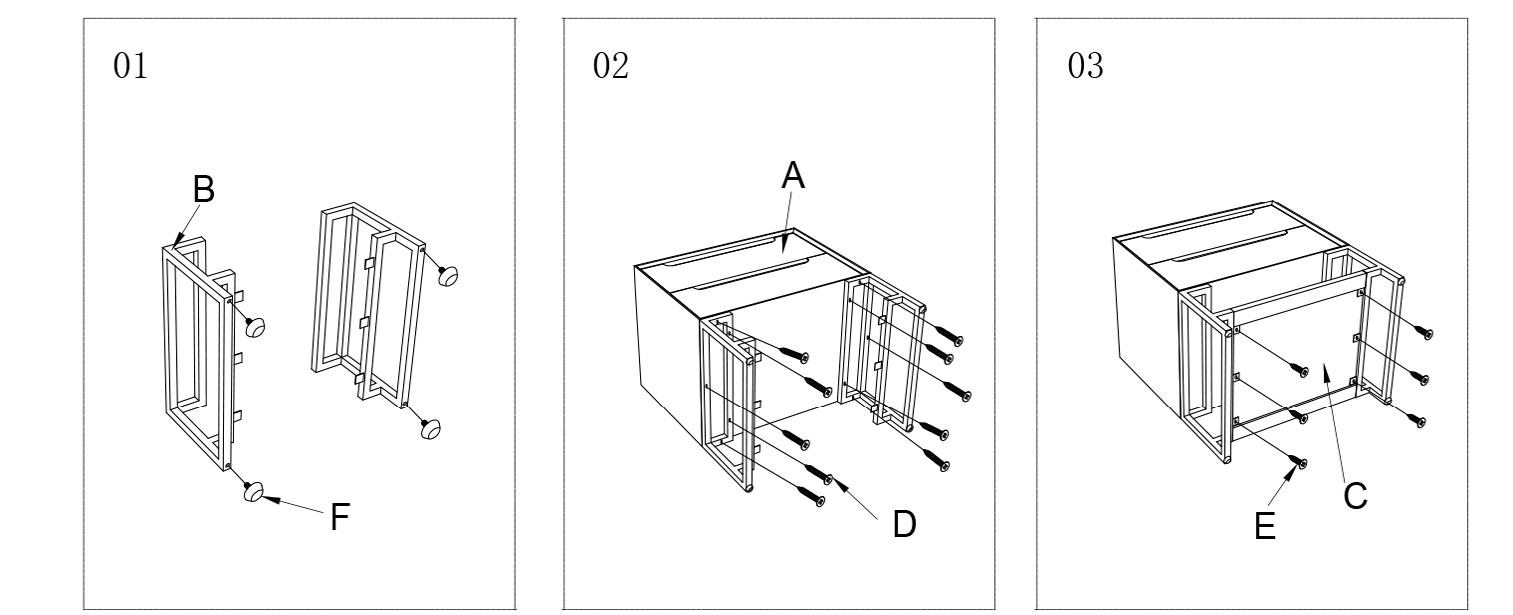
- Place Cabinet on its side on protective sheeting.
- Locate all parts.
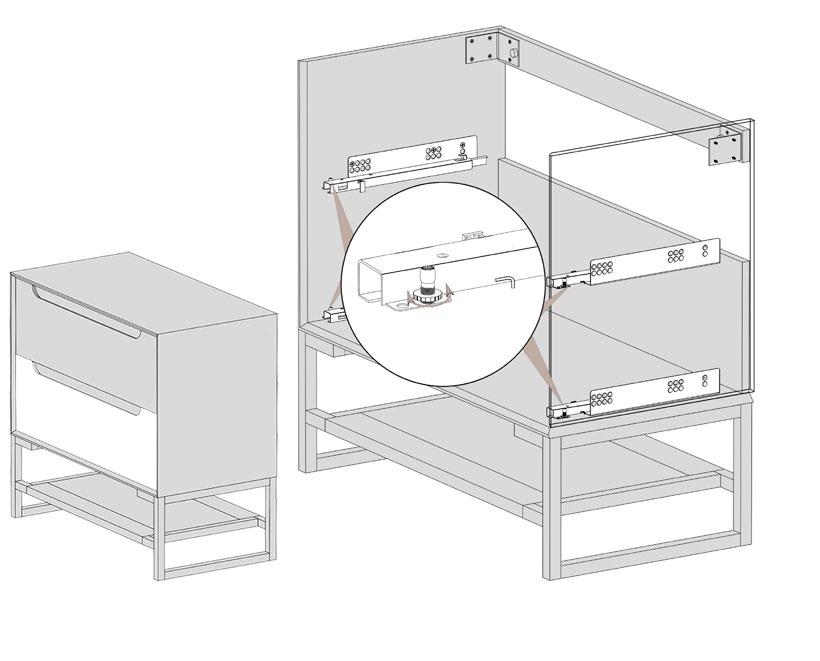
01 - Arrange legs as per image 01 with L-bends facing internally. - Add rubber feet to leg bases.
02 - Line up with the bottom of the vanity ends and screw in lightly.
03 - Then, Line up shelf between the leg bases and screw shelf panel between to 2 leg ends using the allocated screw holes. Ensure shelf is installed above the middle section..
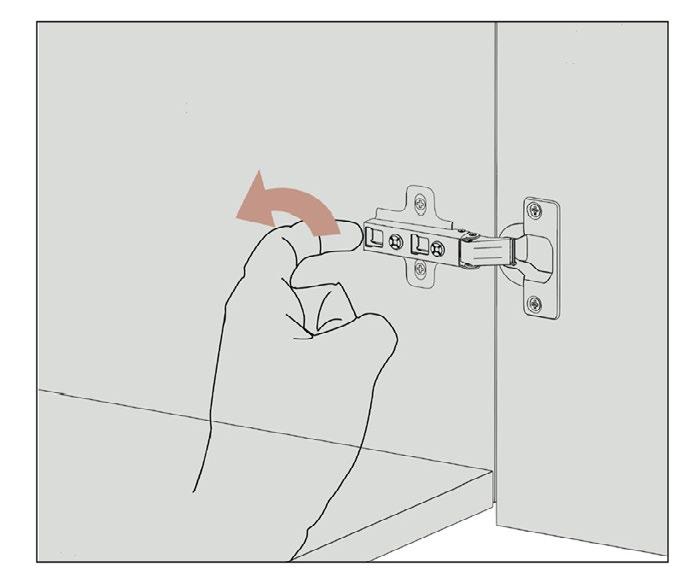
DOOR HINGE ALIGNMENT
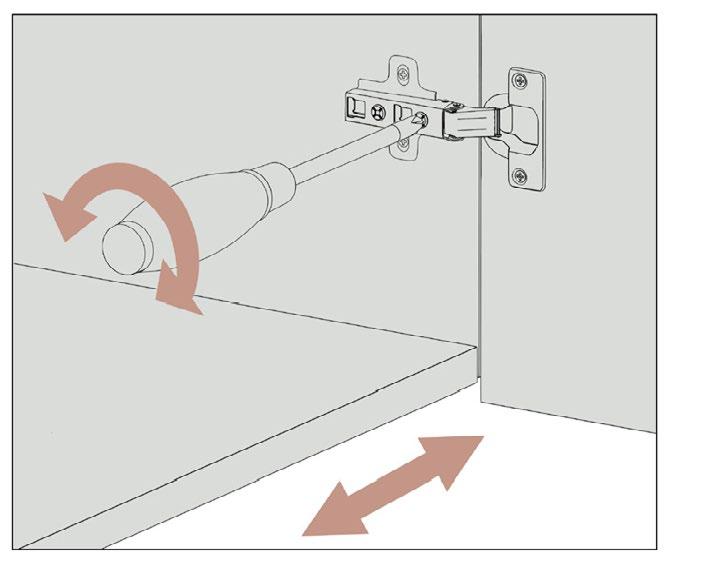
DEPTH ADJUSTMENT
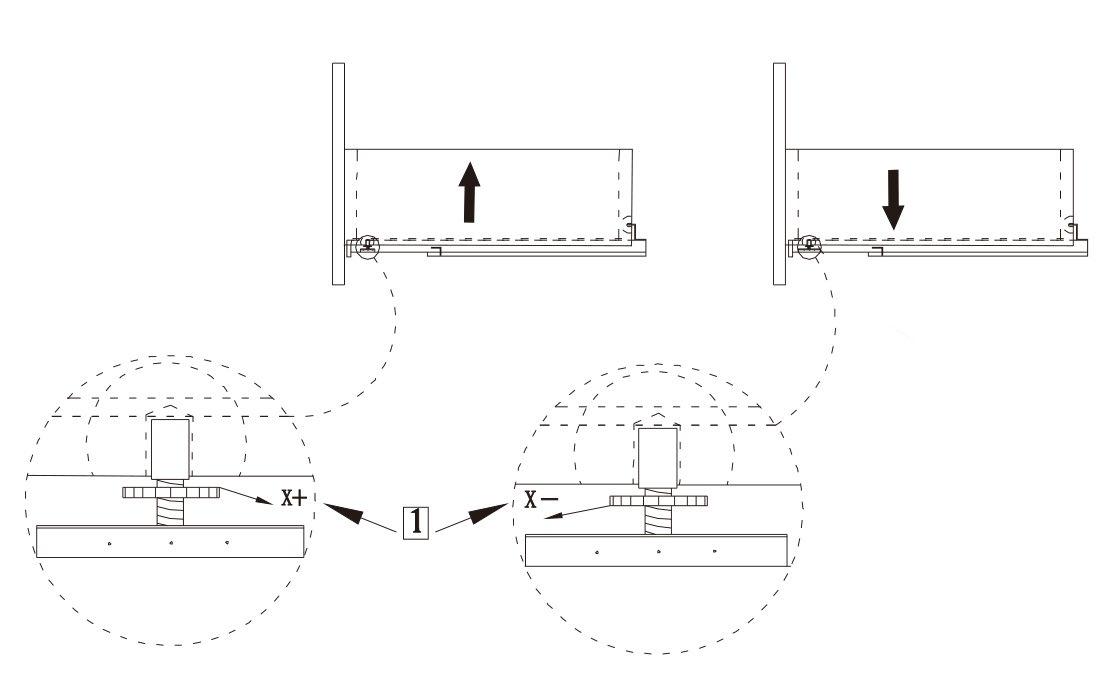
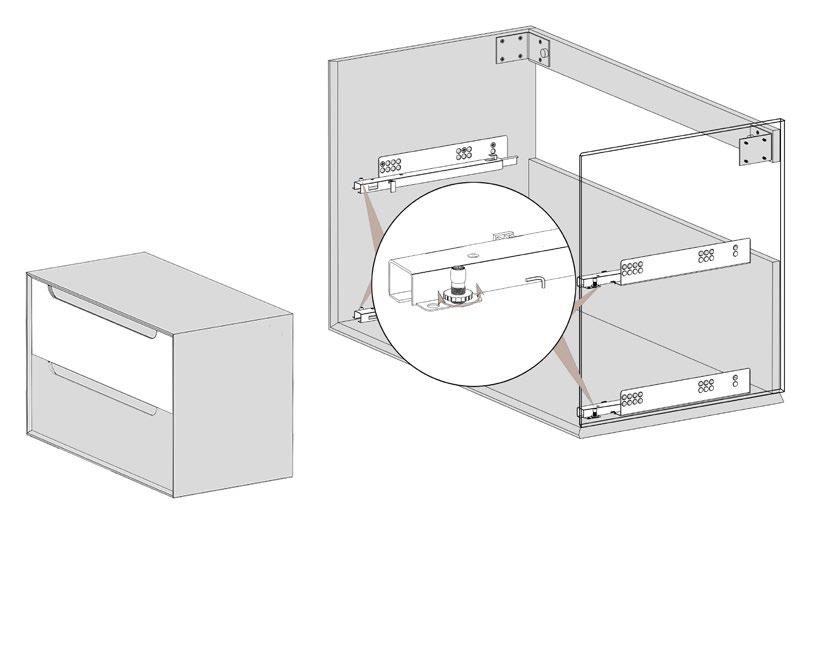
Draw Adjustment
To adjust the level of you drawer, locate the metal dial under the drawer and rotate to adjust level up or down.
Loosen the top and bottom screw on mount plate, adjust door height by moving door up or down, then retighten screws.


HEIGHT ADJUSTMENT
Use back screw to move door inward or outward from carcass.
Use front screw to move door to the left or right, or to level each door

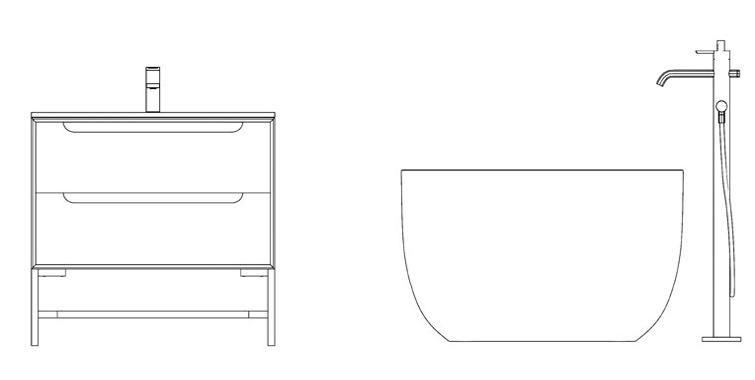
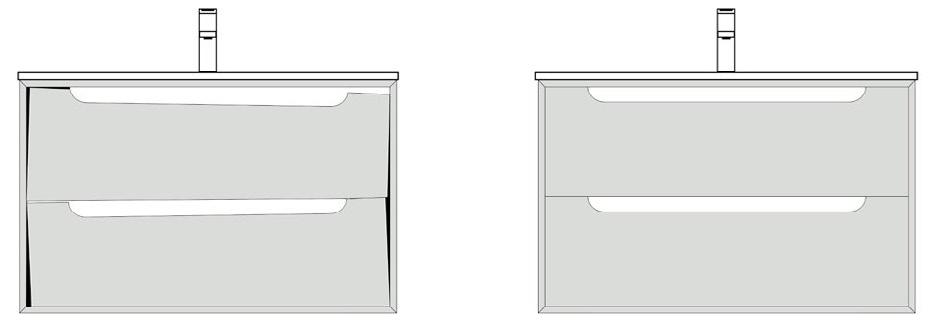
PRODUCTS
Vanities