12 minute read
6. About That Wax That It’s All About


About That Wax That It’s All About 6
Beeswax is the light-colored waxy substance that honeybees use to form their comb, which makes up the internal structure of the hive. Comb is what houses the brood and the food stores of nectar and pollen.
All worker honeybees make beeswax. Worker bees between 10 and 20 days old are best able to produce wax. After this age, their wax glands decline and they move on to other tasks, such as foraging. Transparent liquid wax is secreted from eight wax glands found on the underside of the bee’s abdomen, which then harden into eight small oval wax scales upon contact with the air. A bee can produce eight scales of wax in twelve hours. Bees use their legs to move the wax scales forward to their jaws, where they masticate the wax, adding secretions from their saliva to create the right consistency.
The ambient temperature in the area where the wax is being built must be at least 91°F (33°C). To obtain this temperature, the first combs are built inside the cluster of bees, where they can create these temperatures. The wax-building bees festoon, or bridge, hanging in chains while they are secreting wax. When a bee’s wax glands have secreted eight scales, she climbs up the chain to the place where the comb is actively being constructed, and contributes her eight wax scales to the building process.
Figure 6.1. Bridging or festooning is how the bees work with gravity to build natural beeswax comb. Credit: Ben Sweetser.

Figure 6.2. Bridging bees can hold on incredibly tight!
Credit: Ben Sweetser.
The construction of beeswax comb is an impressive feat. The hexagonal shape of the cells uses the smallest amount of material possible to create the highest strength and the most efficient use of space. The cells that are attached to the top bars of your hive, which hold the comb and all its contents, can hold more than 1,300 times their own weight. Their six equal sides leave no wasted space between cells. Pretty good engineers, these bees!
Beeswax can vary in color from pale yellow through orange and red to brown and grey. The color makes no difference in the quality, although lighter-colored wax is usually considered more desirable. When comb is used to raise brood, it turns quite dark over time. This color is due to the cocoons spun by the bees as they pupate, which are left behind when the young bees emerge from their cells.
The chemicals used by some beekeepers to control the varroa mite adversely affect the quality of beeswax. The commercial beekeeping industry has succeeded in contaminating 98% or more of the beeswax supply that is used to make foundation. This means that, for your bees,
the clean natural combs in your untreated, natural wax top bar hive is pretty special stuff.
How to Save and Store Beeswax There comes a time for most beekeepers when they find themselves with a loose, broken or even a purposely detached piece of natural beeswax comb in their hand, wondering what the heck they should do with it. It’s obviously pretty important stuff, but since “this little bit in my hand doesn’t add up to much,” it sometimes gets discarded...sometimes in the trash, sometimes on the ground. What a waste! Especially if it is clean, natural wax from a hive that has never been treated with chemicals!
In the interests of keeping a clean and healthy bee yard—one that looks good, feels good, thrives, and doesn’t attract pests—and especially in the interests of not throwing away such beautiful and valuable stuff, I suggest that everyone should have a wax box. What makes a good wax box? A sturdy container with a tight-fitting lid—that will hold the bits and pieces of broken comb that you will find yourself collecting until you are ready to render them.
You may be surprised how quickly beeswax accumulates. How long you wait before rendering the wax may depend upon what you’d like to do with it. If your wax collection grows slowly, and your wax box is small enough to fit in your freezer, that’s a good place for it to live—at least for a couple of days at a time—because freezing the wax will eliminate any wax moth larvae that may be hiding there. If you need a bigger wax box than will fit in your freezer, be sure that the lid fits tightly and don’t let it sit around for months; render it promptly to prevent wax moths getting into it!
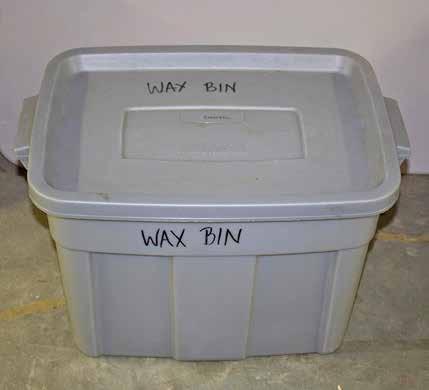
Figure 6.3. A good choice for a wax bin. Credit: Christy Hemenway.
The bees do not gather wax in the same way that they gather nectar and pollen and propolis, so you won’t find them picking up bits of wax and taking them back into the hive to create comb. All the broken bits and pieces of comb from your hives should go in your wax box.
Rendering Your Beeswax If you are a treatment-free beekeeper, your wax is some of the cleanest, purest beeswax available. All of the wax from your hive—brood comb and honey comb—can be rendered successfully; they will both yield wax. Once rendered, the wax turns into a solid block of beeswax, which can be stored with no threat from wax moths. Here are some suggestions for rendering your clean, natural beeswax.
Solar Wax Melter The beauty of a solar wax melter is that once you’ve built it, the hard work is done. Happily, a solar melter requires no fuel in order to render wax; the sun provides all the heat needed for free! The temperature inside the wax melter only needs to reach 155°F (68°C). At its simplest, a solar wax melter is a box that collects heat, so it is often painted black inside. To let in the sun, it needs a clear glass or plastic lid, one that seals tightly to contain and amplify the heat. The box needs to be big enough to hold two containers: one that you will place your saved combs into, and another one set below it. This bottom container should contain water, which will catch and cool the clean beeswax after it has melted, and keep it from sticking to the container. Between the two containers, the wax should Figure 6.4. Comb in a solar wax melter—ready for the sun! flow through a strainer to remove Credit: Christy Hemenway. debris.
How to Do It Place the wax comb in the top container. Be sure the strainer is in place. Add water to the bottom collector container. Put the clear cover in place.
Reposition the box throughout the day so that it is always facing the sun, and maintain at least a 40° angle to the direction of the sun. The wax you render in this way will have soft rounded edges and an amorphous blobby shape, due to the fact that it dribbles from one container to the other.
There are plenty of plans of varying complexity available on the internet.
Boiling Method Another way to render your wax is to boil it. This requires more labor for the beekeeper, but it also takes less time, and of course it works even on cold and cloudy days. For this method you will need: • a wax pot • a strainer • a heat source • a 5-gallon bucket or similar heatproof container • a stir stick
Your wax pot will never again be suitable for anything other than rendering wax, so be sure the pot you choose is not a family heirloom. Look for stainless steel or enamel, as beeswax can react with other metals such as aluminum. Secondhand stores often have good wax pots.
While you’re there, look for a large strainer as well. A coarse metal kitchen strainer is a good choice. The closer the size of this strainer is to the diameter of a 5-gallon bucket, the better, as this will help prevent it from falling into the bucket while pouring. A stout piece of wood such as a 1" by 2", longer than your wax pot is deep, can be used for stirring the pot as the wax is melting.
You will need a substantial source of heat, as you will be boiling a significant quantity of water and wax in your wax pot. Since this can be
messy work, it is a good idea to do this job outside using a heavy-duty camp stove or similar appliance, but if you’re careful, it can also be done on your kitchen stove. If you do process your wax in your kitchen, be sure to protect the floor with a layer of plastic such as an old shower curtain; otherwise, you may find yourself scraping small droplets of beeswax off the floor long after this project is complete.
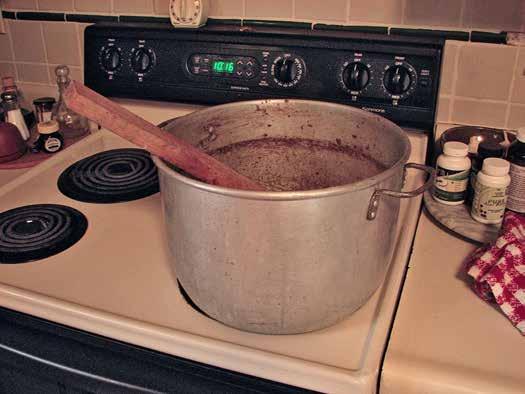
Figure 6.5. A good choice for a wax pot. Credit: Christy Hemenway.
Figure 6.6. This wax pot will never be good for anything but a
wax pot! Credit: Christy Hemenway. How to Do It Fill your wax pot about 1/3 of the way with water. Bring to a boil. Add the combs one at a time. If you have both brood comb and honey comb, you might choose to render them separately to preserve the light color of the honey comb.
Do not fill the pot with comb more than 2/3 full, to prevent hot wax and water from splashing over as the water boils. Stir to get all the combs down into the water. The wax will melt and disappear into the water.
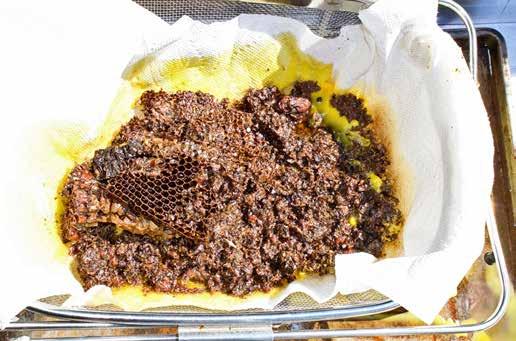
When all the combs have melted, set your strainer into a 5-gallon bucket. Protecting your hands, carefully lift the pot full of hot water and wax and pour it through the strainer into the bucket. Leave it to cool for several hours. The more slowly it cools, the fewer impurities become trapped inside the wax.

The wax will float to the top, hardening as it cools. When it is completely cool, run a sharp knife around the inside of the bucket to release the wax cake from where it may have stuck to the side of the bucket. Push down on one edge of the round of wax, and the other edge will rise up out of the water. Grasp this edge and remove the wax from the bucket.
There will likely be a layer of fine debris on the underside of the wax cake. How much debris depends on the initial cleanliness of the wax and the gauge of the strainer. Most of this layer can be scraped off; any that remains can be removed by a second rendering in boiling water. For the second rendering, line your strainer with several layers of cheesecloth laid at 90-degree angles.
After the second rendering, the wax cake can be carefully melted and poured into containers that will give the desired size and shape to your wax cake. Coat the container with a very fine film of soapy water. The soap will help to release the wax from the container after it has cooled. Let the wax sit for a full day, so that it is completely cool before attempting to remove it.
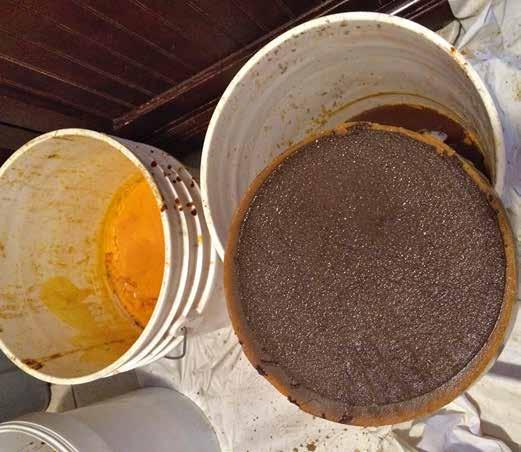
Figure 6.7. A layer of fine debris remains on the underside of
the cooling wax cake. Credit: Christy Hemenway.
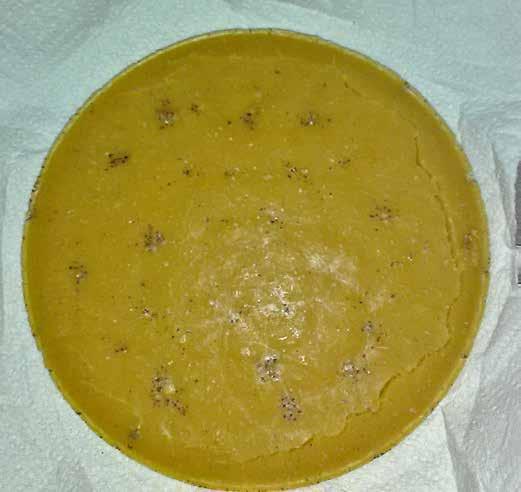
Figure 6.8. A cake of rendered beeswax. Credit: A & R Verbeek.
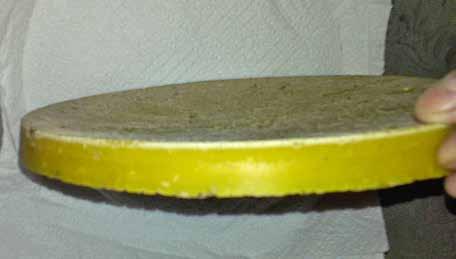
Figure 6.9. Beautifully rendered beeswax.
Credit: A & R Verbeek.
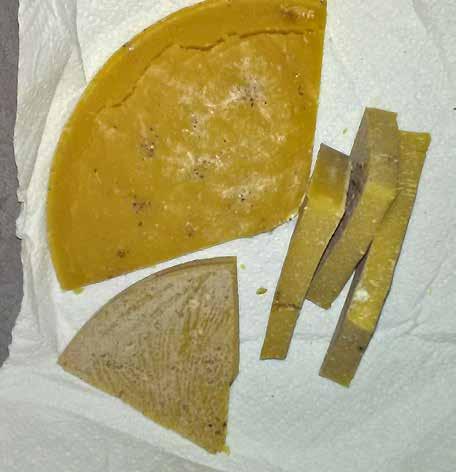
Figure 6.10. Clean beeswax ready for sale or for your
projects! Credit: A & R Verbeek. Fire Starters, or...Waste Not, Want Not The dark brown cocoons left behind when brood comb is rendered will collect in the strainer. Don’t throw these away! They still contain a significant amount of beeswax and can be used to make fire starters for your fireplace or woodstove. Use the cardboard tubes from paper towels or toilet paper, and pack the cocoons and other dreck left behind in the strainer into them while still warm. When they have cooled, use a sharp serrated knife to cut them into 1-inch slices; use them to help start your kindling on a cold winter night.
Safety note: Notice that both methods of rendering use water. When rendering wax by boiling it, this increases the safety of the process of melting beeswax, which is flammable and can be very dangerous to heat directly over a heat source. Water and beeswax have a unique relationship, the most important feature of which is that beeswax floats. The liquid wax will be indistinguishable from water while it is hot, but as it cools, the wax floats to the surface and becomes the yellow color that is the hallmark of clean rendered beeswax.
Some Uses for Beeswax
Soaps, Lotions and Cosmetics Beeswax can be added to any oil-based preparation that needs to be made thicker or firmer. Until you are familiar with your recipe, add small amounts of beeswax at a time and allow the mixture to cool after each
addition to test the consistency of your creation. If it is not thick enough, gently reheat and add a bit more beeswax. The addition of any essential oils you plan to use should be done last, as they are adversely affected by repeated heating. The oils will also add a small amount of liquid back into your mixture, so be sure to compensate for that.
Candles One of my favorite things in the world is a hand-dipped beeswax taper candle, but hand-dipping candles takes a large amount of wax. Molded tapers and figurine candles require less wax. Herbal preparations, such as salves and lip balm use even less wax, unless you are producing them in large quantities. Beeswax Versus Paraffin
Beeswax is an organic substance—it comes from the body of the honeybee. Paraffin, on the other hand, is a petroleum product. Beeswax burns brighter and more slowly than paraffin, ionizing the air when it burns, cleansing it. Paraffin emits toxins and plenty of black soot. Beeswax candles burned in a still environment rarely drip or run. Paraffin drips frequently. So while both are called “wax,” the differences are significant.
Other Handy Uses A cake of beeswax can be useful in many ways and places. Run the threads of a woodscrew along the edge of the cake of beeswax, and the screw will drive into wood more easily. Rub a cake of beeswax along the runners of a stubborn dresser drawer, and it will slide more smoothly. When sewing by hand, run the length of the thread over the corner of the beeswax cake—this will strengthen the thread and help to keep it from tangling.
This ebook is distributed by Ogden Publications. All rights reserved. No part of this ebook may be copied or sold.