13 minute read
7. Year Two: Your Best Resource Is Natural Beeswax Comb


Year Two: Your Best Resource Is Natural Beeswax Comb 7
Year Two and You’ve Still Got Bees... The sun came out and the temperature got warm, and you went out to look at your hive(s) and found to your delight that your bees have made it through the winter!
Awesome! You’ve successfully overwintered bees in a top bar hive— something you may have heard could not be done! But it can, and you have done it. This is definitely a cause for celebration. It is also early notice that you should be prepared for a swarm and be ready to perform intentional splits for increasing the size of your apiary, or for helping another top bar beekeeper get started. In any event, you should consider investing in some additional hive equipment. You are likely to need it and probably somewhat sooner than you might have thought.
Now you’re looking at this hive filled with survivor stock—locally overwintered honeybees. What should you do first? If the growing season is in full swing in your bee yard, and your bees have still got honey, then you might consider a honey harvest for yourself. I would start with an inspection to investigate their honey stores.
If the weather is warm enough, say 65°F or warmer, do a thorough bar-by-bar inspection. Look for all the things you want to see in a thriving
hive: eggs and larvae, capped brood, pollen stores, honey, the queen. Take some notes about what you see, and be sure to include the date of your inspection. Now you have a new starting point, and while it’s not quite the same as counting from the day you hived your first bees, it is important to know and will still give you a good idea of how the “Bee Math” works so that you can assess their progress during the course of the season.
Check to see what you can most logically do to keep your bees working in a “unidirectional” fashion, just like you did last year. In a side center entrance hive, you want them to go from brood nest on one end to honey stores on the other so that, come next winter, they will once again have their honey stores on only one end of the hive. This prevents the problem of them having to move across empty comb in order to reach additional bars of food that—you probably realize by now—they cannot do when temperatures require them to be in cluster. The cluster must always be in contact with food. Since you were able to inspect them last, the bees may have put honey in places your management methods would prefer that they didn’t. See if you can arrange the combs that contain honey so that they are all together on the honey end of the hive; if they won’t fit well against the bars at that end, then harvest the honey on one end, leaving the honey on the other.
As soon as practical, monitor your hive for varroa mites. Please don’t let them fool you. Just because you don’t actually see them, that doesn’t mean mites aren’t in there. They don’t spend a lot of time walking around in the open where you can spot them. Most of the time, they are hidden away in capped brood cells where they reproduce; otherwise they are tucked in between the articulated segments of the bees’ abdomens, where it is easiest for them to get the lymph of the adult bees, which they feed on.
If levels warrant it, treat for mites. In The Thinking Beekeeper, we talked about how to do a powdered sugar treatment. In Chapter 12, we will discuss the use of oxalic acid (OA), which may be something to consider as well.
Culling Comb for Maintenance So now you’ve got this hive containing beeswax combs. They’re made from clean natural beeswax because your bees made it all themselves— you didn’t need to use any foundation, and you never added any toxic chemicals to the hive.
However, it’s important to remember that beeswax is lipophilic. That means that the beeswax will absorb any fat-soluble chemical elements that it comes into contact with, such as miticides, which is how the world’s supply of foundation has become contaminated. And it’s why we say, “It’s all about the wax!”
Now, you know that you’re not purposely putting chemicals into your hives. But what if toxic pesticides are getting there some other way? If there is a substantial amount of Big Ag within 5 miles of your hives, you can be sure that your bees have been foraging there. And if these crops were sprayed or treated with toxic chemicals, then those chemicals will come back to the hive in the nectar and pollen the bees collected and be absorbed by the natural beeswax combs.
This makes it a good practice to cull comb as a part of your long-term maintenance and integrated pest management program. Early in the season, before the queen has gotten a good start laying eggs, remove the oldest 2 or 3 bars of brown brood comb from the hive and cut the wax from the top bar. Put the now empty bars back in place at the new end of the hive, in the direction the hive is growing toward. Move the next bars with existing comb up to the starting or anchor bar position.
Culling older comb in this way will help to minimize the accumulation of toxins in the comb that bees may have introduced due to their normal foraging. Save this comb in your wax box for rendering later. In Chapter 6, we discussed ways to turn this culled comb into beautiful beeswax.
Year Two and You’ve Got No Bees... Remember how we talked in Chapter 2 about your bees’ strong drive to reproduce by swarming and how that was a “Congratulations, I’m sorry” kind of event?
Well, losing a hive during its first winter is a little like that, only different. In this situation, it’s an “I’m sorry, congratulations” moment. It’s very disheartening to lose bees, whatever the cause. It’s especially tough to see them get through the winter but then not manage to make it through the spring. That’s why April is said to be the cruelest month in beekeeping. It’s so exciting to see that your bees are there and flying in March and then so incredibly sad to discover they’ve died in April.
In any event, you’re standing there looking at a dead-out hive, and wondering what to do next. There are probably some dead bees in the bottom of the hive, and in and on the comb. There might be some mold, pollen, or the white dross that is left behind when uncapped honey/ nectar crystallizes in the cells. There may also be white specks at the tops of cells, which are mite feces and indicates the presence of varroa mites. It’s depressing.
And I’m sorry. Really, I am. I hear stories from novice and experienced beekeepers alike, frustrated, downhearted, and crestfallen over their bees dying. And believe me, every single one of those stories hurts; it does not get easier, and you do not get used to it, and every time I hear such a story, it’s like attending a little funeral.
But even if you have not yet succeeded in overwintering your bees, please don’t lose heart. Because...and really, I mean it—Congratulations! You have a precious resource this year that you didn’t have last year, and that is natural beeswax comb, made by bees for bees, without the use of foundation and never subjected to the typical chemical treatments placed in hives. This is really very special stuff. You might say it’s worth its weight in gold. (Unfortunately it doesn’t weigh very much, but still!)
Another thing you’ve gained, even though it appears that you’ve been unsuccessful, is a full year of experience with bees. At this point you probably aren’t even aware how much you’ve learned! Take a little credit for the journey you’ve made thus far.
And...once again—Congratulations! The natural wax you are sadly examining is about to make a very big difference to your beekeeping. Do not destroy the comb! Unless wax moths or small hive beetles have in-
fested the comb (both destroy the comb and leave it obviously unusable), or your bees died of a known disease, you now have the stuff to give a new hive of bees a very nice head start. If you can find the fortitude within yourself to start over again, this time it will be a very different scenario.
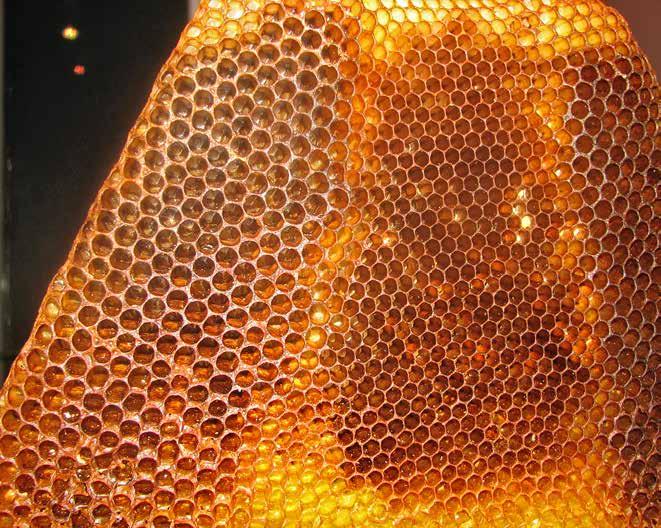
Unlike your first year, when you started out with a pristine, clean, empty hive and brand-new blank top bars, now you have something known as drawn comb. It represents a pretty hefty amount of effort by your former bees, which your new bees will not have to expend. It’s not that they aren’t amazingly good at making wax, but a new package of bees is a fairly fragile beginning for a hive, and having some bars of already drawn wax will benefit them twofold. One, they have drawn wax with empty cells, and the queen can begin laying eggs the moment she is released from the queen cage, because the empty cells are there, ready and waiting. And two, you no longer need a starter kit to anchor your bees into an empty top bar hive. You’ve got something much better than a starter kit—you’ve got fully drawn combs!
Figure 7.1. Having drawn comb will make a big difference to your new bees! Credit:
Christy Hemenway.
Installing Bees in Year Two with Drawn Comb Now that you have a hive with drawn comb, how do you configure the hive when preparing to install new bees? Last year you installed your bees into the space of 10 or so empty top bars. This year, you probably have 10 or more bars of drawn comb—so where should you put it all? These are questions relevant to your second season, so let’s talk now about configuring your top bar hive to start again in year two, with drawn comb and new bees.
The typical top bar hive started from a package usually begins with the beekeeper installing the bees into a bee bowl—a space of approximately 10 bars, perhaps a few less if the weather was still cold when your bees were hived, perhaps a few more if it was later in the season or warm. It’s a bigger challenge to hive bees in very cold weather in a brand-new empty top bar hive. Without drawn comb, the bees have nothing to climb on up to the top bars to form the cluster they must create to stay warm and to survive; they can only clamber up the inside of the hive. But with comb to use as a ladder, this scenario improves.
So let’s suppose that you can start bees in this second-year hive, with 10 bars or more of drawn comb to go into what last we called the bee bowl. Set up your follower board or boards as you did for last year. The bars you remove in order to install the bees into the hive will now have comb on them. Remove these bars from the hive and set them aside somewhere safe, perhaps inside the overturned lid of the hive, lying on the ground next to you while you are preparing to hive the bees. Be careful to preserve the order and direction of each of the bars.
Remove the lid from the bee package, and investigate the configuration of the package itself. Some packages require that the syrup feeder can be removed first; some allow the queen cage to be removed before the can. In any event, work these two items out of the package and leave it loosely covered with the lid to contain the bees while you get started.
To hang the queen cage, choose either a blank bar or a bar with only a small piece of comb hanging from it, which leaves room enough to
attach the queen cage. Remove the cork that covers the “slow-release” candy plug and hang her from the bar you’ve chosen, placing this bar in the number 1 position in the brood nest.
Bonk and gently pour the rest of the bees into the bee bowl. So far this has been very much like your first year, hasn’t it? Except now you want to put the bars back into the hive, and there is comb on them! This complicates things a little bit, but it’s definitely a good problem to have. Slowly lower each bar into place, one at a time, moving bees gently off the top edge of the hive as you go, until all the bars are back in the hive. The last one will be the most difficult to insert since it’s no longer just an empty bar to drop into place but now has comb attached, but no worries. Here’s the trick: Just remove 1 or 2 bars from the hive on the far side of the follower board, and move the follower board over to get the room you need. When that last bar of comb is in place, put the follower board back where it belongs, and then reinstall the blank bar(s).
Just like last year, check in 3 to 5 days to see that your queen has been released. If she has, remove the queen cage. If she has not, you should release her. Remove the queen cage from the bar, and holding the cage deep down in the hive, remove the staple that holds the screen, letting the queen walk out into the hive.
The rest of the year’s buildup and maintenance will mimic the hive’s first year, except that the queen will already have places to lay eggs and the hive will be able to build up the brood nest much faster than in your first year.
It’s Year Two and You Don’t Know Yet If You’ve Still Got Bees... This is a long-time conundrum in beekeeping. If you buy a package thinking you are sure to need it, but then your bees make it through the winter, now you’ve got more bees than you need, possibly even more bees than you have hives. But if you don’t buy a package and your bees don’t make it through the winter, now you’ve got fewer bees than you wanted. And
of course, there’s a lot of pressure to order your bees early; bee suppliers often sell out in mid-spring, even before you can get to your bees to check on them, depending on where you live and what your winters are like.
One way to deal with this dilemma is a “just-in-case” package of bees. Gold Star Honeybees instituted a practice to deal specifically with this very situation. It works like this: It’s early spring, and it looks like your bees are still going strong—but April is not over yet, so you may still lose them.
In a “just-in-case” scenario, you order a package just as you normally would, but if your bees are still alive, and you don’t need the new package, you can cancel the purchase (in a timely manner!) and pay only a nominal cancellation fee.
This way you don’t have to worry about missing out on bees for an entire year if your bees don’t overwinter, and you also don’t have to worry about having more bees than you planned on when your bees do successfully overwinter. Pretty good insurance, just in case, isn’t it?
Part 2
Smoke and Mirrors
This ebook is distributed by Ogden Publications. All rights reserved. No part of this ebook may be copied or sold.